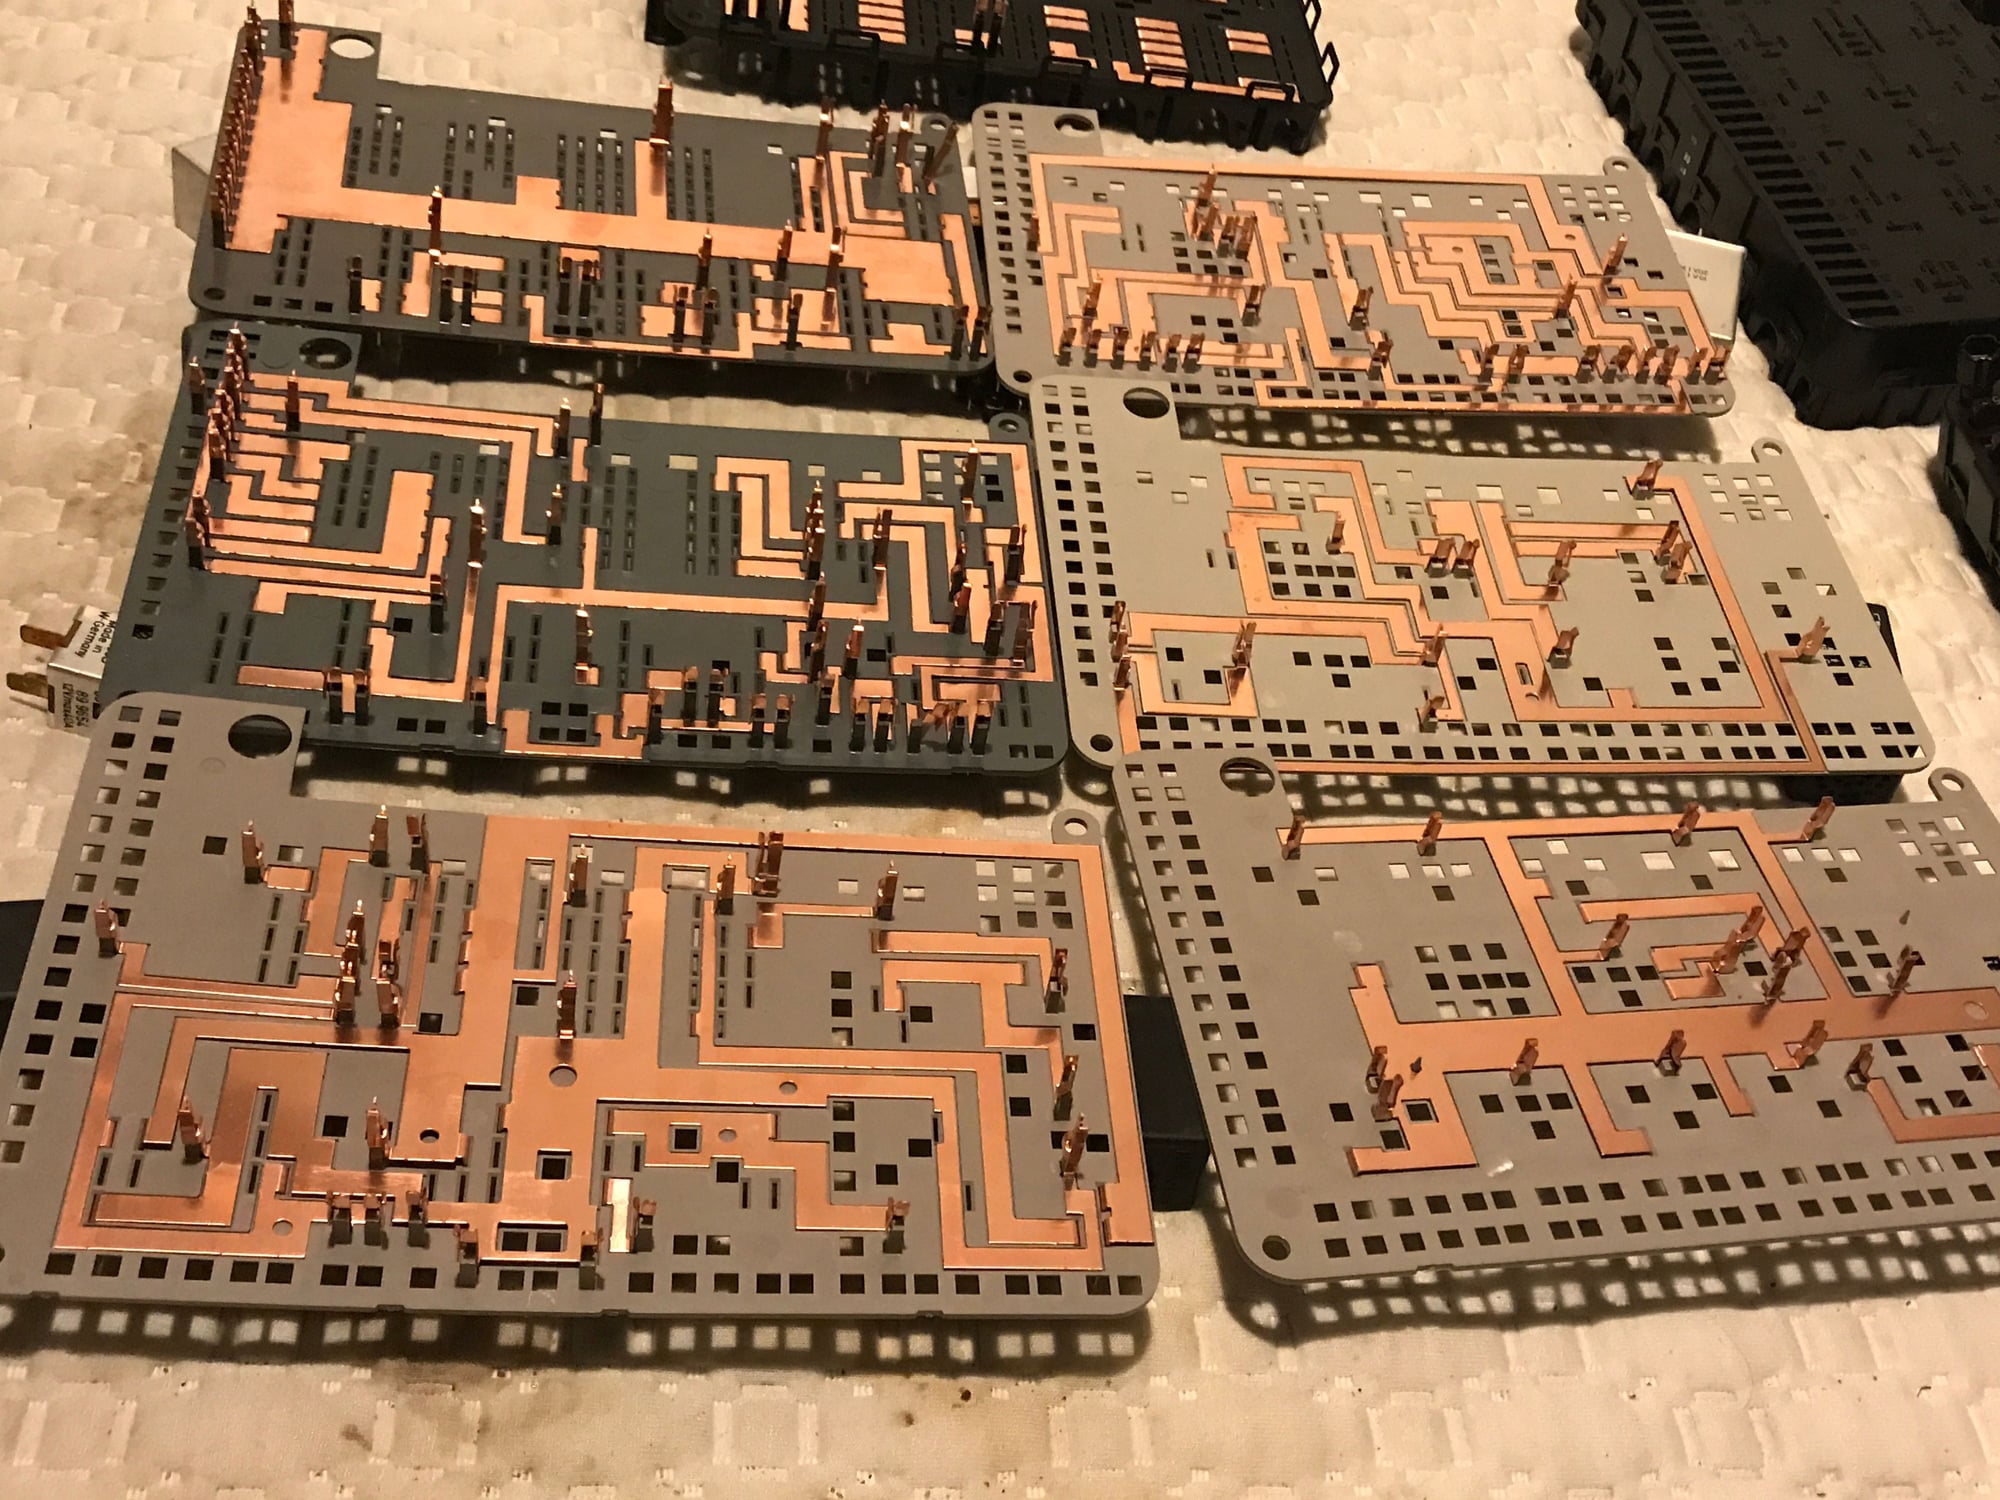
Distribution block corrosion cleaning.
#16
Drifting
Thread Starter

As the photo sets the bottom right is the top, above that is section two then three. Bottom left starts off with section four and goes up to the black bottom being section seven or the black base. Notice how clean the copper in the first section is. It has been cleaned. Even when I thought it was clean it got cleaner. So now everyone knows that even there old clean looking Power Distribution Block can get cleaner.
This gives a good idea of how it's put together.
#18
Drifting
Thread Starter

One of two tabs that needs to be removed.

This is showing the driver side connector lock that needs to be pushed back to unlock it then removed, sometimes they are tough but they will unlock. Both sides have them. The passenger side connector lock strip needs to be bend out on the side nearest the windshield then slipped down to remove.

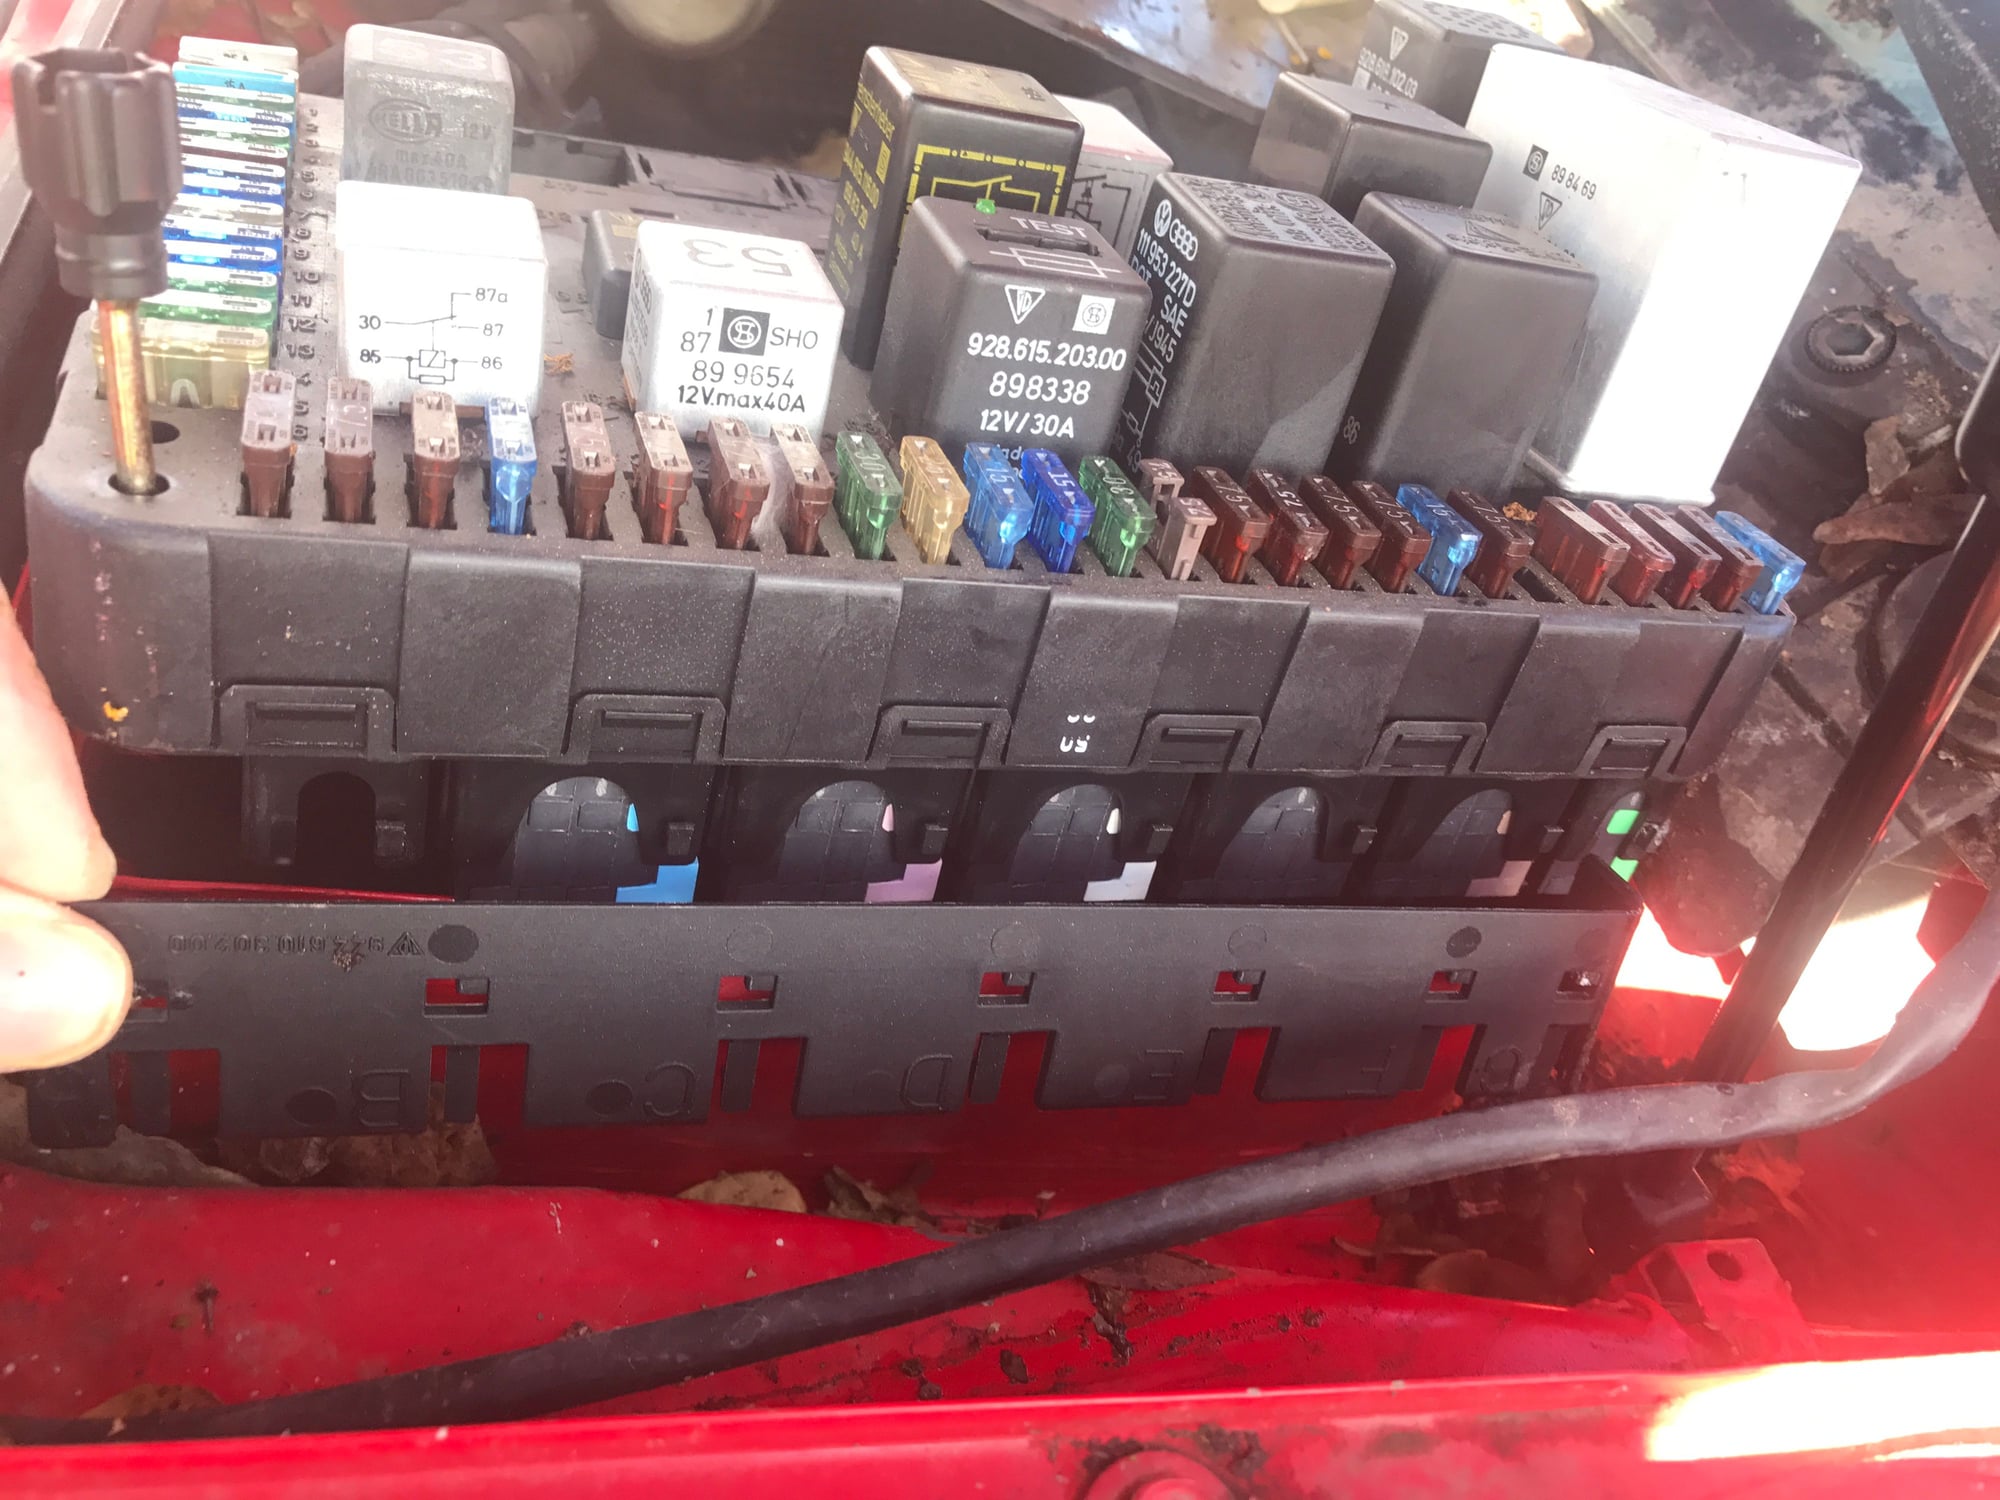
First you want to remove the relays associated with these white connectors, then unscrew the two hold down screws at the corners top side on the block (they usually have a black plastic head on a metal threaded body). A 90 degree tipped pick is best to use to push in the tabs on the white connectors from the underside after lifting out the block. Also there are two 10mm bolts that need to be removed in the front lower area of the Power Distribution Block(Power in red cables).

EVERYTHING IS LABELED FROM THE FACTORY, SO NO WORRIES.

The tab I'm holding is in the locked position

Pull it out to unlock the connectors, it's the center lock for all the remaining connectors.

Showing how it's labled, this one is connector H.

Just pull

Tools I used, 10mm 1/4 drive. 90 degree pick.

This is the location where you need the 10mm socket.

its removed.
I'm posting some photo's showing how to remove the Power Distribution Block. Pictures are worth thousands of words.
#19
Instructor
Join Date: Sep 2013
Location: Spokane, WA
Posts: 206
Likes: 0
Received 0 Likes
on
0 Posts
Great info. Mine was definitely in worse shape than this one, but it was pretty straightforward. I had a couple broken clips already and a couple more broke from being fragile. It was tough to see under the white connectors to release them, but I was able to push their clips in through the top. I had a relay contact that melted in to the plastic around it I think and was very hard to pry off. That was the hardest part and I figured I was going to break something before it let go. Mine was worse, but I had to soak them for about 30 minutes and run some sandpaper through the relay contacts to get them clean, so it took several hours.


