When you click on links to various merchants on this site and make a purchase, this can result in this site earning a commission. Affiliate programs and affiliations include, but are not limited to, the eBay Partner Network.
Crank Scraper finally arrived so assembly has started. Crankshaft installed.
Question on the oil pump. I disassembled the pump. When I put it back together (using loctite 574 around the edge) and tighten up the screws, the pump wont spin. If I back off the screws its spins. do you put oil in there and then tighten? I was trying to keep oil out of the system to give the 574 best adhesion.
It's should spin by hand with a little bit of drag. Yes you must coat the gear/parts with oil, but try to keep the sealing surfaces clean and free of oil so the 574 sealant can seal. If it doesn't spin freely, there's a chance you installed one of the gears wrong.
thanks Dave. I took it apart and reassembled oil pump with little mark in the correct orientation this time and went together fine with smooth operation.
Today I expected to make a lot of progress. Plan was to install balance shafts and oil cooler housing. Ended up stripping an 8mm bolt on upper so decided to do lower....stripped a 6 mm bolt on lower
I guess I should have chased all the bolt holes first but really they seem to go right in hand tight so not sure why they would be stripping unless block had been torn apart a few other times before I got it. (yes using torque wrench on proper setting)
Never used a thread inserts before so at least I'll learn something else new.
I did get the oil filter housing on and the new one piece OPRV (correct for 86 block) fit in nicely without and binding so good to go there.
Yes oil passage caps were removed for cleaning but thanks for checking. Your ports look good. What carbide tool did you use?? Based on tools I see when searching they look too long to get in there?
I decided not to port based on feedback from Mike at LR. I had the block at his shop to do the ports. When they got ready to do it, they saw the sleeves bores went pretty far down and were concerned about interference or too much weakening and advised against. You can kind of see that in the picture on post #44. He said I could make my own, but after looking at it and understanding just a few holes wouldn't do much I decided not to risk it. I did go ahead an get a crank scraper.
FWIW I chased all the holes in the block for the balance shaft covers. highly recommend as they get pretty gummed up over time. If I was doing a full blown race car, and planned on doing multiple tear downs I'd put inserts in them. It turns out one 8MM was hole on upper balance shaft was already heli coiled. When they did it they used a shorter bolt, but for some reason decided to use shorter bolts for all holes on upper mount. I didn't notice the bolts were shorter until I went to install the lower balance shaft and noticed the 8mm bolts were longer. The short bolt is was stripped the 8mm hole.
Question and opinion. The manual shows two part numbers for balance shaft seal for 86 and 87 and newer. I have an 86 engine. the photo shows what was on the car. They added some gasket maker. I have the one on the right from the Victor kit, but the kit is actually for 87 and newer.
Anyone know the difference between them, can't find a spec. I suppose I could just put gasket maker on there like they did before, but would like to know if I have correct caps or not. I already put on the upper shaft, but now want to make sure that was correct. I did not put gasket maker on that one.
bump for sanity check.
So I was told 86 cap has dimples on both sides. 87 and newer is flat on one side. Anybody know if they are different other than dimple?
Seem like upper fit just fine, but I did not put any gasket maker on it, just oiled it up and installed.
really don't want to remove it if I don't have to. Had two install the lower cover twice since another bolt stripped. Proud owner of a timesert kit now.
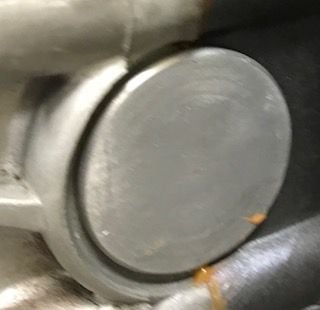
getting ready for head gasket install. block deck is flat and within spec, but a little concerned about machining marks for cometic (photo2), Current tune is at 16 psi and don't plan to run more than that.
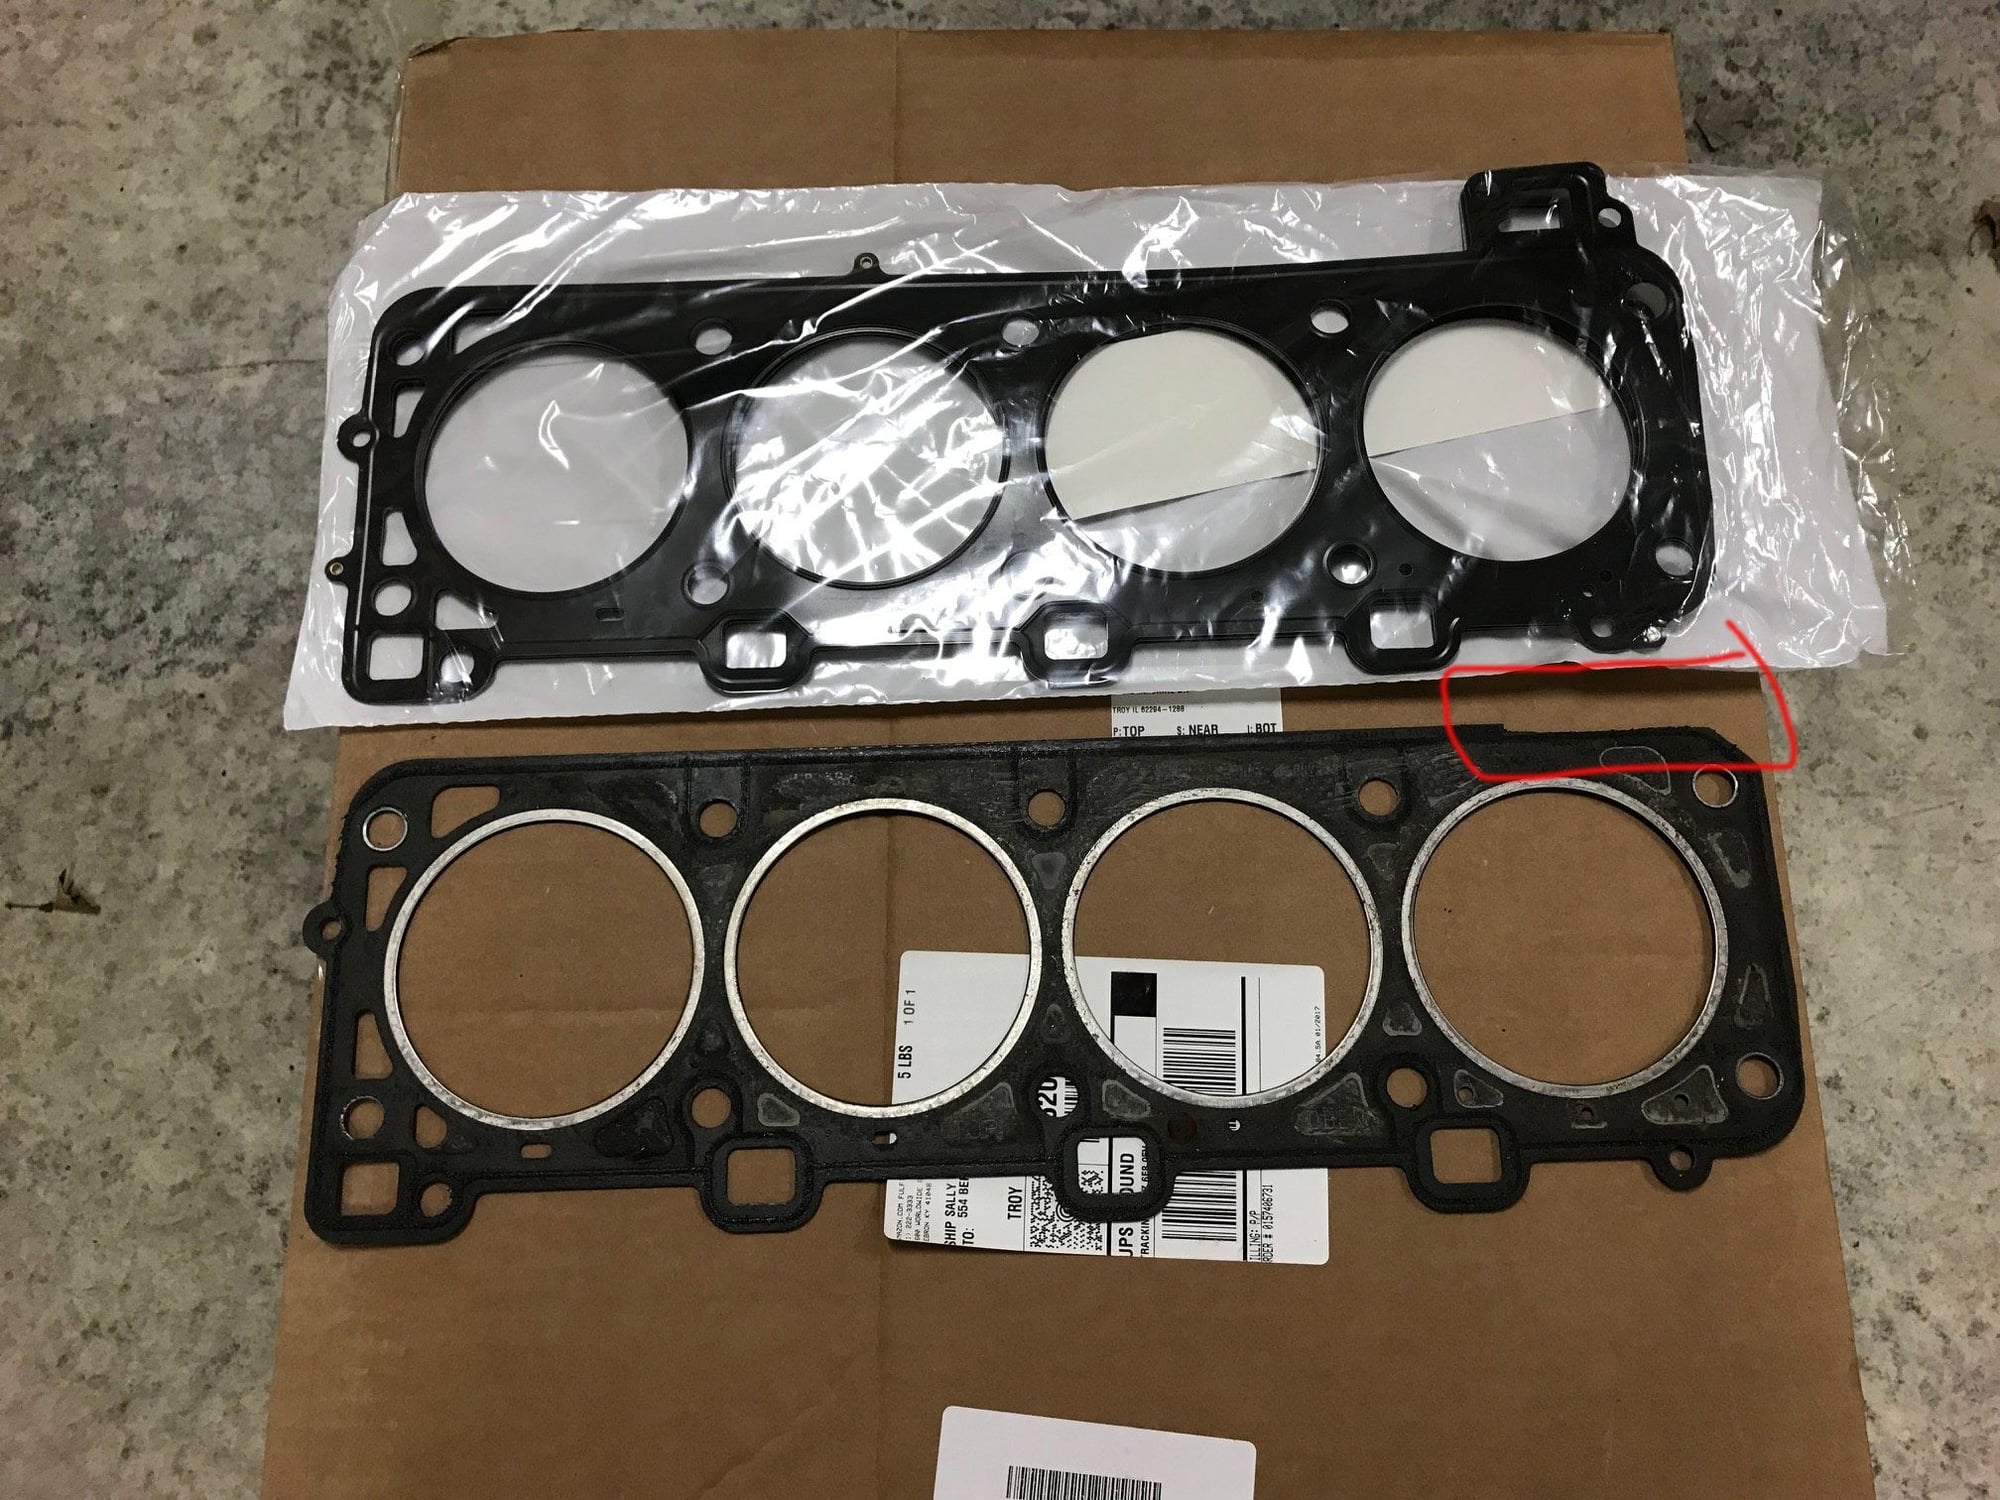
It had a modified VR gasket on it (106 Bore for a 3.0 gasket) with water passage cut off (Photo1). Don't recall how they sealed that area prior to disassembly, going to look through old photos for clues
Options
1 install cometic dry
2install cometic with copper gasket sealer on bottom side
3 modify a Victor Reinz - If you stroker guys do this, what is best method for sealing water jacket, ? Or what other HG option are out there. Bore is 104mm
resurrecting my thread to close the loop now that the car is back up and running. Made two bone head mistakes on assembly and threw in the towel. First one was it actually helps to install the piston squirters before you install the crank and put the motor in the car. That was fail one. Fail two I don't take all the blame, but this is when I threw in the towel. After removing and installing the engine in a weekend, with the piston squirters installed this time, I started the car, had oil pressure but once the car warmed up the pressure would drop so I would shut it off. Having no clue as to what I could have done wrong, I ended up towing it to a local specialist and let him finish the job whenever he could get to it. Just got it back today. The problem, well it turns out my crank guy turned the mains. So too much clearance on mains. Somehow my local shop was able to find a set of undersized mains. That solve the problem. I'm not sure if my crank guy told me that or not...but I certainly didn't ask him to do it......maybe he saw something I just assumed turning it wasn't a big deal.
Anyway, just got the car back today.......all is good. Just taking it easy for the first 1000 miles or so to let it get good and broken in. Keeping the rpms below 4200. I will say I forgot how much power this thing has.. just giving it 1/2 throttle it wants to take off at 3500 rpms.
Now I just have to get rid of the air bag light and seat belt light.......I believe just jumpering pins 3 and 4 will do the trick and eleiminate them from operation, or do I have to unplug the air bags too?
Glad to hear you have your engine back up and running - nice job documenting your rebuild. Reading through it, I have a few questions:
- Do you (and the other racers/DE enthusiasts out there) use conventional or synthetic oil? I've always used synthetic Driven 15W50 Hot Rod oil (recommended by Lindsey Racing)
- How many hours (or 20-minute sessions, or whatever units are most convenient) between oil changes? I know there are probably as many answers to this question as there are people, but I'd like to see the range. I don't race, but do about an average of about three 25-minute session a month at my local track, and like the O.P., have been driving the car harder lately as my skills have improved.
- How many track hours can be expected out of a well-cared-for 3.0l normally aspirated engine between rebuilds?
My engine (as indicated by the last bullet item) is a naturally aspirated 3.0 liter. I have a set of RS Barn dual oil coolers, cross-drilled crank (also a LR recommendation), a LR oil pan "trap door", and a crank scraper I purchased frorm RS Barn. The engine has never used a drop of oil between oil changes, but lately, somewhat alarmingly, my oil consumption has recently spiked, and my oil temperature hit a higher-than-expected 212F on a 70-degree day during my last session. I plan to send a sample of the oil to Blackstone when I change the oil this weekend. Thanks.
I don't think you can go wrong with driven 15W50. I use synthetic and was using valvoline 20w50 VR1 when I spun the bearing. Generally I like to change oil after each event, but our events are typically all weekend, but it really depends on the engine. I"m not sure my original build was ever full sorted....I mean the oil would turn black very quickly so I think there was quite a bit of blow by on the rings. We will see how this one goes. Obviously the track and driver have a lot to do with it as well.
Just another example, I ran my honda s2000 at the last event....ran it pretty hard for several sessions some were shorter for student rides, but the oil still looked new which was pretty shocking to me considering what i've been seeing. And the car has 86K miles on it.
IF your starting to loose oil just keep an eye on it and watch for any signs of things getting worse. losing some oil isn't too unusual at track days but definetly check between each run. Look for lower oil pressures, higher temps as you mentioned or any signs of smoke. You can do a compression check/leak down test and just look for changes. When things start to go down hill, plan on a refresh. If your just tearing it down for a refresh of seals, etc its not too bad and all in all a pretty fun experience.. I really had to scrub every nook and cranny since my rod bearing disintegrated.
Thanks for the quick response. By tracking standards, I probably haven't been changing my oil often enough - the equivalent of about once every 3-4 DE weekends. I figured that since I use synthetic, and have the dual coolers, I could let it go a little longer between changes, but that may turn out to be a bad strategy, depending on what the oil analysis shows. I estimate about 70 track hours on my engine since its rebuild was completed in August of 2013. My concern isn't them amount of oil it's consuming, it's the fact that it has gone from literally zero, to something clearly measurably, like about 1/2 quart after a 25-minute session.
that is quite a change in consumption. You might start a new thread to get more replies to your question. IMO 70 hours is a fair amount of track time if your pushing it hard.
I know some racers do tear downs each season. I'm certainly not an engine expert but would be curious what takes the most abuse. Meaning if you wanted to do some preventive things periodically without doing a complete rebuild. An example would be do the rod bearings.....easy enough job with engine in car.
Traded a few emails with MM today as he was updating me on something unrelated but we race the rod mod he does on a set of Pauters in the 2.5 8V SP2.
I am sending him another set of rods for the bearing mod for my 16V 2.5 and wanted to let him know to send me a spare set of bearings since I'll have two engines running these now.
In that conversation though, I was telling him, we had a valve spring failure after maybe 40-50 on a fresh engine, valve seal garter springs, rubber seal material, spring seat shavings etc. through the engine, so I replaced the cooler, flushed the engine, pulled the pan to clean it all out and at that 40-50 hrs duty on the engine, I pulled the rod caps and the bearings were like I just took them out of the box.
Previous to that, we'd change the Glycos with an additional anti friction moly added about once a year.
The engine that we followed that format, is wrapped up in storage as a backup and still runs strong if I need it, an 87K original mile engine when we started DE then racing it and it still has pistons and rings that it left the factory with and has probably 100-150 track hours on it.
And for anyone who has seen the race vids I post, I'm not talking about lulling around below 6k revs at the back of the pack.
I don't think you can go wrong with driven 15W50. I use synthetic and was using valvoline 20w50 VR1 when I spun the bearing. Generally I like to change oil after each event, but our events are typically all weekend, but it really depends on the engine. I"m not sure my original build was ever full sorted....I mean the oil would turn black very quickly so I think there was quite a bit of blow by on the rings. We will see how this one goes. Obviously the track and driver have a lot to do with it as well.
Just another example, I ran my honda s2000 at the last event....ran it pretty hard for several sessions some were shorter for student rides, but the oil still looked new which was pretty shocking to me considering what i've been seeing. And the car has 86K miles on it.
IF your starting to loose oil just keep an eye on it and watch for any signs of things getting worse. losing some oil isn't too unusual at track days but definetly check between each run. Look for lower oil pressures, higher temps as you mentioned or any signs of smoke. You can do a compression check/leak down test and just look for changes. When things start to go down hill, plan on a refresh. If your just tearing it down for a refresh of seals, etc its not too bad and all in all a pretty fun experience.. I really had to scrub every nook and cranny since my rod bearing disintegrated.
The oil sample should give clues as well.
IMO, black color oil is engine oil that is run above recommendations. We had that situation in a race car because the external oil cooler was installed behind instead of the engine radiator.
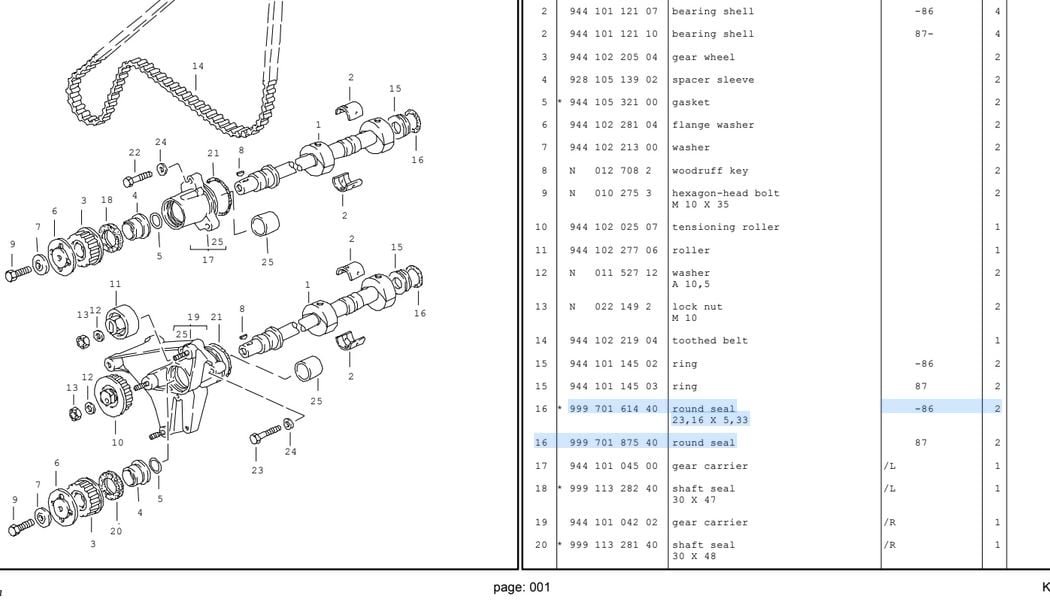
I have this oil pressure relief, did some searching but couldn't find answer.
Is there a way to check this or clean this?
No reason to think its not working but since I'm in hold mode. I didn't even know it existed until today.
Yes! Blow compressed air through an air nozzle into the holes at the lower end. This is to make sure the piston opens (raises). If the piston is stuck for any reason, the head won't get any oil. Does it happen? Oh yes. Ask me how I know. I check each and every one now to ensure they're serviceable. It's also a good idea to change the o-rings. Note that 9442.5 NA, 2.7NA, 951, 944S/S2 and 968 all have different cylinder head oil passage valves, but all have a similar function.
MM

 03-11-2018, 03:33 PM


 so decided to do lower....stripped a 6 mm bolt on lower