When you click on links to various merchants on this site and make a purchase, this can result in this site earning a commission. Affiliate programs and affiliations include, but are not limited to, the eBay Partner Network.
They are not tacked, I would drown it in PB blaster for a day attempt, then heat the hell out of it and put some vice grips on there. If that doesn't work you might be able to file/grind the sides so you can put a wrench on it. Not much to work with but worth a shot. Otherwise you are going to have to drill it.
Also, I agree with Tom, remove it, Heck at this point I would just pull the exhaust and add all new hardware. You've done most of the hard stuff. If you ever decide to upgrade exhaust, wastegate, etc. you will be thankful.
if the bolt snapped off, the threads are VERY stuck in the internal threads of the nut.
youre going to be drilling for a while to remove enough meat to even hope to let the threads loose, if they will let go of the rust/corrosion binding them to the nut.
i still think cutting the nut off and using a new one is better course of action..
This is only supposed to be an AOS seal replacement! lol
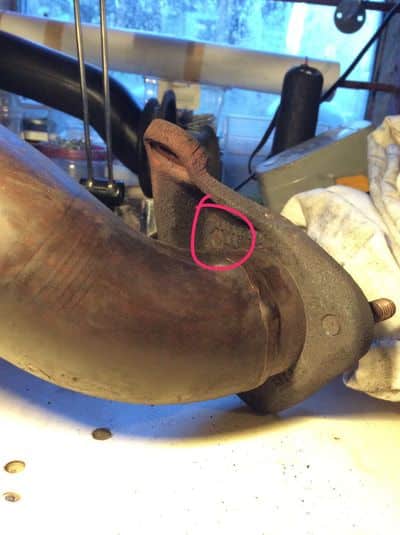
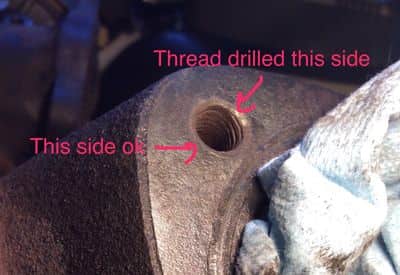
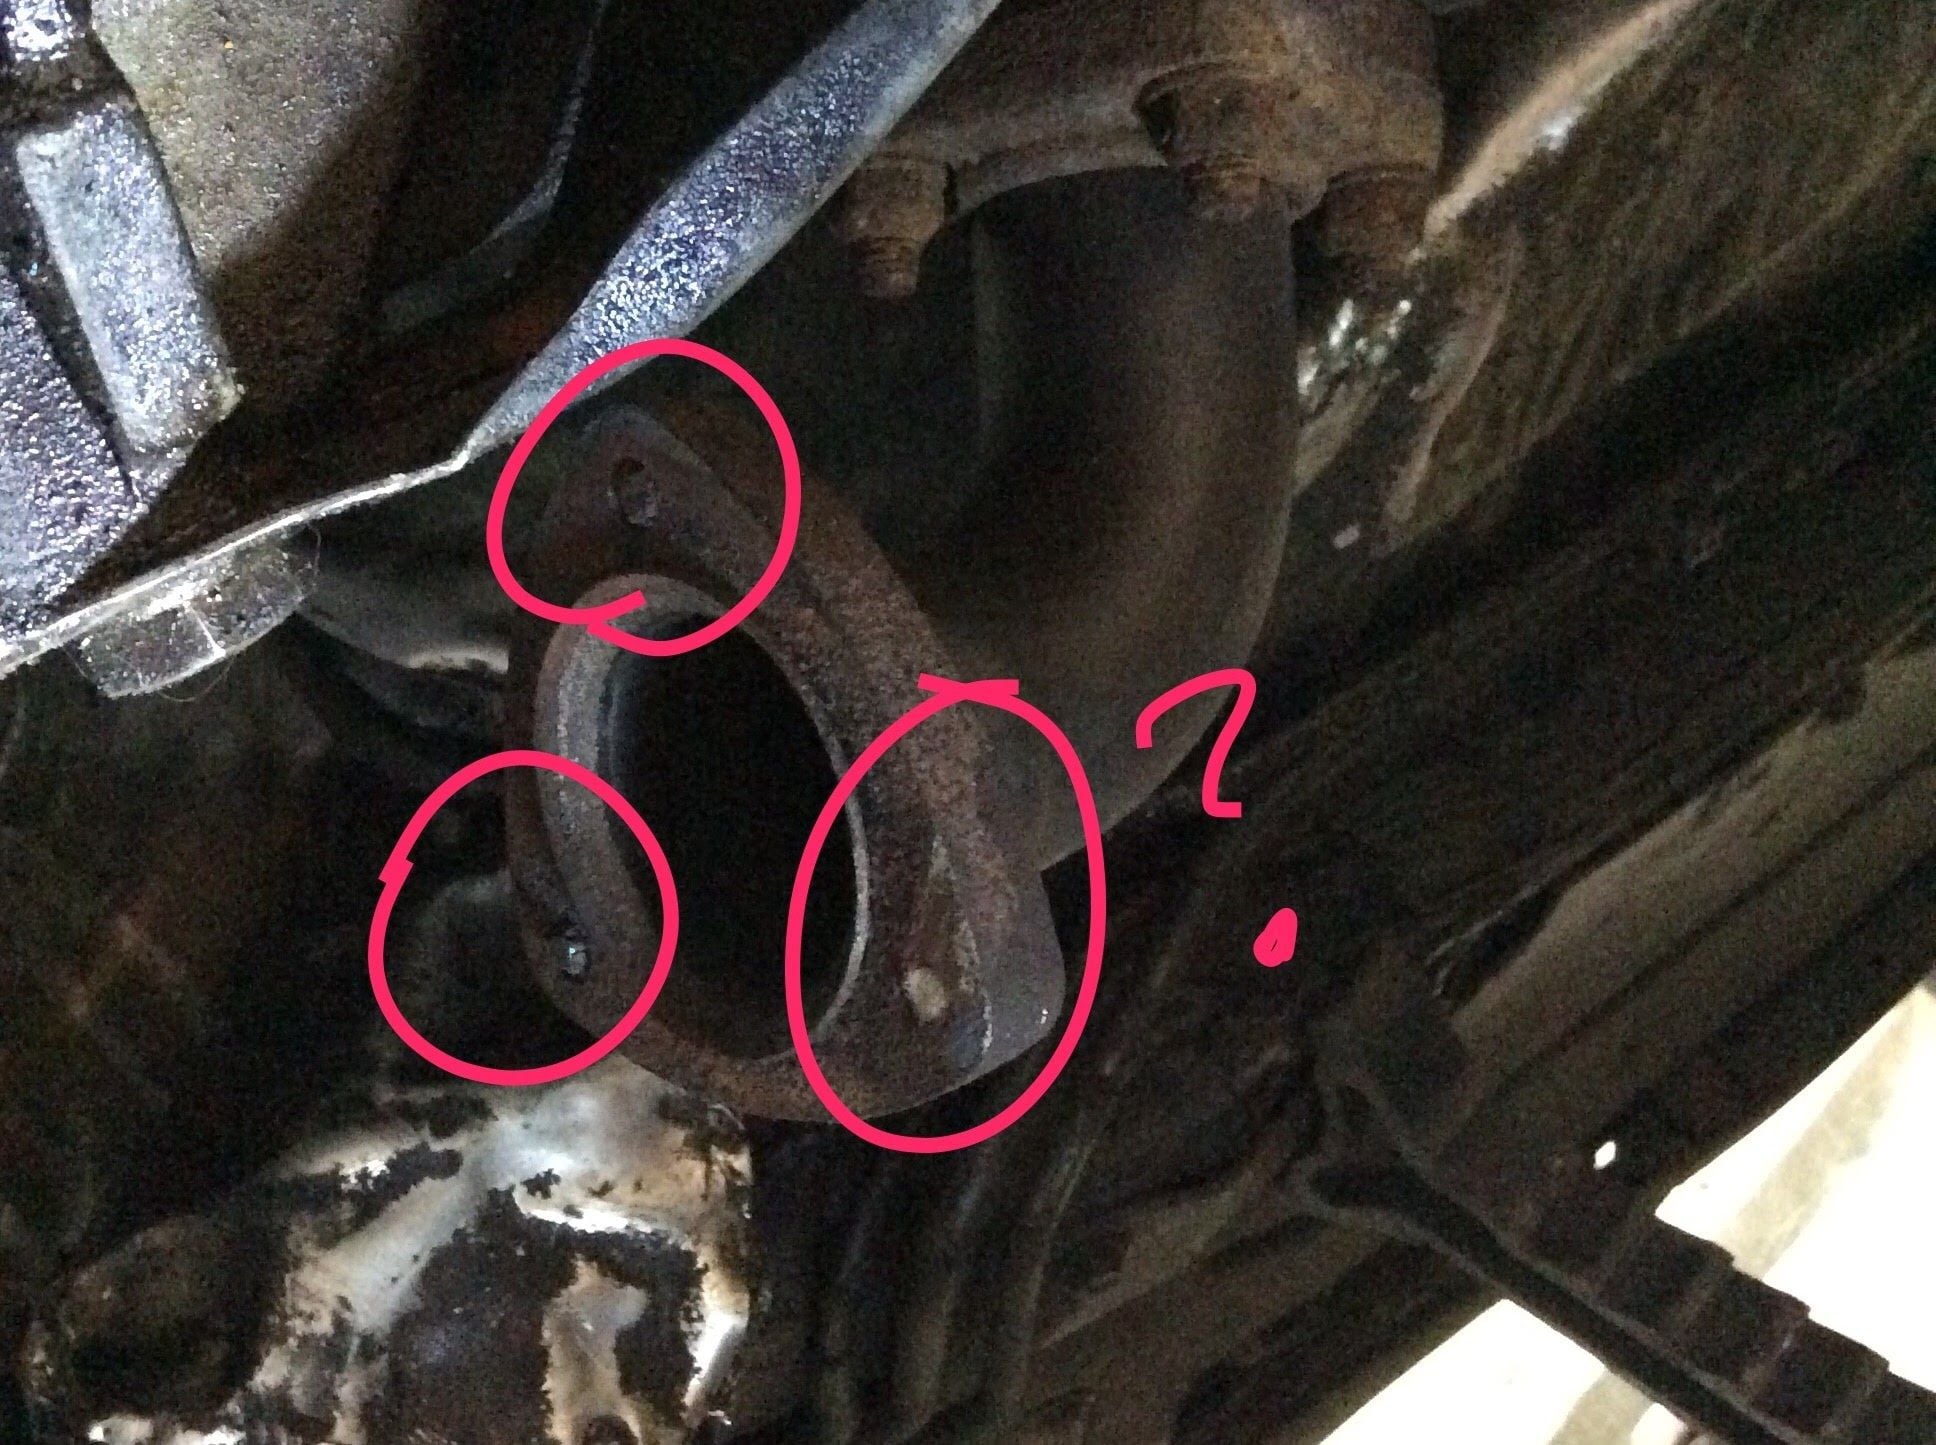
I took out the one broken stud still on the downpipe.. but.. in my drilling, I went off-centre. You can see where the thread was drilled and resulting slight elongated hole (right side).
What now? What do I do with this? FYI I have a tap/die set (but don't exactly know how to use)
The drilled-out thread is the bottom half of the right side (hard to see; top half still shows thread)
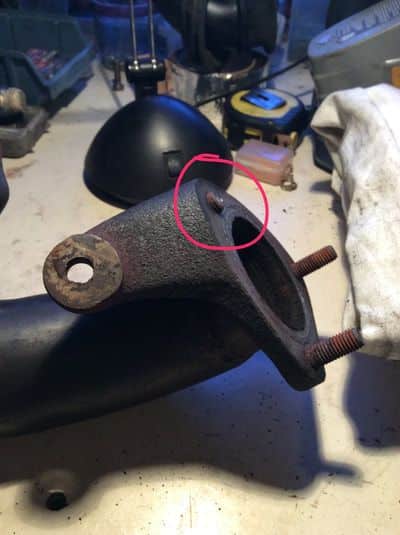
It doesn't look that bad -- had you tried putting a bolt in there to see if it will tighten up? I doubt a tap alone will help if not, but google Helicoil and/or Timesert to see how to restore those threads. They do make high-temp helicoils, which might be a good idea for that spot. Your local machine shop can do in easily if you're not comfortable trying -- but it's pretty easy and there are endless YouTube videos to show you how.
It doesn't look that bad -- had you tried putting a bolt in there to see if it will tighten up?
A bolt won't go in; gets stuck immediately. The picture looks better than it is. The top threads on the right are flattened and half way down, the drill bit smoothed them out. I will have a look at the options you've suggested.
I just finished removing all the fasteners for the crossover pipe!!
When I realized that the rest of the crossover fasteners are all bolts on nuts, I wasn't afraid of any breaking. And the "do it right" post has been in my head all day
Amazingly, all six of the header-to-crosspipe fasteners came off beautifully. Odd, since all of them looked pretty bad. Before even trying, I heated them up. Now, I know.
This should be standard instructions for r&r of exhaust: always apply heat before torque.
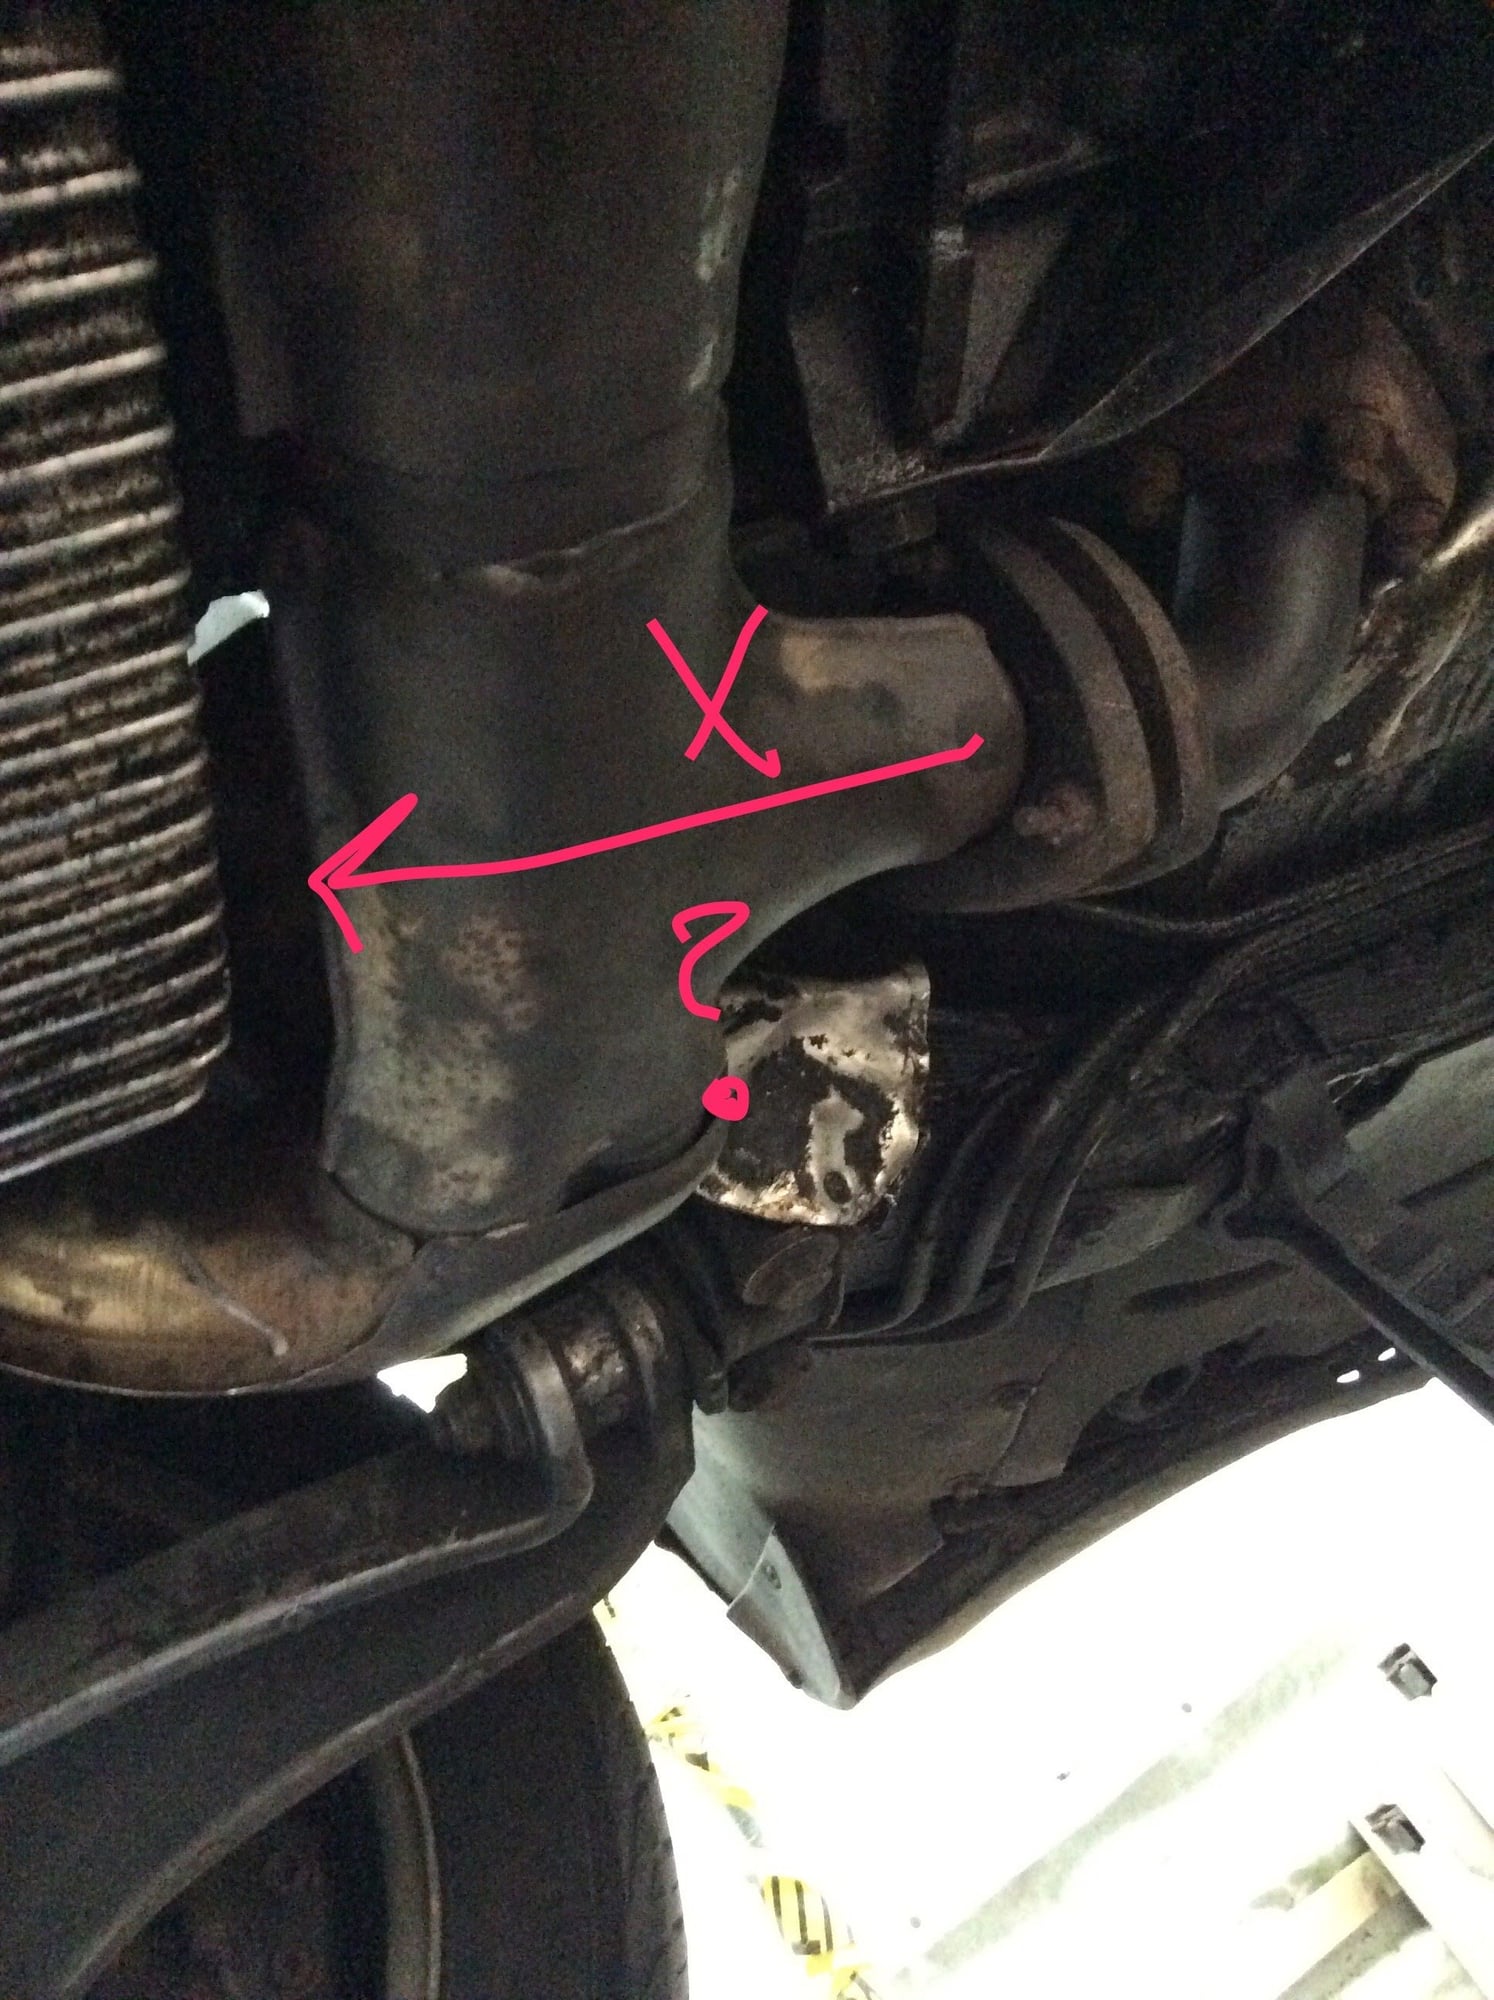
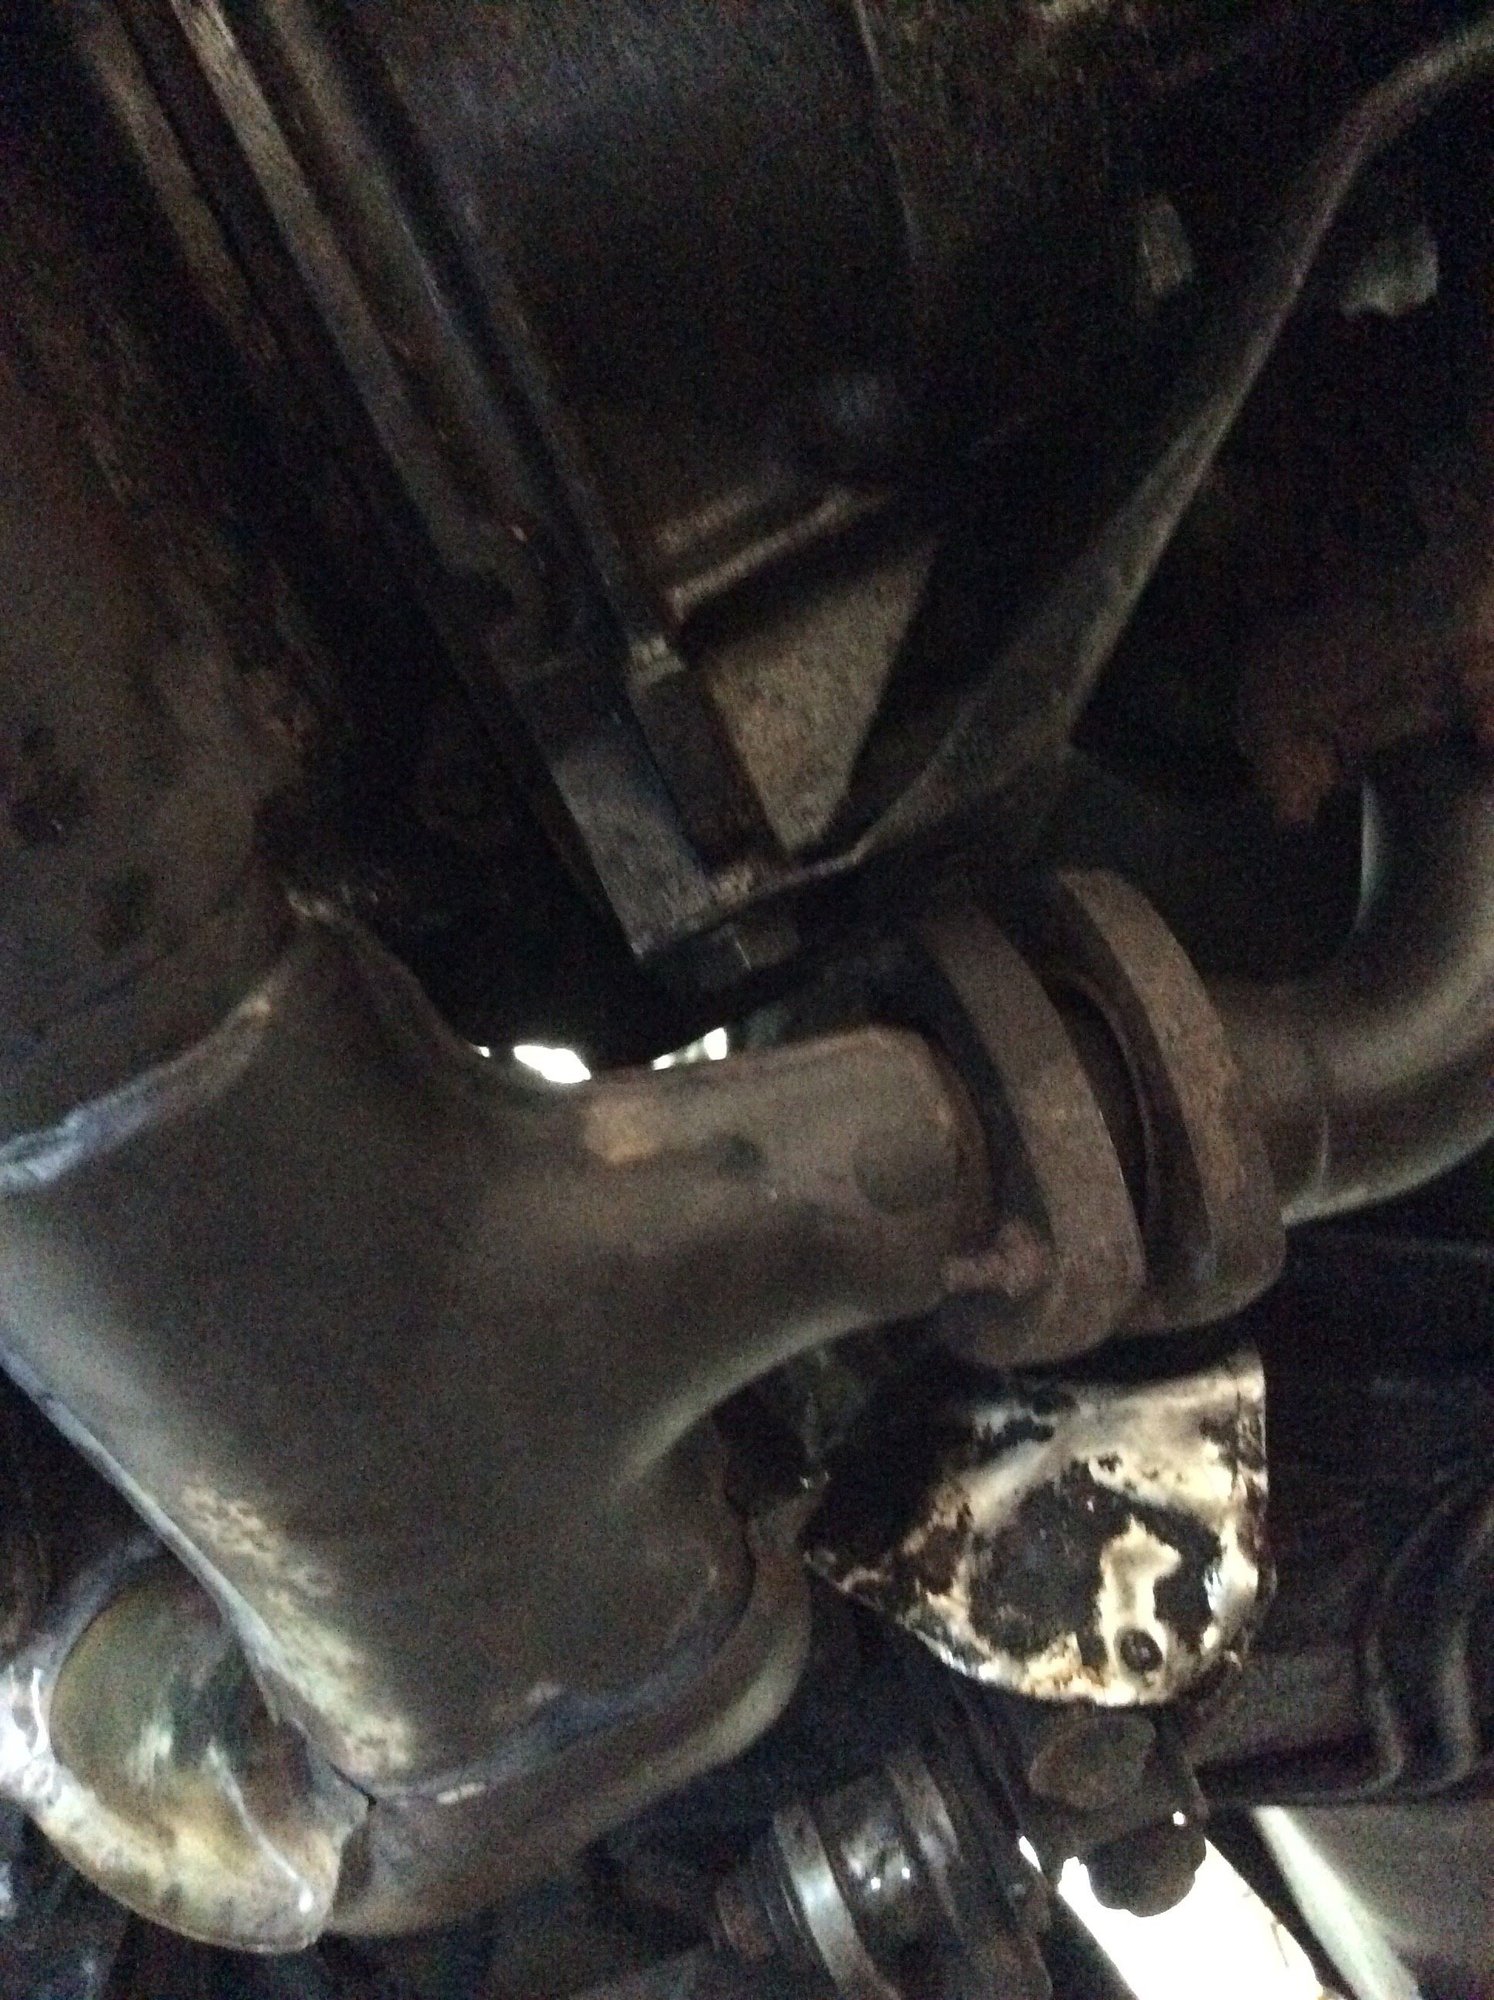
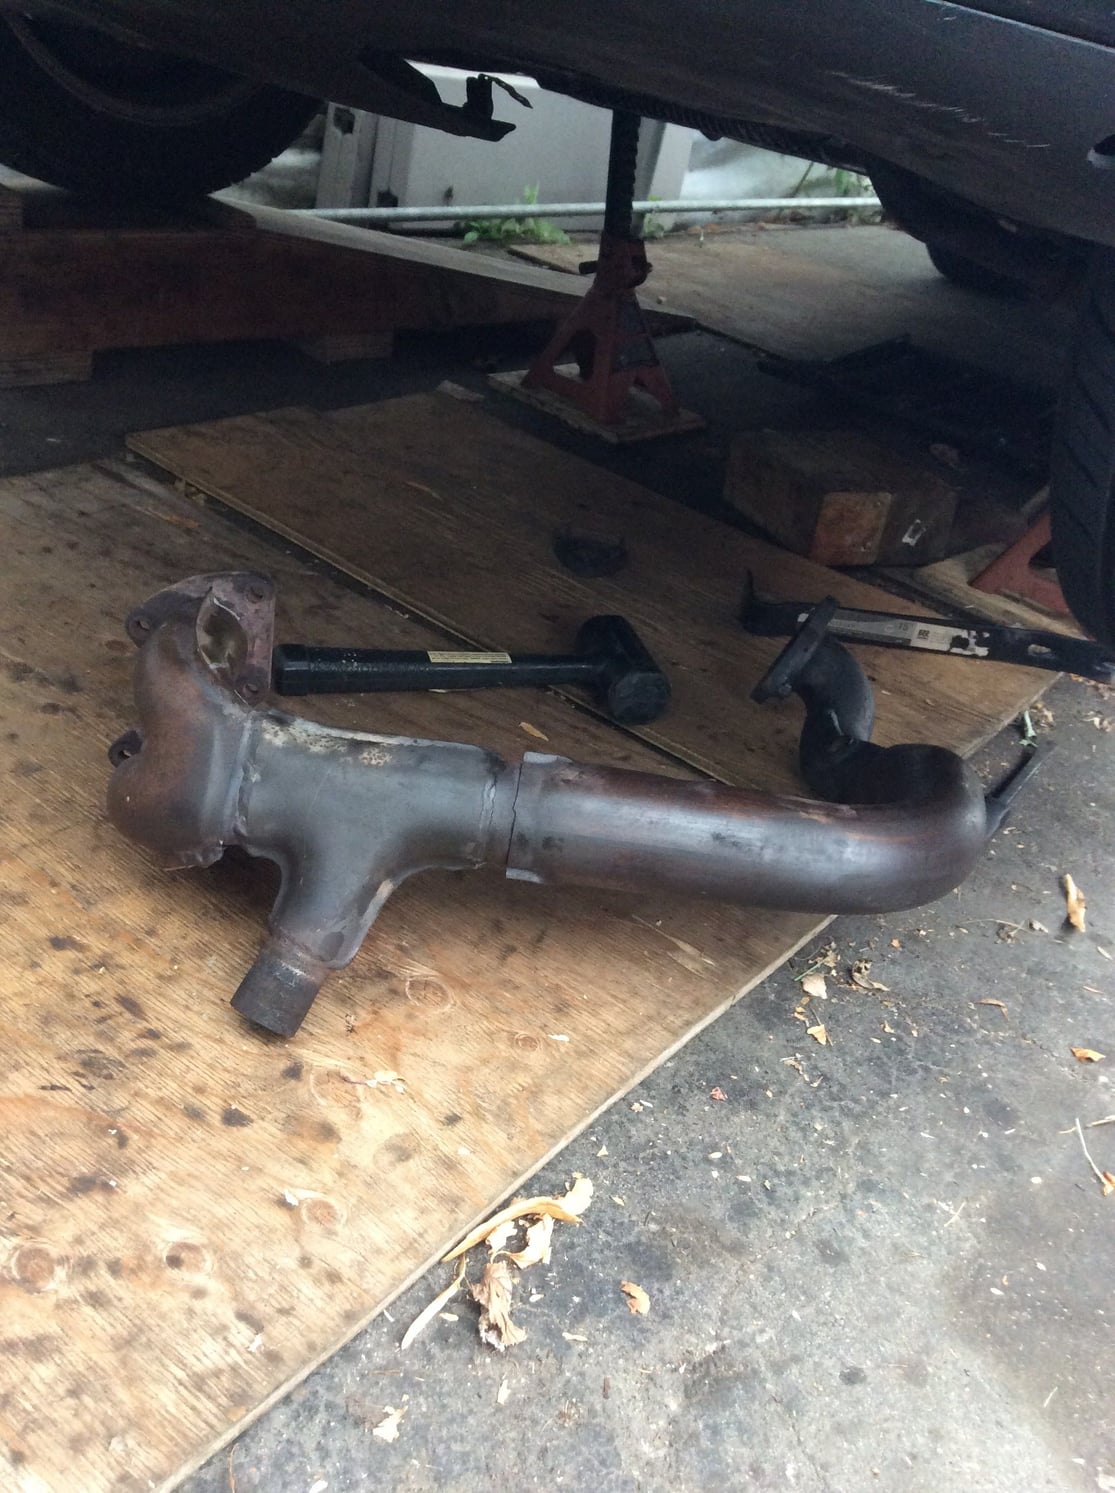
I left the triangle piece for last (attaches in the "middle" to a small pipe that goes to the wastegate).
The fasteners on this part are very small and on mine, no longer recognizable. They are so rusted, the have no threads showing and look like big blobs.
I briefly heated one and tried to put wrench & socket, but none of the sizes fit; there are no longer any shoulders.
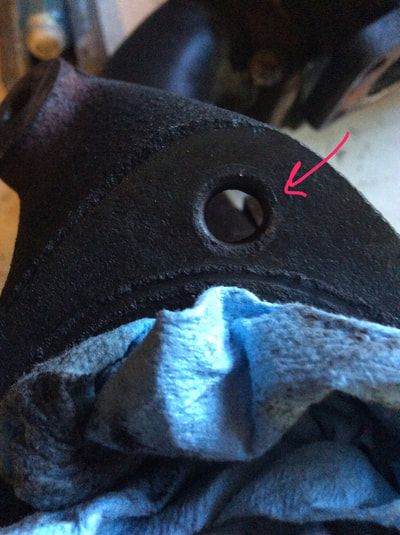
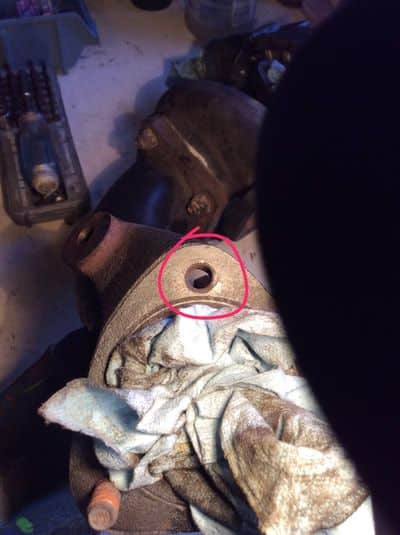
Noticing space between the flanges, I took a little hacksaw blade and literally cut the bolts down the middle! Well, before I did that, I sawed off one of the heads, which resulted in a round shiny circle completely flush but no amount of banging got it to budge--it's as if it's part of the flange now.
Completely free, the crossover pipe now swings slightly but will not break free from that little "middle" pipe! I banged on it and it budged a bit forward.. but then no more.
I recommend getting a spray bottle and buying a jug of Naptha, "final wipe solvent"
Bought this today! A whole gallon $23 not bad. It's by a company called Pro Form.
Looking forward to plugging the holes and cleaning all that grime. If I understand correctly, you just spray, brush, and wipe? No rinsing with water or anything, correct?
LOL nice. That is one of the brands that I use. They are all the same chemical. Just be very careful with the stuff as it is also used as camp stove fuel. Very Very flammable.
Keep a fire extinguisher around...20lb bottle preferably. I am comfortable using the stuff...I was a fire fighter for 15 years...I am comfortable around fire
Here is the link to the photos I posted of what I used.
As for it's use yes just spray/brush lightly and wipe. I used the blue paper towel that Costco sells in bundles of 8 rolls. They work very well.
Also use in a well ventilated area. You don't want to ignite the fumes. If you can get yourself a chemical mask or use a very large fan to get good air flow. I use a 3M 7000 series mask with multi-gas cartridges.
Originally Posted by martinicd
Bought this today! A whole gallon $23 not bad. It's by a company called Pro Form.
Looking forward to plugging the holes and cleaning all that grime. If I understand correctly, you just spray, brush, and wipe? No rinsing with water or anything, correct?
Also use in a well ventilated area. You don't want to ignite the fumes. If you can get yourself a chemical mask or use a very large fan to get good air flow. I use a 3M 7000 series mask with multi-gas cartridges.
The car is outside, under a tent shelter garage. There's good air, but I'll run a fan.
What do you do with the wet wiping material? Hang it to dry before putting in the garbage, correct?
Can I clean rubber parts such as the J-boot and hoses?
Making good progress. I'm sure you have read this already, but when putting back together, assemble everything loose and then start tightening from the outsides of the car to the middle. Header and turbo first and work your way to the middle doing wast gate last.
I put my down pipe on the turbo tight before dropping turbo back in.
Not disagreeing about the helicoil, but If you have a tap and die set, I would try it. Pretty simple to use, select correct size...go about 1 full turn, back off a 1/4 turn (repeat until threads are restored) You should use oil on the cutting tool too. They make "cutting oil" but since most of the threads are still there you could get by with any oil (wait...I thought we were doing it right ). If cutting brand new threads use should proper cutting oil......if the stud is wobbly at all going in, use the helicoil. Good luck
I just leave the lid off of my garbage can....Metal can.
Naptha evaporates fairly quickly.
It is safe to use Naptha on any car parts...plastic, rubber etc. It will not melt anything.
If you were to paint your car this is the final stage before tack cloth and blowing down whatever you are painting. It will remove all contaminants except adhesives....you would use isopropyl alcohol or paint thinner for that.
Dirt, wax, grease...petroleum products, bugs.
I will be washing down my engine with soap and water rags as a secondary clean only because I am taking it apart in my basement.
Engine is in the garage right now. Not using Naptha in the house and the soap and water will remove any dust that has settled on it.
Originally Posted by martinicd
The car is outside, under a tent shelter garage. There's good air, but I'll run a fan.
What do you do with the wet wiping material? Hang it to dry before putting in the garbage, correct?
Can I clean rubber parts such as the J-boot and hoses?
I can't get the crossover pipe off! According to Clark's procedure, it should come off the wastgate pipe; afraid to bang on it too hard, so far I can only move it half way.
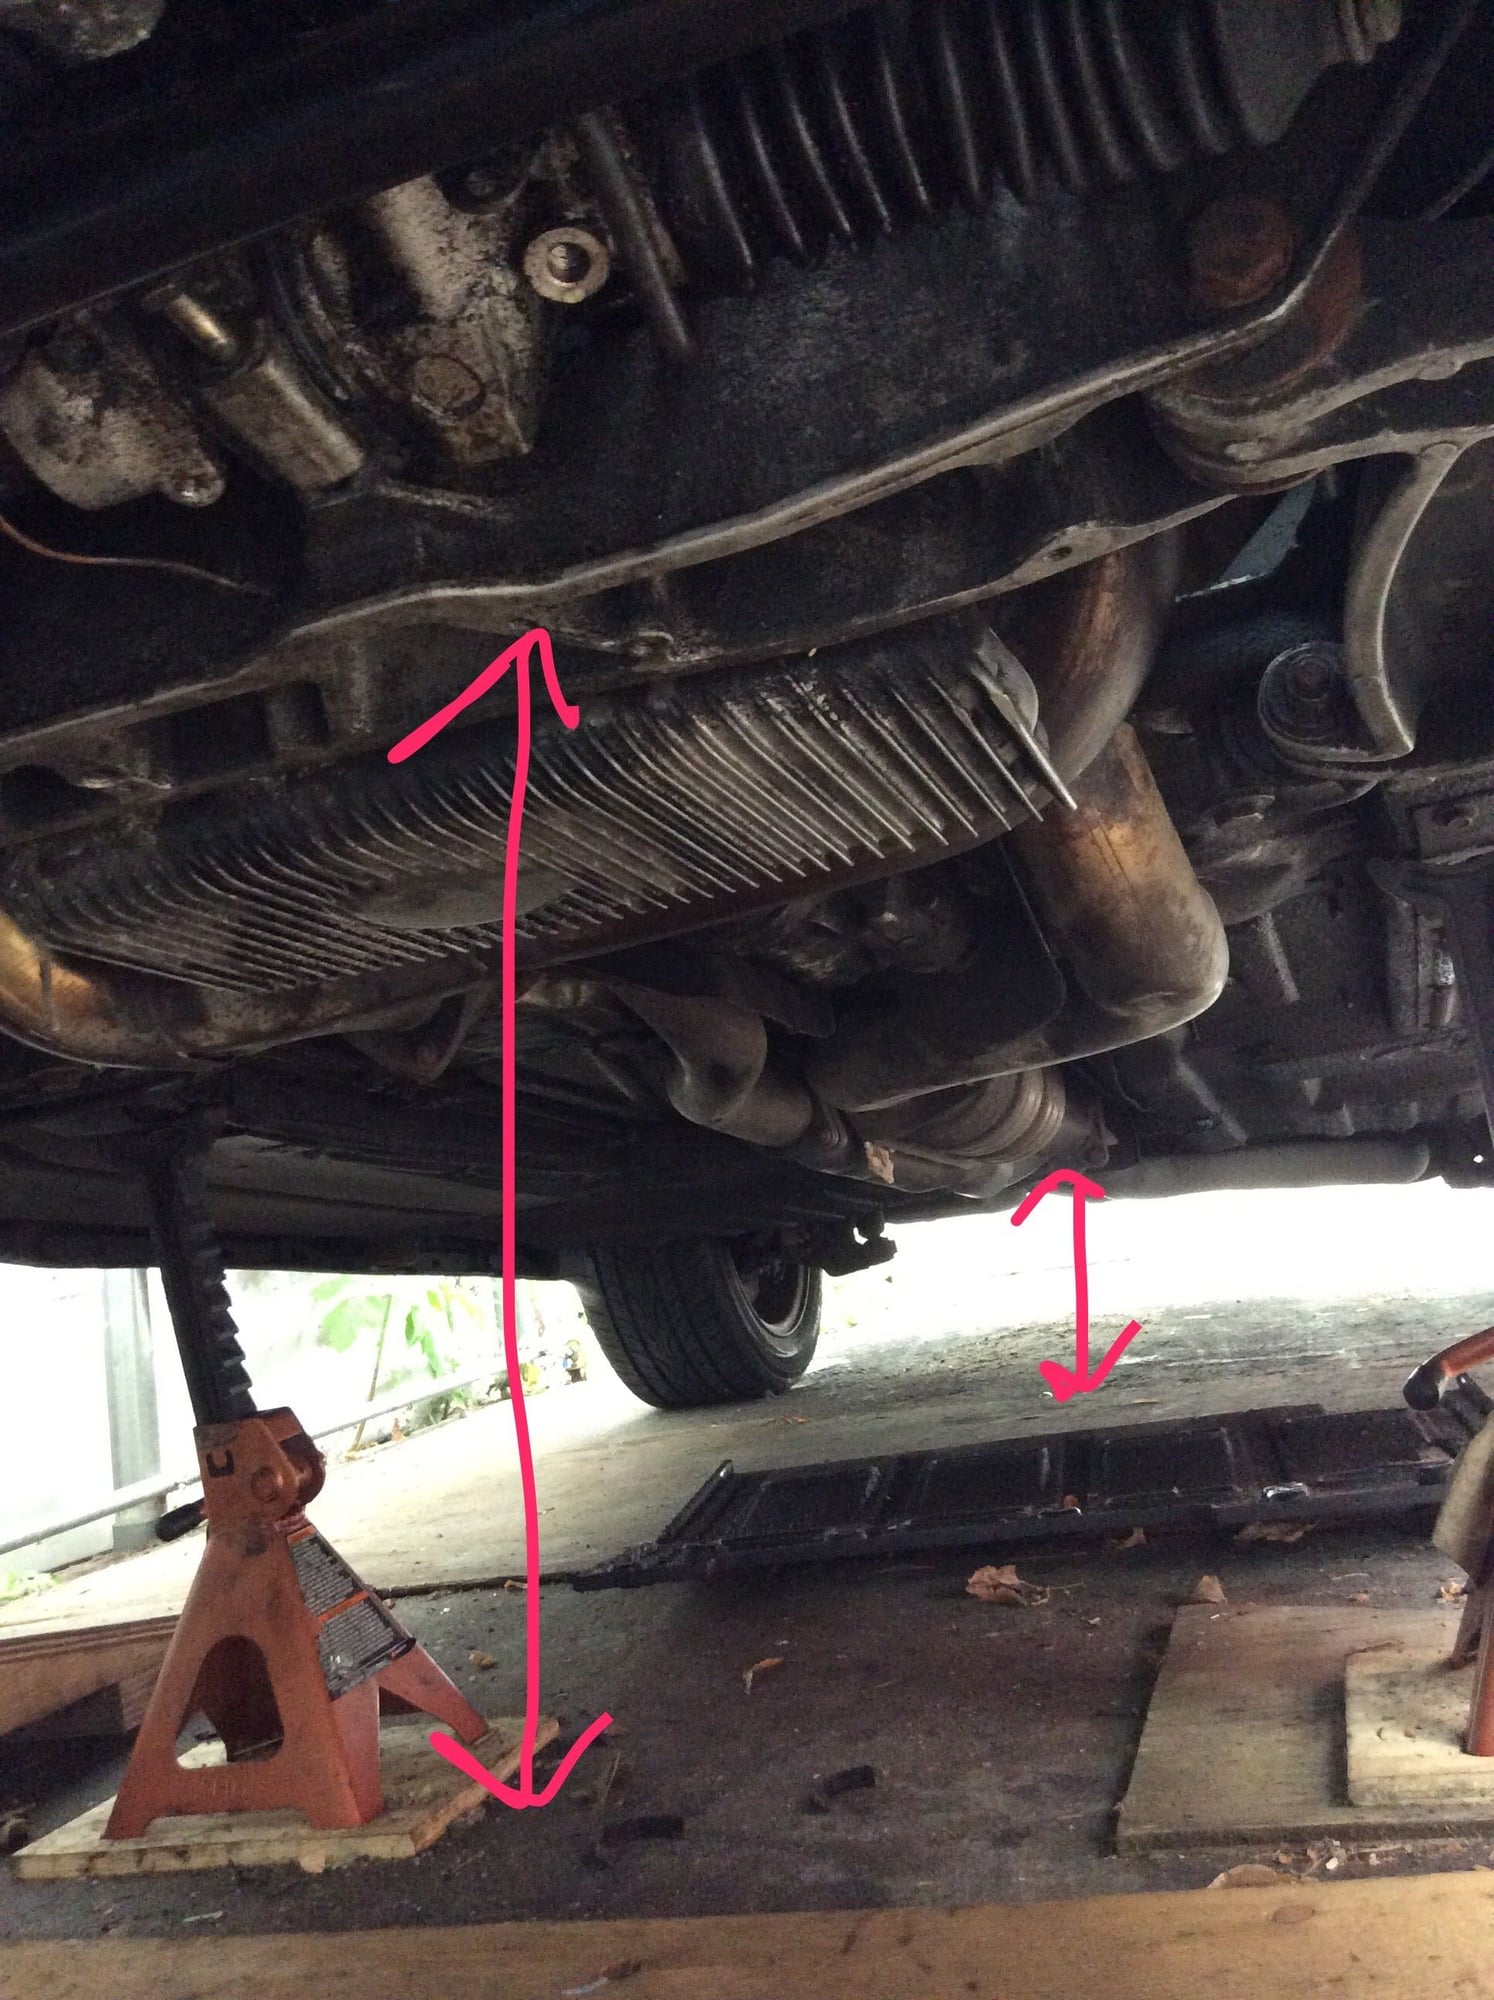
I haven't touched the header bolts (at the head) or the wastegate or the rest of the exhaust. The crossover fasteners are all off but after hours of trying, I'm at a loss.
Some reading suggests removing the entire exhaust, but as you can see, I don't have much room left.
Is the 2-piece crossover not designed to come off that little pipe as Clark's procedure suggests?


 08-31-2017, 08:30 PM