When you click on links to various merchants on this site and make a purchase, this can result in this site earning a commission. Affiliate programs and affiliations include, but are not limited to, the eBay Partner Network.
How bad do you miss this feature?
I put this off as I have heard this is not an easy job because the access is limited where the pump resides. This is an understatement.
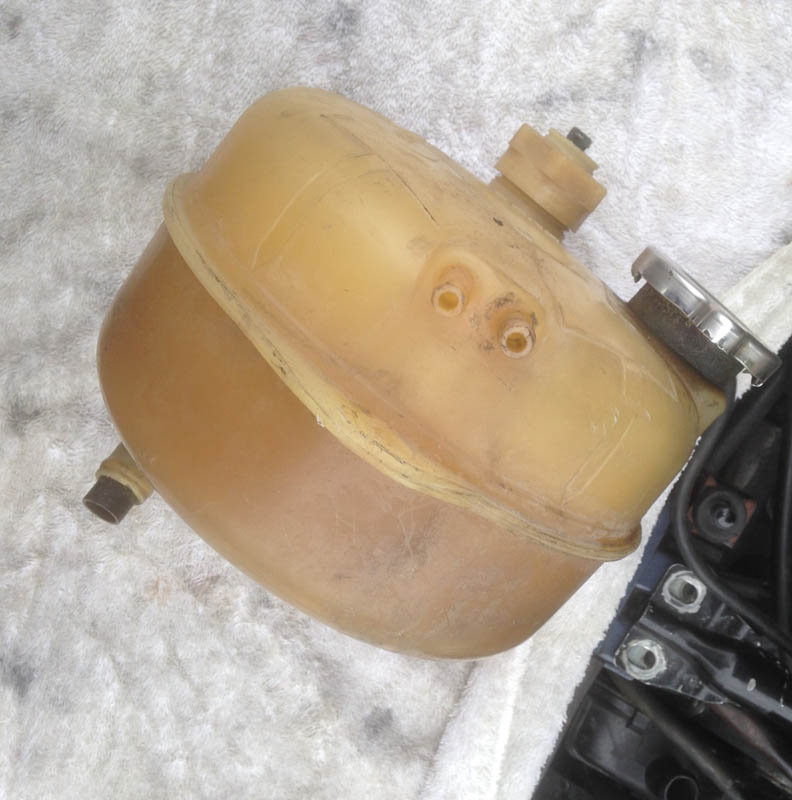
You have to pull the coolant reservoir but first the top of the air filter box, air tube and then the right side air accumulator.
Then the smog pot, vacuum pot and a couple to heater water lines.
Next the mounting bolts on each side of the reservoir, the low coolant light plug and three hoses including the large one on the bottom of the tank.
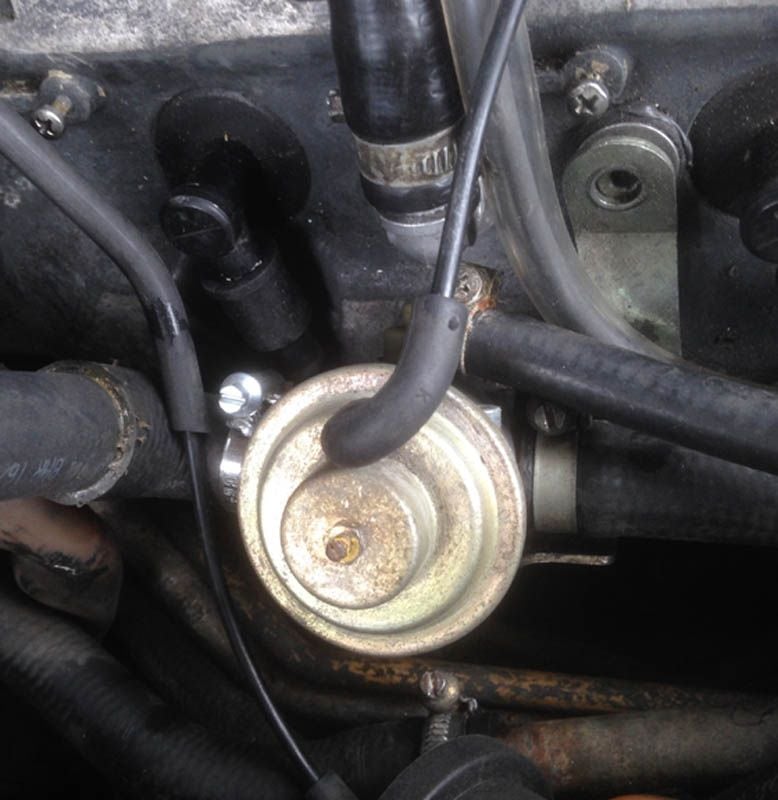
Now your getting close but look at the mess of lines including air conditioning hard lines that run right over the pump.
Really! the pump is under there. You can barely touch the pump under that shield of tubing. The white electrical plug is a bit lower and to the right near the center of the picture. It was tempting to try going at it from under the car but Forget about it.
Before I pulled the old pump I pulled the electrical plug first and checked the new pump worked and the old one did not. I sort of hoped for a bad connection. No such luck. I began loosening the array of tubing clamps but still could not see screws or bolts to remove the pump.
I recalled some odd hardware on the outside of the fender so I pulled the fender liner for a clear view. Note the three rubber stoppers that hold the pump in and are not removable unless replaced.
Being rubber you can pry the top right side rubber head off the U shaped edge of the steel pump mount and the two rubber heads on the other side will slide out by prying the pump to the right side of the car.
Looking at the back of the pump (left side of the pic) you can see where the three rubber mounts attach.
This is not my idea of a proper mount because to reinstall the pump you need new rubber mounts. I assume you cut the old ones out, start the new ones thought the holes and pull the arrow head shaped stopper through the holes to the catch point while hoping they don�t pull off the pump flange. My supplier failed to mention the rubber mounts. Probably not available any longer). I decided to move the pump from under the virtually unmovable lines that cover the location. Near by there is a plastic clip and hole that secures the wire bundle to the wheel. I used that hole in the fender to line up the pump on the outside and drill a few more holes to mount it. I fit some grommets into the mount spots for a cushion and decided to just use nylon ties to secure the pump on this none flat surface.
The original water lines reach the new position and did not leak under pressure without the crimp clamps which were overkill from the factory. It�s a windshield water pump not a fuel line so I�ll take the chance on the hose attachment without clamps. A bit of sealer on the holes I added and then after a couple tests everything goes back together. If there is a next time the nylon ties and new location will make the job a bit easier. Start wit the large hose on the bottom of the coolant reservoir. This hose is fairly easy to remove but not to replace. Just be sure this is the first thing to do when the new pump has been tested. You need all the room you can get to maneuver the coolant tank so you can connect the hose and it's clamp. I hate this hose location.
This is a $20 plastic pump you should expect to fail within the life of the car so that it got buried in such a bad location is sad. It could have easily been moved outside the fender with a slight bump in the fender liner. Maybe it has a new location on later years.
I bet there are a lot of older cars out there with bad pumps, having done the job it is easy see why others would to put it off forever.
Making space
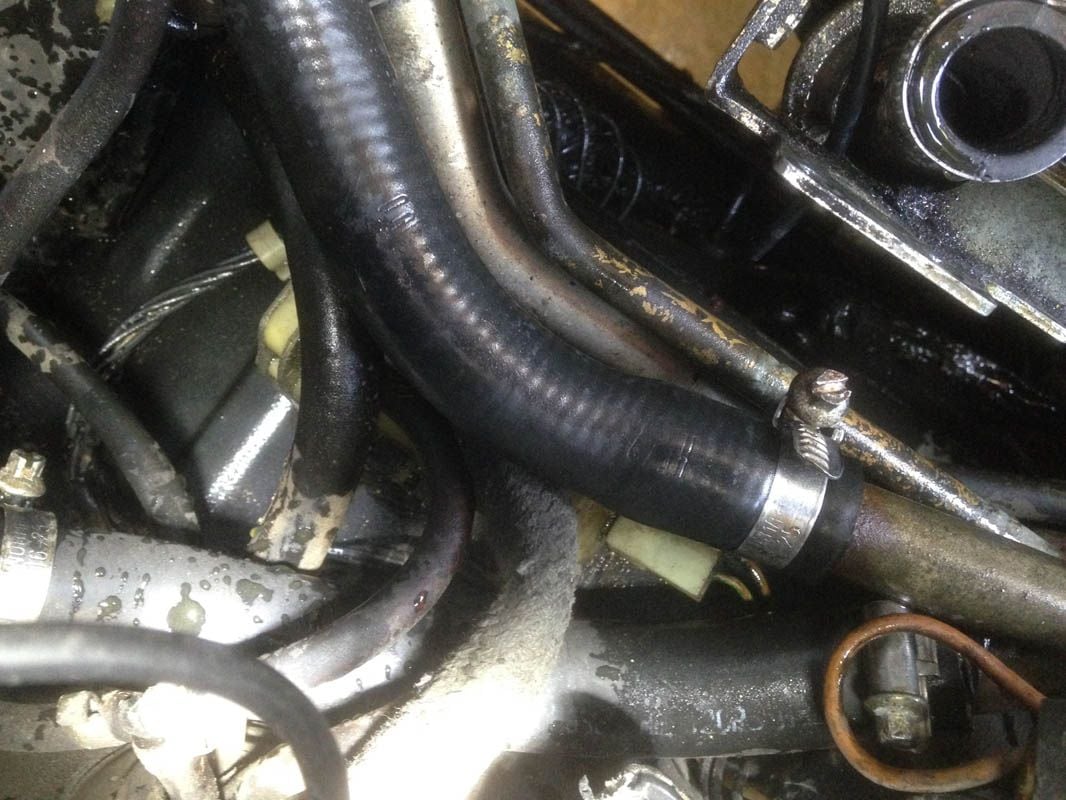
The hose on the bottom can be a bear if the clamp is not properly oriented.
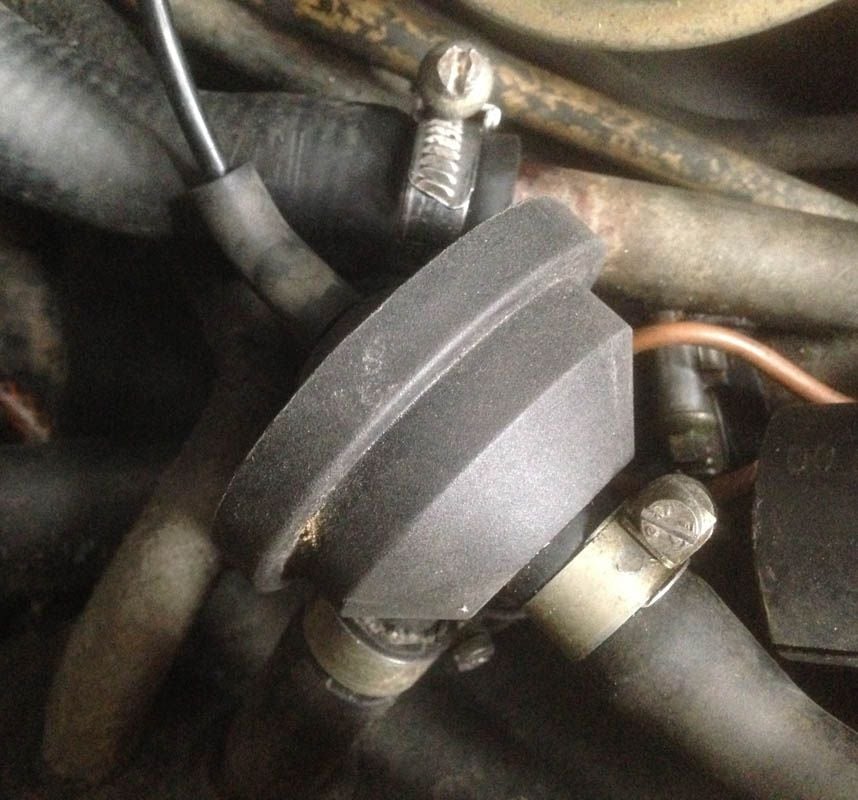
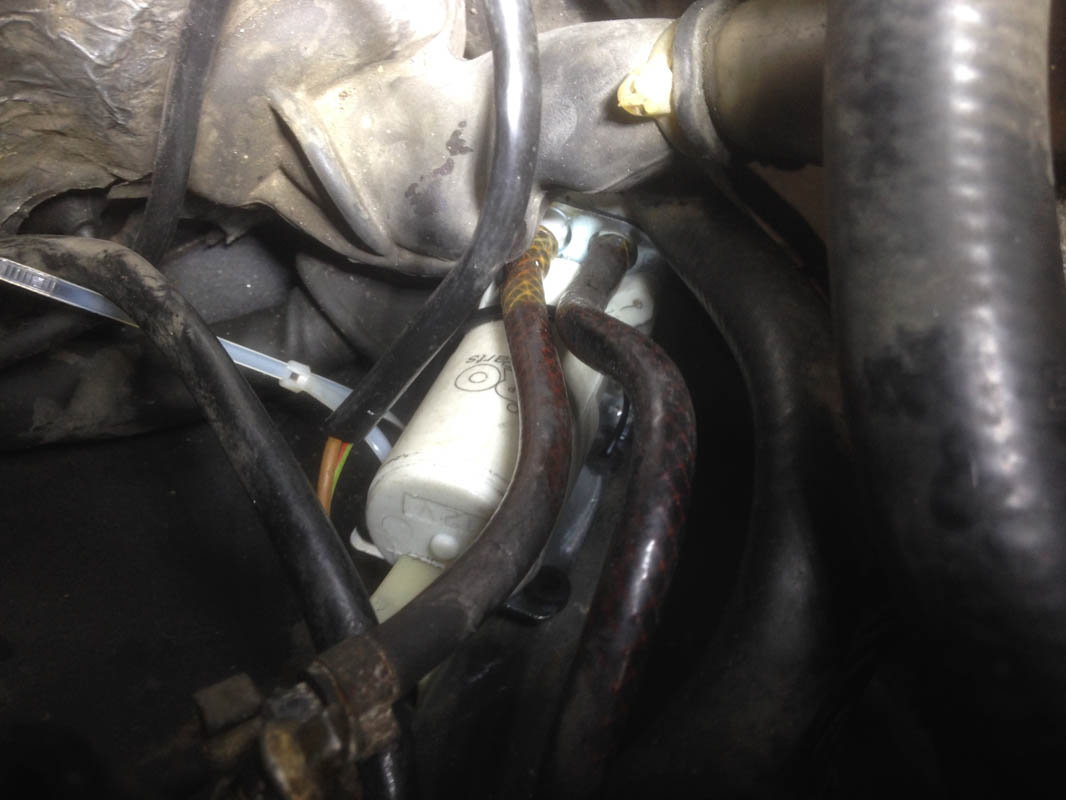
The Carbon filter vacuum controller by the coolant tank.
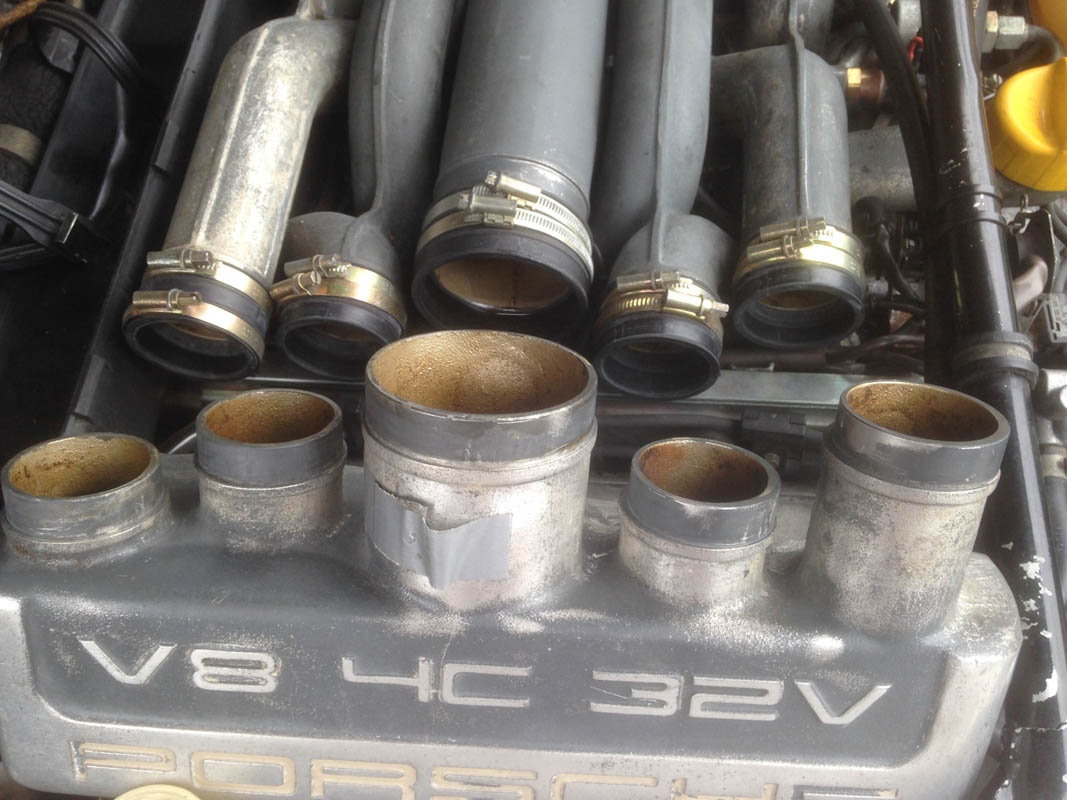
Lines running beside the cam cover are right in the way
The connector on the bottom was the most difficult step in putting it back together. It has a metal insert to keep the clamp from collapsing the connector neck. I wonder if over tightening that clamp around the neck of that port is sort of a natural response
There is probably an easier way to replace the pump but it was just not obvious to me. If you have the engine out I believe it might be a good time to replace it.
Nice collection of Threads, Looks like this topic including the head light washer has been full of issues for people. I was lucky and the pump has my system working great again. If you live in a warm weather area and don't have freezing as an issue always using DI or distilled water for the washer will help keep clogging and contamination down . I have not pulled the tank yet but will to just be sure it does not have anything to create a problem.
Cheers, Steve
Just ran across this and wanted to shout a big THANKS to Steve Drake for the pics and great idea to relocate....I was under the car and saw it and just stared at it for like 10 seconds...my small mind incapable of processing what my eyes were telling me I was seeing...
Totally going to relocate the pump as well if I need to replace...
Definitely easier on a RHD, and 16V! I just pushed the nipples back from in the wheel well to free the pump, then after it was cleaned and working, started the nipples into the holes, pulled them through from the wheel well again.
jp 83 Euro S AT 57k
I've decided to do like others and relocate the same style pump on top of the washer tank. My stuff is in good shape so I'm replacing the hoses (got the correct braided style) and will be getting a new pump. I am thinking of using a ton of industrial strength velcro...maybe a zip tie or two...got a new pump ordered today...not going to do the other type of washer tank since mine looks fine..and I wouldn't have messed with it but the hose going up to windshield leaks and I found out why...looks like someone either tried a repair or something funky about 5 inches after the pump to the feed line going to windshield...it was completely corroded and wrecked....
Once I get the new pump it's not going to be tough to route it back up ....there are much easier choices than doing what was done originally...what a mess!
Definitely easier on a RHD, and 16V! I just pushed the nipples back from in the wheel well to free the pump, then after it was cleaned and working, started the nipples into the holes, pulled them through from the wheel well again.
jp 83 Euro S AT 57k
Same here re: removing the rubber nipples- no need to destroy them at all.

 05-06-2017, 09:19 PM


 . This hose is fairly easy to remove but not to replace. Just be sure this is the first thing to do when the new pump has been tested. You need all the room you can get to maneuver the coolant tank so you can connect the hose and it's clamp. I hate this hose location.