When you click on links to various merchants on this site and make a purchase, this can result in this site earning a commission. Affiliate programs and affiliations include, but are not limited to, the eBay Partner Network.
My experience paralleled leiplouis79’s, only one of the four fittings showed any inclination to move.
While waiting for the penetrating oil to work it’s magic (which it didn’t) I started thinking about plan B… if worst came to worst I could use a Dremel to remove the fittings and replace them along with new hose… then lightening struck, or rather a dim light bulb came on just over my head. If I was going to be Dremeling on the fittings why not just Dremel the hose ferrules in place and replace the hoses “in situ”? The advantages to this method being 1) not having to loosen the fittings and 2) not having to worry about the fittings leaking upon reassembly.
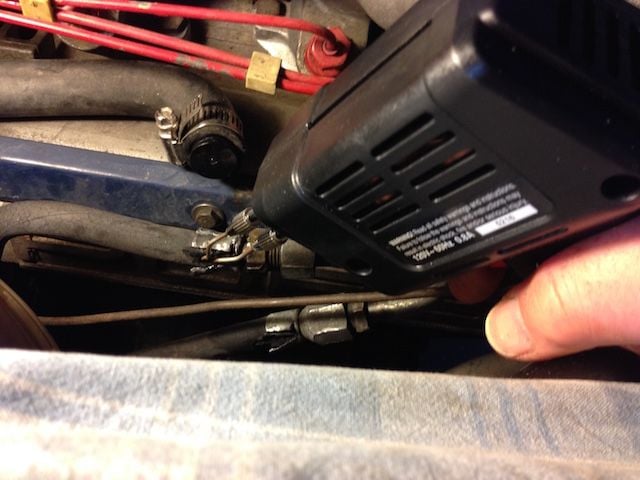
Studying the possible angles of attack I decided it was possible to get the Dremel on the ferrules from above and/or below. Next how to cut the rubber hoses off the barbed fittings once the ferrules were off. Wielding a knife in the restricted space would be a challenge and the possibility of scoring the barbs would be increased, so I looked at melting the rubber off.
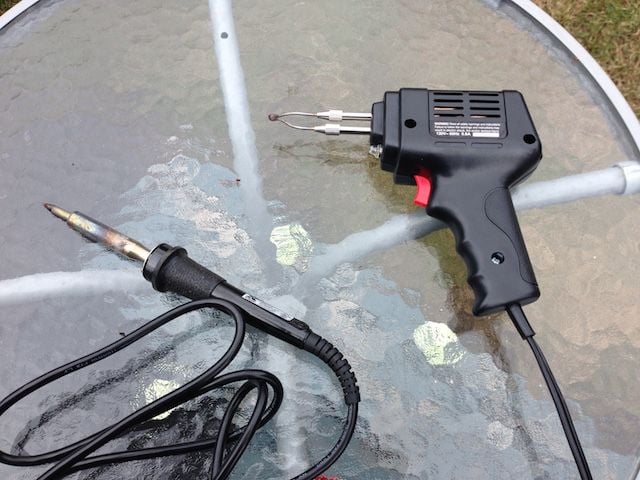
With a bit of Googling I determined that a soldering iron would be hot enough to melt the rubber but not hot enough to ignite the fuel that might still be in the fuel lines. To test this I put a small amount of gas in a container and stuck in the heated end of my soldering iron… lots of evaporated gas but no fire!
The other worry was that sparks from the Dremel would be a fire hazard, but given that I could cut all the ferrules before cutting the hoses I figured it was pretty safe, but my fire extinguisher was close at hand as well as a bucked of water with soaked towels. In the end there are very few sparks produced by the Dremel.
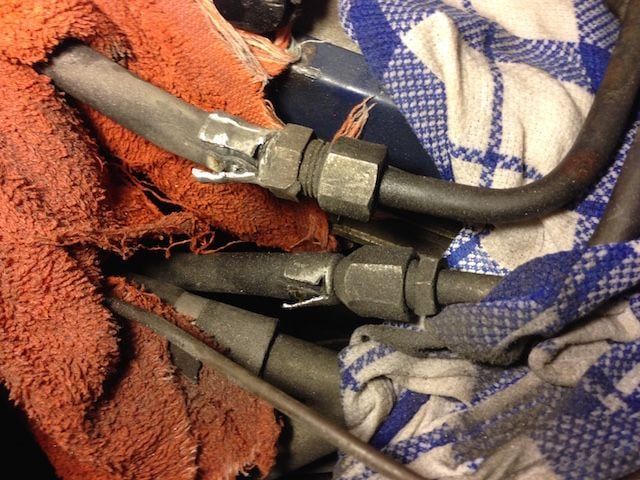
Upper ferrules cut. I packed soaked towels around the scene of the operation to catch the sparks, before deciding there weren’t enough to bother
Working from below, cutting the bottom ferrules wasn’t as difficult as I expected.
An aside… those cutting disks are really fragile, too many times while trying to place the Dremel (befire turning it on) I just barely touched something and broke the disk in half… always while on my creeper under the car!
Cutting the hose with the soldering iron. This iron worked for all but the lower high pressure fitting where I had to use my pencil soldering iron, but that worked.
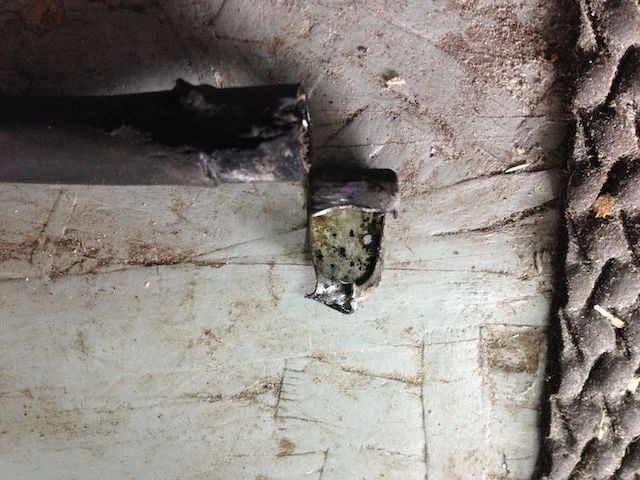
The high pressure hose freed from the fitting.
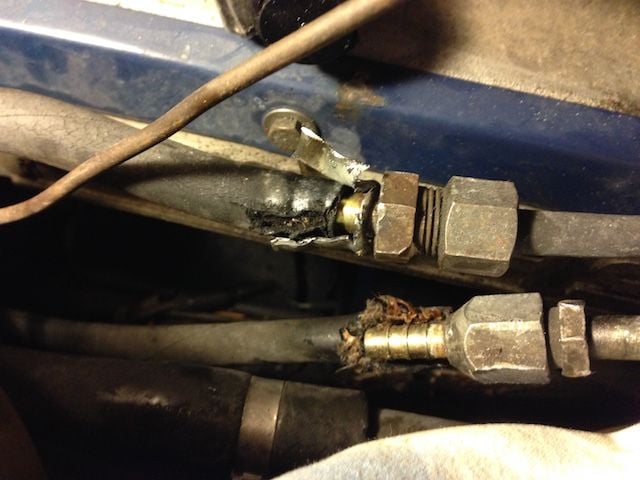
The difficulty with melting the hose was the very end where the remains of the ferrules got in the way. I ended up having to entirely remove the ferrules, a combination of twisting and tearing with long nosed pliers and some additional careful Dremeling on the ring that the end of the ferrule forms. I managed to not mark the barbed part of the fittings, just a bit on the hex part.
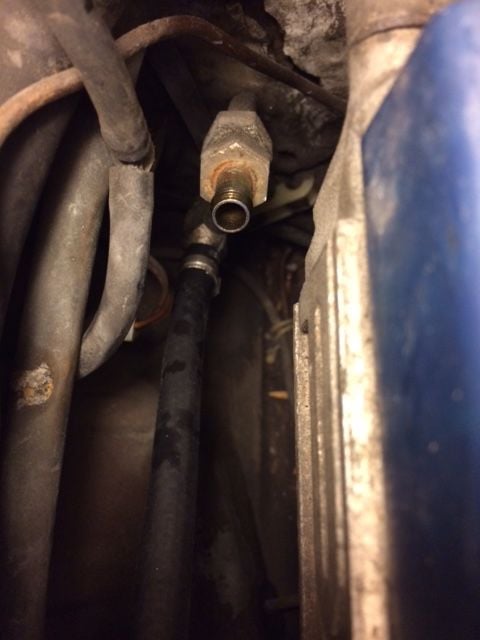
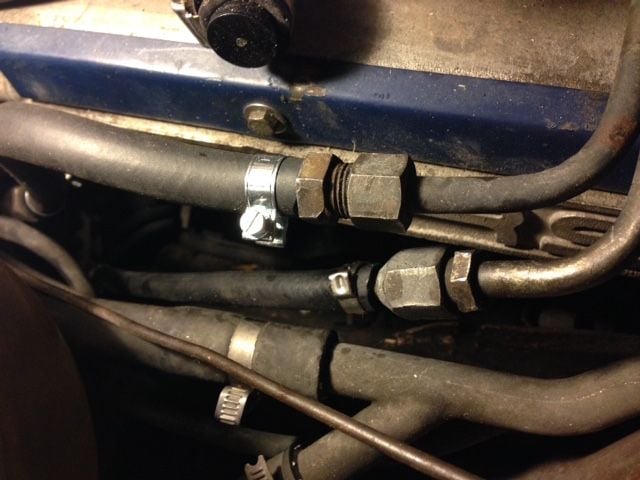
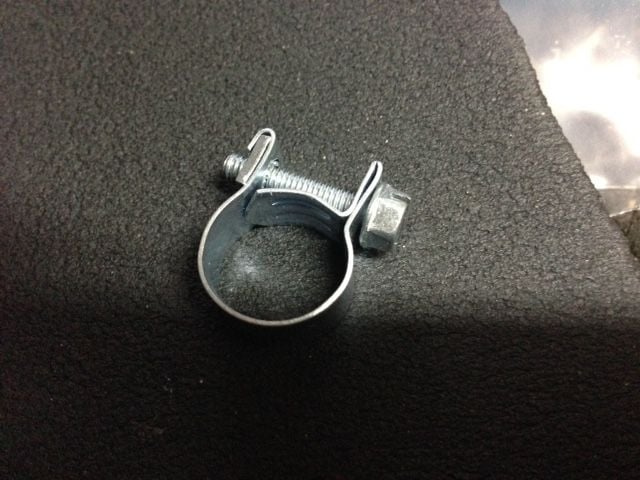
Getting the new high pressure hose on the barbed fitting was fairly easy, forcing the Oetiker clamp into place with a screwdriver took a bit of time and tightening the clamp from underneath was a challenge (strong, non-arthritic hands would have helped, but I am all out of those).
Make sure that the clamp is placed so that the ear is accessible from the bottom… it ain’t gonna turn once its placed on the barb!
I will do the bottom ends of both hoses first, to have a bit of room for working from the top.
Here I have run into a problem, the hose that came with the kit is fine for the high pressure fittings but I cannot get it on the return hose fittings. I am assuming I have to get a slightly larger hose (greater than 7.5 mm or 5/16 in for that. Suggestions are welcome.
Clarification : I bought the kit from 928 Motorsports, which it turns out is not what I need for my '78. I will find the proper braided hoses locally and indicate what I end up using in a later post.
Last edited by elgy; 04-24-2017 at 01:47 PM.
Reason: Clairification...
An aside… those cutting disks are really fragile, too many times while trying to place the Dremel (befire turning it on) I just barely touched something and broke the disk in half… always while on my creeper under the car!
Good safety precautions.
Re. those cutoff disks, you would do much better to use the composite ones with the quick change feature - they last much longer and don't break nearly as easily as the stone ones.
If you happen to be using full replacement hoses, use your Dremel to cut relief slots in the nuts. Most of the way through you can wedge a tool (screwdriver) into your relief slot and twist a little. Just avoid cutting all the way into the threads.
Heat from a small butane torch on the nut does a lot to break corrosion bonds. Drain The Line Completely first. You aren't going to ignite fuel inside the hose, just get the nut hot enough to expand a bit and come free.
I have not found a lot of information on what hoses to use for my DIY installation, but I will share what I have found from a couple of sources.
The high pressure supply hose:
- 7.5mm ID and at least 100psi rating.
- 5/16 in will work if you cannot find metric.
I used the hose that came with my kit from 928 MS (7.5mm and 145psi with the Oetiker clamps.)
Low pressure return hose:
- 9mm ID (I think) and I got 2 different suggestions for the psi rating:30psi or 100psi.
- 3/8 will work if you cannot find metric.
I could only find 3/8 hose rated at 50psi from auto parts sources, but I found 300psi (!) at a hydraulic equipment supplier, so used it. With screw clamps... not radiator clamps.
I bought some hose from a truck equipment supplier (which I ended up not using) and the hydraulic equipment supplier mentioned above. I was a bit worried that these places would laugh at my order of two 1 foot lengths of hose, but there was no problem. So next time I will start with them.
Here are the hoses installed and ready for testing.
It's been a while for me, I know I got my hose from Oreileys, and it was made for fuel injected vehicles (#30 is cis). I am sure somewhere in my restoration thread, it's in there.
I did the same on my white 82, but was able to get the fittings apart, so I assembled them on the bench. Used leftover fuel line from #30. I used the domestic style hose clamps that Hacker shows.
I did buy a roll of metal jacketed fuel injection hose from summit racing, to use on he 82, but since I can't get the darn thing to run for any length of time, changing the hoses again is low on the list.
One of these days I might be able to afford Greg Browns hose kit, that's the ultimate goal.
Good luck!
Last edited by AirtekHVAC; 04-30-2017 at 07:23 PM.

 04-23-2017, 01:13 PM