When you click on links to various merchants on this site and make a purchase, this can result in this site earning a commission. Affiliate programs and affiliations include, but are not limited to, the eBay Partner Network.
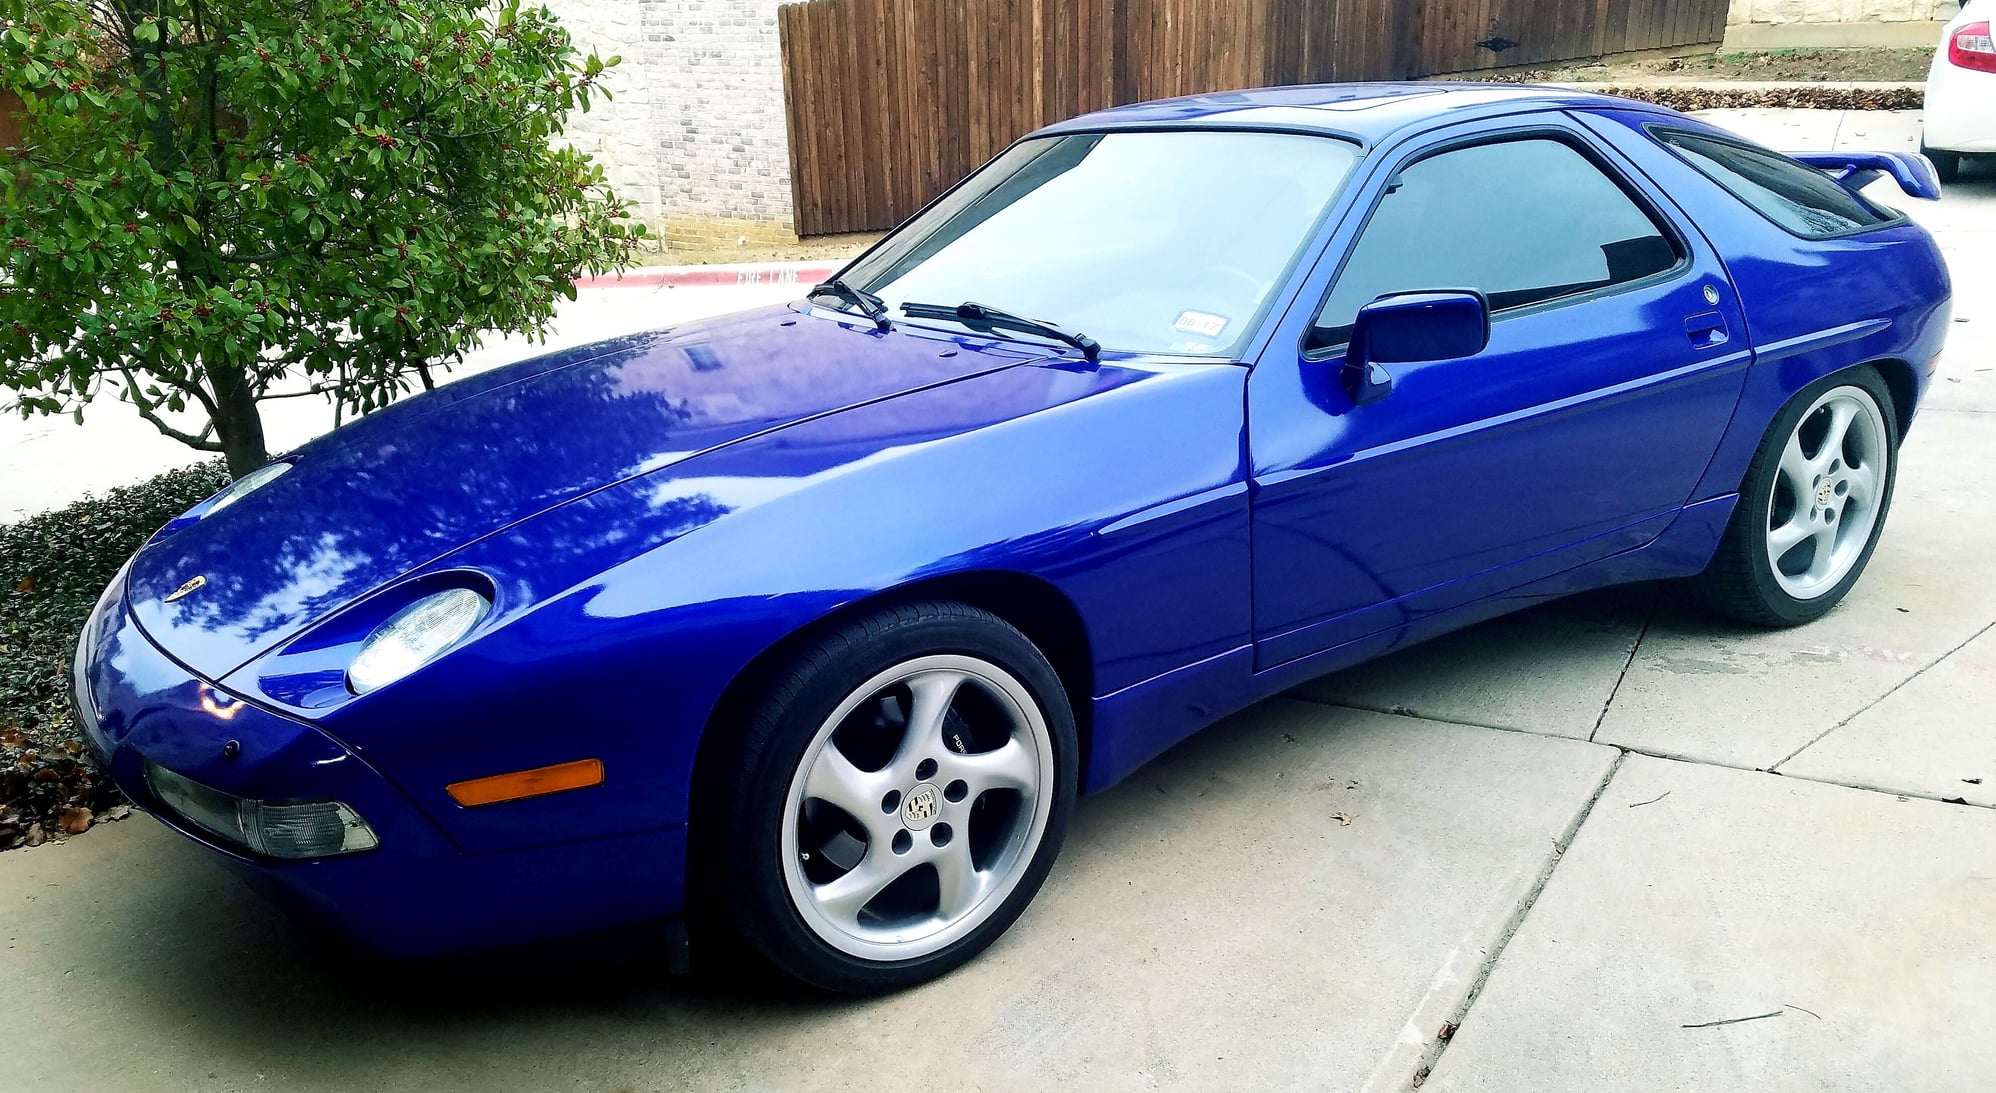
Finally Finished the wrap, side skirts, and spoiler!
I'll preface this by saying that getting these three things done took about 3 months of work... with 1 month just for paint cure time. It was a pain in the *** to get these aftermarket parts to fit correctly. If my fiberglass guy wasn't a personal friend, I would easily have $1500 in labor invested in JUST the spoiler and side skirts, not including the parts themselves, and paint/materials.
The wrap is a 3M product, color is Blue Raspberry. Material cost was about $700, and lots of time with a personal friend that does this on the side professionally. I paid him $1300 for a long weekend of work (about 3x 8 hours days, including time to remove/reinstall trim, lights, mirrors, etc)... so $2000 total. The wrap would cost about $5000 if done professionally, with jambs and everything, including materials. My paint was getting quite thin, and this was a way to preserve what's left. There is a possibility that removing this wrap will pull up the paint, which is something that happens occasionally even on brand new cars. If that happens, I'll repaint the car... which was honestly what I would have done in the first place if I had an extra $7K laying around for a proper job. This was a fun way to try a different color that also didn't break my wallet. Should last about 5 years if properly maintained.
928MS side skirts (Same as AIR) are NOT a direct fit in any way, whatsoever. If you don't have a competent body guy that can work fiberglass, don't buy them. The side skirts were too long, didn't fit like the original panels at all, required sectioning, shortening, LOTS of sanding, build up with dynaglass, and a complete overhaul from what comes out of the mold when purchased. I have pictures of the entire process that I'll post below.
The spoiler is a Jacquemond look-alike. I found it on eBay for a killer deal, and paid the price dearly in personal labor/time to get it to fit correctly and sit flush on the hatch. It was like it was made for an entirely different car, fitment was so poor. The gelcoat was paper thin, and the wall thickness on the fiberglass was nearly the same. I also have pictures of my trials and tribulations to get it perfectly flush.
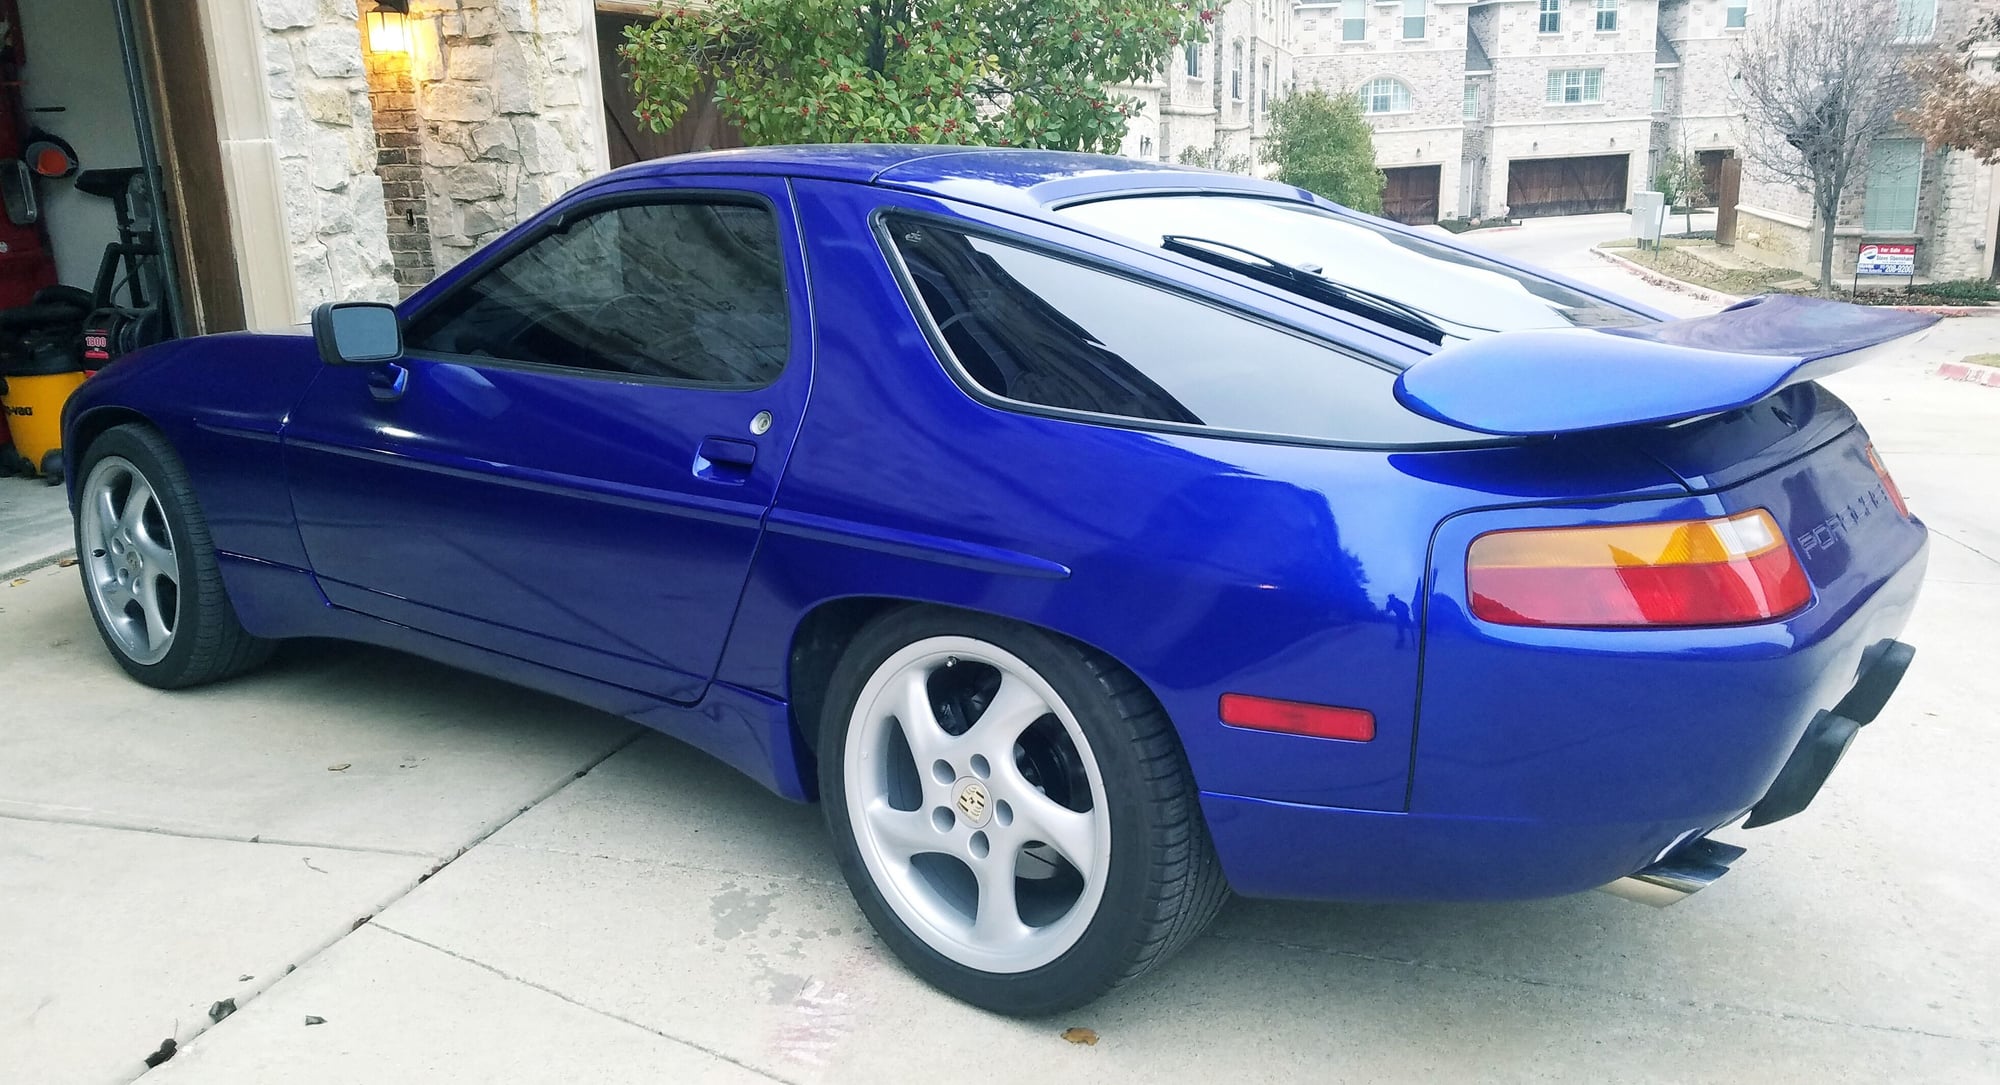
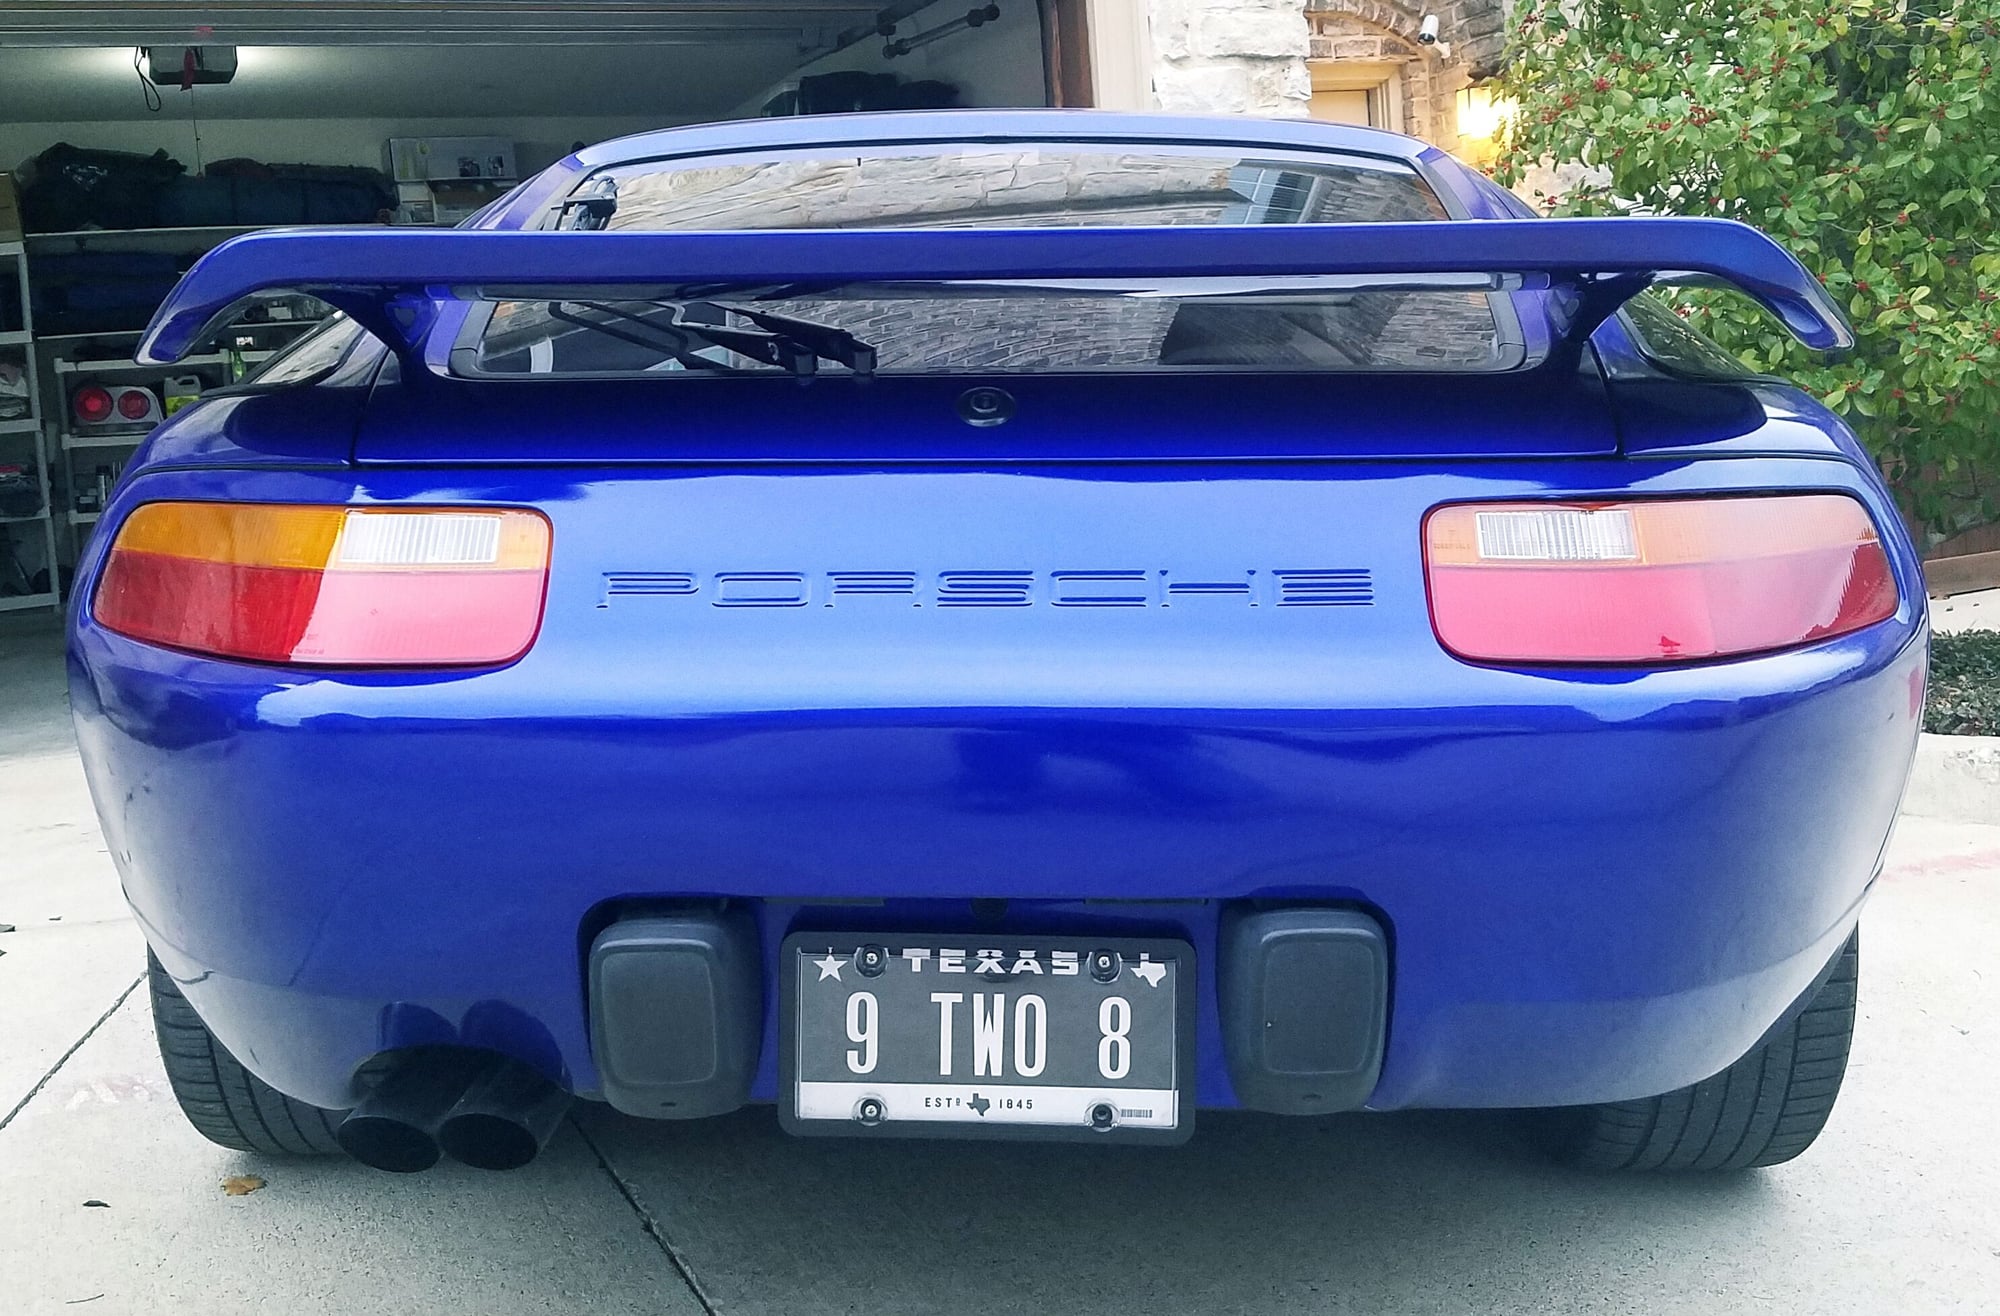
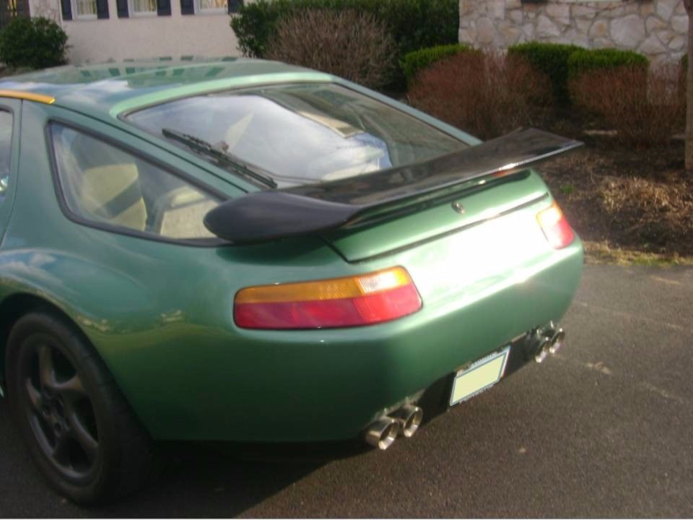
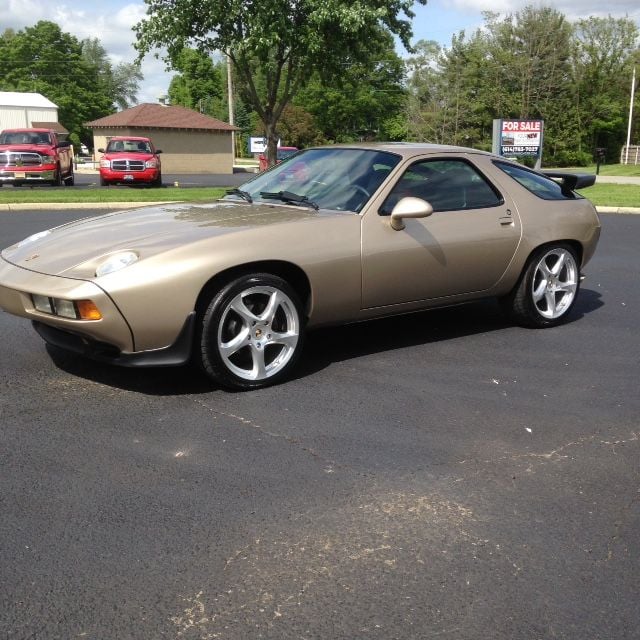
In the meantime, here's the good stuff. Finished Product:
Last edited by traxtar928; 12-30-2016 at 09:12 PM.
Wrap looks awesome. Having gloss finish really makes it look like a new paint job instead of a vinyl wrap. Is it 3M? Does your man say anything about the typical cost of parts and labor for a car like the 928? Looking to wrap mine in Pearl White, preferably gloss.
The owner of the body shop quickly pointed out the issues with the parts and the work that would be required to get them to fit right. I pointed these issues out to the owner of 928 Motorsports. They agreed that the parts do not meet their quality standards. 928MS sent all the pictures to the manufacturer that molds the parts, and if they cannot be resolved, they will no longer be selling those fiberglass parts. He also agreed to refund me 40% of the cost of the parts due to the required rework.
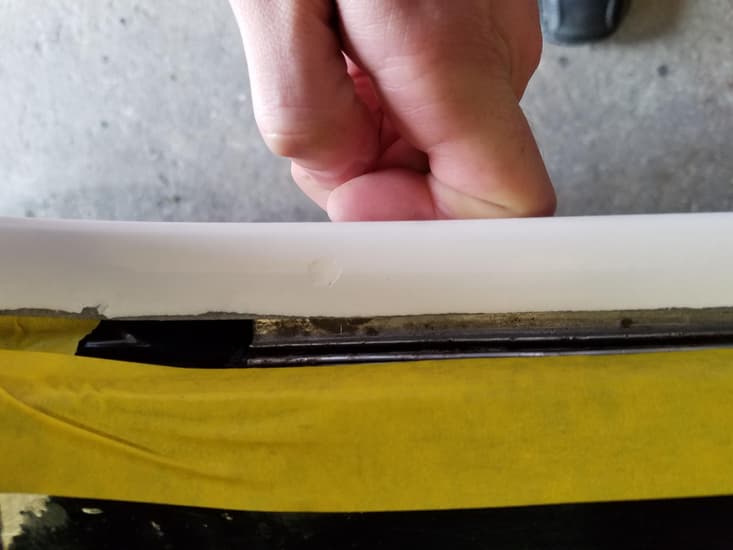
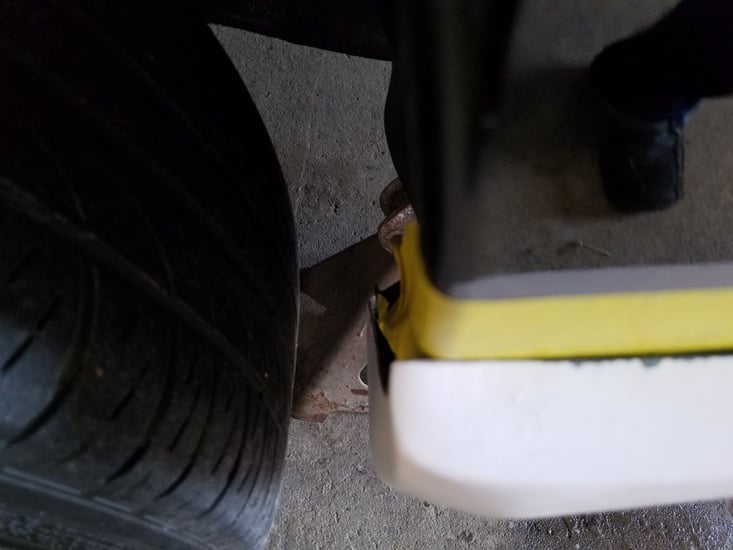
Here is where they shortened the end to fit the fender:
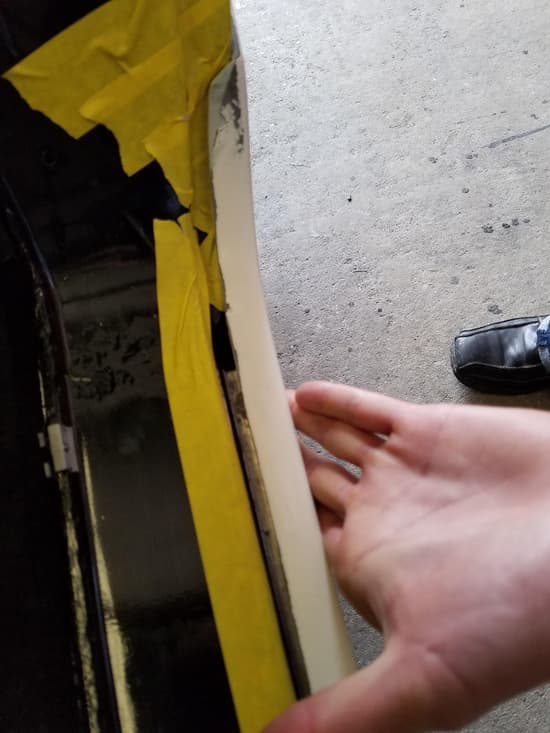
Here is where they added material to match the profile of the 1/4 panel and fender and close gaps:
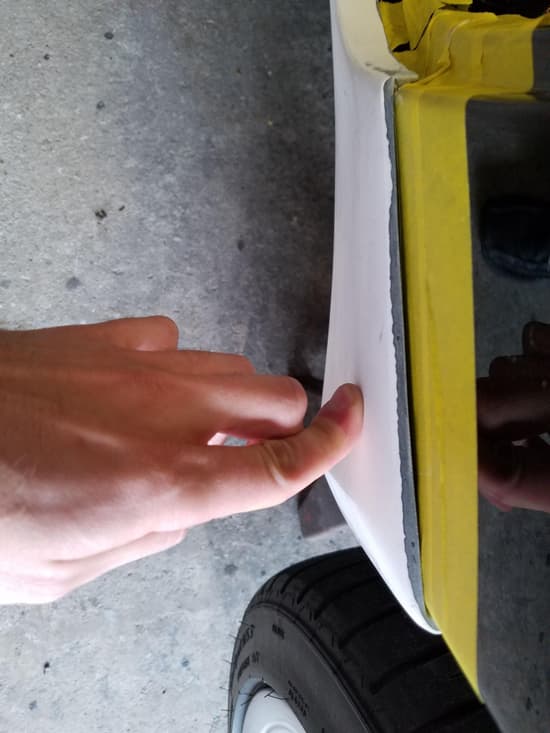
Once the side skirts were fit, they were painted/cleared, and left to cure for 4 weeks in a spare room. The long cure time is so the wrap wouldn't bond to the paint. During the cure process, the paint would shrink into the fiberglass and lots of pin holes presented themselves. I had to fill these with touch-up paint and wet-sand too many times to count, because as soon as I felt like I got the last one, another few would appear. This happened much more on the spoiler than it did on the skirts, since it was much poorer quality product.
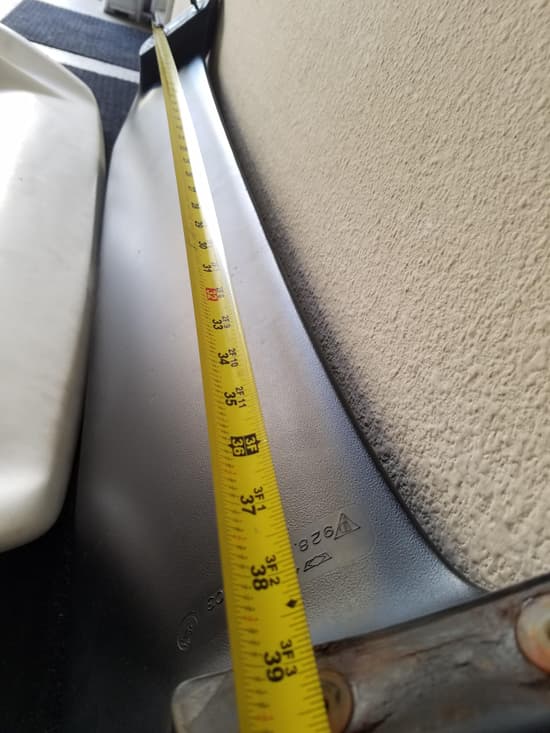
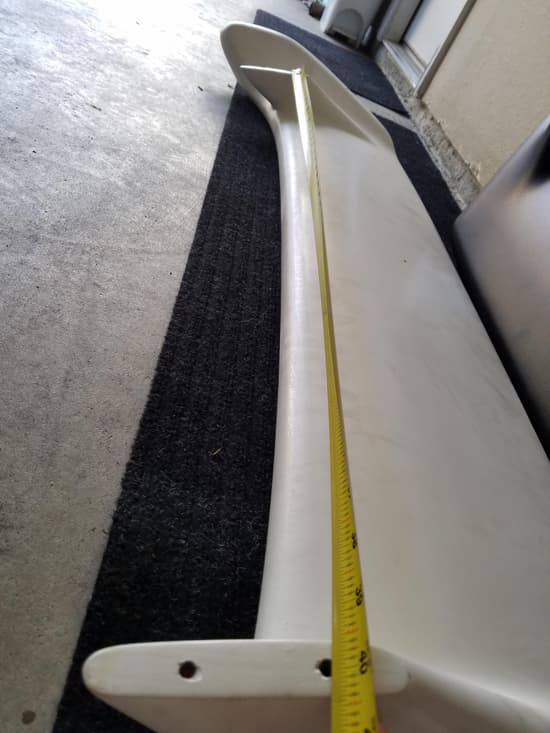
The spoiler is a fiberglass product based on the Jacquemond spoiler. It was dry fit and is a direct replacement for the stock spoiler. I got my money back on the spoiler because of the fitment issues, shown below. Here's what it was supposed to fit like, from the eBay ad. No modification required, it said! Bull. Crap.
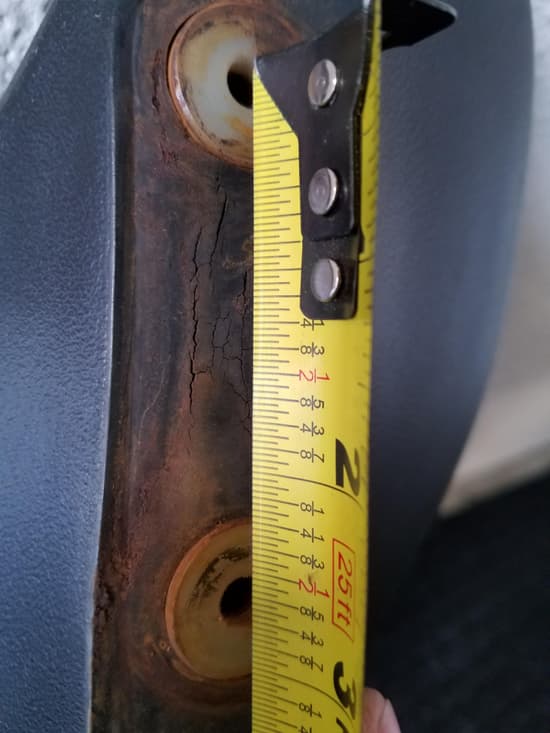
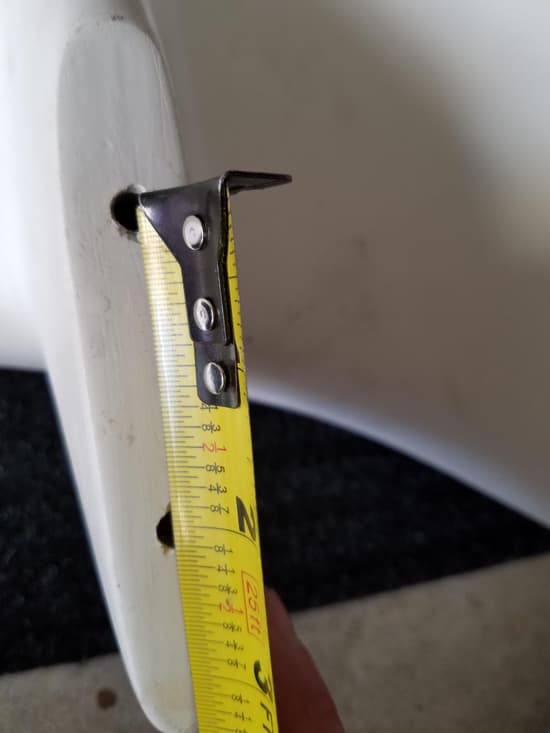
Comparing the holes on the stock vs fiberglass spoiler.
I exaggerated the poor fitment in this photo... most of this sanded out, surprisingly. These photos, along with the photos above, were enough for a 70% refund on my eBay purchase price. I still came out behind, as you'll see later on.
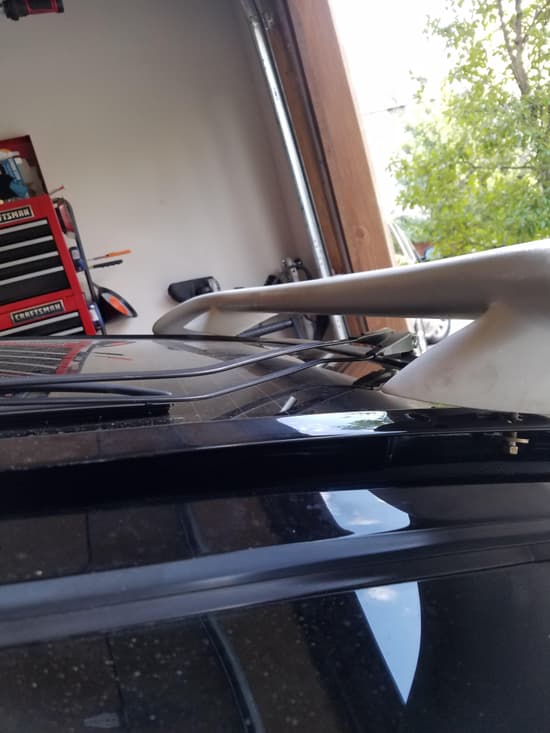
So, now I was tasked with figuring out how to make this spoiler sit flush on the hatch. I decided to create a spacer/gasket that would hide any variance in gap, and also create a nice seal. At the time, the best way to create this part without access to a injection mold machine was to go to the local smooth-on supply store and get the products necessary to create a silicone part from a clay mold. This stuff is NOT cheap! All in all, I had about $150 in materials invested to create two gaskets that may or may-not work (they didn't work).
First I had to make two clay part by dry fitting the spoiler on the hatch, using hand tools to get a perfectly smooth shape that matched the profile on the spoiler and filled the gaps between it and the hatch. This took considerable time, because every time I tried to get the clay off the part, it would deform or stick and tear apart. Very frustrating.
Once created, I used the clay models to make a negative out of this purple high-durometer silicone. Once the silicone hardened around the clay, the only way to remove it was to dig it out with tools (hence, the sacrifice of my hard work). This was the point of no return, since those clay models took so much time. Using a hard resin, I cast two parts identical to the clay models.
I wanted the final part to be black, and used a coloring product from smooth-on. Unfortunately, I found out that the colorant is for silicone only, and doesn't blend with resin. You can see little specks of color just floating around in the resin, not doing much. Turns out, I did this backwards (DAMMIT)... The negative was supposed to be resin, and the final part was supposed to be silicone rubber. Before realizing my mistake, I thought that this was going to give me a good final part... boy was I wrong. In case you don't know, resin is not good as a final part because it's brittle and has no resistance to the elements or UV. This failed attempt was due to pure inexperience. Oops.
Luckily, I had enough of the purple silicone left over after my blunder to use as the final gaskets. So, I had to buy a softer silicone (blue), and use a mold release agent to separate the two different silicones once cured... otherwise, they are similar enough that they could fuse together. The picture above shows the hard resin "mistake", which I used to make another negative out of soft blue silicone. I poured the black colored silicone (same as the purple stuff shown above) into this, and it took a few tries to finally get two good gaskets. At this point, I have 20-25 hours invested in this gasket project so far.
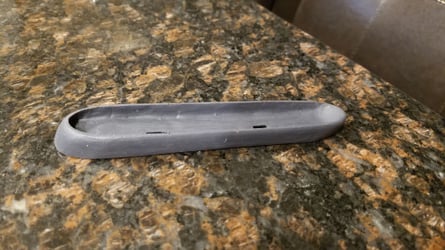
Finally, a proper gasket was created! Unfortunately, this had a ton of gaps around the inside of the 'cup' and the outside surface of the spoiler... so all that work was for nothing. I ended up cutting the edges off to get a flat gasket that showed how uneven the mating surfaces were. Better than investing another $150 in mold material and countless hours into a project that I'm already sick and tired of.
So I send the spoiler off for paint, and it comes back beautiful. My painter had mentioned that he needed to paint the spoiler 3 times because as it cured under his lighting, the paint would shrink so bad that it looked like garbage. Ended up with 5 coats of black, and 10 coats of clear. This spoiler looked like a mirror! That being said... while sitting in my spare room for a month, the pinholes presented themselves over time. Lots of filling with touch-up paint and wet-sanding was needed.
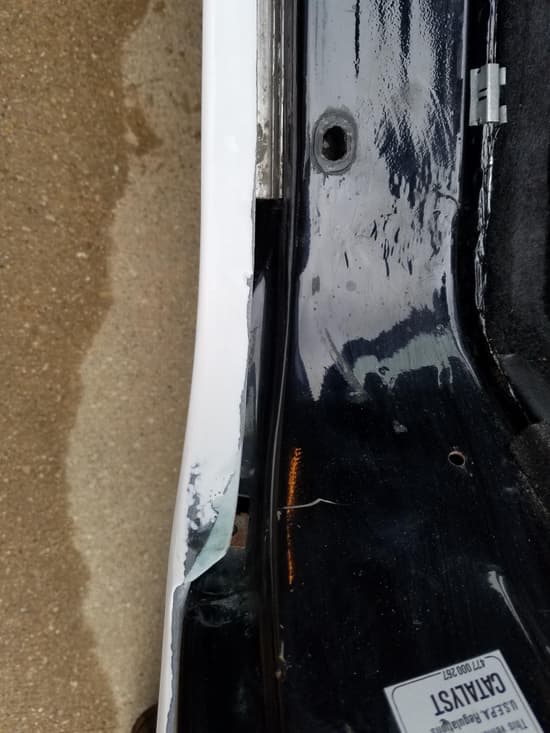
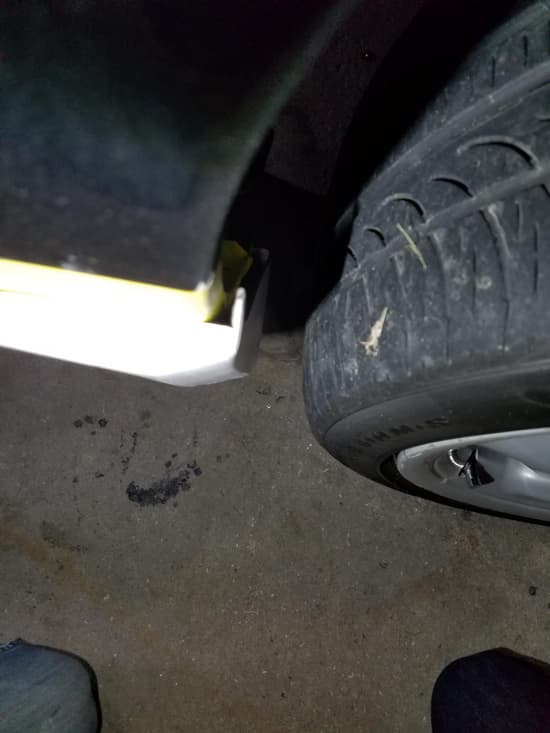
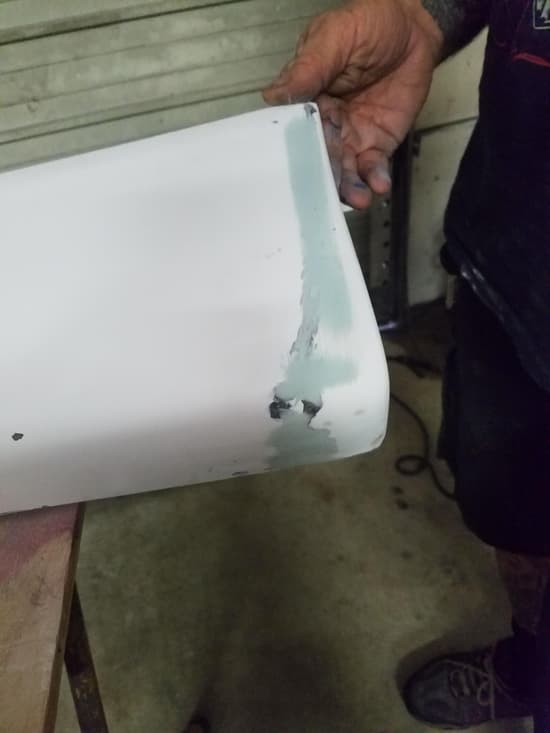
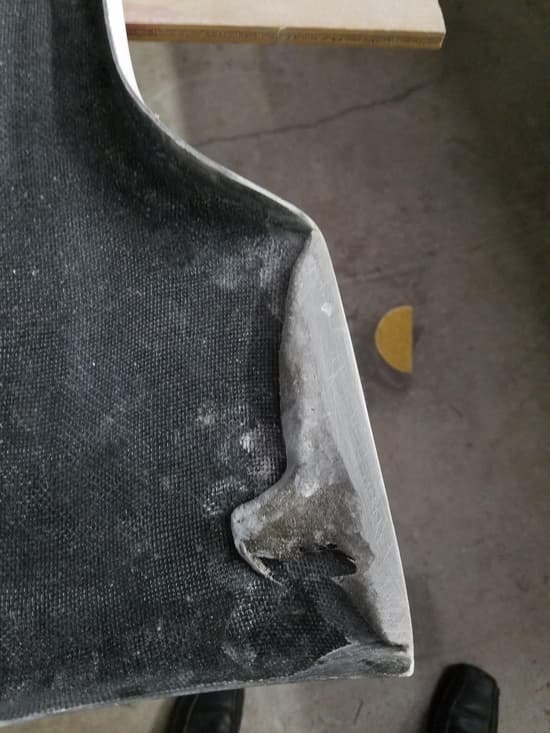
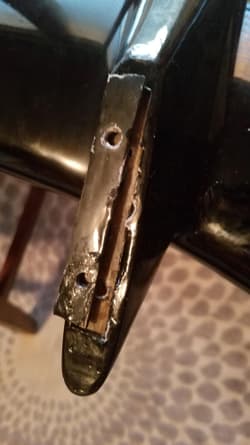
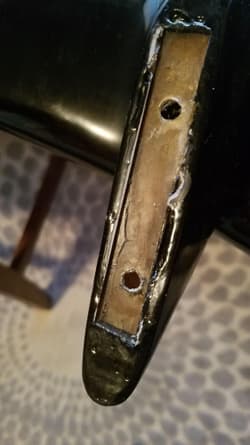
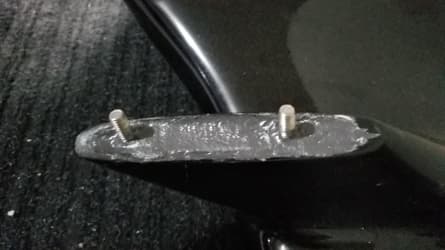
Finally... while bolting the spoiler down to the hatch, thinking I was almost done... when this happens. CRACK! This metal plate was hardly held in by anything... just a thin layer of fiberglass resin. There's nothing even behind it! So, it's likely that the spoiler would have flown off while driving had this not happened in the garage. There's maybe 2-3 threads of engagement in this flimsy 1/8" plate. Terrible. I was so upset I can't put it into words. Countless hours making a clay part, trial and error with silicone mold making, all for nothing!!!
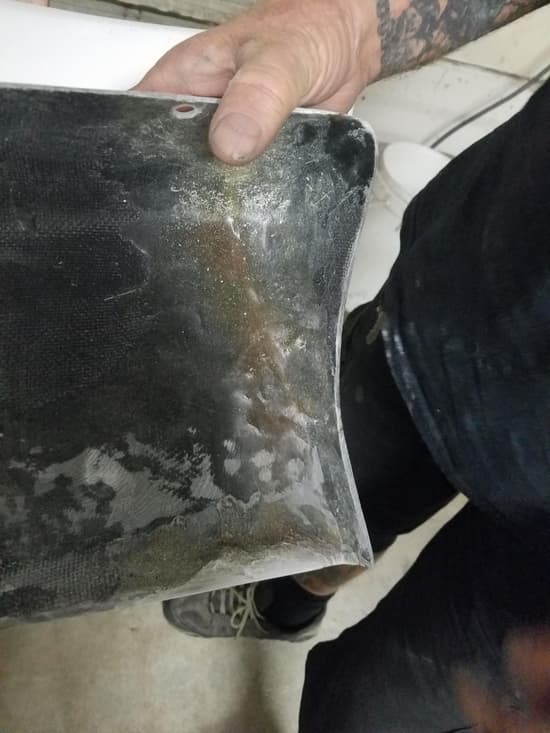
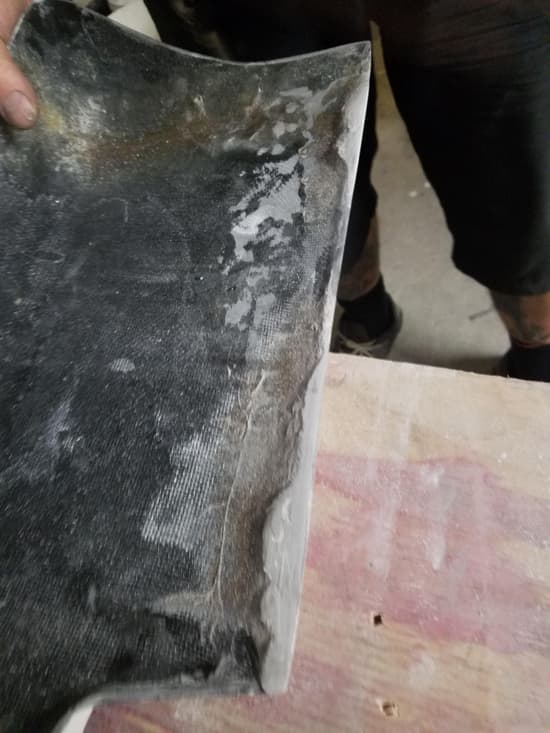
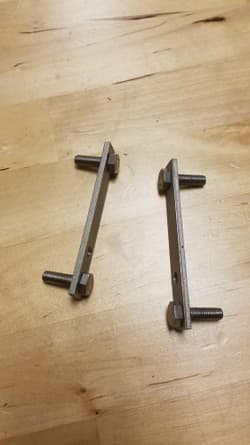
So I take a dremel to the bottom surface of the spoiler standoffs and cut it entirely out, so it's just a thin shell wall remaining. I was also able to sand the base of the spoiler even further to get a perfect flush fit on the hatch. Then, I got some Stainless hardware and bar stock, and created new brackets. This picture shows them before a TIG spot weld.
To fit the spoiler, I had to make a jig out of some scrap wood and angle iron. The stock spoiler was the perfect tool to bend/position the angle iron on the wooden standoffs, and mark/drill holes identical to the hatch in spacing and profile. This jig would allow me to position the brackets in the new spoiler so it would line up perfectly with the hatch.
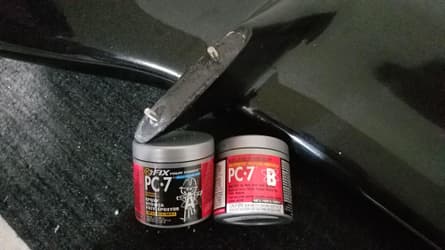
I filled the spoiler with expanding foam to strengthen it up and give the stainless steel brackets a backing surface to lay against. I found a two-part epoxy at Ace Hardware called PC-7, which is similar to JB Weld. It cures to a very hard, sandable finish... and bonds nearly anything, including fiberglass.
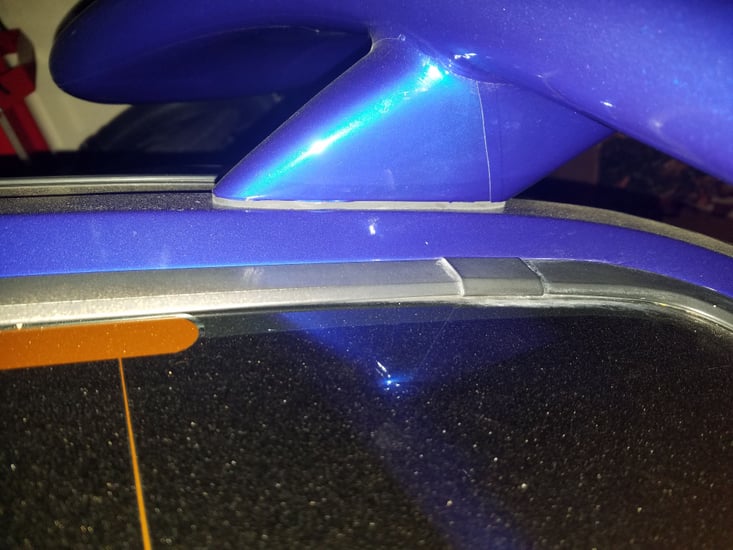
Here's the final result, with a simple 1/8" rubber gasket I cut from a sheet purchased through McMaster Carr. Taken with flash on, which highlights the seams in the wrap. Ordinarily, they are nearly invisible... but you can see how the complex shape is covered.
Moral of the story... don't mess with mold-making products if you don't know what you're doing. Don't mess with fiberglass parts, even if they're expensive... and ESPECIALLY if they are not. If you DO decide to try fiberglass parts, prepare yourself for high costs to rework, as they never fit like you think they will. Lesson learned, even if the end result is great.
The wrap isn't perfect... and will never replace a quality paint job. It's already started to lift near some complex tight inside curves (like the fog lights, for example). Door jambs aren't done yet, but I plan on finishing those up in my spare time. The 928 has a pretty easy jamb to wrap. If you don't have the skills to wrap a car yourself, don't even try. Luckily, like I said, I have a personal friend that does this professionally. Most trouble spots present themselves early on, and he said that it was to be expected. We'll go over the car again in a few weeks and re-wrap any portions that need it.
I would recommend using a reputable shop for a wrap, which offers a warranty on their services and touch ups. Just like with paint, prep is key. You WILL see any dirt and dust that was left on the paint... and once the wrap is on, it's not coming off easily. If you pull it off to try and reposition, you'll see a crease at that point.
I'm somewhat of a perfectionist... and I would rate my wrap a 7/10. It's like a 2 ft paint job... once you get up close, you can see the vinyl material and small imperfections. If I had it wrapped at a shop and paid retail prices, it could look better. It takes wax and polish just like paint, and actually resists scratches much better than paint. If I do scratch it while washing, I can use compound just like paint. It's pretty amazing, actually.
I decided that it was a temporary solution while I save for a proper full repaint in the original black color, and I can live with the minor defects as it's my daily driver. YMMV.
So that's what Blue Raspberry looks like on the car.That's the 3-M G378 color right? I want to wrap my '83 with that color and I got a 4"x6" sample but it's hard to tell what the car will look like with such a small piece. Now I'm really motivated to do it. THANKS
Was it hard to apply? I've built R/C planes for decades and covered them with 'Monokote'. The adhesive on that is heat activated, so after you heat shrink/stretch in into place you iron it on at about 330*F. Car wrap uses pressure so I guess I'll have to learn that. How many sq. feet did it take? My car may be ready for that this summer.
Okay, just have to disagree with you, traxtar, concerning wraps and scratches. Having had my car wrapped now for over three years, an extremely light scratch may come out with proper application of heat, but most will not. Maybe the wrap technology has gotten better over the past three years, but mine has plenty of scratches that I can't remove.
I used an entire 75ft roll of material, as some pieces took trial and error to get right. There are some complex shapes on the car with tight inside corners (headlights and foglights, front bumper, etc). I personally wouldn't try it myself without prior experience wrapping vehicles. The gloss finish will show dirt/dust that was left on the paint, much like an improperly prepped paint job. It's a ton of work, that required the assistance of a personal friend that does this professionally.
I'm guessing that the material has improved, then... because there are very few scratches that I couldn't remove without compound and polish. Even swirl marks from what I discovered was a contaminated microfiber were removed by hand with some elbow grease. I also keep the wrap waxed, which should help hide scratches.
You paid $2K and lots of sweat equity to get a very nice 5 ft paint job. I'd say that's a SUCCESS! I feel your pain concerning the aftermarket sides and wing. My car came with fiberglass sides and a wing. Nothing fit like it should - not even CLOSE. The sides fit so badly and were without ANY mounting hardware - NONE - so we had to scrap them. The wing was well made but was not a "finished product" by any stretch of the imagination. It took many, many hours of prep to get it to sit flush and many more hours to get the primer / paint to adhere correctly. We used the rubber mat liner from inside the floor of the rear glovebox and cut gaskets to fit - we got lucky as it worked PERFECTLY creating the desired seal, absorbing imperfections and cushioning the paint from the wing footers. Again, I think you did an AWESOME job with the materials at hand... takes a lot of patience & determination to make a fiberglass "silk purse out of a pigs ear"! Job well done!

 12-30-2016, 07:32 PM