
LED upgrade guide for OBs

 02-11-2017, 05:37 PM
#32
Racer
Thread Starter
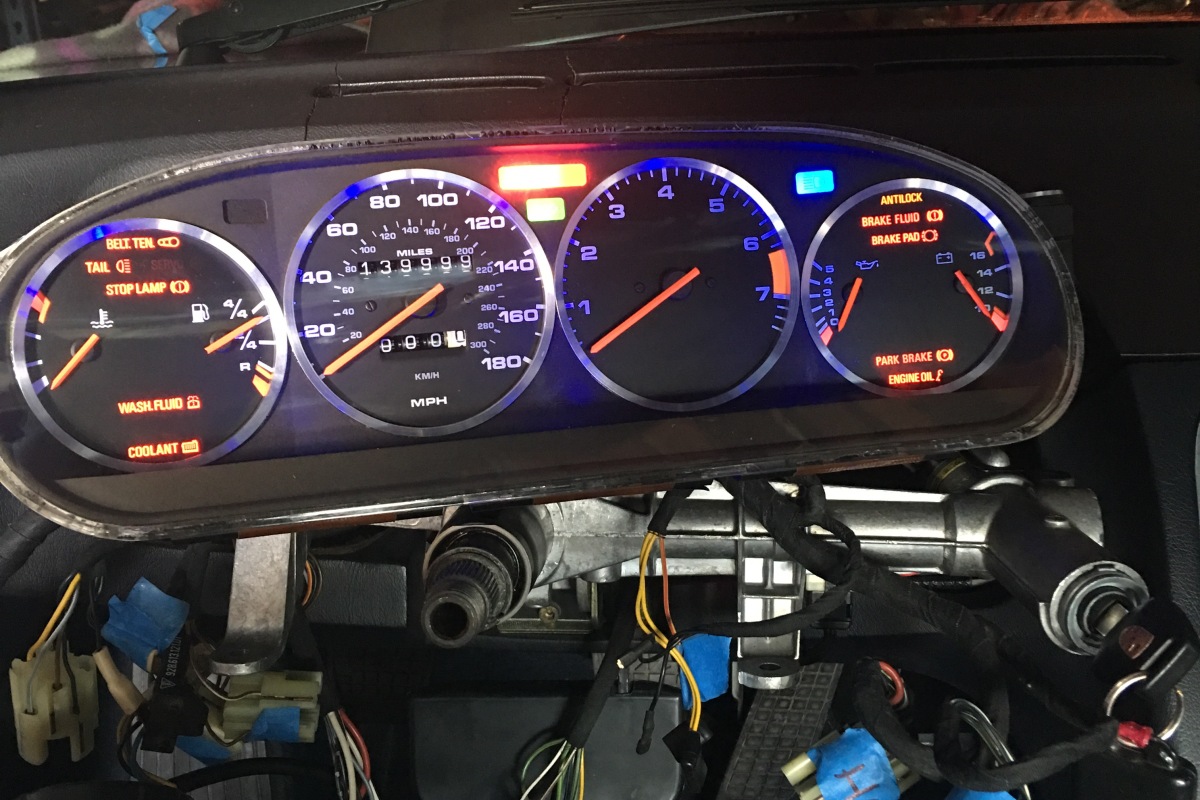
Guys I need help. I've installed the wedges and now I'm doing the bulbs. Problem is my LEDs are fixed polarity (as most are) and while Ed's amazing guide shows the layout and required polarity for the digidash models, I can't find a reference to OBs (mine is MY 1980).
Even just knowing where the car puts current on the 3 x 12 ribbon tracks on ignition on would help, as I can then simulate that and test that way. But maybe somebody has already documented this?
Cheers,
Joel
Even just knowing where the car puts current on the 3 x 12 ribbon tracks on ignition on would help, as I can then simulate that and test that way. But maybe somebody has already documented this?
Cheers,
Joel
02-11-2017, 09:21 PM
#34
Rennlist Member
I guess it is pretty bright, but it's currently blocked by my arm when driving, possibly because I routed that switch where the fog light switch should be (Doh....). The one that's bugging me is the hazard switch...very bright red, keeps startling me lol. I need to pull it and take a look, but I think MAYBE I put the resistor in just one of the black/blue wires, rather than running both through it. There are a number of things I need to take care of that I botched in my pod rework...
02-12-2017, 04:16 AM
#35
Racer
Thread Starter
02-12-2017, 07:46 AM
#36
Rennlist Member
It's not easy, but you can follow the ground traces to determine polarity. I did mine that way and only had to repeat it a couple of times to get it right...  It would still be good to bench test it before reinstalling the pod.
It would still be good to bench test it before reinstalling the pod.
02-13-2017, 04:22 PM
#39
Rennlist Member
I did the LED replacement using the respective colored LED's from Superbright.com and and I found a few of the locations not appropriate for LED for a variety of reasons:
1. High Beam - far too bright for driving at night. Edit - fixed this by putting some painters tape over the LED which lowered the brightness level
2. Central Warning Indicator "!" - a little too bright given how often it is illuminated. it is difficult to distinguish the ! from the red background. Edit - fixed this by putting some painters tape over the LED which lowered the brightness level
3. Turn Signal Indicator -may need to be incandescent for hazards and blink function depending on if you did the blinker lights in LED. Edit - LED works fine
4. Some of the pod switches the LED's are so bright that is shines through the thin paint on the switch. Edit - fixed this by putting some painters tape over the LED which lowered the brightness level
1. High Beam - far too bright for driving at night. Edit - fixed this by putting some painters tape over the LED which lowered the brightness level
2. Central Warning Indicator "!" - a little too bright given how often it is illuminated. it is difficult to distinguish the ! from the red background. Edit - fixed this by putting some painters tape over the LED which lowered the brightness level
3. Turn Signal Indicator -
4. Some of the pod switches the LED's are so bright that is shines through the thin paint on the switch. Edit - fixed this by putting some painters tape over the LED which lowered the brightness level
Last edited by Michael Benno; 08-03-2020 at 02:35 AM.
02-14-2017, 03:40 AM
#41
Racer
Thread Starter
Michael, did you do the bulbs at the bottom of the fuel, volts, oil and temp guages? I have managed to expose those yet, I think I need to take the cluster apart even more
Good point on the highbeam and ! lights. Especially the high beam since by definition you only use that when it's very dark outside.
Good point on the highbeam and ! lights. Especially the high beam since by definition you only use that when it's very dark outside.
02-14-2017, 10:17 AM
#42
Rennlist Member
02-14-2017, 08:48 PM
#44
Intermediate

Join Date: Oct 2016
Location: Montreal
Posts: 39
Likes: 0
Received 0 Likes
on
0 Posts
I did the LED replacement using the respective colored LED's from Superbright.com and and I found a few of the locations not appropriate for LED for a variety of reasons:
1. High Beam - far too bright for driving at night.
2. Central Warning Indicator "!" - a little too bright given how often it is illuminated. it is difficult to distinguish the ! from the red background.
3. Turn Signal Indicator - may need to be incandescent for hazards and blink function depending on if you did the blinker lights in LED.
4. Some of the pod switches the LED's are so bright that is shines through the thin paint on the switch.
Where did you take those silver gauge trim ??
02-14-2017, 11:24 PM
#45
Rennlist Member

