When you click on links to various merchants on this site and make a purchase, this can result in this site earning a commission. Affiliate programs and affiliations include, but are not limited to, the eBay Partner Network.
Bertrand Daoust: Thank you on all counts! This is my passion, and I am doing it to the best of my ability. I am no Gregg Brown or Rob Edwards, but I believe in what I am doing and am happy.
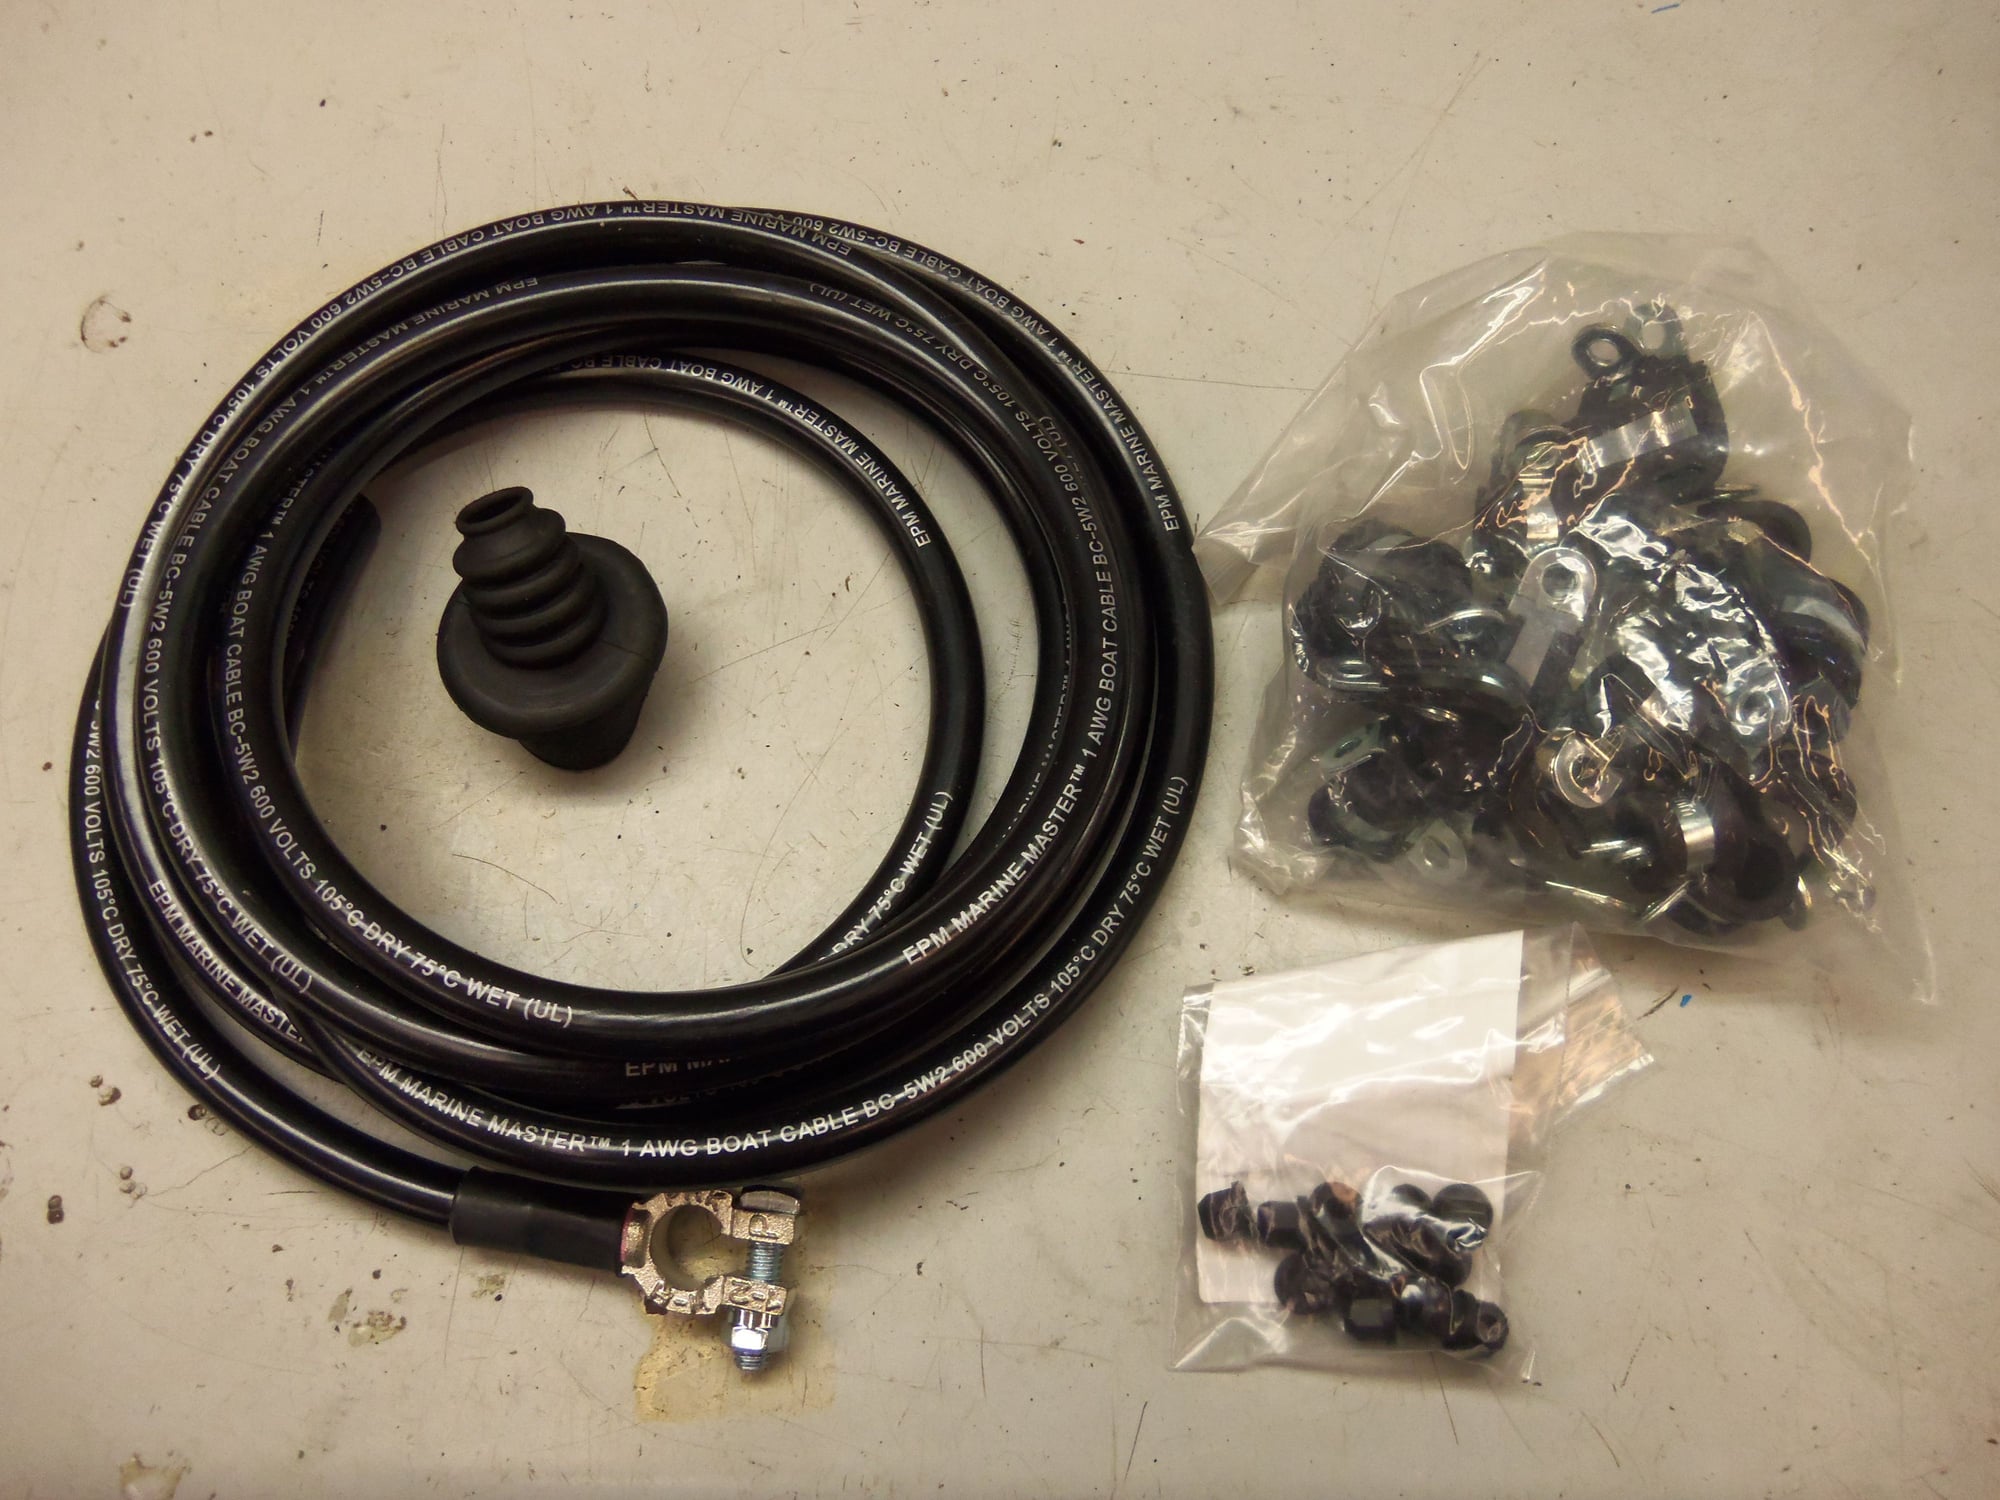
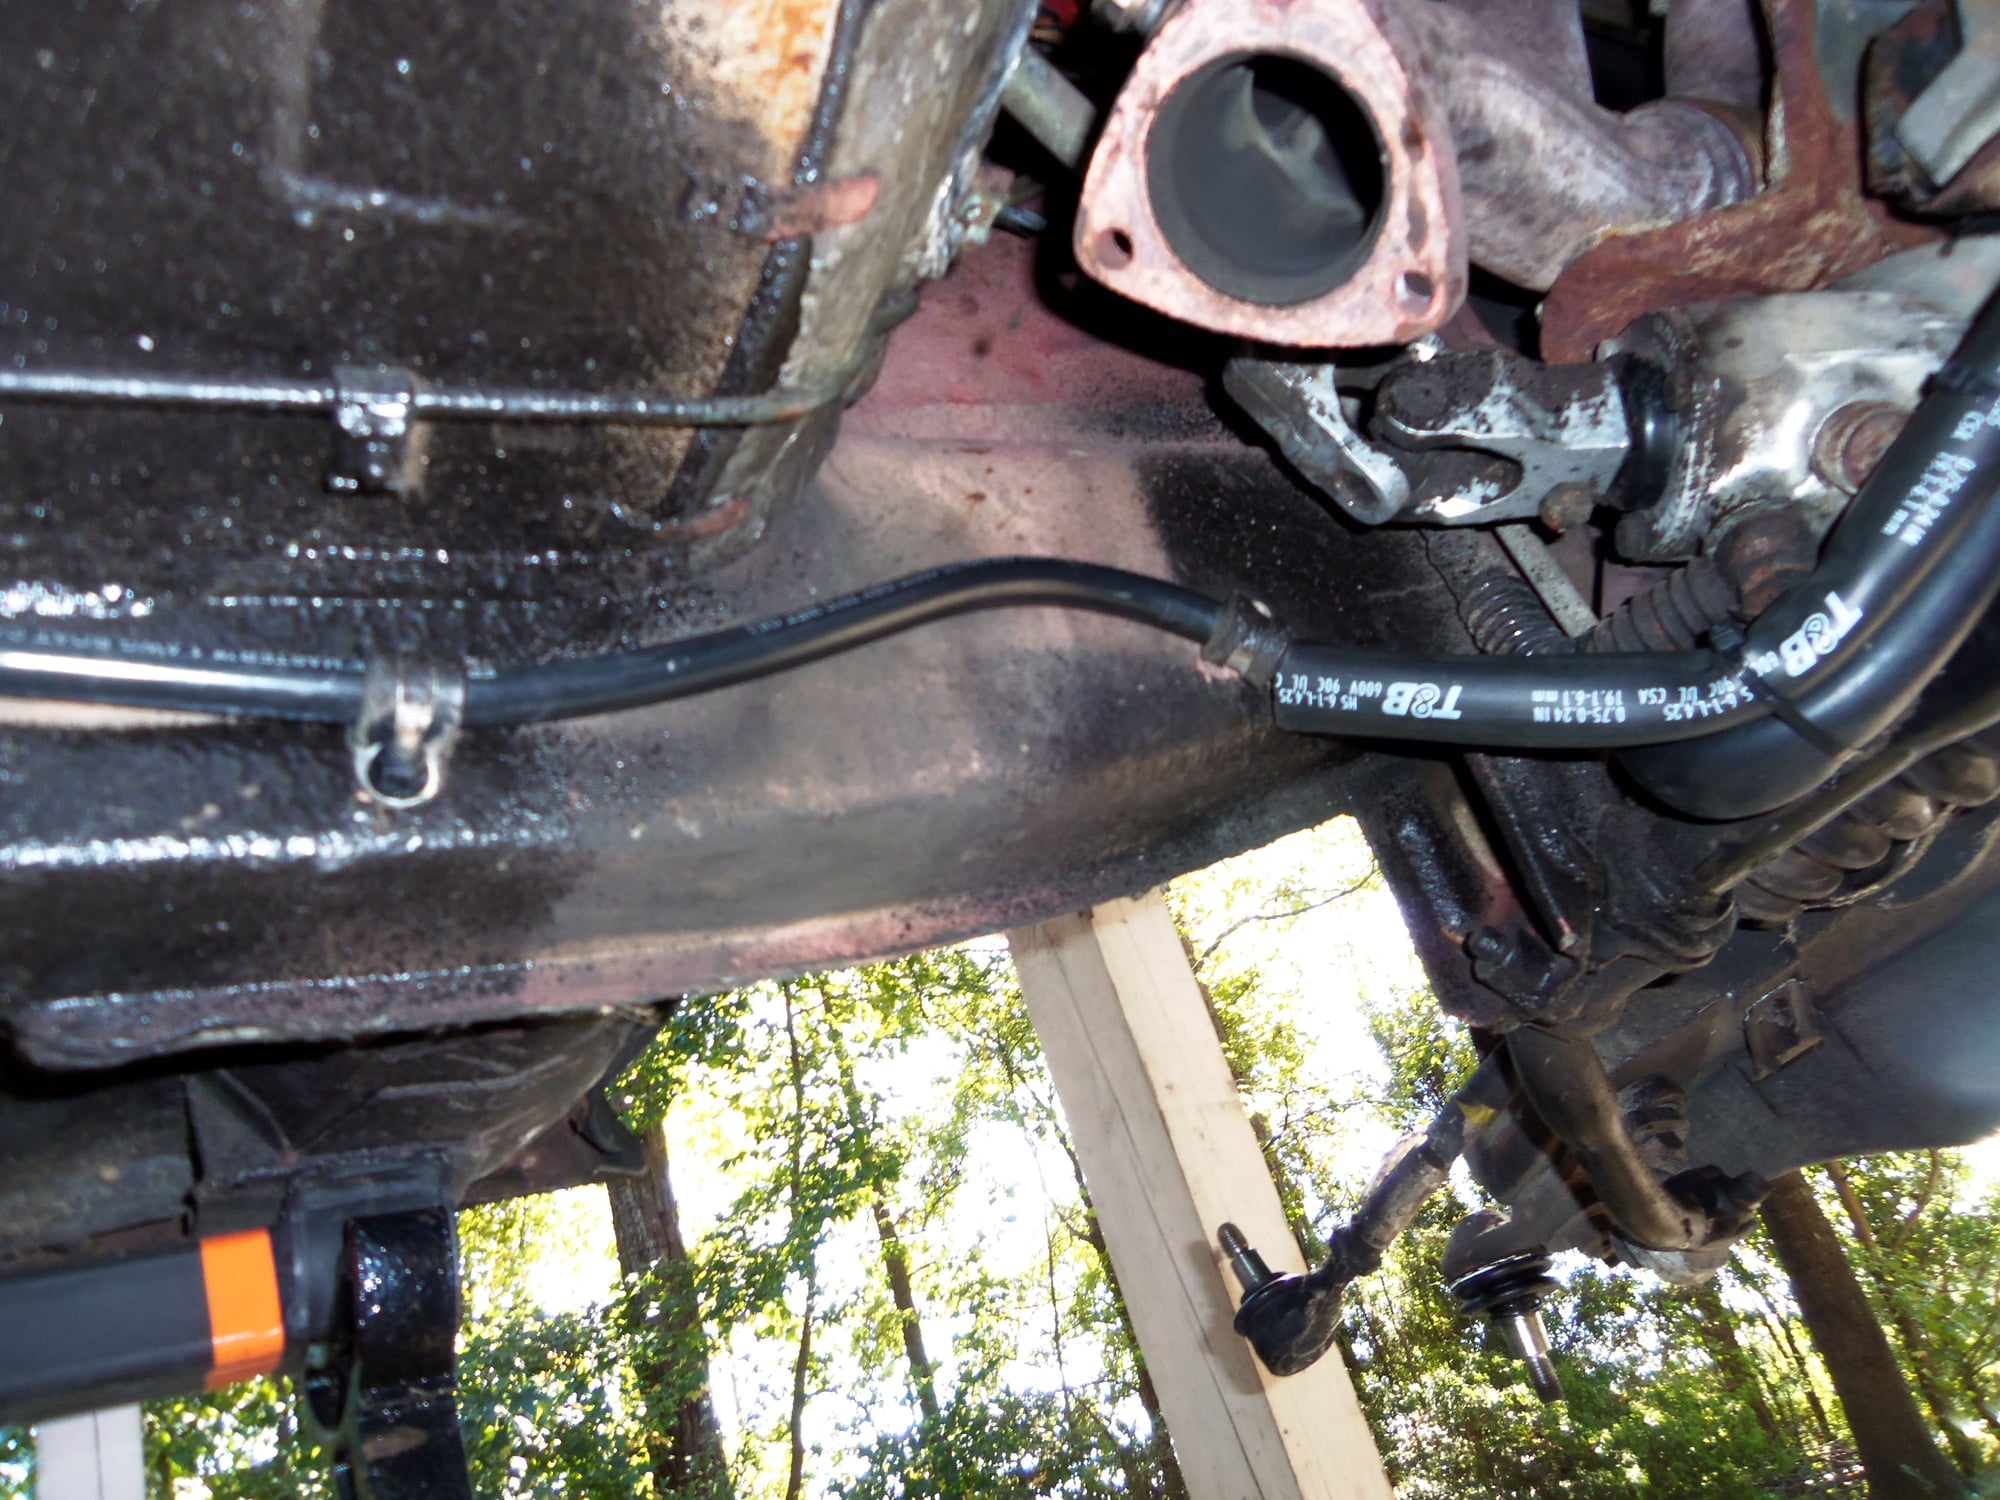
hessank: Thank you! My intent is to wrap up the battery cable and such this weekend. As for routing, I will be following the factory locations for the cable. I chose 1 gauge because it is larger than the factory 2 gauge, but not so much larger that it won't fit in the same location.
I have been very happy with my experience with www.bestboatwire.com. The prices are reasonable and the service is great. I recommend them, but that is just me.
Got you covered Chris! 928 611 085 00
Keep me in the loop for your intended CnC meet. Assuming I have the Red Witch back on her tires, I am very much interested!
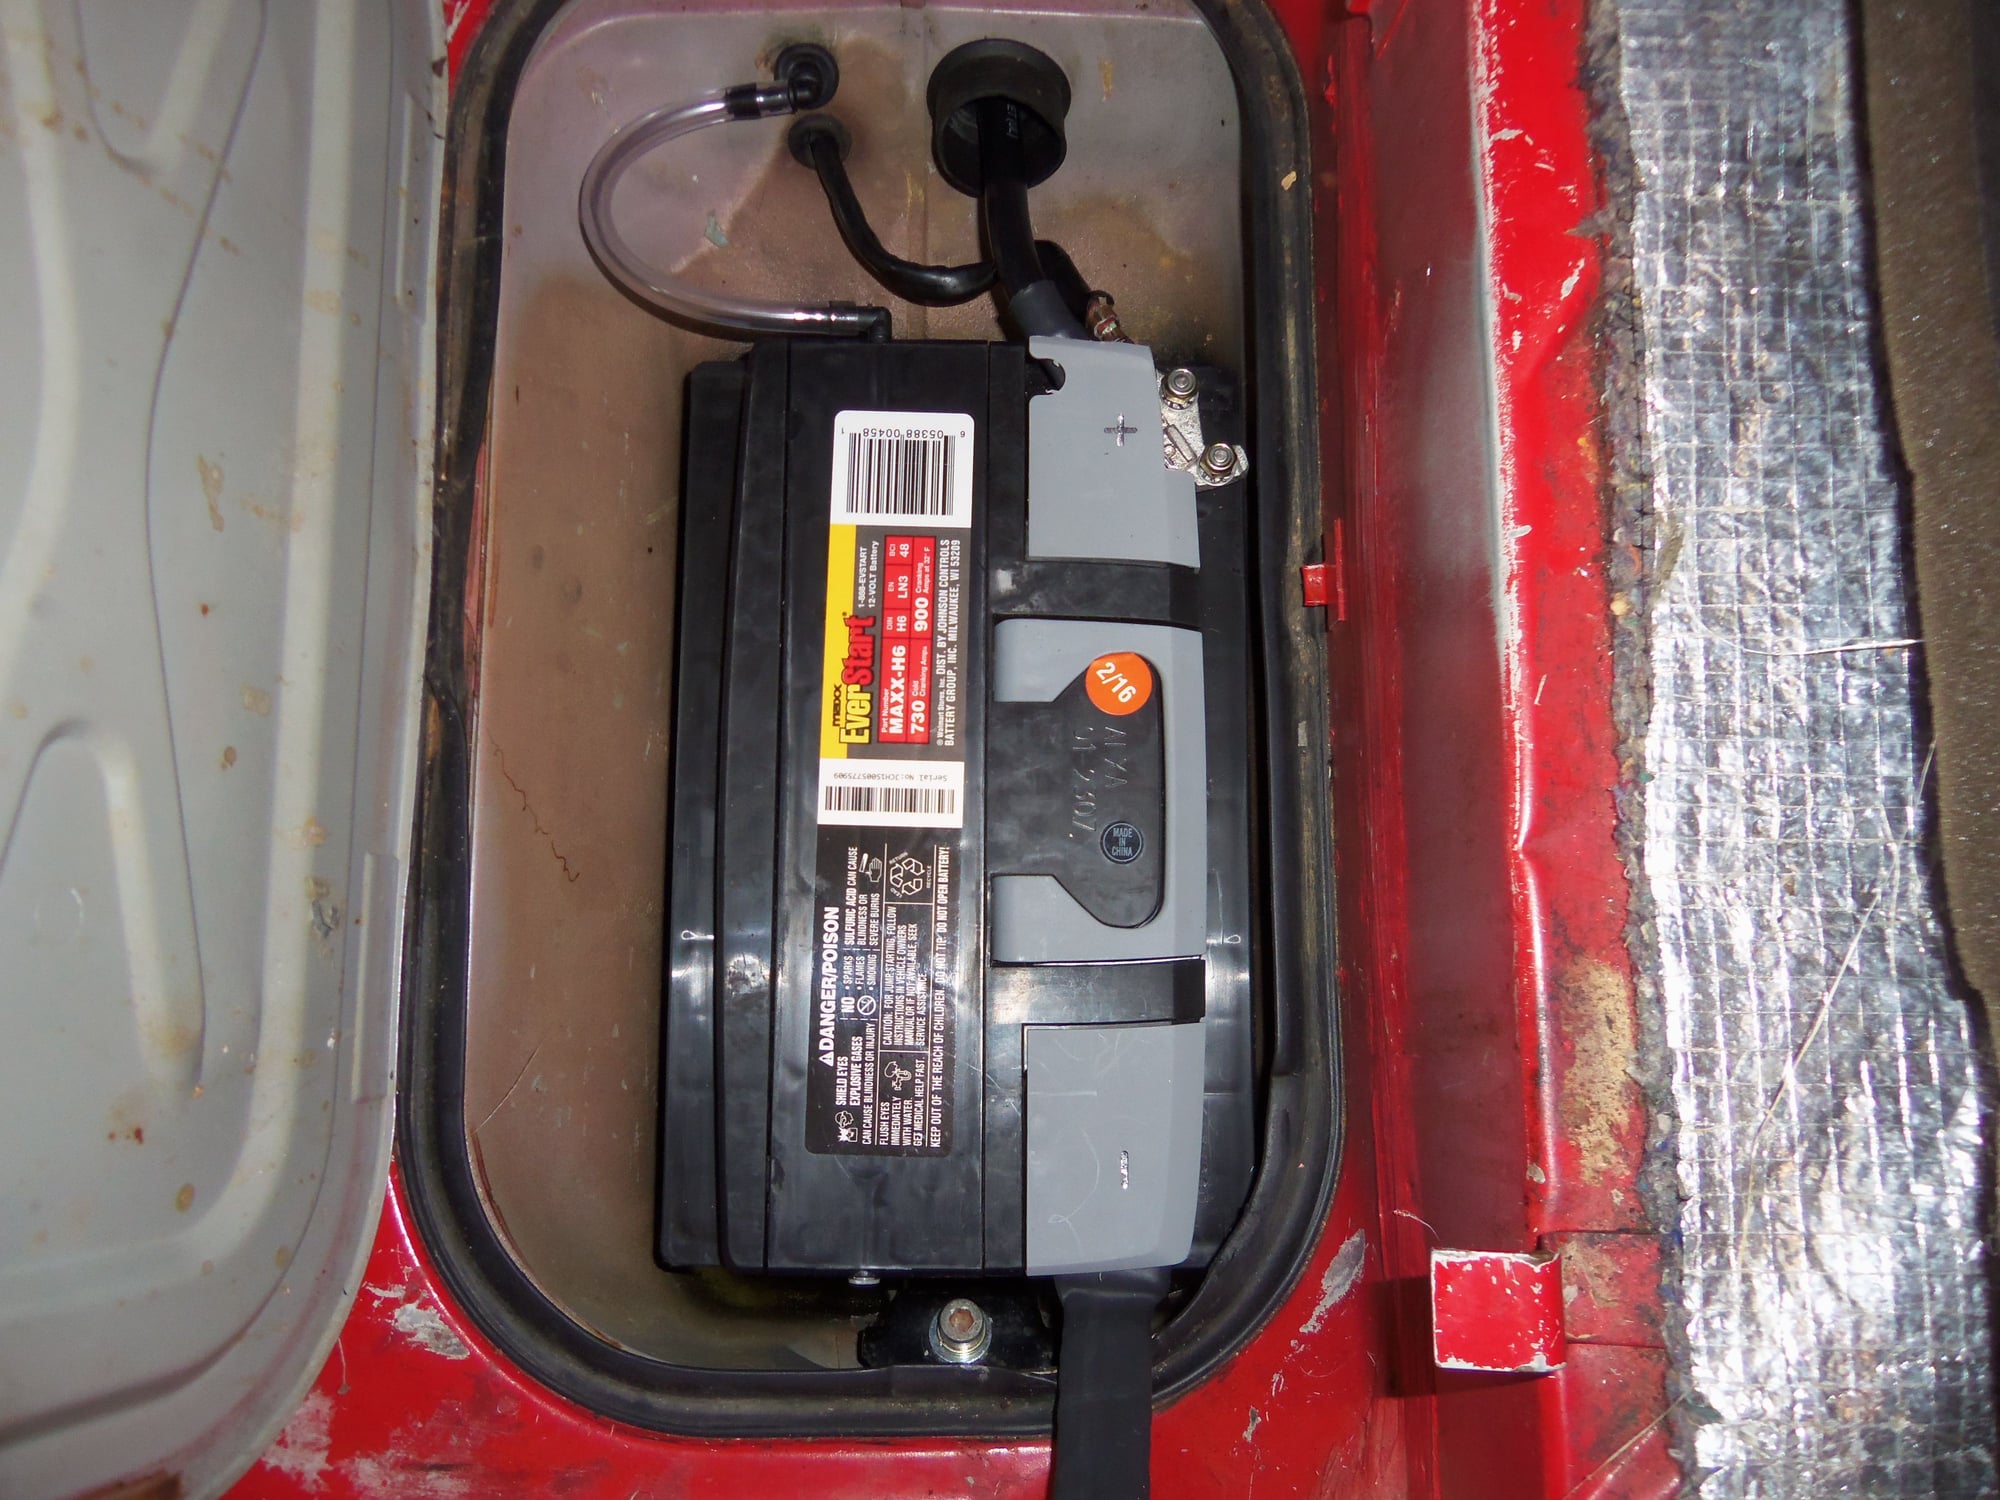
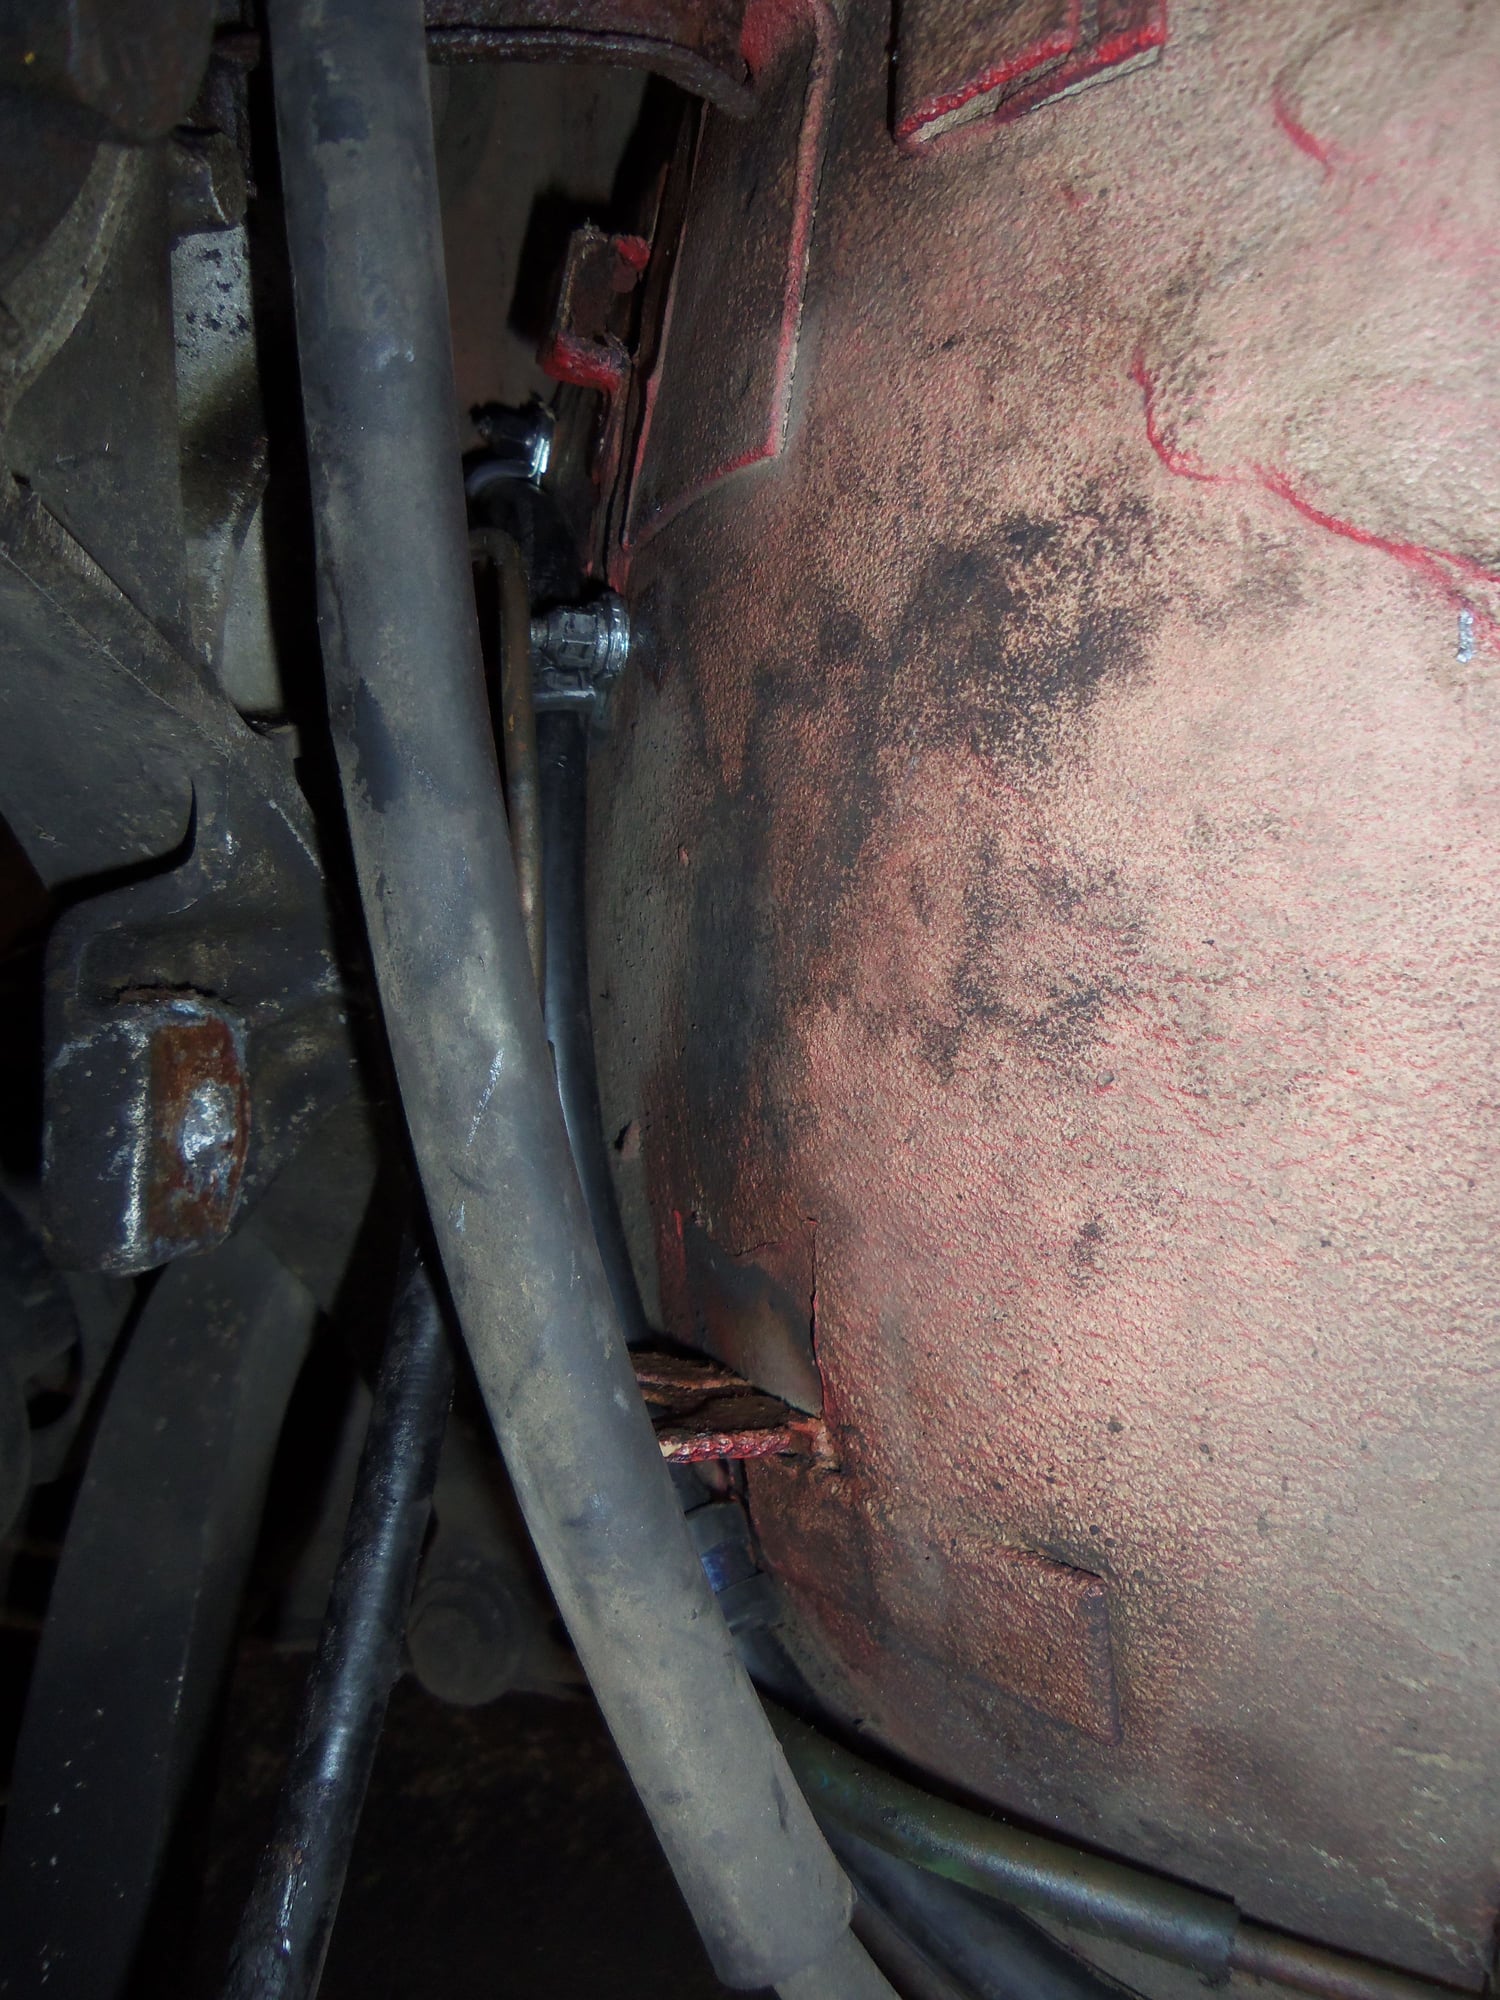
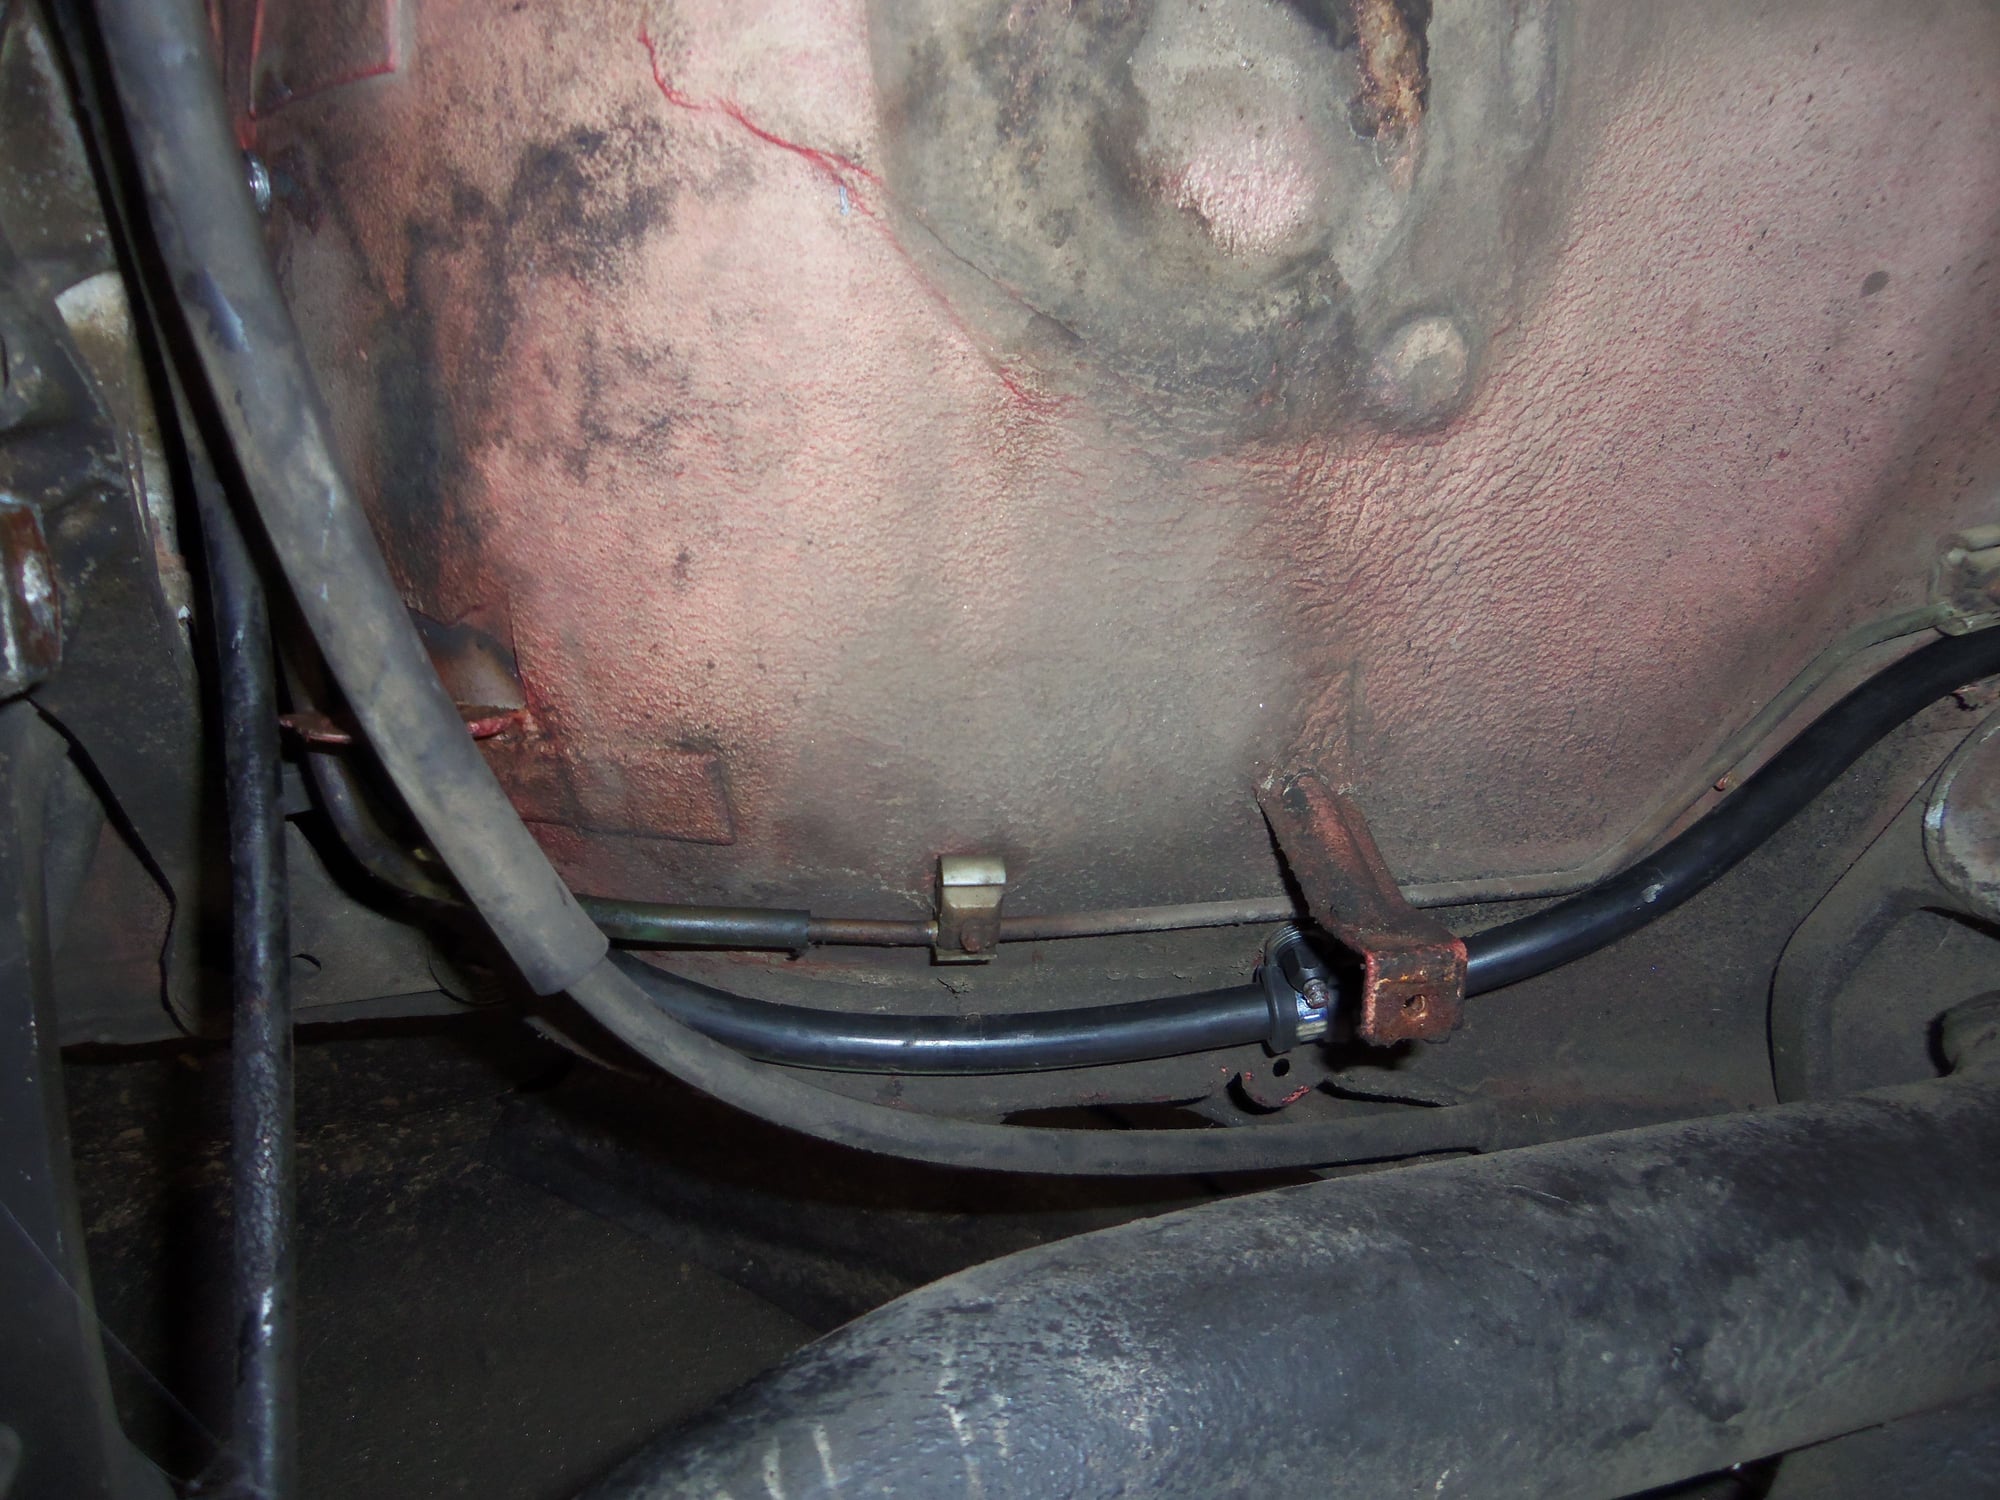
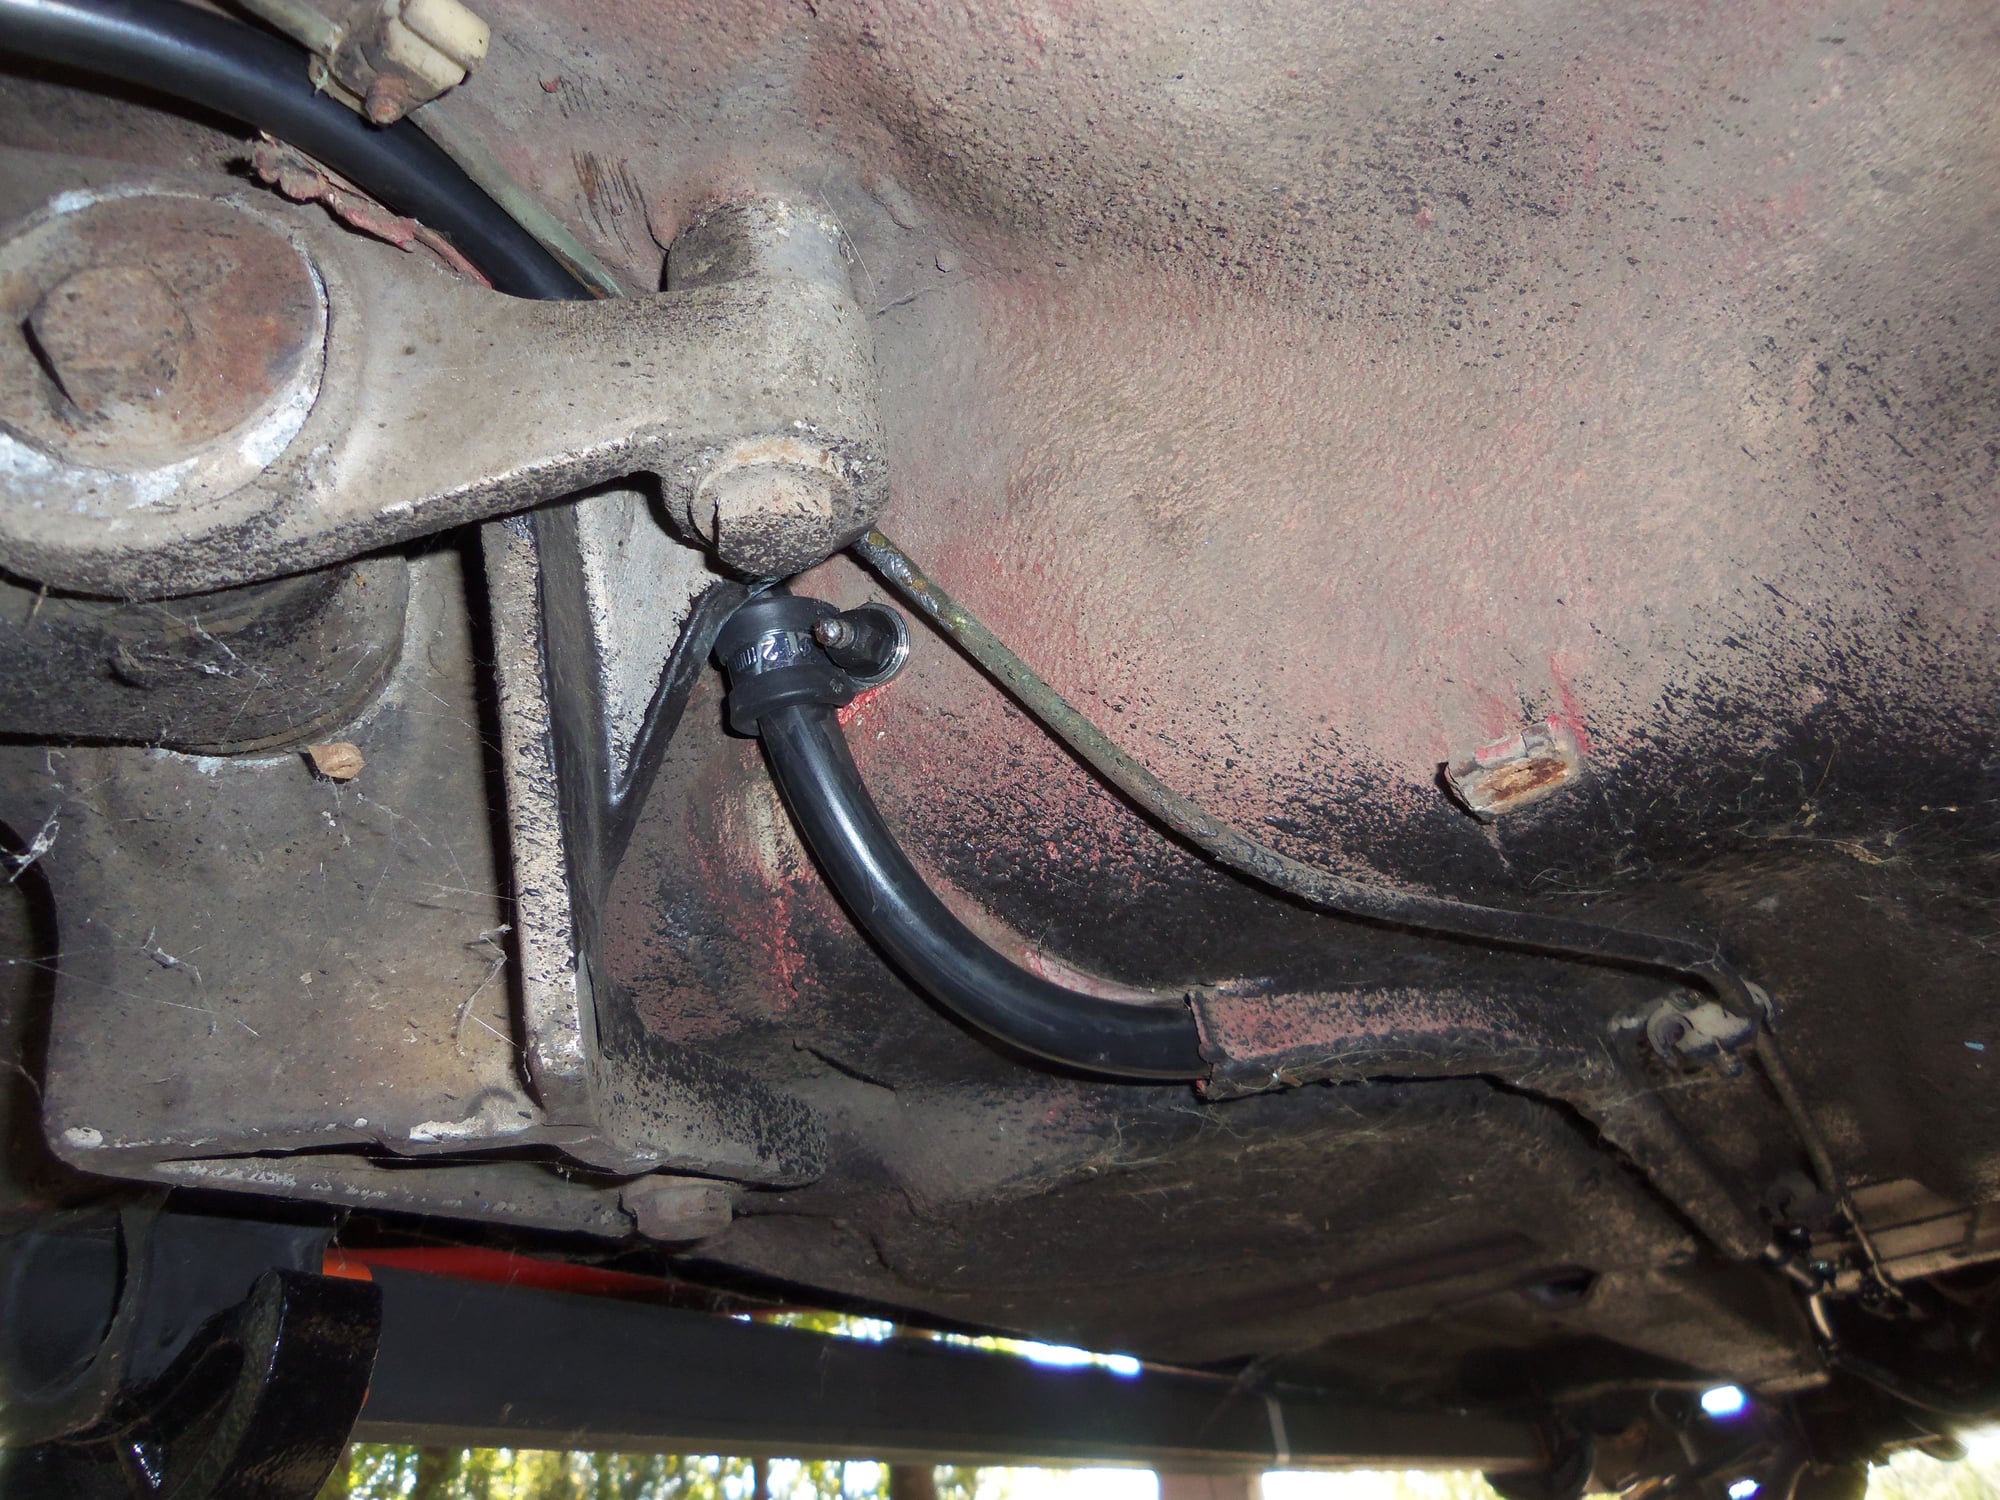
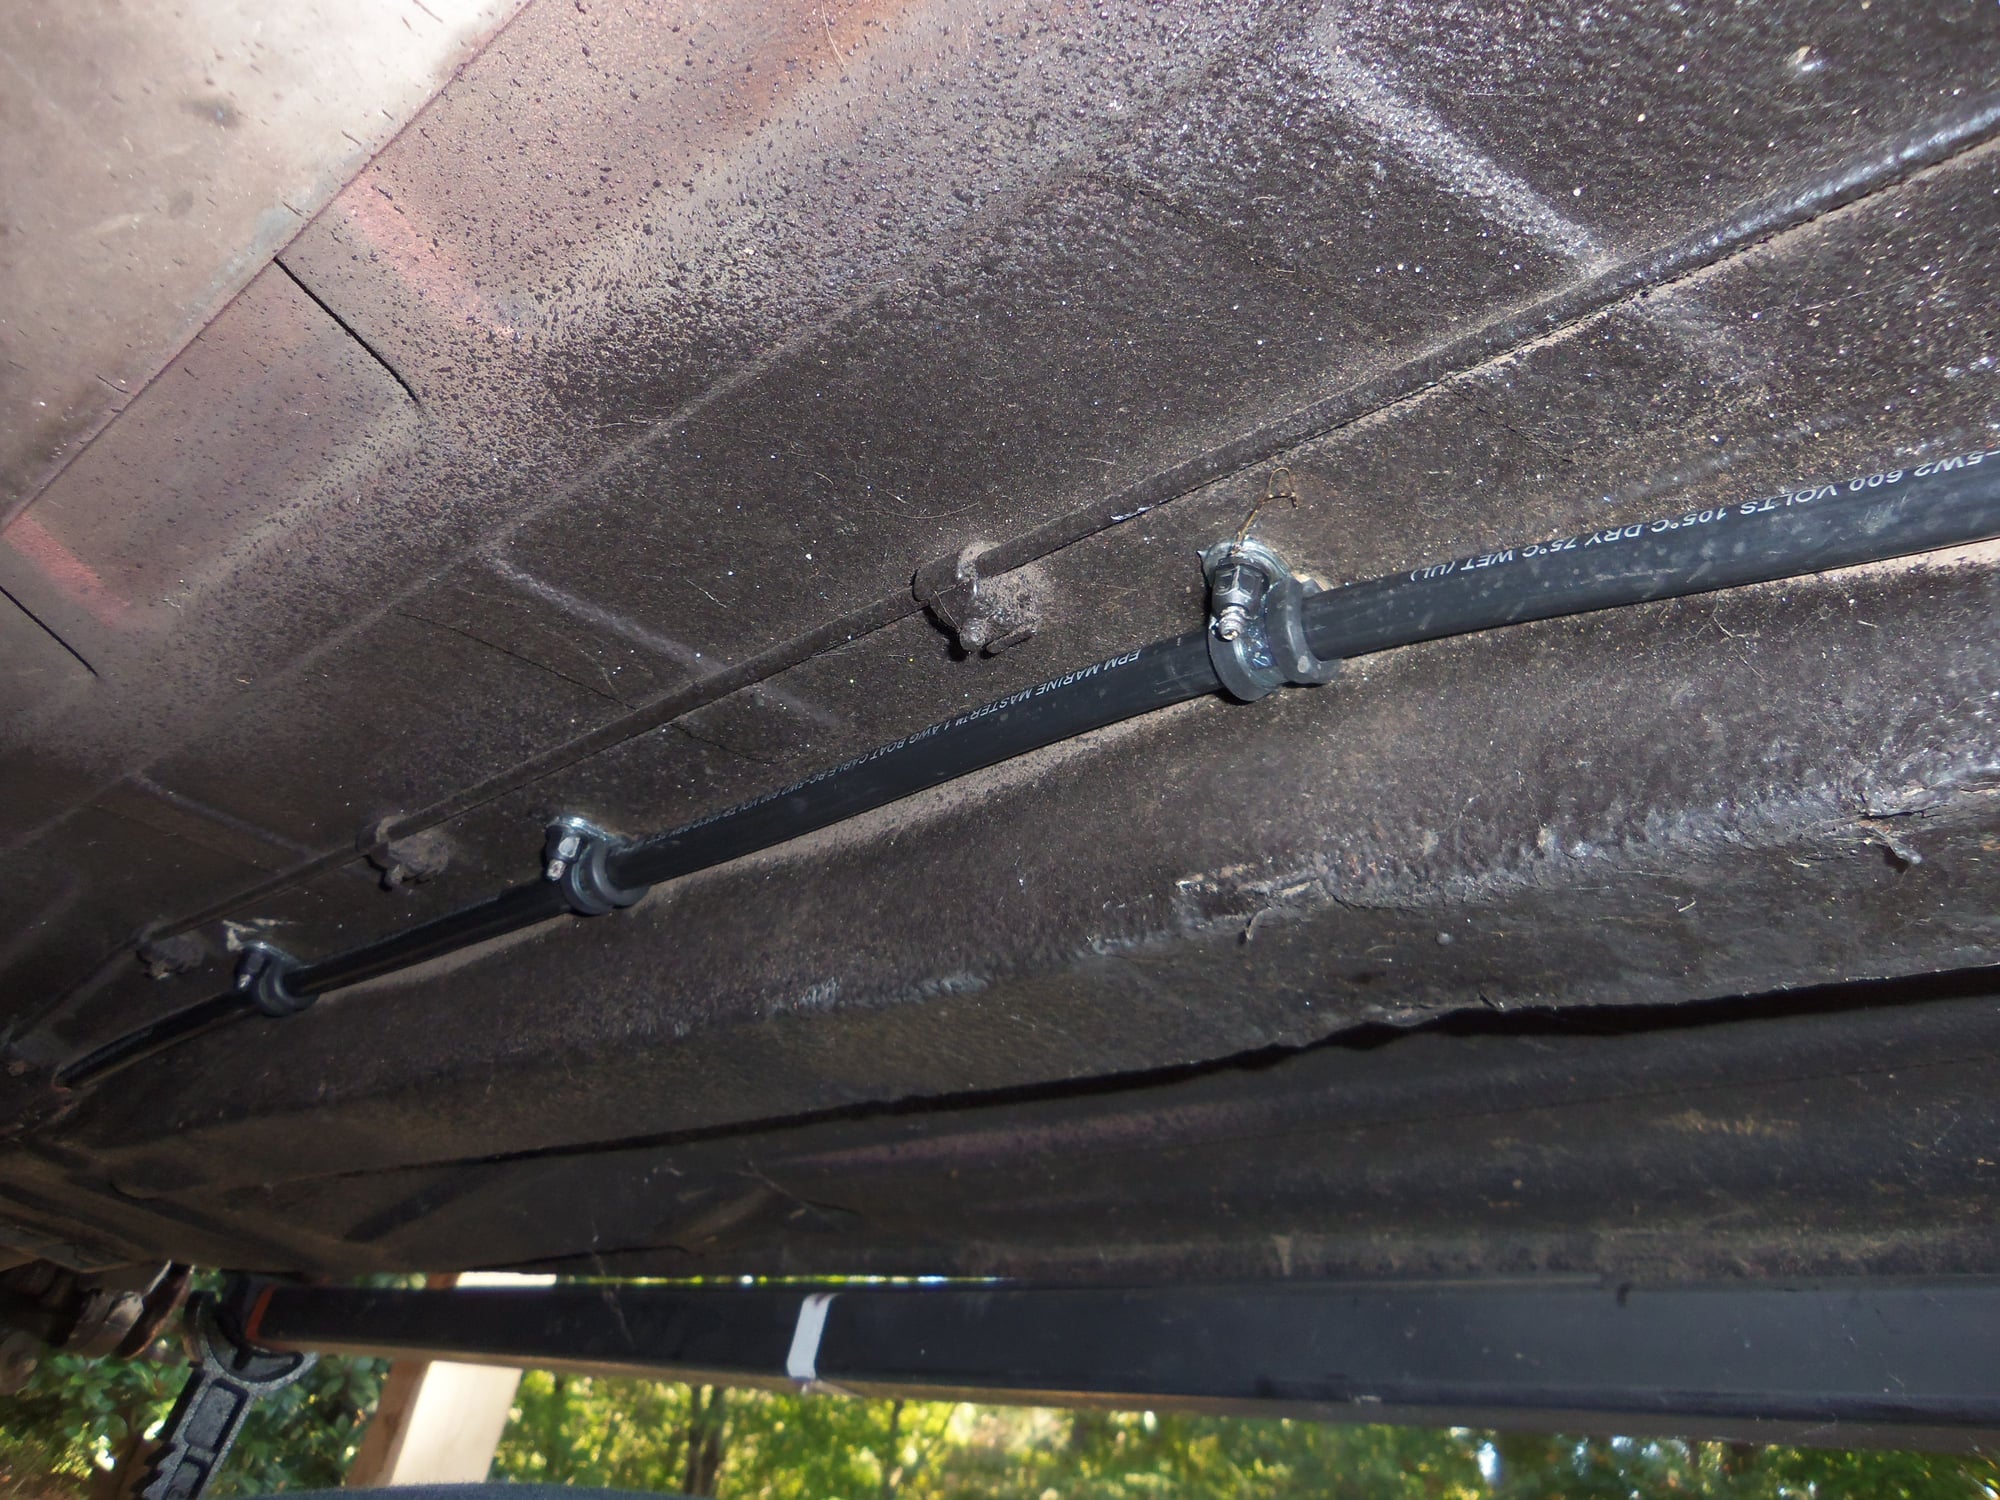
I finally got the new battery cable routed and terminated. It was a bit of a bitch.
The 1 gauge cable was thicker than the stock 2 gauge cable, but not so thick that I could not work with it and manipulate it. That said, routing the cable over the rear suspension and such was all kinds of fun.
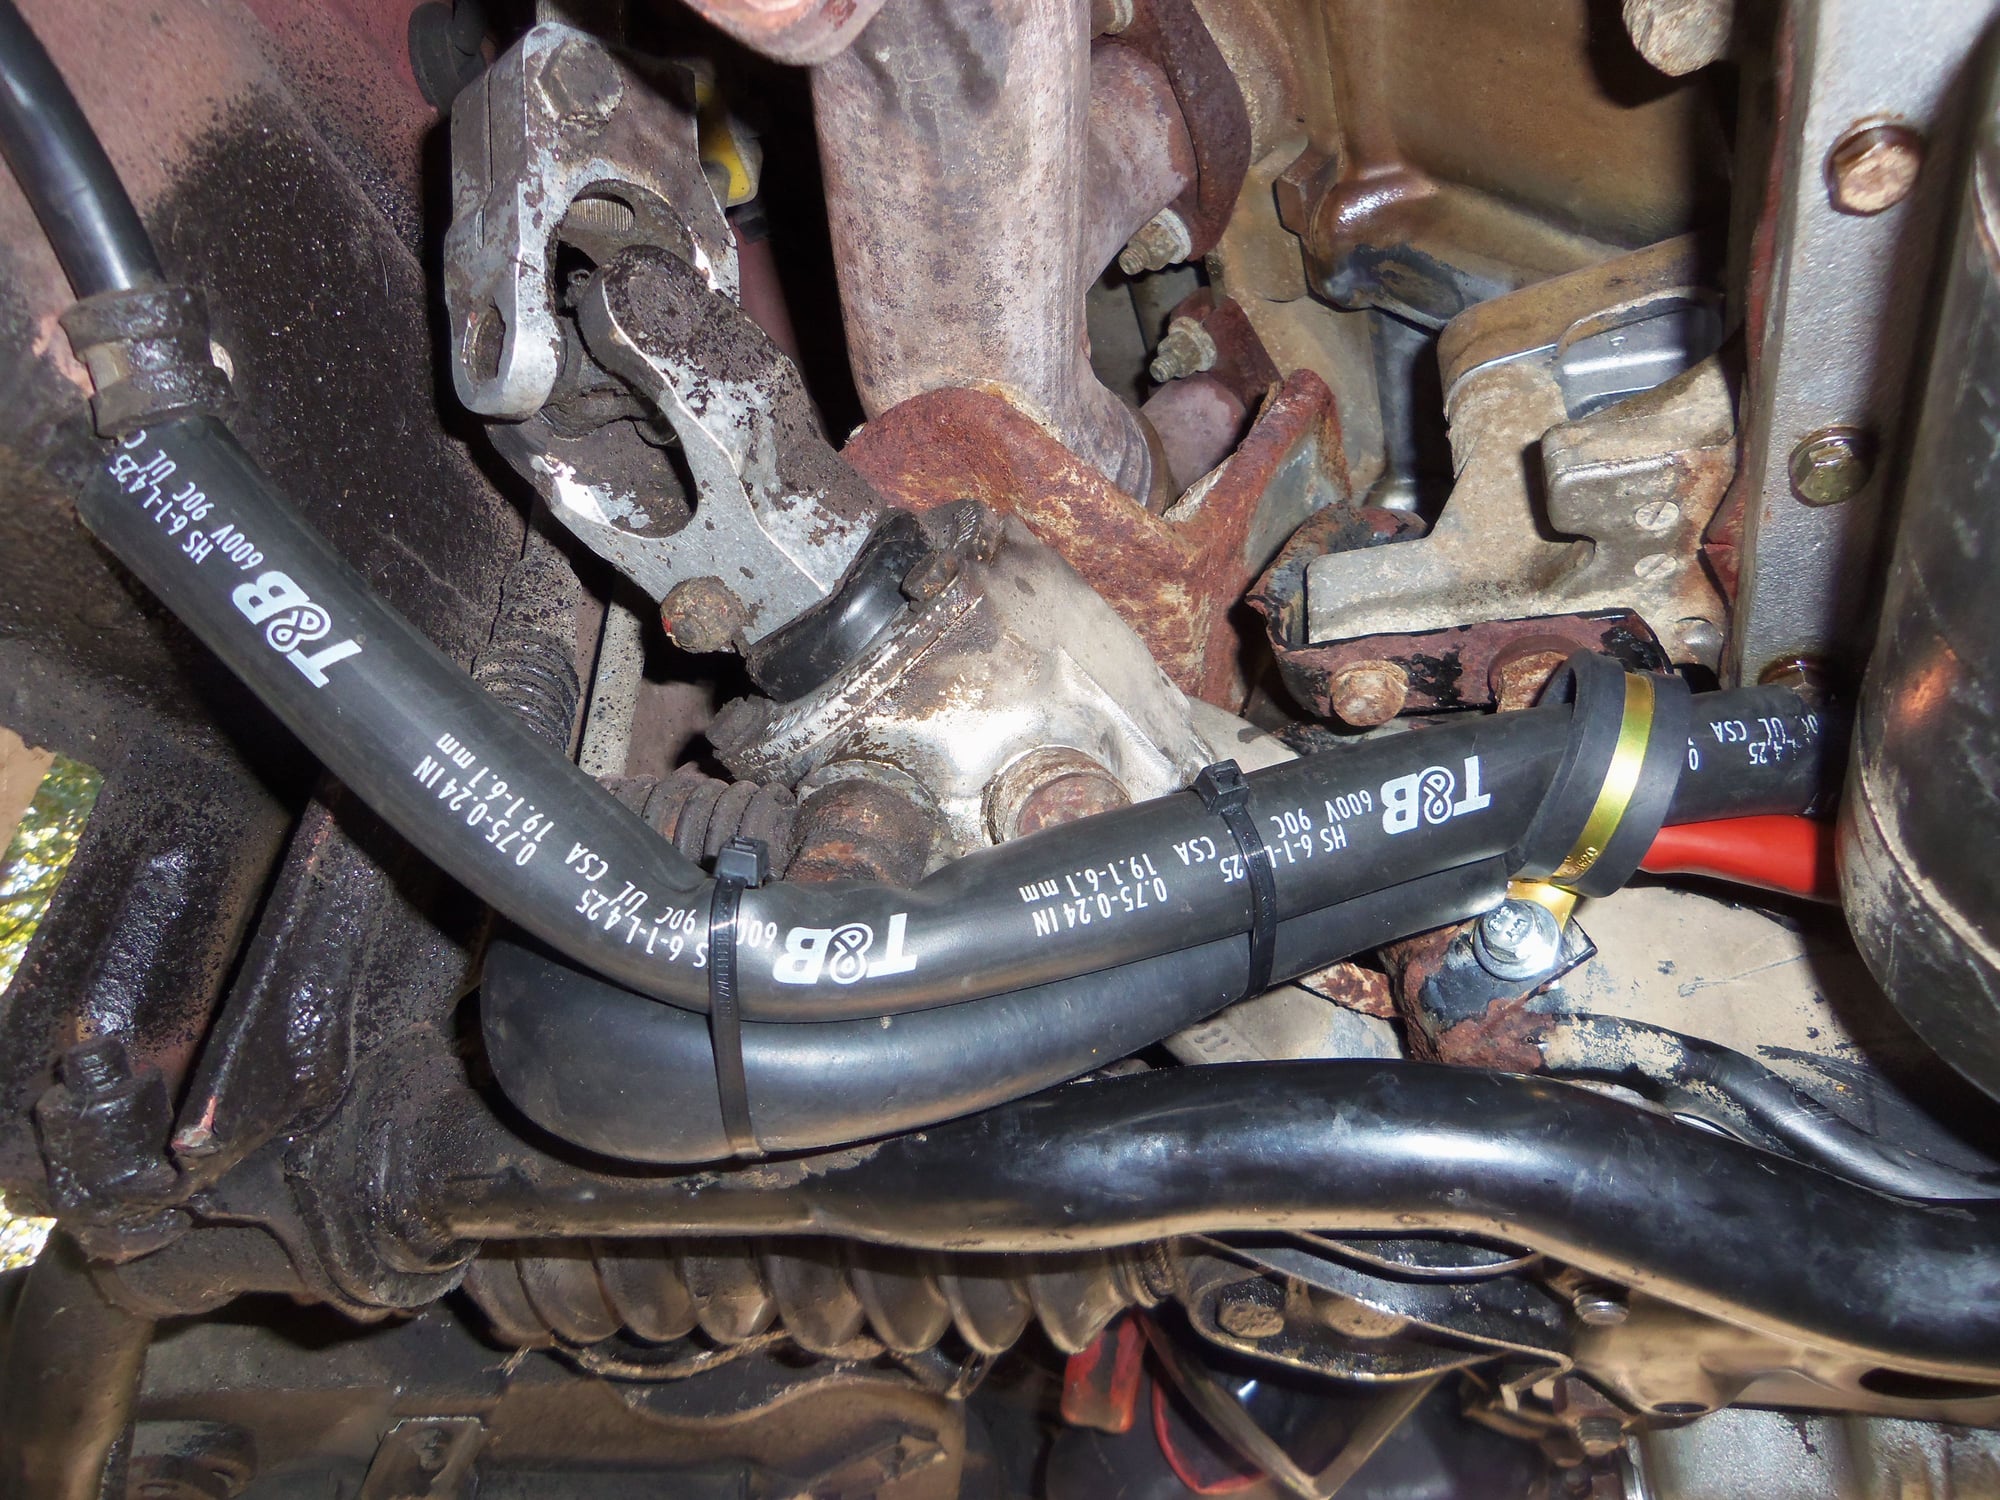
I used all new plastic nuts and 10 new clamps along the underside of the body. I ran short and had to reuse two of the old clamps. Turns out the new nuts are smooth on the inside. They are threaded by the studs. The stud right next to the rear brake line junction TEE was fun, as I could not get a socket and ratchet on it. I had to start the nut using only my finger and a wrench. I did have the forethought to wire brush as much of the corrosion as I could from the studs, then put a little antiseize on them.
I was unable to find any suitable vinyl tubing to put over the battery cable near the engine. I ended up using some 3/4" thick wall heat shrink tubing. It was stiff, but worked out better than I expected.
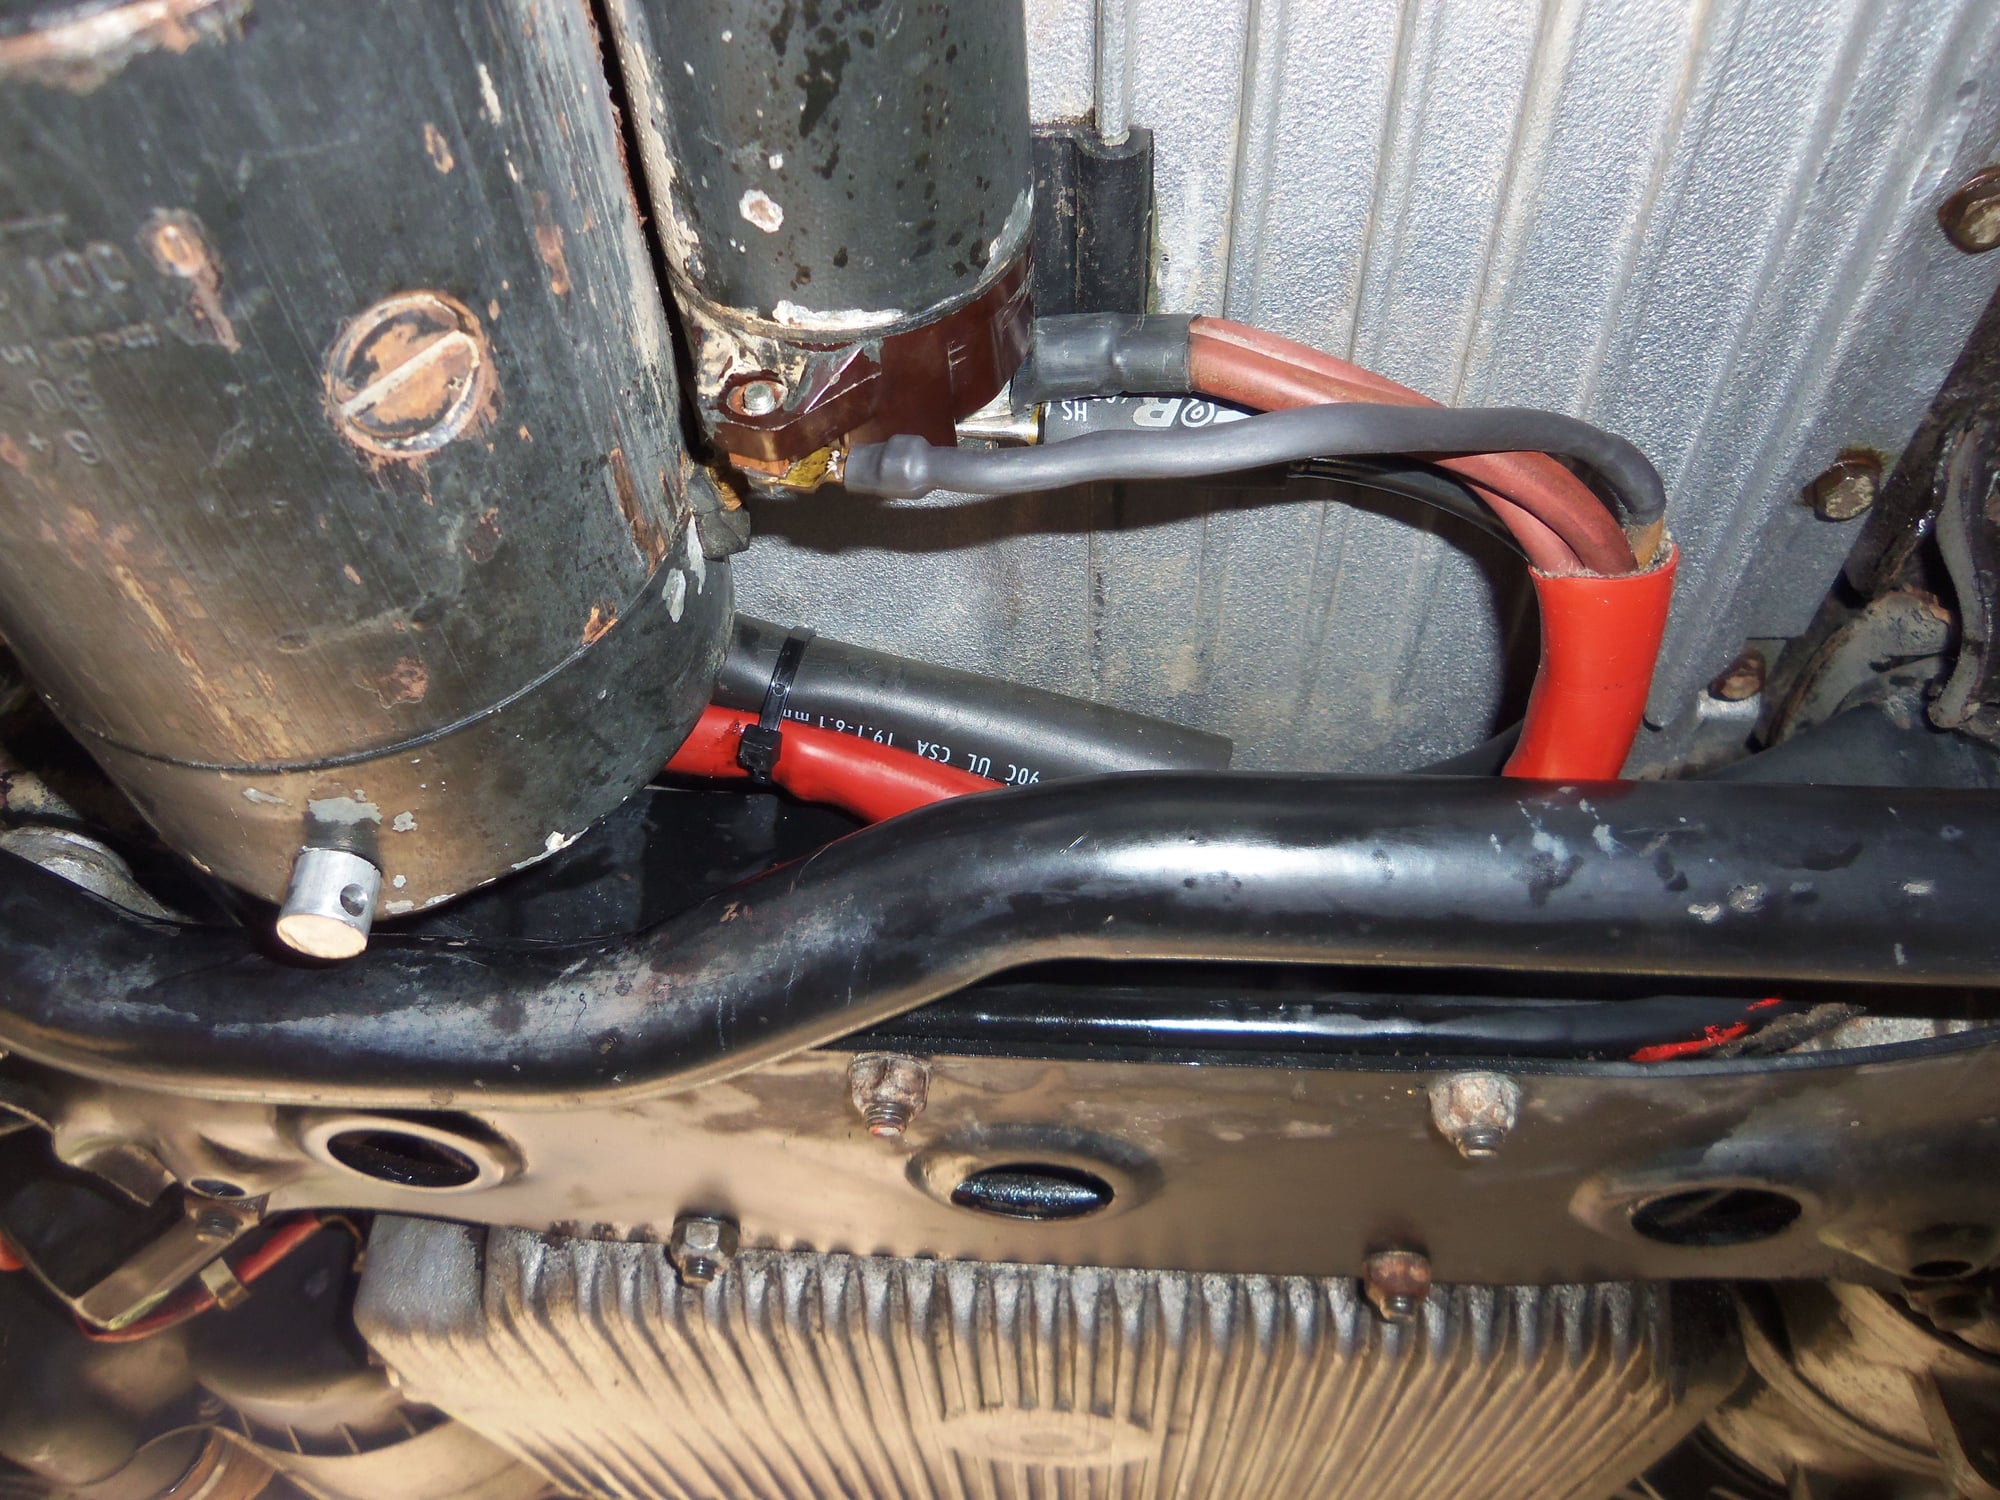
I did finally finish cleaning the starter area and cables. That involved lots of quality time with mineral spirits and a tooth brush. Worth it, because it all looks much better. I can now clearly see the oil pan gasket leaking...
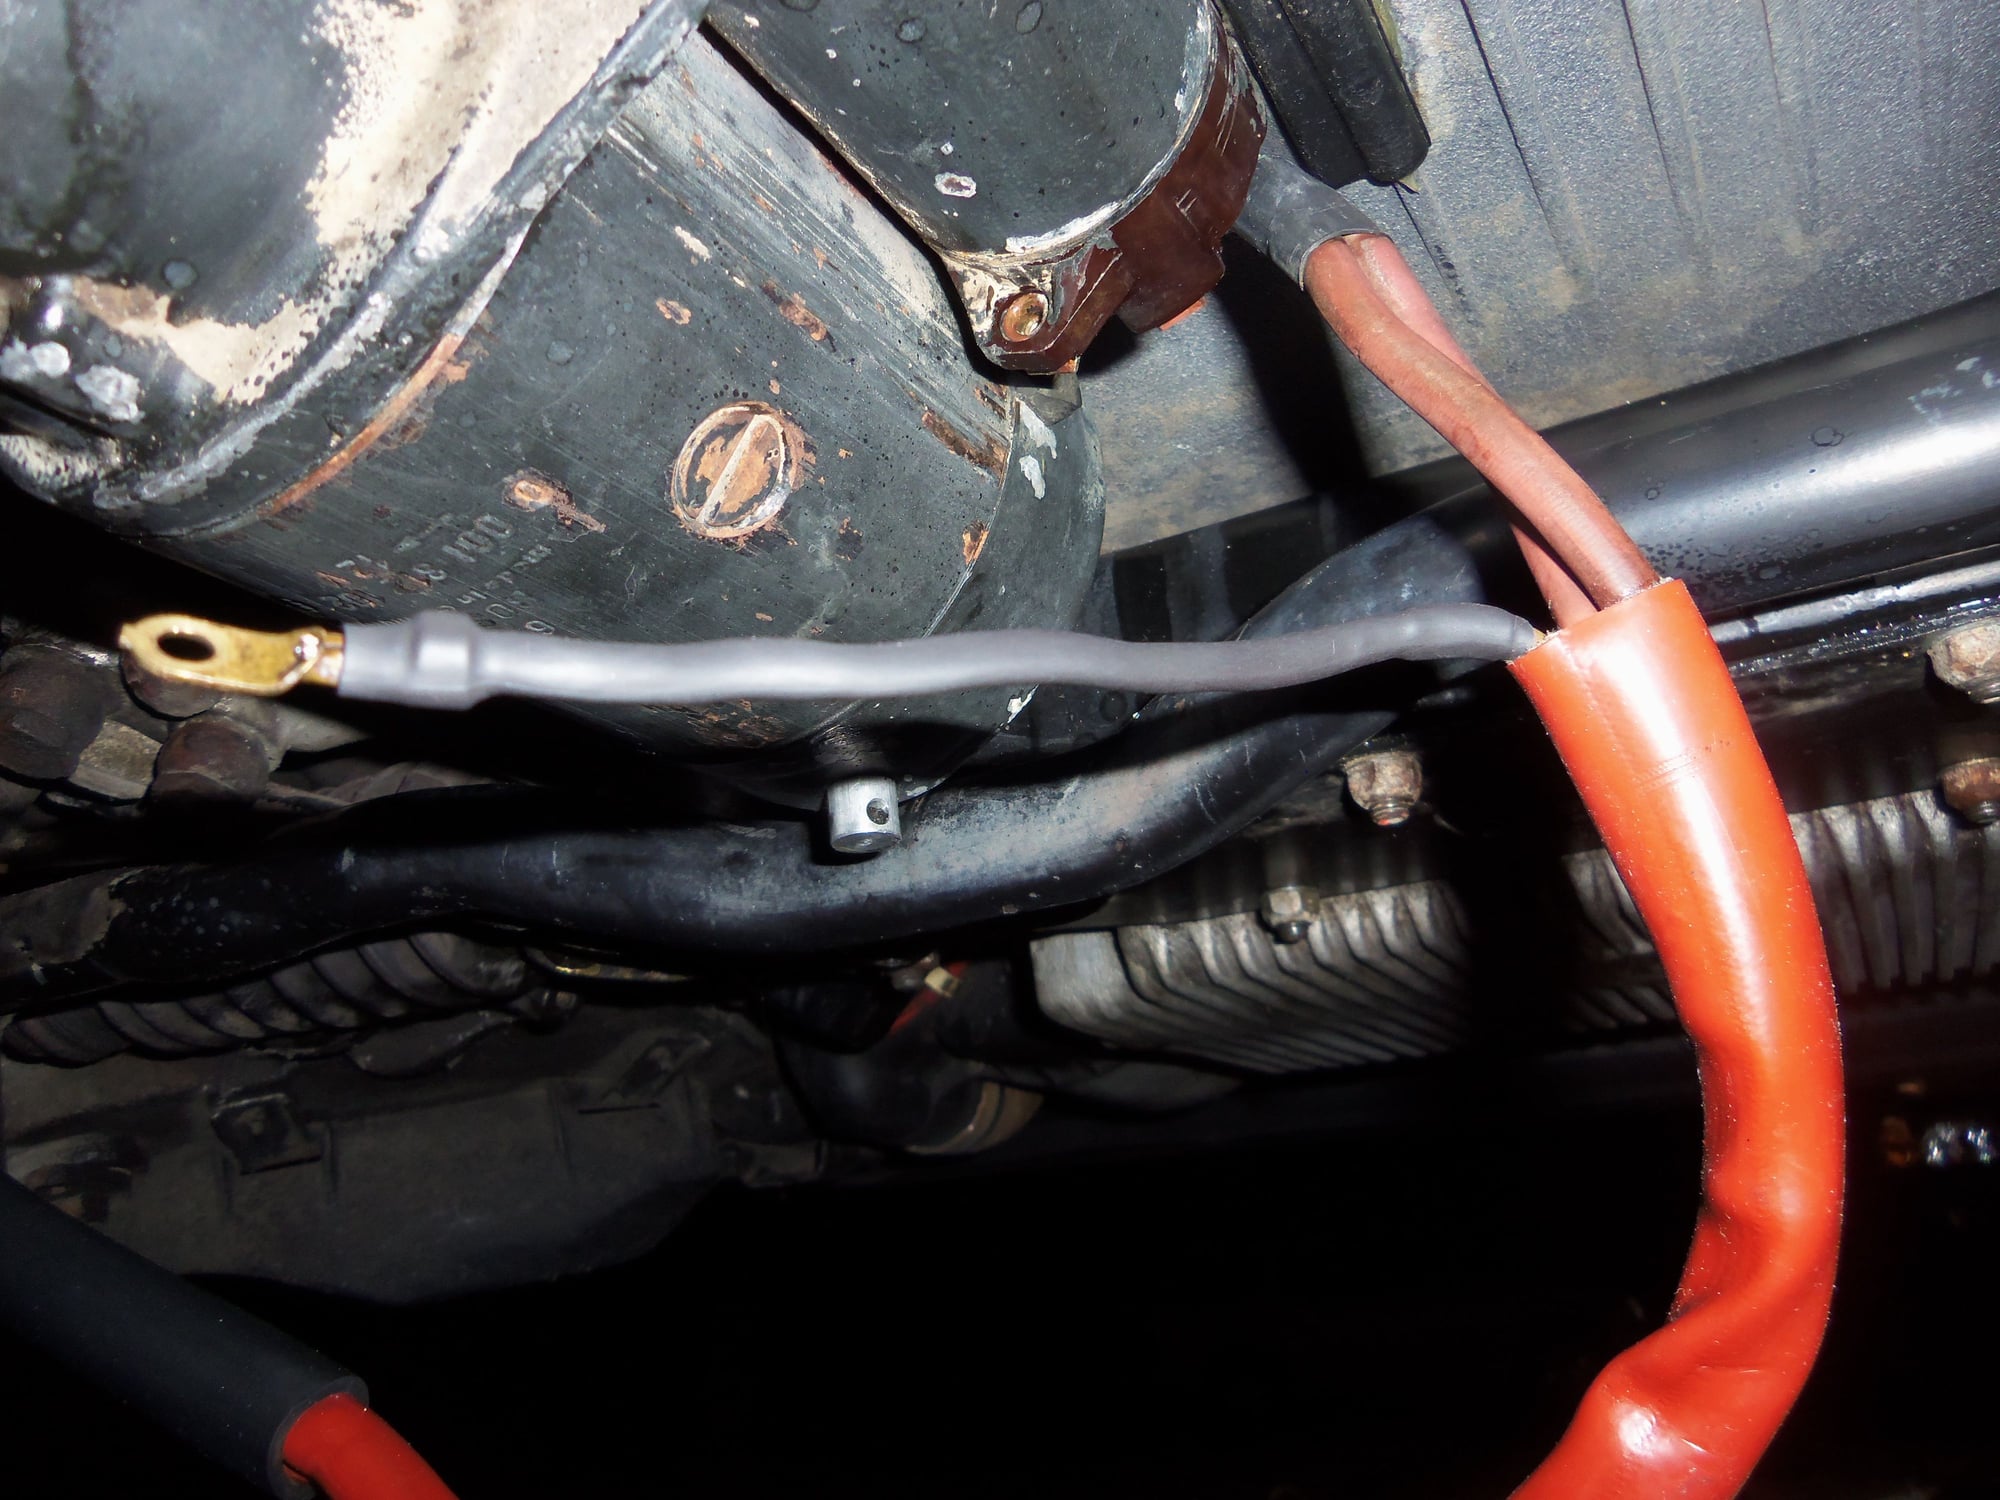
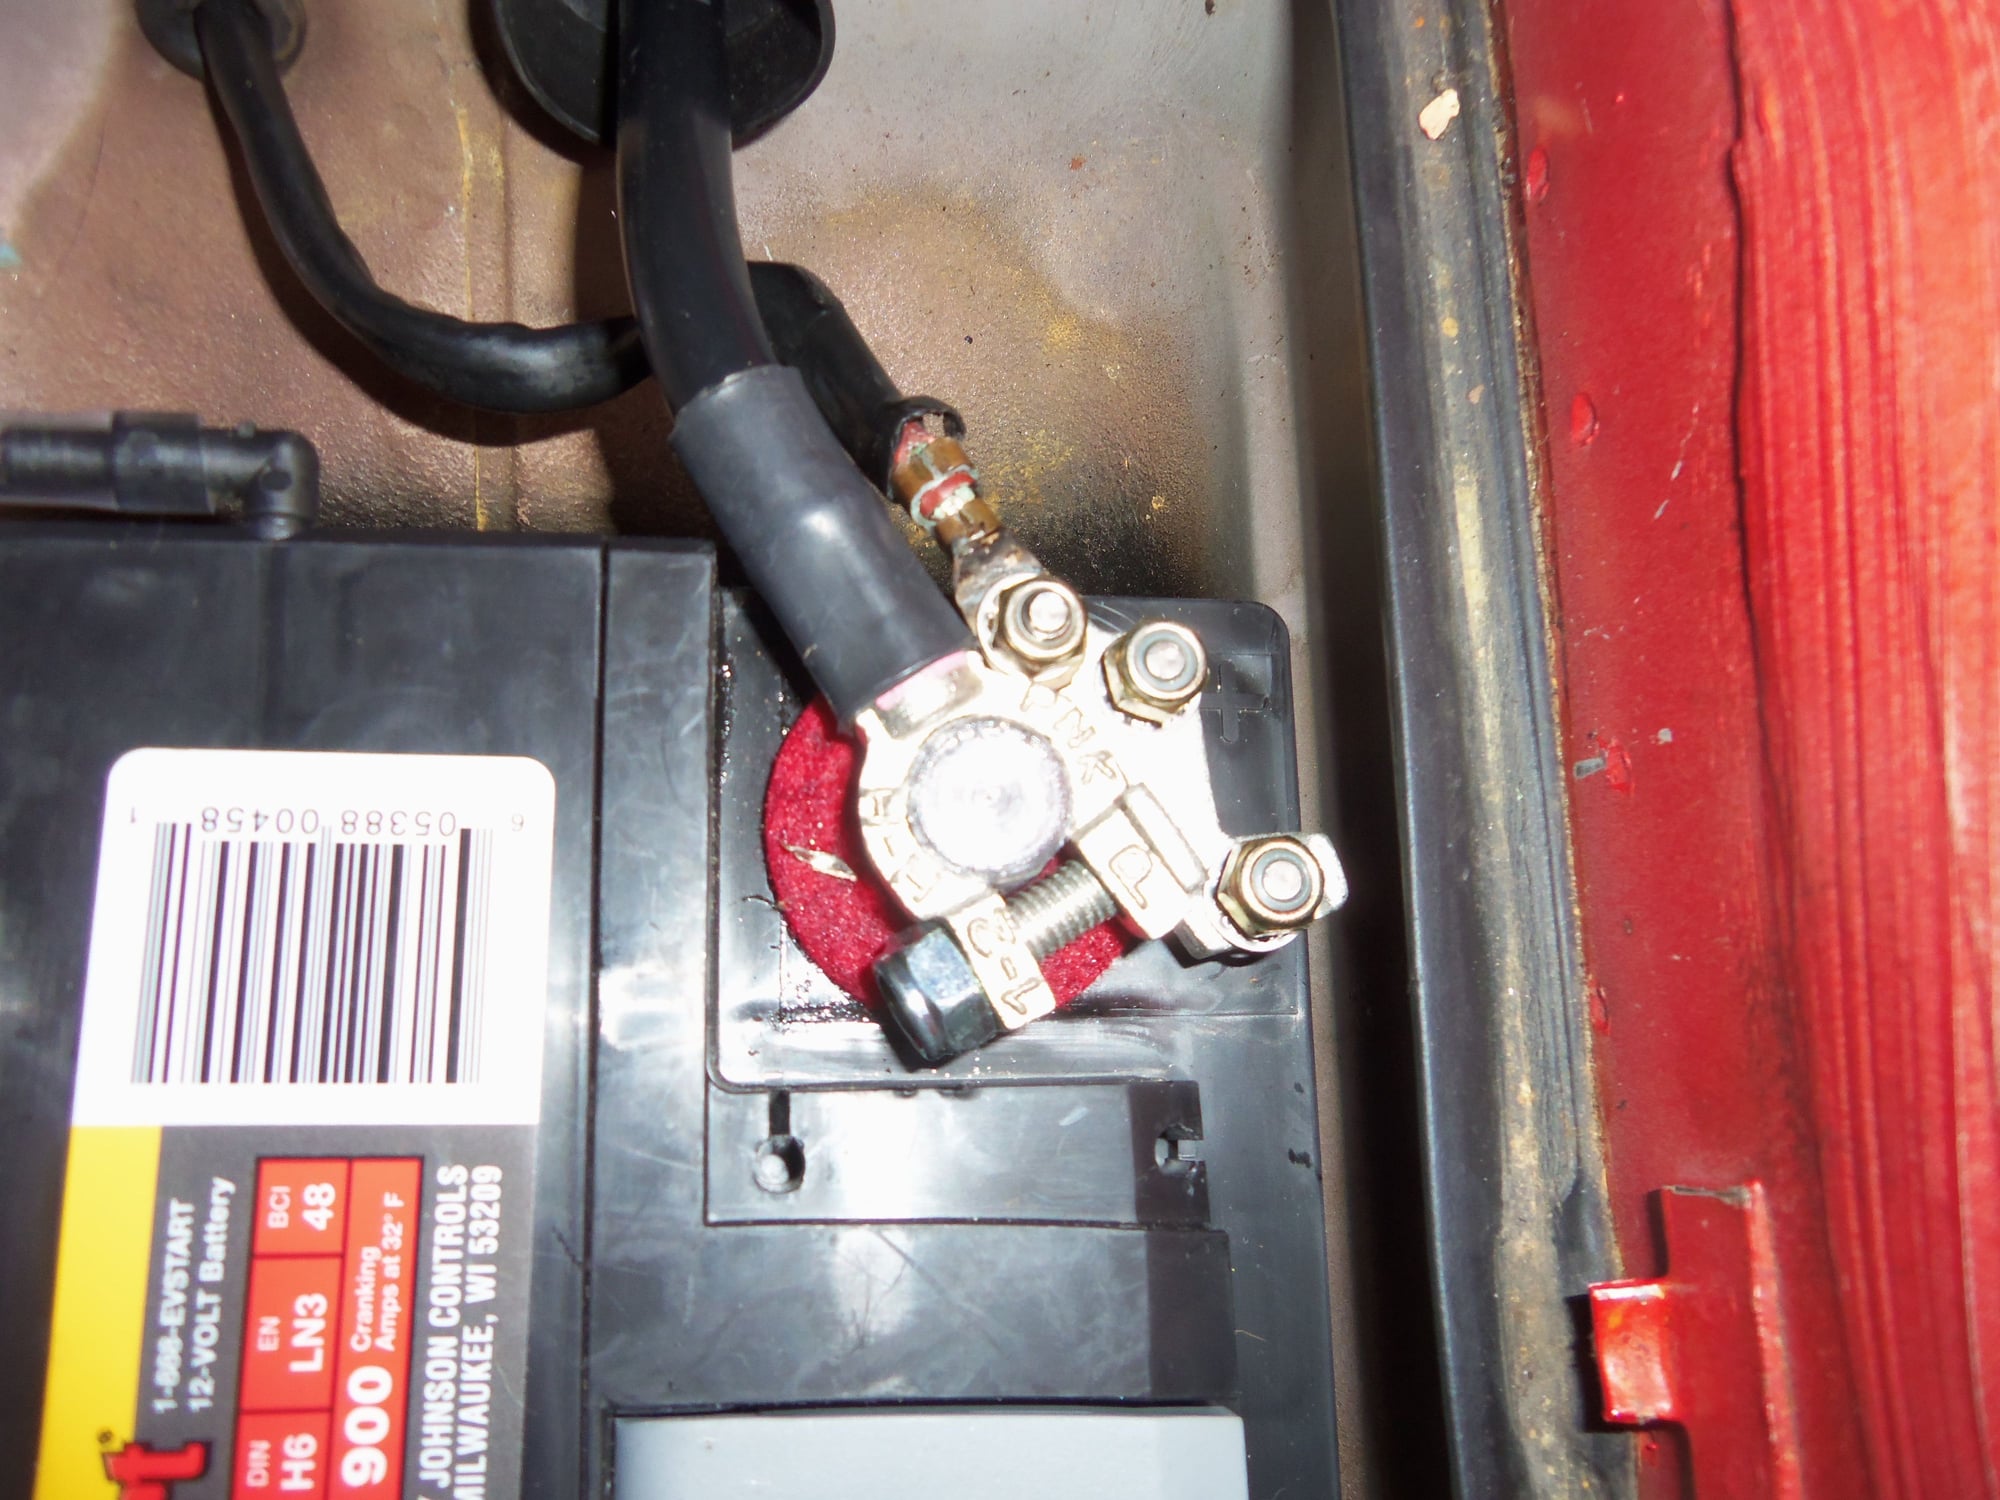
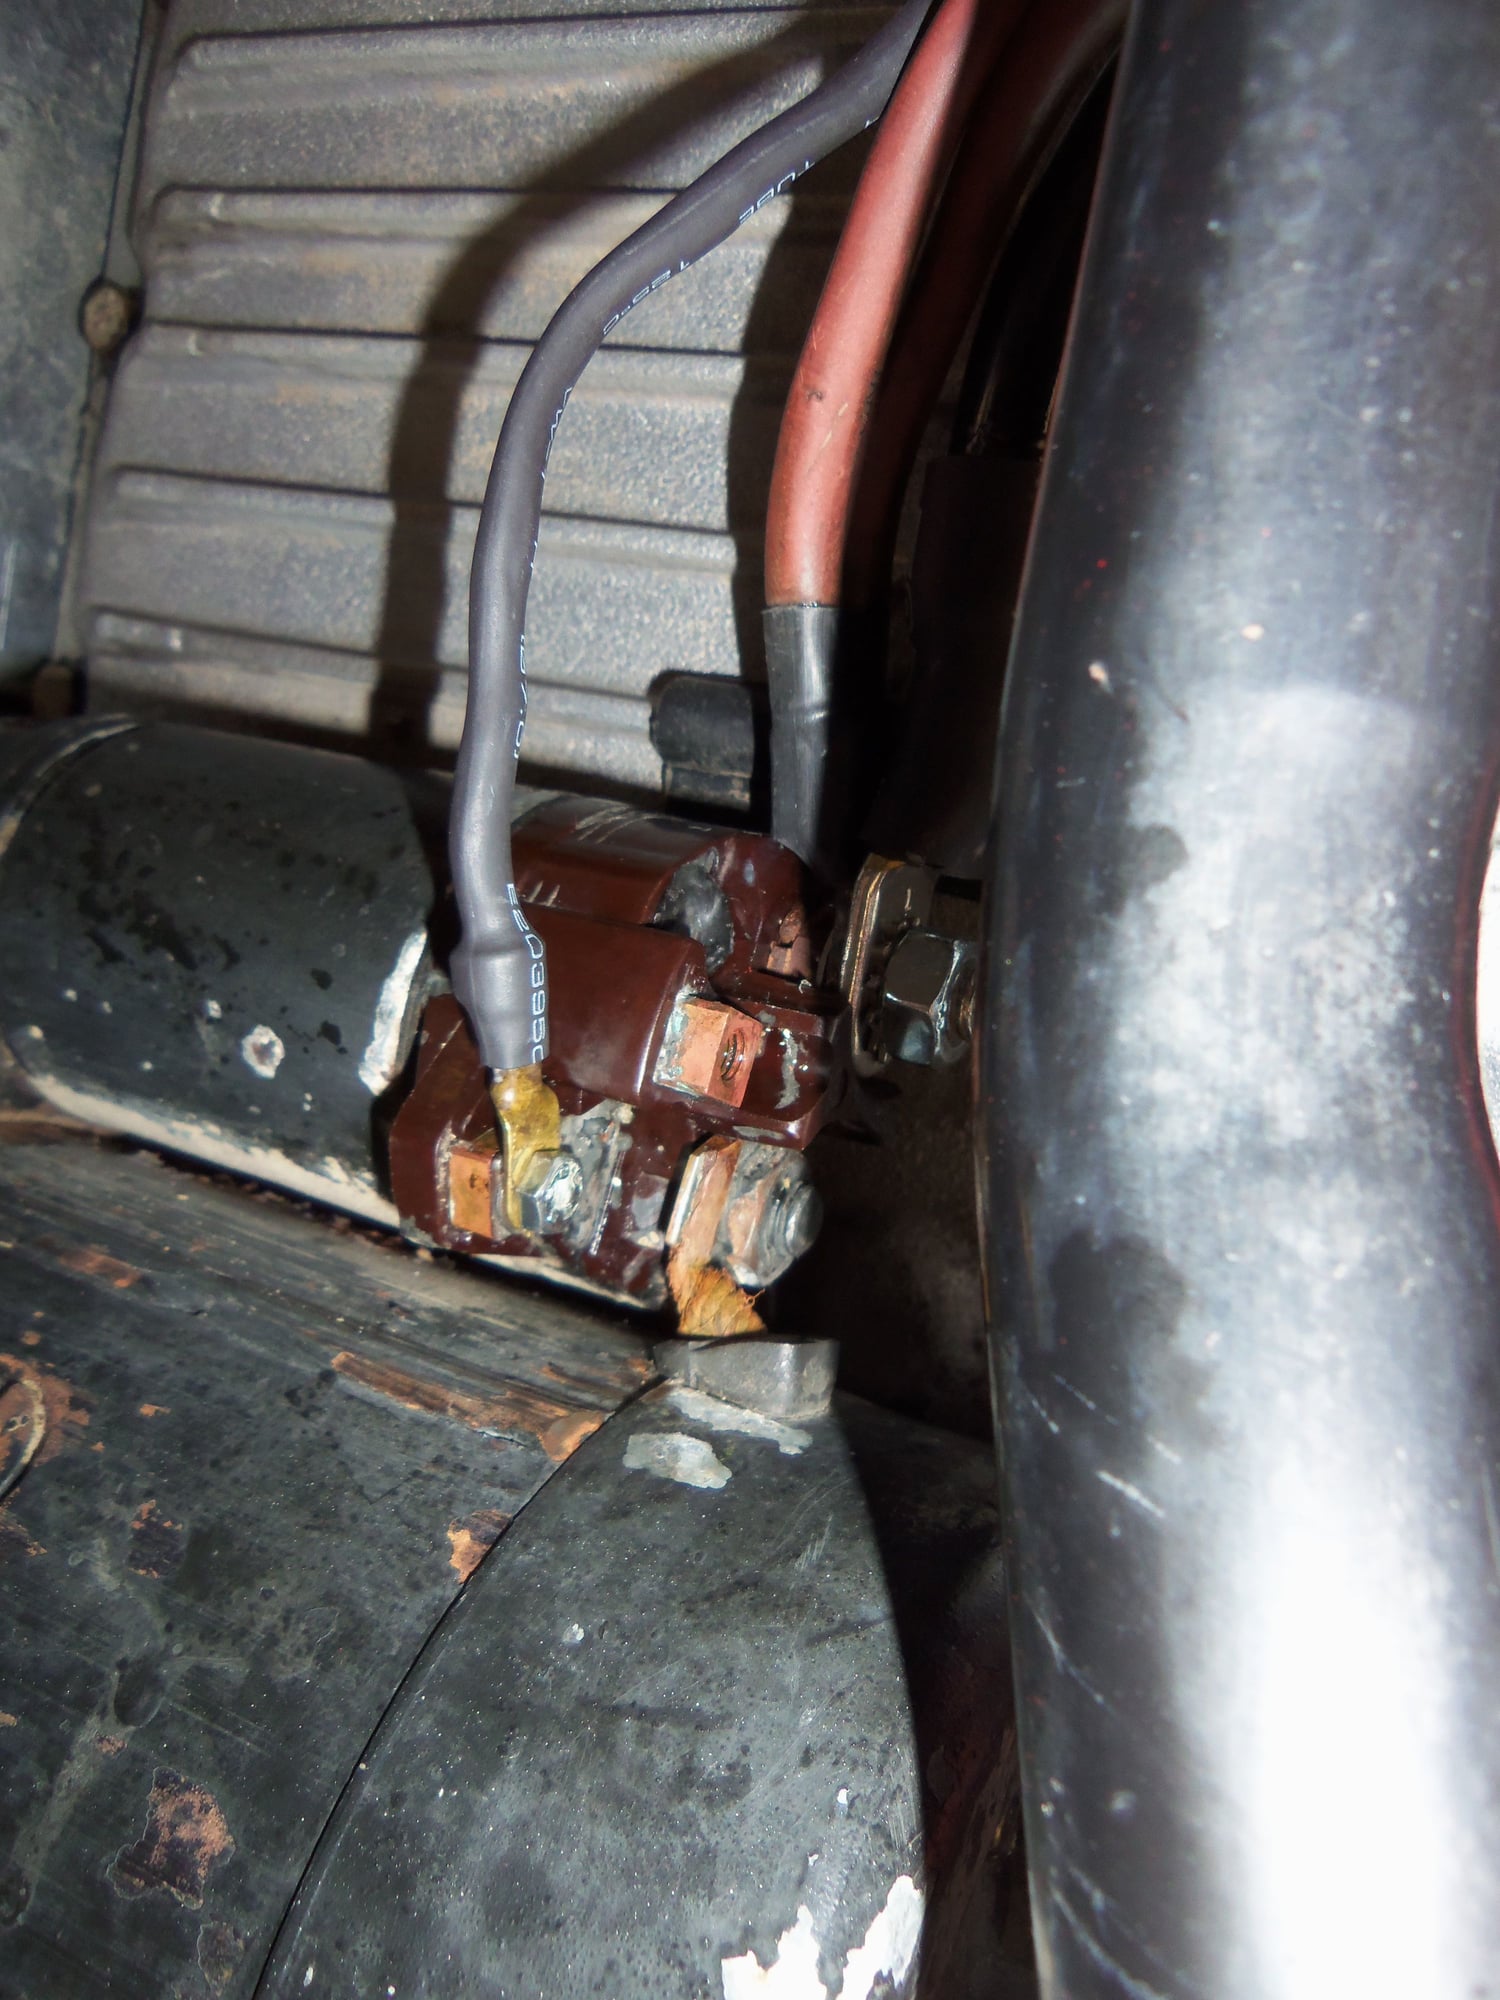
I routed the new battery cable right to the lug on the solenoid. There, I measured it to the ring terminal on the lug. After stripping the insulation, I slipped the ring terminal onto the cable, then installed it onto the lug on the solenoid. Point of this was to make a match mark with a sharpie on the terminal and the cable. That would ensure I had the terminal clocked correctly when I crimped it down. I borrowed a heavy terminal crimping tool from work. To finish it off, I used a piece of the same heat shrink I placed on the cable earlier. It was heavier than that supplied with the cable.
I also came up with yet another routing for the battery vent. I think I am happy with this one, as the routing is more relaxed.
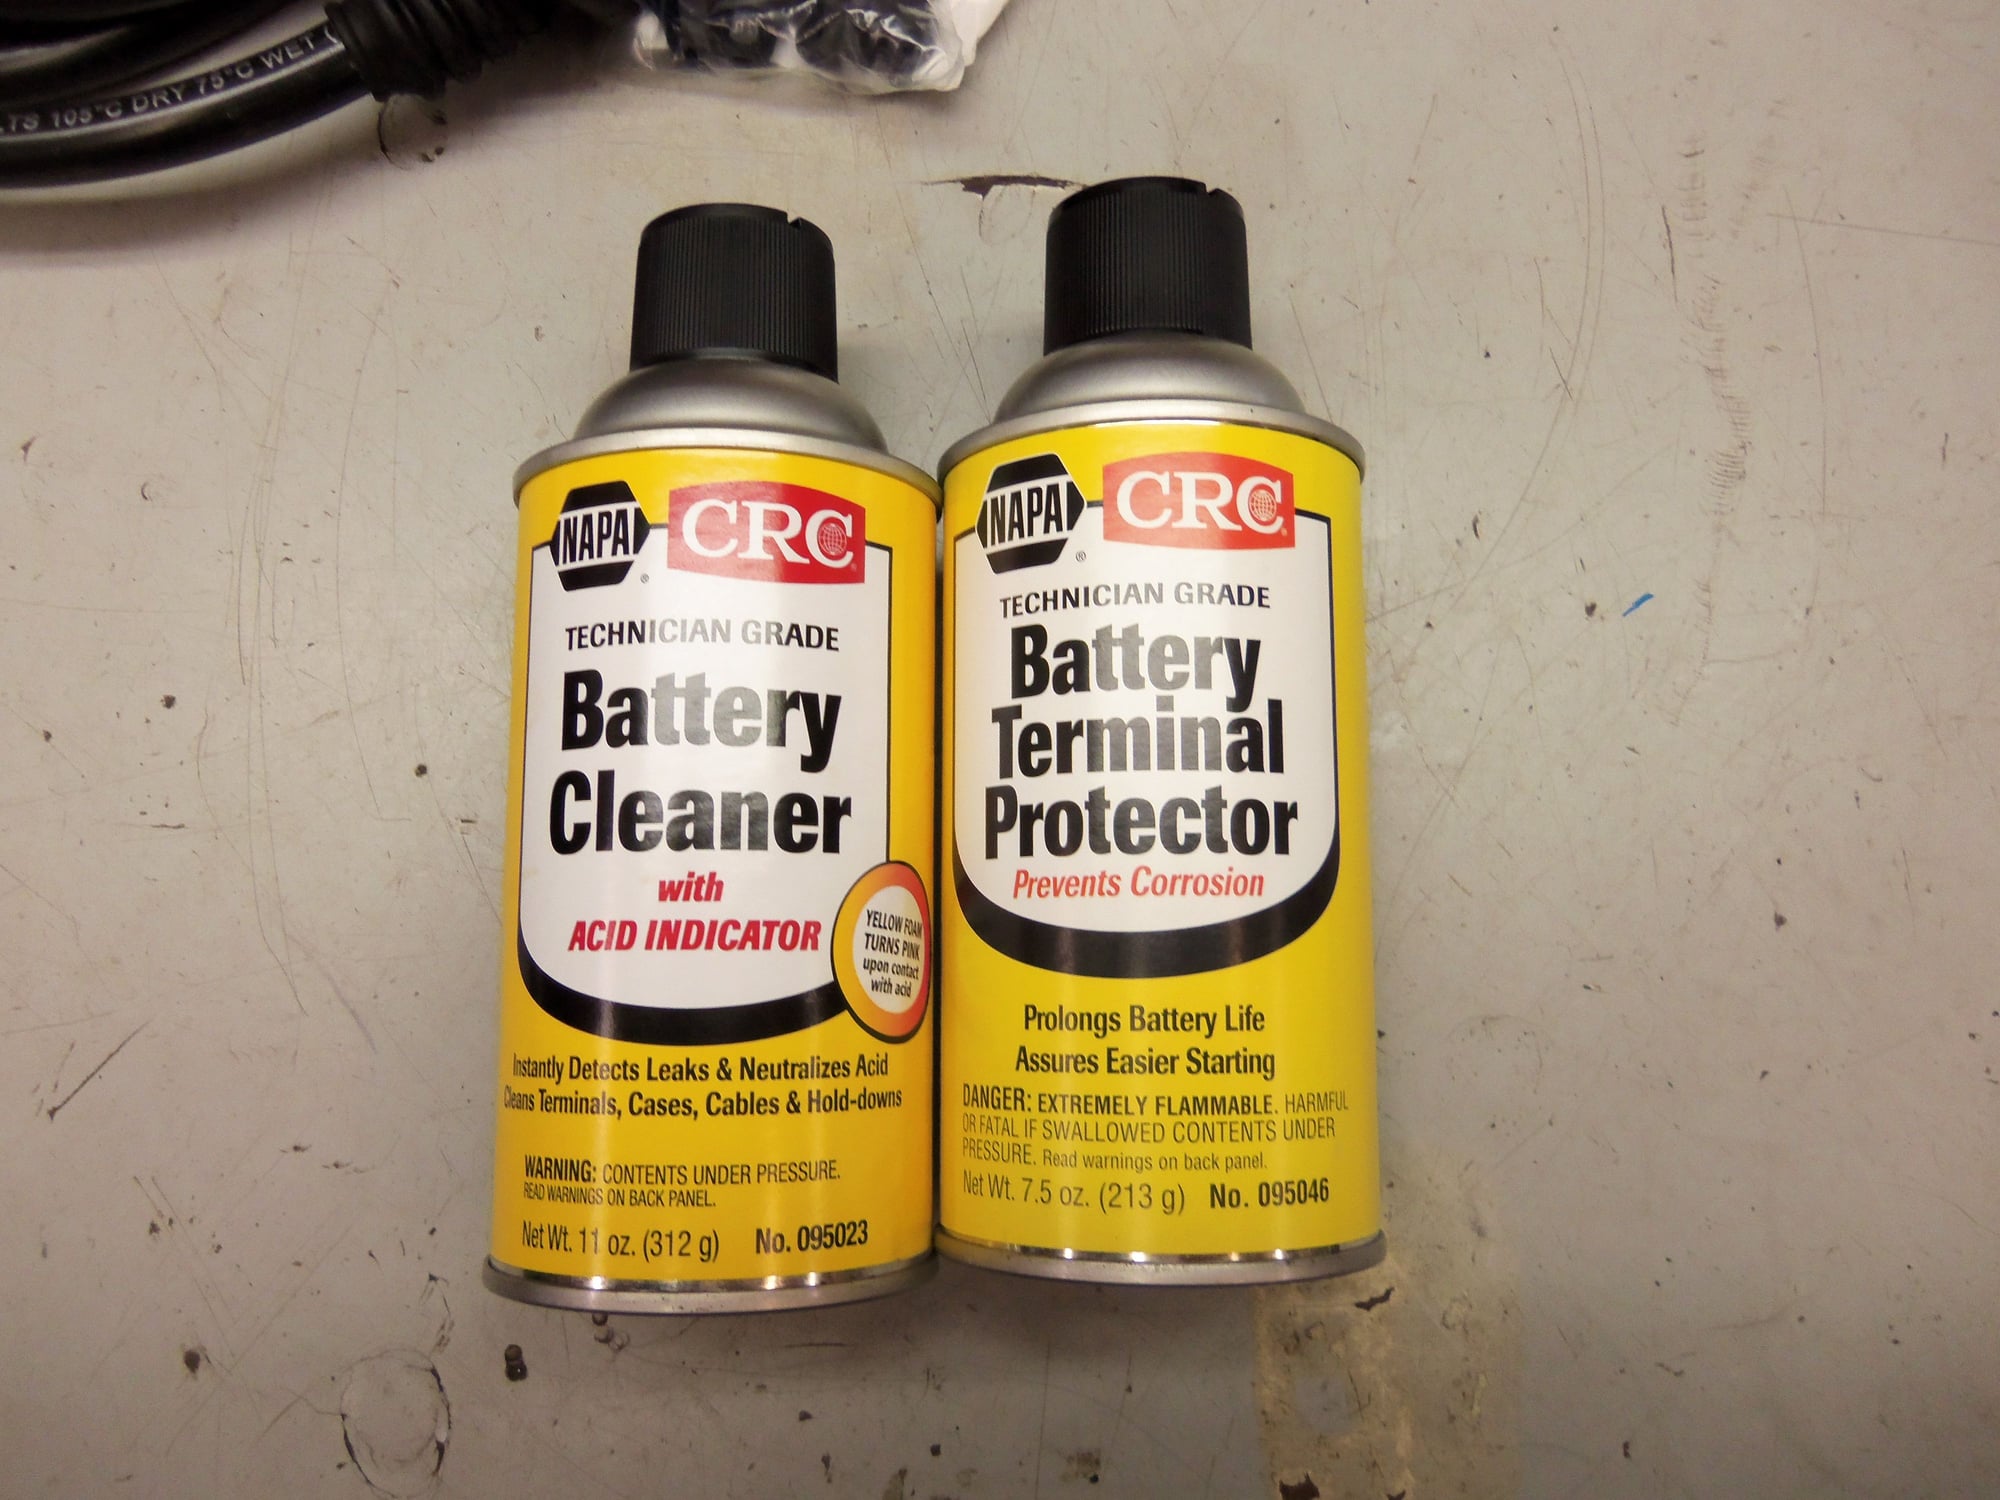
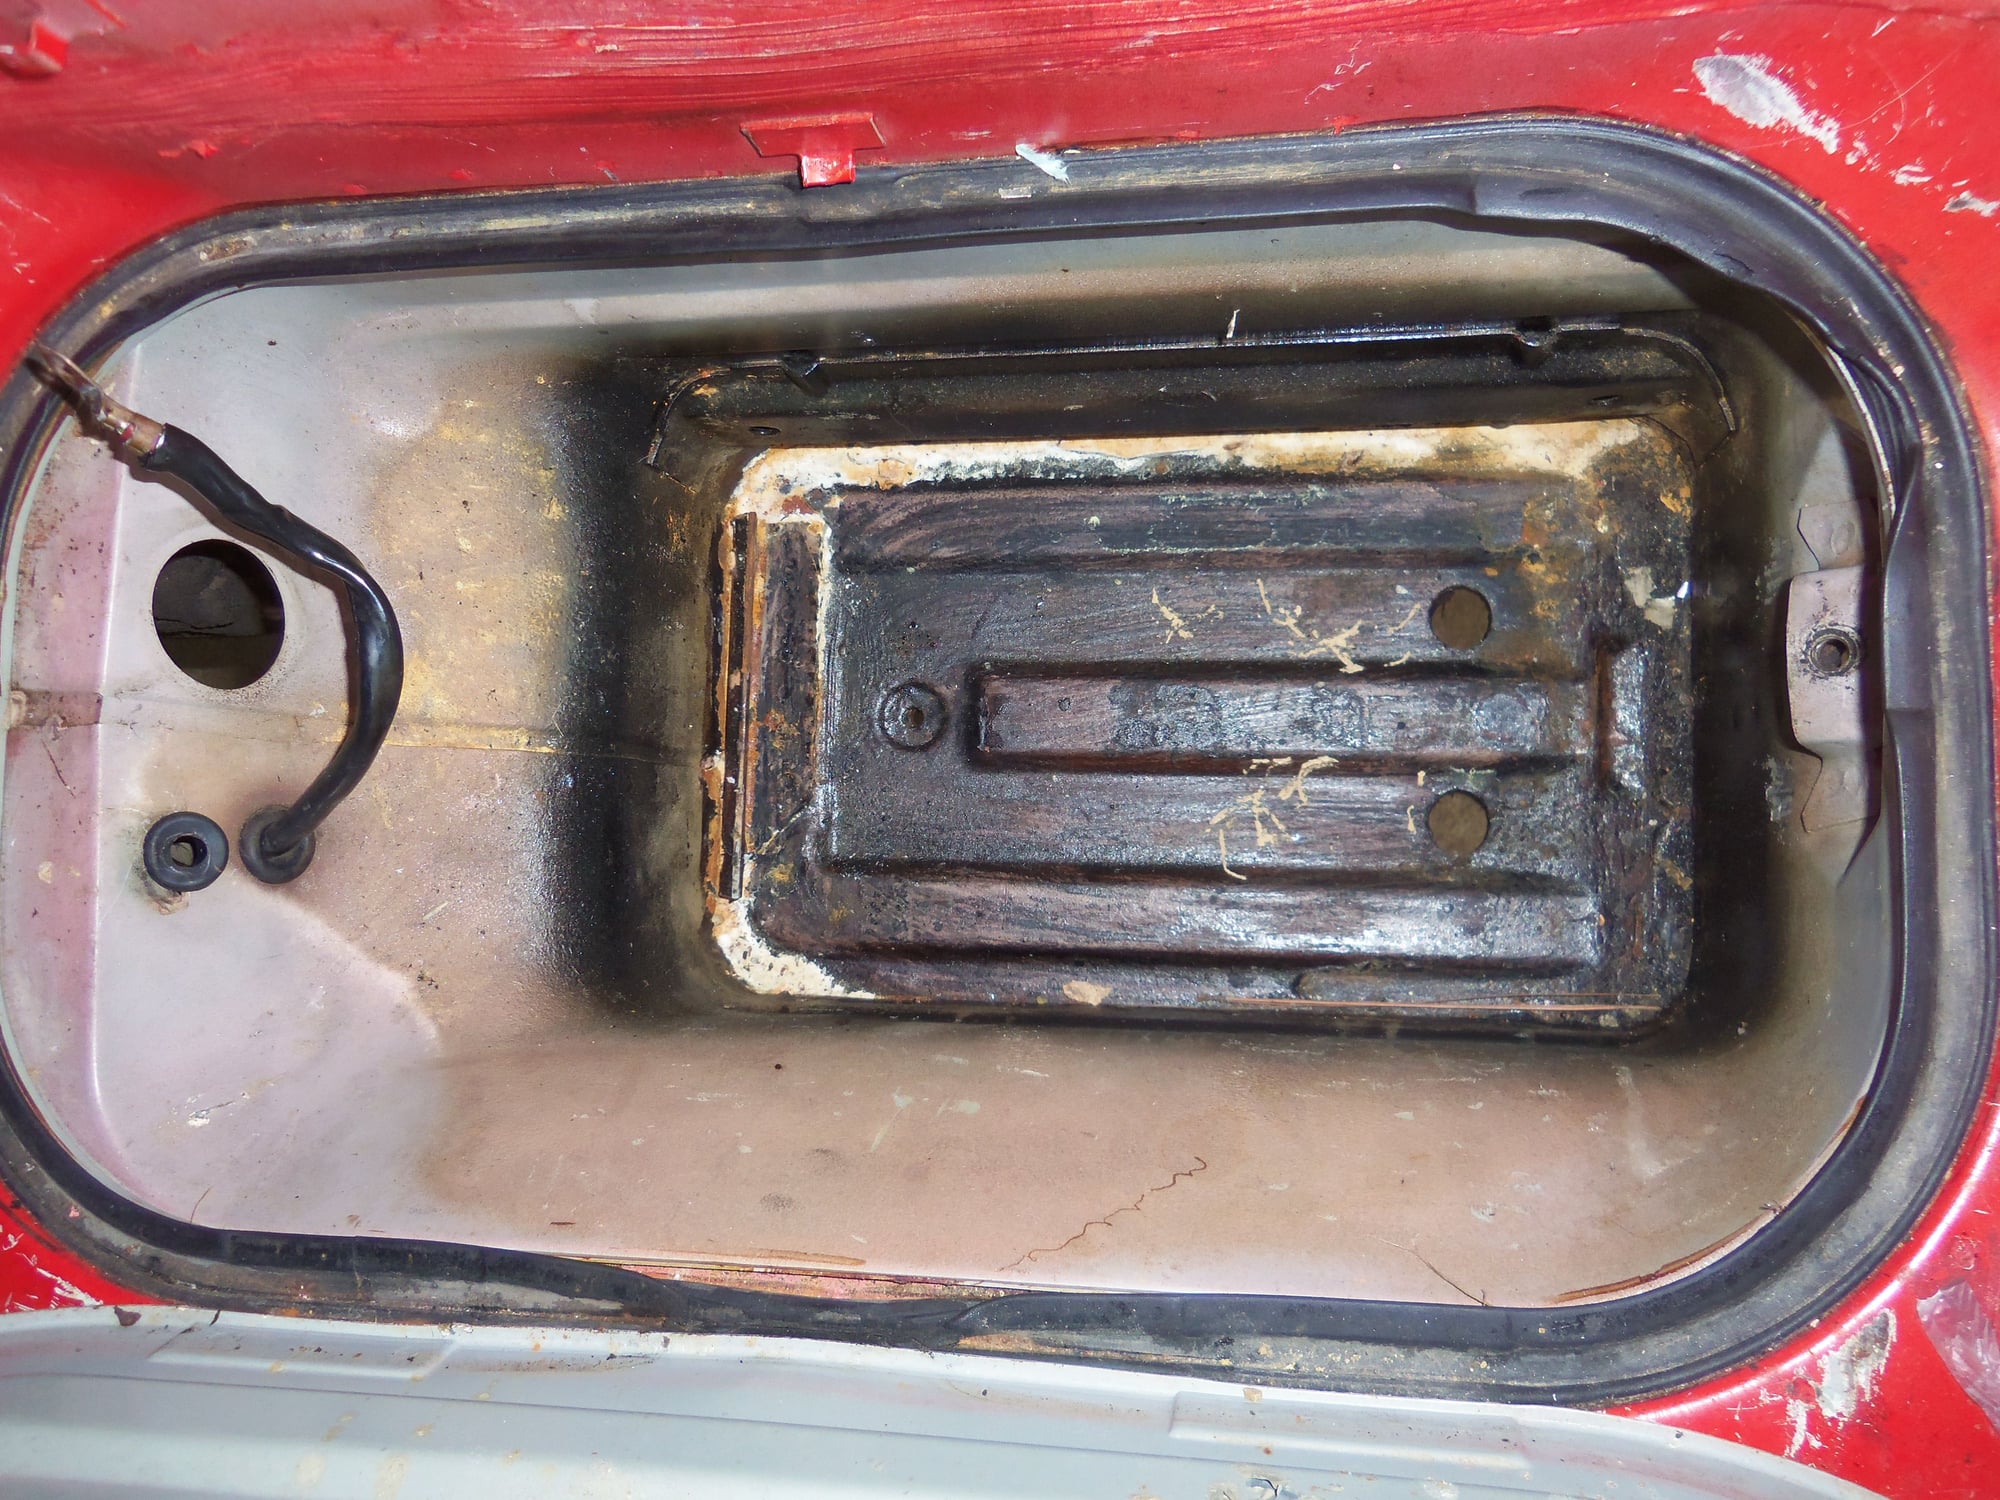
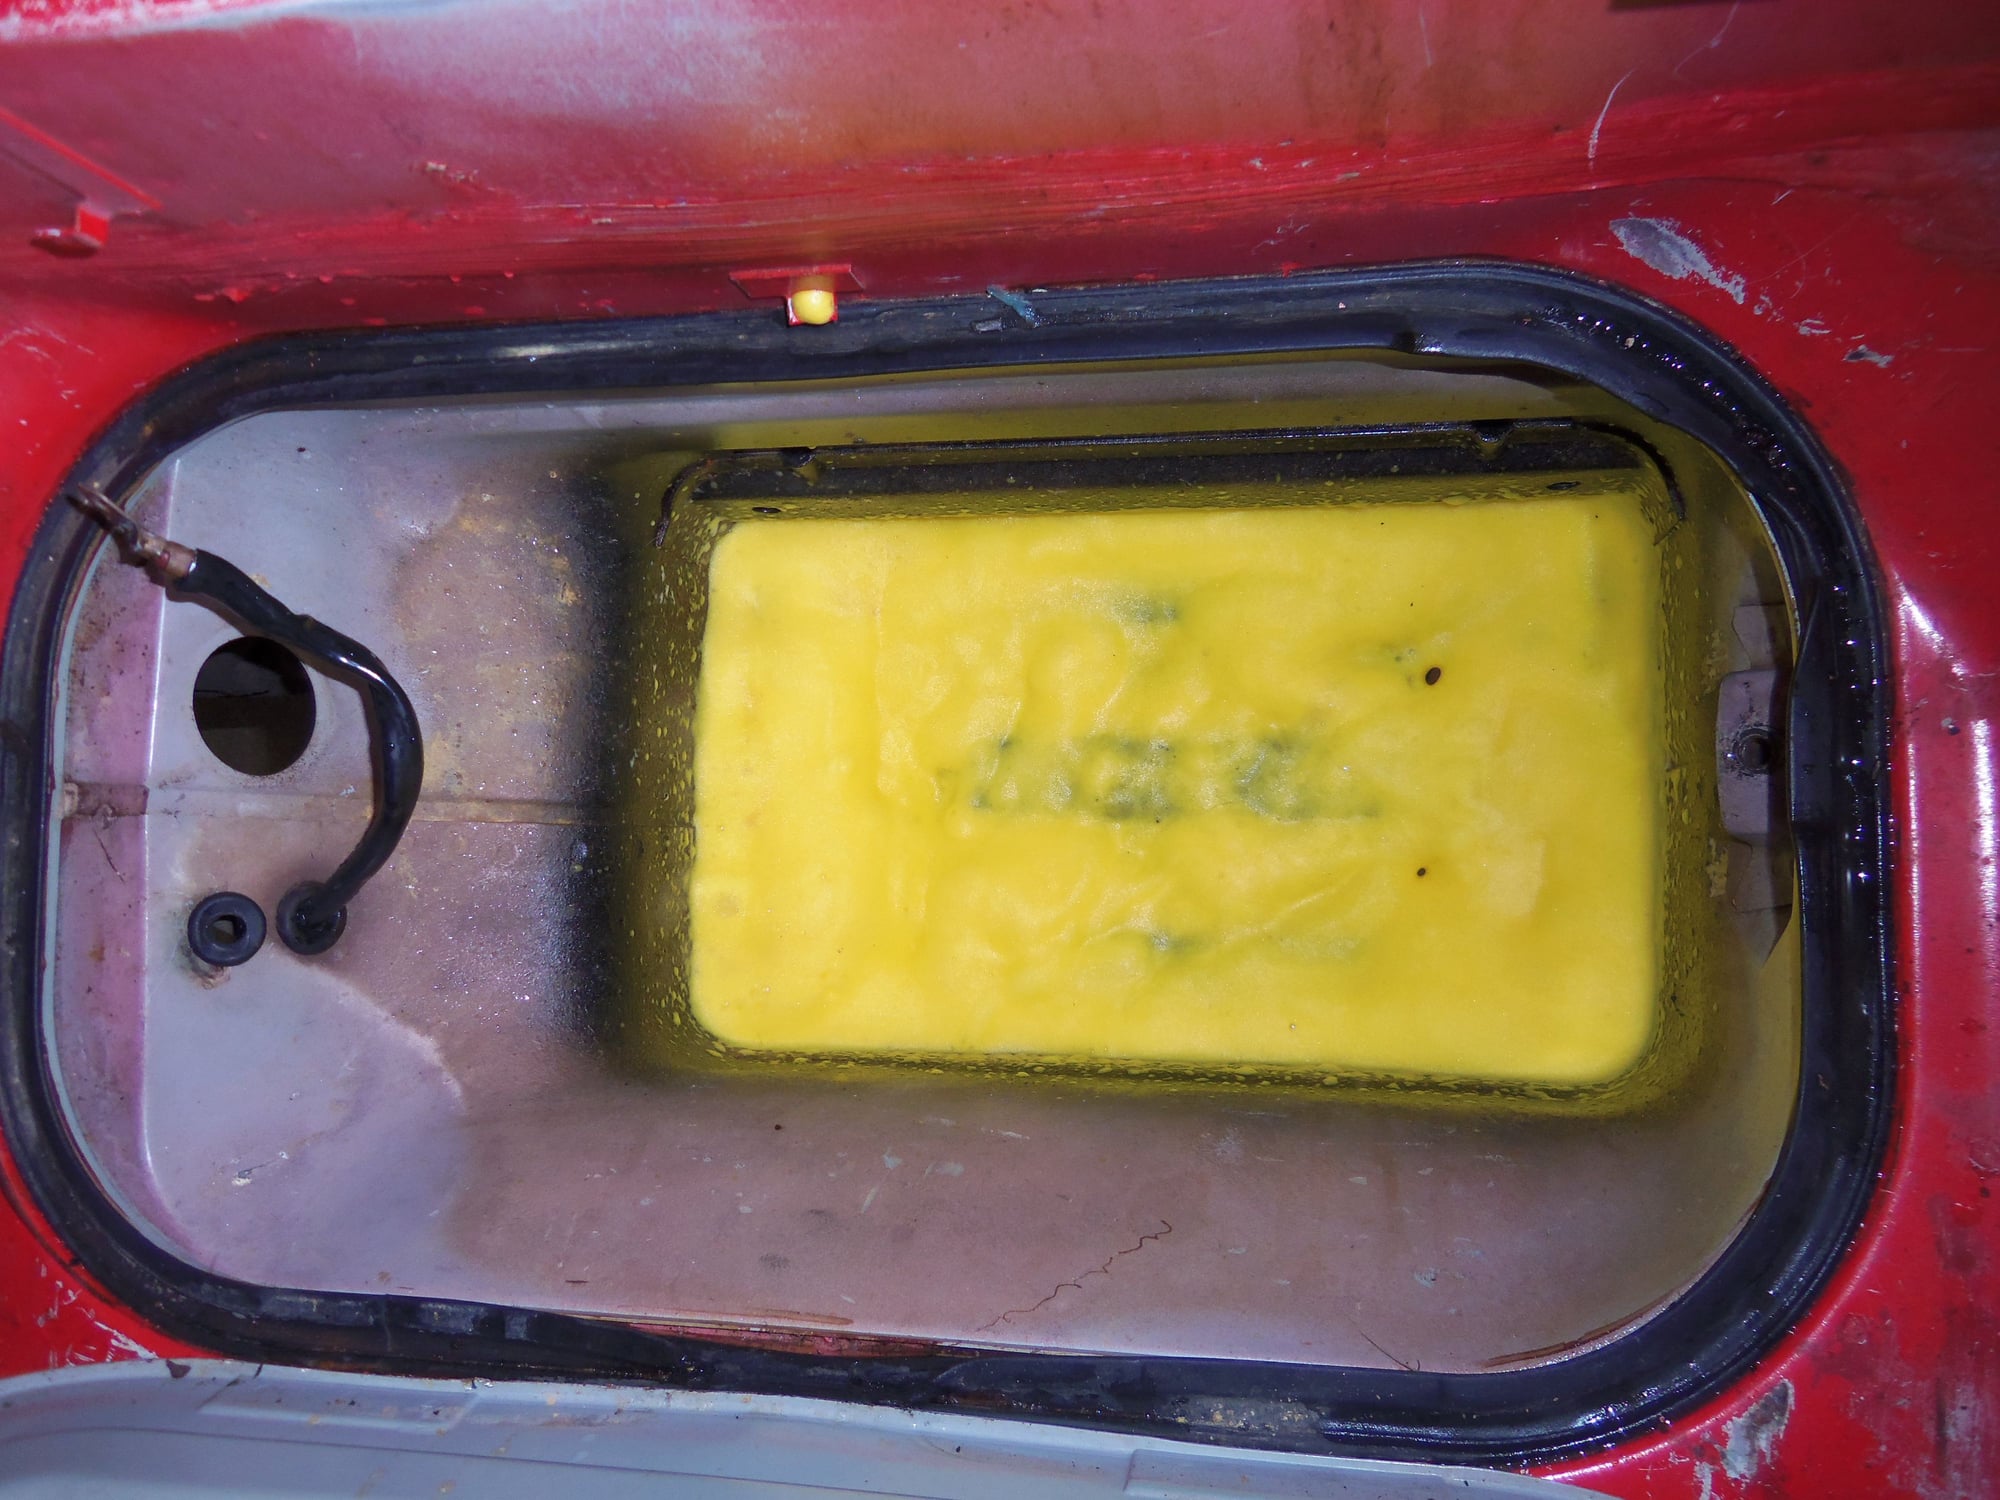
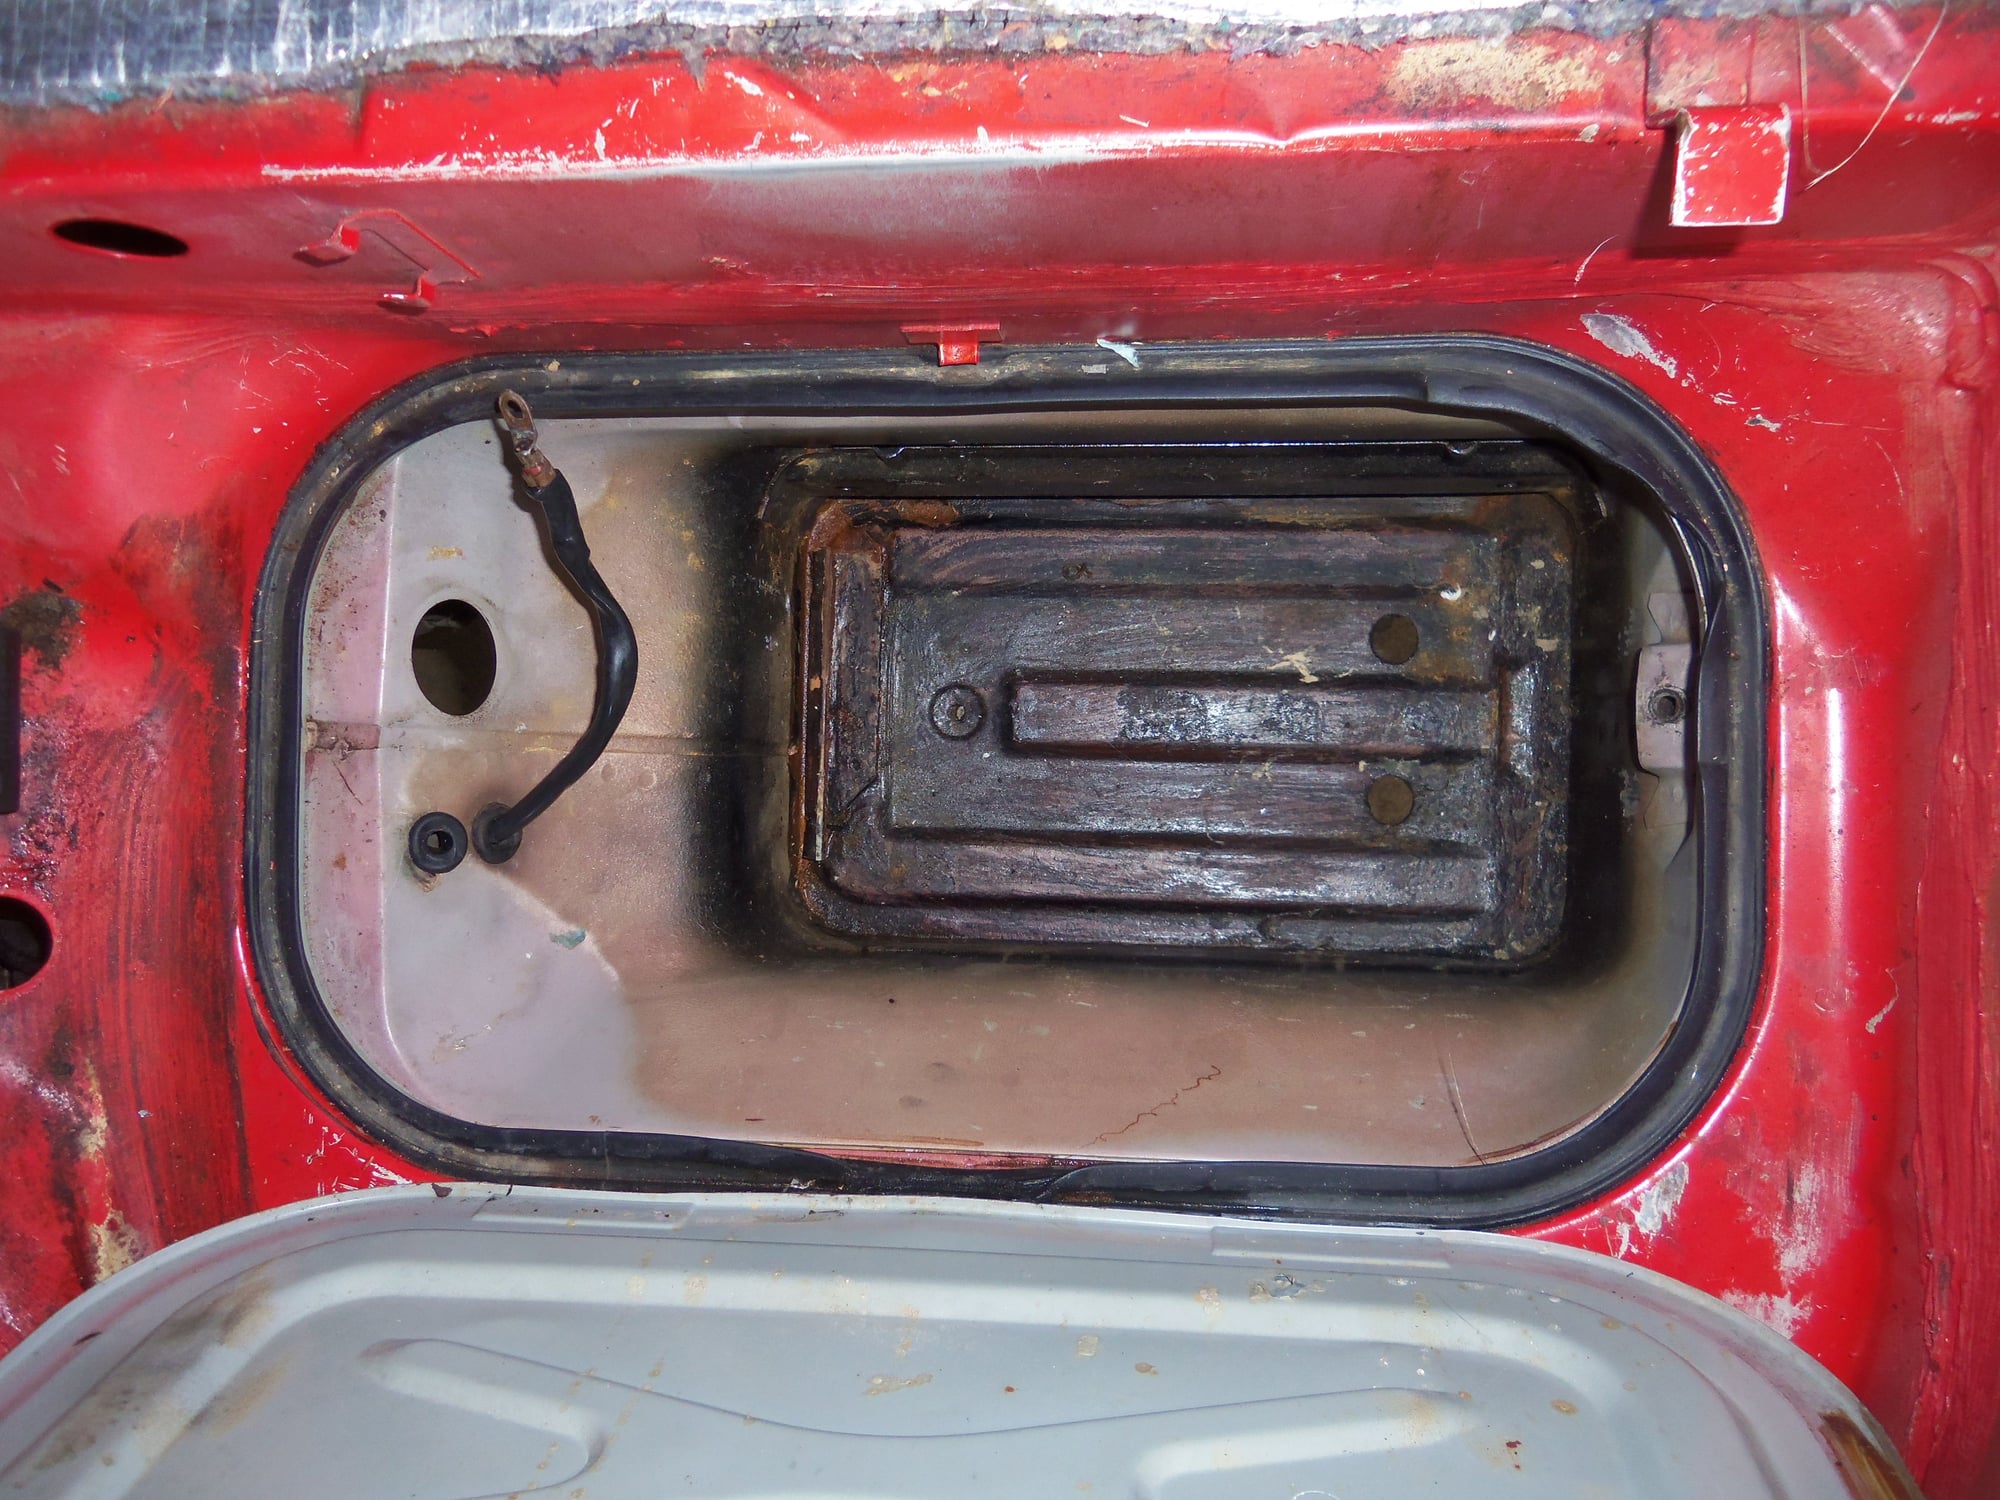
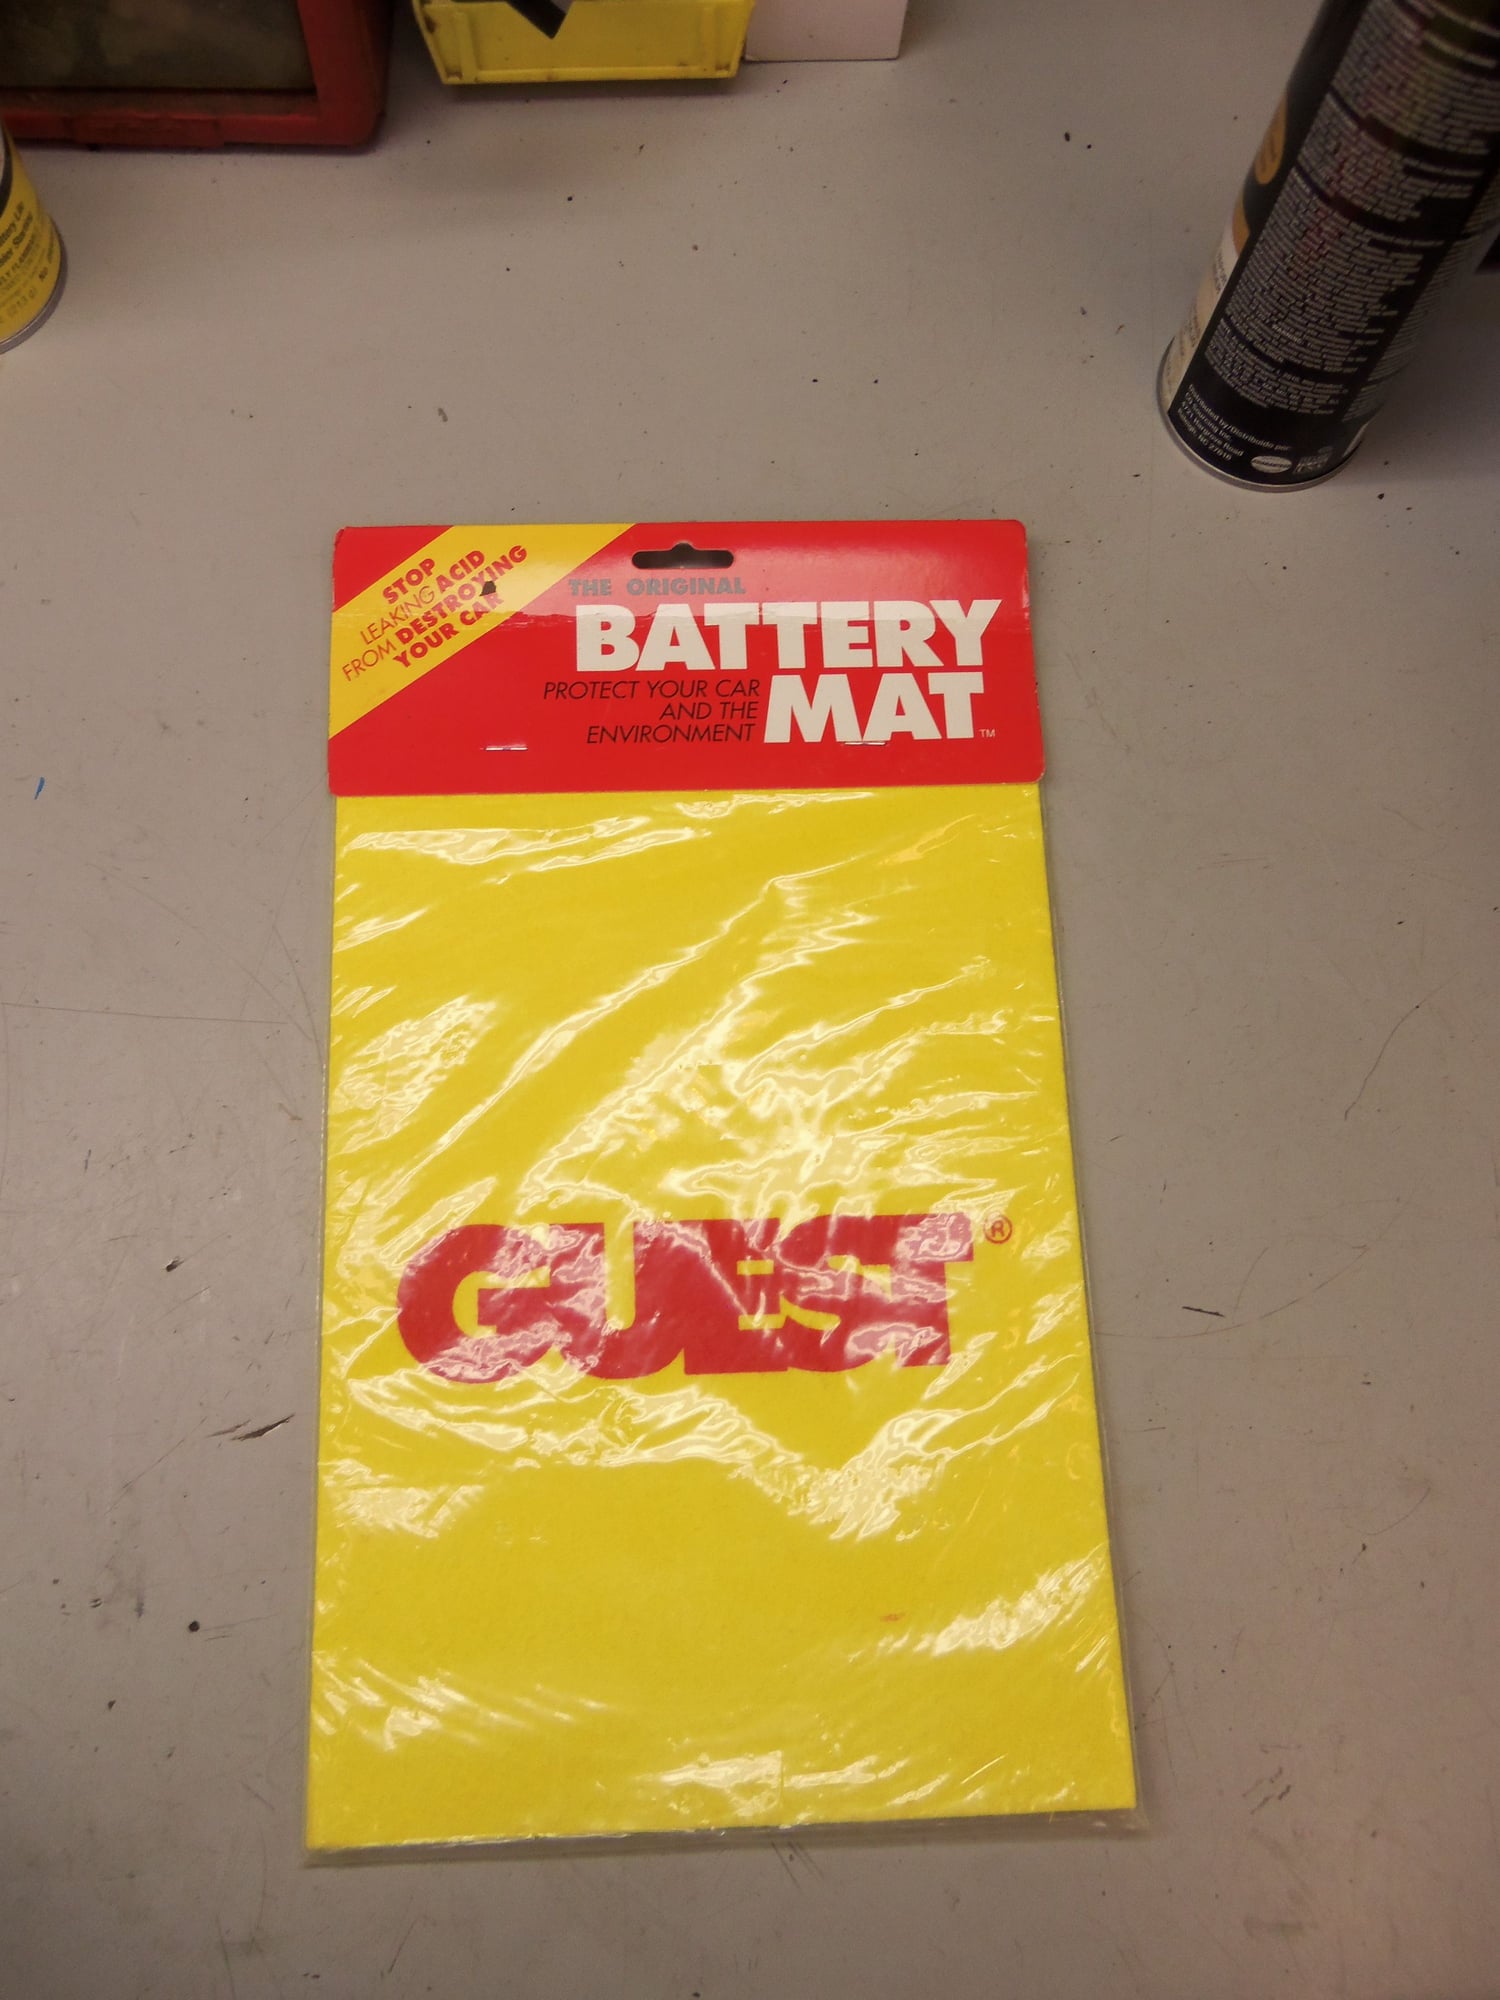
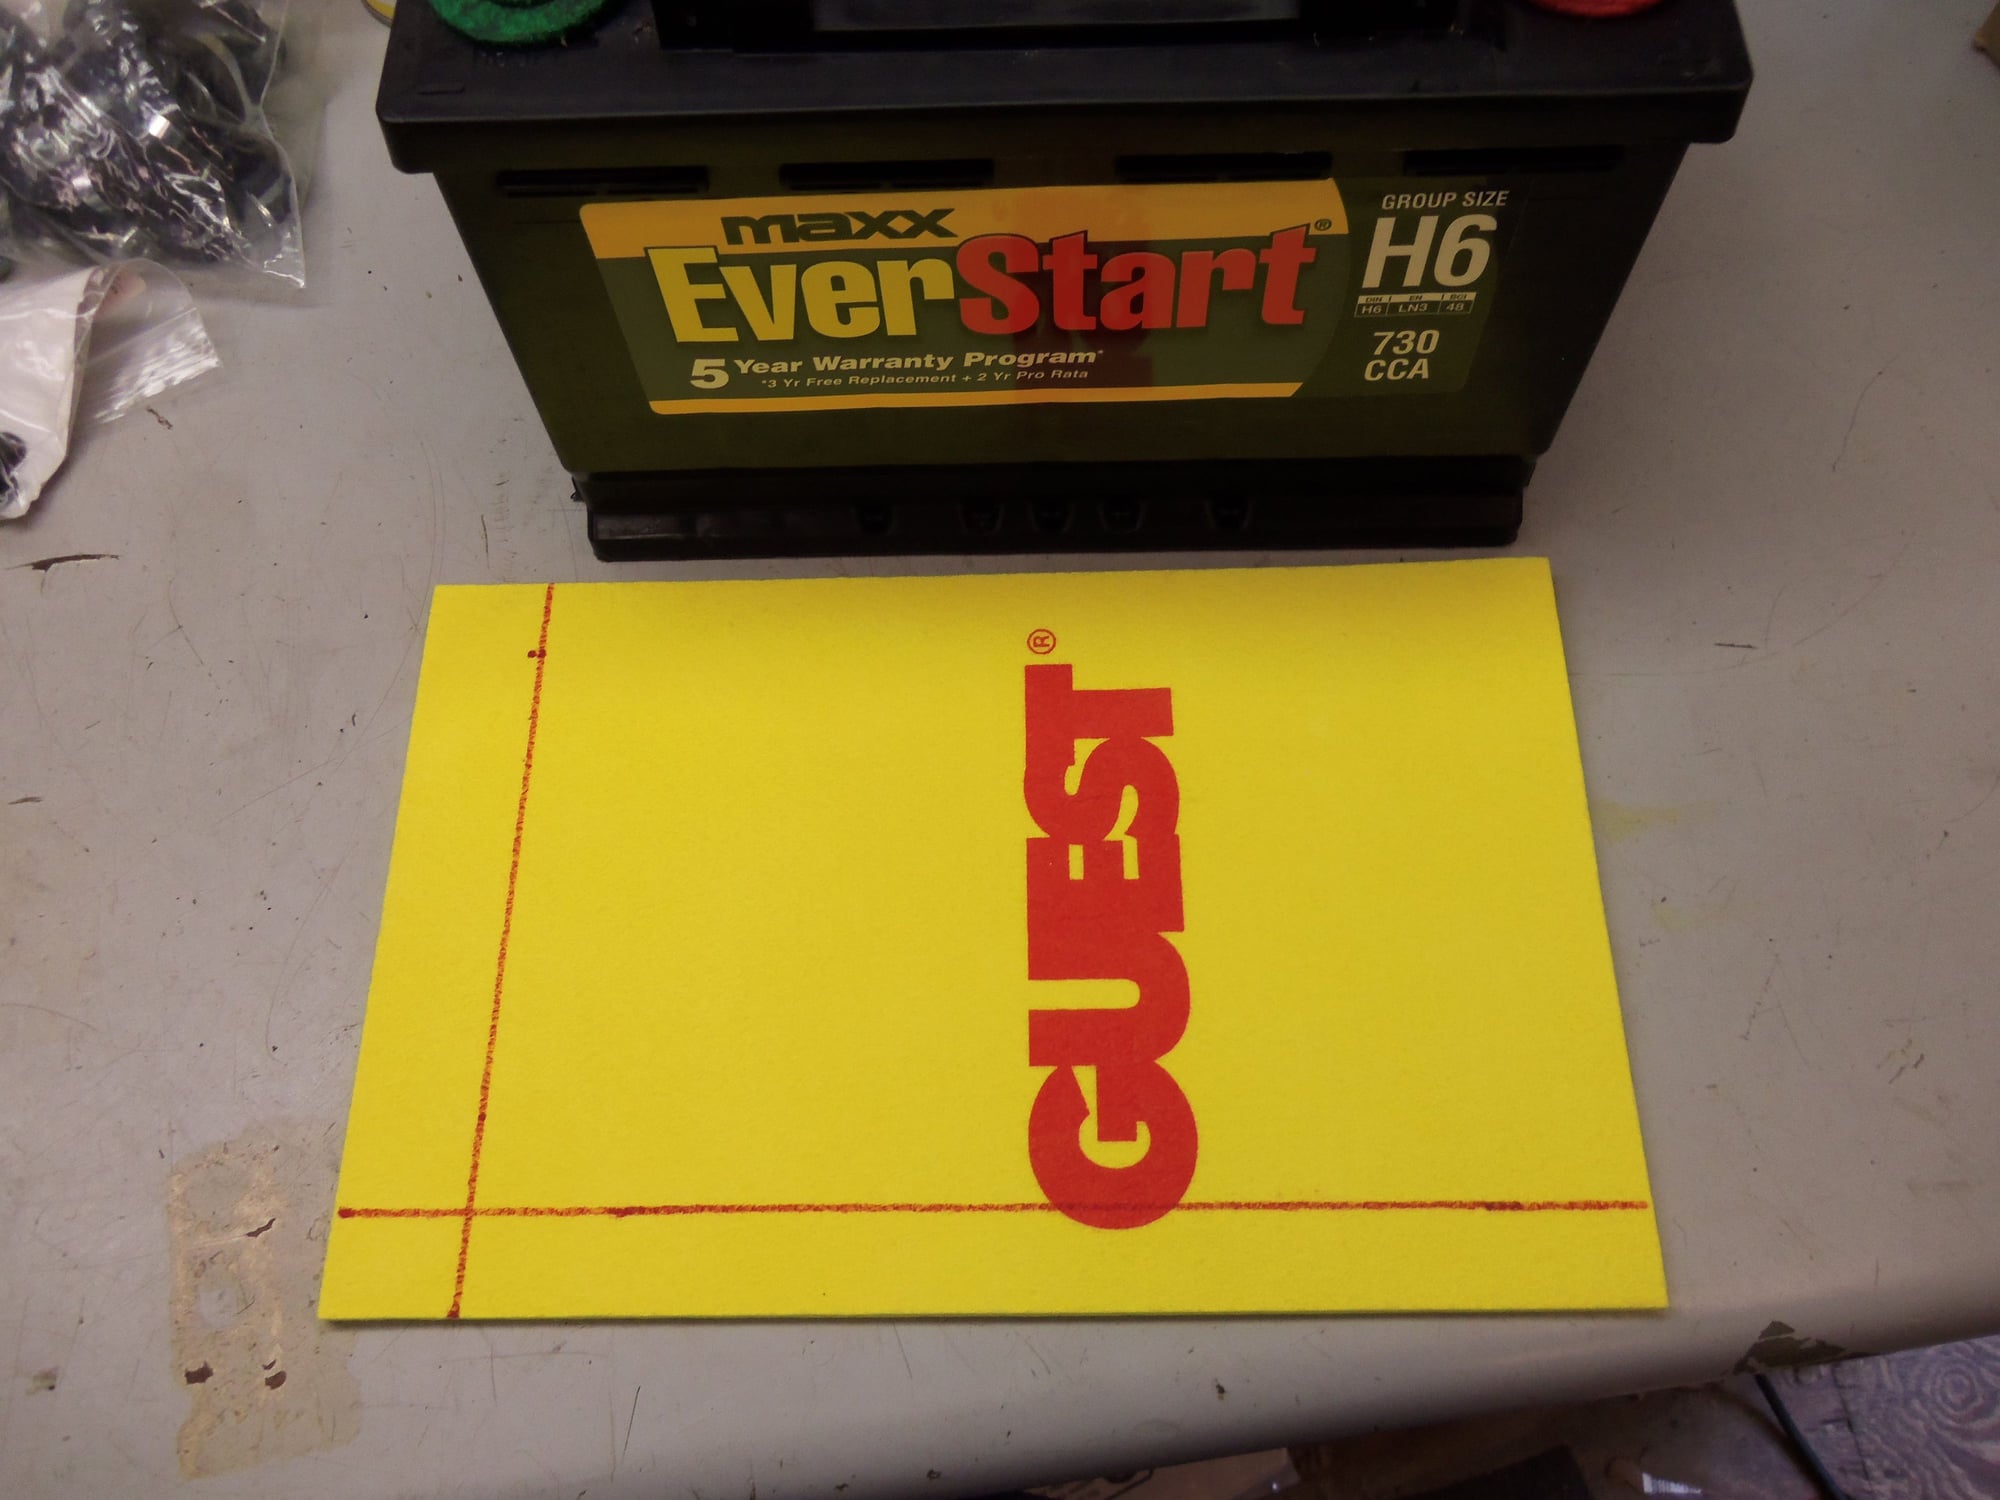
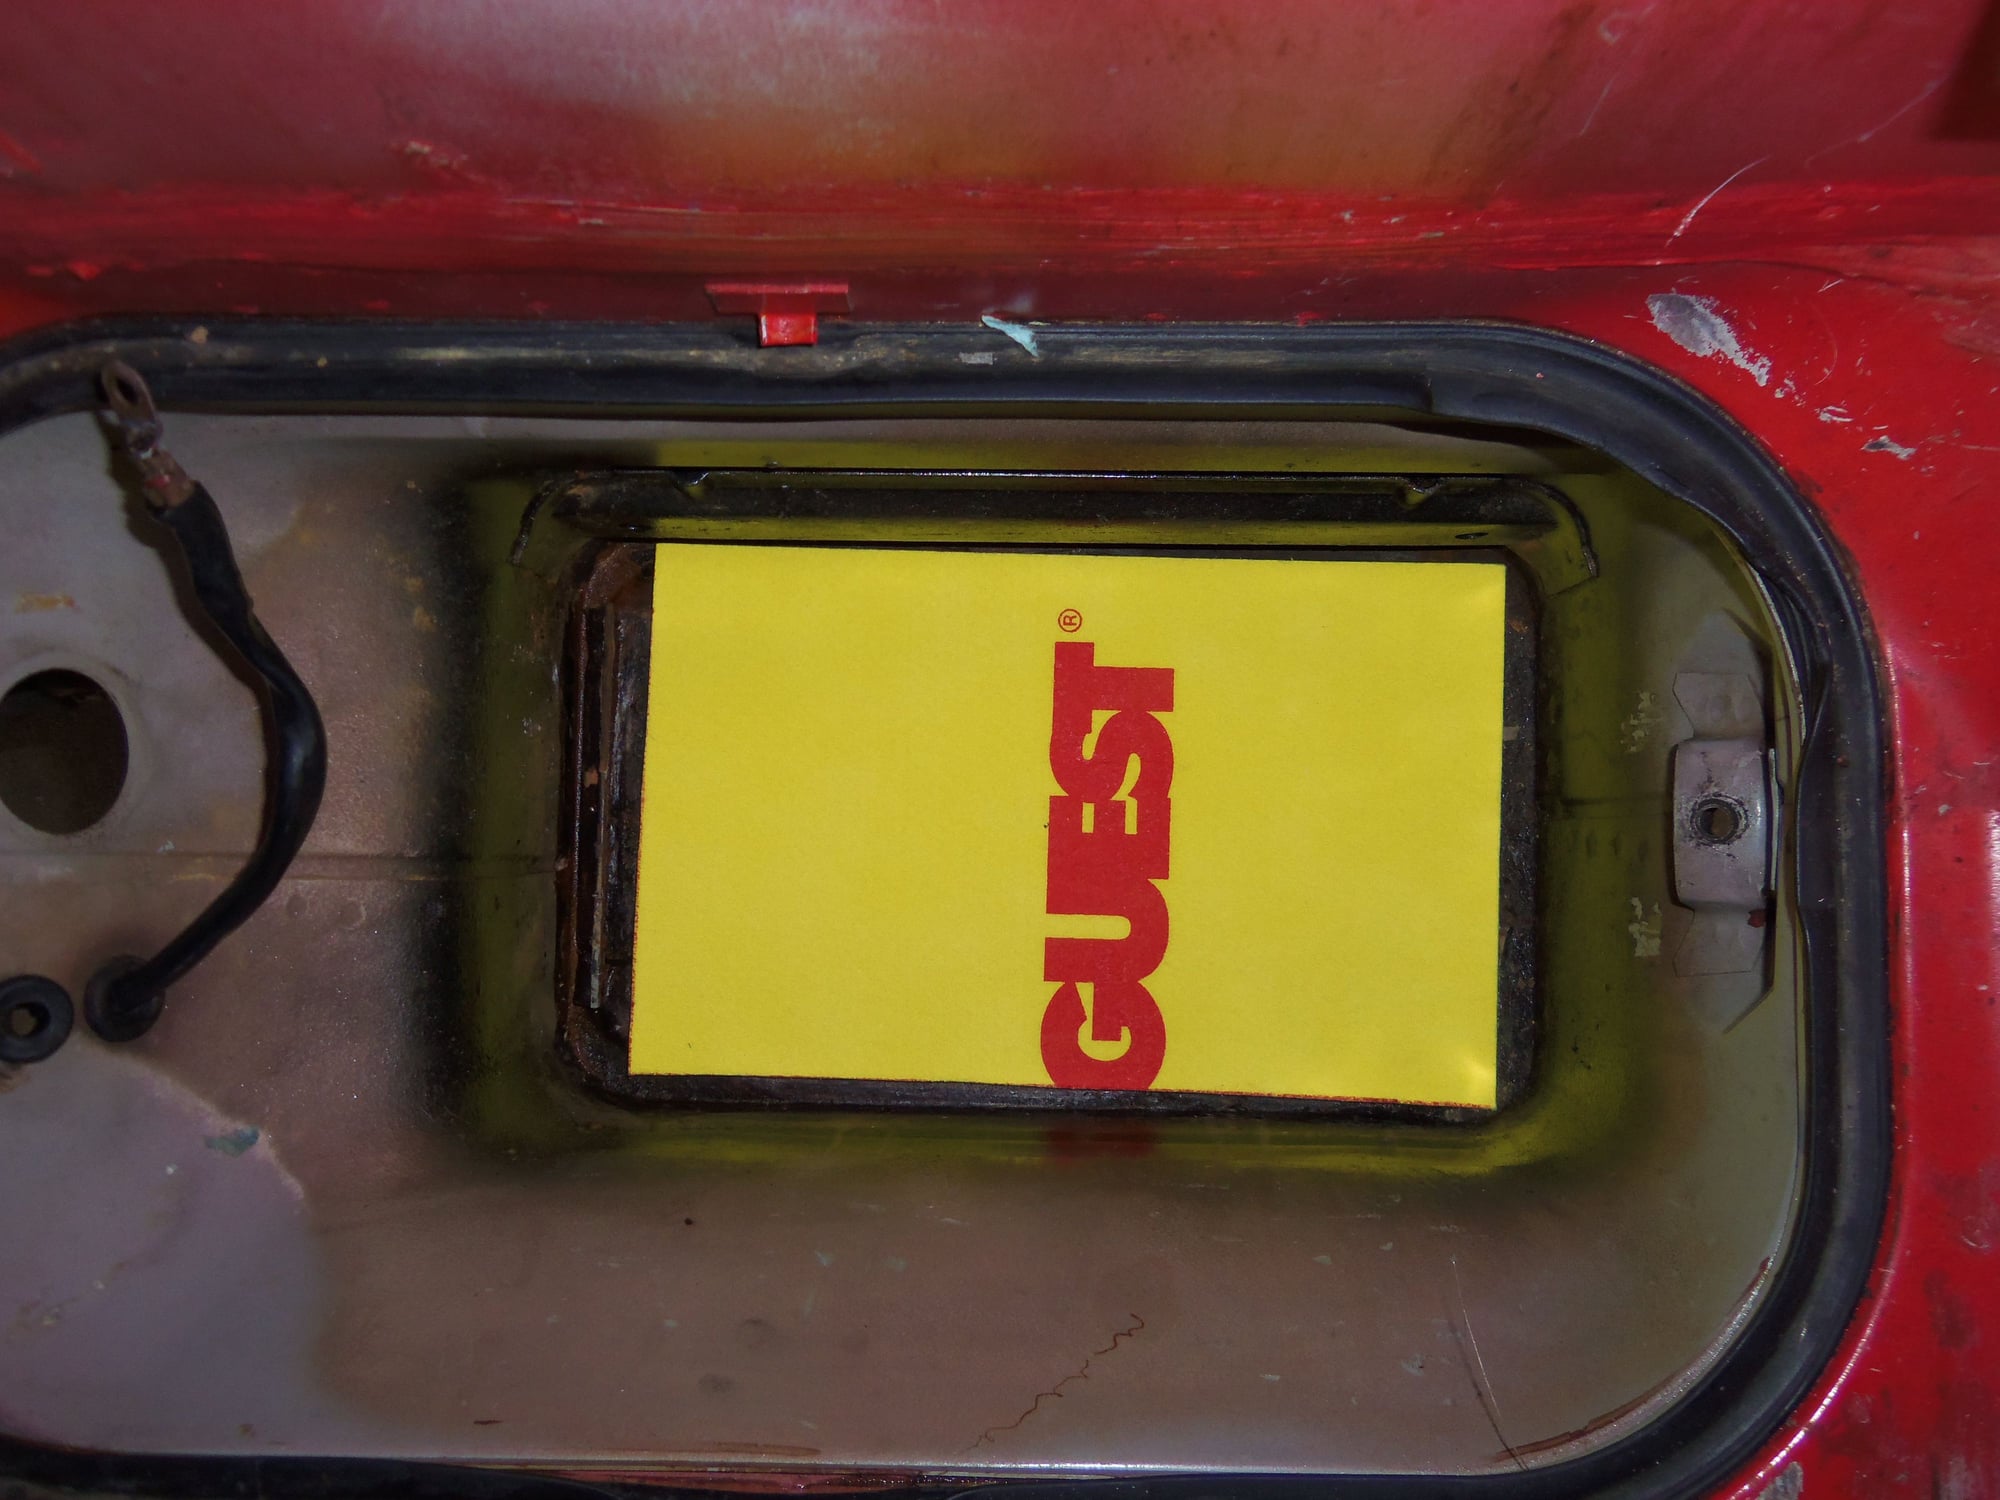
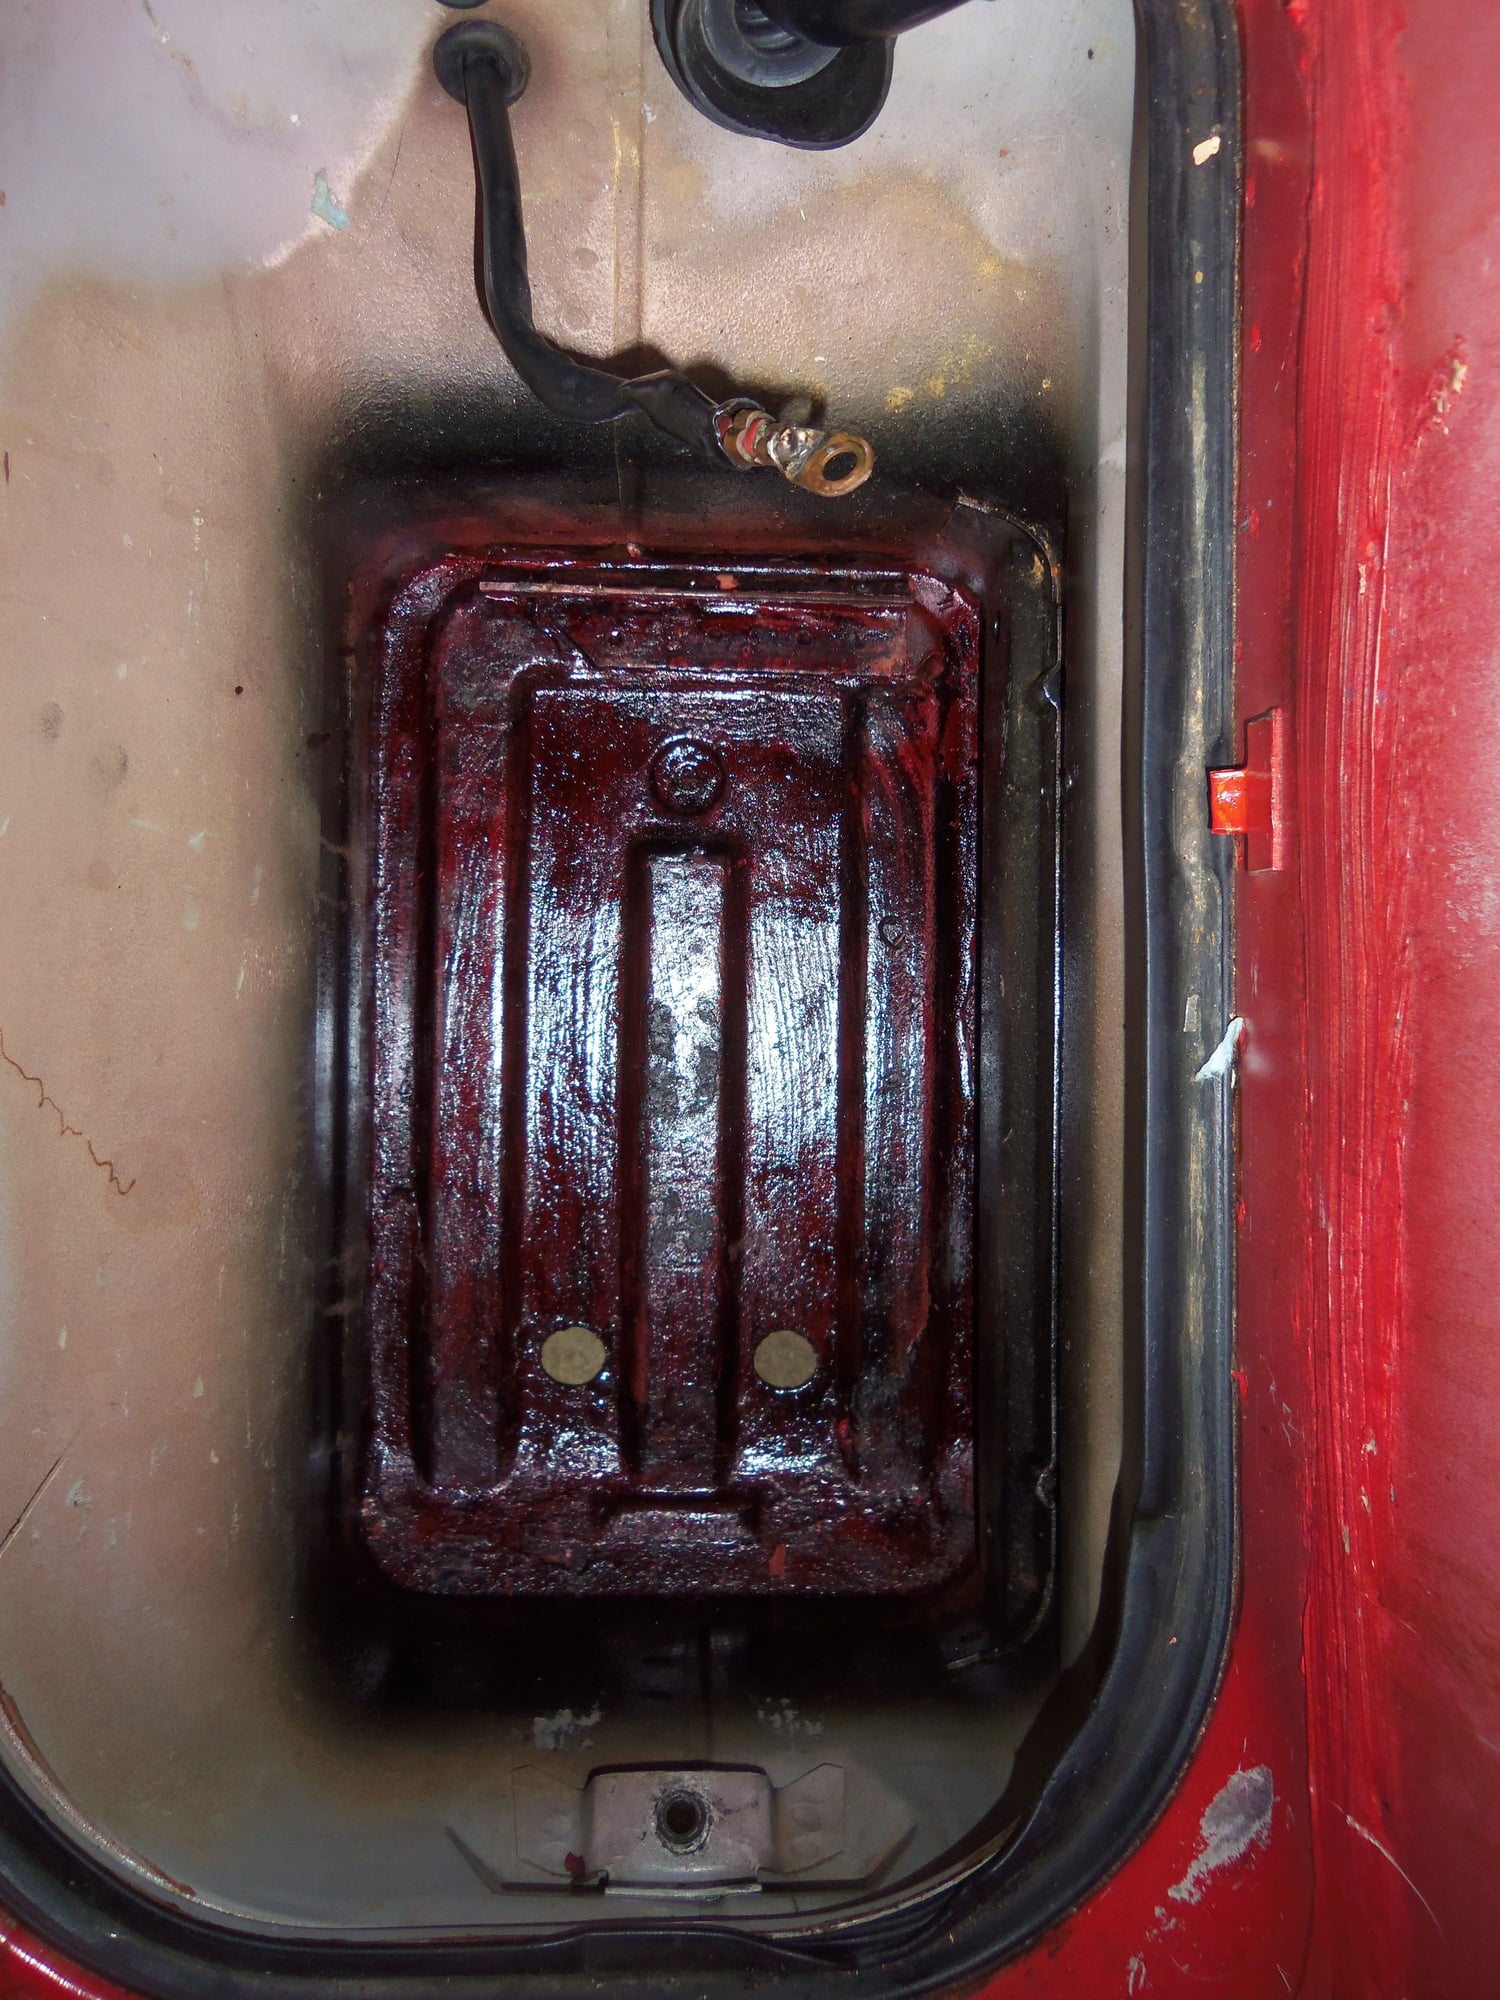
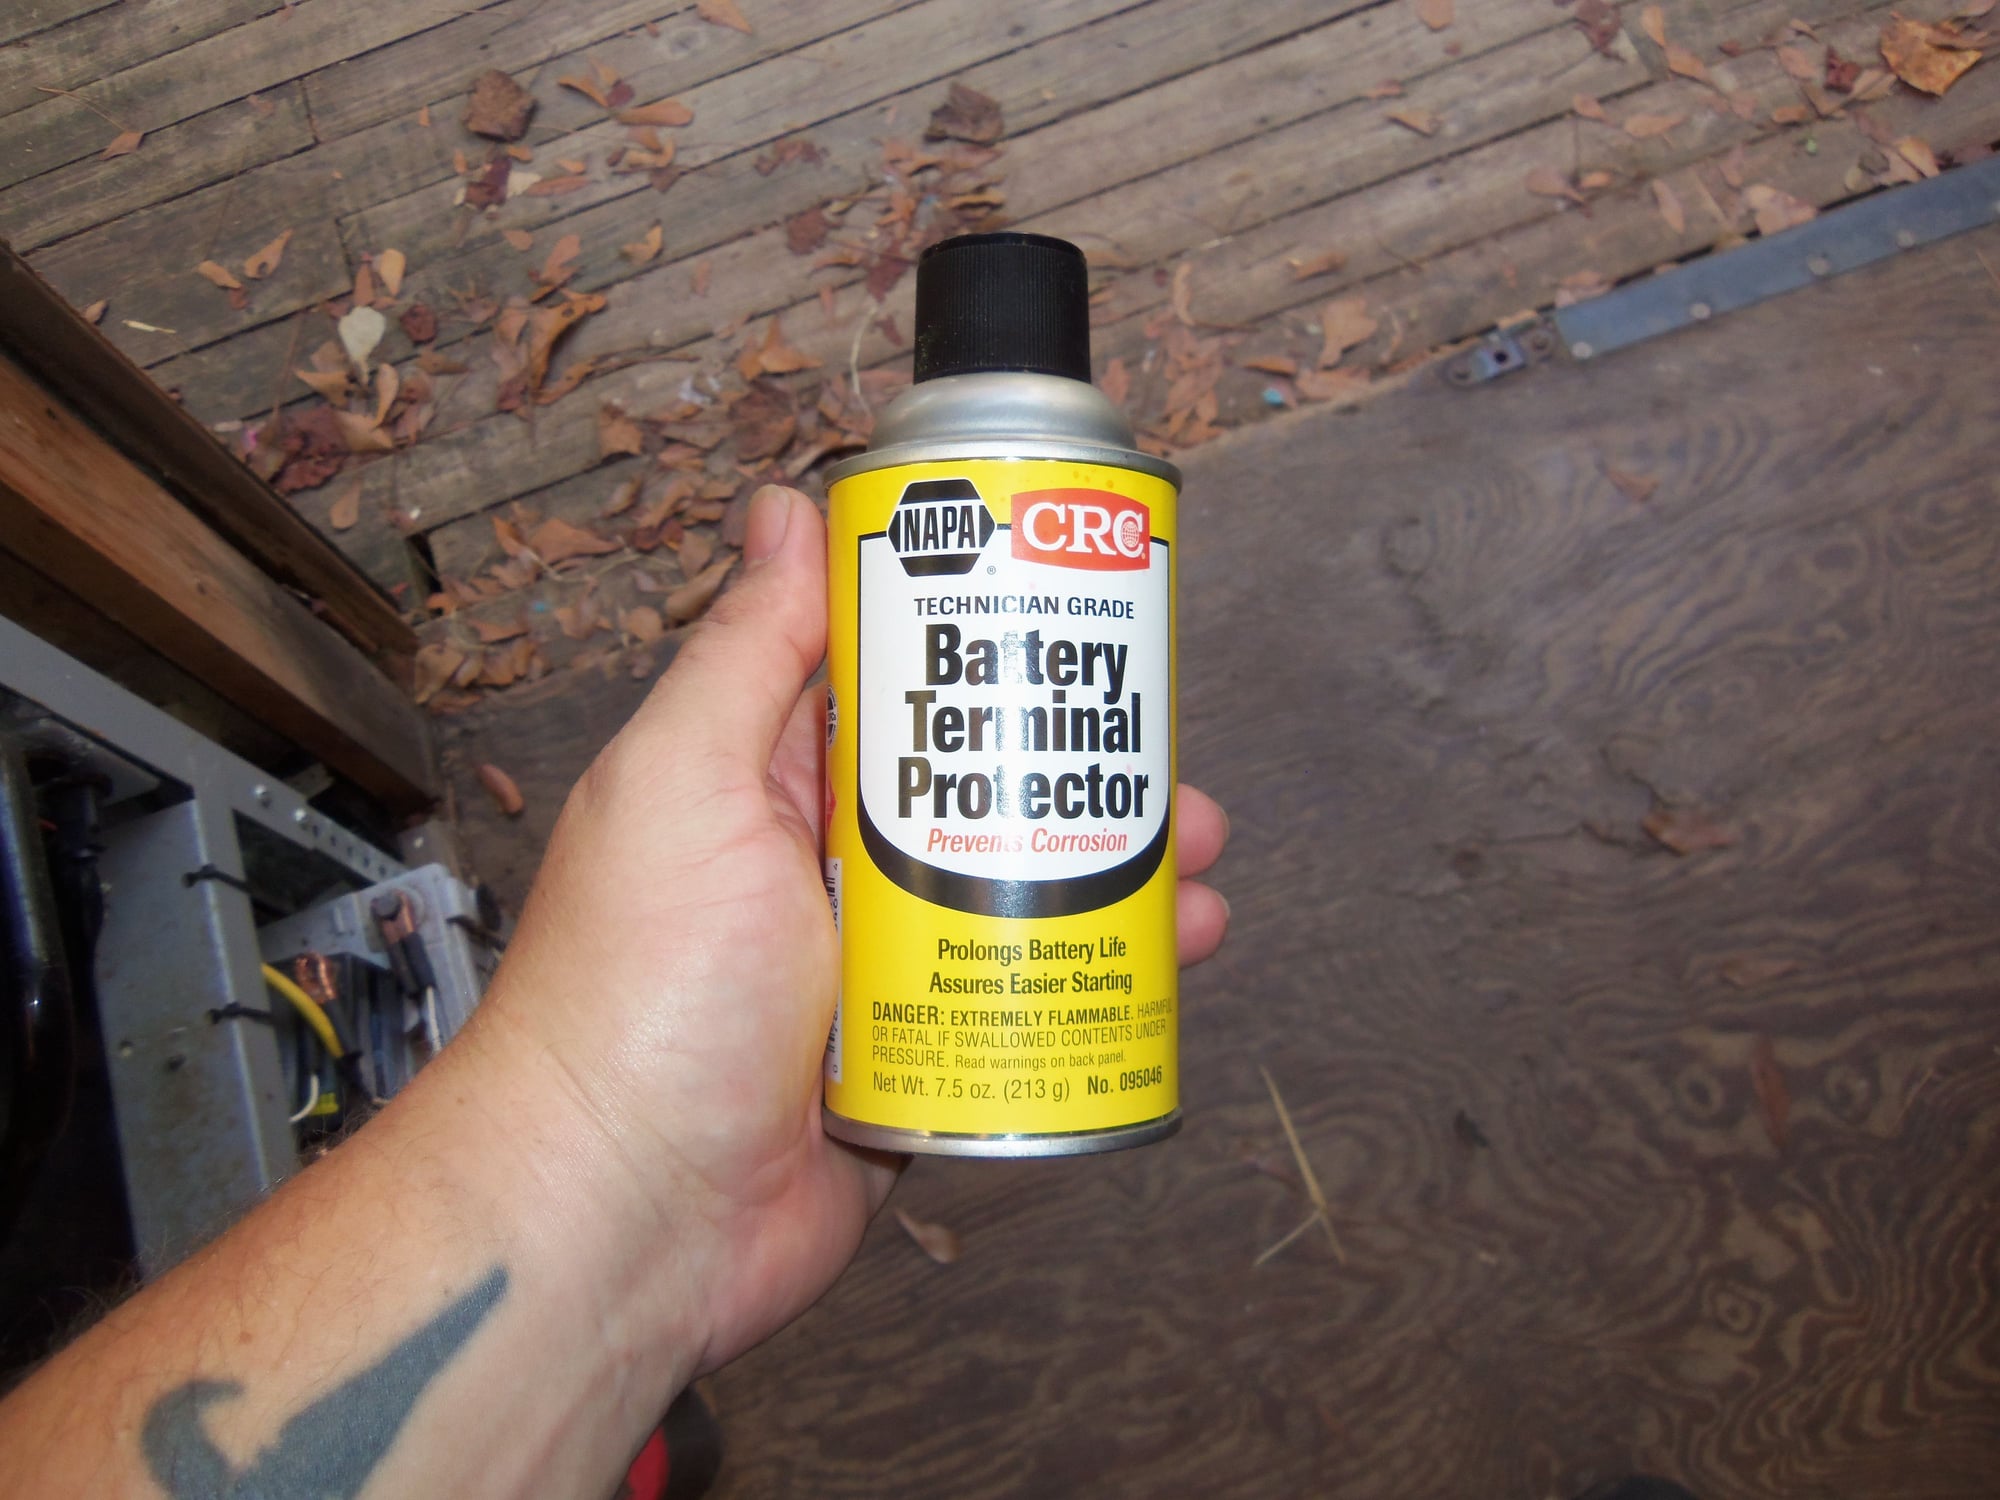
I cleaned the battery box twice with CRC spray foam Battery Cleaner and water. Once dried, I laid down a heavy coat of CRC Battery Terminal Protectant. Then, I put down a sheet of yellow Battery Mat. My intent is to keep the acid corrosion at bay. We shall see how it works...
I was able to use the Porsche distributing piece on the (+) battery terminal. It is quite convenient for attaching the other hot wire, and will be useful when I wire in the amp. I had to cut on the battery (+) terminal cover to get it to fit. I may get some thin sheet rubber to put over the edge of the distributing piece.
Initial checks looked good. 12.56VDC at the battery, 12.55VDC at the jump post. Starter pulled in cleanly and rolled the engine over with no problem. With the engine running, I saw 13.99VDC at the jump post and 13.97VDC at the battery. Instrument voltmeter read approximately 13.5VDC.
I am very pleased!
And..the neighbors LOVE open headers on a Sunday afternoon.
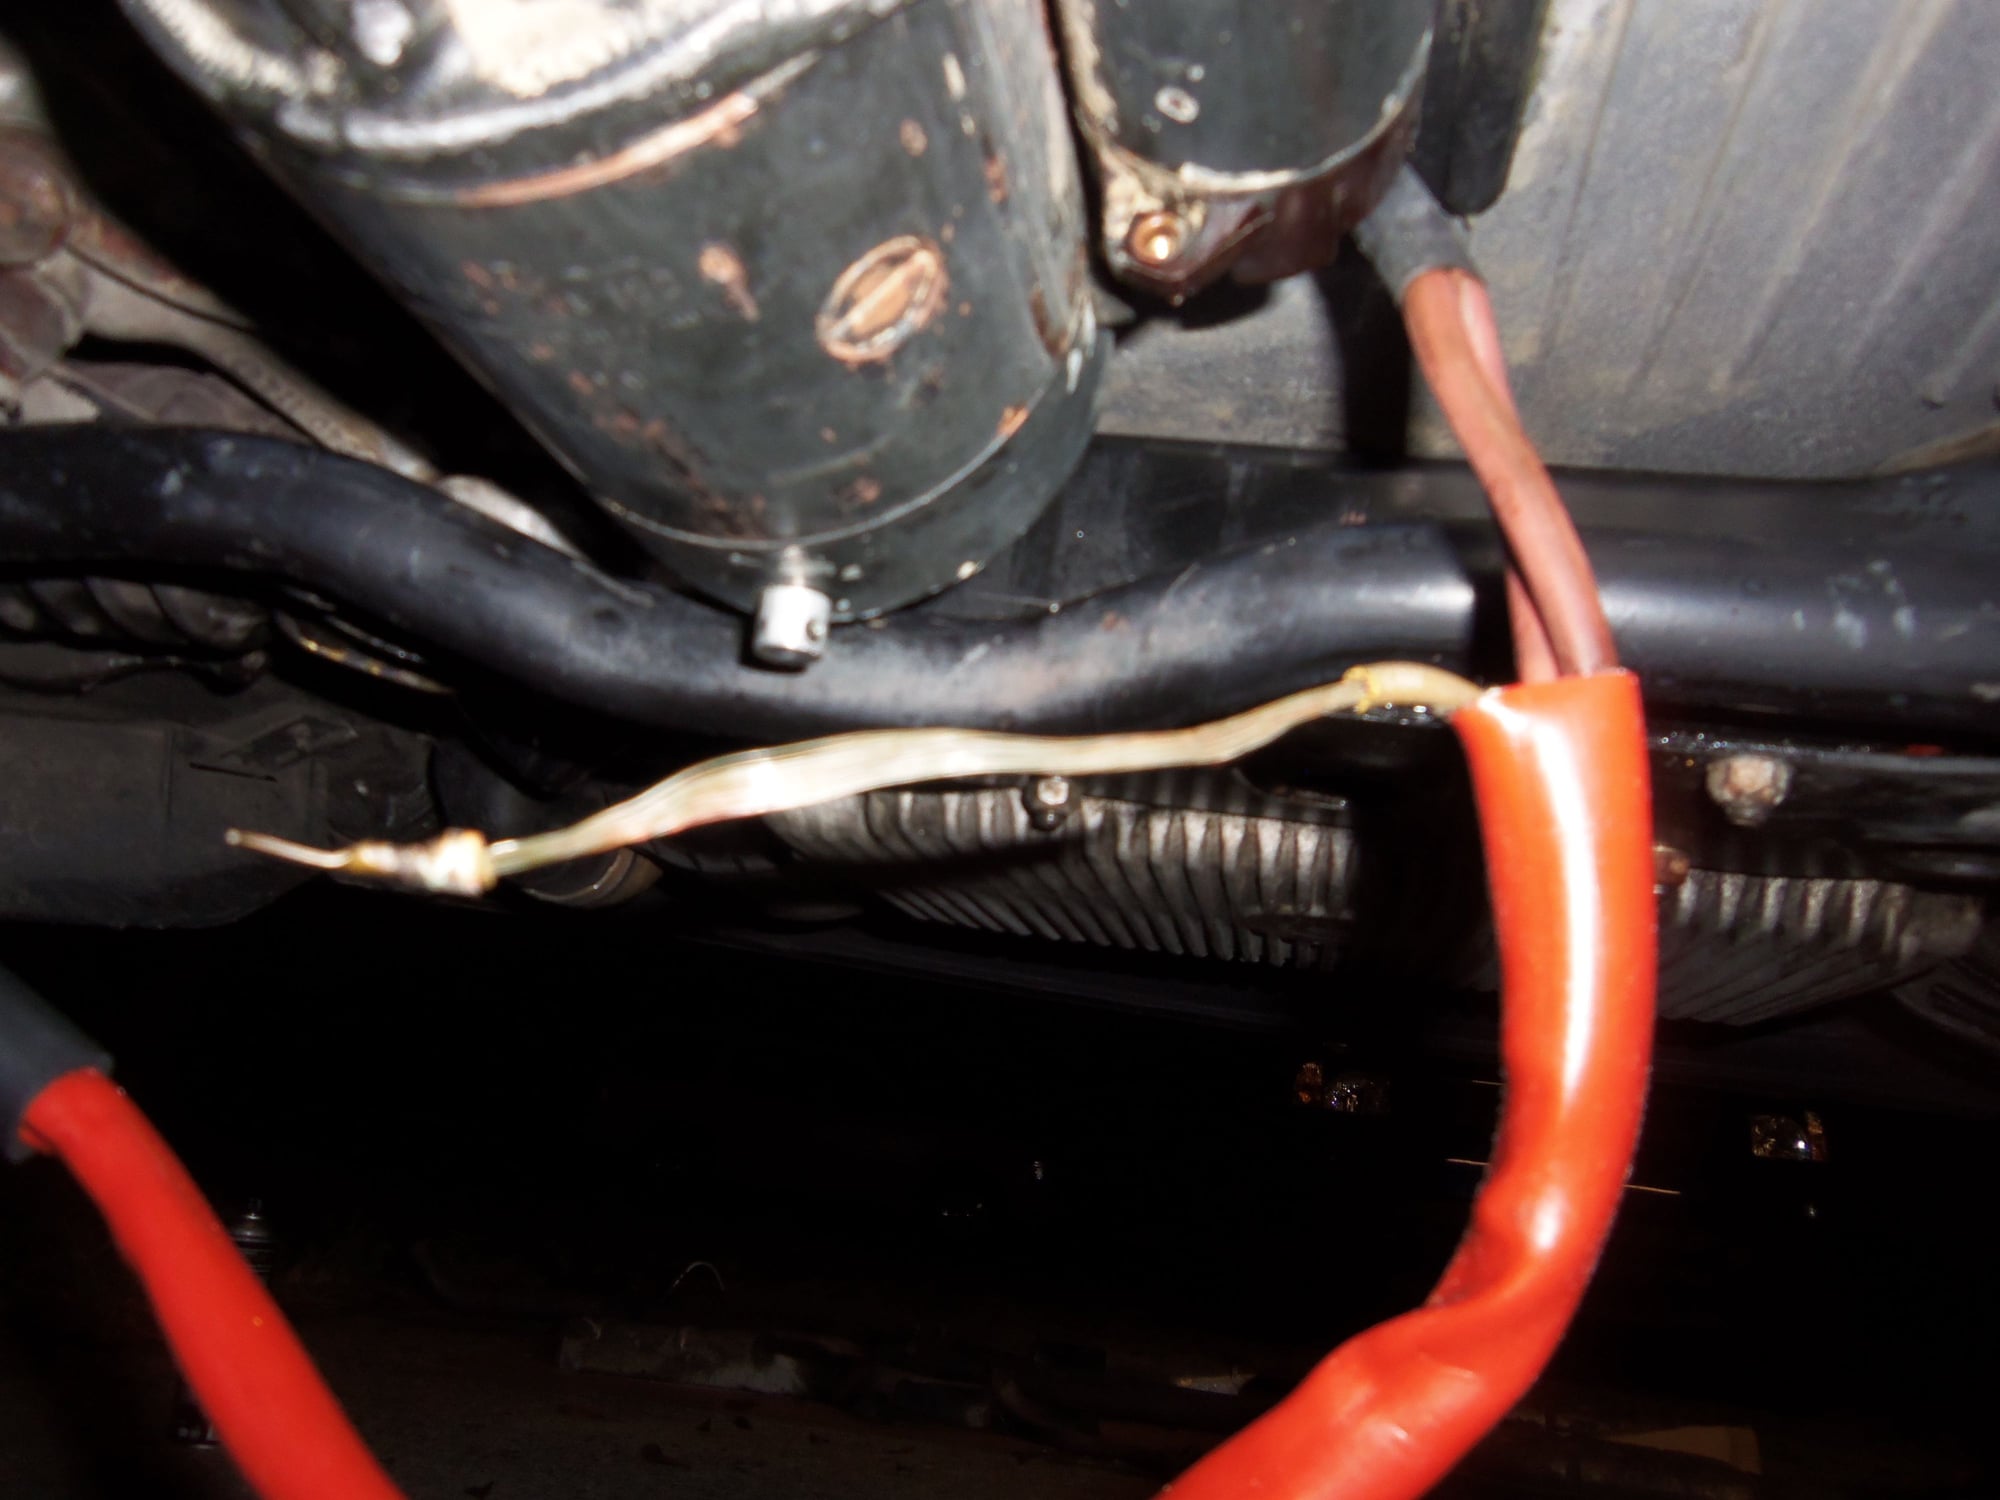
I did find a couple of issues. The yellow starter solenoid wire is sh*t. The insulation is brittle and the conductors are corroded inside. I pulled off the insulation, cut off three broken strands, and gave the conductors a lethal coat of DeOxit 100. It bubbled nicely. I covered the conductors in two layers of heat shrink tubing. Best I can do for now. When I replace the alternator, I will see what I can do about routing a new yellow wire.
The cable from the starter solenoid to the body of the starter is badly corroded. Looks like rust. I did not mess with it too much for fear of getting crud into the starter. I have another cleaned starter ready to go. However, due to collapsed motor mounts, I will need to remove the front anti-sway bar for clearance to remove the starter. Not quite ready to do that at this moment. In due time.
While spending quality time under the Red Witch, I worked on the transmission again.
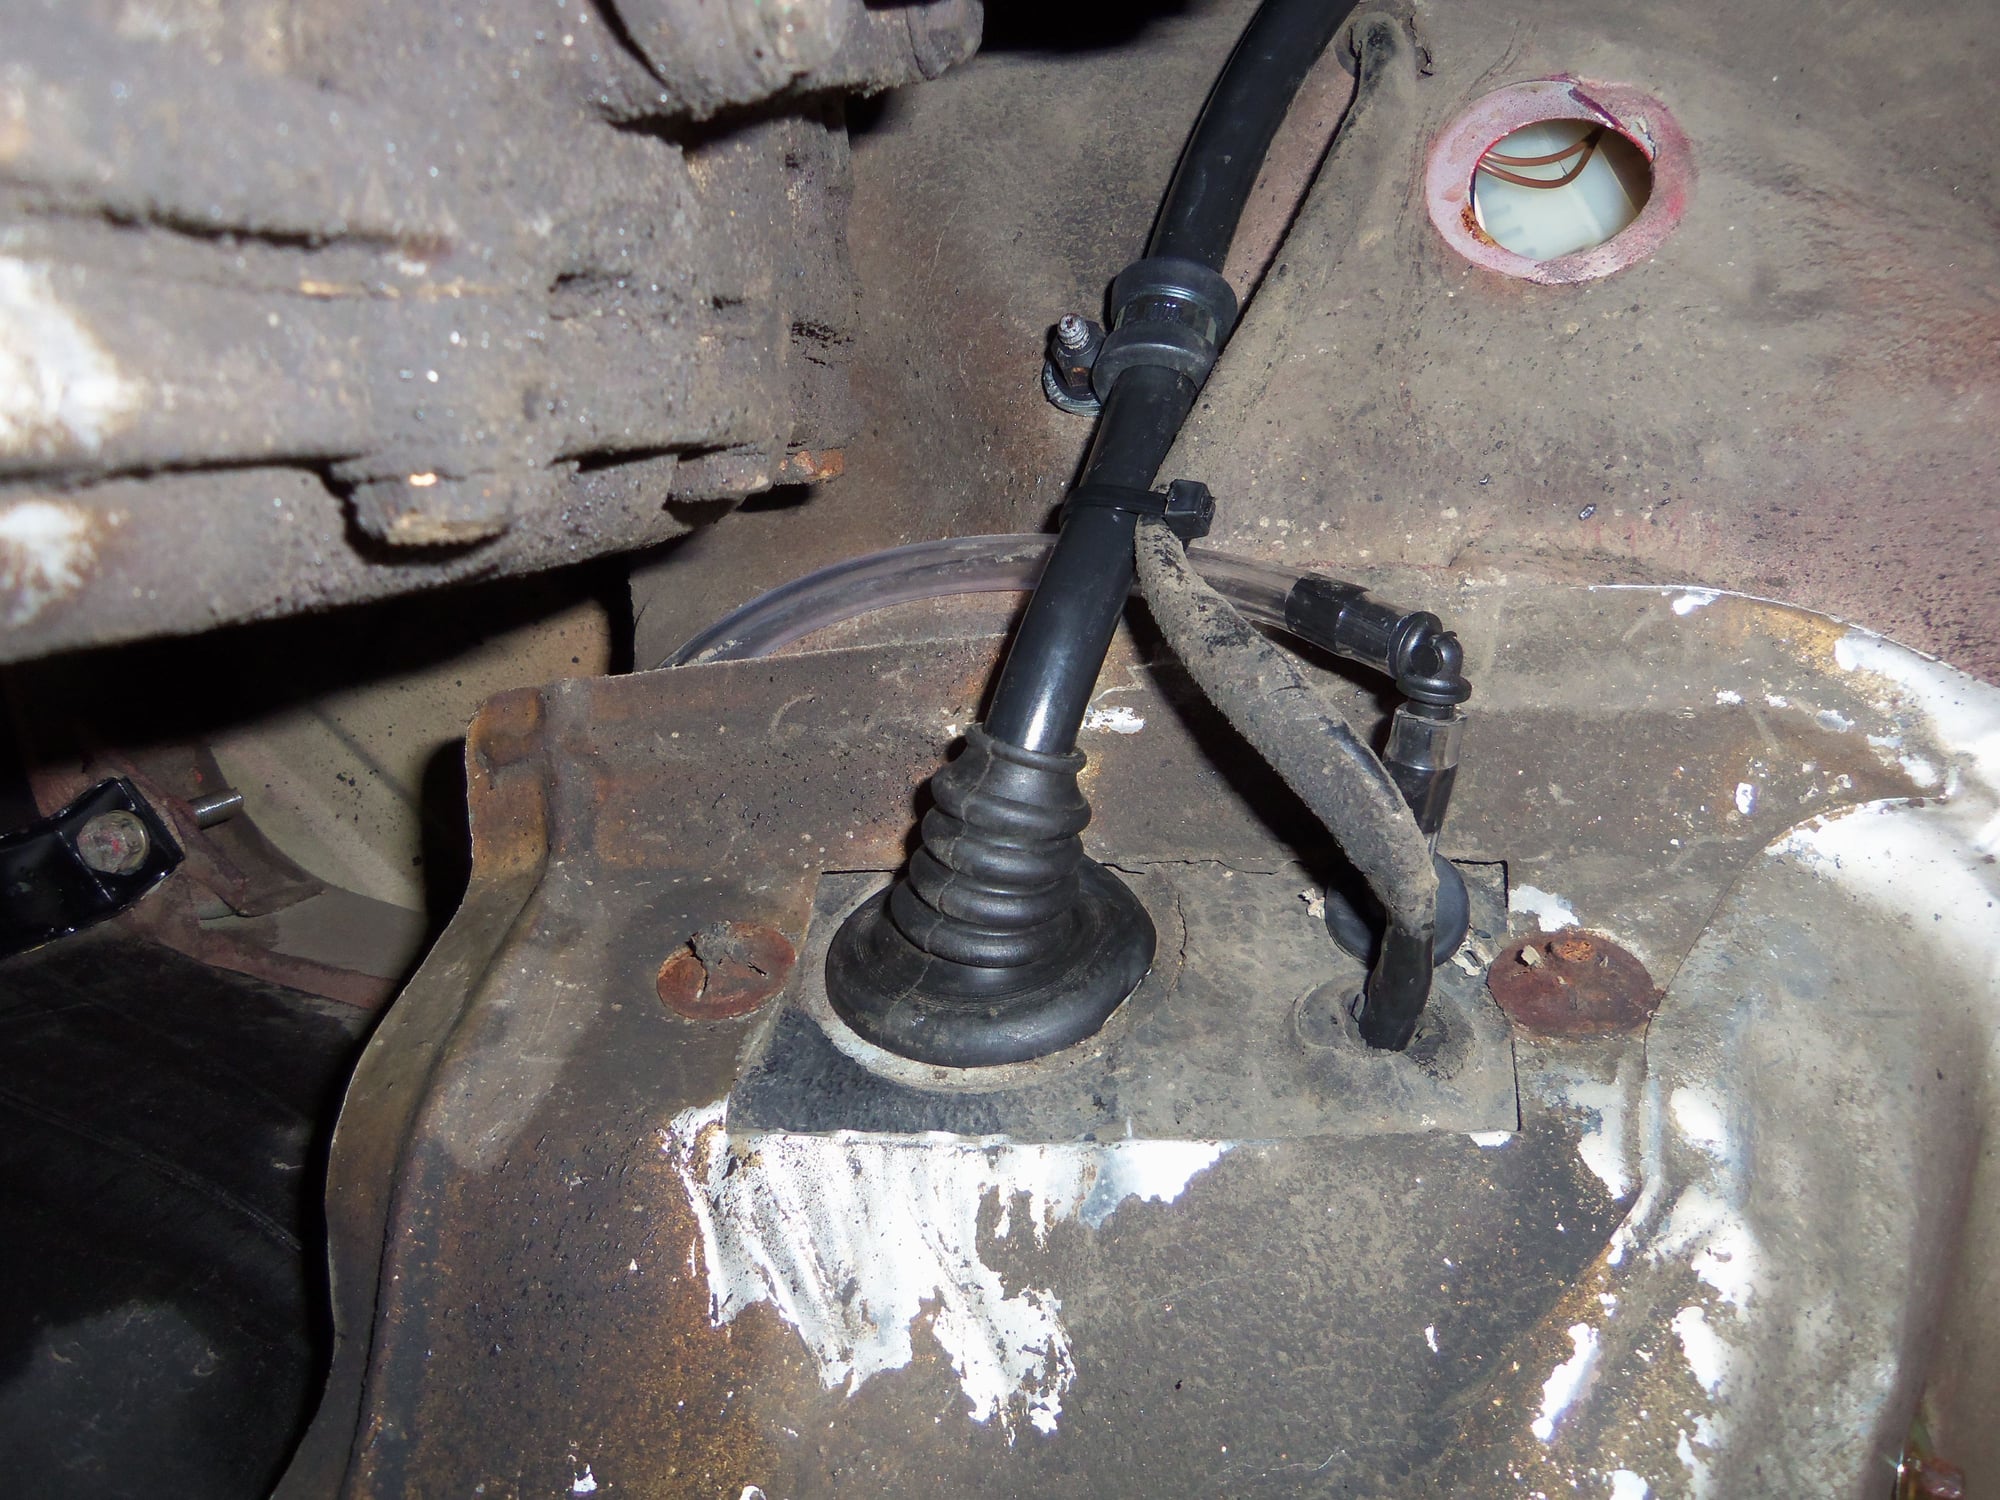
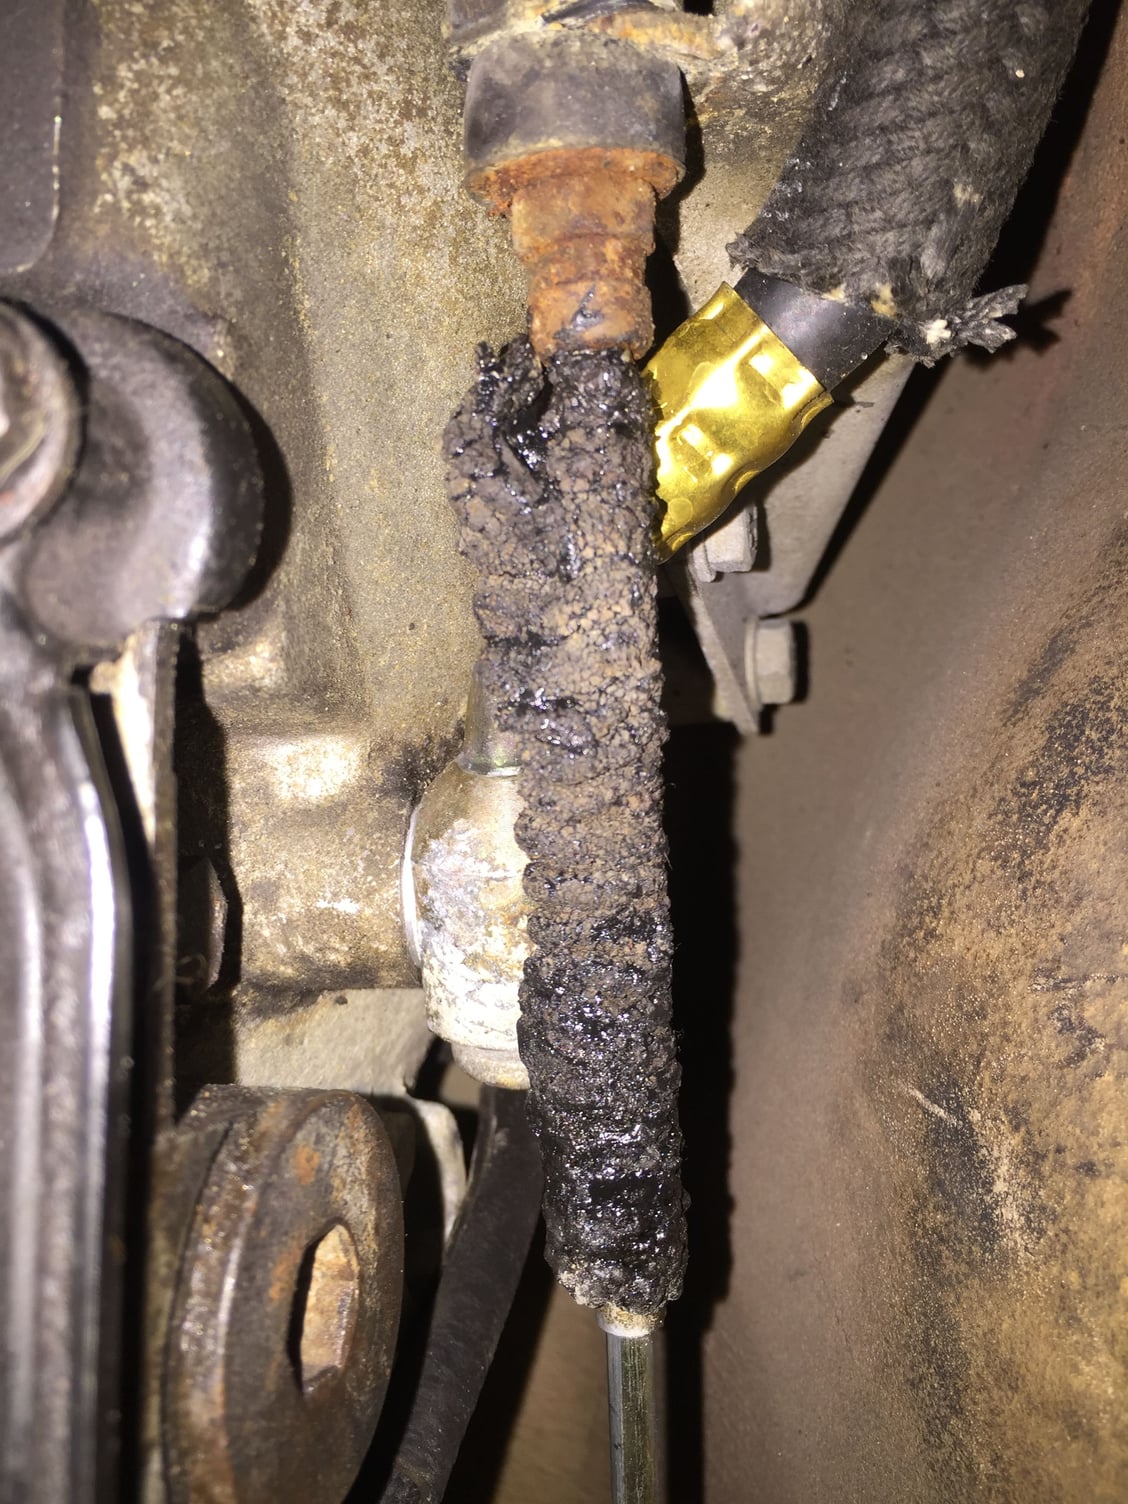
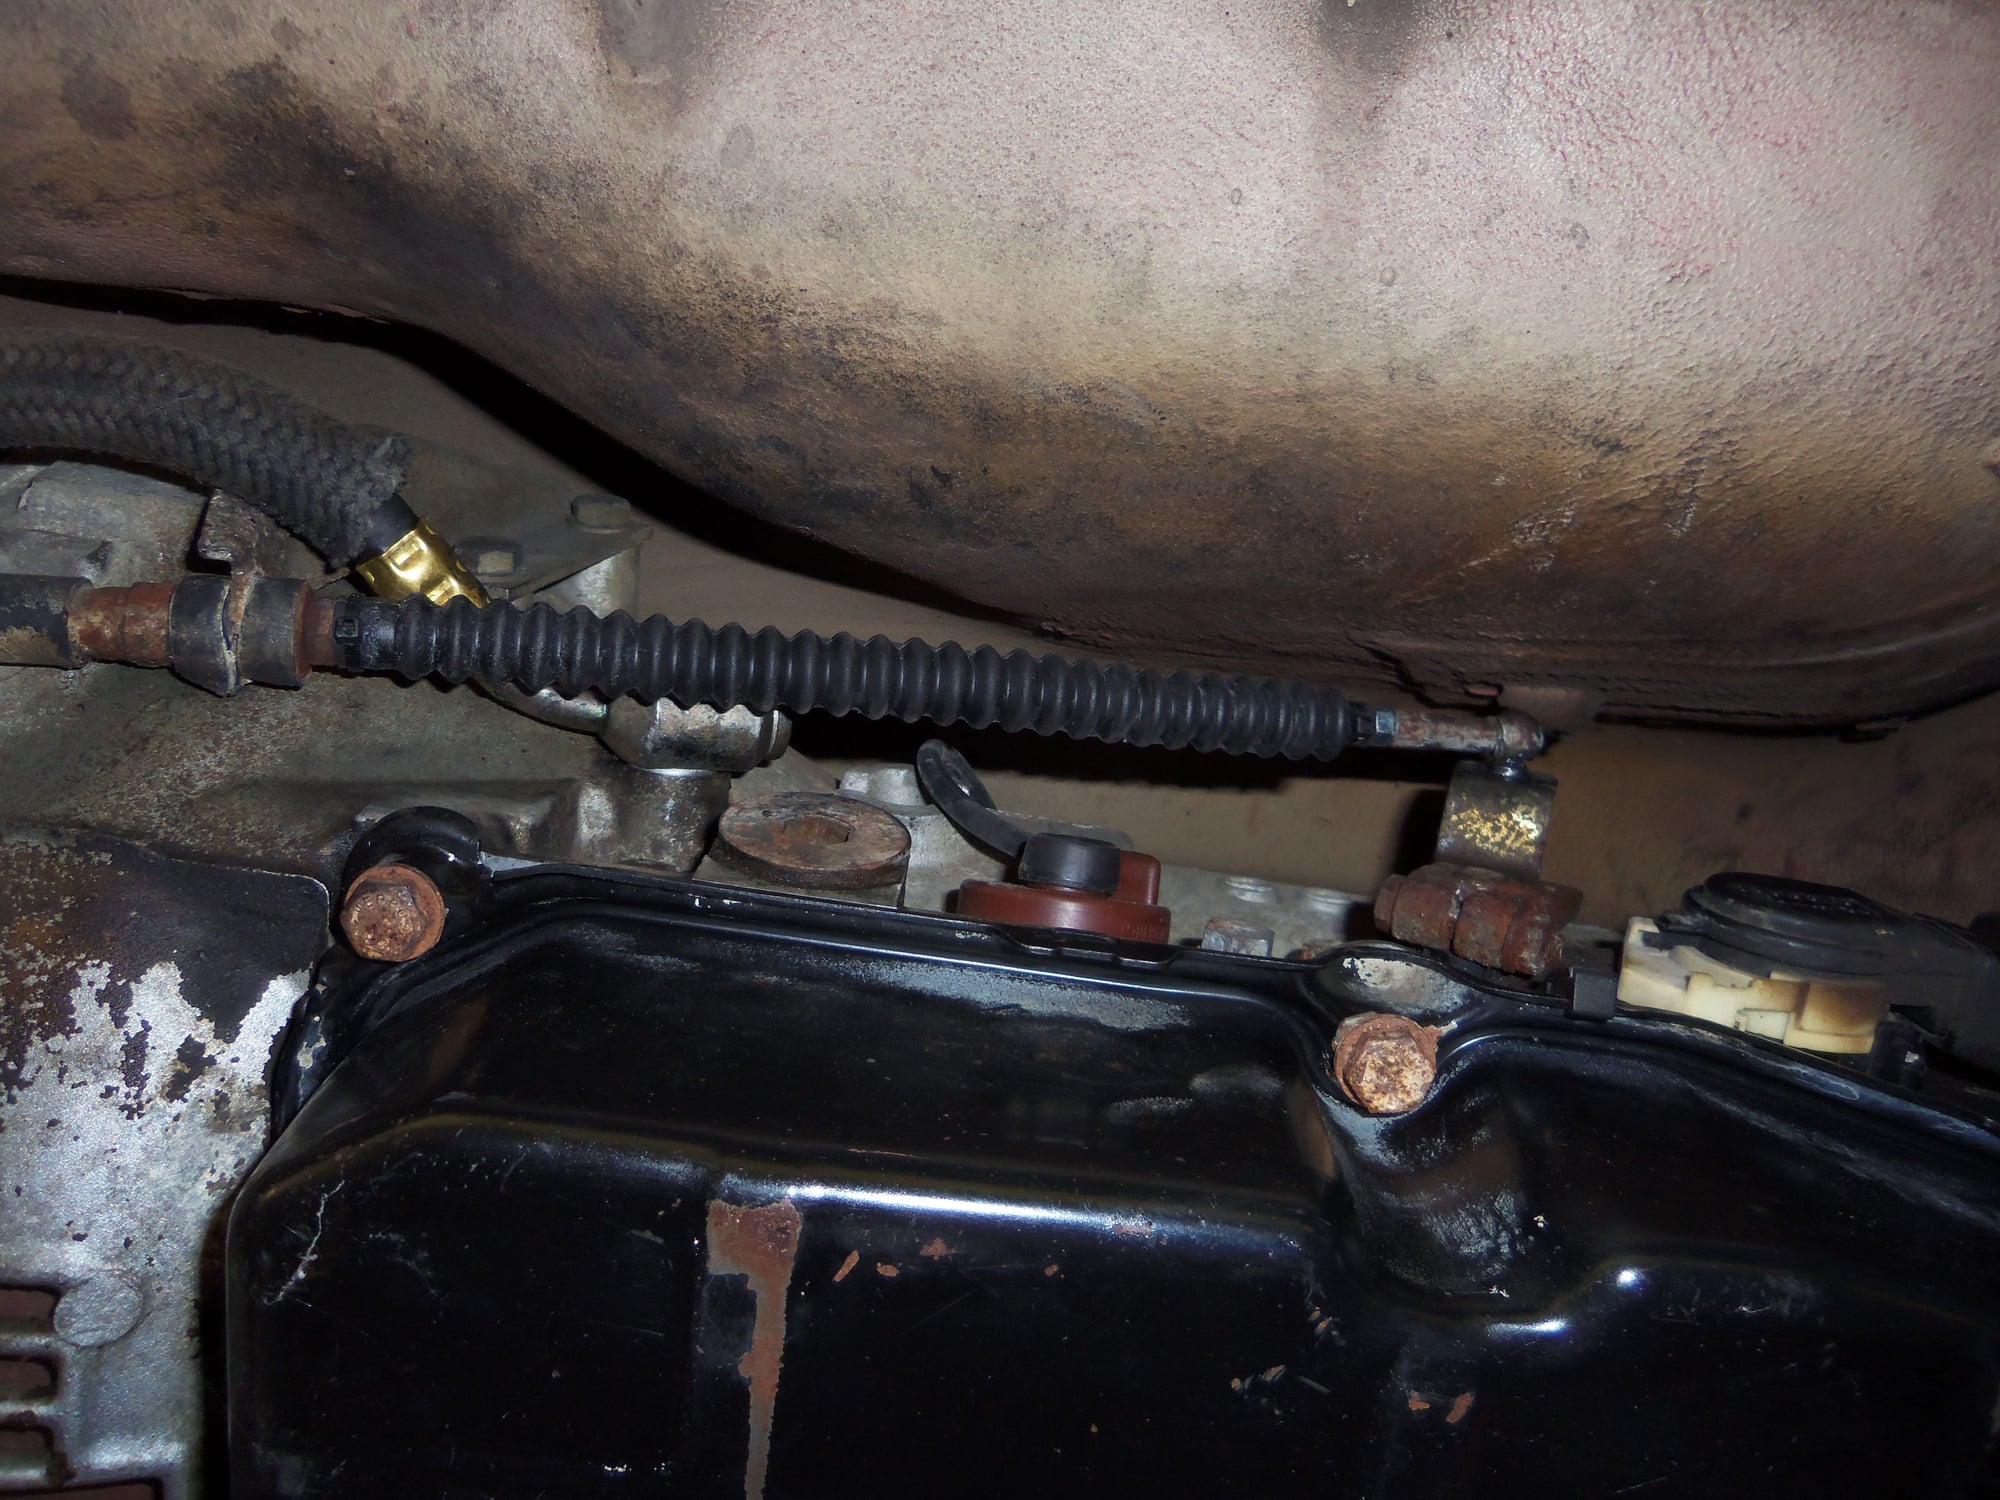
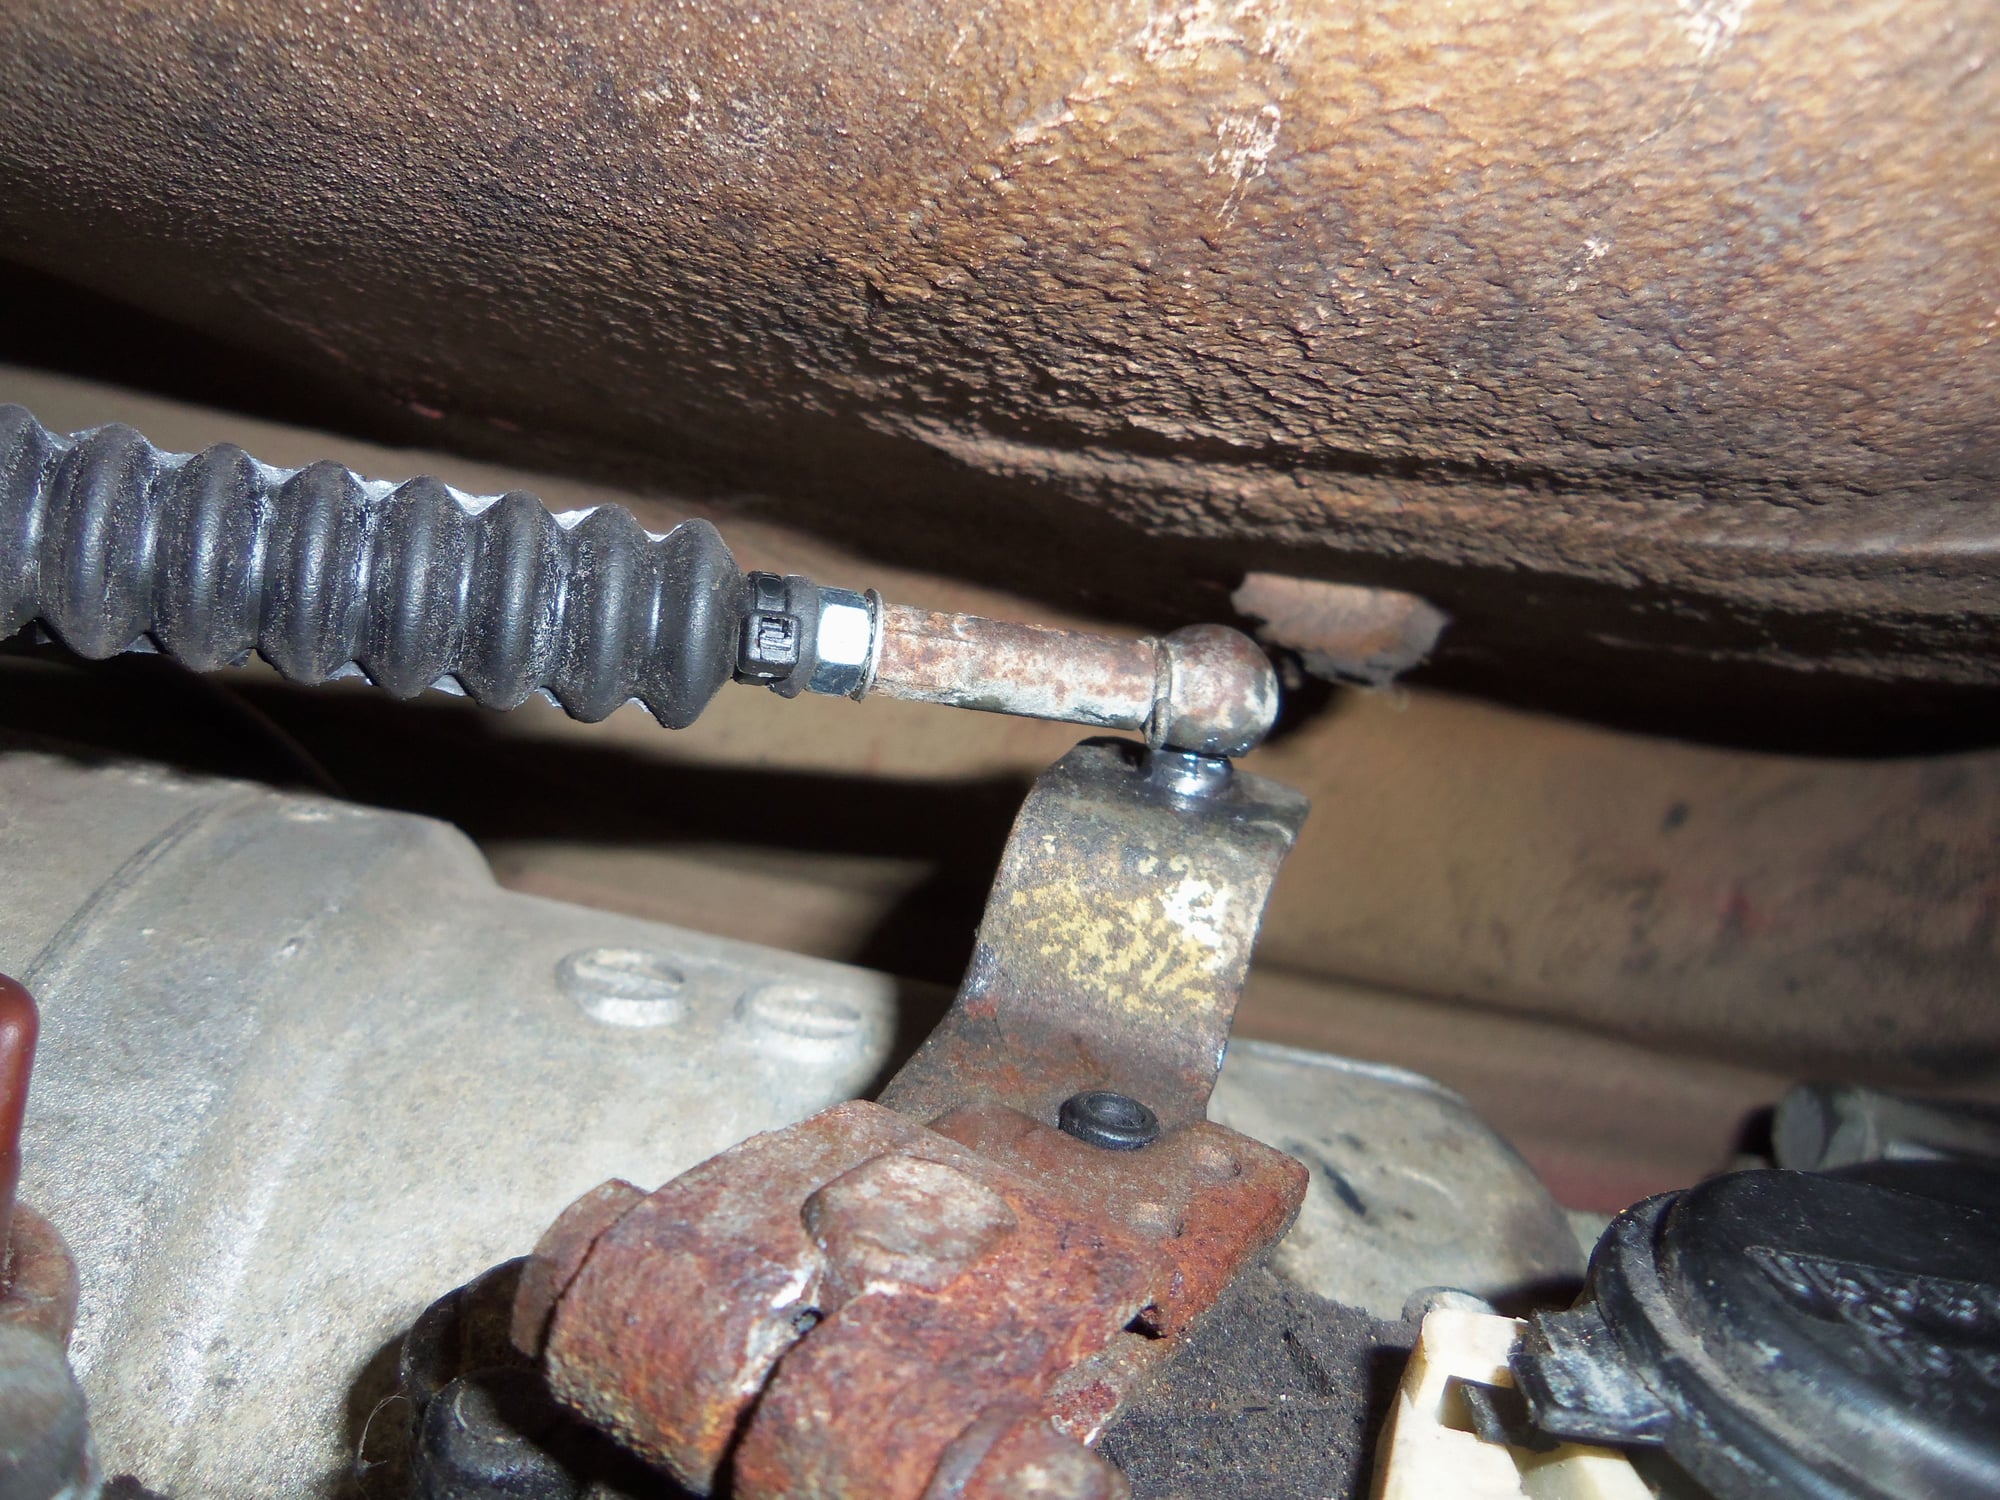
I replaced the crusty remains of the non-existent shift cable boot at the transmission. Mineral spirits, a coarse rag, and elbow grease cleaned the crud from the cable.
Fitting the tiny locking clip back into/onto the ball end of the cable was an absolute beyatch. I found no way to install it after the end was on the ball. Then, I figured out how to insert the pin into the first hole, just enough, then hold the whole thing with my finger. I kept the clip tight against the end as I installed it on the ball. Then it was just a matter of wiggling the clip to engage the other hole at the end of the ball end.
Good thing I figured out that trick, as I had to take it all back apart. The lock nut was stripped.
Crusty old boot.
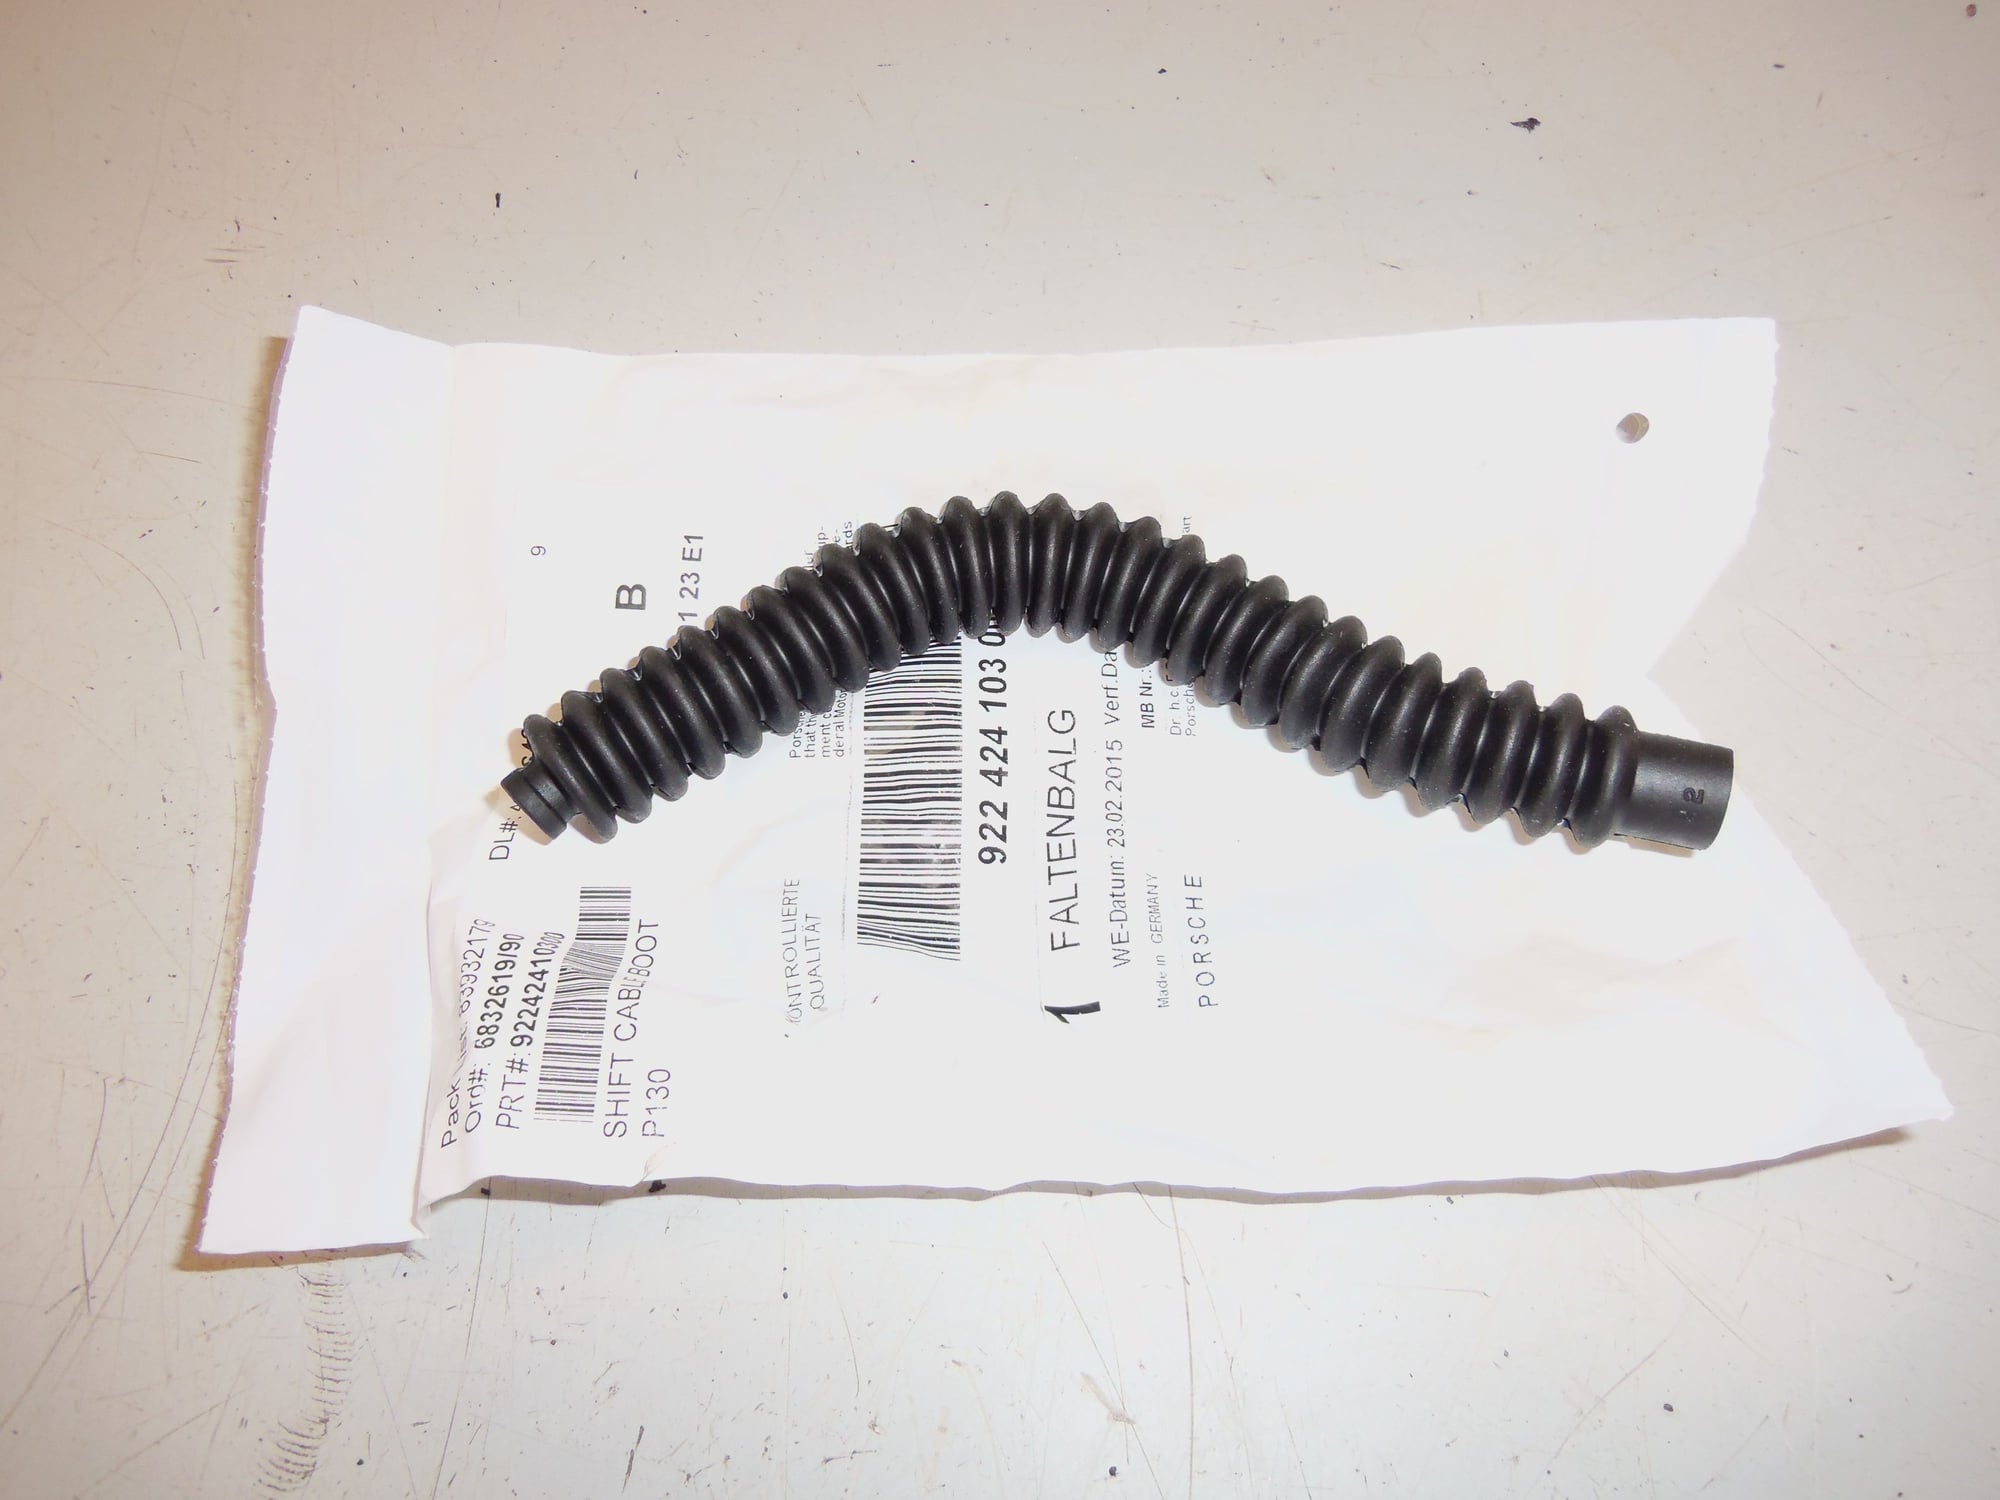
Much better new boot.
Horrible little clip, and the new lock nut.
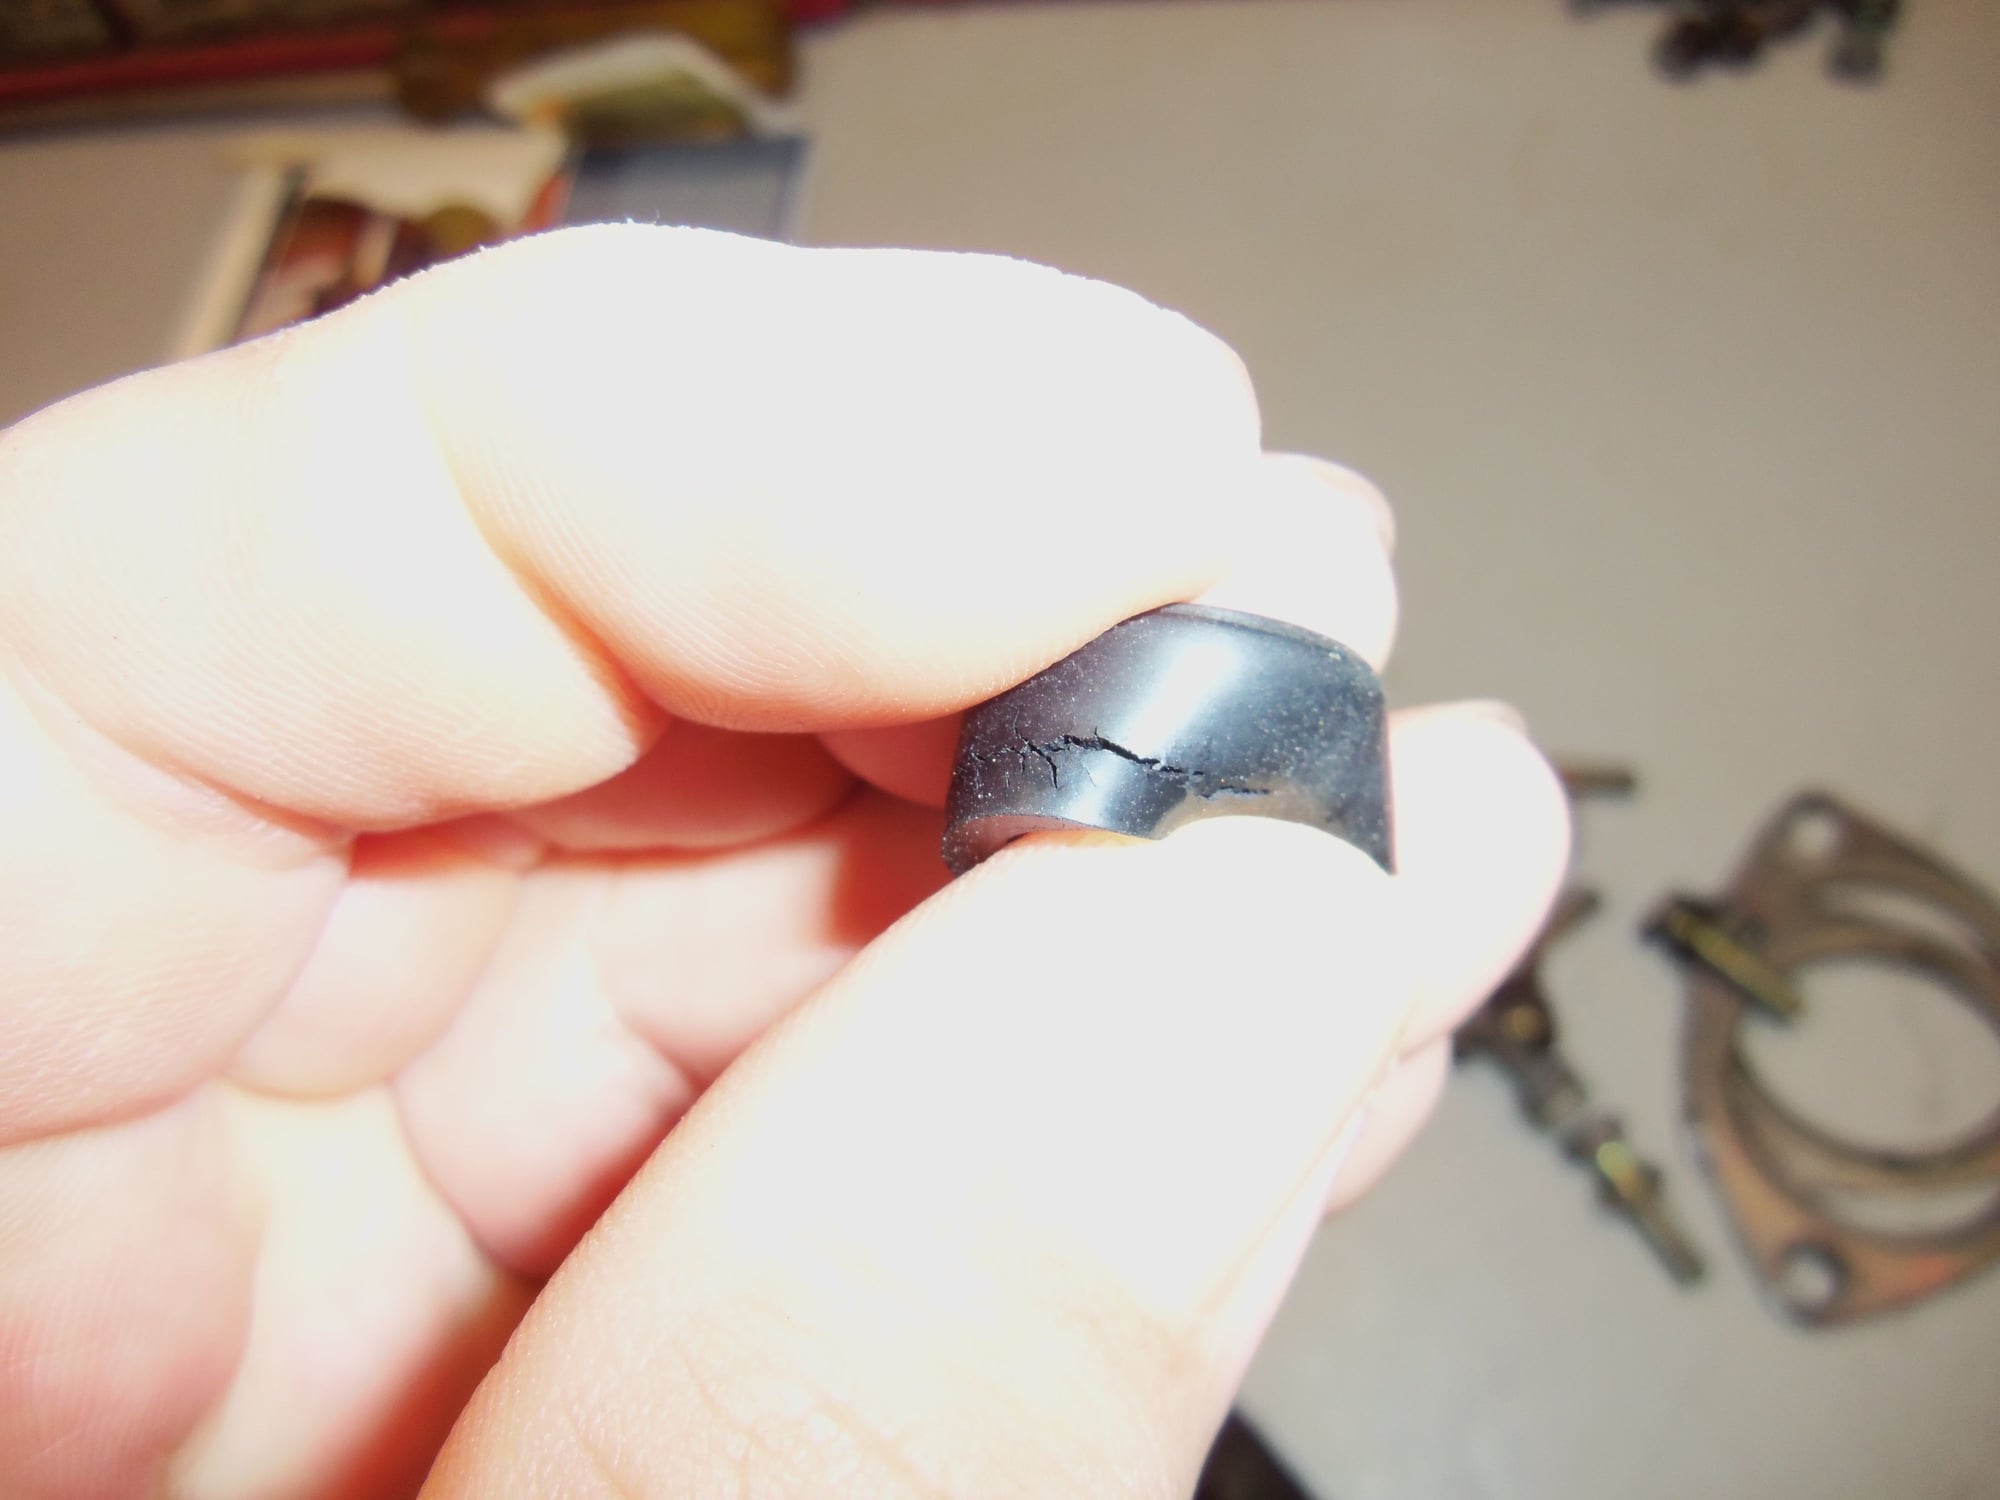
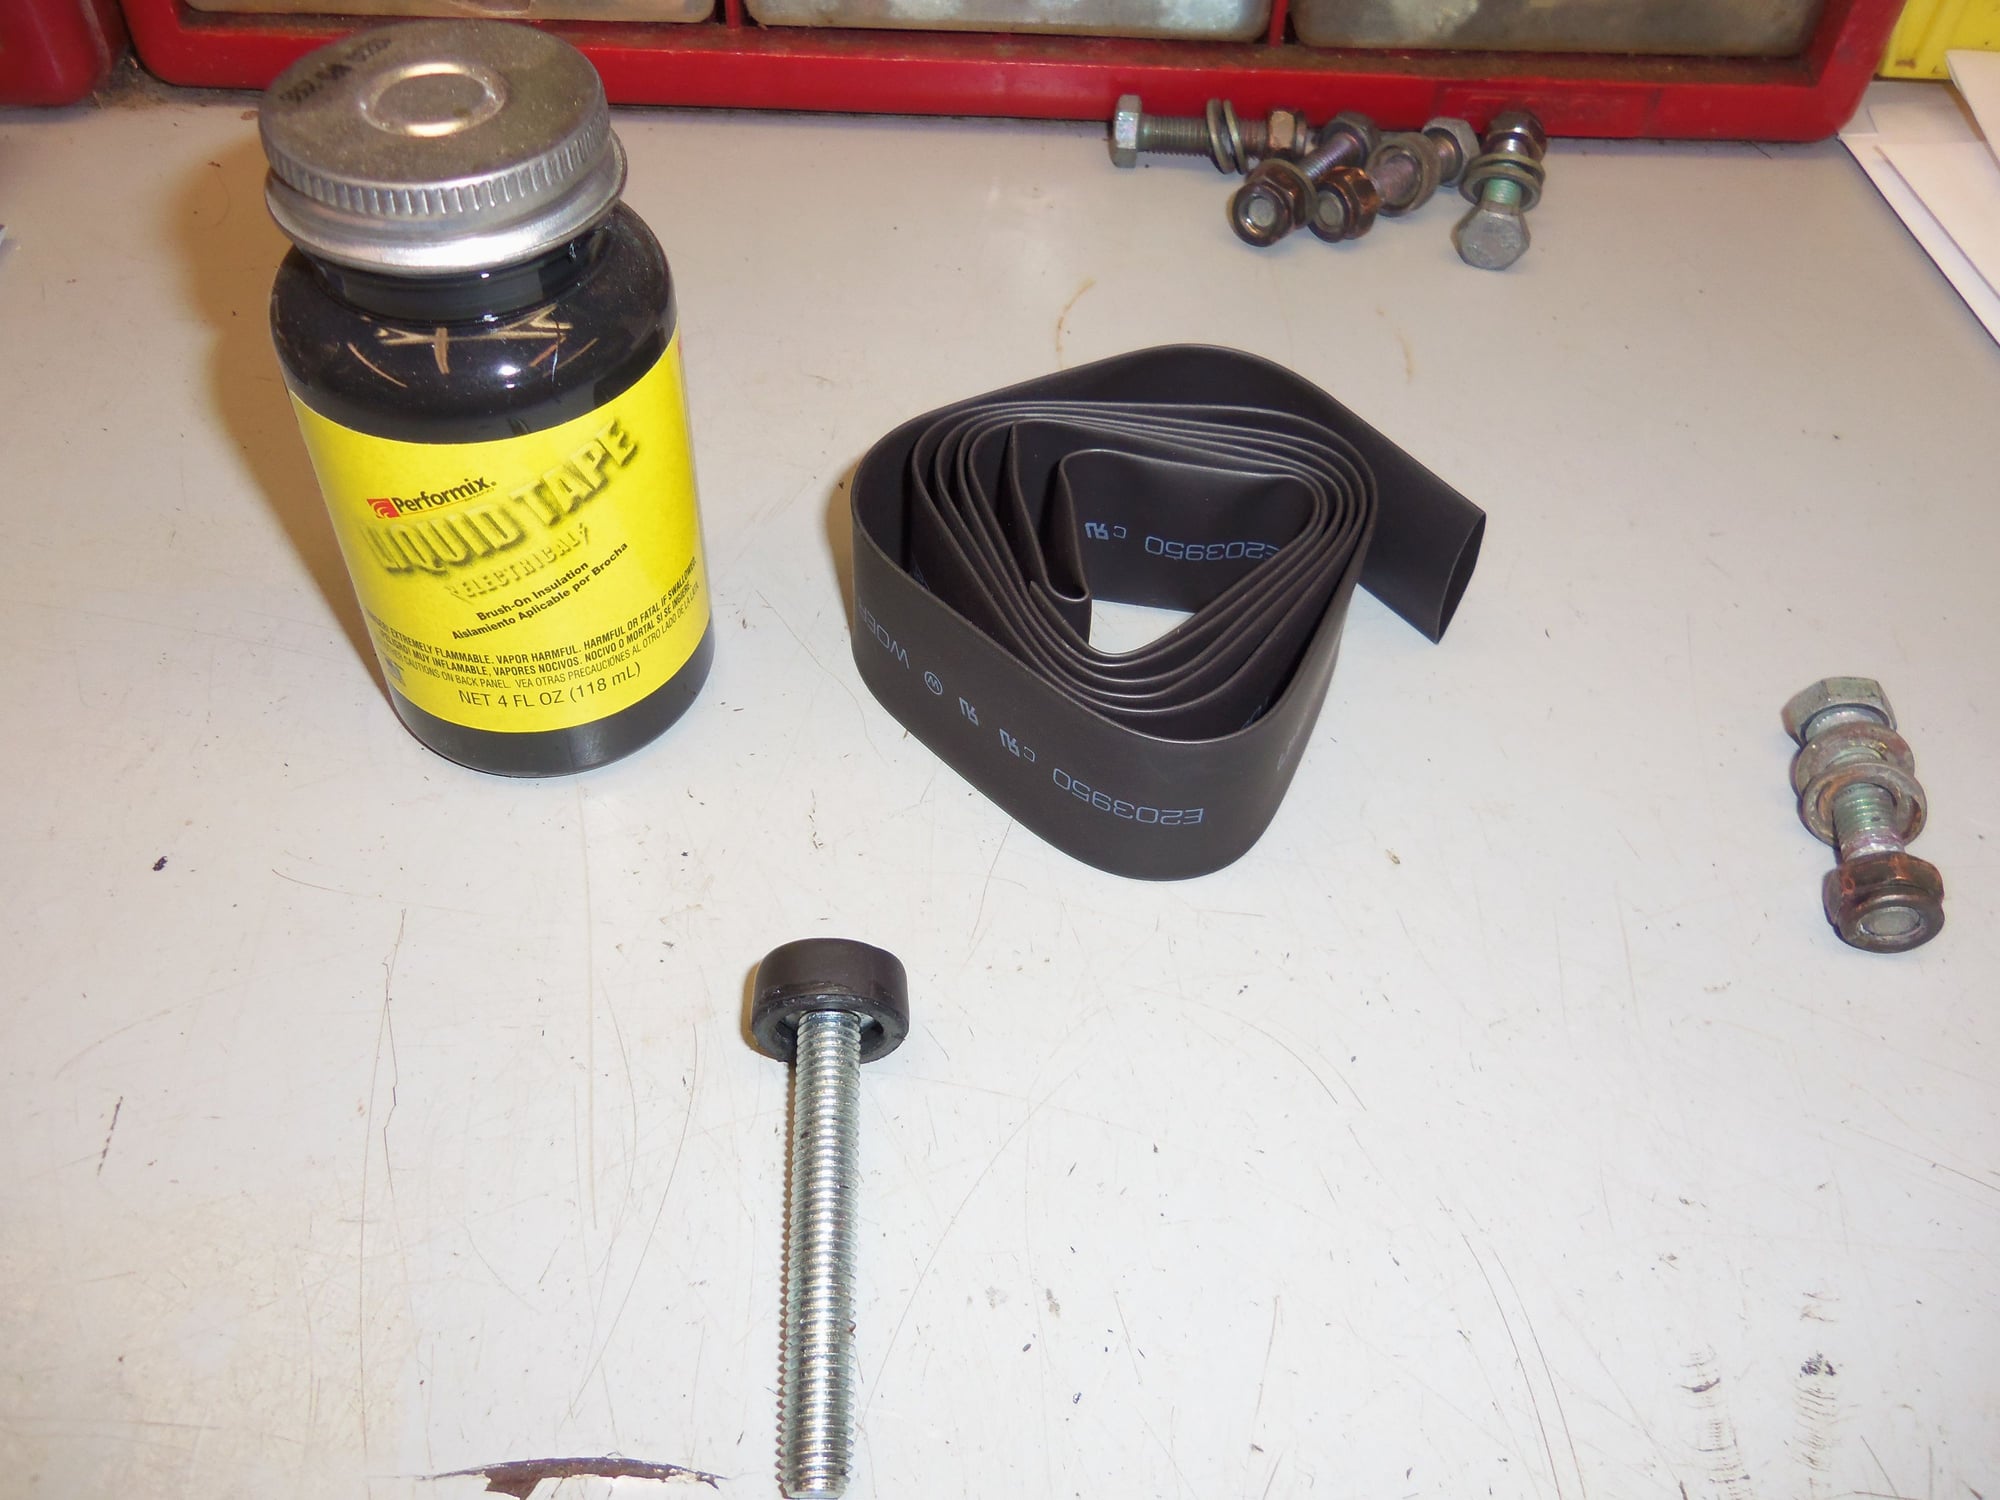
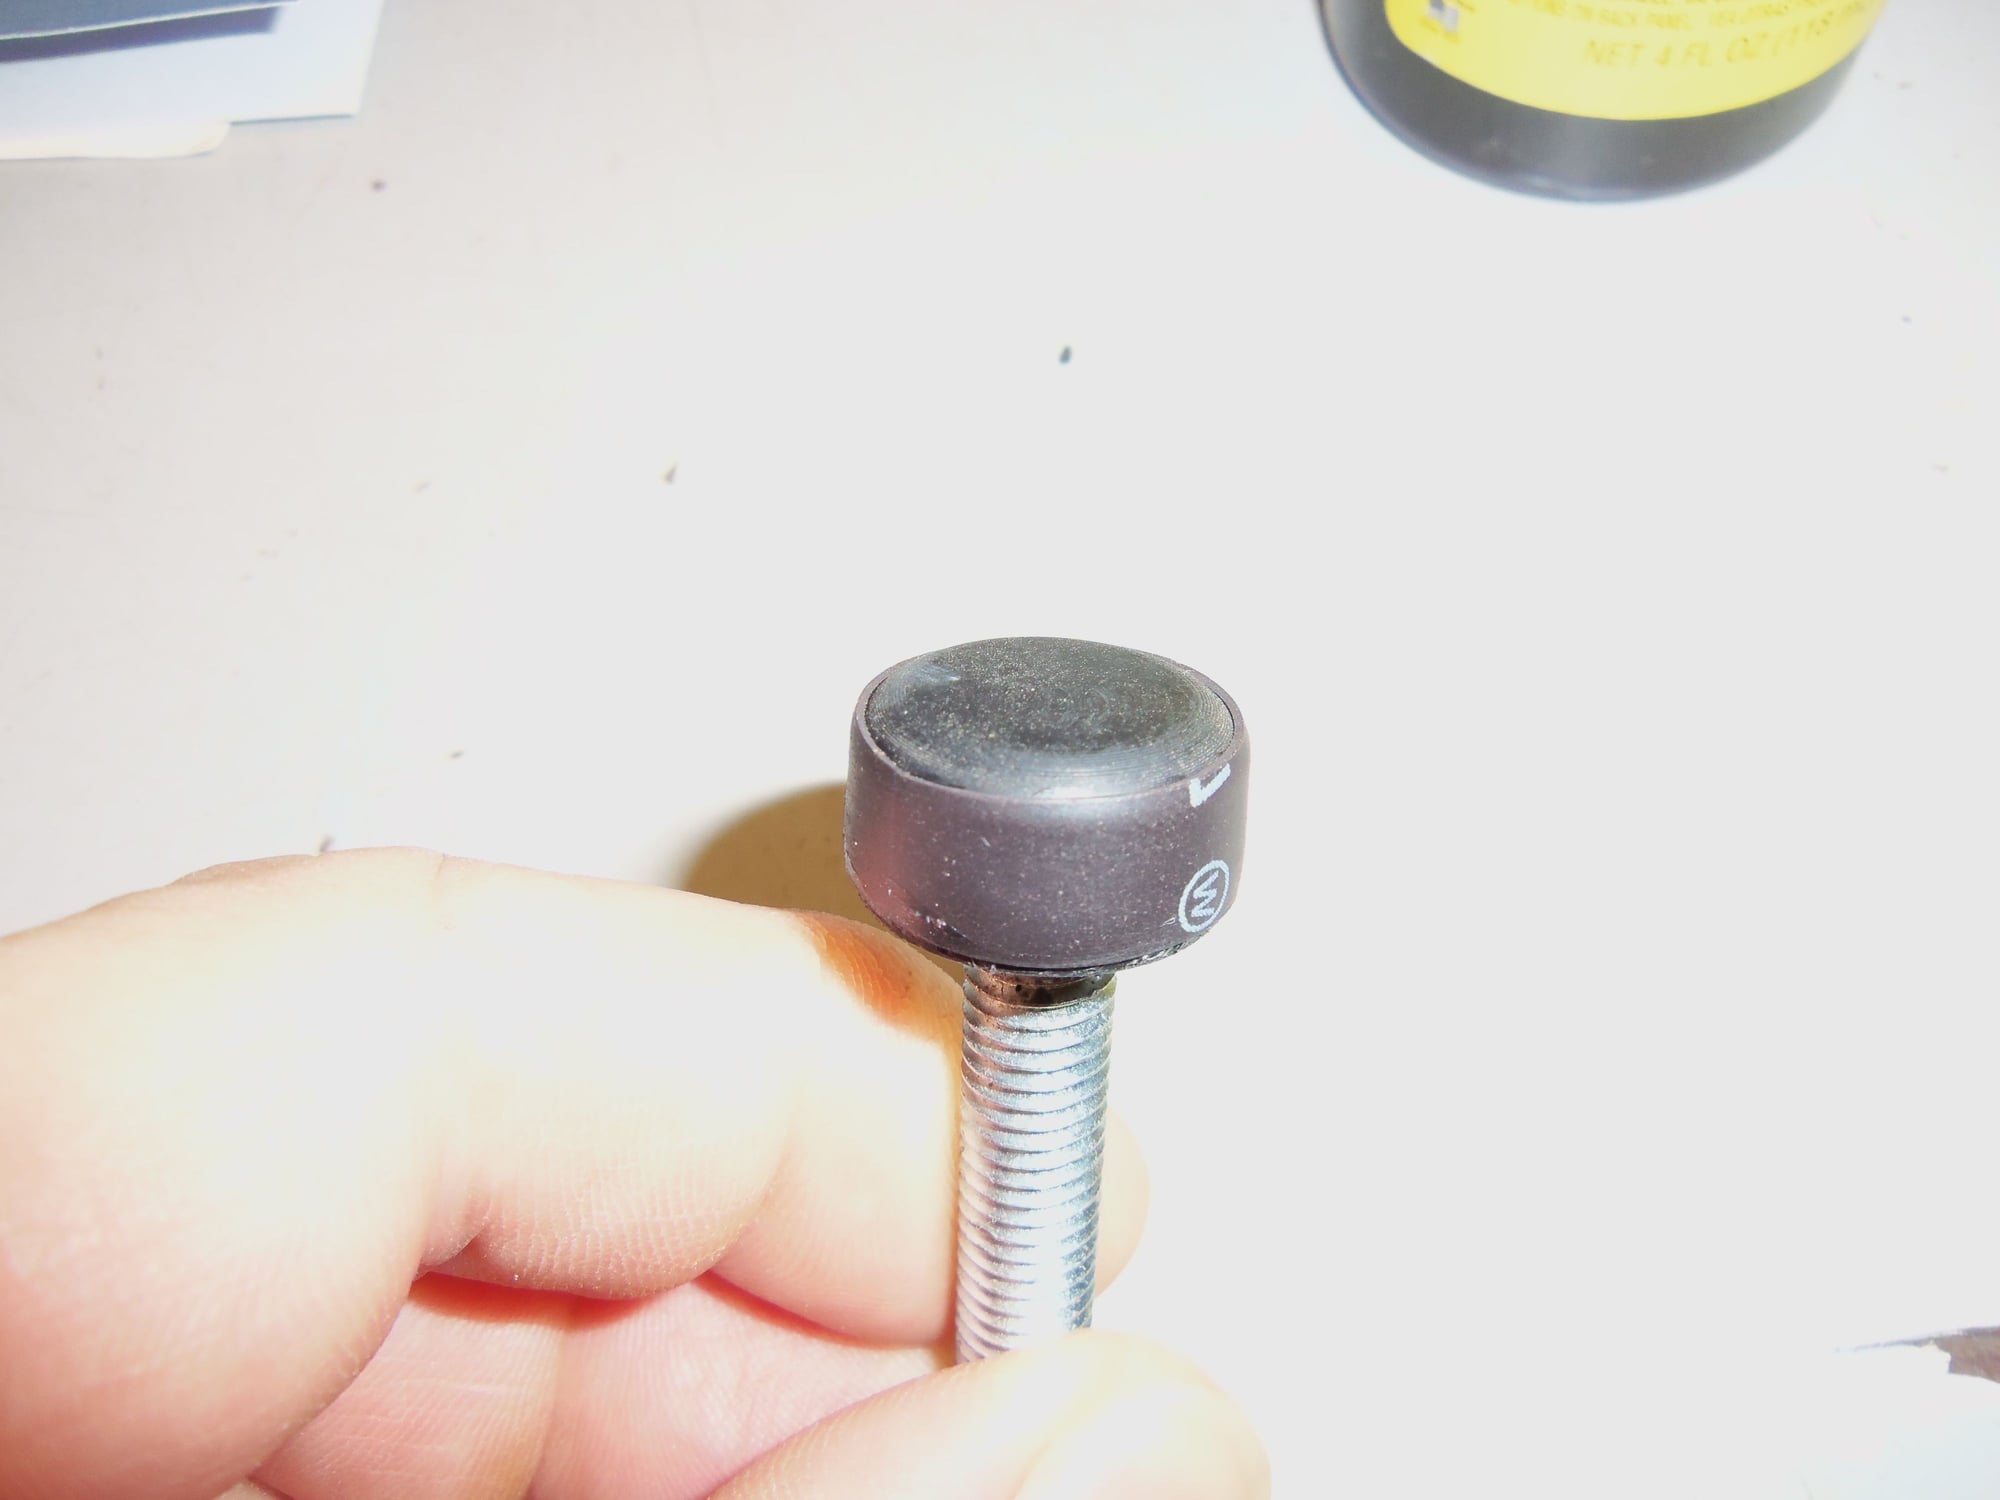
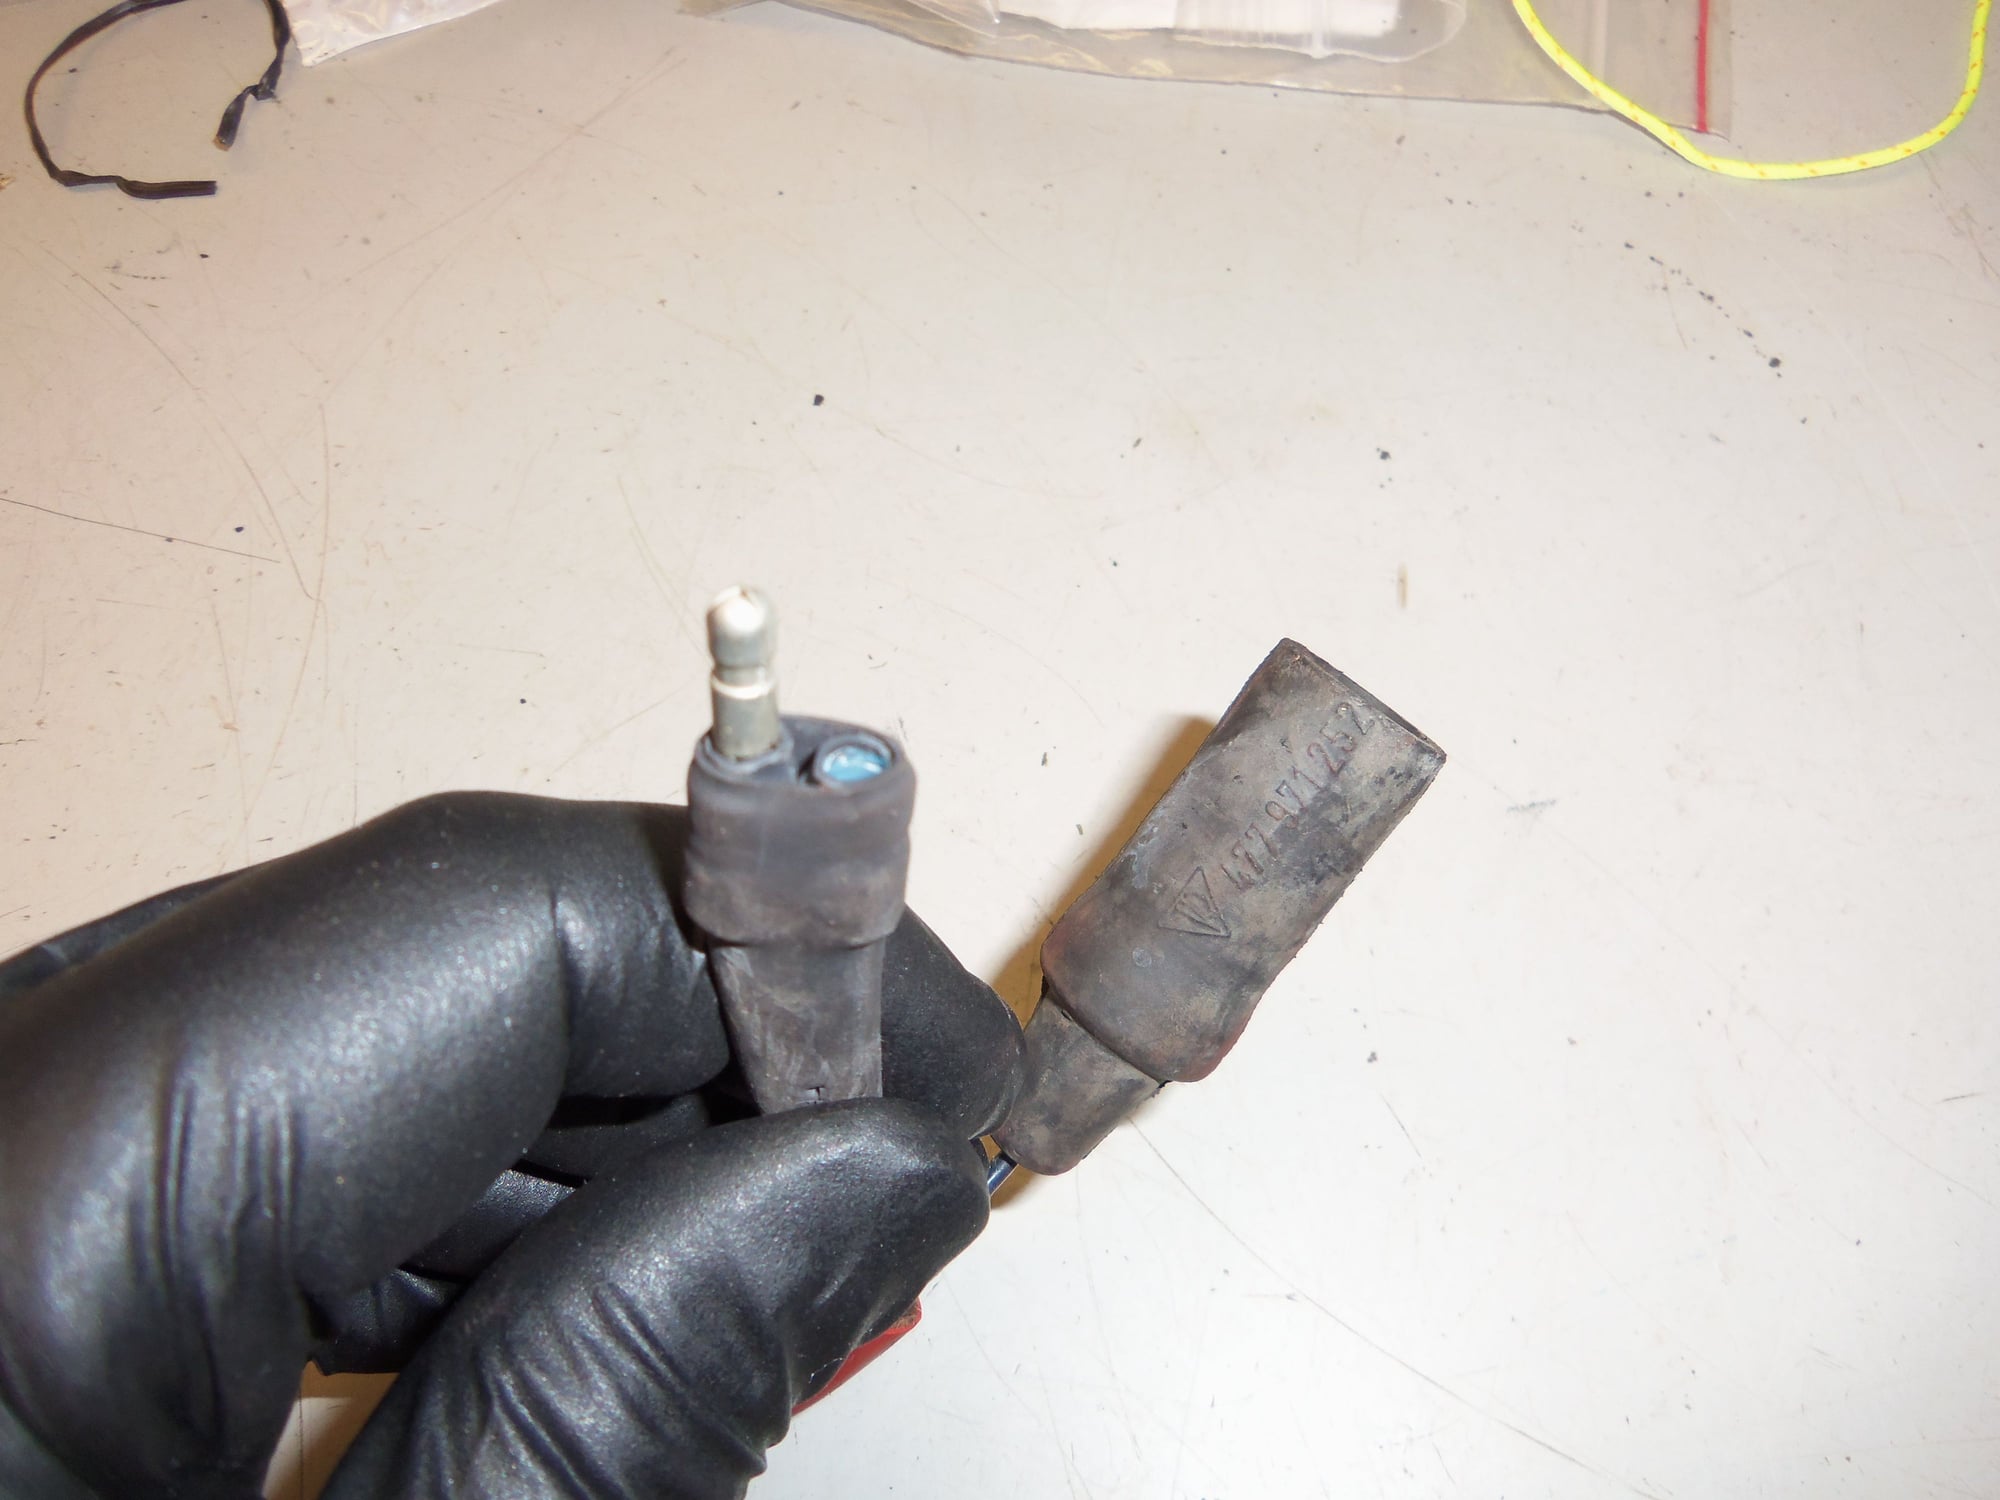
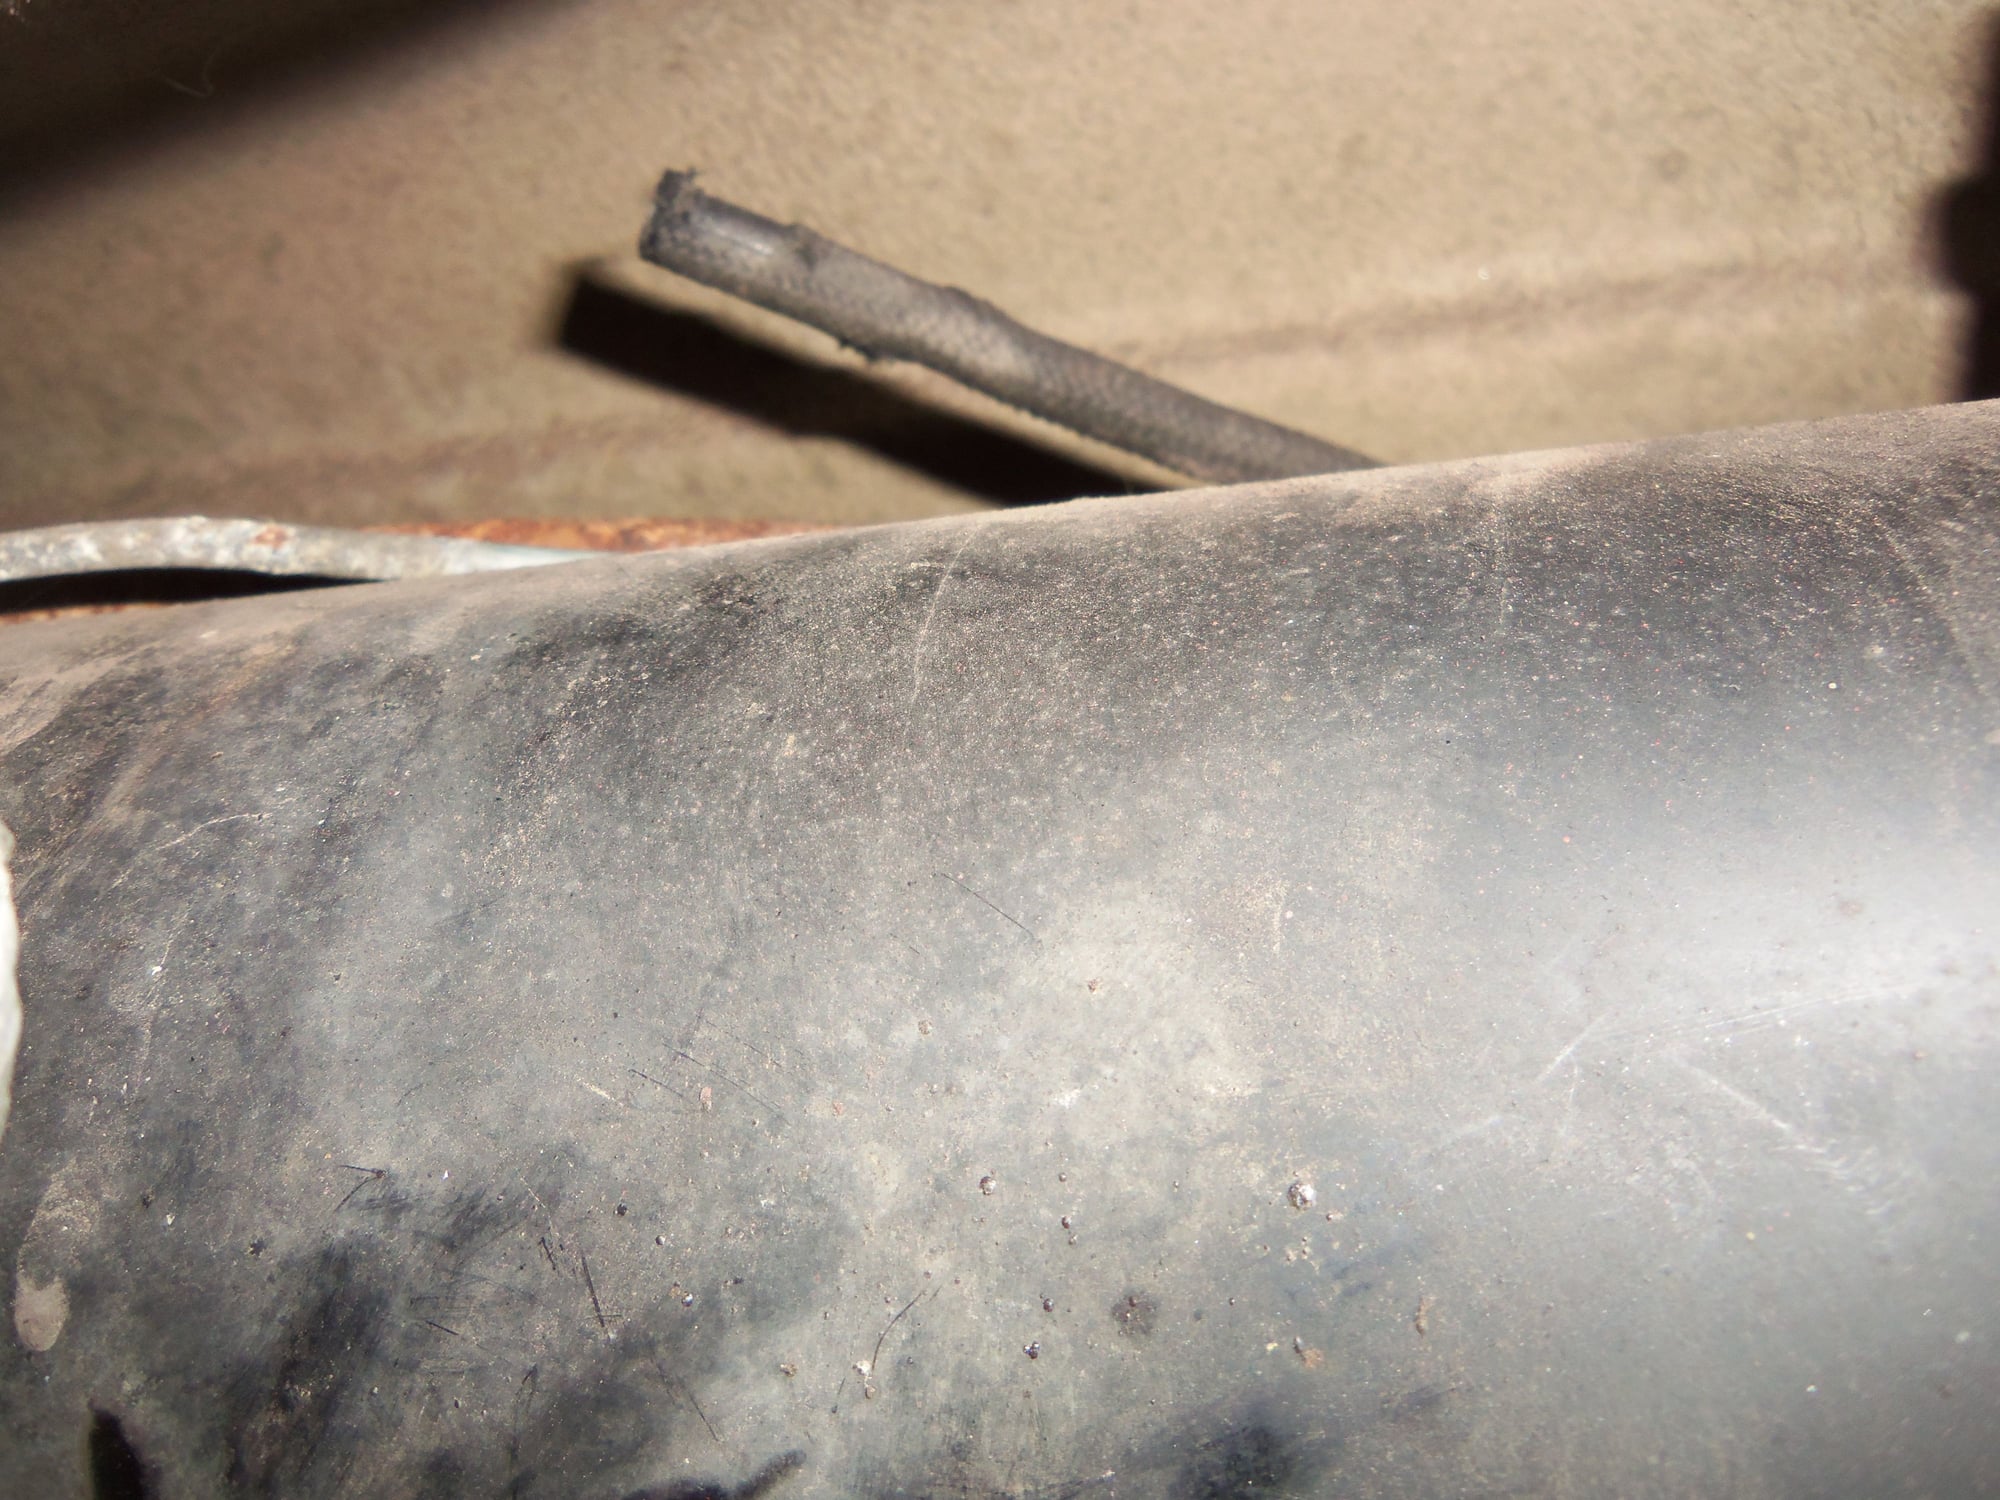
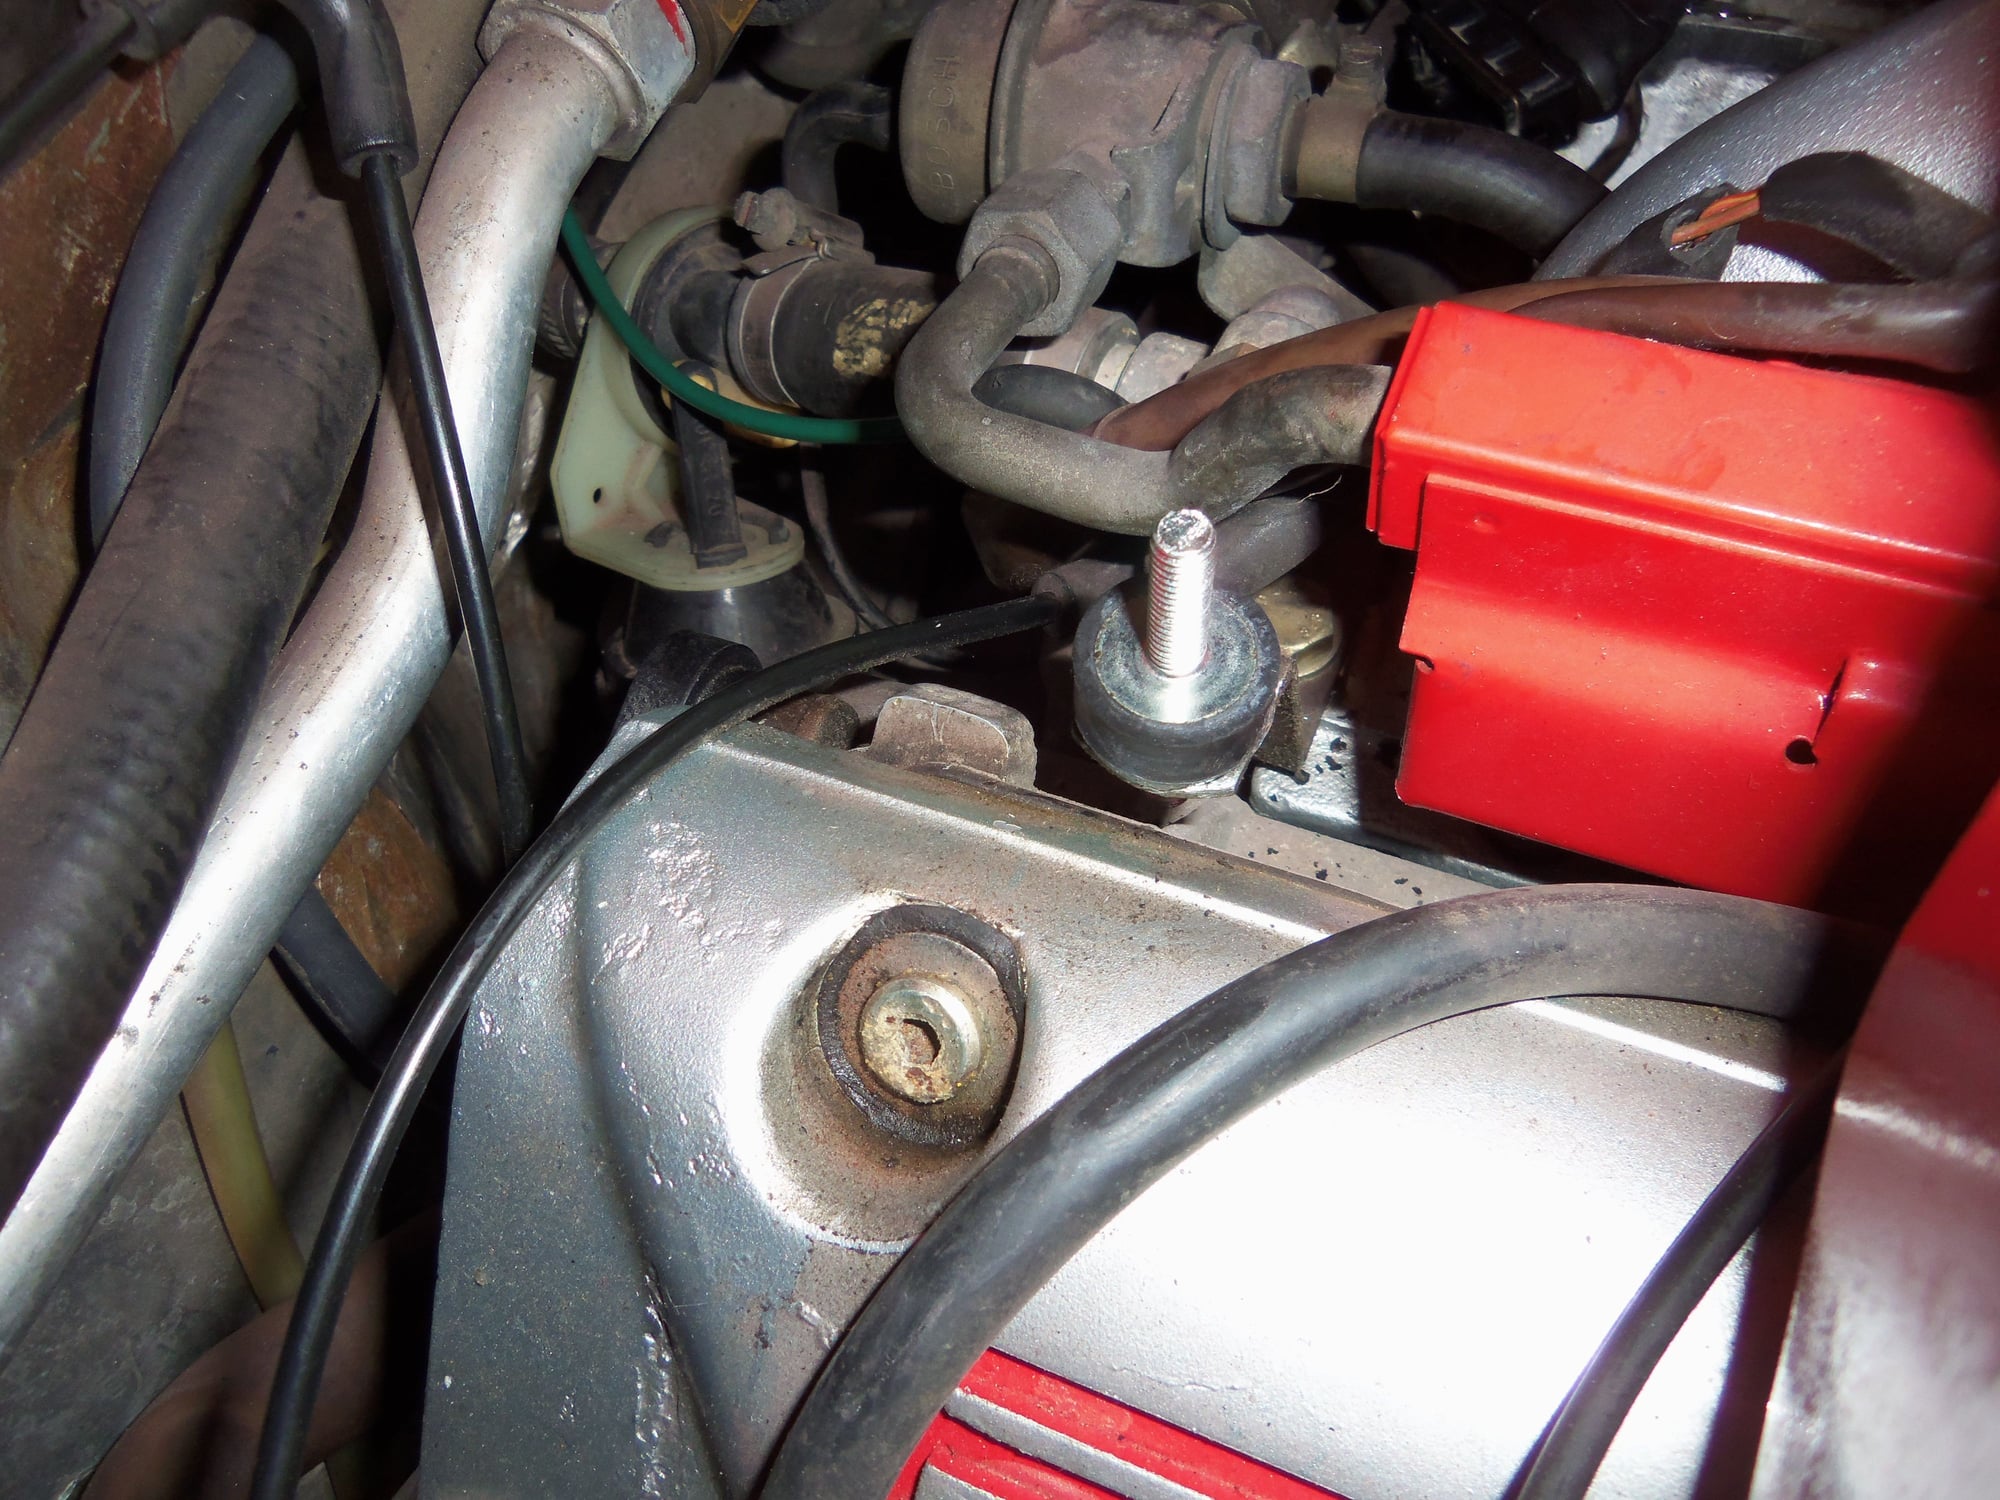
While working on the shift cable, I noticed the new rubber cap on the end of the vacuum modulator was already cracking. Its only a few months old! I put a thin layer of liquid electrical tape around the circumference, then covered it in heat shrink tubing. That should hold it...
Grrr...
Ghetto and butch, but it works...
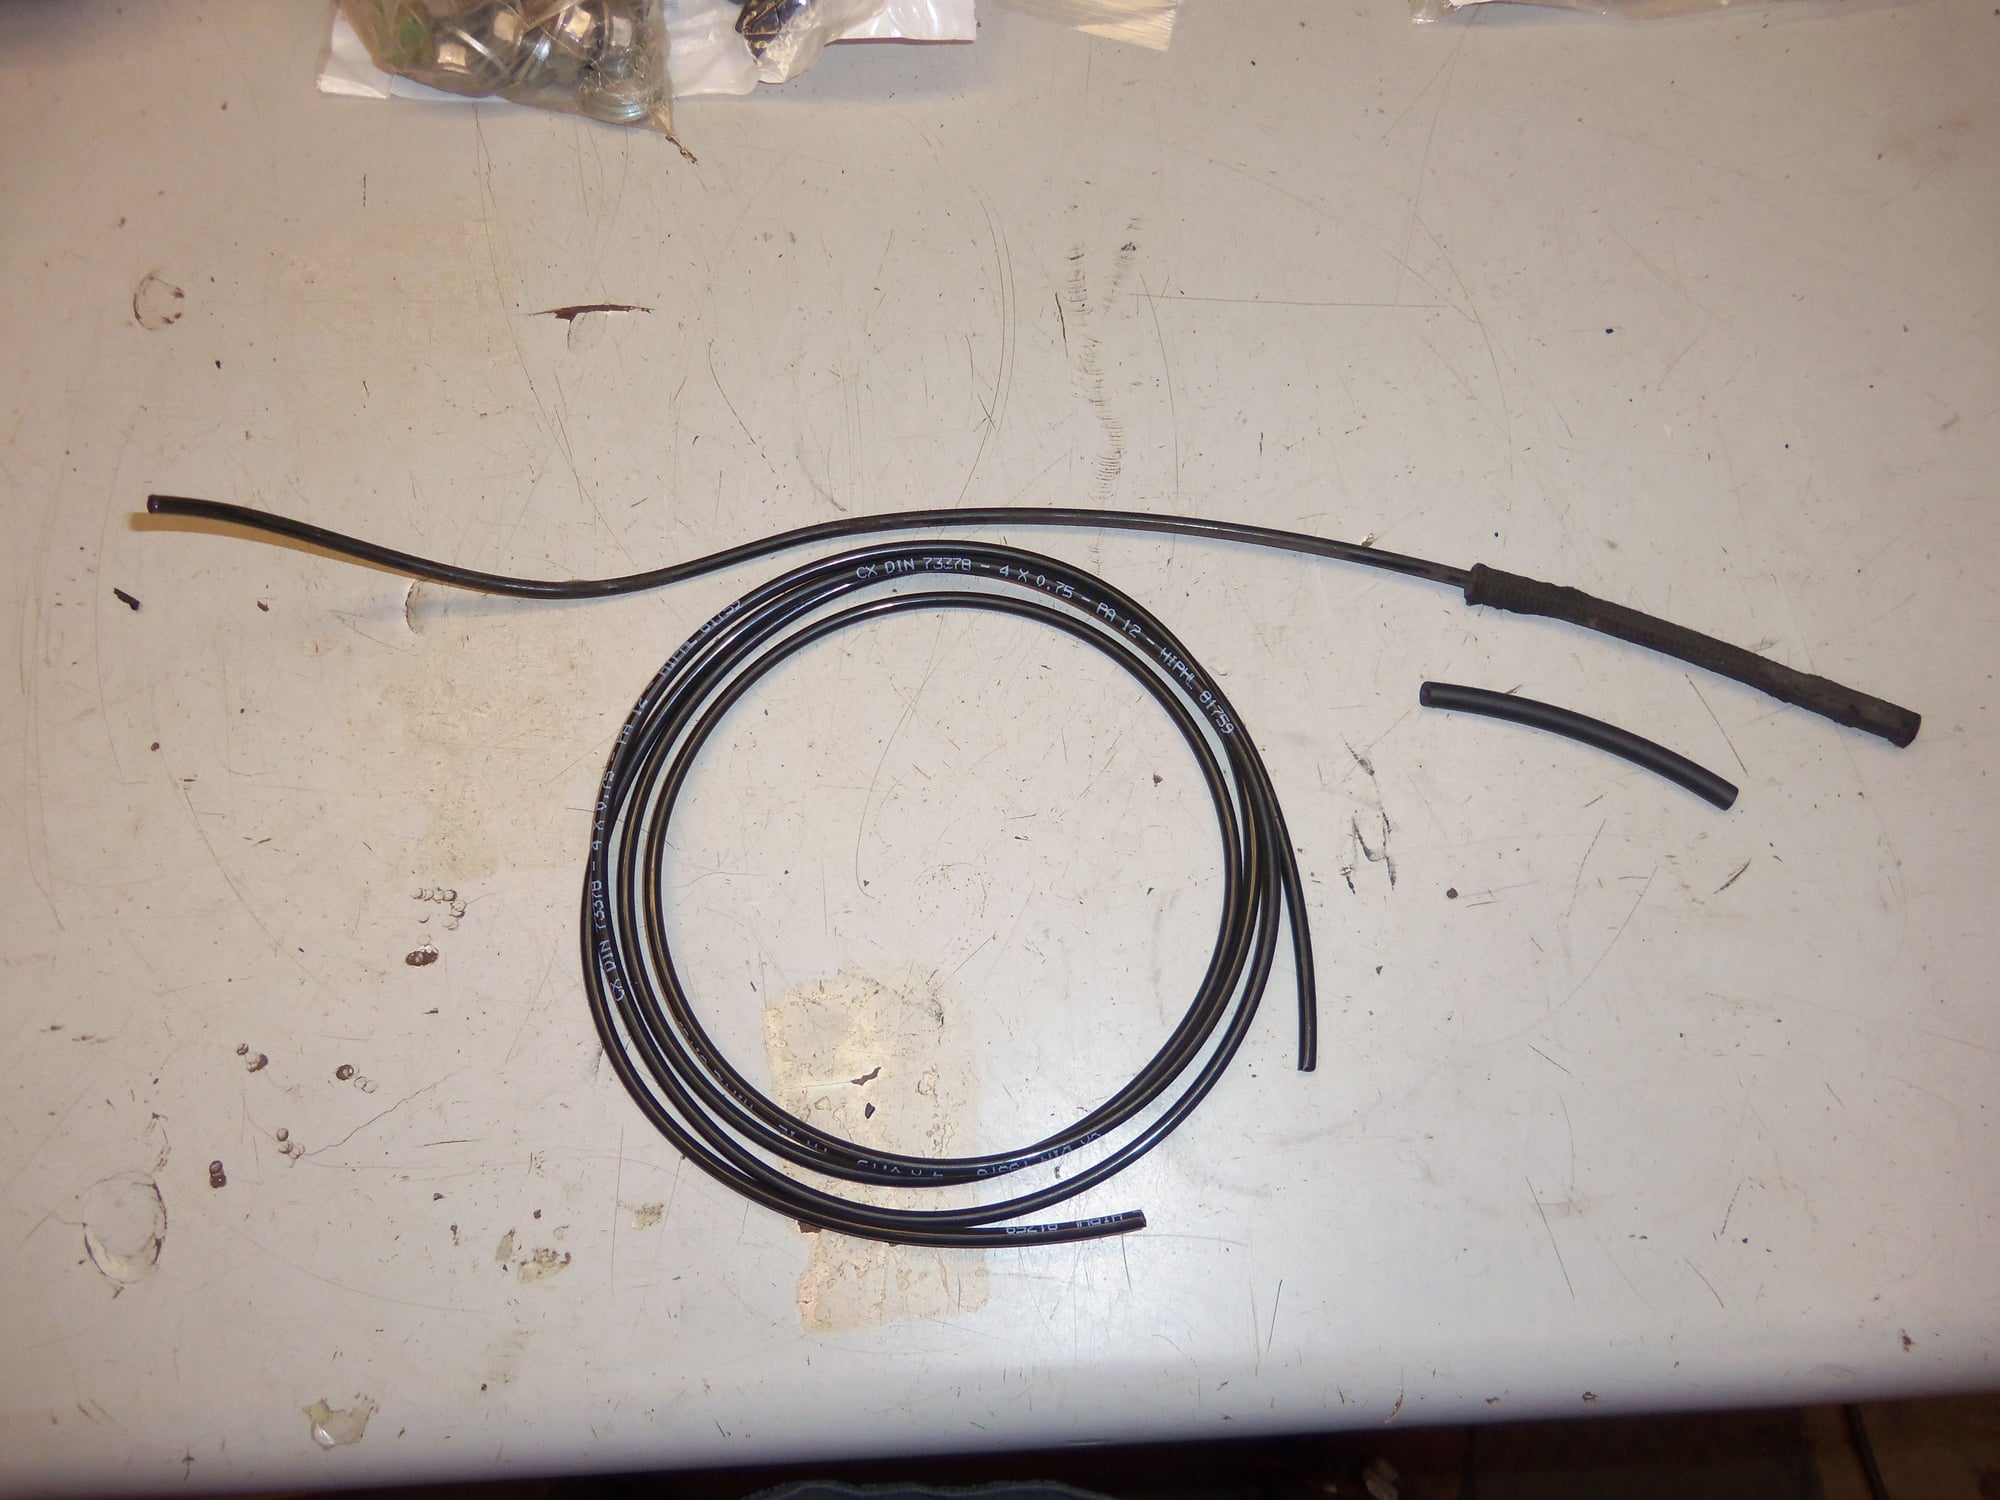
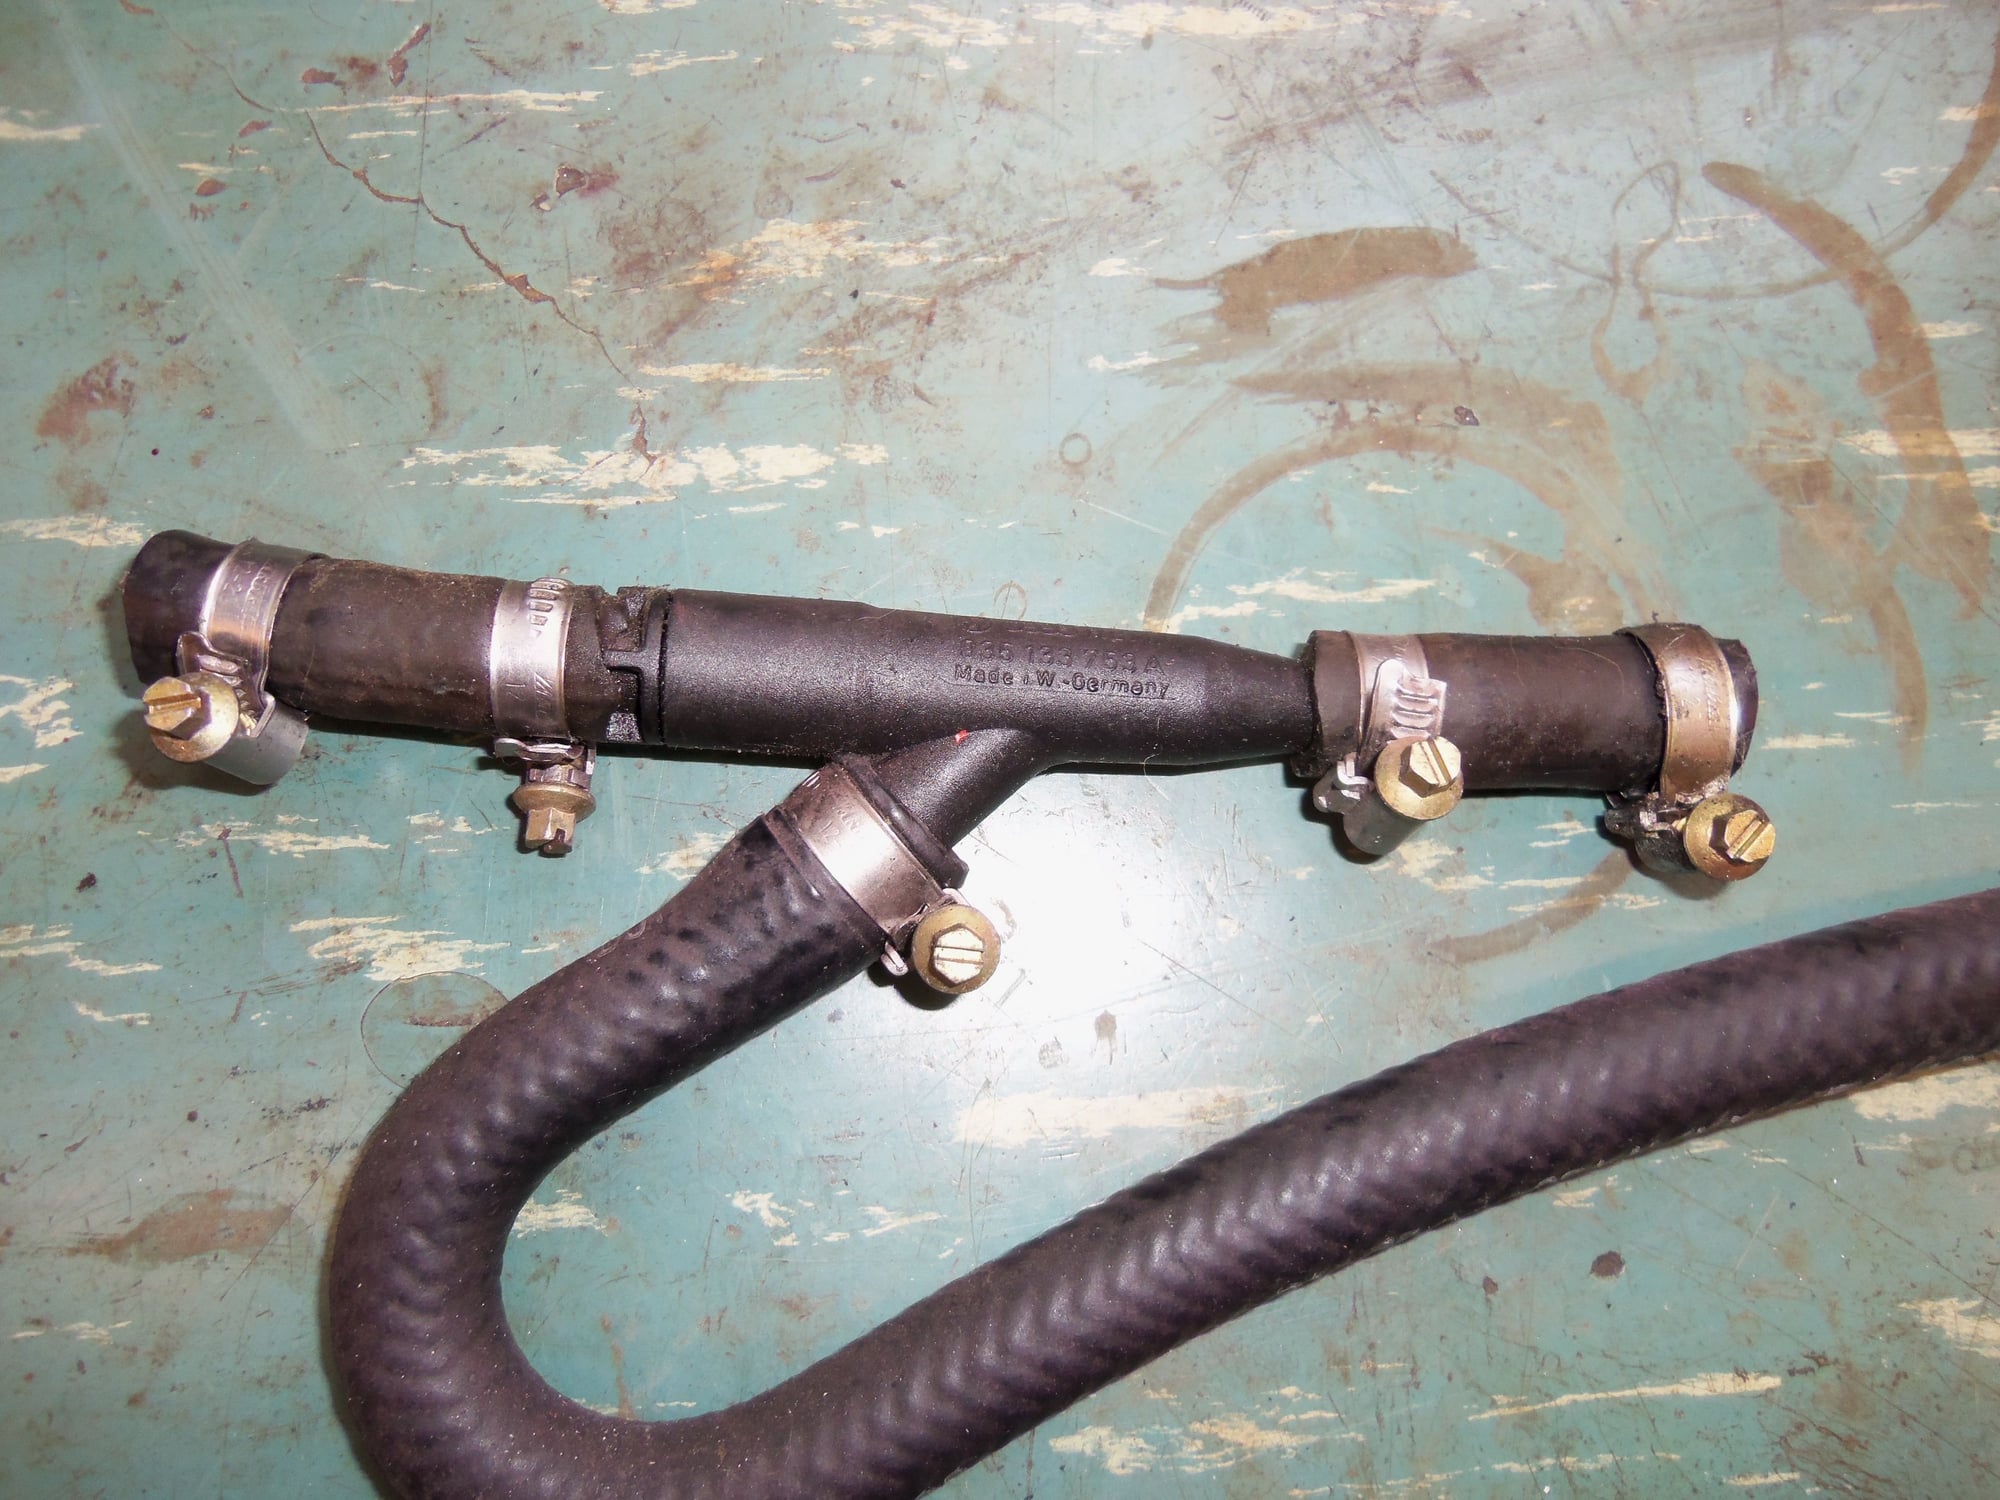
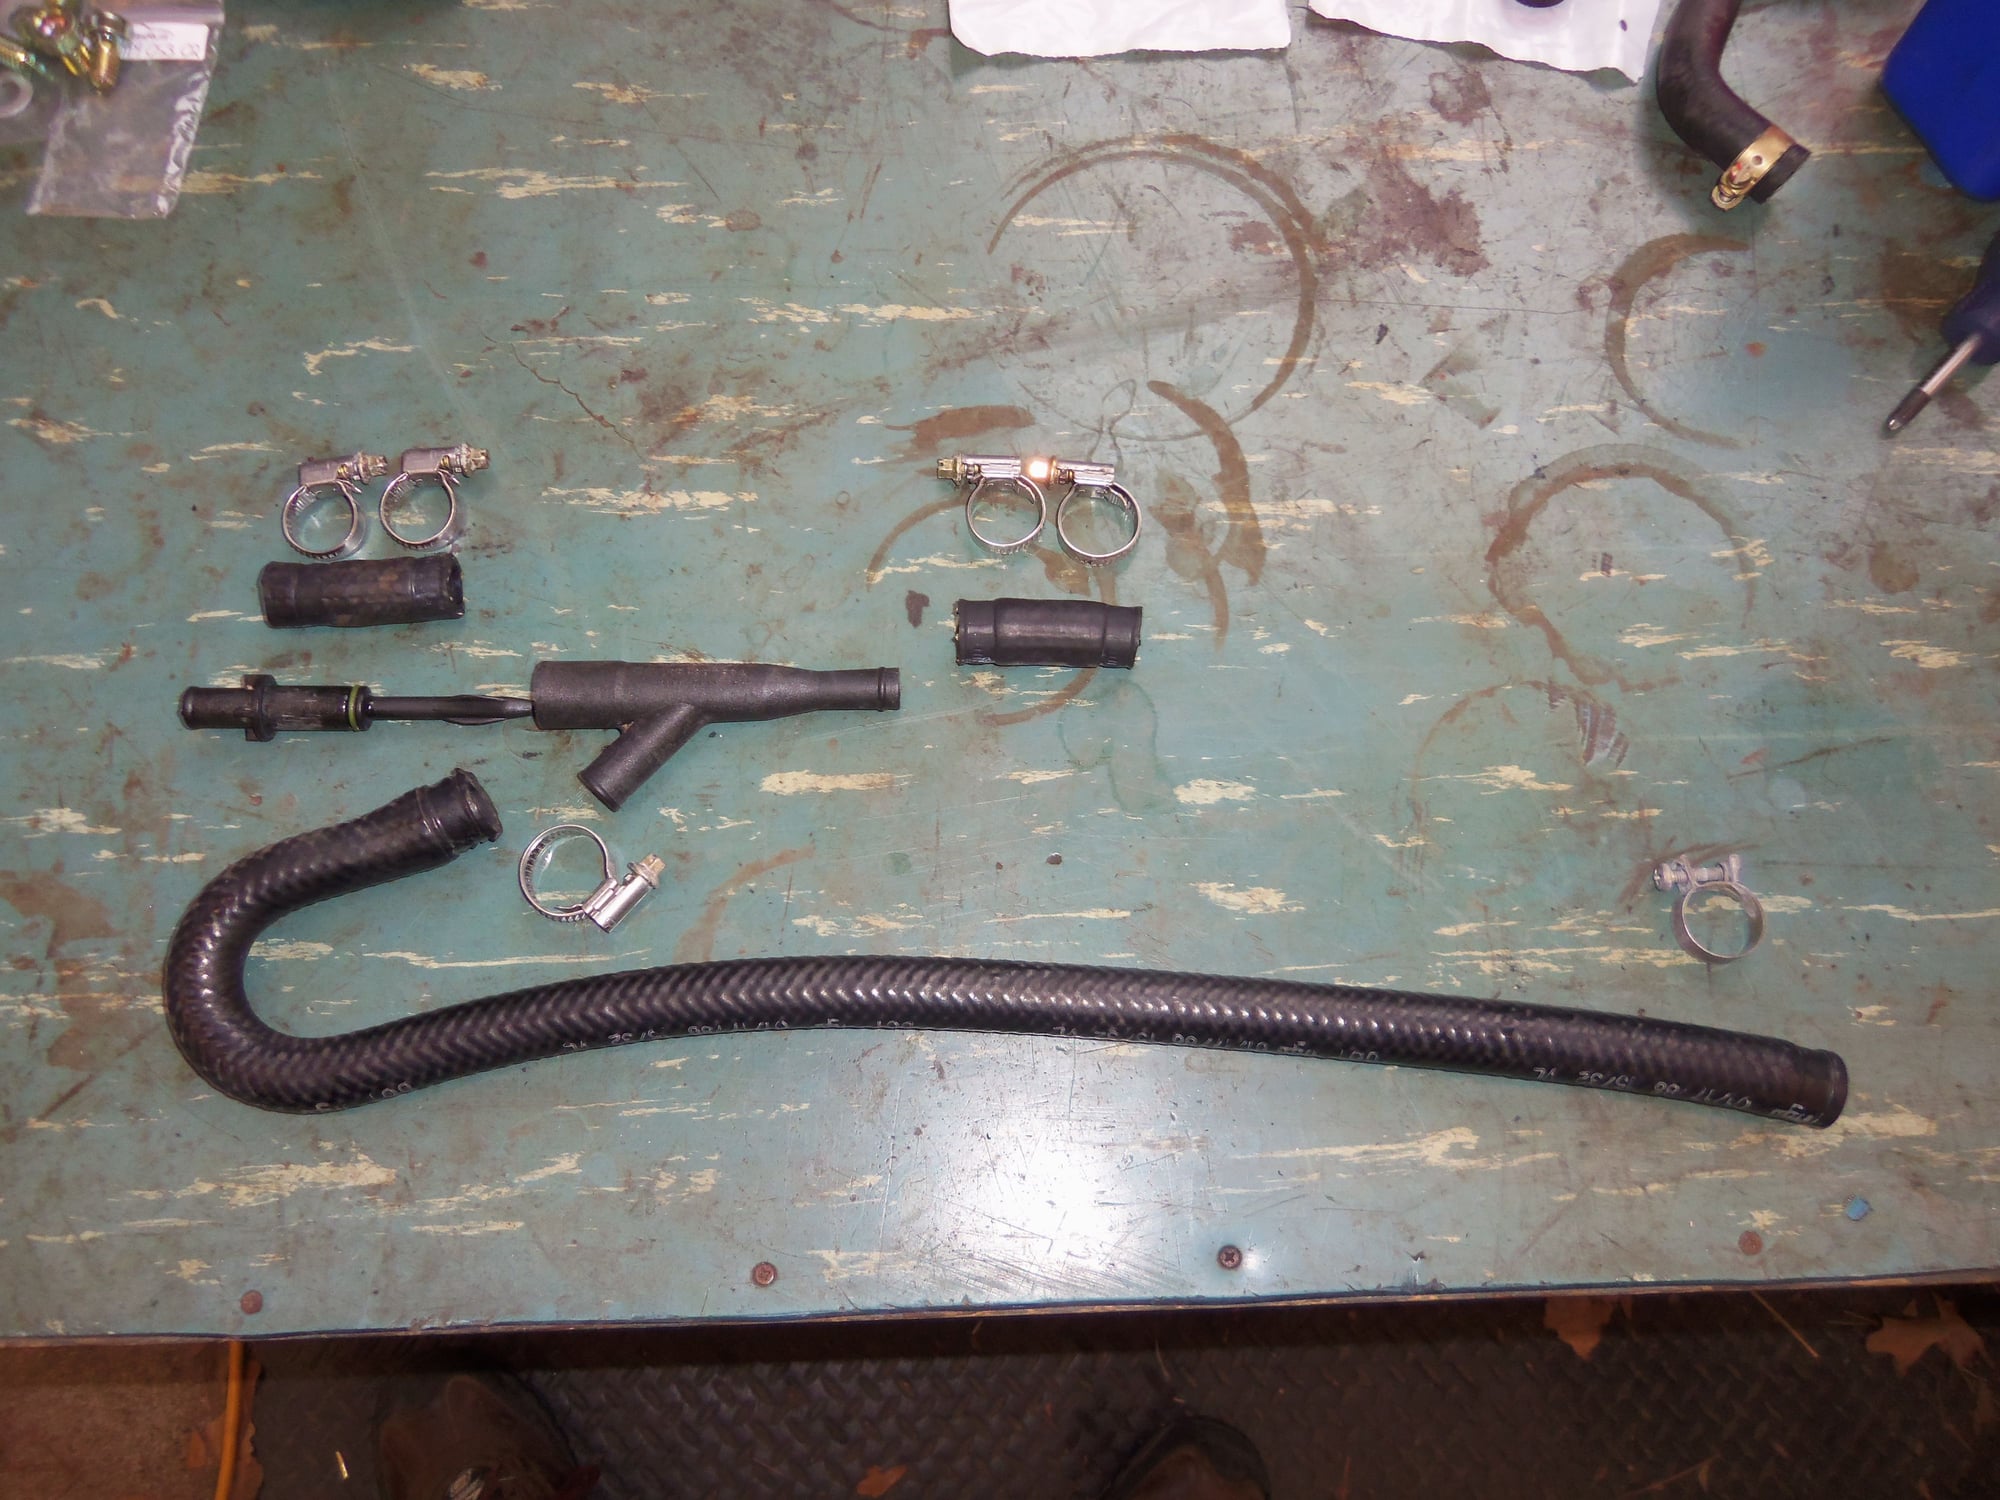
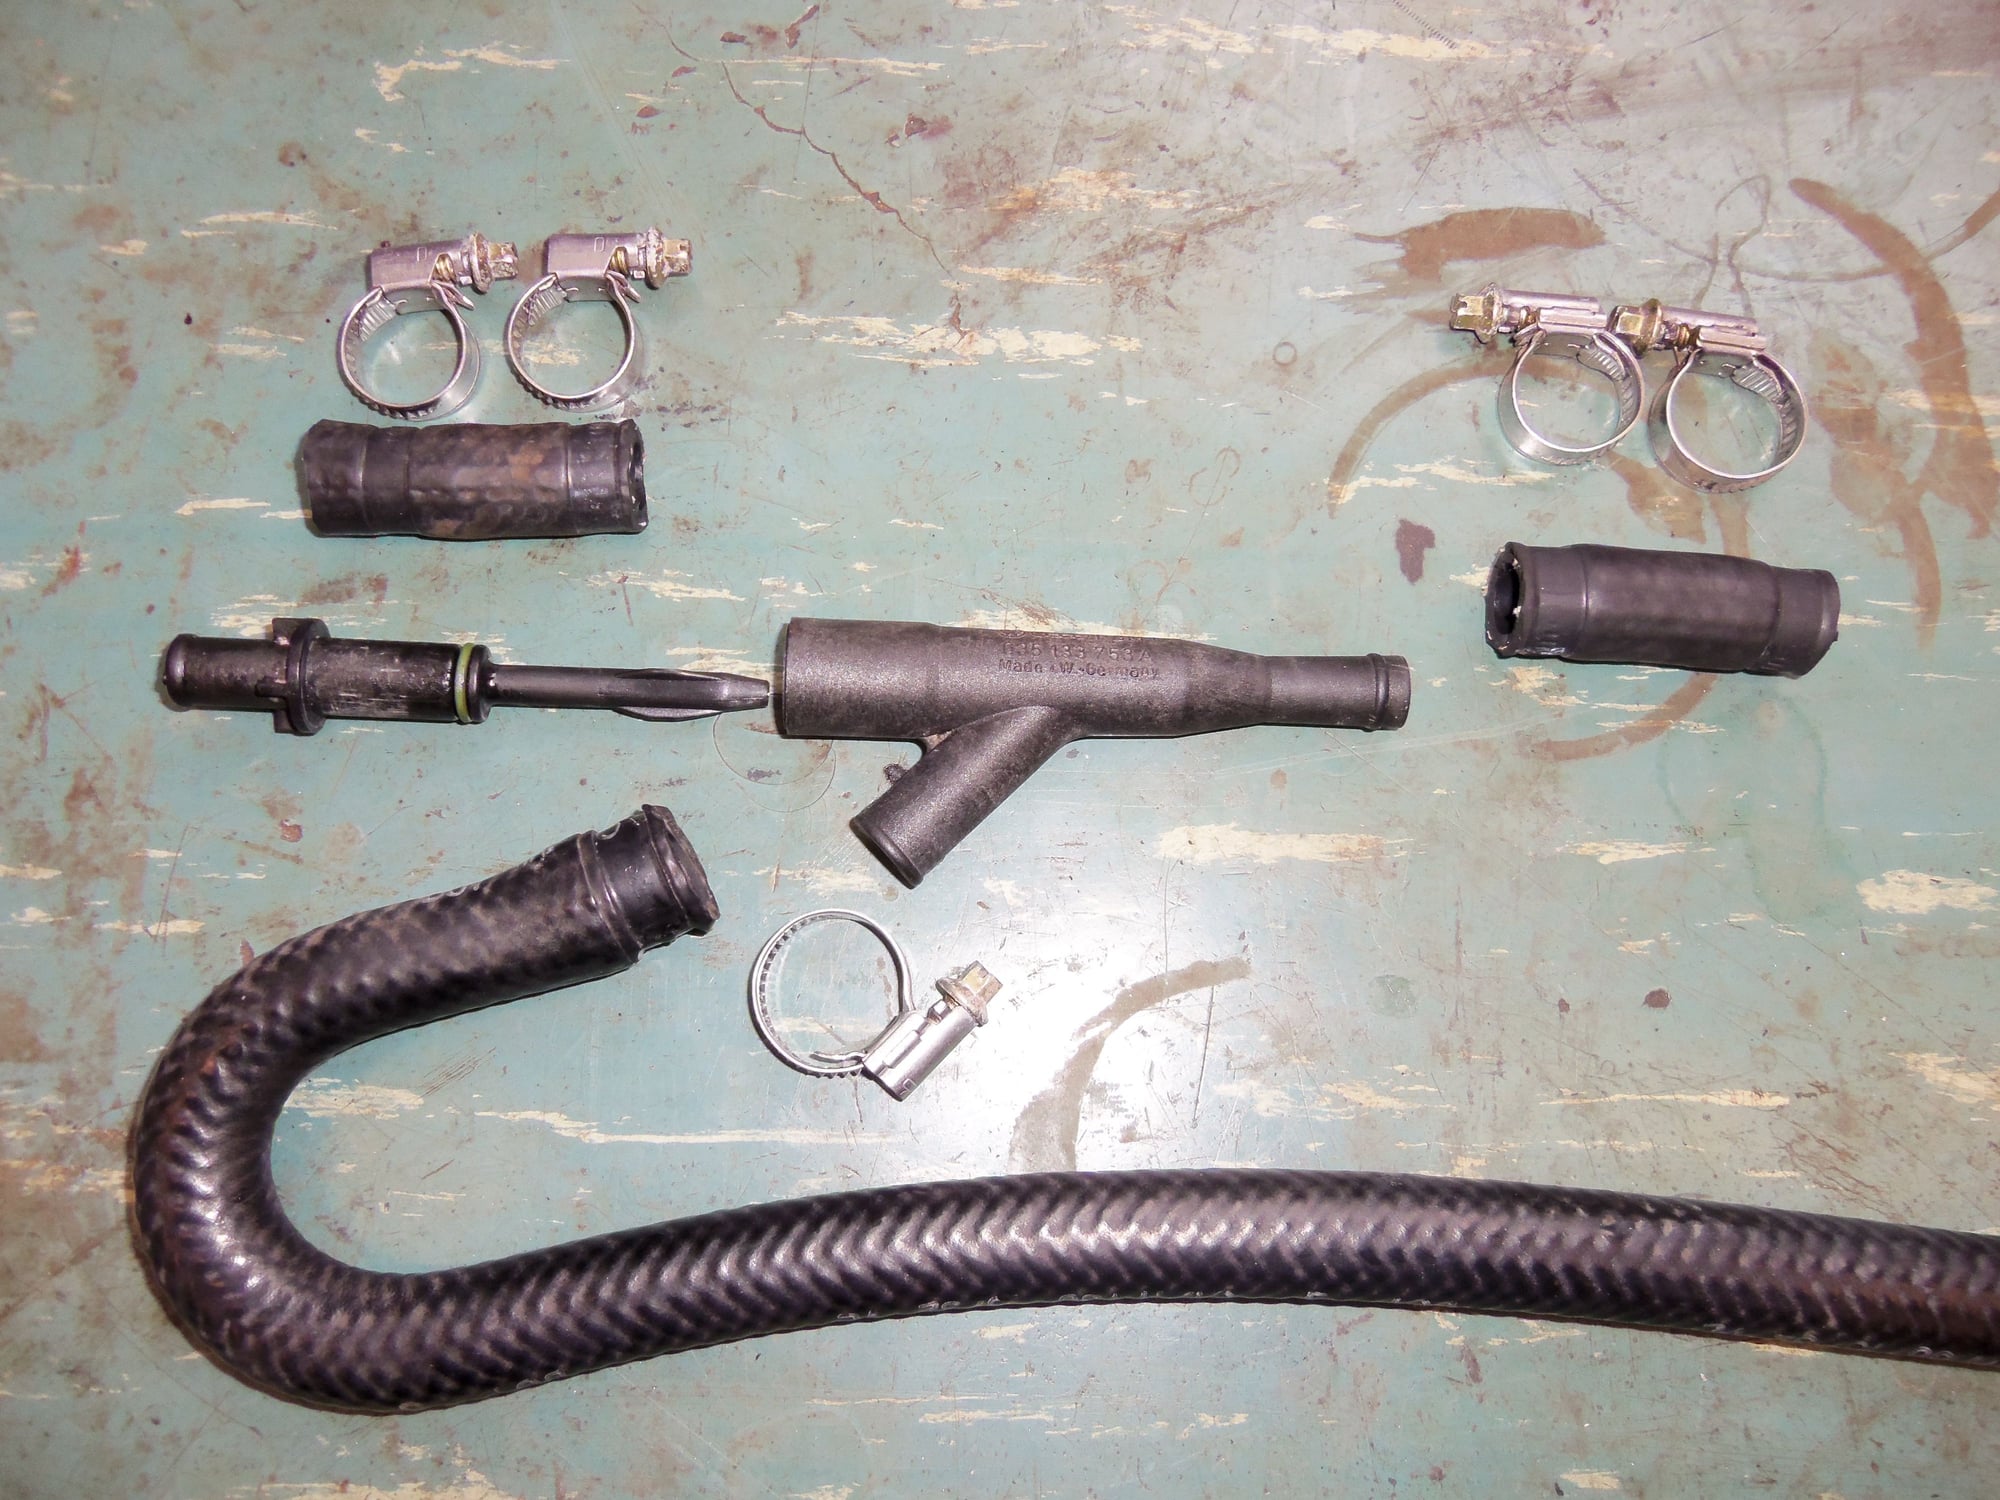
Being a glutton for punishment, I decided to replace the vacuum lines for the transmission modulator.
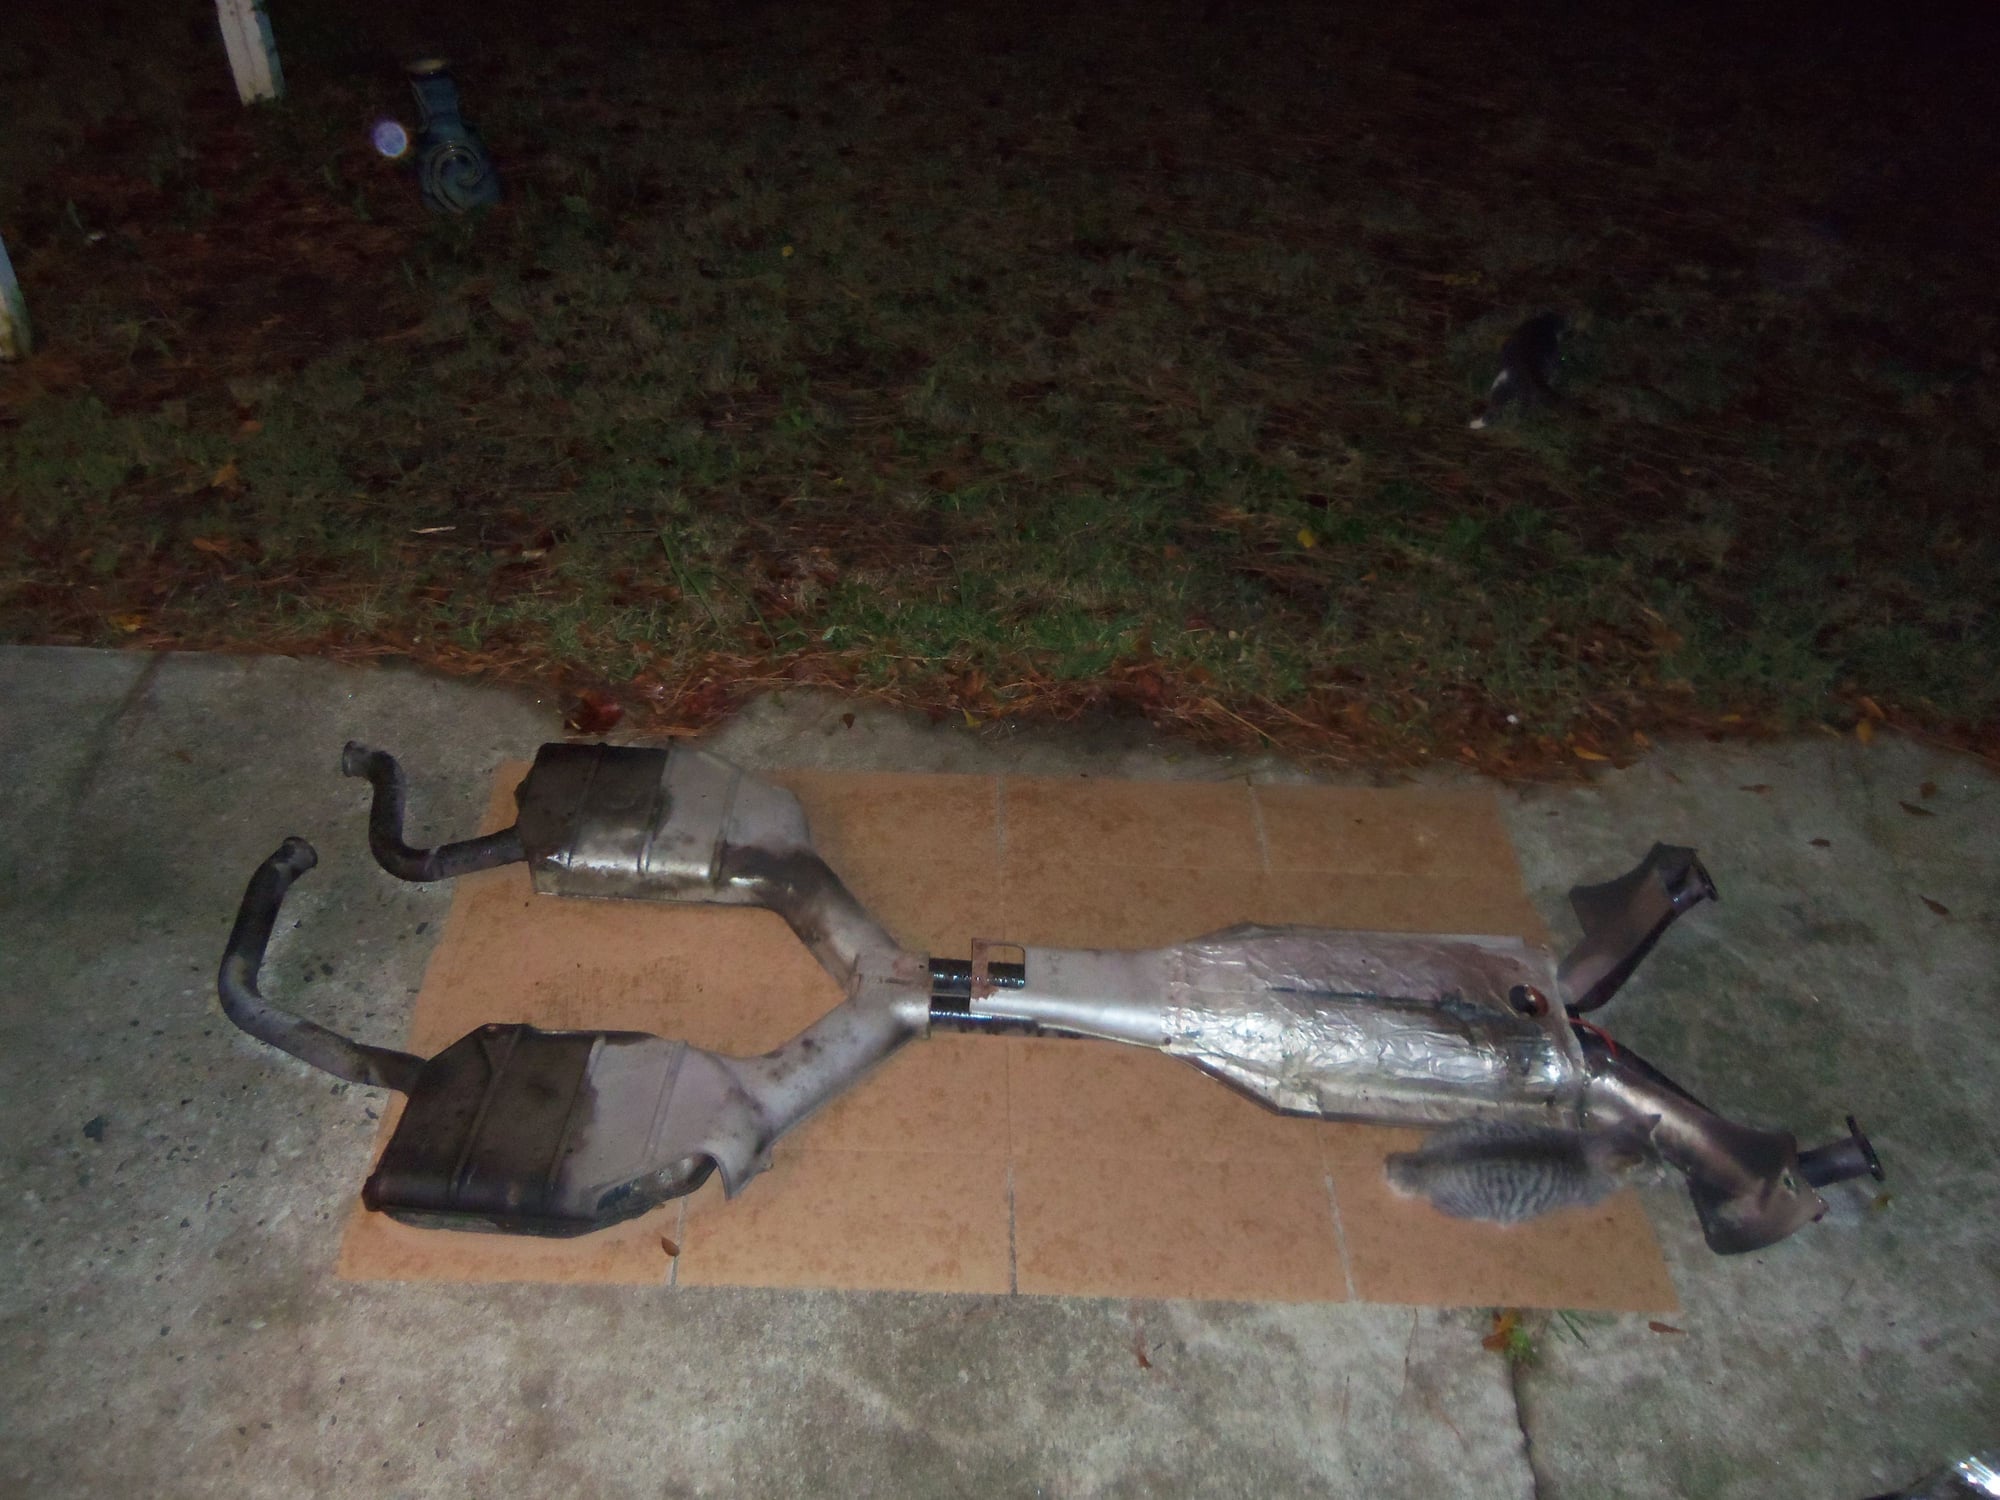
I started by dropping the exhaust and all the heat shields. Luckily, Auto Assets did this back in April, so nothing was stuck or corroded.
Jack stands were a plus in manipulating the exhaust coming down. I did not see a need to remove the mid pipes from the Devek test pipes.
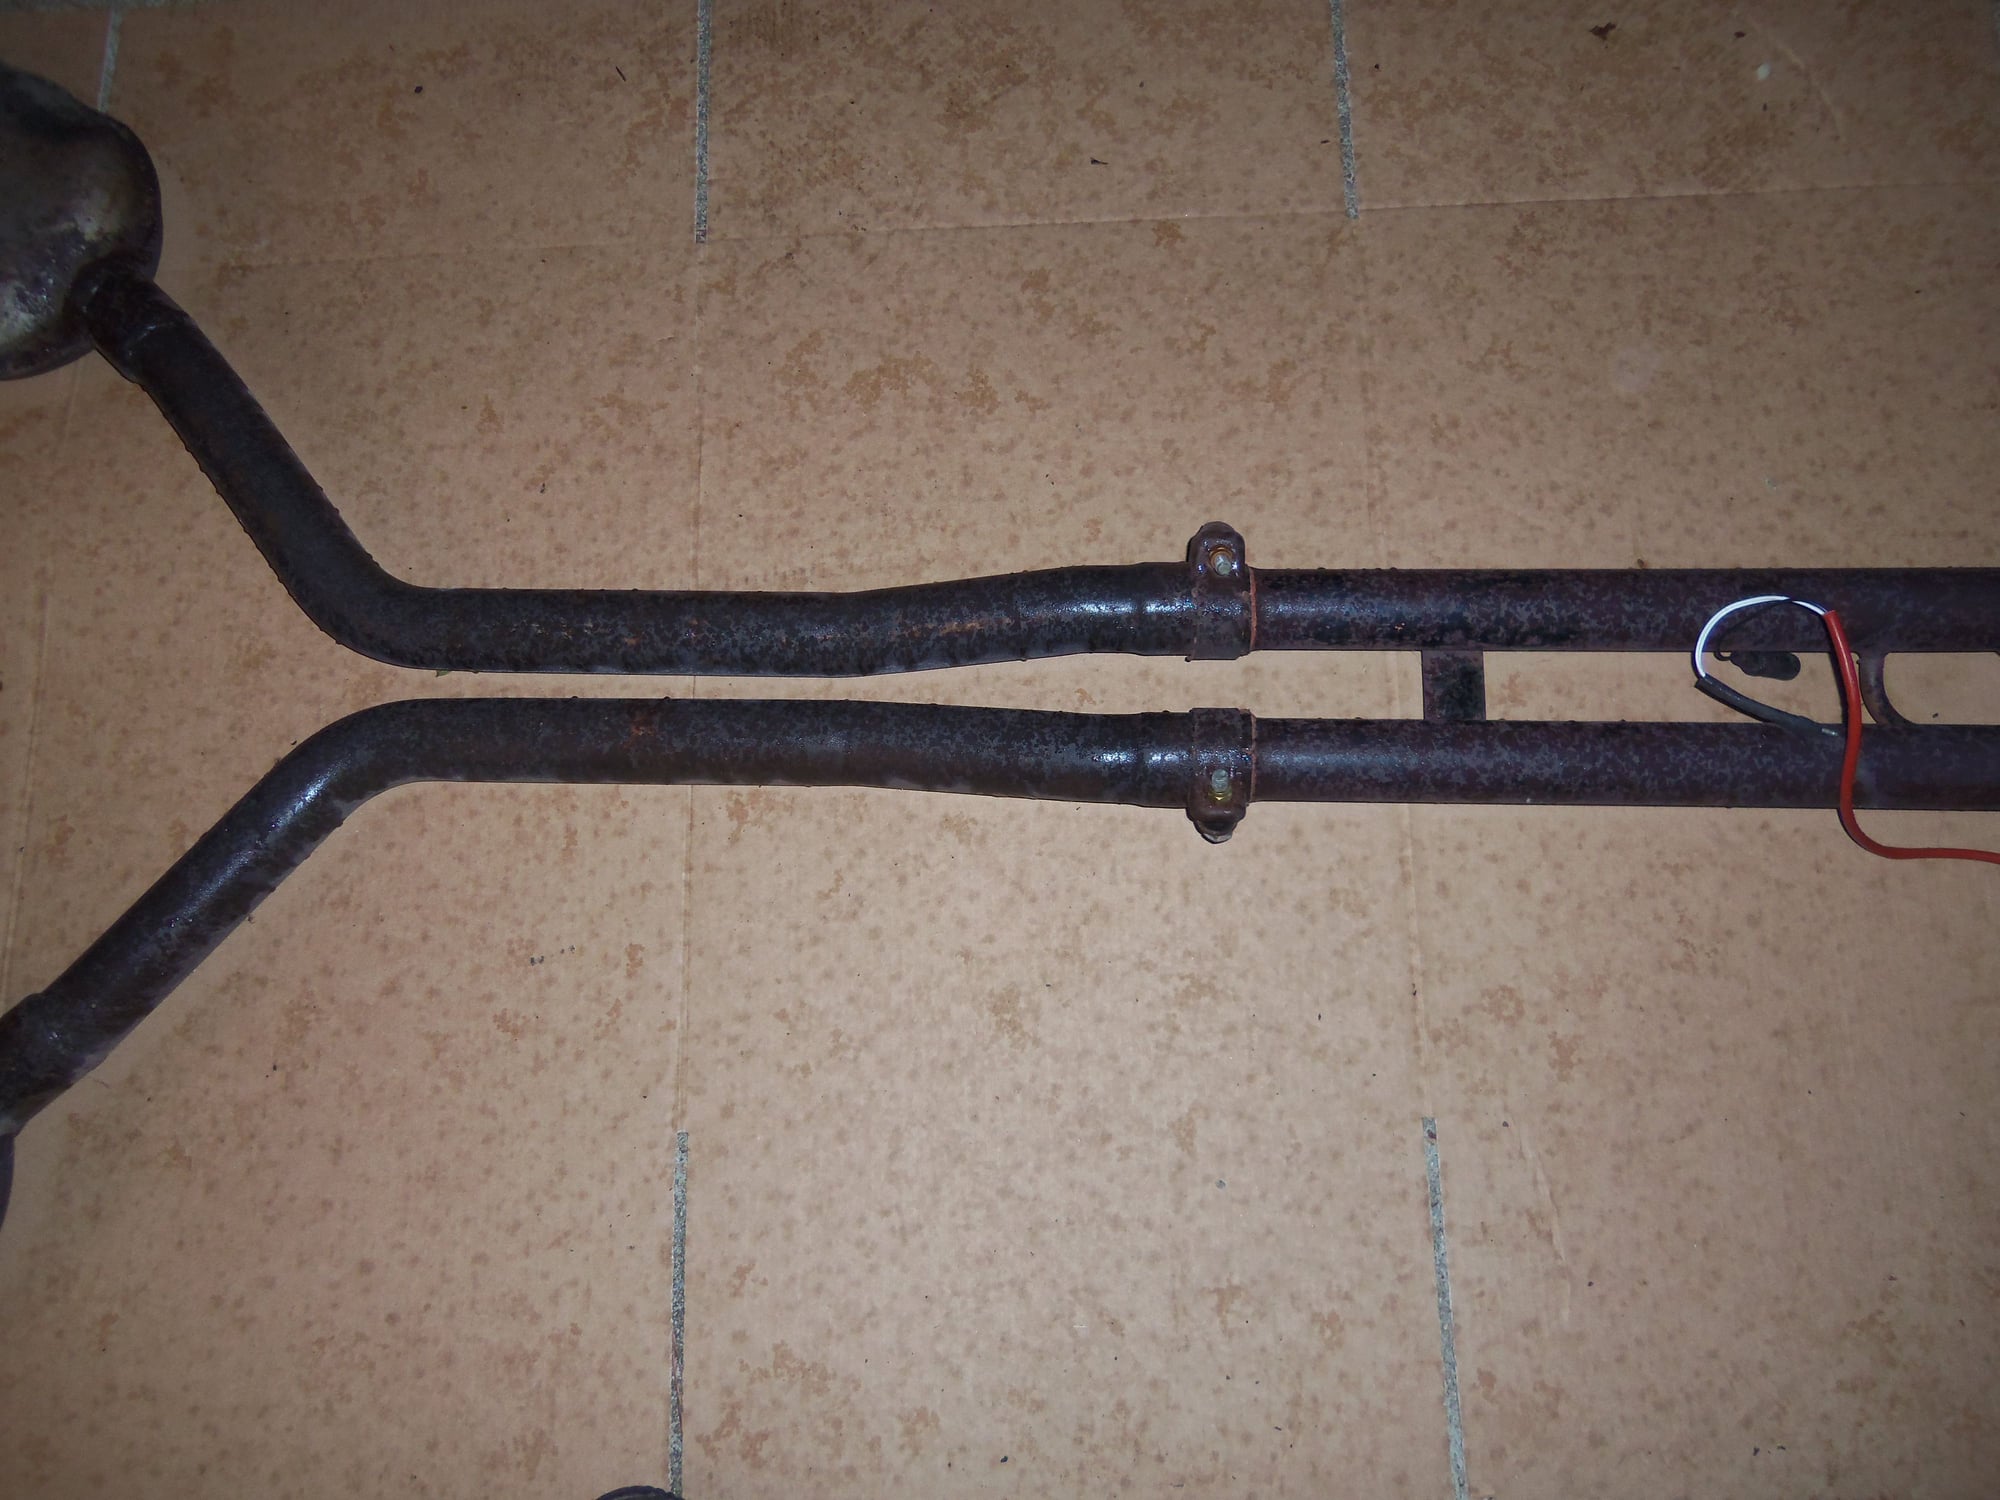
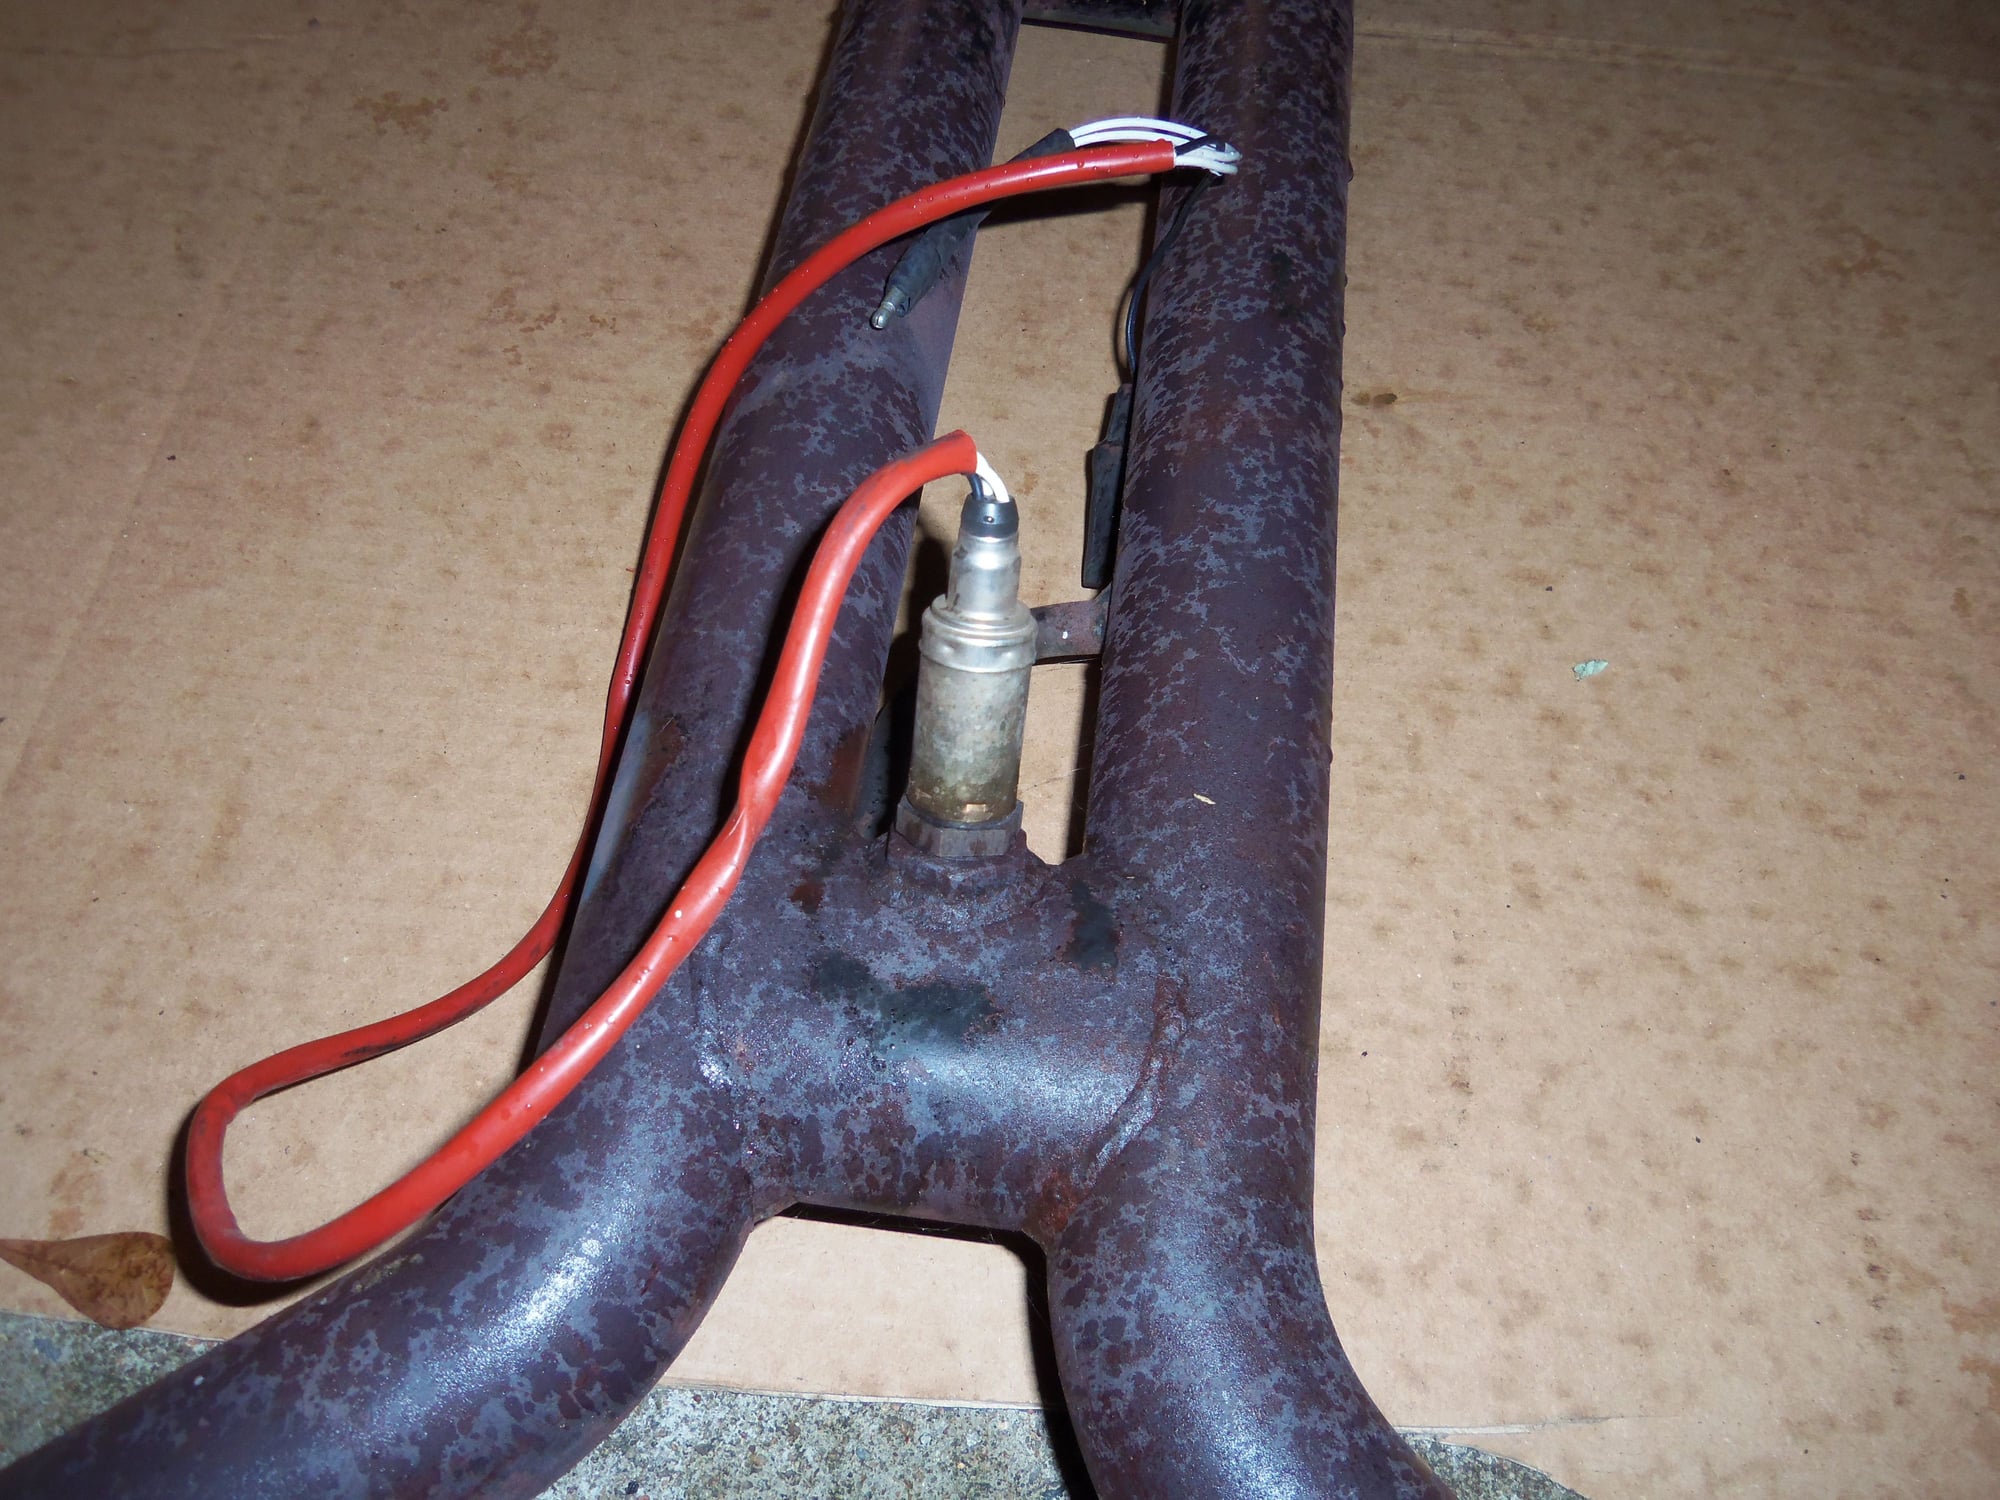
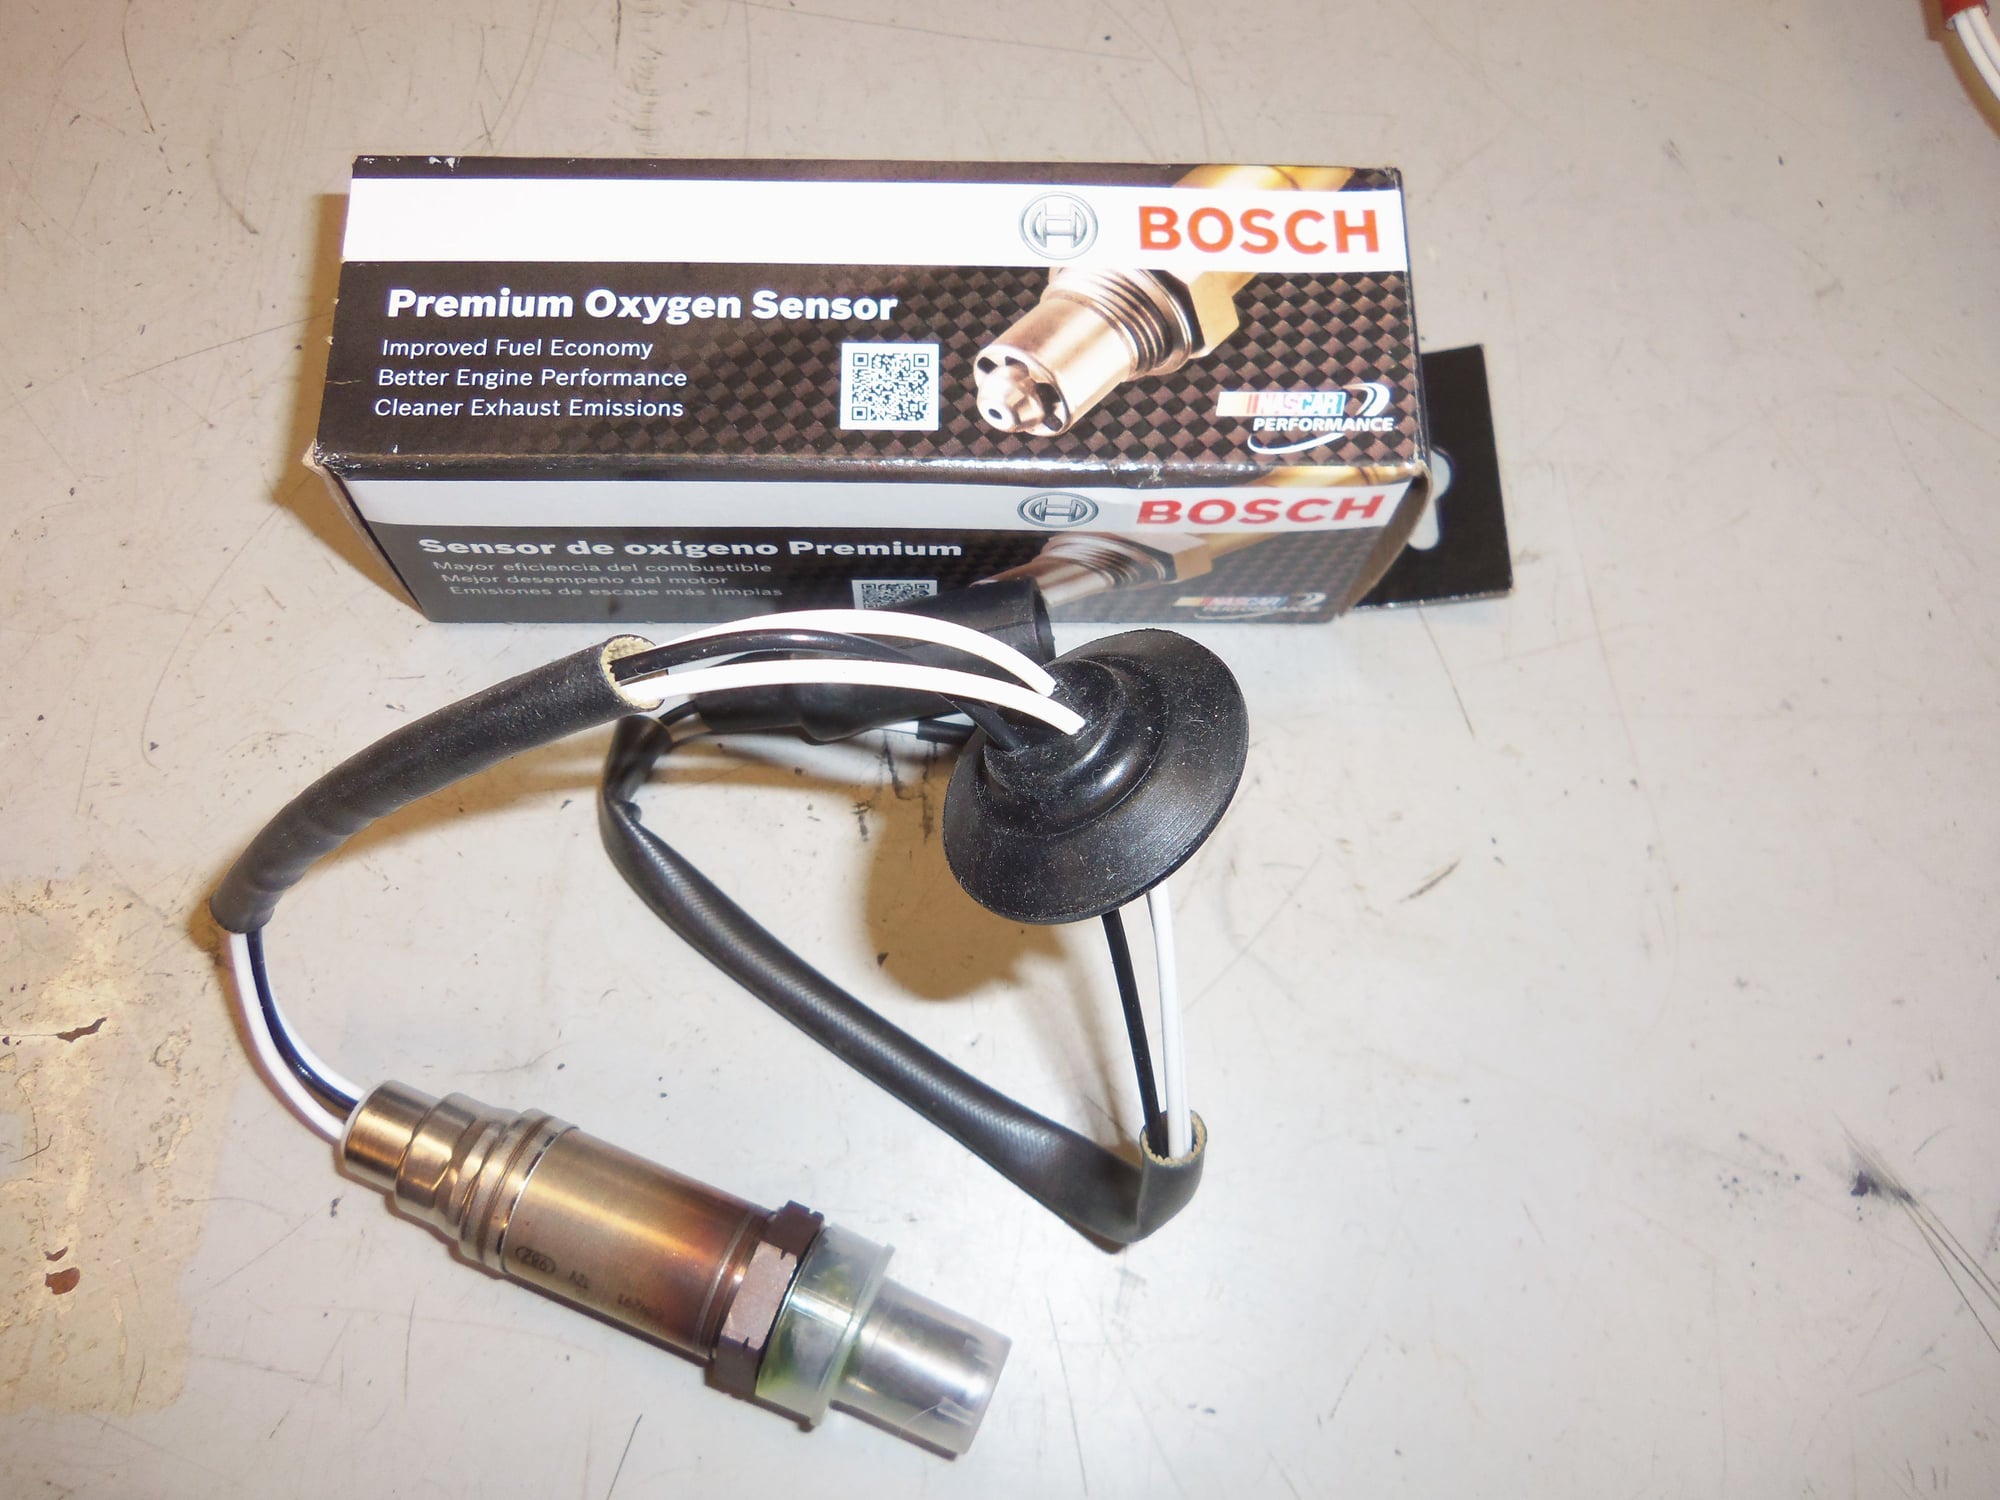
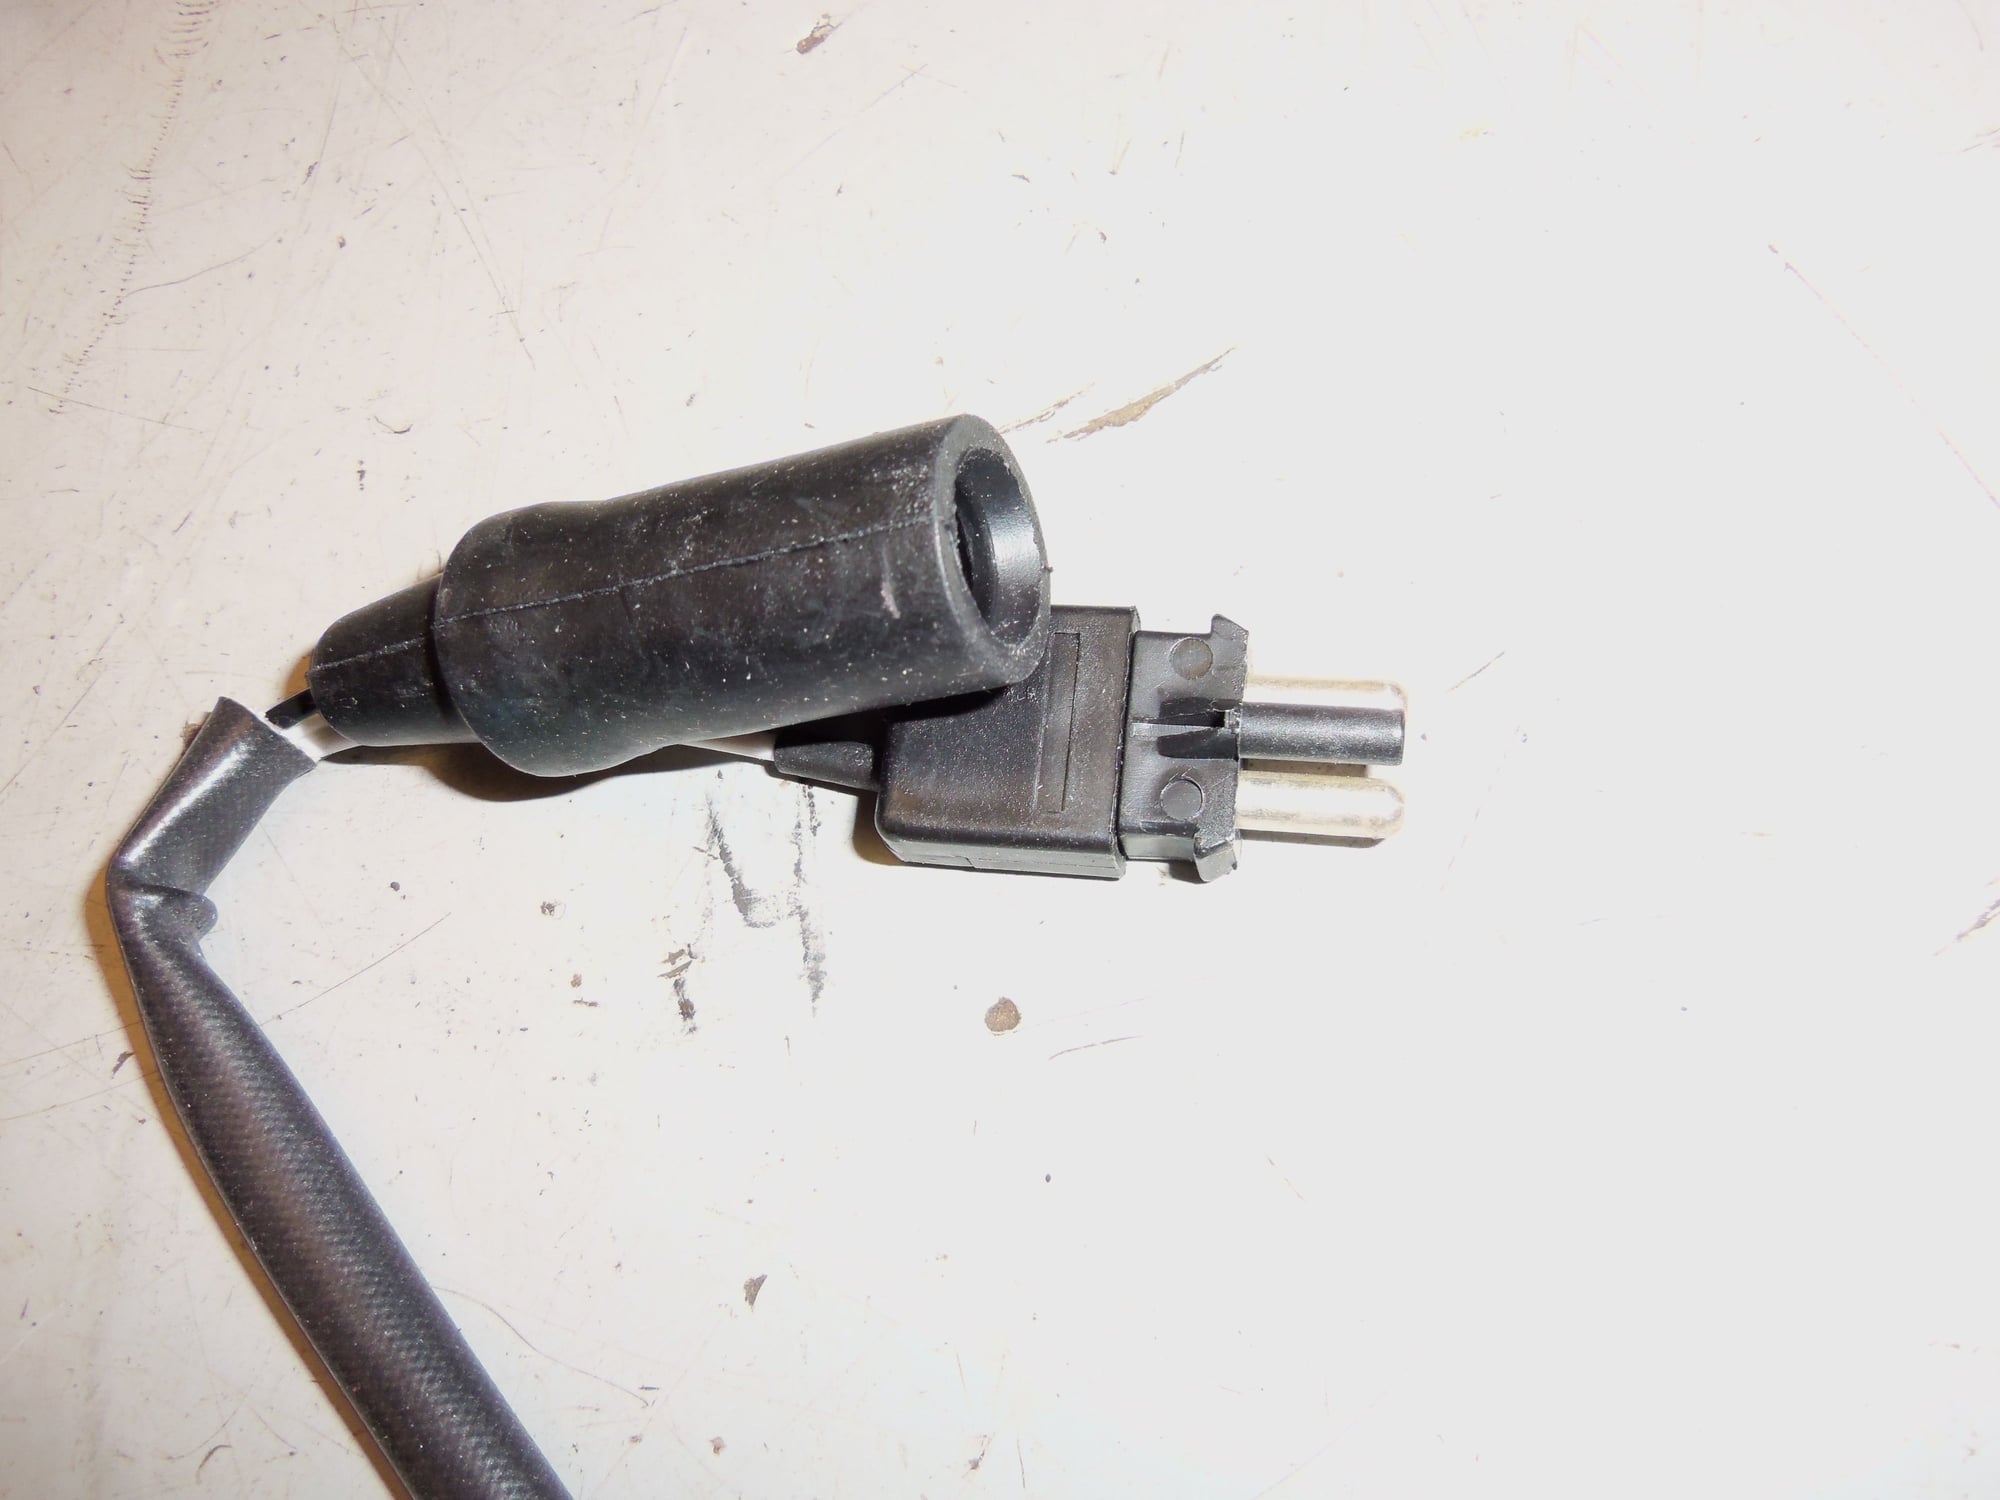
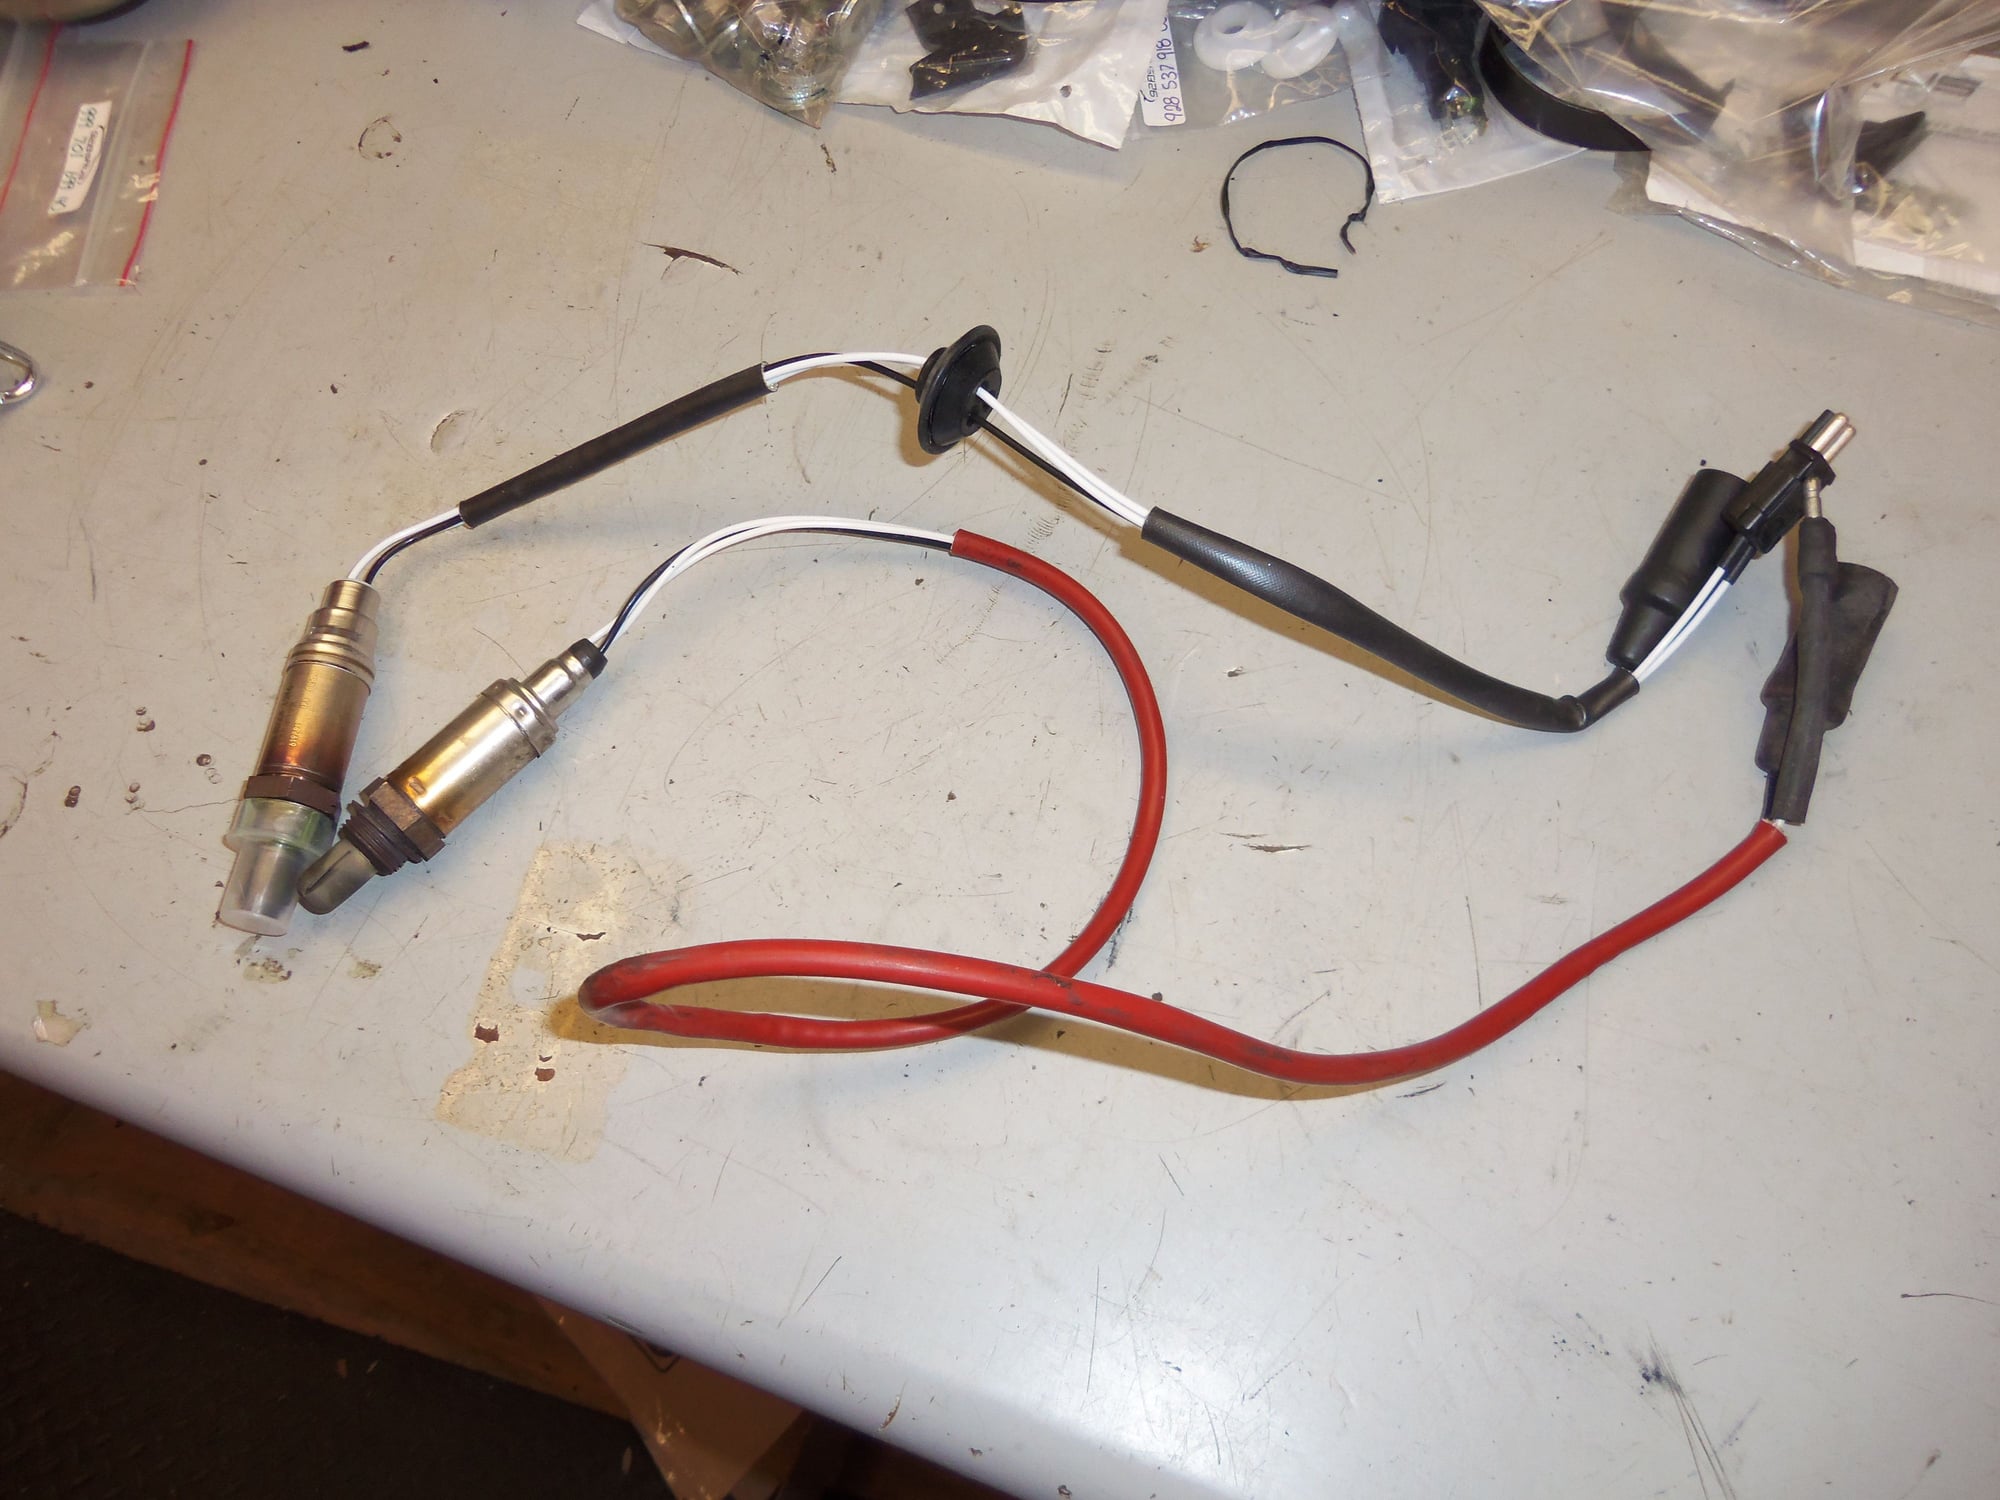
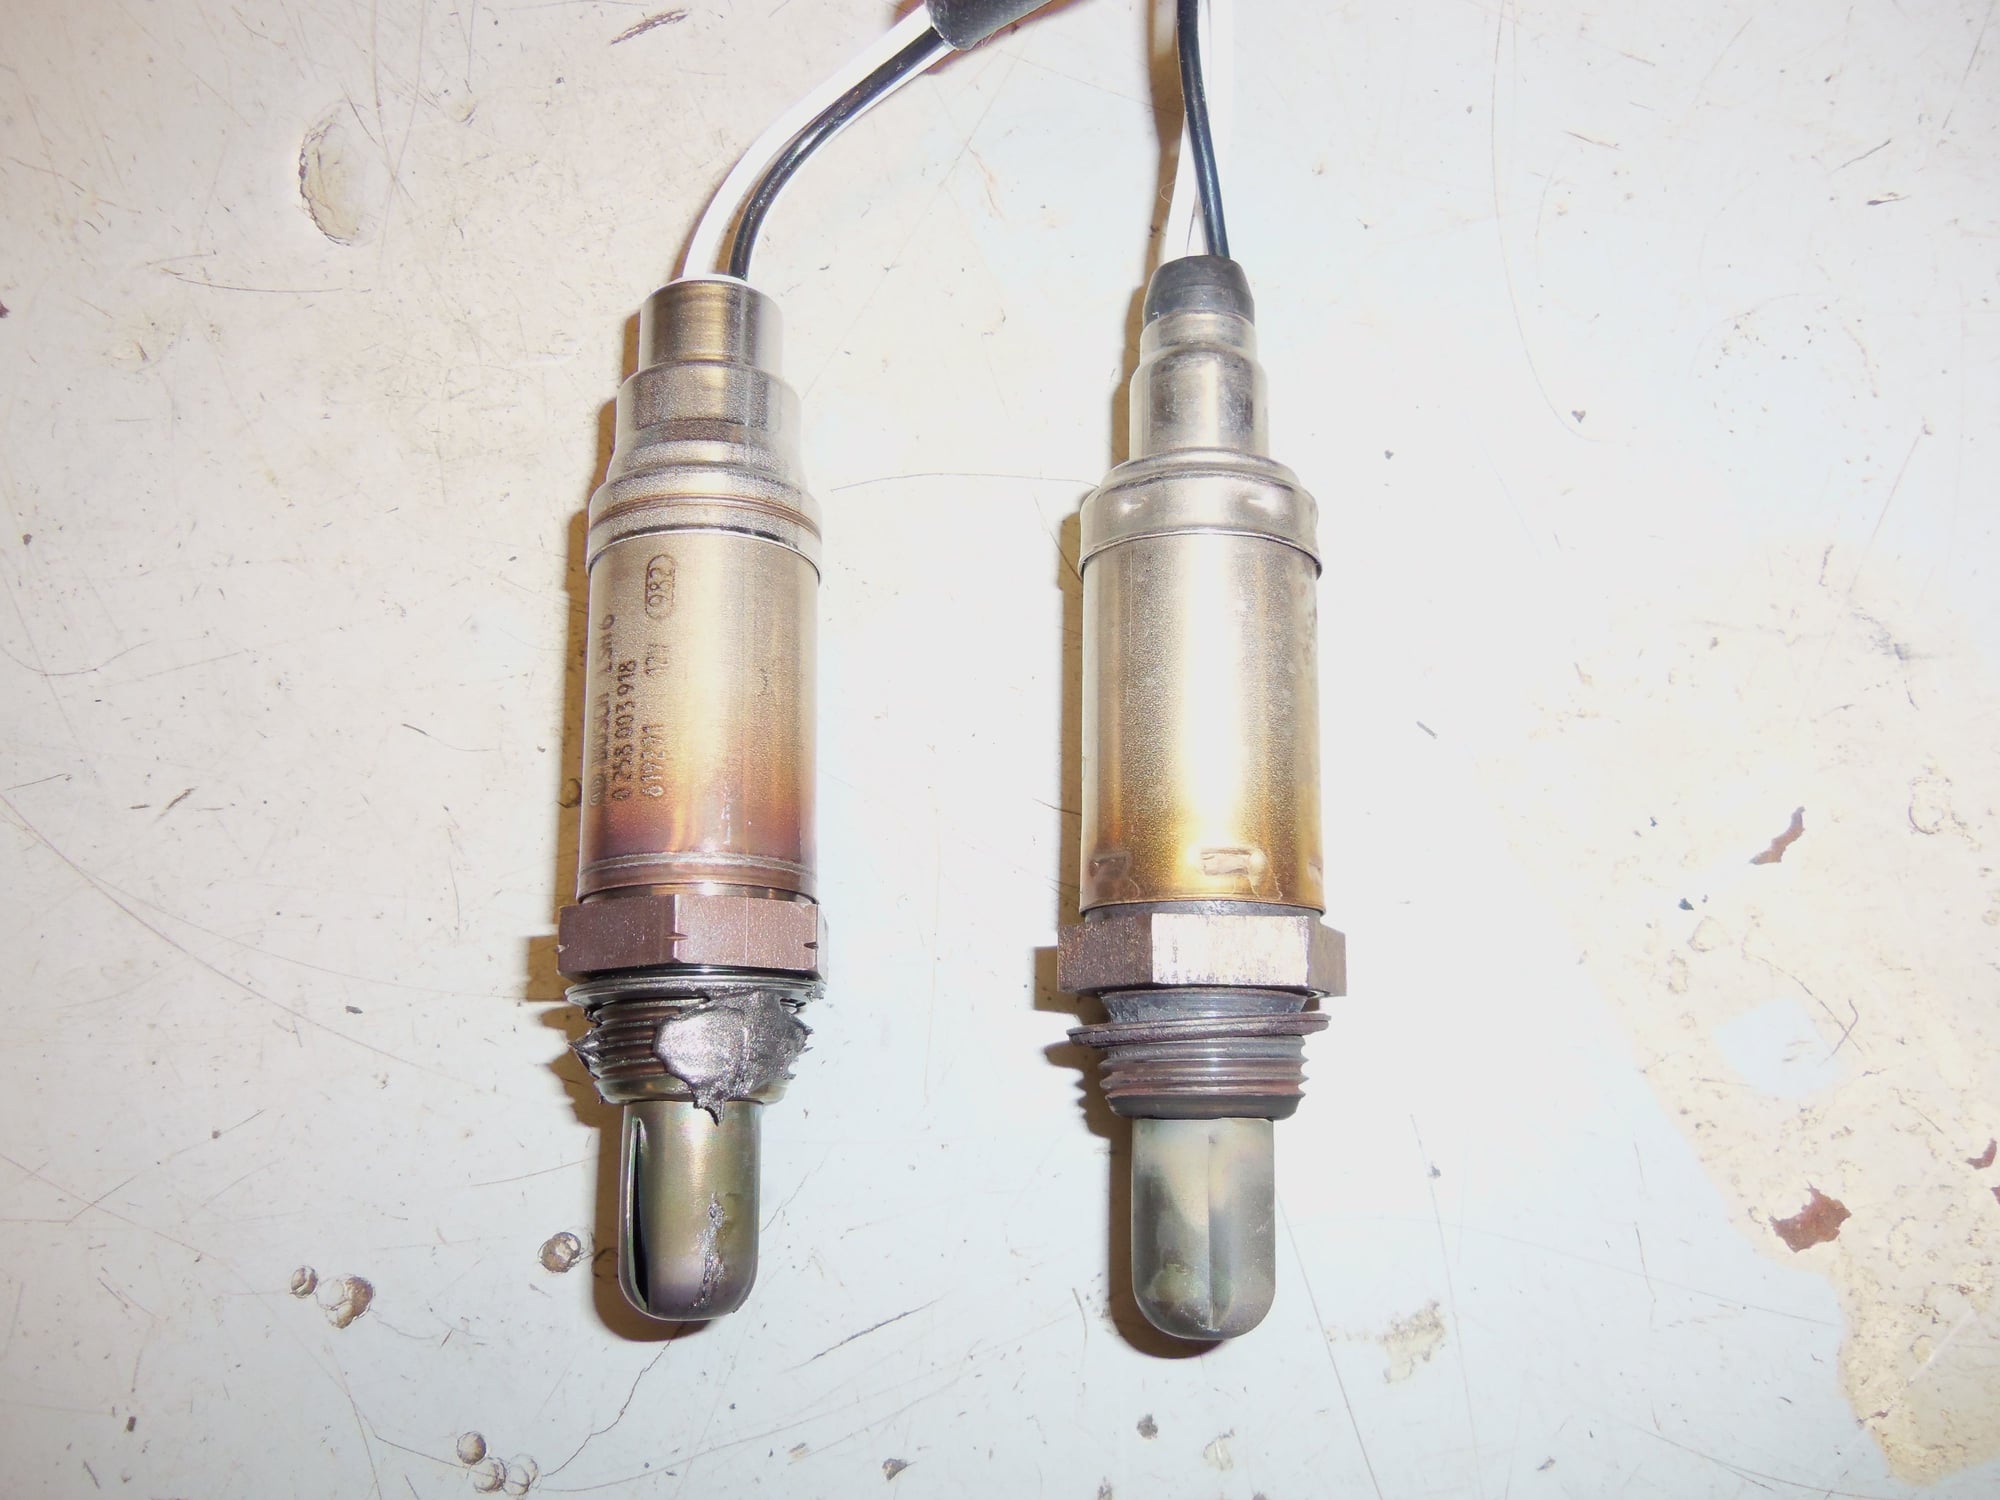
I did learn a not so good thing. The O2 sensor was a universal replacement. Someone had rigged up a connector to plug into the stock female connector for the sensor heater. I have ordered the correct Bosch sensor and will install it.
Ingenious, but not stock. Has to go.
No need to break these joints.
No rubber body grommet either...
Correct replacement O2 sensor.
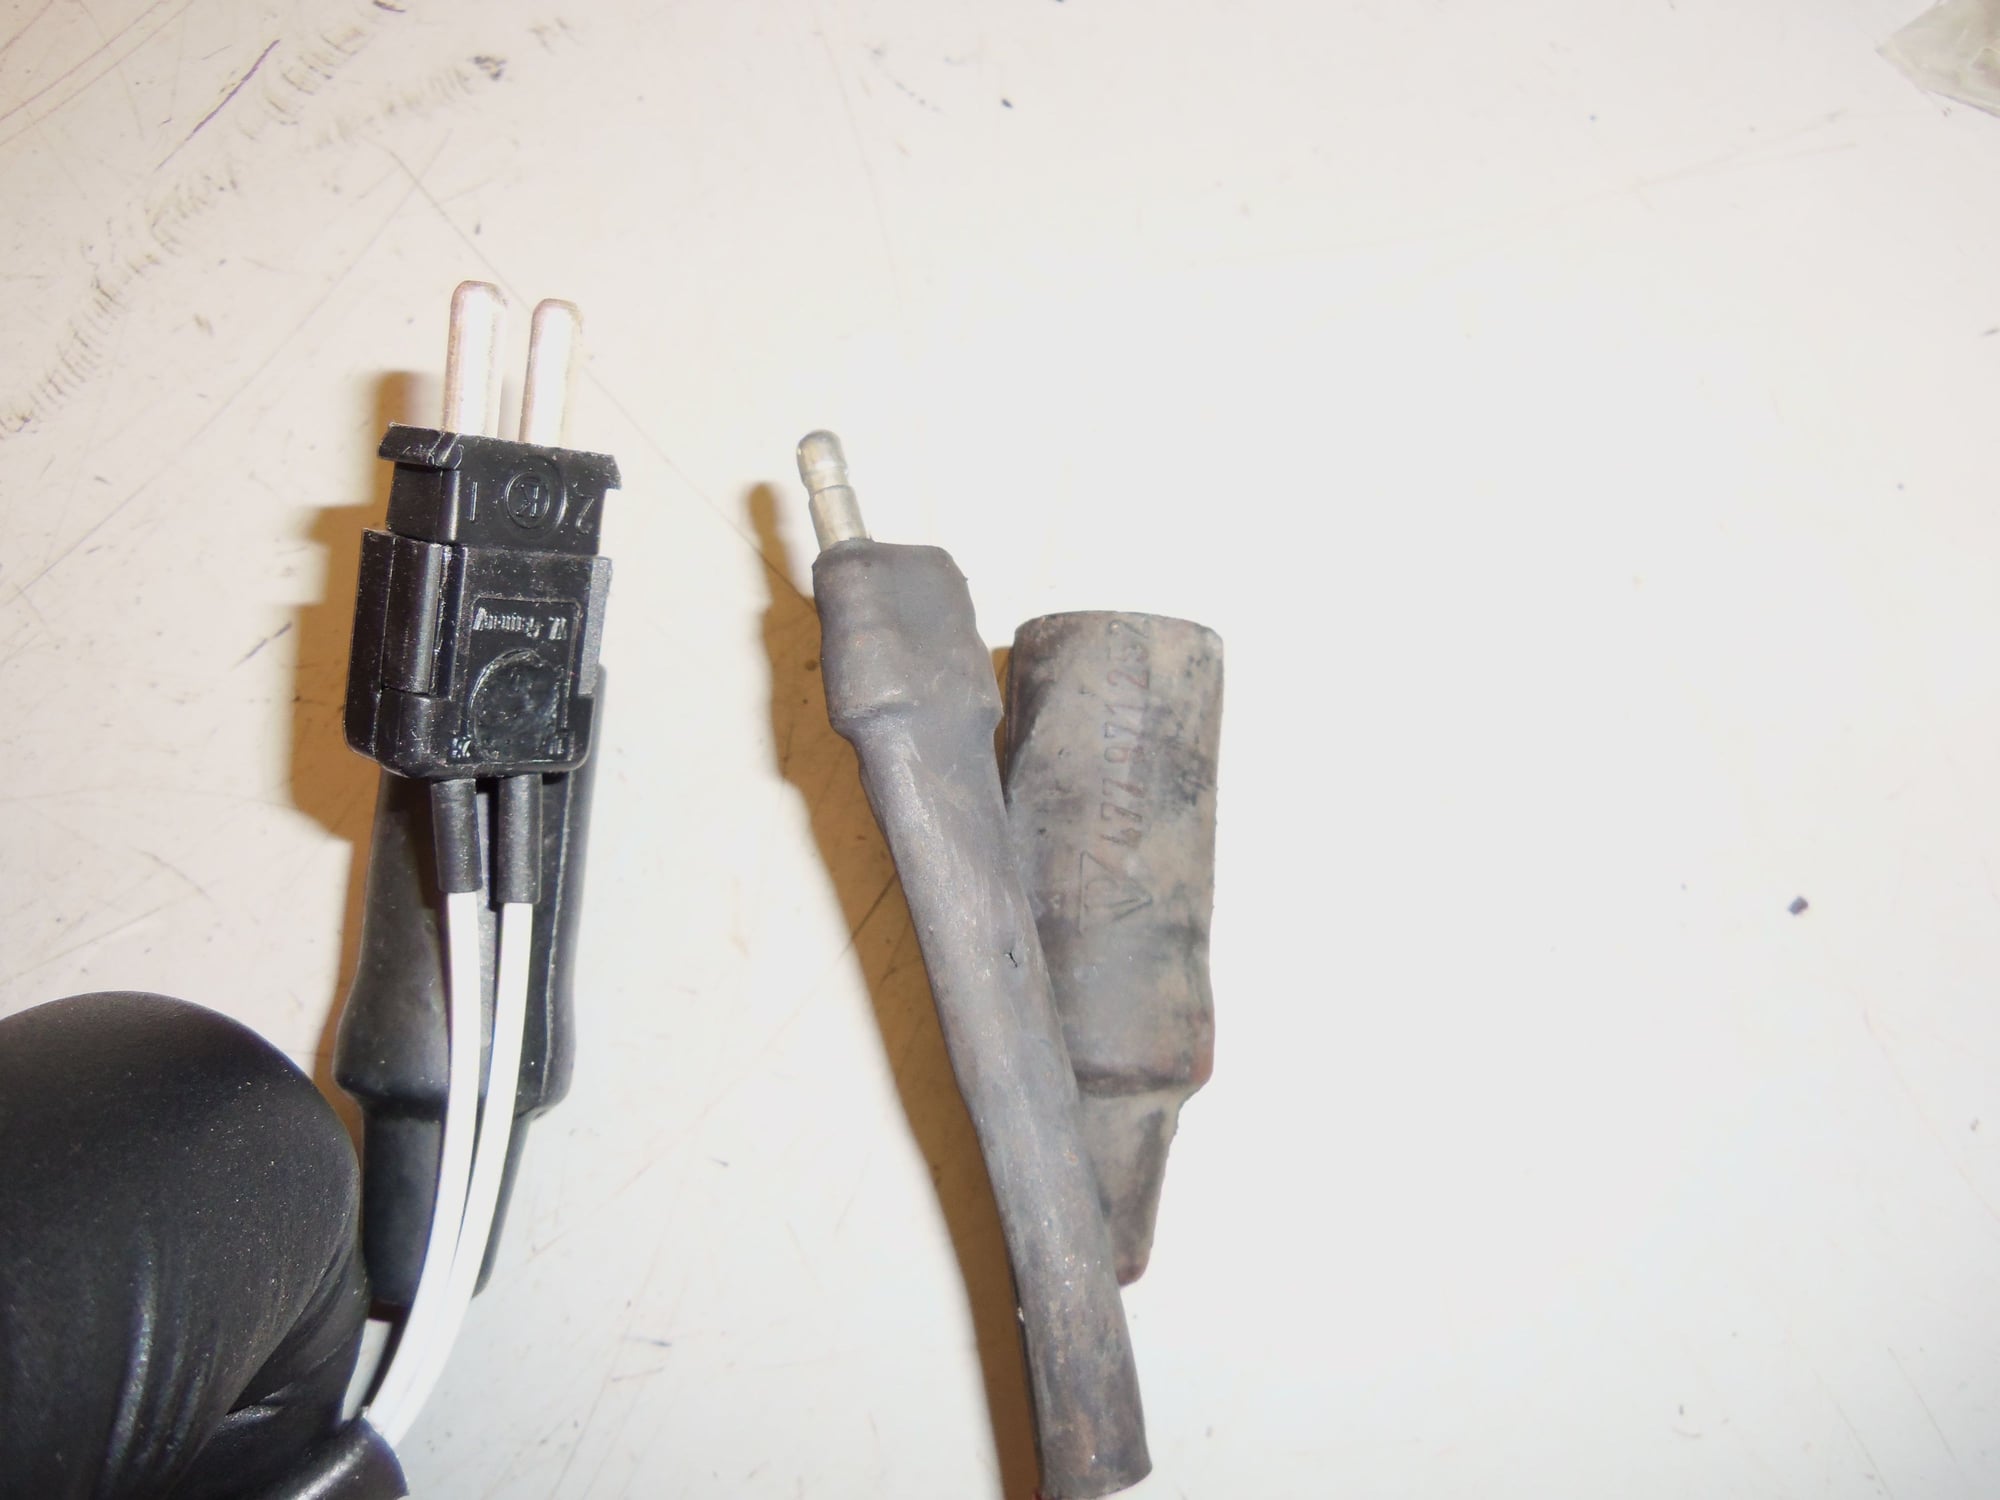
Correct sensor heater male plug.
New versus old.
Not quite the same...
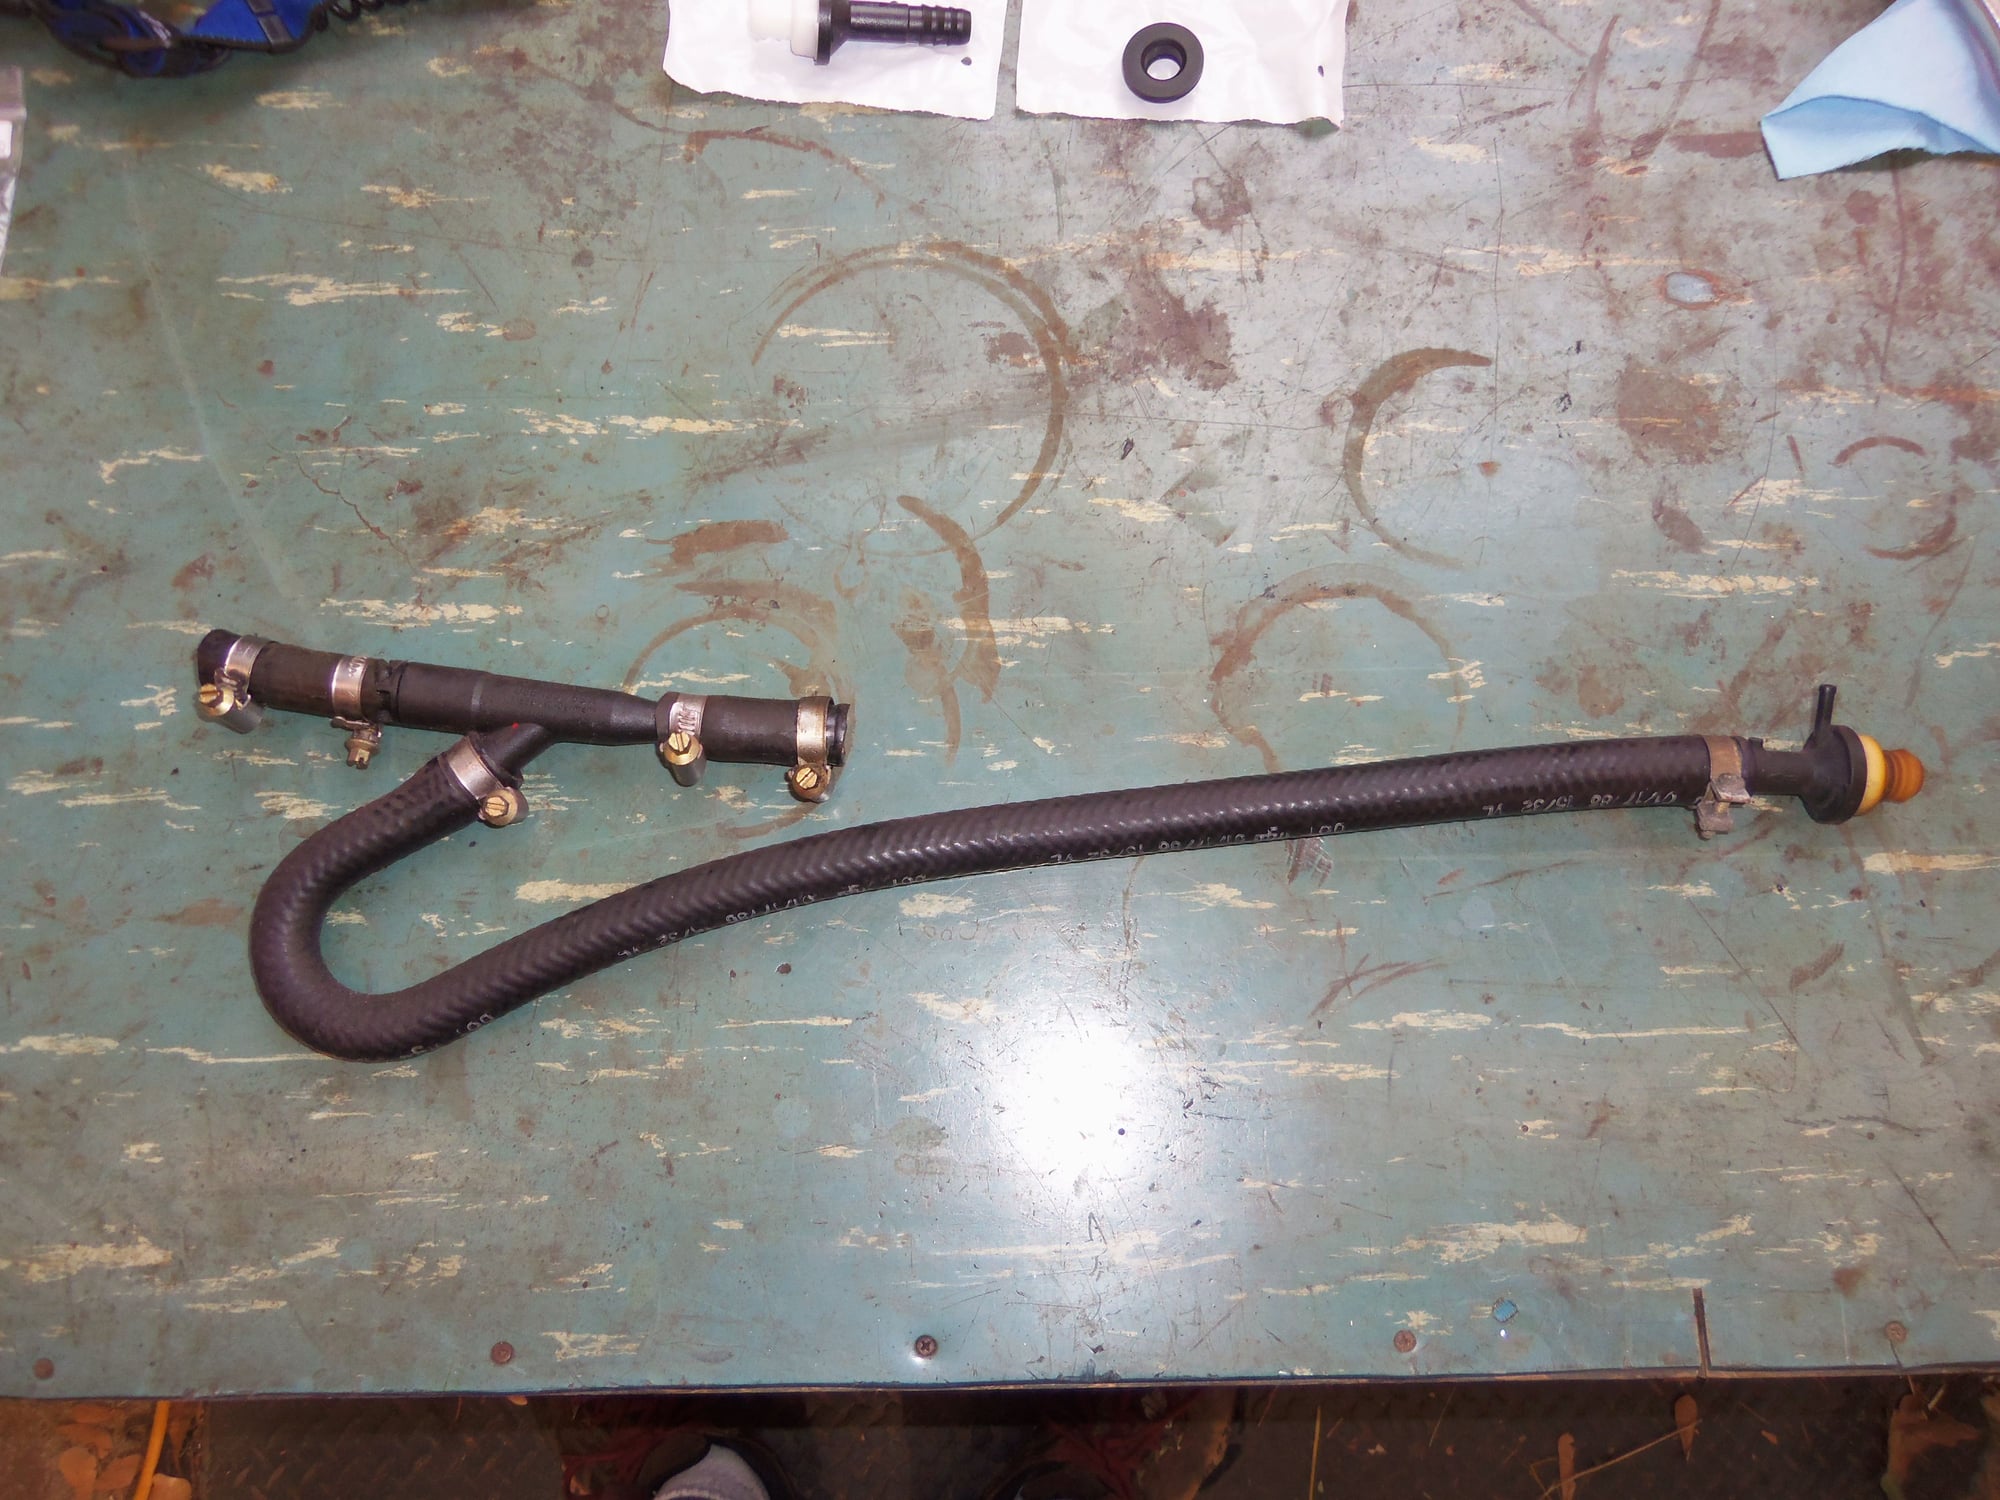
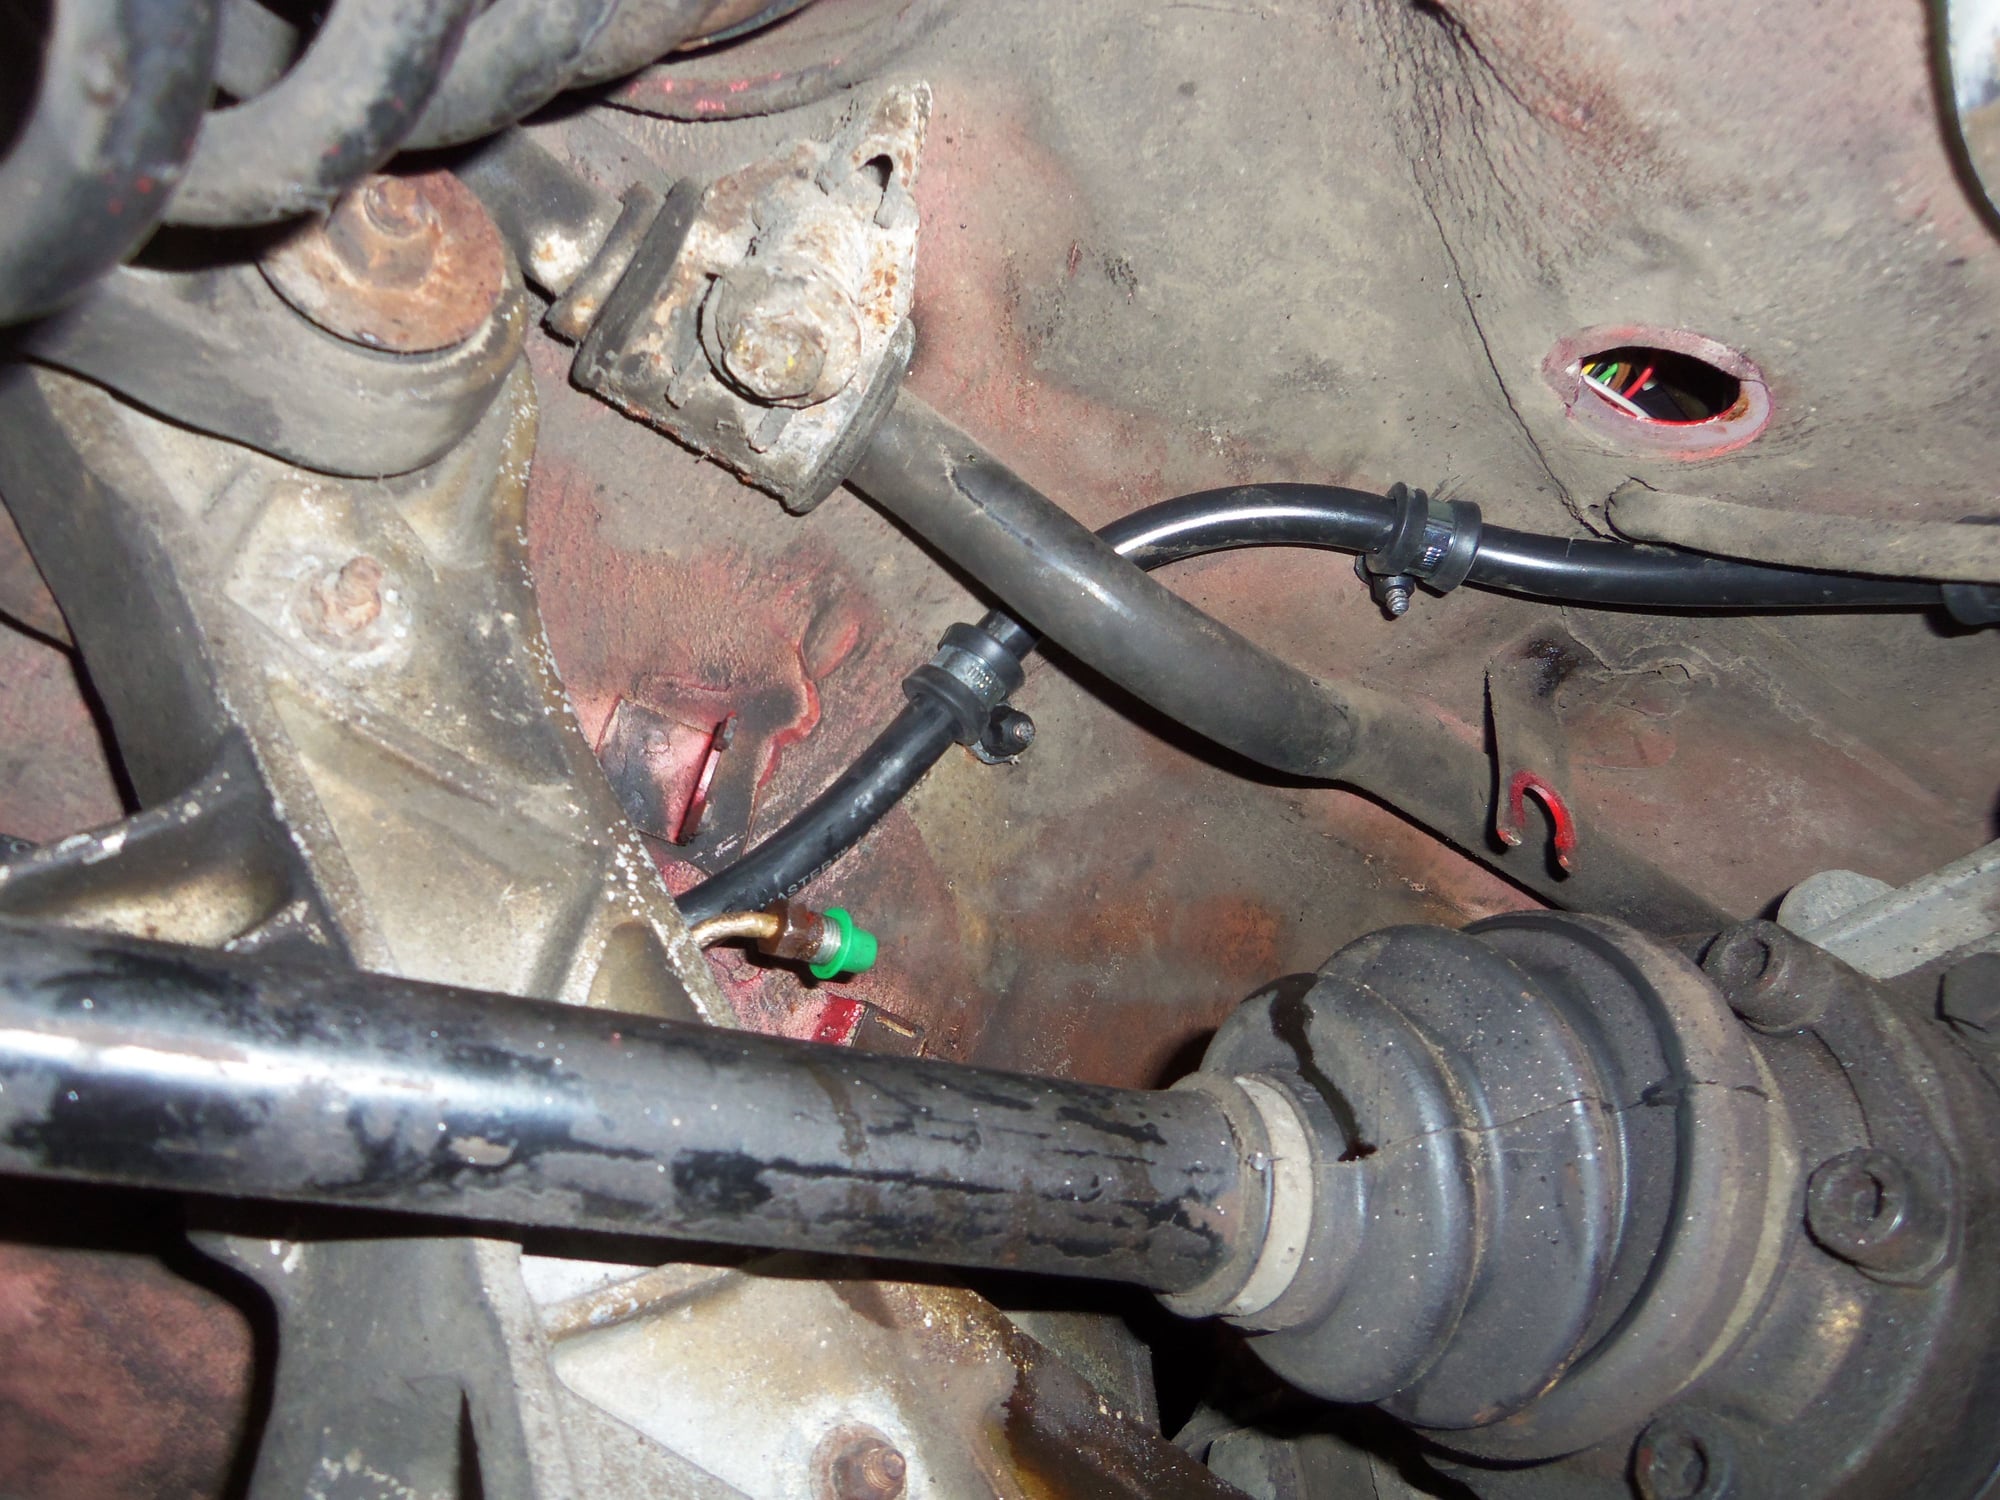
With much mangling of fingers, curse words, and creative use of long needle nosed pliers, I got the rubber and plastic vacuum lines off both ends of the torque tube. Of course, after all that effort, mine were fine. The plastic was not brittle and the rubber still soft. Too bad, I had new parts and they were going in.
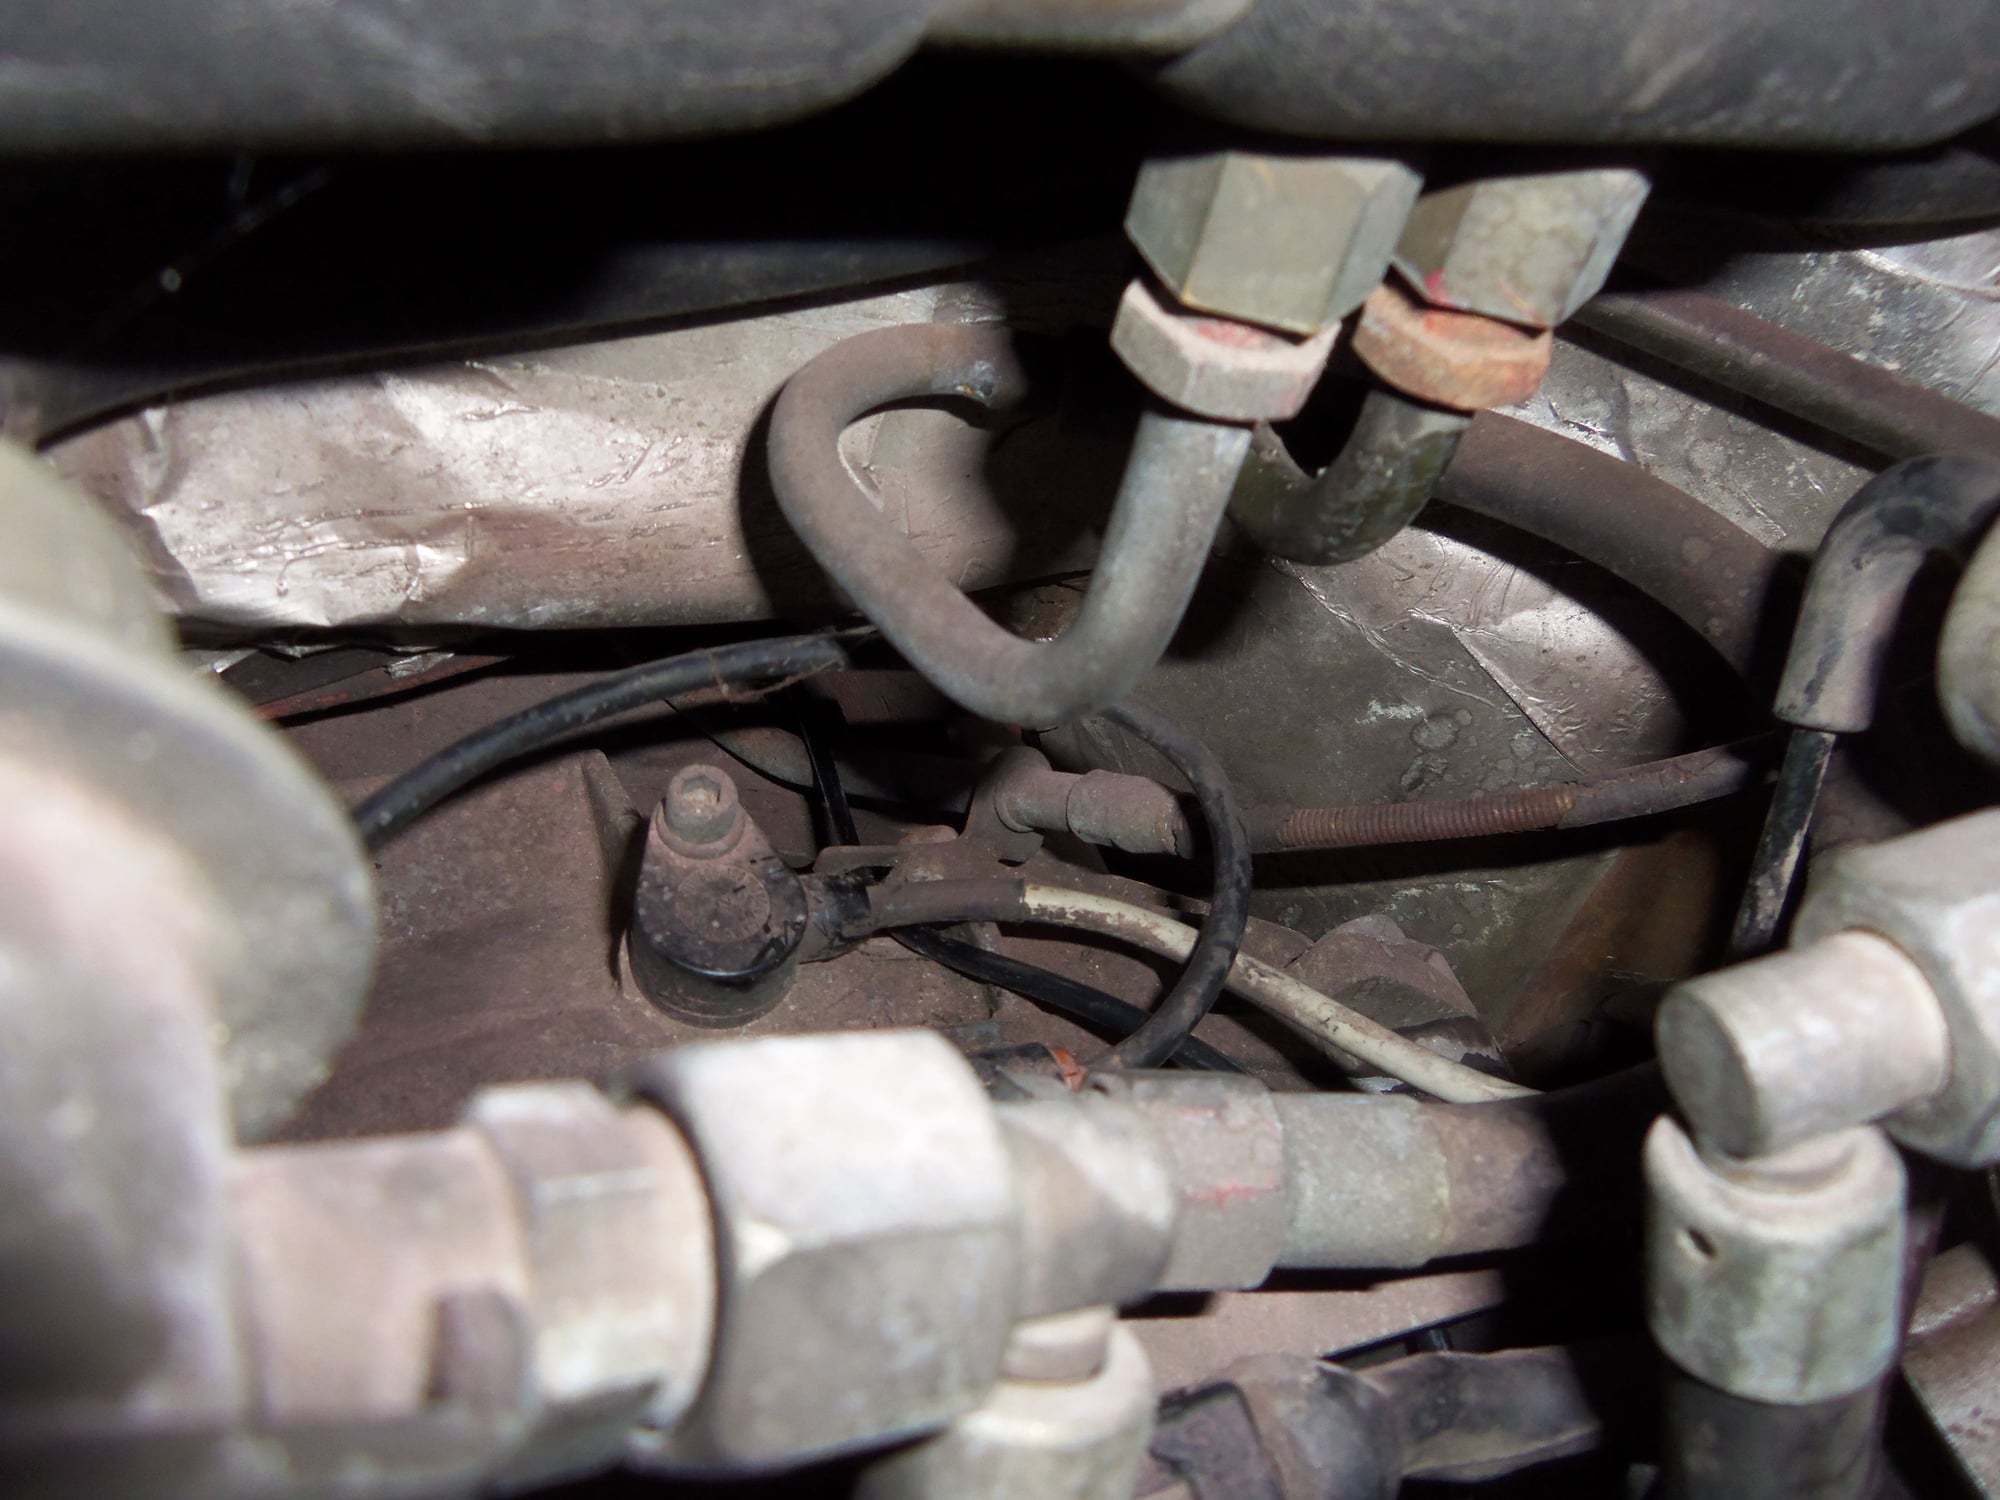
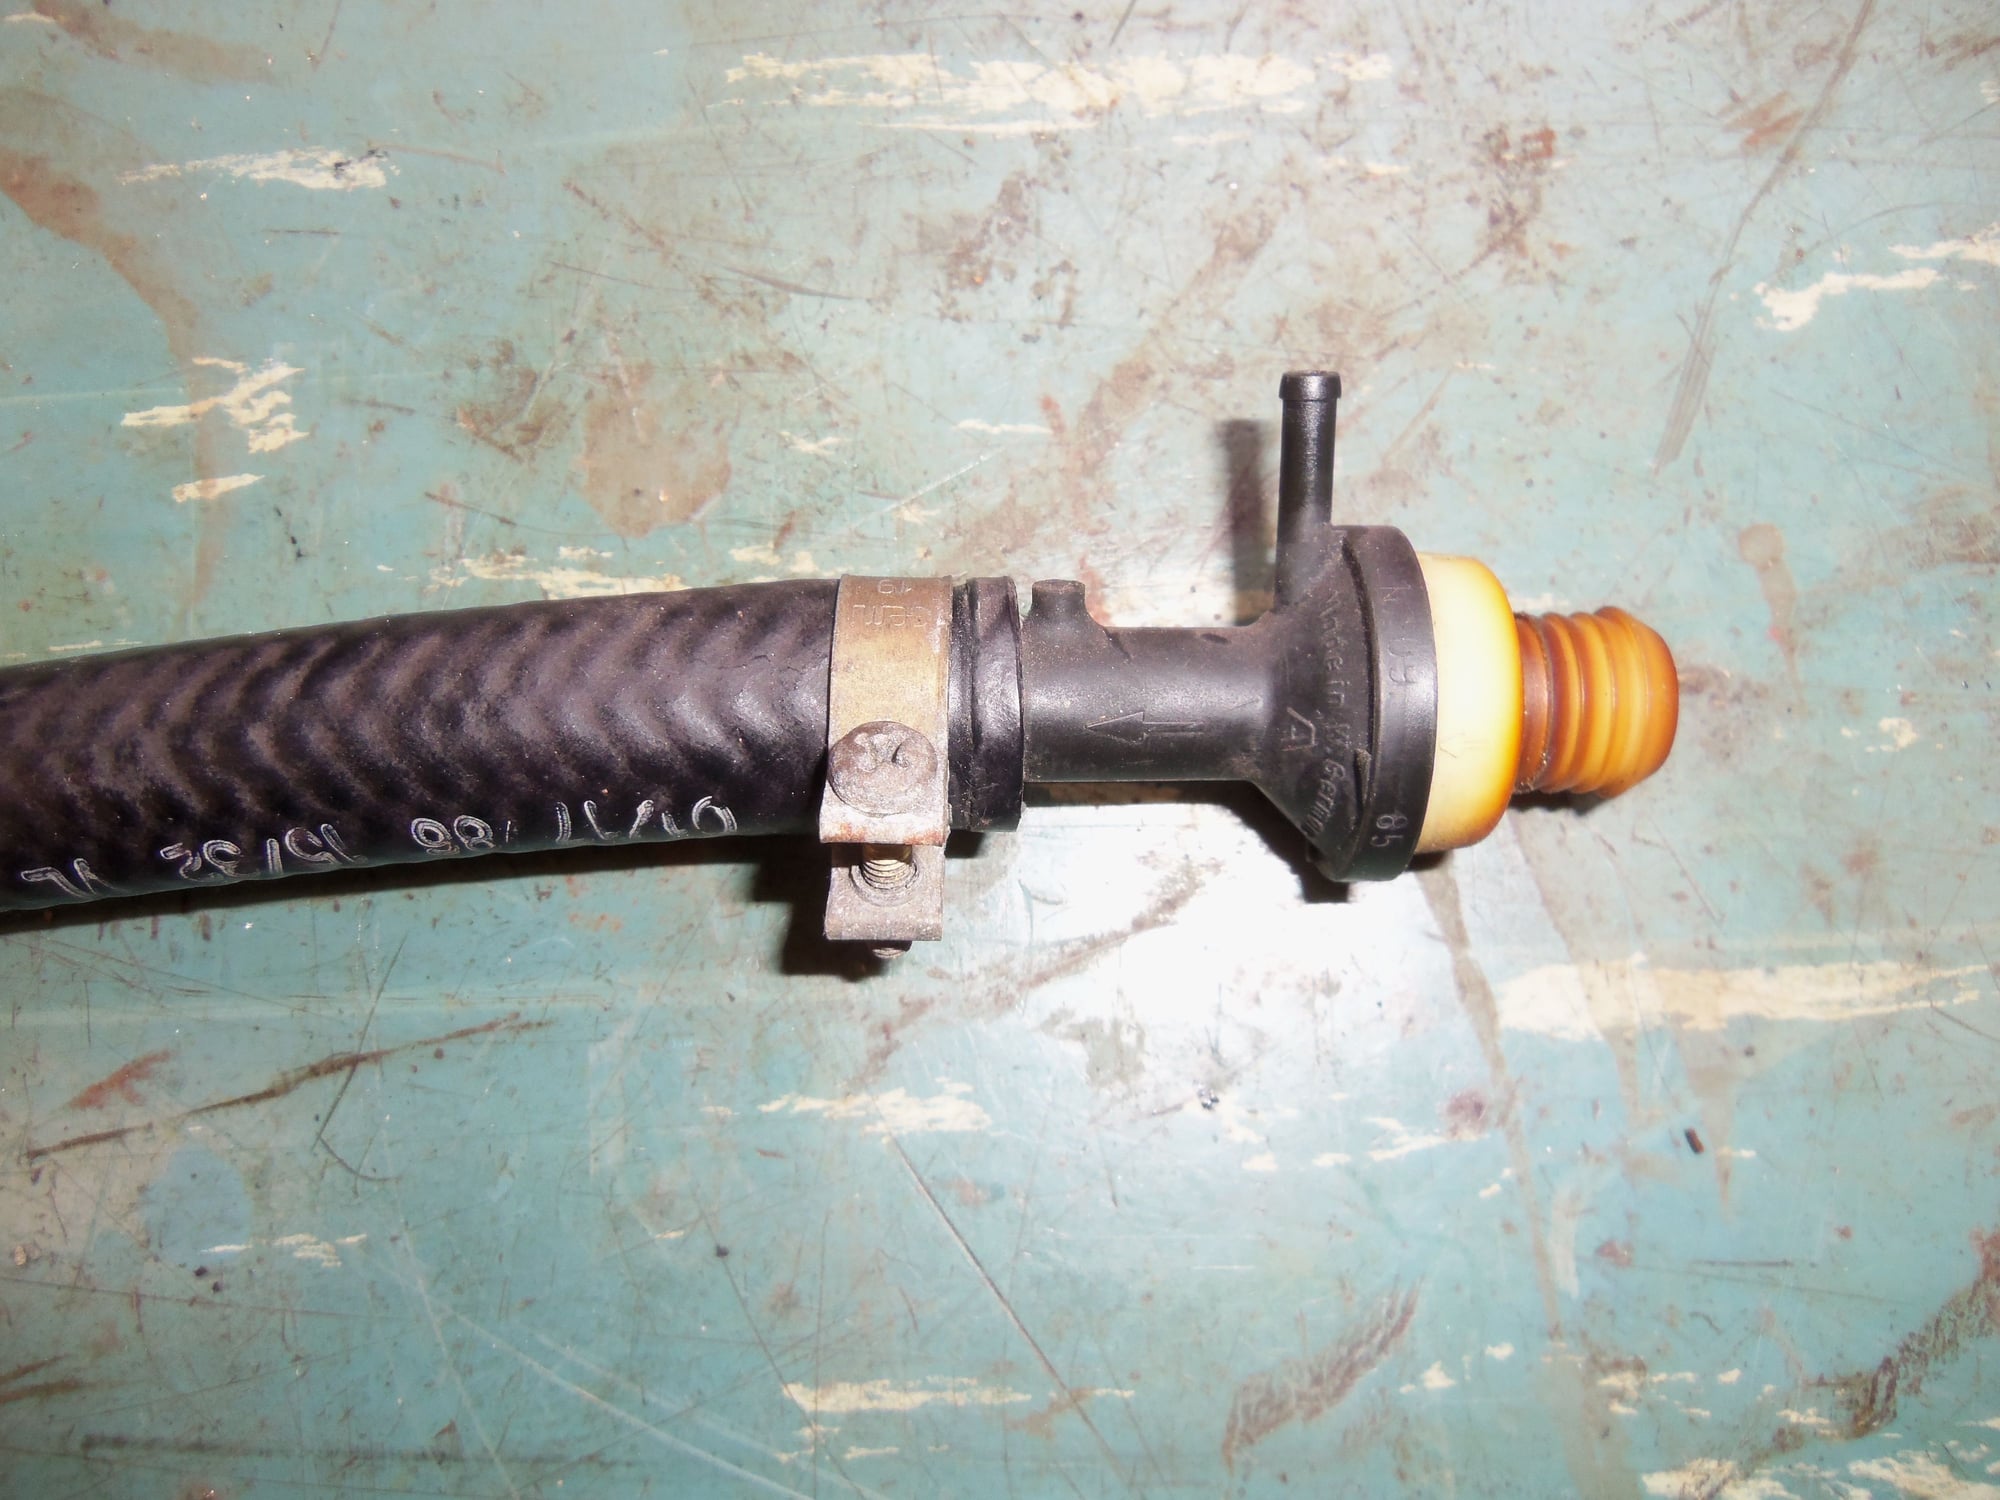
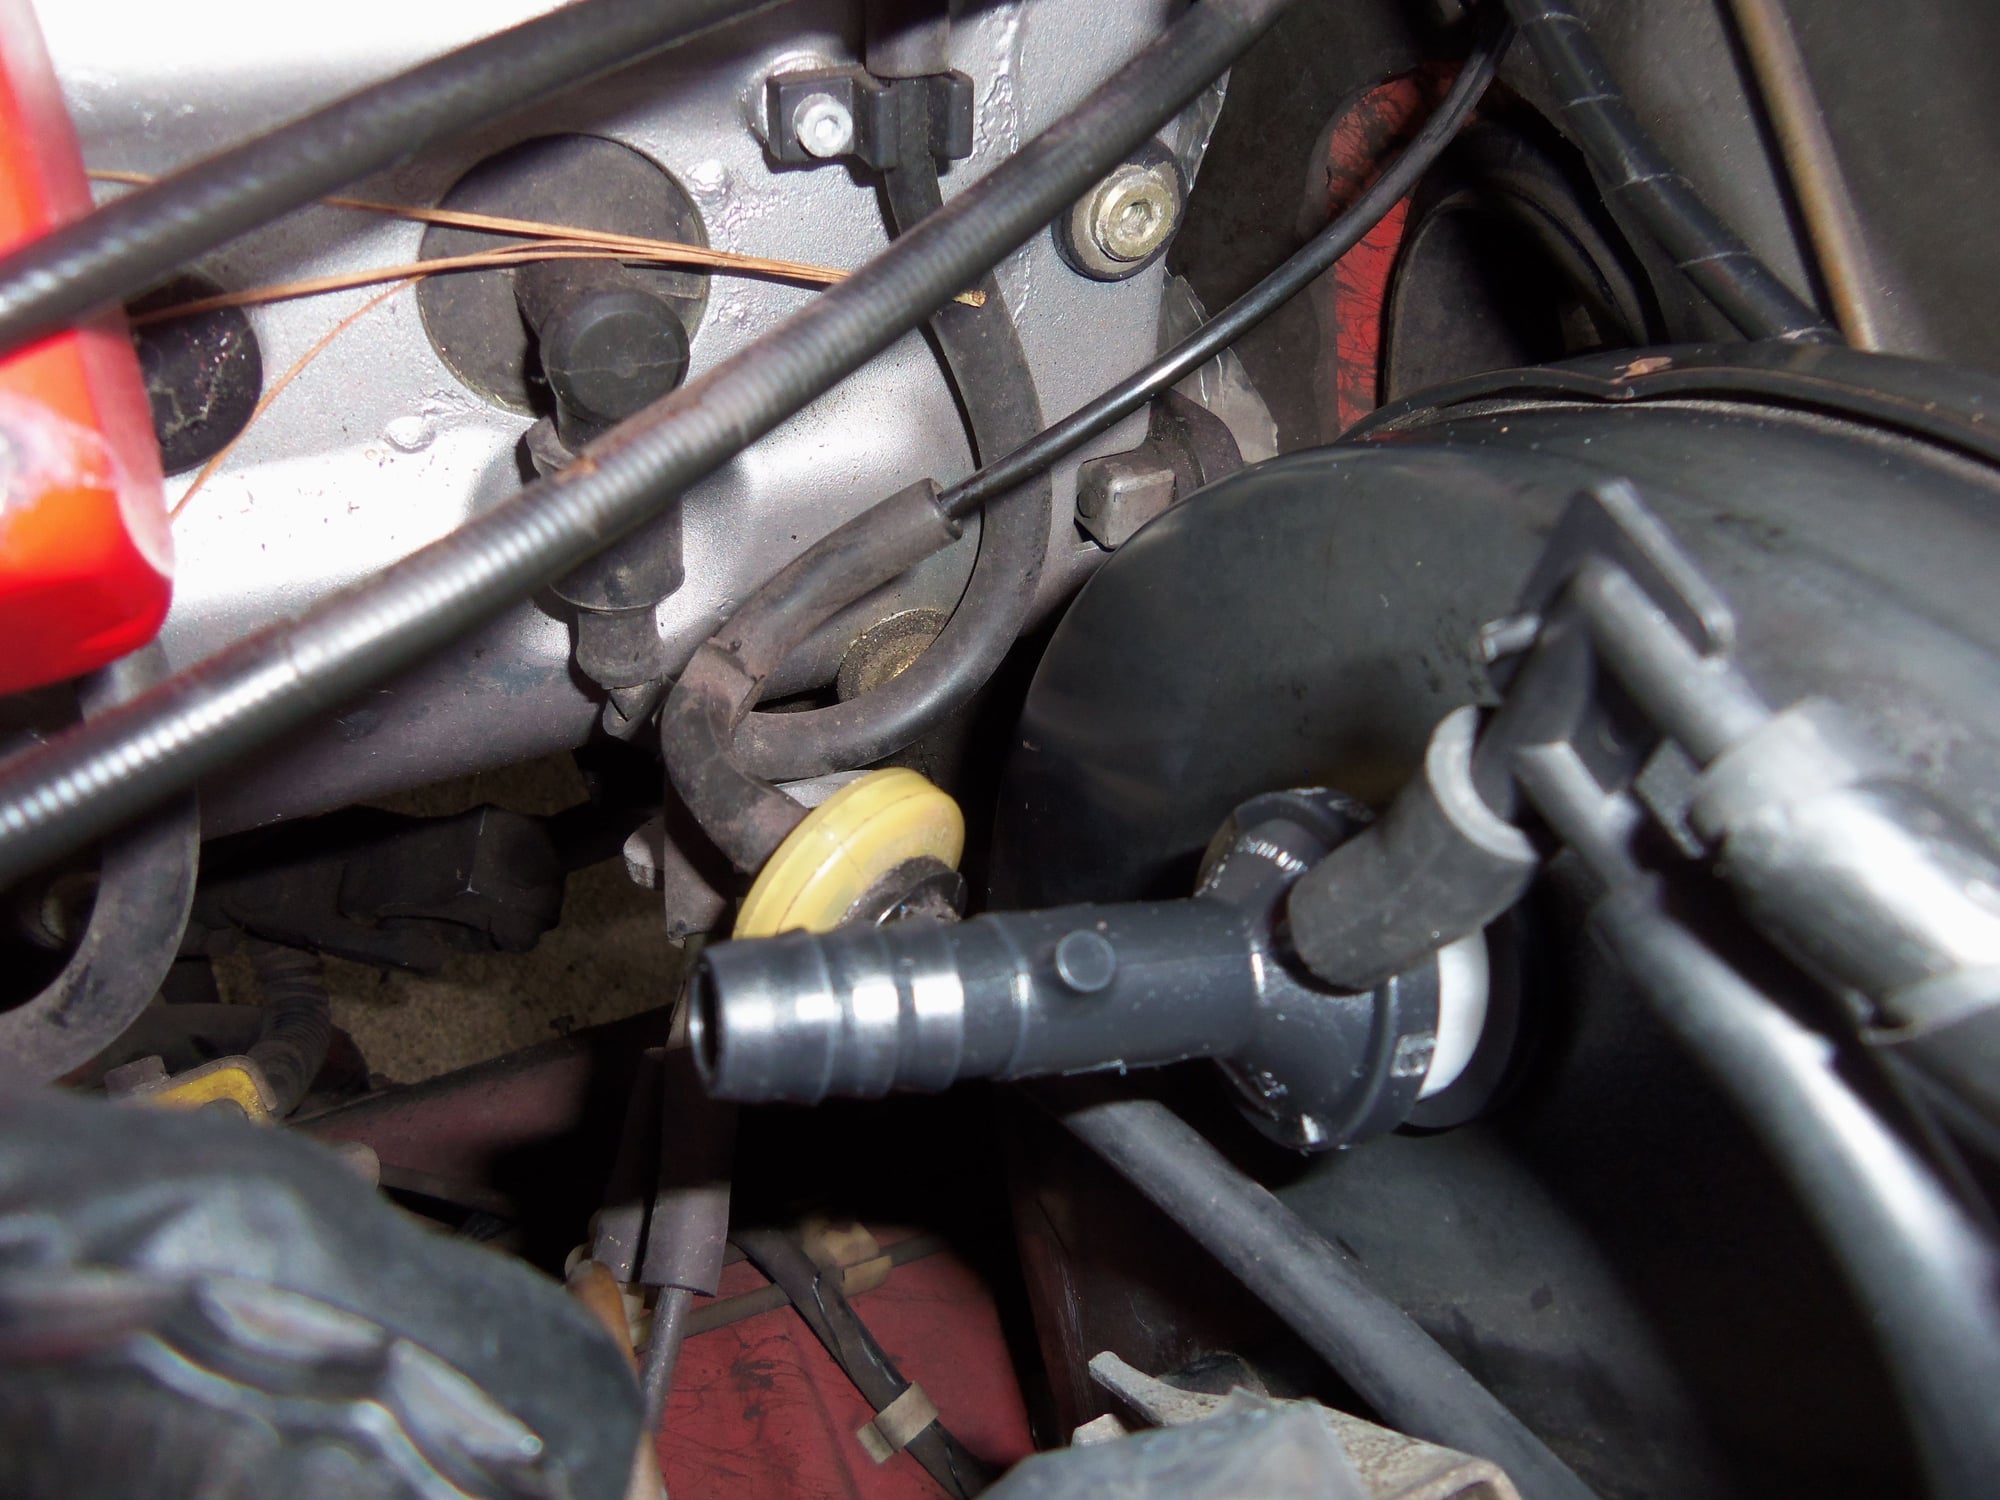
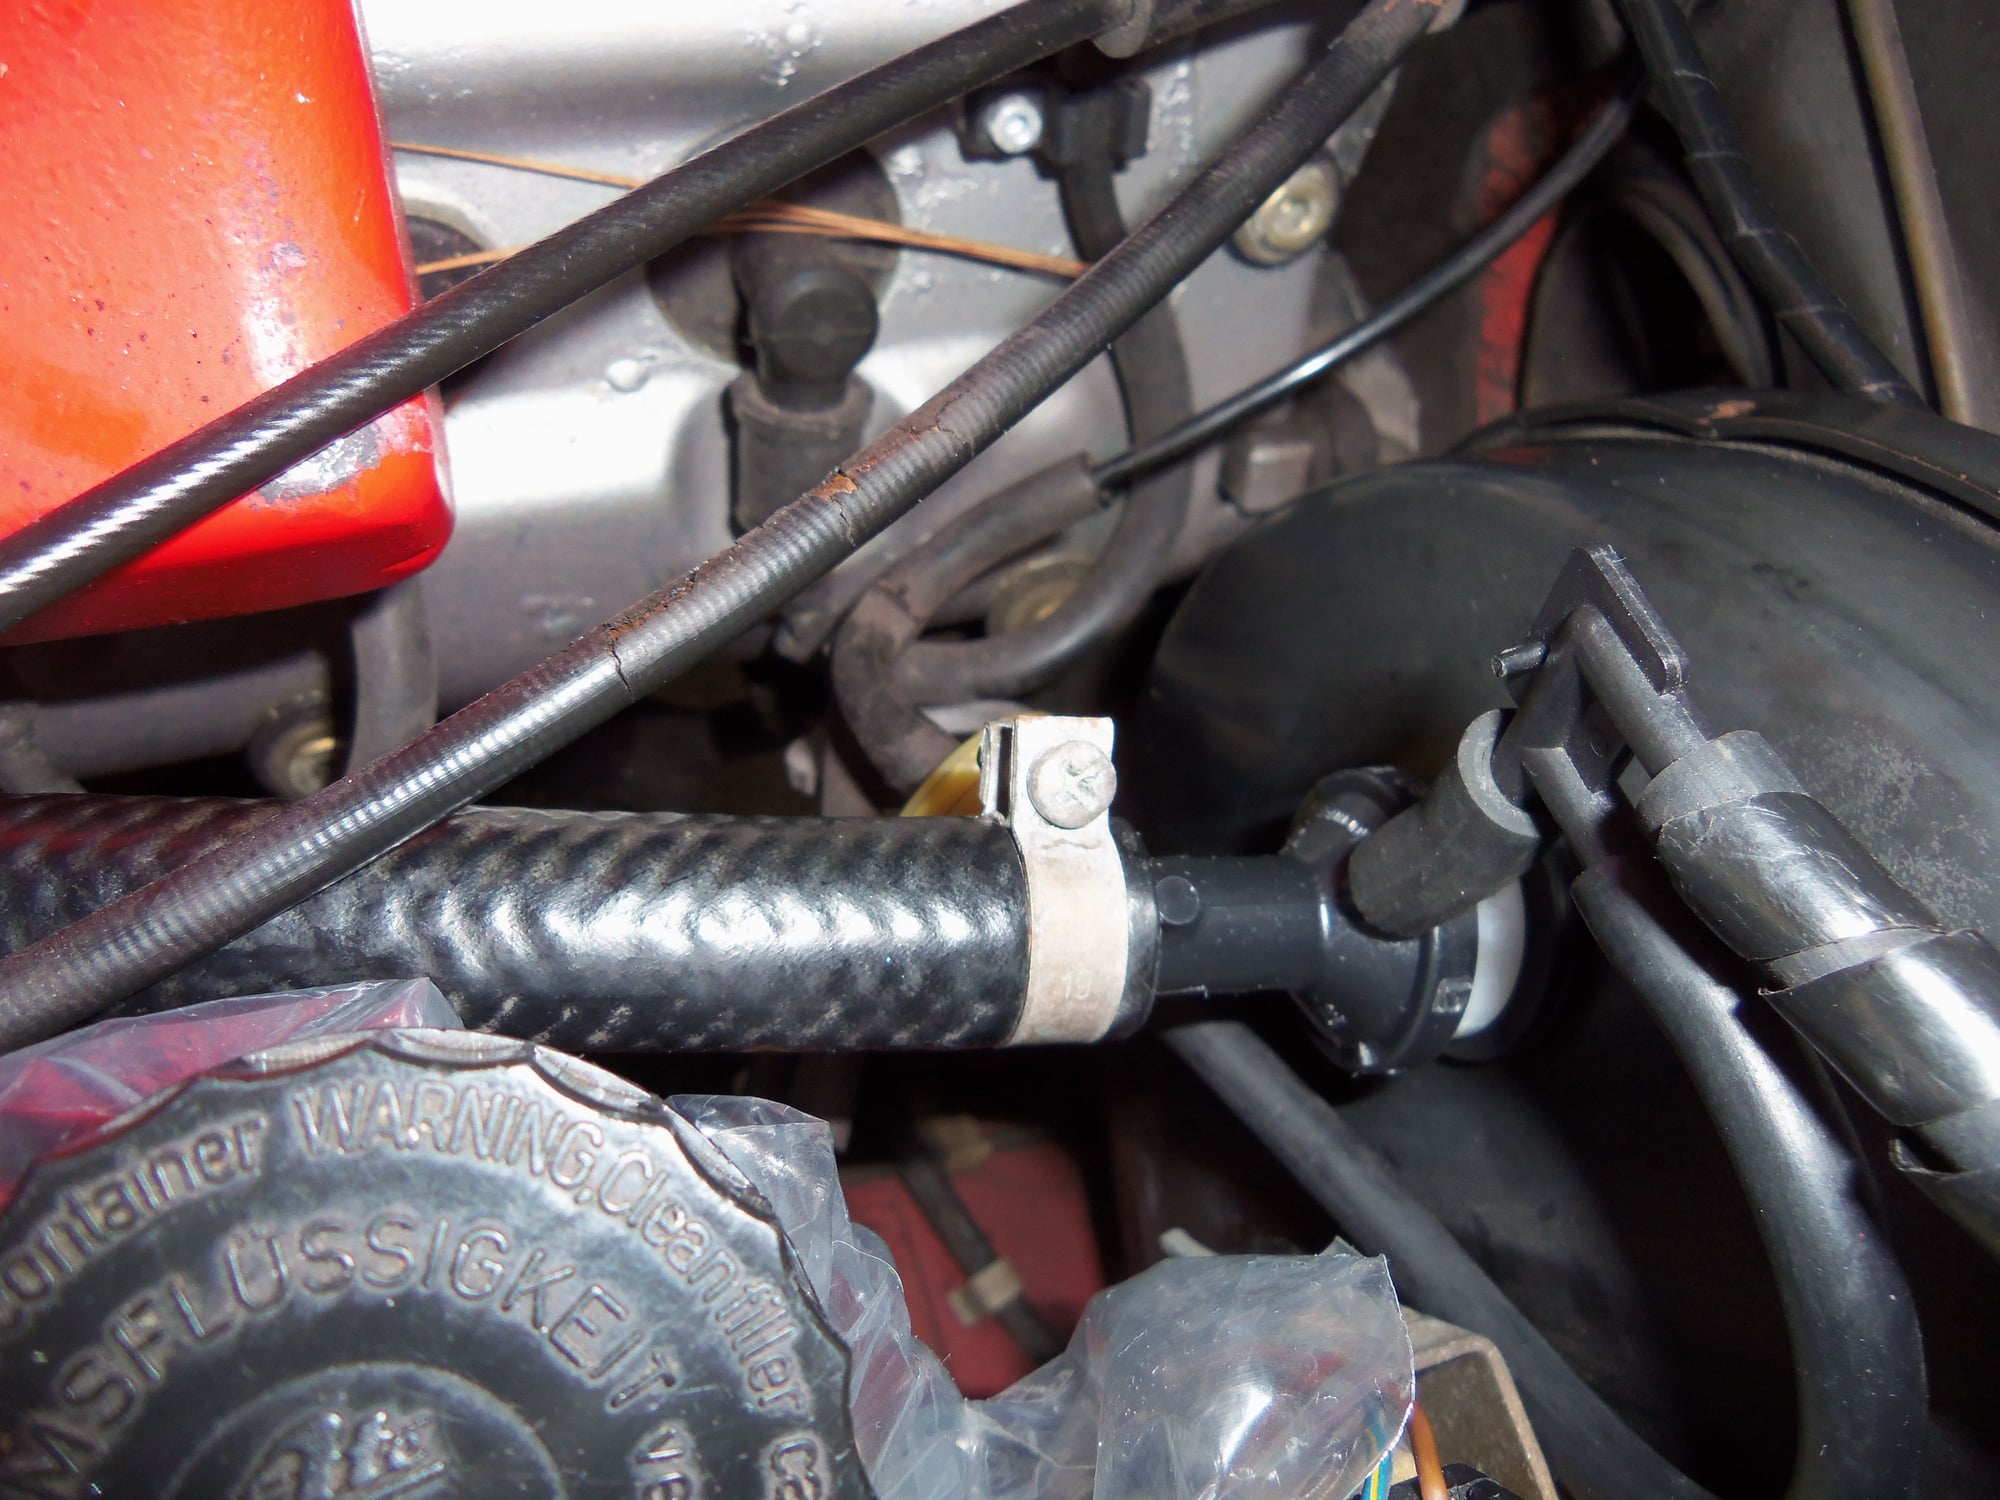
In the process of me tugging on the transmission end of the vacuum hose, the metal line on the torque tube got pulled back towards the transmission. Which I later found out pulled the plastic vacuum line out of the 5 or 7 way connector under the MAF. I learned to work by Braille for that one. I ended up maneuvering the rubber connector with the tip of a finger and pushing the new plastic vacuum line into it with long needle nosed pliers.
Same thing for getting the tiny rubber vacuum line started on the metal tube. Much finagling with long needle nosed pliers.
However, at the end of the day, I got it!!!
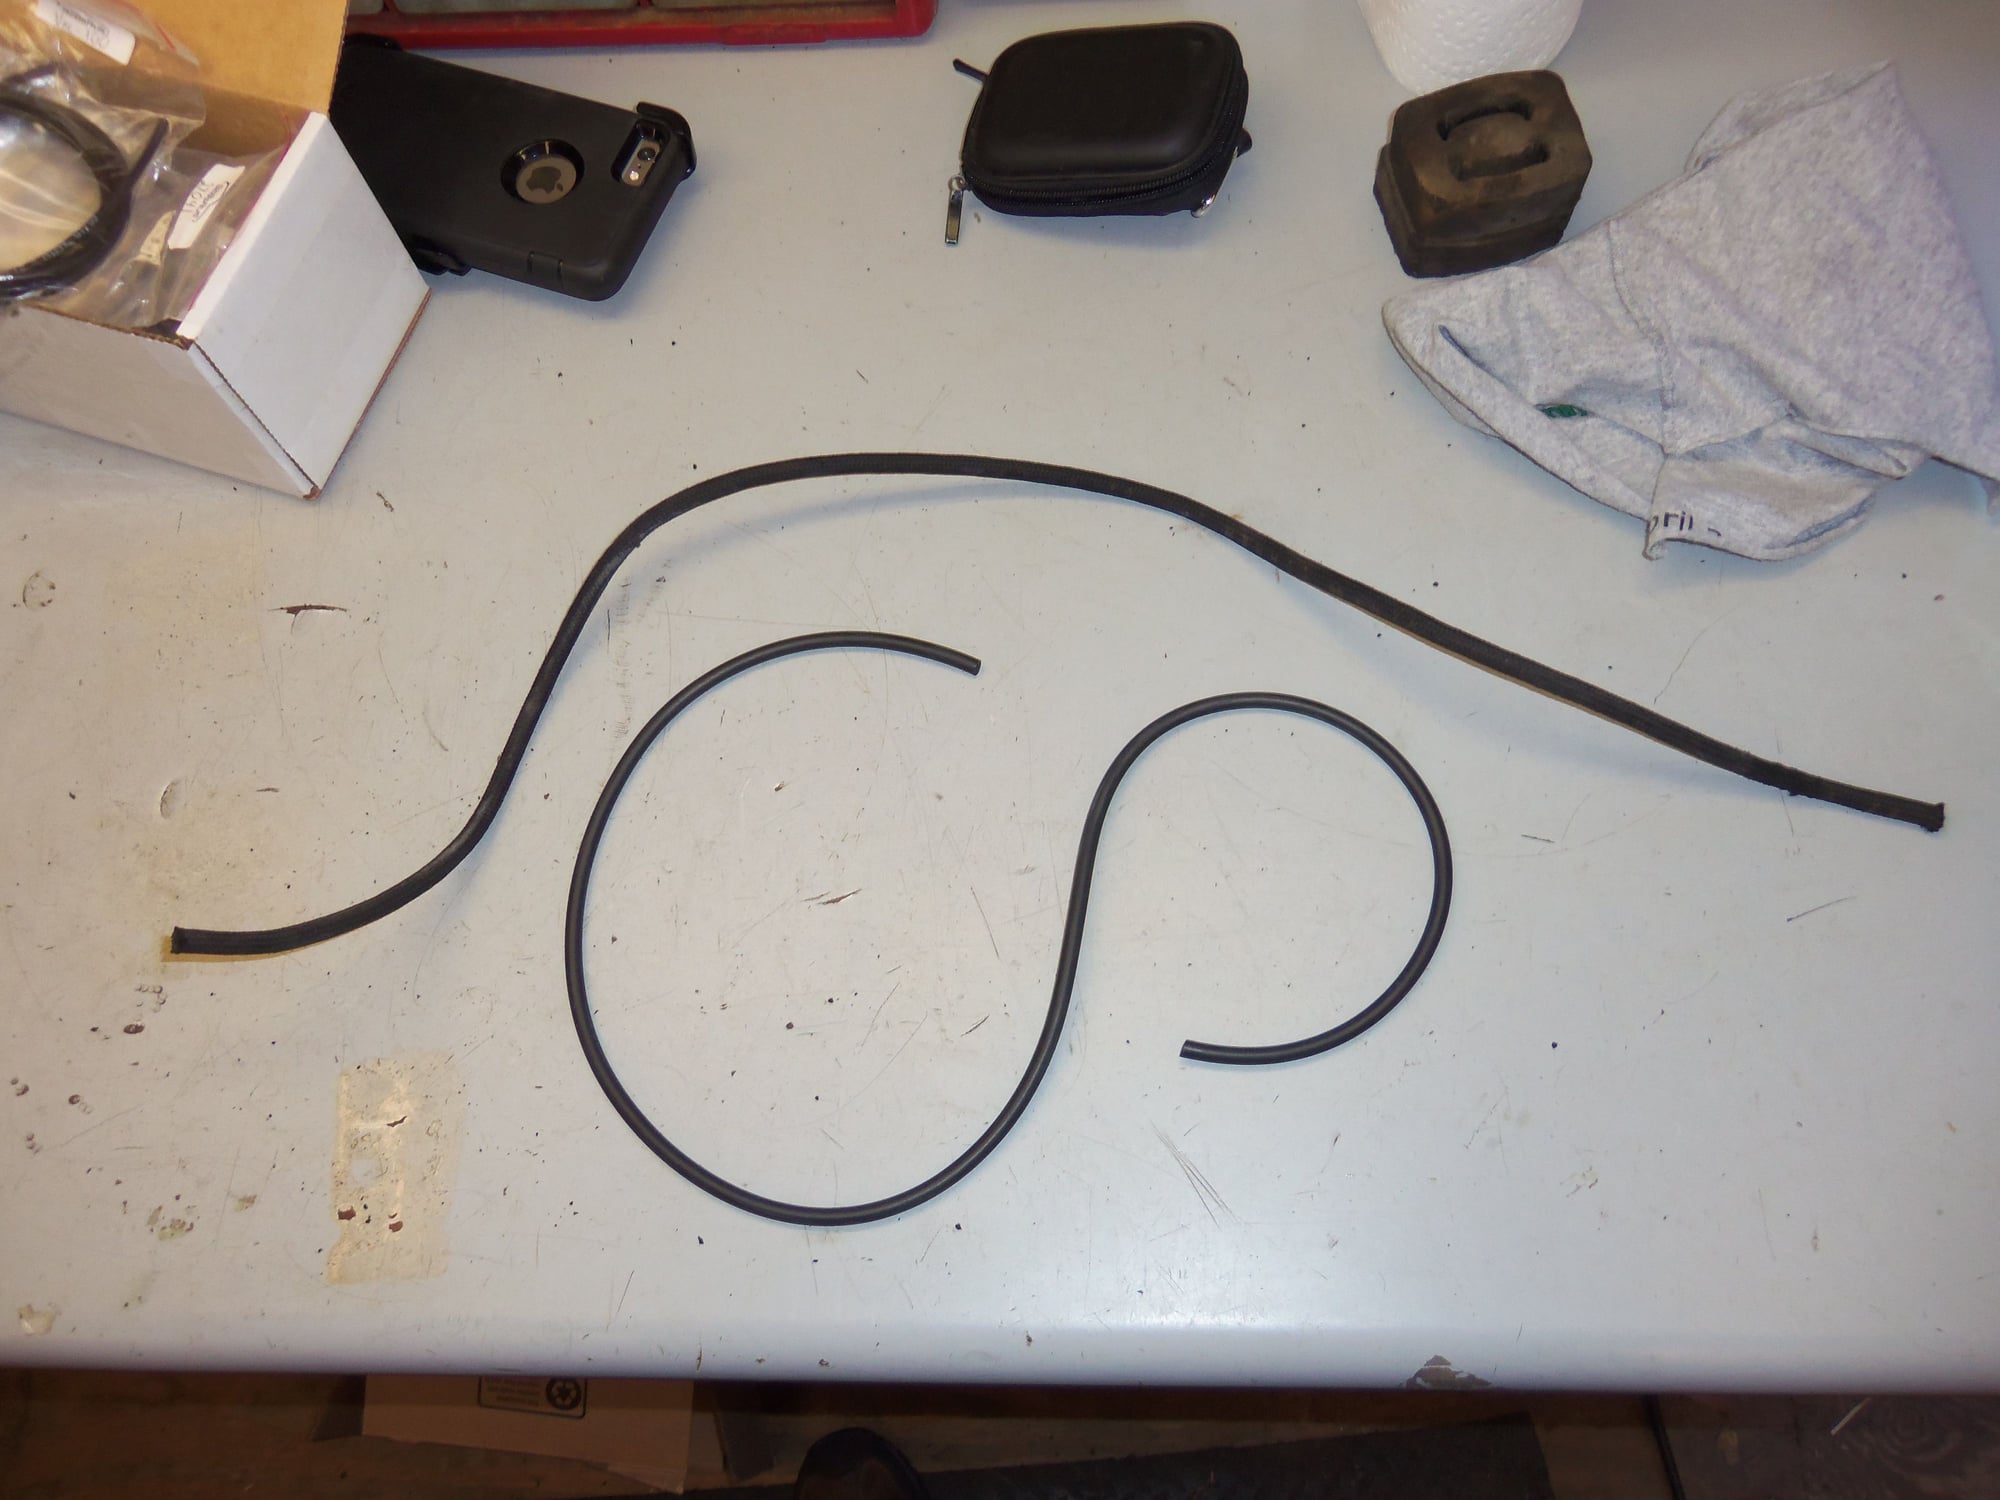
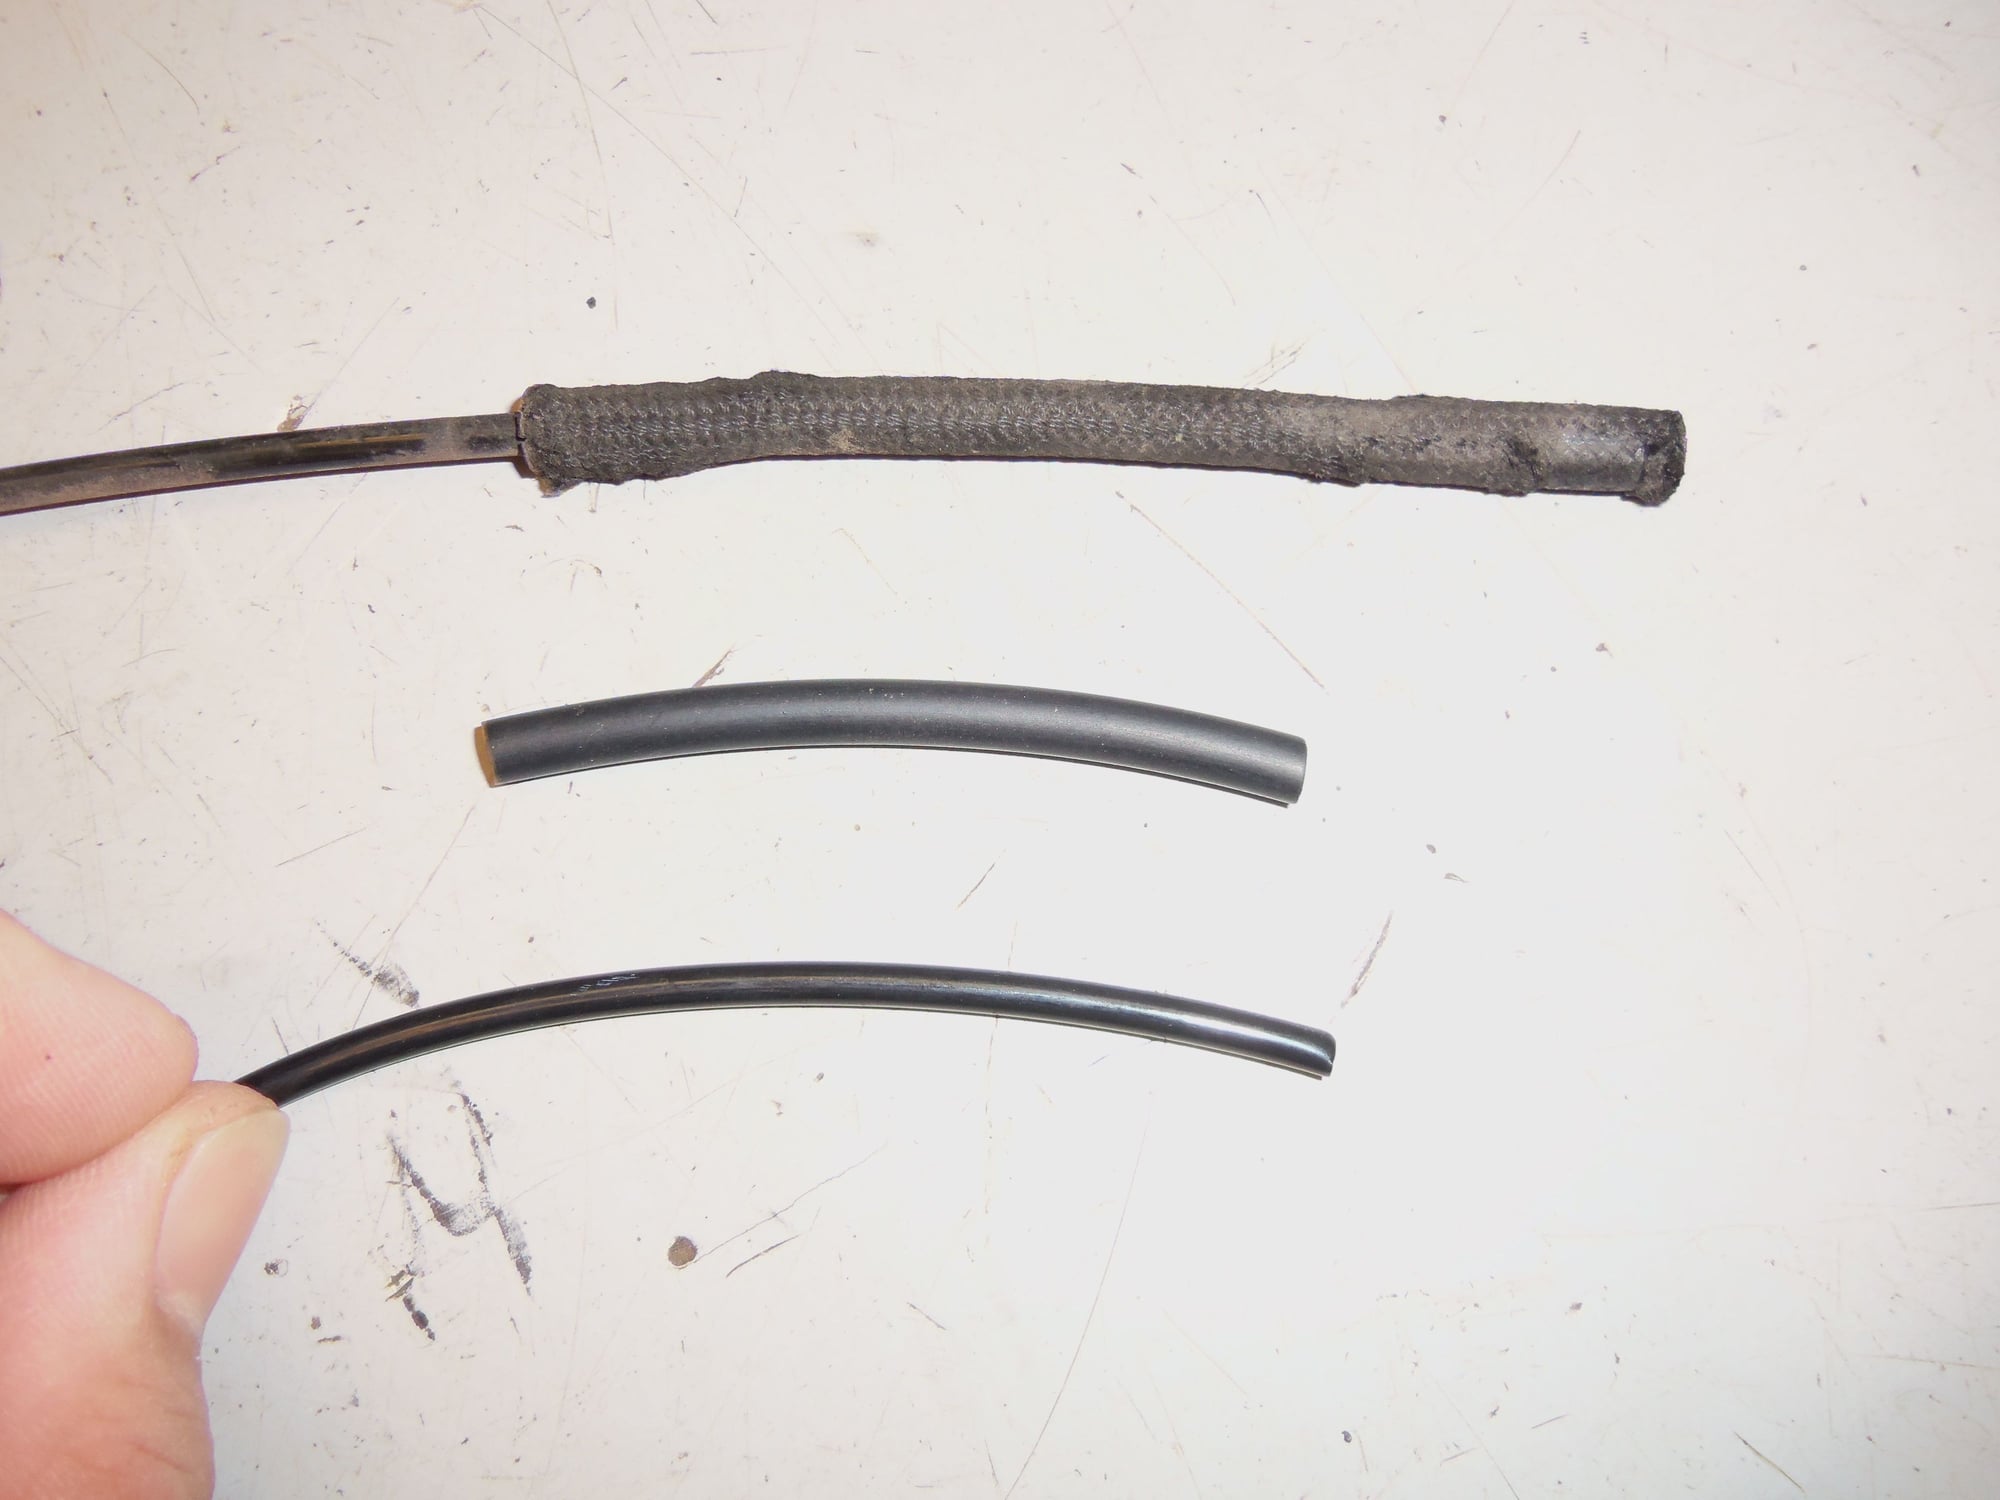
Old fabric covered rubber vacuum hose on top, new rubber vacuum hose on bottom.
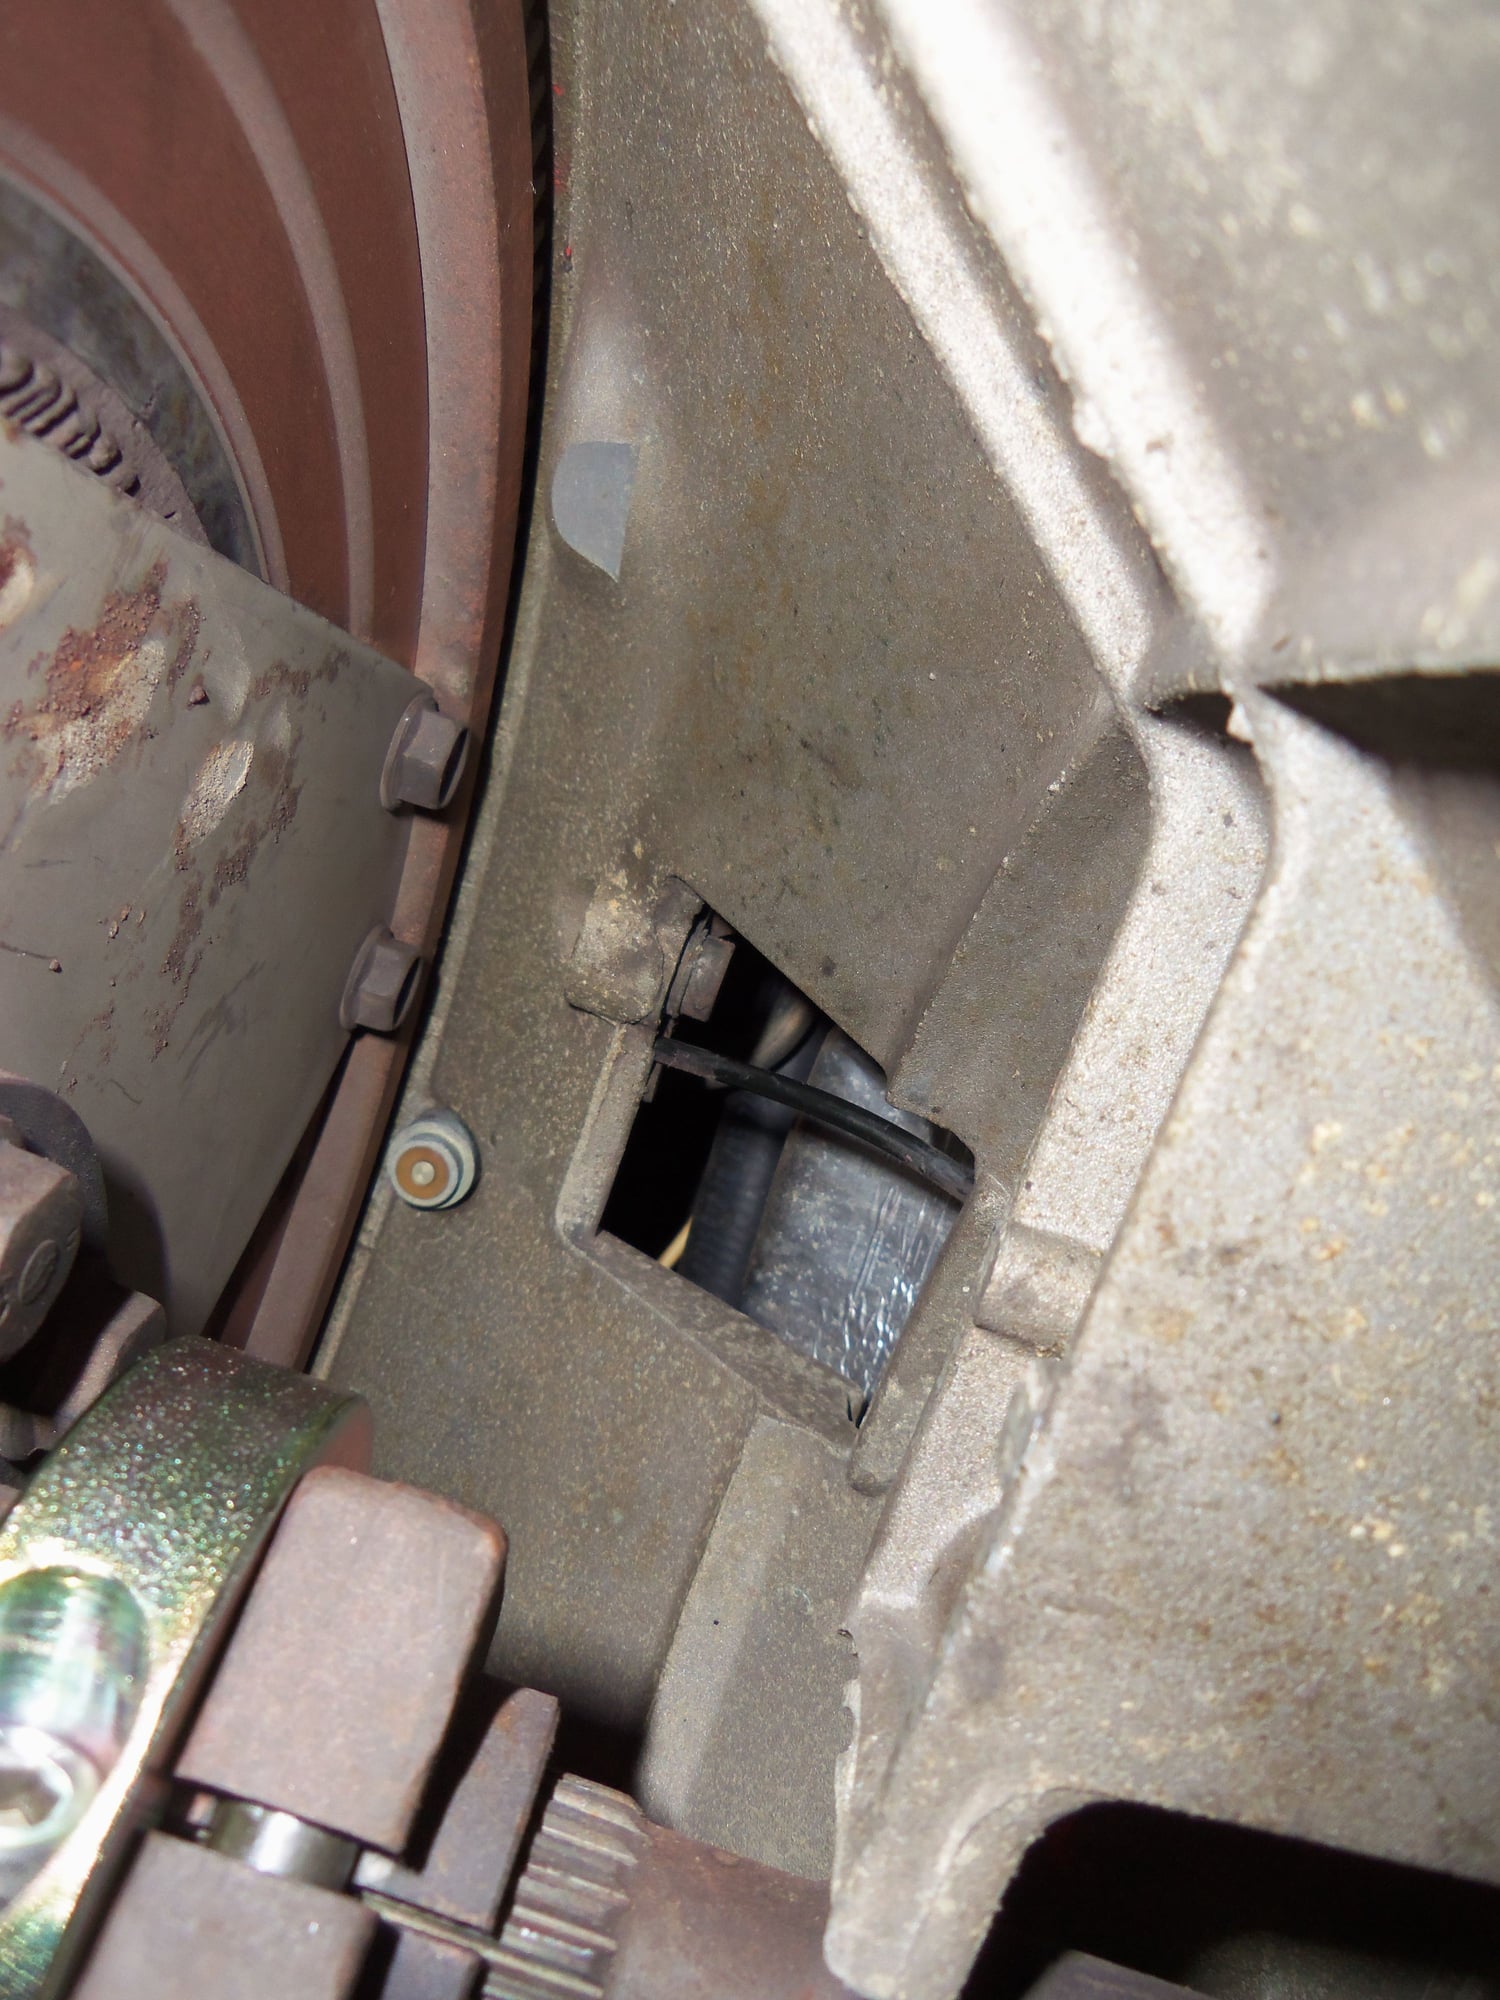
Plastic vacuum line peeking through opening in top of bell housing.
Old vacuum hose just removed from metal tube.
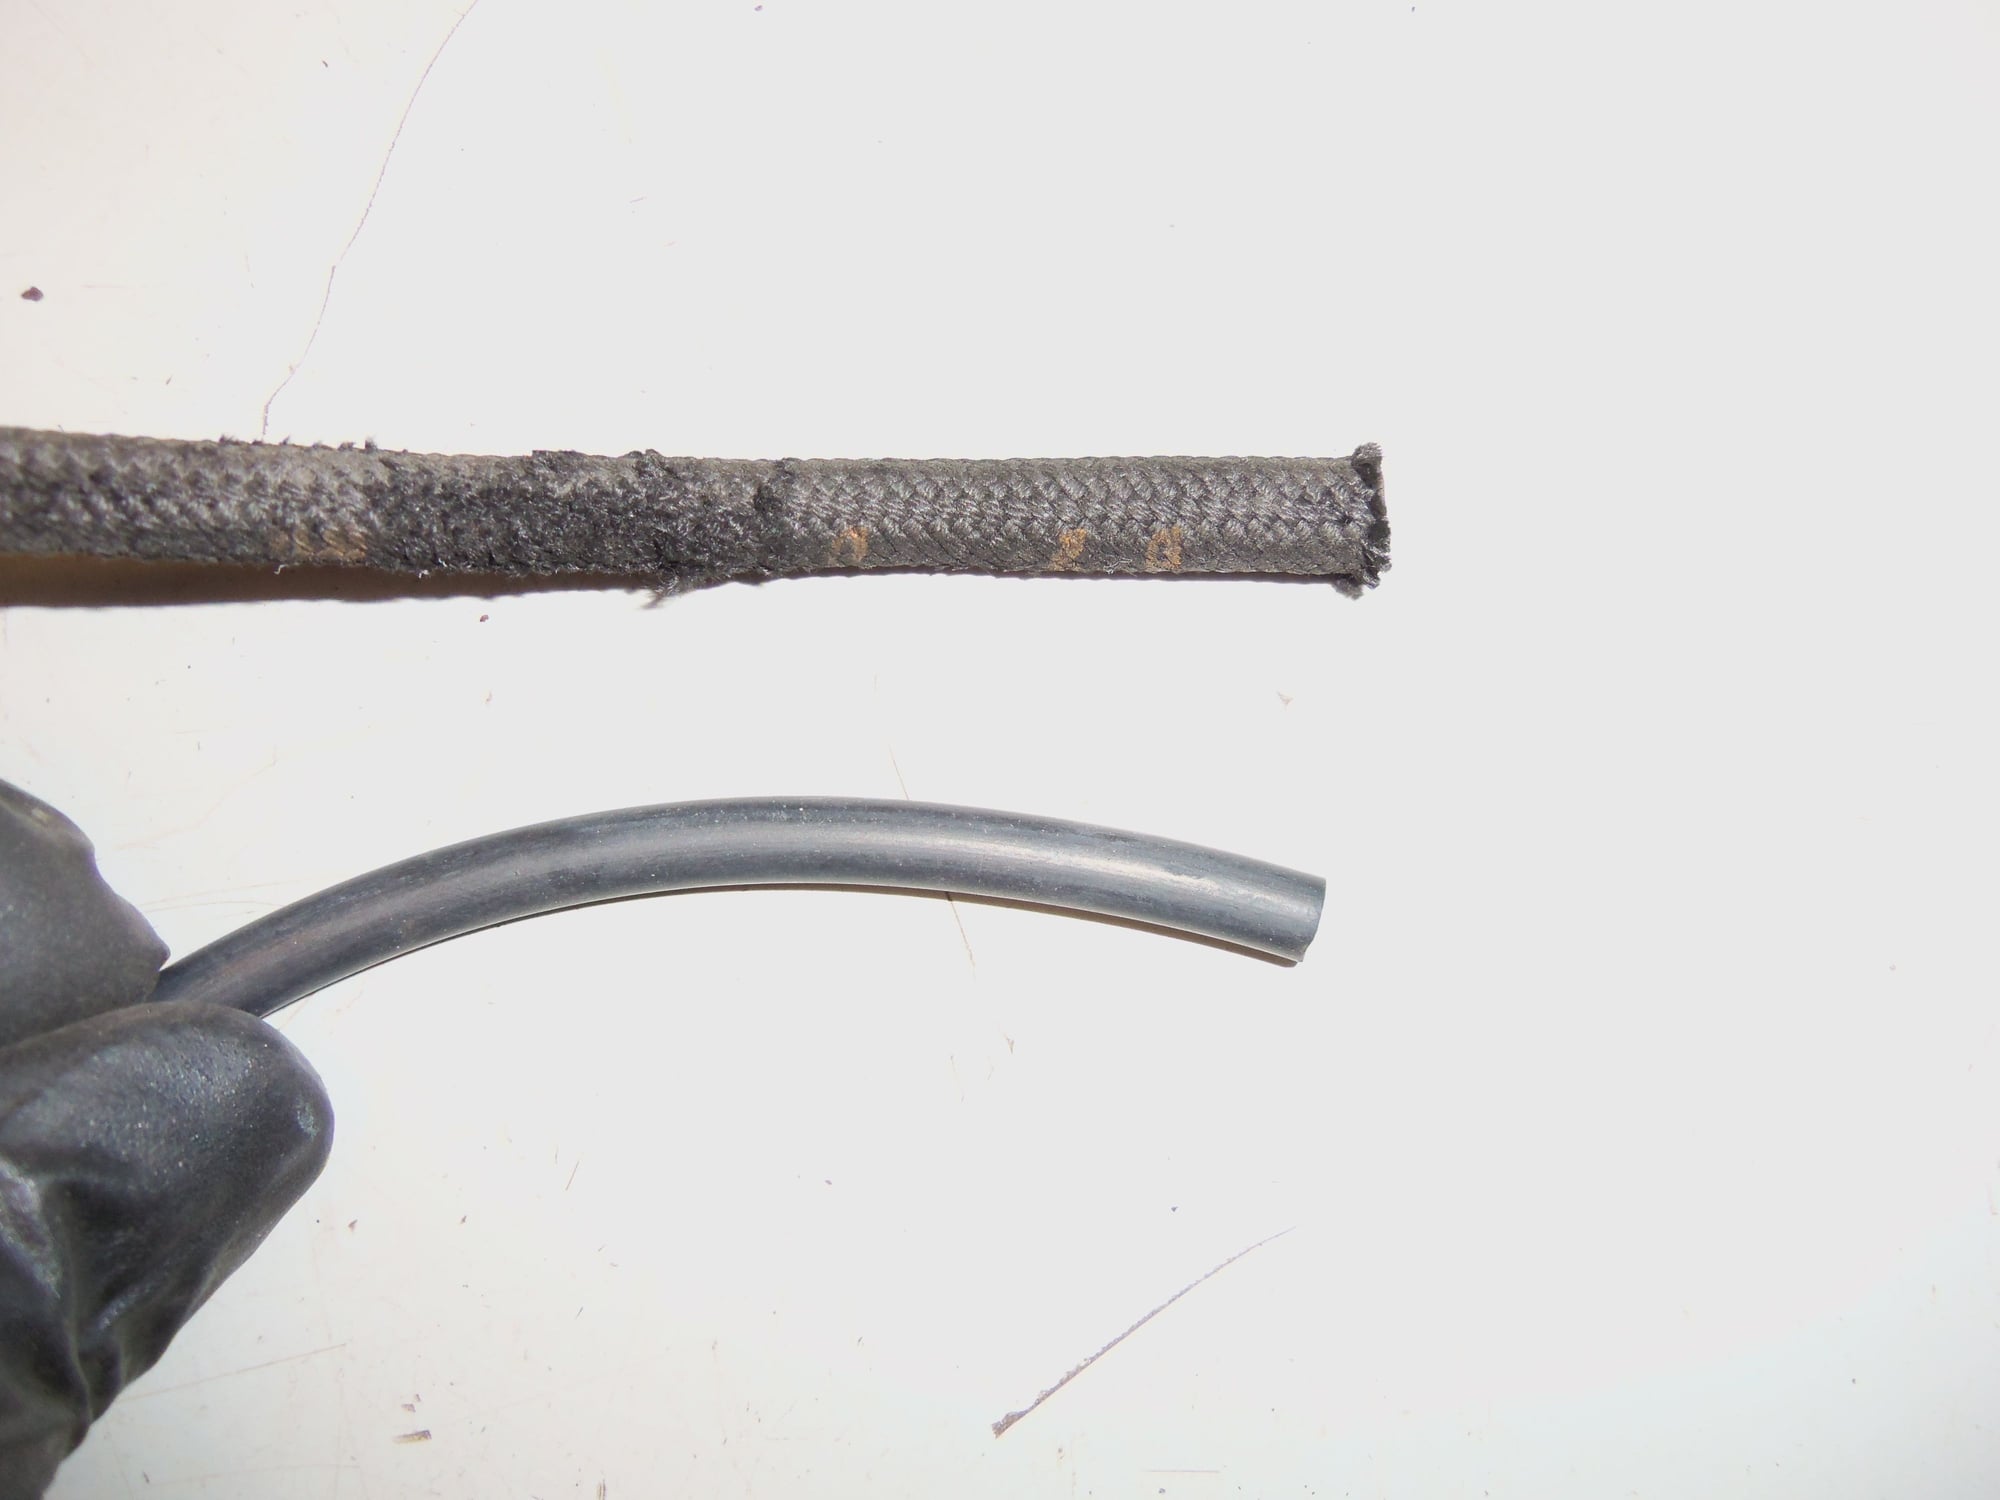
New and old plastic vacuum line.
Just barely see the new plastic vacuum line snaking under the CPS and down the bell housing.
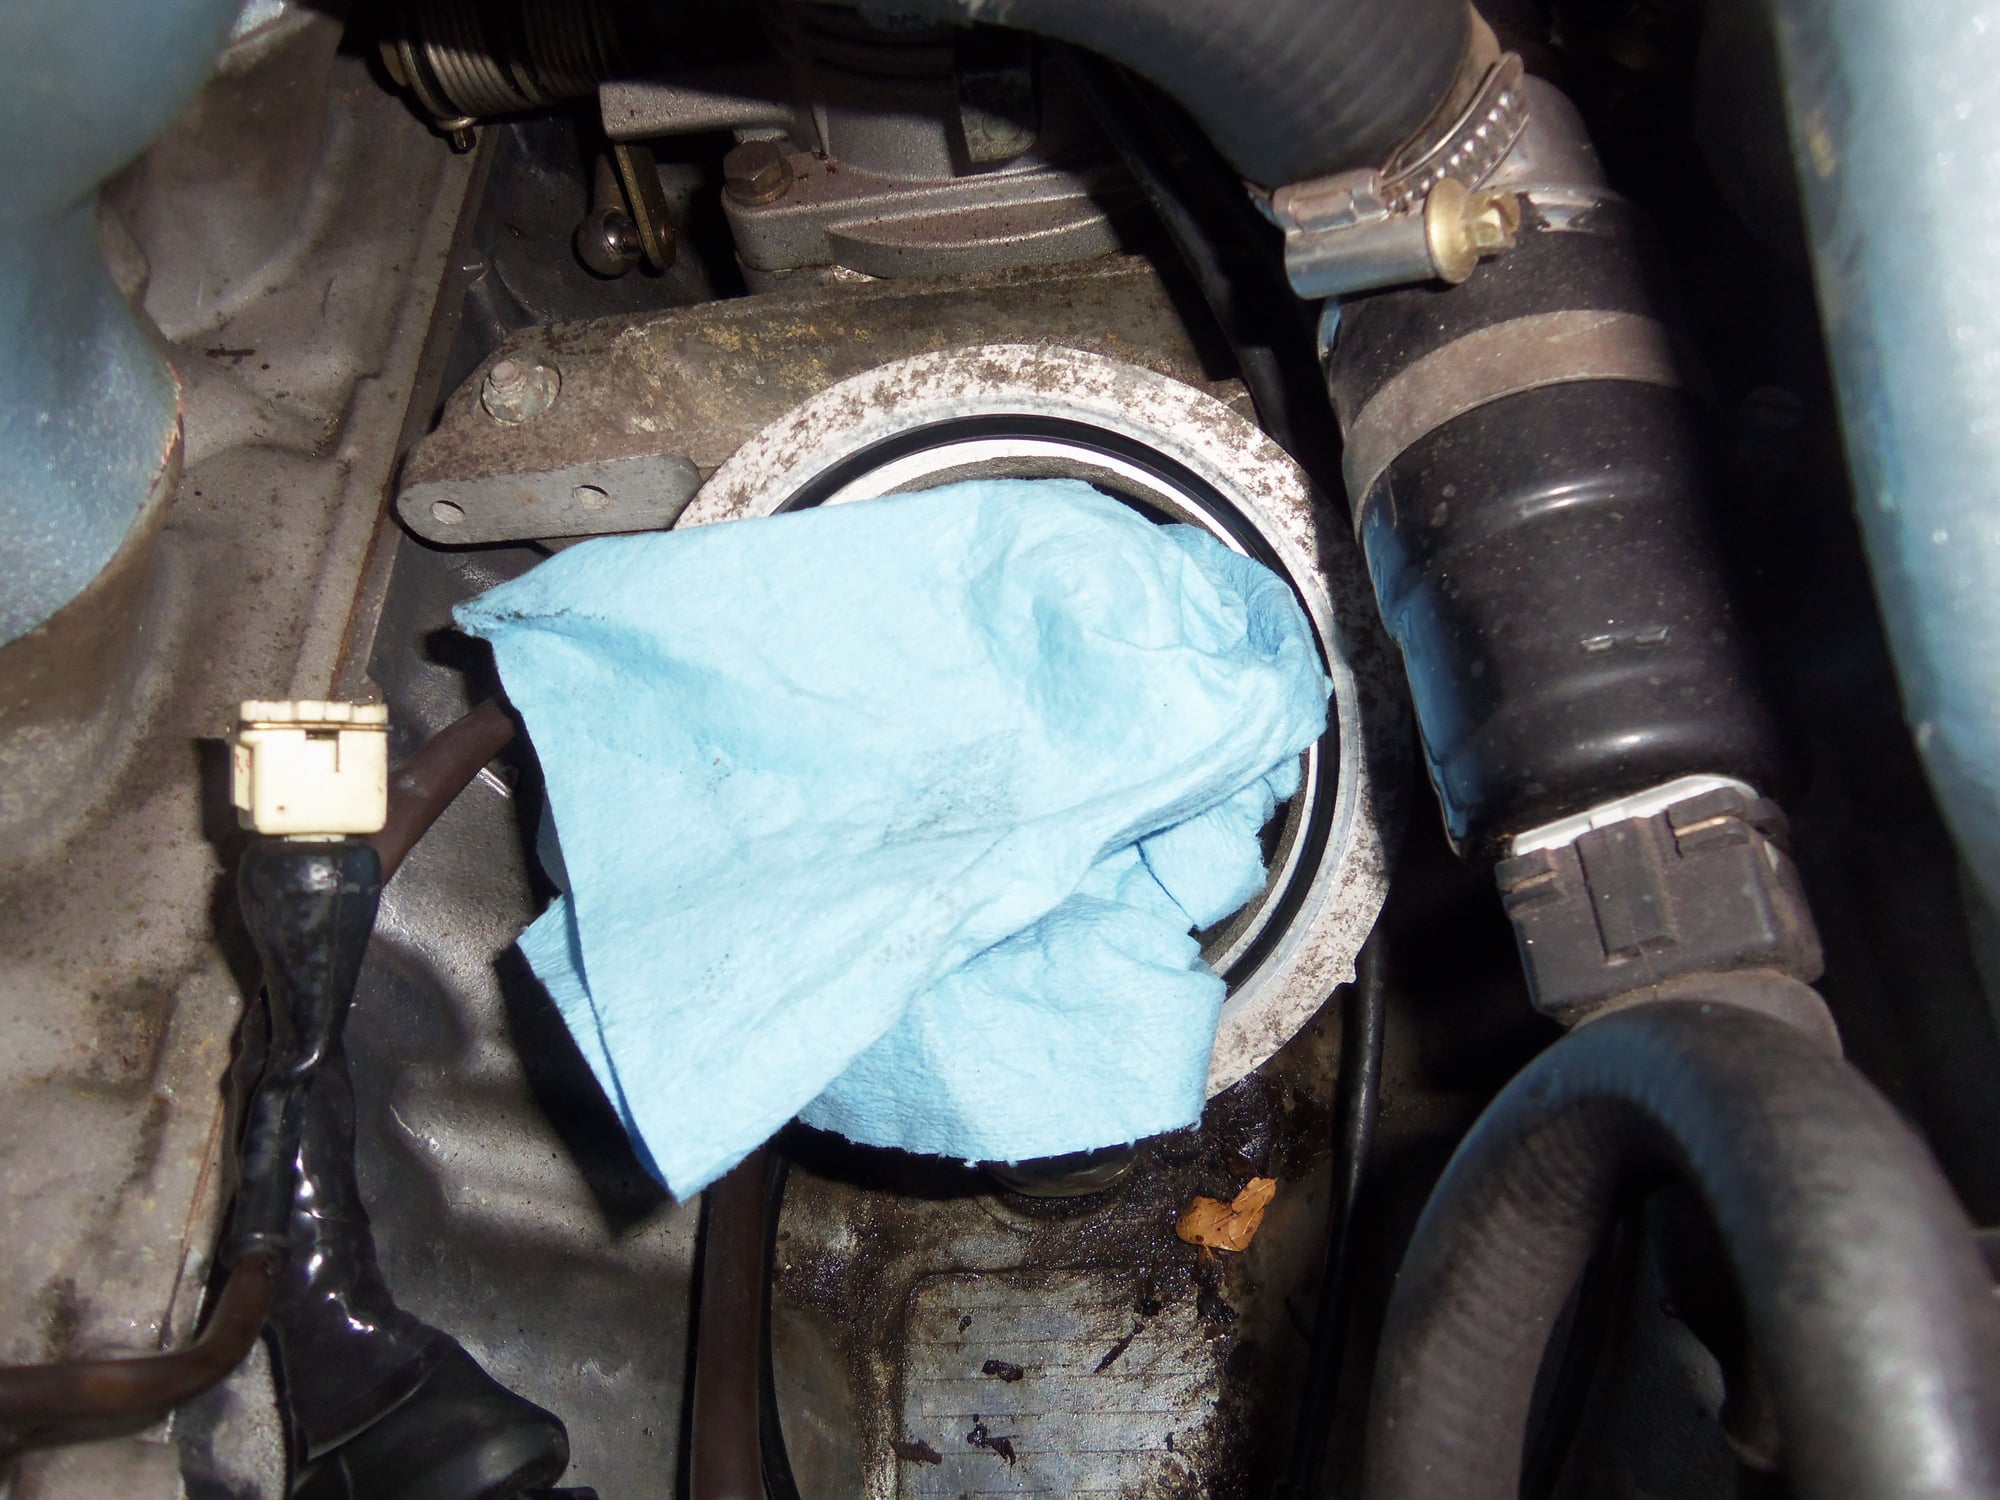
Since I was working on top of the engine, I took care of some details there.
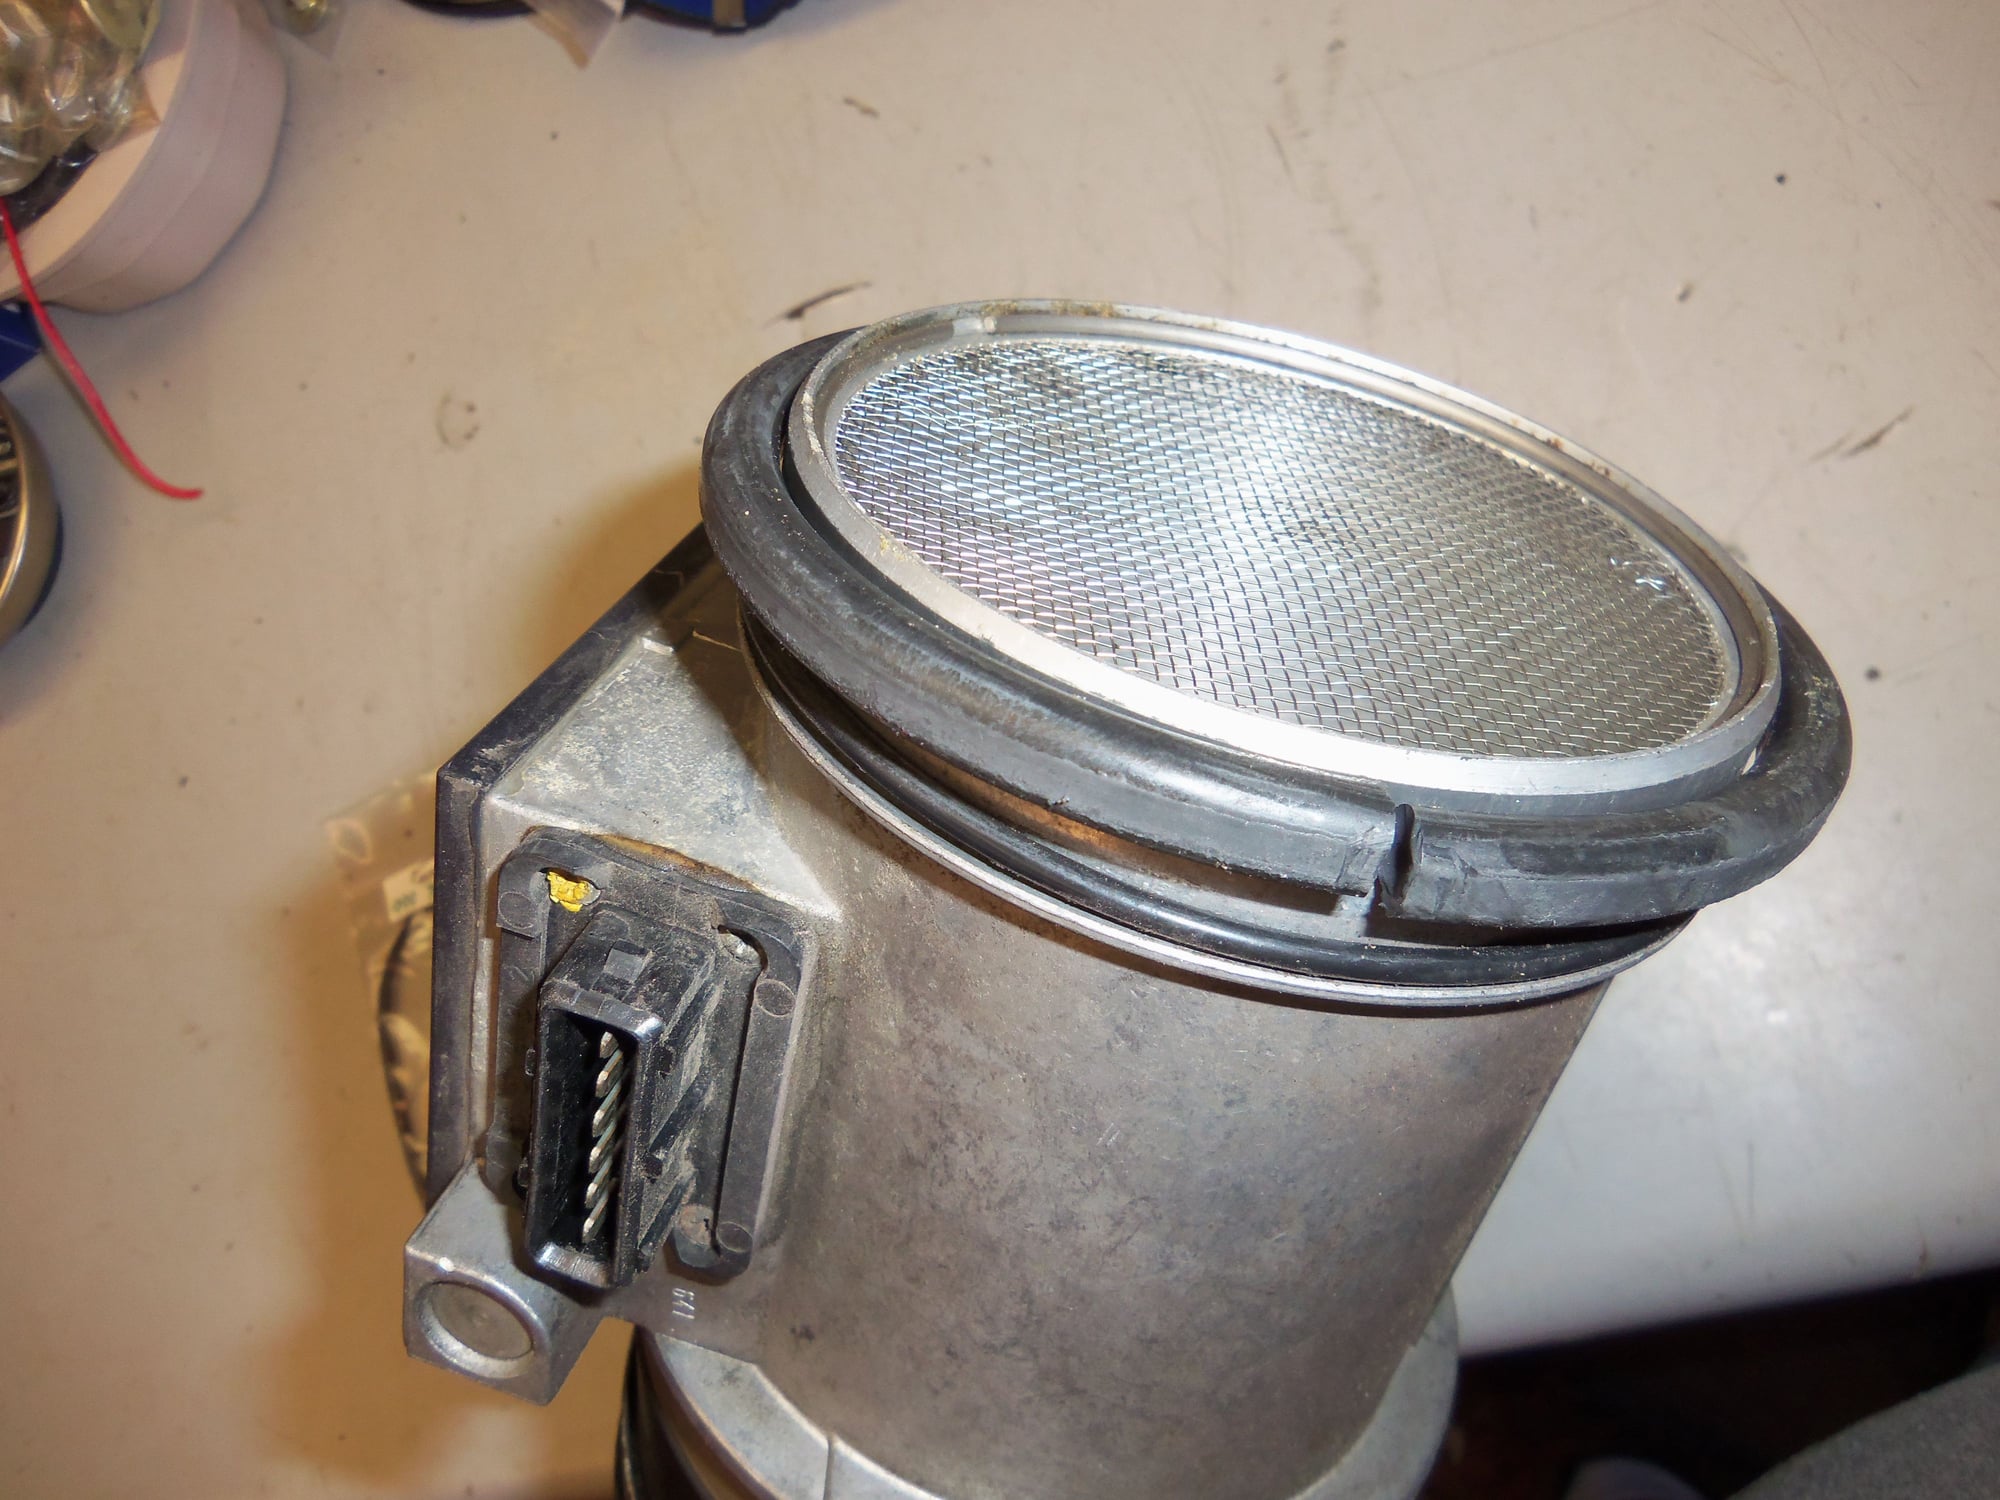
In the past, the MAF has popped out of the shoe quite easily. Dead O-rings. I had read somewhere that it is best to install the MAF O-rings dry. Which is why I was never able to get the MAF to seat properly.
Sean Ratts straightened me out, and had me coat the O-rings in Dow 111. Much better.
Typically, the boot for the MAF plug was torn. In due time, I will replace it and the plug. For now, after hitting the plug with DeOxit 5, I wrapped the boot in the same self-fusing silicone tape as I used on the ABS harnesses. Much better. I did notice the MAF wiring seems a little stiff. Best not to mess with it too much...
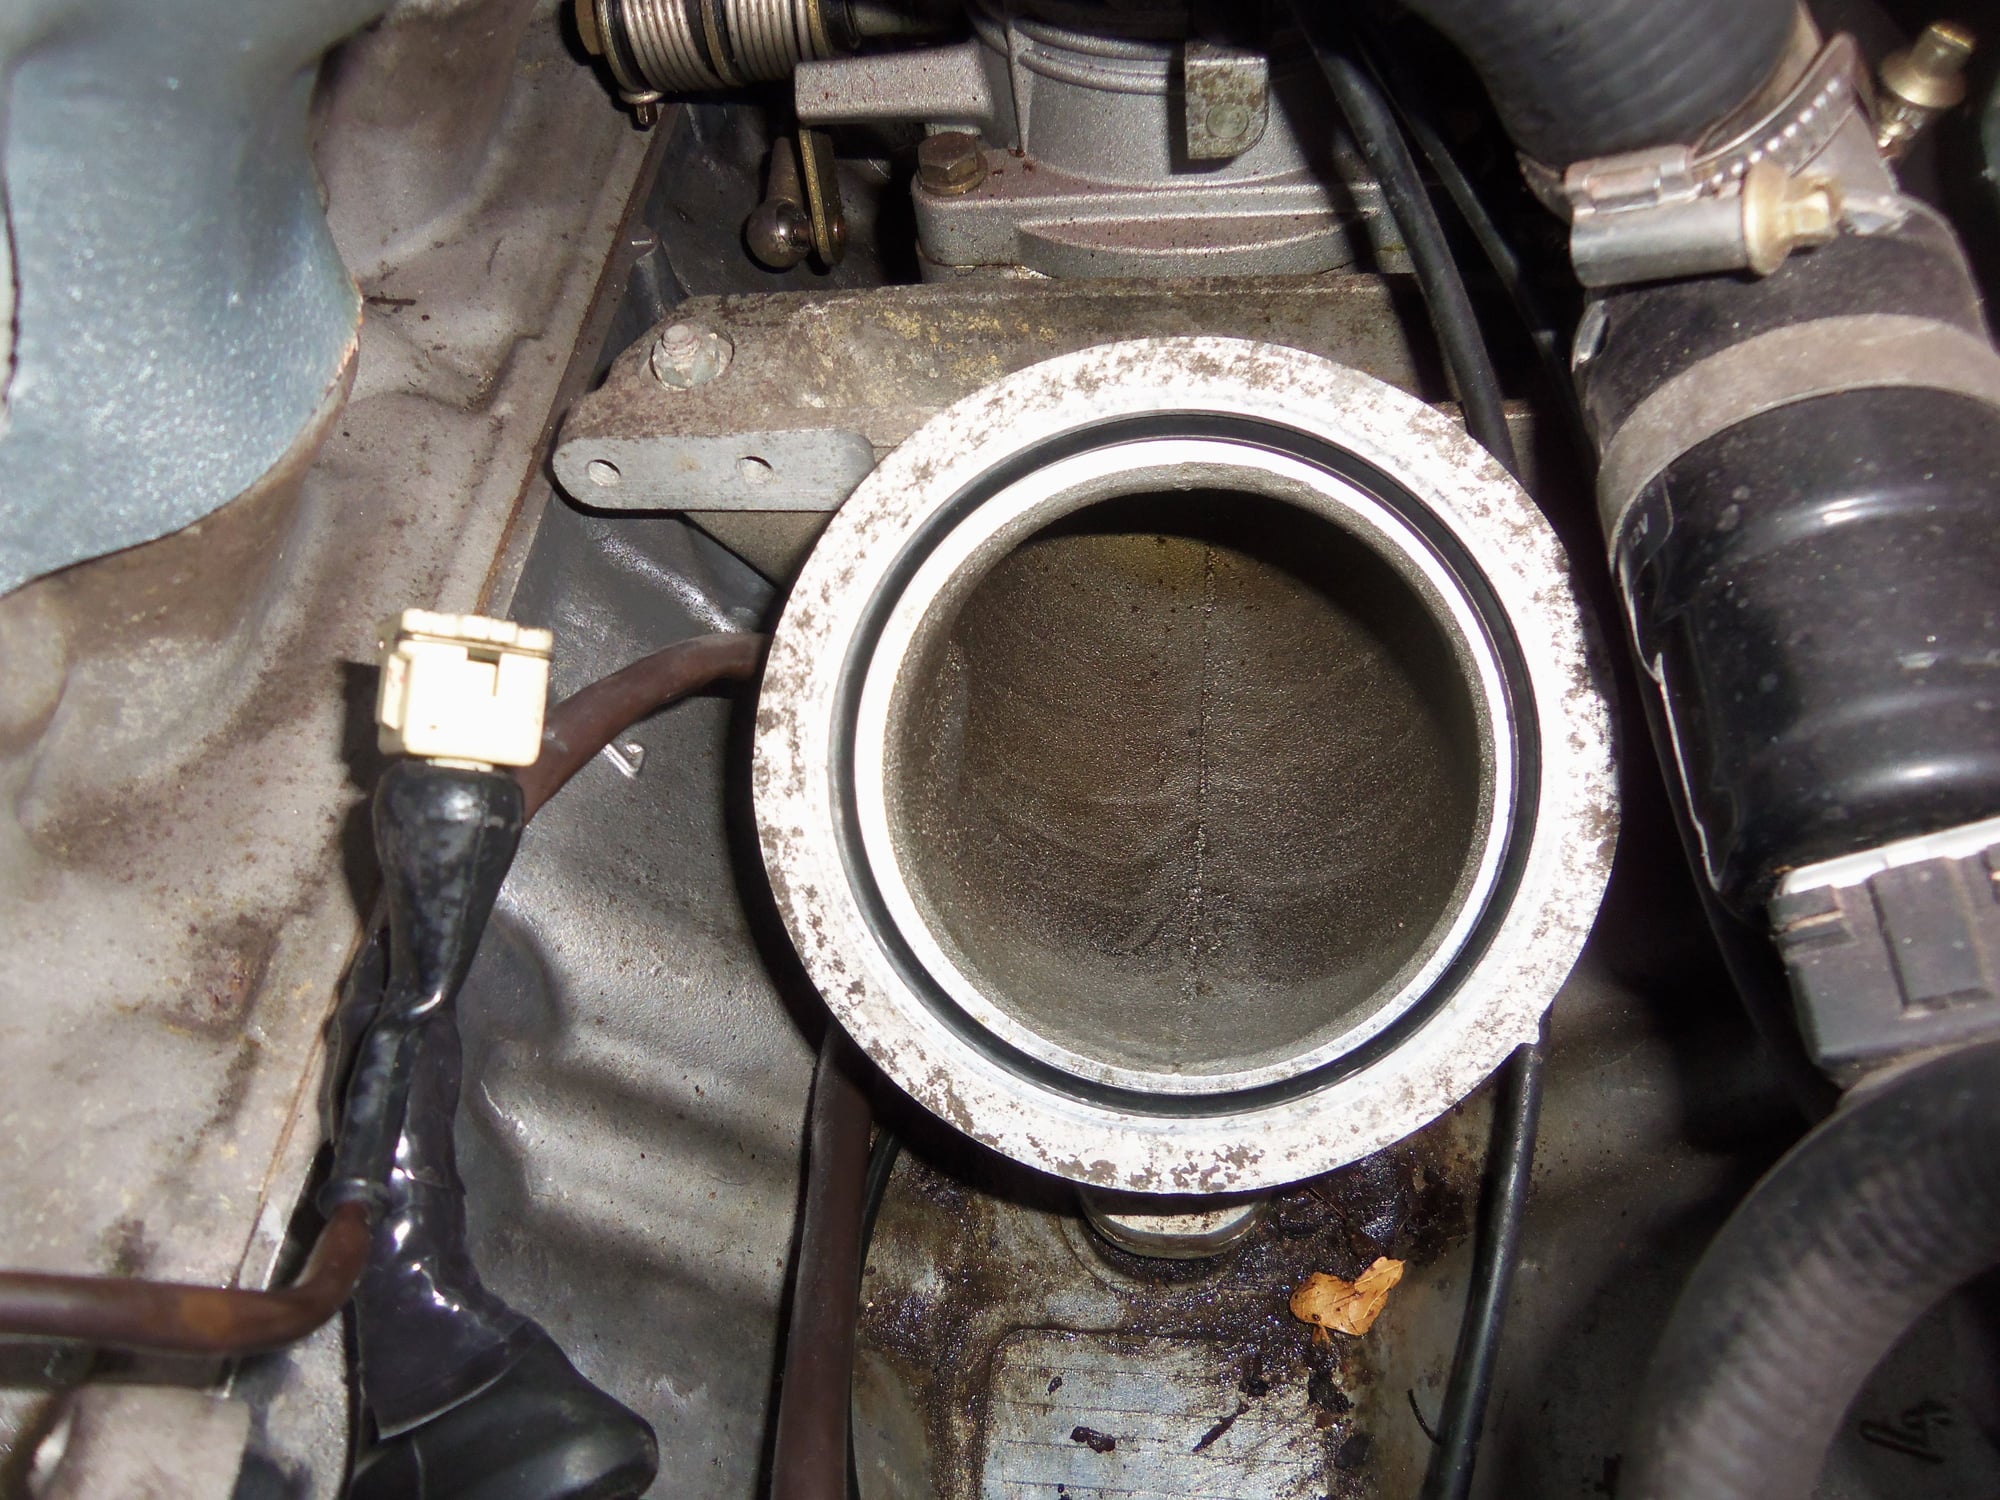
Of course there was some oil in the shoe. Its an S3...
Better, for now. I am afraid to see what is in the side plenums...
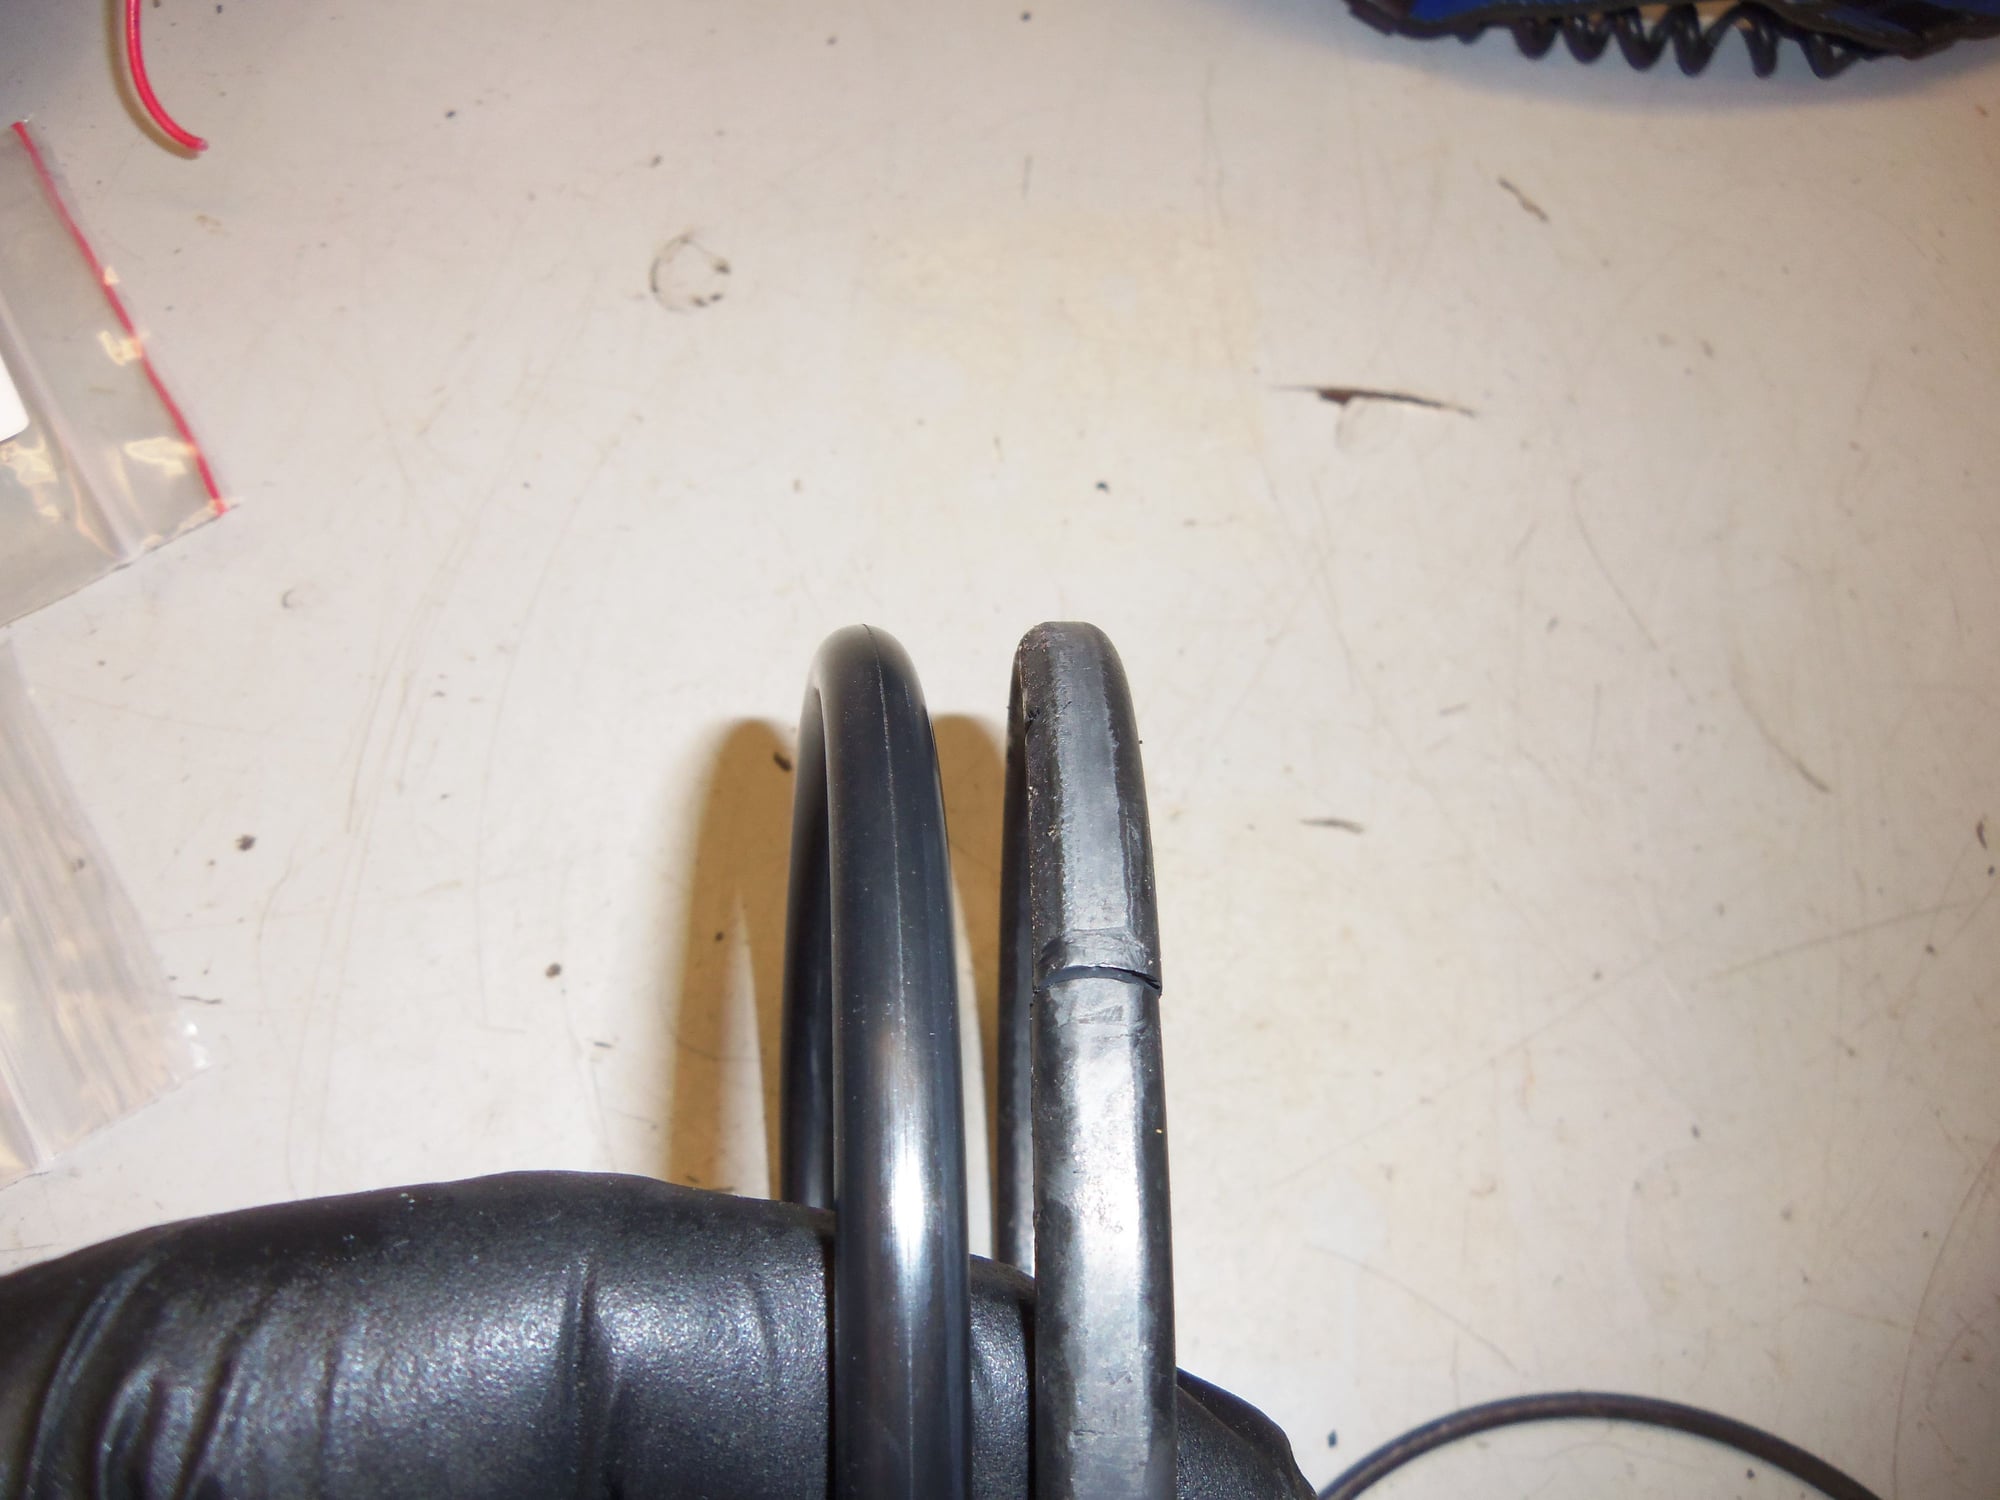
Big O-ring was so stiff it broke coming out.
None of the wires were broken.
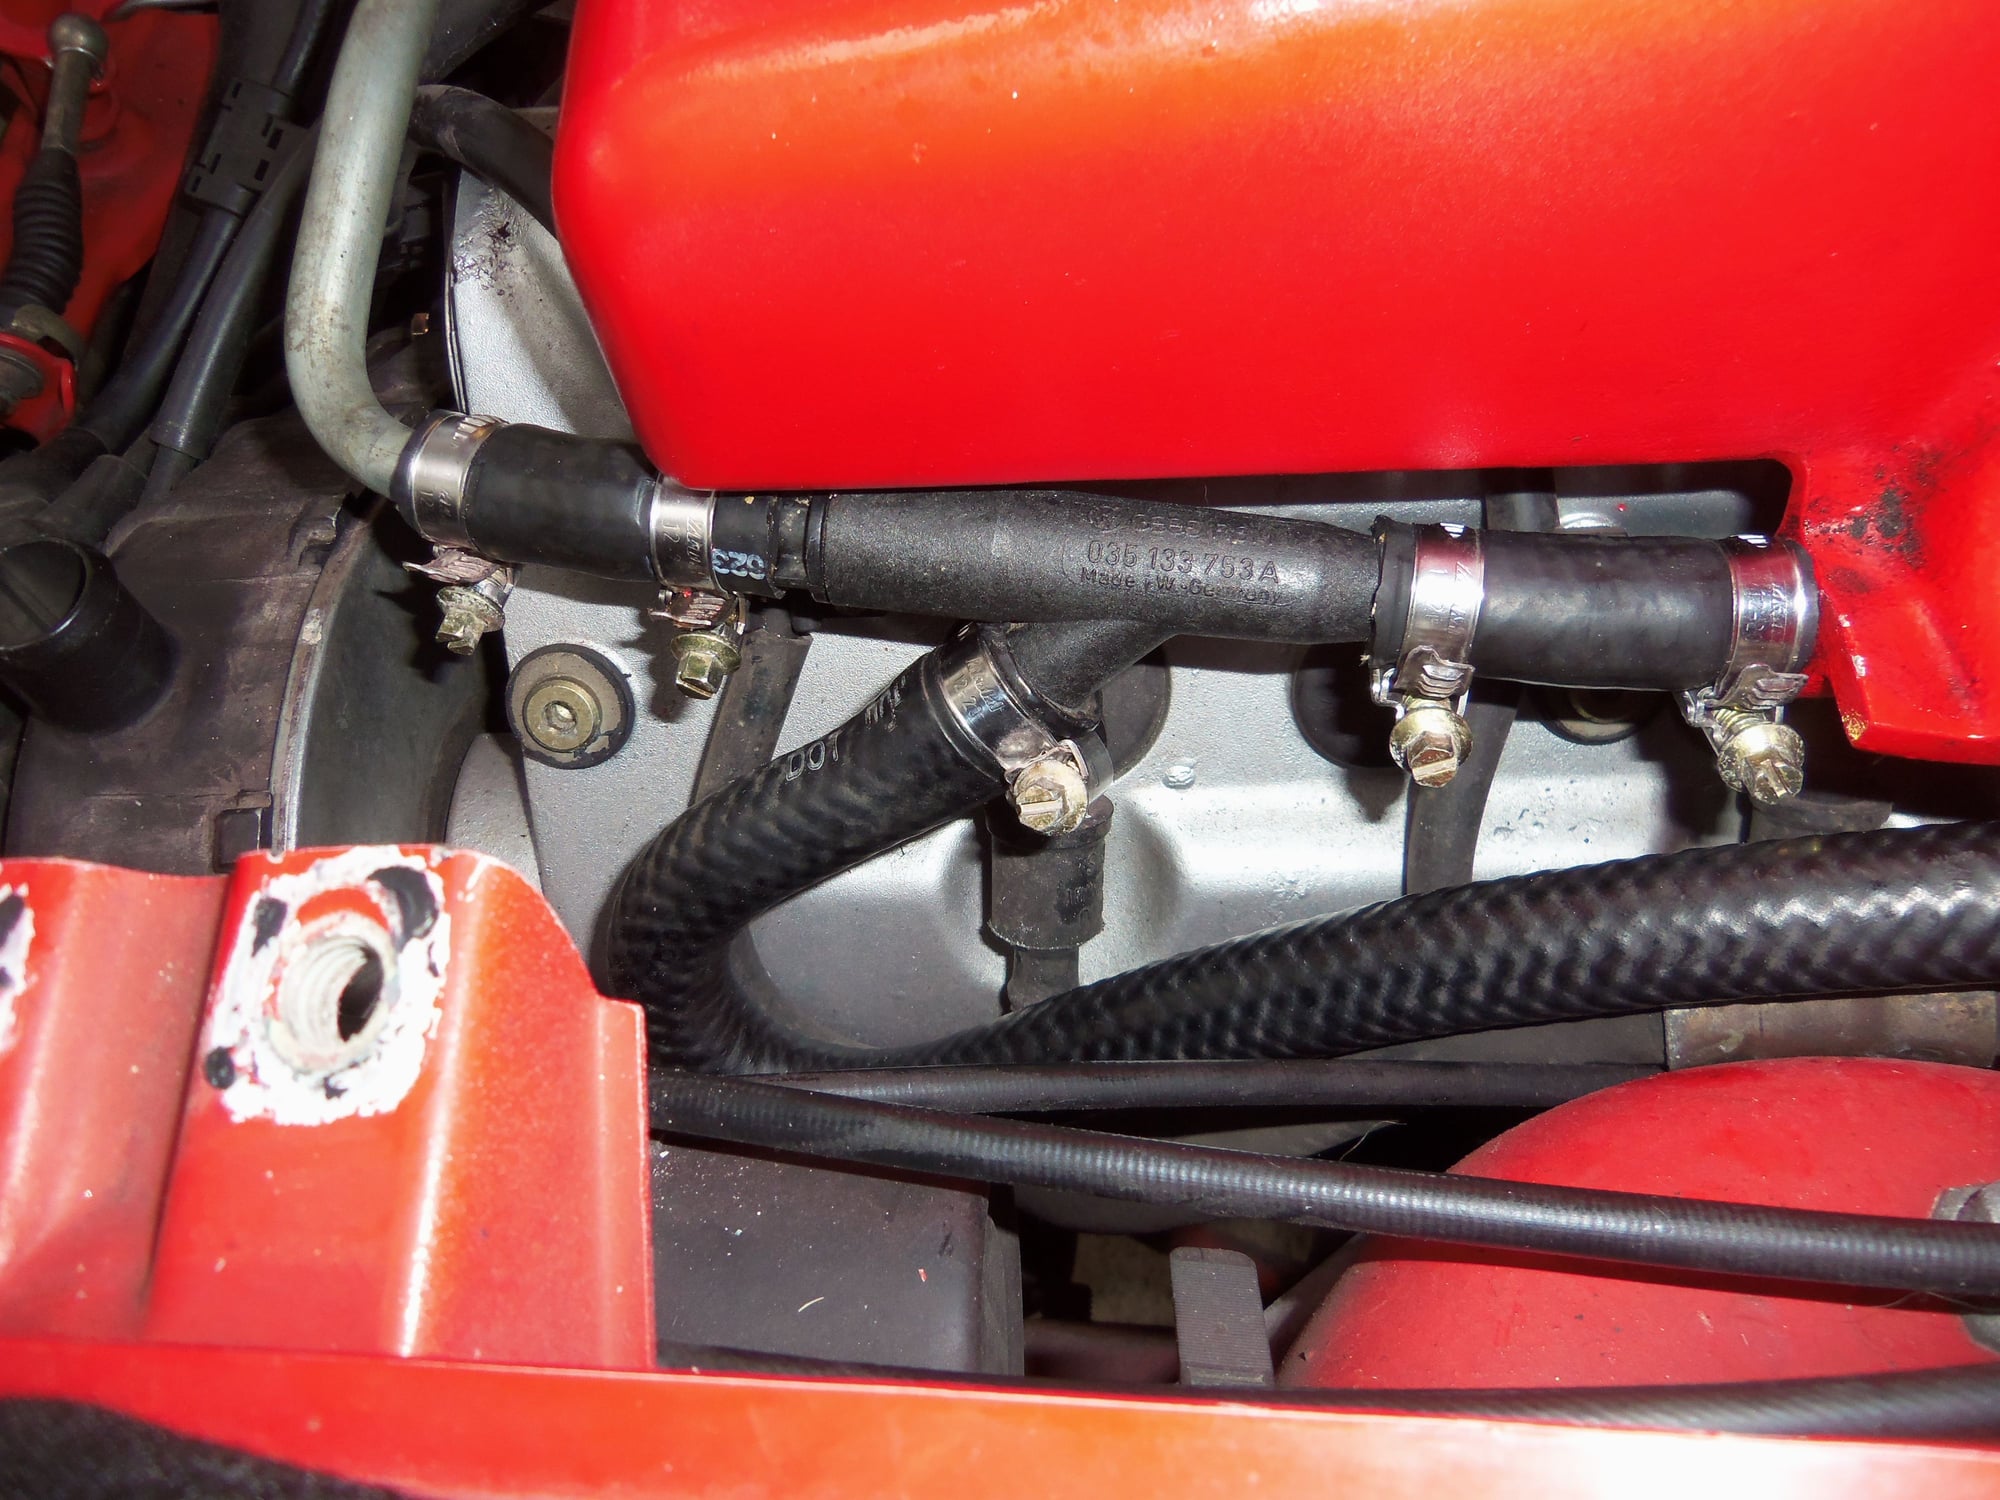
While I was in there, I examined various vacuum lines and rubber vacuum elbows. All were in surprisingly good condition. I have replacements on hand as required.
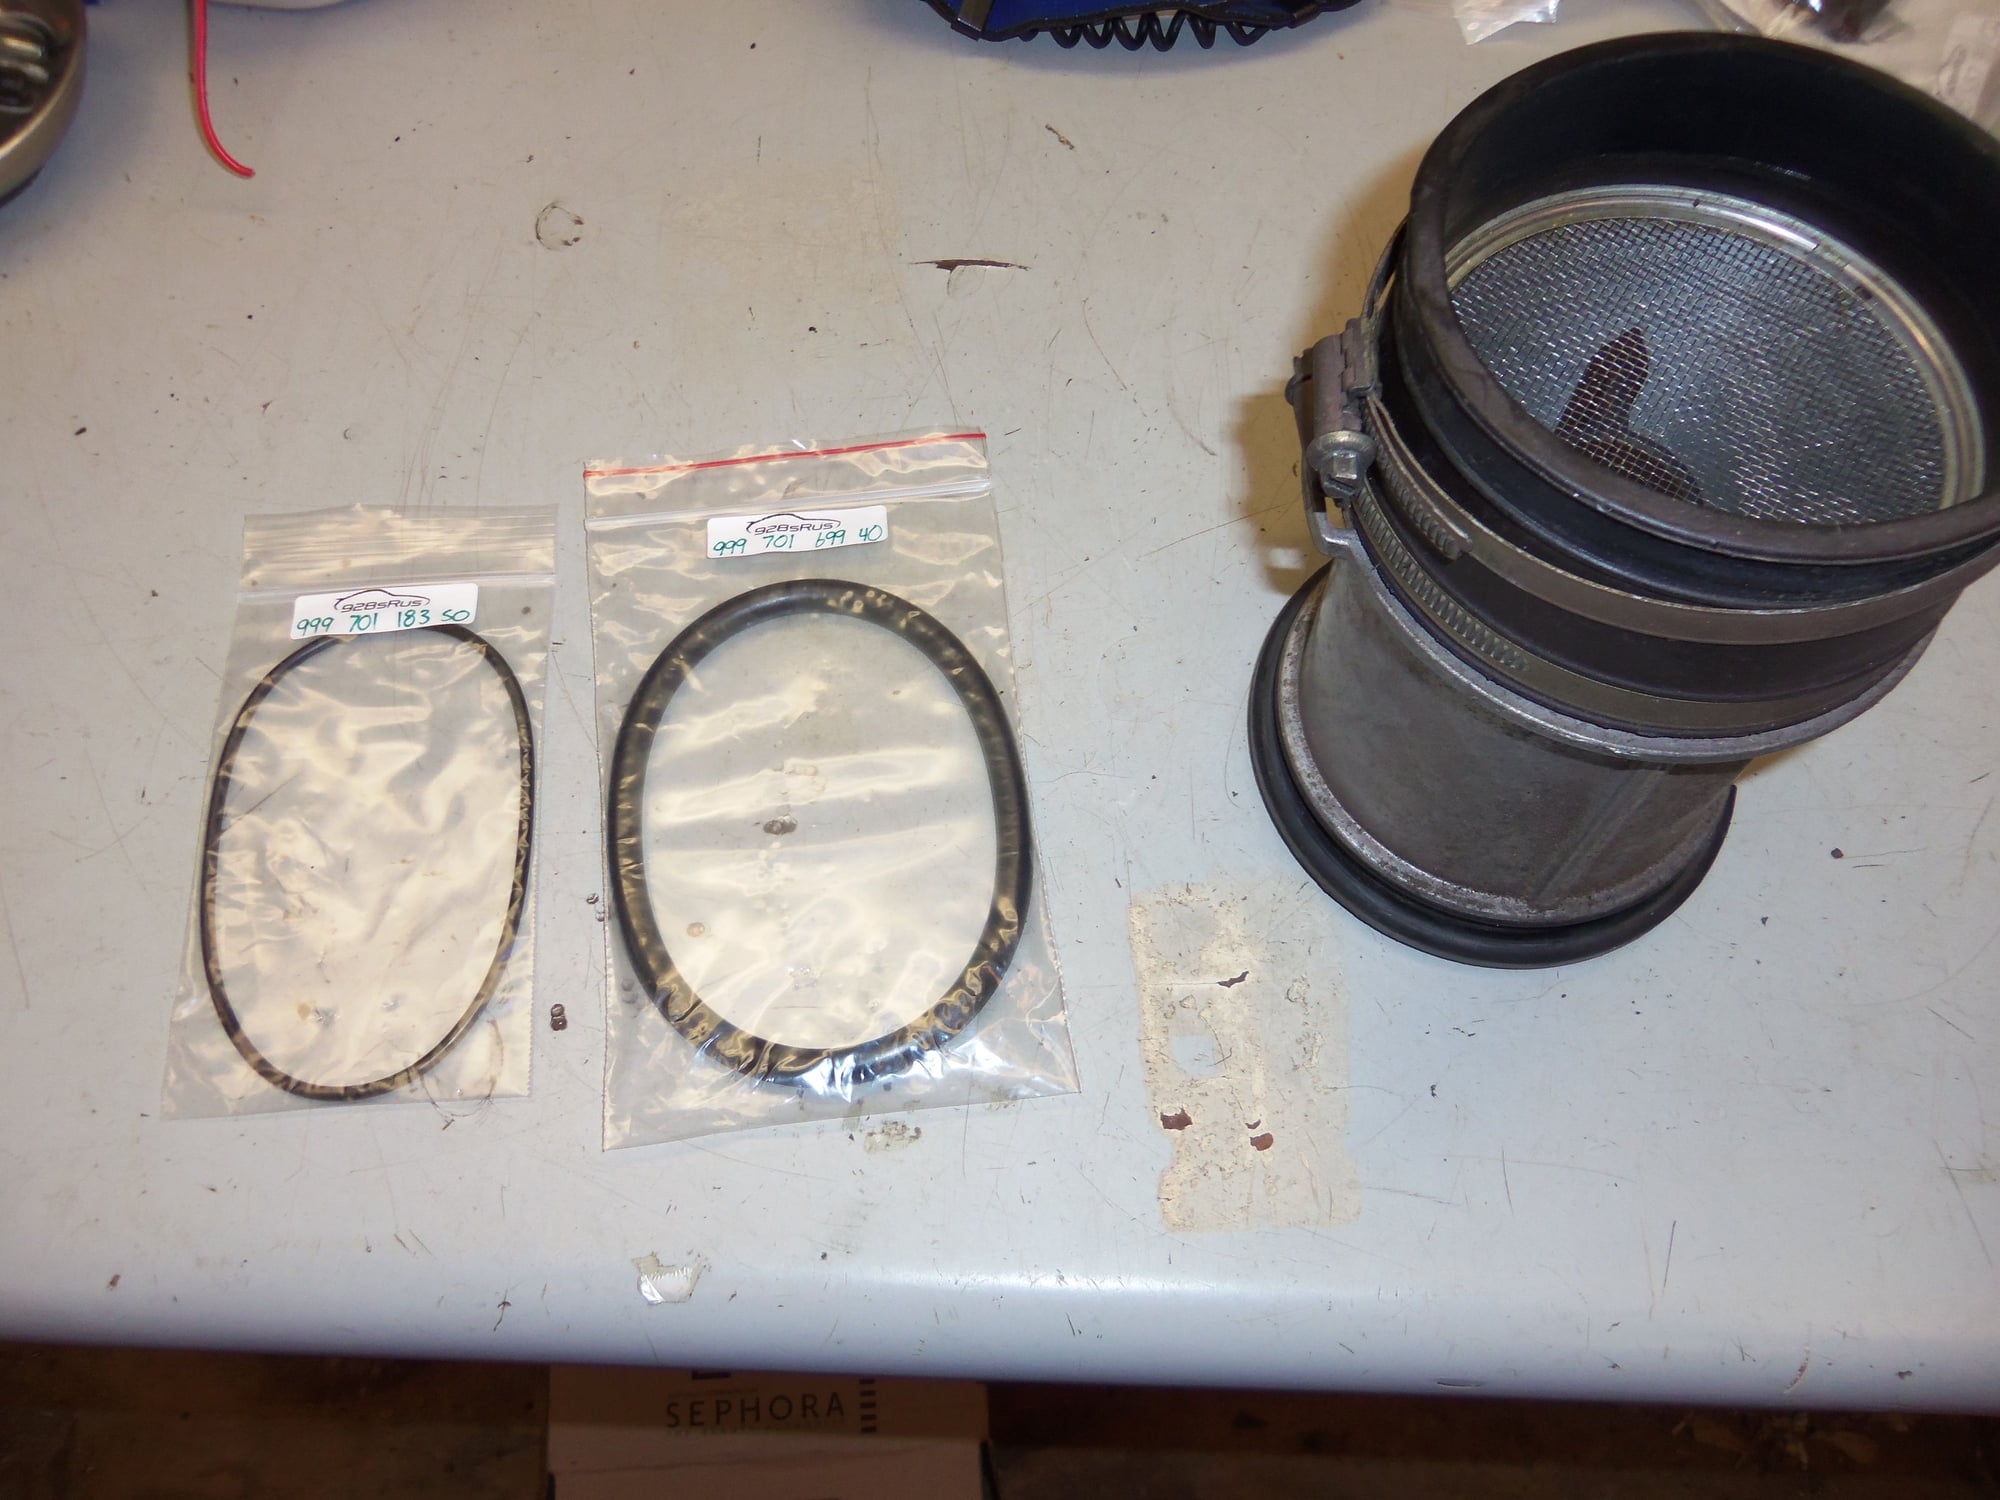
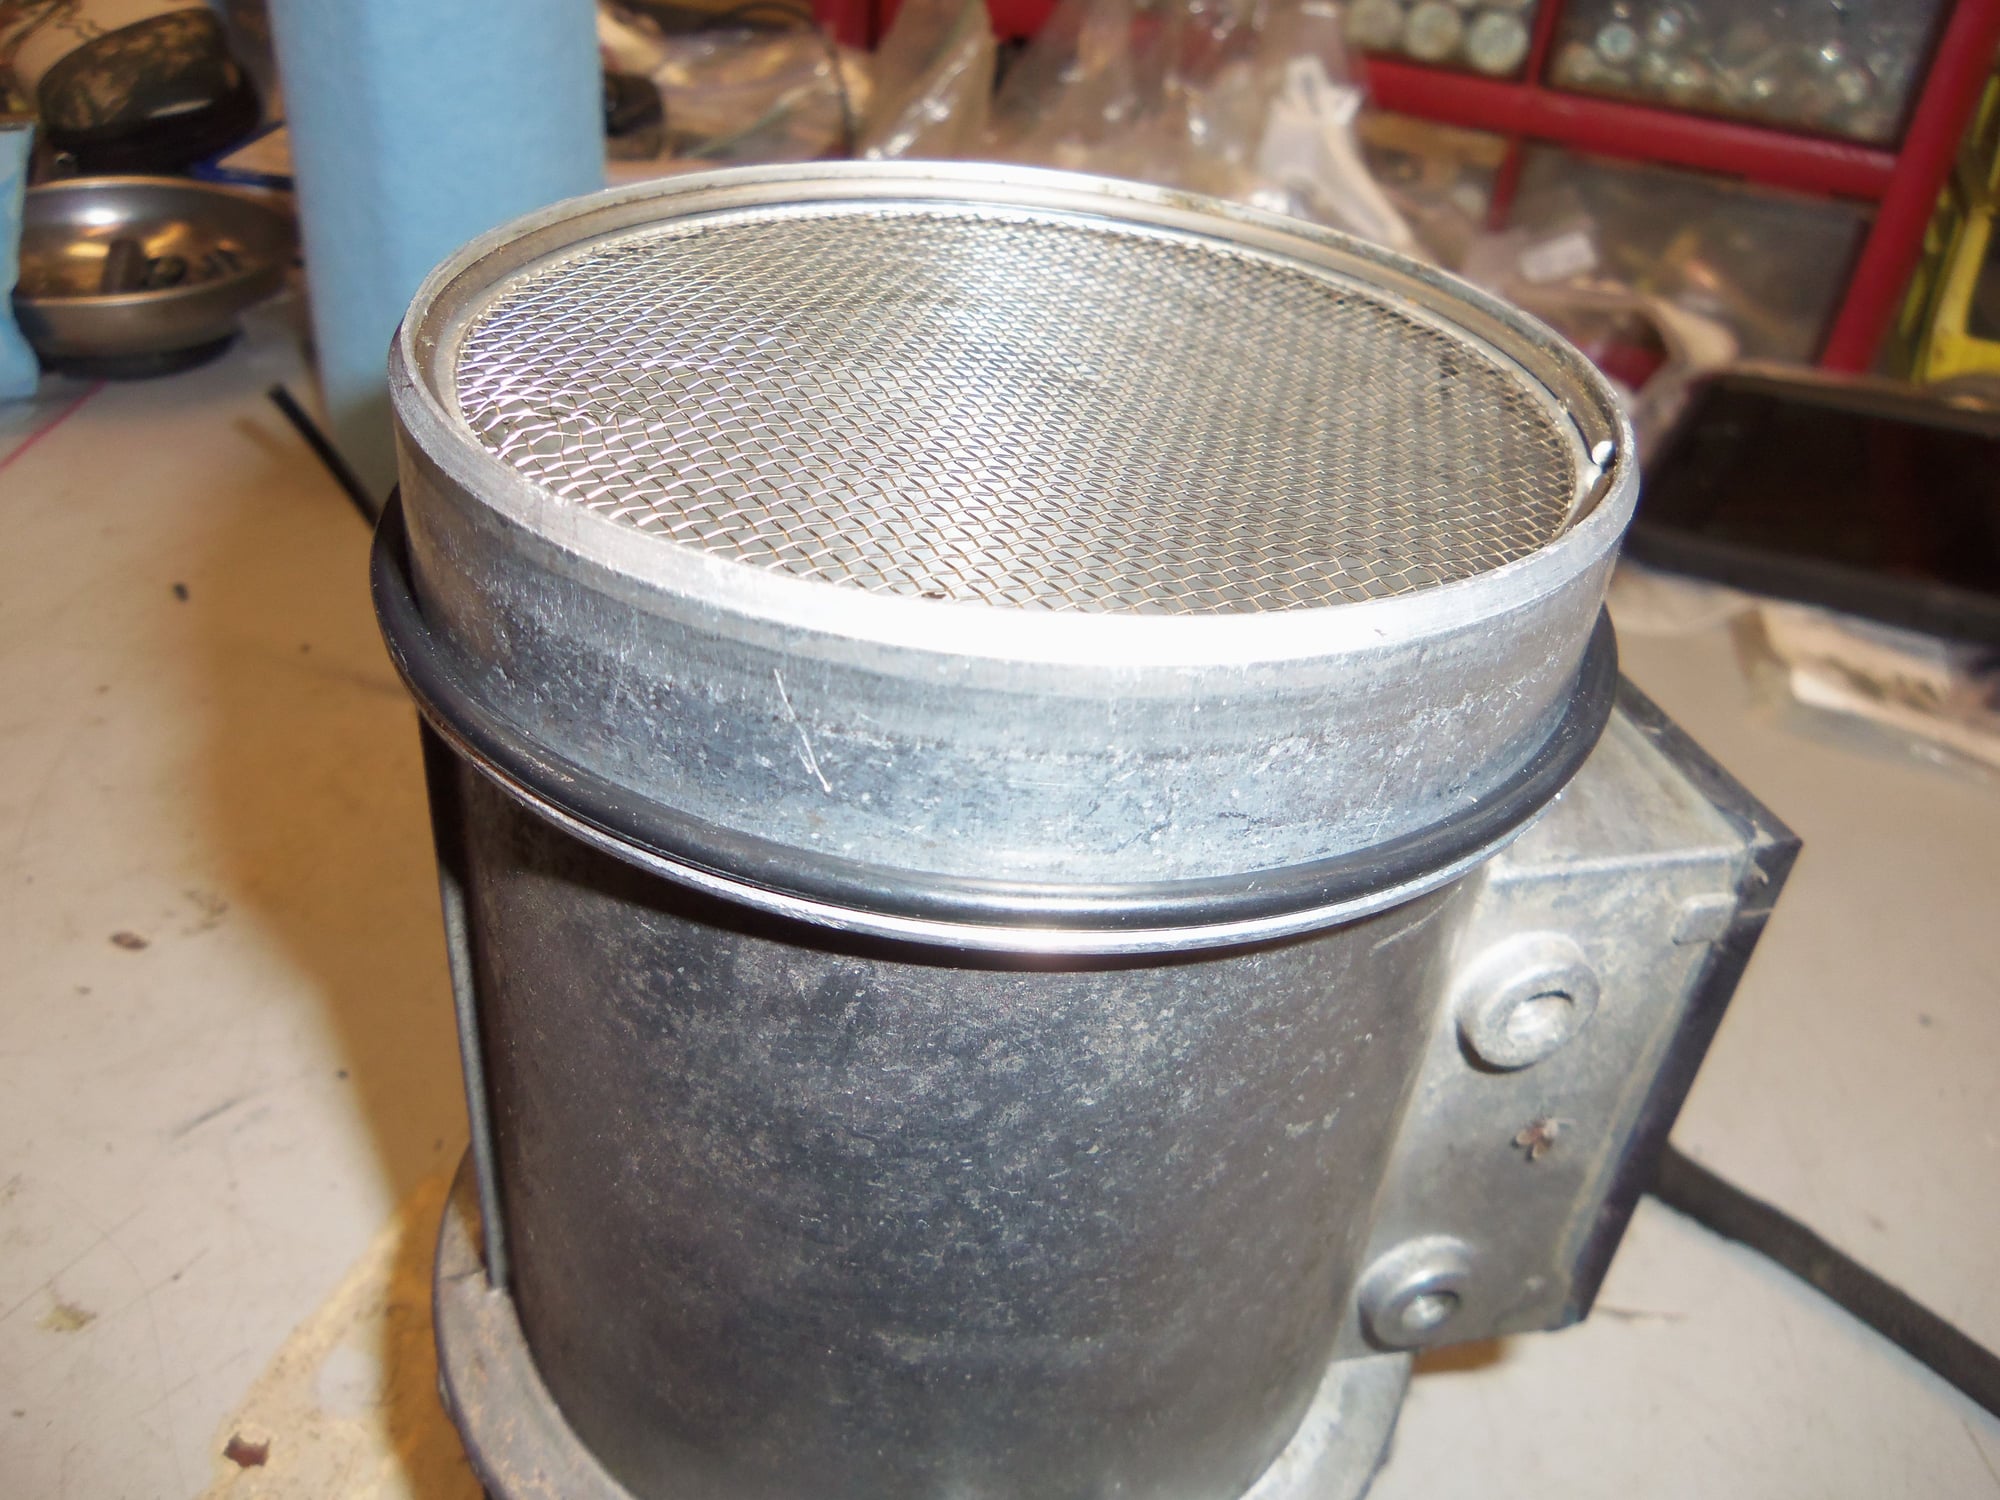
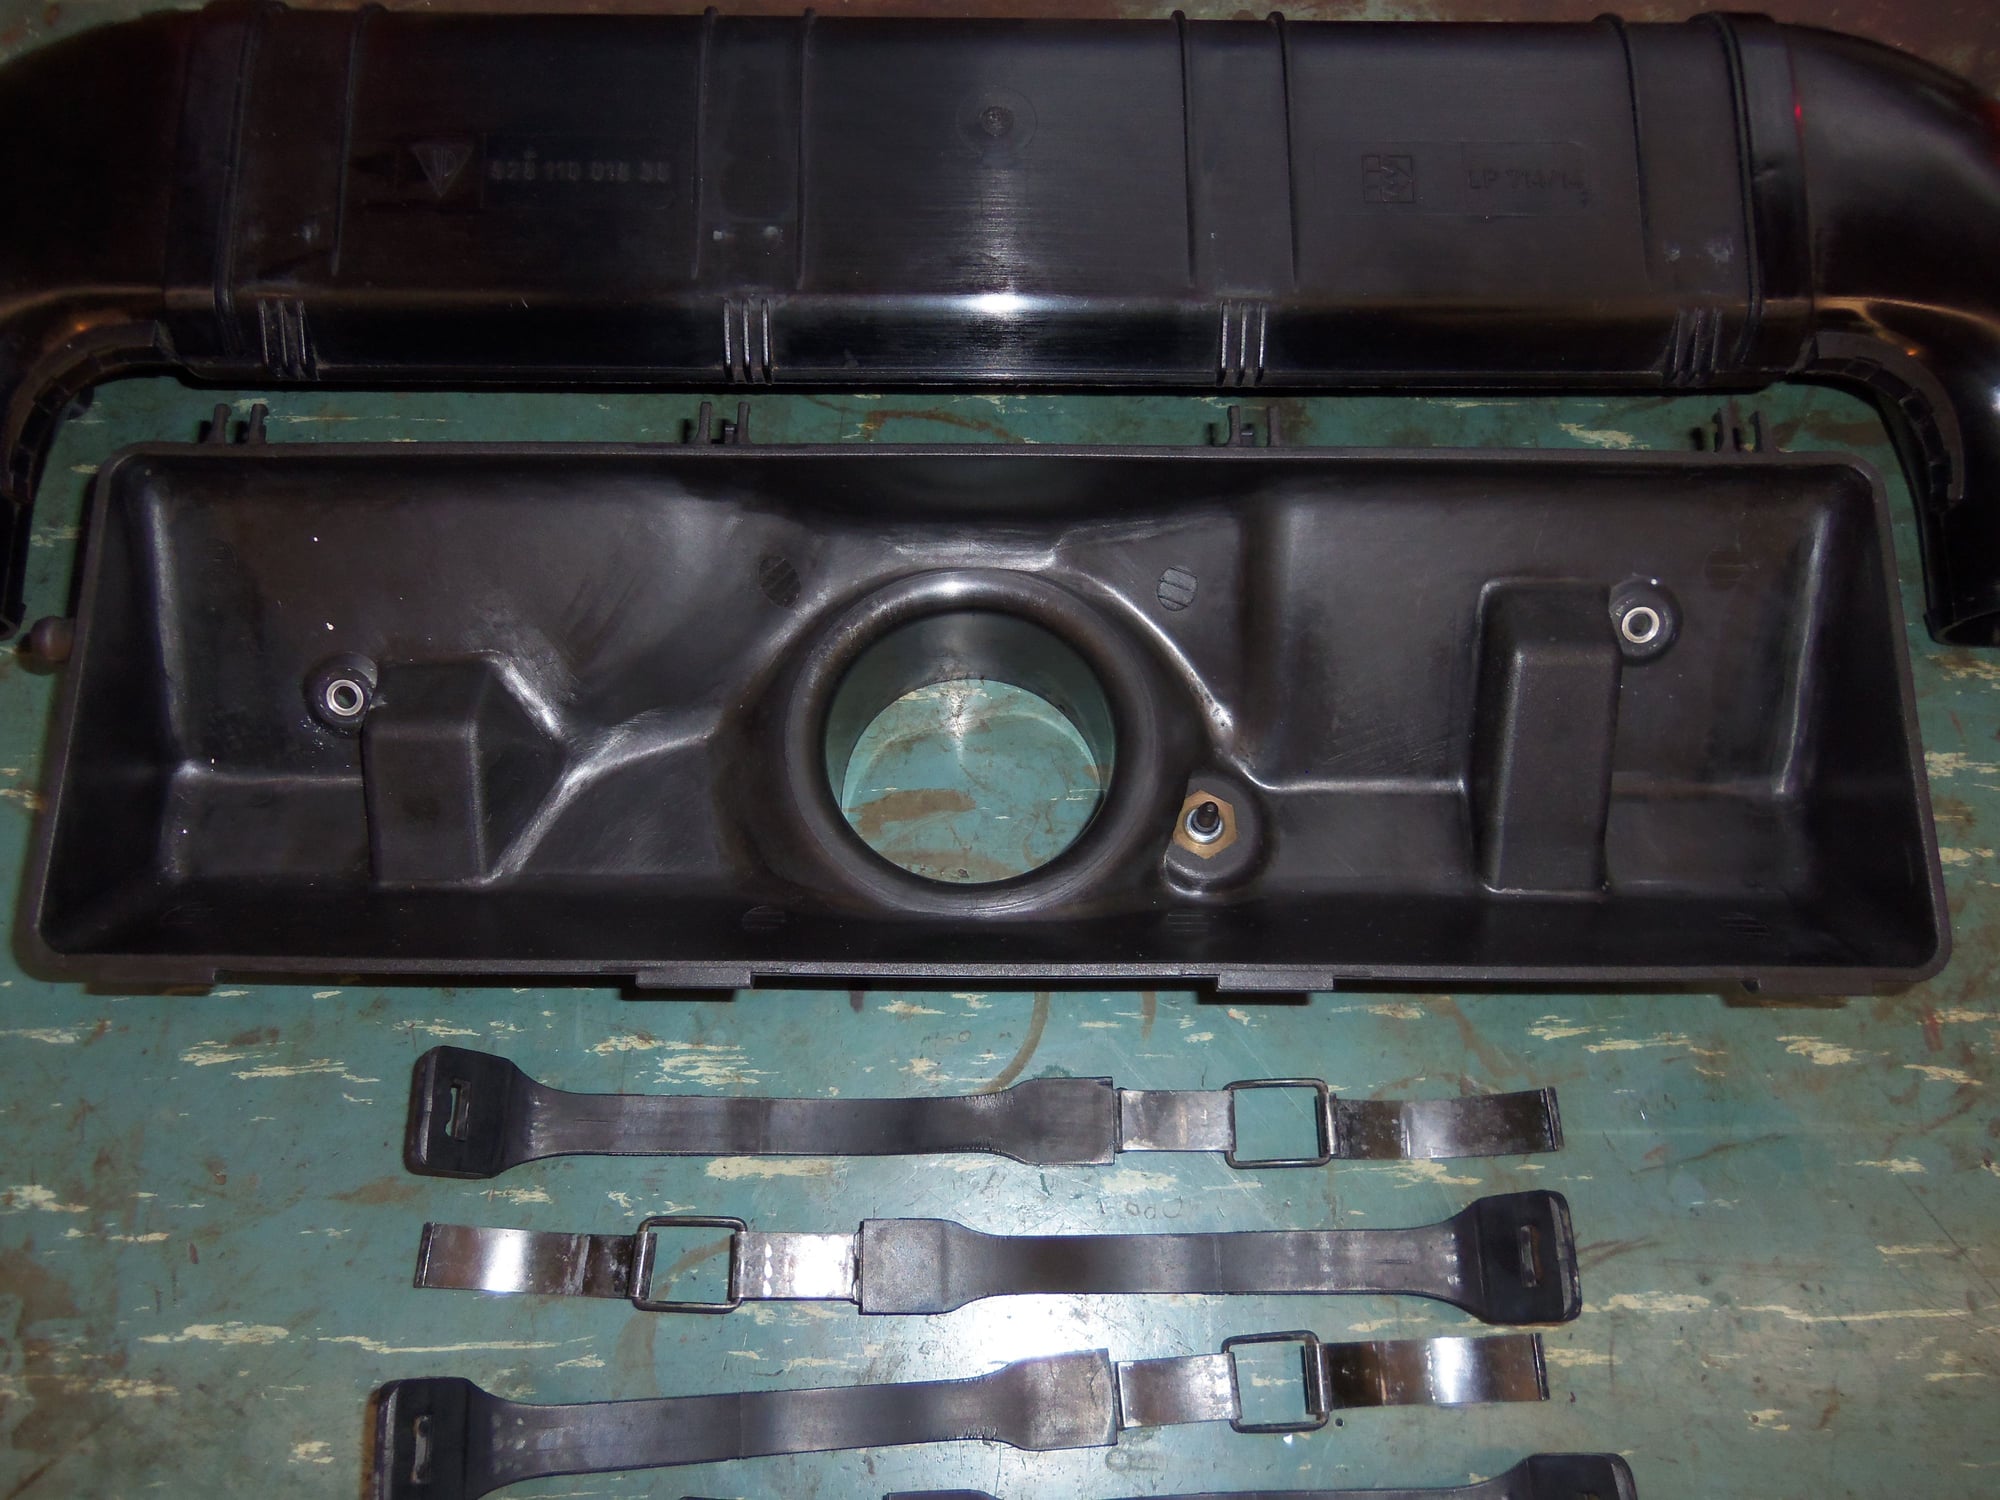
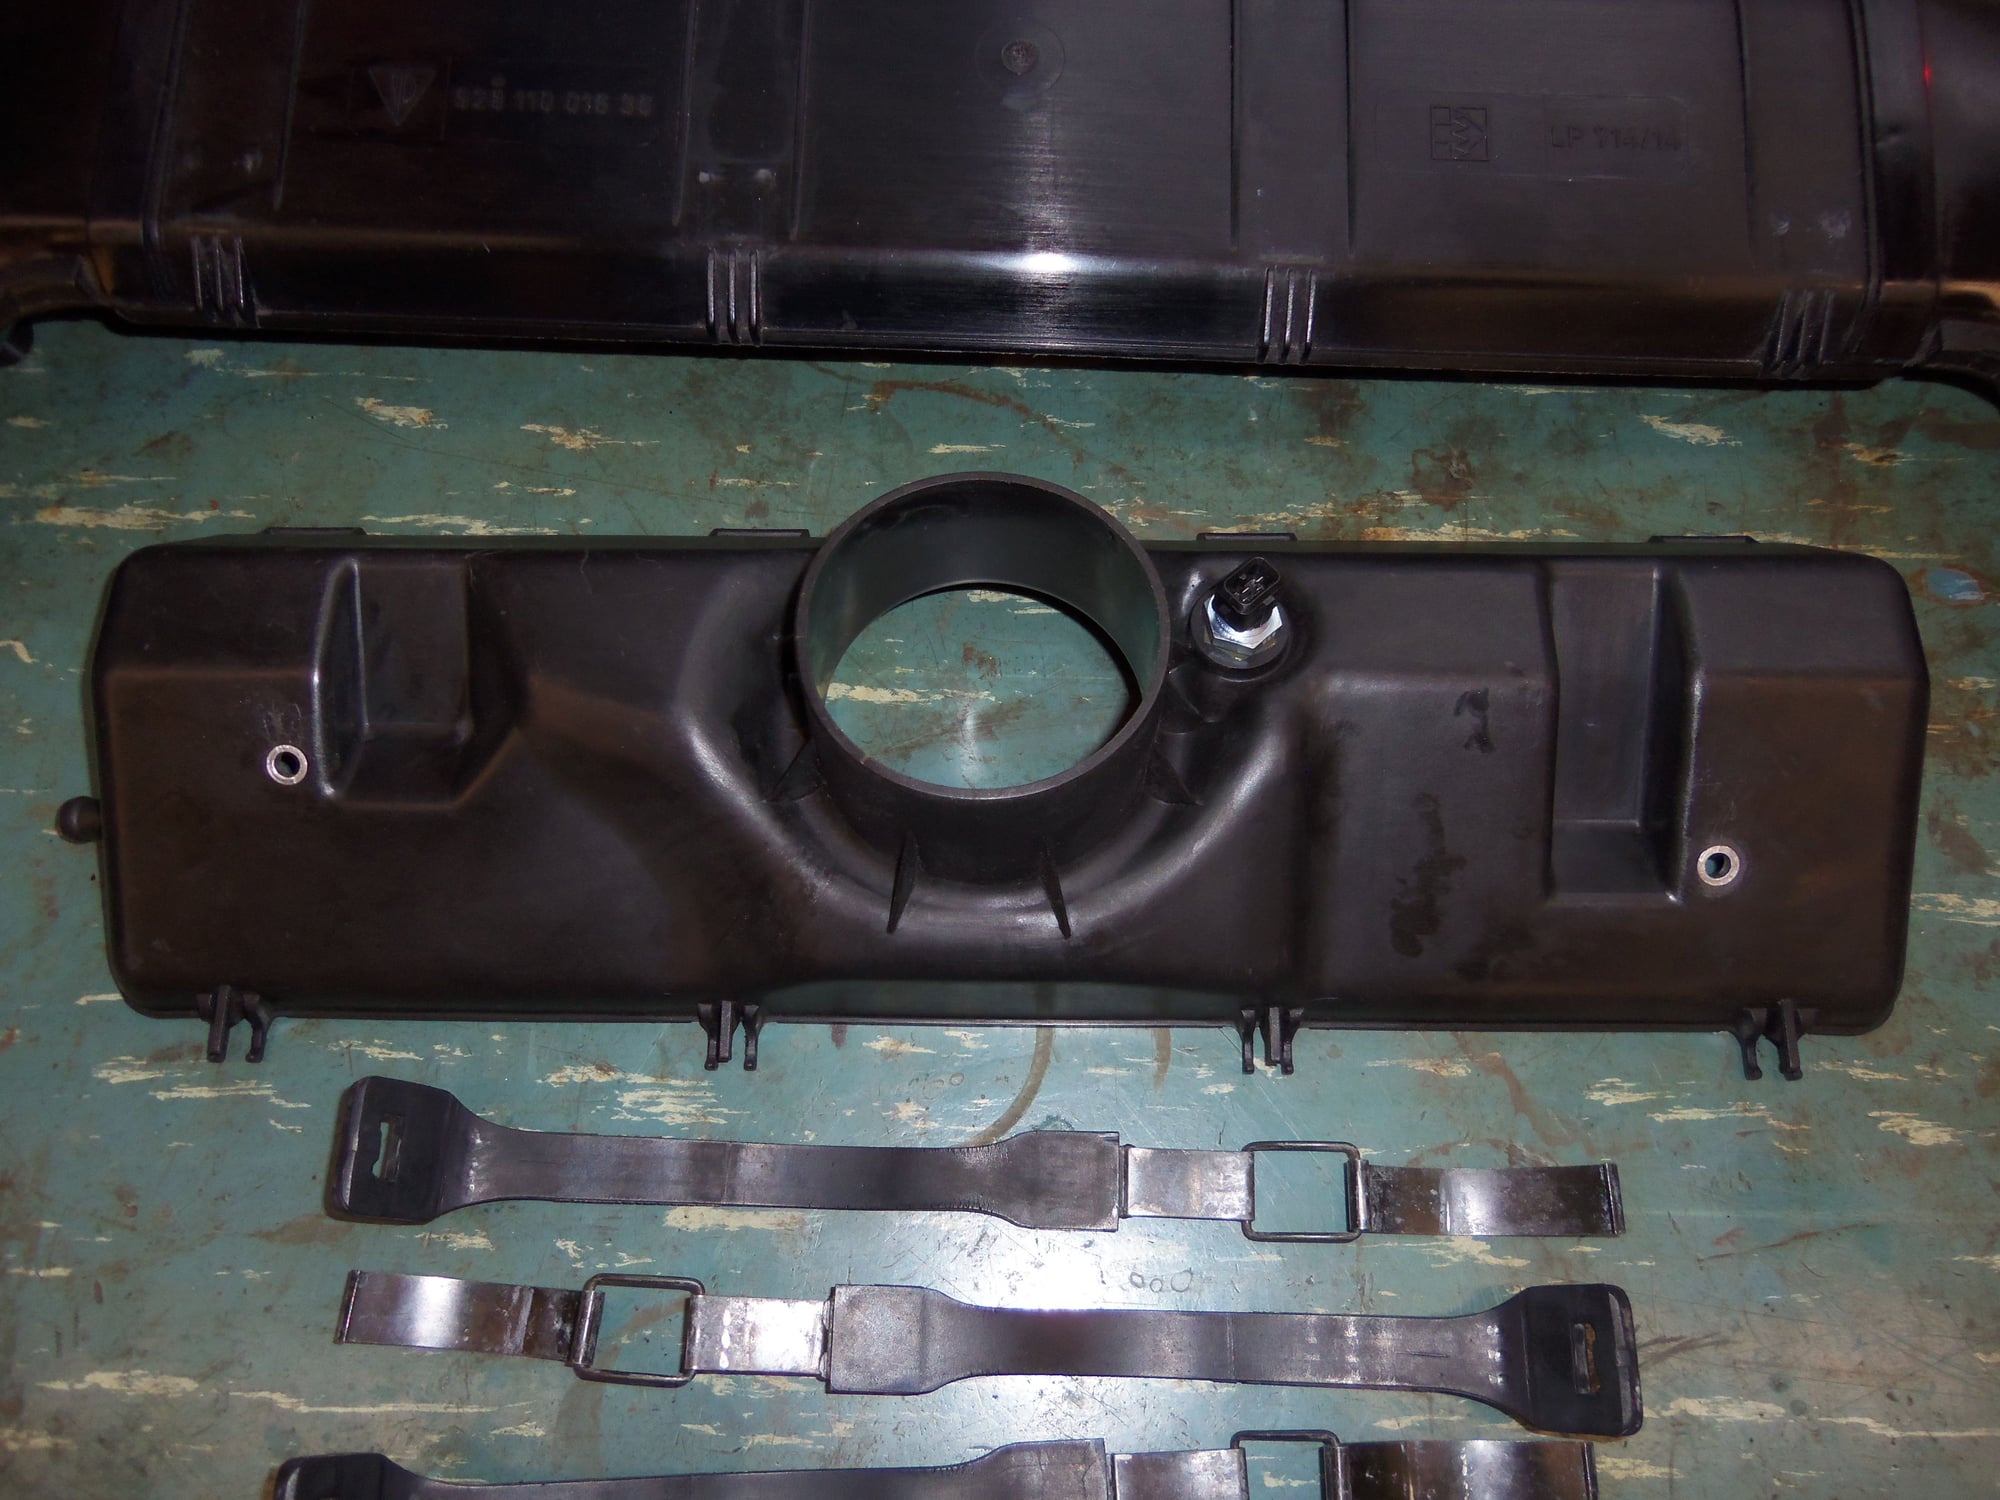
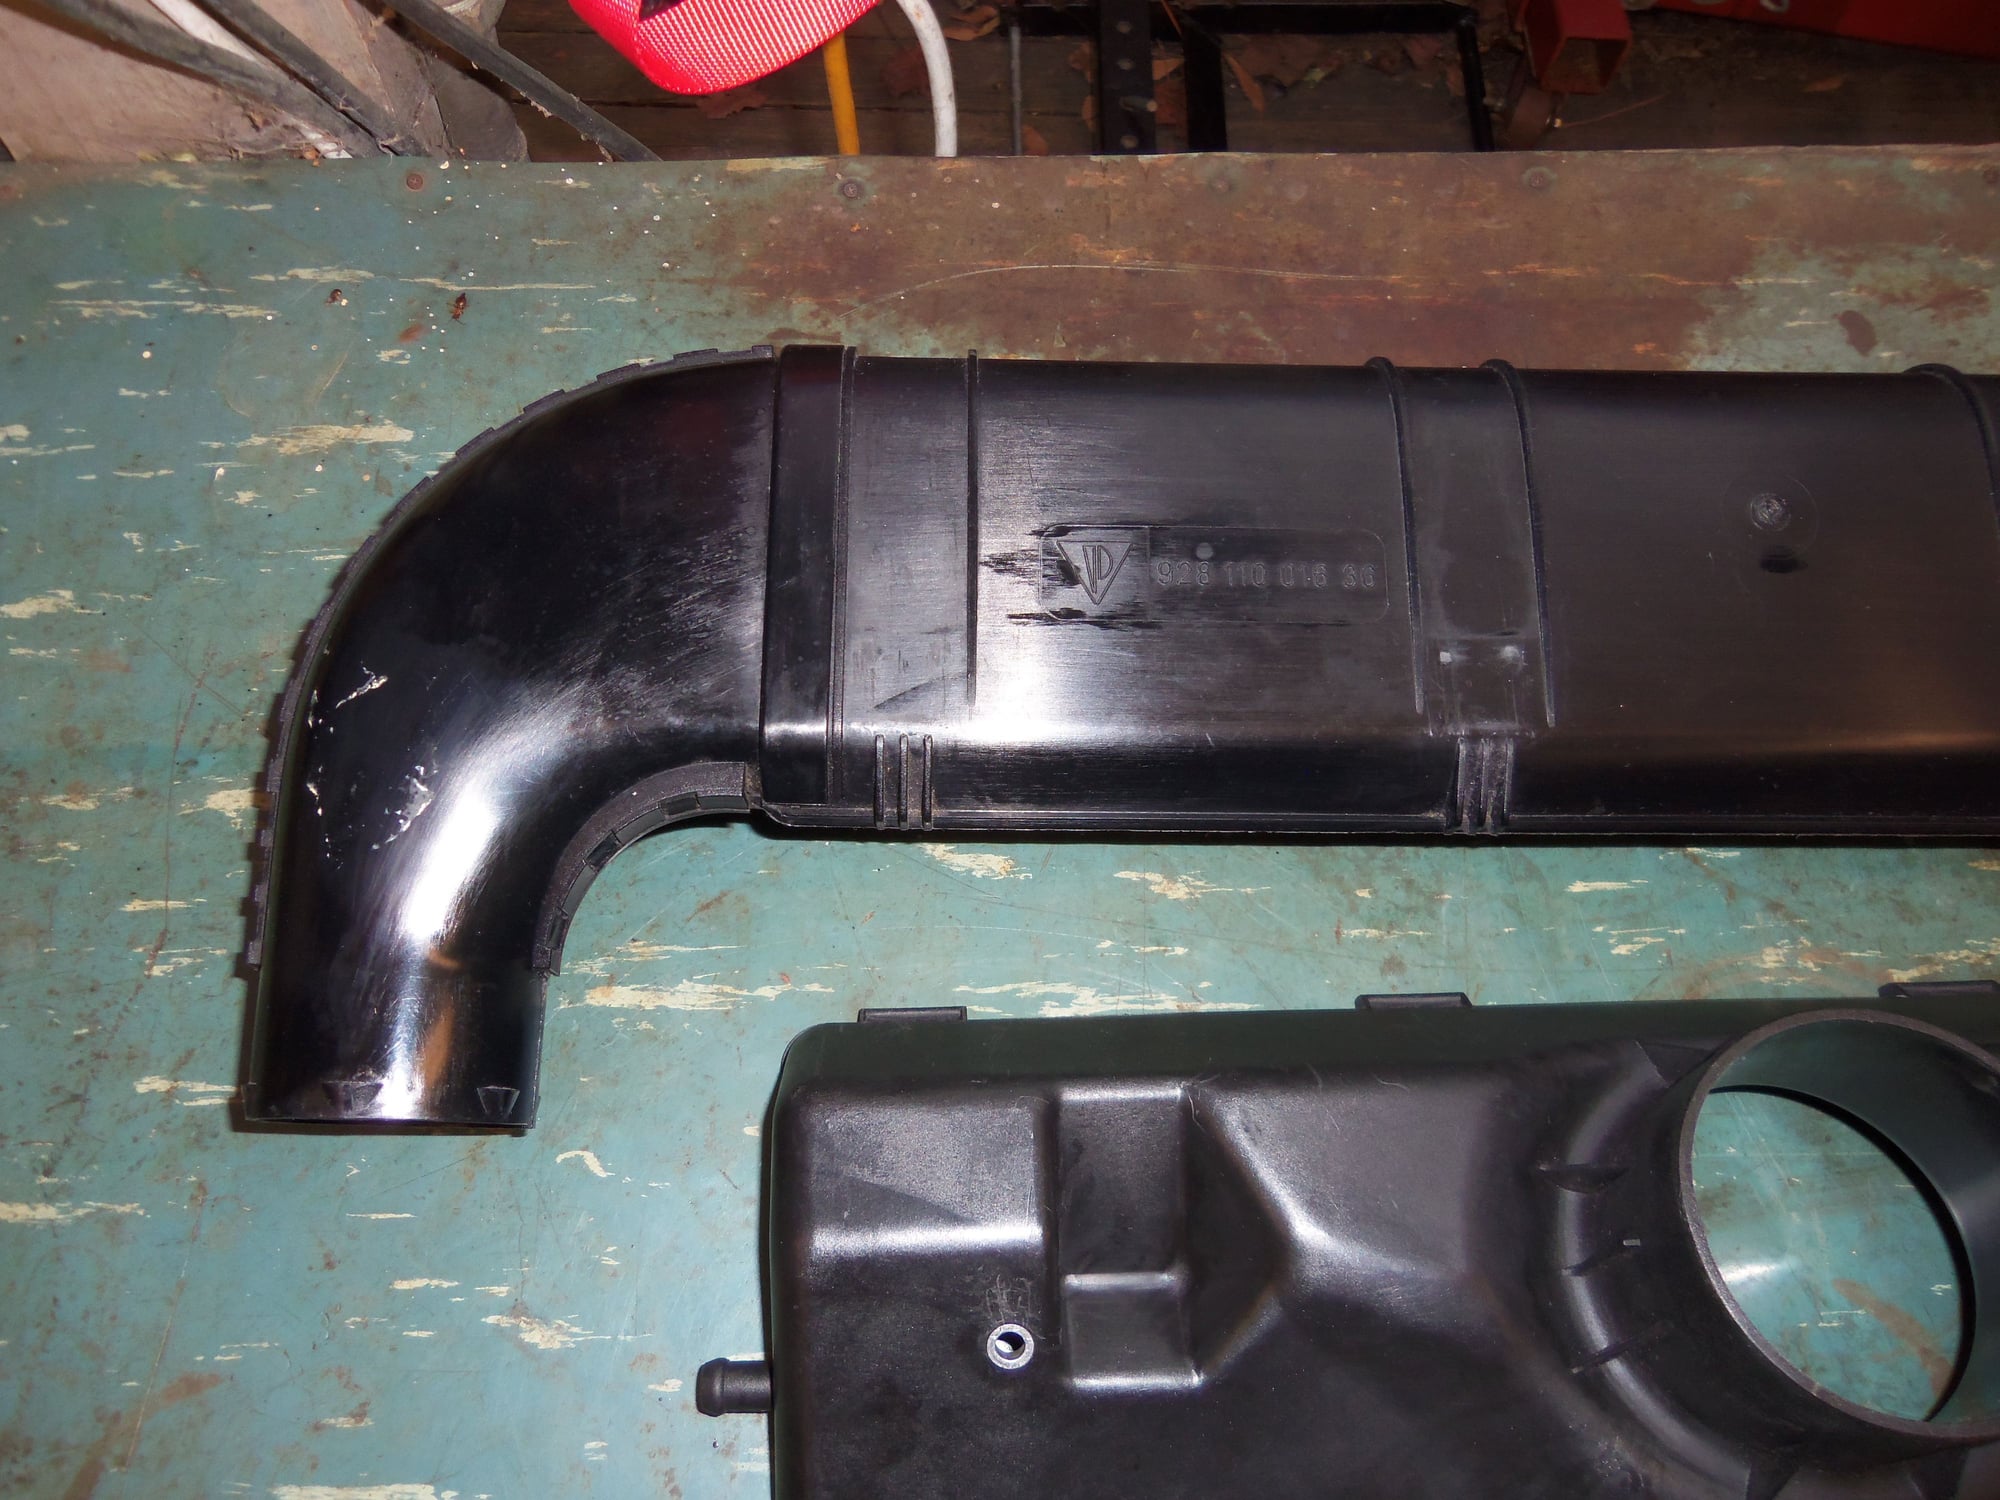
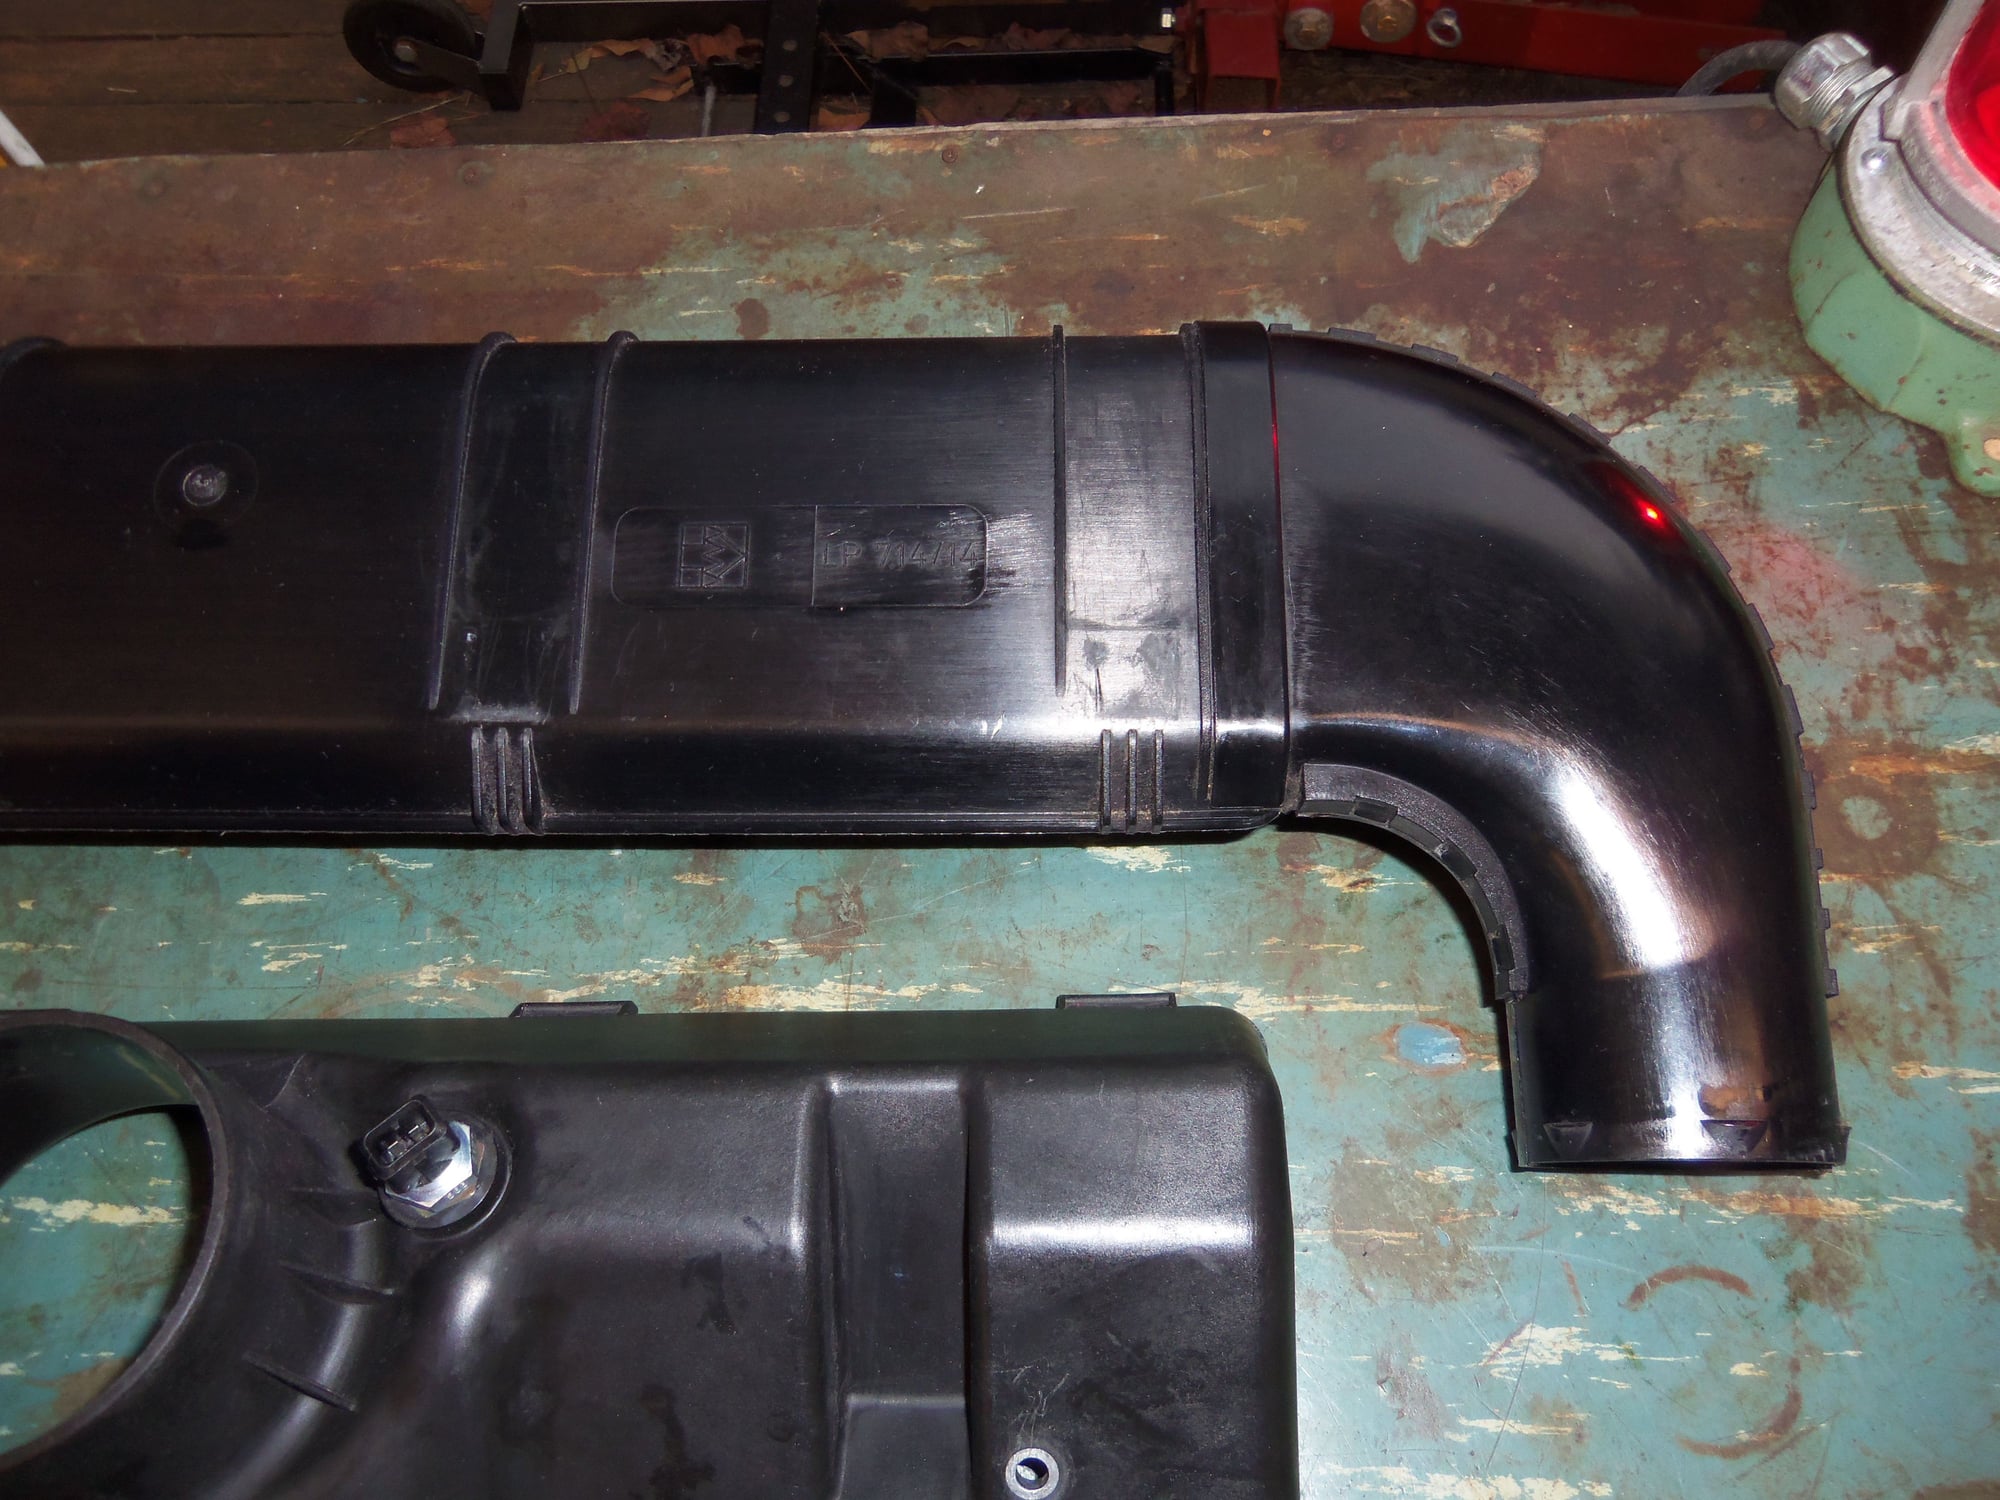
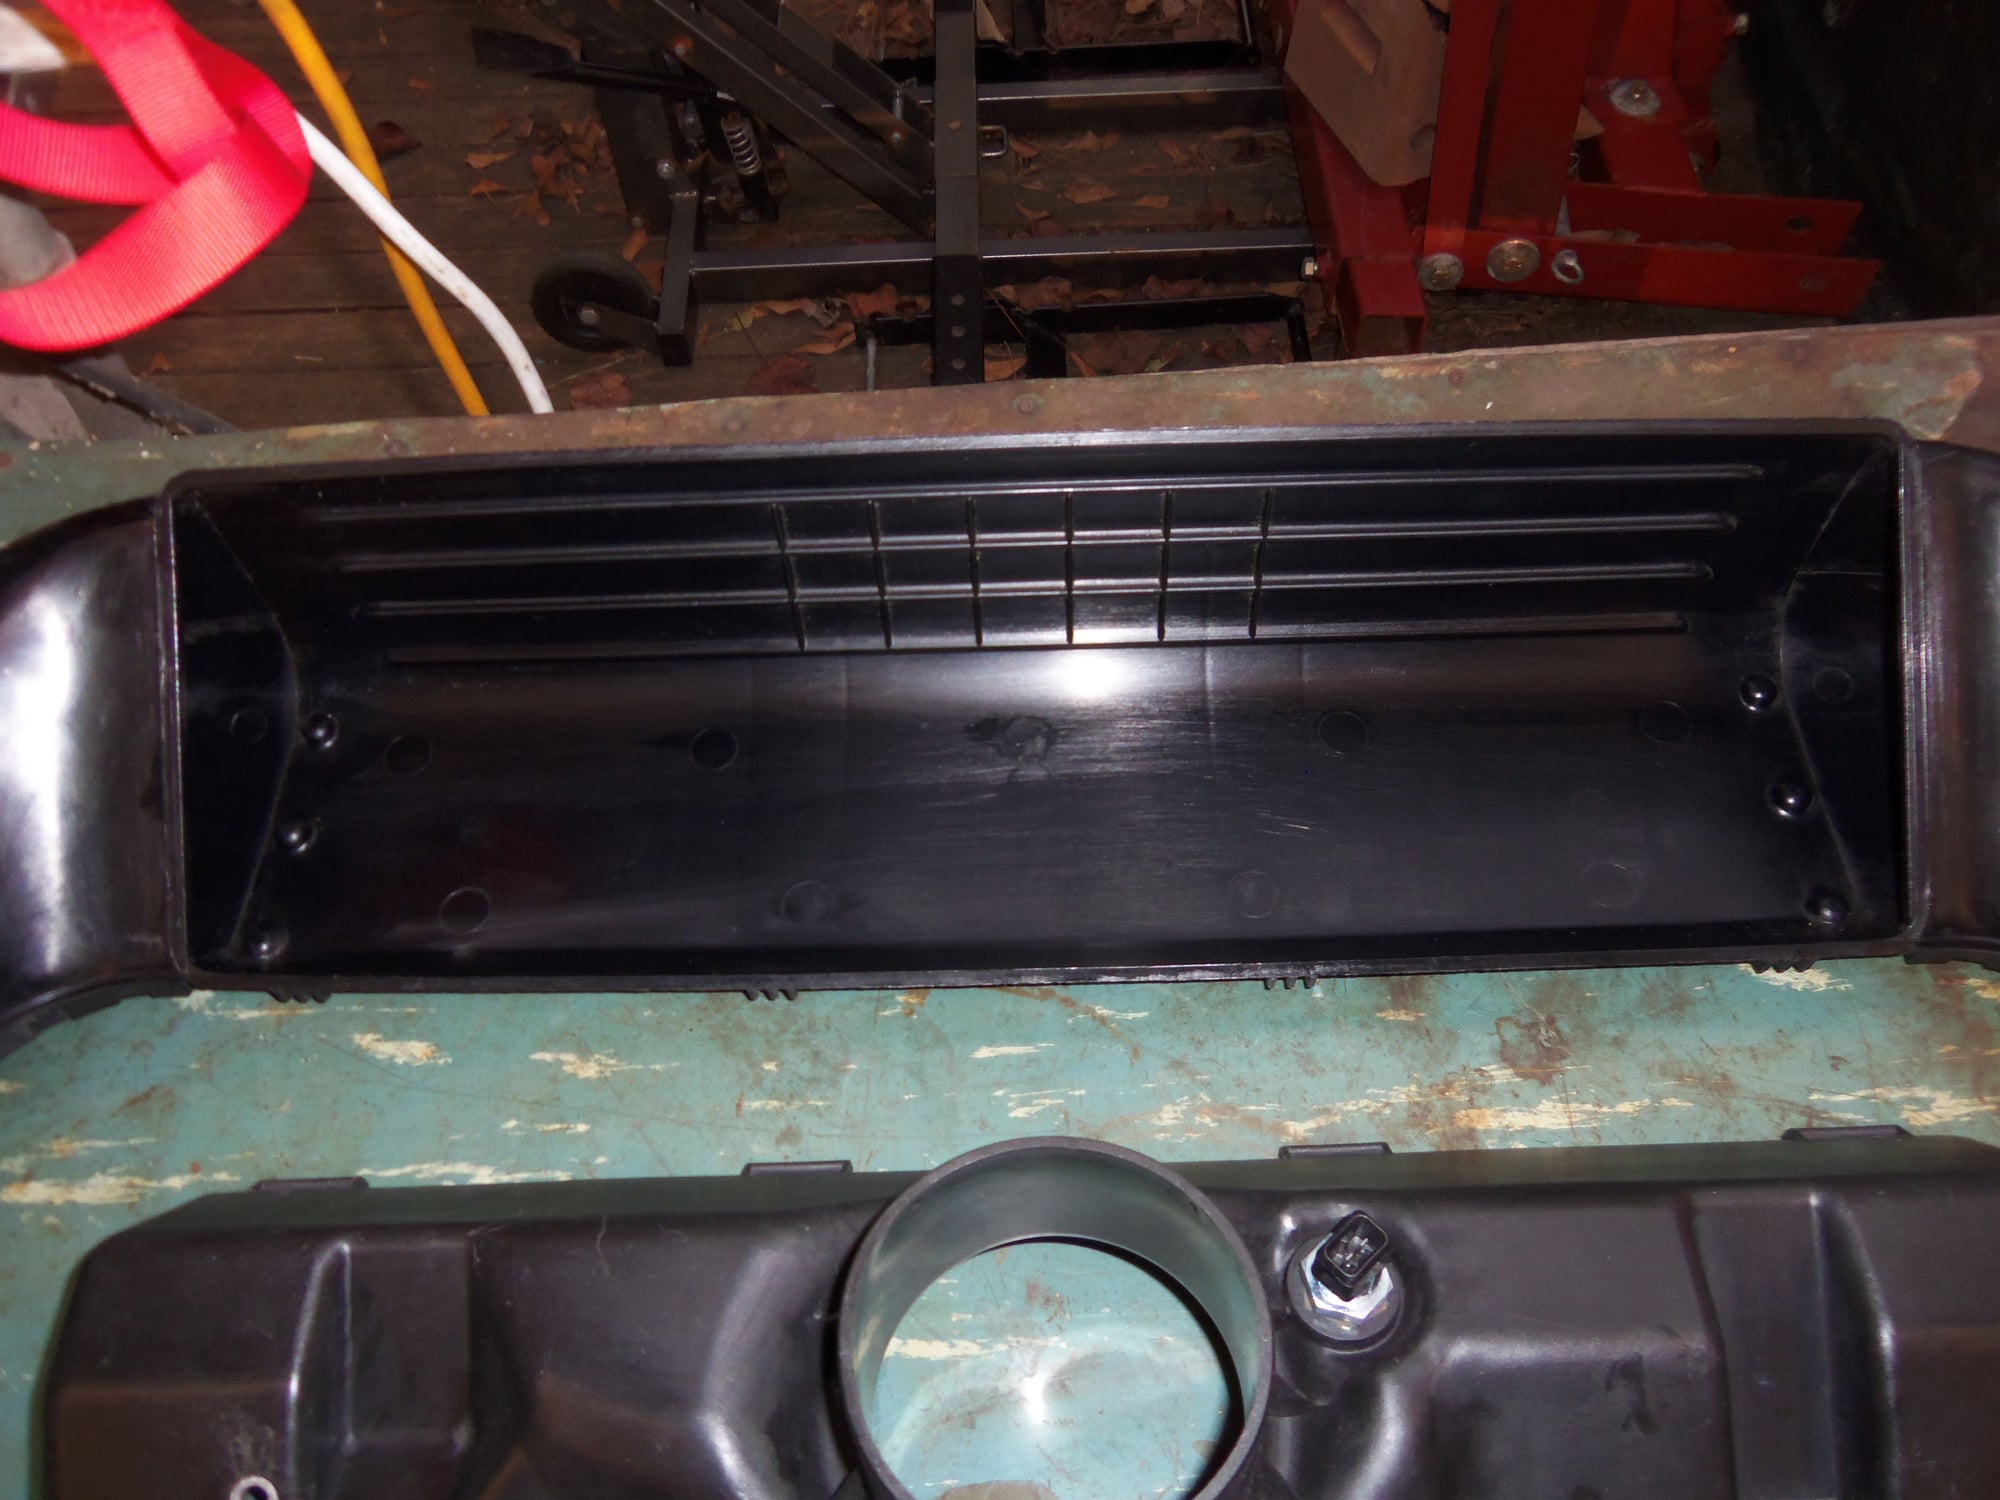
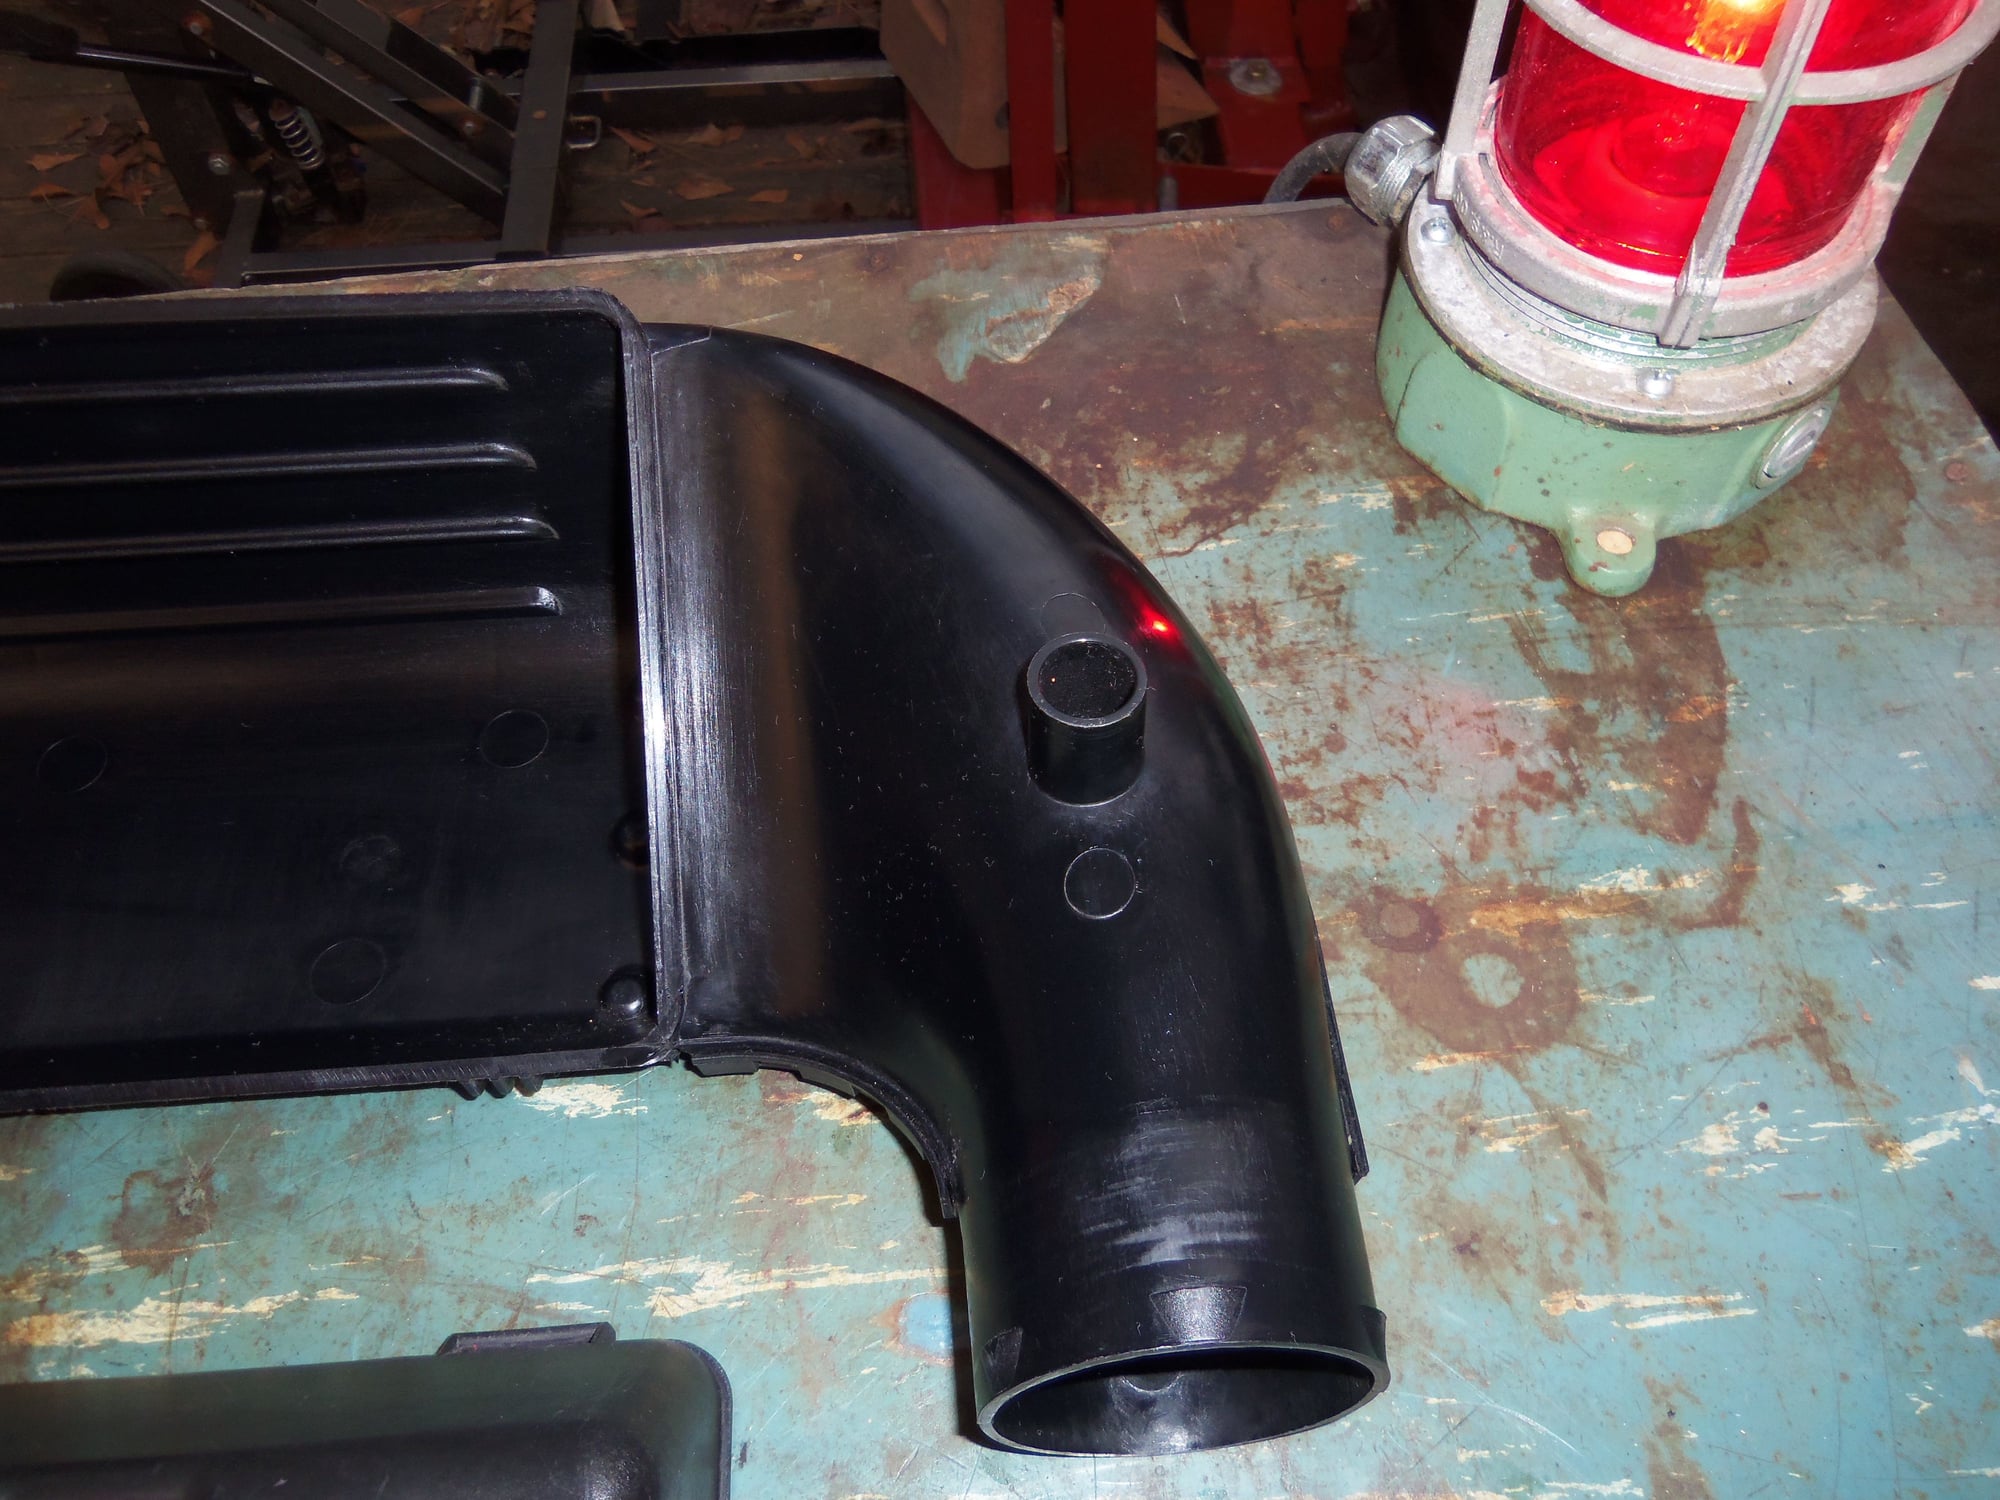
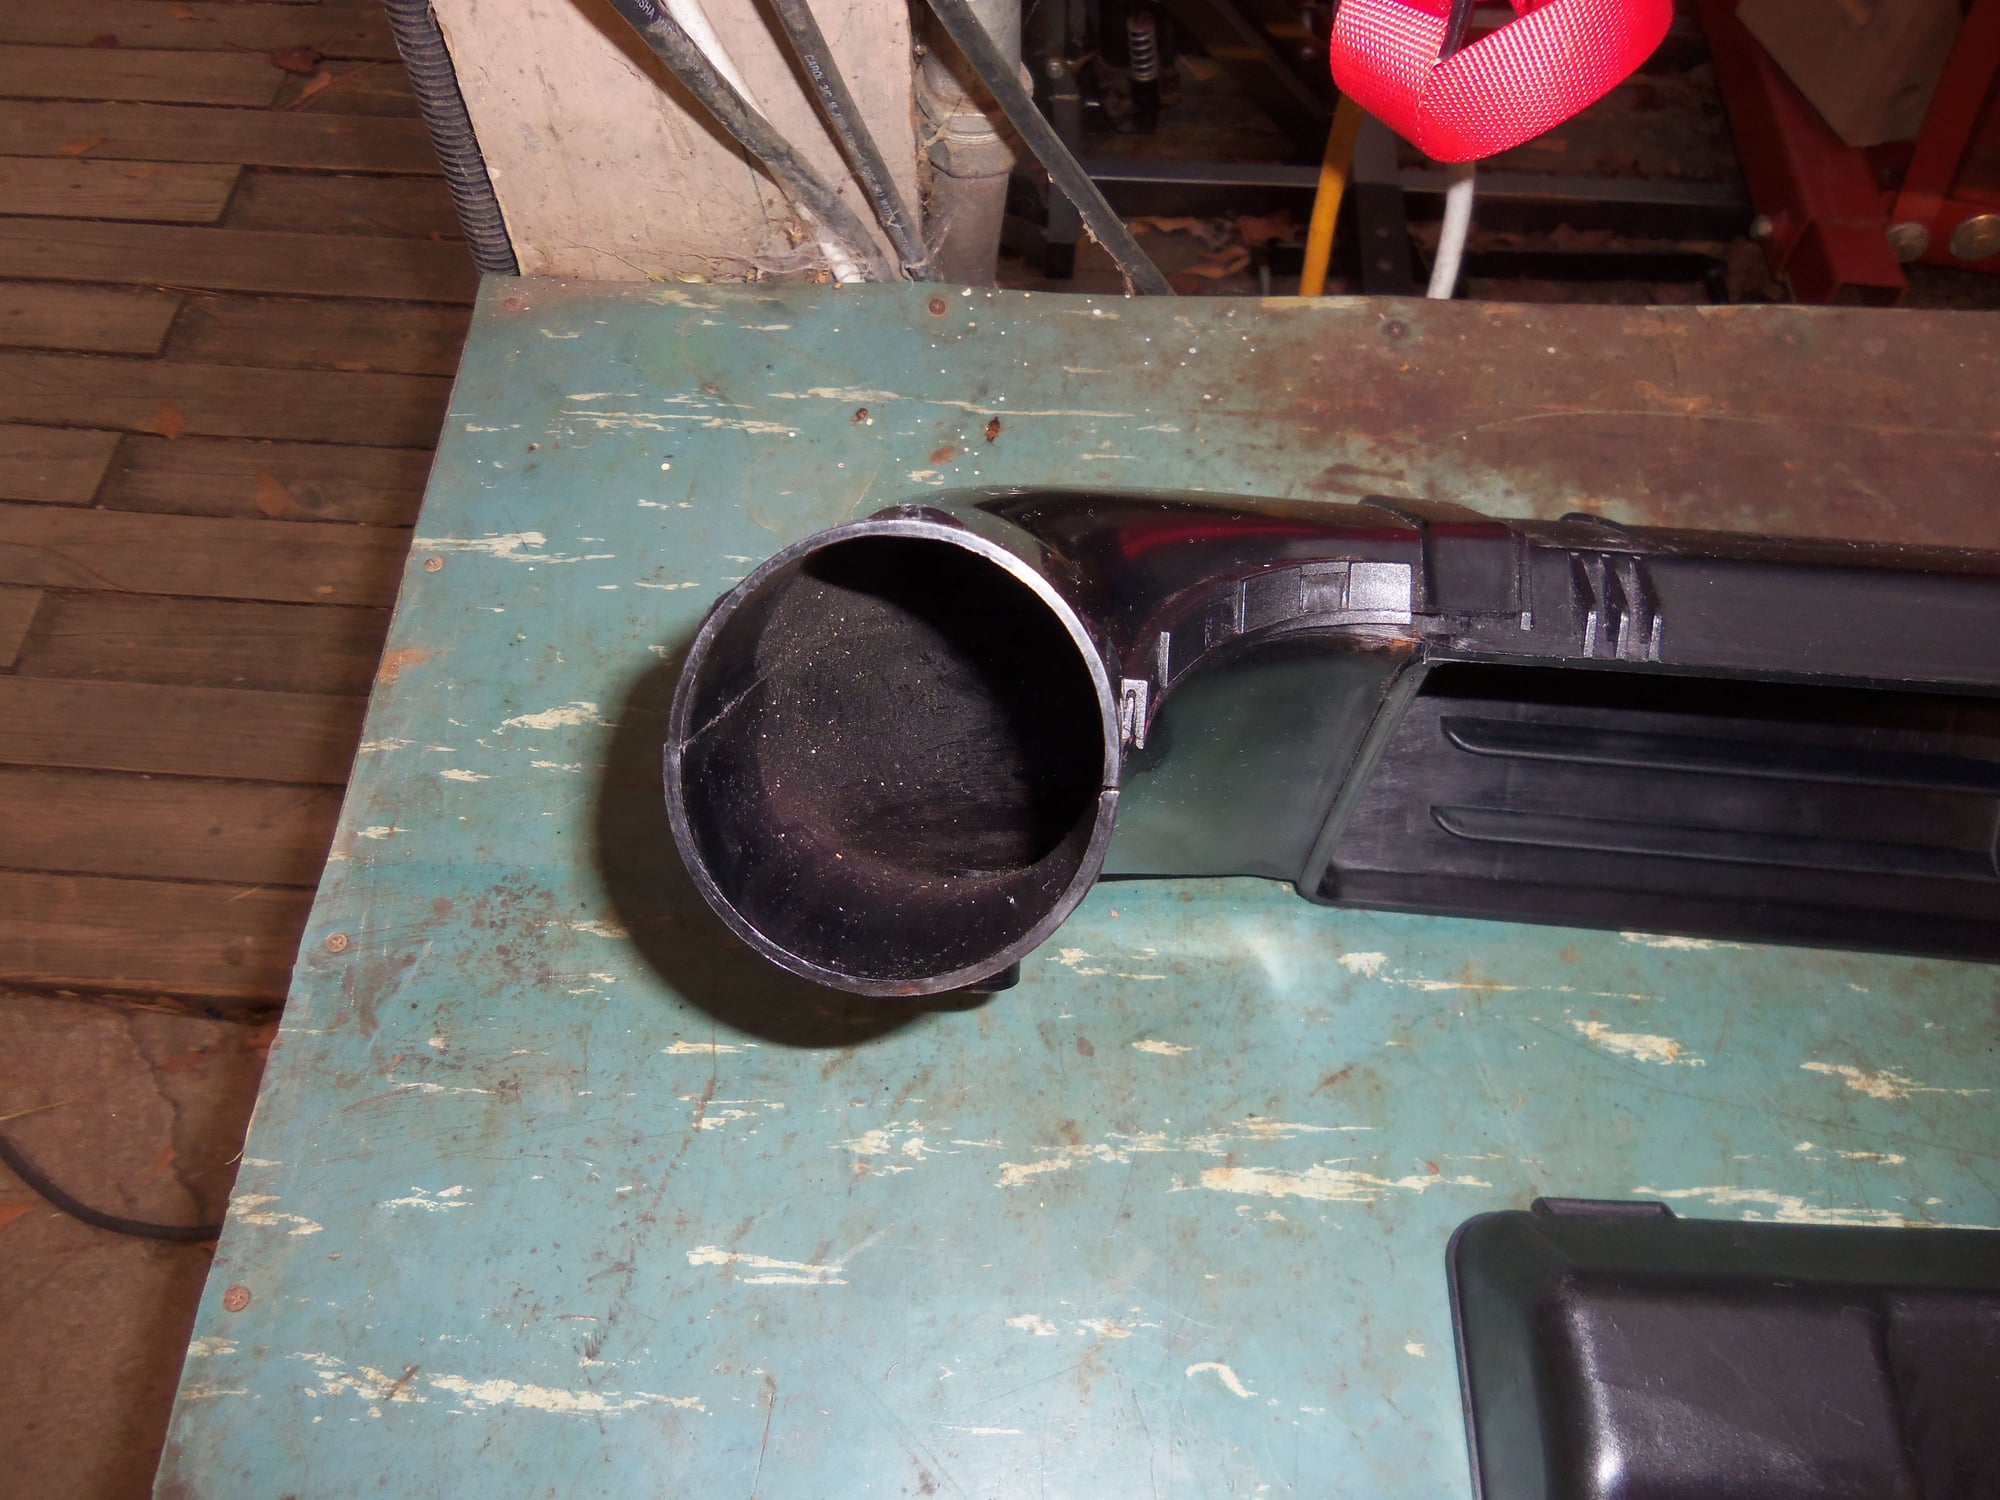
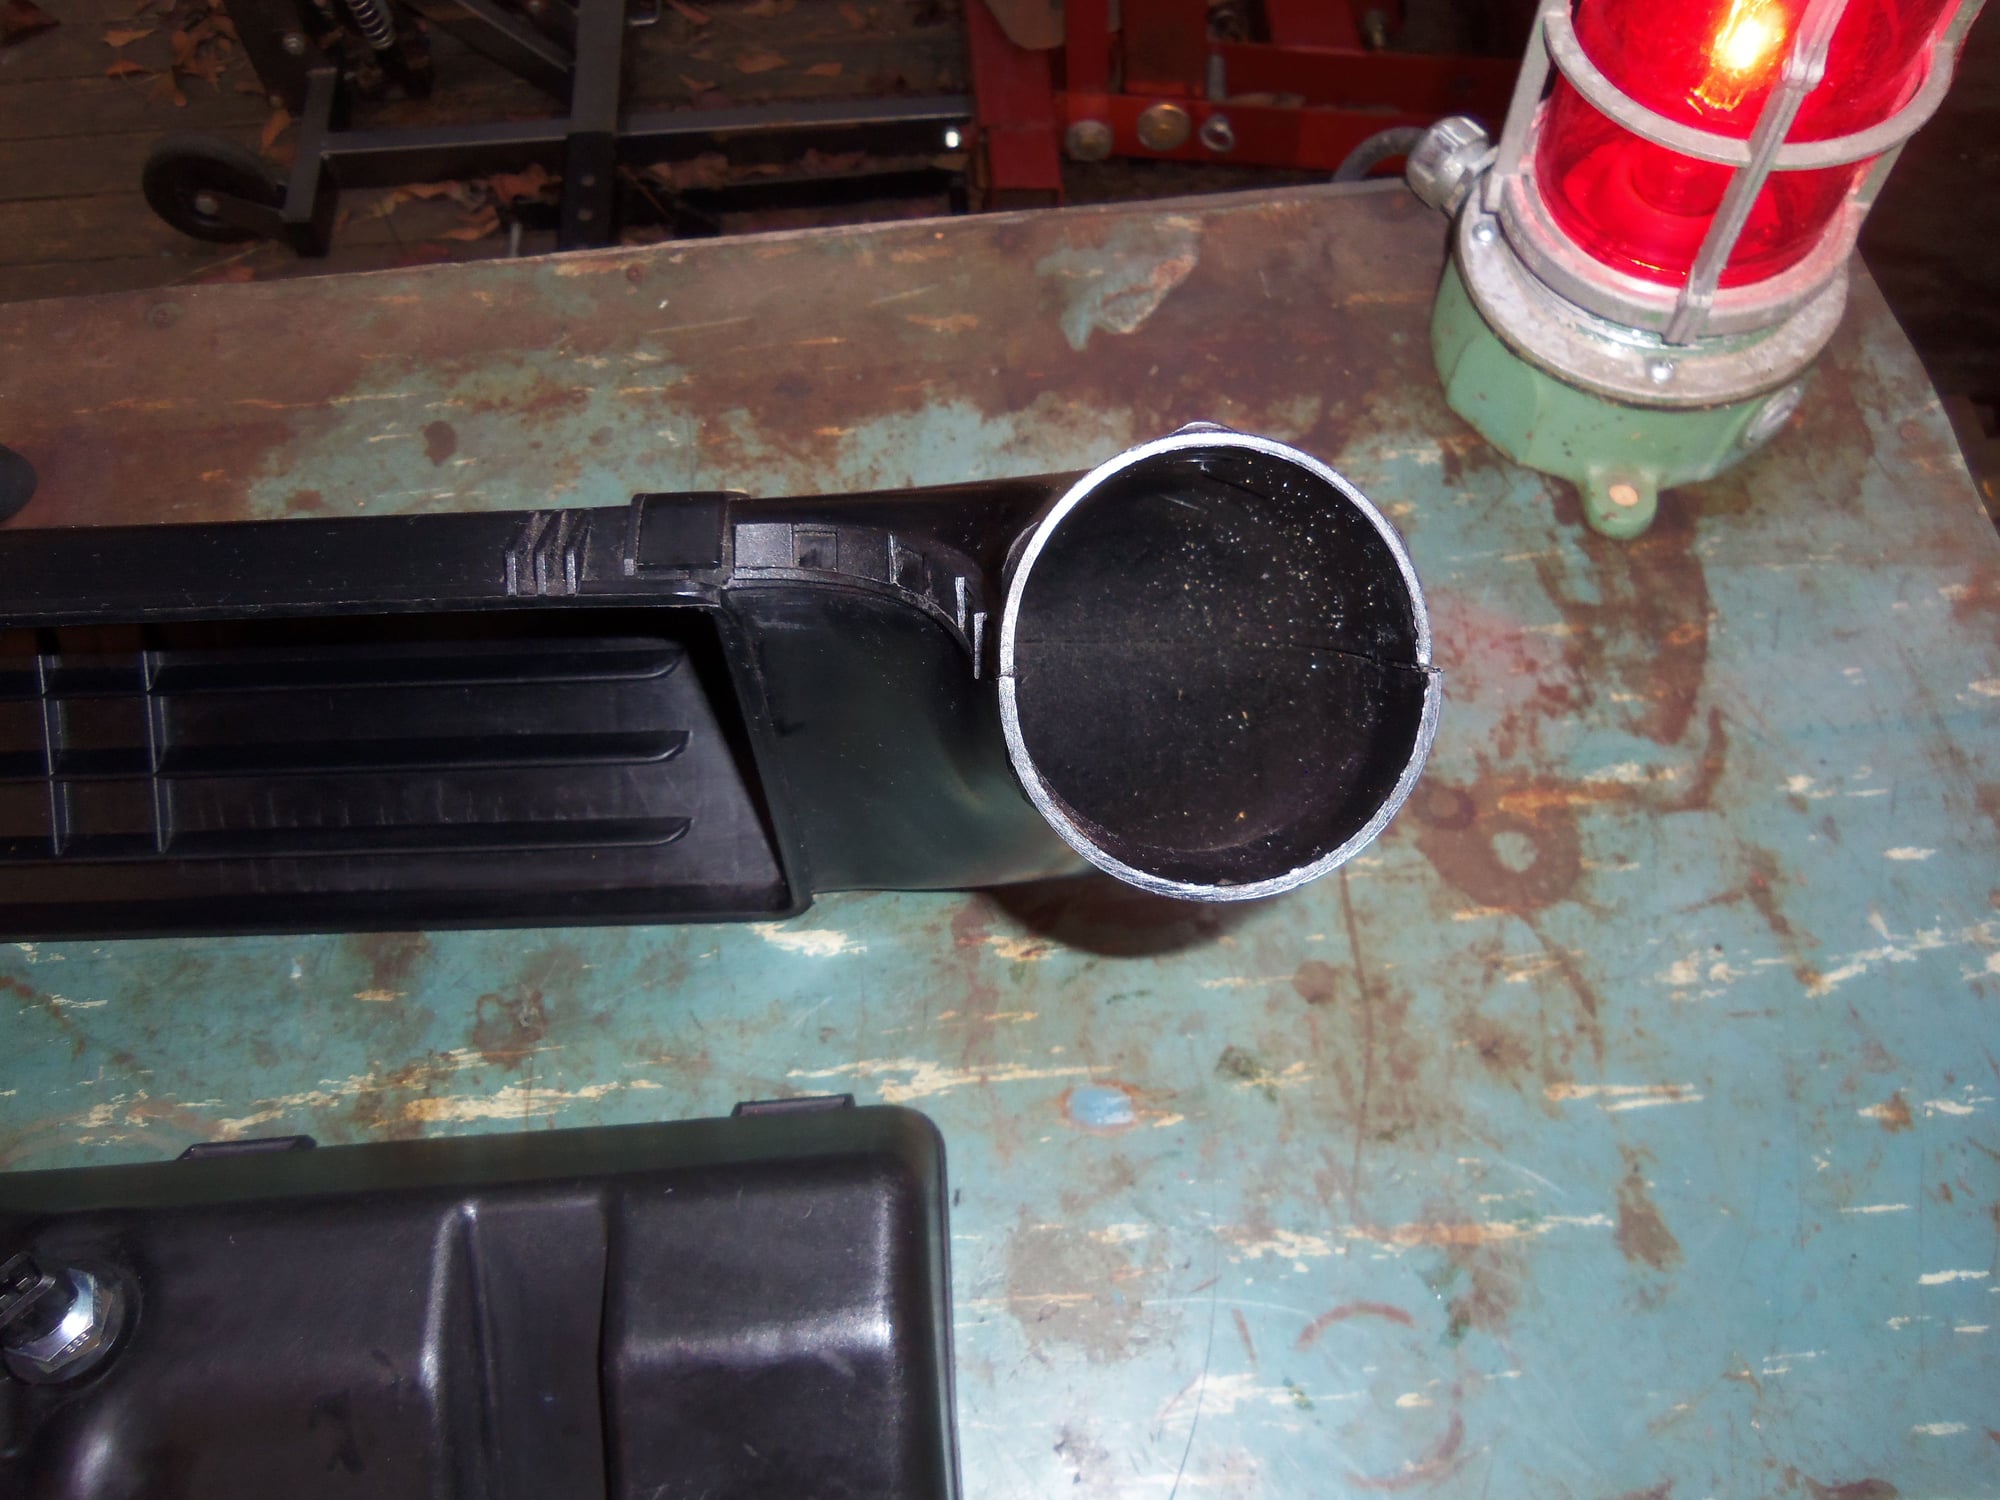
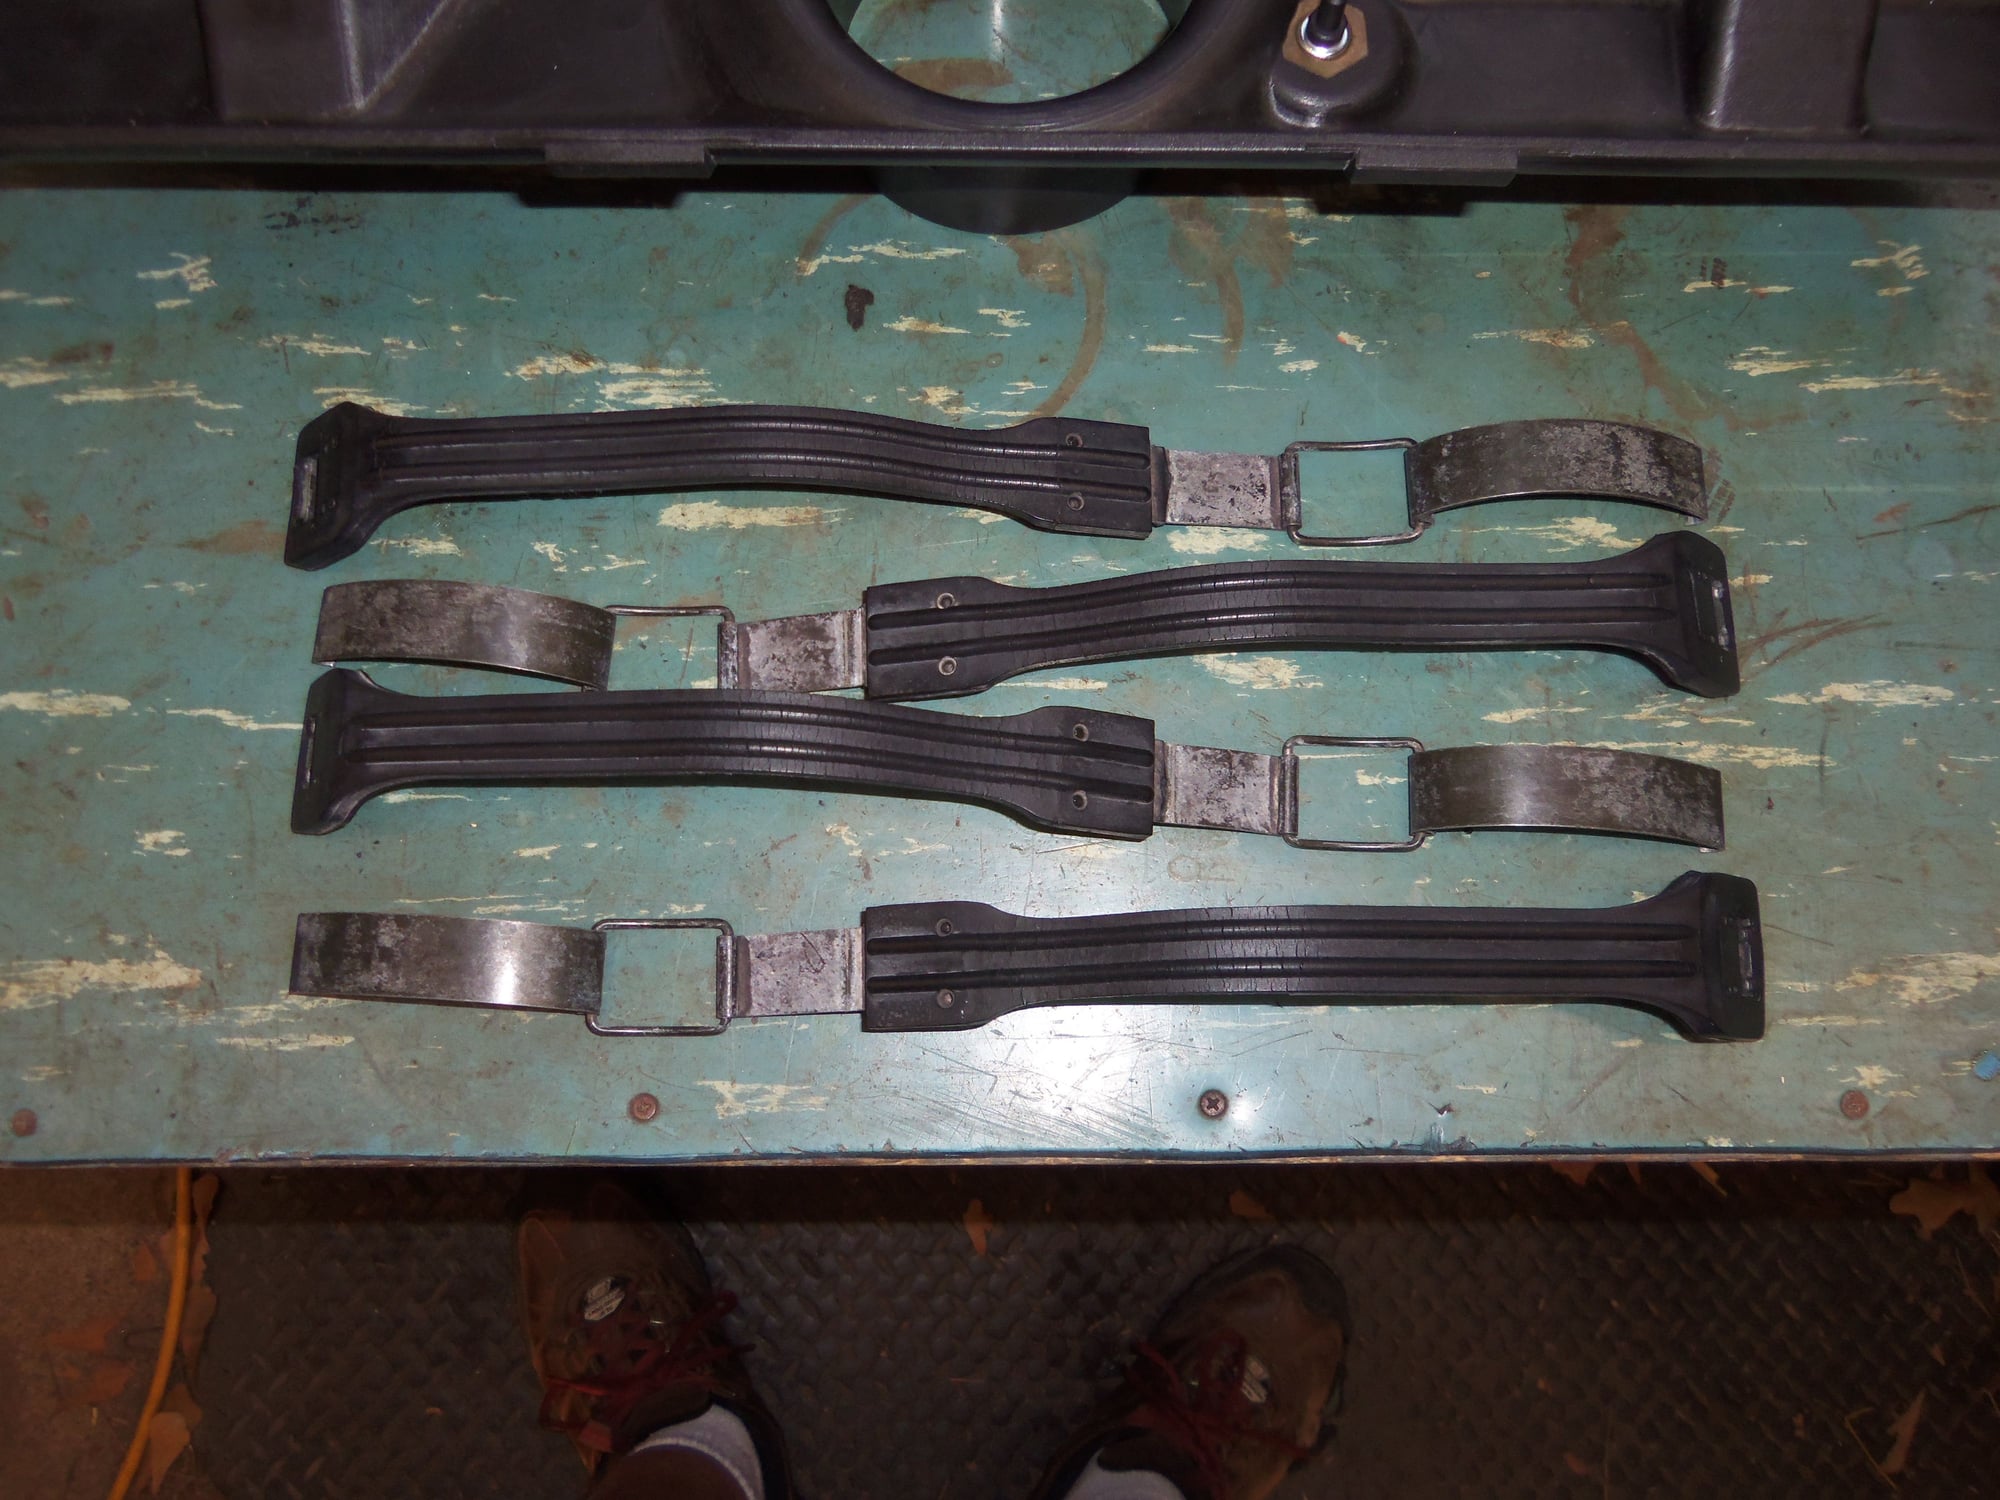
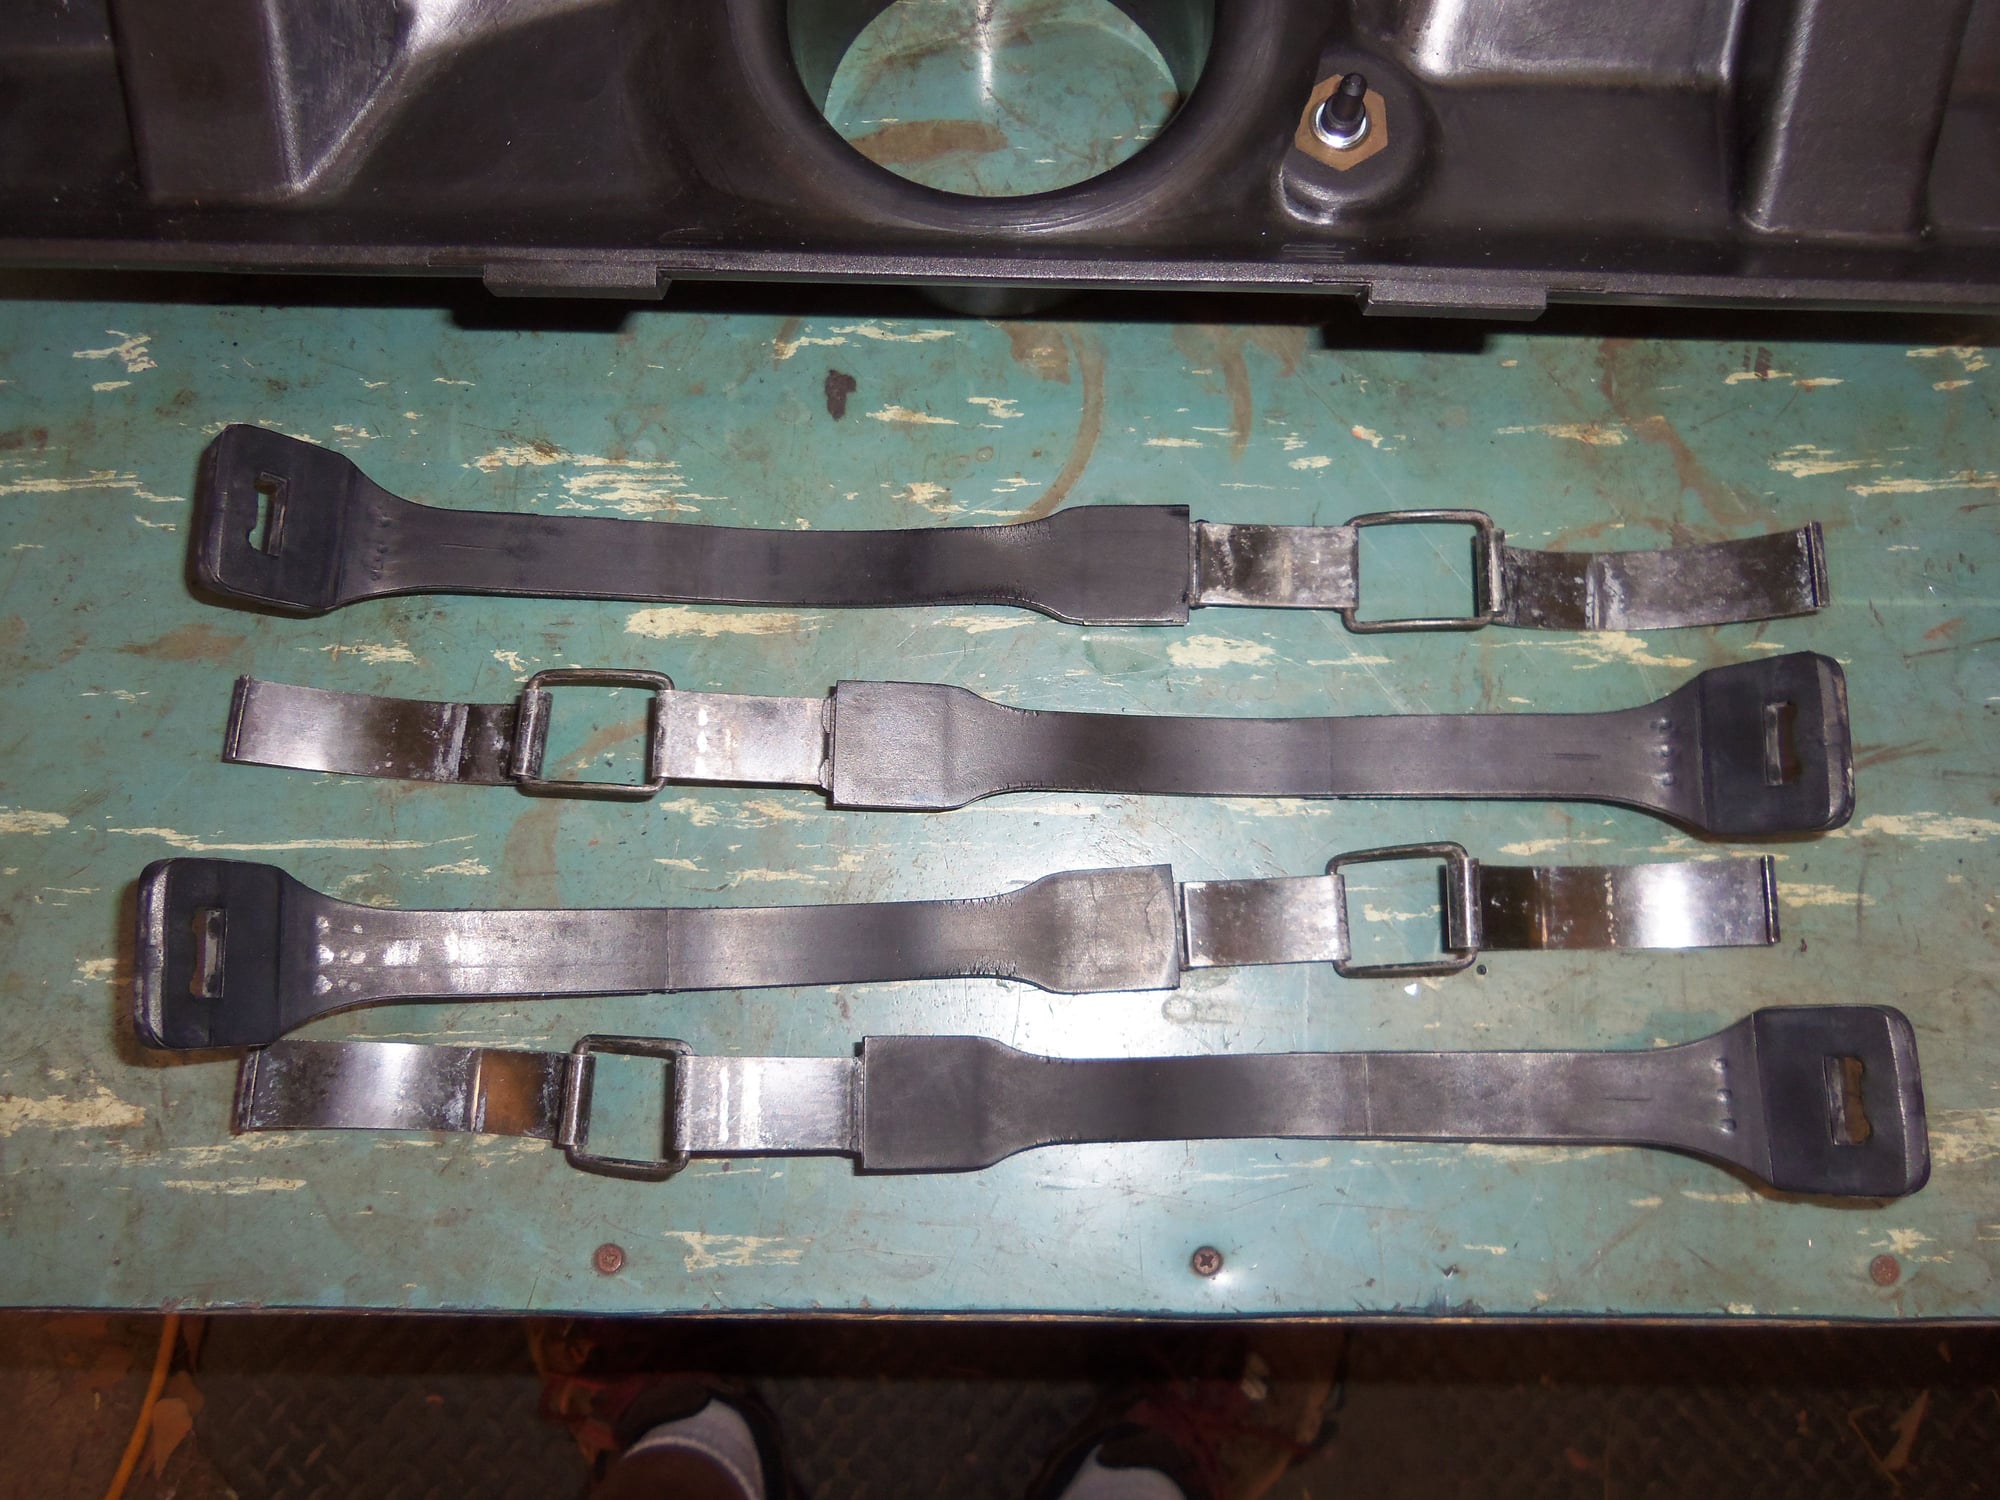
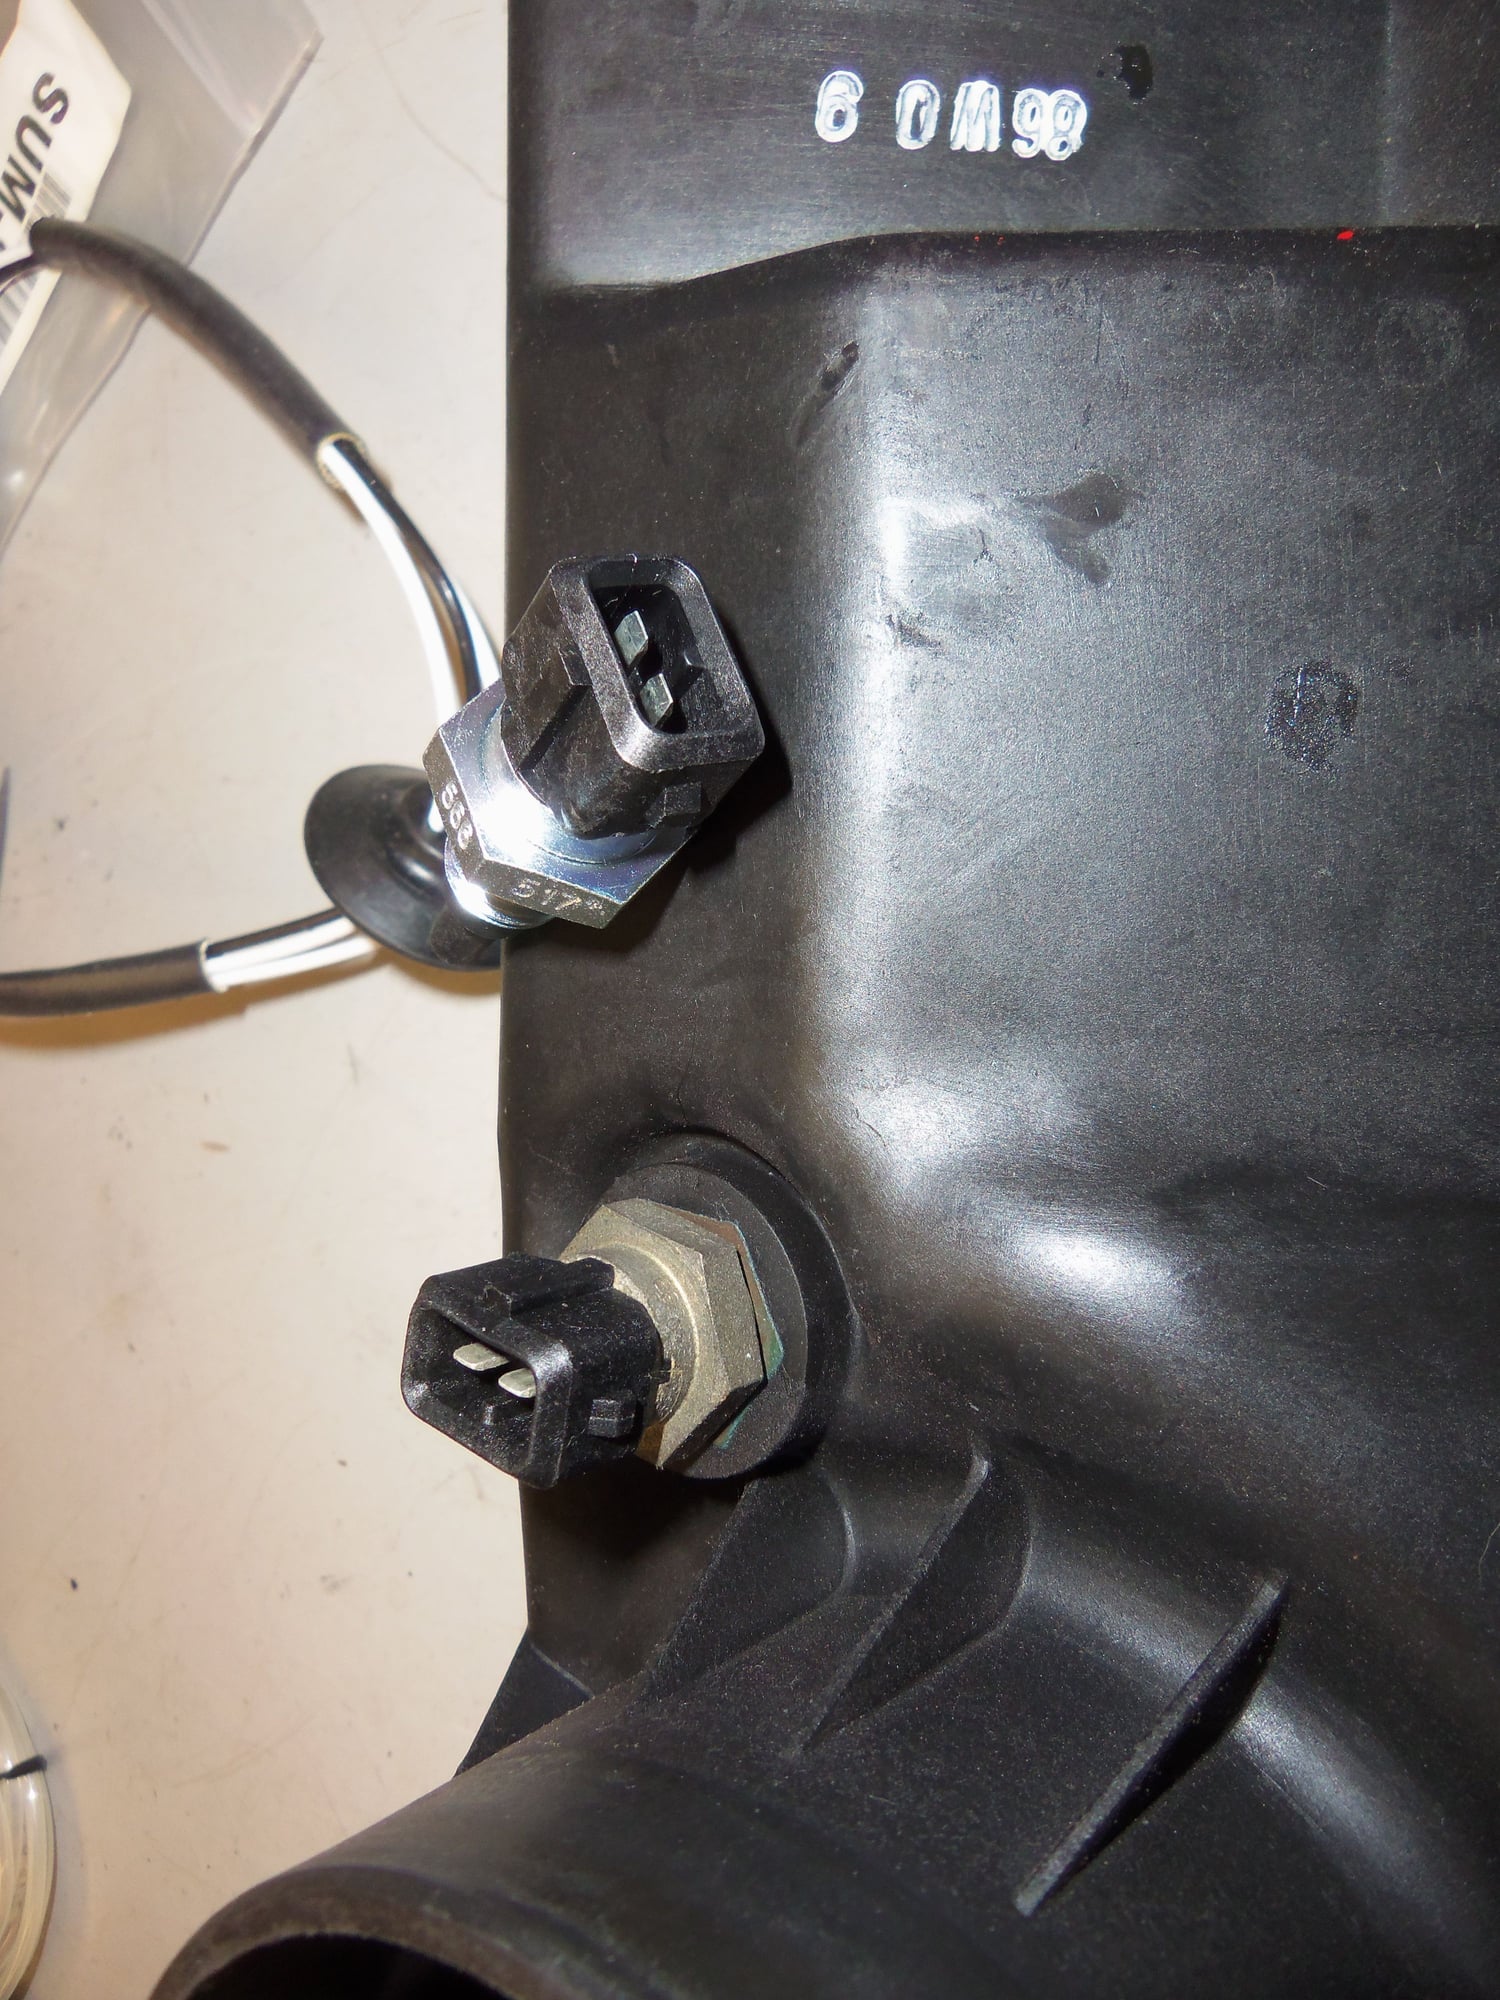
The air cleaner housing had always felt a little oily to me. So, off it came. I spend quality time with mineral spirits and rags cleaning the upper and lower housings, all four strap assemblies, and both ram tubes. Much better.
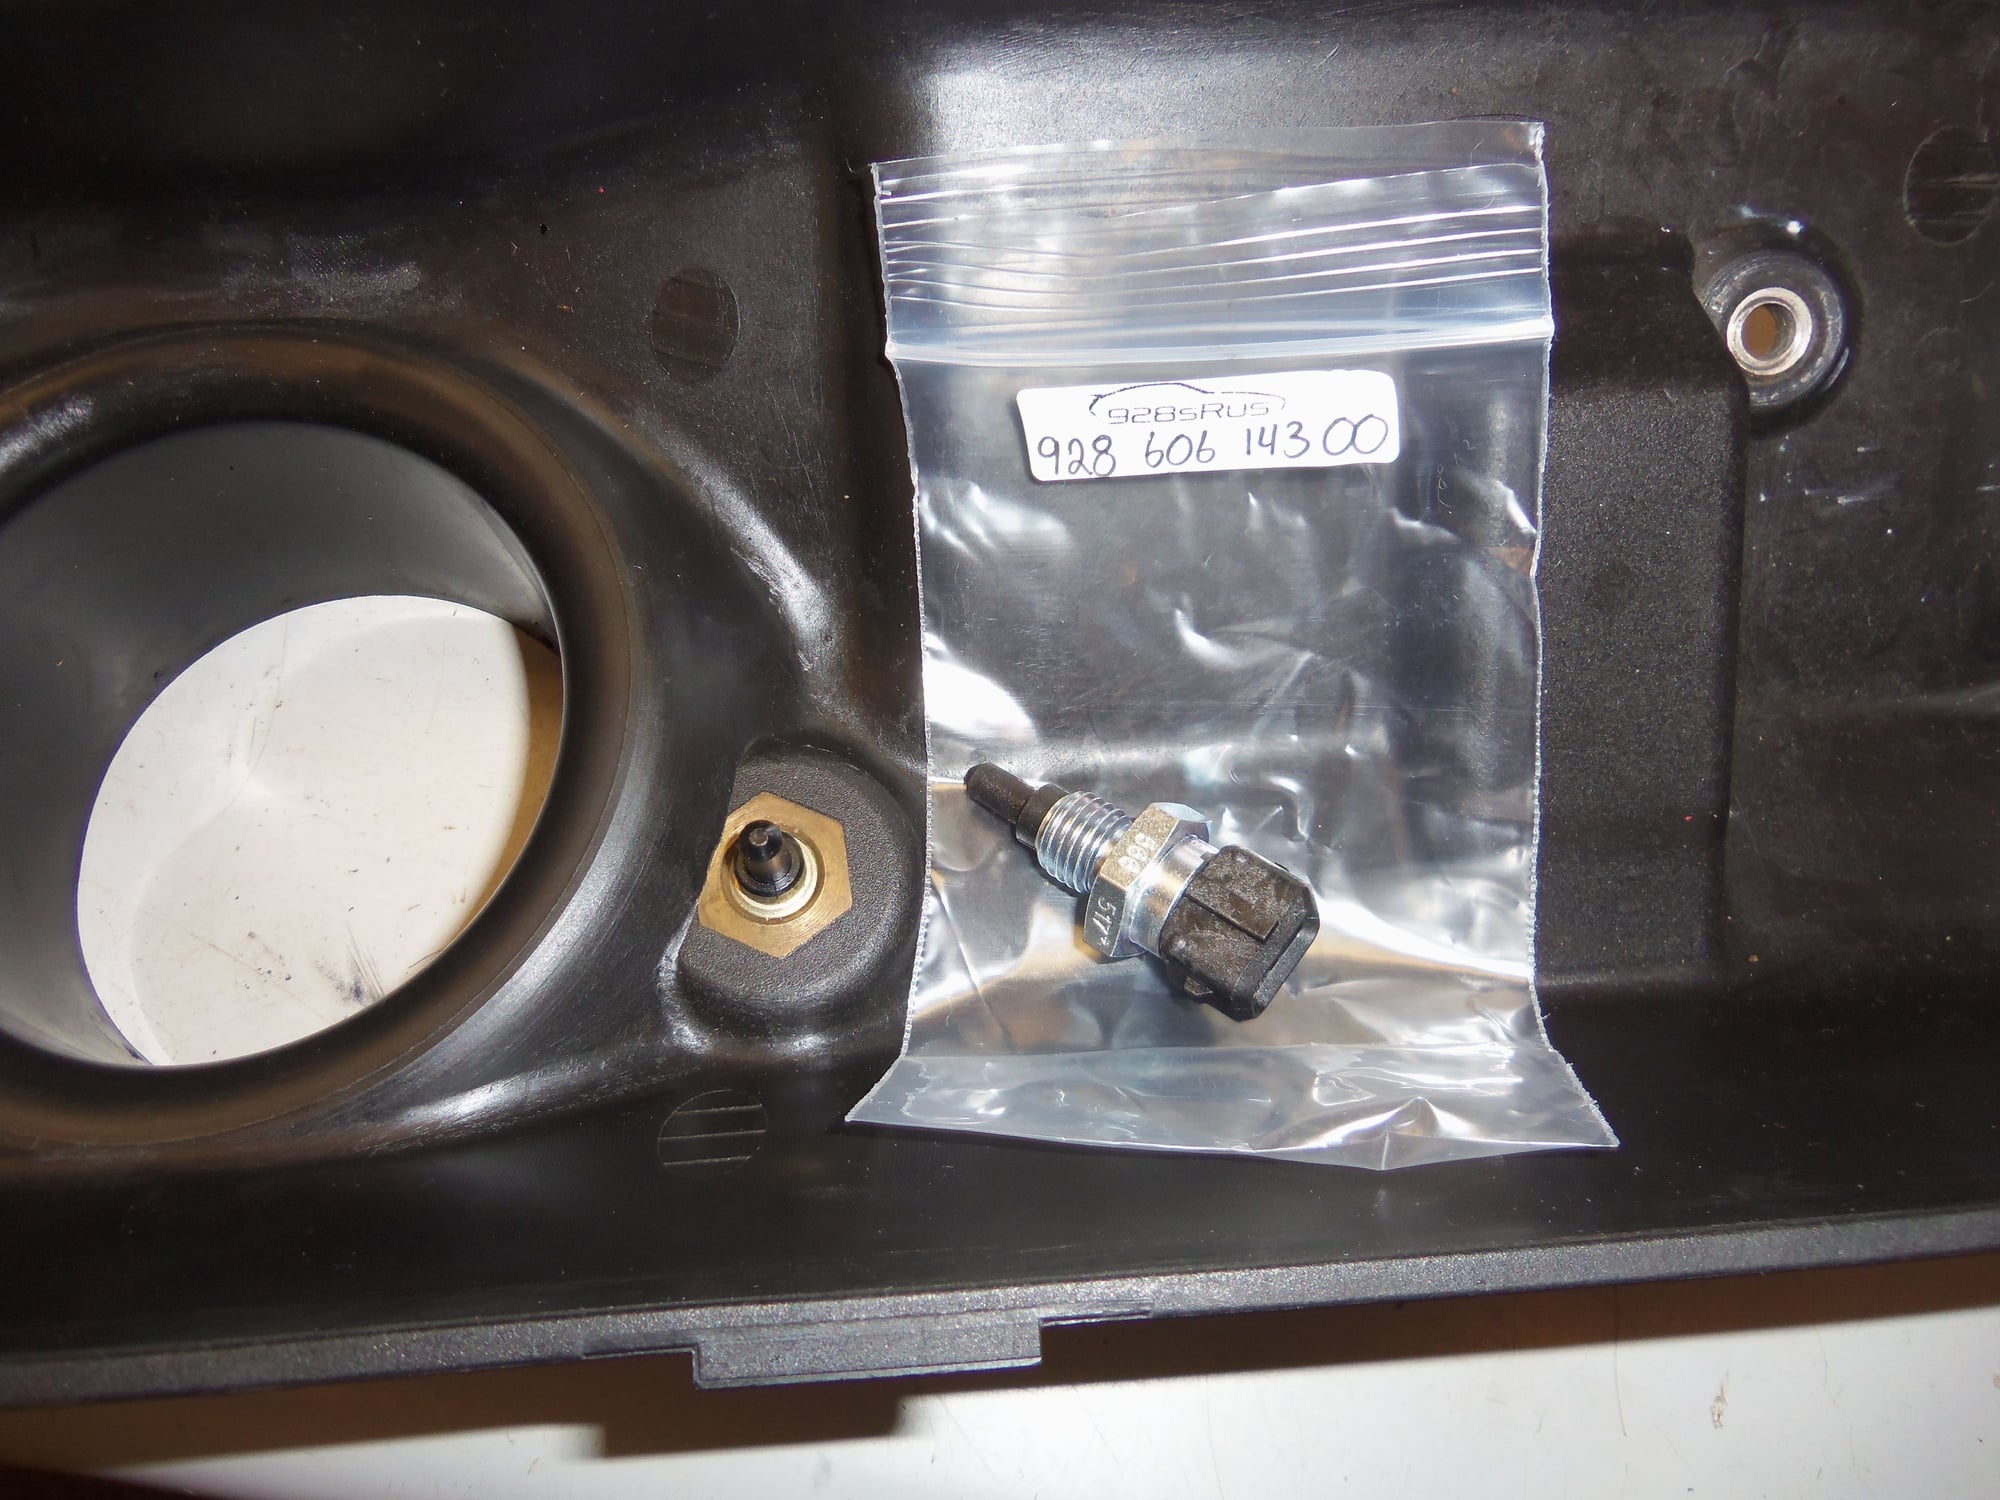
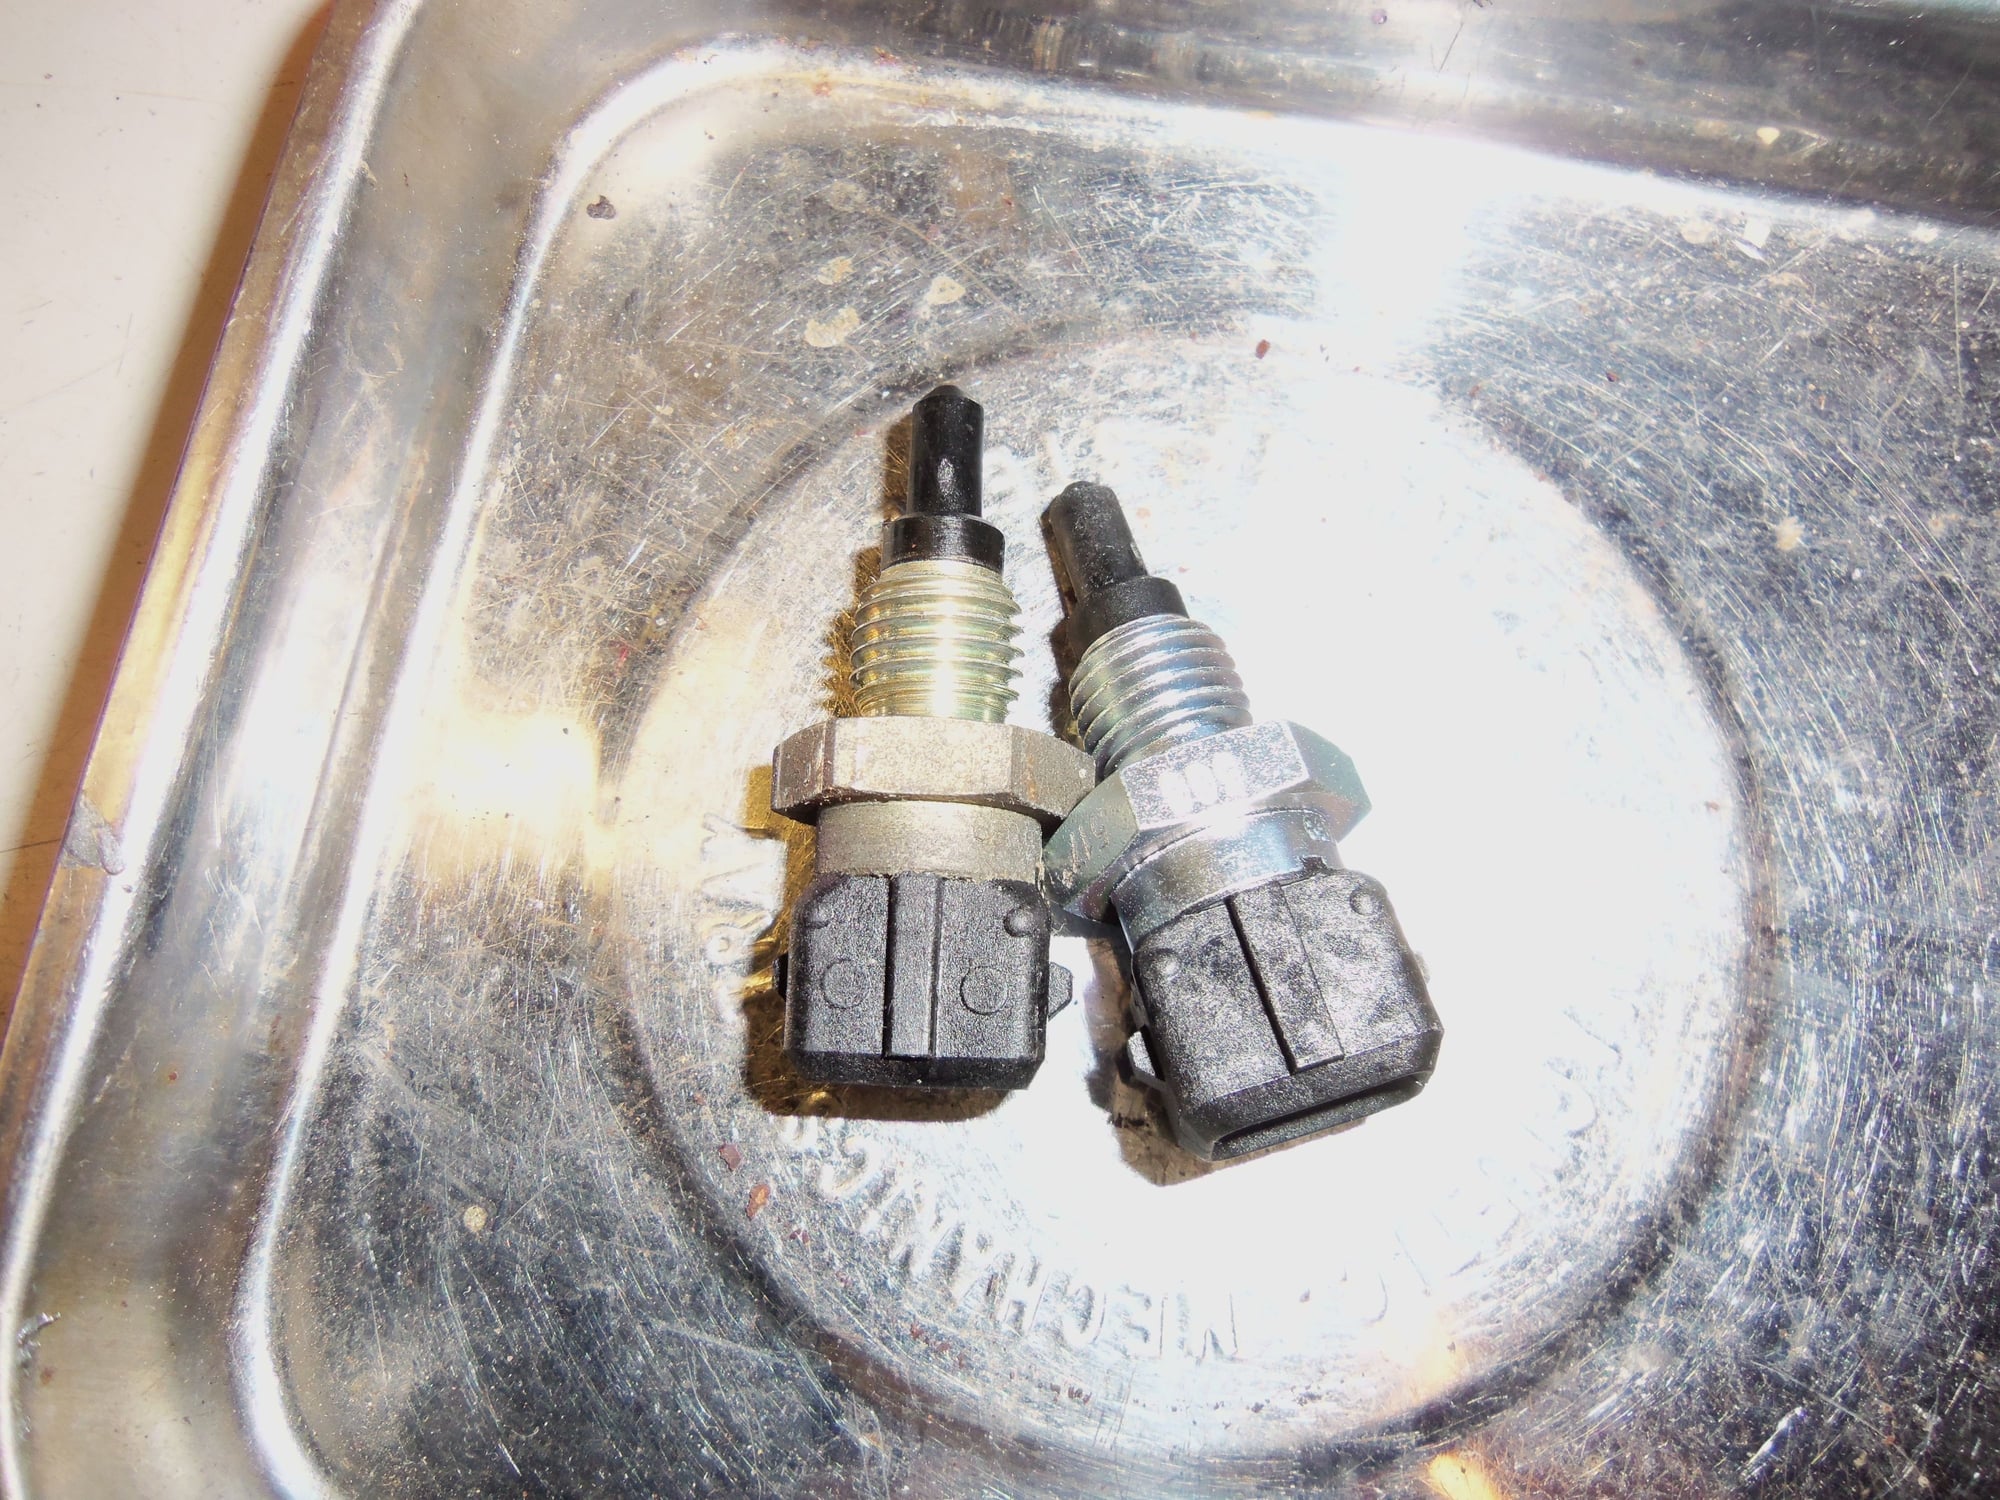
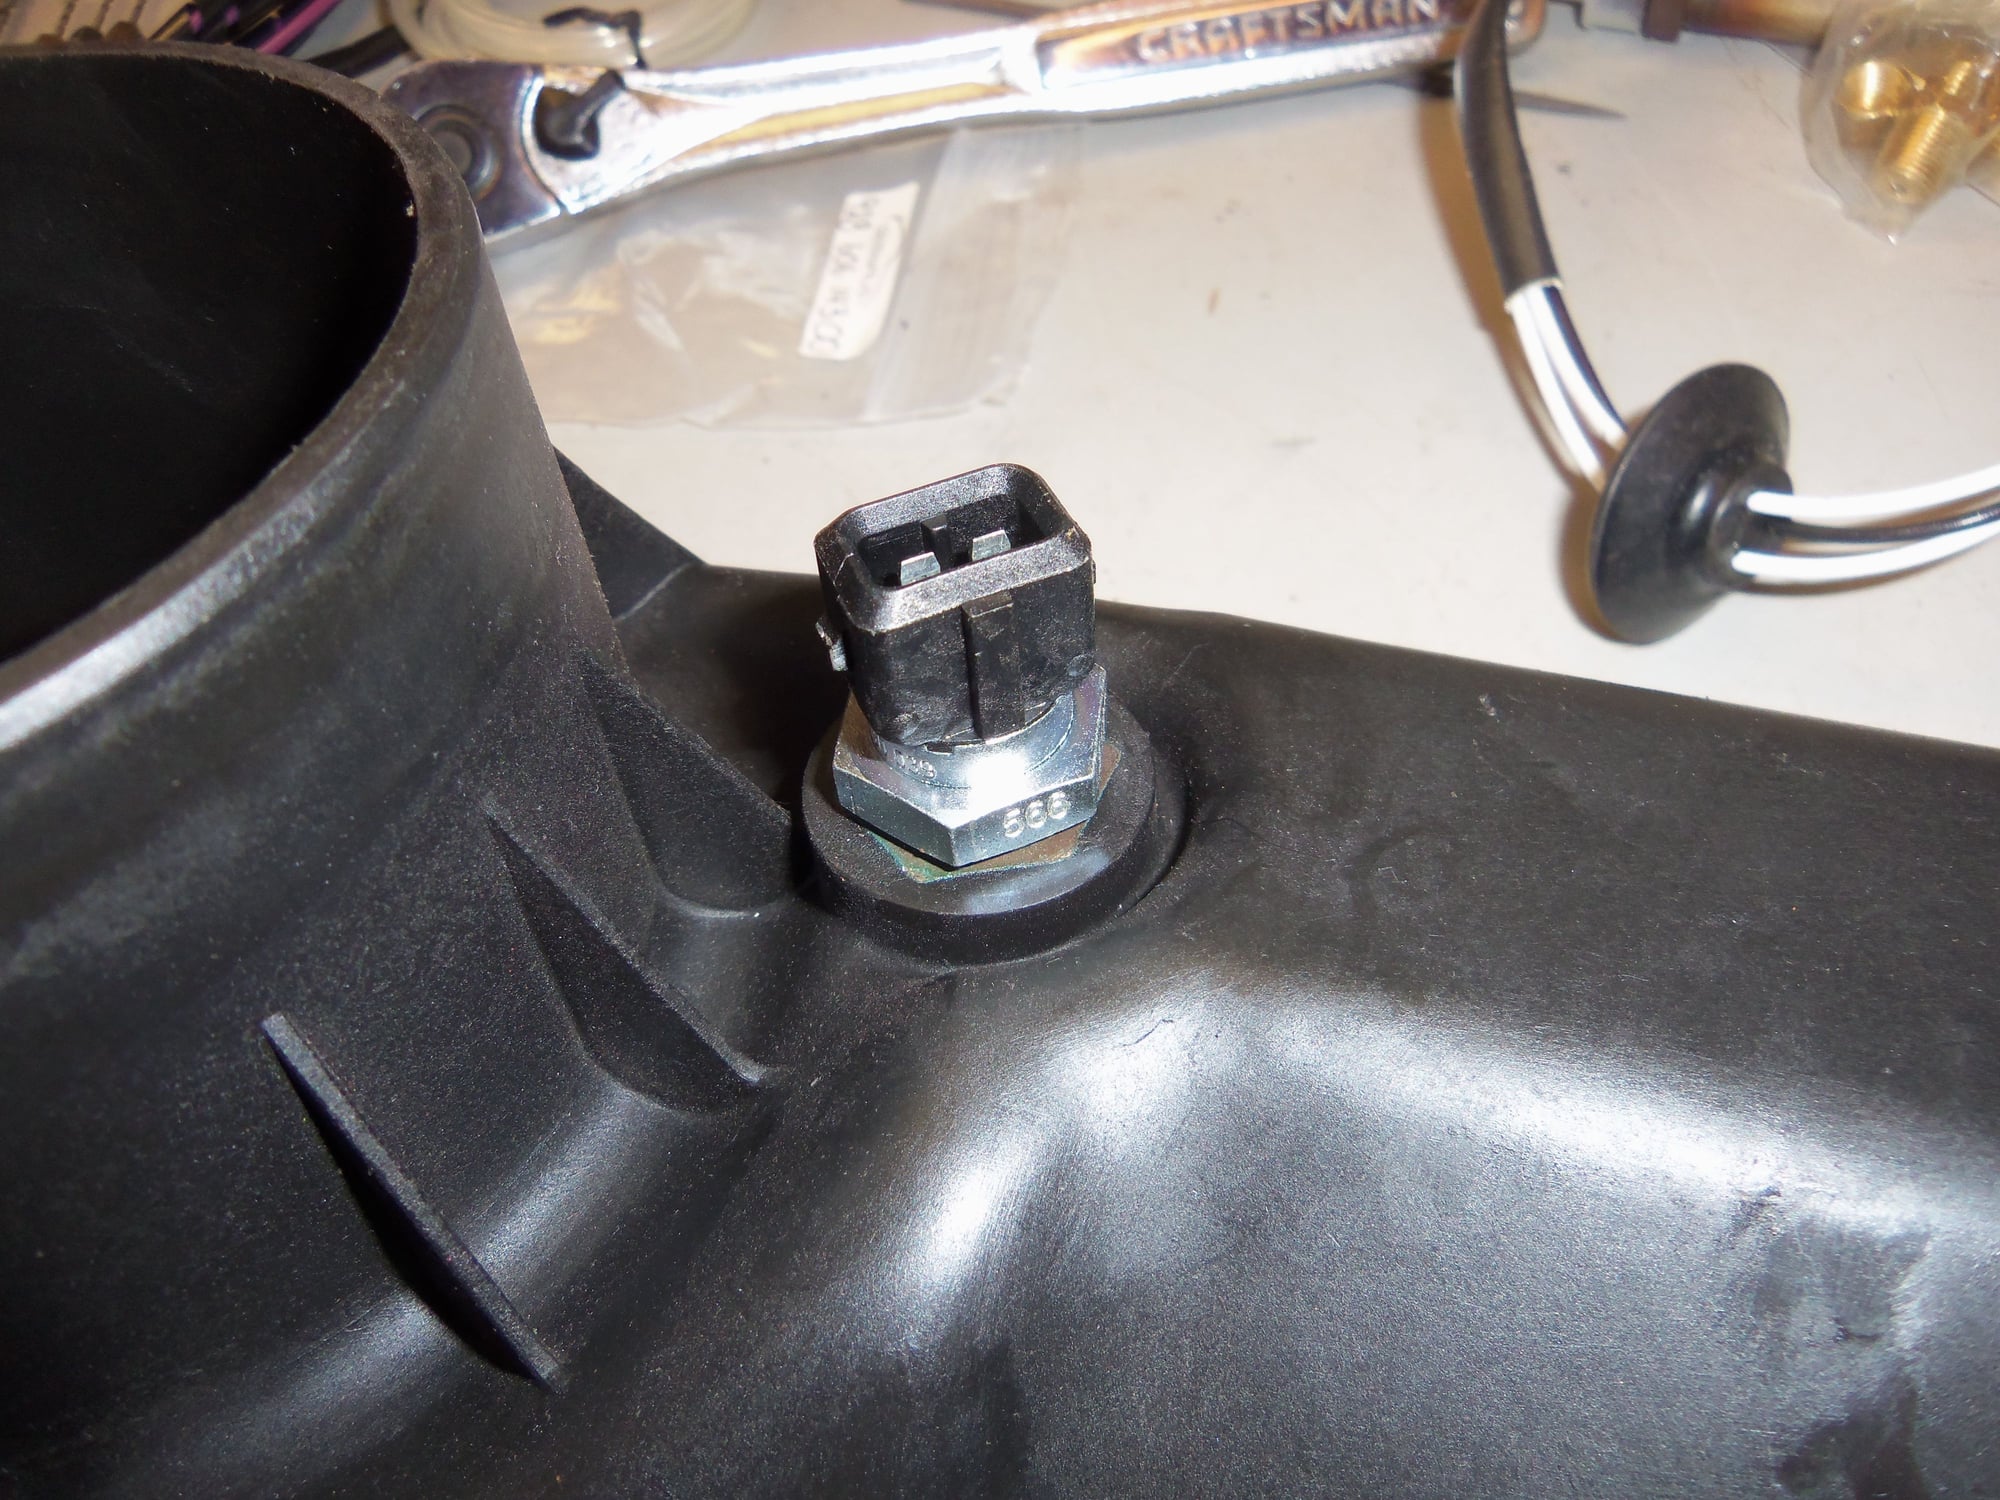
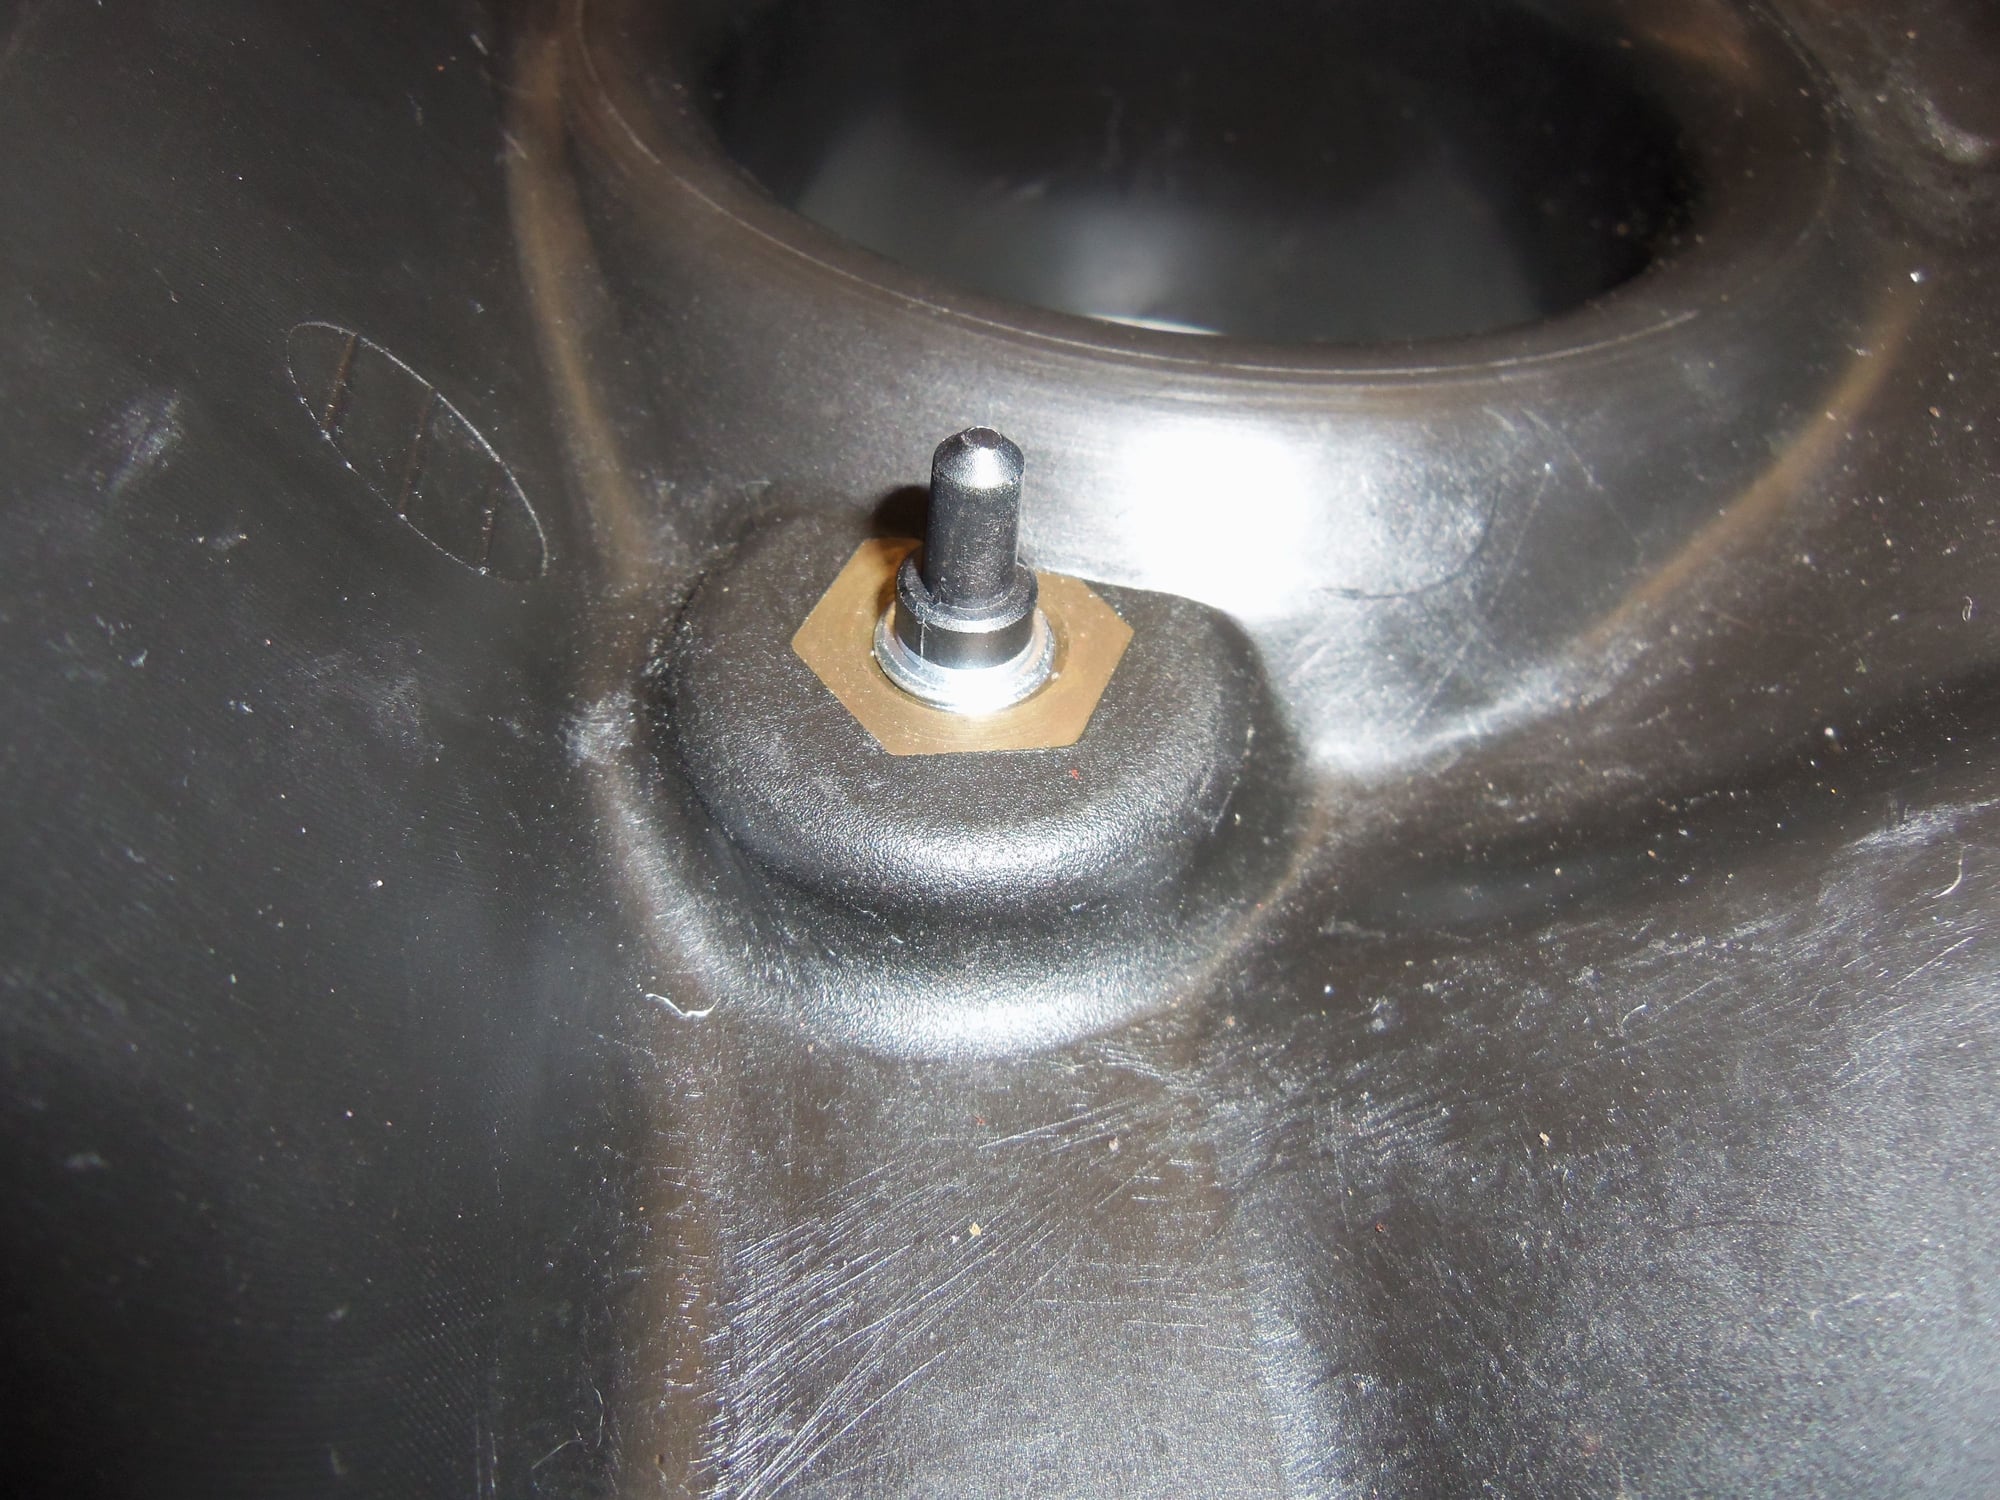
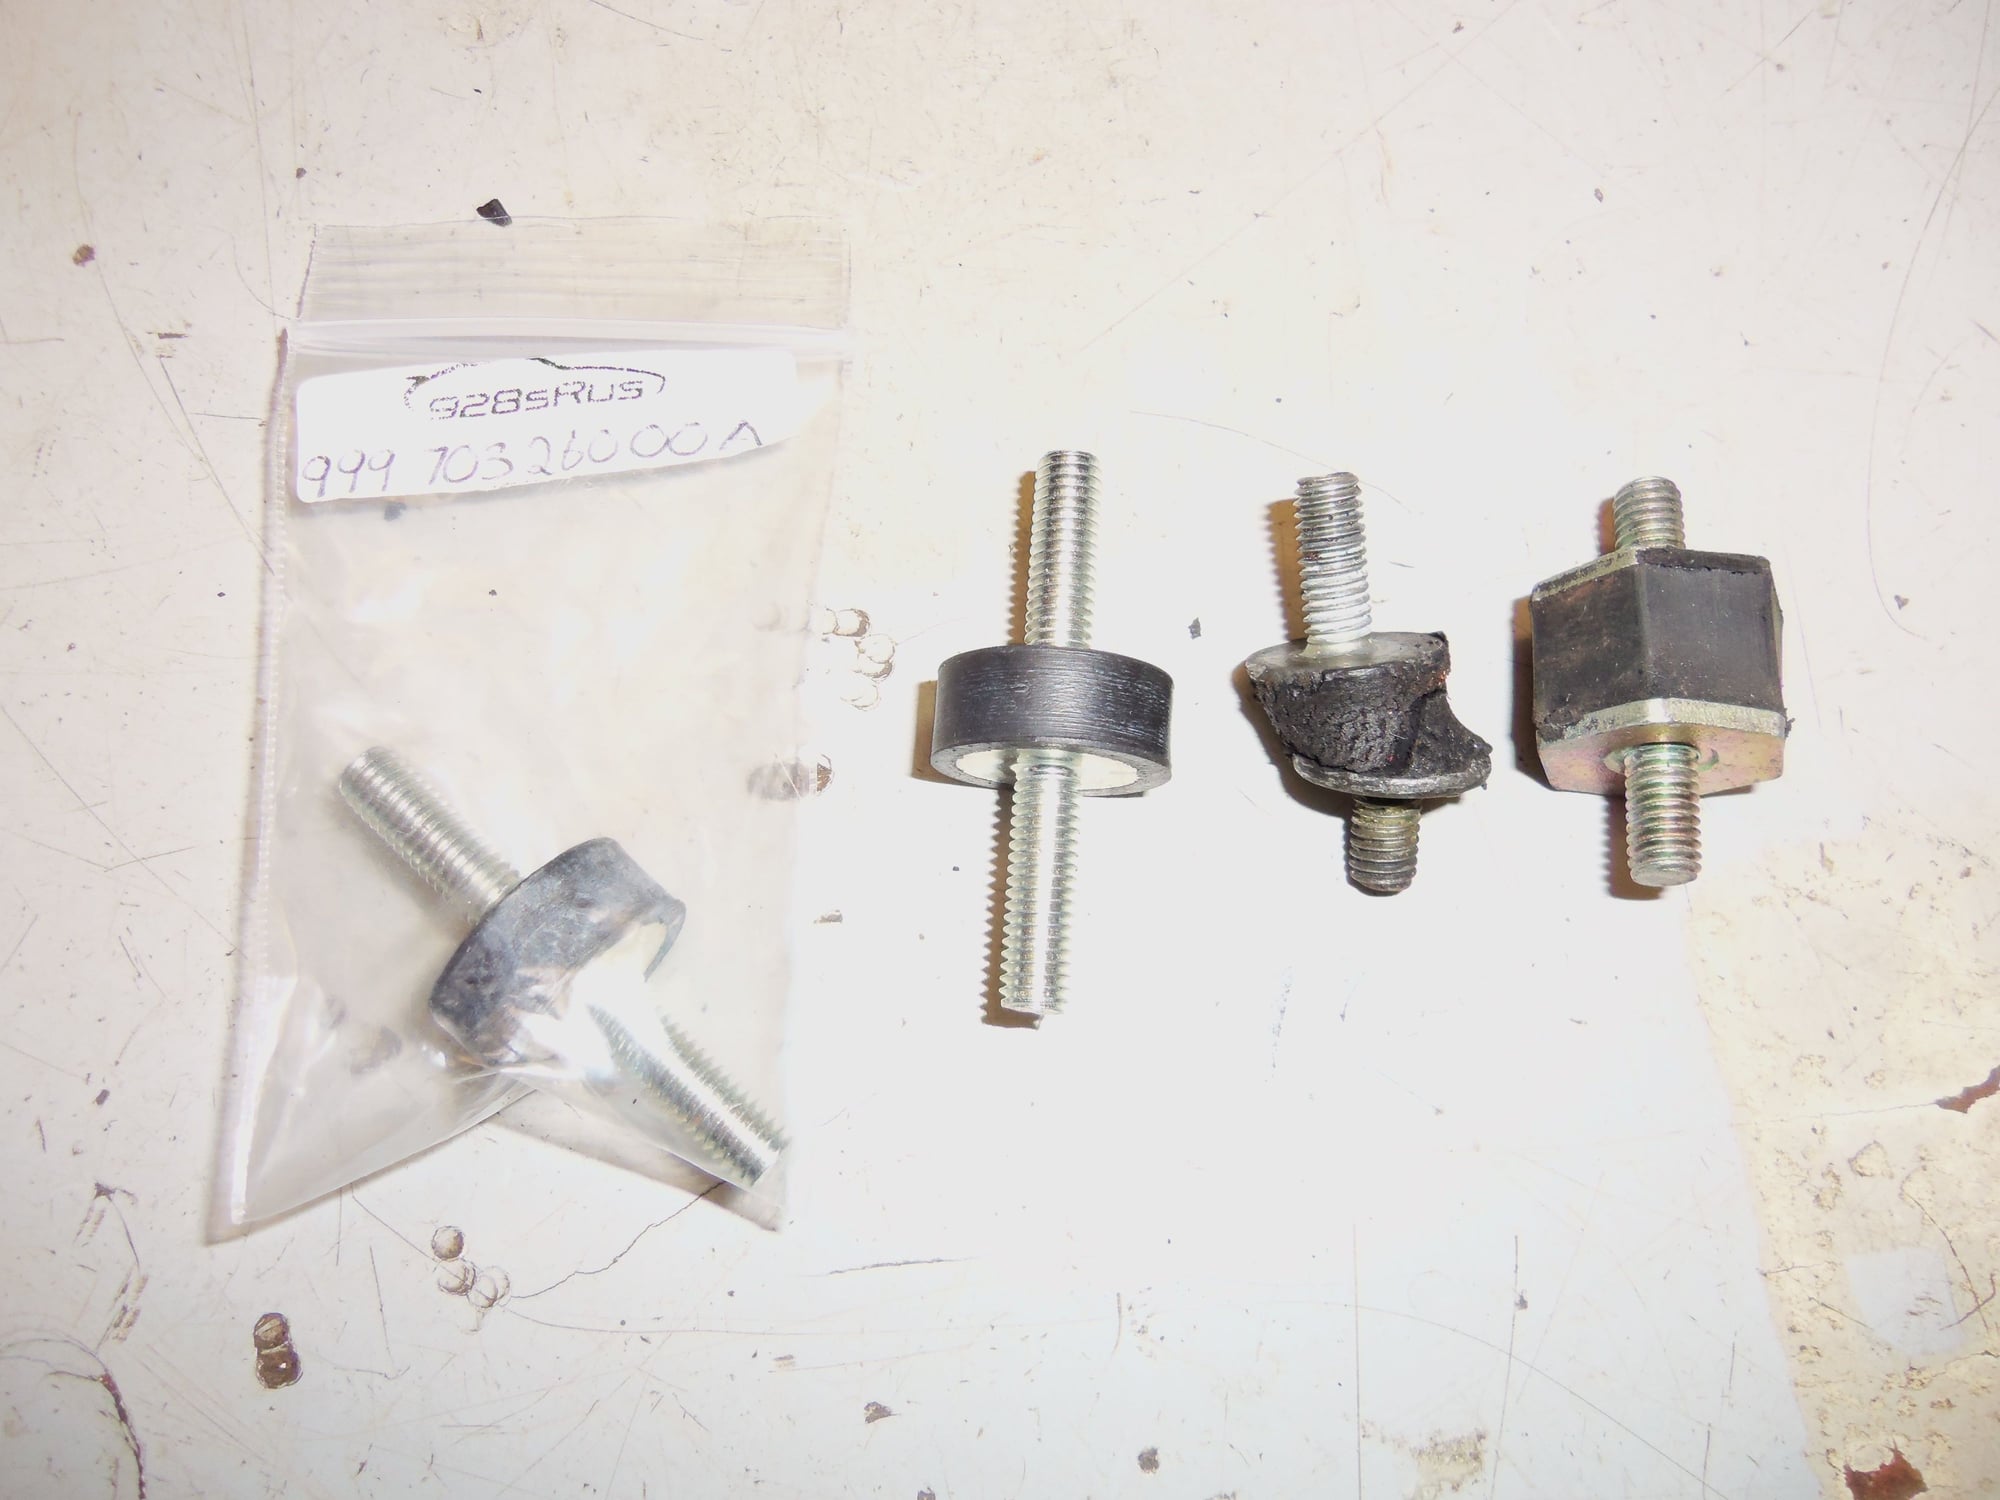
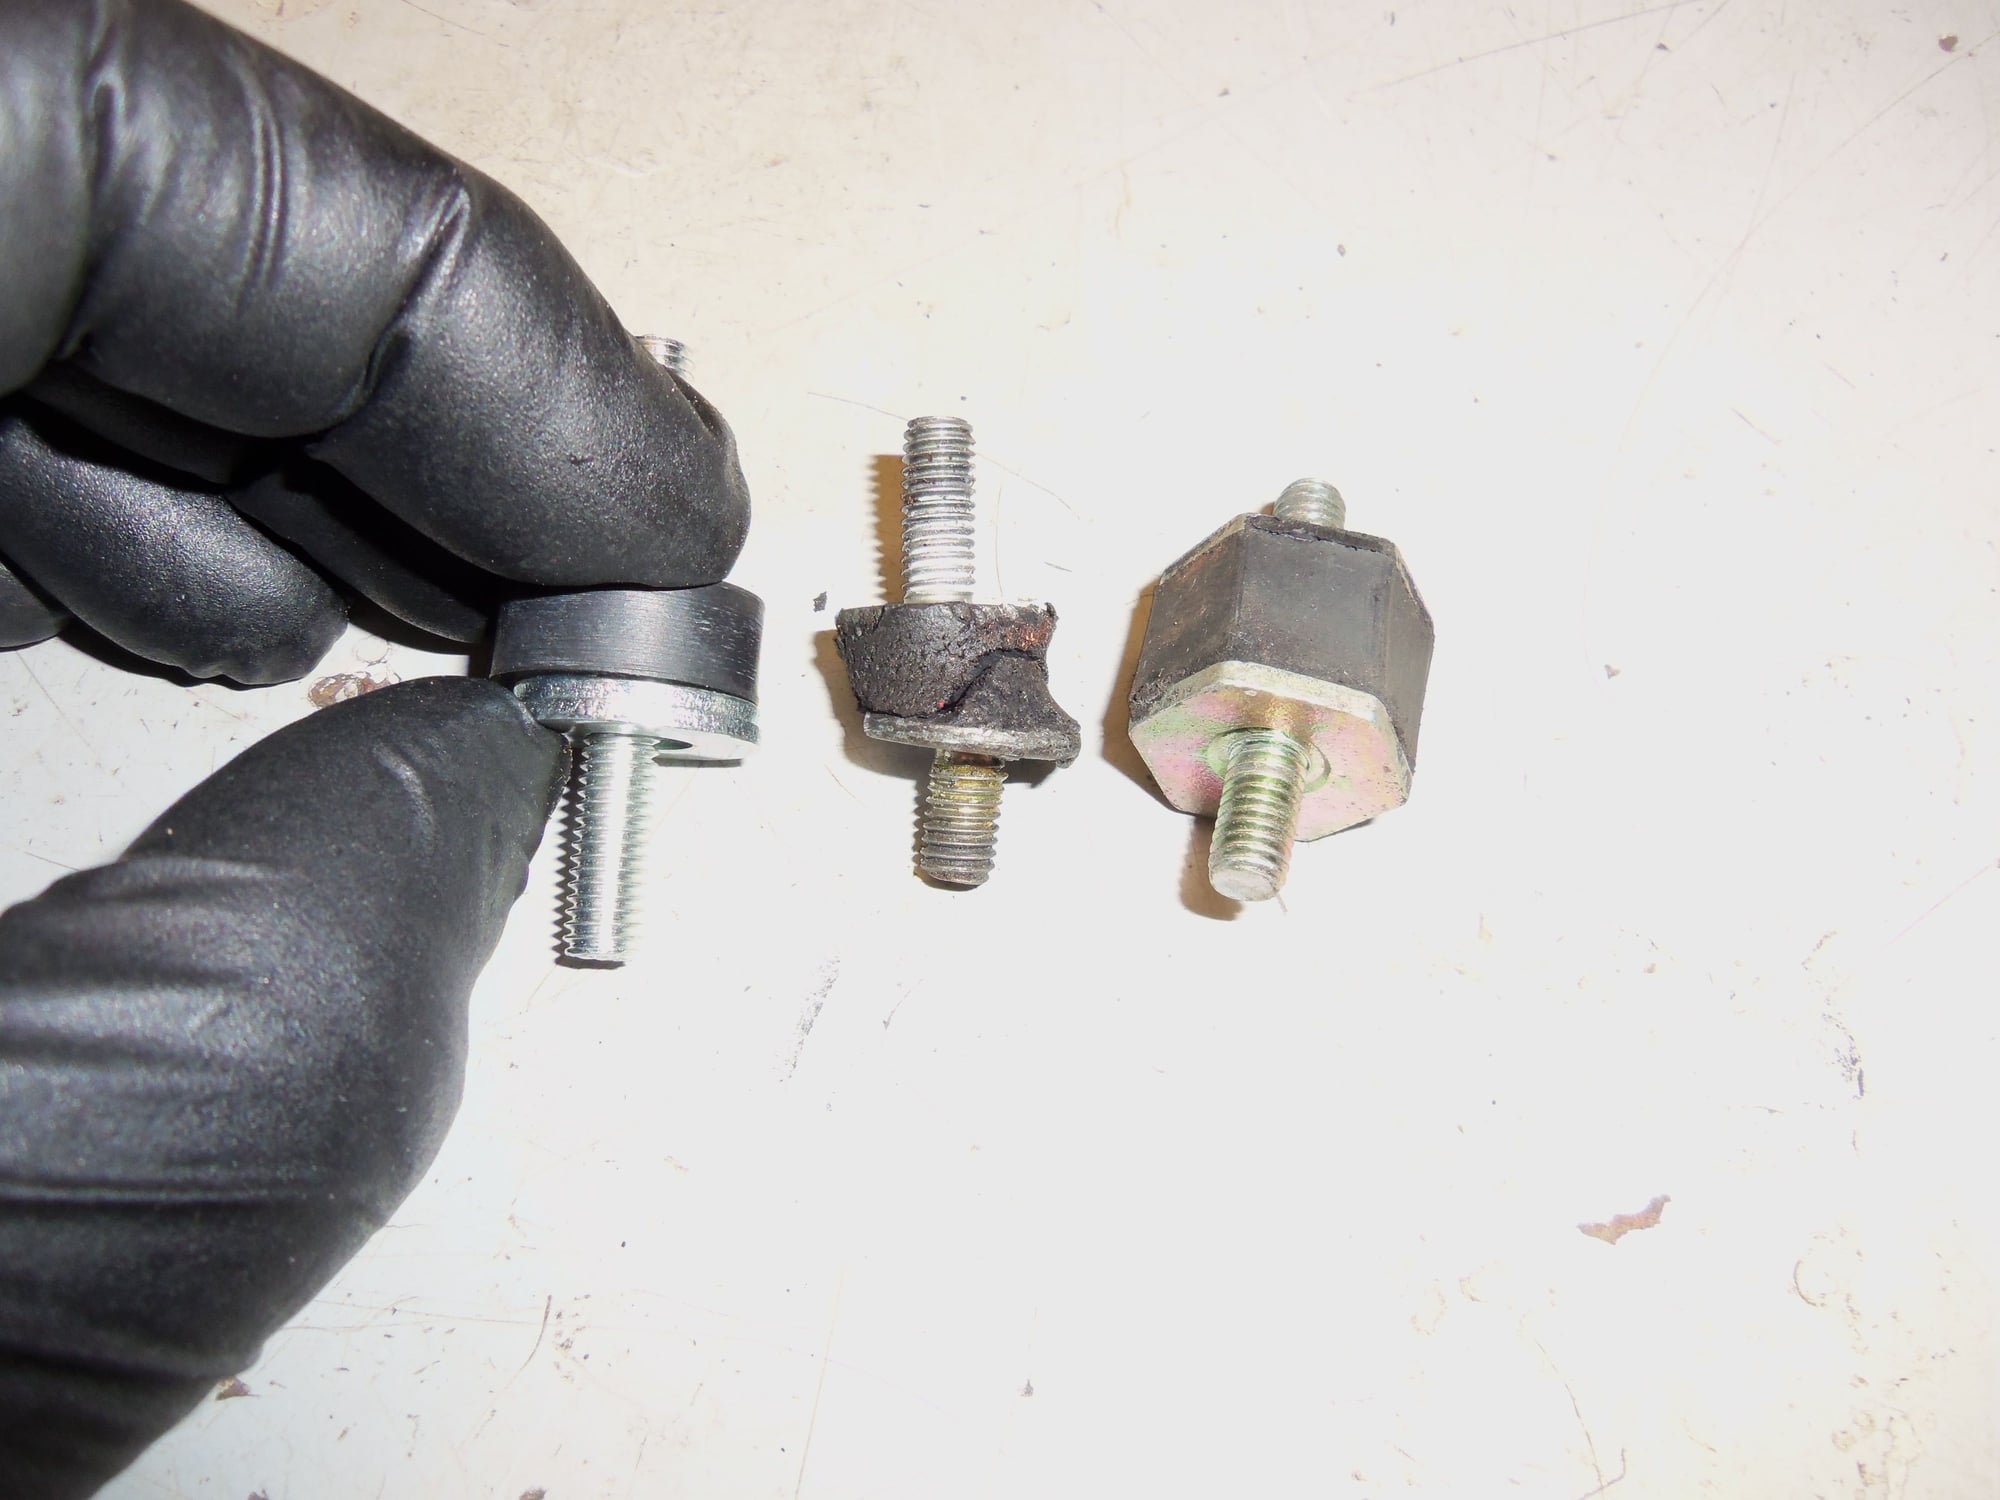
While I was at it, I replaced both the lower housing rubber isolation mounts and the air intake temperature sensor.
One of the mounts was original, one was a generic replacement installed back in April.
Straps are cracked, but useable. I will see if 928 Intl. has any better ones.
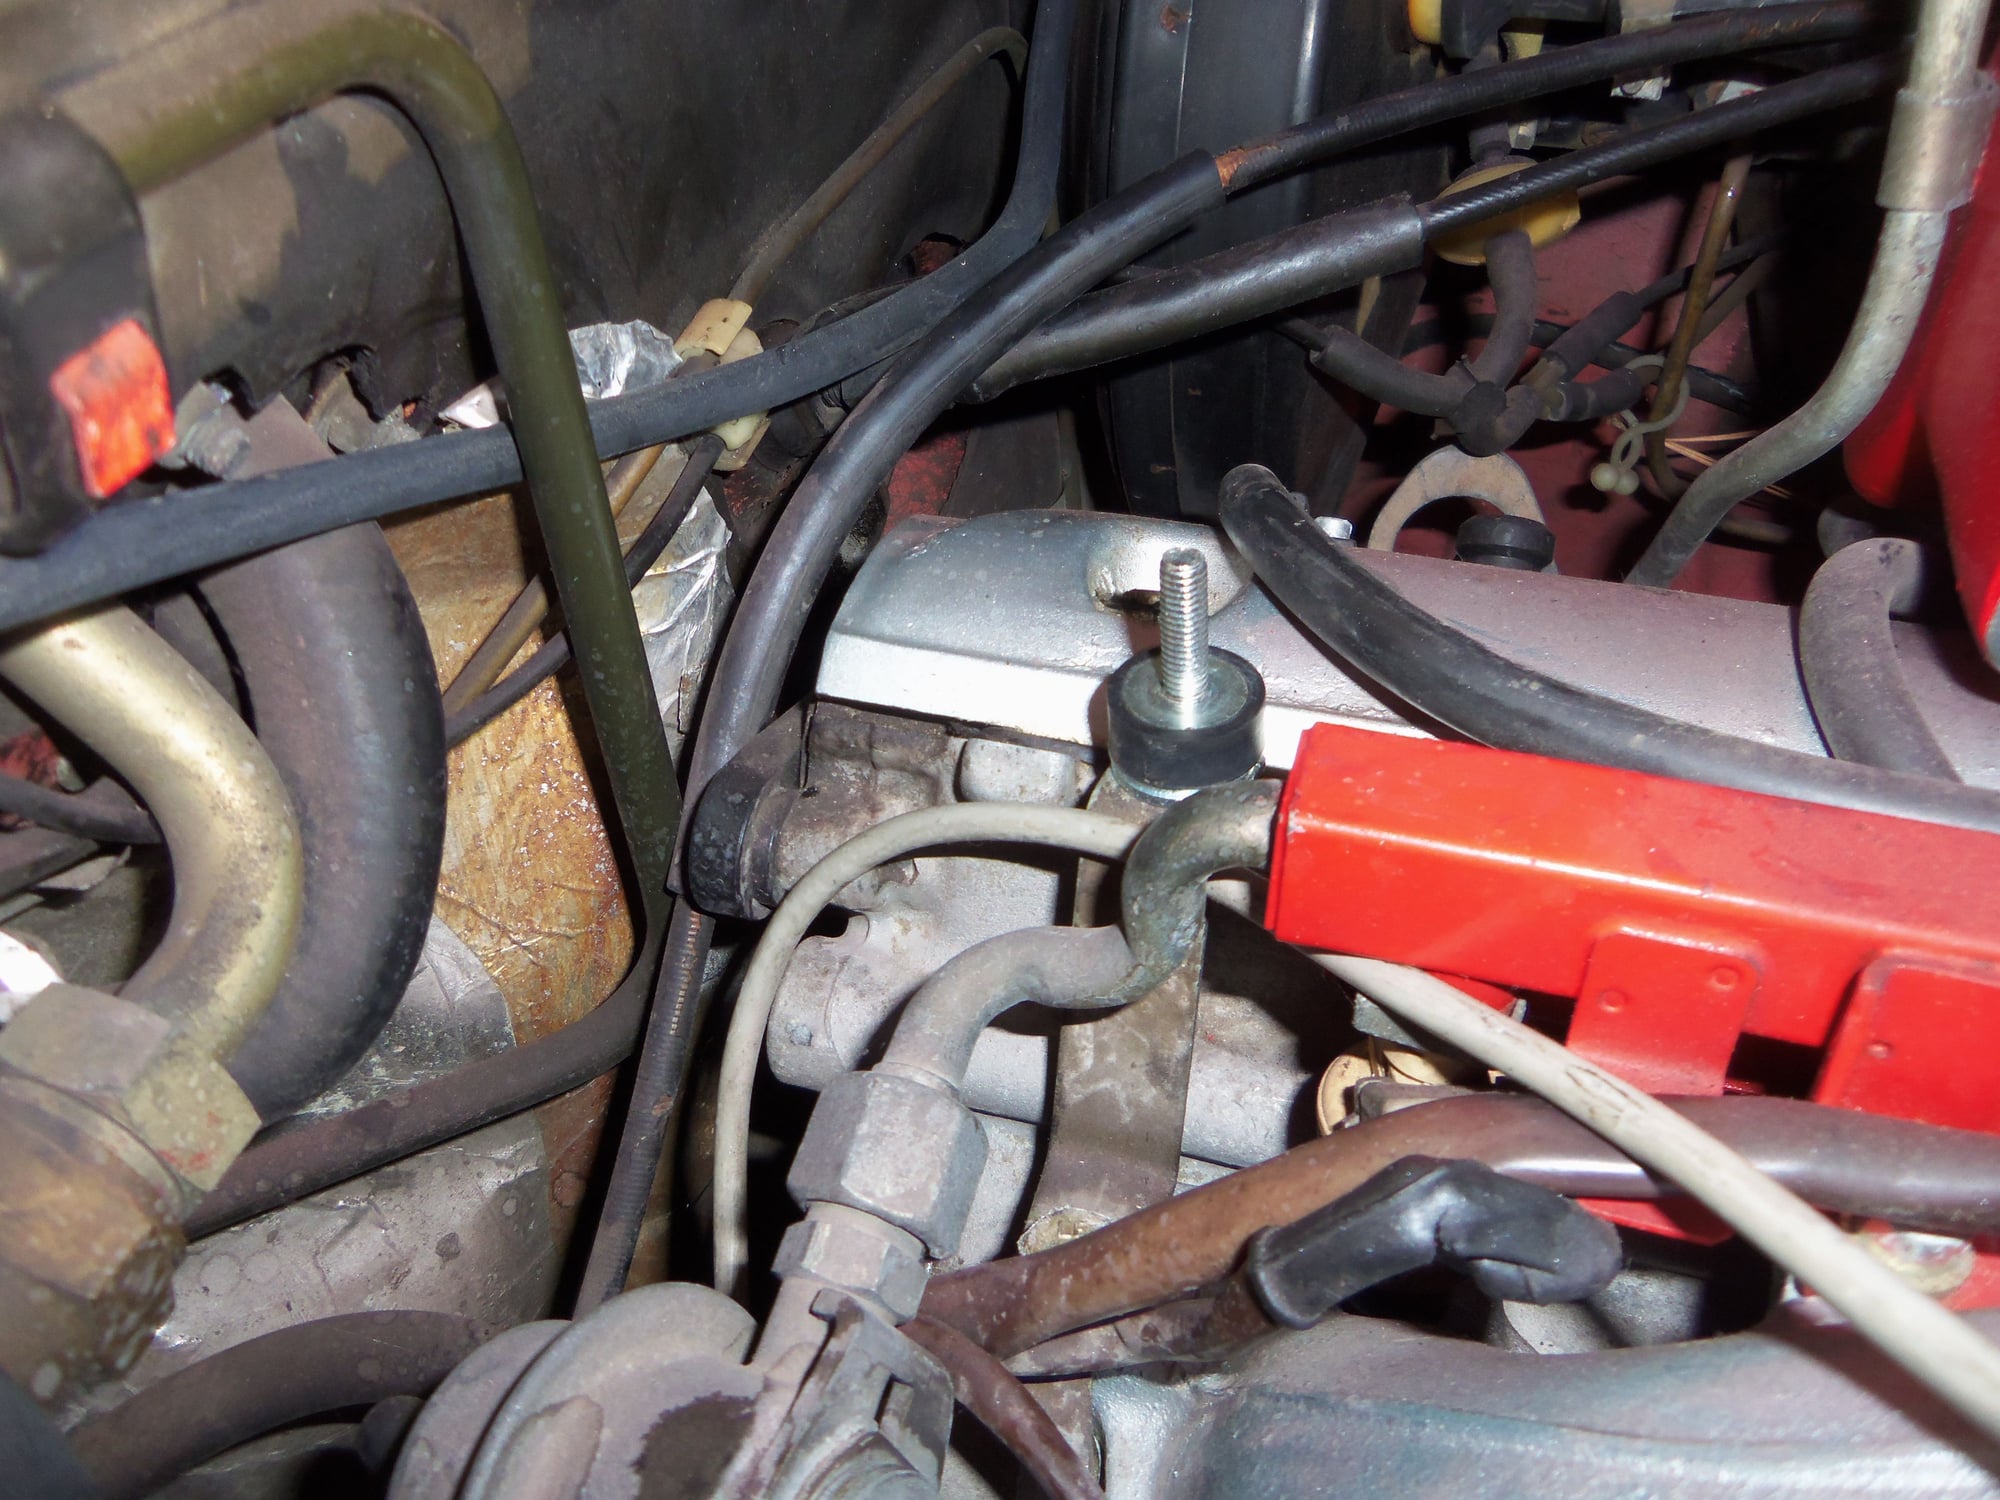
New isolators are shorter than the others. I shimmed them to fit.
I wrapped up by replacing the power brake booster check valve and grommet. Due to the tight grip on the hose, I elected to remove the entire hose assembly. The old valve was a pain to get out of its grommet. It came out with a 'whoosh'. Turns out, the check valve had been holding vacuum in the booster for almost 3 months. Good valve. The new valve was a royal pain to install in the new grommet. I had to do a combination of wiggle and push. But, it went in.
I took the opportunity to clean the venturi assembly in the hose. Disassembled the venturi, verified the O-ring inside was still good. Cleaned it, all hose clamps, and all hose sections. I wanted to replace the two short sections, but I don't have any 12mm ID or 1/2" ID hose here at my shop. Will have to pick some up later.
Anyway, got it all cleaned, reassembled, and installed. Had an 'oh sh*t' moment. I was looking at PET to check the orientation of the hose clamps. It showed the venturi going in the opposite direction as was installed on my engine. I thought my way through how this venturi worked, and decided the way it was installed was correct. That, and I saw 18" of vacuum at the modulator hose when I was working on the transmission back in July.
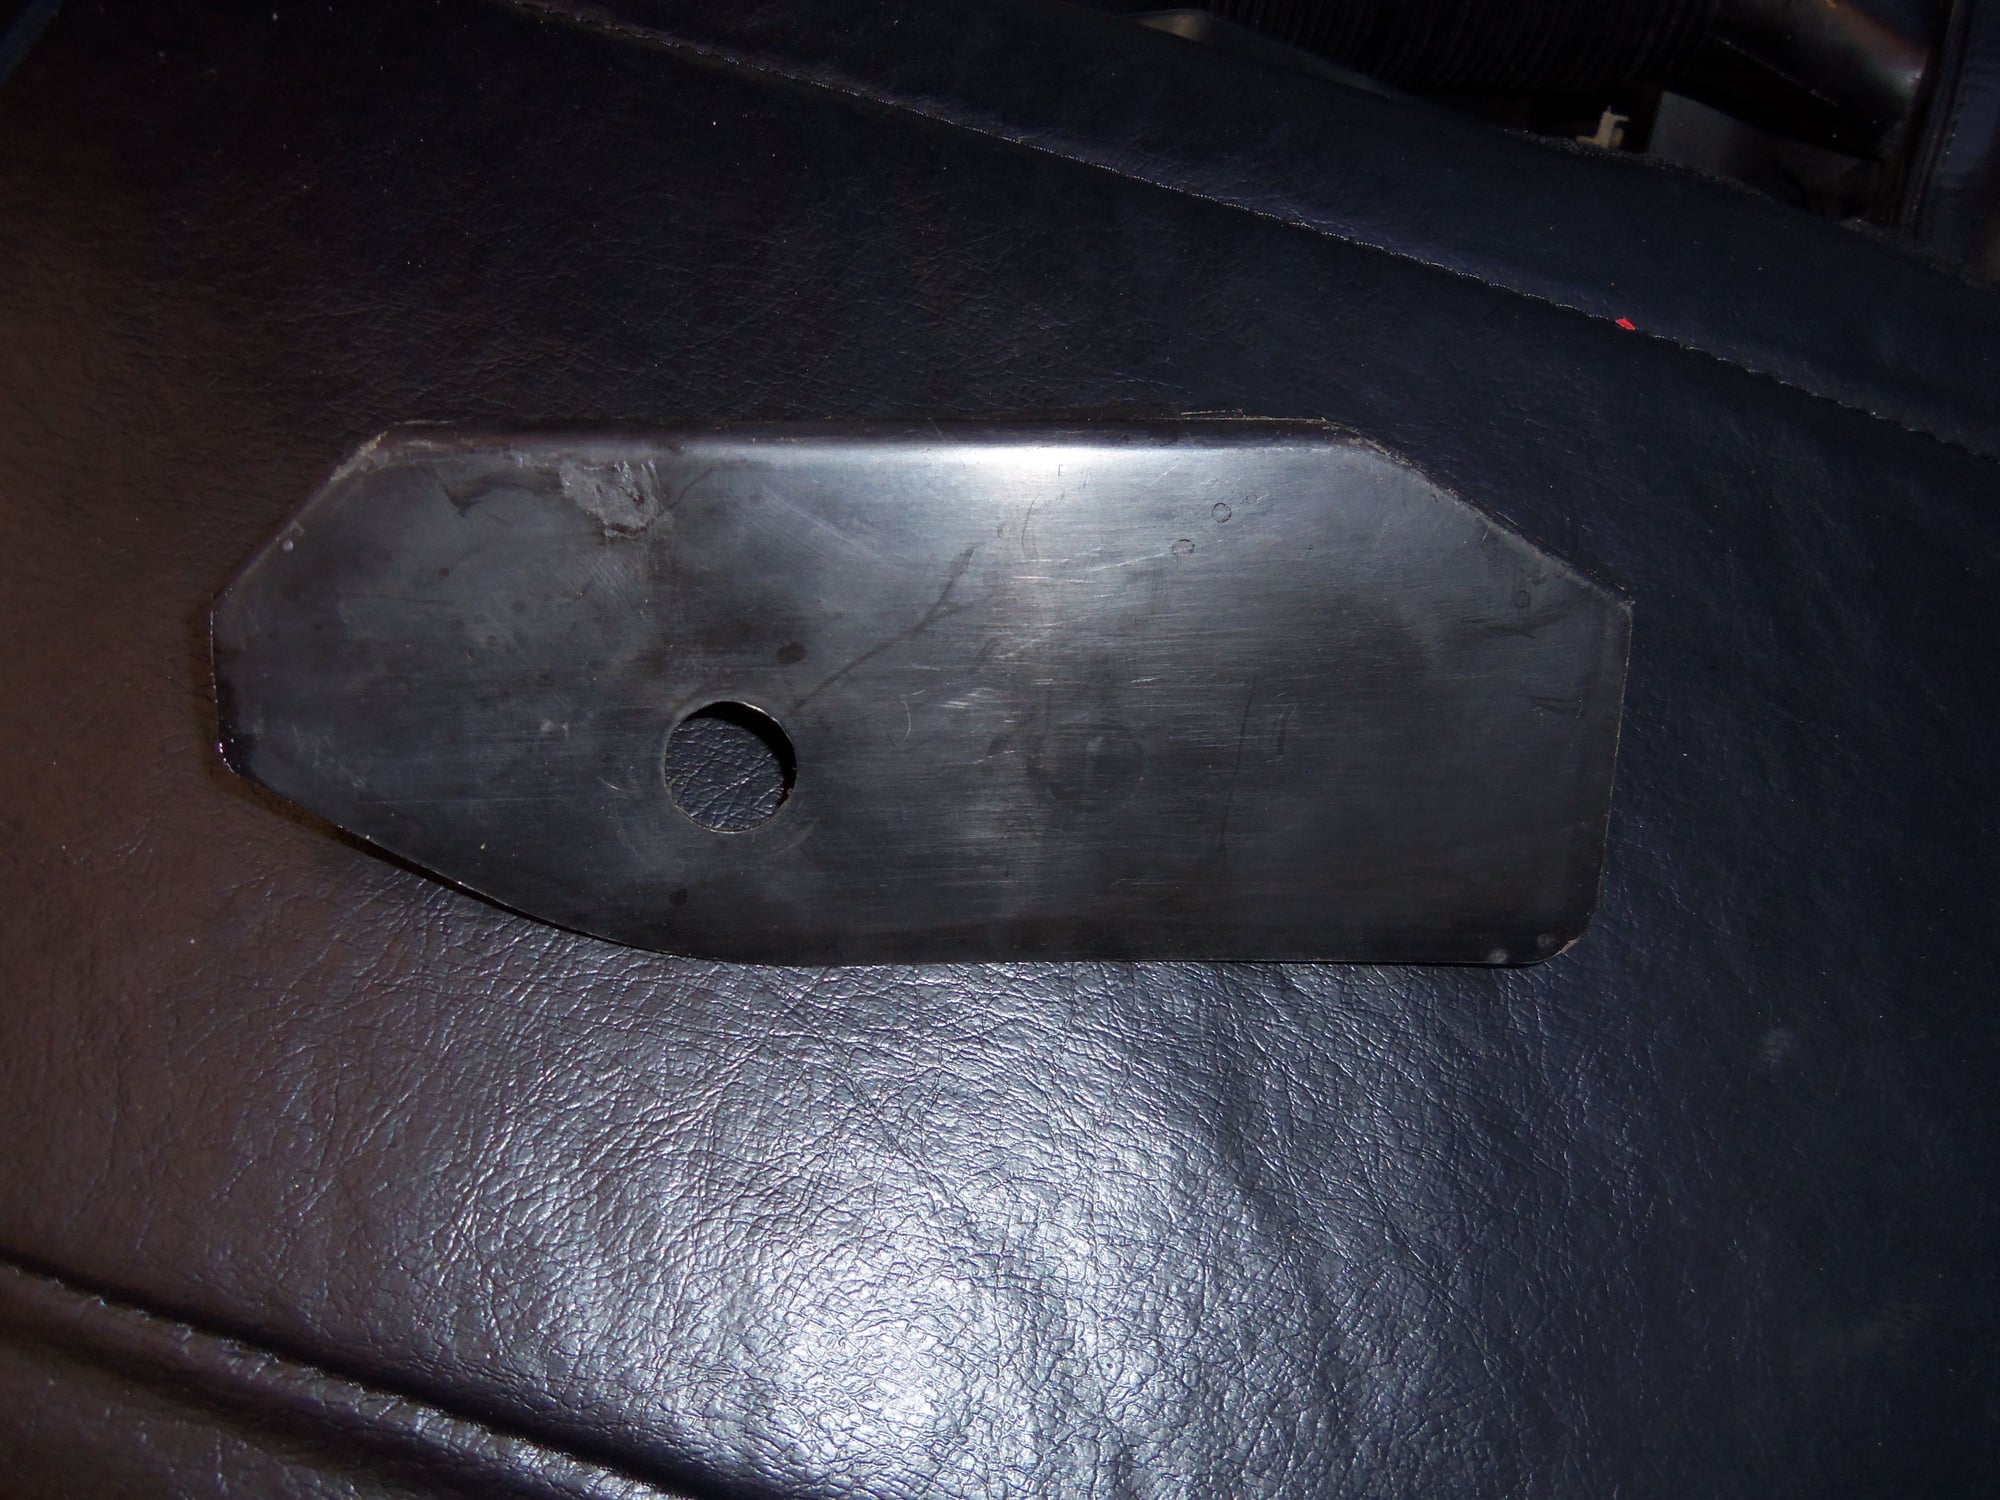
When I bought the Red Witch, photos showed it having the jump post cover in place. When he picked me up Mike (buccicone) gave me the original jump post cap. When I got home from my road trip, the jump post cover was not there.
Rather than make a stink and possibly generate ill will over a relatively cheap part at the shop that repaired her, I just set about replacing it.
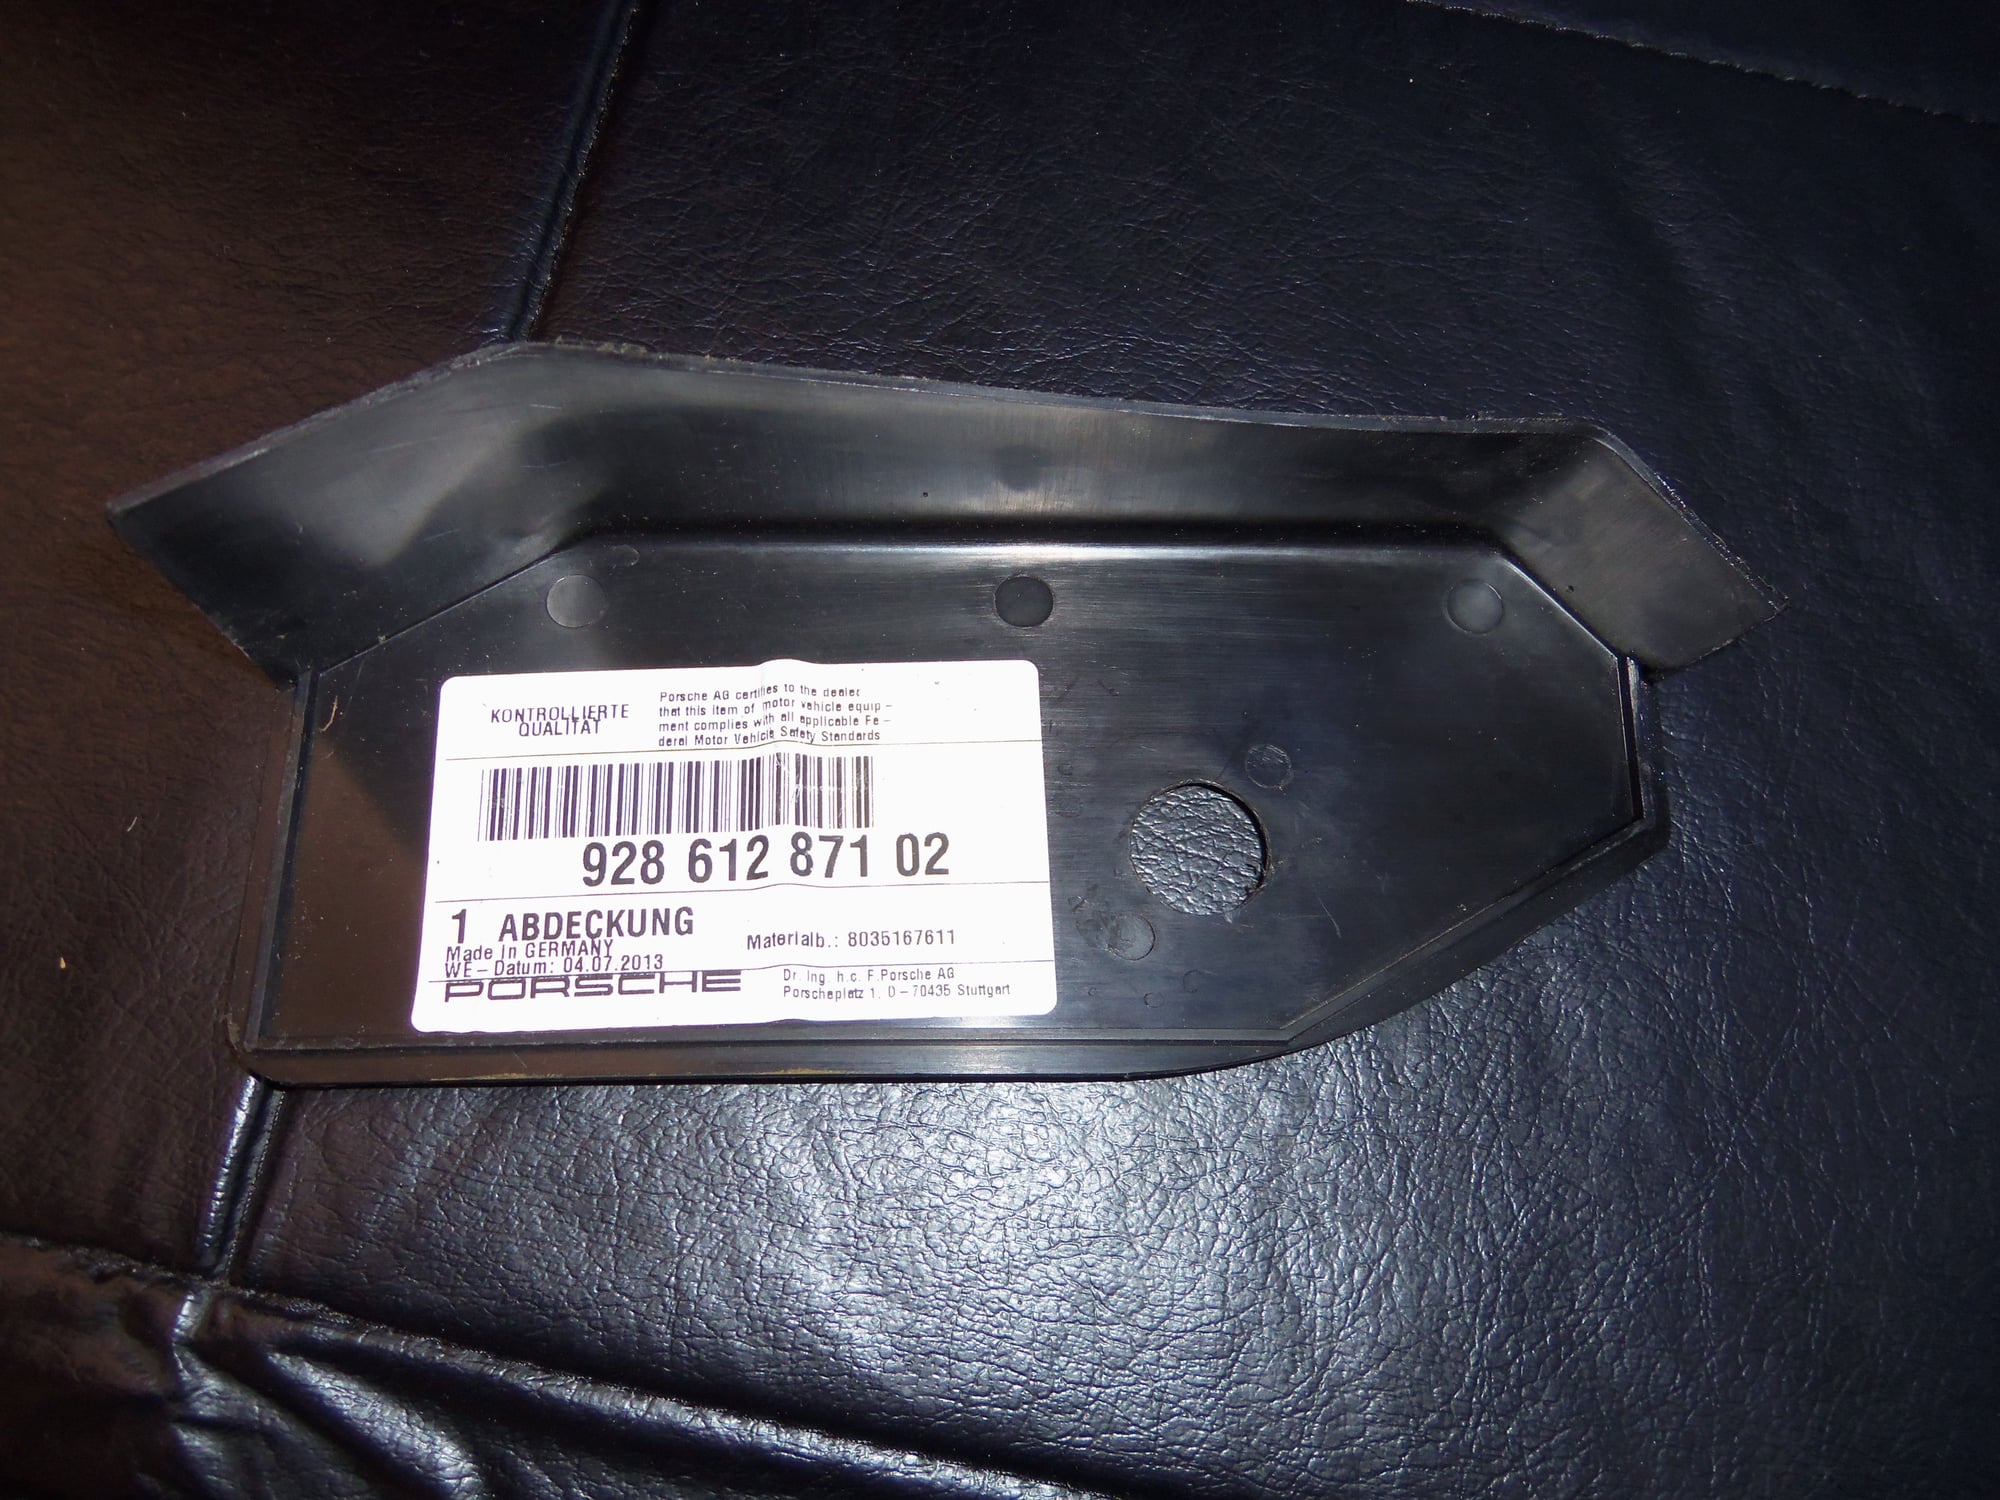
Turns out, The Deputy had a spare jump post cover. I ordered a new jump post cap, and all was well.
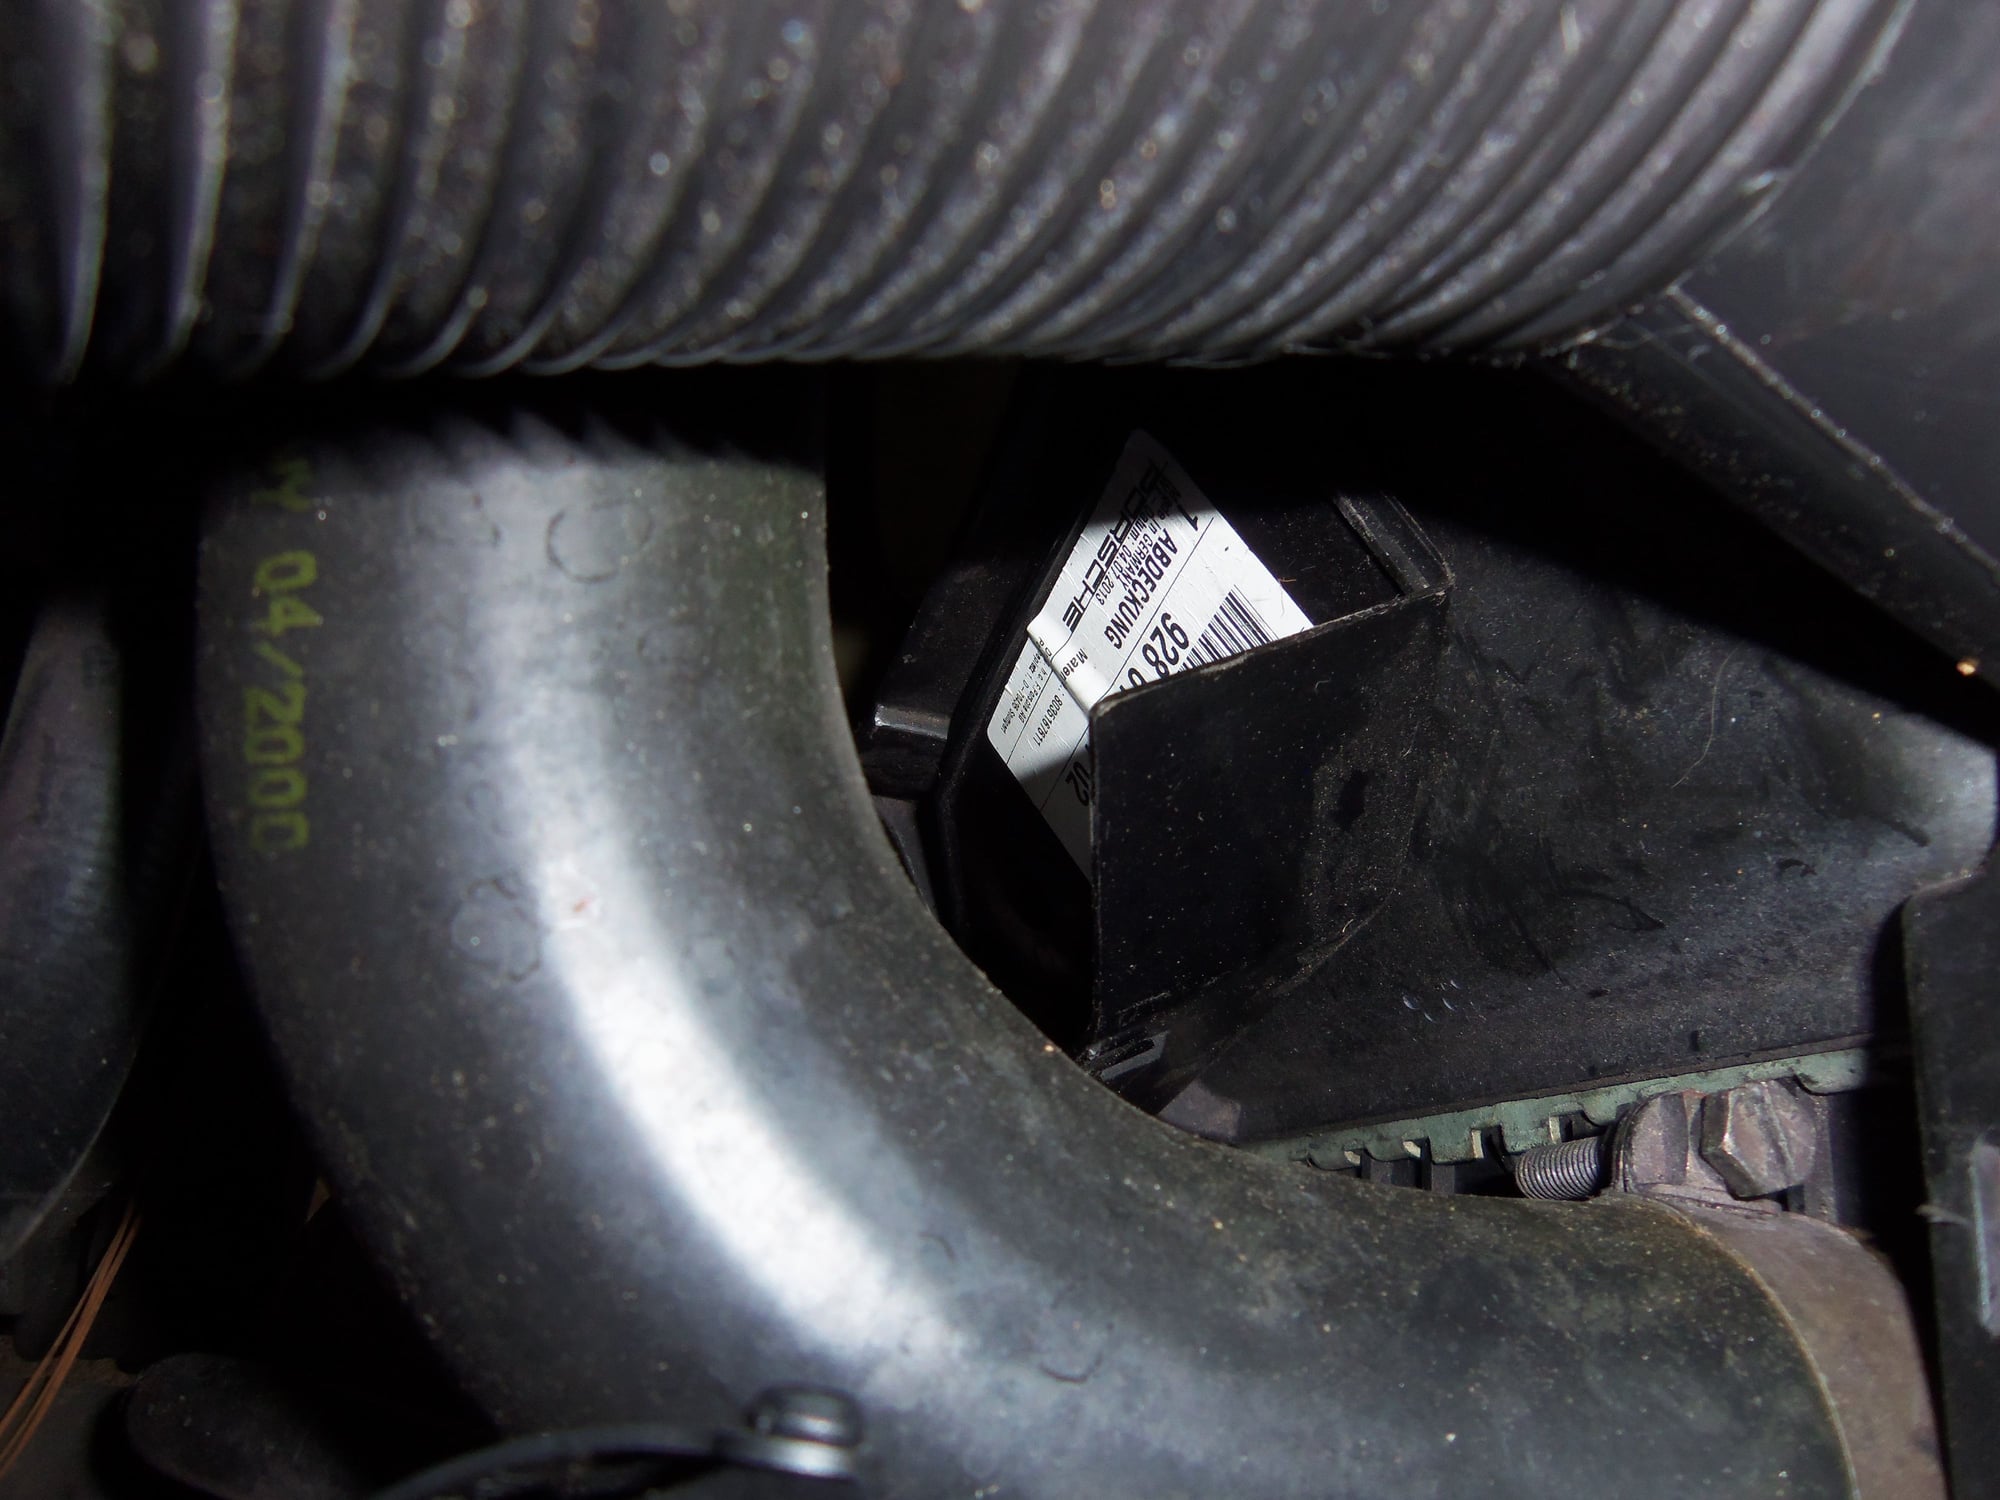
This past week, while working in the engine bay, I noticed something odd under the passenger's side ram tube and radiator hose, up against the fan shroud.
It was the missing jump post cover. It has been riding there since May 6.
It is in excellent condition, but I don't need it. In thanking The Deputy for giving me his spare jump post cover, I told him I would pay it forward in some fashion. So, I will now do so.
drscottsmith just bought his first 928. It is missing the jump post cover. And, he is in my neck of the woods. I am going to give the jump post cover and the original jump post cap to him as a house warming gift.
Buccicone, tell Peter that I found the missing jump post cover...


 08-09-2016, 11:14 AM


 Its only a few months old! I put a thin layer of liquid electrical tape around the circumference, then covered it in heat shrink tubing. That should hold it...