When you click on links to various merchants on this site and make a purchase, this can result in this site earning a commission. Affiliate programs and affiliations include, but are not limited to, the eBay Partner Network.
I would probably leave the brake cleaner on the shelf when the valve body is out. There are potentially sensitive seals in there that may not do well with the solvents in brake cleaner. The consumer stuff is mostly acetone, while the 'pro' has carbon tet and other nerve killers mixed into make it more effective. Meanwhile, the seals in the trans will soften and swell with even a little of the wrong solvent.
and a word from the cleanliness lobby...
The trans (like most precision hydraulic devices) is extremely sensitive to particle contamination. It may be a little late for yours, but for others playing along at home: Spend the time and effort to completely sanitize the transmission and surrounding pieces before you do anything more than a visual level check at the little reservoir. I use a spray engine cleaner when it's grubby, or some spray detergent (Formula 409) if it's relatively oil-free but a little dusty/dirty. Dirt falls from everywhere, and will travel sideways when necessary to contaminate a project. Clean also makes it much easier to work on, and makes it possible to identify small leaks visually, rather than waiting for damage and funny shifting from low fluid levels.
I figure i sould be able to put my sandwich down pretty much anywhere on the car, and be able to finish it without worry of contamination... of the sandwich.
Any concerns with power washing and forcing contaminates inside?
I still cringe while following this, I now have 9's on the rear and can still hit it, no trans mods, no engine mods.
I suggest a new filter and fluid flush, and correctly adjusted cables.
Any concerns with power washing and forcing contaminates inside?
No need for power washing, if you use a decent engine cleaning spray first. If you do decide to power wash, the reservoir cover needs to be tight so water won't get in. Otherwise have a ball. The vent line to the reservoir area is closed at the top, no worries if you don't cause it to come off.
Usually, the trans receives everything that leaks on the car, plus stuff from cars you are following. Like the front crossmember where the steering rack lives, the trans is a slime and crud magnet. Easier to keep it clean once you get it clean, for sure.
Look for a recent link to a Flussig feature on undercarriage cleaning. There are some hints there for chems for a serious undercar cleaning.
Found it. Good article. Very tedious but probably the best way to get familiar with your undercarriage.
First, a question: is a new vacuum modulator set in the ballpark for installation?
I ask, because I have 120PSI(8.16bar) at the modulator port on the transmission.
Recap:
Drained trans and torque converter.
R&R valvebody, cleaned with parts store brake cleaner.
Installed updated Mercedes K1 spring kit. (Shift kit stayed on the shelf.)
Installed new sealing O-ring on bowden cable.
Installed new green top vacuum modulator, thrust pin, and plunger.
Adjusted accelerator pedal cable.
Adjusted trans pressure cable 1 turn tight past the socket fitting on the ball.
Filled the transmission with Dexron III, ending up in the middle of MIN/MAX with the engine idling, engine and trans at operating temperature, car level.
(Fill to MAX, run engine for 20 seconds, repeat until level stays somewhat under MIN. With parking brake on, run shifter through the gears, remaining in each for around 10 seconds. Final fill to midway MIN/MAX with engine idlung.)
Verified good vacuum, 18", at the modulator hose.
With the vacuum hose off the modulator, engine running and transmission in "D", I did not see any modulator pressure on the gauge. I am using the OTC trans and engine oil pressure test set.
I then realized the 0-100PSI gauge was pegged.
On the 0-400PSI gauge, modulator pressure read 120PSI.
So, is it as simple as I just need to adjust the modulator until pressure is 4-4.2bar? Or, have I screwed something up.
Chris Lockhart: Yep, when I'm in, I'm in all the way.
davek9: I ended up taking your advice. The shift kit stayed on the shelf, and I am starting with a stock baseline. Good point about S3 vs S4 information. I have had to search carefully.
zekgb: Thanks for the advice! I will double check this after work tomorrow.
dr bob: Uh-oh...I got happy with the brake cleaner. Its how I have always cleaned valve bodies in all the transmissions I have worked on. I don't have access to 'pro' strength, so that may help.
This will go one of two ways. I did let the valve body drip and air dry for several hours after cleaning. It will either work, or I am now in for a nice, expensive object lesson.
Either way, I will deal with it.
I totally agree about cleaning the trans before opening it. Granted, I did not get this one surgically clean. More like battle field clean. I hosed everything down with engine cleaner, then went at it with a small electric pressure washer I keep for light jobs. It got rid of the big chunks and alot of the build up. I followed up in certain areas with Simple Green and a tooth brush (my cleaning brush of choice for just about everything.)
I did wipe all the machined surfaces with clean lint free rags.
SMTCapeCod: I noticed the instructions for the shift kit were a little vague. I was going mainly by some Rennlist 928 posts I found. Right up to where I put the kit back on the shelf.
Good to know that Greg will rebuild just a valve body. However, I did see where he felt that a post 150,000 mile A28/** was not worth putting effort and money into. So...all this may just be p*ssing in the wind.
I have researched the B2 servo issue. Based upon advice from Roger, I elected to not worry about it now. If I go in to install the shift kit at a later date, I may worry about it then.
GT6ixer: I had no issues with power washing under the Red Witch. Granted, I did disconnect the battery (-) lead, and avoided wailing on the starter and alternator. As dr bob recommended, I did make sure the reservoir cap was on tight.
OTR18WHEELER: Have patience, Farris. I am working this out. I have taken all y'alls advice and put the shift kit back on the shelf. I am going to get a stock baseline. As you reccomended, fluid, filter, adjusted cables. I do still need to adjust the modulator pressure down to 4.2 bar.
dr bob: very good advice on the cleaning! I am taken aback at the daunting task of cleaning under the Red Witch. She has a mixture of undercoating and road grime. Good stuff...
So...the point of all this was a plan dating back from the PPI in April. PO's paper work showed that the transmission fluid and filter were last changed in October of 1997. During the PPI, the shop indicated that the transmission reservoir plastic might have gone opaque.
My intent was to do a filter and flush job. I added replacing the tiny kick down lever spring, the bowden cable sealing O-ring, and the vacuum modulator to the list. Finally, after researching the A28/07 transmission 2-3 flare, I added the Mercedes updated K1 spring kit as a preventative measure.
I had this week off, so, it was transmission time.
My first hard knocks lesson was lining up the torque converter drain plug. Somewhere I got it in my head that putting the engine at TDC would line up the torque converter drain plug with the opening in the bottom of the housing. Wrong.
I had to lay under the engine, turn it slightly clockwise with a 27mm socket and long ratchet. Then, pull myself down to the transmission. I slid along cardboard, pulling against the exhaust system. Damned glad I bought the liftbars...
After an eternity of inching the crank over, I got the drain plug lined up. After reading a few horror stories of stuck and stripped plugs, I used a good, tight 5mm hex key. Both the torque converter drain plug and the transmission pan drain plug broke loose with little fuss.
The fluid was not burnt or brown, but it wasn't good and red anymore. I let it all drain overnight.
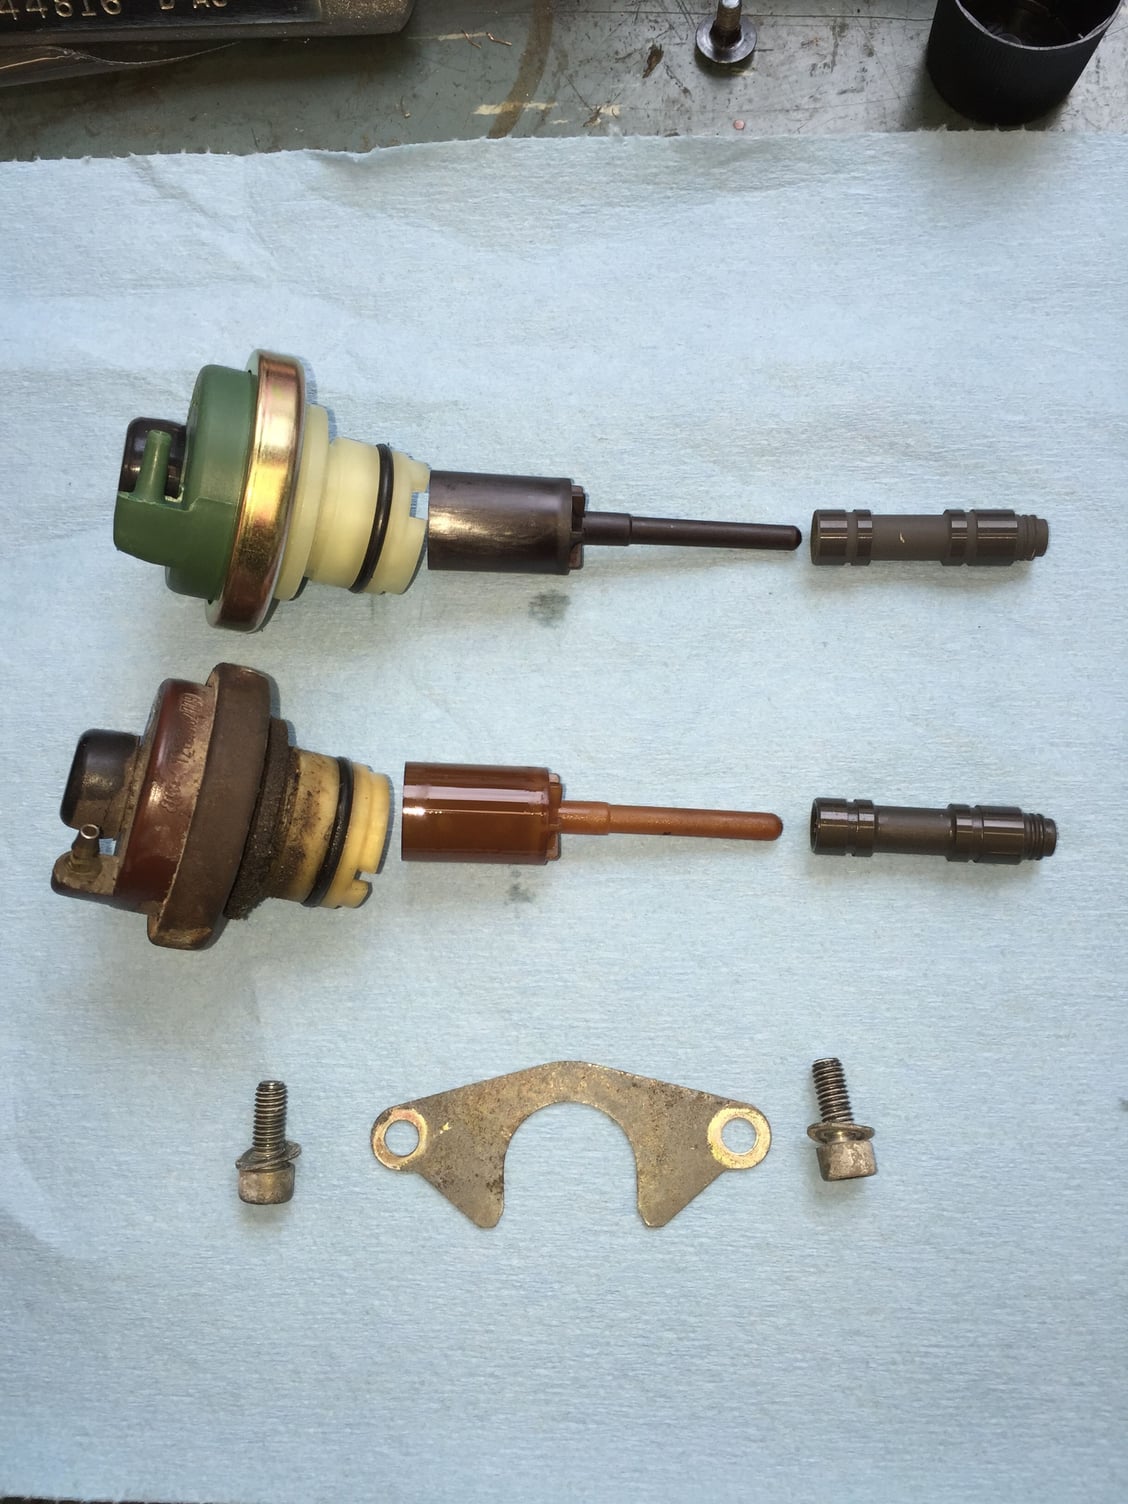
I started kinda bass-ackwards, as I went to the modulator next. I replaced the vacuum modulator based upon age. Also, the PO mentioned that he had the modulator screwed all the way in.
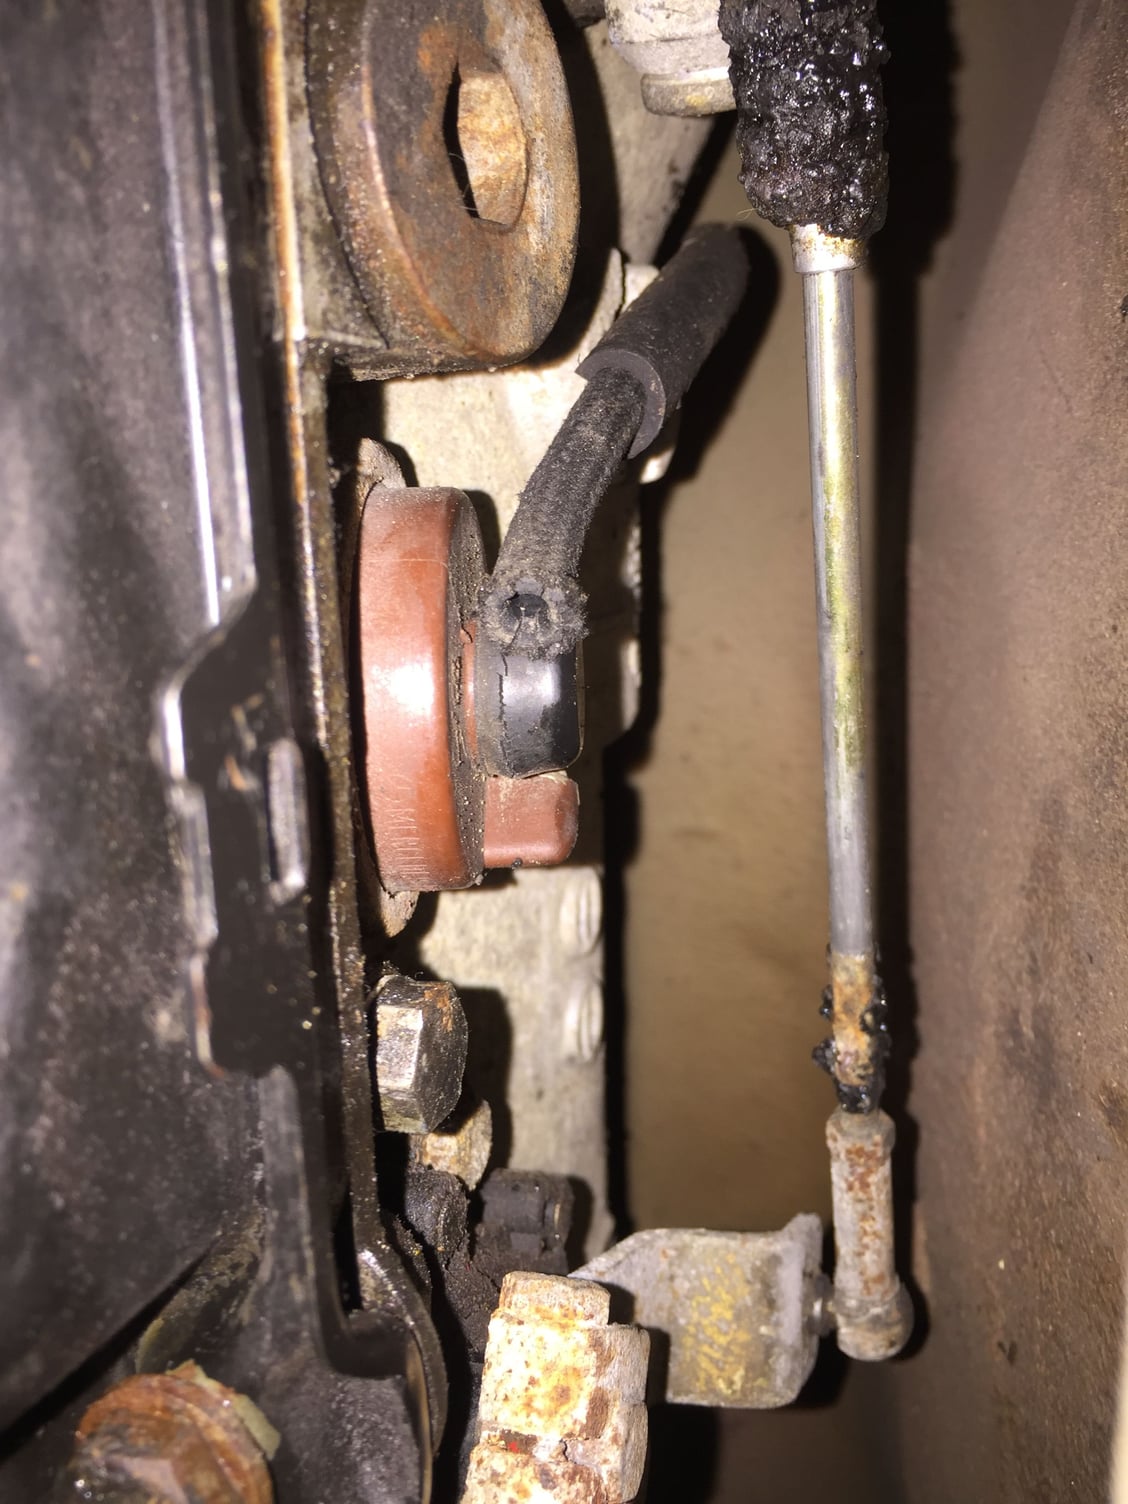
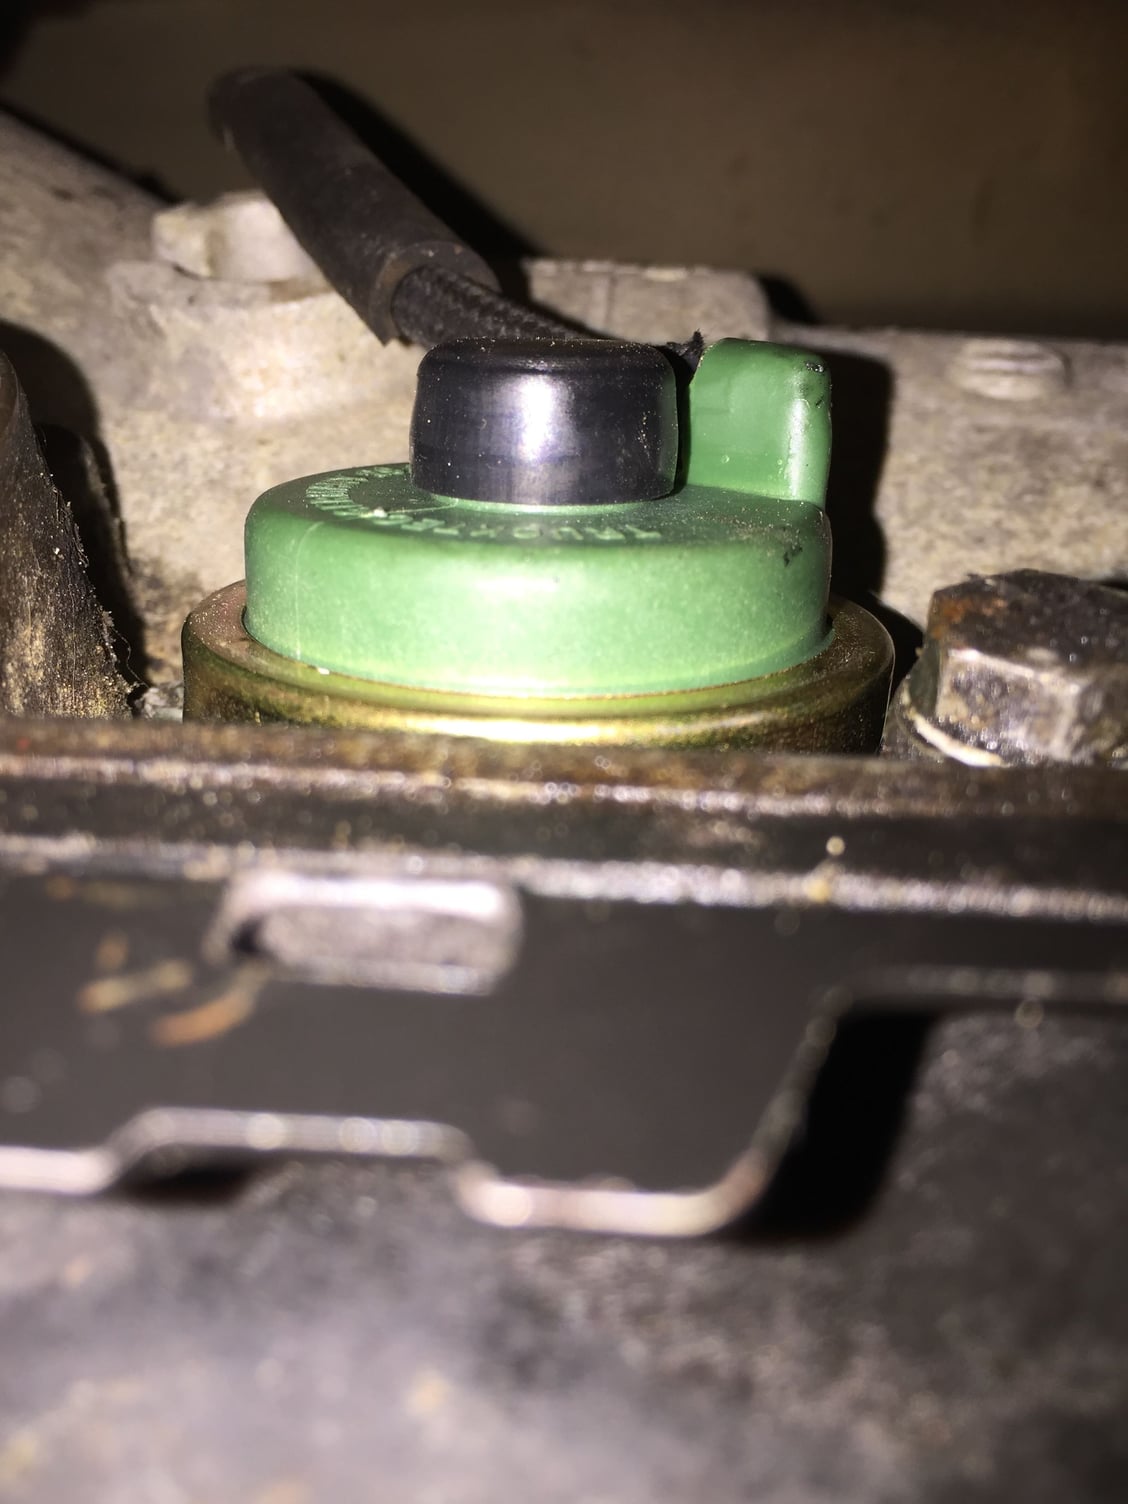
I found the rubber cap on the modulator cracked, and the vacuum line was cracked and starting to split.
I mistakenly removed the modulator pressure port plug, thinking it was the retainer for the modulator. Nope. Looking at PET and the WSM, I figured out it was 5mm socket headed cap screws. Even though I couldn't really see what I was doing, I had decent hand access to disassemble everything.
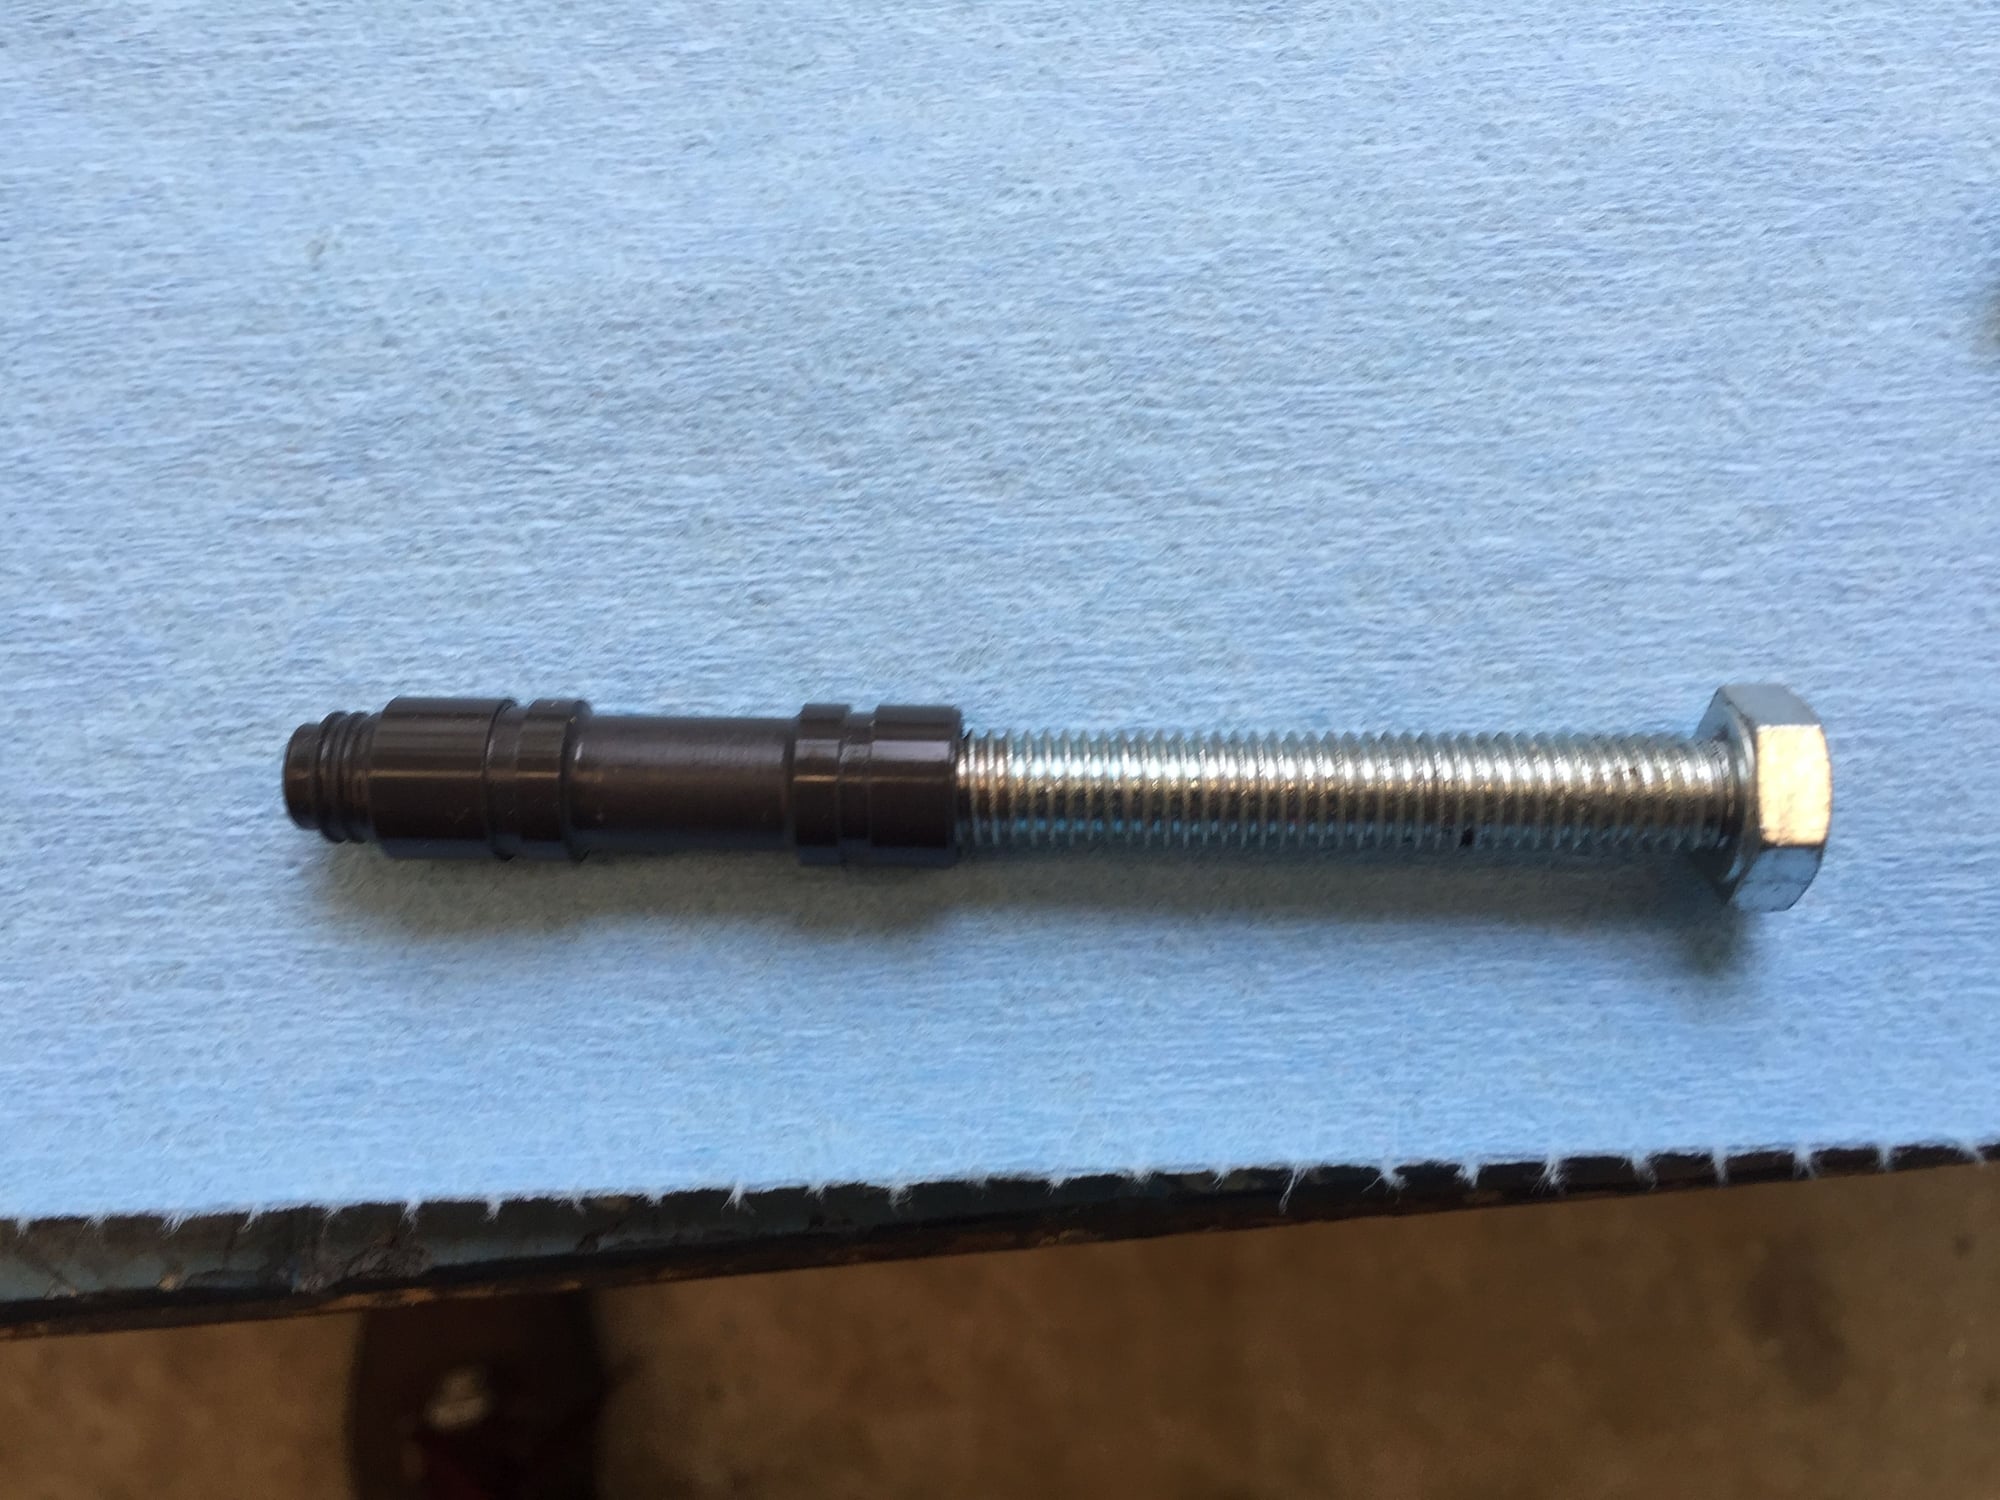
The modulator and thrust pin came out no problem. The plastic thrust pin was not broken. Based upon advice from Roger, I also replaced the modulator plunger. I had to figure out how to remove the plunger. I finally hit on a long 8mm bolt to reach in and grab the plunger by the bore. I also used the bolt to install the new plunger.
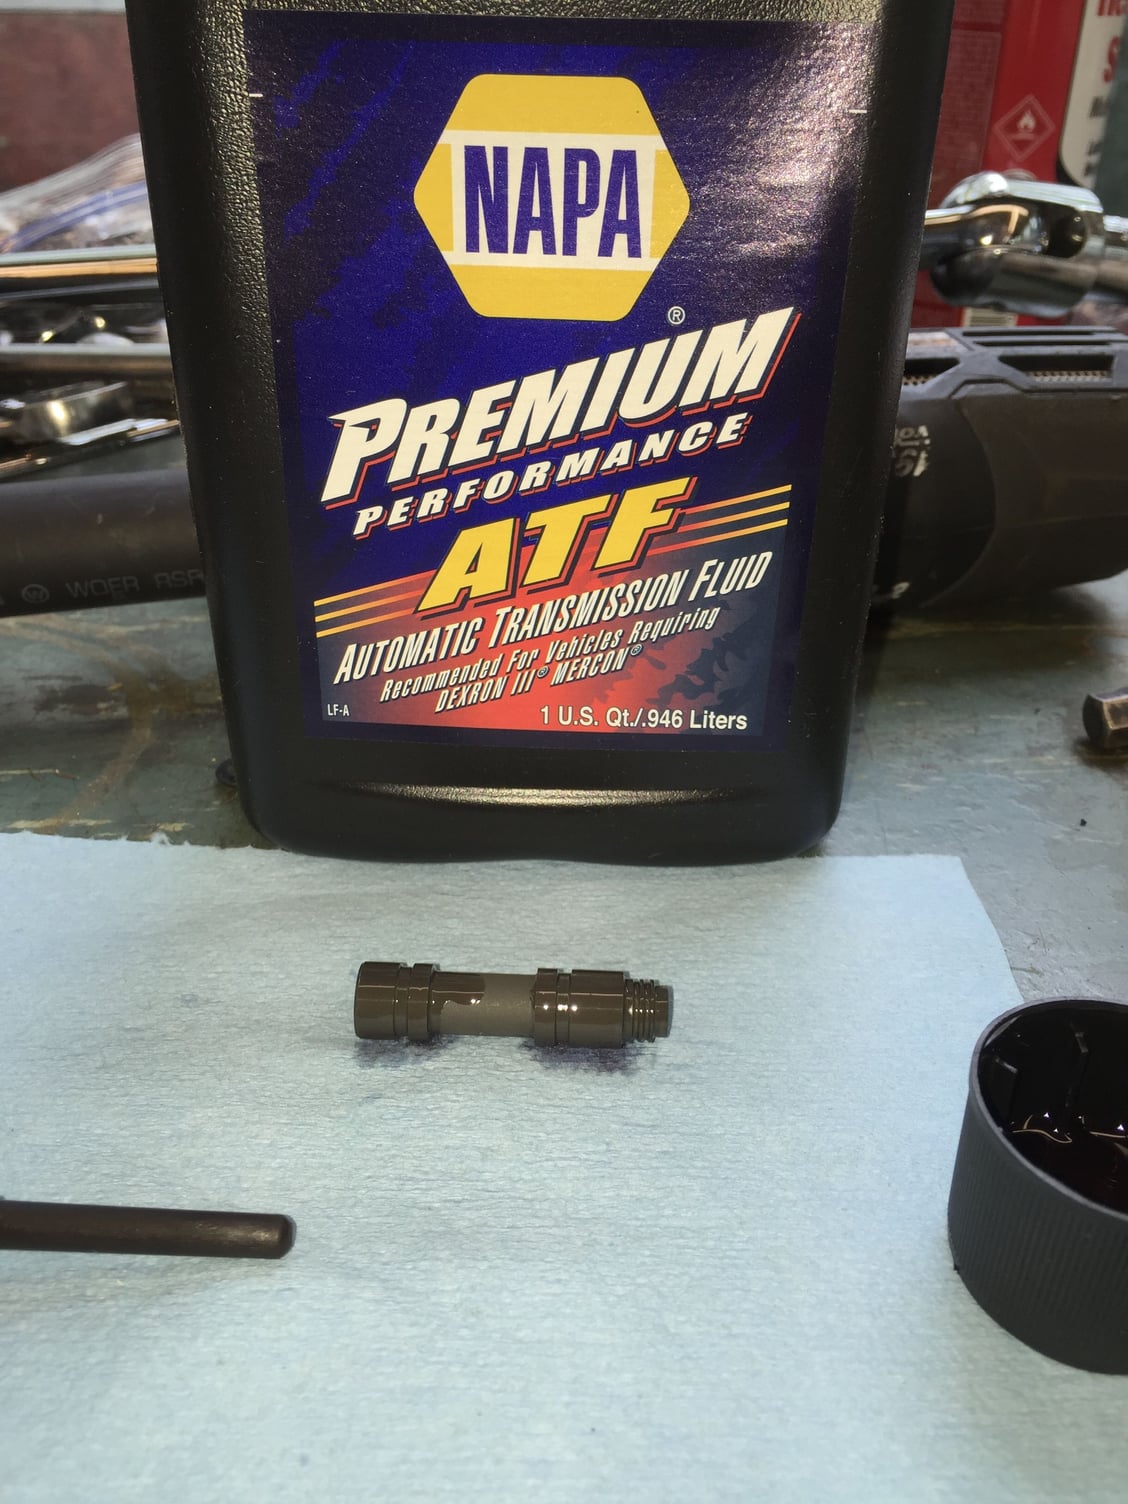
The old plunger did not show any appreciable wear. Still, new one was lubricated with NAPA Dexron III and installed. I cleaned the cap screws and retainer plate, then reinstalled them with the new modulator. O-ring had plenty of ATF on it for lubrication.
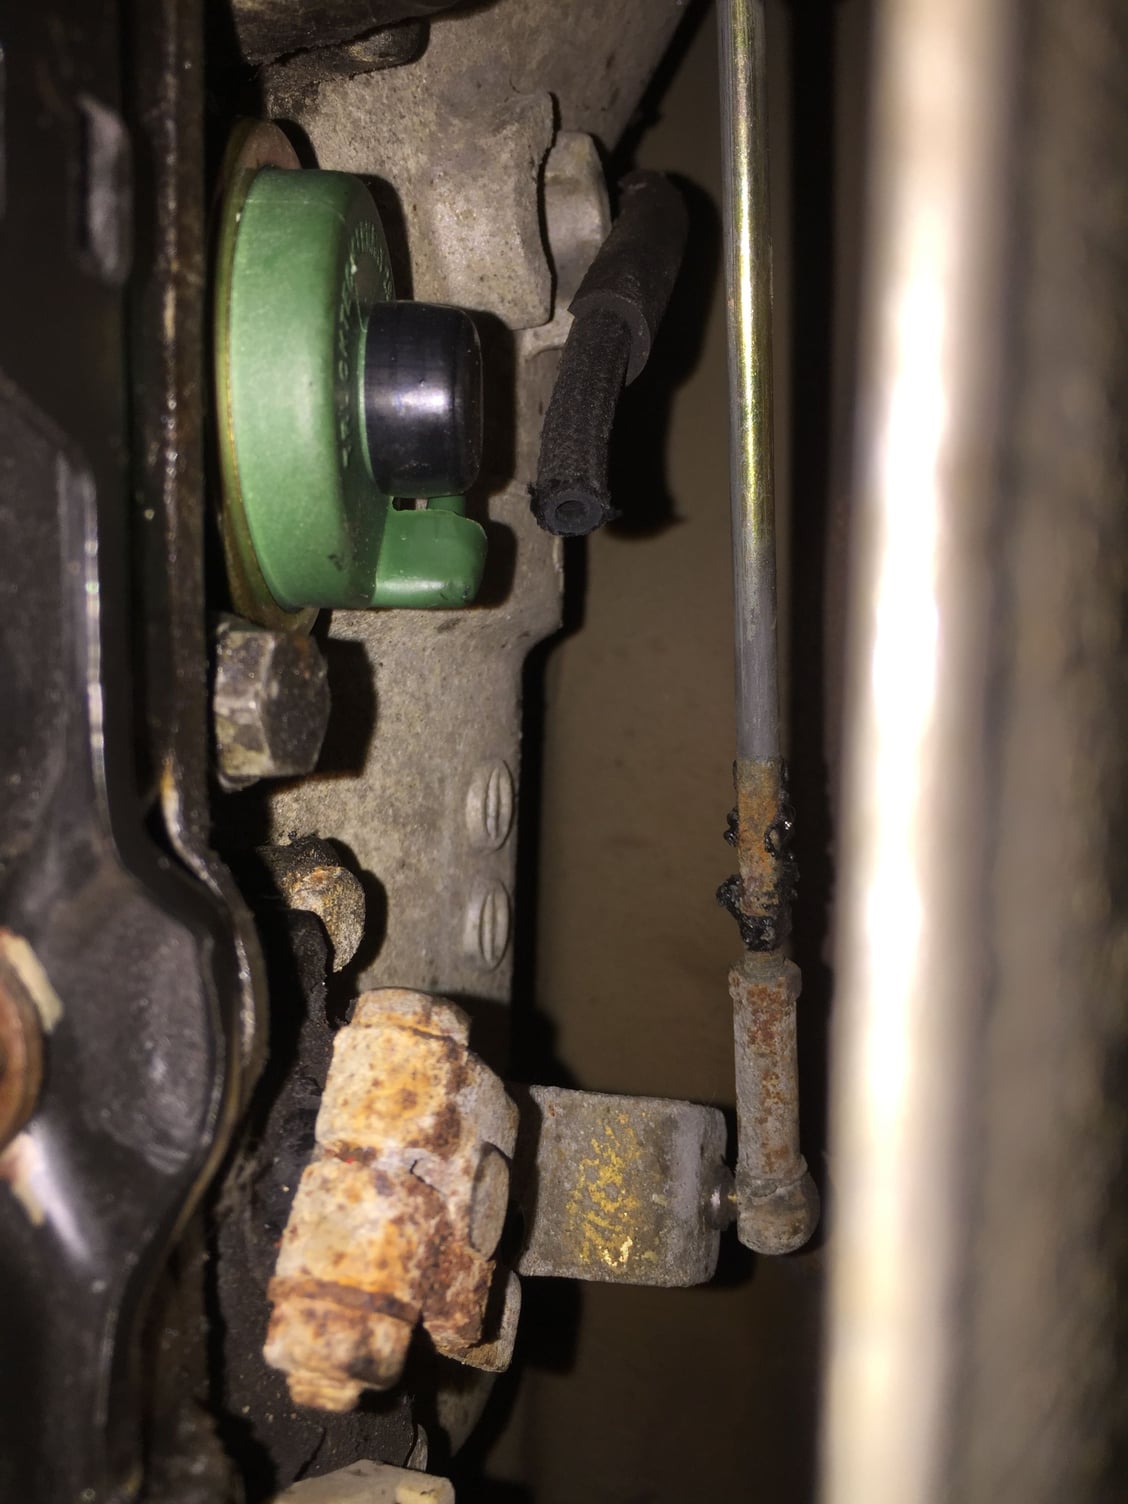
I used a set of end nippers to trim off the cracked end of the vacuum hose. It still reaches and connected tightly to the modulator. If necessary, I will use a tiny connector and splice a short length of hose in.
Note cracks in the end of the vacuum line.
You can just see the head of the 8mm bolt in the modulator plunger bore.
Said bolt.
Old vs new, with cleaned screws and retainer plate.
Lubricated the plunger prior to installation.
Vacuum line after nipping.
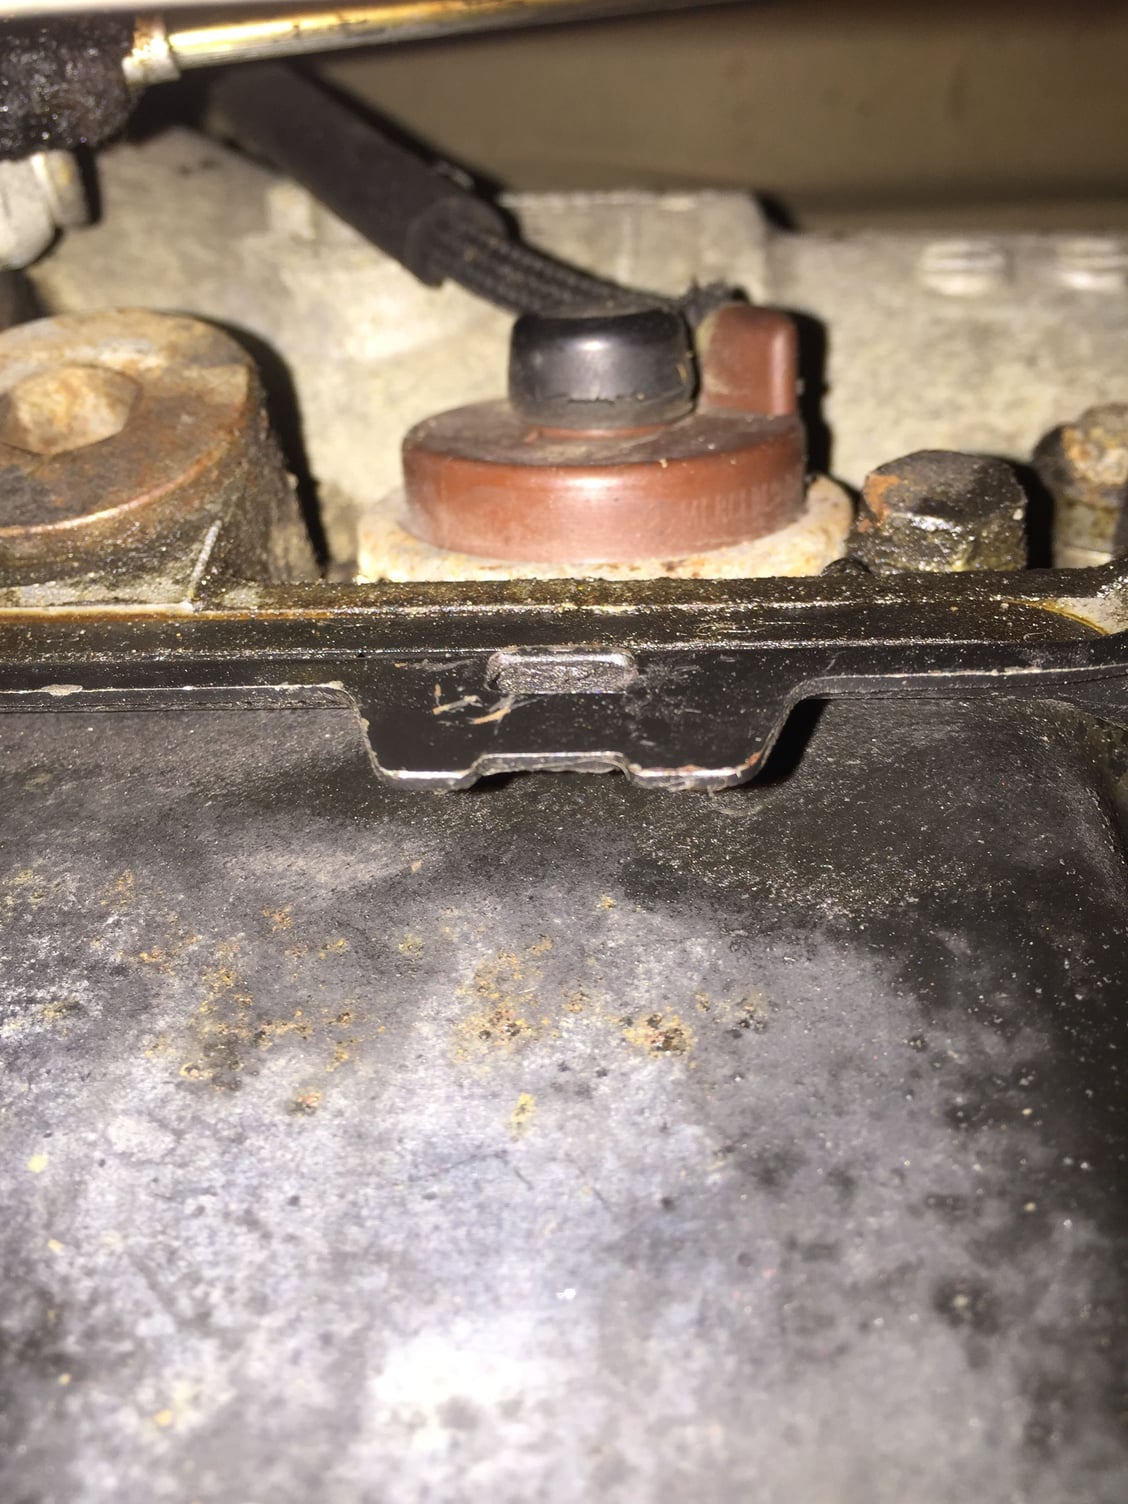
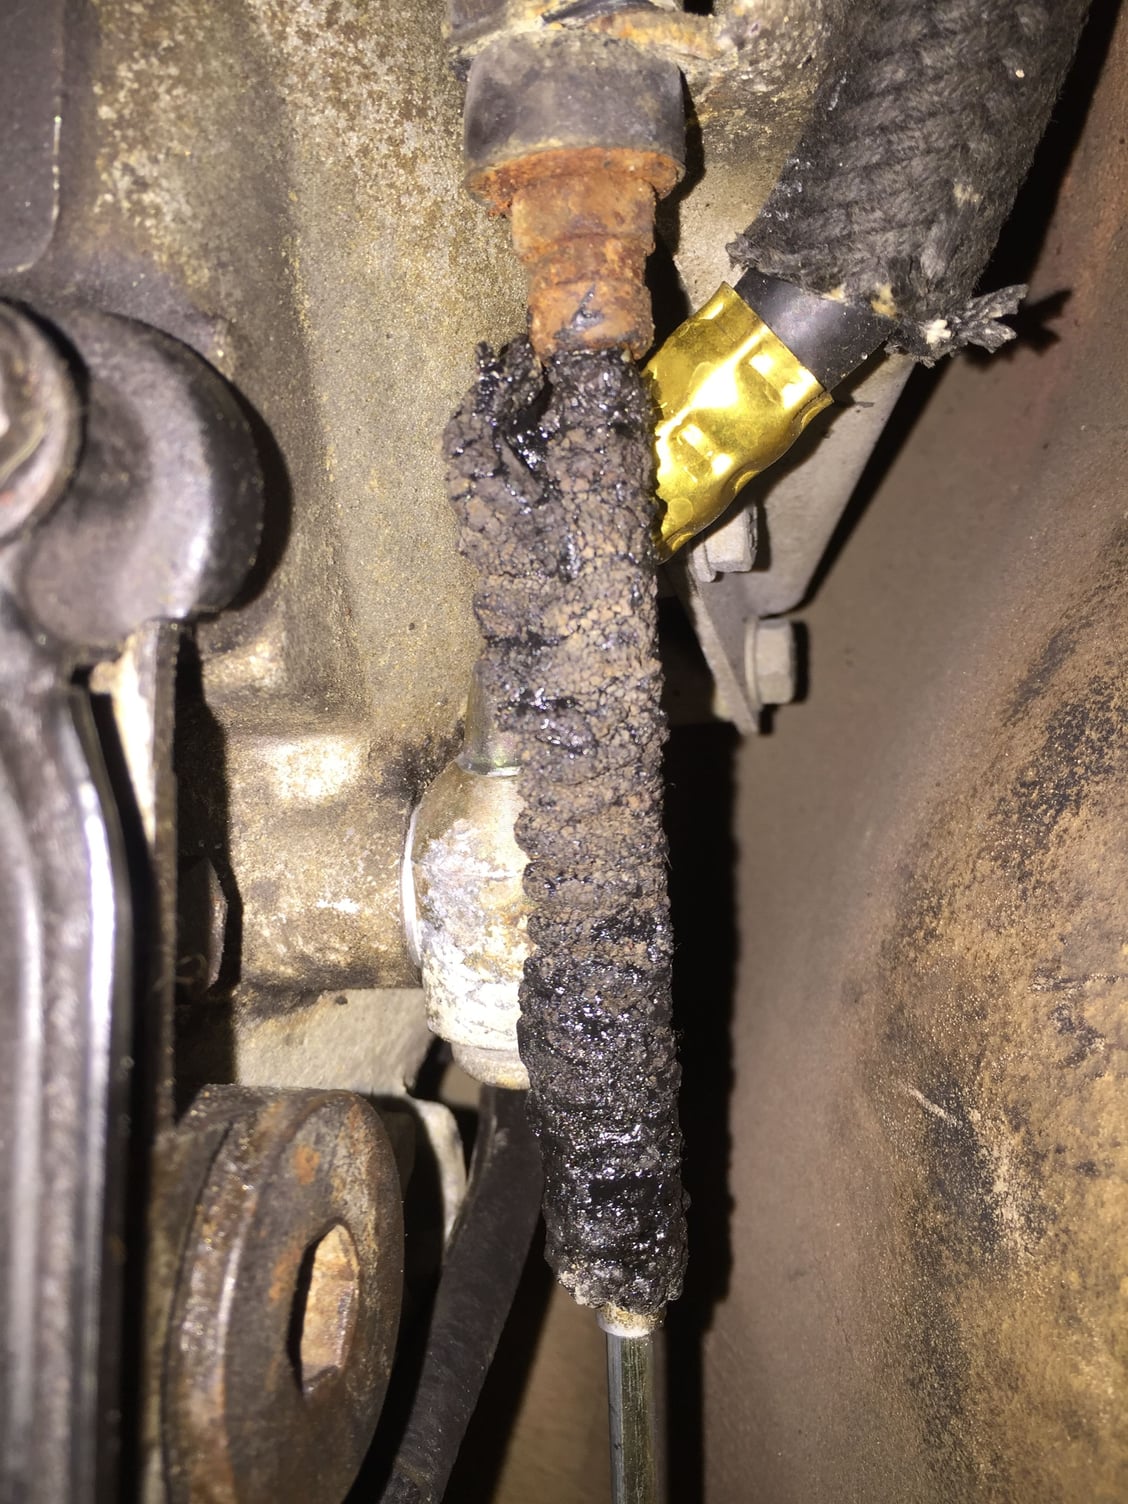
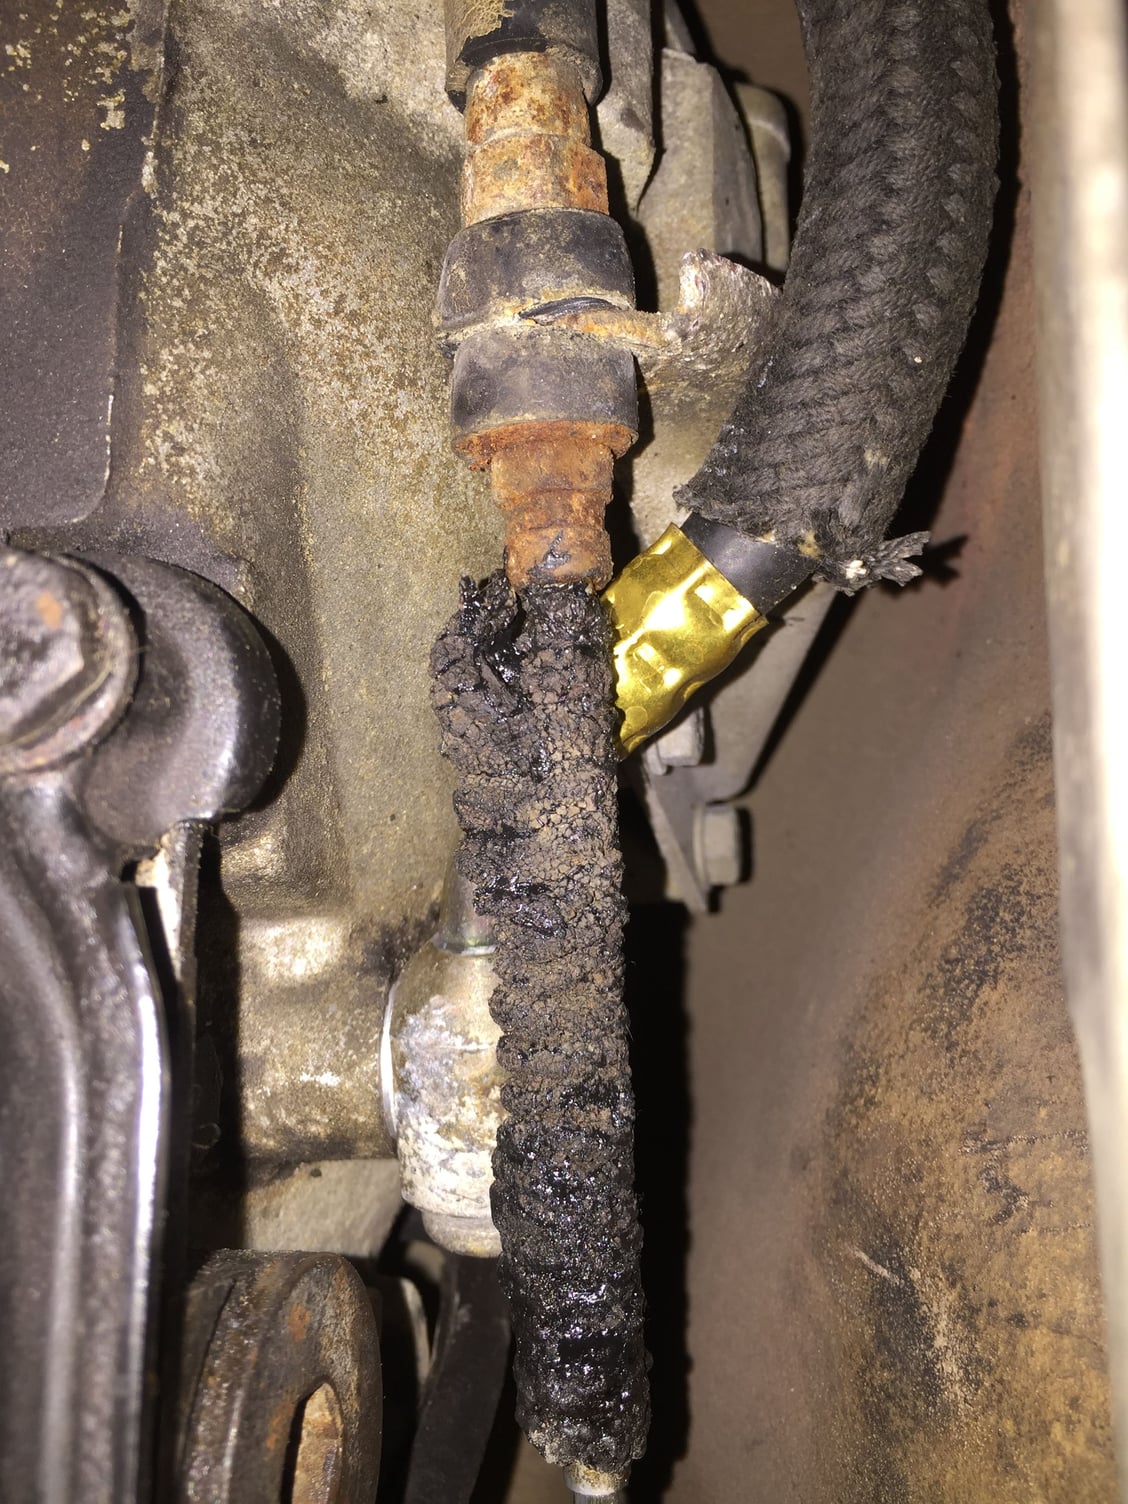
Two things I noticed while replacing the vacuum modulator:
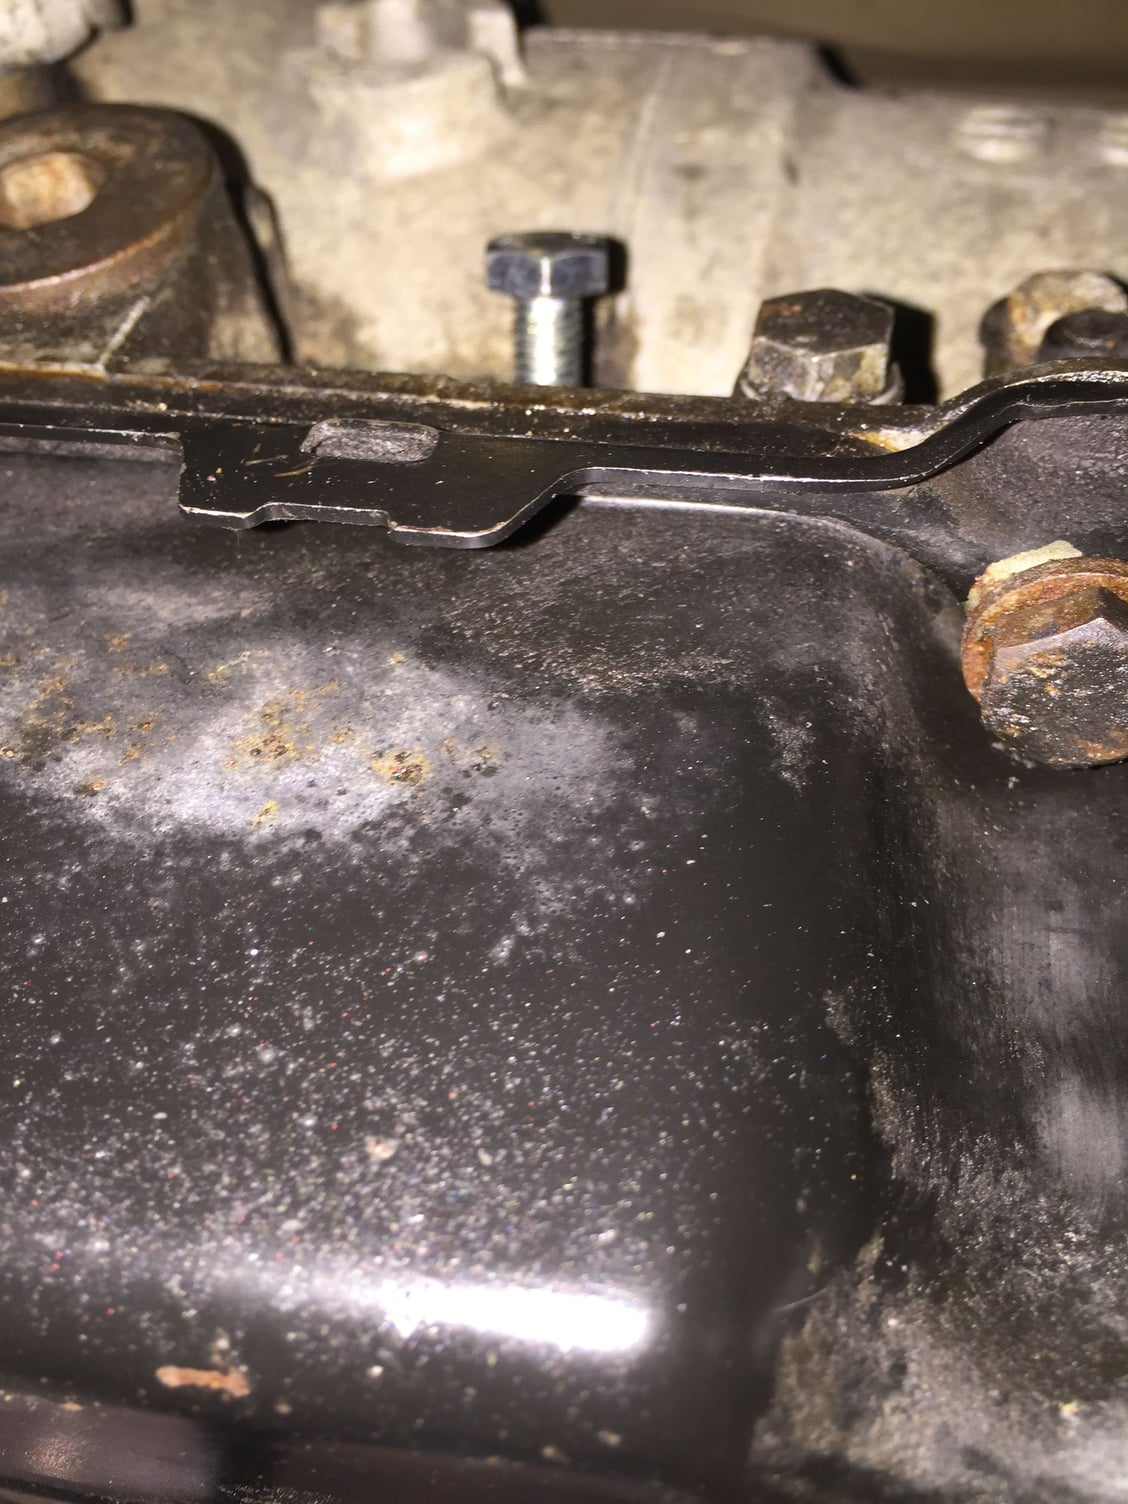
-shift lever cable boot is absolutely ruined.
-saw the new crimped on transmission cooling line.
Inside the boot/gaiter on the shift cable is a thin-walled bit of metal tubing that's key to the cable's survival and service. It's a $150 piece, comes with a free replacement cable in the bag. Use appropriate care.
The boot/gaiter is the same at either end of the cable in spite of PET's listing. IIRC, one of the PET-listed pieces is available and the other not. Get a couple of the 'available' version, and secure with snug cable ties as necessary.
Looking at the end of that vacuum hose and thinking that only the last half-inch of that hose is cracked and the rest is perfect... You're not in Kansas anymore! The hose pieces see oil/crud/exhaust heat, making replacing the hose sections a Good Idea vs. just trimming the end with nippers a potentially Bad Idea. I bought a yard of 5/32" (same as 4mm) vacuum hose at the POLAPS to use with the hand vacuum pump and the HVAC diagnosis last week. Cost: under $2. Not the fabric-braid-covered German hose though, but Good Enough while the Right Stuff is in transit? Anyway, do it like you mean it.
Keep up the good work! Many of us are living vicariously through your posts.
Very good to know the boot is available separately! I thought my only recourse was replacement of the cable assembly. Which I was not looking forward to. On that note, what is your recommendation for cleaning the shift cable and metal sleeve prior to installing the new boot?
Yes, I am not in Kansas any more. I thought about the hose last night and realized it needs to be replaced. Getting hose is no problem. Routing it up above the torque tube will be the trick.
Please read post number 20 about the issue I'm having with the excessively high modulator pressure after installing the new modulator. Can you advise?
The hose sections are accessible after dropping the exhaust and the heat shields. The exhaust is ungainly, but all of the hangers are bolt-up so you won't be prying aged rubber bits off of hooks. ASSuming there isn't a lot of corrosion on those little bolts for the shields, they come out easily. Most if not all of the ones you'll need to remove thread into tinnerman-style "speed nuts".
Greg Brown is the guru of the transmissions, and can probably answer your question on control pressures. Else, lots of info on that would come from a search on the trans info from the MB crowd.
I thought about the hose last night and realized it needs to be replaced. Getting hose is no problem. Routing it up above the torque tube will be the trick.
Seth,
IIRC, the flexible hose is short piece that attaches to the metal line on top of the torque tube at either end. Both flexible lines are likely split. This could be the ultimate cause of your shift problem. Replace the front hose also from the front end of the torque tube to the 5-way by the brake booster.
dr bob, you may not be ASSuming. The exhaust and heat shield was dropped in April to repair the transmission cooling hose and replace the rear pinch bolt. I have noticed some new hardware in various places on the exhaust. I am hoping that means all of the fasteners will come free for me.
I have PM'd Greg Brown and have a plan to go forward.
soontobered84: Good point. If I am going to replace one, I need to replace both. Thanks!
Crumpler: Thanks for the support! I can understand your concern. Right, wrong, or otherwise, I am going to jump in and do it. Yes, I will make mistakes. But I will learn. I am mechanically(and electrically) inclined and reasonably competent. I enjoy working on intricate machinery. In the Navy, I worked on and with gas turbine engines. I didn't screw up. Too much...
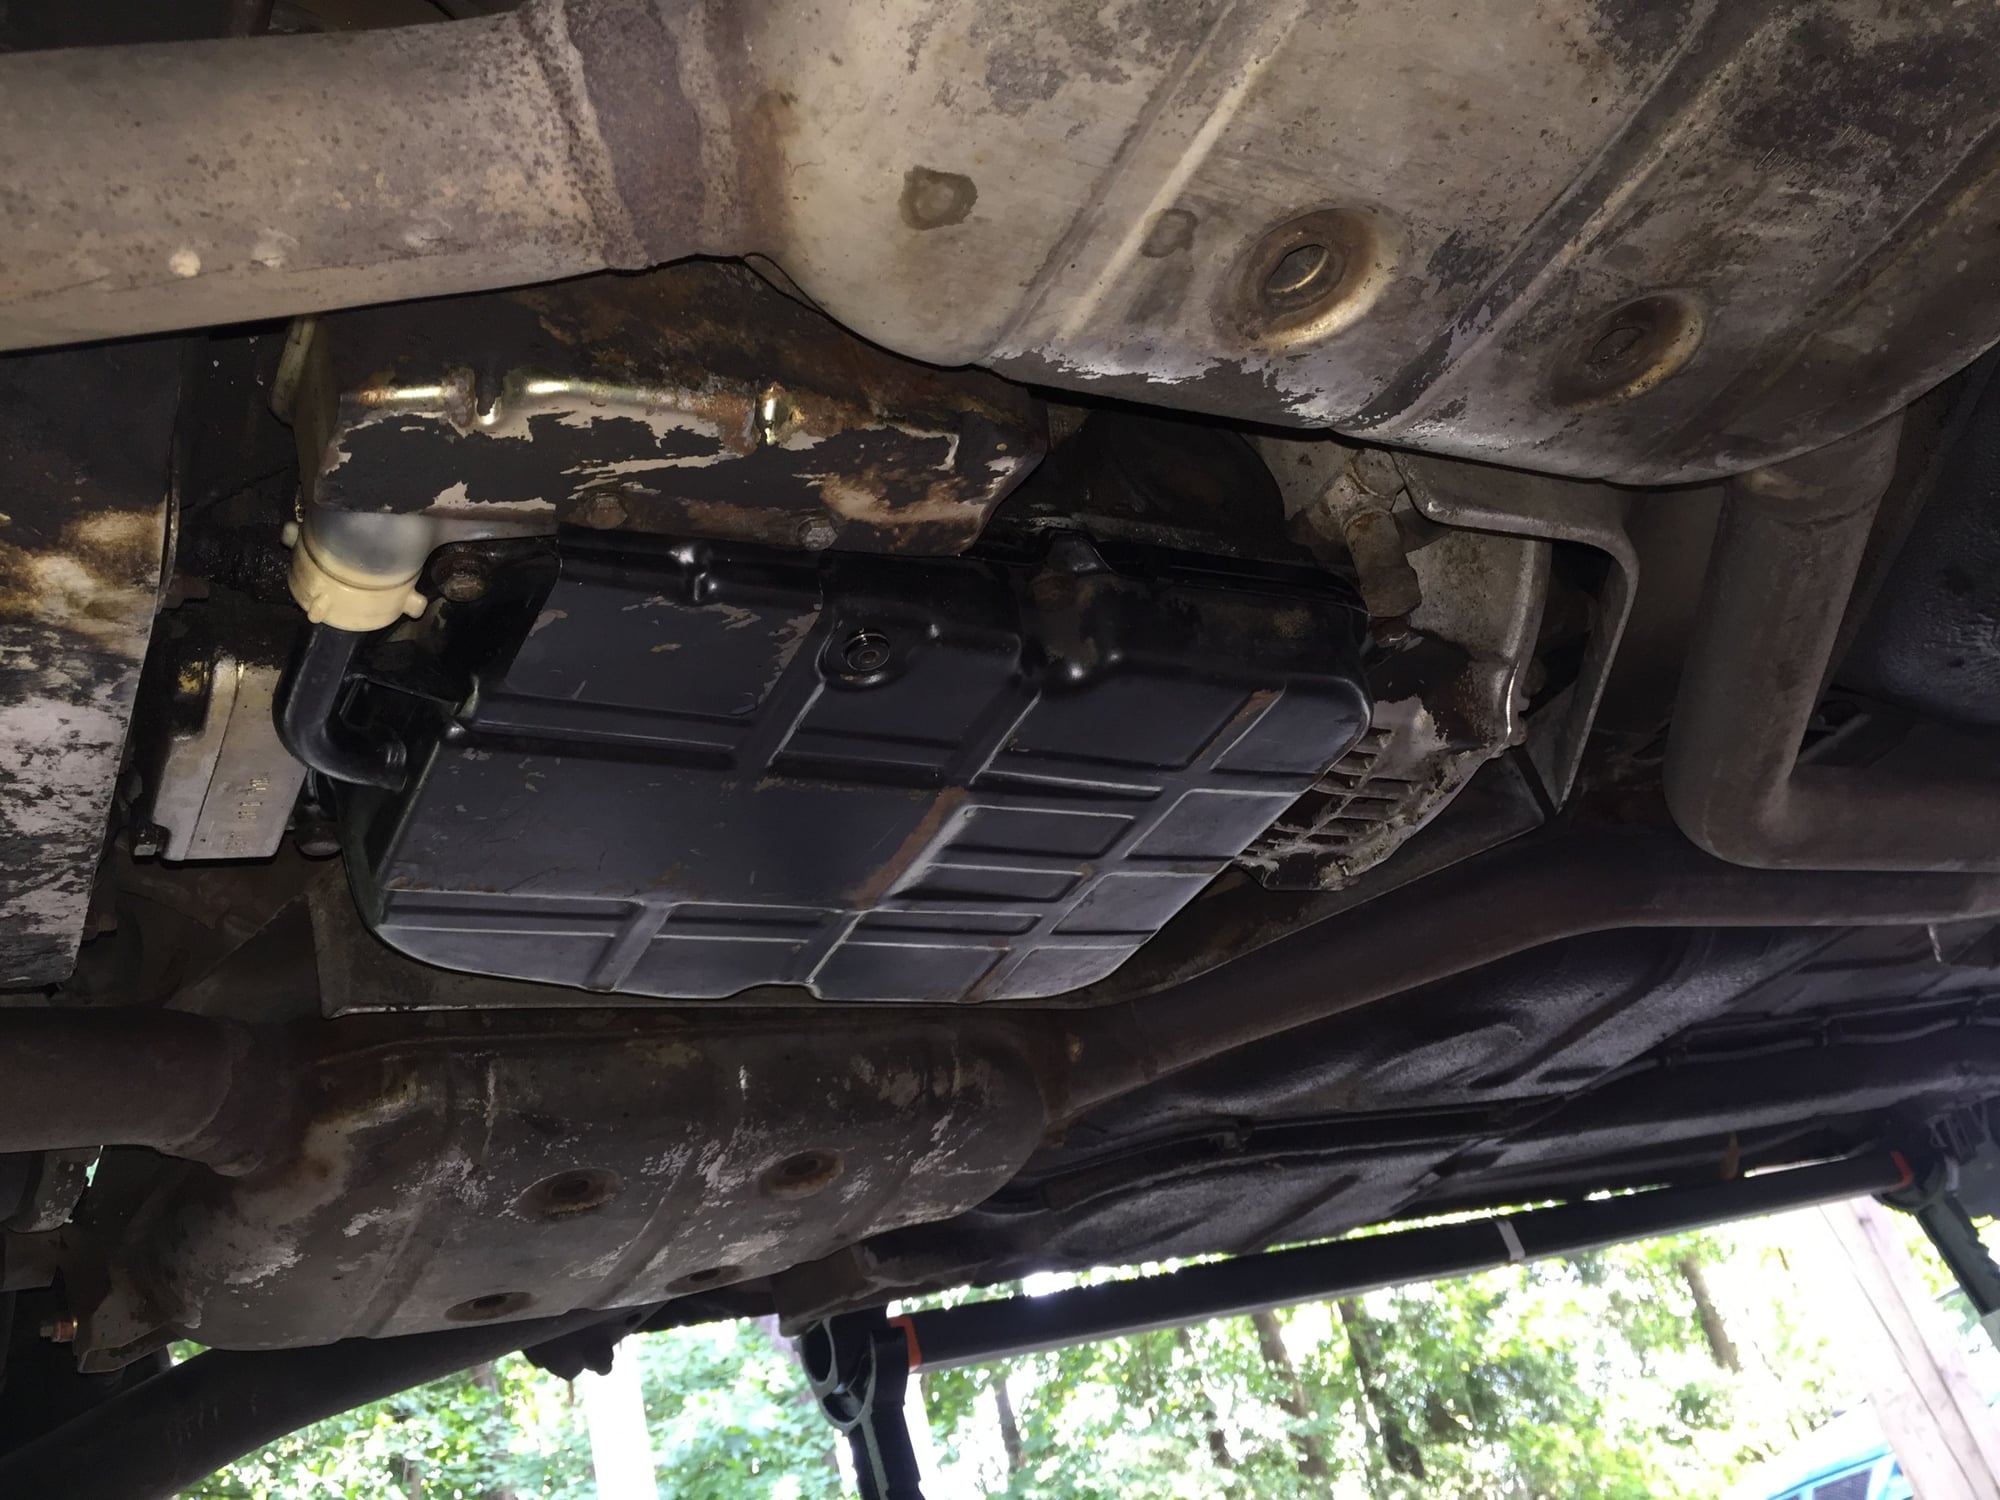
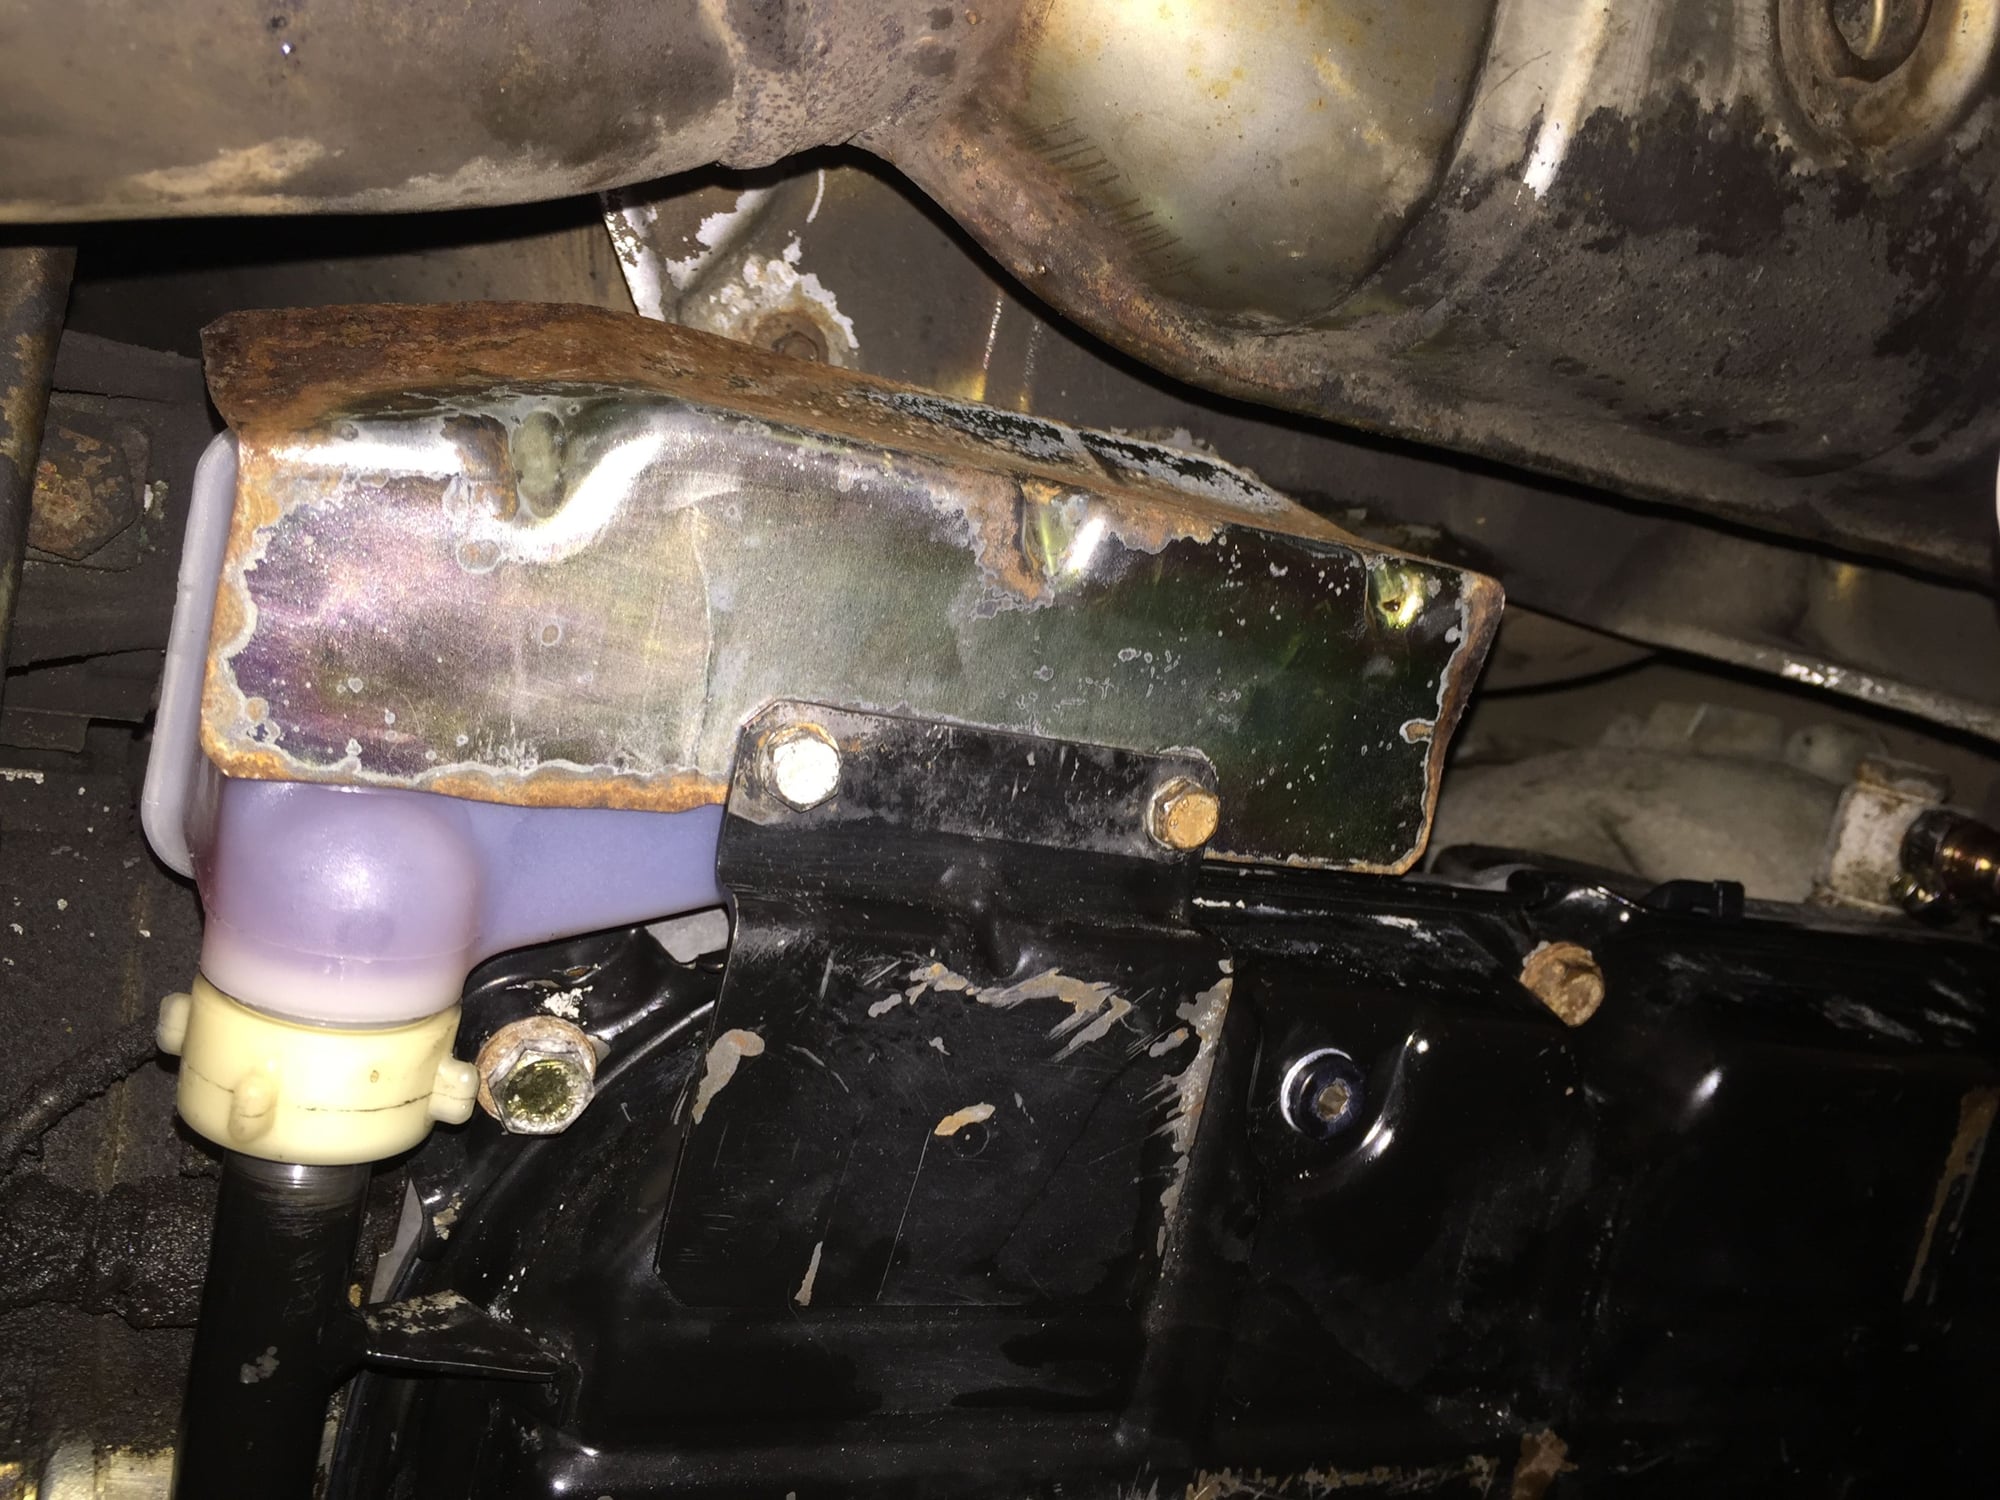
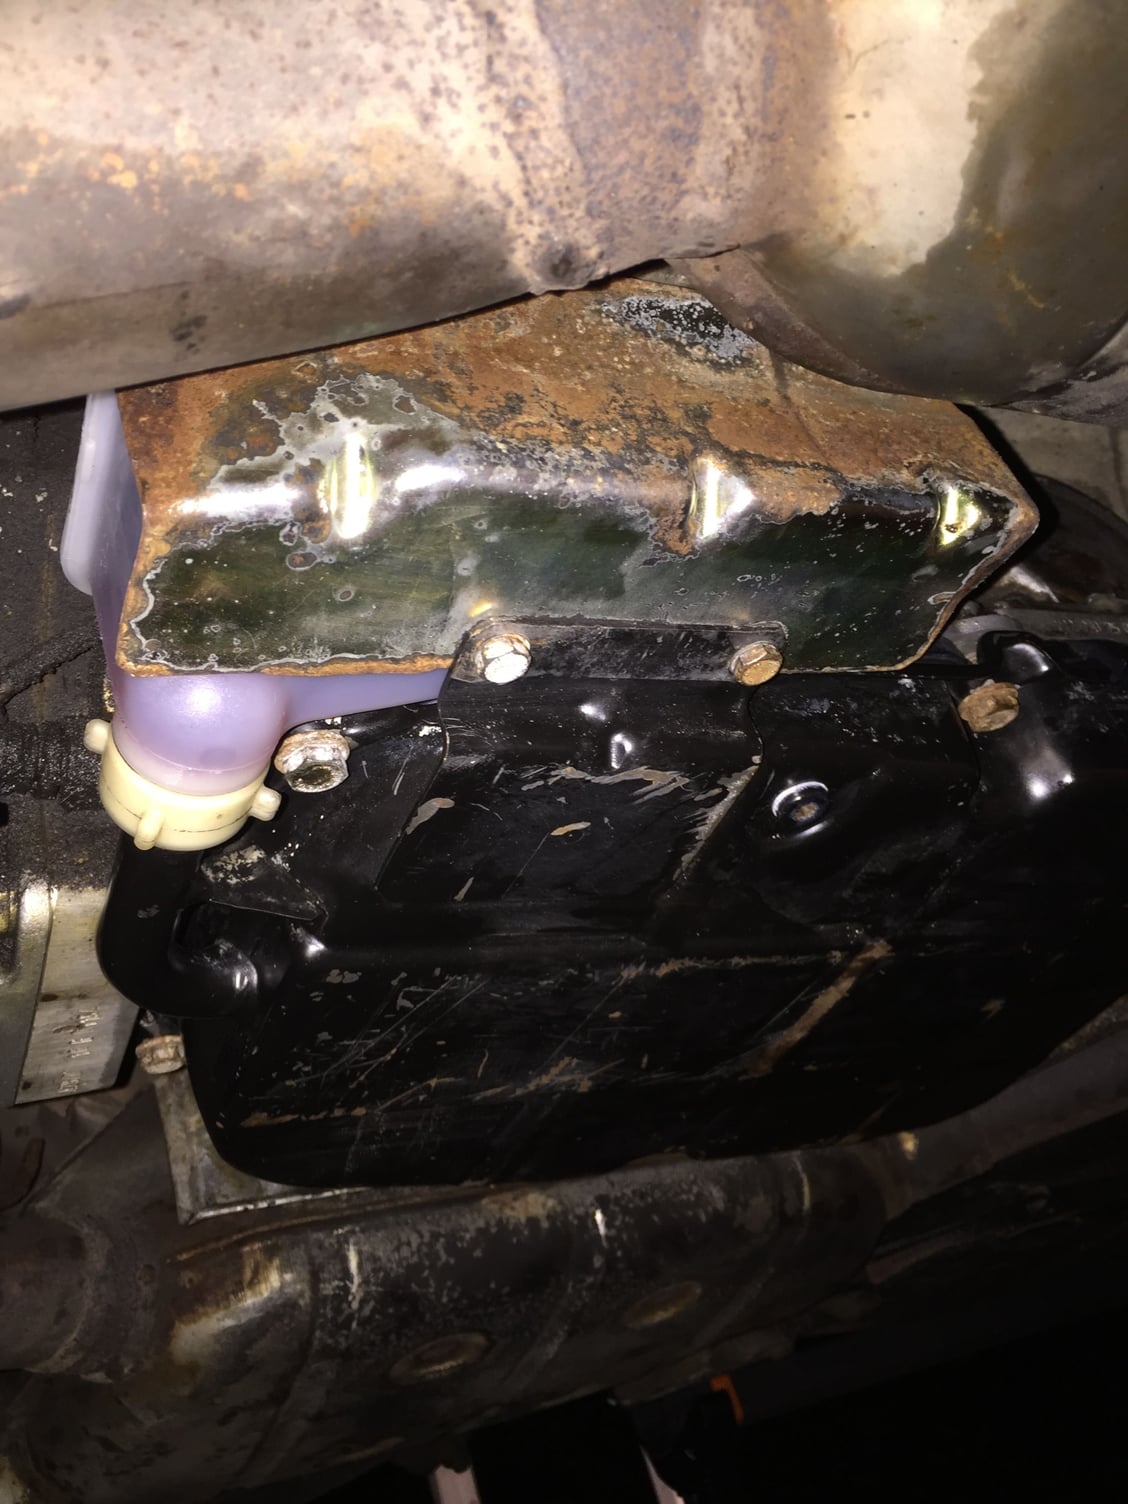
Having replaced the modulator and sundries, I moved on to pulling the pan and reservoir.
They came off with a minimum of fuss. Though, there were a couple of catches.
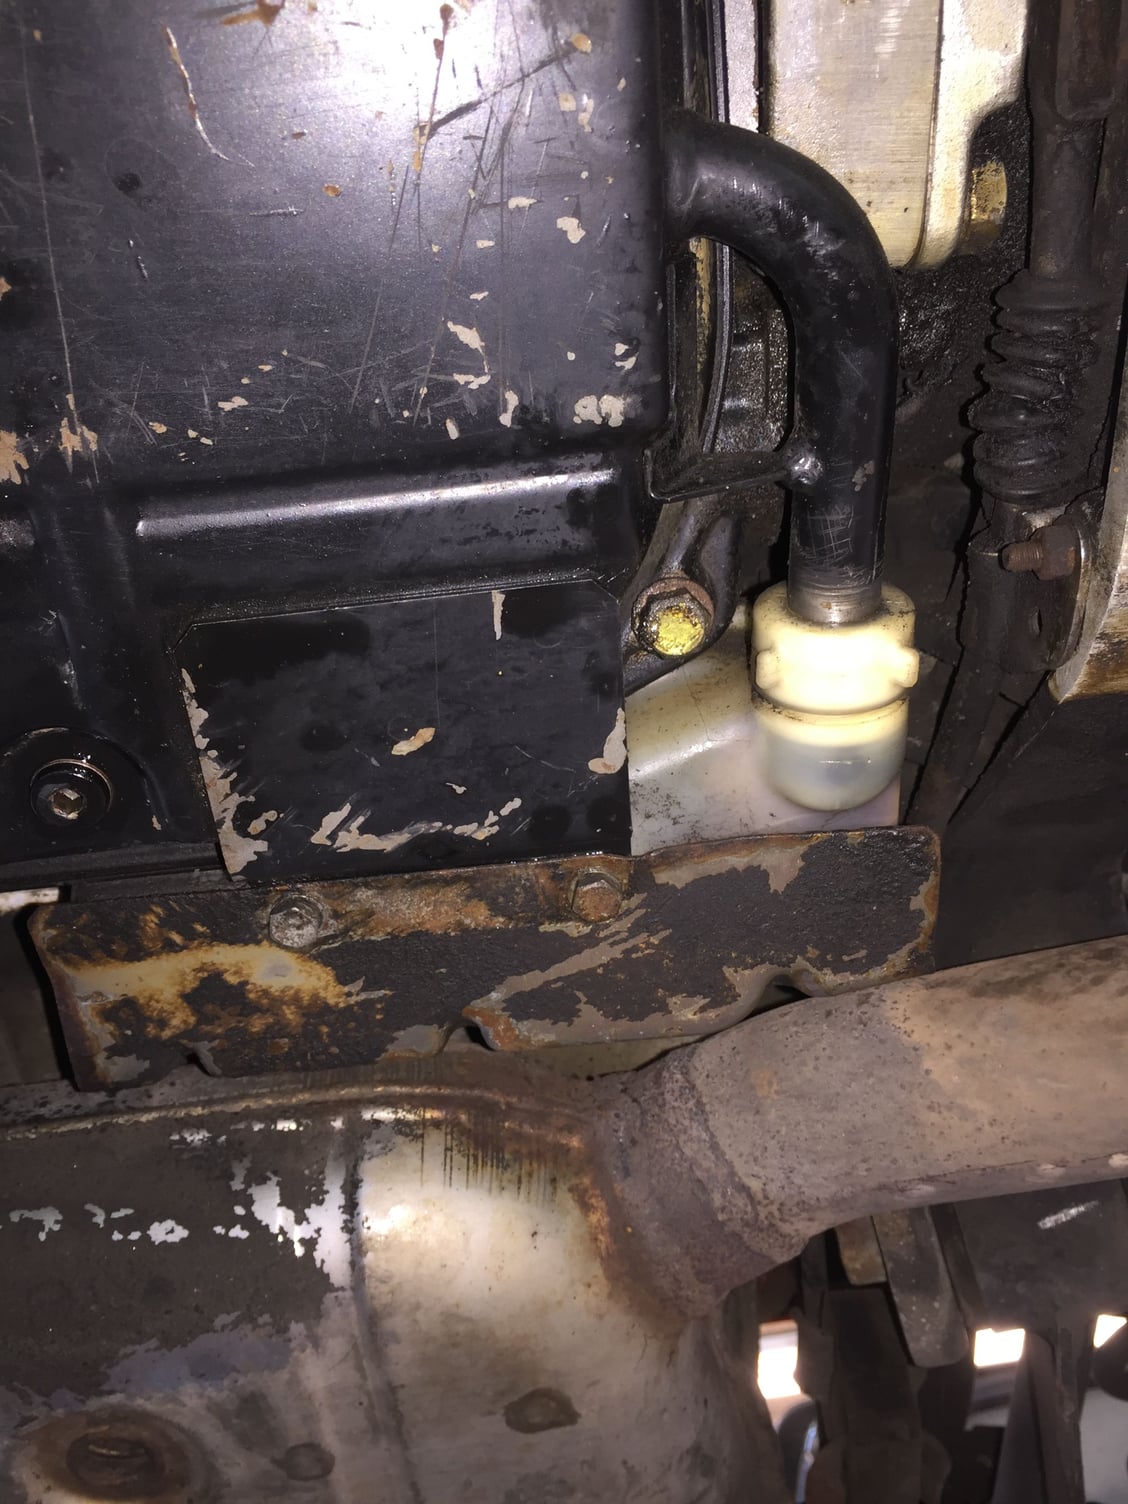
I removed the reservoir heat shield and unscrewed the coupling nut for the reservoir to pan tube. I could not get the reservoir to move or come loose.
Changing tactics, I tried to remove the pan. It would not come straight down. I figured out that I had to tilt the pan slightly to get the reservoir to clear the pan rail on the transmission casing. Then I found out about the vent line to the top of the reservoir.
Remember, I am making all this up as I go.
With the vent line disconnected and the pan down, I finally figured out that the plastic around the threaded mounting bosses had been compressed into the mounting bracket. I popped the reservoir free and removed it from the tube.
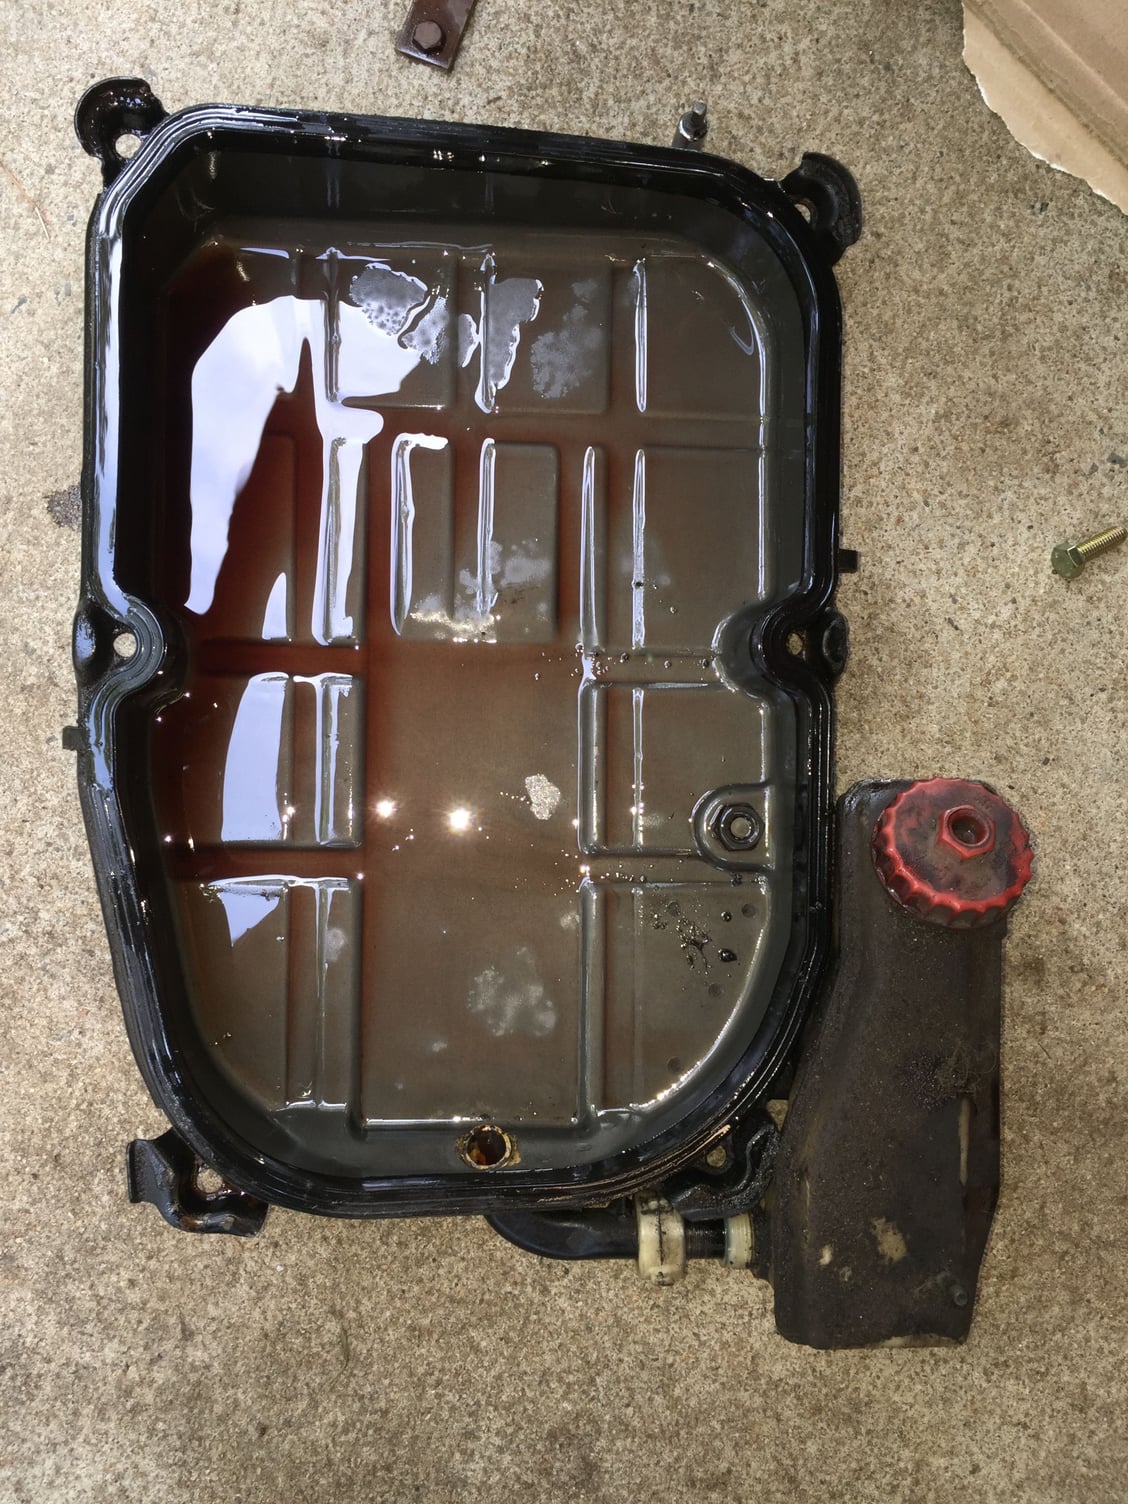
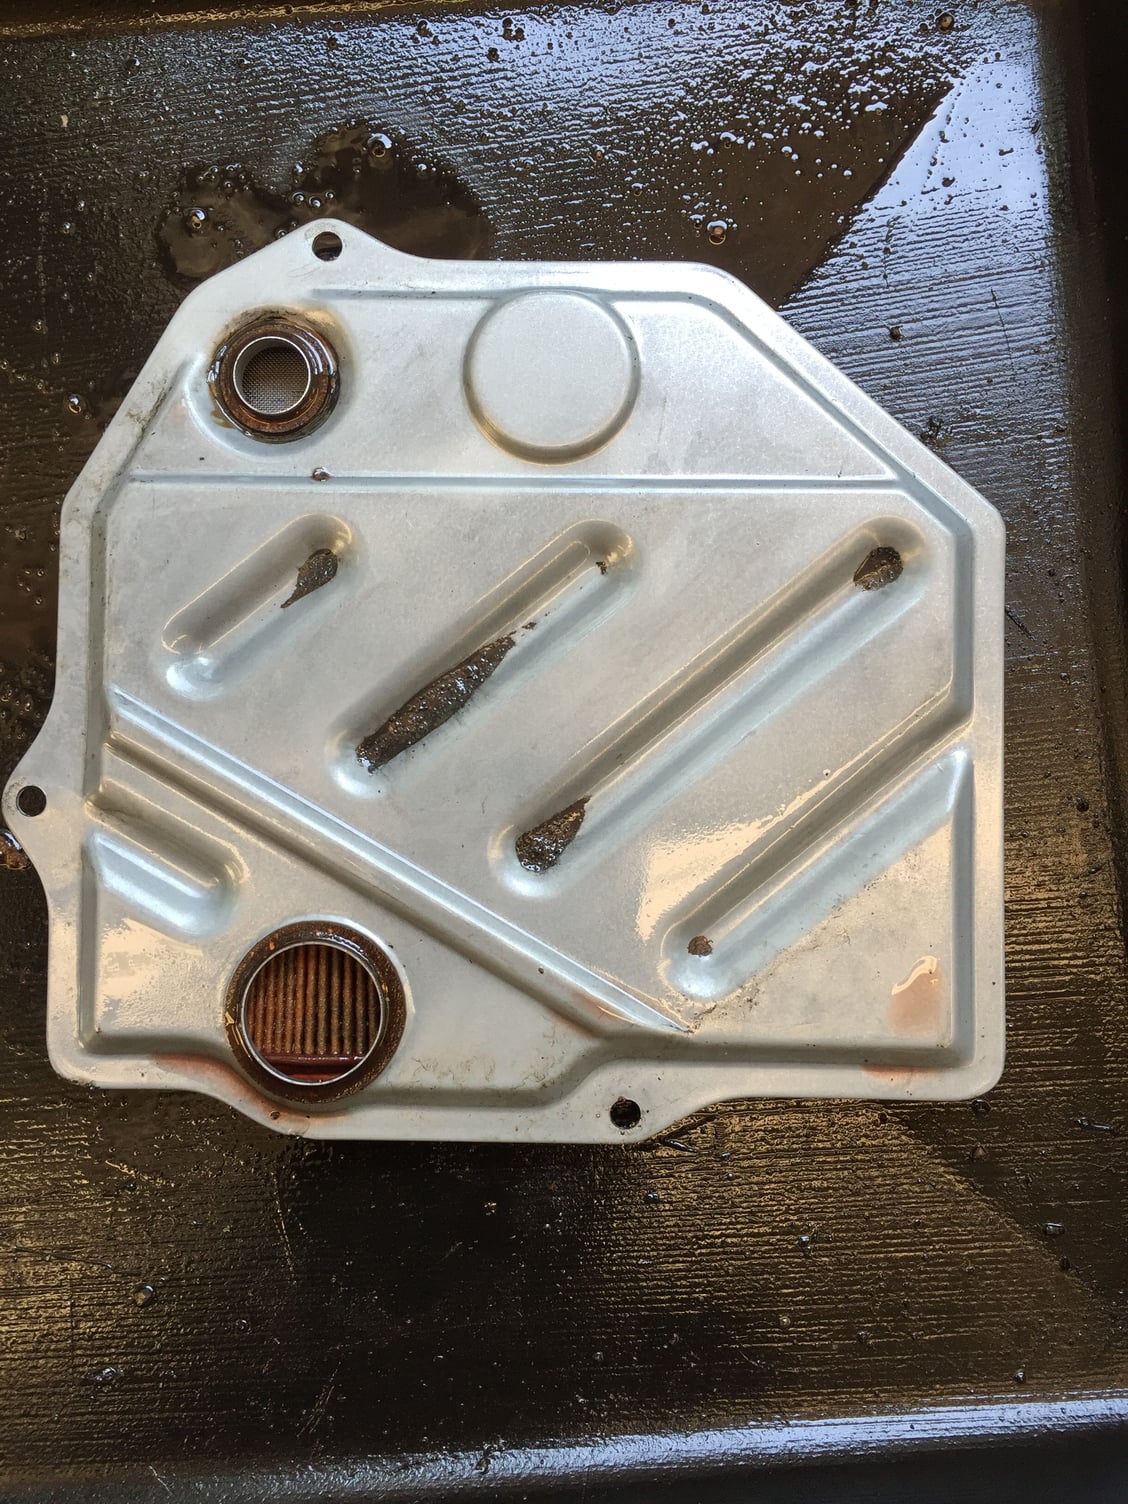
I was surprised at the lack of sludge and debris in the transmission oil pan. For being 18 years since the last fluid and filter change, I expected more mess. There were a couple of wisps in the pan. When I pulled the filter down, I found a little sludge in the depressions on top of the filter. Not bad at all.
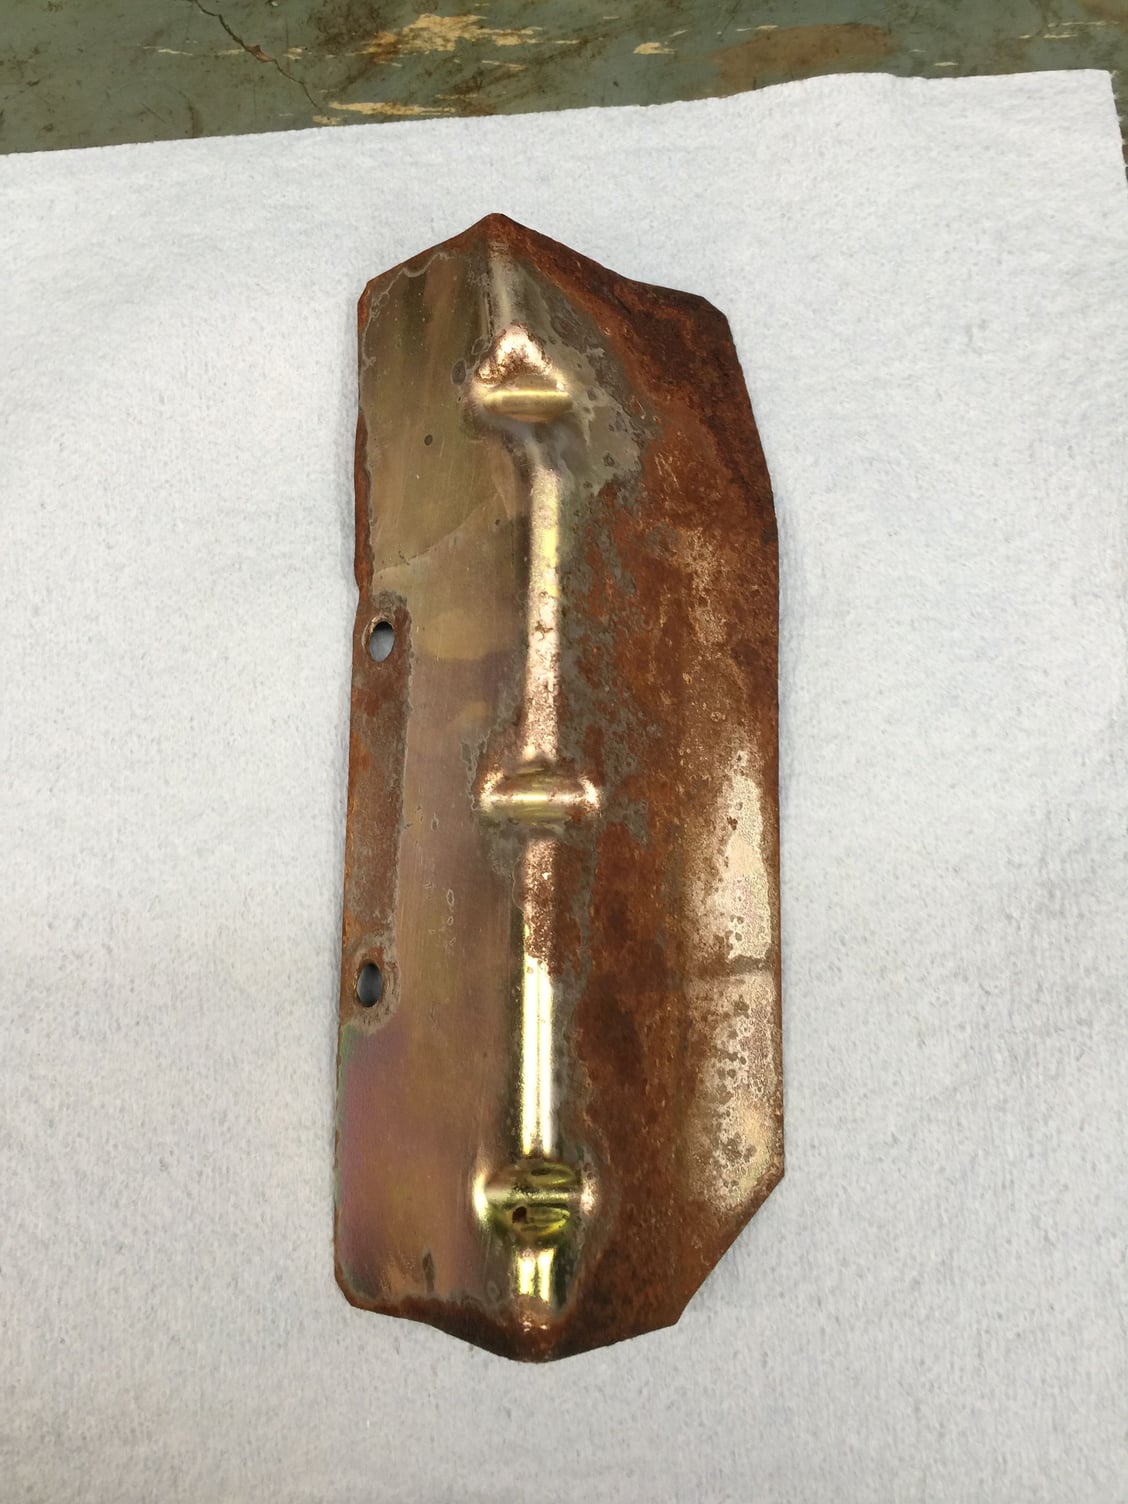
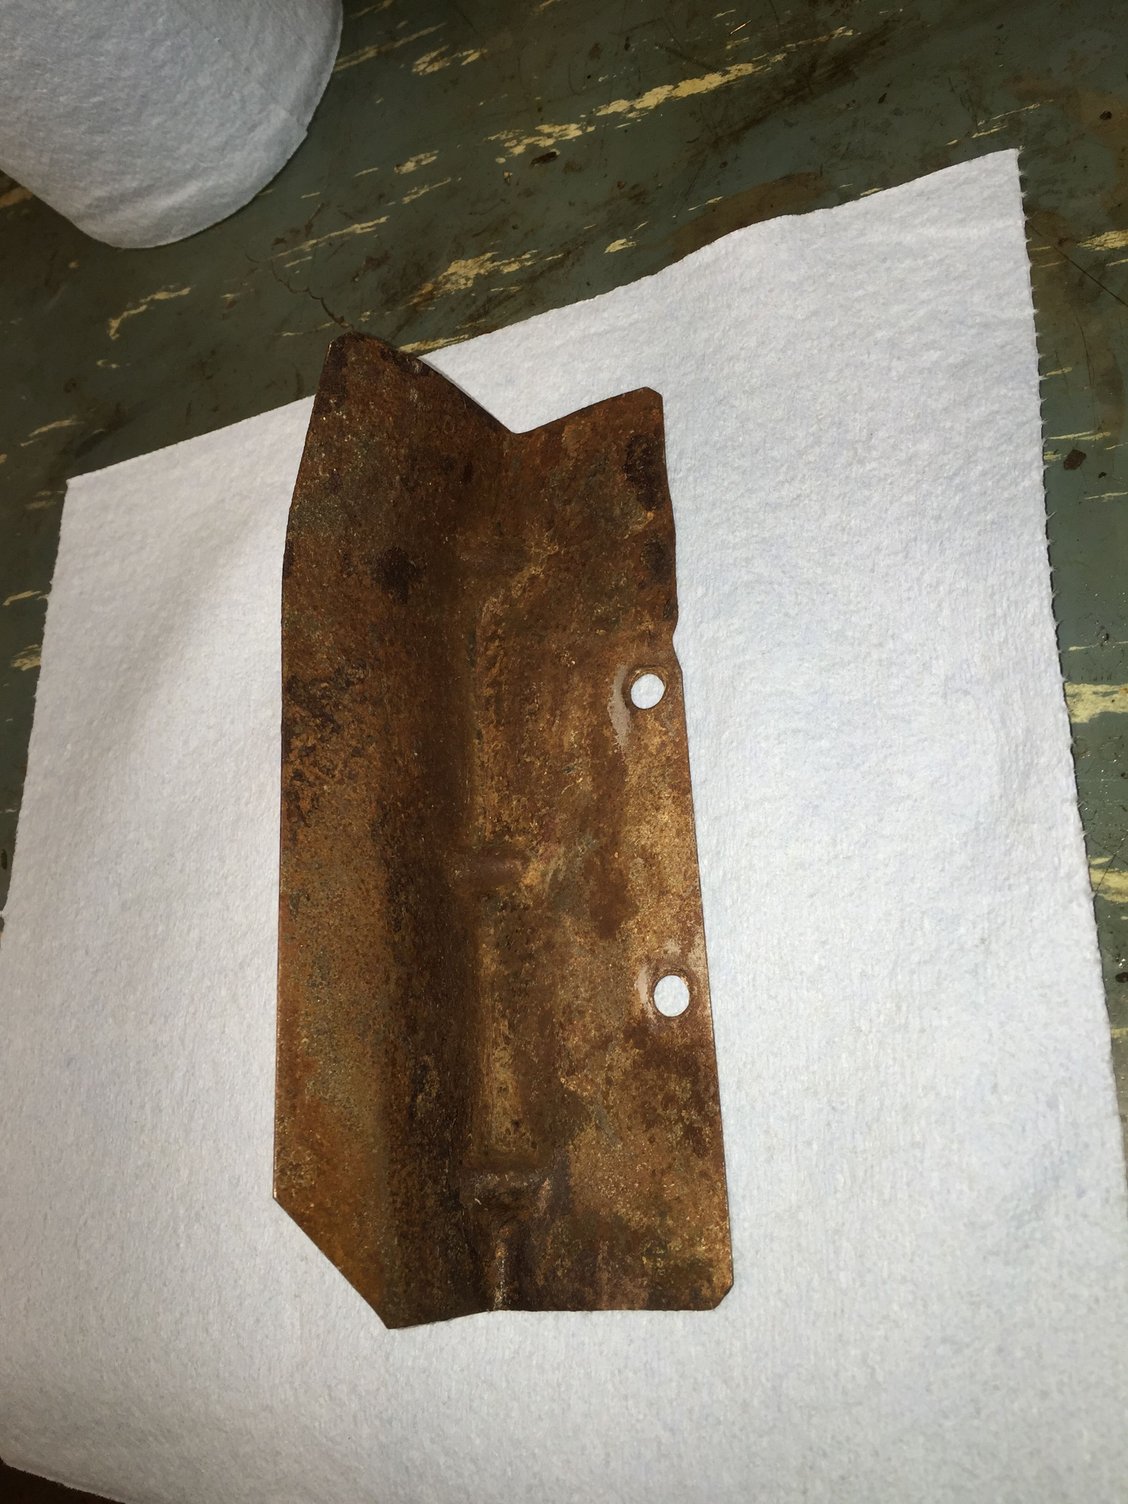
The heat shield was a disastrous mess of rust and grime. It went straight into my ancient pot of carburetor dip. This is the good stuff from before the EPA took the teeth out of the carb dip. A few hours of soaking cleaned it right up. Most of the plating is gone and there is a healthy coating of surface rust, but it is still a serviceable heat shield. I may see if Mark Anderson has a better used one available.
Question: When I removed the heat shield, it was attached to the underside of the reservoir mounting bracket on the pan. After cleaning, I found a corrosion pattern implying it was on top of the bracket at one time. Possibly 18 years ago before the previous fluid and filter change.
I reinstalled the bracket in this position.
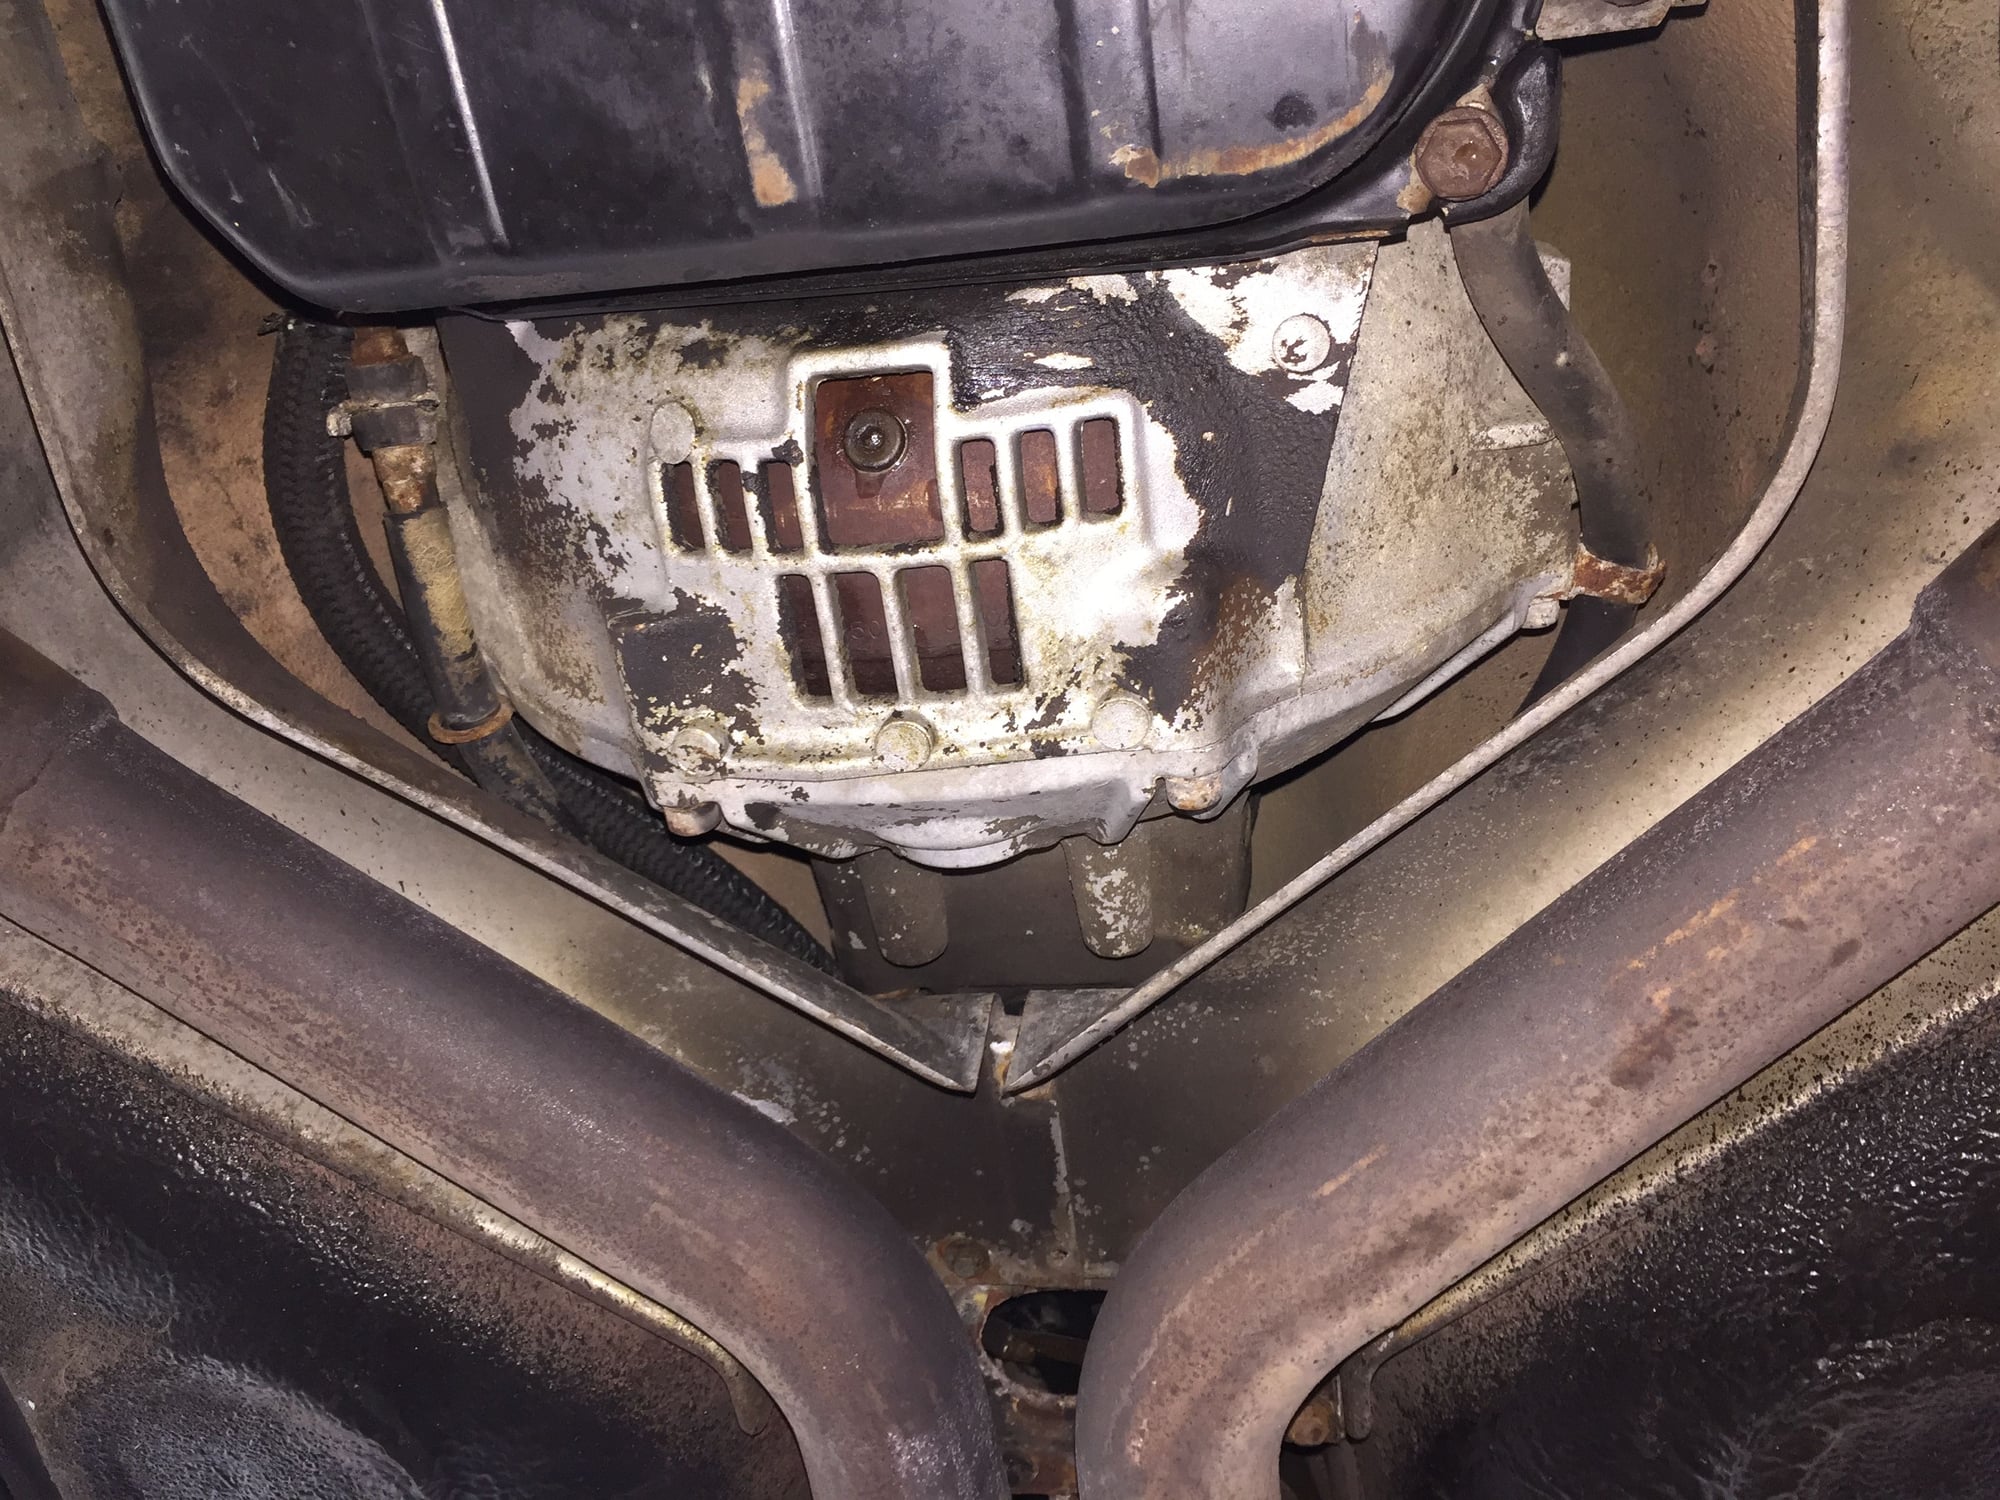
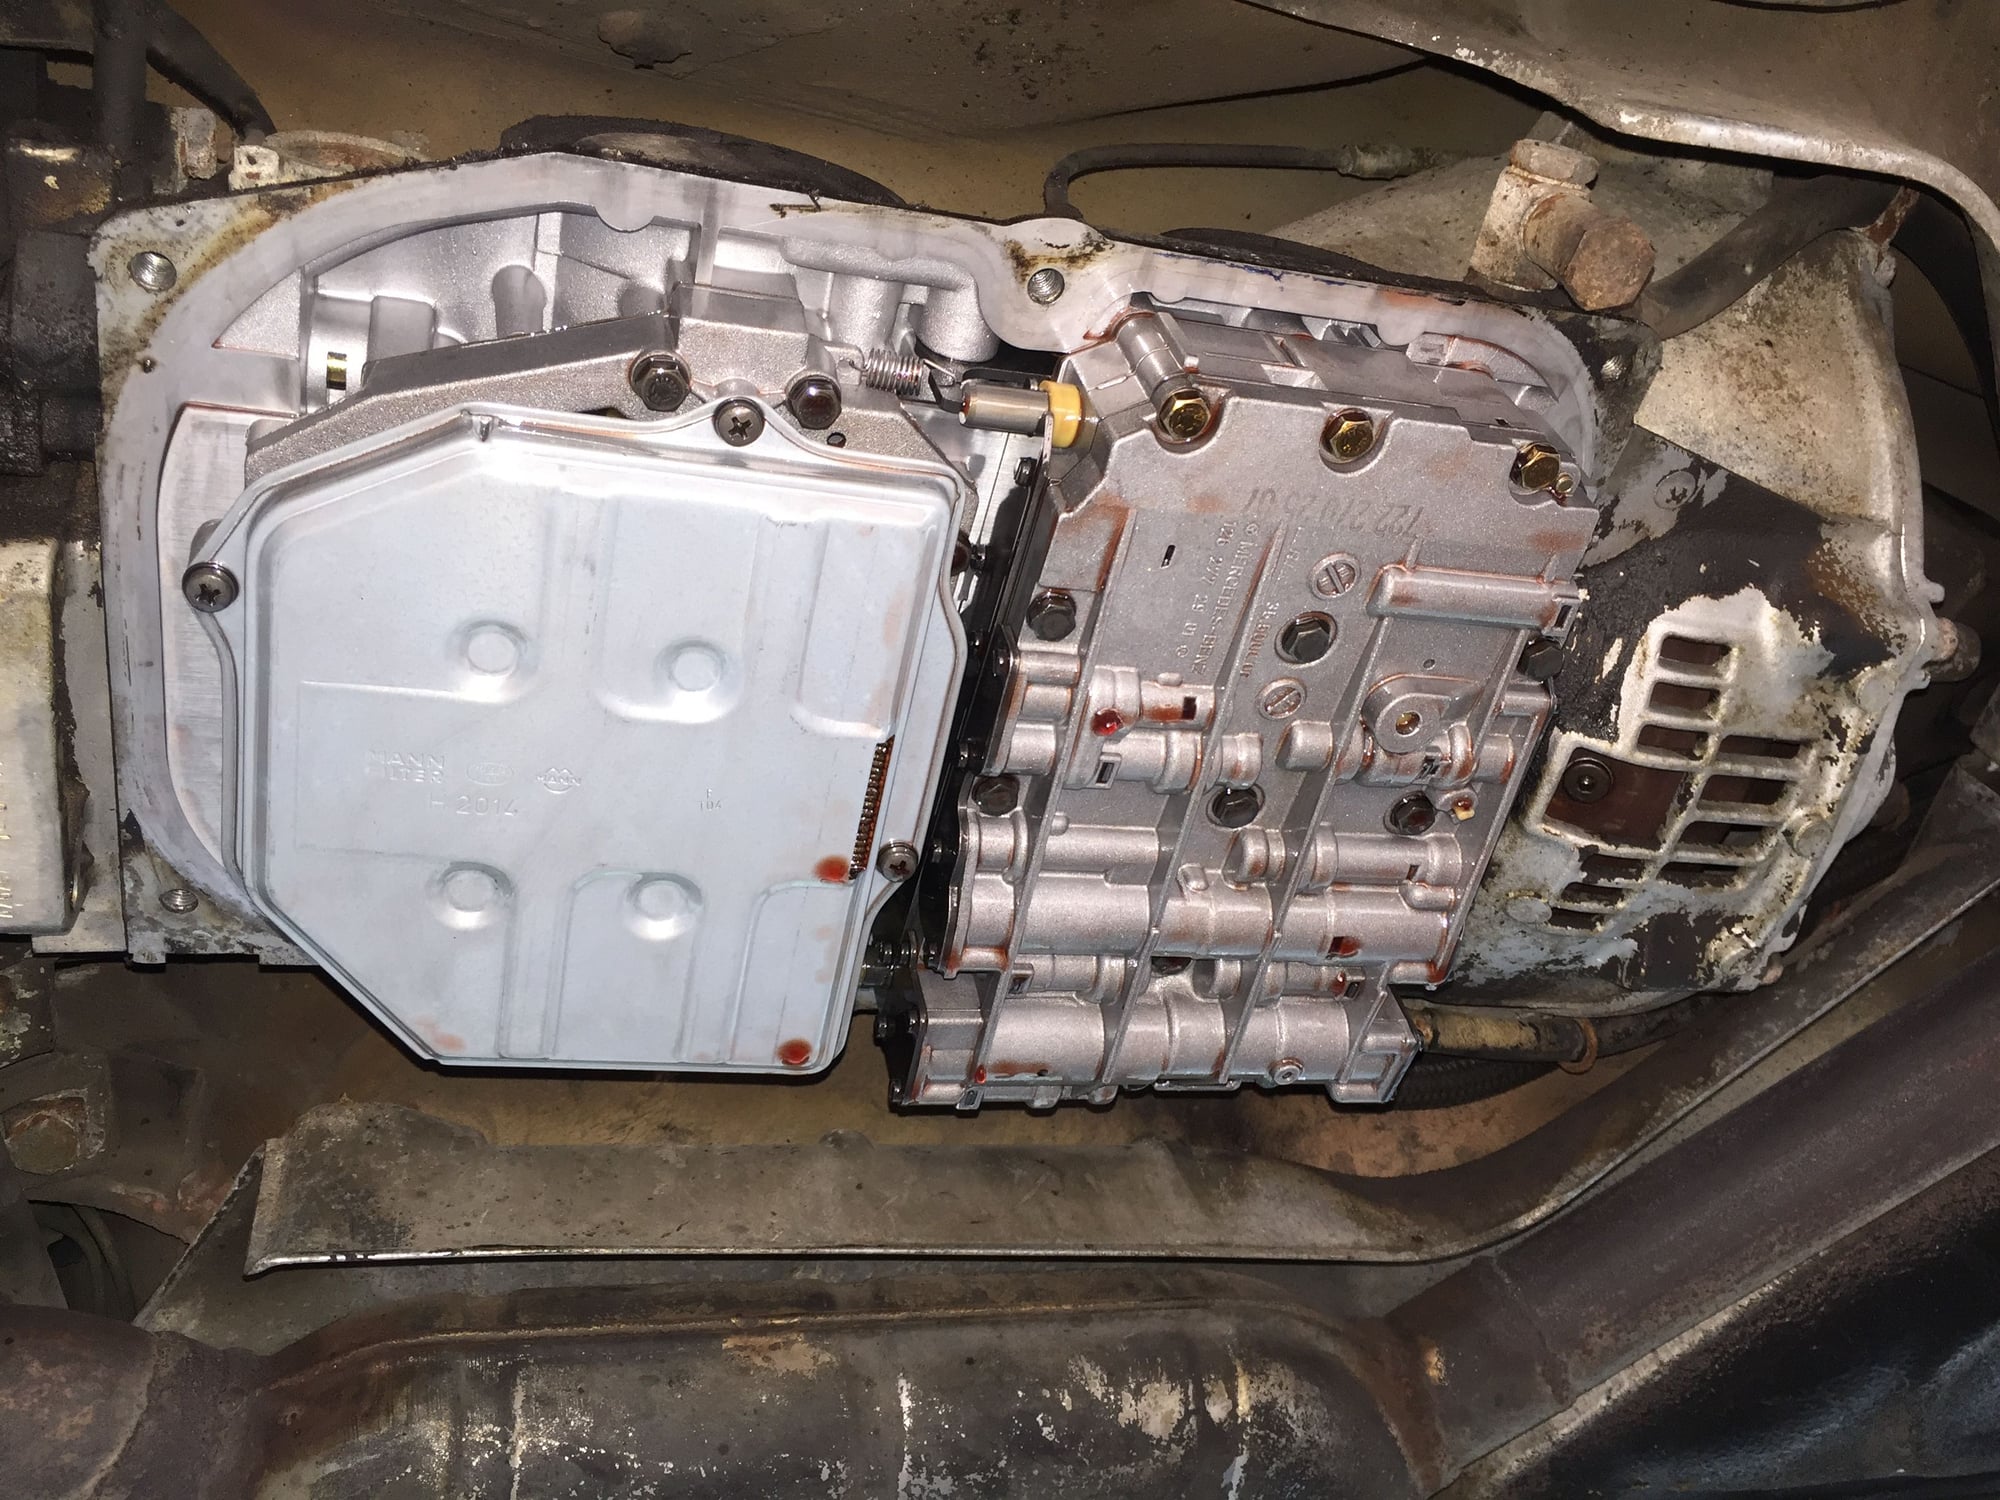
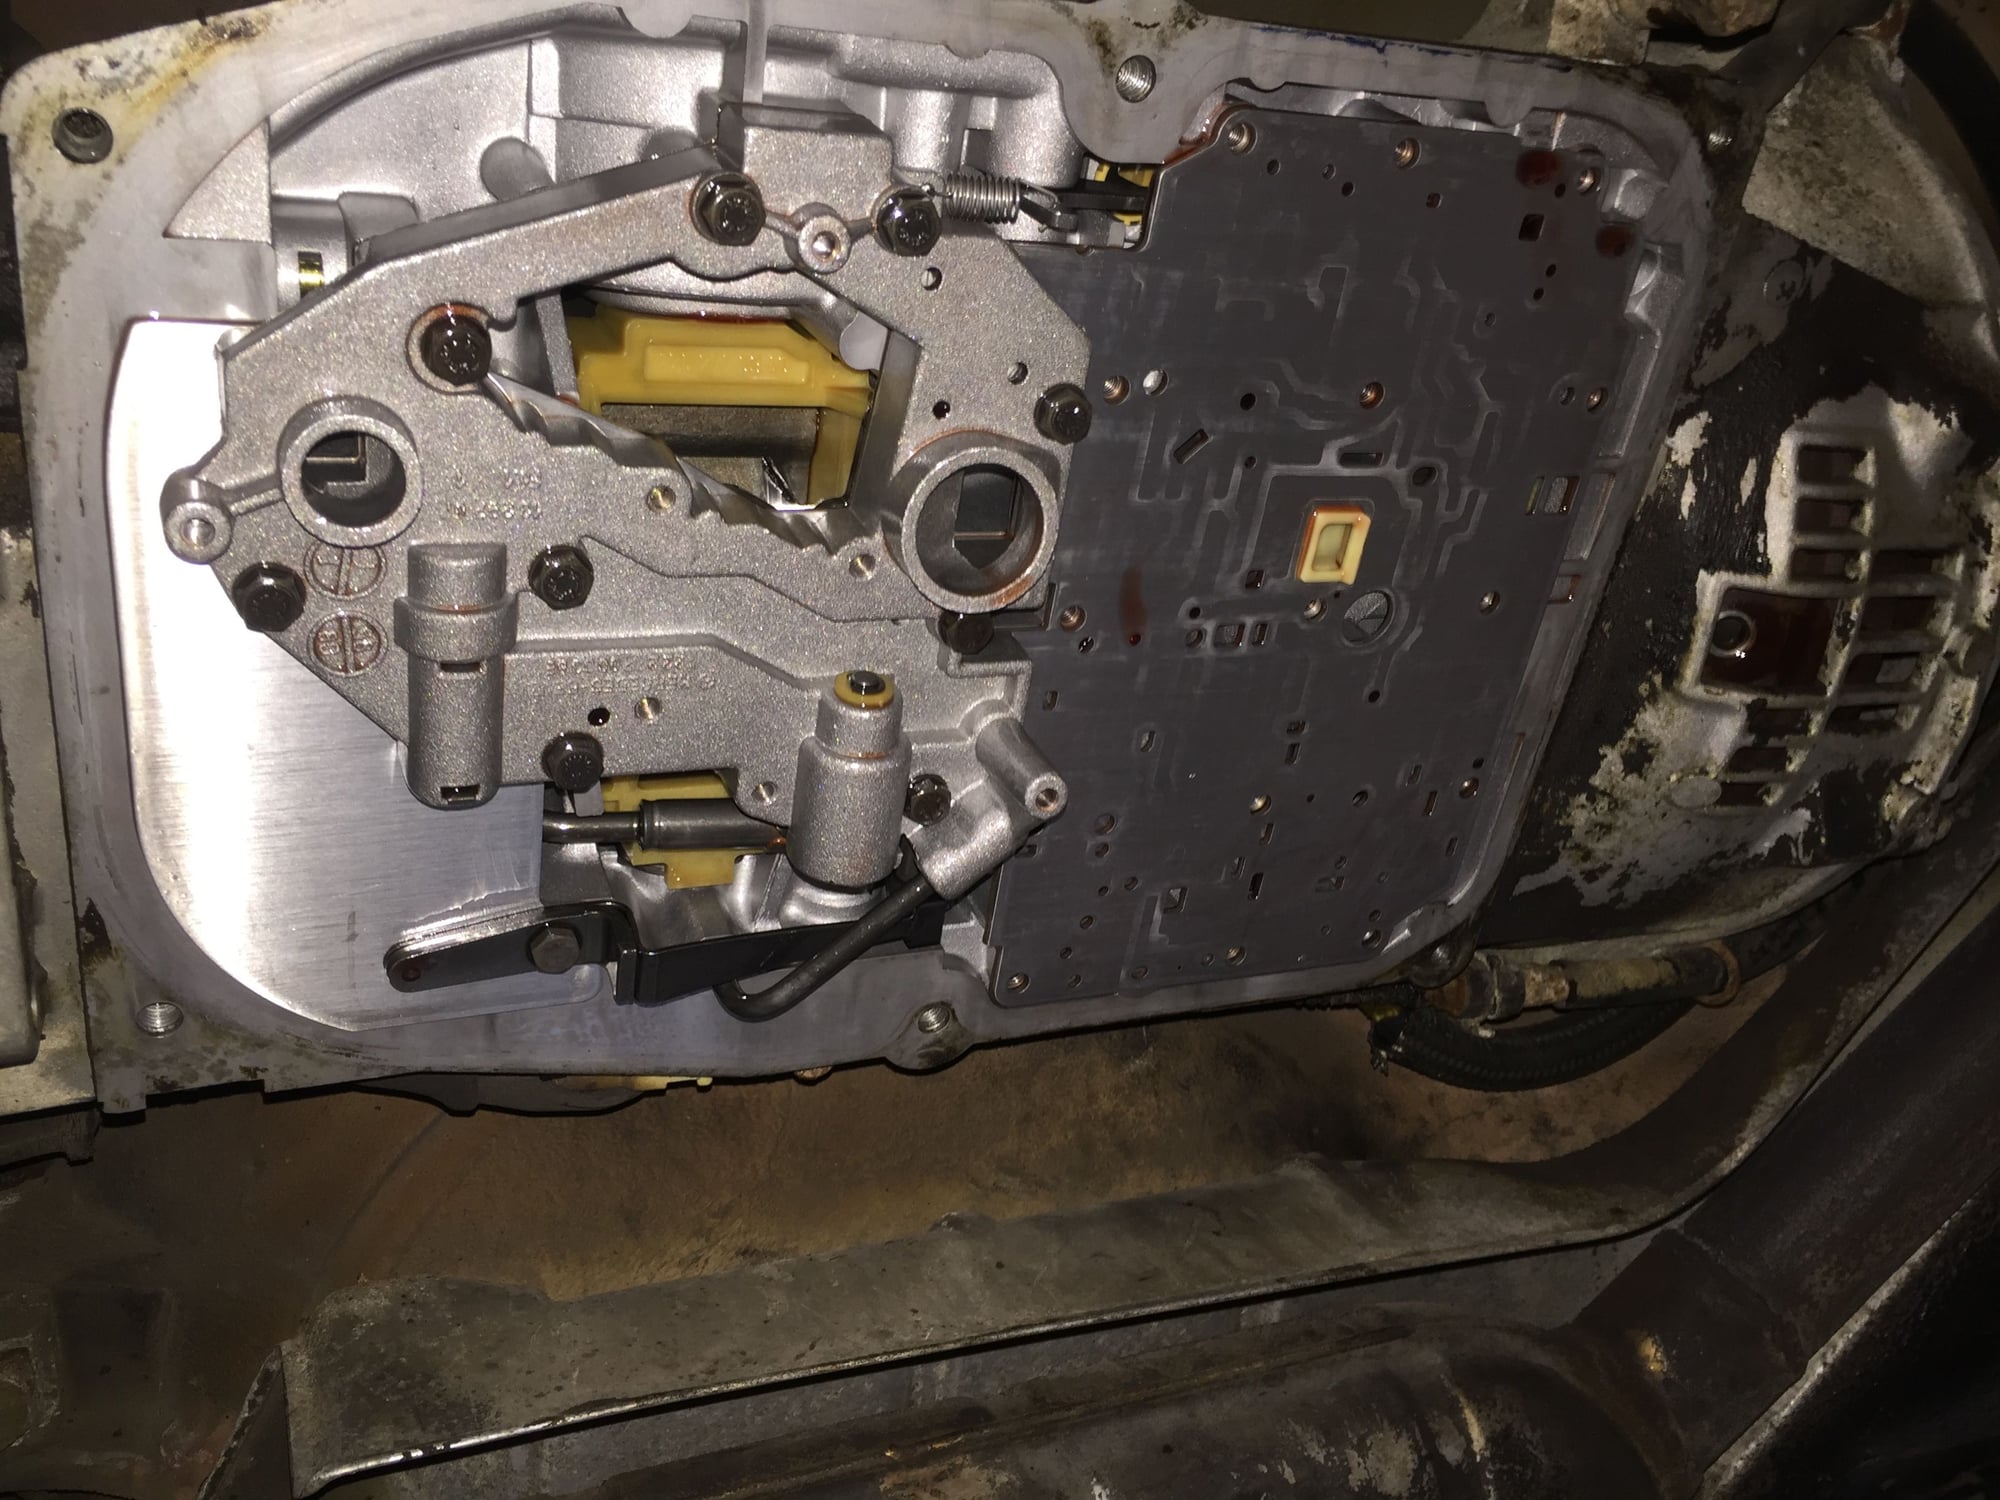
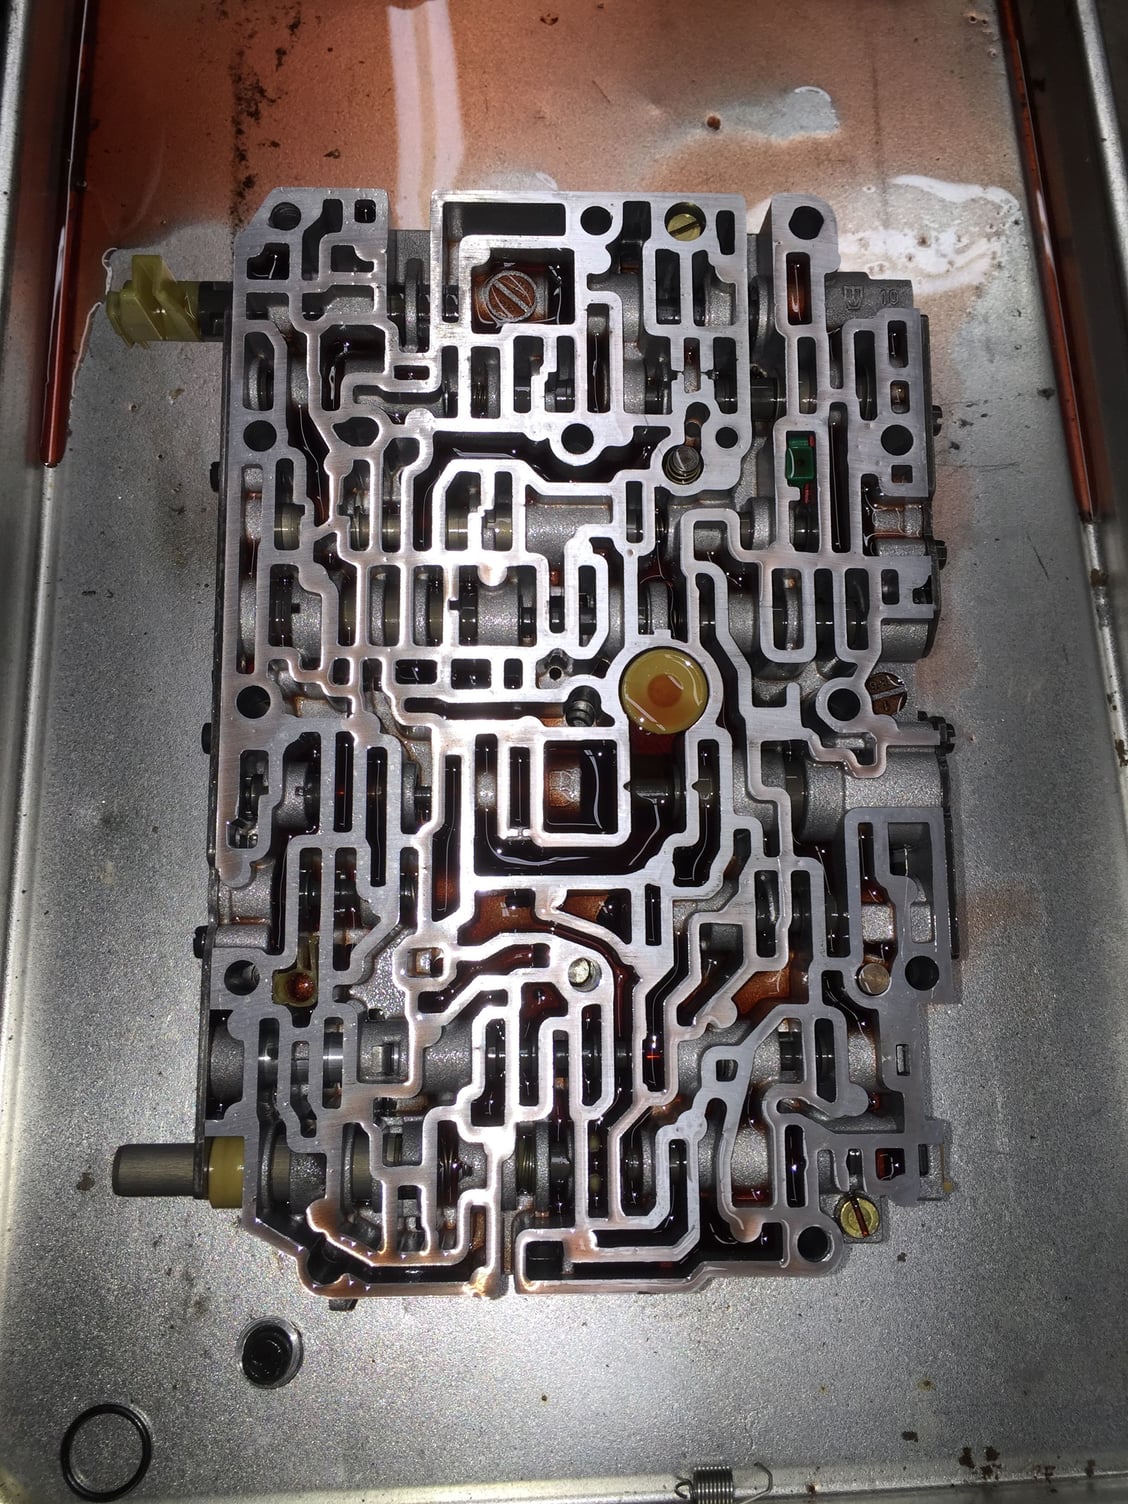
After countless readings of the WSM, Mercedes manuals, and Rennlist posts, I pulled down the valve body. It was actually anti-climactic. I misunderstood and thought you had to hold the valve body halves together while removing. Nope, it all comes down as one assembly.
I set the valve body aside, upside down, on a baking sheet to drip drain.
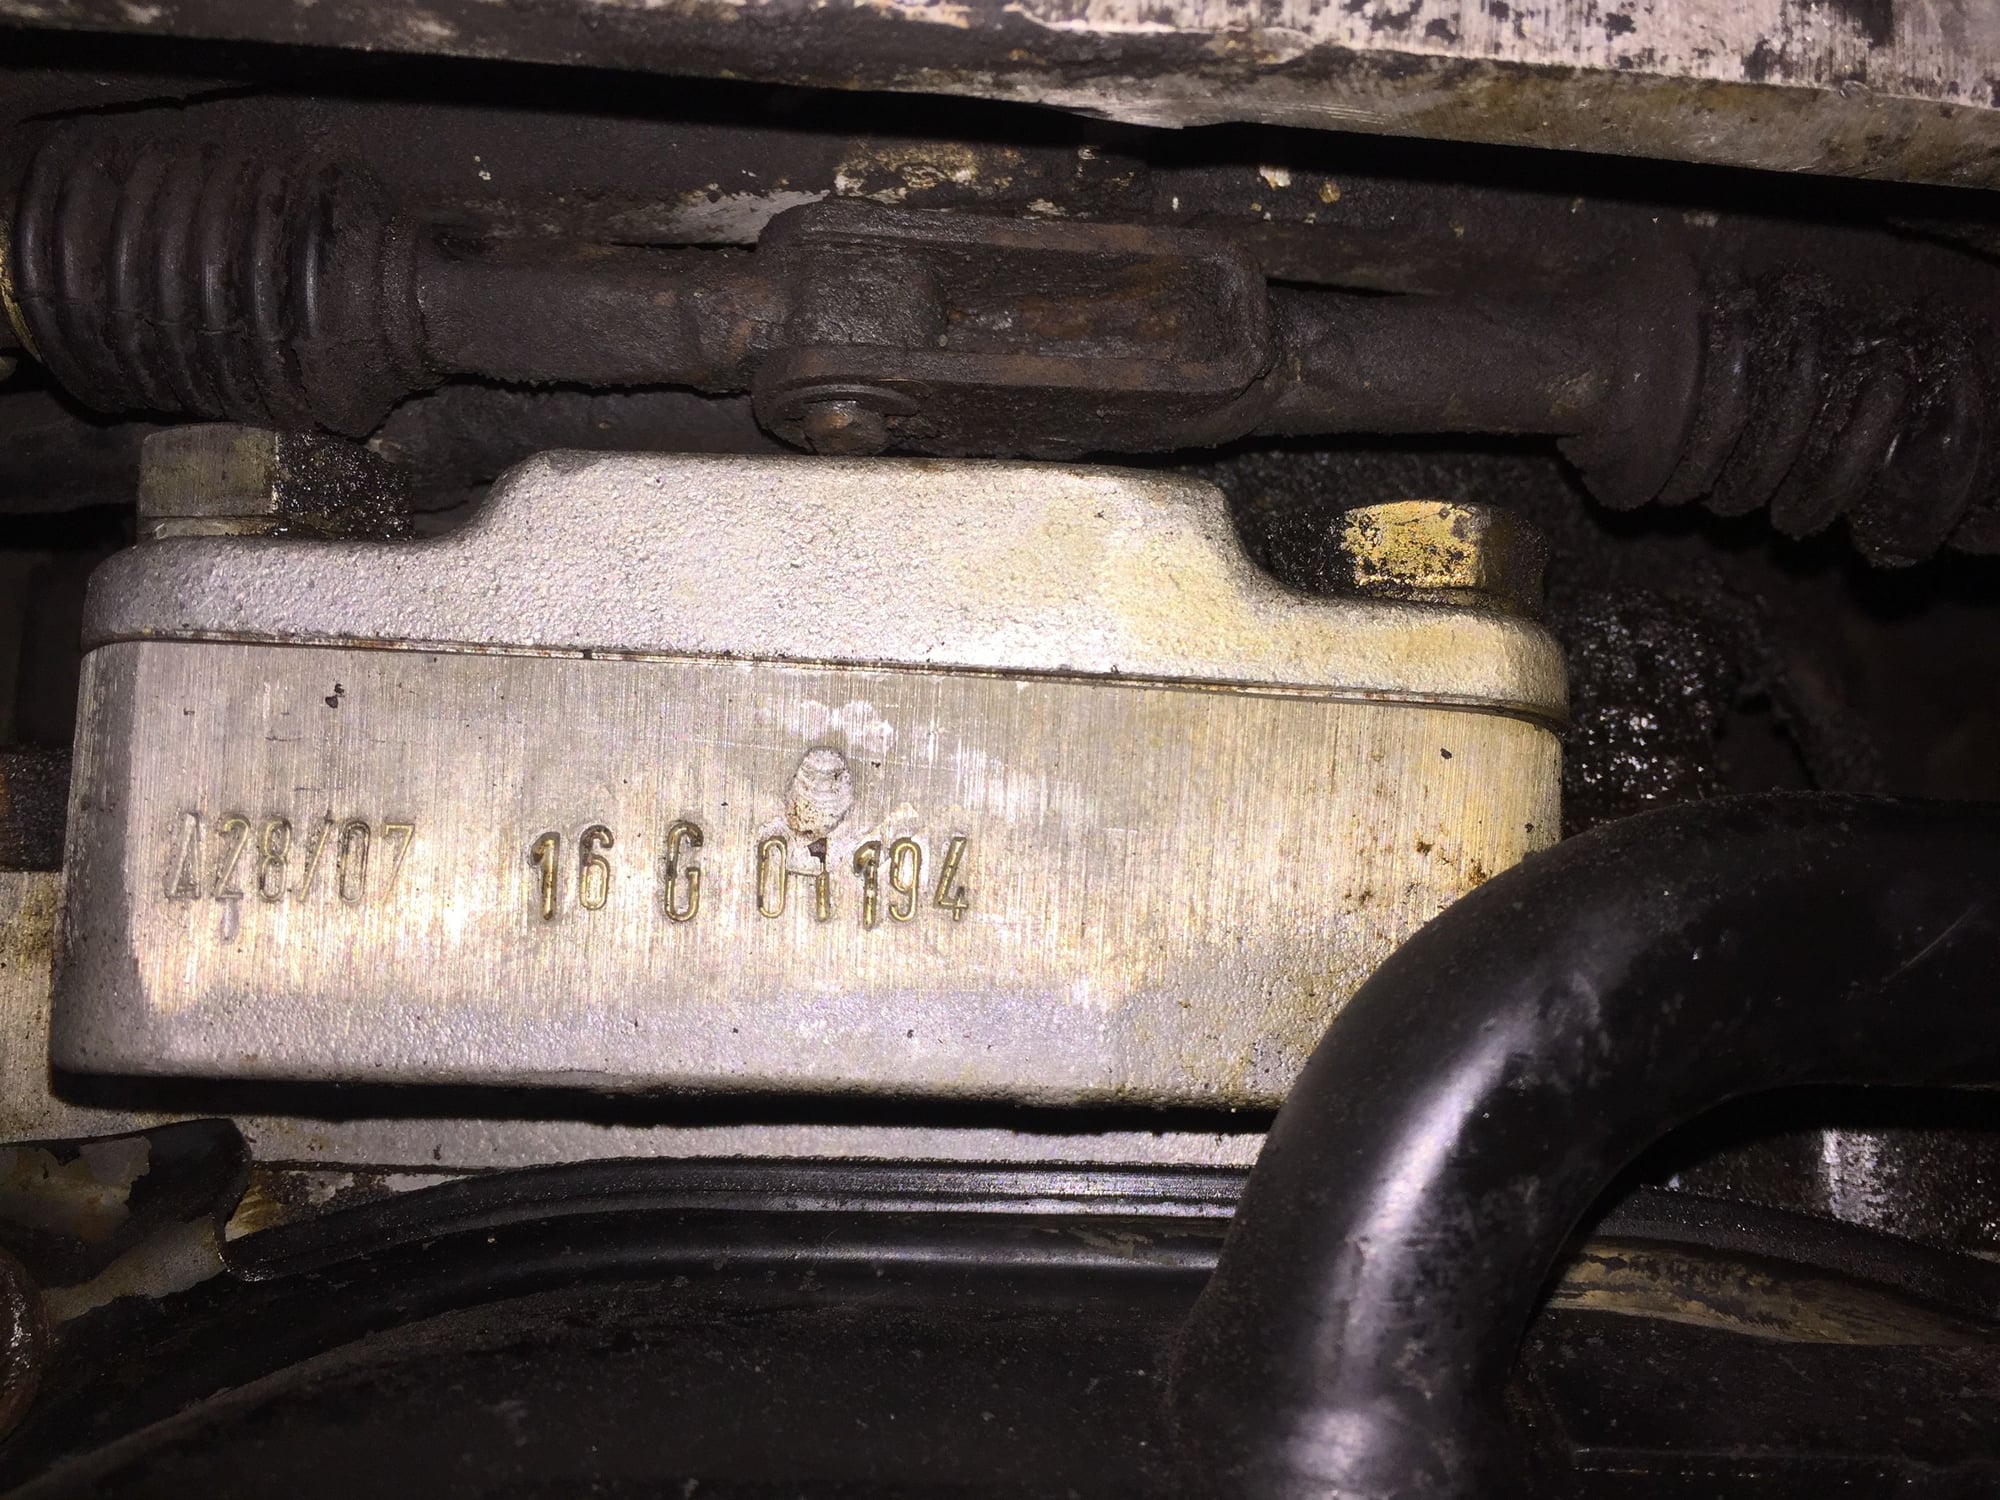
Porsche transmission numbers.
Infernal torque converter drain plug.
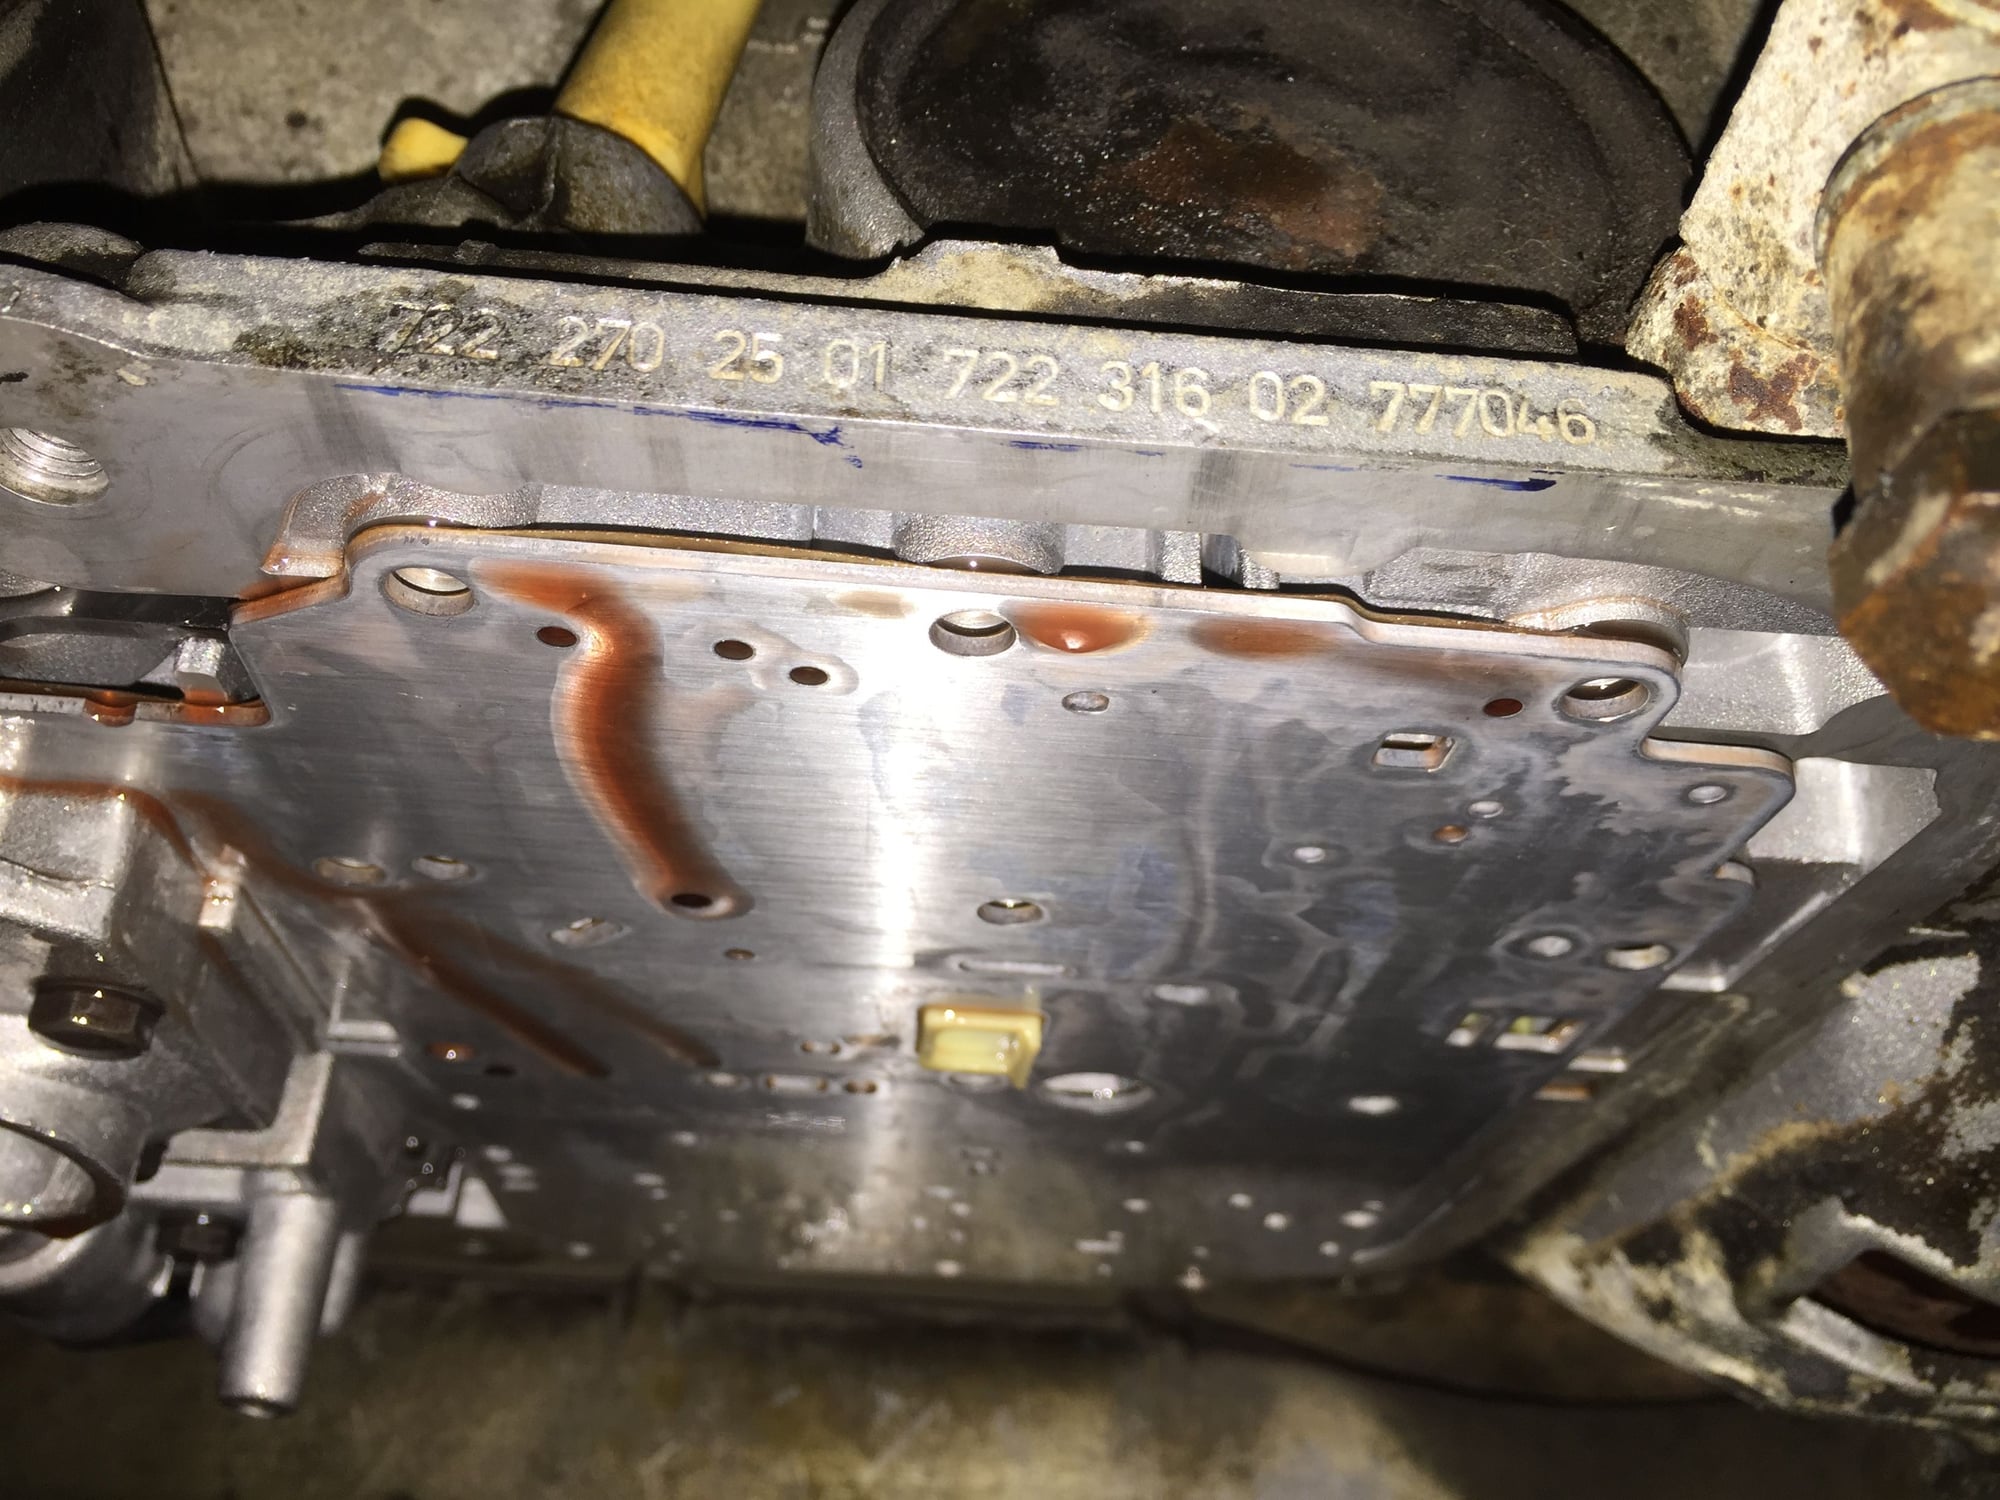
The crud in the bottom right of the pan was NOT in there. It fell in from the case. Sorry dr bob.
Not as intimidating as I expected. Not my first automatic transmission valve body.
The only real sludge I found was this little bit in the depressions on top of the old filter.
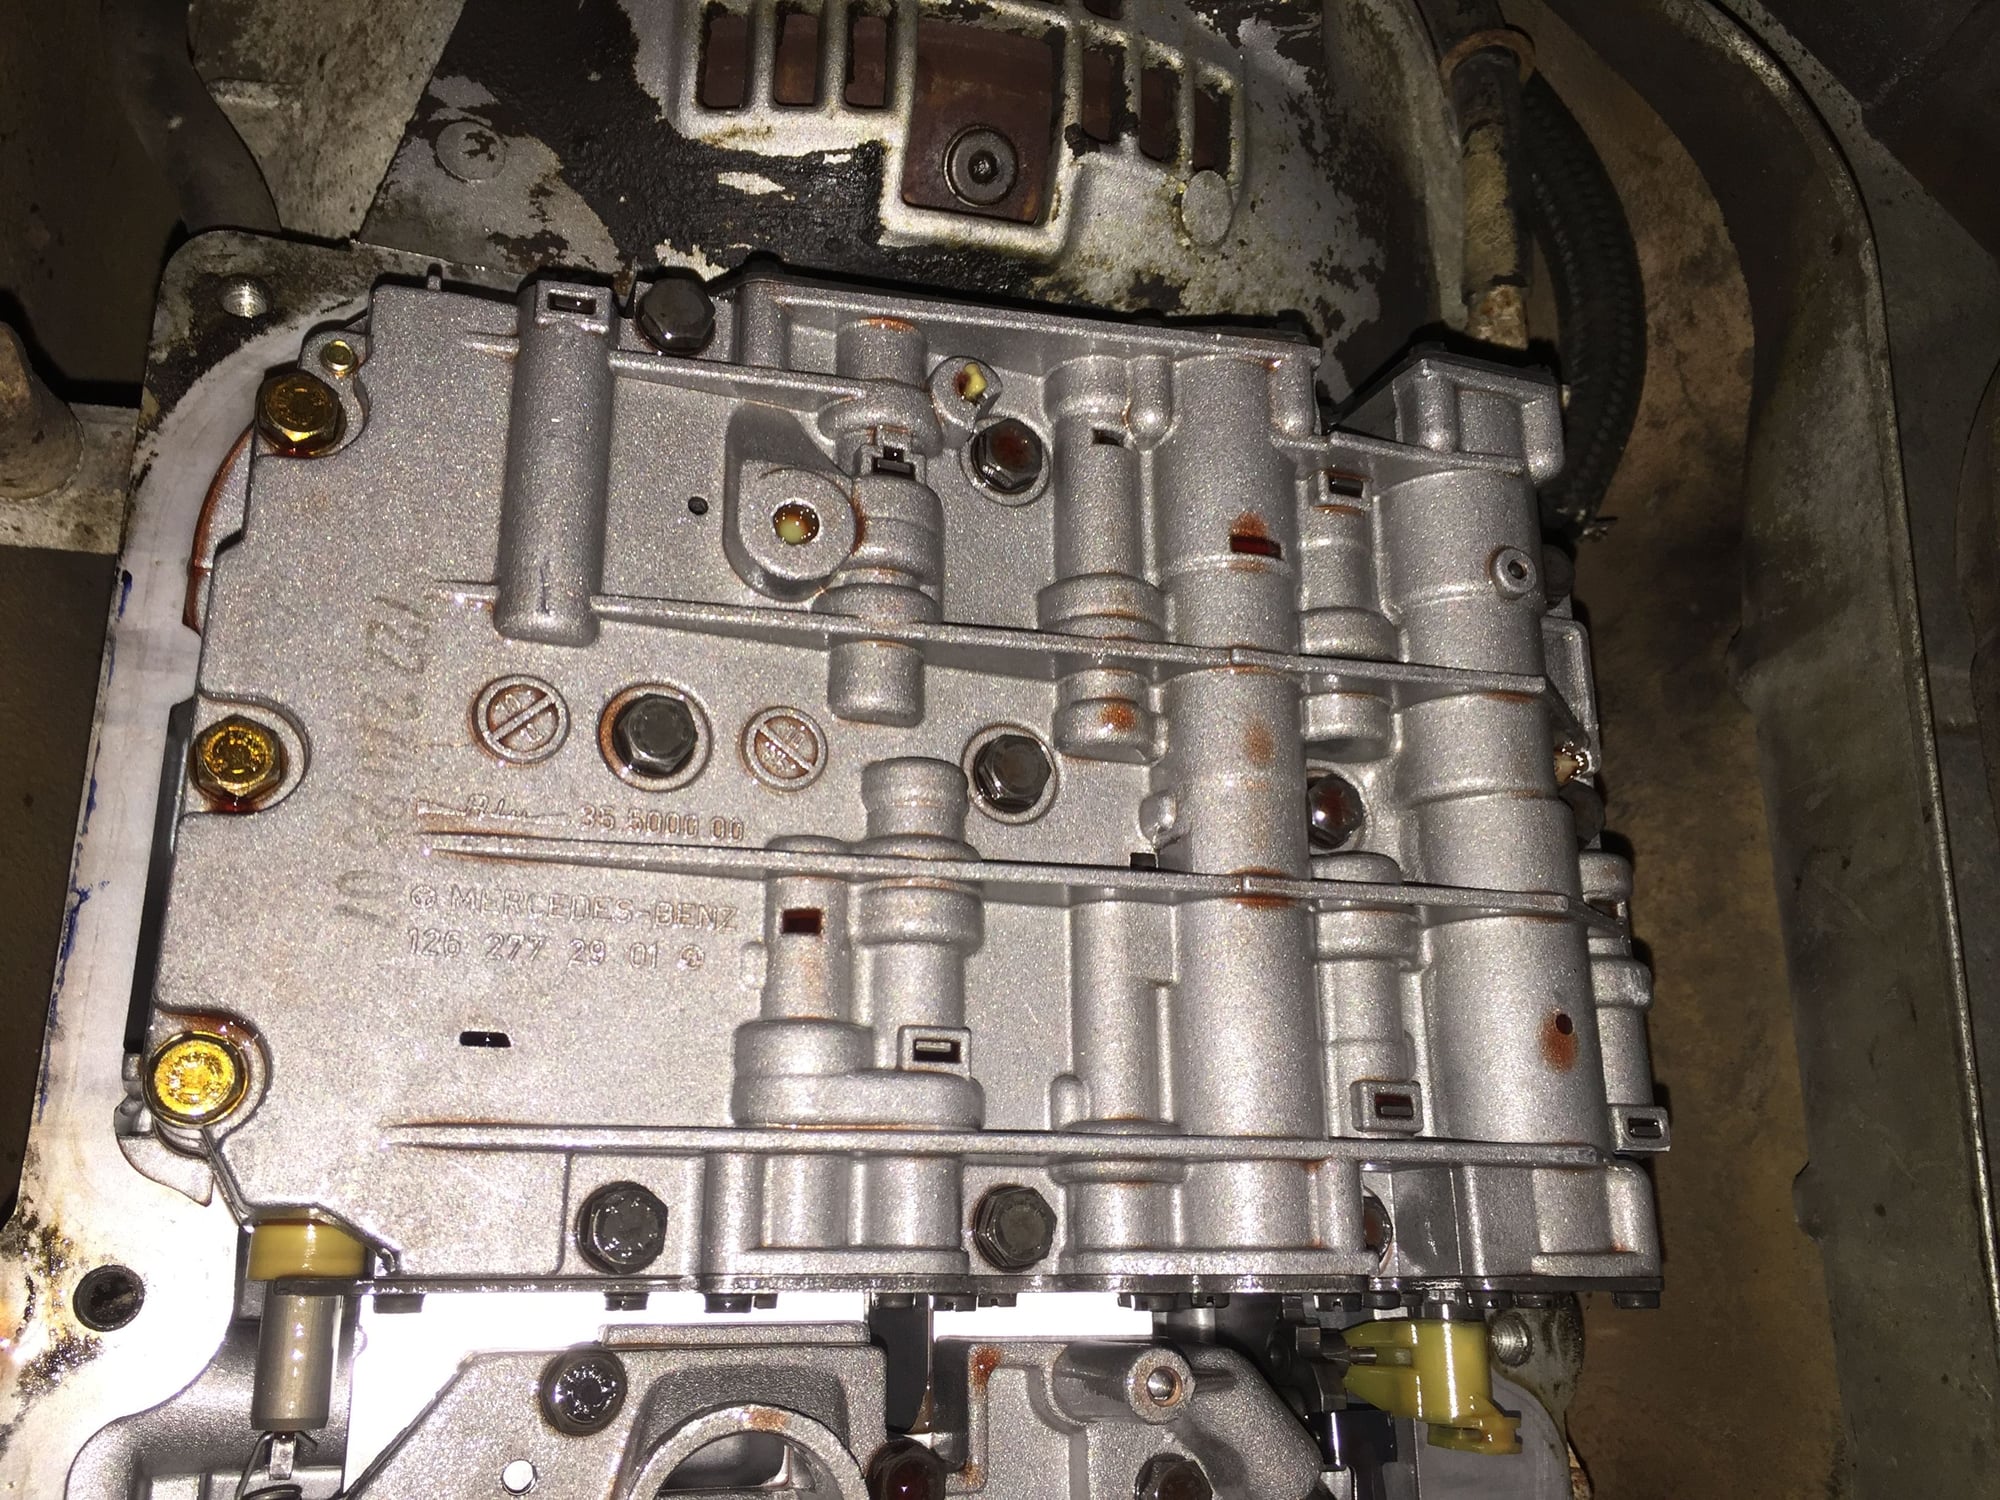
Mercedes transmission numbers
Note corrosion pattern from mounting bracket at bolt holes.
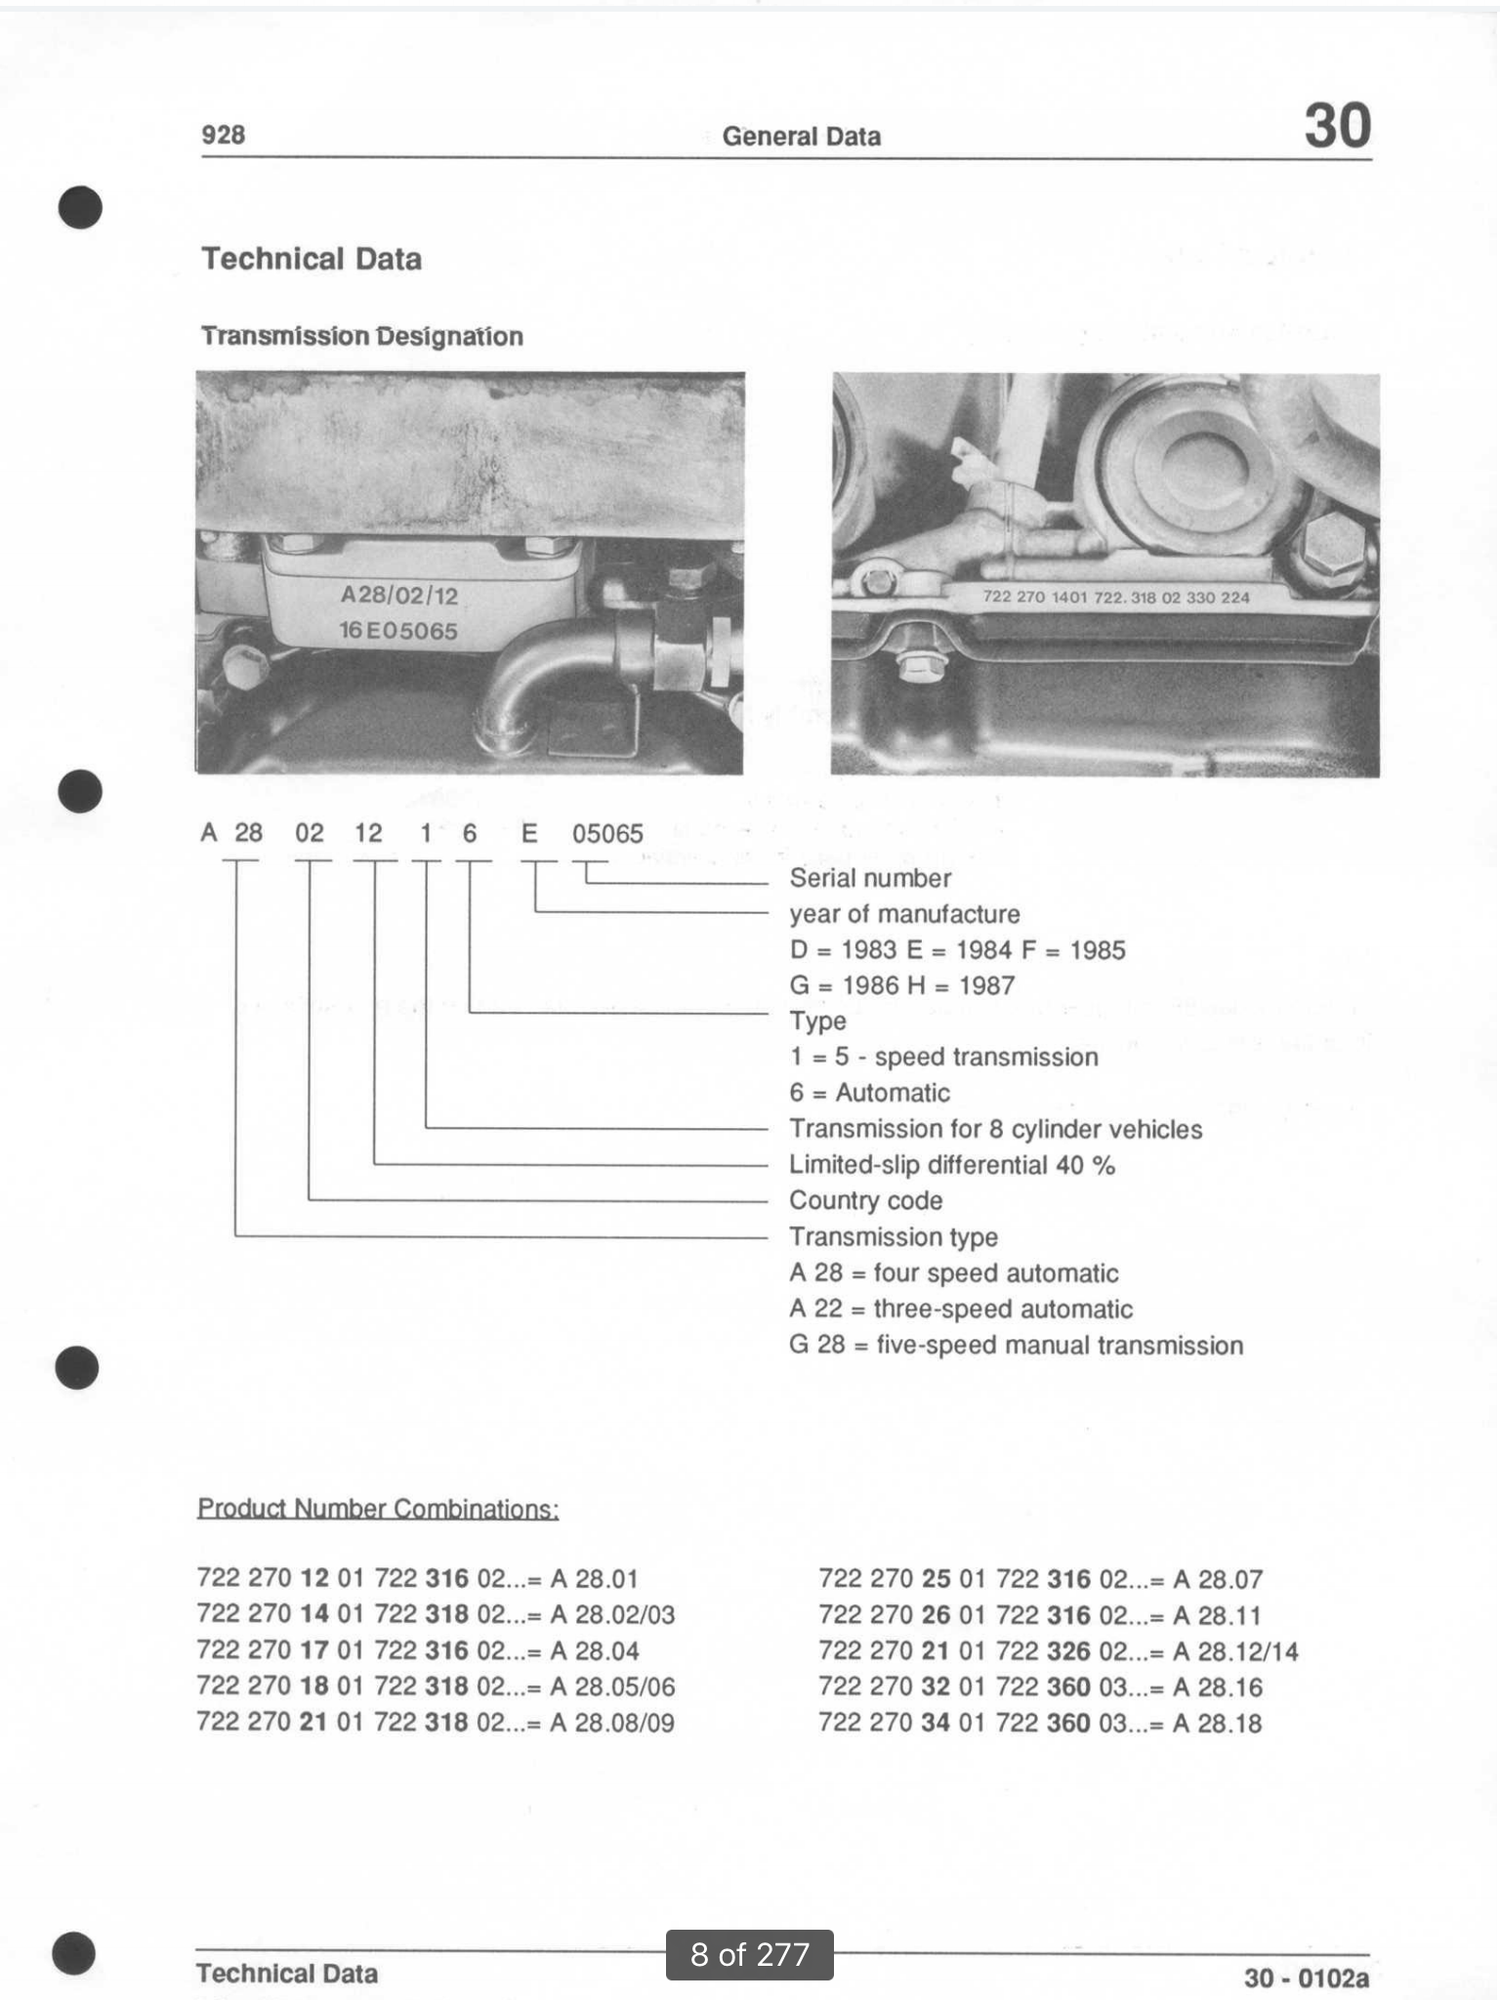
Found this in the WSM, volume 3, section 30, page 30-0102a:
Porsche number on my transmission: A28/07 16 G 01194
So, I have a four speed automatic transmission, 928S for USA series, non-LSD, transmission for 8 cylinder vehicle, automatic type, manufactured in 1986, serial number 01194
Mercedes number on my transmission: 722 270 25 01 722 316 02 777046
This means I have a Porsche spec A28.07 transmission.


 07-05-2016, 07:13 PM


 I can understand your concern. Right, wrong, or otherwise, I am going to jump in and do it. Yes, I will make mistakes. But I will learn. I am mechanically(and electrically) inclined and reasonably competent. I enjoy working on intricate machinery. In the Navy, I worked on and with gas turbine engines. I didn't screw up. Too much...