When you click on links to various merchants on this site and make a purchase, this can result in this site earning a commission. Affiliate programs and affiliations include, but are not limited to, the eBay Partner Network.
Thanks for the great write-up and the pics. I had done the job this way probably 20yrs ago when I had my '83 S but had long since forgotten the details. Fast forward to now, and I have a new MC and "blue" (it's actually black now) line from Roger sitting in the garage after my line let go on my S4 last month. I'm planning to install everything in the next few days and you've saved me from having to dig through the archives and re-learn the steps.
With the new master in place can the hard line to the slave be easily attached?
Define easy
In hindsight next time I'll attach the hard line first.
Once I had the angles all figure out (after some annoying trial and error) it threaded right in. My first mistake was putting it "in place" the first time. That puts the line at a slight angle preventing the threads from starting. I eventually allowed the line to just hang down and supported it with my right hand while I snaked my left hand up to the master and started the line.
Suggestion: Loosen and lower the exhaust heat shield. It's sharp......
I would also install the hard line into the MC with the B nut 1 turn loose before installing the MC
Whoops... I must have taken for granted this is a "known" step with the master install I omitted it from my steps, since I'm 99.9% sure I did the same (and always have).
Good catch.
No clamps are necessary
Unless you regularly use a power bleeder, no fun having that hose blow off at 10psi
Well I have experienced a hose blowing off at 10psi so I will always use a Euro style Norma band clamp (as seen in the photo. Not a domestic version and especially not a zebra clamp.
Well the past week I have been working on the clutch master. Since the first week I have had the car (2.5 years now) I have been putting this off. First week I had the car I had to replace the bake master and when I bleed the brakes the blue hose was leaking. I have done almost everything you could posable imagine, with out rebuilding the engine, on this car. And so it has finally come time to do. I thought that it was going to be an almost imposable job. Getting it out is not to bad, I had to remove the pressure line to the slave to get it out. I just would not turn or slide out from under the brake booster.. It would just jam no matter what direction I put it. But I got it out.
Now for the "fun" part, putting it back in. I put the blue hose on the new master and put the pressure line on the master. I am using the new hose from Greg Brown and it routes around in a different way that I like. My old hoses has some fairly good rub marks on them, so everything was going to get replace anyway. I found this thread and decided I would use the string method to get it in.
I just would not fit. It will NOT!! fit under the master, no matter what I do. So I took off the pressure line off and got it in place, still a bit of a struggle.
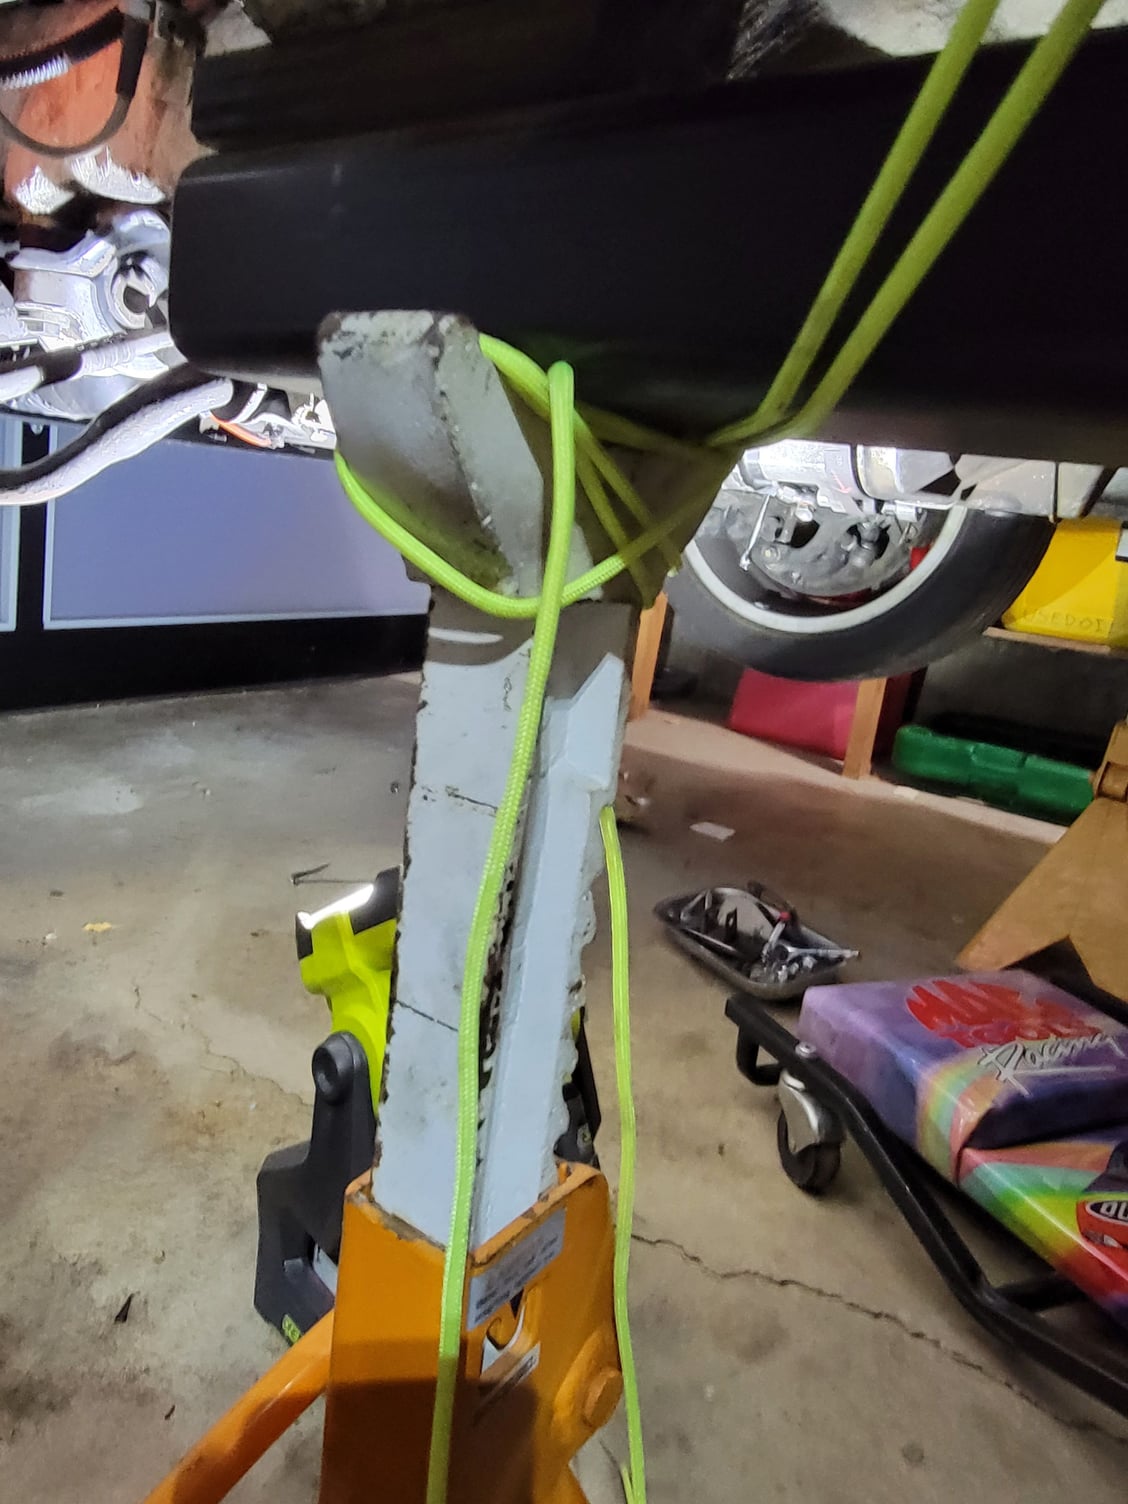
I found a bit different way of holding the string.
I have a jacking bar held up by jack stands and just wrapped it around and it held perfect. That way I can leave the drivers door open to see what I'm doing. I also used para cord so I could pull on as hard as I wanted.
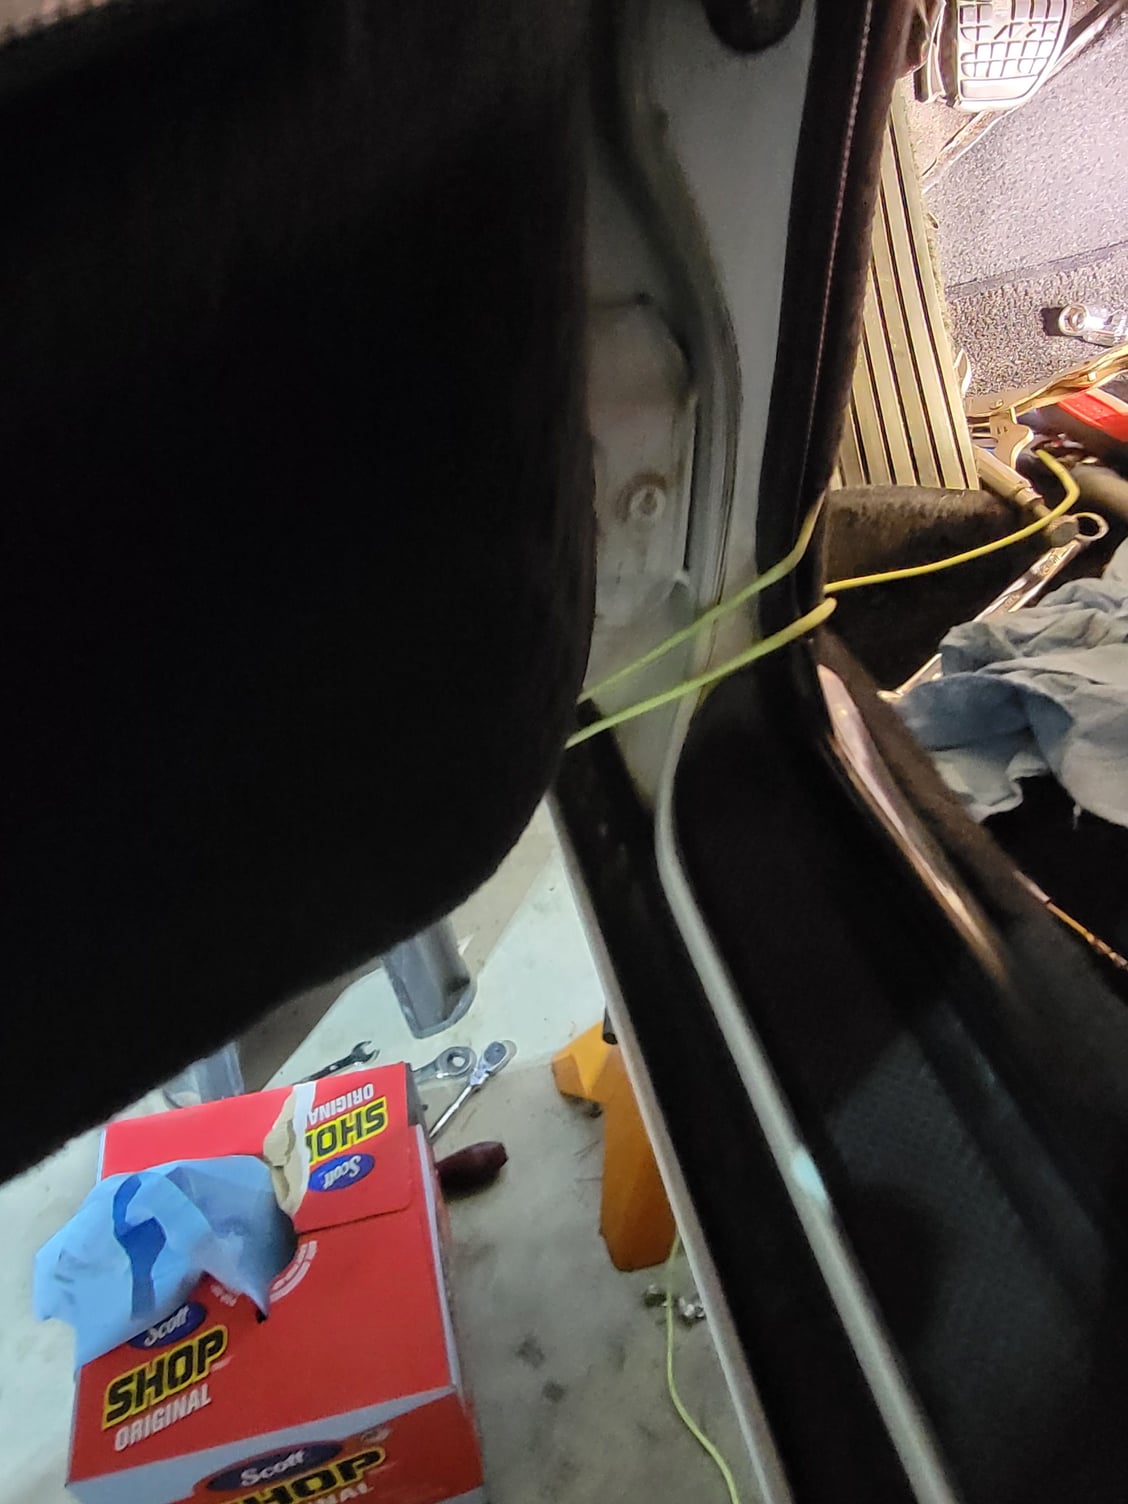
I got the master in but then I had to get the line on it. So it let the string loose the is farthest to the left and could turn the master a bit to the side under the booster. Trying to get the line on with no space and sausage fingers was hell.
After getting them finally started I could get the maser twisted back in place, I never turned it far enough for the part that sticks into the driver compartment to come all the way out, just enough to give it a bit of a twist. Then putting the bolts back in was fairly easy with the string holding it in place. I did put some vice grips on the part sticking into the drivers compartment just to be able to move the master around and twisted to get the bolts in. I could then use a stubby wrench to get the pressure lines tight.
I did not bench bleed any of it. I have a Motiv pressure bleeder and I reverse bleed it with the blue line off the brake master. My blue line was about 2 feet too long so I just bleed it into a bottle. Then after the pedal felt good and I got all the air out I just cut the blue line to fit. and filled the brake reservoir back up
I noticed that someone had replaced my brake booster in the past sometime. So maybe that why I couldn't get it to fit under, I don't know. But total, It took me about 6 hours to get it done.
This "string" method was an absolute god-send, I don't know how I would have lined up the master otherwise. Even with this, I had to enlist the wife to hold it up against the firewall so that I could get the bolts in (getting them to thread with the cover plate and spacers was a nightmare). The whole job was made a little easier because I replaced my brake master at the same time, although I also swapped the clutch slave and flex line whilst I was in there.
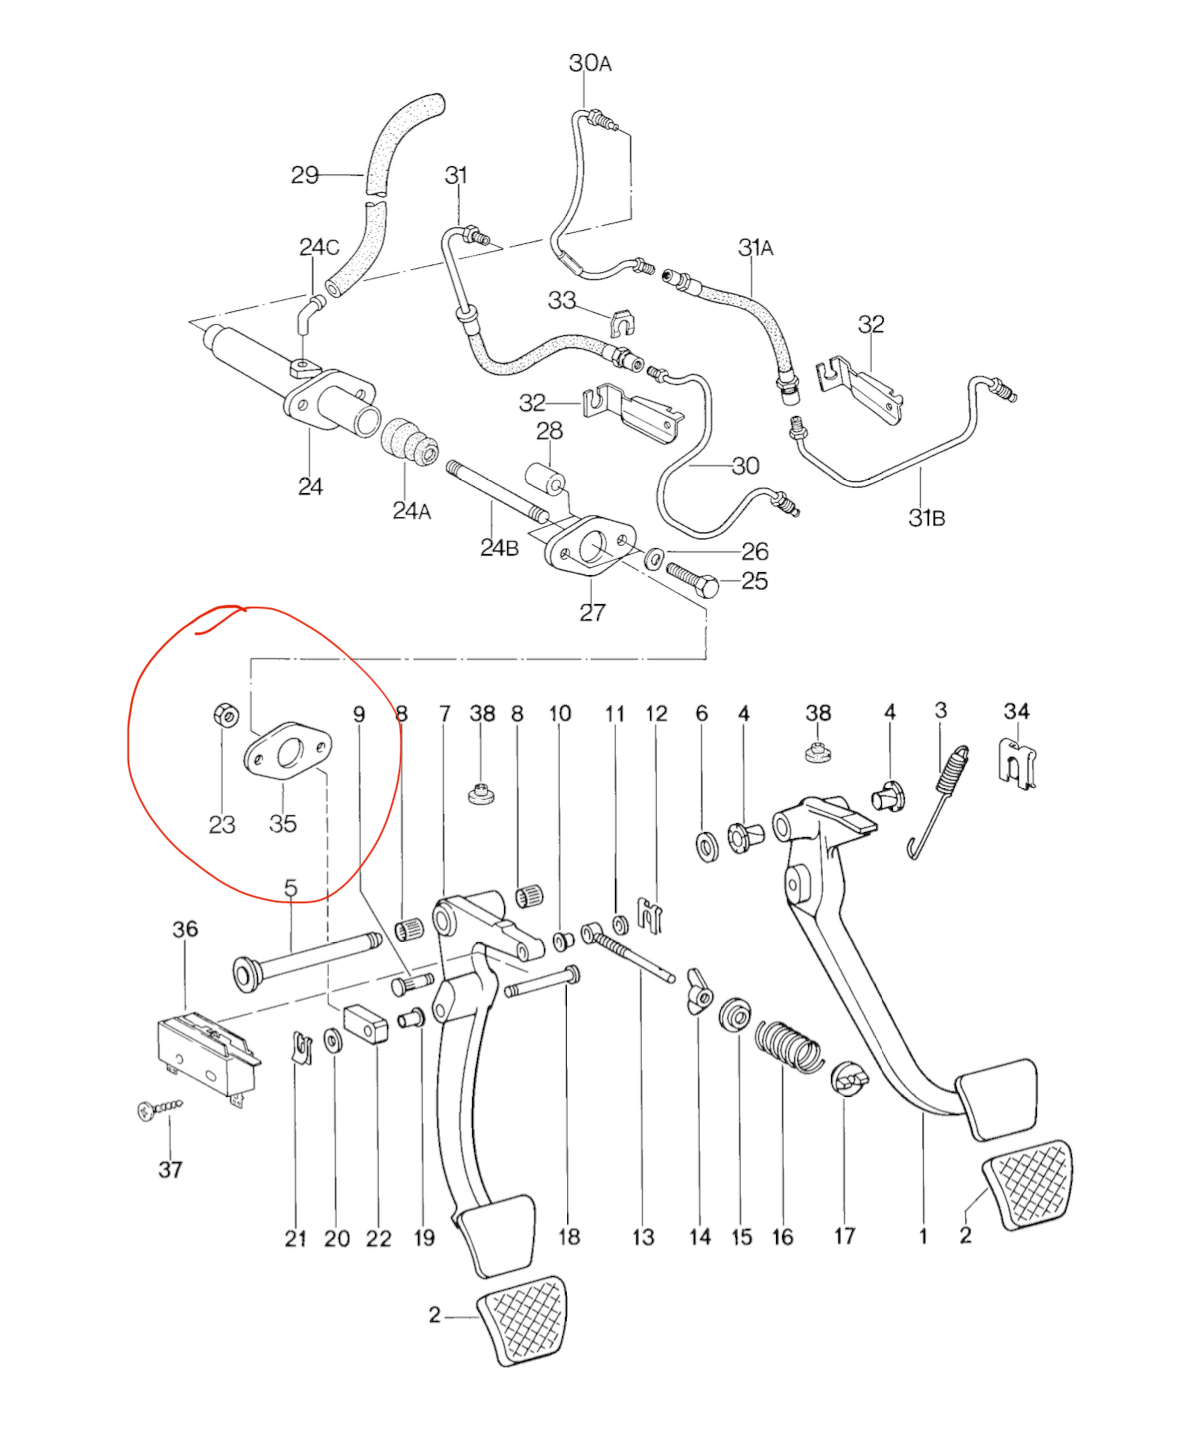
One thing that is currently causing me a lot of stress though, is that in inspecting the old clutch master I see that it had a paper gasket on it that fit between the master and the firewall - I didn't notice when I first got it out because the whole thing was black and covered in dirt. I don't think this was on the new master that I installed, and looking at the PET diagram it's very vague about the placement (it shows that it goes ahead of the cover in the car). Is that the end of the world or do I need to do the whole damned job again just to put this in?
Also, the reverse bleed procedure (hooking up the pressure bleeder to the slave and bleeding backwards) worked wonders and I have a strong clutch pedal.


 03-22-2016, 11:20 AM
 http://jalopnik.com/lazy-idiots-at-l...pan-1748394648

 I would just remove the master......