When you click on links to various merchants on this site and make a purchase, this can result in this site earning a commission. Affiliate programs and affiliations include, but are not limited to, the eBay Partner Network.
Thanks for staying tuned, Gunar. It appears that there is a lot of interest in this project since there are a lot of guys watching. There is not much feedback or input from the gang, but then there is probably not much anyone can say since this is pretty much unplowed ground. Except for cutting a 928 up to make a pick-up or convertible no one has ever taken on this kind of task, and not likely to ever be done again. I like to keep posting my progress because I think it is educational for the rest of you and it gives me something to study as we progress. It is a lot easier to study the pictures on this thread versus sitting out in the shop studying the car.
Jerry, I'm sure I am one of many who read every word and study every picture in this thread. You're right, there is not much I at least can contribute, but I am thoroughly enjoying being a spectator!
This is one of those things that if I were given 100 years I don't think I could have figured out how to do something like this or even where to start. I find the process fascinating, nice work so far.
I can't speak for anyone else, but I've tapered off on my replies to a certain degree because I didn't want to clutter up the thread (like with silly stuff about the definition of "welding").
But...
I can't believe the progress you are making. I've seen a couple 'chop & section' cars done in my time. They can take years. You commented a bit ago about how fast it would be on 'reality TV'. Those shows have very little to do with reality.
You commented on the 'lack of attractiveness' at a couple points. I disagree. The bare welds and gaps aren't an issue. They can and will be fixed. The true beauty of this project is how well it's fitting together. Paint and a smidge of bondo will address the minor cosmetic flaws. There would be no way to 'fix' it if with those it didn't fit right.
I have to admit that I thought that you were out of your mind when you first proposed this idea. I felt that, at most, you would chop up a shell and try to put it back together, fail miserably and give up (more a feeling about the complexity and difficulty of the entire project than a dig at you).
I'm still not convinced you are in your 'right mind', but I now believe (and have for a while) that this will see the road at some point, and that point isn't all that far away.
One of the reasons that I seem to be stepping out ahead of myself with the sectioning of parts of the tail is that I am really anxious to be able to do some work on the sectioning of the bumper covers, at least the one in the back. I have it sectioned across the apex and have most of what it will take to "weld" it back together, although PU is said to not be weldable, but rather more like brazing. That's kind of why I am anxious. Also I am just wanting to get a preliminary look at what it is going to look like in the end. Pardon the pun.
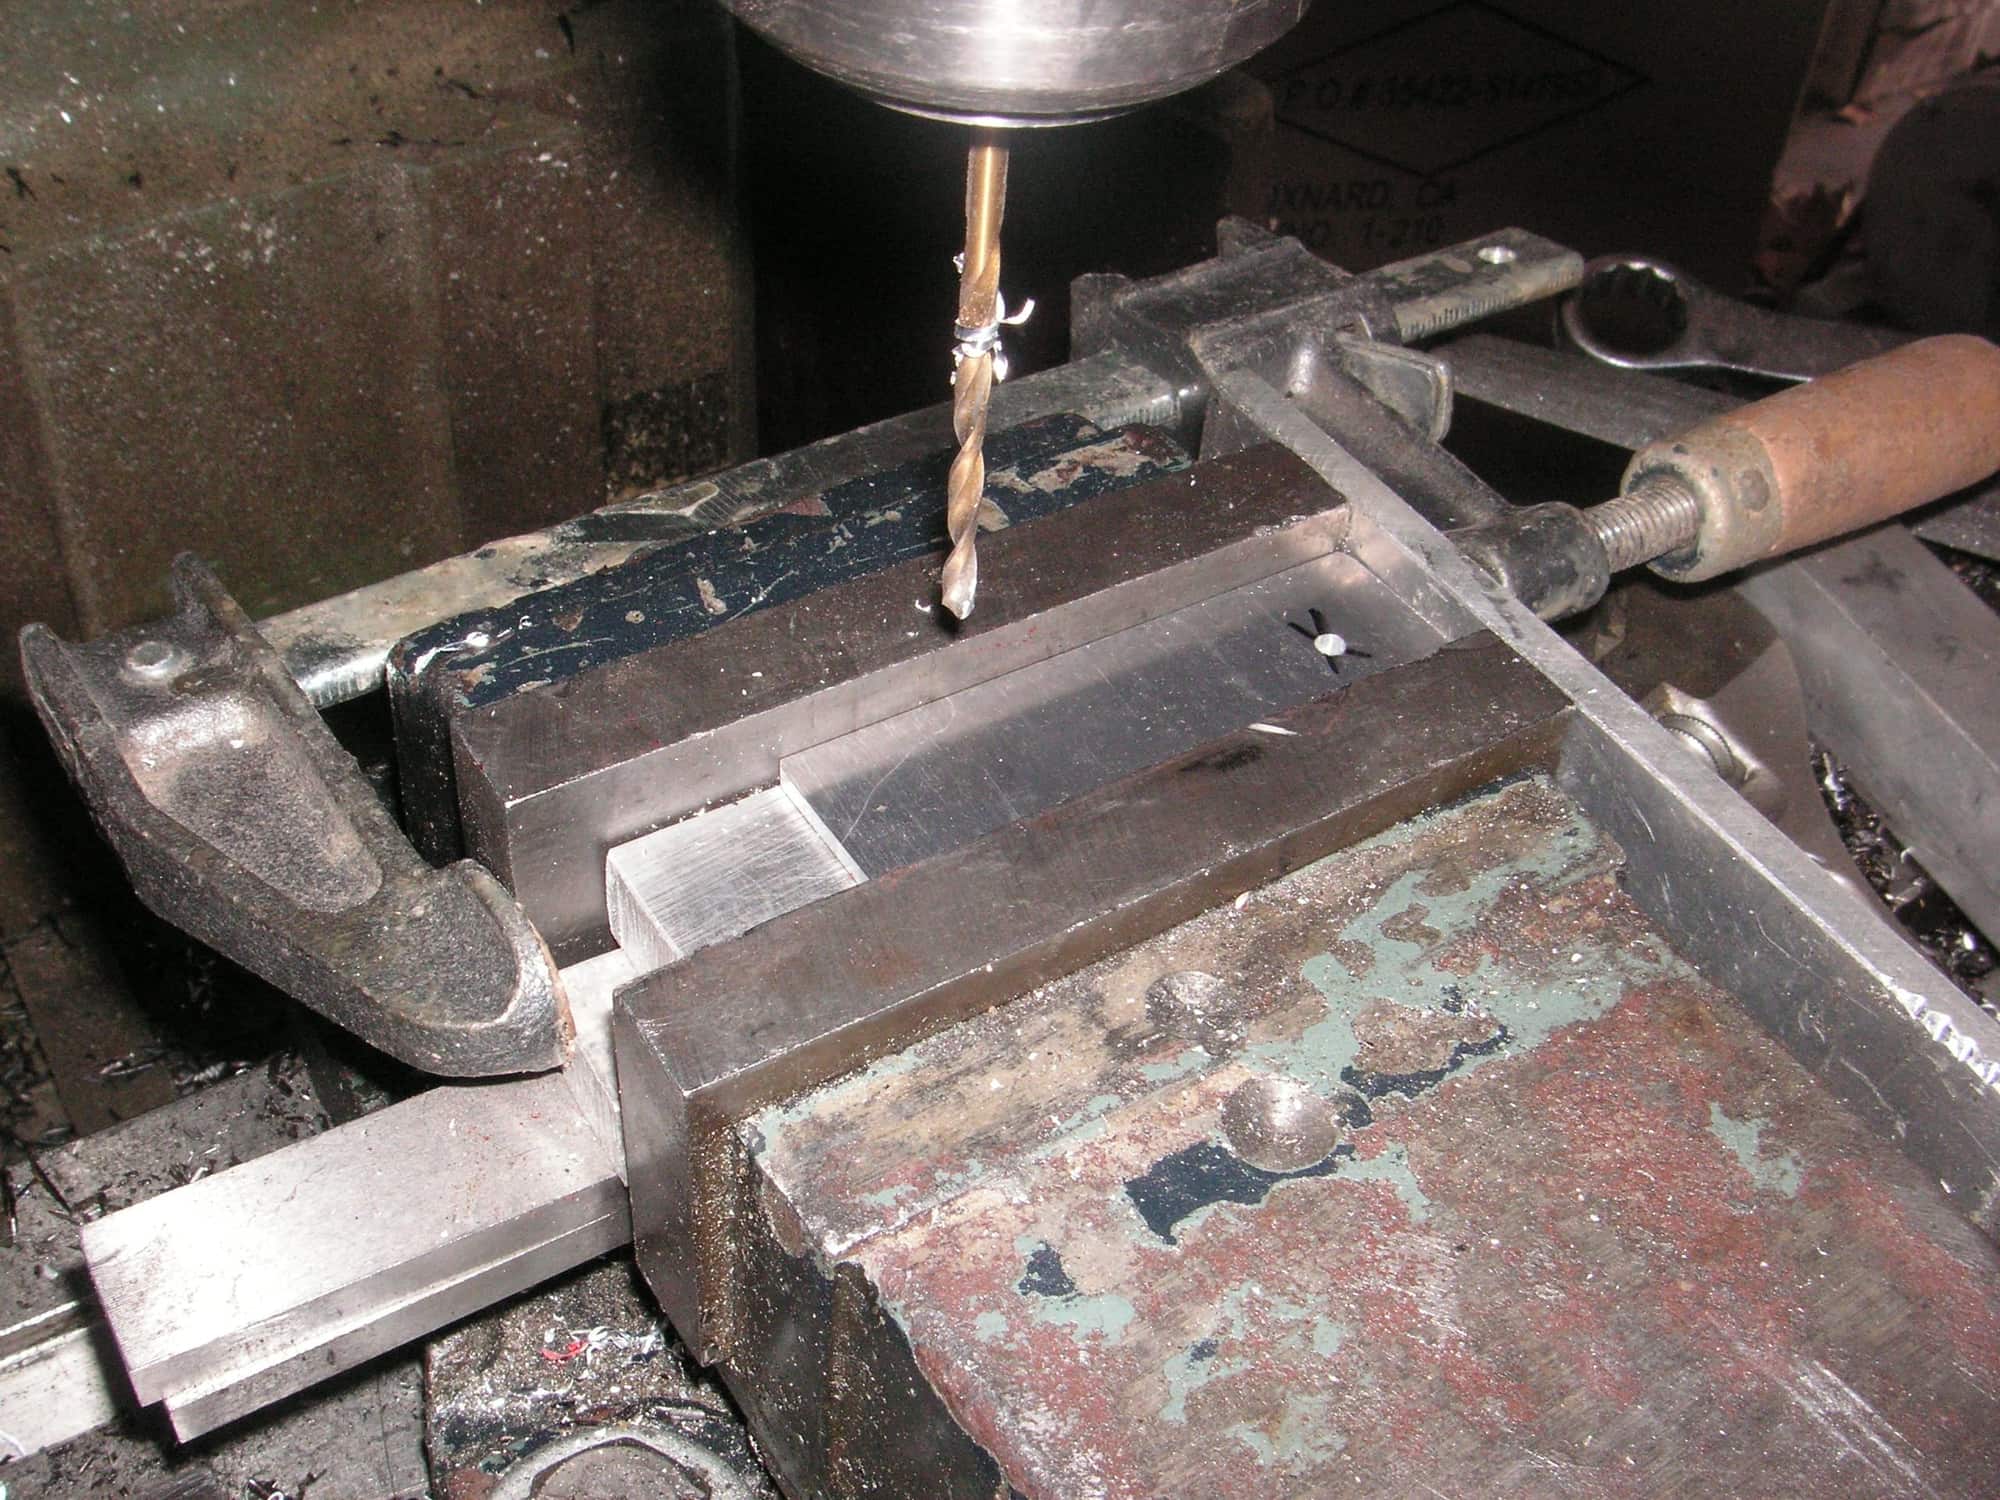
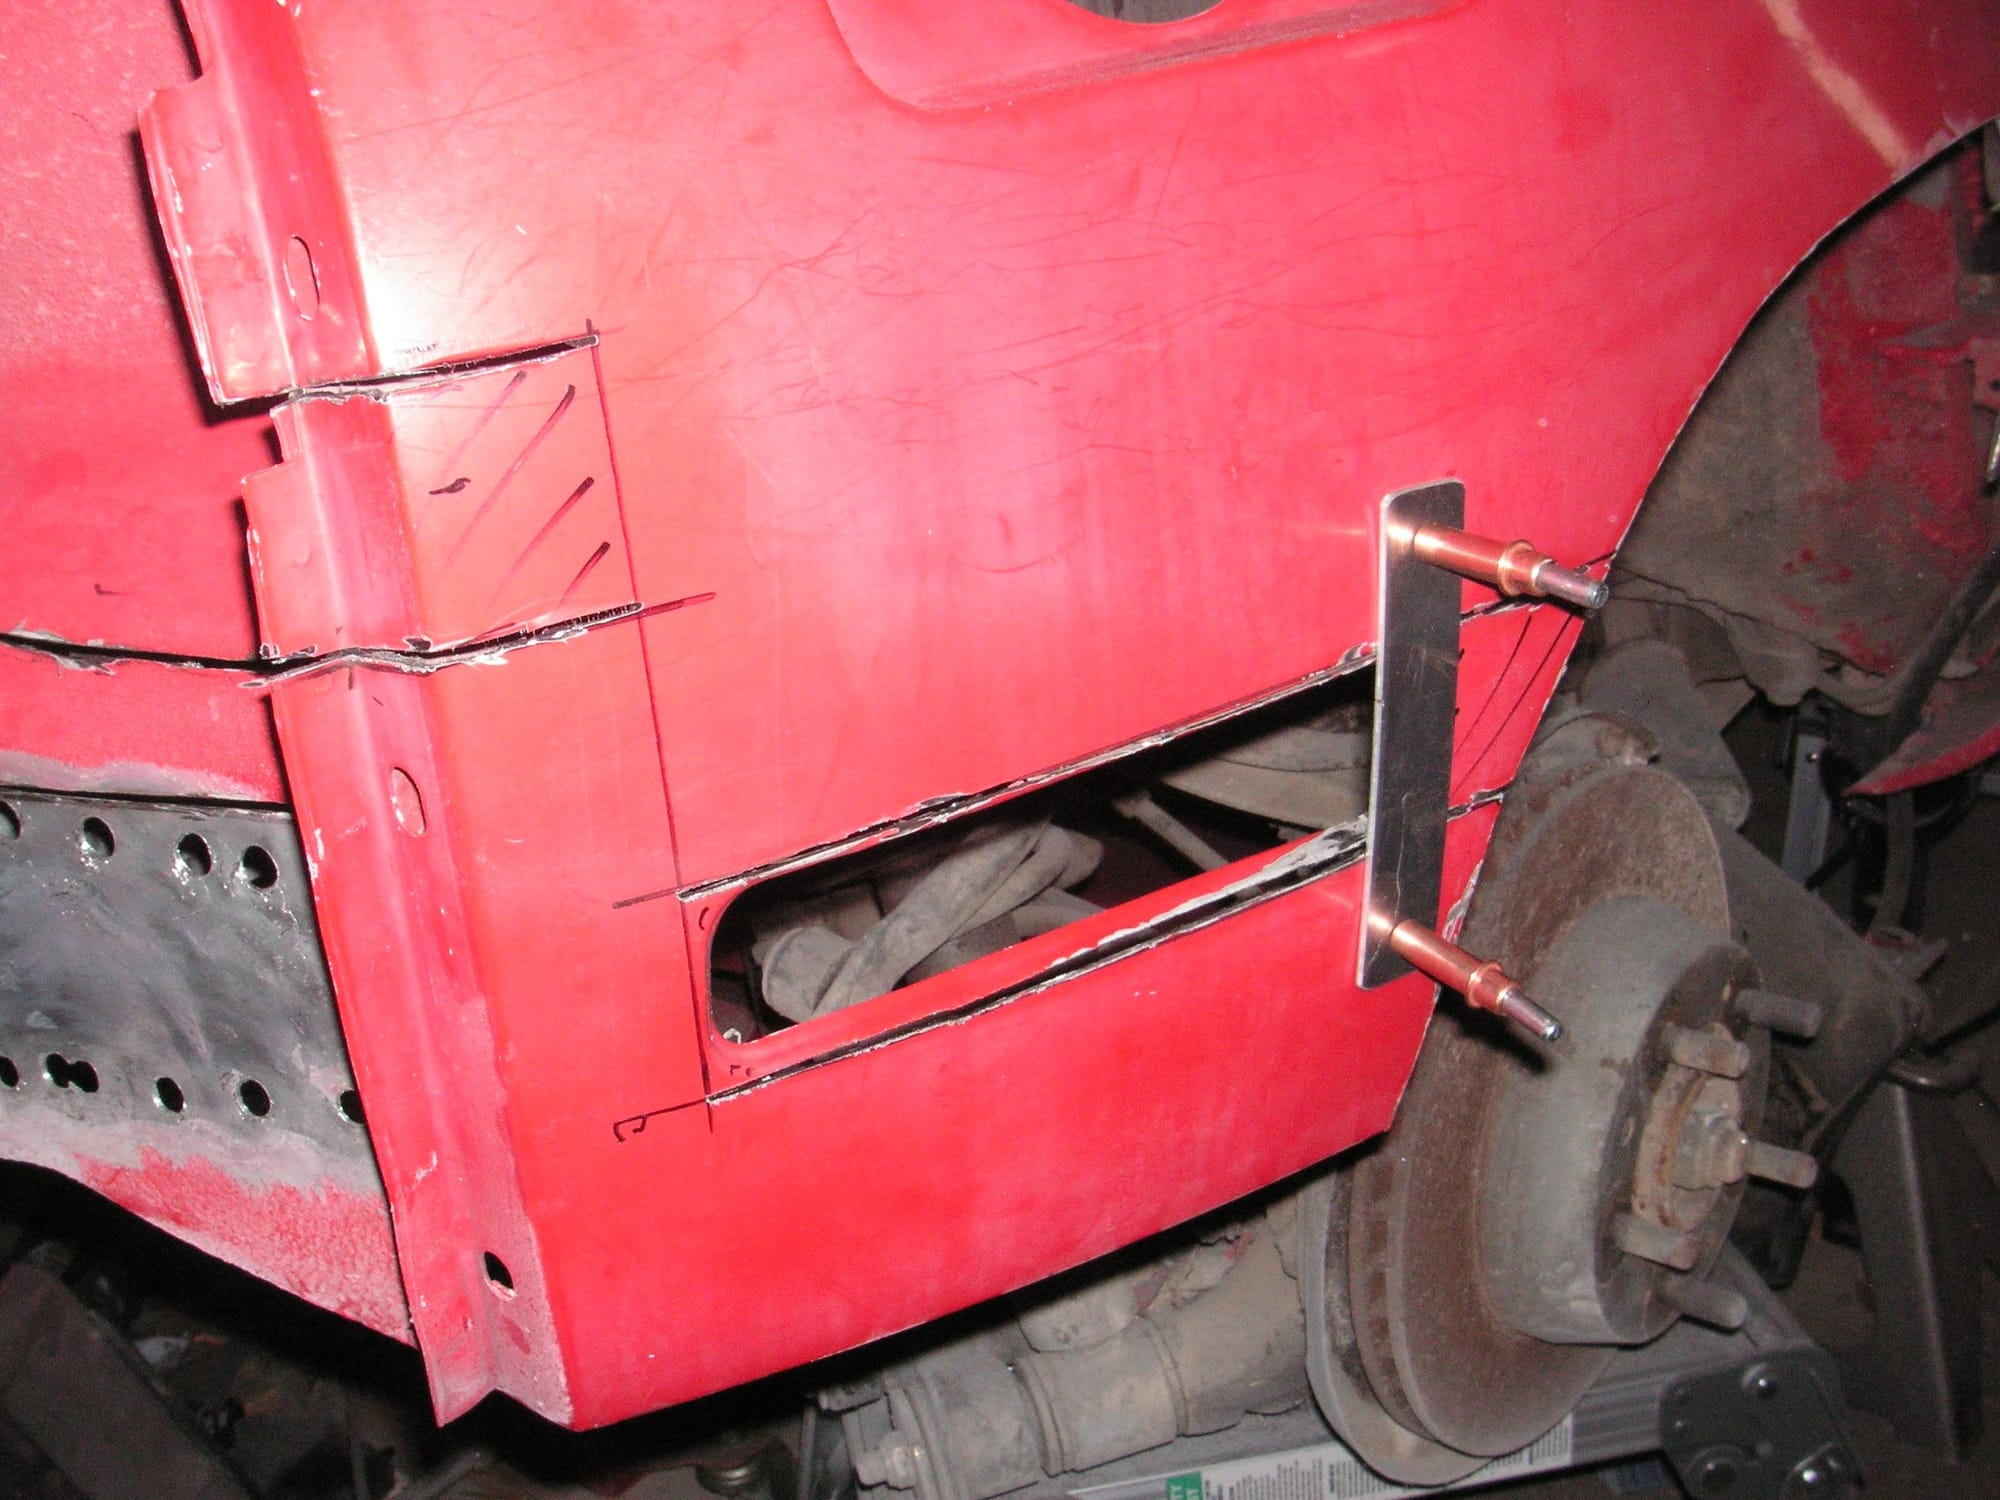
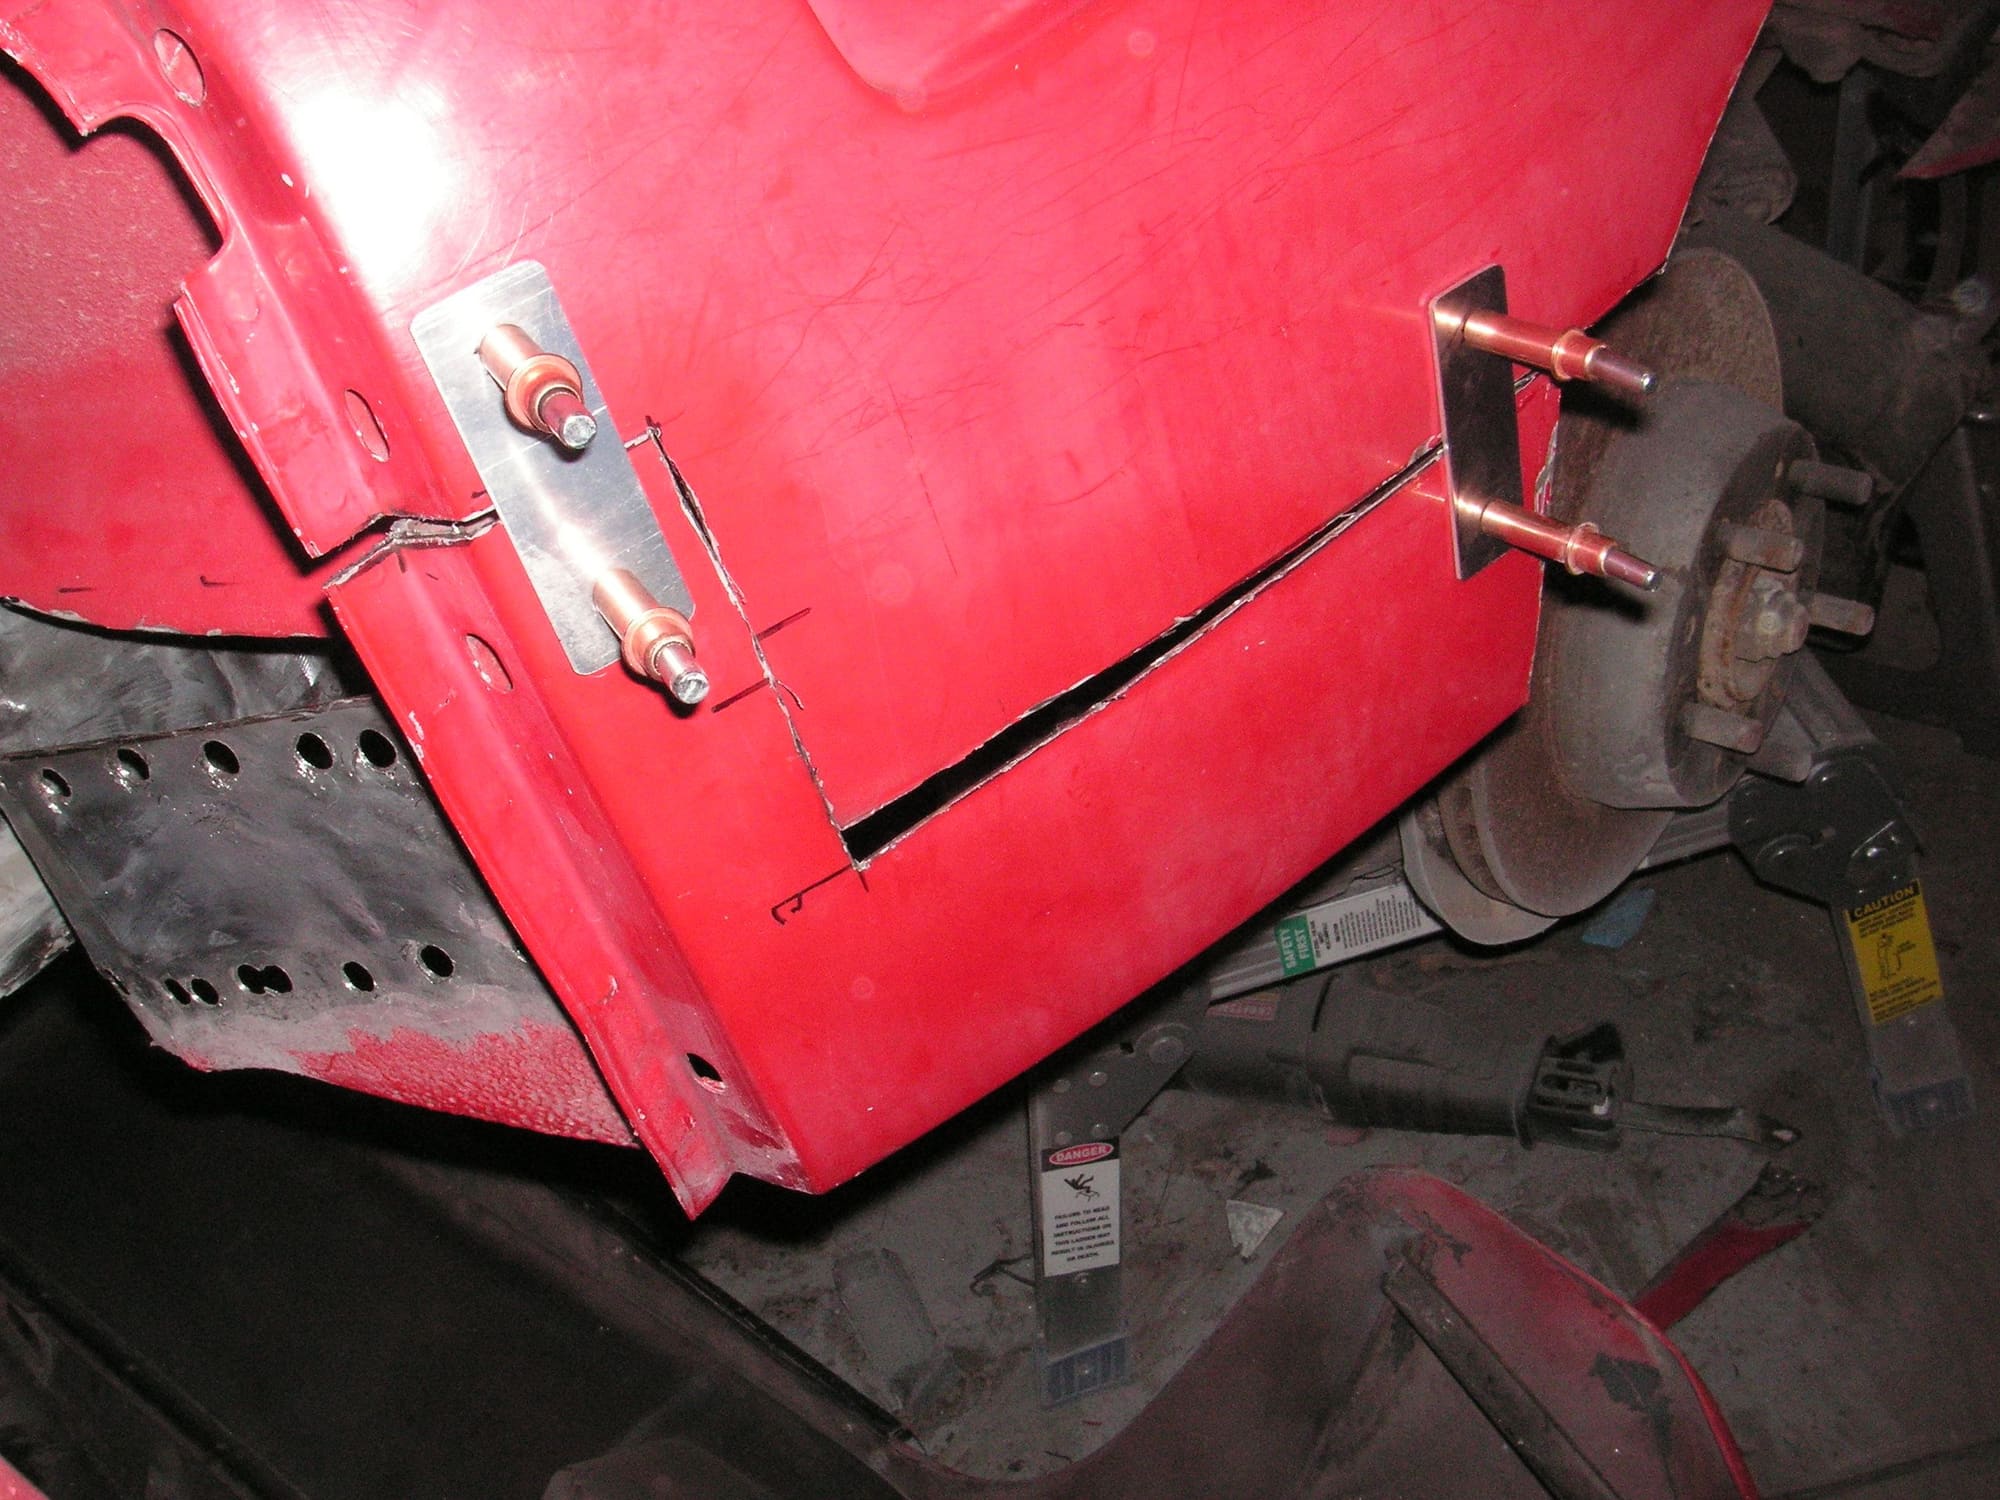
The little bit of sectioning I did at the rear corner as shown just above taught me that I probably need to devise a better method of gauging the cuts when the 2 inches are taken out. Marking for the cuts can be fairly accurate, but then cutting is not so much so and then the cut edges need to be ground on to be true and the end result needs to be almost exactly at 2 inches and possibly a tiny bit more which can be filled up with weld. What I have devised in my mind is a method of marking the areas where the cuts are being taken out of very vertical panels. I'm going to make a simple drill jig with two 1/8 inch holes in it 4 inches apart and lay that across the cut area and drill the body. Then when I make the cuts I will have another similar piece of metal with drill holes in it 2 inches apart that can be clecoed into the holes in the body when the cut is ground to its exact width and lowered. That way I will have a measurement of the exact width of the section cut out at critical locations, and I think it will also work as a means of holding the top and bottom of the car in position for welding. I'm going to work some of this up and use it on the other corner of the tail panel.
Thanks guys for your feedback and your continued interest in this project.
Last edited by Jerry Feather; 06-02-2018 at 10:51 AM.
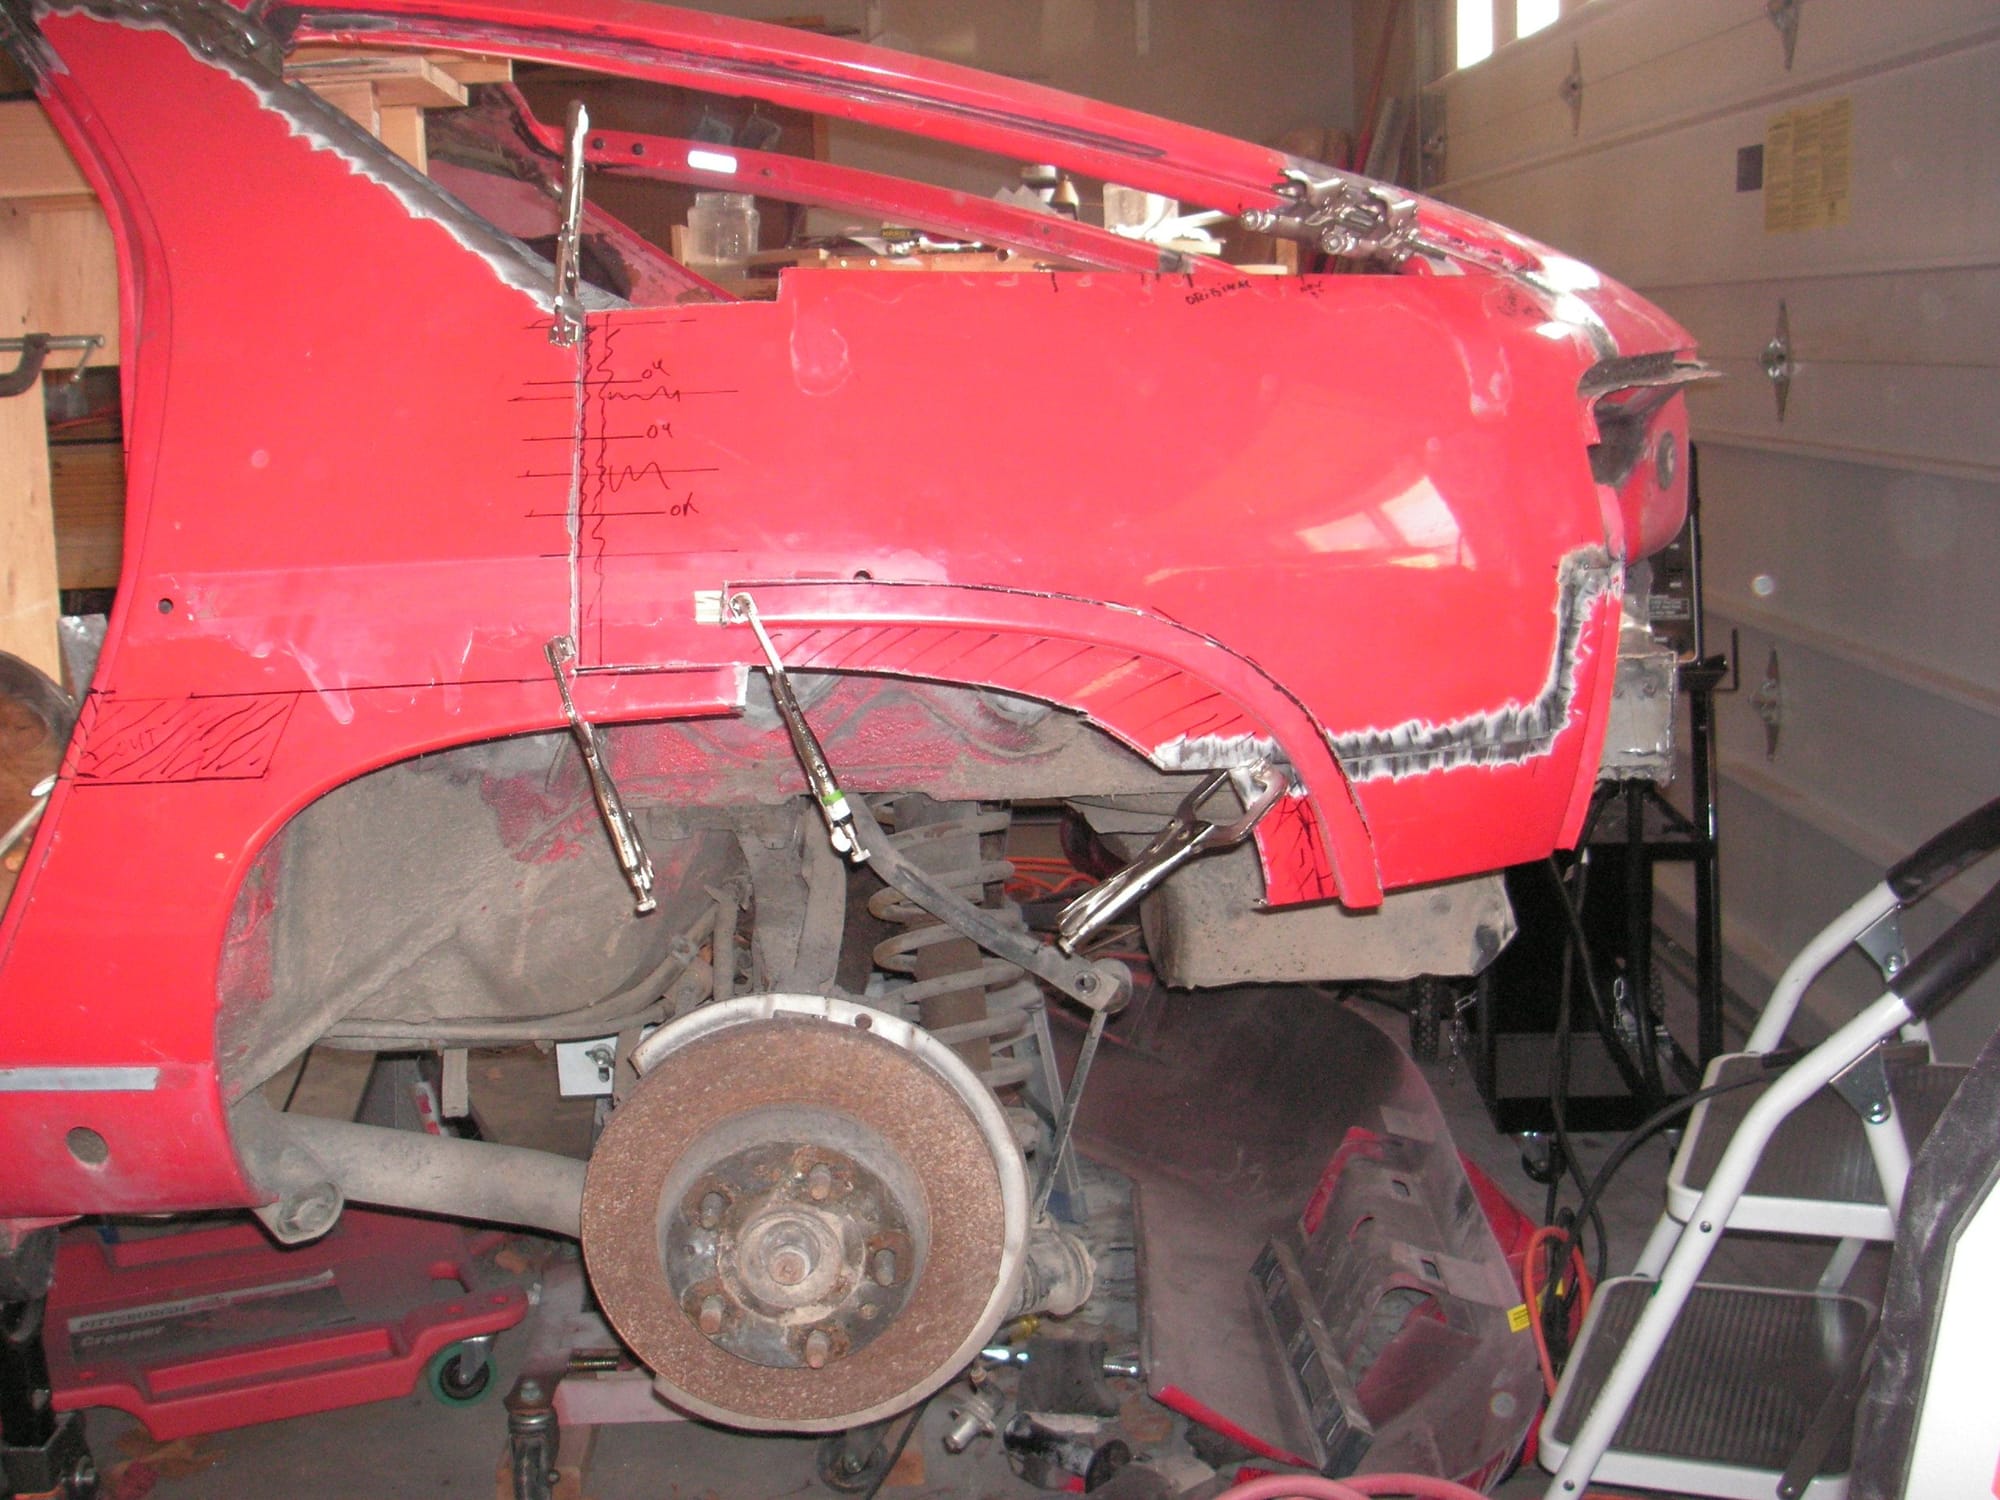
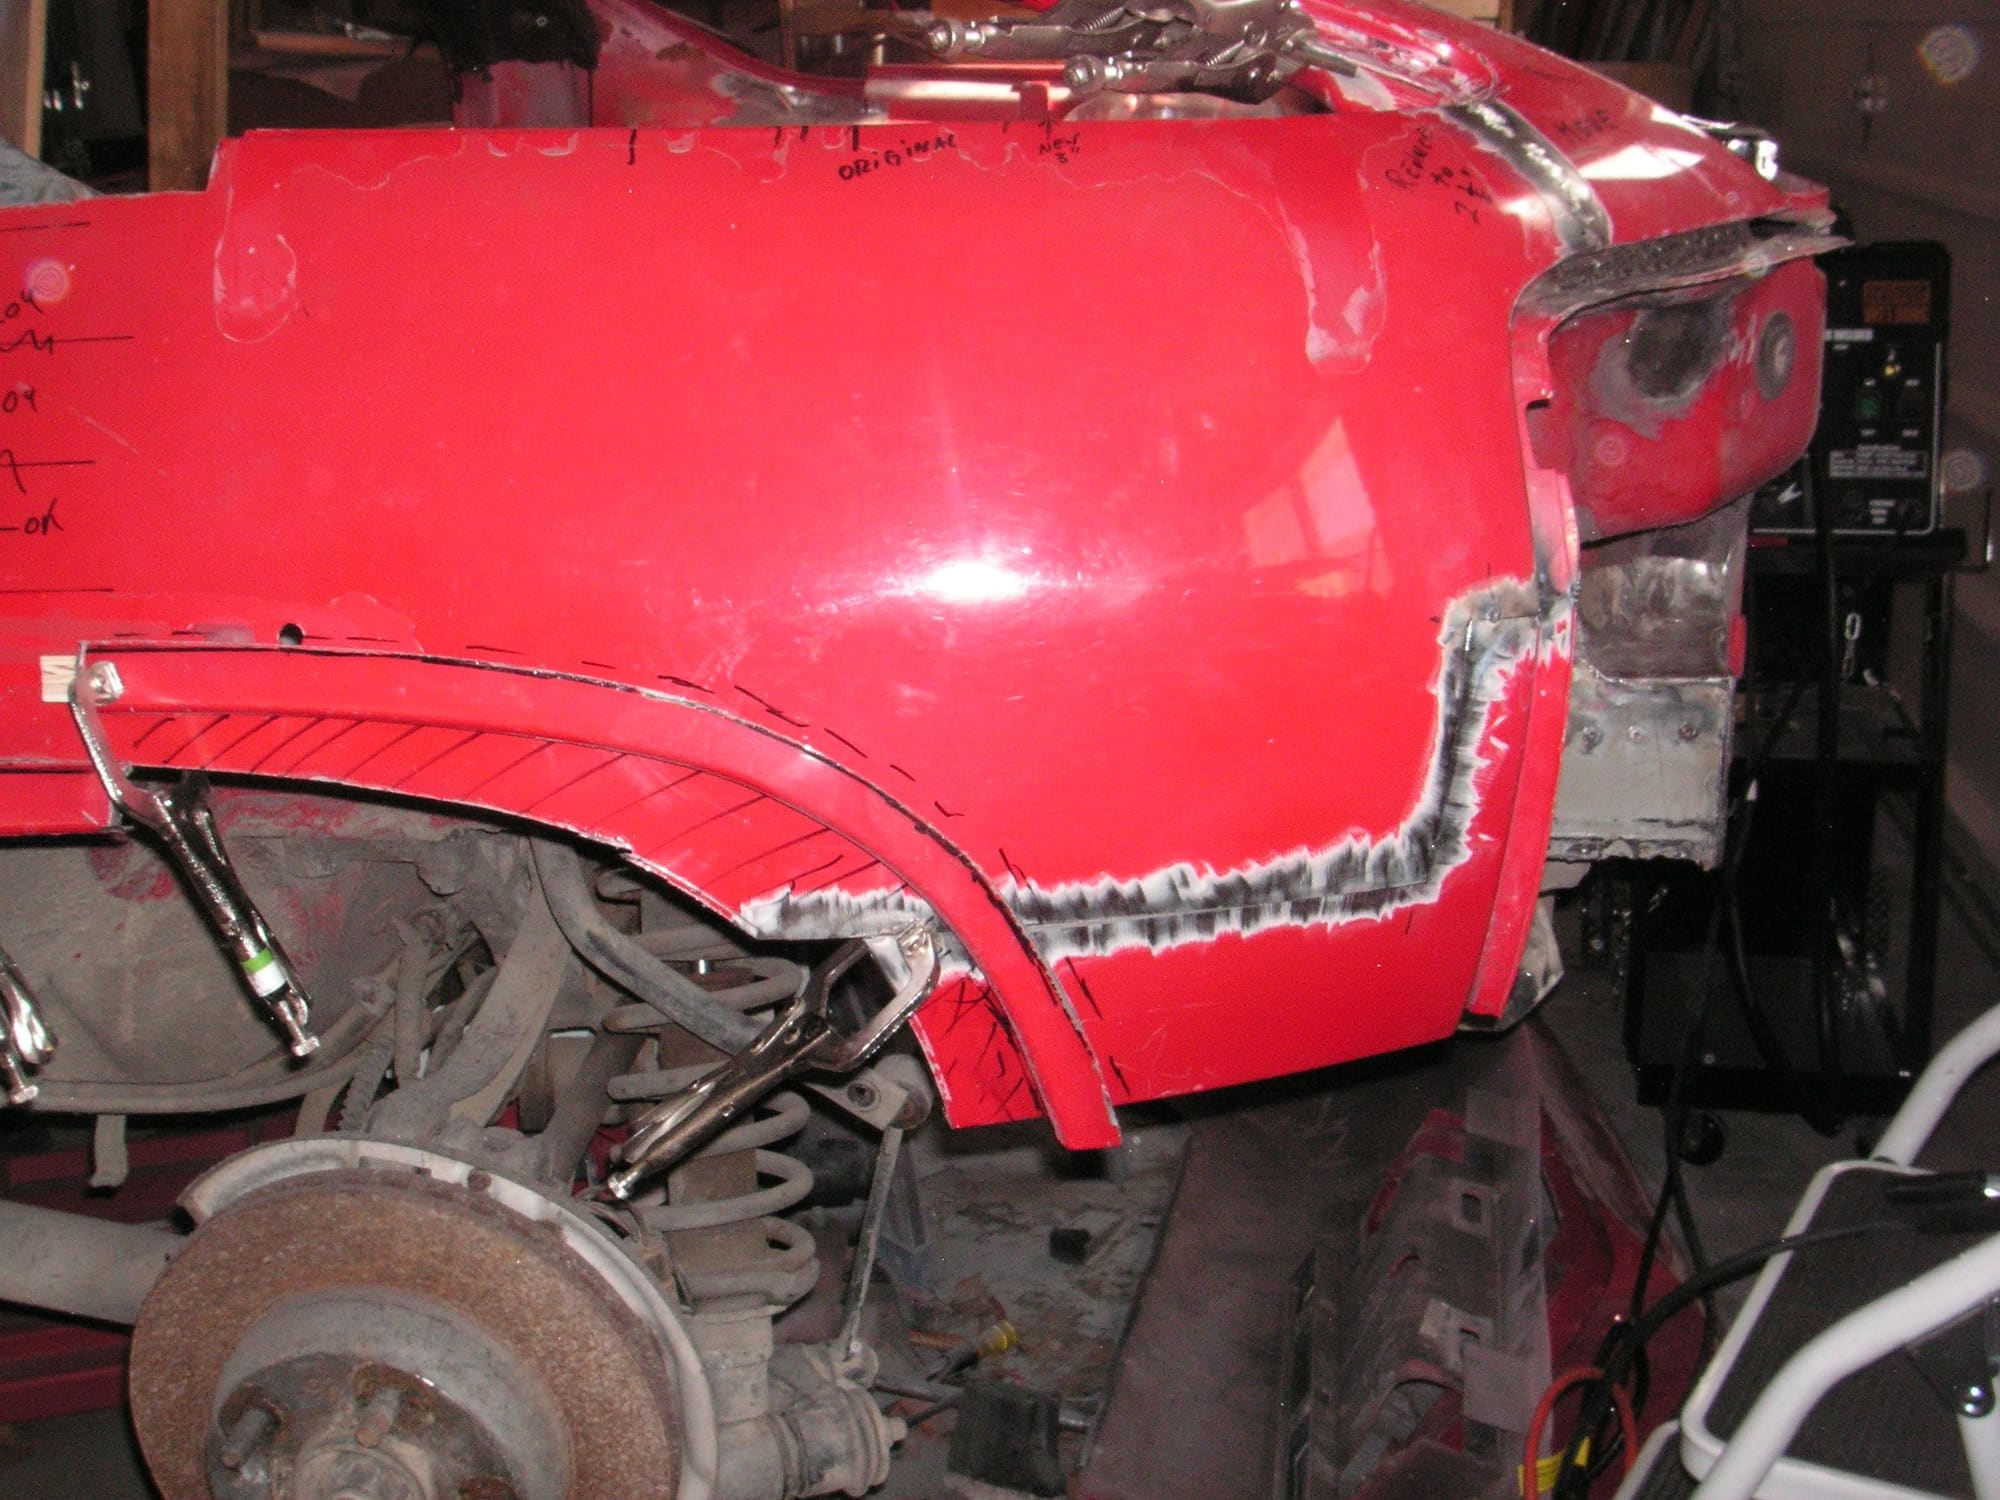
Here is kind of a lay-up of the quarter panel with the piece of wheel arch laid on in the position about where I plan for it to end up. It will be 2 inches up the panel and about a half inch flared at the top and an inch flared at the rear. It will also be moved forward about a half inch to kind of tighten it up around the rear tire. The metal below where the arch is now clamped will be gone.
The front of the arch, as you can see from the cut lines now drawn in that area, will be moved back about an inch, but I am going to change the arch at the bottom of the front to put it back to just about where it is now. The result will be to sort of close up the gap in the arch at the front top sort of corner.
I'm moving my professional office right now so have been spending much of my time with that. What a mess.
I did get to tack weld the corner piece on more permanently and then laid out the lines and cut some of the for the other rear corner. I stopped at this point so I could work up the little ;pieces of aluminum to be drilled as cut gauges or alignment pieces and will set my mill up and drill the many holes in them with the precision needed. After this break I'll get to it.
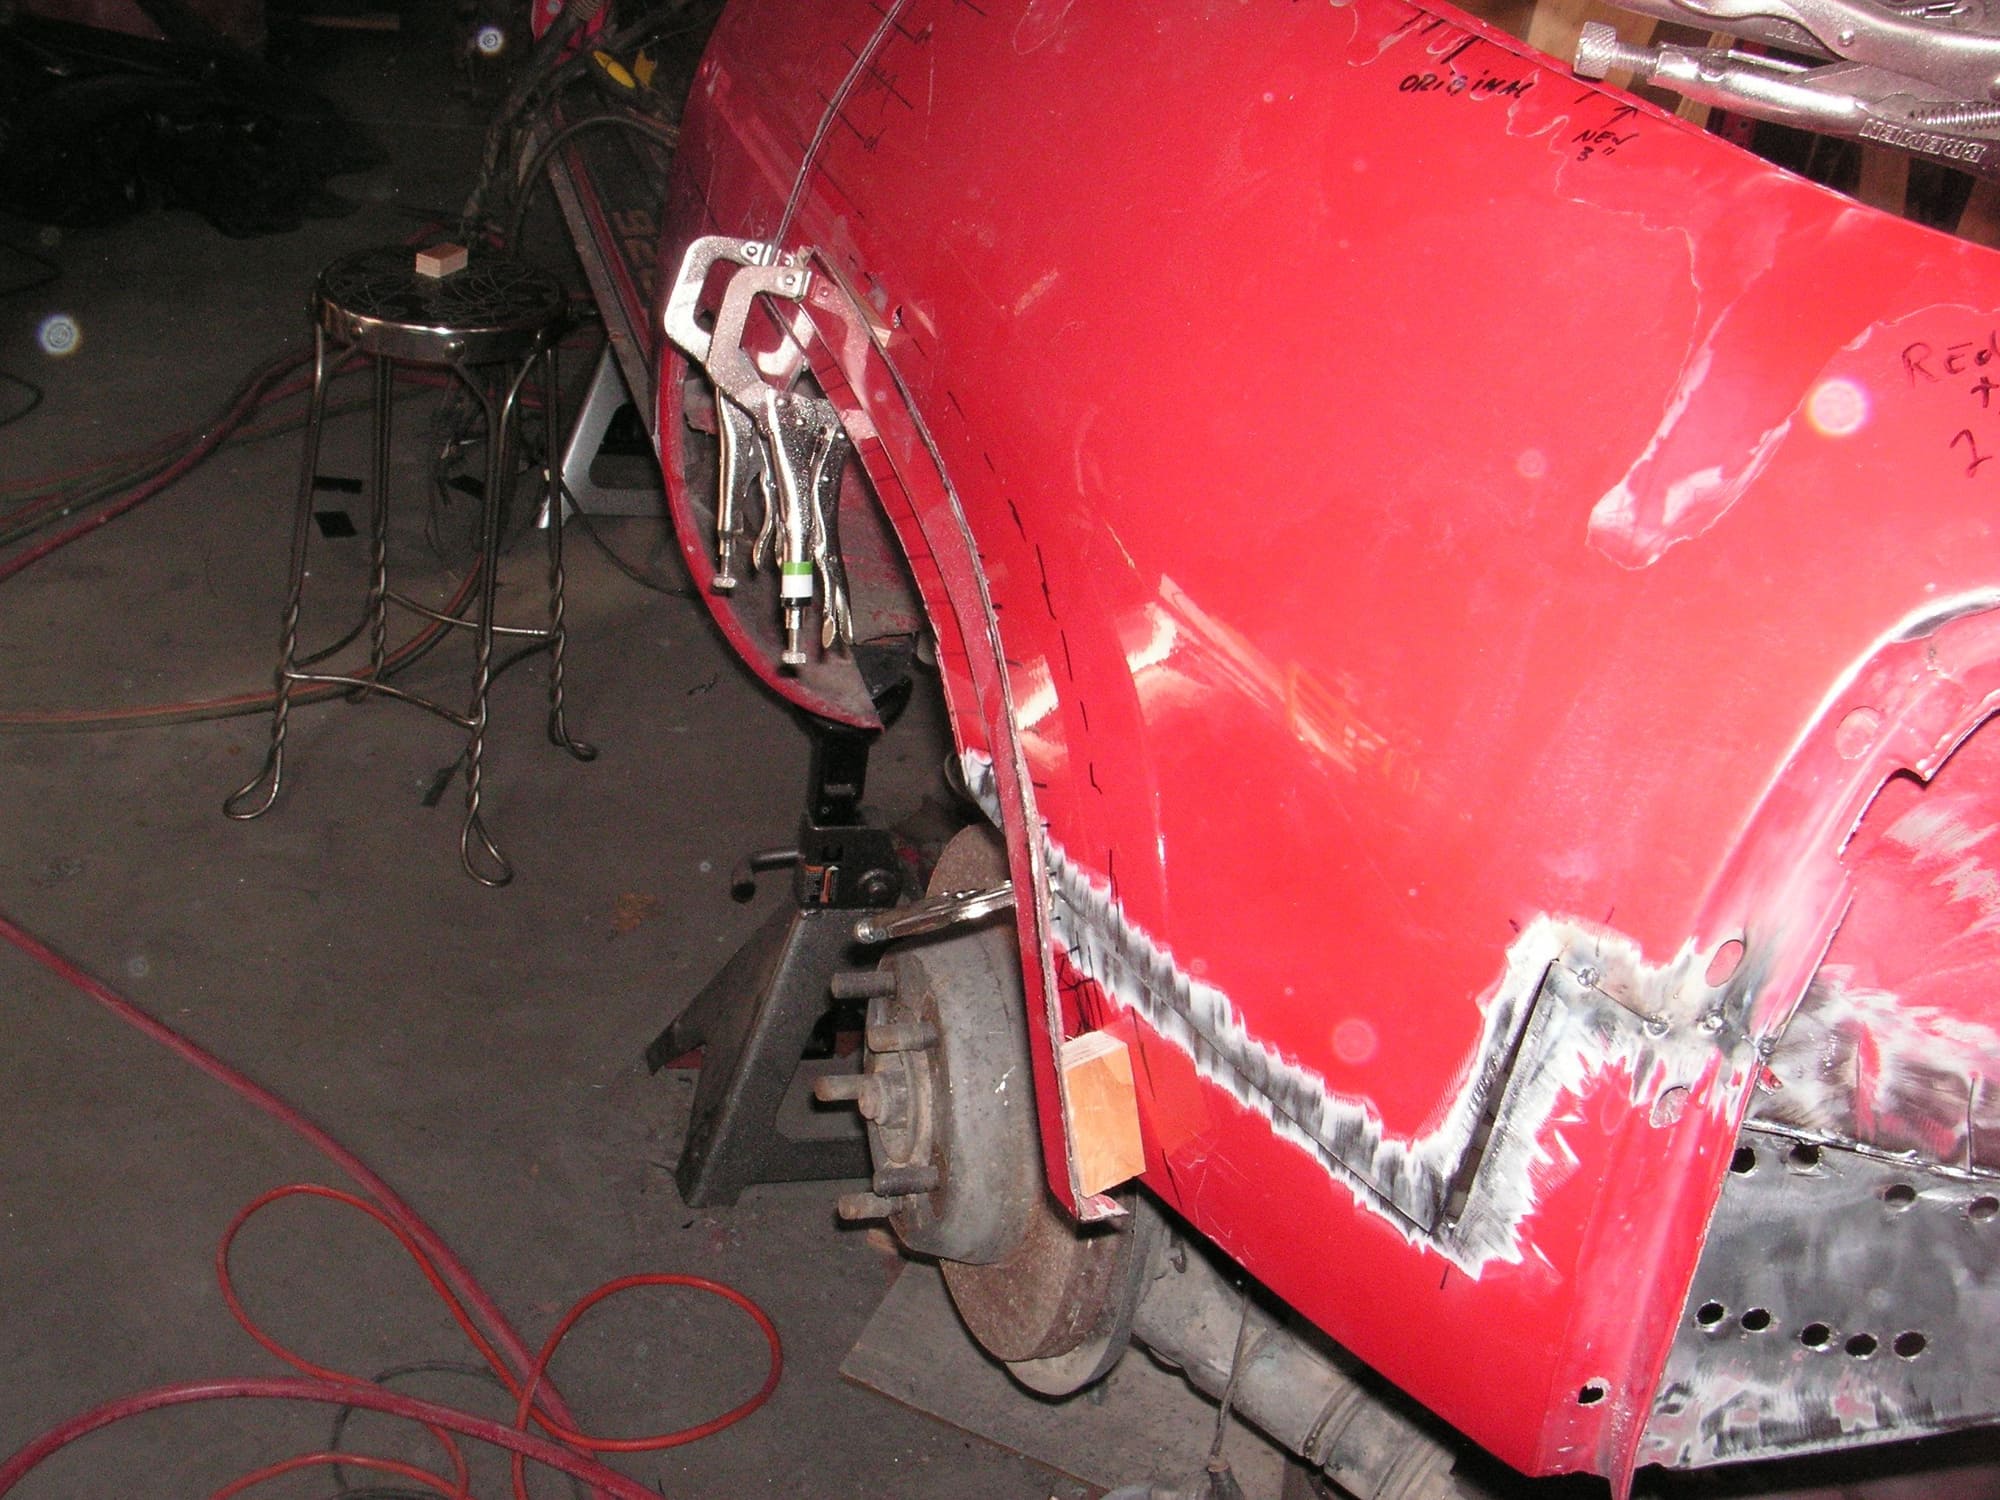
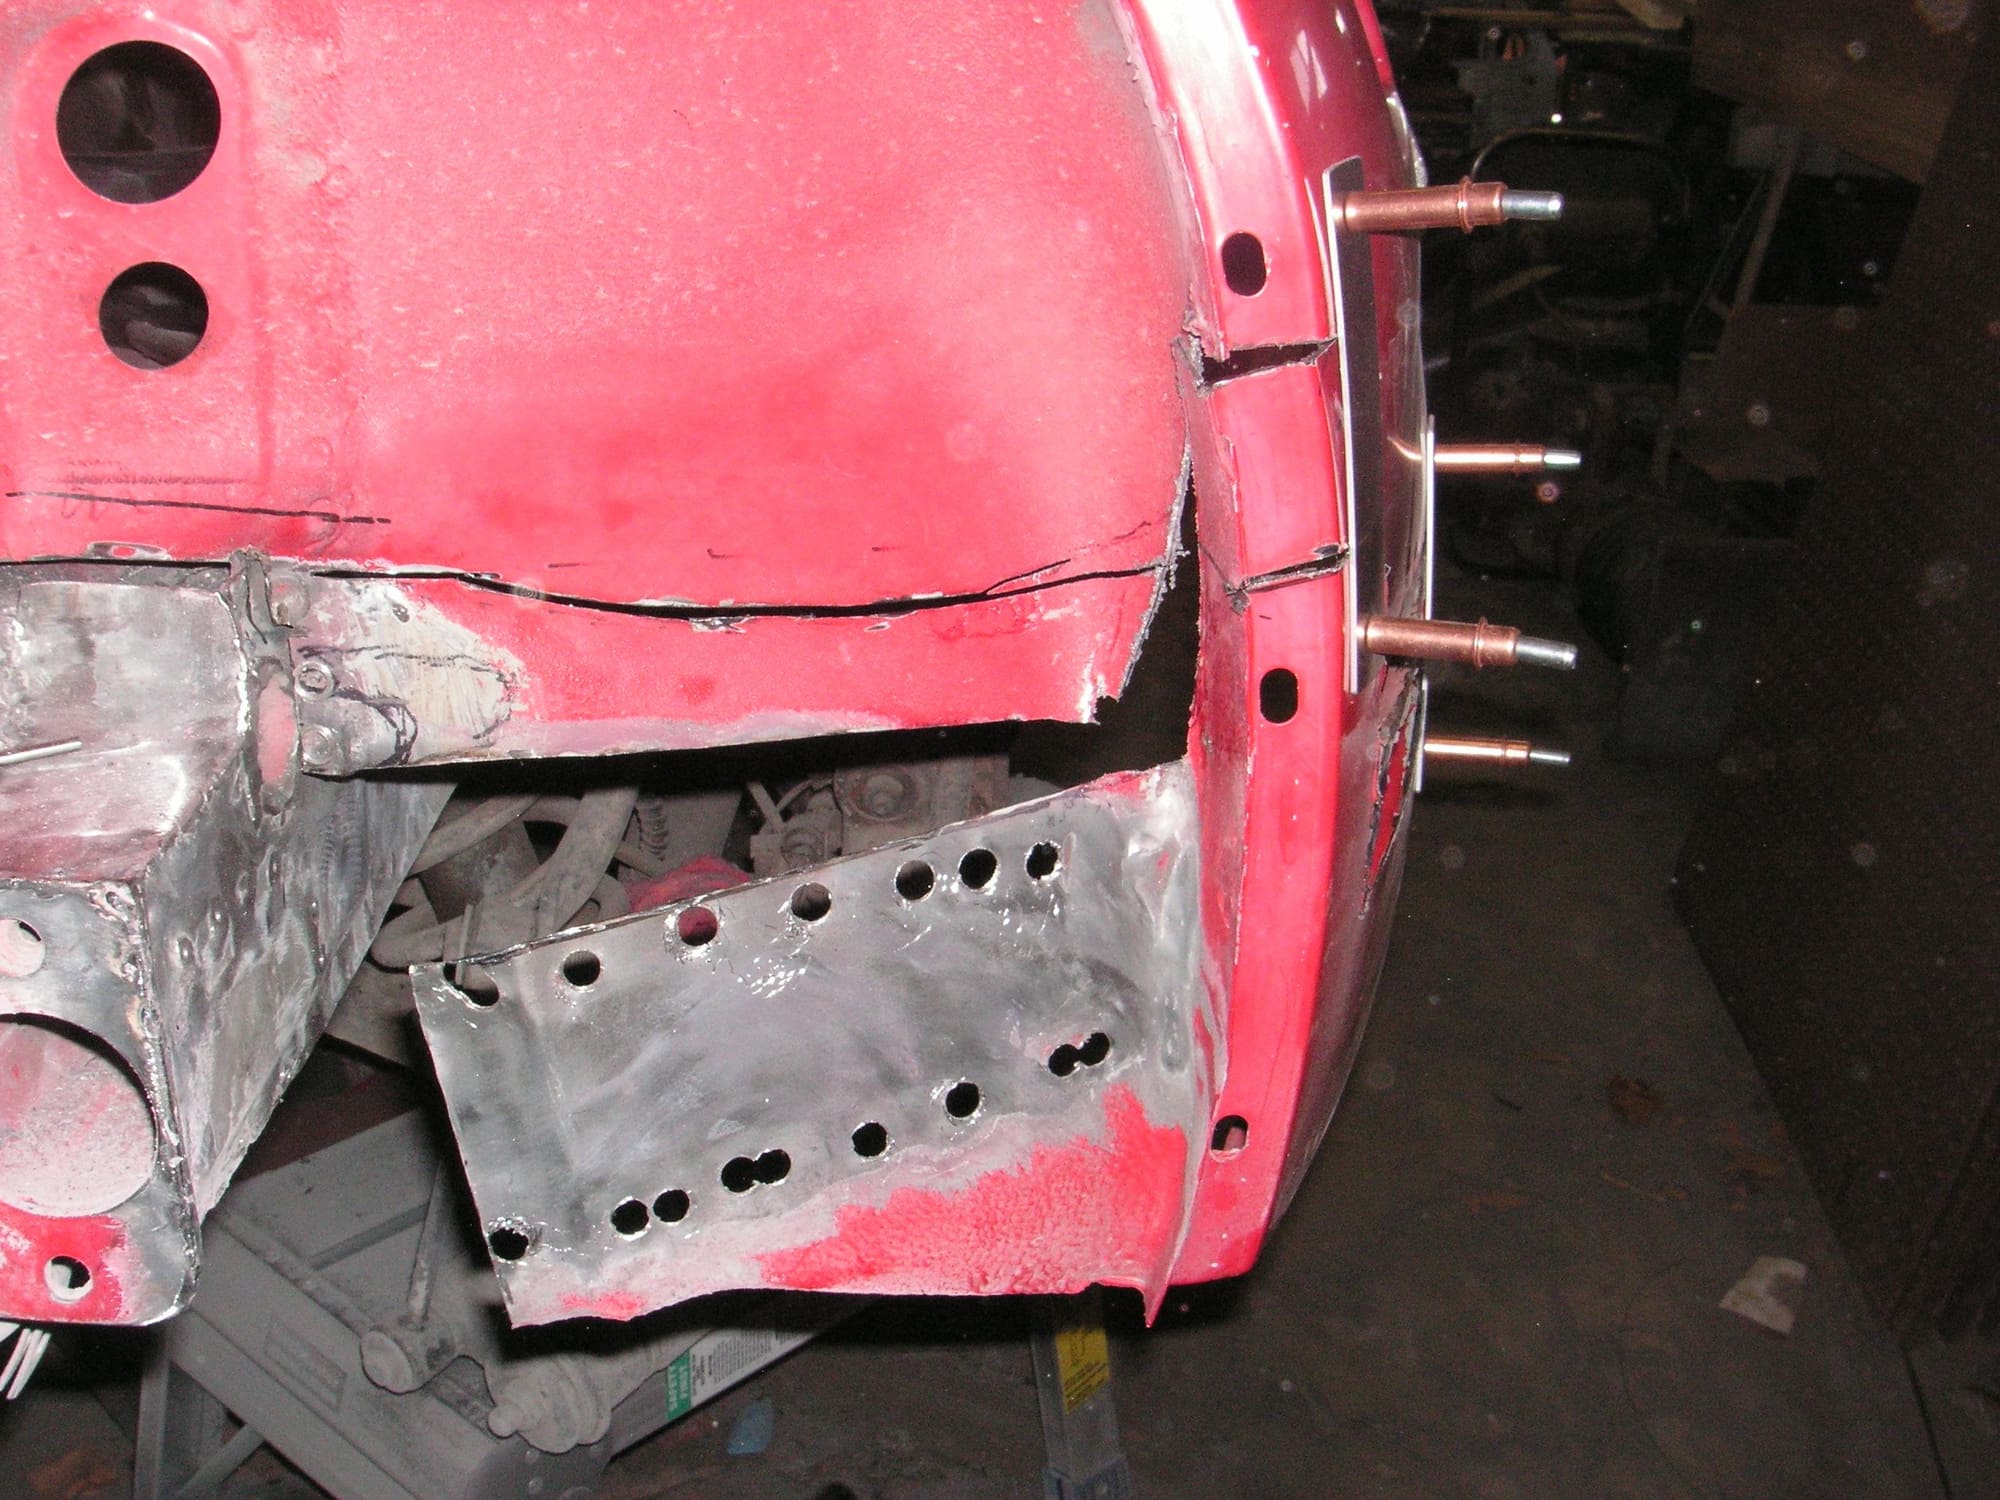
I made a bunch of the section guides and then put a couple of them into service on the right rear corner of the tail. I have it cut free now and have it held in rough place with two of the guides. Next I'll grind the cuts into the closest fit I can get and then weld it into place.
As I described above a bit, I am shortening the rear wheel arches front to back a half inch in the back and the average of that in the front. Then I would kind of like to shorten the front arches also when we get to the sectioning of the fenders. But I have been concerned about where and what alloy to obtain to fill the gaps; and also about all the extra welding and that close to-boot. Then in making the vertical cuts in these two small tail corner sections, doing them at a slight angle so that the width of the cut, the Kerf as it were, gets filled up when the bottom moves up it occurs to me that we can do the same, but much moreso in shortening the front arches. If we make our vertical cuts at much more angle, the angle of the hypotenuse of a right triangle 2 inches tall and 1/2 inch wide, that converts some of the removed material in the section to fill the gap otherwise caused by narrowing the arches. You may have to be there, so we will take some pictures when we get to it.
(Edit): Well, after some further thought it occurs to me that this will work only in respect to the top half of the car, the part above the section, since the bottom does not go anywhere. And even then the angle will be based on one inch up and half inch in since we are going to shorten the front arches by an inch verticaly. We will still have to graft in some aluminum to narrow the bottoms of the front arches.
Last edited by Jerry Feather; 06-07-2018 at 12:09 PM.
Of course, it goes without saying, but we are eliminating the rear side marker lites in this project and that is why there is the big offset in the section cut with these rear corners. We will be eliminating the front ones in like manner when we get to the fenders.
Last edited by Jerry Feather; 06-03-2018 at 12:27 PM.
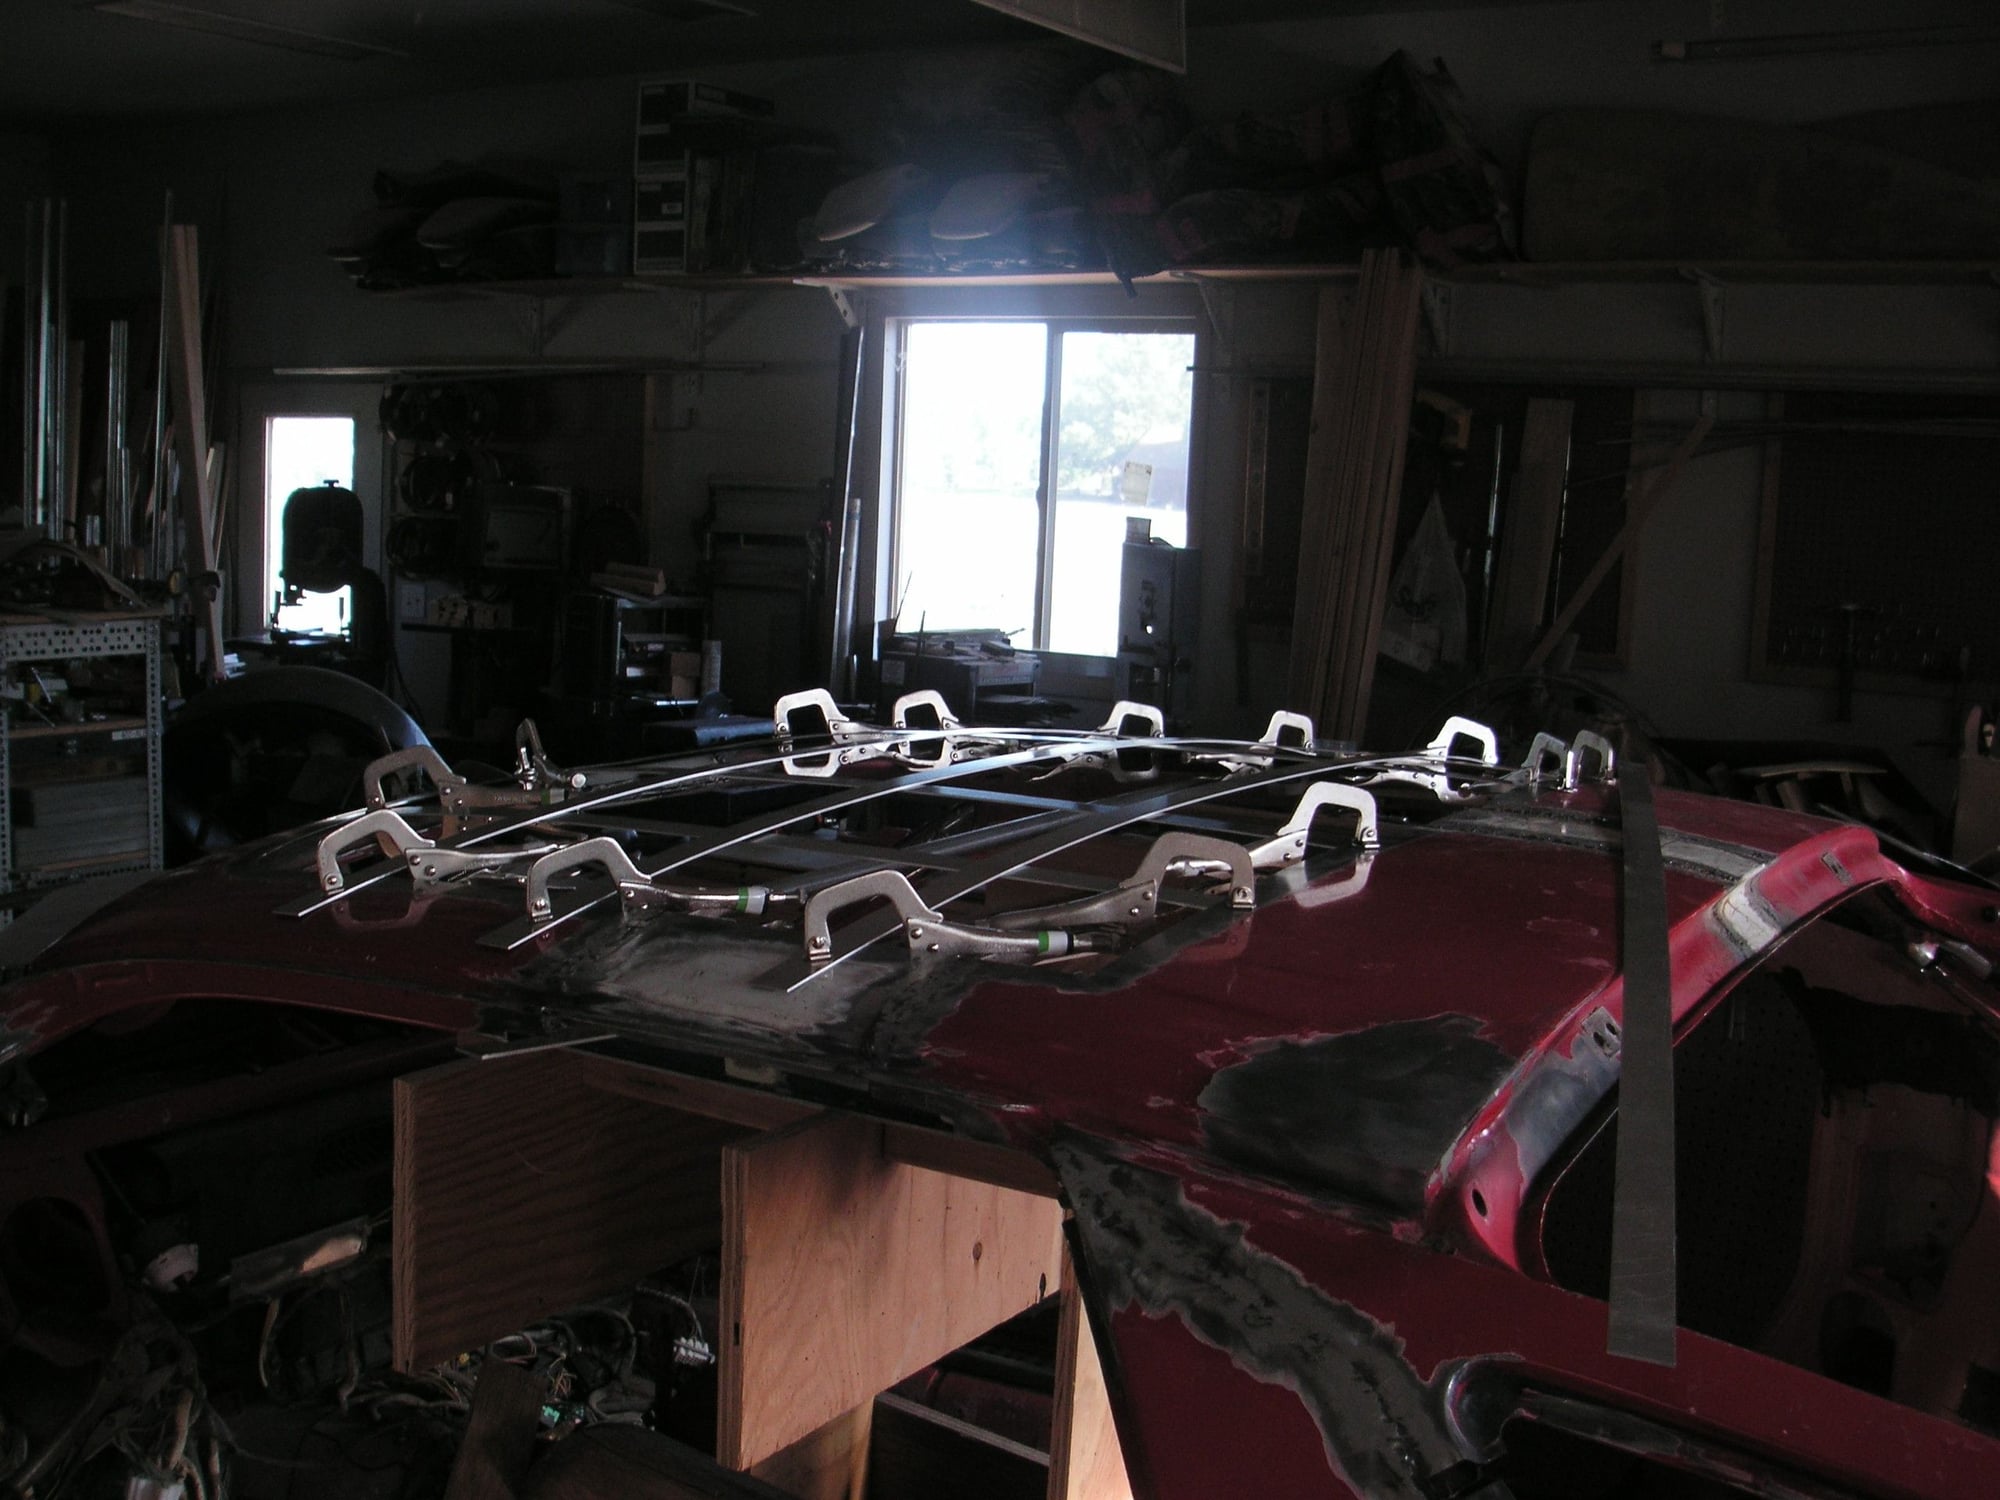
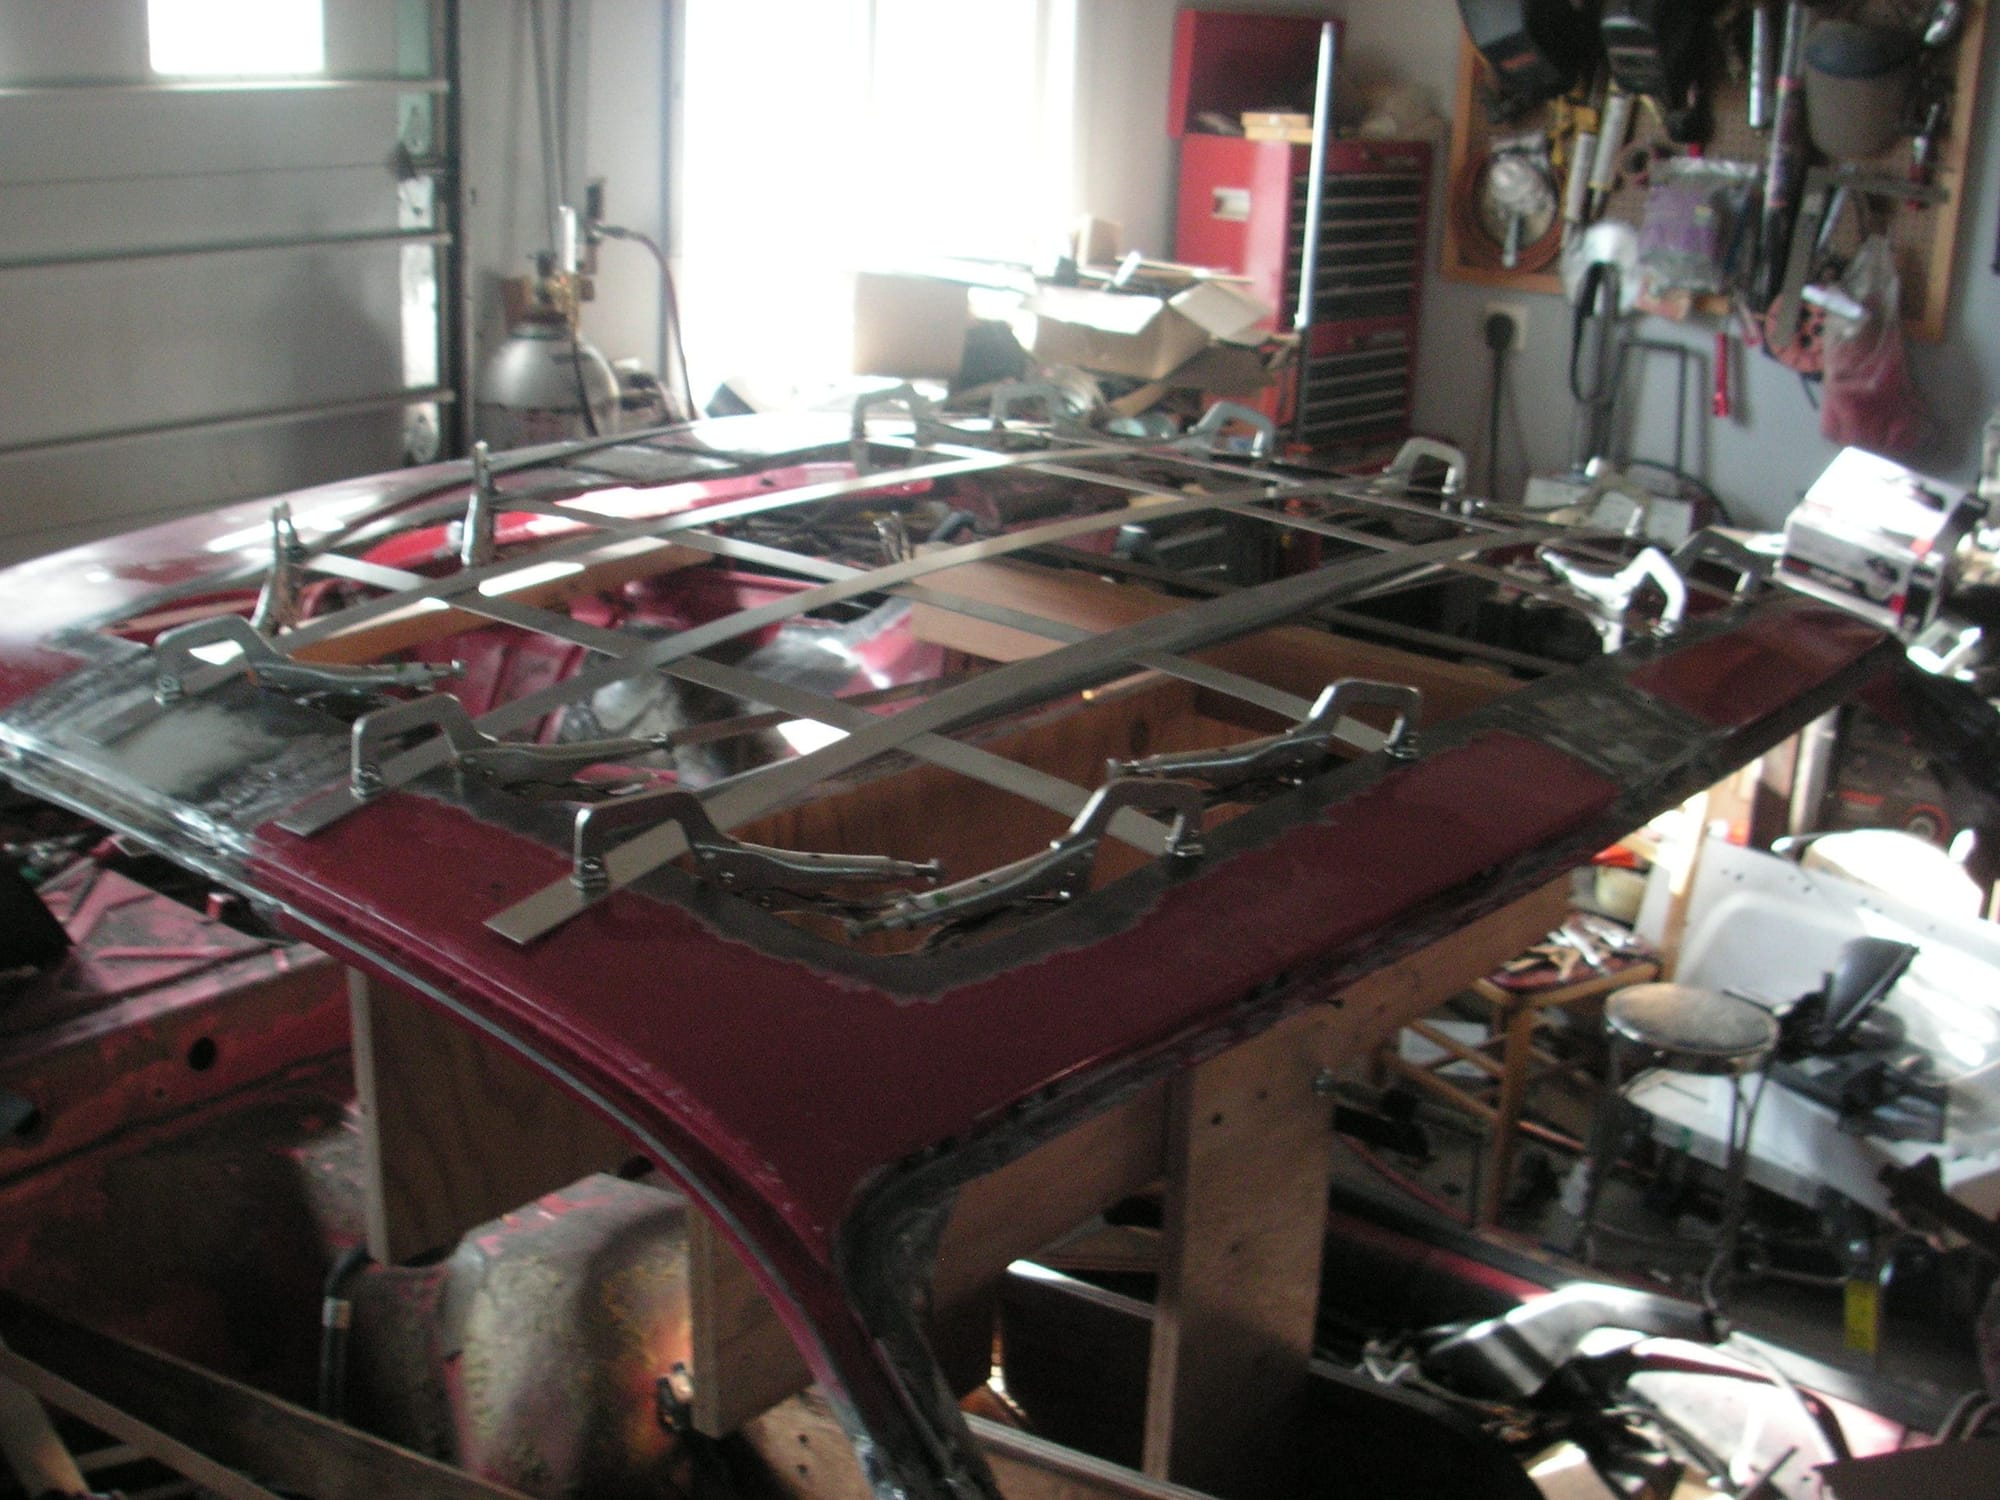
I didn't get a lot done on this project yesterday since I was trying to finish up my office move. I did get to lay out some strips of aluminum across the roof opening to use as a pattern to make a buck sort of think to use to try to find a donor roof at the junkyard, and to use to help make a mold for the headliner. I think I have the shape just about right. It is amazing how much difference a very small amount of change makes. Even as little as 1/8 inch shows up in the shape.
Last edited by Jerry Feather; 06-07-2018 at 10:46 AM.
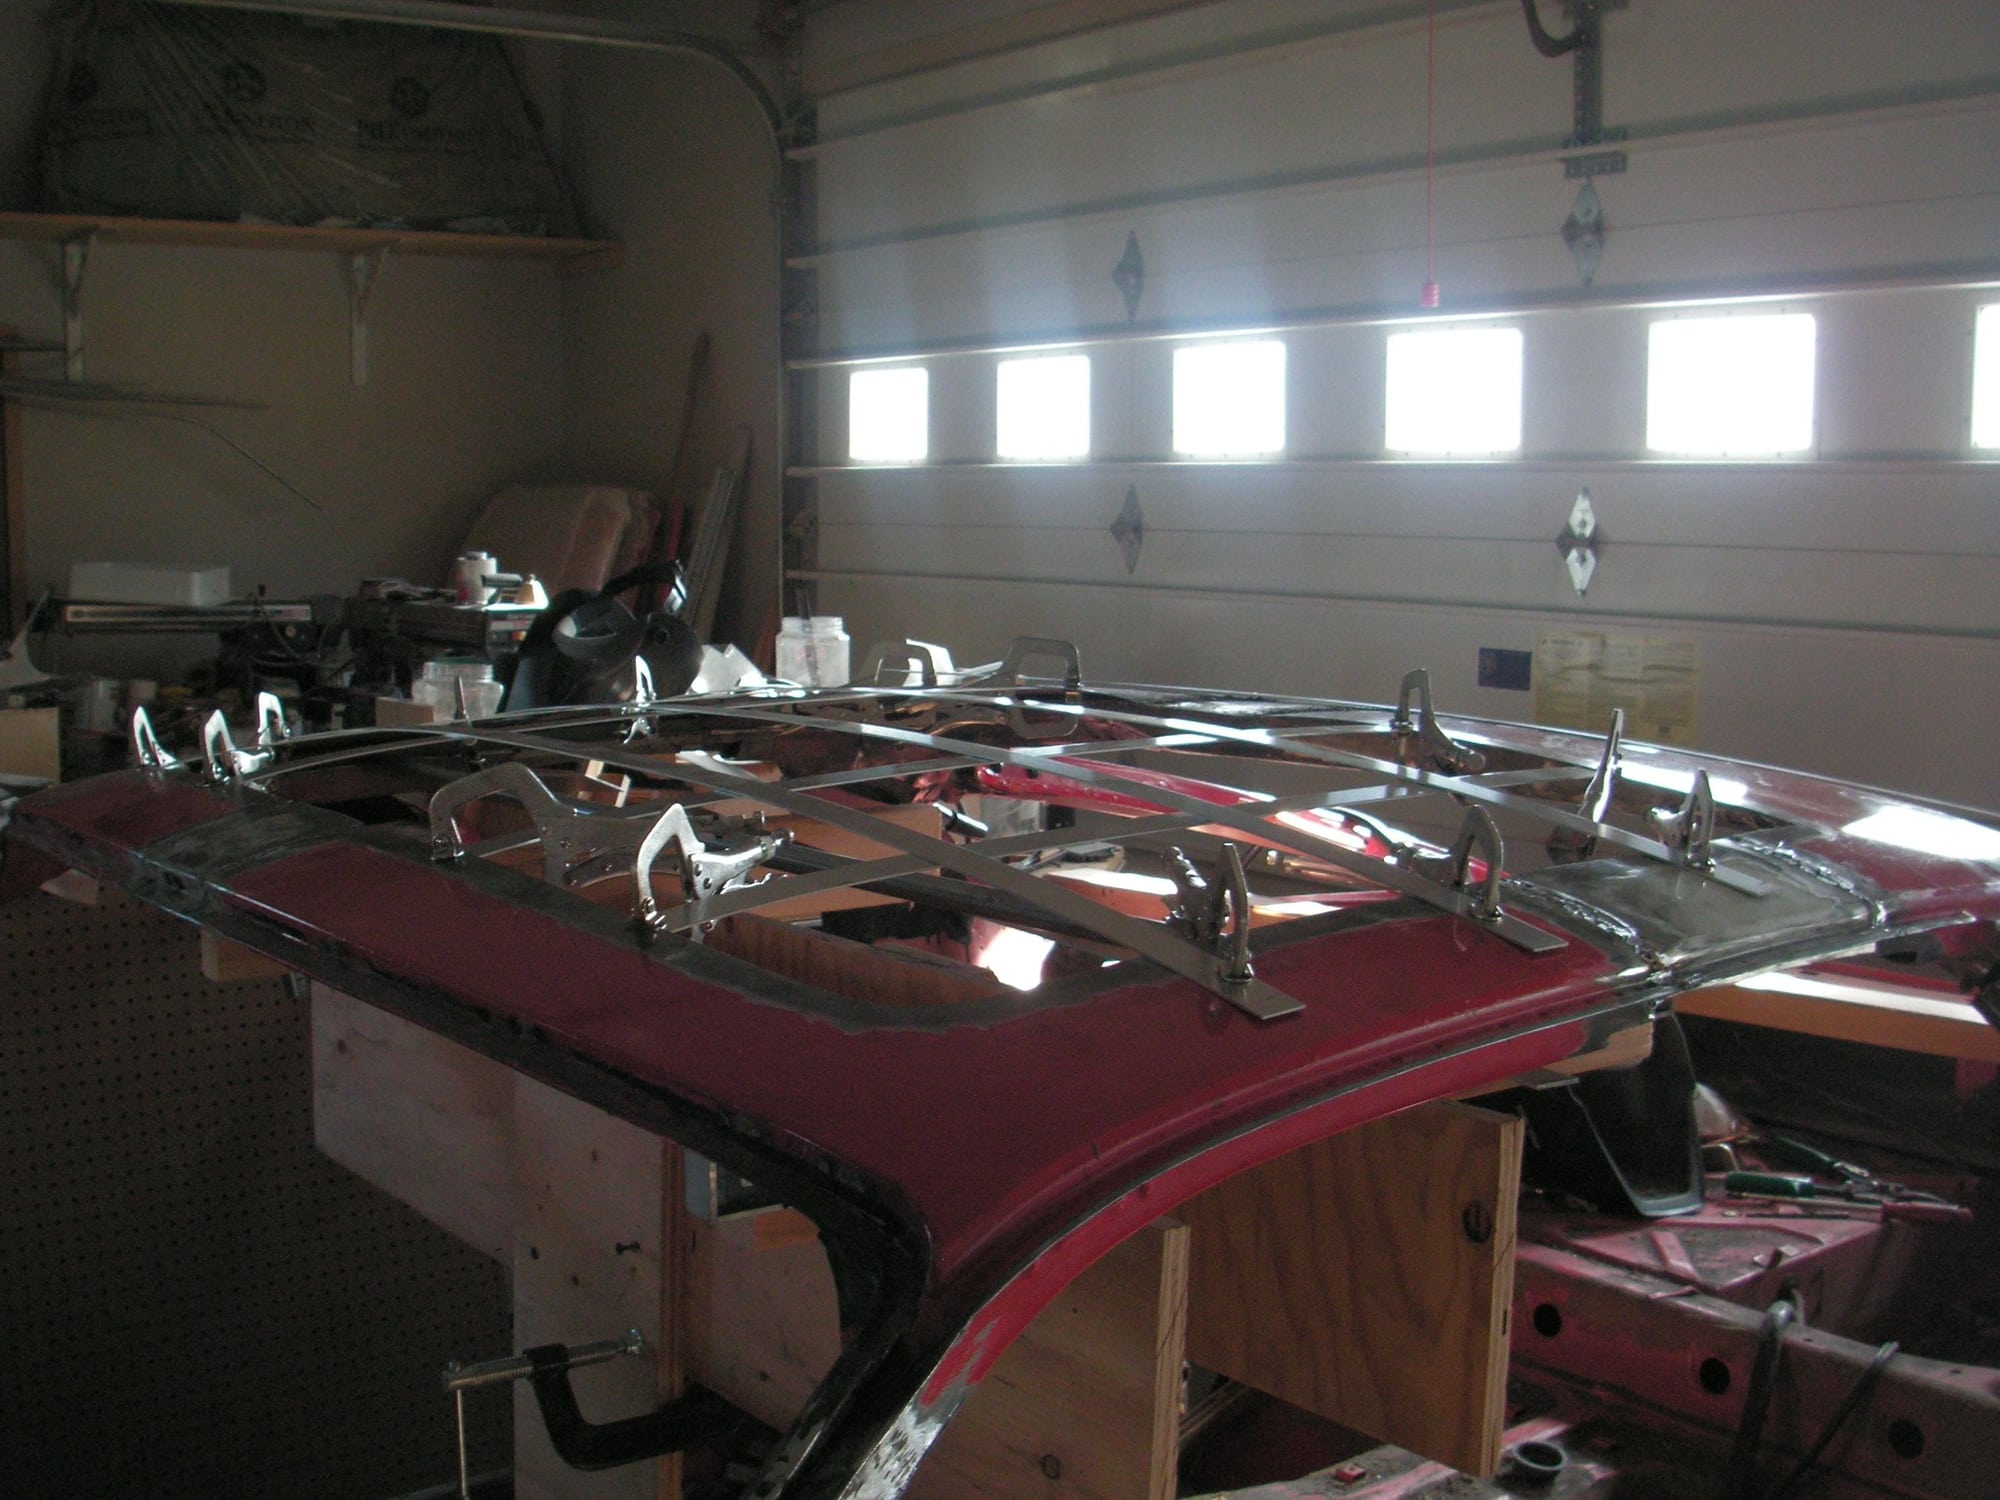
After I got home from shuffling stuff around at the new office space I spent the rest of the afternoon adjusting my metal strips to get the correct roof curvature, then I worked up some wood and made the pieces of the buck, or whatever it might be called, to use to find a roof with the correct shape for grafting into the big hole. The pieces worked up pretty well into the shape we need, and next I'll probably epoxy them together in place so I can carry it around. I think it will also be useful in working up the mold for the headliner without having the new roof welded in as I plan.
I trimmed my roof pattern down some and then epoxied it together. When the epoxy sets I'll glue in some pieces to stiffen the corners and then I can put it into service trying to find the right donor roof.
Last edited by Jerry Feather; 06-07-2018 at 10:43 AM.
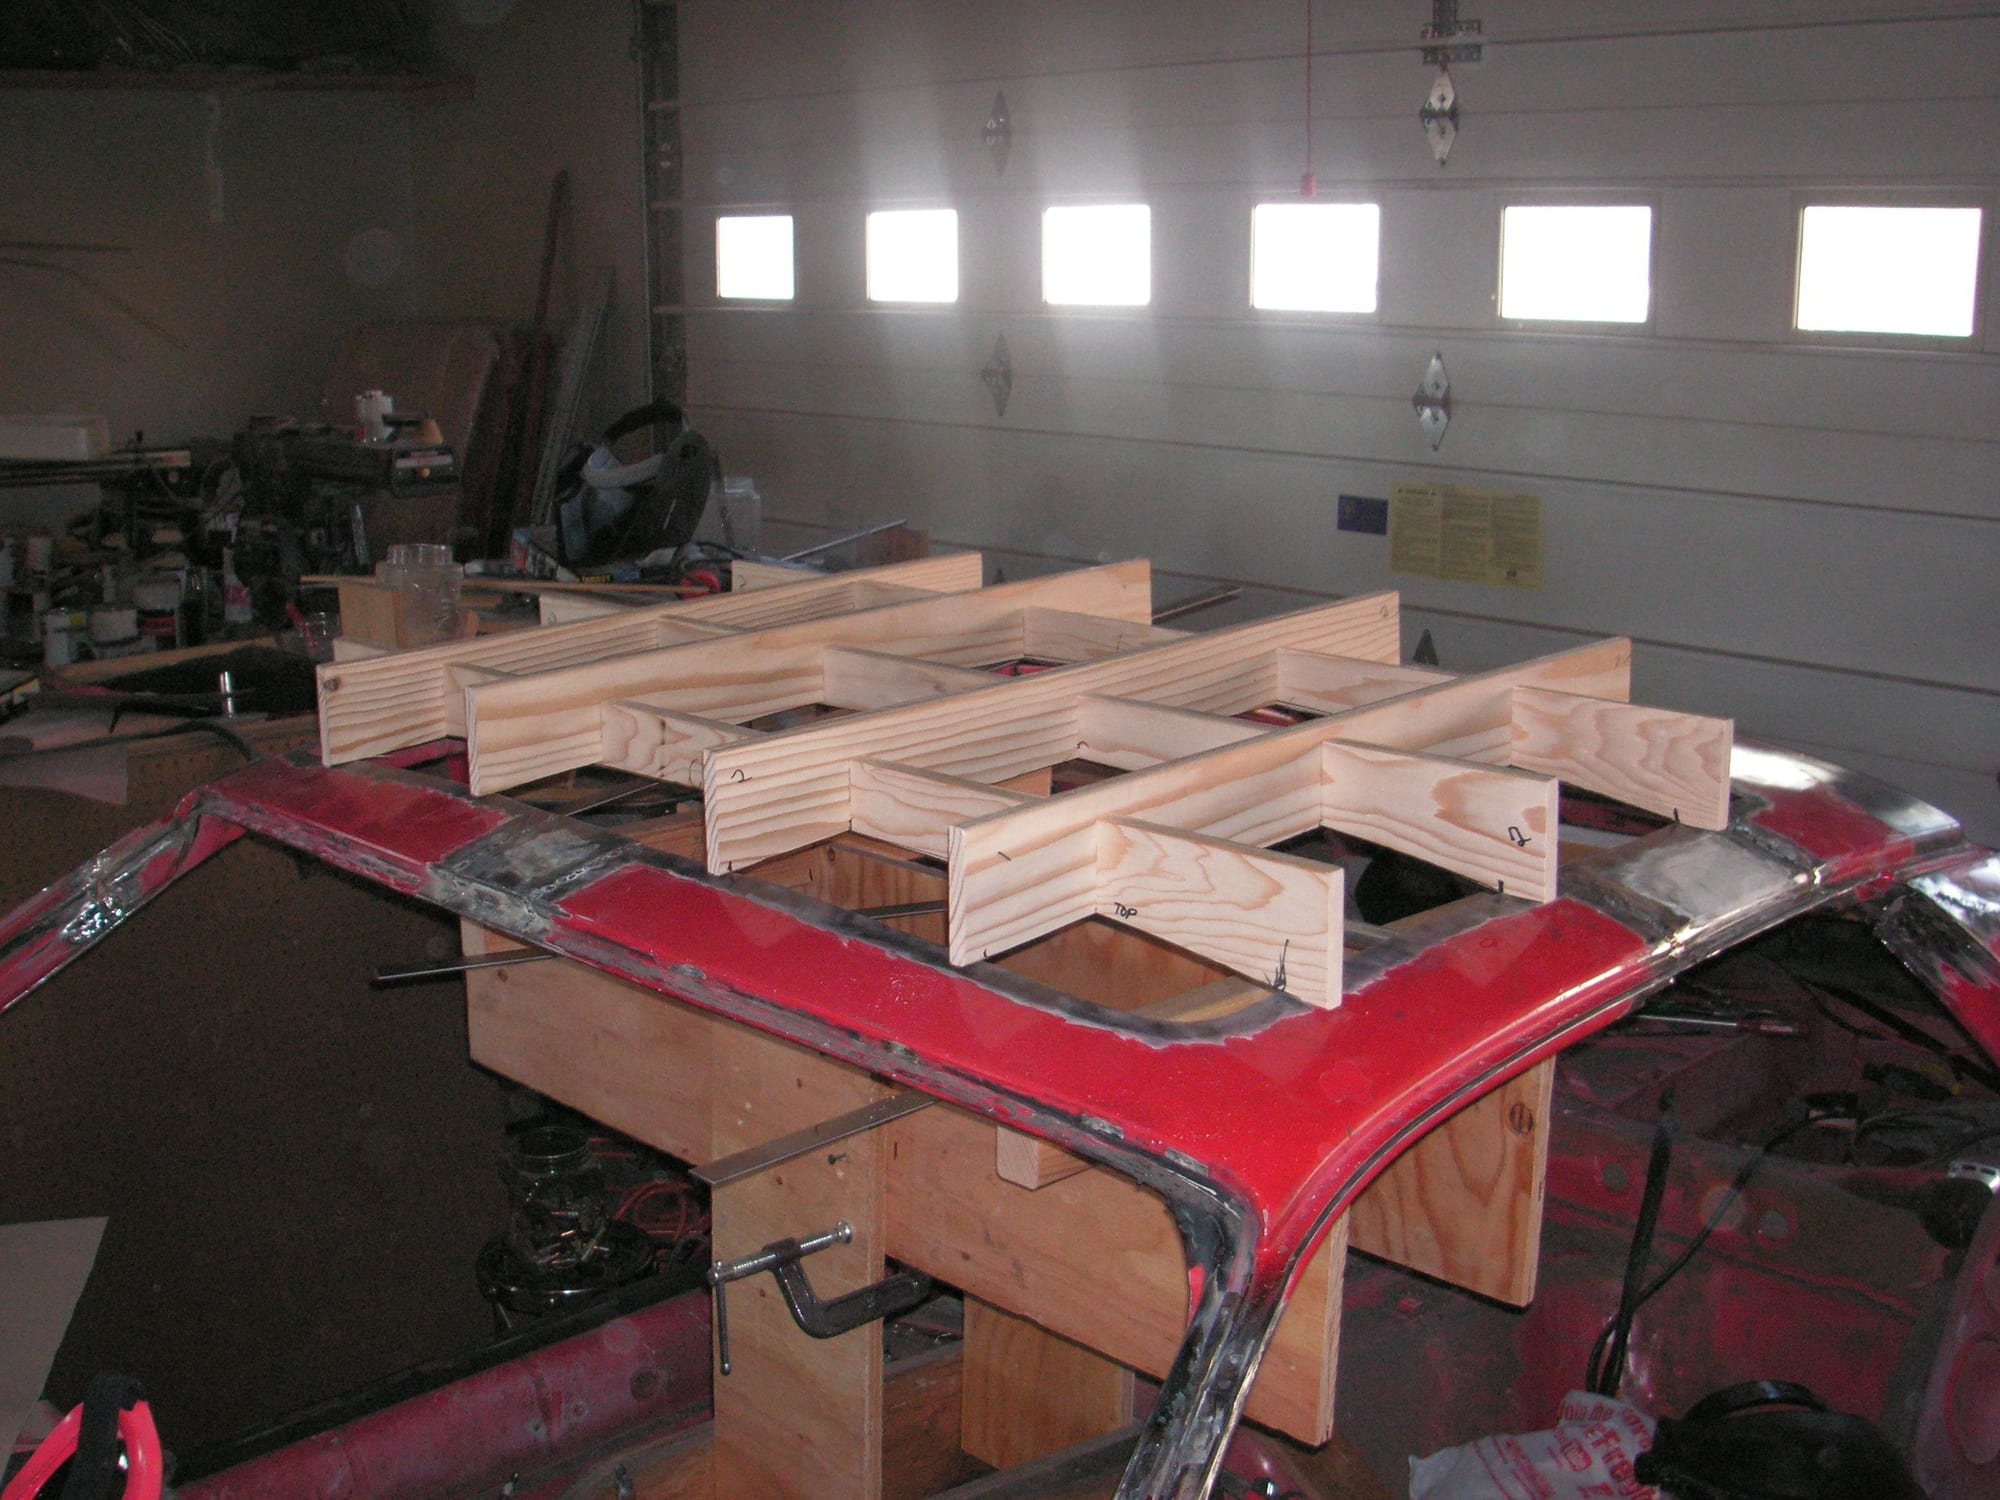
You can see that I have left some of the guide post structure in the car. I am going to use that as the base for the next phase of this endeavor and that is to make a mold for the headliner. I want to make it at this point while we can still work thru the large opening in the roof to a great extent. I am going to move the two two-by-fours outboard quite a bit from where they were originally and I have shortened them some already. Those, together with the two crossways pieces of 3/4 inch plywood, will be the base for fabricating the new mold. I'm going to make the mold in 4 pieces in the car and then fix them together outside the car to finish up across the center as the final mold. I have quite a bit of it figured out so far, but have not yet determined just how best to form the corners. That will probably come to me as we progress.
The roof pattern is now pretty much complete and setting up with some blocking in many of the corners; so I hope to have some time today away from the office to go try it out at one of the junk yards. Wish me luck.

 05-31-2018, 10:39 AM