When you click on links to various merchants on this site and make a purchase, this can result in this site earning a commission. Affiliate programs and affiliations include, but are not limited to, the eBay Partner Network.
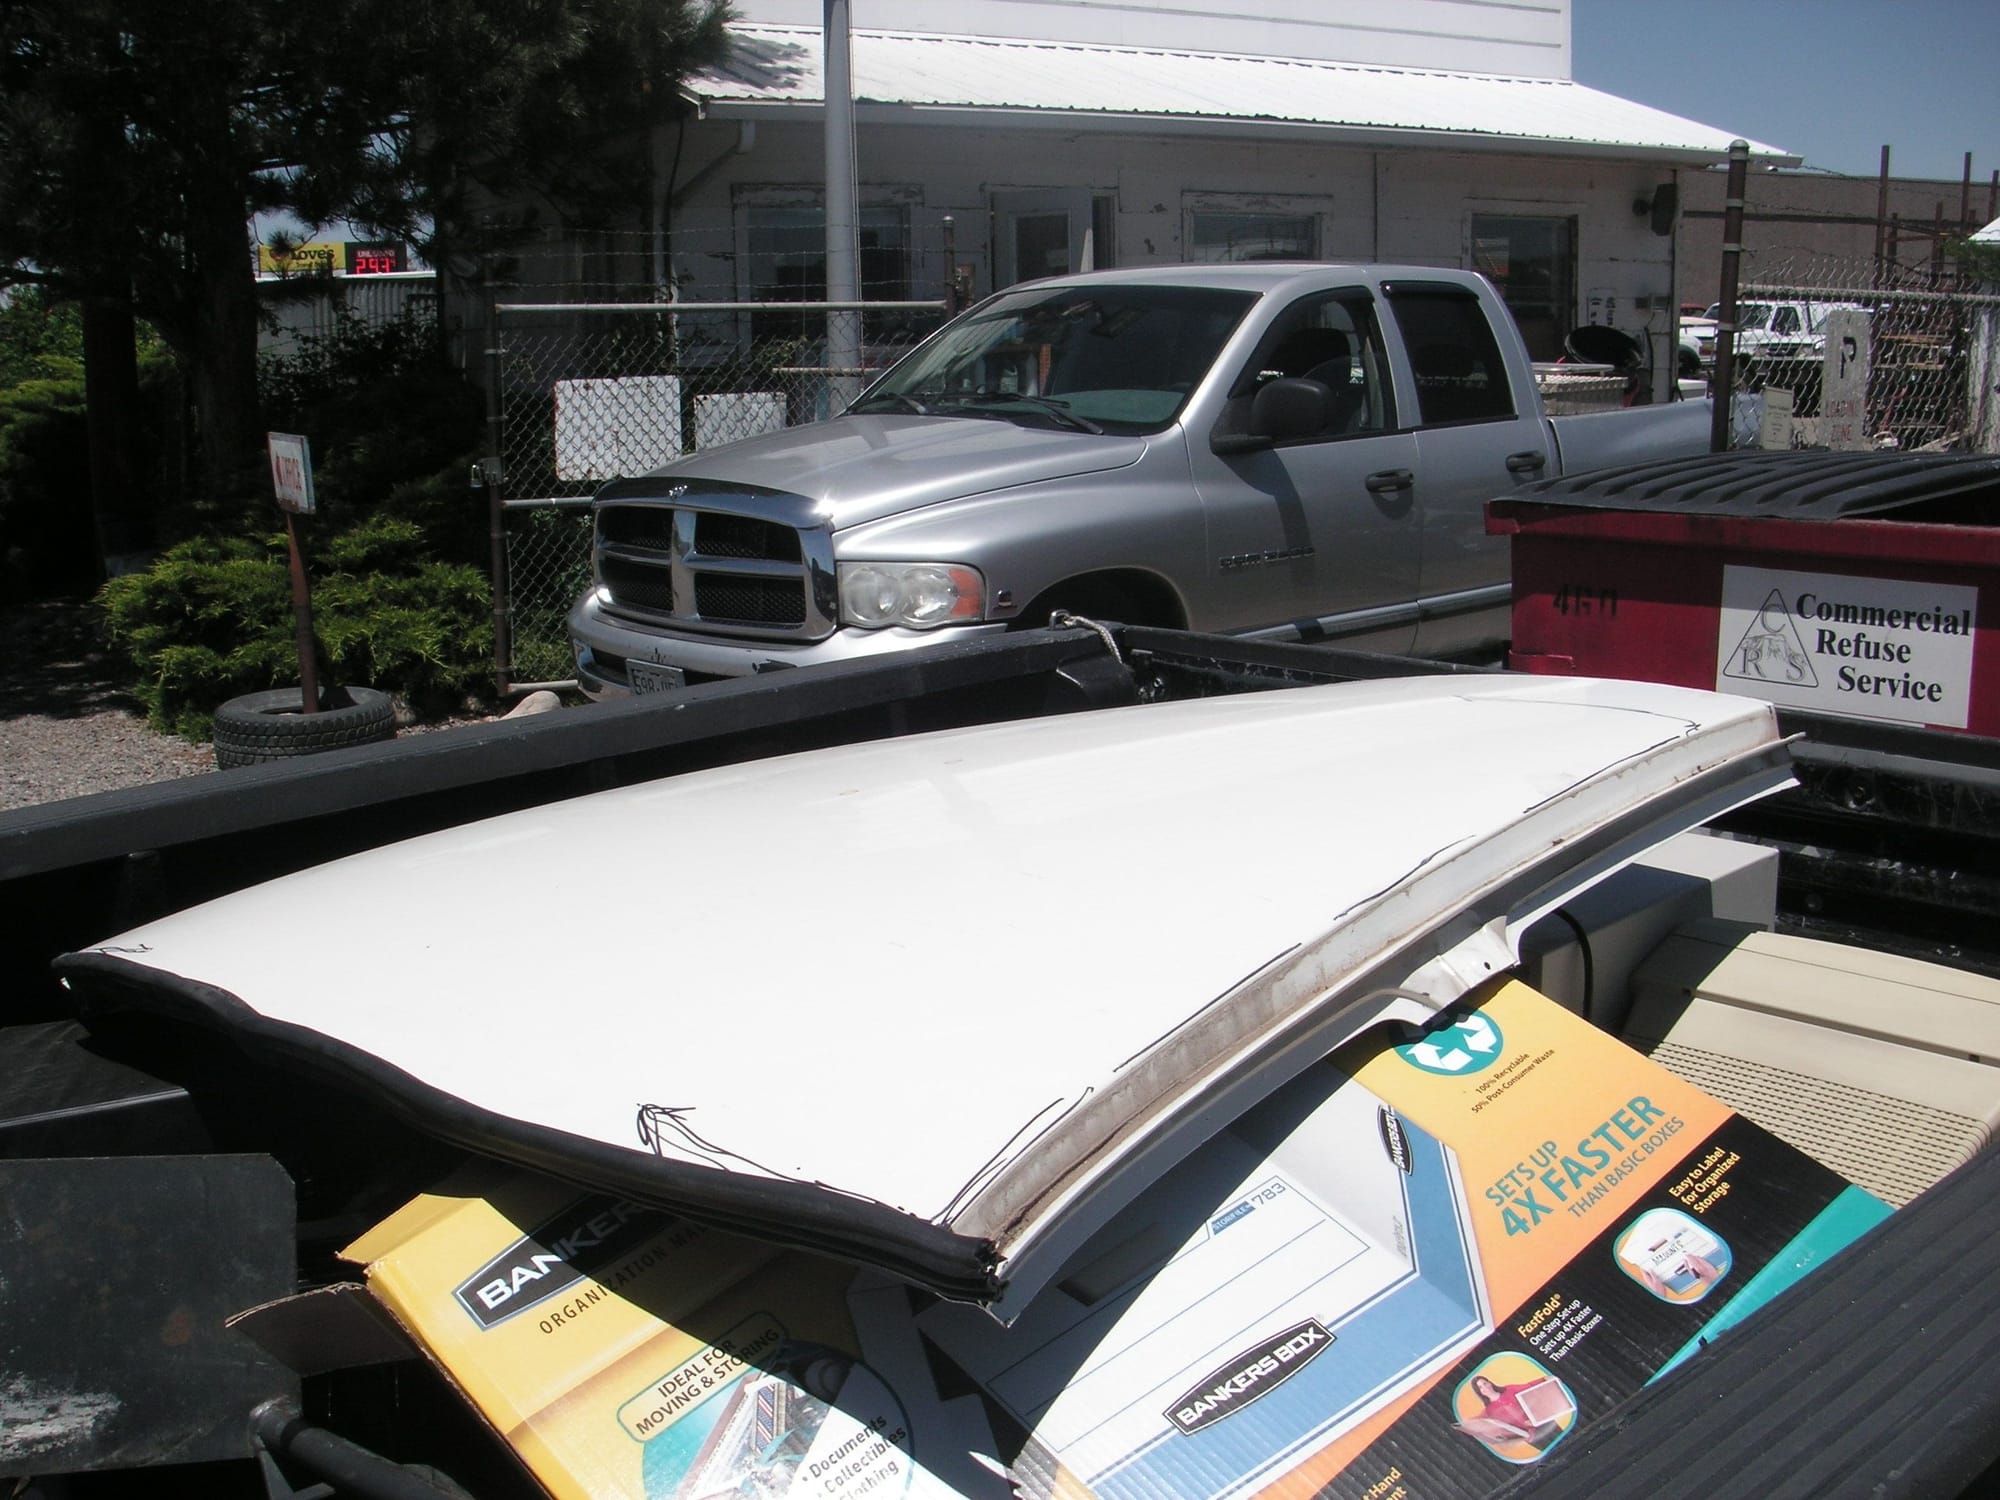
Well, that was certainly an adventure. I took my roof pattern out to the junkyard and got permission to take it out in the yard and try it out on various car roofs to see if I could find one that will match the curvature close enough. I discovered several things. One is that not too may late model cars have a roof wide enough to accommodate our needs. Another is that most of the roofs are too flat. I did find one roof that was kind of close and might have even worked with some cutting and shrinking here and there, but then I found another on a 2003 Saturn that fits almost exactly. I have arranged to have it cut out/off and will pick it up tomorrow . It cost me $200 plus tax.
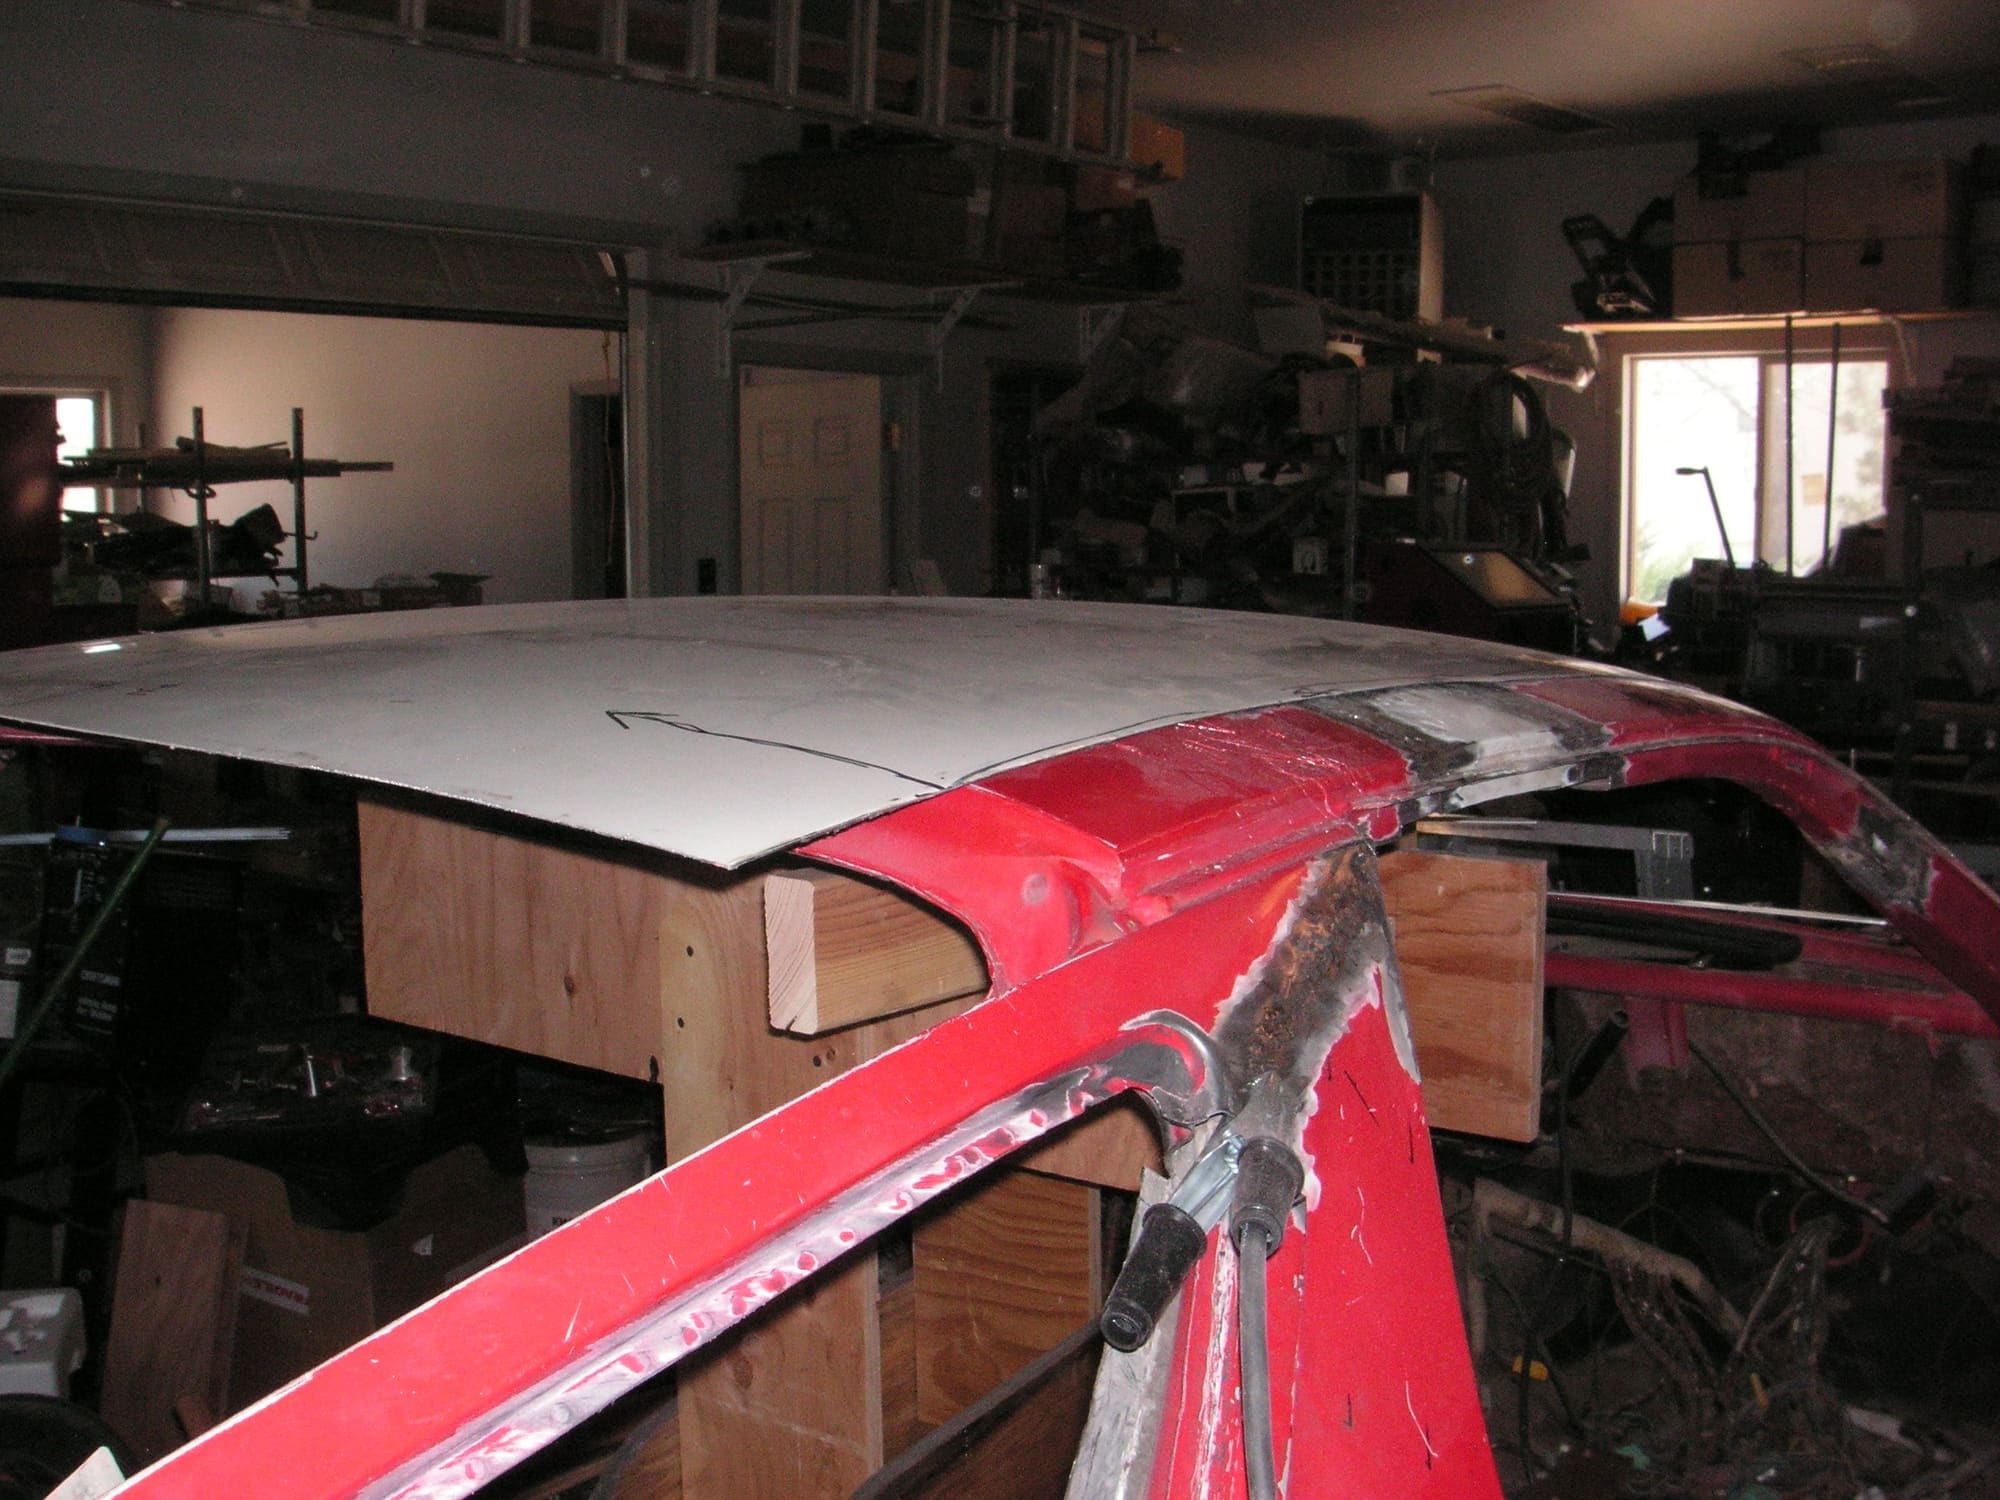
Here are some pictures of the pattern on the new roof. You can see that it fits very close except for one corner. That one corner is the result of my pattern having taken on a little bit of twist when I took it off the car to let the epoxy cure while it was standing on one end. However, when I pull it down on that corner it looks like it fits just fine.
Last edited by Jerry Feather; 06-06-2018 at 11:52 PM.
Yeah, watching this thread everyday, but too gobsmacked to say much. Except that when you started I thought 'Maybe I'll do some of that myself', since I have always felt the tail end of my convertible is too long. No longer thinking that. I'm no stranger to big projects, but this is way above and beyond.
^ This exactly. I had to work up the nerve to tackle basic stuff like timing belts and intake refreshes. I can't even imagine trying to do something like this.
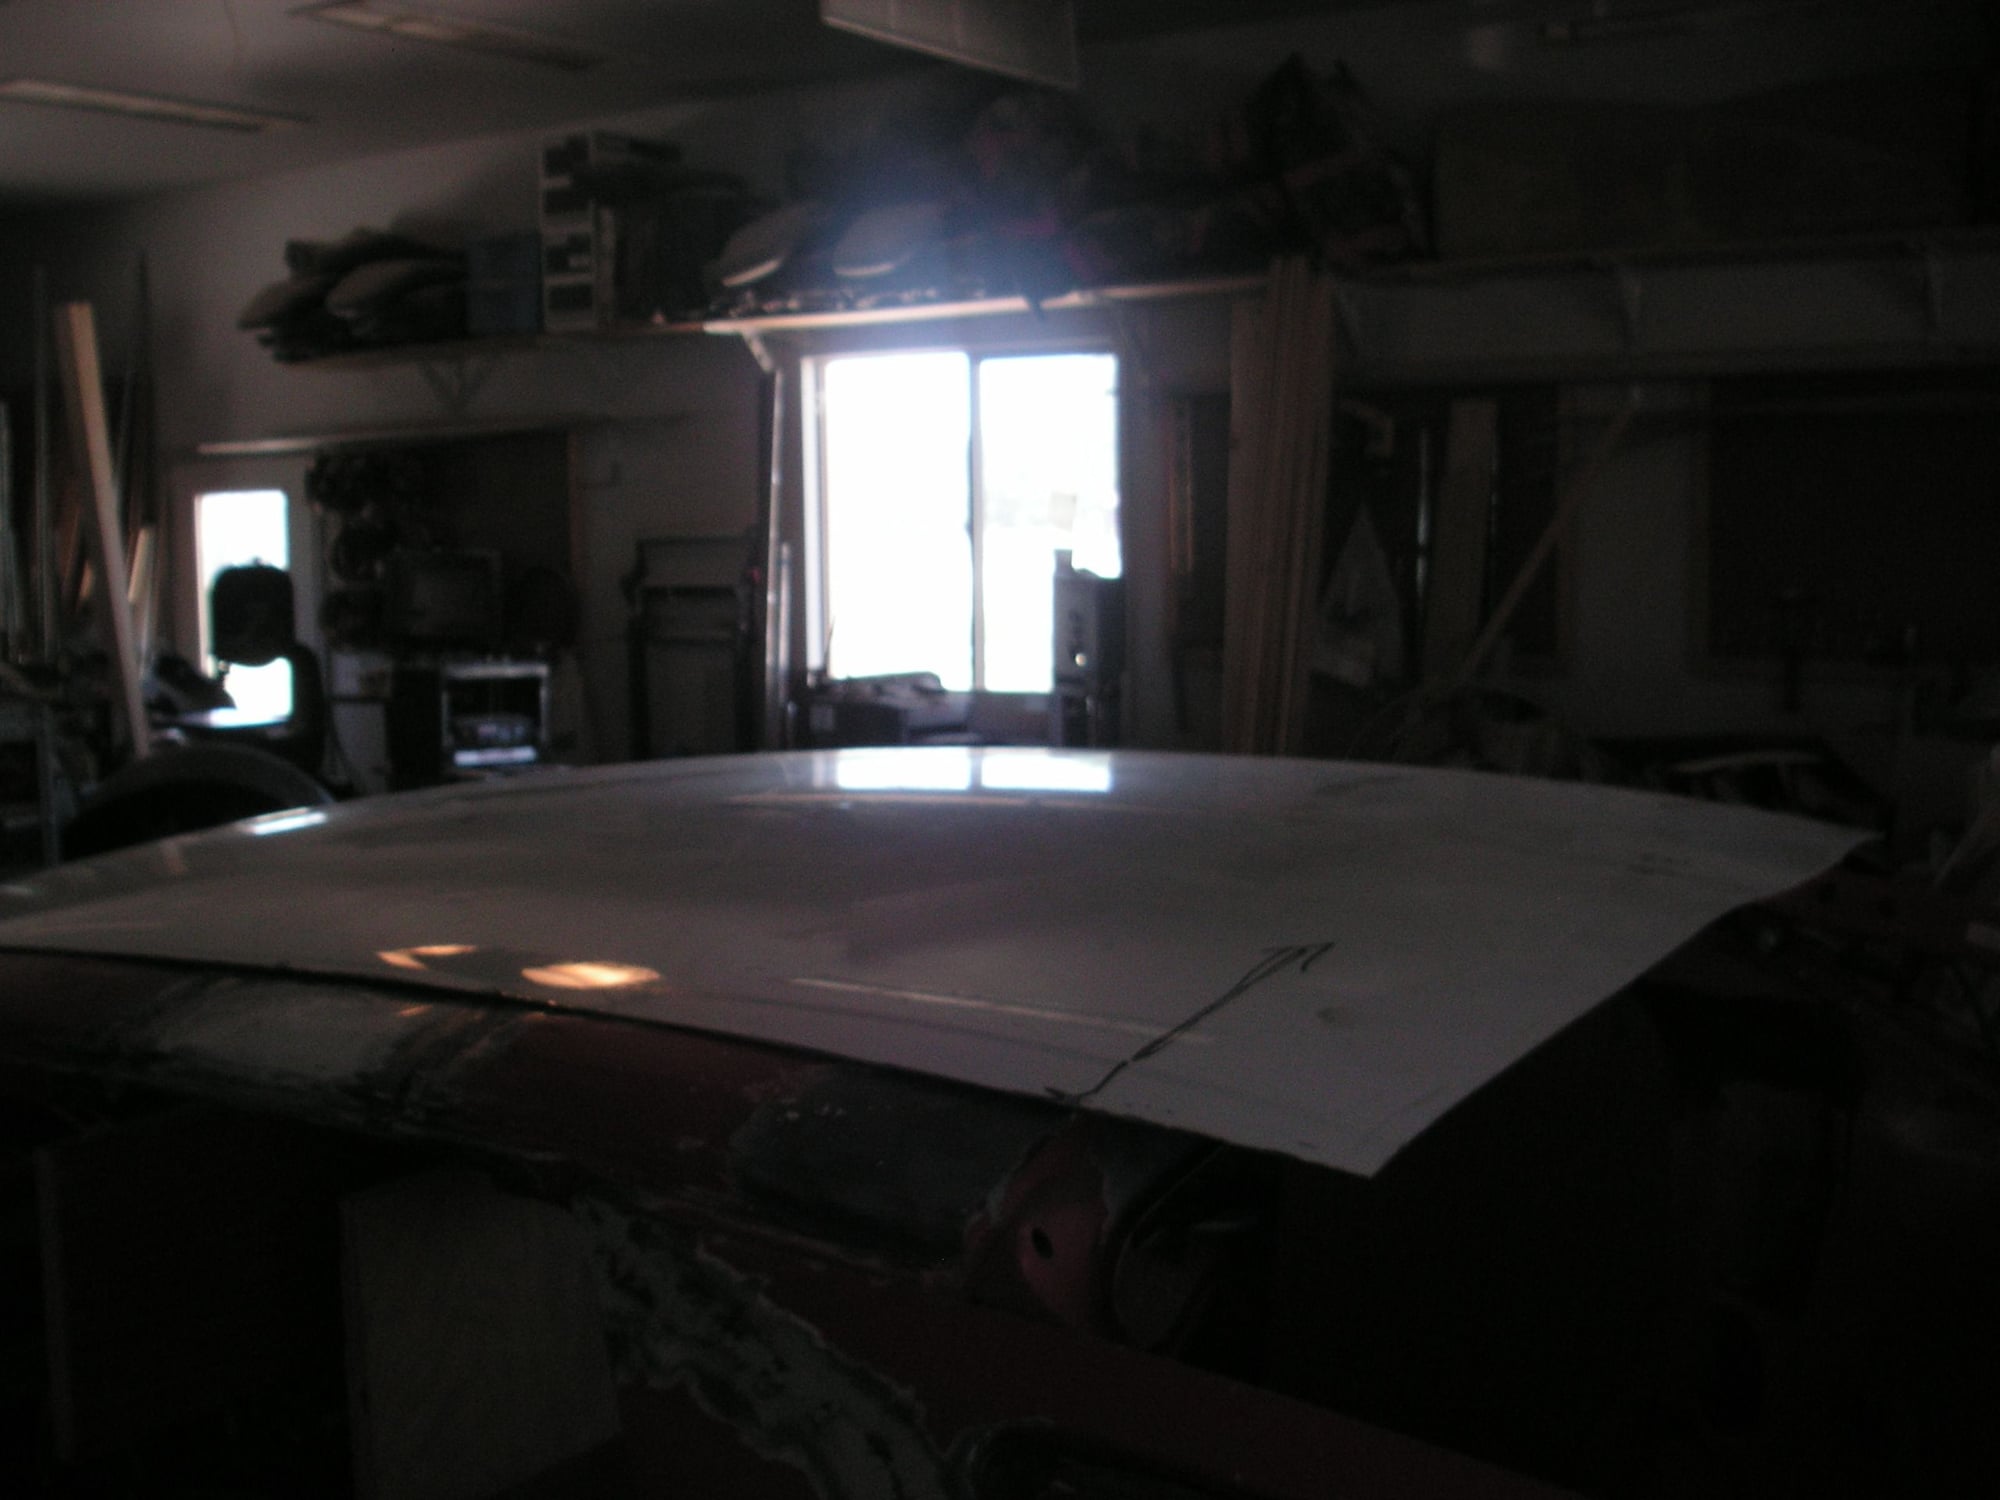
I think I am finding that this piece of donor roof is actually a pure stroke of luck. I was pretty sure that I could eventually find something close and that I could cut and shrink it to get it to work, but this piece of Saturn roof fits so perfectly that I cannot quite believe it.
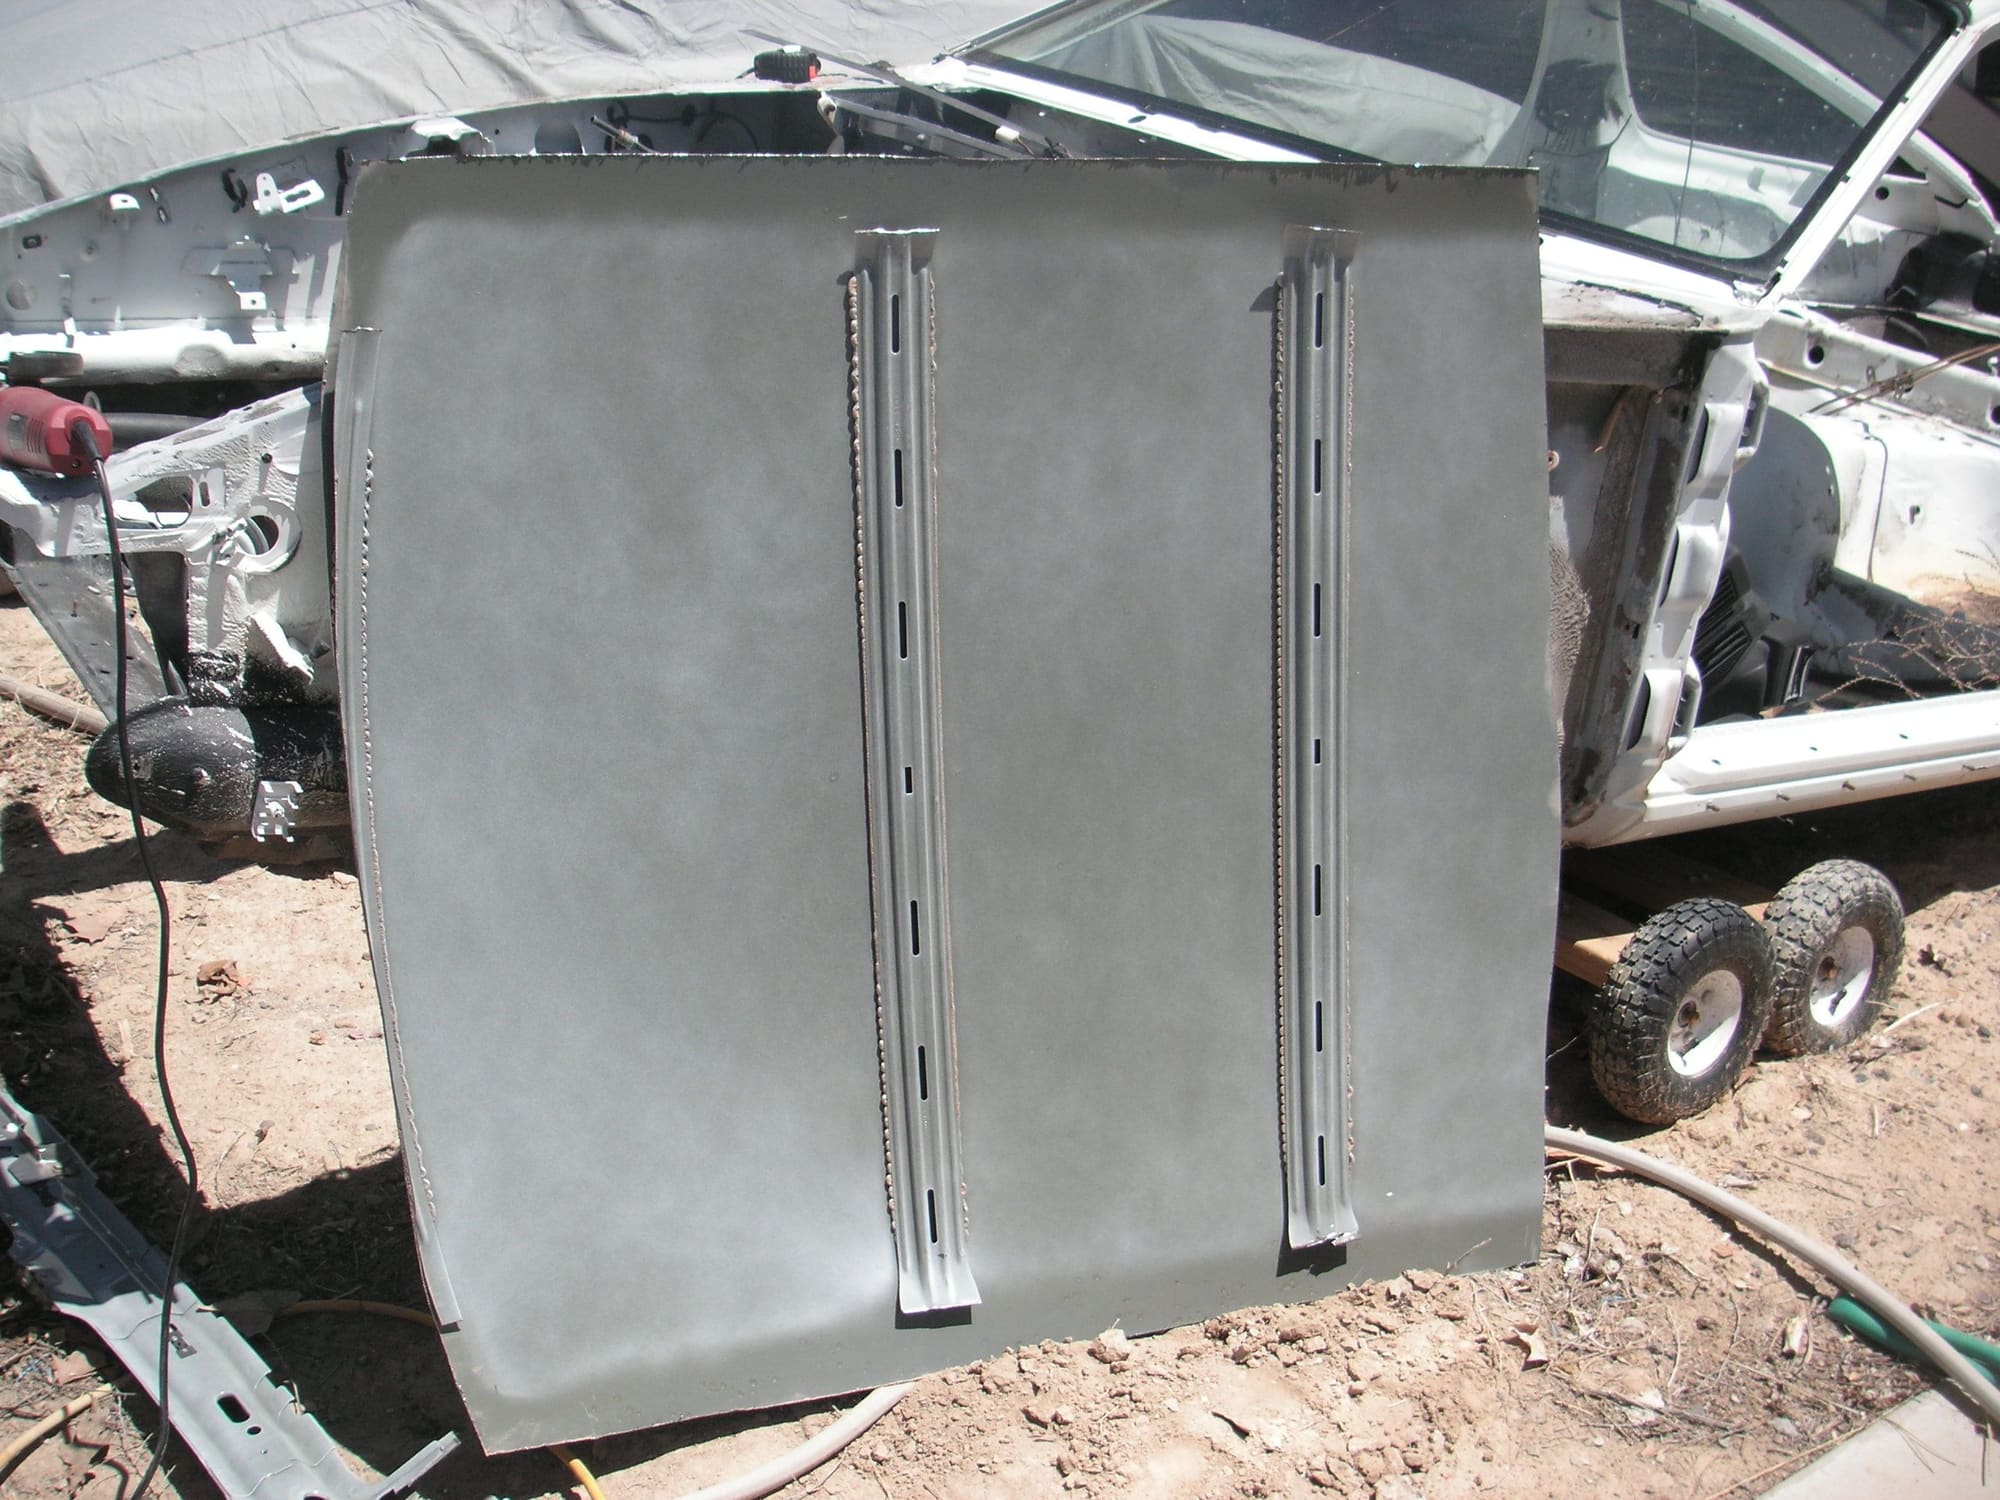
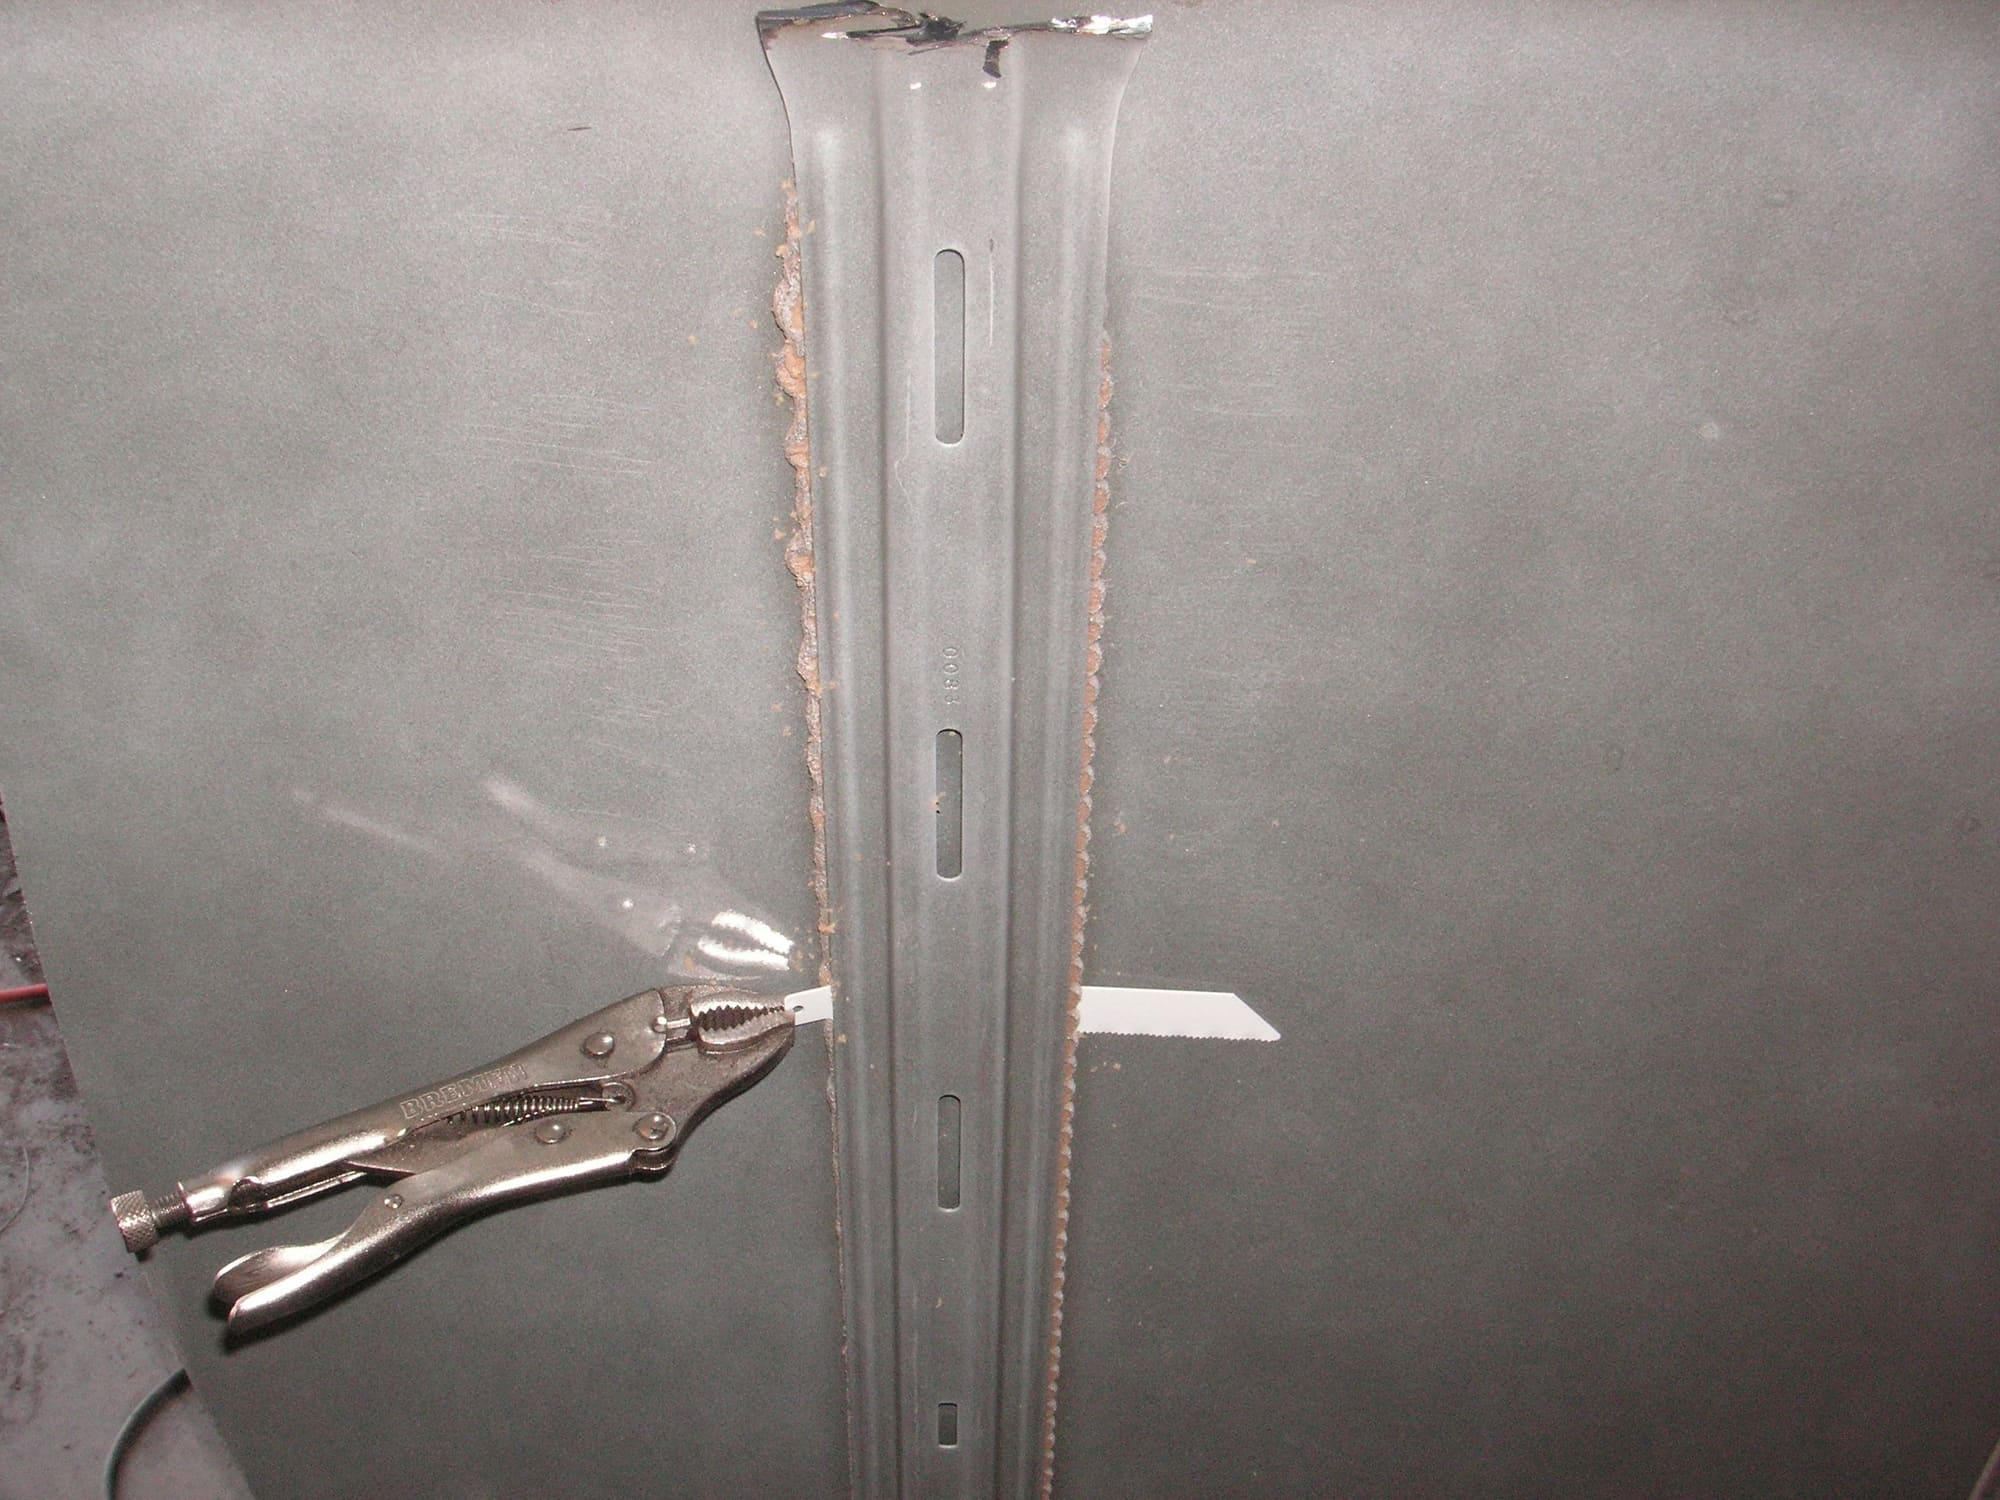
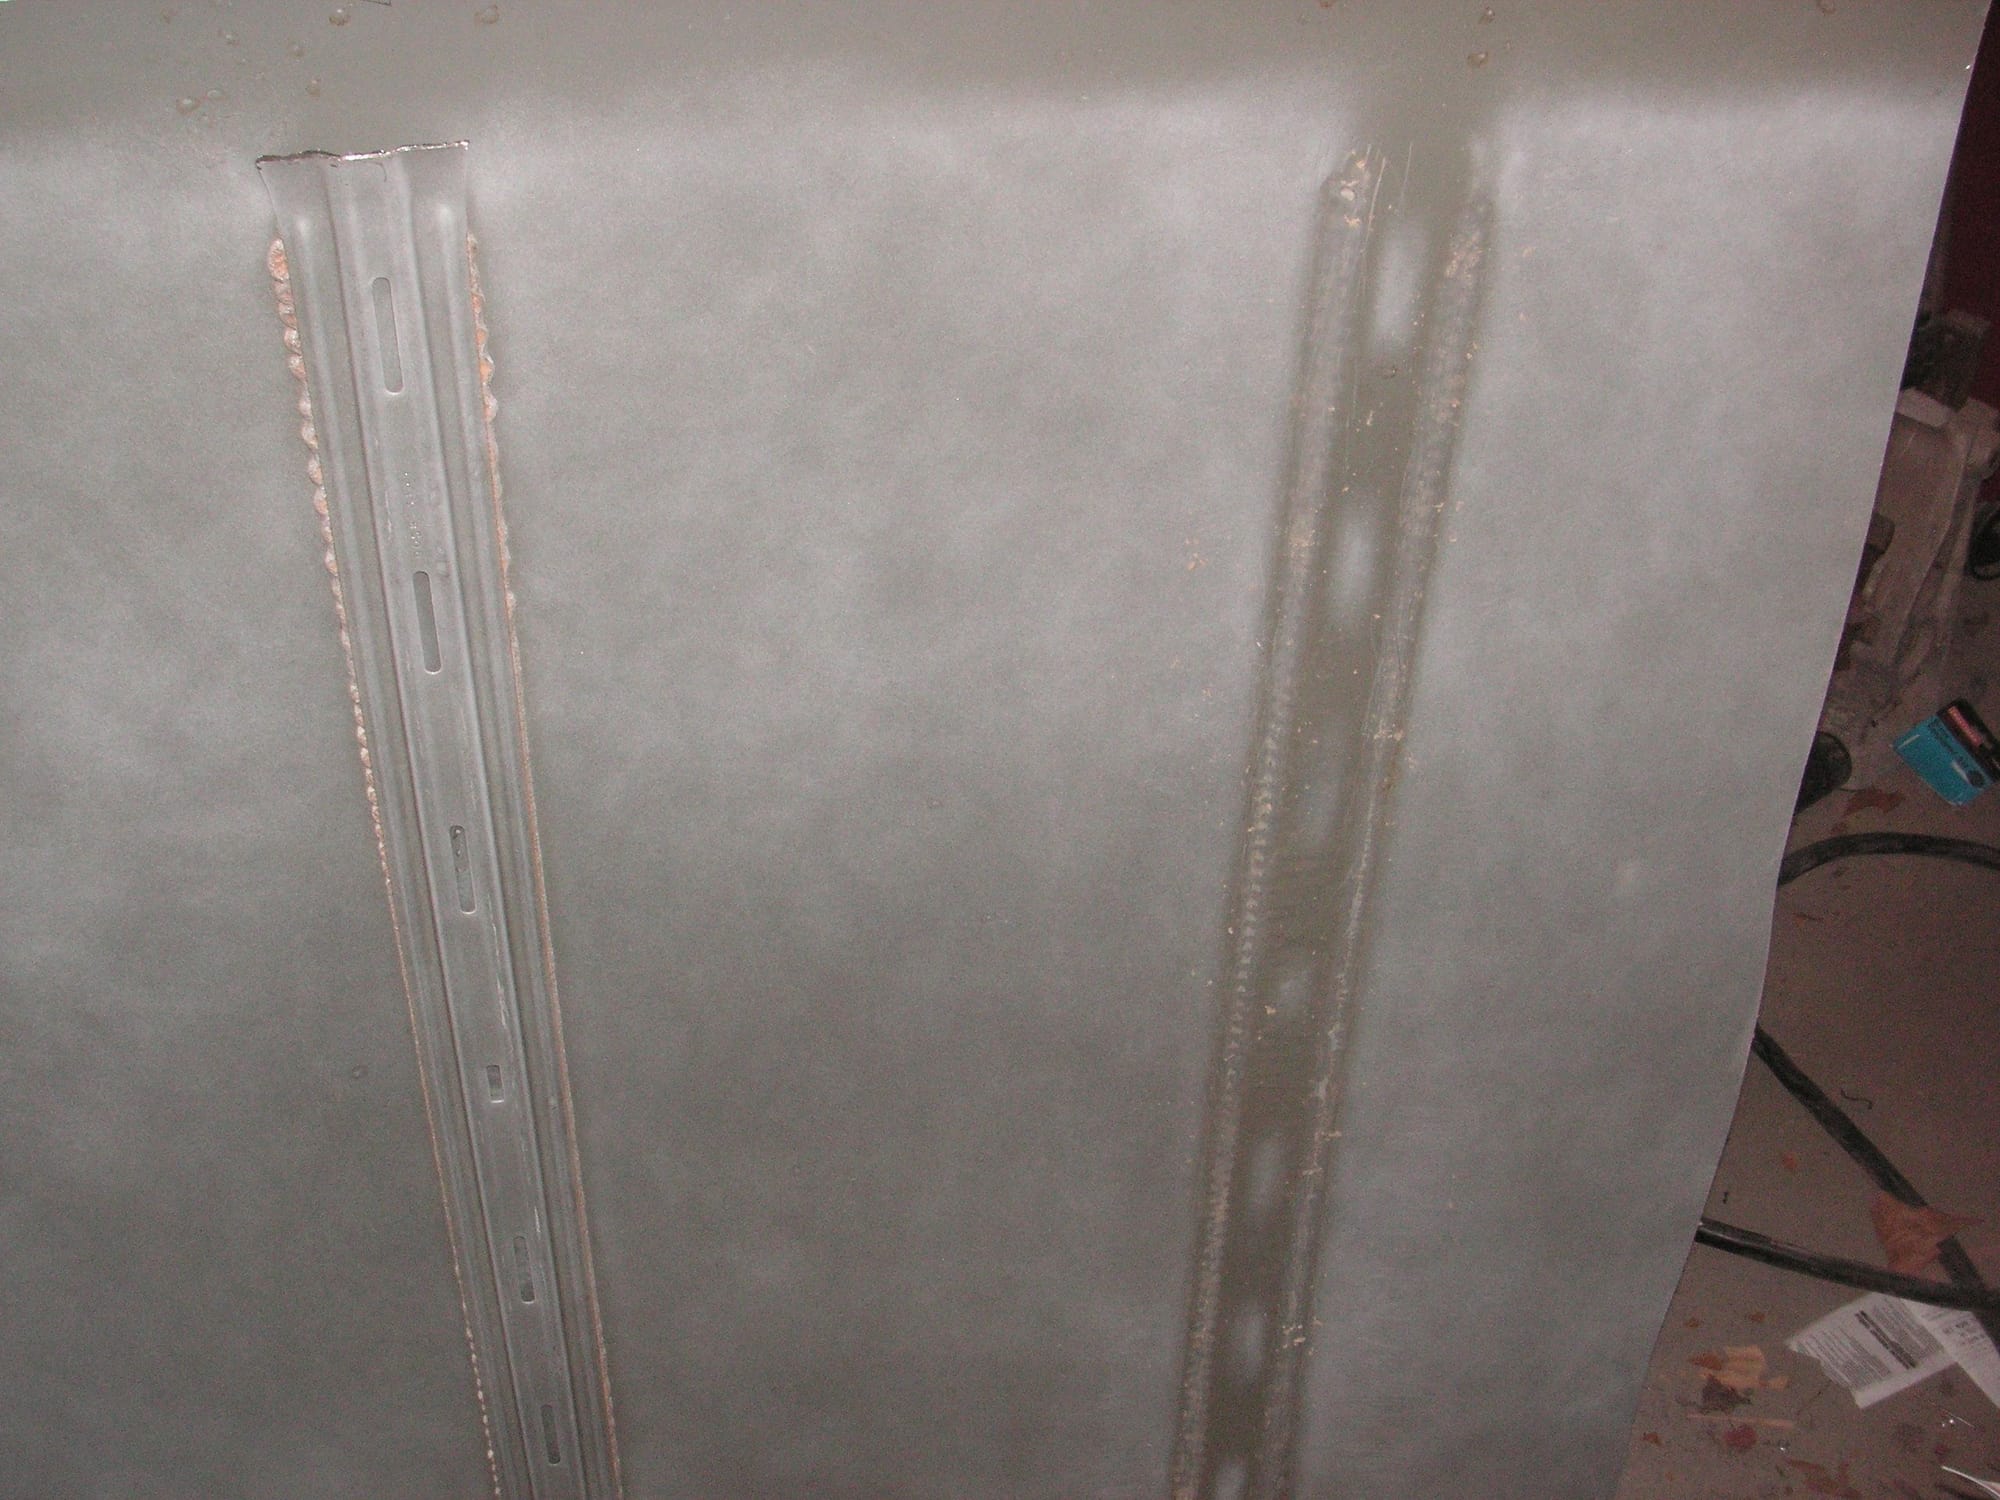
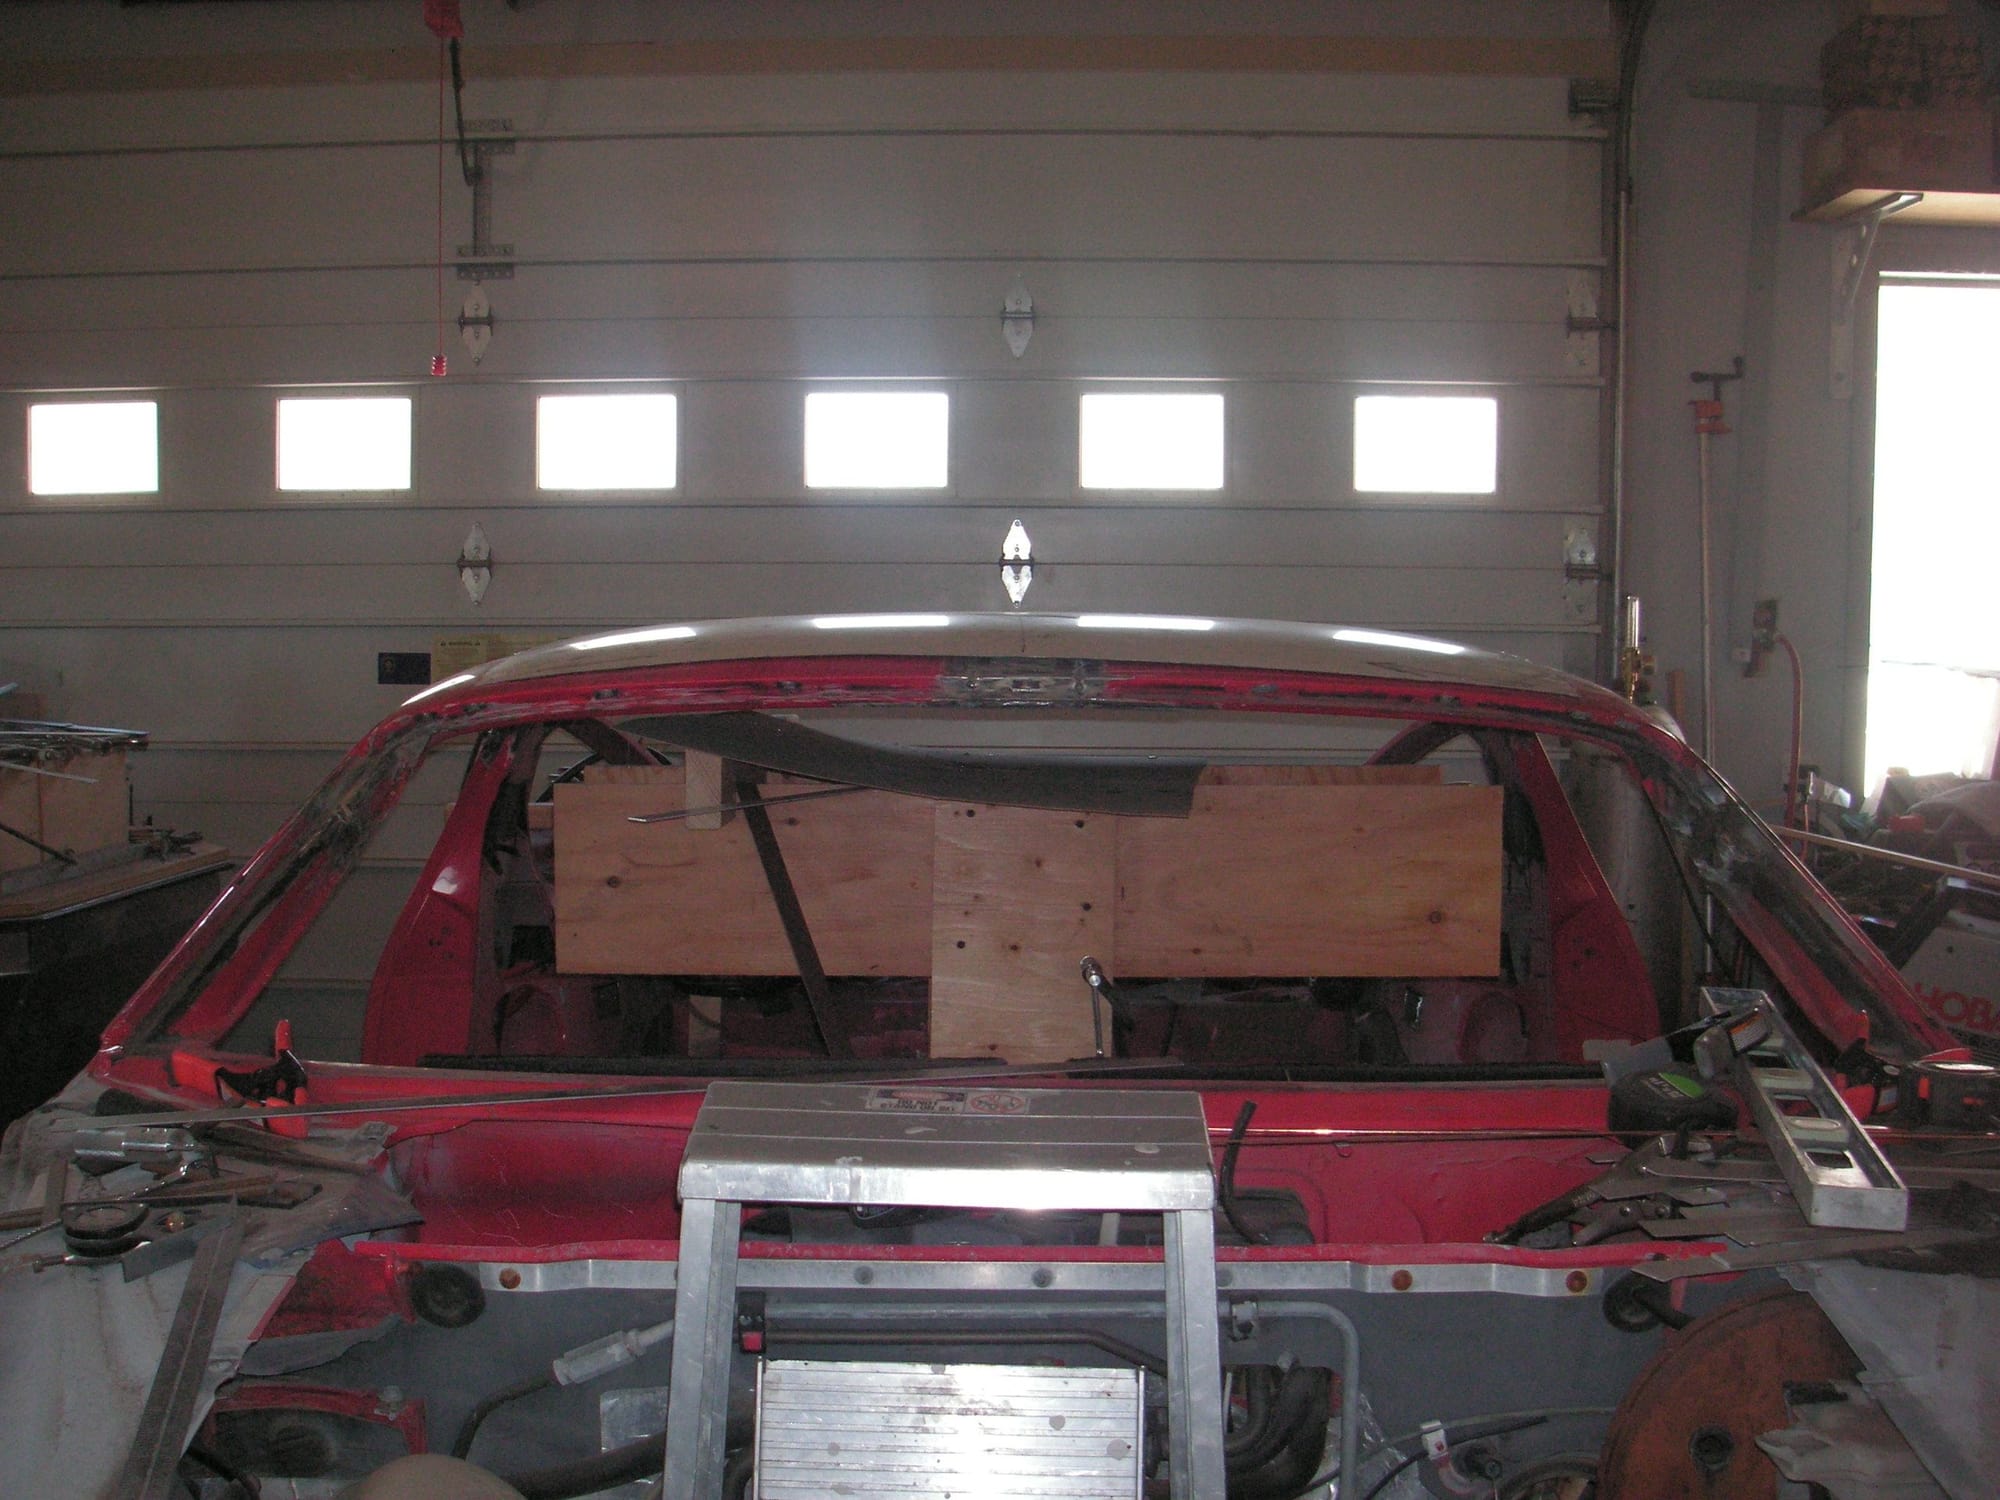
I picked it up this afternoon and hauled it home then cut the sides off of it at a point allowing about 3/4 inch on each side for final fitting
and then I had to take part of one and another of the inner structural braces out which was laying on the top in the rear. I may leave the other one in since it is helping to define the curvature across and will add some strength for later.
Just laying on the top now it looks like the curves on all four sides are exact and the crown, although maybe a quarter inch lower than my pattern, looks just about perfect. Talk about lucky!
Last edited by Jerry Feather; 06-08-2018 at 06:28 PM.
I didn't find it by make and model. I simply walked the rows of junk cars looking for a roof that appeared to have some promise, then trying my pattern on it. I didn't know it was a Saturn even and not the year until I paid them to cut the roof off. It was identified as something like 160078 in spot H-4.
I didn't find it by make and model. I simply walked the rows of junk cars looking for a roof that appeared to have some promise, then trying my pattern on it. I didn't know it was a Saturn even and not the year until I paid them to cut the roof off. It was identified as something like 160078 in spot H-4.
Right. I understand that you simply looked for the 'right shape', testing your 'buck' to see what fit best.
However, you could have had a lot of fun with a 'Hey guys! Guess what car the roof that fits best came off of" game.
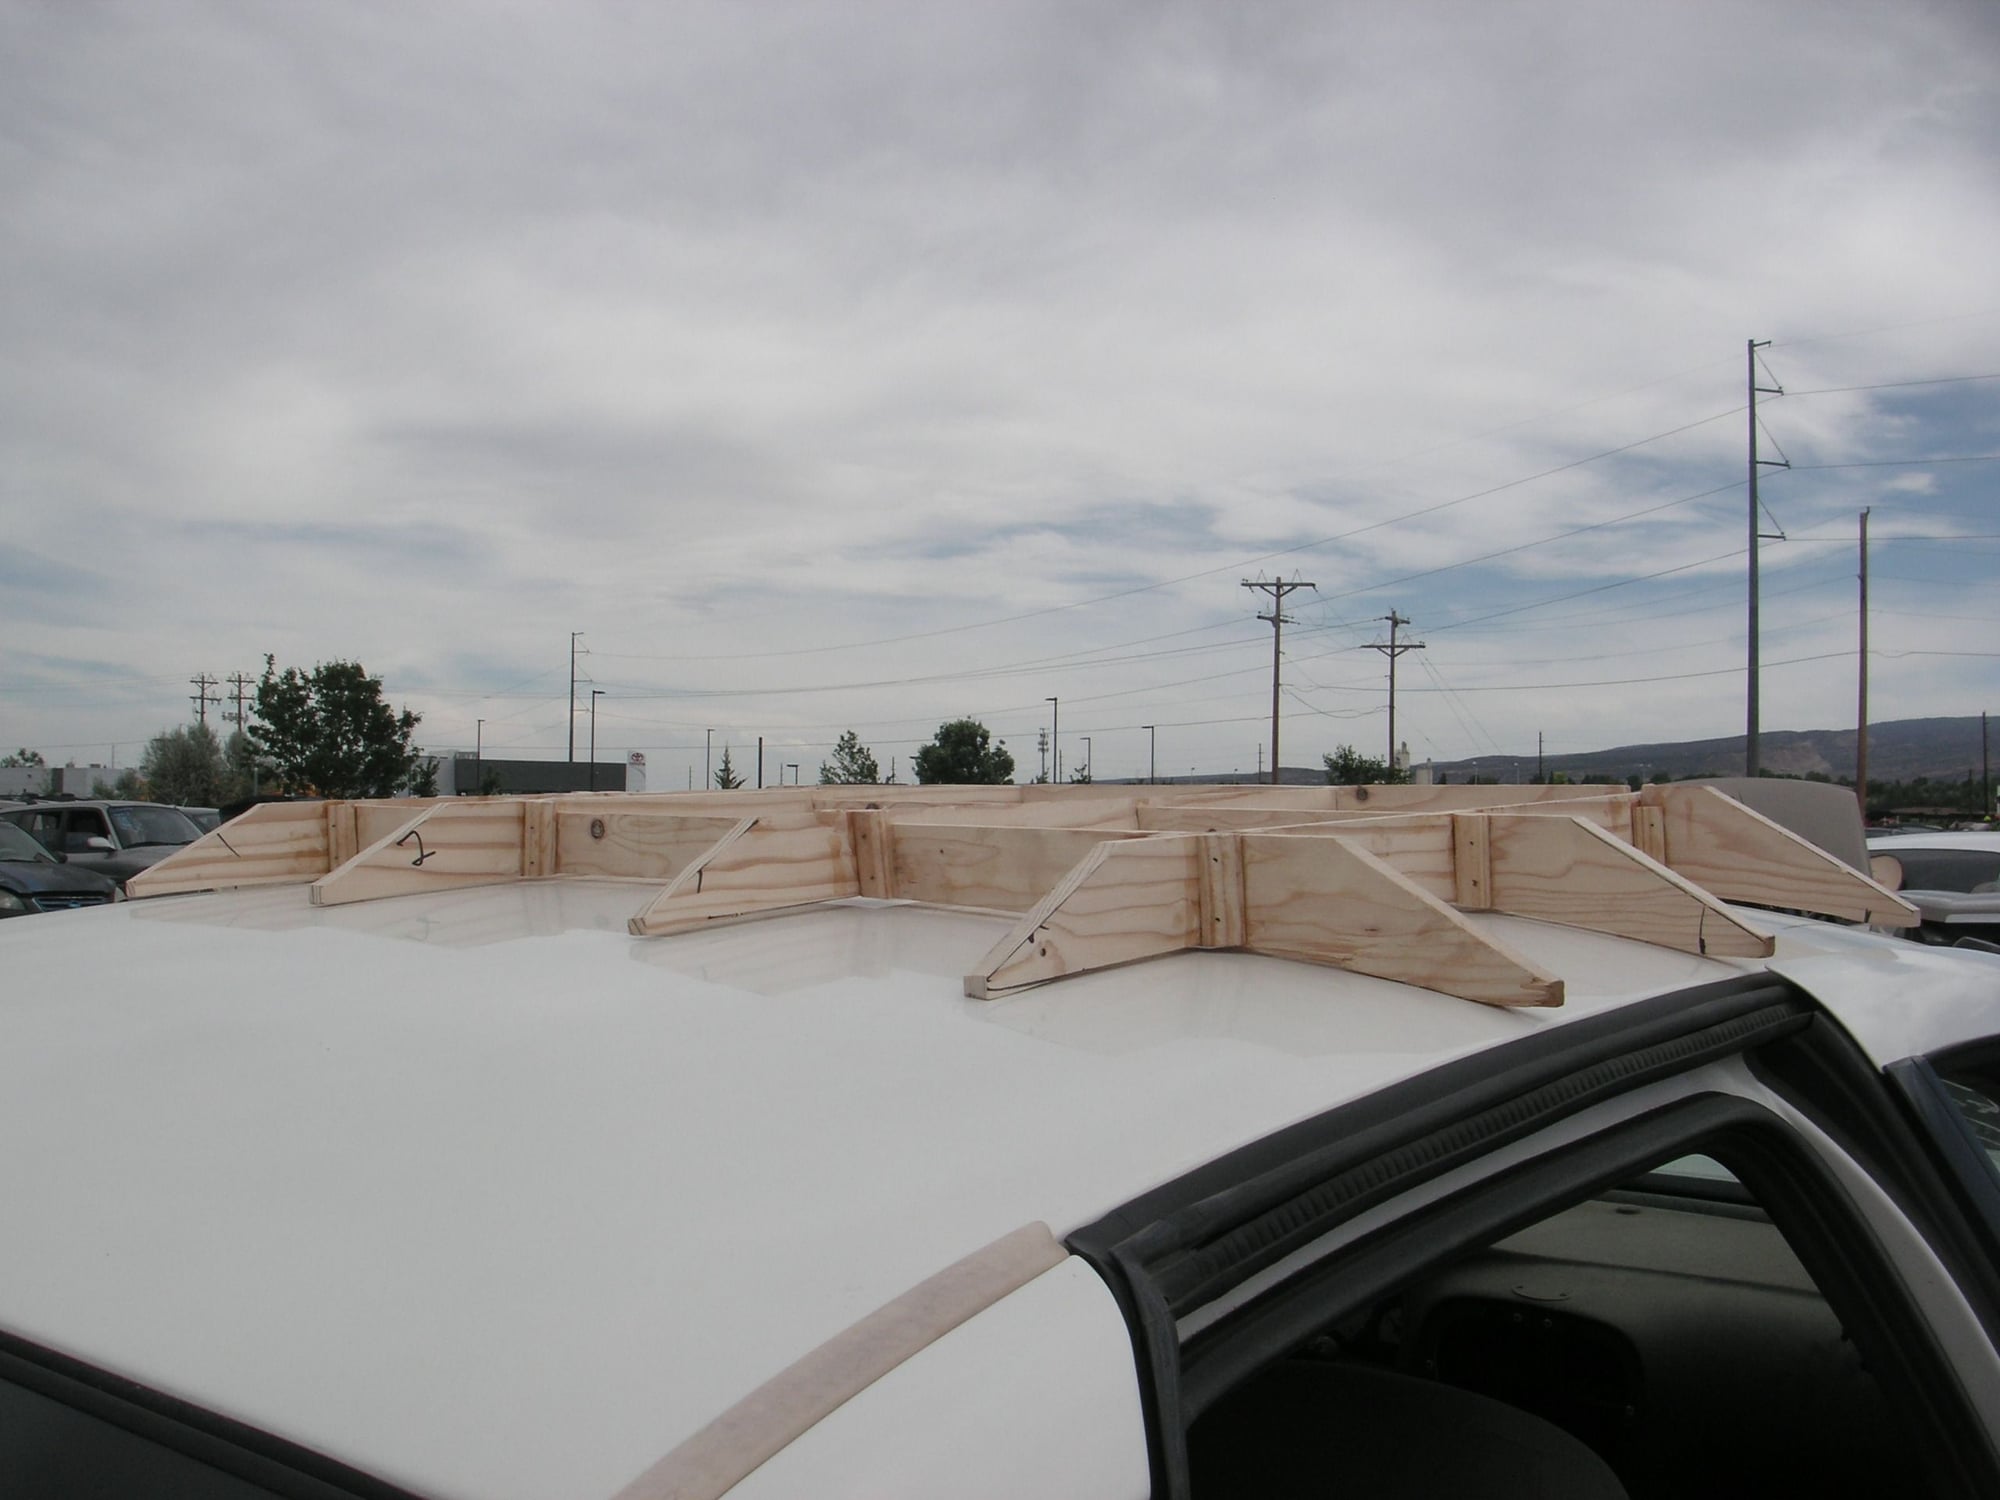
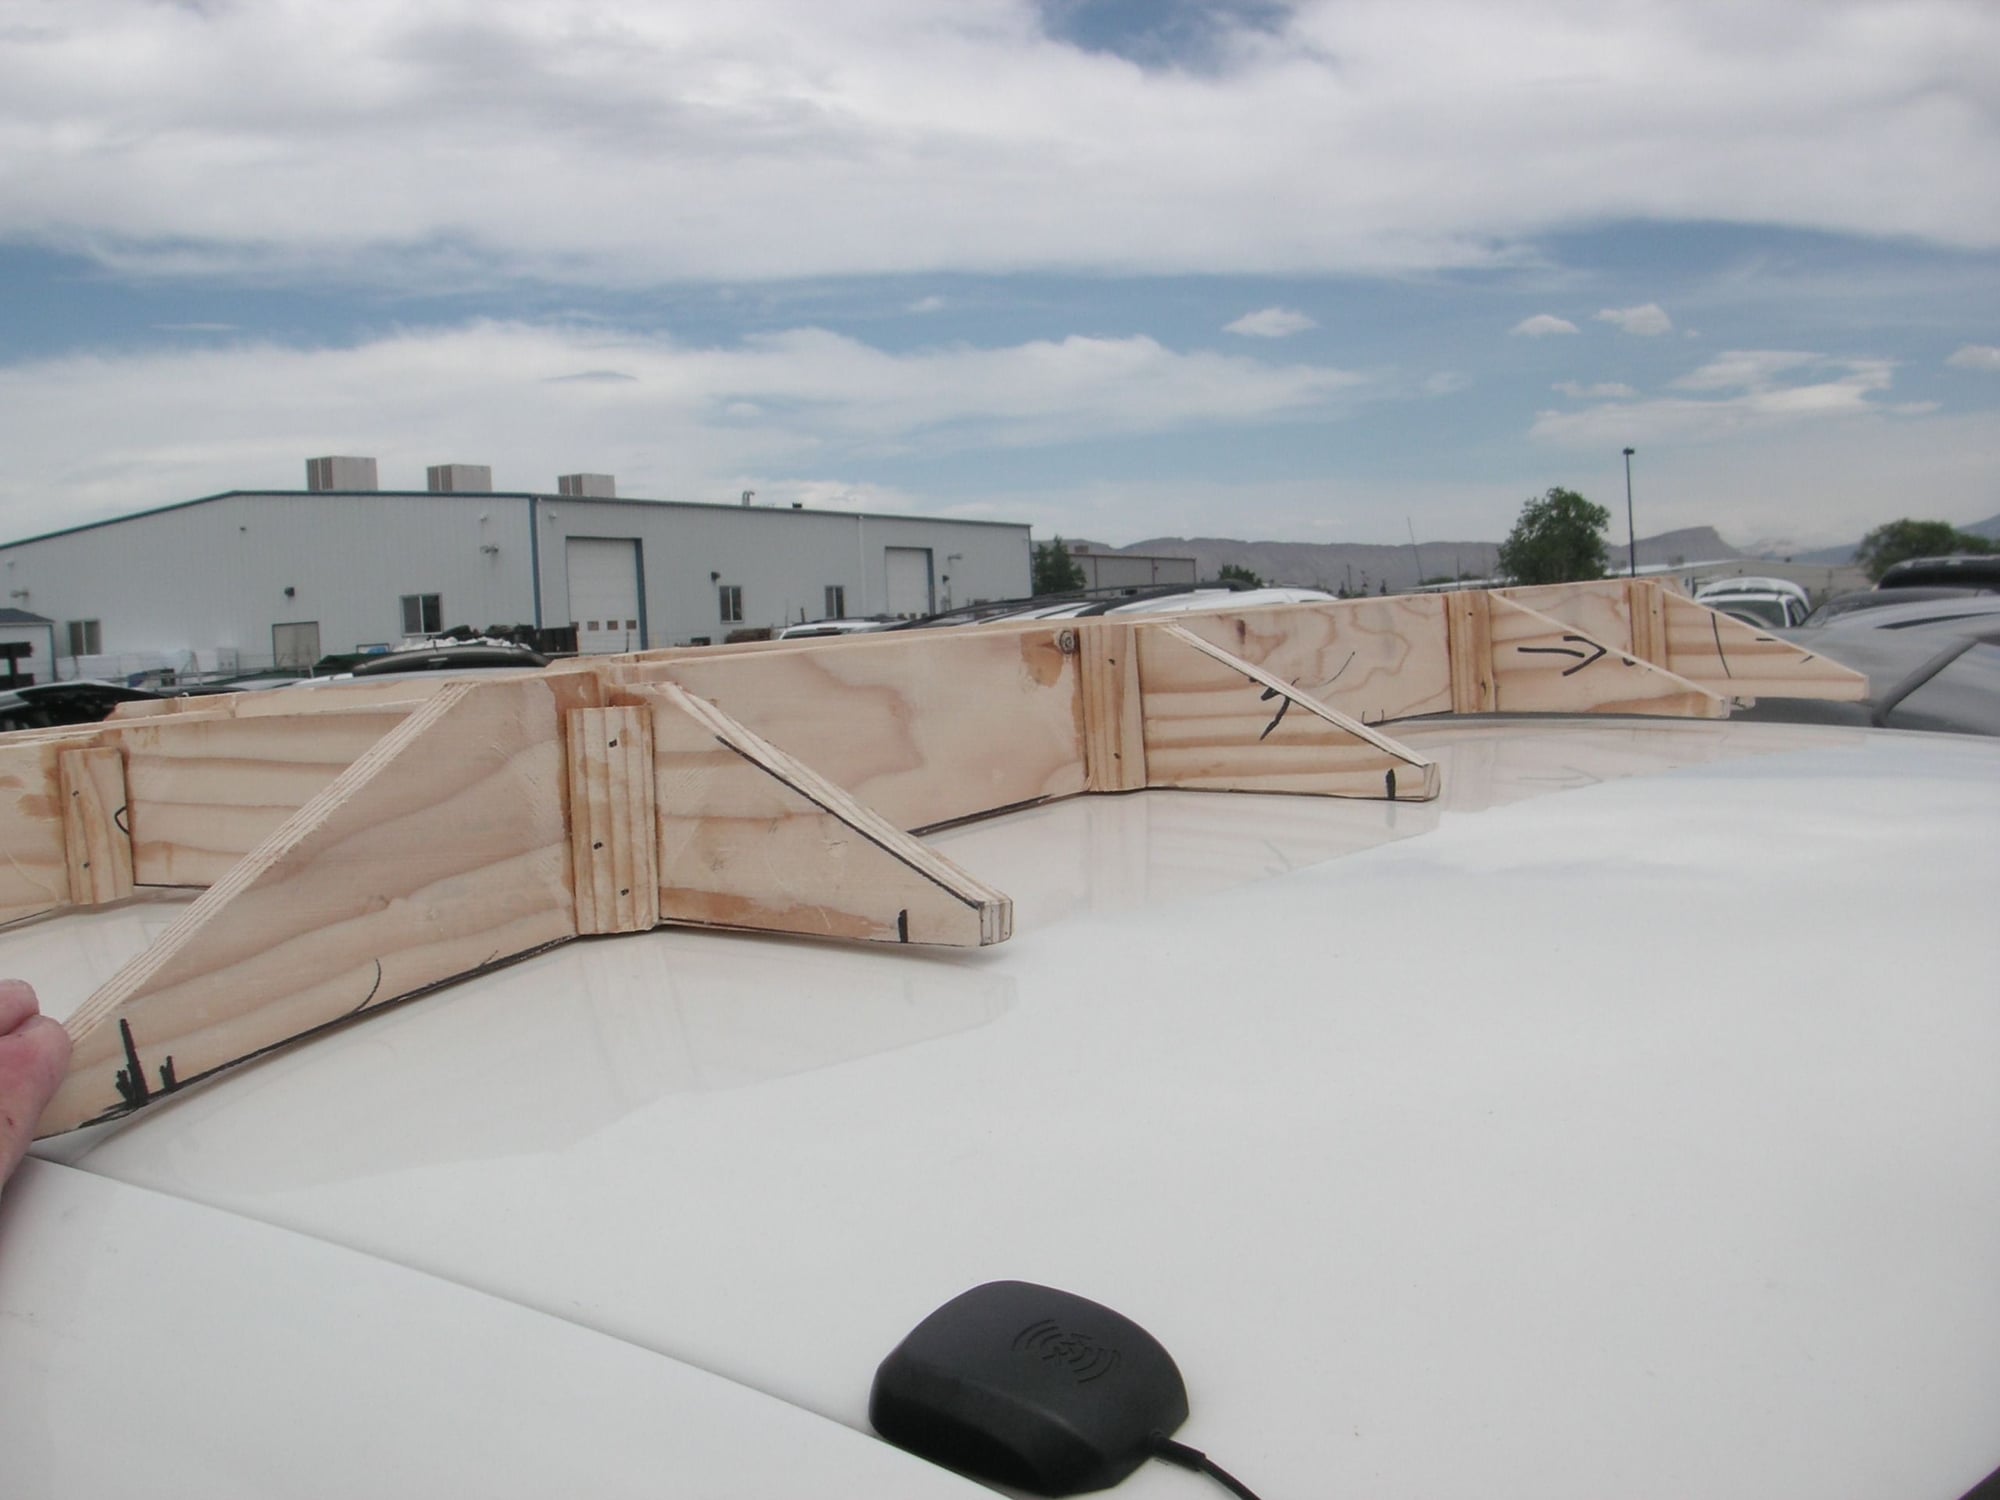
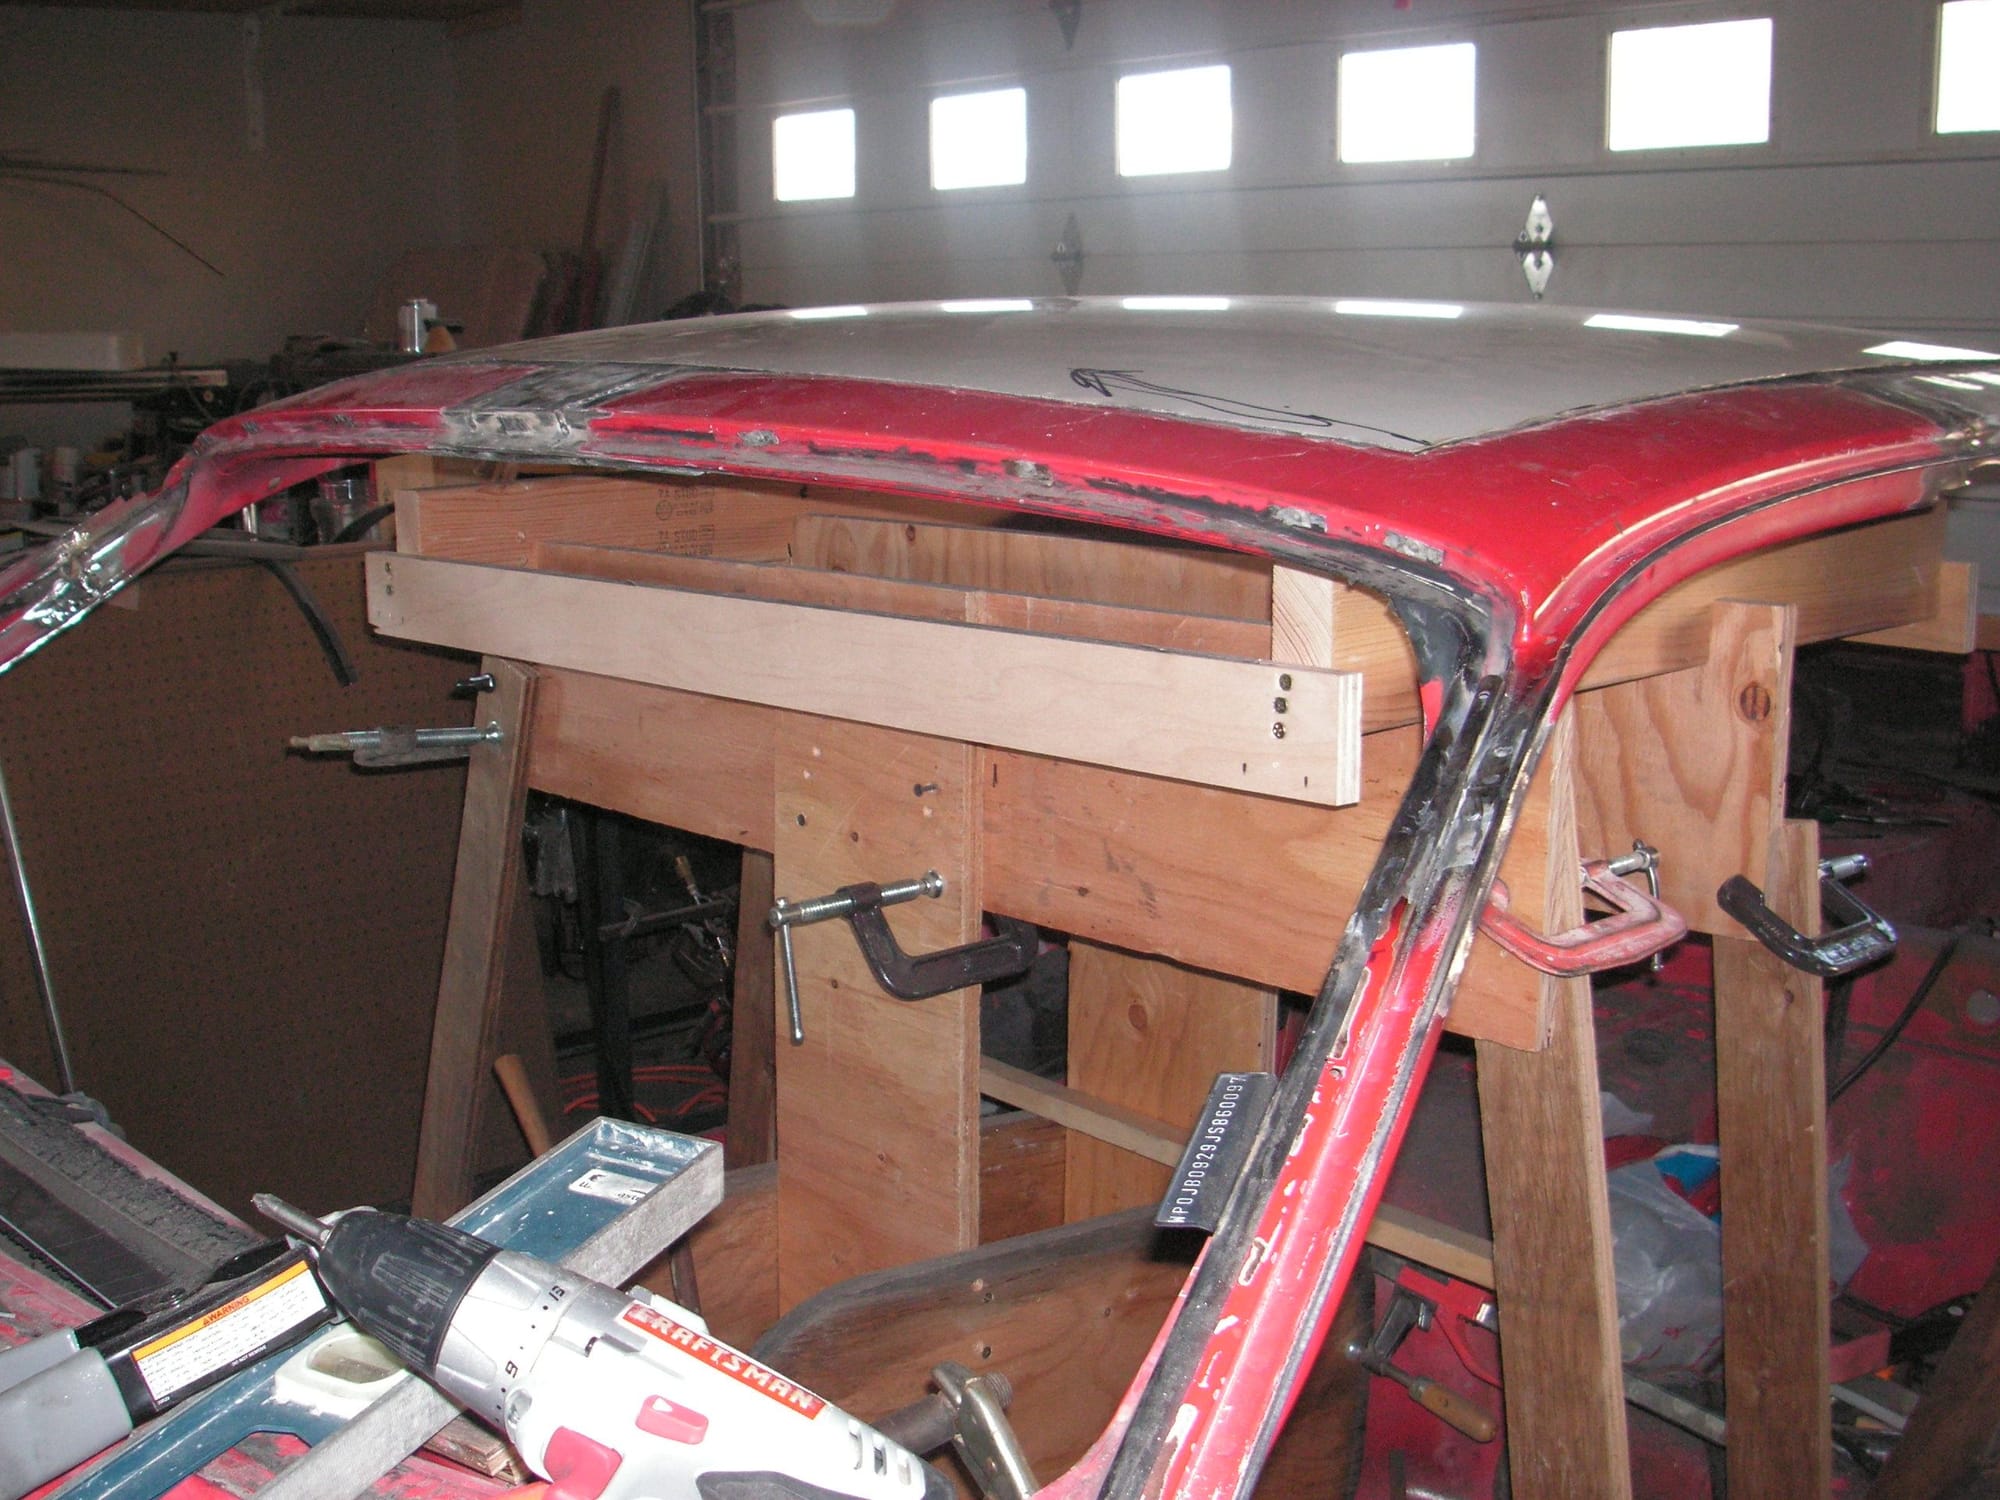
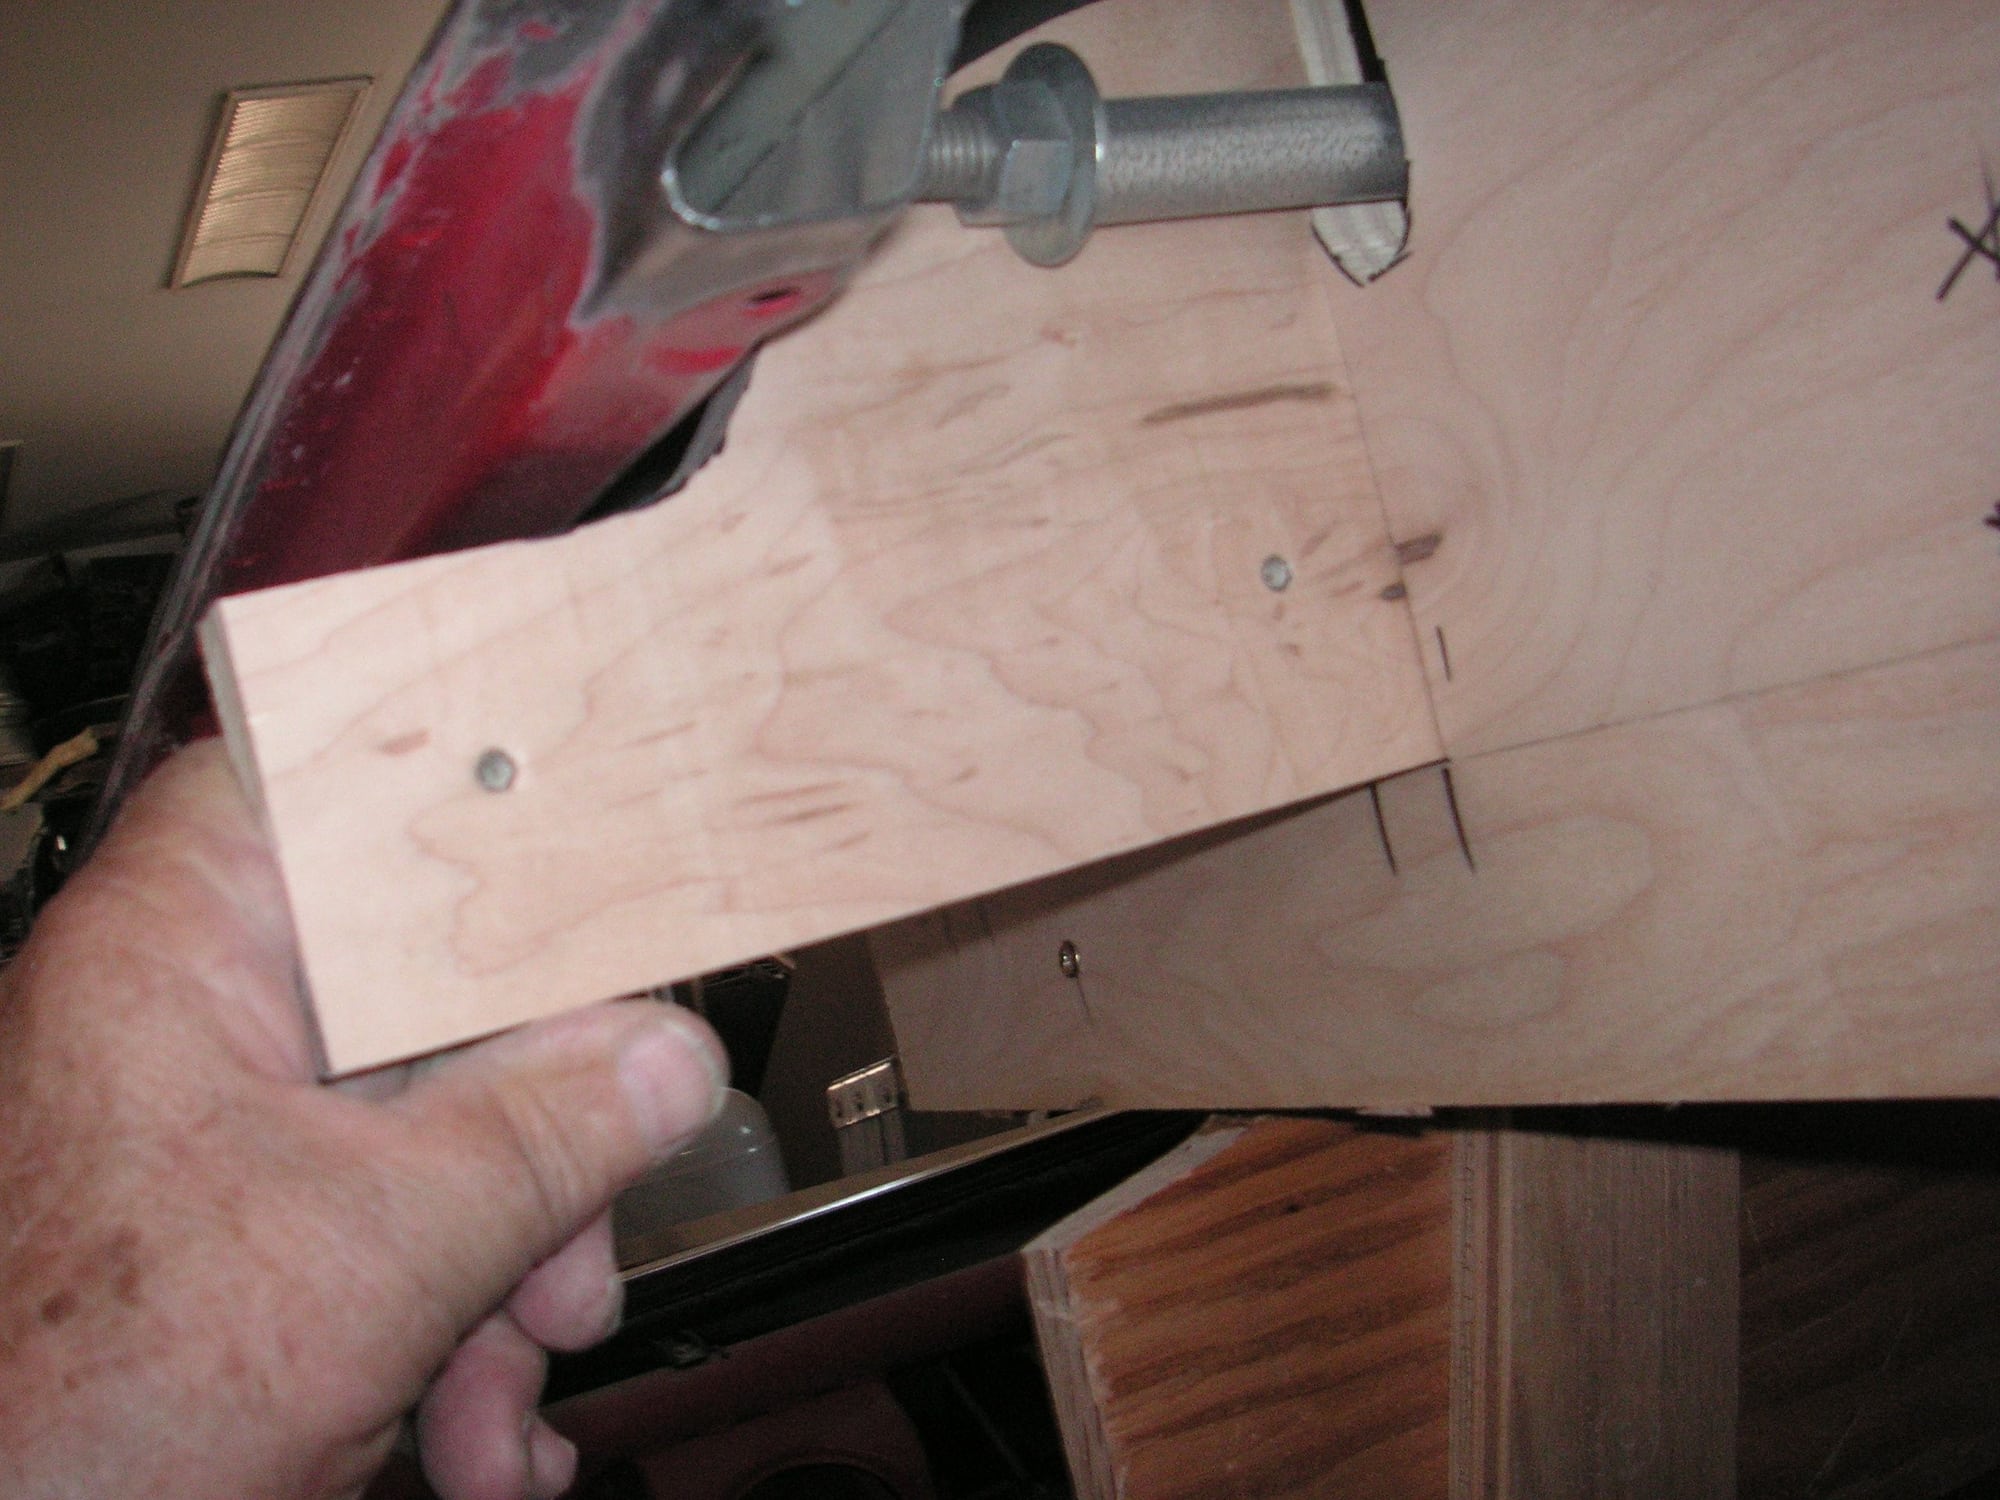
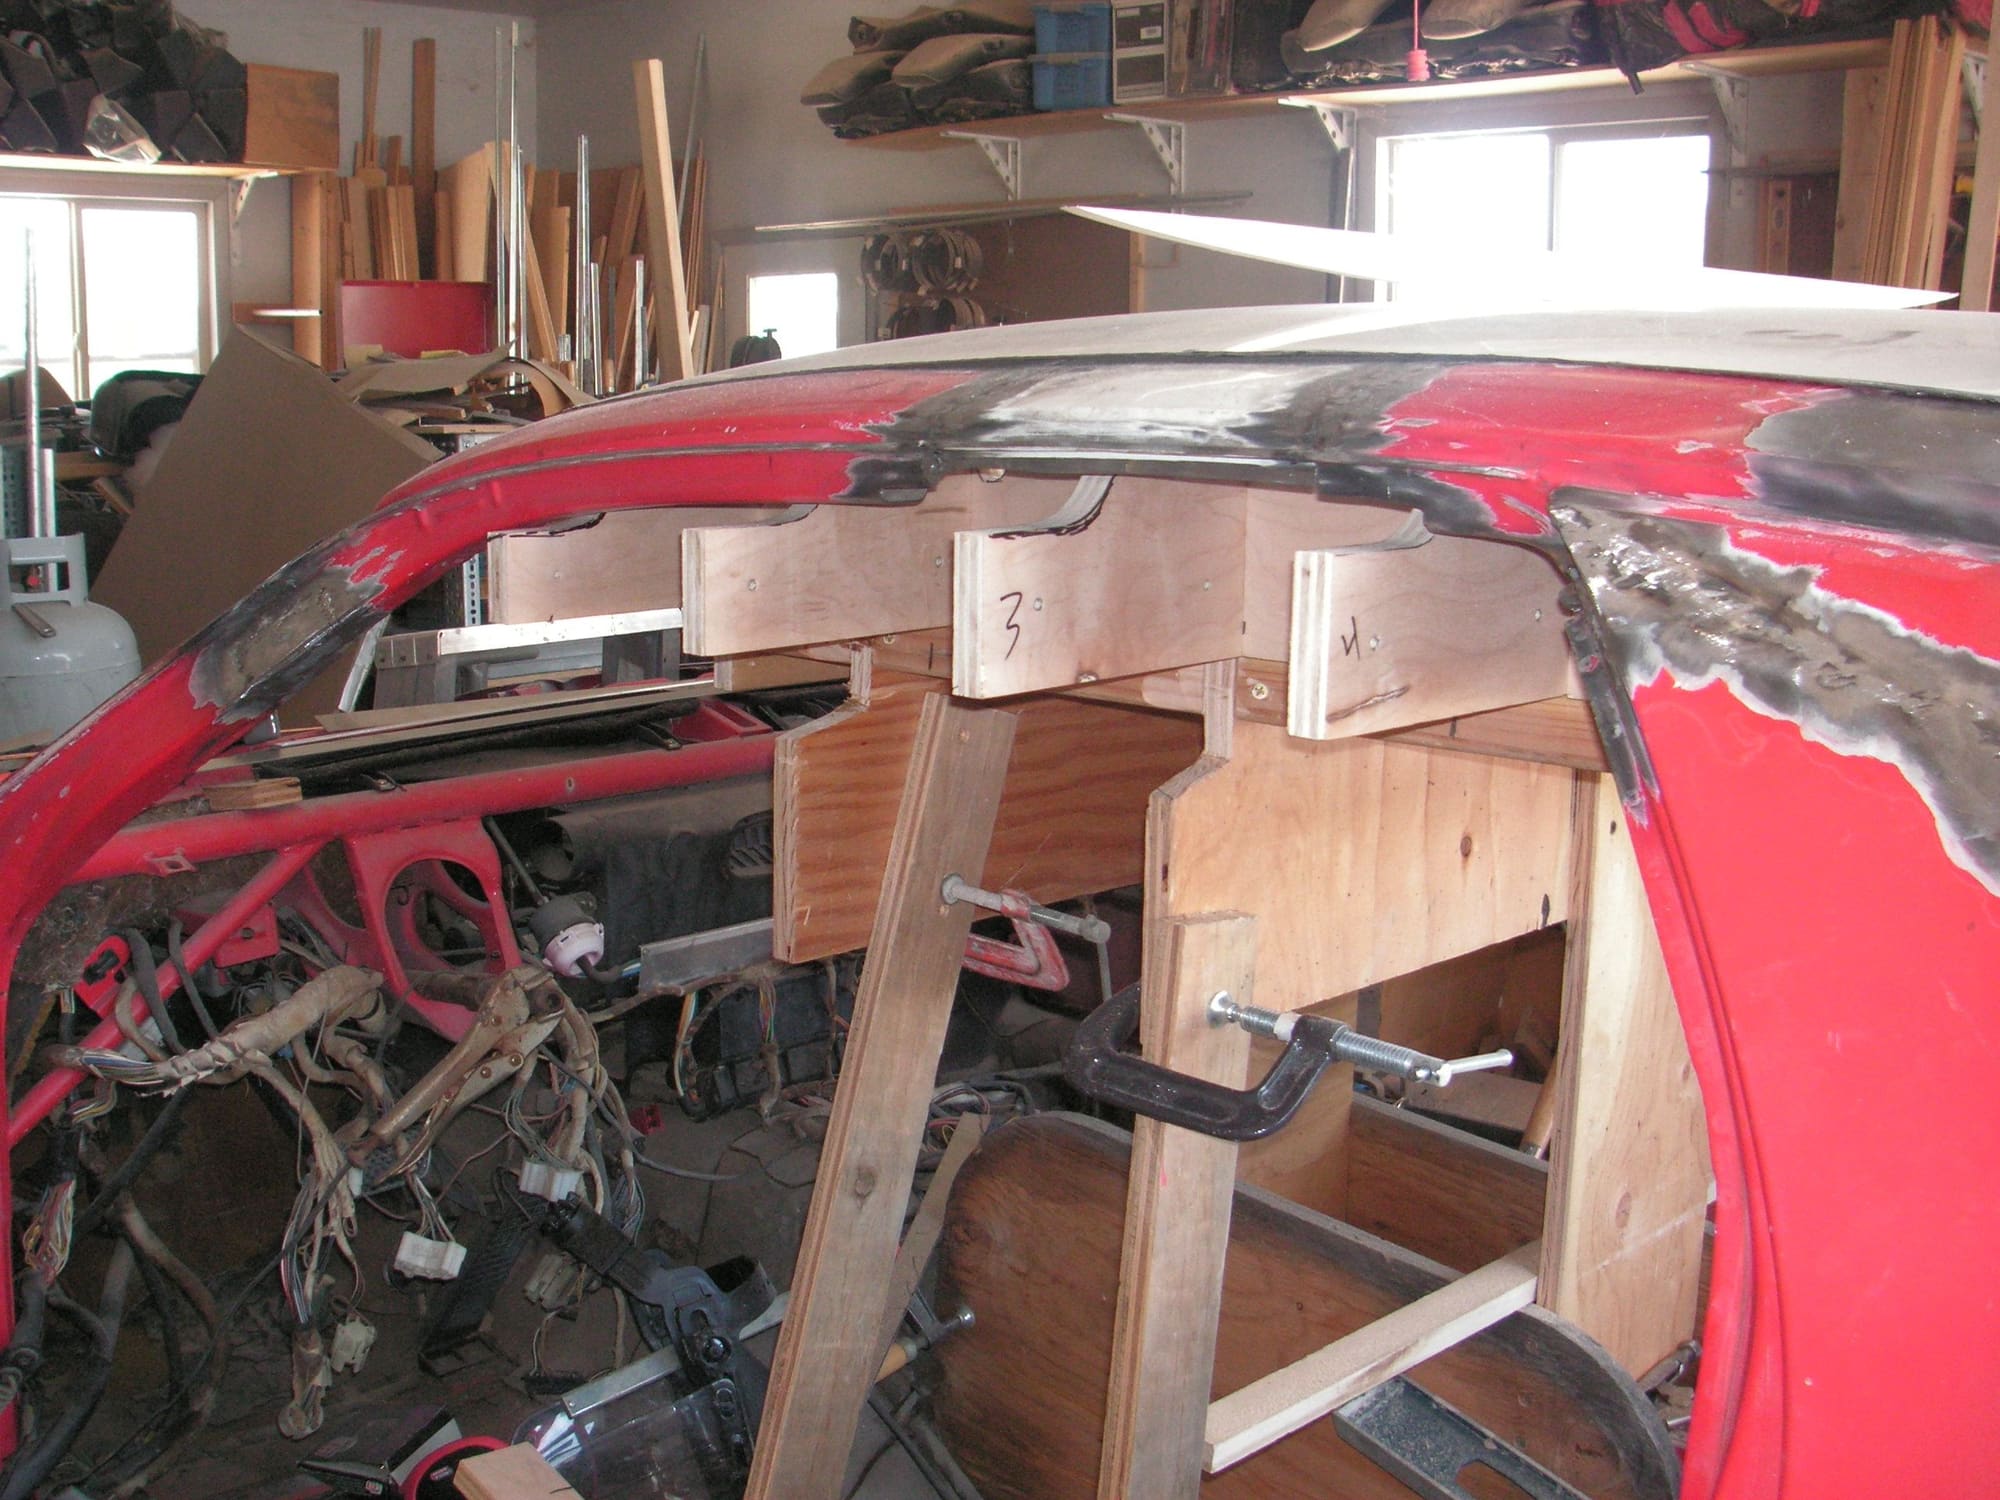
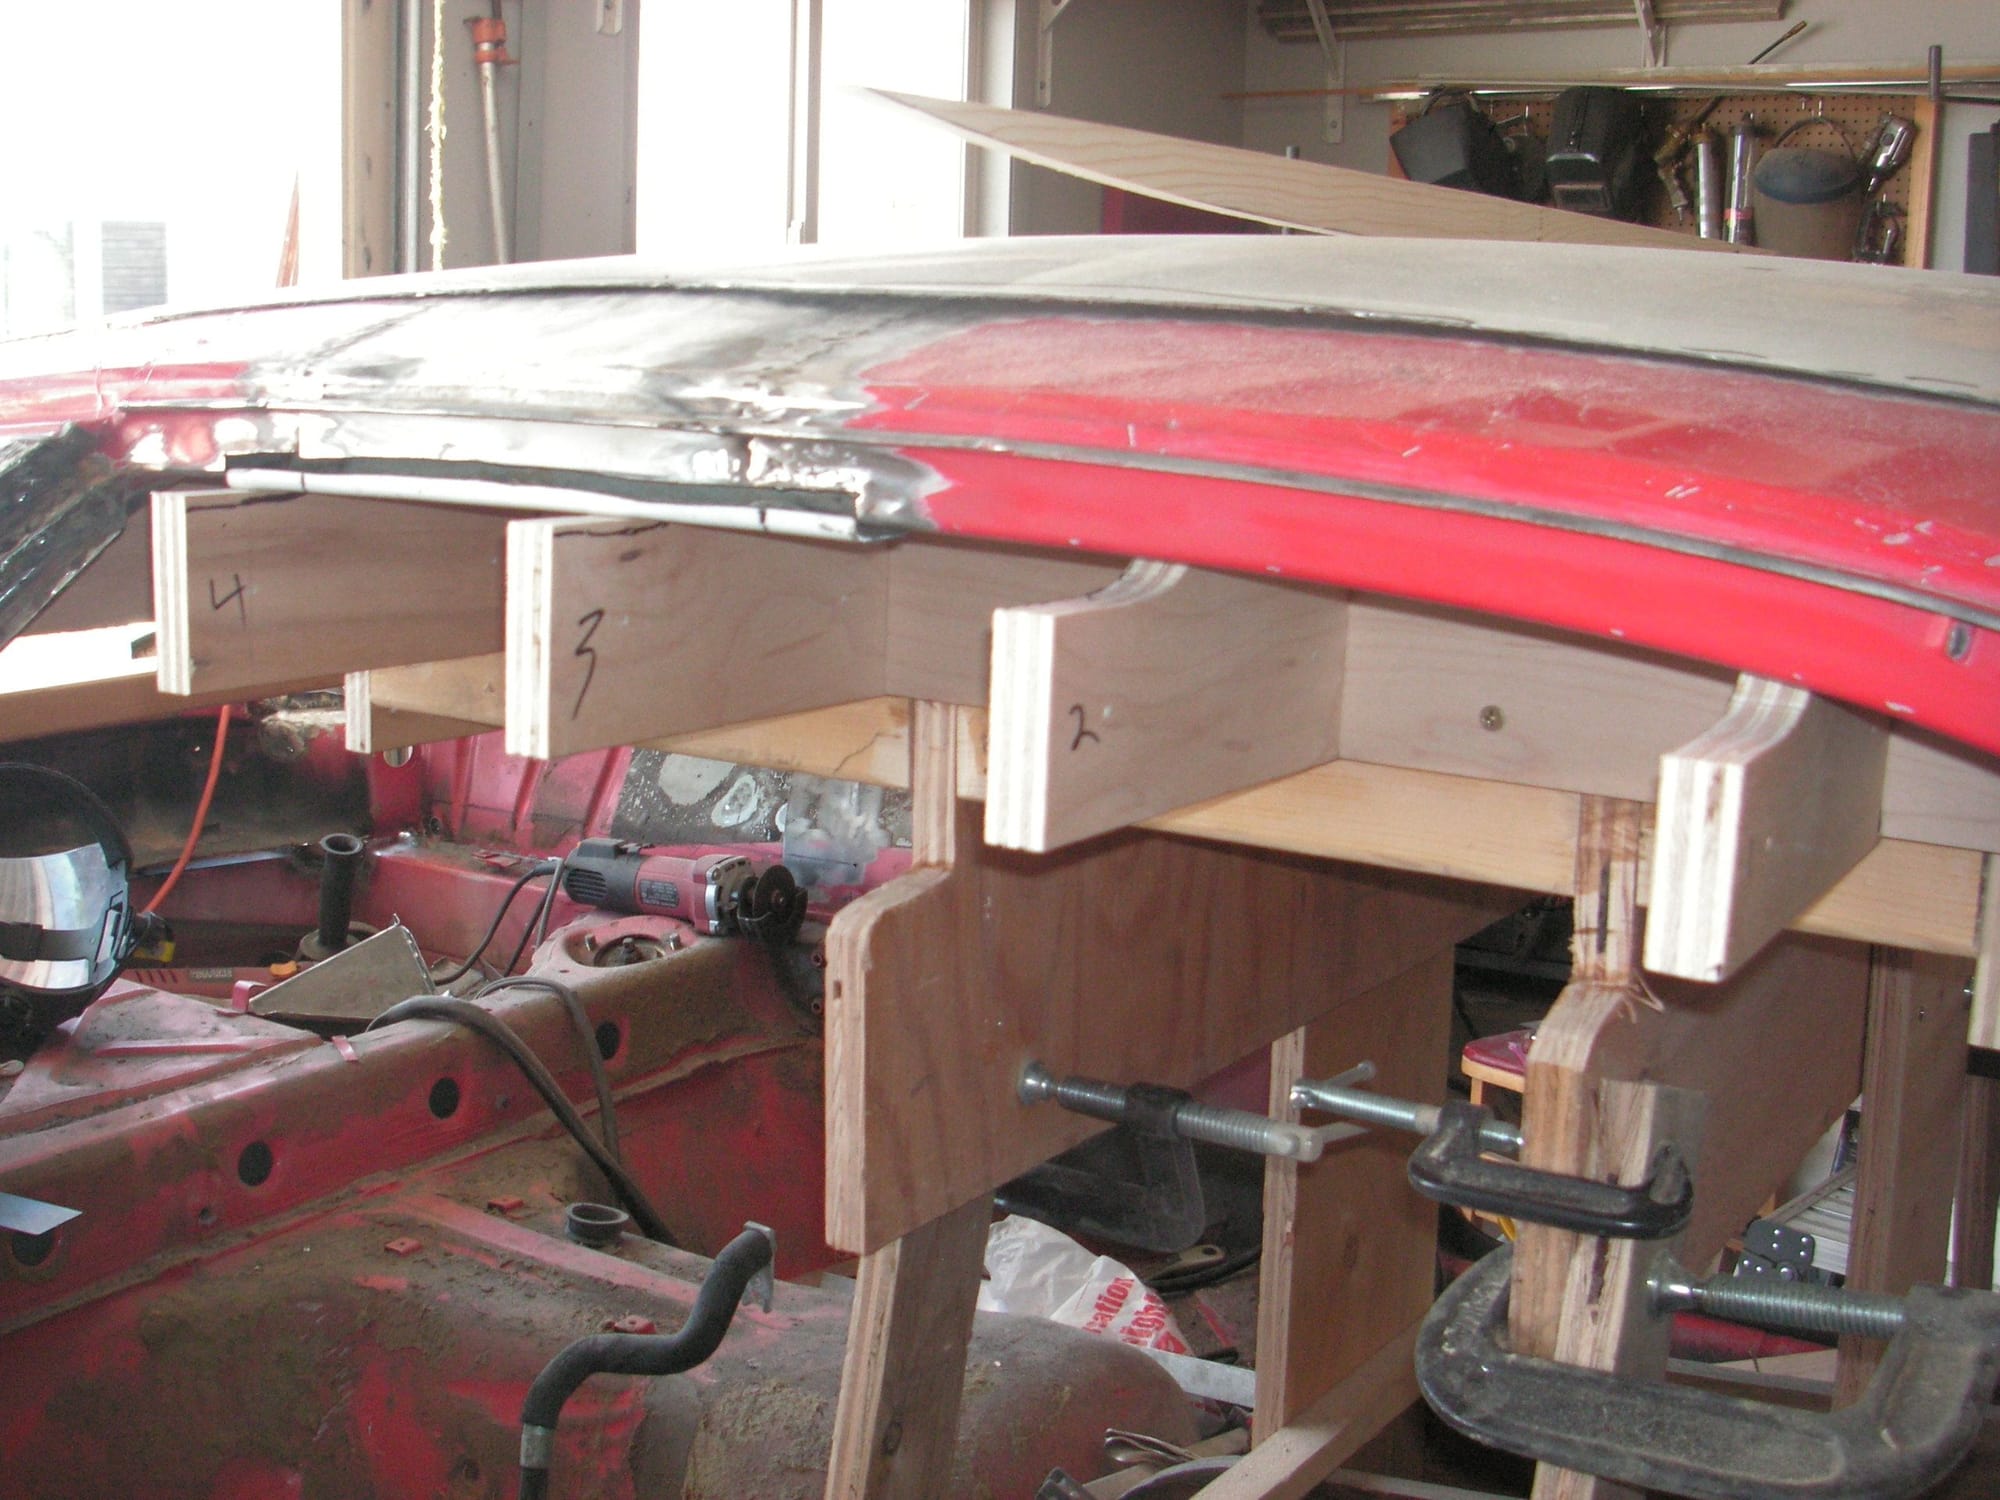
I started the structure for the headliner mold but only got two of the cross pieces screwed in place along with locating the longways two-by-fours. I found it was a real trick to locate and screw into place the two cross pieces working from one side at a time and trying to hold both ends of it up in position.
Building this headliner mold is kind of like making a small very flat boat. I am first making a sort of keel, but in four pieces forming a rectangle. They have the shape of the underside of the roof. Then I'll add some formers outboard to them all around having the shape of the outer perimeter of the headliner; and then I'll make some similar forms to fill in the inside of the rectangle keel. All the shapes of the keels and formers will be formed to fit below the roof skin by 3/4 inch in the central part and about half that around the edges. The reason for the space is that after the form is made it will need to be skinned with about 1/4 inch thick strips of wood. Then the finished headliner will need to have space above it and between the roof skin of about 3/8 inch to allow for some jute insulation. Finally the headliner itself will be about 1/8 inch thick
I had some other stuff to do yesterday so all I got done was the two side pieces of the keel. I need to work over the base of this mold that is in the car and then do the front and back pieces of the keel, then start making the individual formers. There will be several of them, but they will be made in pairs so it may not take so long.
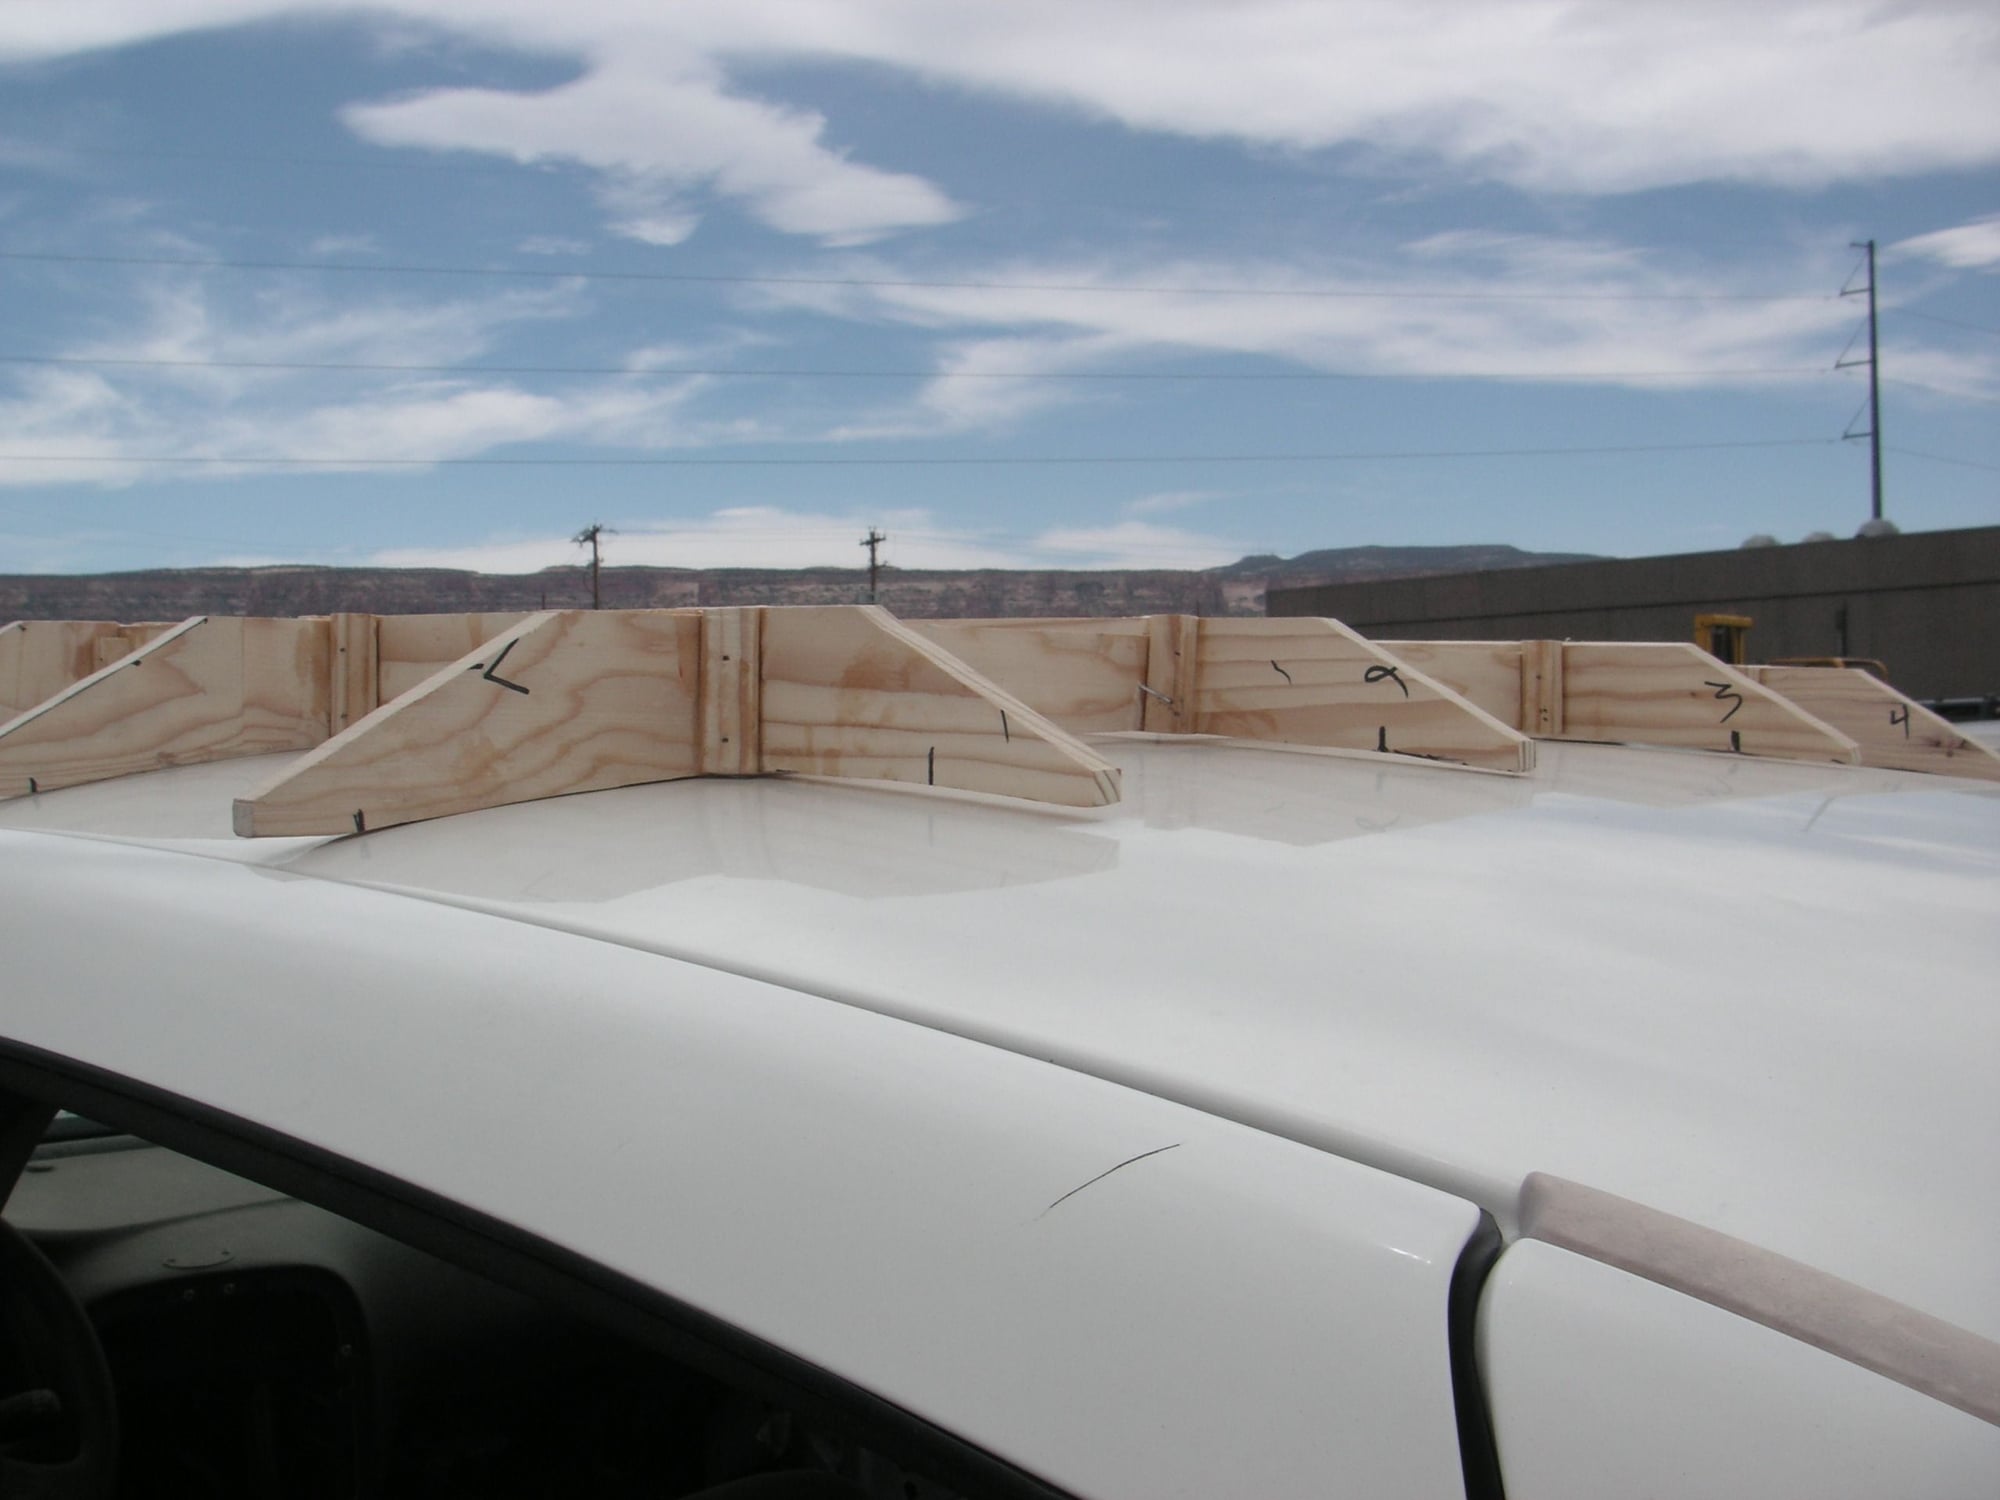
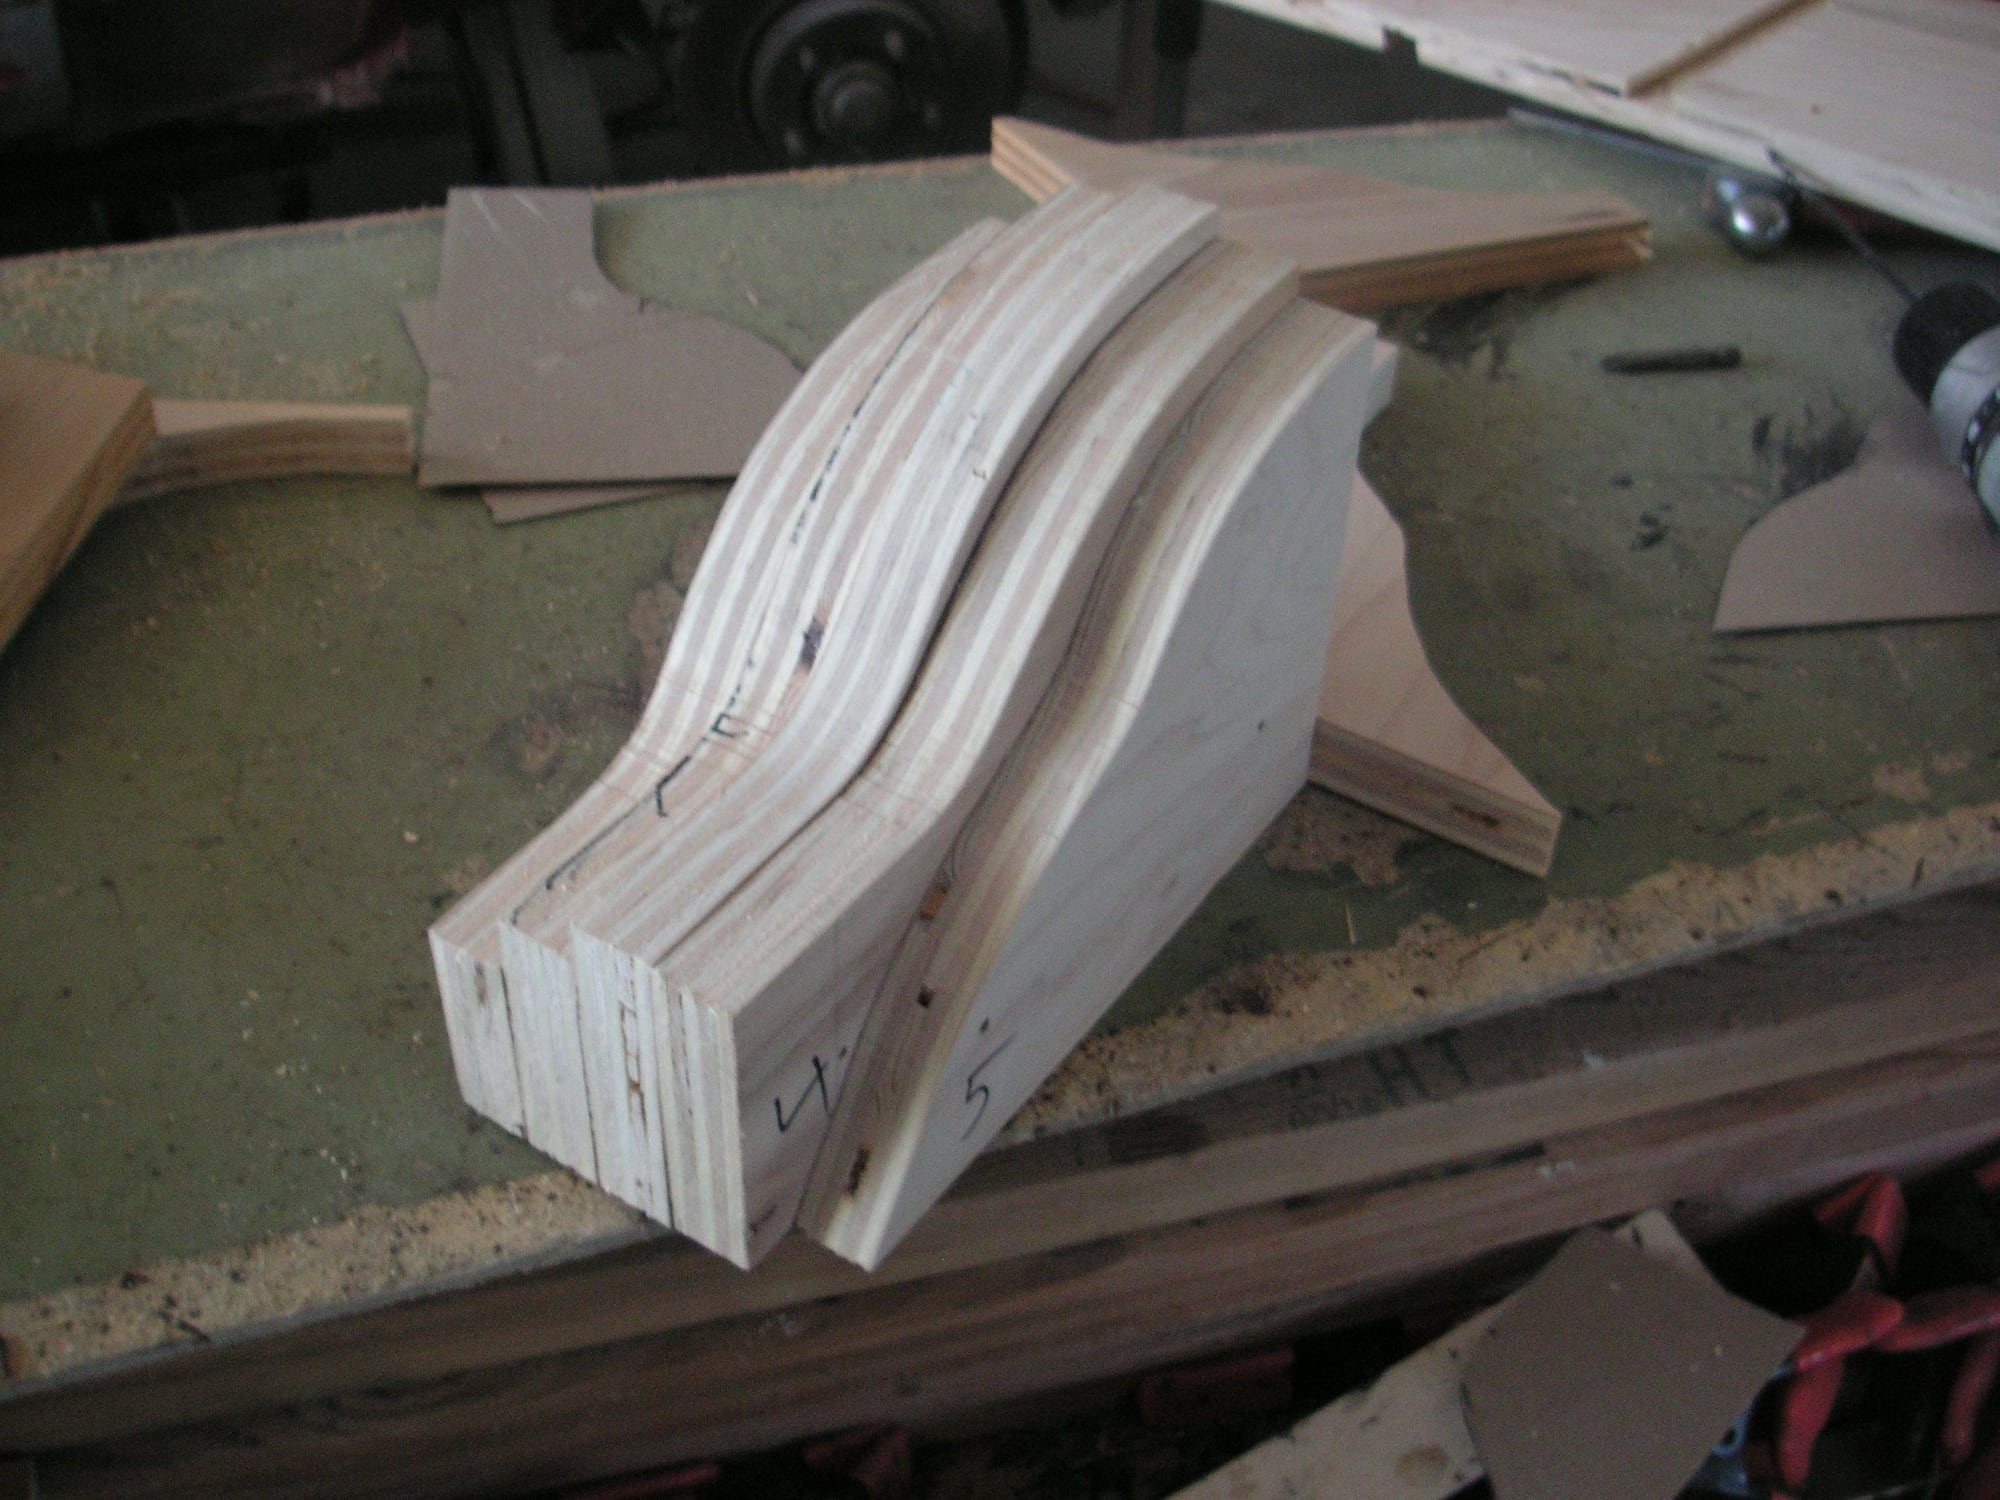
I made the two side pieces of the mold keel and then patterned, cut out and affixed the 5 formers on each one of them. I think I might need to add one more former on each side the help get the wood strips I'm covering them with to bent correctly.
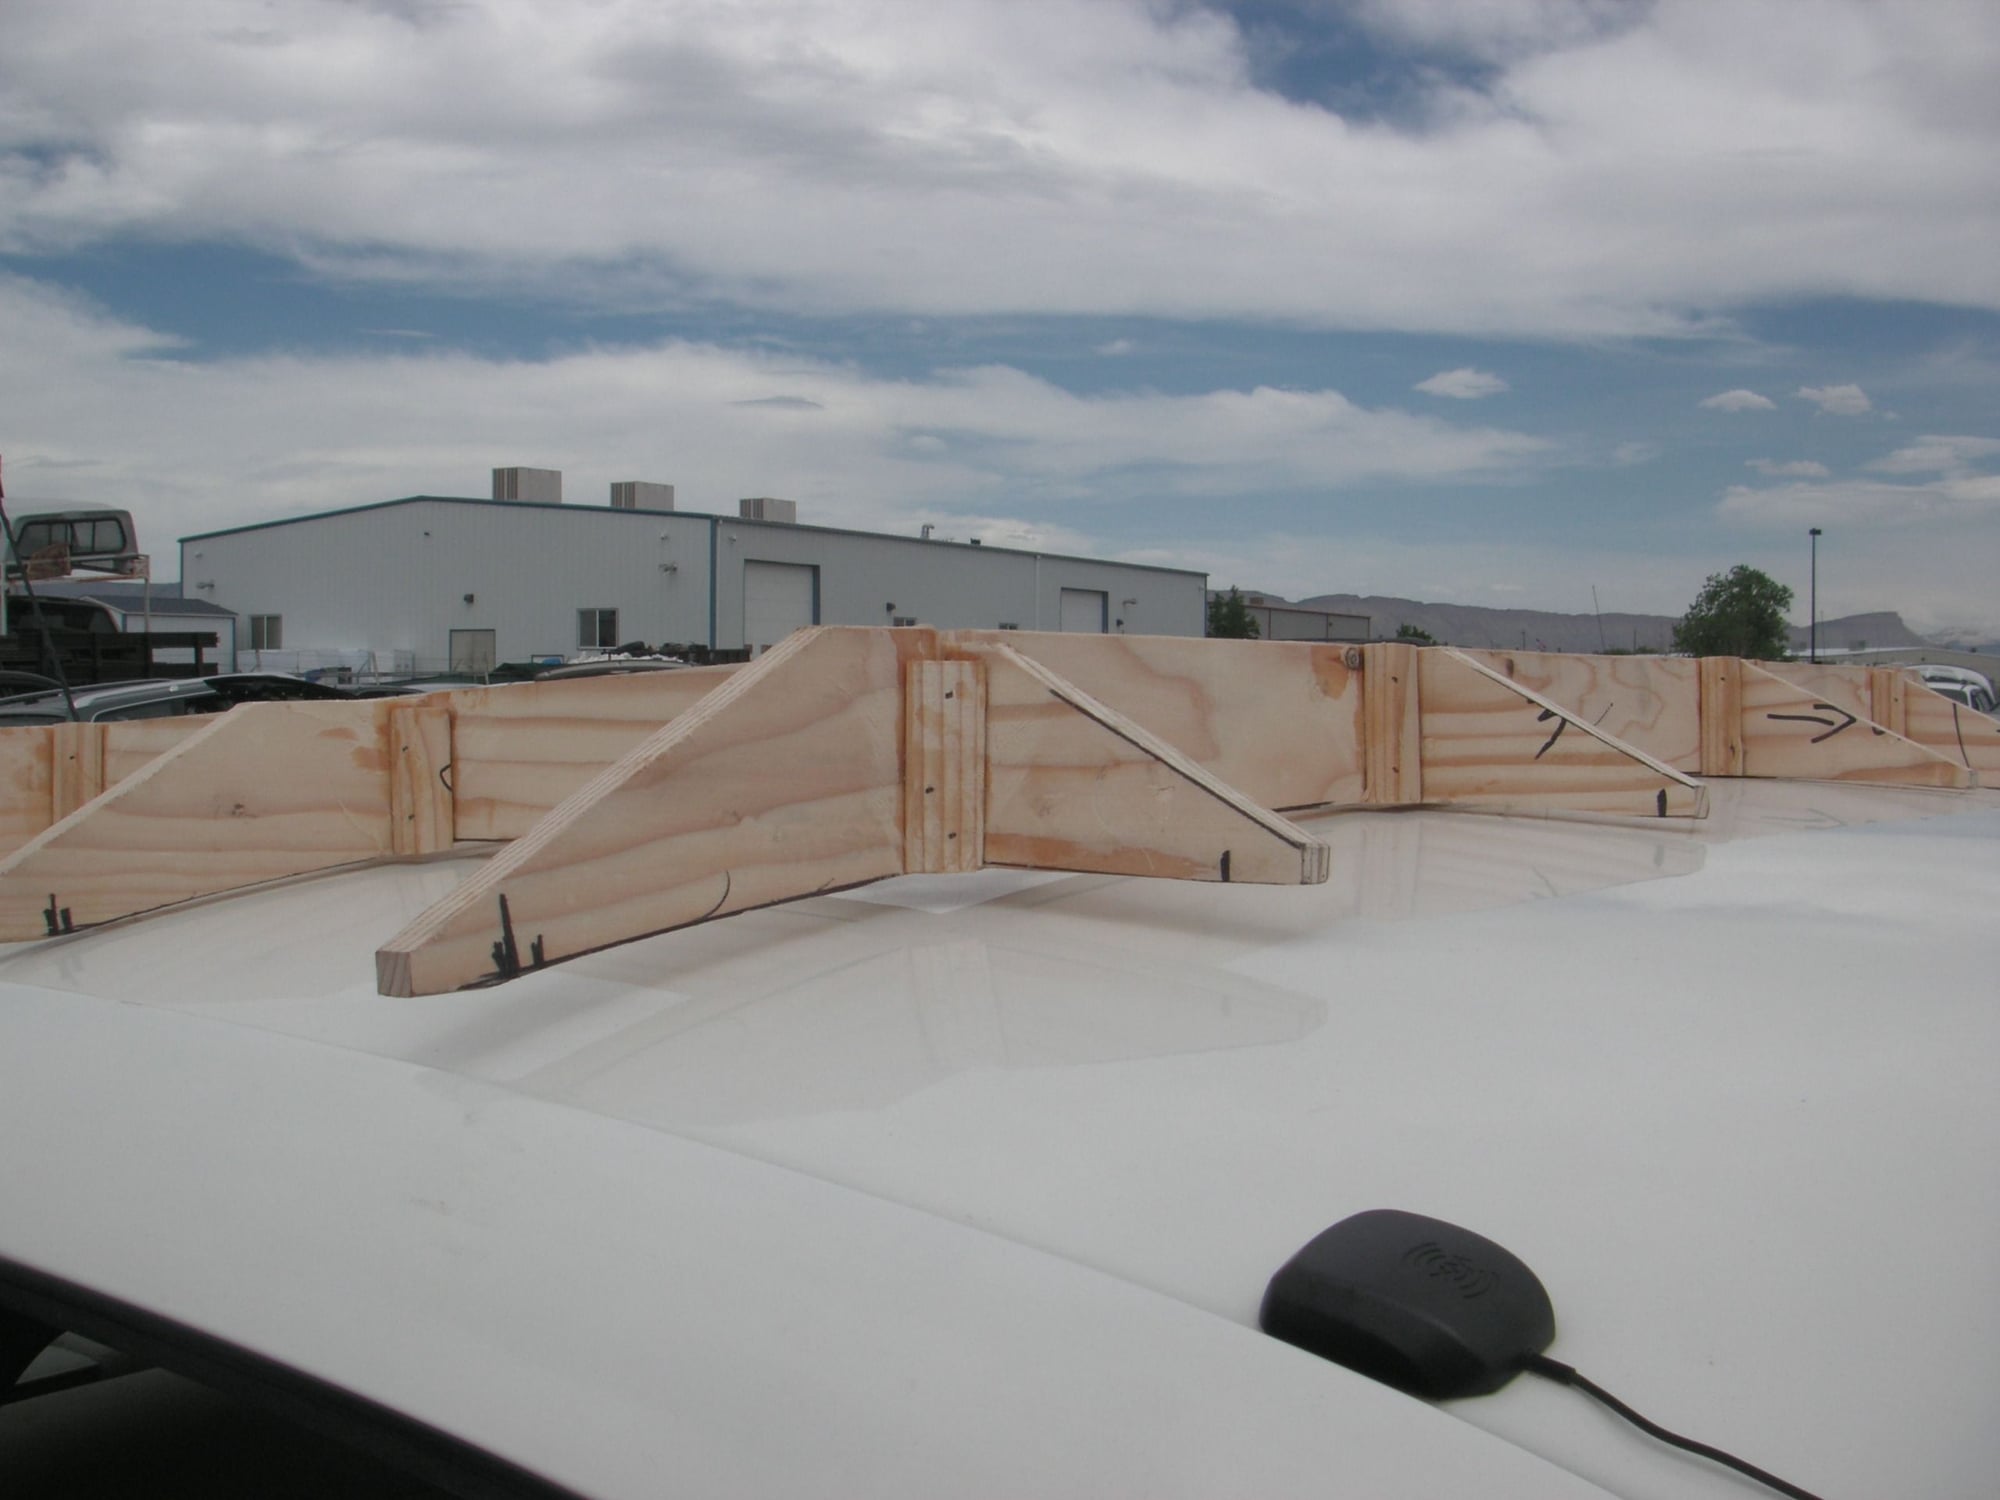
Then I am kind of stumped about just how best to fasten the wood sgtrips to the formers to hold them while the epoxy sets. The last time I did this kind of thing I think I used my air stapler and then pulled the staples after they were set so that I didn't have to deal with the heads of the staples in the finish work with sanding and so forth. That is a lot of work and; and I may just staple them and work with the heads of the staples in the finishing.
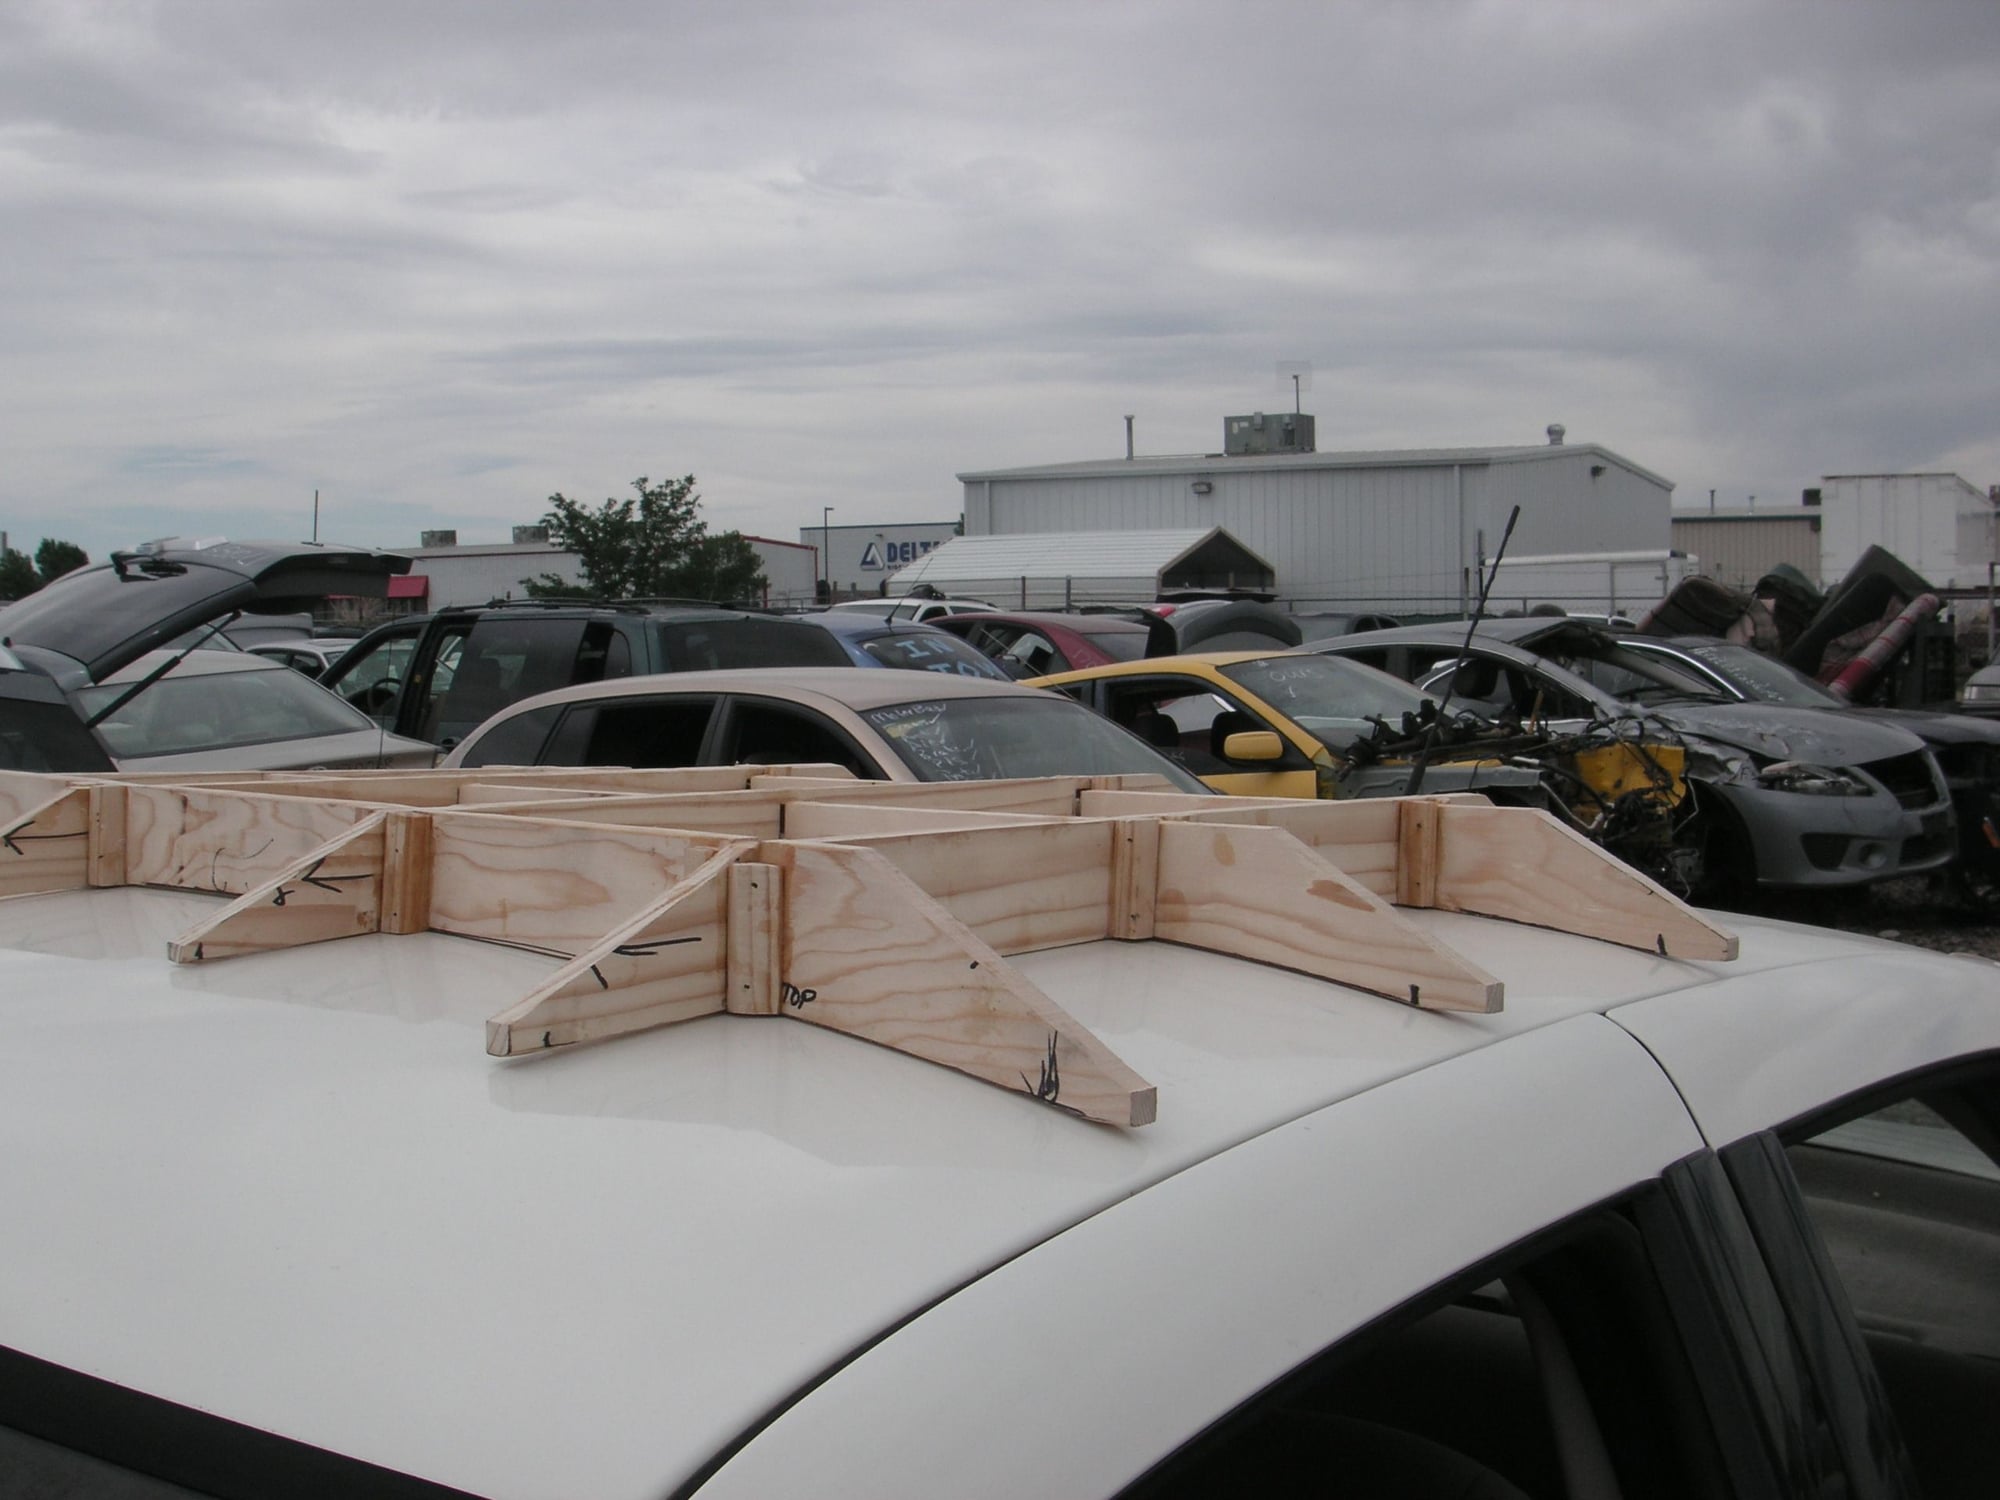
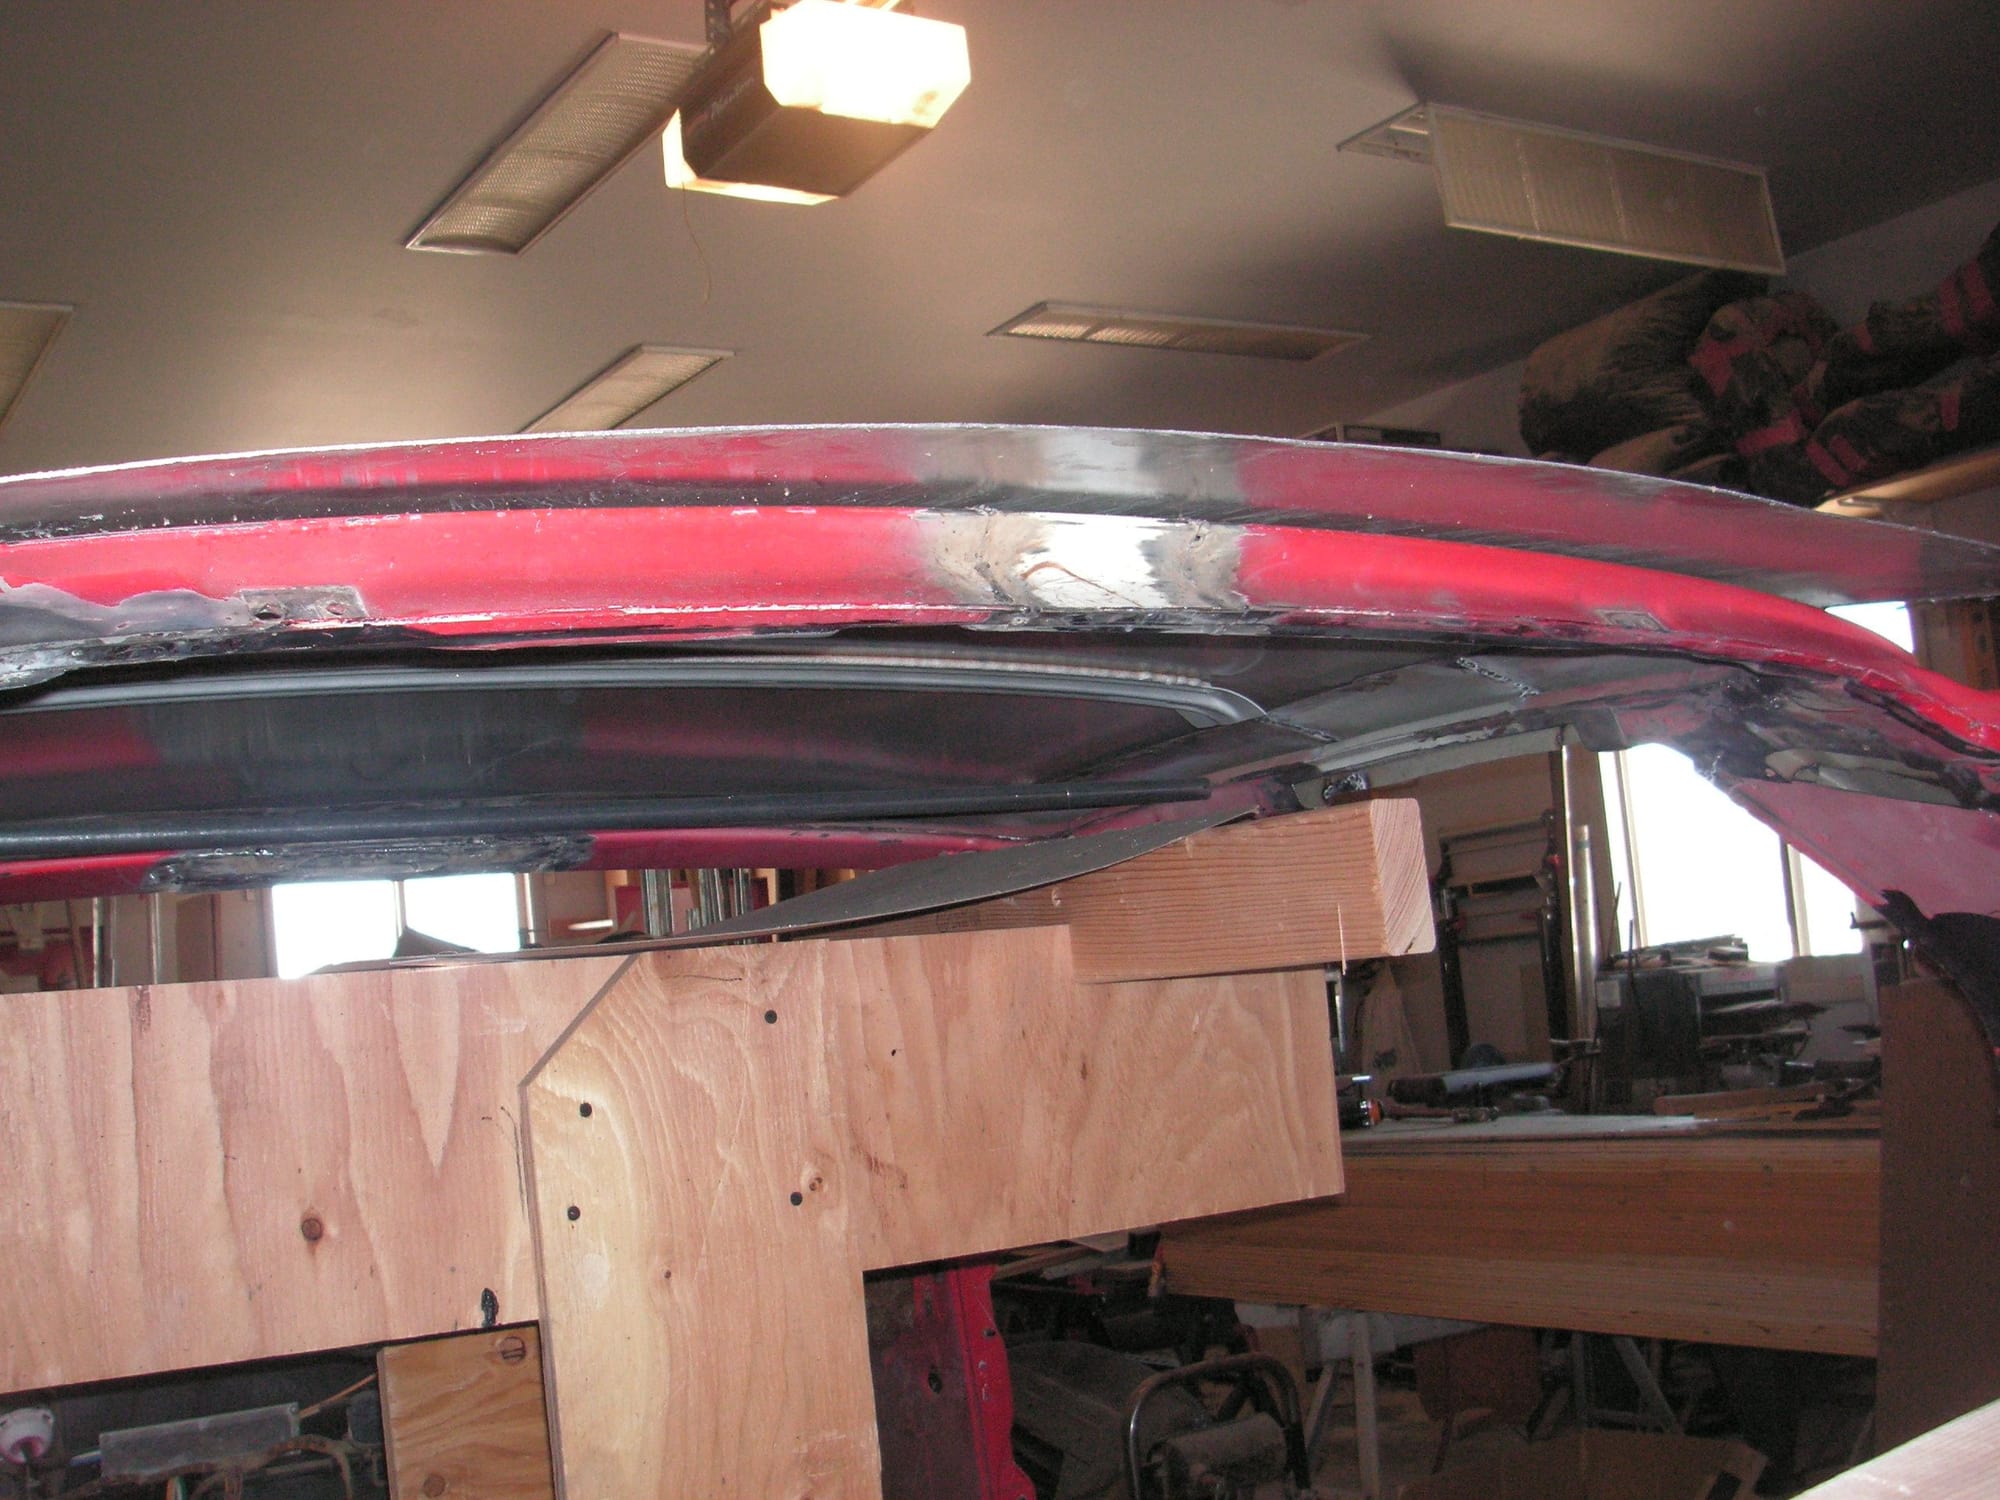
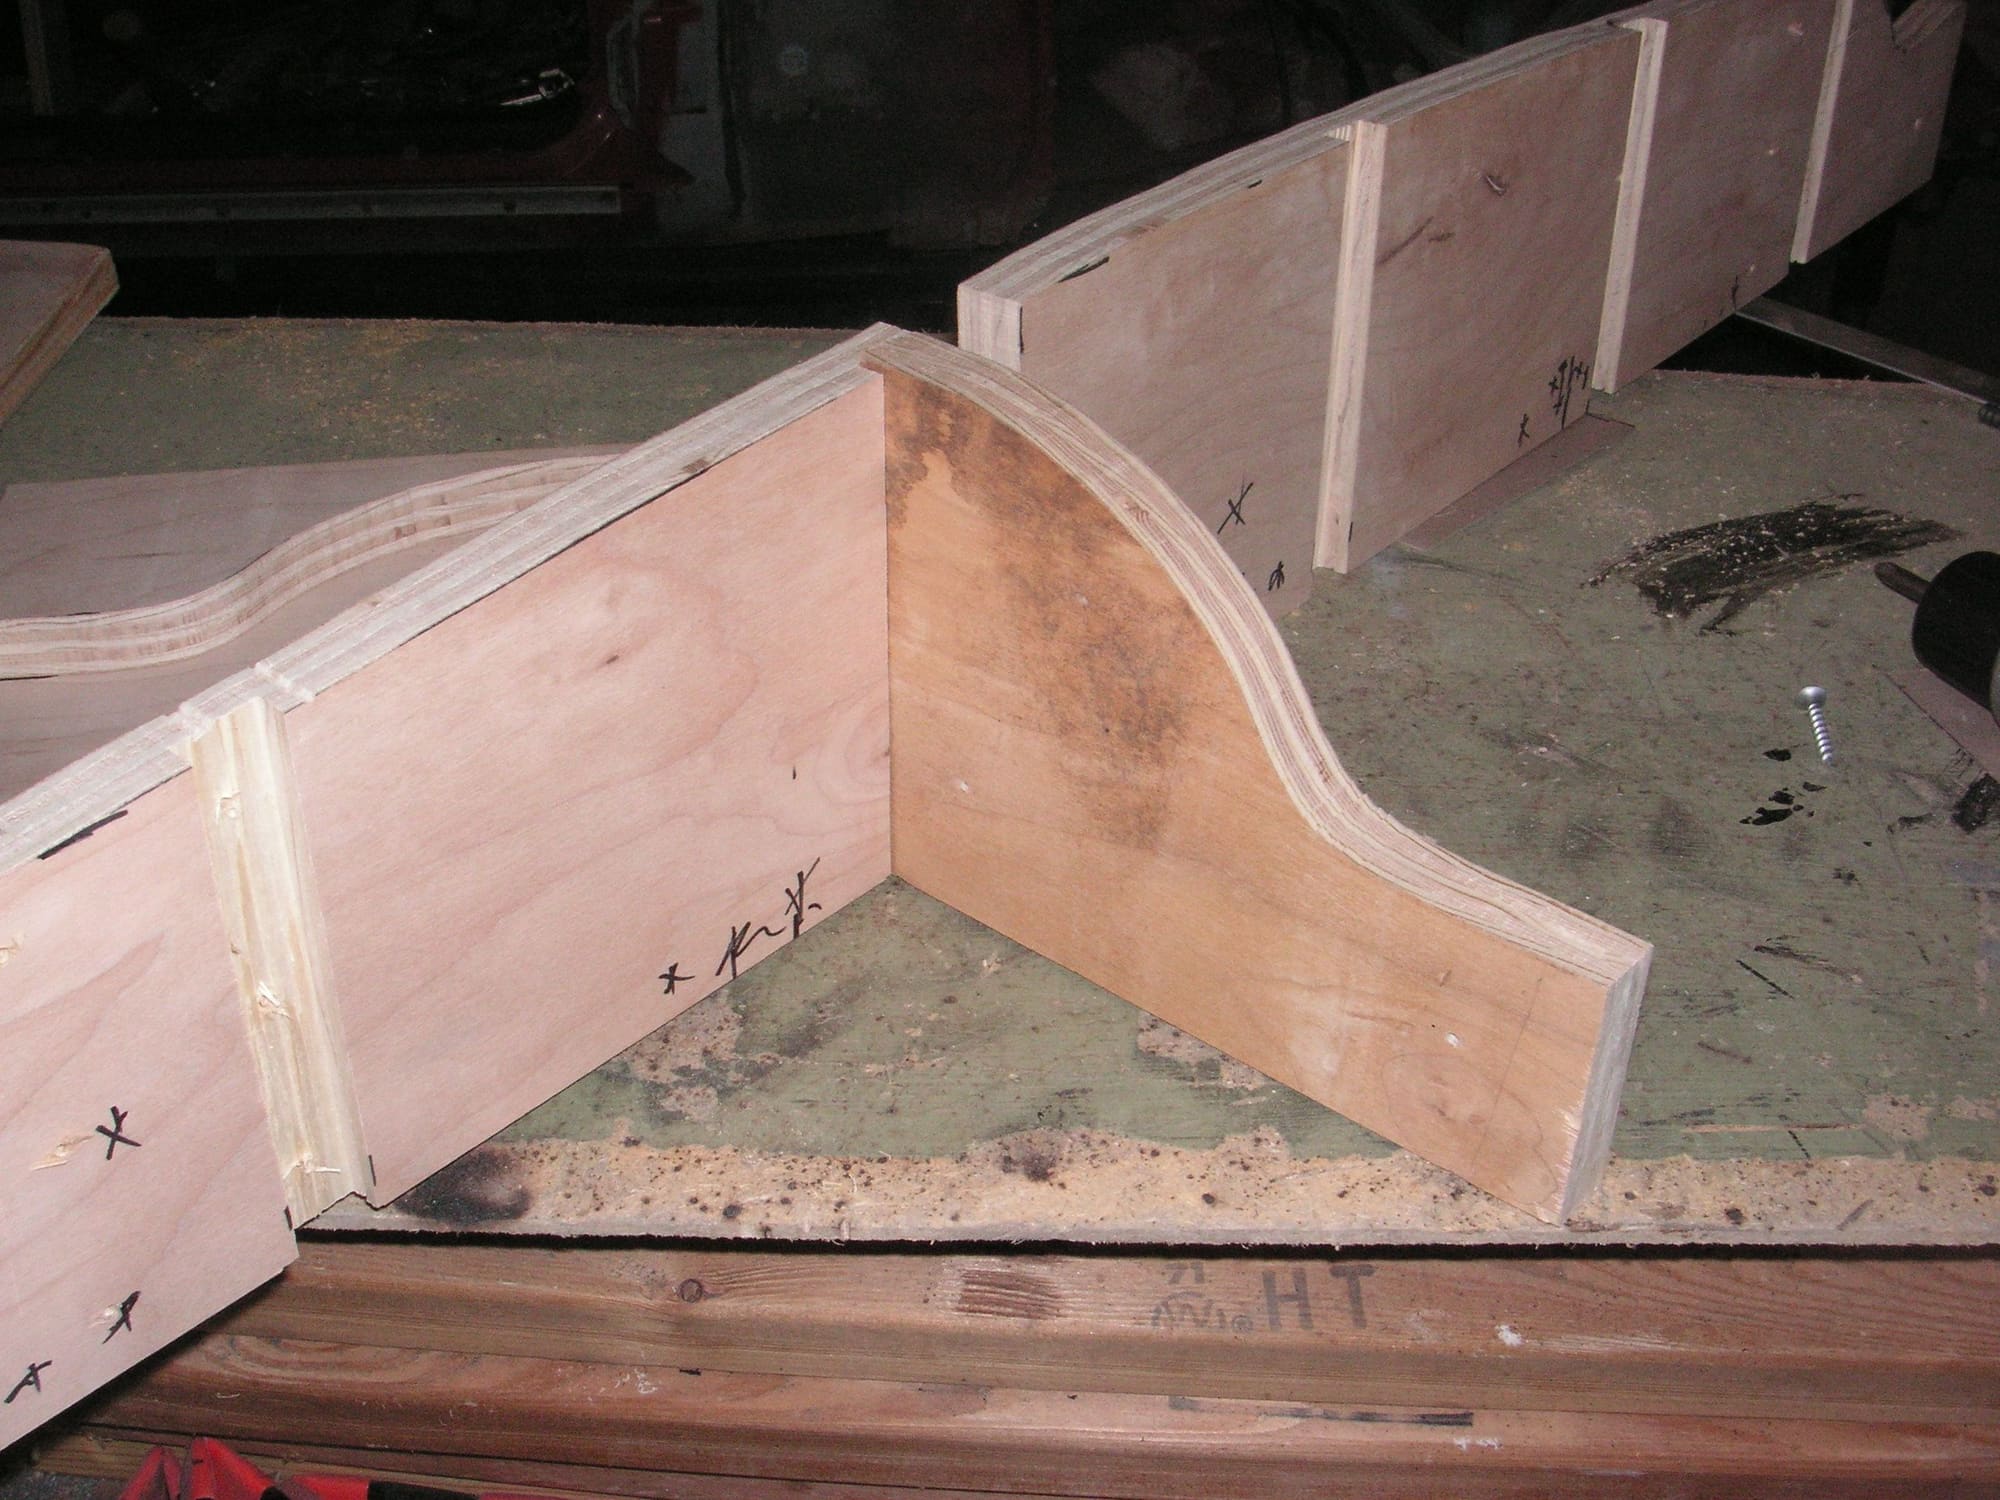
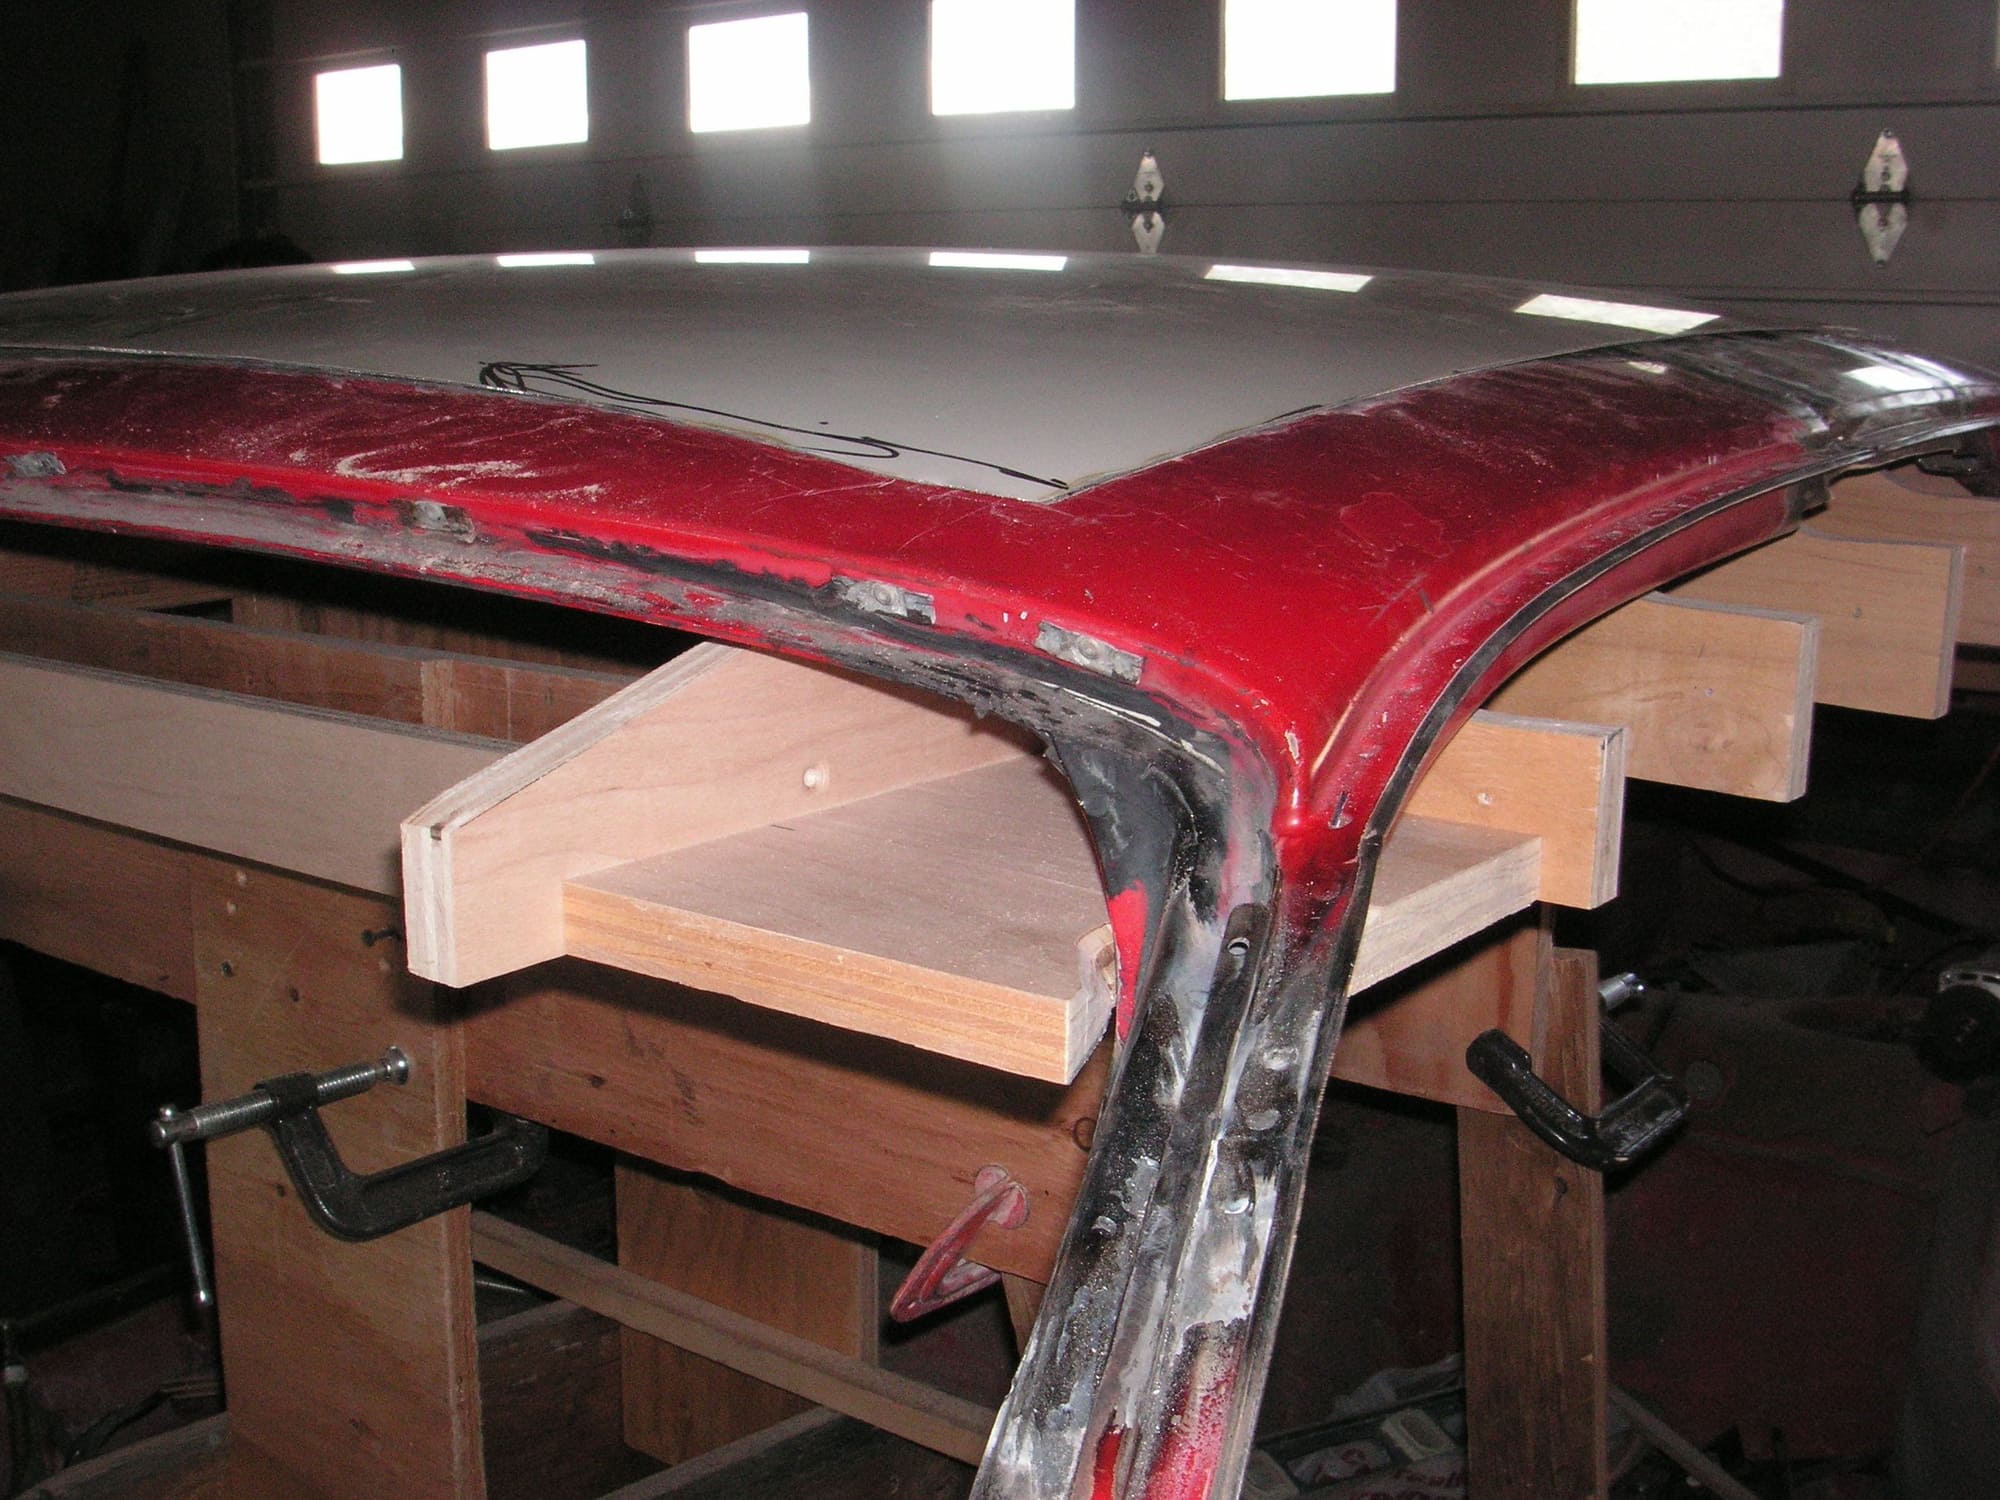
I cut the roof skin back some to eliminate much of what will not be needed and to make it easier to handle on and off the roof while I'l working on the headliner mold. Then I made a small step in the direction of developing the corners of the mold. I have been troubling about how best to do the corners since it is a little like building a ship in a bottle, but with the bottle painted black. In other words much of the corner development is kind of in the blind.
I think I am going to simply build the corners up in layers of plywood roughly cut to size and then simply sculpt the shape they need to be. I have the base for that laid up in both of the front corners now. I haven't quite figured out how best to do that for the rear corners at the B-Posts. Those have to mate up to the tops of the inside quarter panels, and there needs to be a jog in the headliner to overlap and mate to.
Last edited by Jerry Feather; 06-11-2018 at 08:32 PM.
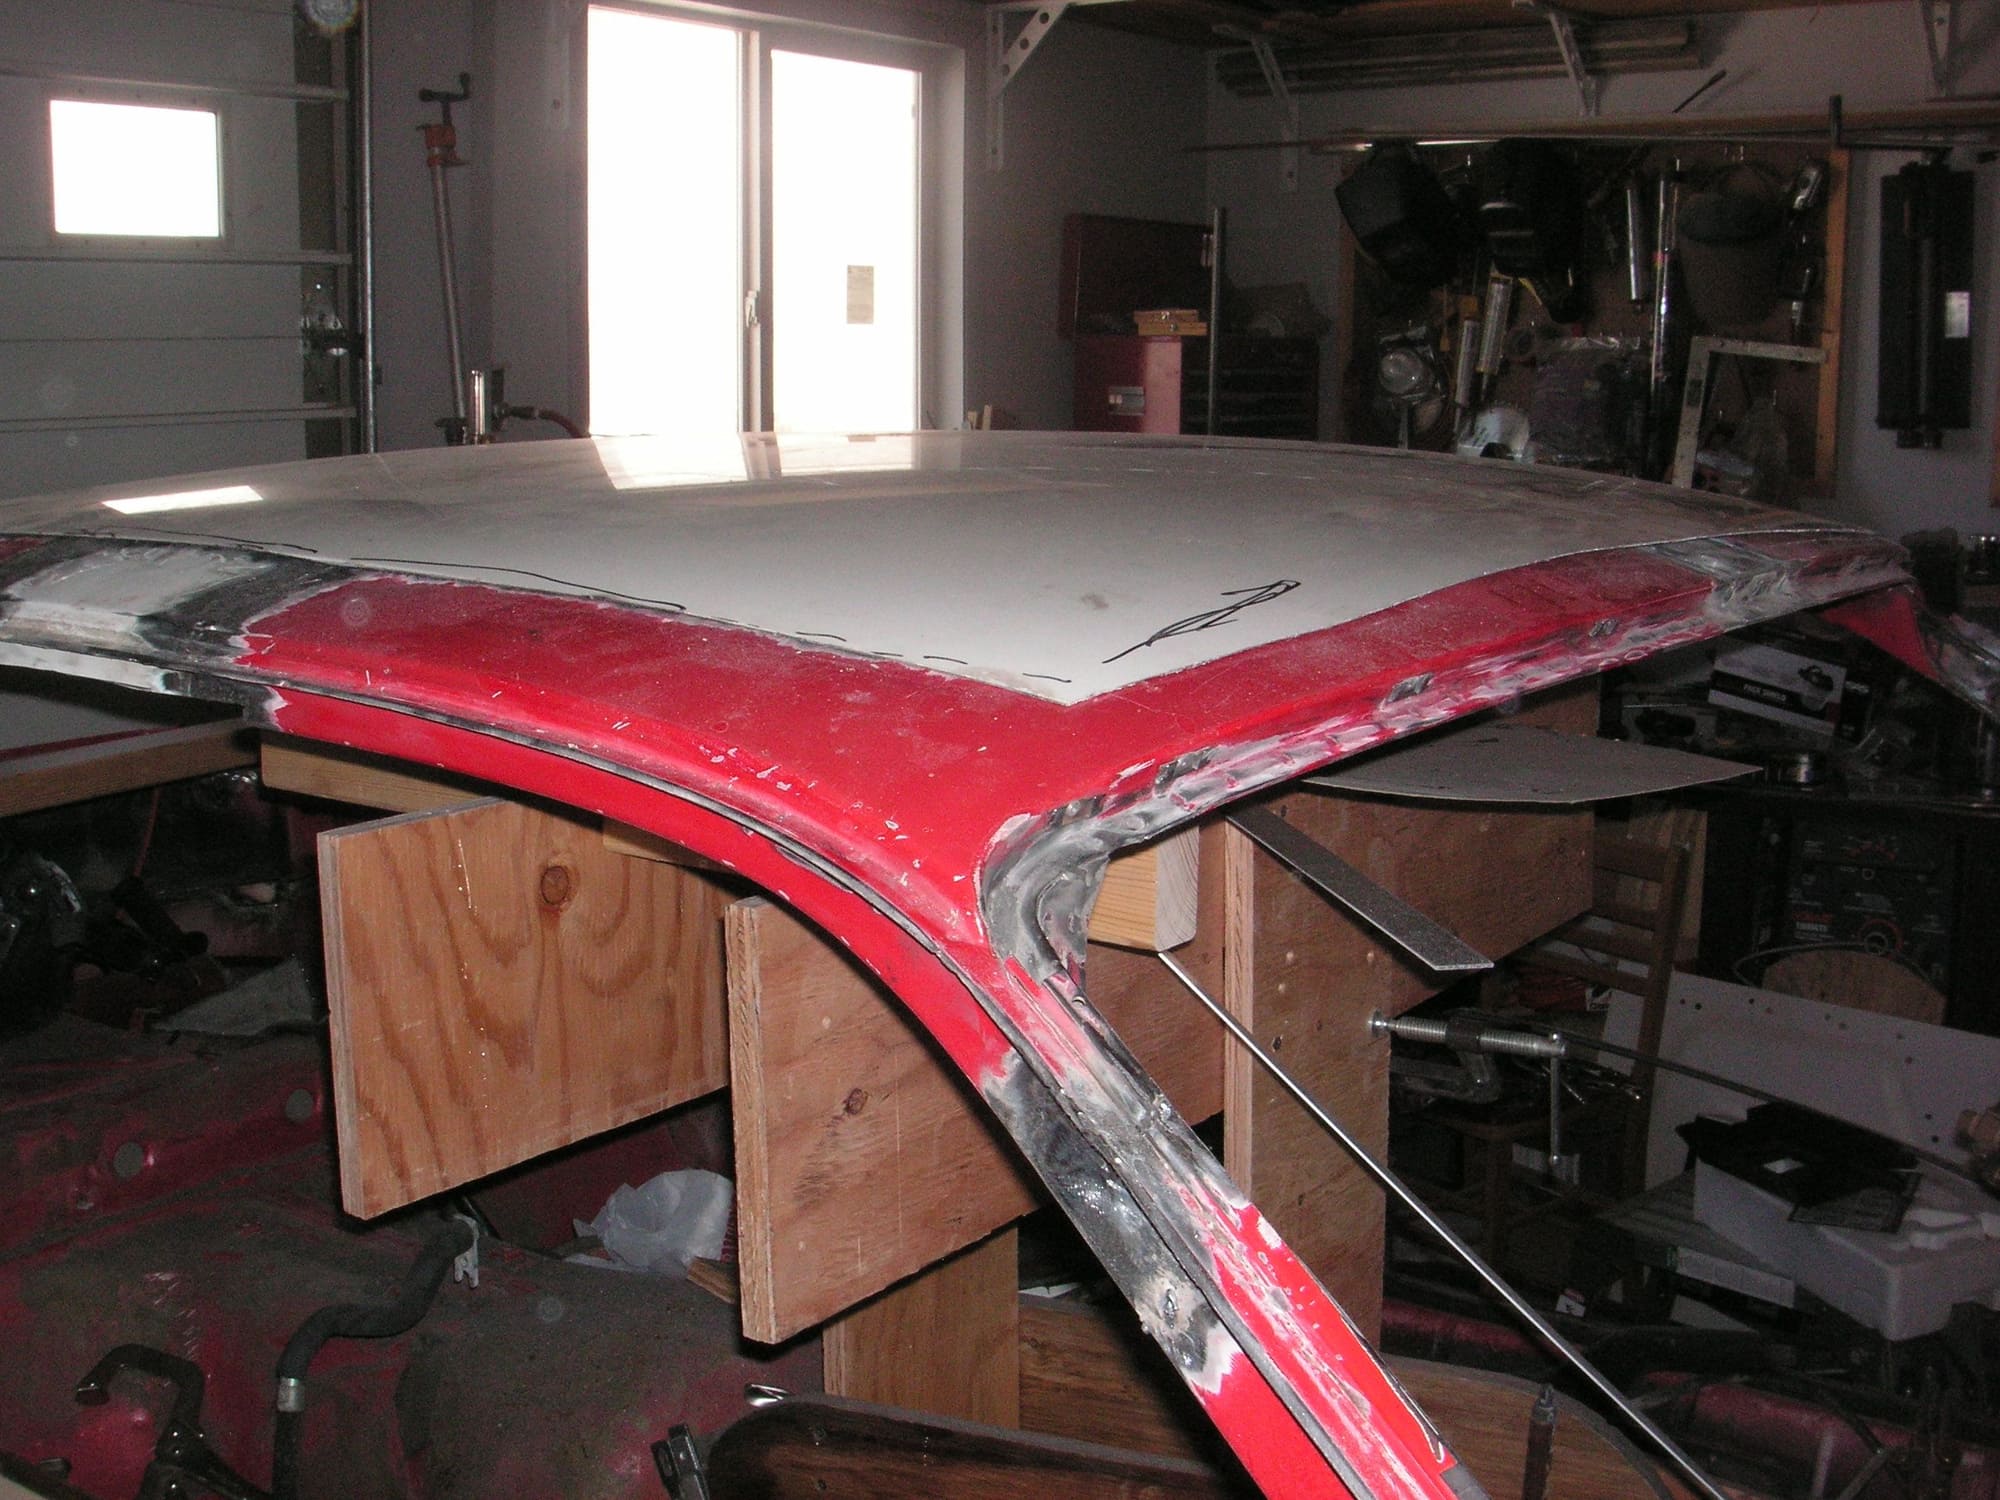
I have been busy with some other stuff, but should get back to this this afternoon or tomorrow. I have been troubling about how to actually do the corner sculpting of the headliner form, and think I have it kind of figured out. It is going to be a real mess with sawdust and bondo dust all over the place, but I think I can do it. I think what I am going to do is try to rough sculpt the corners in wood and then work up the final shape by covering a part with bondo then pushing it into place while the bondo it soft, but with wax paper over it so it doesn't stick to the car and then when it sets do the final shaping by hand. I'll probably put some guide material in place on the car so that I can see where to sculpt to leaving the space for the fiberglass. At least that is my thought process right now. More later.
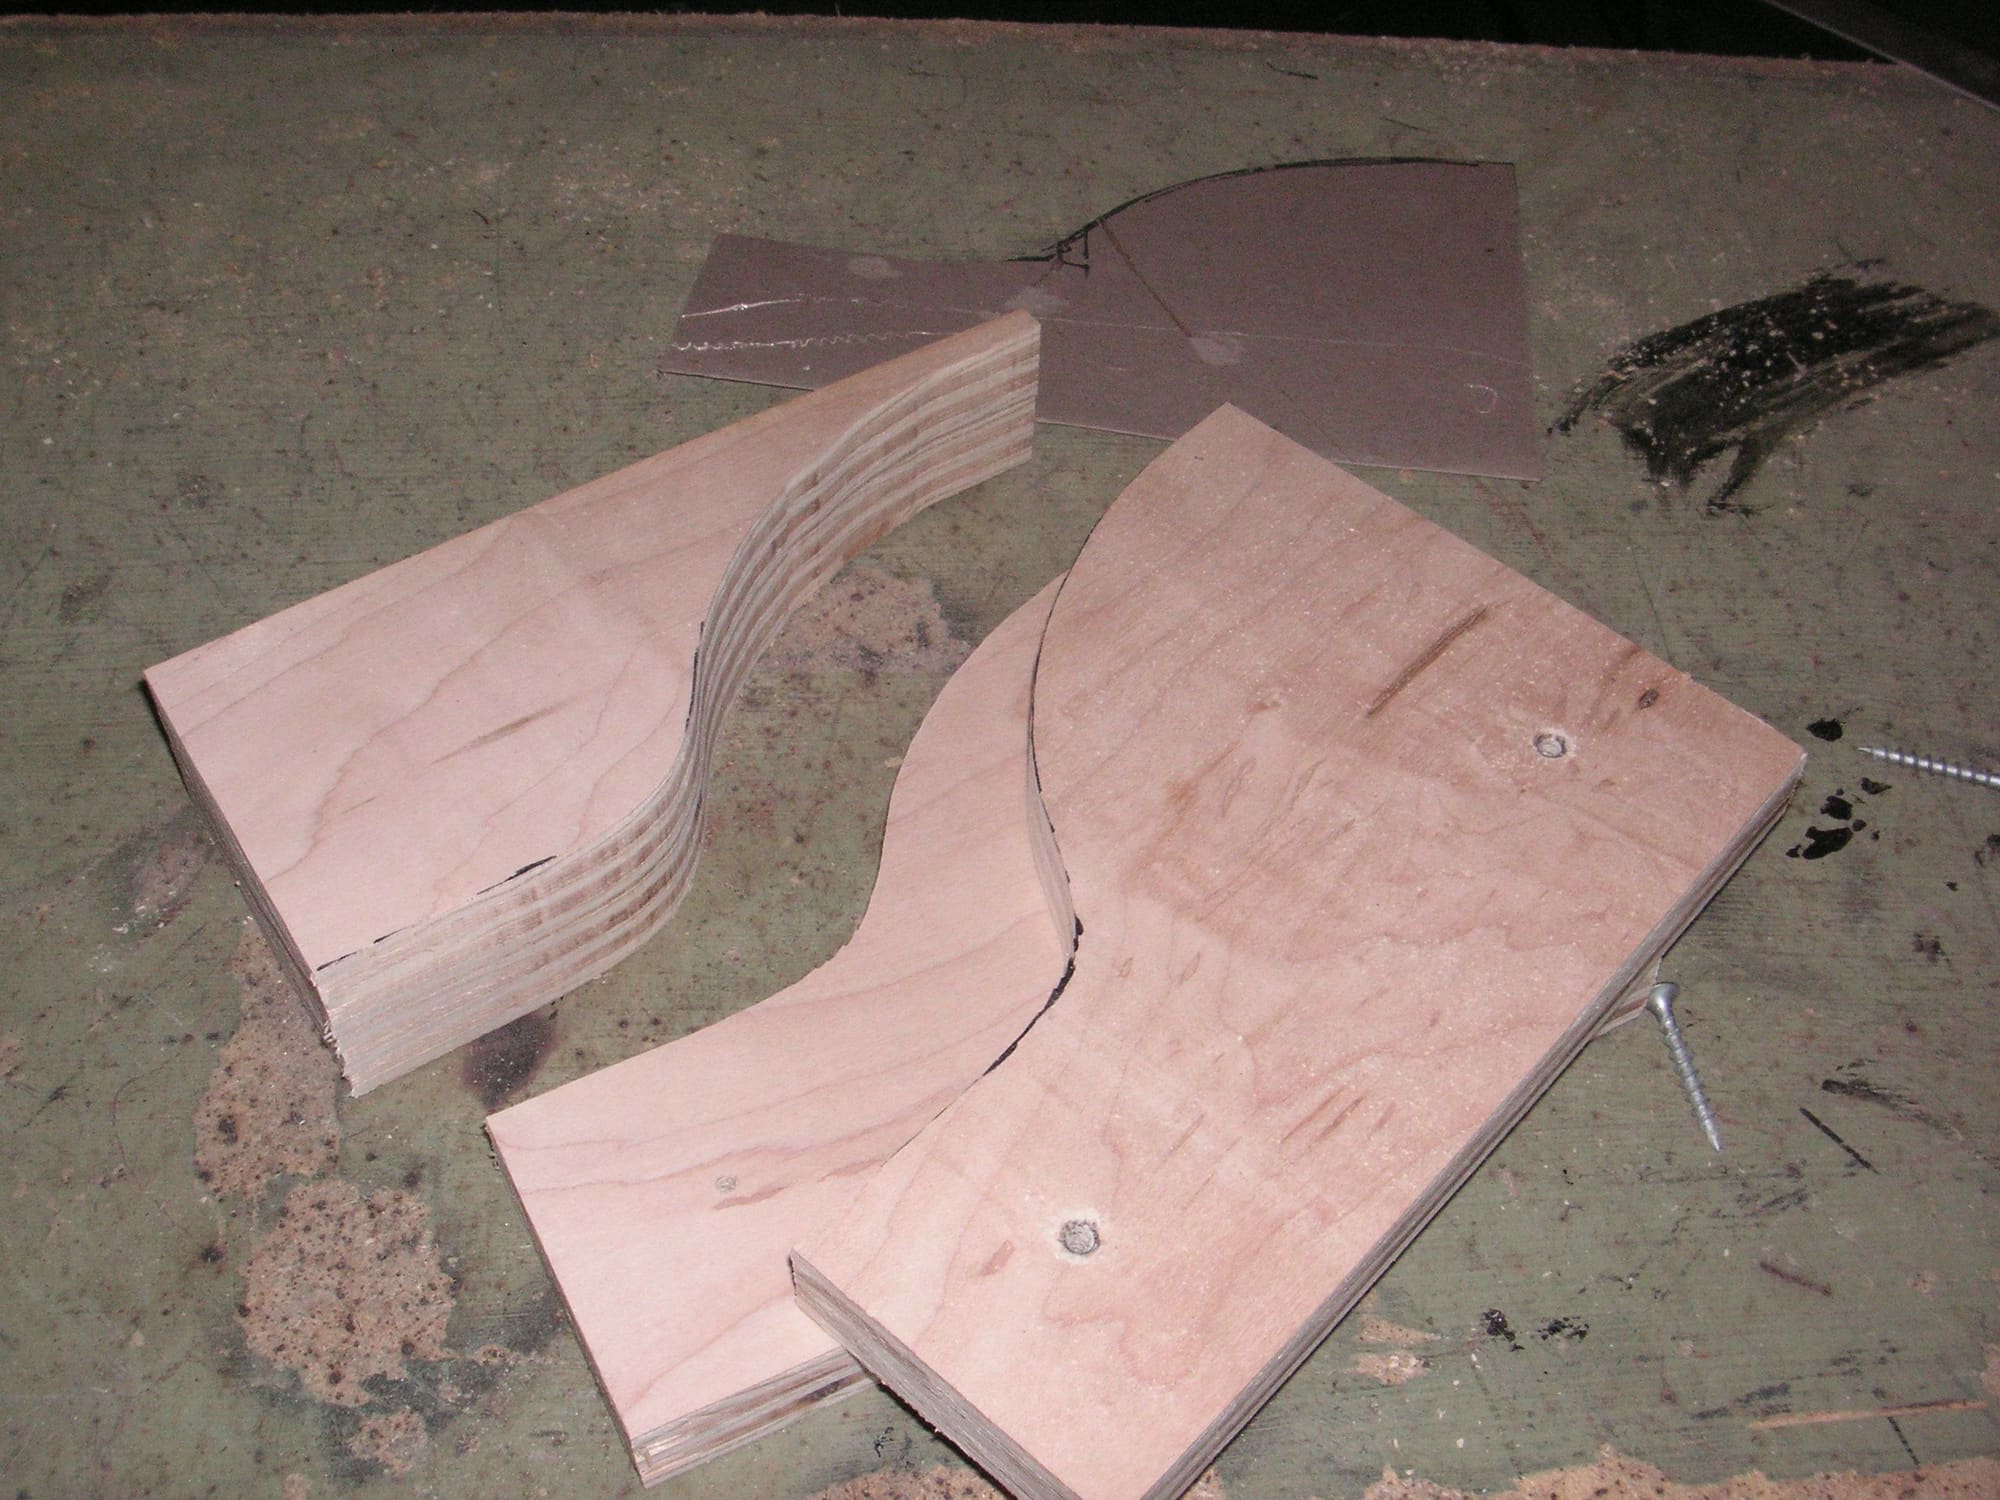
It doesn't look like much sculpting, but I have spent most of the day doing this. I started with the other corner, the drivers side, first then got it kind of close and used it as a pattern for the passenger side. These pictures are the passenger side showing first one effort, then the results of a second effort. Now I have to go back to the drivers side and do it over.
These efforts are just preliminary because I still don't know just how they need to be finished up to look right, At this point they are being made to just fit.
Last edited by Jerry Feather; 06-24-2018 at 12:45 AM.

 06-06-2018, 06:29 PM