When you click on links to various merchants on this site and make a purchase, this can result in this site earning a commission. Affiliate programs and affiliations include, but are not limited to, the eBay Partner Network.
Just how we deal with the inside of the roof segments pretty much depends on what we will be doing later with the headliner. I have had three different designs for that going thru my head and they all work with any one of the headliner ideas I have had so far. My first idea was to make some forms and then form some ABS plastic in two halves to fit the inner roof closely, but leaving a gap down the middle for a kind of overhead center console. I am still considering that approach, mainly because it will make the forms the smallest since the center OH console will be about the width of the third brake lite in the hatch window and blend in to that and then flow forward to the front where it would drop down slightly inside the windshied where there would be a small pocket to hide the radar detector just above the inside rear view mirror.
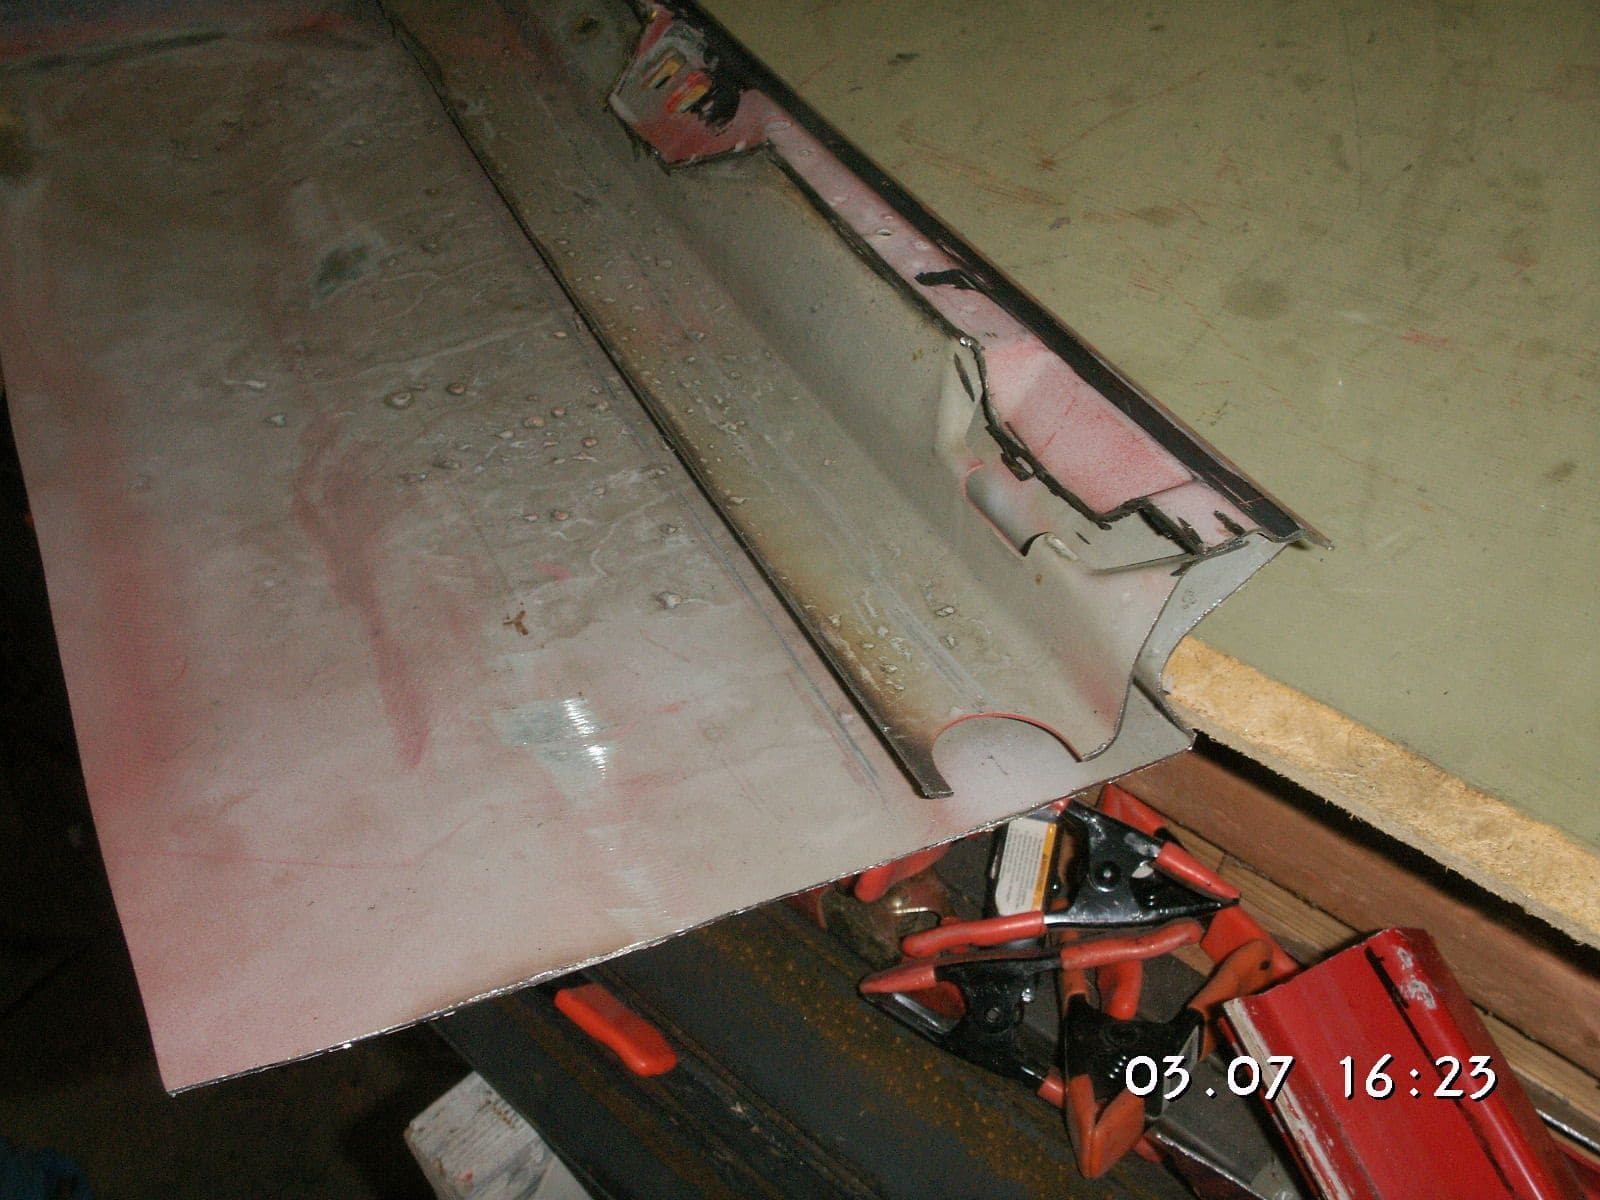
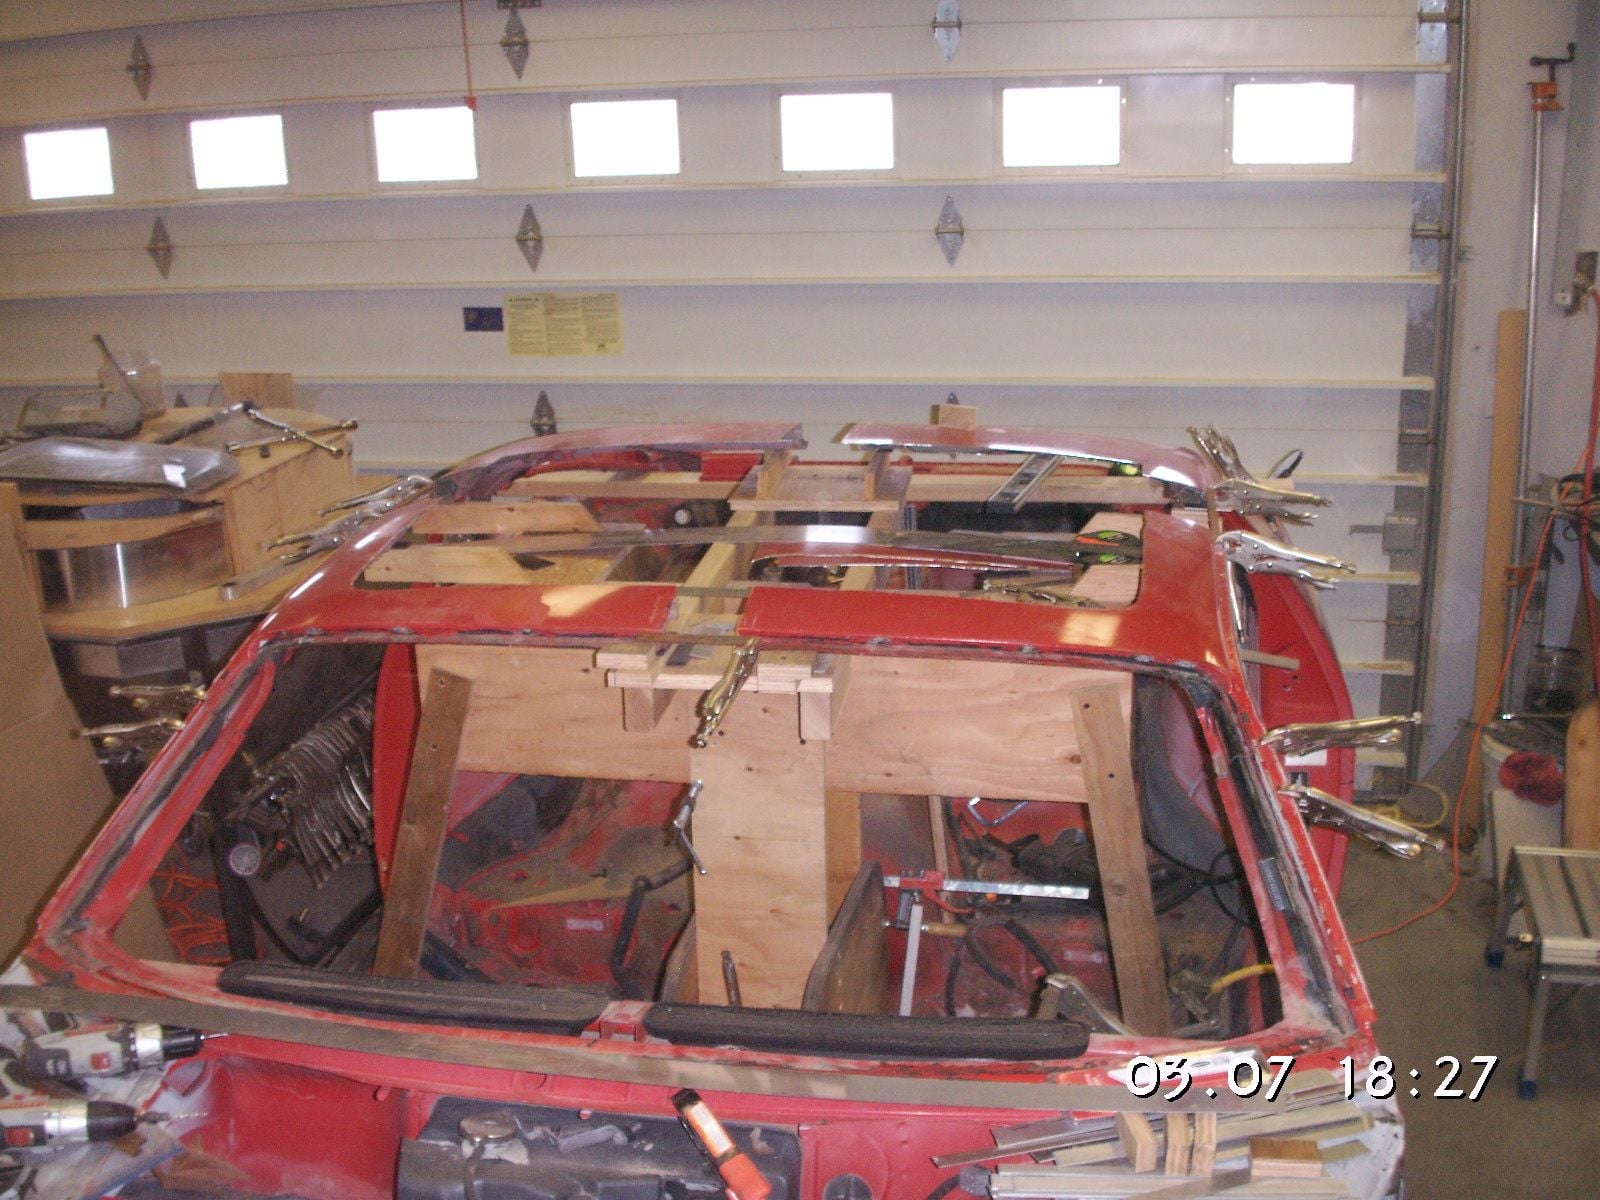
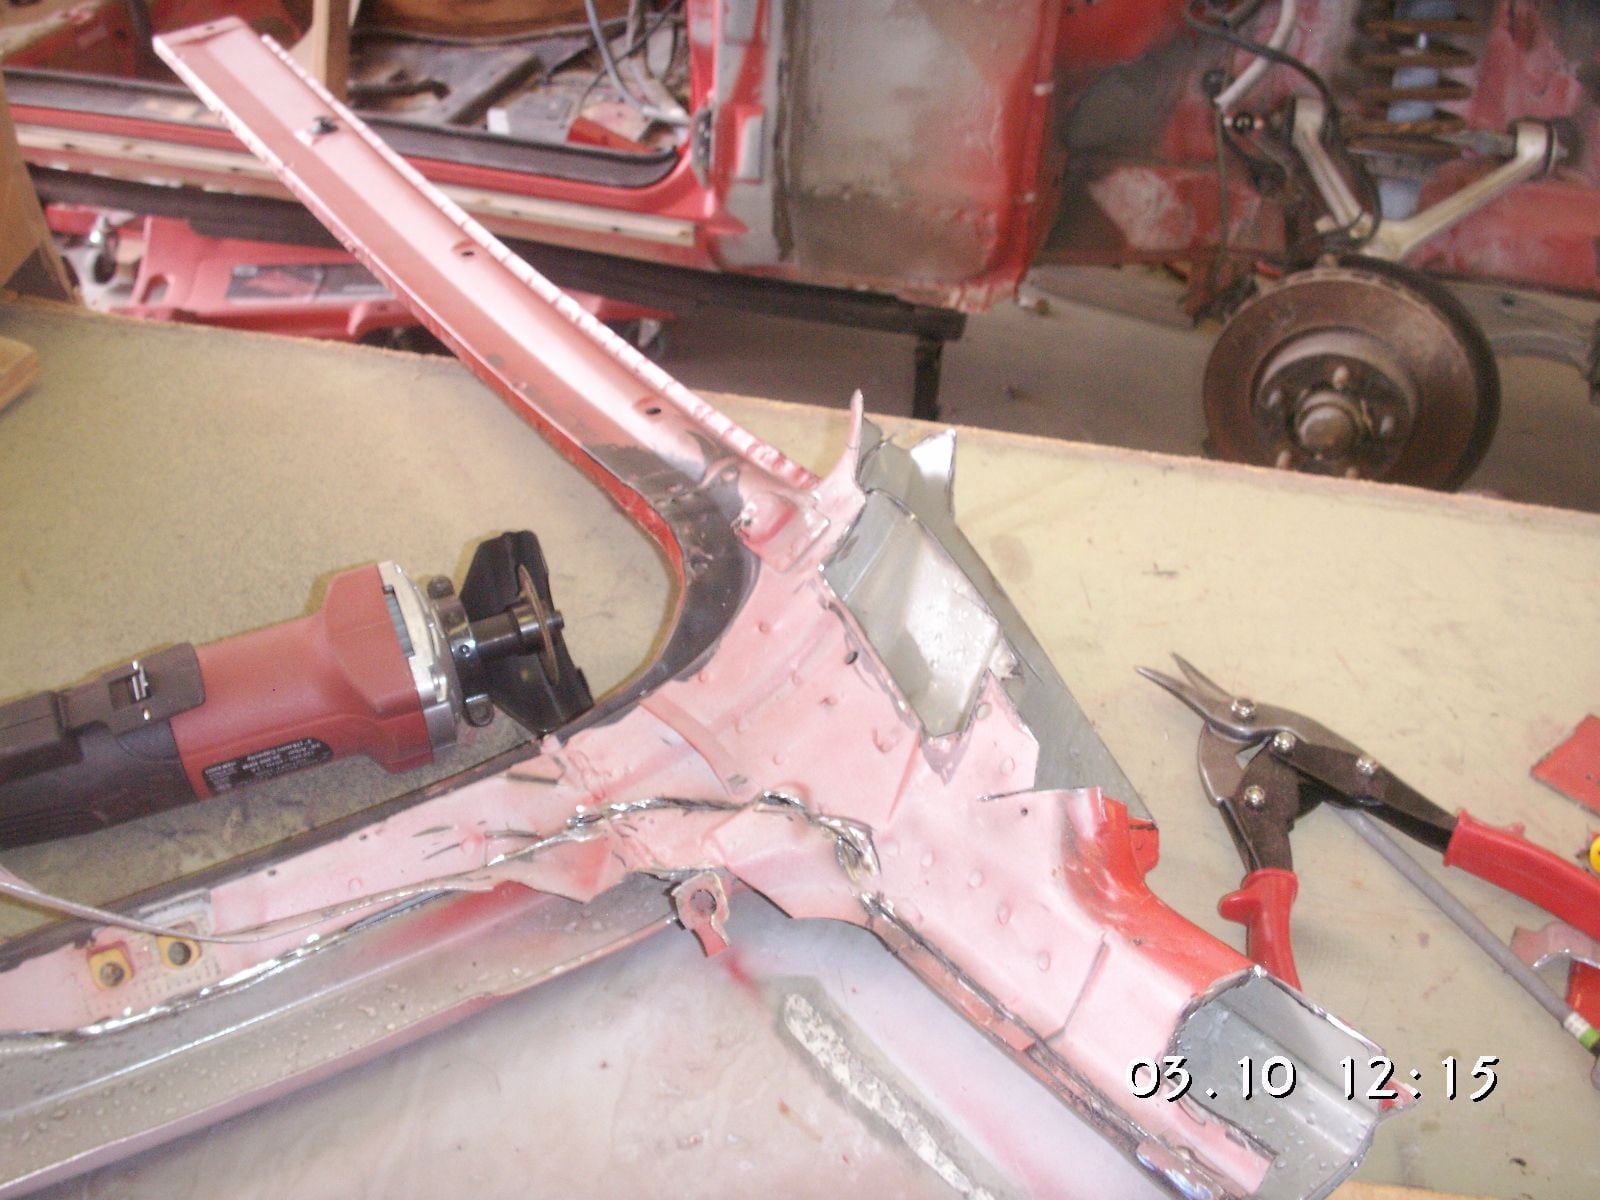
I have the insides of the roof segments pretty well figured out and you can see in one of the above pictures how I have trimmed around the inner edge. That approach lends itself well to the sides and front of the roof, but the rear edge at the front of the hatch seems to be a bit more complex. I haven't decided just how much of that extra metal to trim out to end up with a smoother surface back there. Left alone it is pretty irregular across the back, at least with the innermost of the three members; so I am thinking about just removing all or most of that third member.
My second thought about the headliner is similar, but just excluding the overhead console idea. For that one I am preserving the front overhead light and will be welding in the light recess from the donor roof for it since I cut thru the middle of the original one in making the center front roof cut.
My other thoughts about a headliner include making one with leather and spring wire bows to hold it in much like the old fashioned cars. I could even run the wires crossways or longways, whichever. The problem with that approach is in how to finish the outer edges all around. That tends to lead me back to the formed ABS plastic, at least around the edges and then snapped into place with the original door panel clips.
Overall, at this point I am leaning toward the formed ABS plastic without the overhead console and forming it in two pieces and glue them together in the middle before covering them with foam and leather. With that I think I will still clean up the rear inner edge leaving only two layers of metal, although I might weld in some additional metal for support, but smoother than what is in there now.
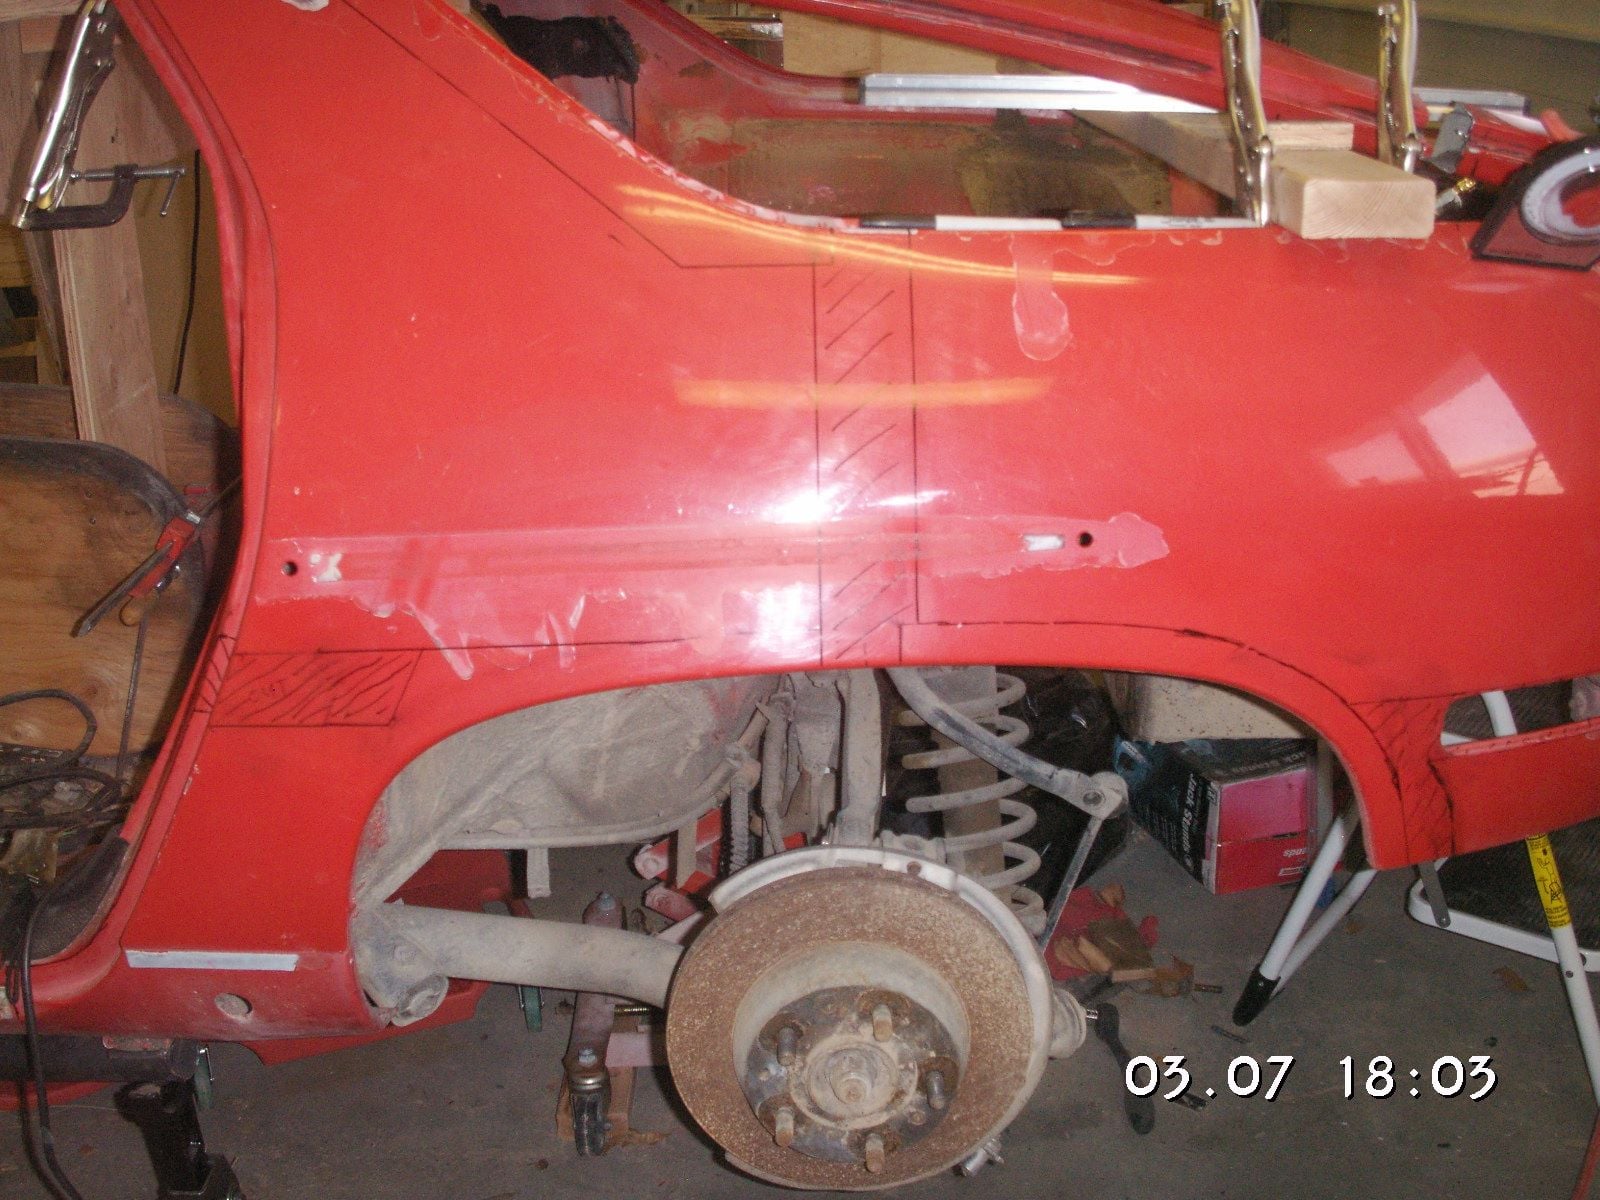
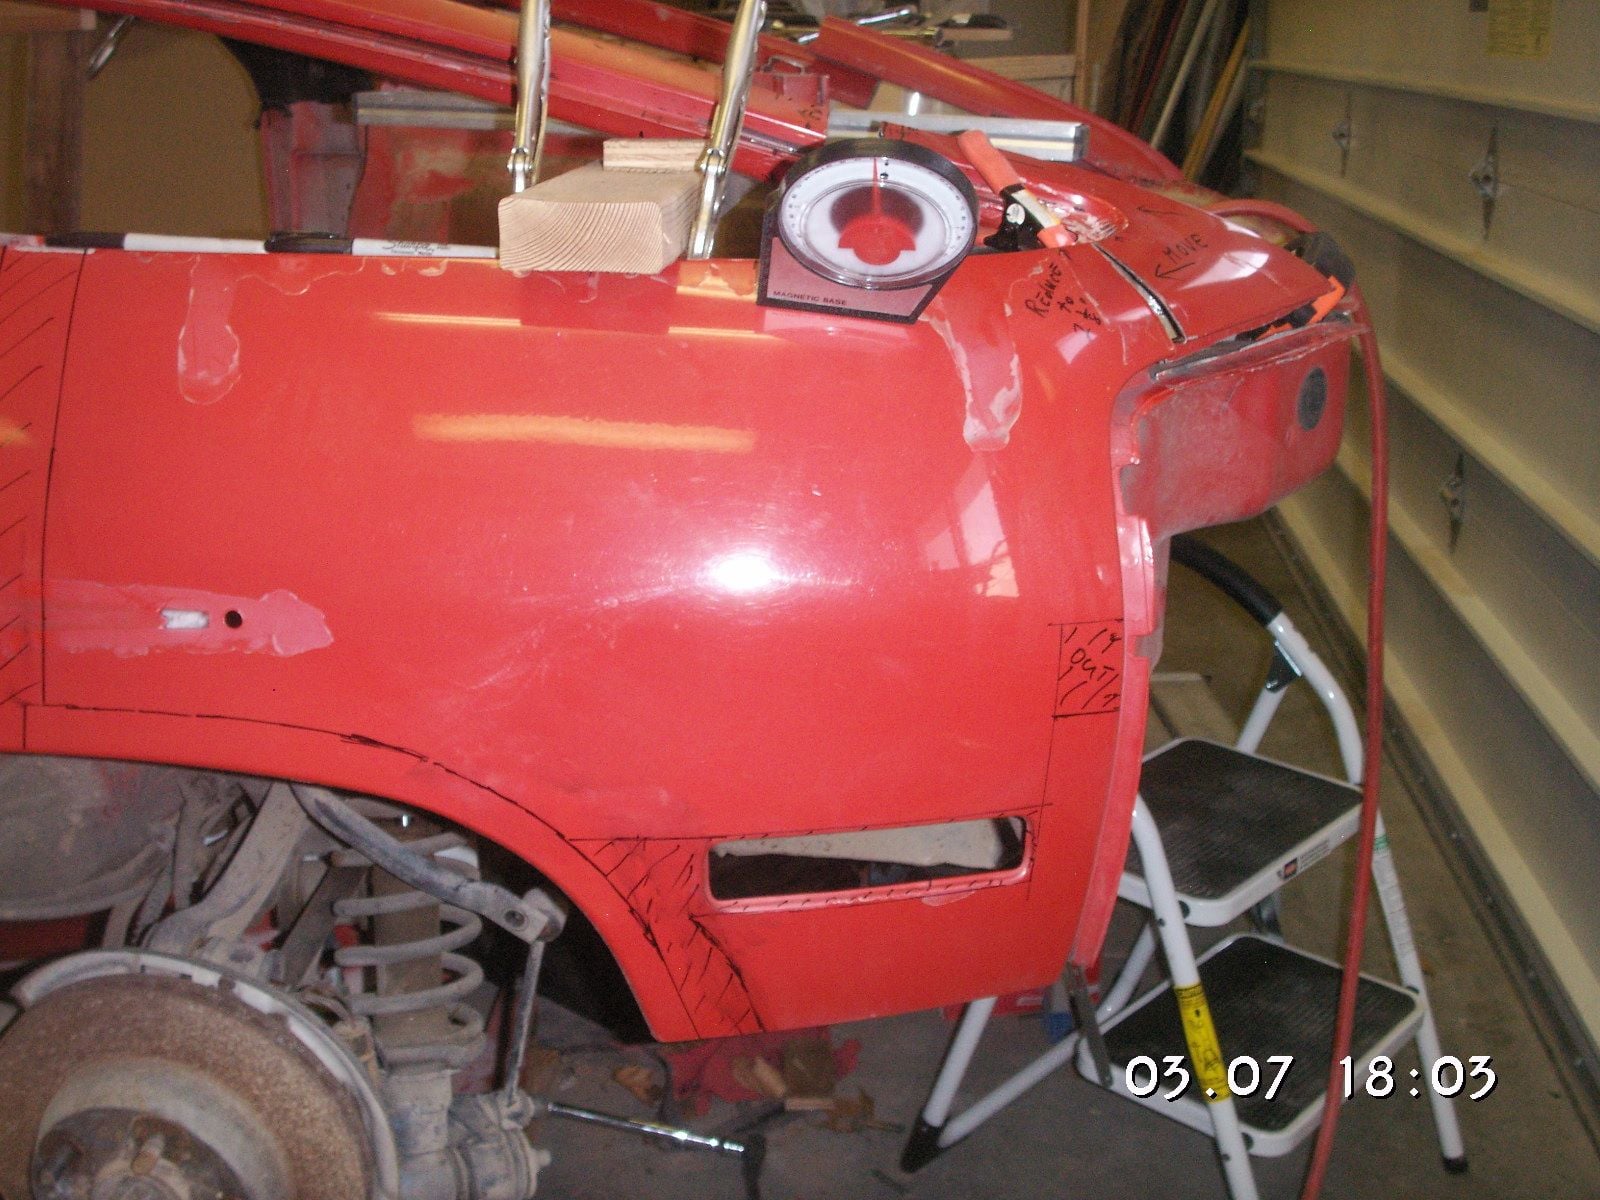
About the wheel arches, based on the good input from Martin and Carlos I have abandoned the idea of changing them to circular from their original shape.
My first thought about the wheel arches when designing the section aspect of this project was to leave them as they are, cutting them loose from the fenders in front and the quarter panels in back then sectioning the body and then put them back where they were. That is pretty much how you see them in the photo chop picture that Carlos has cleaned up for us and recently bumped by him. My second thought was to do that except for the front ones which I would shorten their height by one inch and put them back into the 2 inch lower upper body. That would give us a little more metal to work with in shaping the area of the fenders around but mostly above the arches.
After having studied that image of the project for many months I could not escape the feeling that after the car is sectioned the wheel arches just seem to stand out a bit too much. That is what kind of led me to thinking about the radiused arches.
Now I am thinking and planning to keep the arches much the same, but I think I will shorten them front to back by an inch or maybe even an inch and a half, half of that on the front and back of each one. With the front one an inch lower than original and being less wide will, I think, fit the overall design of this car very well.
Then, the rear arches will also be massaged quite a bit to widen them some, maybe about half of what the GTS rear arches are like, but not so pronounced. That shape will depend on just what it looks and feels like when we get to it and start hammering.
Last edited by Jerry Feather; 03-06-2018 at 08:36 PM.
All this time I have been thinking about and wondering just how I am going to make forms for the headliner if I were to have it vacu-formed in ABS plastic. Then, after I posted what I did about it above, I began thinking more about just how such a form or half forms might be made. In that process I was thinking about how strong and firm it or they will need to be to withstand the pressure, and I was still thinking about the set-up time and cost for the process at my Plastic Guy's place, plus the wait time for them to get to it. Then it suddenly occurred to me that the same process, form making, can be utilized in mold making and then molding the headliner in fiberglass. In fact the mold can be made in fairly easy to handle segments for fitting in the car, can be much lighter, and then fastened together to lay-up the fiberglass. Duh!
Last edited by Jerry Feather; 03-13-2018 at 11:30 AM.
I think the stock long, and squared wheel-arches make the car look archaic, even with aero-mirrors and nice rims installed. They just stick-out like a sore thumb, and especially with the stock 4x4 ride height.
Therefore, rounded arches which surrounds the tires would look much better, and modern, IMO.
Perhaps your new plan to shorten them will improve their looks.
.Perhaps your new plan to shorten them will improve their looks.
I keep looking at the picture of the chopped and sectioned 928 and seeing what you are seeing also. Then I am thinking that shortening them a half inch might be about right. However that still seems like not quite enough. Then I go to an inch and a half and that is looking better. But, I find that when we get to the sectioning of the lower body the rear bottom corner of the doors is going to be moving aft a full inch, based on the relative location of the vertical part of the body in relation to the vertical line of the aft edge of the doors. So, I kind of hope to use that full inch for narrowing the arches; but by measuring the width of the arches at the bottom of the quarter panel they come out only 29 inches wide. With the tires being 25 to 25.5 inches in diameter that seems to leave only about an inch of space between the view of the tires and the arches.
Then, I still keep looking at the picture and realize that where I am measuring the width of the arches is well above the center of the tires, so the actual width of the arches at nearer the bottoms is much greater than 29 inches; and the side view looks like there is close to 3 inches of arch width front and back of the tire that can close. The result is that I think a full 2 inches of narrowing the arches will fit the move of the panel in front of the arches and work for the rear also and will save a lot of welding in front of the arches.
Some of that welding may have to come back in if I decide that the rear arches don't need to move up into the upper body the full 2 inch section, but rather, like in the front, maybe only 1 inch.
"Chopped and channeled" looked so easy in the 50's.
Well, to be fair, chopping the top on a 30s era car was a lot easier. The pillars were vertical, so chopping didn't involve anywhere near as much of the "jigsaw puzzle" issues that are going on here.
And even back then, as usual, doing it right took a lot more skill and effort than most people realize.
There's a reason that the "legends" from back then became legends in the first place.
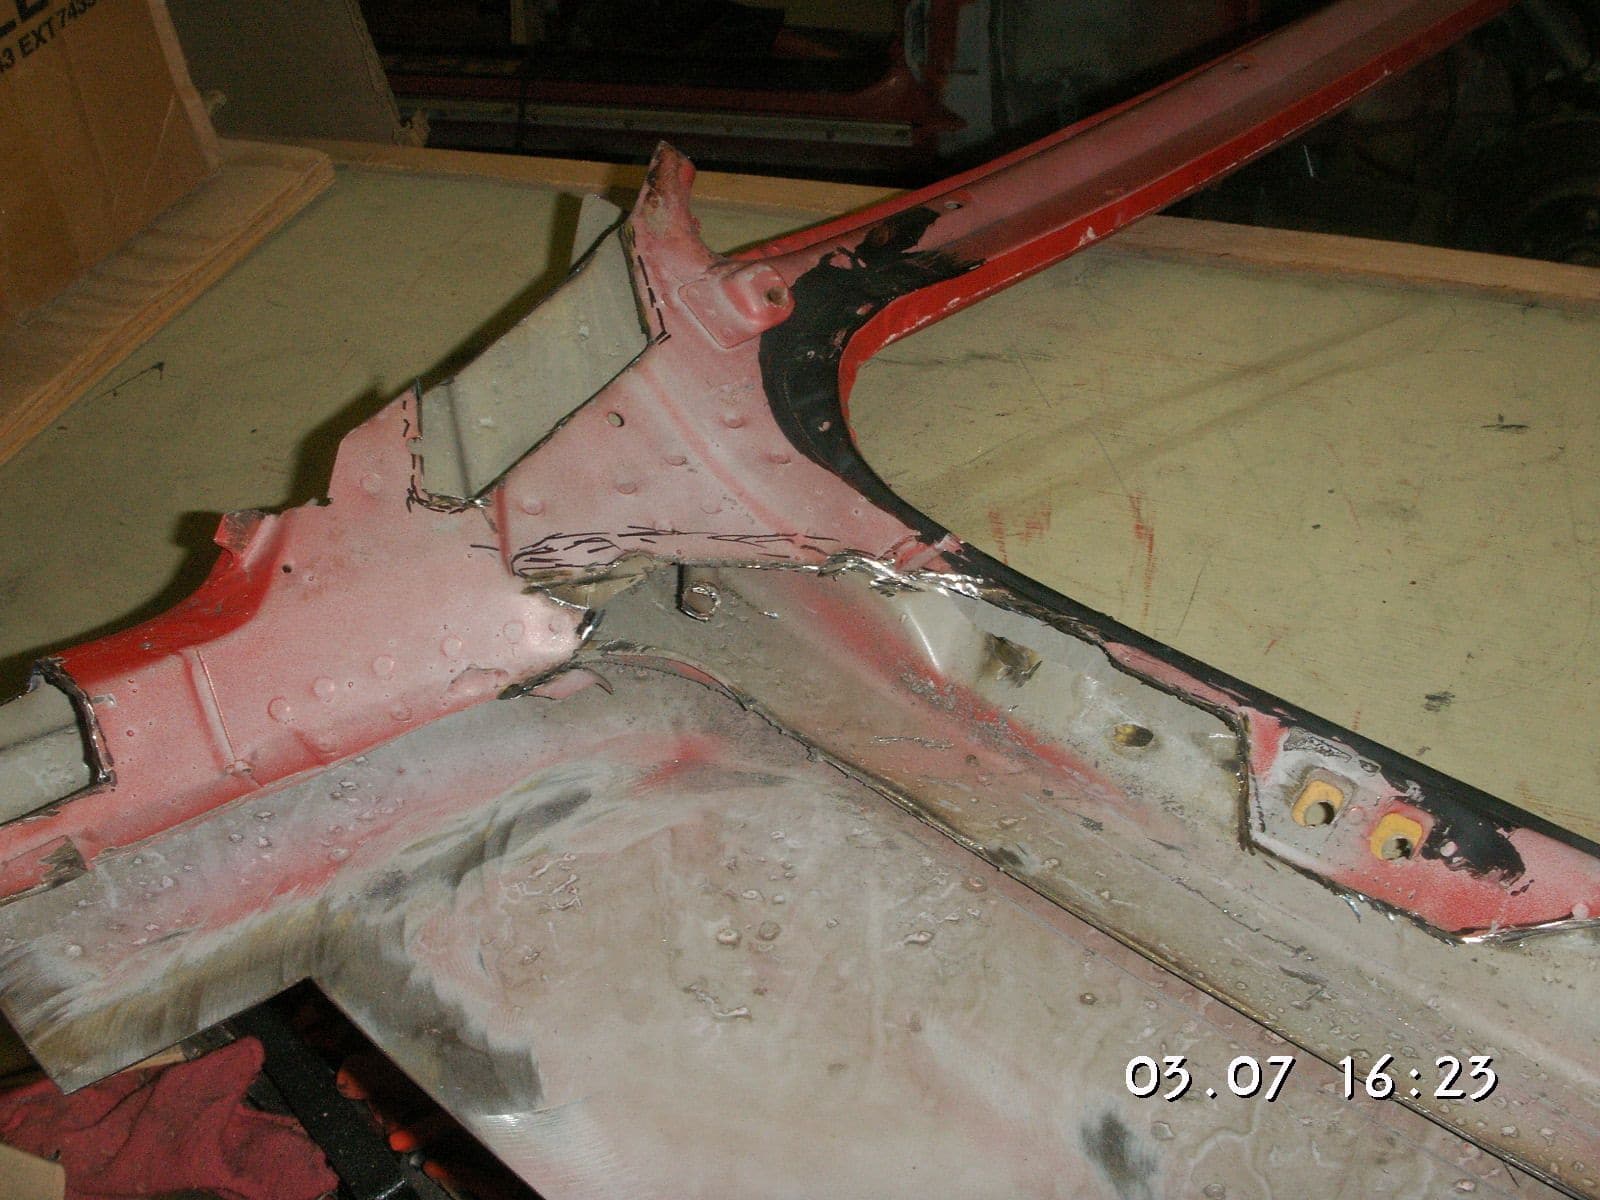
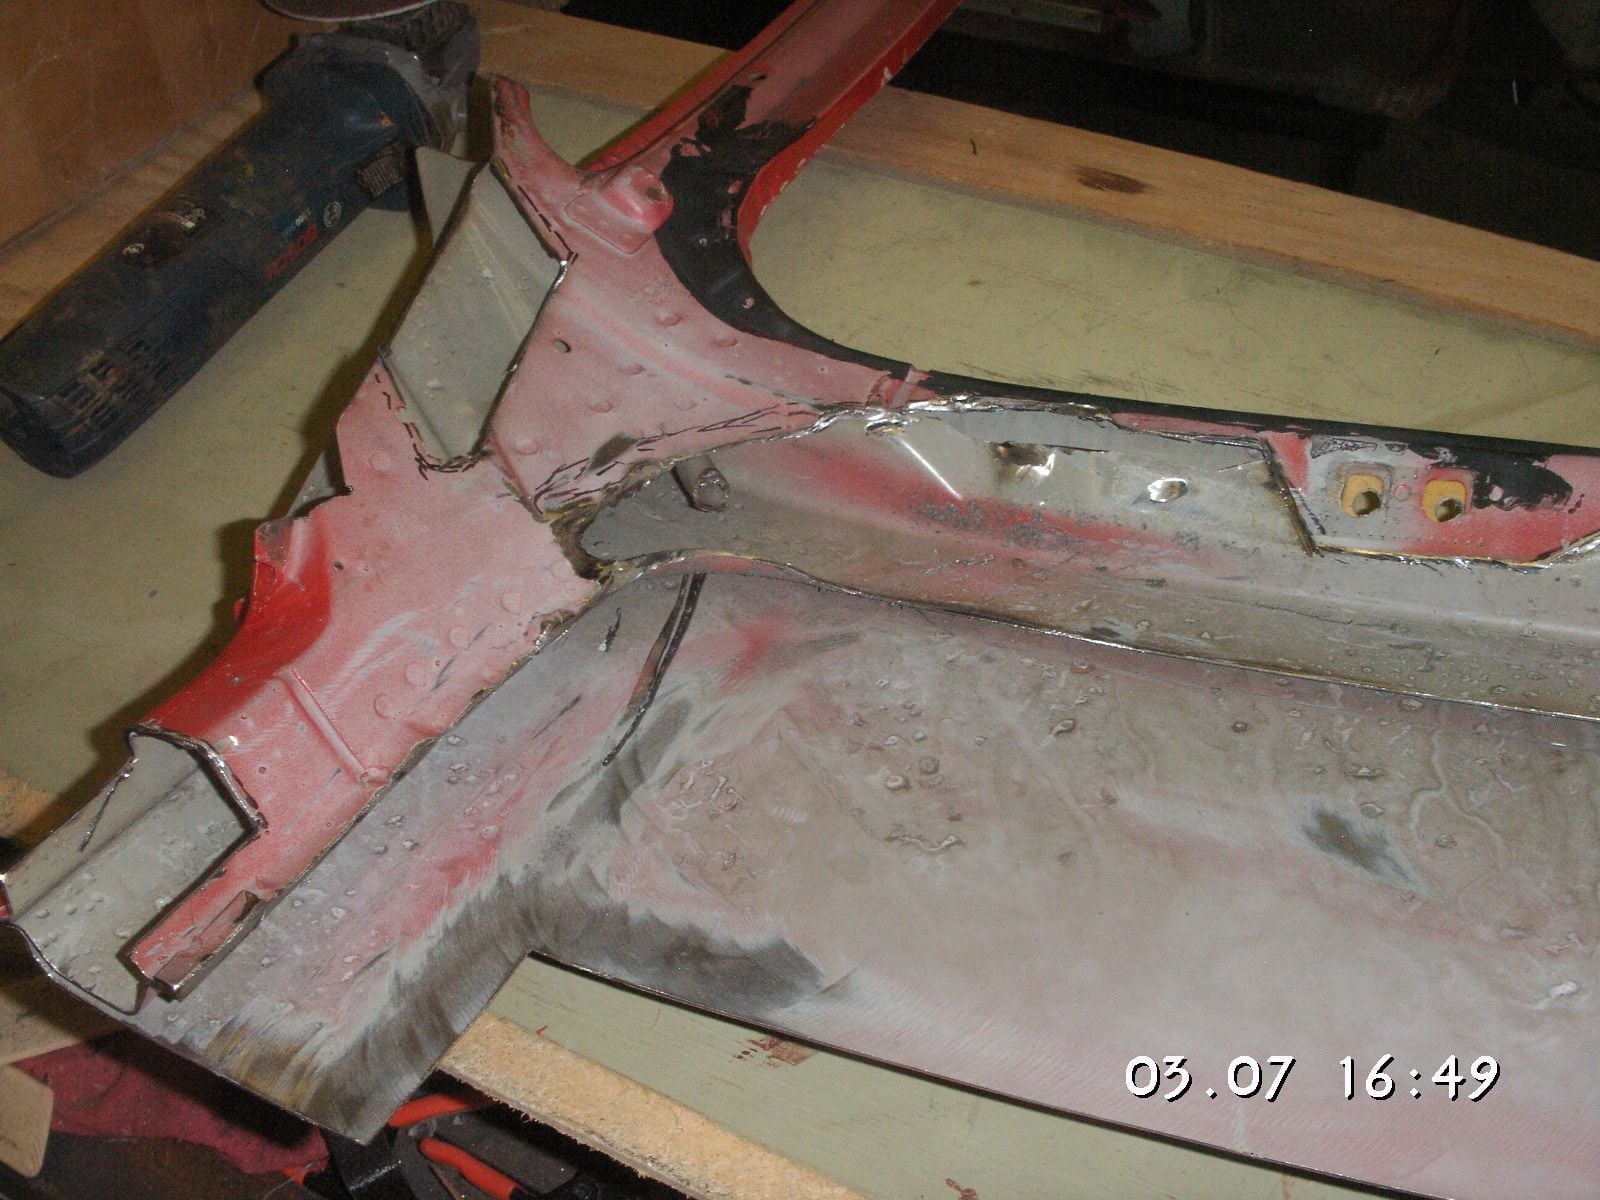
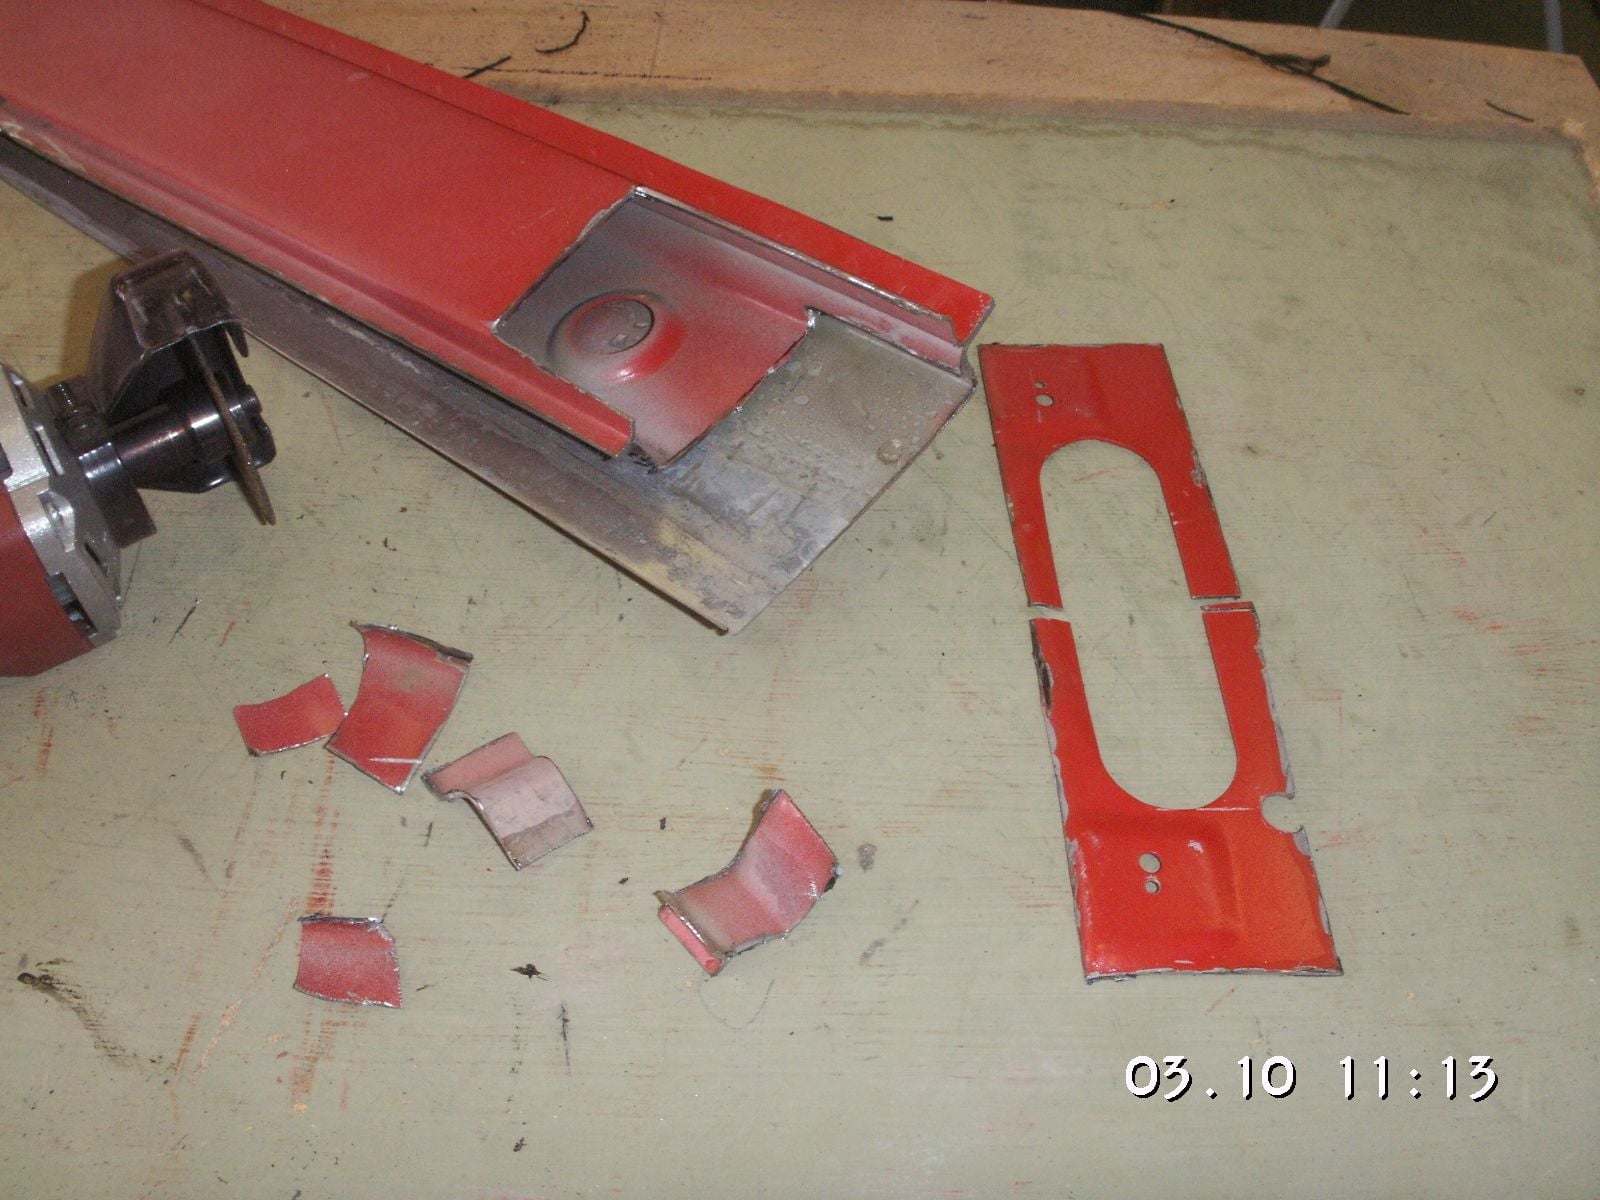
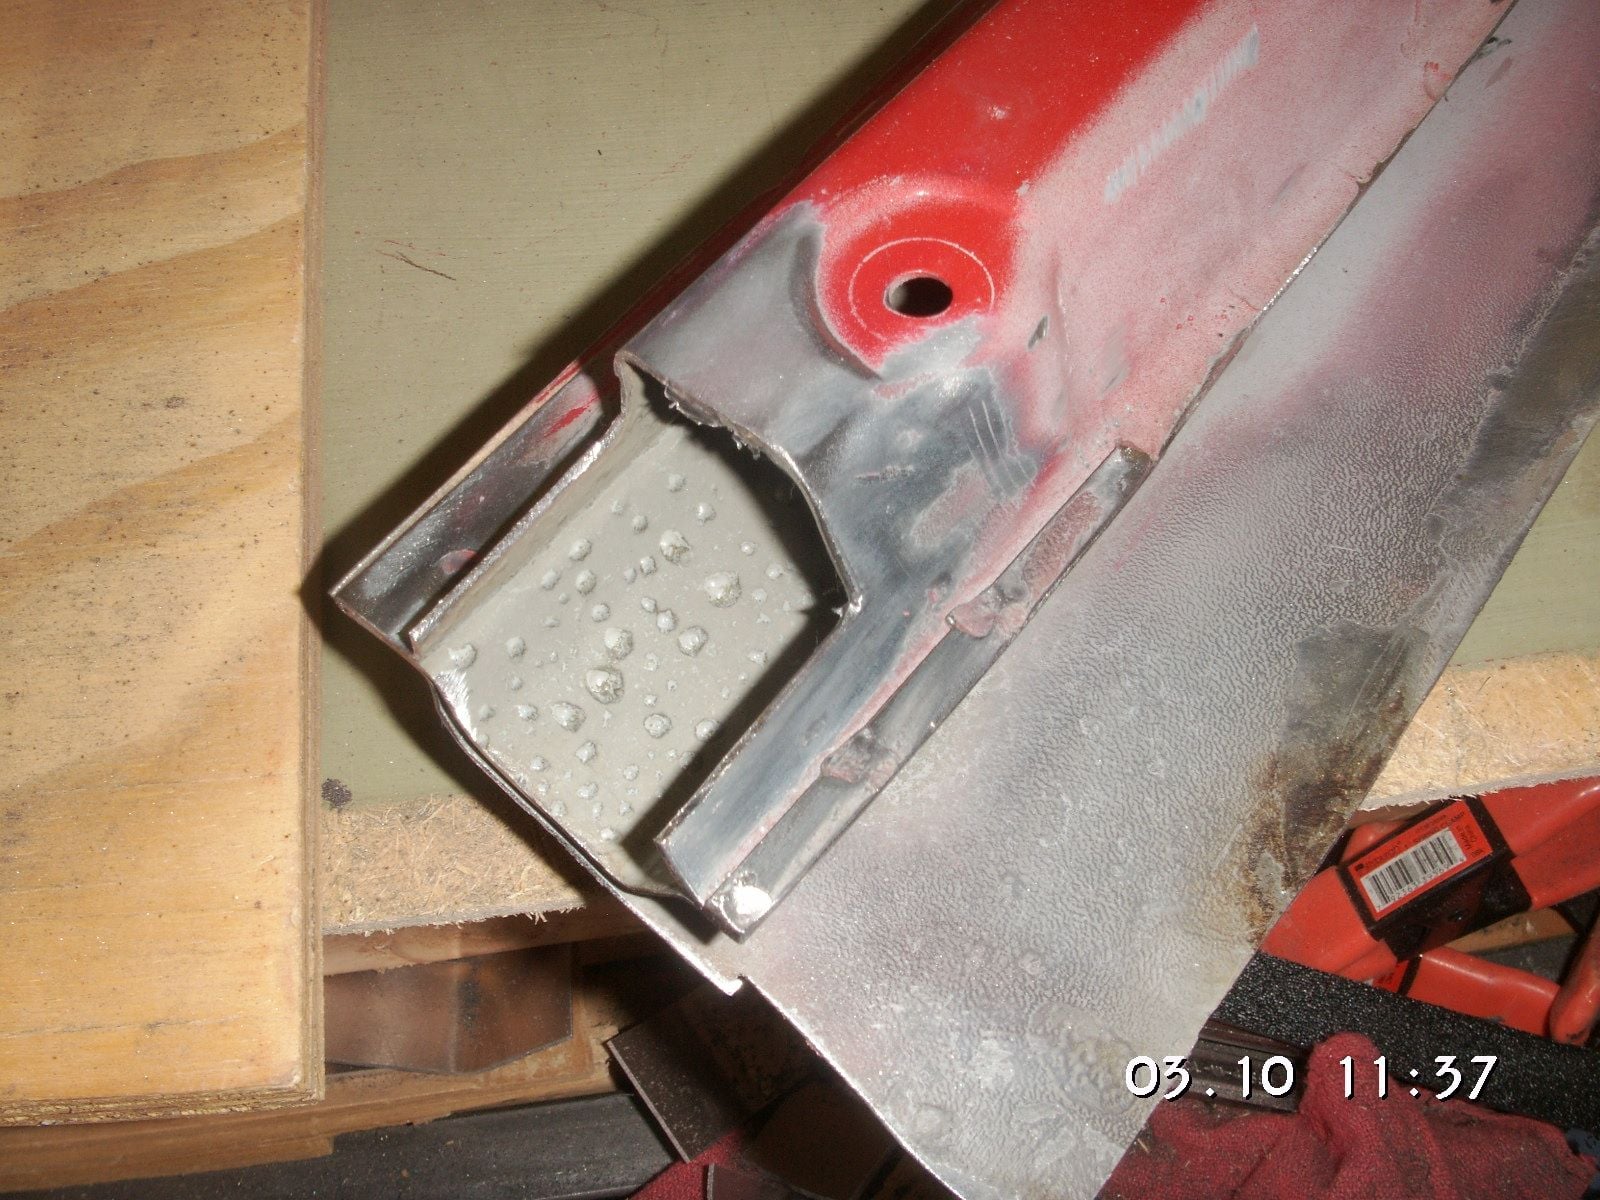
I spent some time on the left rear roof quarter mostly on the inside of it cutting out some of the extra sheet metal that is going to be in the way of the headliner, and then I cut out where the patches will have to be to complete the joints in the gap filler patches.
I have inspected the donor roof and see that there is plenty of metal in it to do everything that it is going to give itself up for.
Then I made pretty near final fitting of the right rear quarter of the roof and will next take it and the right front off and clean them up on their undersides.
I also changed some of my markings for the quarter panels both incorporating the 2.5 inch shortening of the tail of the car, the changes to the wheel arches, and some of the sectioning.
Last edited by Jerry Feather; 03-08-2018 at 09:23 AM.
I took quite a bit of the third layer of sheet metal out of the rear of the roof, mainly because some of it came out with the sunroof material, but then to clean it up for better headroom, especially above the rear seats, which I now think will be retained, since we are not shortening the car thru the middle of where they are. I feel the need to put something back into the rear roof header where the hatch hangs, and I think I have a pretty good idea of what to put back in there. I have some 1 inch by half inch channel steel in about eighth or 3/16 thickness that I think I can mill to a nice profile to fit into what looks like a nice space for it and then bend it slightly to match the final curve of the roof in that area after the filler patch is welded in. Then I can trim out the rest of what is pretty much left over leaving a nice profile of material that will be as strong as needed across back there. I am also going to cut and form some sheet metal to weld in to fill in smoothly where I have cut out the inner corners as shown.
"Chopped and channeled" looked so easy in the 50's.
Originally Posted by Wisconsin Joe
Well, to be fair, chopping the top on a 30s era car was a lot easier. The pillars were vertical, so chopping didn't involve anywhere near as much of the "jigsaw puzzle" issues that are going on here.
One of the most popular cars of all time to chop the top is the 49 Mercury. Nothing "simple" about that roof-line:
Not a lot of apparent progress in the "big" areas, but I have been busy detailing the roof quarter panels getting them ready for the various patches and welding. Still quite a bit to do in those regards.
I propped up the donor roof and then found and remembered that it is actually complete. That means that it weighs probably over a hundred fifty pounds, so it is going to be a bear to move around. I may end up just cutting it up where it stands, but first it looks like I am going to have to take all of the sunroof and structure out of it
I began cutting the sunroof and its structure out of the donor roof, and it went a little better than when I took it all out of the subject car. By studying the pieces cut out before I was better able to tell where to cut this time because it was welded and where to simply pull it free where it was glued. Having it out has reduced the overall weight by probably over 50 pounds.
Now I think I will cut off much of what was left for me on all 6 posts, and that should make it very easy to handle while I measure, mark and cut the gap patches out of it. I hope to get to that tomorrow. along with working over and cleaning up the rest of the weld joints. Then, I can't think right now what it is that I think I need to do before I can do any welding.

 03-06-2018, 10:59 AM