When you click on links to various merchants on this site and make a purchase, this can result in this site earning a commission. Affiliate programs and affiliations include, but are not limited to, the eBay Partner Network.
I use one leg of a disassembled 3 jaw HF puller (the large one with legs that can be flipped around to lengthen or shorten as necessary) Put one end of the leg behind the gear to be pulled and use a 3 lb hammer to gently whack the opposite end of the leg. It WILL move the gear. Gently tap the gear as necessary to get it the rest of the way off.
No rear washers were sacrificed during the use of this procedure.
OK I have another washer on the way just in case, but I should be able to get the gear off using one the puller methods (luckily I already have every size of two and three jaw puller HF sells.)
I pretzeled my washer and used the BFH to pound it back straight. Put 3500 miles on so far.
Curry taught me the PVC trick for the front seal. His gear method works too, I've seen it done before. I was a bit worried about damaging the rear of the gear with the hammer method.
Hmm. I've gone so far as to use a small "tack puller", the kind that has a V on the end of a screwdriver, and an almost-90� bend in the end. Get that in comfy behind the gear but in front of the washer, and push out radially. That makes enough room to get real puller jaws in the space if it's still needed.
On a few, a gentle tap with a small hammer and a pin punch is used to push the Woodruff key true again. Seems it can rock in the groove, and end up high in the front for some reason. Takes just a very gentle tap to roll it a tiny bit. You can look straight back at the fit between the key and the gear with an inspection mirror, and see if the top of the key contacts the top of the groove in the gear. Be aware that the key is relatively soft, hence the flat-end pin punch between the key and the small hammer. A small brass drift would be even better.
I tried a brass drift on the key and that didn't work, so I ended up rigging a hybrid puller using the rod from a large puller, the two sets of links from a small and medium puller and the hooks from a small puller ground down so the bottom of the hook would fit behind the washer of the crank gear. That did the trick with only a small amount of deformation of the washer - in a pinch I could hammer it flat but I have another coming tomorrow so it's all good.
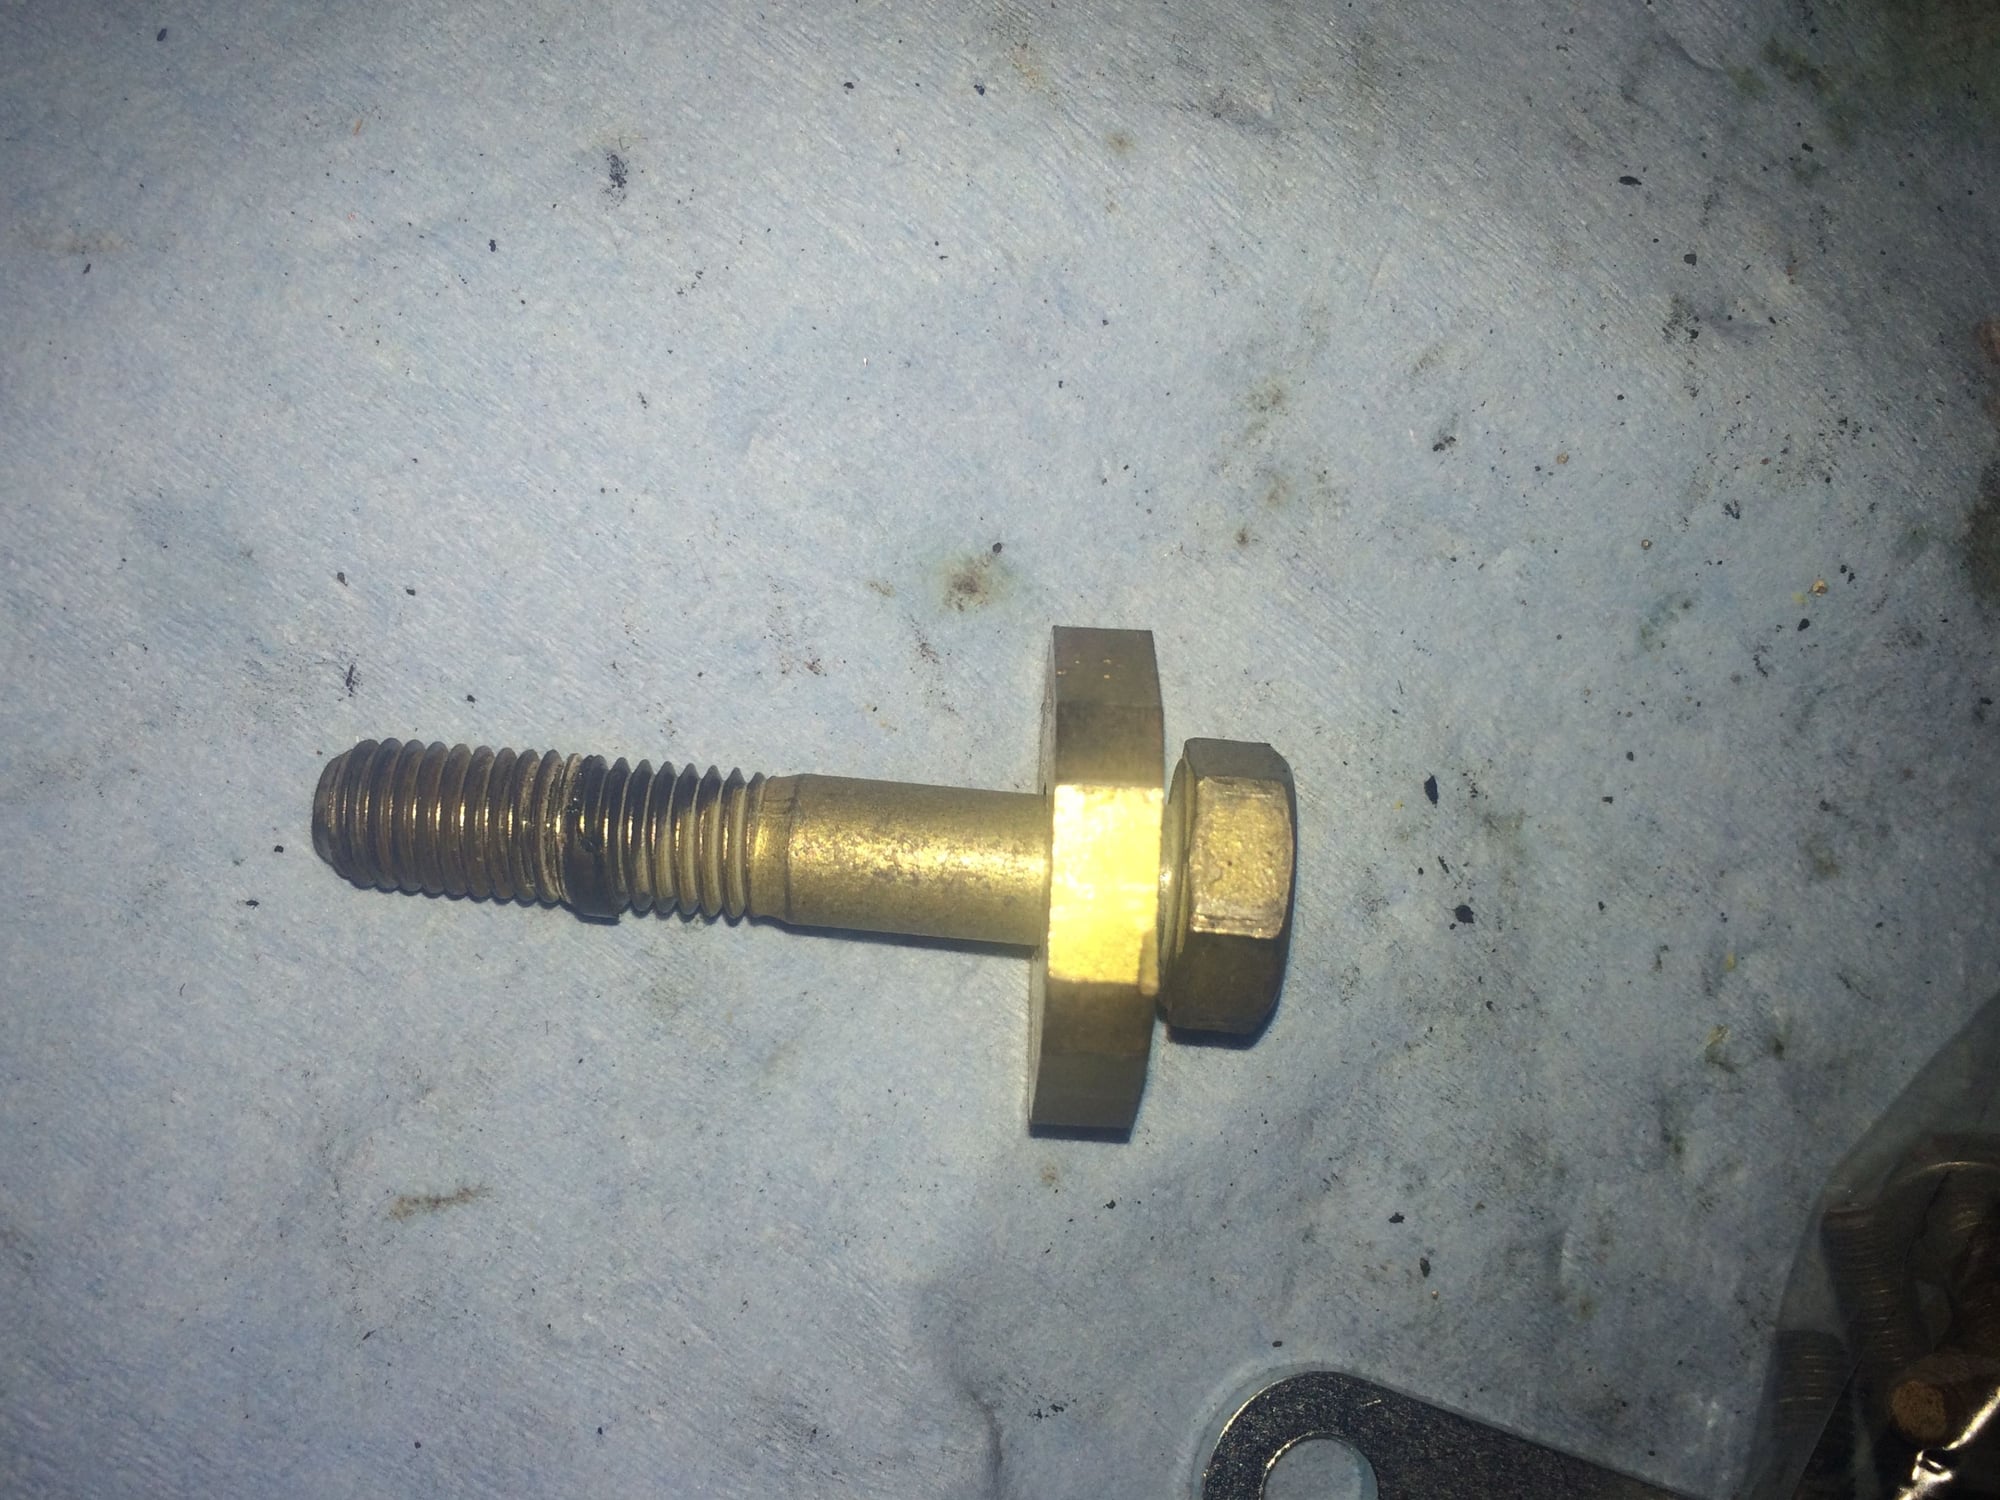
I then spent a bunch of time trying to get at the last hex head bolt of the small cover behind the cam gear. In the process I took the gear off by counterholding the large washer and using a 17mm socket on the cam gear bolt and to my dismay it appears like the bolt is pretty badly damaged. I assume I can't re-use this. Do I have to worry about the threads in the cam snout?
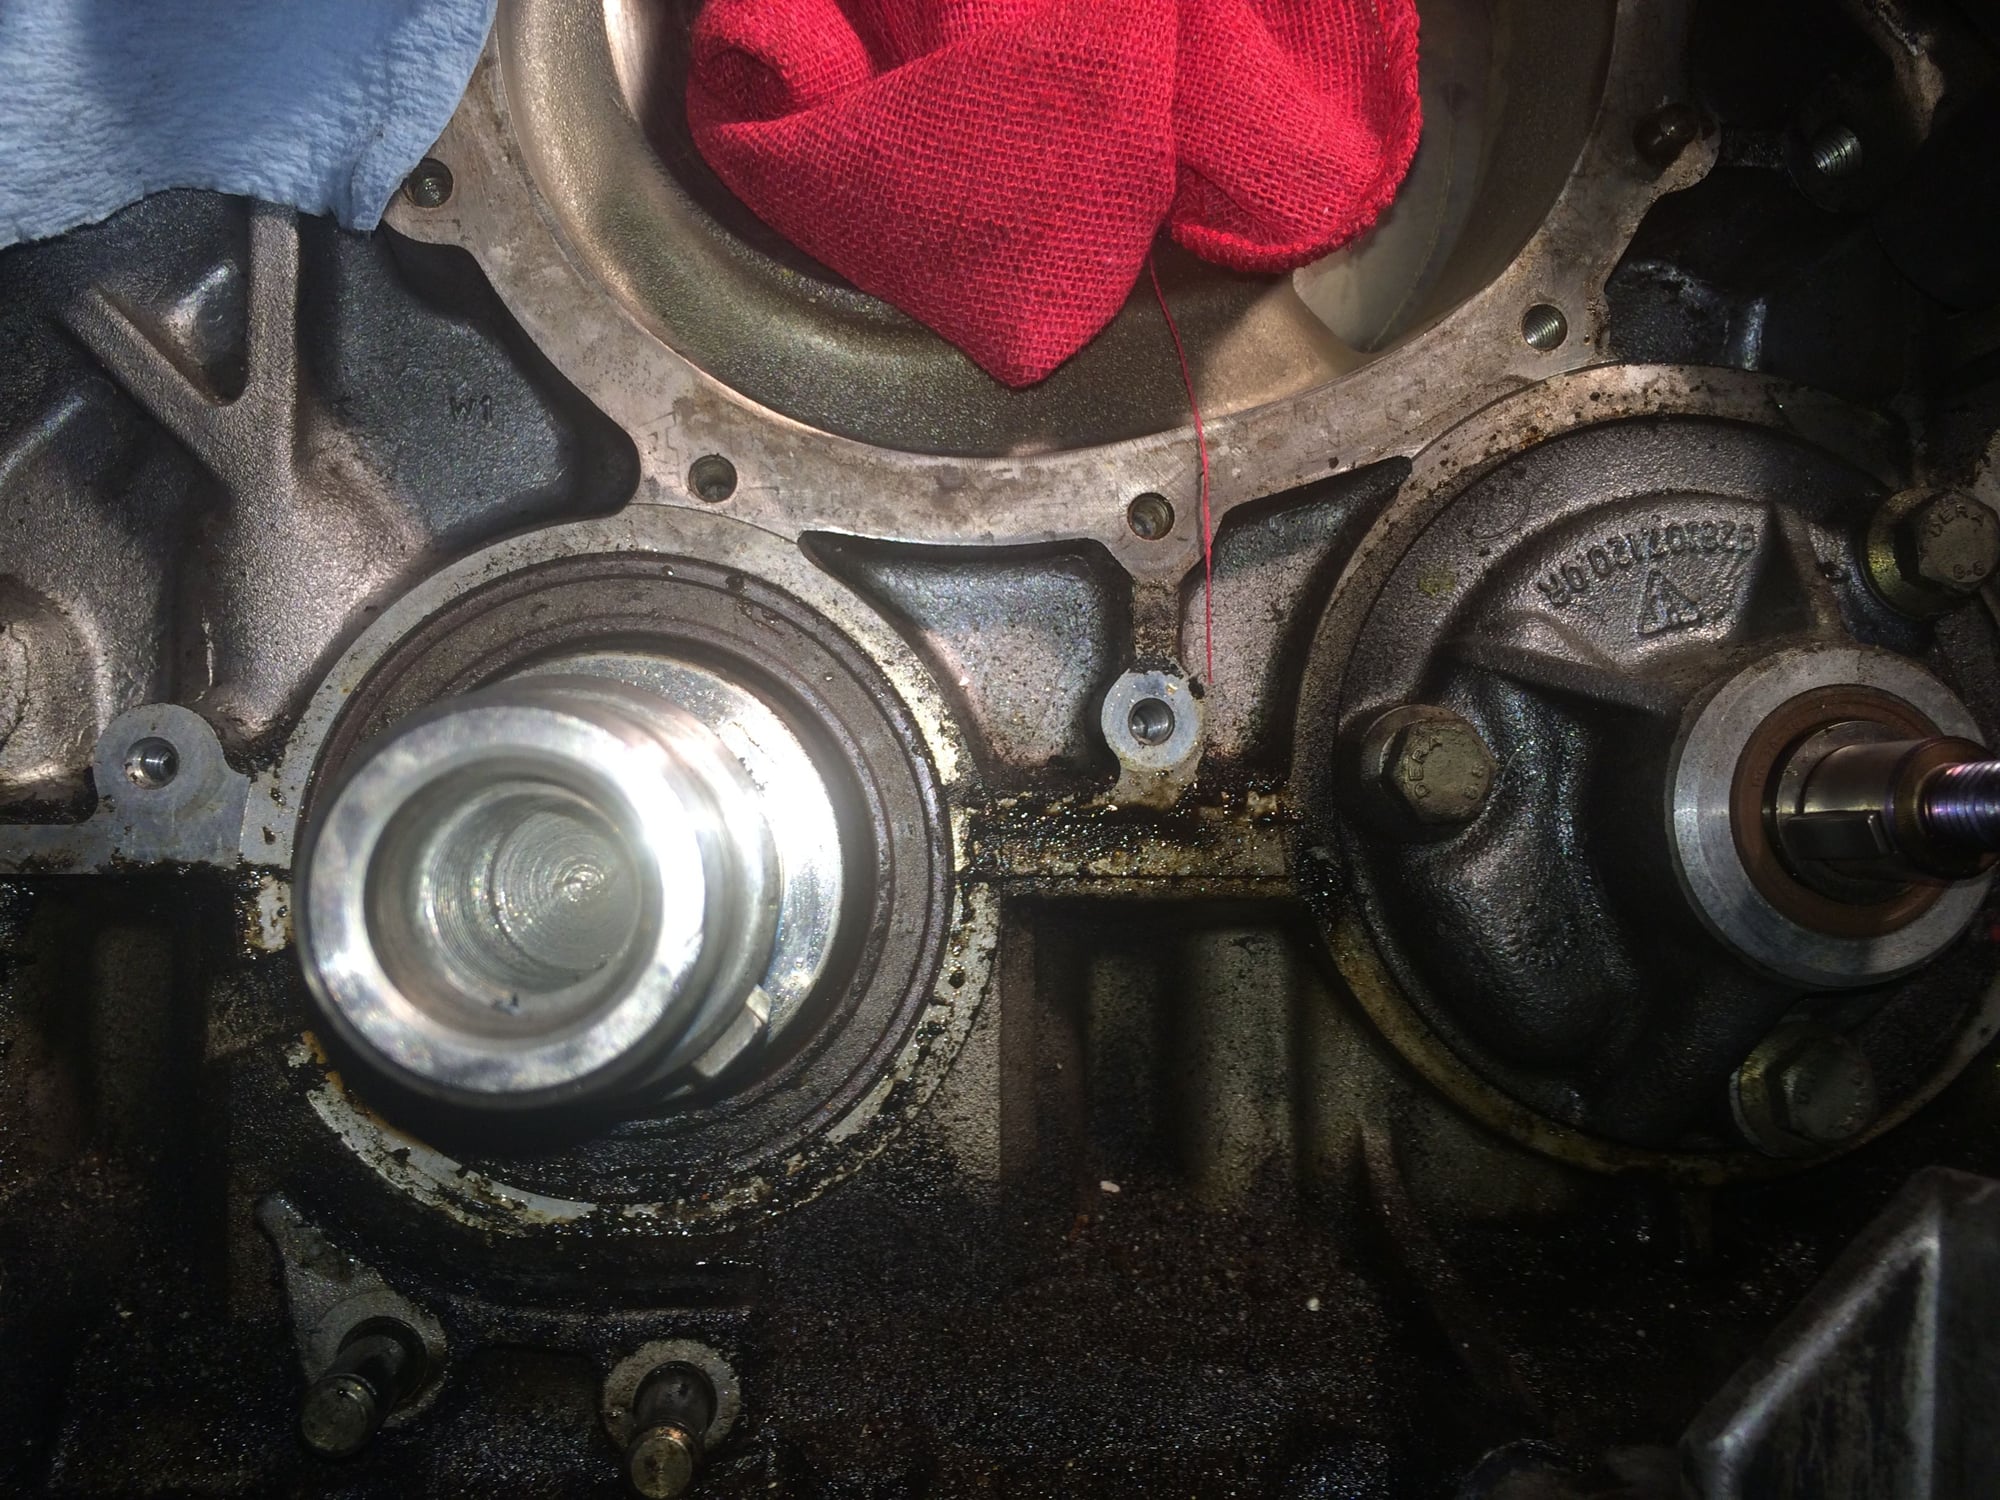
After the rear cover came off here's what the oil pump and crank seal looked like. Crank seal and oil pump o-ring required here right? I assume that once the oil pump comes out the seal needs to be replace even if it's not leaking, is this correct?
I can see why these jobs take a long time between things that don't go according to plan, cleaning, WYAIT's, more cleaning, waiting for parts for things you didn't think about or broke in the process of removing and still more cleaning the work seems endless.
Here's the way I ended the evening. Hopefully tomorrow my second batch of parts arrive and I can start re-assembly after a final round of cleaning of course.
Last edited by zekgb; 03-12-2015 at 11:51 AM.
Reason: corrected references to Cam/Crank gears - thanks Doc :)
Ok, I know it was late, and you were tired so I think you mixed up some 'cam' and 'crank' references in your comment section.
1) First pic, that is the cam bolt and flange. If you took that out and the cam gear off you will need to replace that bolt as it looks damaged. Yes, the threads in the end of the cam are critical. The cam is very, very brittle so chasing the threads is going to be difficult, particularly as it is a dead hole, and there's no where for the metal particles to go. Clean the heck out of the thread hole first. Assemble the cam on gear and use three small screws in the rotor slots to hold the cam in place temporarily. Find a way to secure the cam gear while you work on the threads of the cam. Use a bottoming tap, and lots of compressed air to keep the junk out of the cutting tool. Back off the tap several times and re-clean the bore. After that you will neeed Dr Bob's magic cam timing tool to reset the cam timing accurately.
2) I would replace the crank seal as described before, and the oil pump o-ring at this time. It may not need it, but most likely the o-ring in the pump is original and it's lived a full life for almost 30 years. For the crank seal, note my previous commentary about carefully prying it out from the recess at the 8 o'clock position. Whatever levering tool you put in there be careful not to damage the meat behind that recess or it will leak forever. Note how the seal is flush on the machined part of the crankcase. The new seal needs to go in the same way. I use a very slight coating of Hondabond or equiv on that seal, and a little grease on the inside lip.
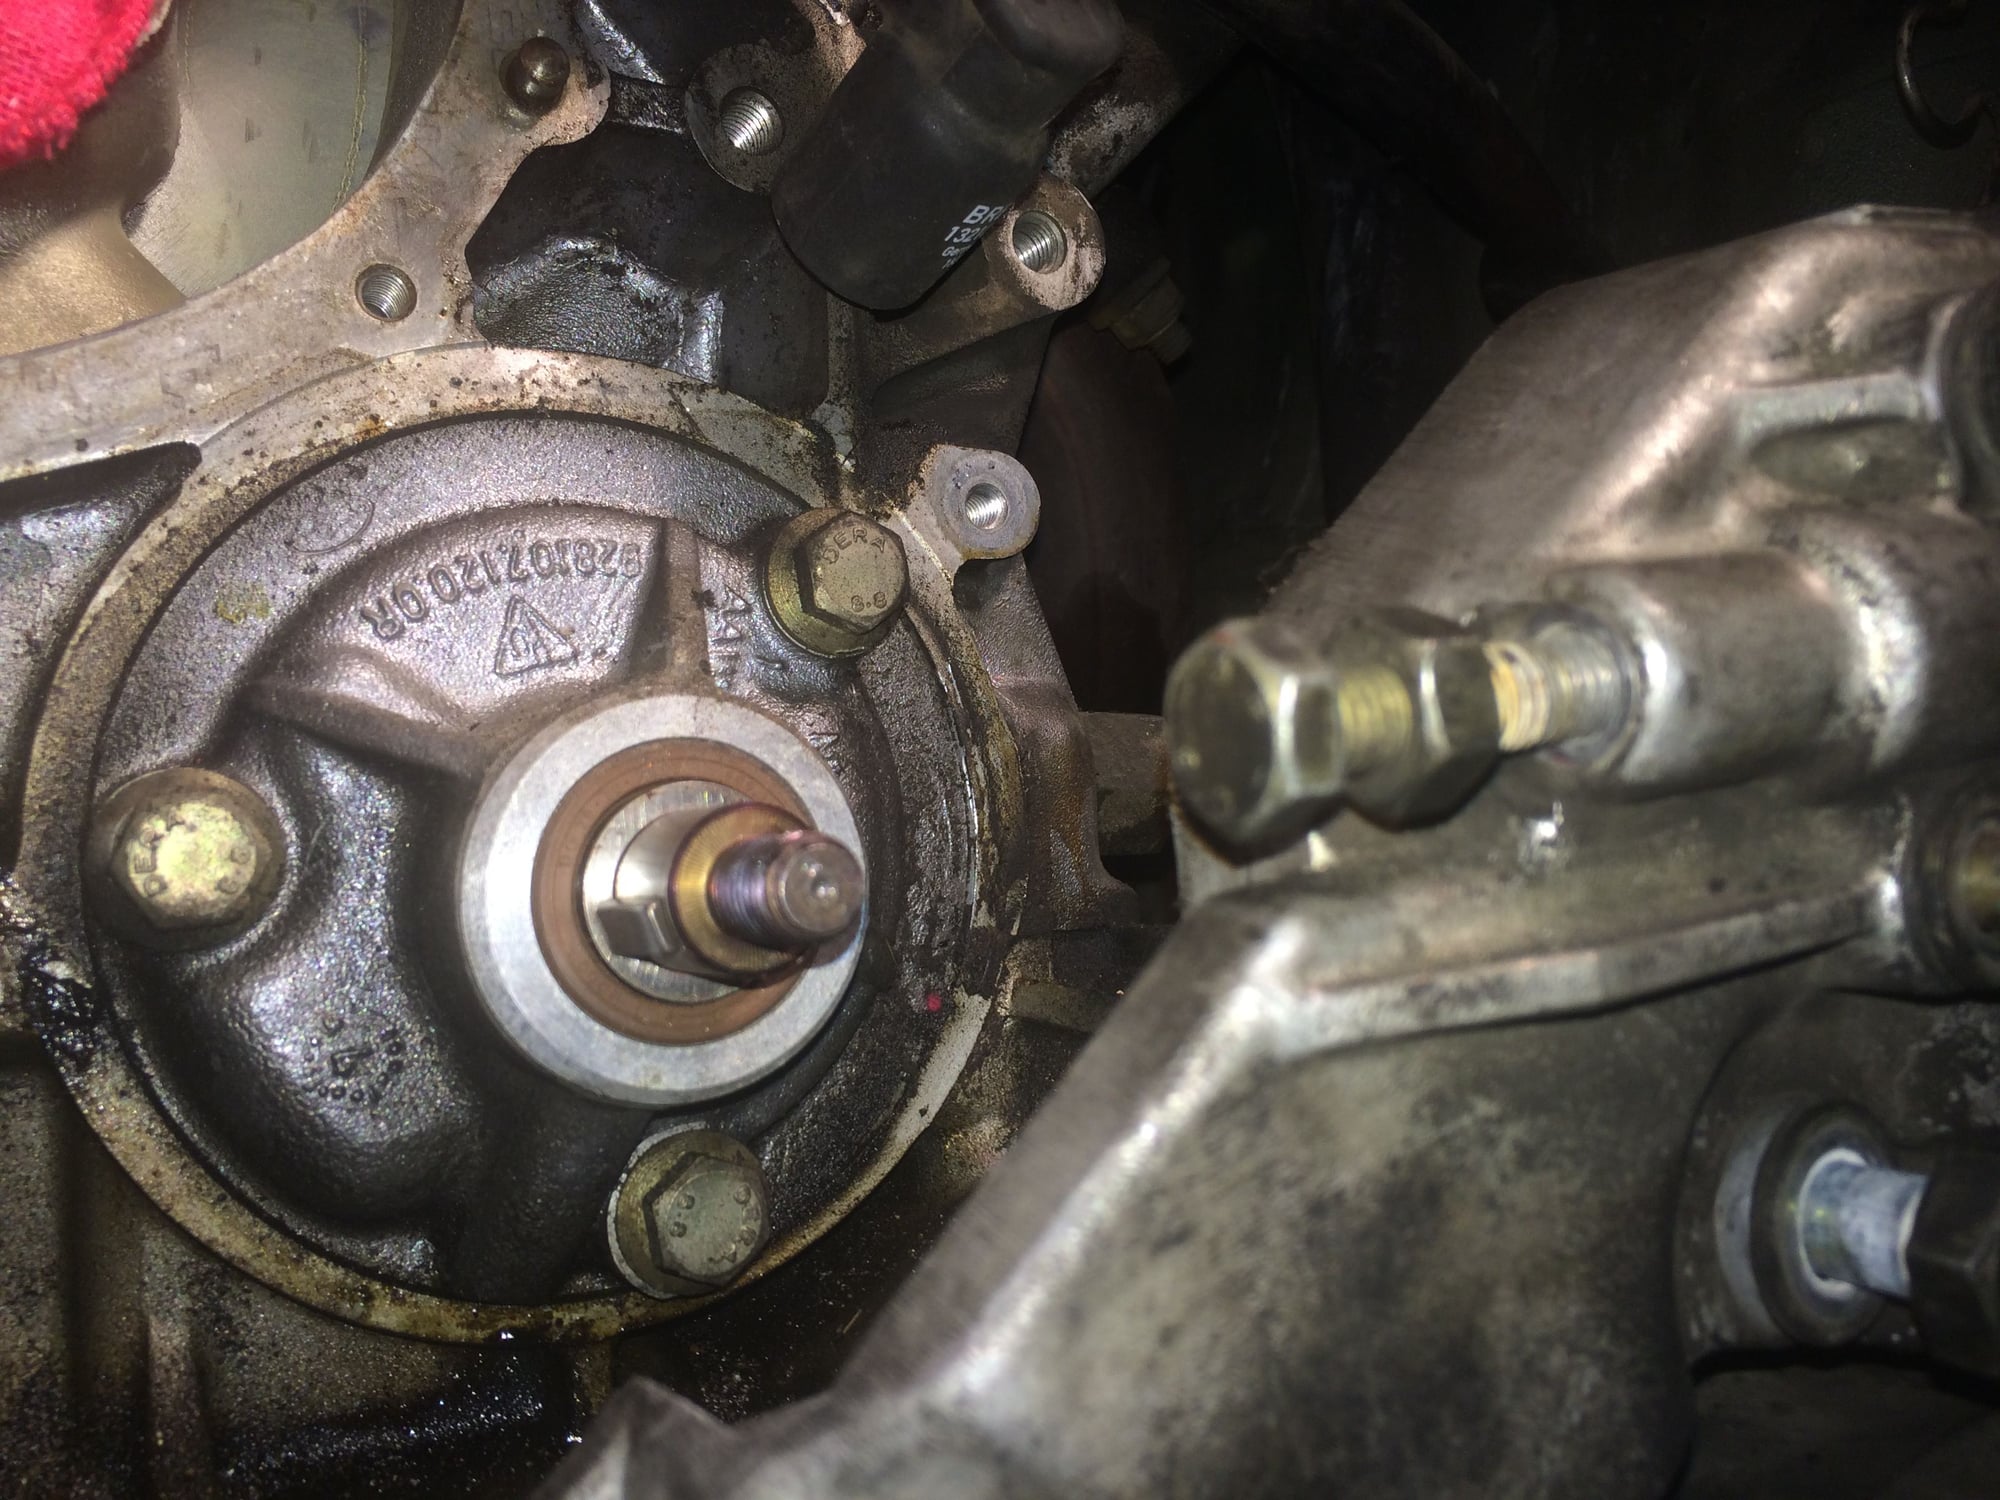
3) Prepare for a moderate amount of oil spillage when you pull the oil pump. When replacing the pump many people advise packing it with Vaseline or other petroleum jelly or other light petro product to advance the process of priming the oil system. Seems like a good idea to me, but I've never done it. It's easy to pinch the o-ring on assembly so make sure it's lubricated and drive the pump in very straight. I use three slightly longer pump bolts and just work each bolt a little at a time as it is drawn into the housing. It'll be easier if you let the Alt/PS pump cartridge hang down and out of the way.
1) ... After that you will need Porken's magic 32VR cam timing tool to reset the cam timing accurately.
...
FIFY
Ask around and see if there's one available in your neighborhood. The Porken tool lets you get the cams timed without the need for dial indicator fixtures, removing cam covers, and a degree wheel on the crank.
Ask around and see if there's one available in your neighborhood. The Porken tool lets you get the cams timed without the need for dial indicator fixtures, removing cam covers, and a degree wheel on the crank.
Bill Ball will be coming down with the Porken tool when it's time to finally button things up.
Ok, I know it was late, and you were tired so I think you mixed up some 'cam' and 'crank' references in your comment section.
1) First pic, that is the cam bolt and flange. If you took that out and the cam gear off you will need to replace that bolt as it looks damaged. Yes, the threads in the end of the cam are critical. The cam is very, very brittle so chasing the threads is going to be difficult, particularly as it is a dead hole, and there's no where for the metal particles to go. Clean the heck out of the thread hole first. Assemble the cam on gear and use three small screws in the rotor slots to hold the cam in place temporarily. Find a way to secure the cam gear while you work on the threads of the cam. Use a bottoming tap, and lots of compressed air to keep the junk out of the cutting tool. Back off the tap several times and re-clean the bore. After that you will neeed Dr Bob's magic cam timing tool to reset the cam timing accurately.
2) I would replace the crank seal as described before, and the oil pump o-ring at this time. It may not need it, but most likely the o-ring in the pump is original and it's lived a full life for almost 30 years. For the crank seal, note my previous commentary about carefully prying it out from the recess at the 8 o'clock position. Whatever levering tool you put in there be careful not to damage the meat behind that recess or it will leak forever. Note how the seal is flush on the machined part of the crankcase. The new seal needs to go in the same way. I use a very slight coating of Hondabond or equiv on that seal, and a little grease on the inside lip.
3) Prepare for a moderate amount of oil spillage when you pull the oil pump. When replacing the pump many people advise packing it with Vaseline or other petroleum jelly or other light petro product to advance the process of priming the oil system. Seems like a good idea to me, but I've never done it. It's easy to pinch the o-ring on assembly so make sure it's lubricated and drive the pump in very straight. I use three slightly longer pump bolts and just work each bolt a little at a time as it is drawn into the housing. It'll be easier if you let the Alt/PS pump cartridge hang down and out of the way.
I'm thinking I can cut a length from the old belt and wrap it around the cam gear to hold it in place while I work the tap, an extra set of hand would probably help greatly here.
Desperately sorry, I confused my Bob and my Bill. Completely my fault.
Old bit of belt should work fine to secure the cam while chasing threads. All old belts should be cut in half when removed anyway. There is something called a 'strap wrench' if you are itching to buy another tool.
Desperately sorry, I confused my Bob and my Bill. Completely my fault.
Old bit of belt should work fine to secure the cam while chasing threads. All old belts should be cut in half when removed anyway. There is something called a 'strap wrench' if you are itching to buy another tool.
Yes I have lots of strap wrenches but I'm super paranoid about munging the gear teeth so maybe cut enough belt to cover all the teeth then wrap the strap wrench over the top of the belt.
Remember you are just cleaning stuff out of the existing threads in the nose of the cam, not trying to cut new threads. So if it takes more than a pretty casual grip on the gear while you gently work the tap in and out, you want to step back and reasses the situation, maybe do some more cleaning/flushing to make sure no chips or other cuttings are binding the tap.
Recommendation before you go in with a tap: Flush the end of the cam inside with some solvent and follow with compressed air, then finger-fit the new bolt. If it goes in easily, no need to chase the old threads. I think you want to leave as much of the existing metal in there as possible, so only go after them with the tap if there's a problem.
Another frustrating evening due to my incompetence. Roger order was waiting for me when I got home, and it turns out that I ordered camshaft seals when I meant to have ordered cam plugs. Also meant to order the inner spring for the tensioner boot and instead ordered the outer crimp clamp that I already had. I need to be a lot more careful when placing these orders.
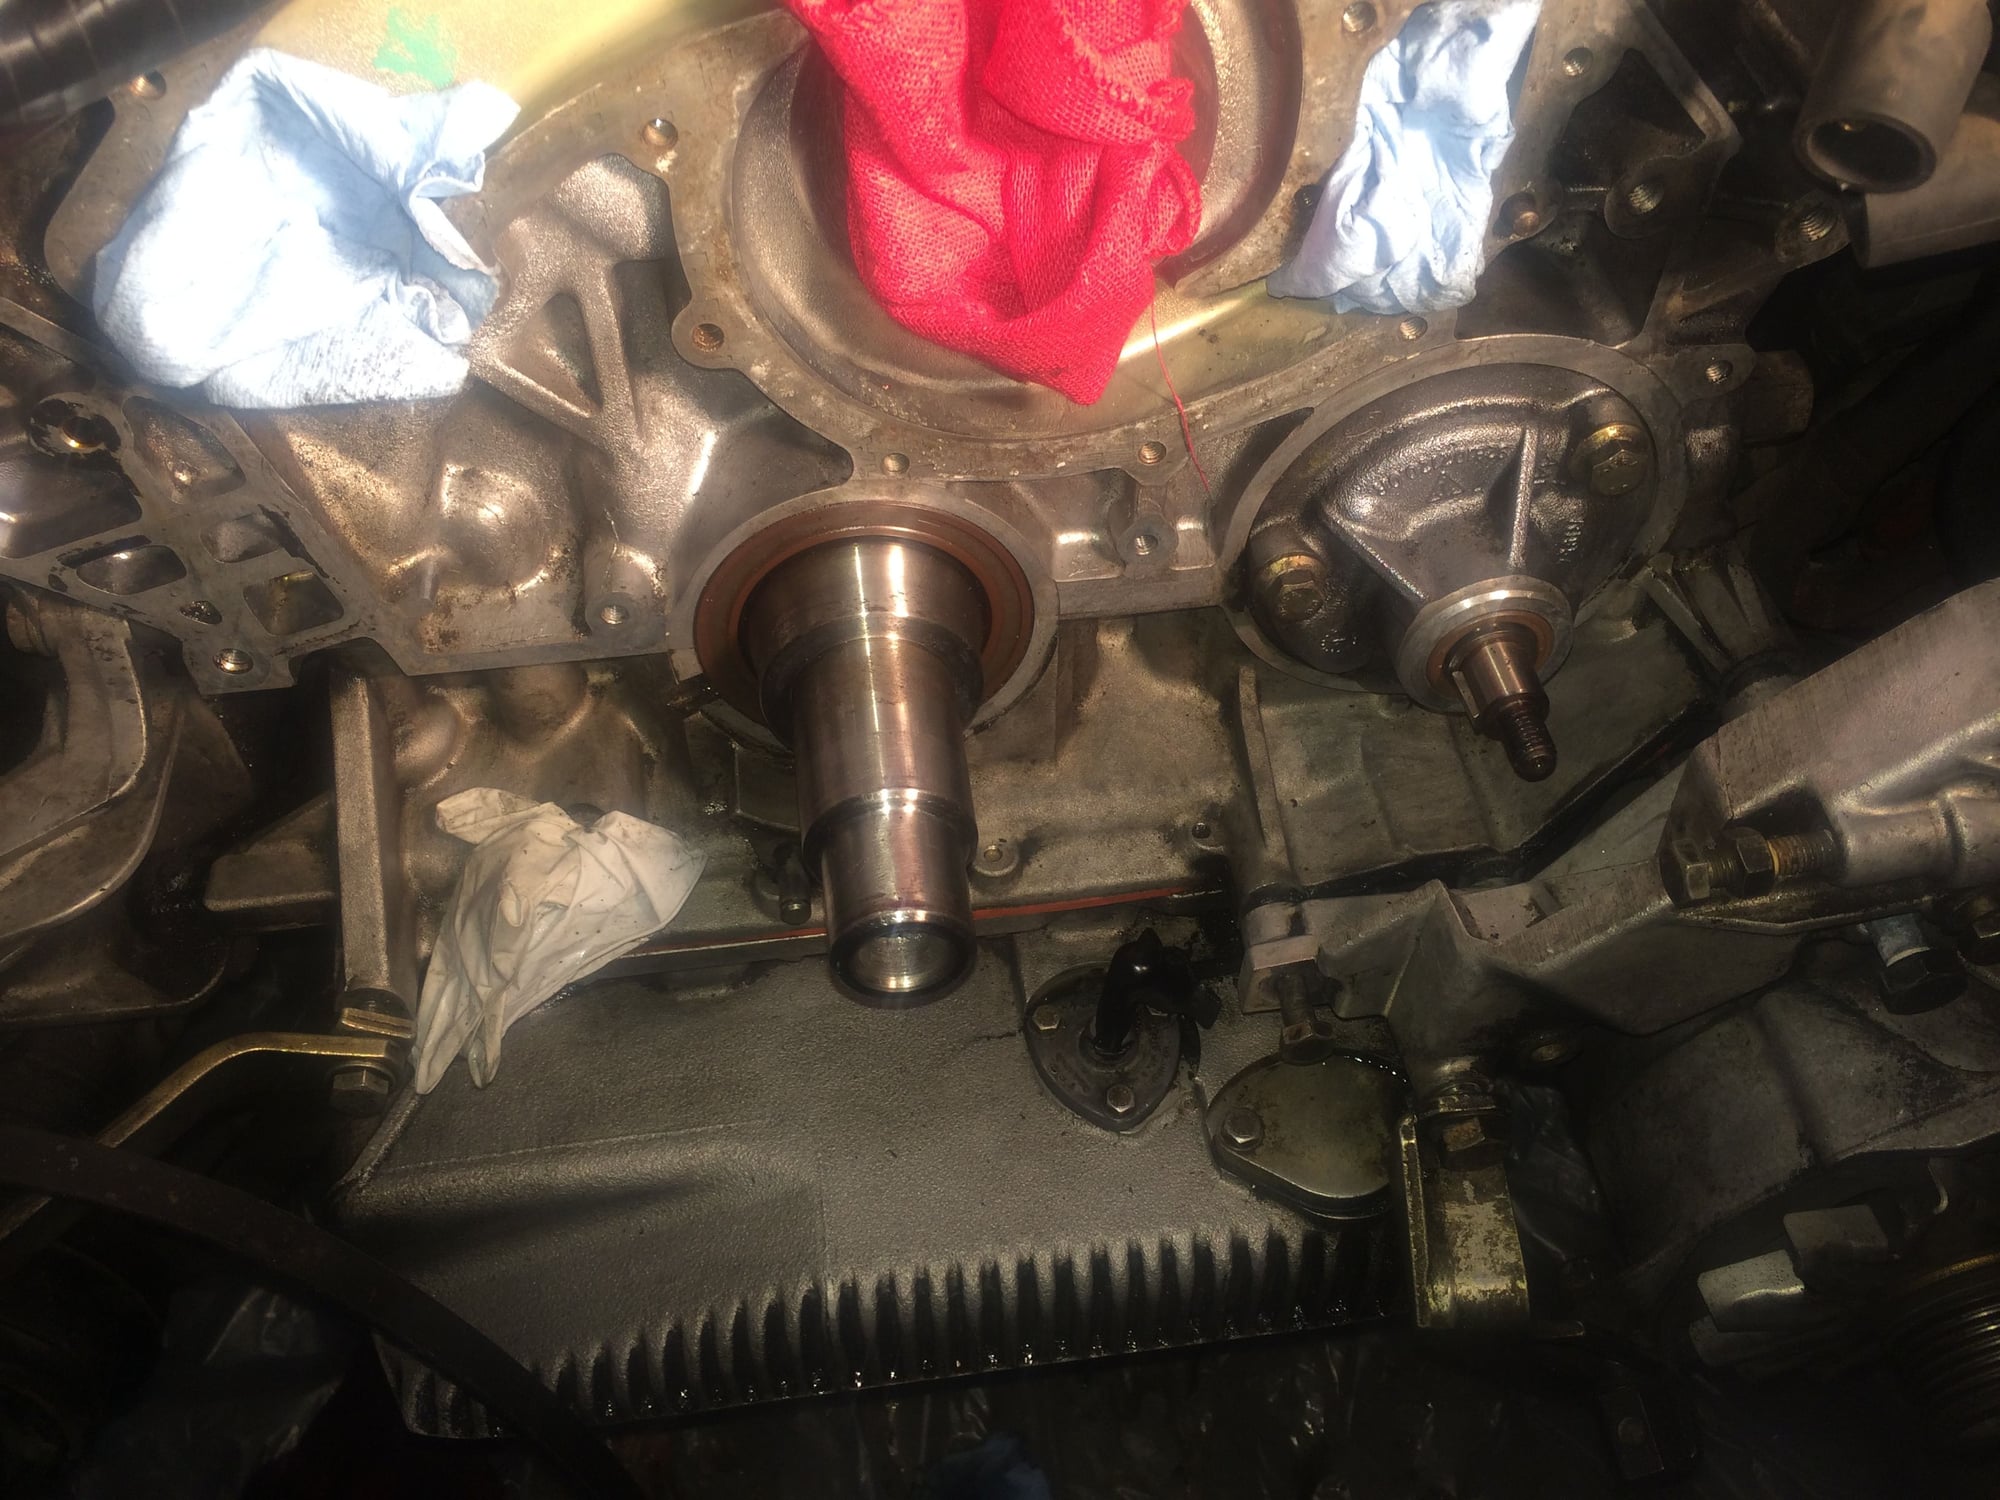
I then spent another hour cleaning things before I moved on to the oil pump. I didn't have much luck levering it from the top as per Dwayne's instructions and it didn't budge until I levered from below on the alternator cassette and then it popped right out. I then spent the next hour carefully trying to remove the woodruff key so that I could replace the seal with zero luck. I tried multiple angles with a hammer and brass punch and was only able to move it slightly, I considered trying to grab it with vice grips but thought better of it. In the end I gave up, put on the o-ring, lubed it with STP and re-installed to the proper torque being careful not to pinch the o-ring in the process. The seal was totally dry initially but I'm sure the manipulation of the shaft during removal had a good chance of damaging it.
Any ideas on how to get the key off? If I can get it off can I replace the seal as is or do I need to remove it again to do so?
I had enough time to move on the the crank seal but at that point I was a bit frustrated and didn't want to make a mistake that would result in a permanent leak.
Any ideas on how to get the key off? If I can get it off can I replace the seal as is or do I need to remove it again to do so?
Use a small punch and just tap it loose and out of there. It's a very tight fit. Don't tap too hard else it will get deformed and be impossible to get the gear on and off. The seal can be replaced after you get the woodruff key out of the way. I would not chance removing and reinstalling the oil pump without replacing the o ring. There's too much chance of it getting mucked up.
OK, went back for round two and was able to get a much better angle with the pump bolted in place and was able to get the key off, the seal out and the new seal punched in. Lesson learned I guess, key out before pump out (actually I really hope it's at least a decade before I have to pull it again, hopefully I remember...)

 03-11-2015, 01:33 PM