When you click on links to various merchants on this site and make a purchase, this can result in this site earning a commission. Affiliate programs and affiliations include, but are not limited to, the eBay Partner Network.
nice job your doing here. I was wondering since you never answered , but did you remove the metal collars for your new washer tank and fill tube? If not they should be removed as they will rust. these parts are not necessary, just make sure to only snug the transition tube clamps. Glad that you fixed the stripped bolt, be aware there is another bolt that is used to anchor the air pump and AC , it has the same sized bolt that you stripped . This is also a common bolt that gets stripped out
No I didn't. They had already been installed when it was mentioned. But now it's been mentioned a few times, maybe it's worth taking them out to remove the metal. Didn't think it would rust so fast with regular maintenance but it sounds like it's a big deal. So I boil them and the inserts come out with needle nose?
Excellent restoration A+ ! I like that you changed out the front seats. I had 968 seats in one of my 928's they were so much more comfortable than the stock seats.
you dont need to remove the tube or washer bottle a hair drier set on hot will also warm the plastic enough to slide the collars out.
You can use a pair of needle nose pliers, fit them inside the collar then open them and gently pull they will drag the collar out once the plastic is warmed
The chemicals in the washer fluid will eat through the plating of the collars,
then they will quickly start rusting due to being in a moisture rich environment.
NOTE about the only thing that will stand up, is to fit a copper piece of tubing .
BUT since these parts are for a fluid transition tube, simply snugging the clamps is sufficient.
you dont need to remove the tube or washer bottle a hair drier set on hot will also warm the plastic enough to slide the collars out. You can use a pair of needle nose pliers, fit them inside the collar then open them and gently pull they will drag the collar out once the plastic is warmed The chemicals in the washer fluid will eat through the plating of the collars, then they will quickly start rusting due to being in a moisture rich environment. NOTE about the only thing that will stand up, is to fit a copper piece of tubing . BUT since these parts are for a fluid transition tube, simply snugging the clamps is sufficient.
excellent! Thank you so much, I'll get to this soon. I got some new tubing to install for the windshield washing system. Now I just need to source some of the little plastic fittings and button up this system.
Thx Duc! Ill likely do it this way since the parts are still accessible, now'd be the time. Rob mentioned boiling them before, but i didn't realize that the inserts needed to actually come out, so I didn't do it. I like the heat gun, hairdryer trick as Stan suggested, but I'm scared of damaged nearby surfaces. Mainly the fender walls, and here's why.
I've found that caliper paint is not the way to go with this application. Which brings me to my first ever warning to my fellow noobs, which I will fashion in Stan format because he has been so helpful.
NOTE:
Caliper paint must be heated (baked) to reach its full protective potential against chemicals and abrasion.
NOTE:
This is very hard to do once the paint is applied to the entire engine bay and inner fenders (unless maybe you have access to a full car size oven booth if that even exists)
NOTE:
Creating a heat tent using flammable tarps and a propane heater is not only incredibly dangerous and stupid, but it doesn't work (ask me how I know) well enough to cure the paint.
NOTE:
Without heating the caliper paint, it will scrape very easily when bumped with a tool or your knuckle even (if your like me and have titanium skeletal structure like the Wolverine).
NOTE TO SELF:
I thought I was going "above and beyond" by using a heat resistant caliper paint for the engine bay and fenders, but without being able to cure the paint, it turned out to be a lesser quality result and a regular heavy duty enamel might have been the better way to go.
The center and rear undercarriage of the Lady will not be painted with caliper paint. Most of the caliper paint dried well enough to be acceptable at least aesthetically and somewhat functionally, but there is one spot in the left fender well that remains sticky to the touch. I thought it was the result of missing a spot while cleaning, but after I stripped away the paint in this location, re-cleaned and resprayed, it's still sticky to the touch. Lesson learned
You could go over the entire engine bay with a heat gun. It's time consuming but it would bake the paint pretty well.
thought about that. Instructions on the VHT say 200 degrees for 1 hr. To cover each spot of the engine bay would certainly be time consuming with a heat gun. I've retired to the idea that I'll probably have to do some occasional touch up paint work in the engine bay and inner fenders for the life of the car. Not a deal breaker
^^ Absolutely ... Here's an IR image after a run on a very cold night (lowest on the scale of 33.8F), showing the highest temp in the visible area of the engine bay at 147.1F, with the hood open and the motor shut off. On a mild day it would easily get to nudge 200F. No worries about curing paint in that environment ... and gives you an appreciation of why hoses, fuel lines, and other heat soak sensitive items degrade.
Air coming off the radiator is about 170F, heat soak under the hood after a run has to be in the 200F range.
Originally Posted by Dave928S
^^ Absolutely ... Here's an IR image after a run on a very cold night (lowest on the scale of 33.8F), showing the highest temp in the visible area of the engine bay at 147.1F, with the hood open and the motor shut off. On a mild day it would easily get to nudge 200F. No worries about curing paint in that environment ... and gives you an appreciation of why hoses, fuel lines, and other heat soak sensitive items degrade.
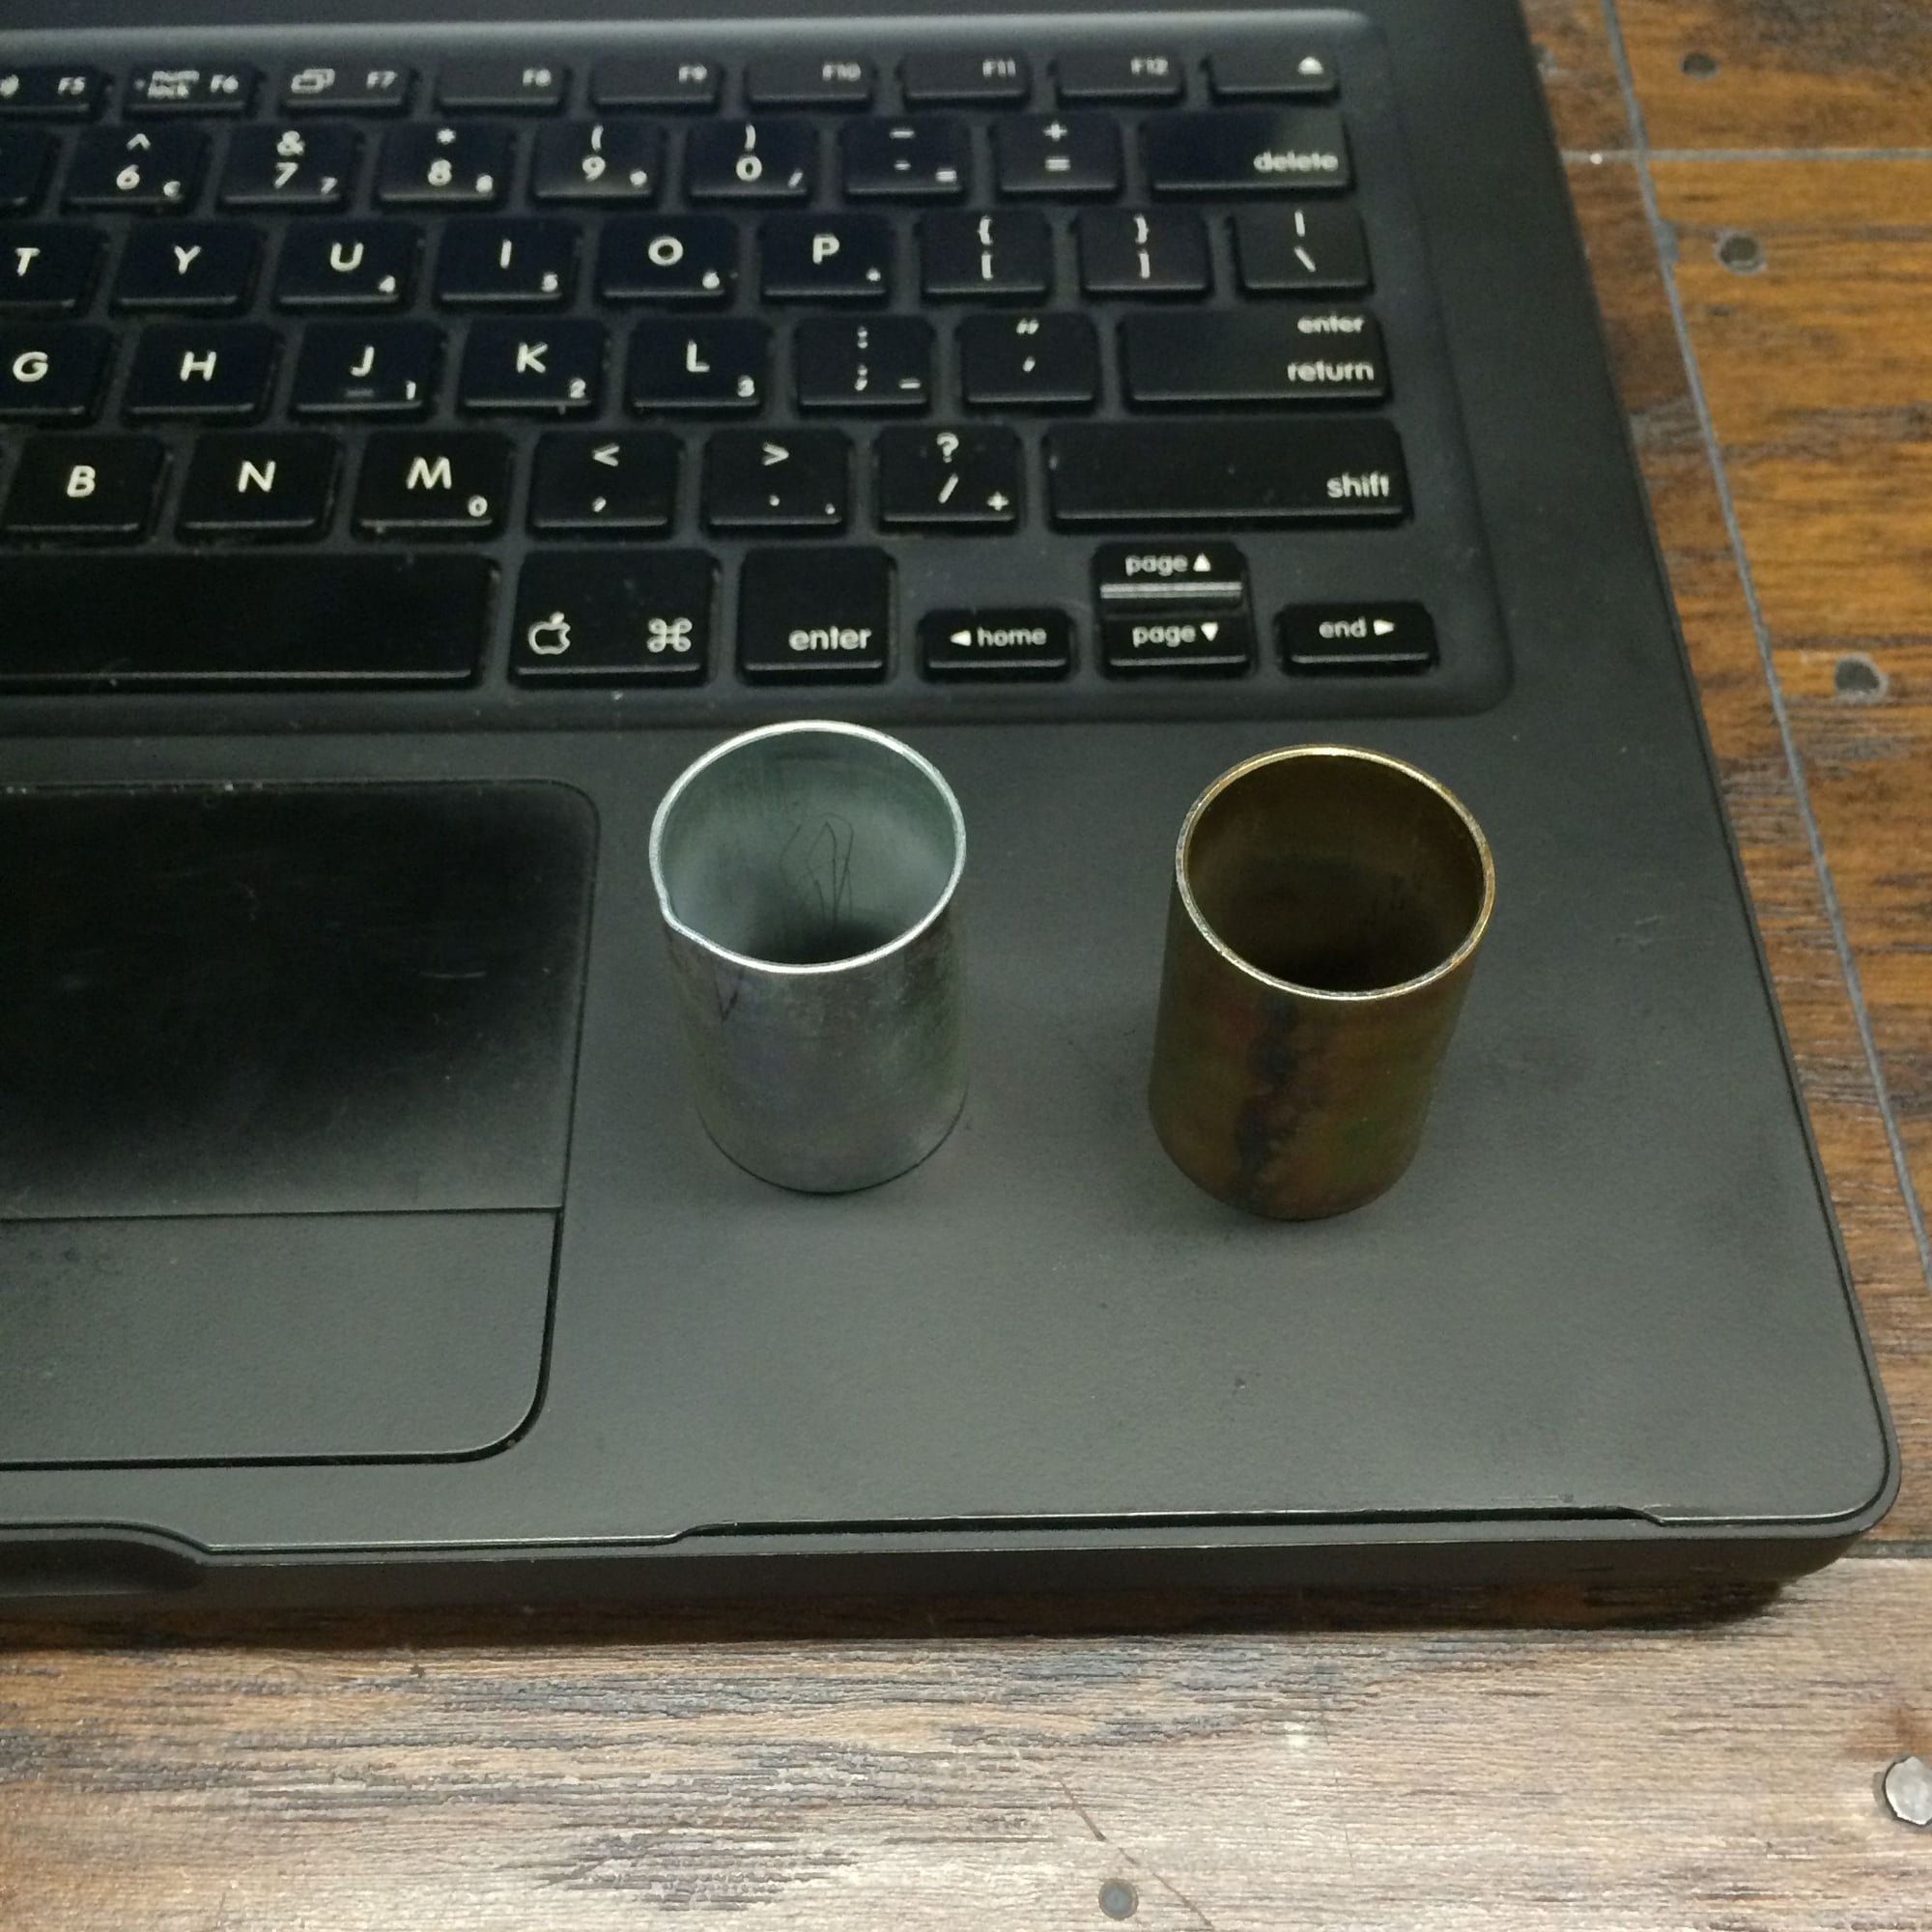
Badda-bing! These inserts came out easy from the filler neck and reservoir, thanks for the tips Stan and Rob. 30-40 seconds with the heat gun on high and the inserts just about fell out. Will save me a lot of rust later. Love it when I don't damage anything, think Ill stop there for the night while Im still ahead. thanks again
at the shop we buy washer fluid by the 55 gallon drum,
they usually also will deliver a new pump device about every other drum.
The new hand pump is fitted and within days the plating on the shaft is quickly eaten away by the chemicals in the washer fluid,
it will do the same to the collars in your tank and fill tube
Thx guys, change my mind almost daily about the color. I think some of the darker colors are more sexy (dark blue, charcoal, etc). But also think a lighter color would set off the black interior nicely (gulf blue, metallic copper). I have a feeling the color choice will be determined the day it gets painted....
Or wrapped perhaps.
Hi, I have a suggestion on color. A few years ago I came across a homely car made by Chevy. It turned out to be something called the HHR. What caught my eyes was the very distinctive color of that car. I actually spent a good 10 minutes looking over the car imagining how it would look on a 928. It is somewhat similar to the Diamond Blue on my Carrera but with a purple twist. If I ever do a ground up 928 hot rod, this "Majestic Amethyst Metallic" paint will be all over it. It really changes with various lighting.
Take a look. http://www.chevyhhr.net/forums/pictu...pix-only-4381/

 03-15-2015, 11:35 PM