
6E171 Rebuild questions
 05-17-2014, 01:03 PM
#1
Rennlist Member
Thread Starter

Another compressor rebuild thread.
I think I tried this about 10 years ago and never got these screws off or had to drill it.

Is that what is needed here? Because these damn screws are not moving.
That plate seems to be over both the first flat seal AND the radial seal.
I think I tried this about 10 years ago and never got these screws off or had to drill it.

Is that what is needed here? Because these damn screws are not moving.
That plate seems to be over both the first flat seal AND the radial seal.
 05-17-2014, 01:04 PM
#2
Rennlist Member
Thread Starter
This is the other end. Are there seals that I would need to get to under this?

 05-17-2014, 01:05 PM
#3
Rennlist Member
Thread Starter
I can destroy this one any way needed to learn. It has a broken mount and I have two others I can rebuild.
05-17-2014, 01:12 PM
#4
Rennlist Member
I found an older thread on this: https://rennlist.com/forums/928-forum/350159-6e171-compressor-rebuild-problems-any-suggestions.html , and Glenn M had the same problem. If he solved it and doesn't see this I should PM him- I got a used compressor, partly because I was stymied trying to remove those screws. If you learn a method, please post it here!
05-17-2014, 03:08 PM
#5
Chronic Tool Dropper
Lifetime Rennlist
Member
Lifetime Rennlist
Member

Brendan-
That looks a lot like a project for the parts-cleaning bath, followed by a couple careful whumps with a hammer on the impact screwdriver. I haven't done this particular compressor rebuild, just relating the tools I'd use.
In a lot of years of fiddling with these compressors, the quality of my own rebuilds has been about 50% success. Buying commercially-rebuilt units raises that to about 75%. Buying brand new ones raises that success rate to very close to 100%. By the time I figure in all the fiddle-farting around with the R&R, hoses and seals, clean, evacuate, recharge, cuss when it doesn't work, then do it all again with the new compressor I should have bought in the first place... You can see where we are going with this.
I know you are the master of disassembly, and may also be a master of reassembly. Sometimes I take stuff apart to see how it works or, as you are doing, to get a risk-free pre-run prior to a 'real' rebuild effort. But the results are key here too, and if you want the car to be cold after the first real effort, decide how much the experience is worth vs. the spotty results (at least the results I've had.)
Then, on to some tips I can share:
-- The compressor needs to be surgically clean, inside and out, before you even thnk about opening it up. The one you are working on in the pictures isn't quite to the required standard.
-- The workspace needs to be surgically clean before you even thnk about opening the compressor. Classroom training on this stuff has you working on clean stainless steel trays. You can substitute a commercial baker's tray safely.
-- I add in clear plastic tubs, like salsa-dip packaging or similar, to receive the screws and other tiny bits as the unit is disassembled. I harvest those from the kitchen on an ongoing basis for just such projects. The pieces are kept together, in order of disassembly, in a row of those little tubs.
-- I have a few plastic dishpans similar to what TSA uses to hold your stuff at airport security screenings. I find them locally at Smart & Final stores for a few dollars each. I'm sure Wal-Mart and Target have similar trays. Actual disassembly of larger pieces is done in those, so all the fiddly bits won't get too far away. The plastic is kinder to machined faces of parts too.
-- Like automatic transmissions, cleanliness is next to Godliness when you have any part of the AC system open. The oil and crud that accumulates on the block around the compressor needs to be completely removed before you even think of placing your new or rebuilt compressor near the car. Disconnected hoses get immediately plastic-bag-sealed with tie-wraps or rubber bands to keep them free of dirt and moisture contamination.
-- Wear clean nitrile gloves. Change them when they get at all dirty.
-- Lint-free towels for all final cleaning and prep for assembly. Scott blue paper shop towels will do the job OK. Regular paper towels, or pre-used shop rags won't even if they've been washed.
Have fun, take lots of pictures for us, etc.
05-17-2014, 04:35 PM
#6
Addict
Lifetime Rennlist
Member
Lifetime Rennlist
Member
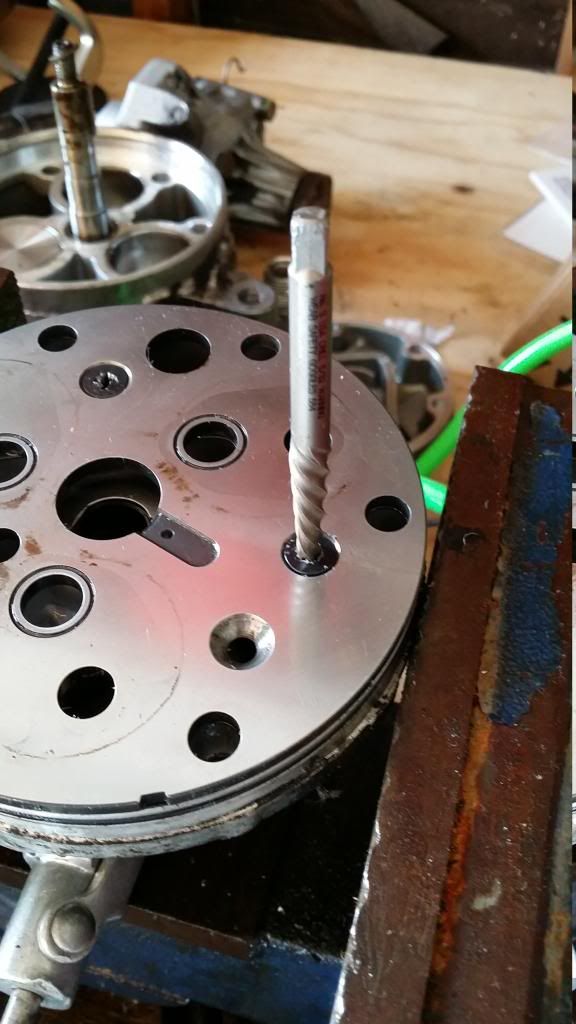
I removed them with left turning drill bits. I found special drill bits for hardened steel and bought various sizes, 2.5, 4 and 5 mm for this purpose. I think the screws are M6. As you drill the screws will start turning and come out. No need to tap for a new thread.
05-17-2014, 06:05 PM
#7
Rennlist Member
Brendan- I hope you don't mind me joining in on this thread- looks like we are not only doing the same thing, but for the same (faulty) reasons.
This approach brought no joy to my efforts (all your other comments are spot on in my experience, and the only reason I'm trying to do it is because it is there to be done. I always learn something from these futile exercises). I've done an awful lot of work with an impact screwdriver (Brit bikes) and love the tool, but no go here.
Did you use heat as well, or was the heat from drilling sufficient? TIA!
Did you use heat as well, or was the heat from drilling sufficient? TIA!
Trending Topics
05-17-2014, 08:04 PM
#9
Rennlist Member
Thread Starter
So yes, when I actually do this on a real compressor, the desk will have spread paper as I always do on real stuff, and the compressor will be meticulously cleaned before any work.
What I remembered from before was I can't get it disassembled properly, and I was right. Those screws will NOT move. I am going to harbor freight to find if there is a different phillips series end for the one I have. The sizes of Philips ends are not working and I hammered and hammered.
For the price of the seals at this point, I think its worth it to find out where this job will go.
05-17-2014, 08:06 PM
#10
Rennlist Member
Thread Starter
No Problem. More the merrier.
Brendan- I hope you don't mind me joining in on this thread- looks like we are not only doing the same thing, but for the same (faulty) reasons.
This approach brought no joy to my efforts (all your other comments are spot on in my experience, and the only reason I'm trying to do it is because it is there to be done. I always learn something from these futile exercises). I've done an awful lot of work with an impact screwdriver (Brit bikes) and love the tool, but no go here.
Did you use heat as well, or was the heat from drilling sufficient? TIA!
05-17-2014, 09:45 PM
#11
Rennlist Member
Thread Starter
Alright. I got this. I think Rob mentioned this when he rebuilt the one on his later 928. He mentioned about not needing to get something off, but I do not recall if it was the same thing as I will describe now:
The little phillips screws do not need to come off from what I can see.
Now, I DID take them off. And then I did what I felt was the next step - prying off the plate that the screws were supposedly holding on.
No.
The screws hold on these spring valves for the compressor pistons, and they do not need to be removed.
You need to get the plates off by gently prying them off. This is the way to get to the seal.
This is what I did (and was not supposed to).
You find this:
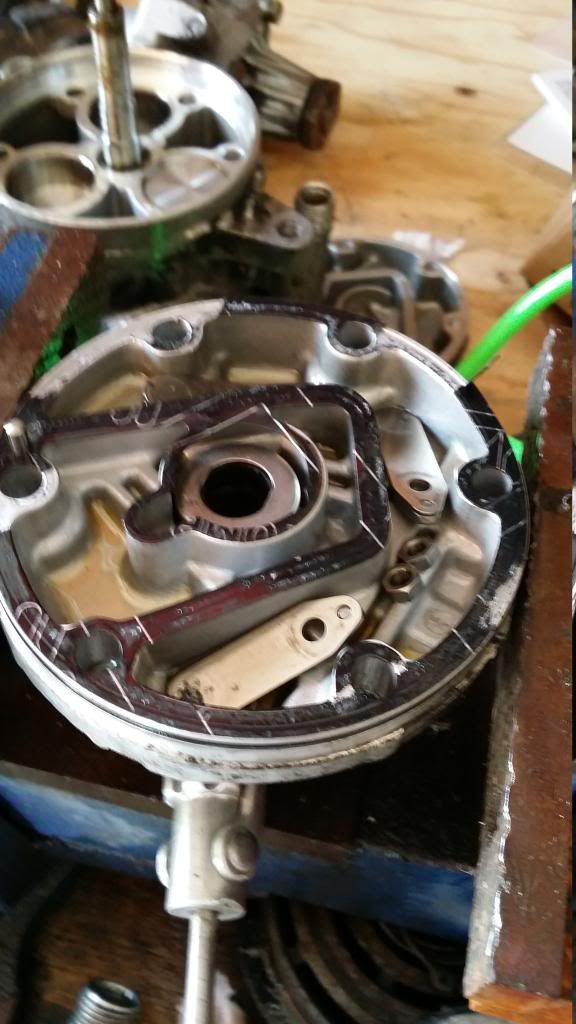
The spring valves have fallen away from the screws. I look at it, and I think "WTF? How am I supposed to get that on....oh."
Yeah.
So.

The little phillips screws do not need to come off from what I can see.
Now, I DID take them off. And then I did what I felt was the next step - prying off the plate that the screws were supposedly holding on.
No.
The screws hold on these spring valves for the compressor pistons, and they do not need to be removed.
You need to get the plates off by gently prying them off. This is the way to get to the seal.
This is what I did (and was not supposed to).

You find this:

The spring valves have fallen away from the screws. I look at it, and I think "WTF? How am I supposed to get that on....oh."
Yeah.
So.

 05-17-2014, 09:53 PM
#12
Rennlist Member
Thread Starter
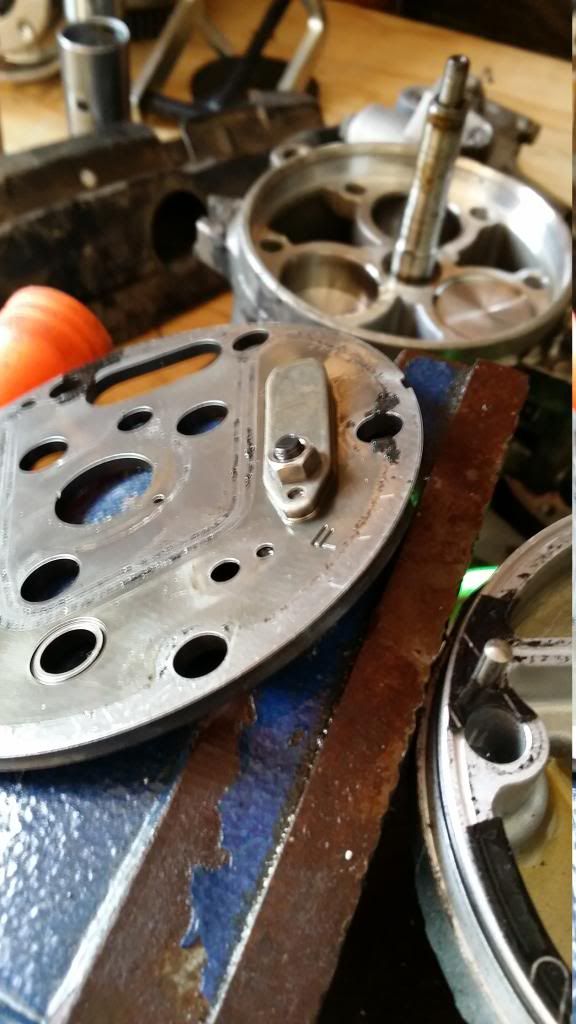
Both plates have pins.
I think the reason this type is called "Swash Plate" i because the spring valves and the plate.
I think the reason this type is called "Swash Plate" i because the spring valves and the plate.
05-17-2014, 10:10 PM
#13
Nordschleife Master
Doh, got to rennlist late this morning. You already found out my answer, the hard way.
You don't need to remove those screws.
The Swash Plate is the angled disc which drives the pistons. Careful - if you pull it out of both halves, the ball bearings will drop out and reassembly gets very fiddly
You don't need to remove those screws.
The Swash Plate is the angled disc which drives the pistons. Careful - if you pull it out of both halves, the ball bearings will drop out and reassembly gets very fiddly
05-17-2014, 11:49 PM
#14
Rennlist Member
Thread Starter
Is that a green seal that needs to be replaced?
05-17-2014, 11:54 PM
#15
Nordschleife Master

