When you click on links to various merchants on this site and make a purchase, this can result in this site earning a commission. Affiliate programs and affiliations include, but are not limited to, the eBay Partner Network.
Did you alternate turning both cables for the forward/back adjustment? If you only turned one side the seat will quickly jamb. You could also have an object jammed in the track. Coins will wedge in there pretty tight.
Sorry, but I don't know of a source for the correct bit or another way to move the seat.
Well I found that a 1/8" flat bladed screw driver works.
However, my seat is so jammed -- I actually spun the plastic on the screwdriver
trying to get it to move with vice grips on the handle for leverage.
I've looked to see if there is something in the tracks -- but it looks to me
the assembly where it clamps to the screw appears to have deteriorated.
[QUOTE=ammonman;10794309]You may notice one day that your formerly rock solid seat now shifts back and forth under braking and acceleration. I've had this issue for a while now and finally decided to tackle getting it fixed. Here's how to remedy that problem.
i have this problem in C2 911- do you have any of the part numbers for the plastic bushes/ washers?
Many thanks for the write up
I don't have any part numbers as Porsche never offered them as spares separate from the seat. The black nylon washers I used per the how-to were sourced from the local hardware store. You need 1/2"I.D. x 3/4"O.D. x 1/8" thick or the nearest metric equivalent.
[QUOTE=ammonman;10794309]You may notice one day that your formerly rock solid seat now shifts back and forth under braking and acceleration. I've had this issue for a while now and finally decided to tackle getting it fixed. Here's how to remedy that problem.
Ammonman
Brilliant write up and DIY- I did my drivers seat today and all went very well. Thank you very much for taking the trouble to help others.
Regards Ken
Yes, this deserves a DWAYNE'S GARAGE AWARD in recognition of an outstanding 928 DIY with superior photo documentation and remarkably clean hands throughout!
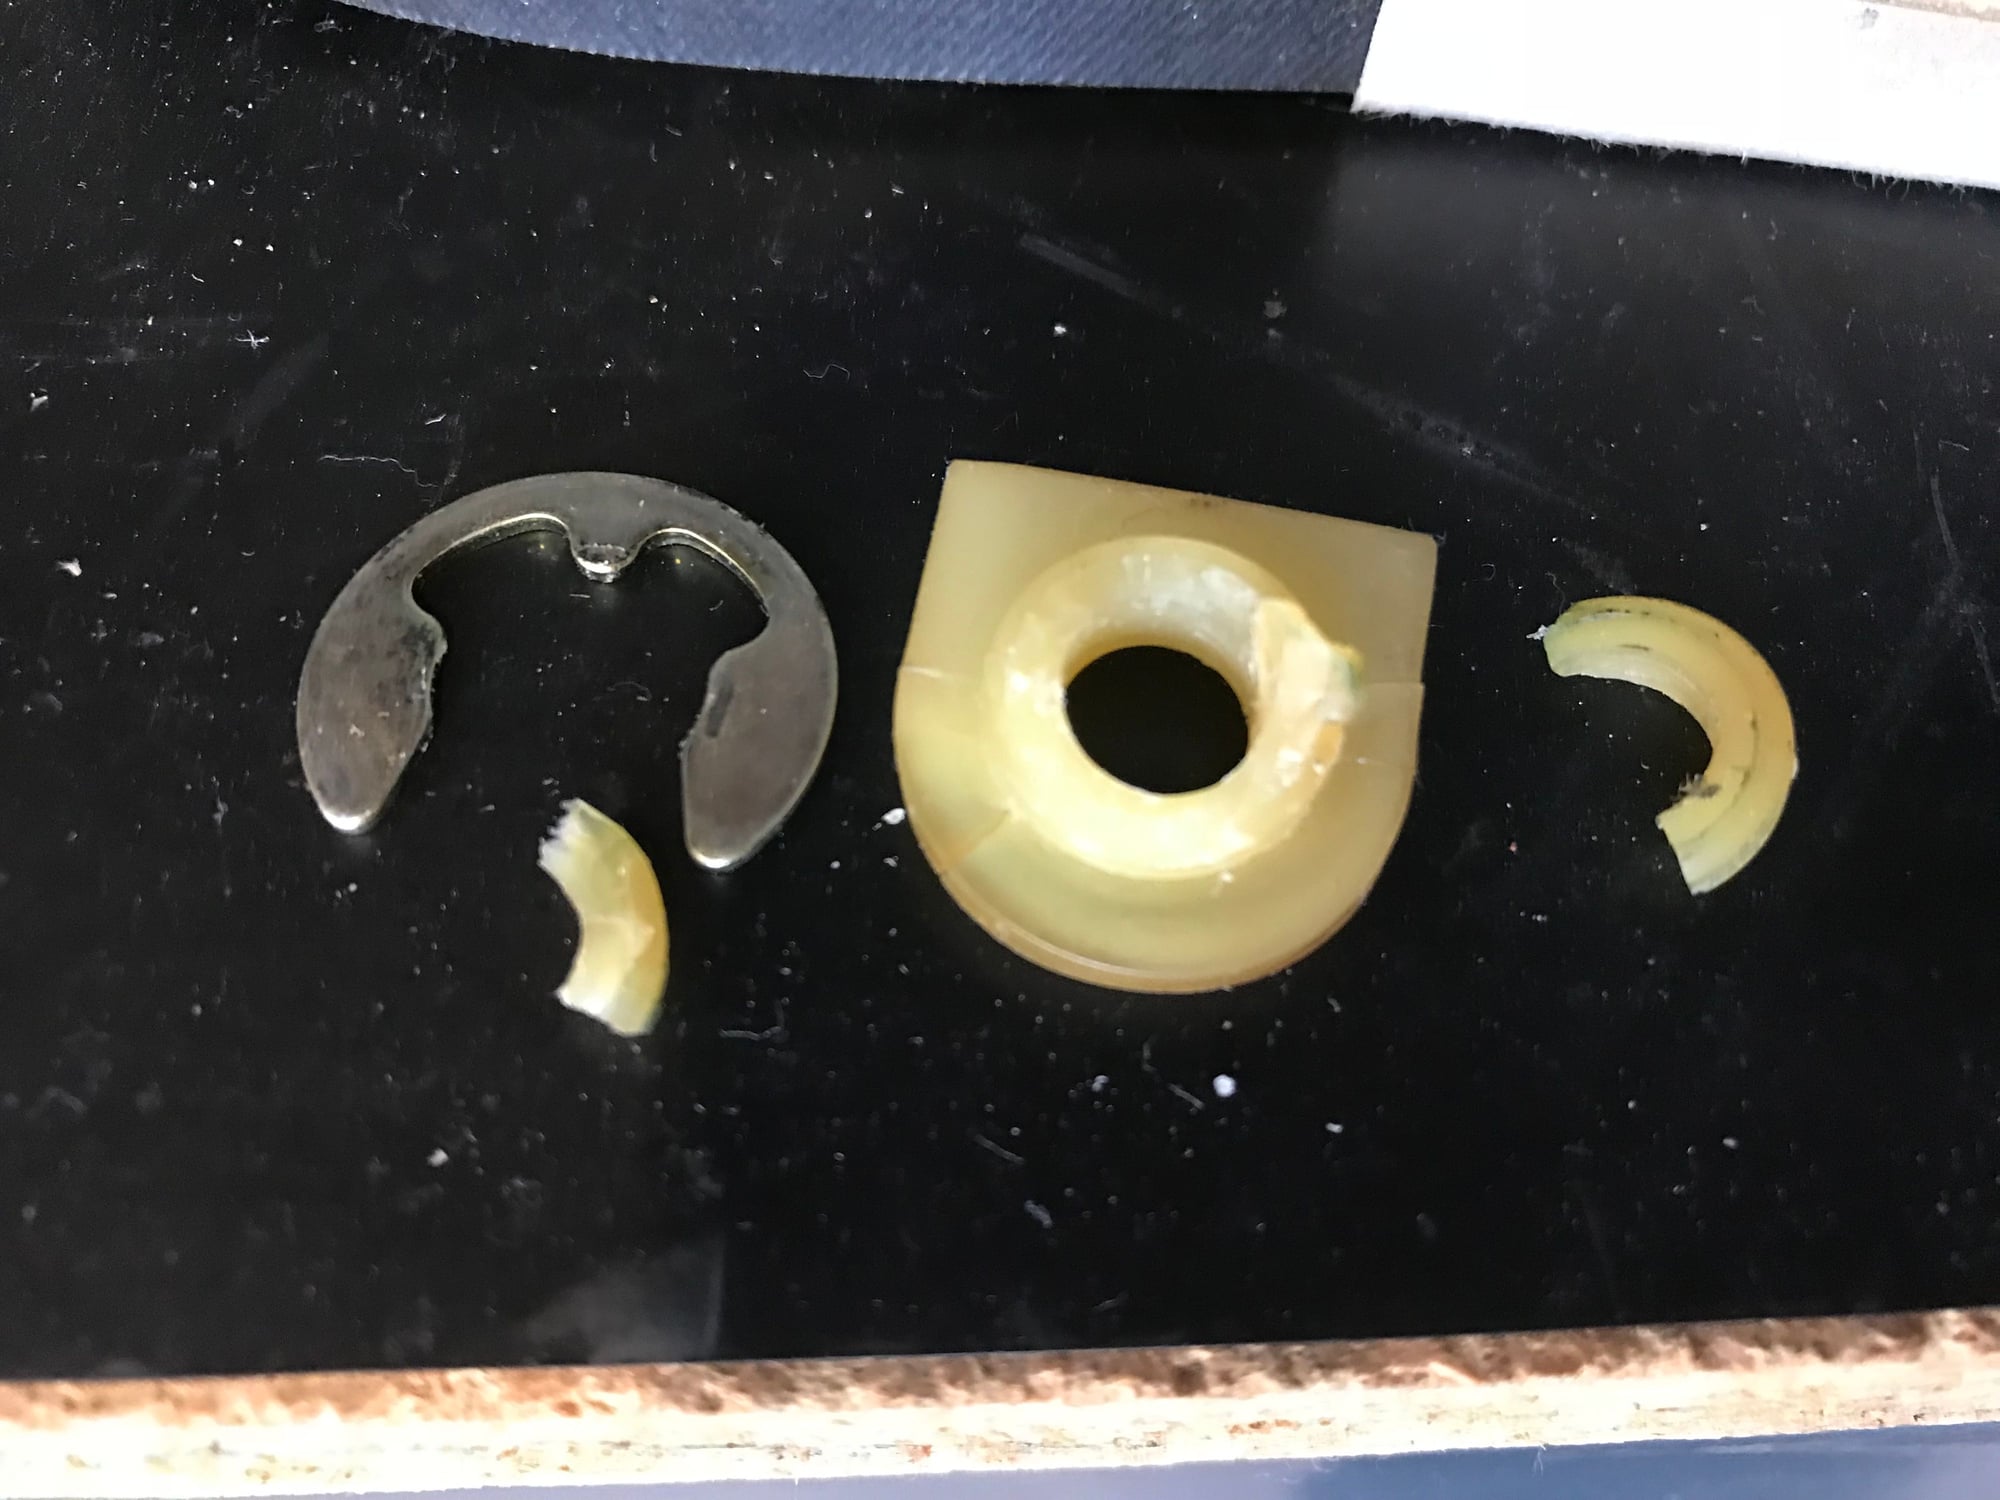
I have this loose seat issue on the driver seat, but the passenger seat is still tight. But just today, when rolling the passenger seat forward to get into the back to install the new P classic rear speaker upgrade (INSTALL THE ADAPTOR BRACKETS UNDER THE SPEAKER NOT ON TOP - THAT KIT NEEDS AN INSTRUCTION SHEET), the LOWER (REAR) CARRIER BUSHING and the CIRCLIP fell onto the floor.
Has anyone got a replacement carrier bushing available these days? I'd like to replace all of them as various ones are disintegrating. 24 years and not the best italian plastic...yours are gonna go soon if they haven't yet, so many will be needing these.
I second the need for a source for the carrier bushing, and if we find someone willing to do those, they might just as well 3D print all the plastic parts in the main fore-aft assembly, to create a complete rebuild kit.
Some points to add to the excellent instructions above:
- Three elements need to be in coordination for the seat to work properly. These are the position of the left slider, the right slider, and the motor potentiometer that the memory system uses to keep track of the seat position. BEFORE disassembly, I suggest (if possible) moving the mechanism to either full forward or full backward. Take a picture, and take note of the relative positions of the sliders. THEN disassemble, and be careful not to run the motor until re-assembly, so as not to change the position of the potentiometer. Obviously, re-assemble with everything in the captured position. The motor can be run with the seat on the bench by disconnecting its wiring harness and applying 12VDC across the exposed terminals.
- I cleaned all the metal and plastic bits, and regreased with silicone grease (M.G. Chemicals, bought at Frys) on both the metal and plastic parts of the lead screw mechanism. That seemed to work fine, and won't further eat away at the plastic bits.
I think you can use any good automotive grease on the slider bearings since that is obviously an all metal assembly, but choose one that you don't mind seeing on the carpet, and apply to the slider bearings sparingly. This grease is easiest to get in there when the lead screws are out, since the sliders can then be moved back and forth easily. Just put grease on the bearing ways, not everywhere. If the slider is full forward or full back, some of the bearing way becomes visible when looking down at the seat (and none of the way is ever visible with the seat turned upside down on the bench). Just put grease on the way and work the slider back and forth to get it into the other bearings.
For those that don't know, McMaster-Carr is an excellent source for a variety of odd bits (e.g. plastic washers)
Back in the day, Mike Frye printed these, alas no more. The 3d printing files are available on the web. I am working on producing them in Delrin. I'll post when I get closer.

 05-19-2015, 07:26 AM