
A 86.5 Intake Refresh Picture Thread from a first-timer
 10-01-2013, 04:20 PM
#61
Inventor
Rennlist Member
Rennlist Member

 10-01-2013, 06:57 PM
#62
Burning Brakes
Thread Starter
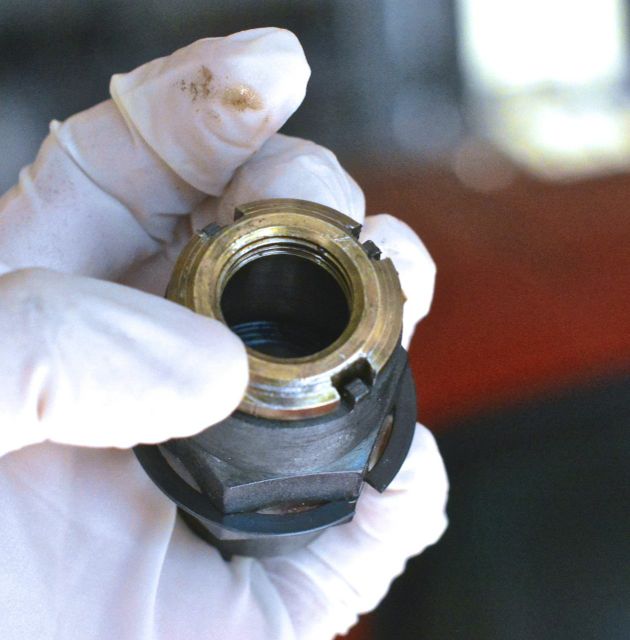
I was having trouble removing the notched bolts that hold in the elbows for the oil breather hoses (from the cam covers.) I was worried about scratching or damaging the bolts with my pair of pliers.
I ended up picking up an "antenna nut socket set" from the Snap-On truck.
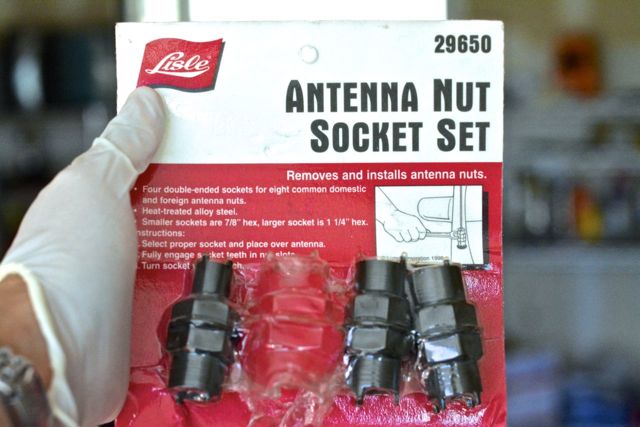
It fit in perfectly, and the bolts came out without a hitch.
I ended up picking up an "antenna nut socket set" from the Snap-On truck.
It fit in perfectly, and the bolts came out without a hitch.
10-01-2013, 07:00 PM
#63
Burning Brakes
Thread Starter
On my '86 cam cover (and according to Roger) there are 13 long cam cover bolts, and 3 short cam cover bolts. They are in this configuration on both driver's and passenger's sides: S=short bolt, L=long bolt.
P O R S C H E
S L L S
L L L L
S L L L
P O R S C H E
S L L S
L L L L
S L L L
10-08-2013, 10:42 PM
#64
Burning Brakes
Thread Starter
October 8, 2013
I am trying to replace the six camshaft end seals.
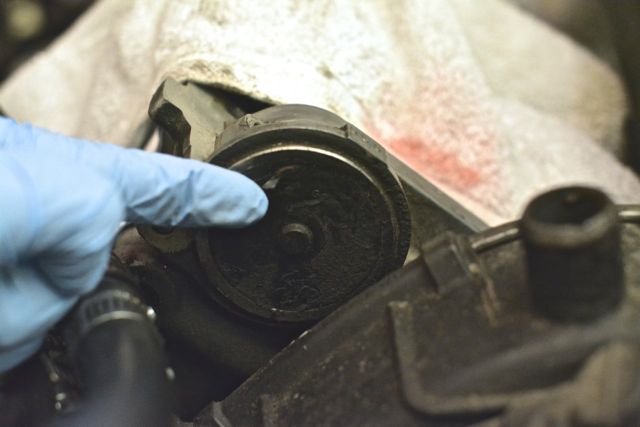
I tried tapping on them with a screwdriver. That didn't work. (I used a hammer, which started to dent them. A kind Rennlister (Lizard928) advised me to drill a hole in the old end seals (hockey-pucks) but before doing that, I wanted to see if I could remove them in a non-destructive way.
So, I removed the four allen bolts on the front bearing bridge:
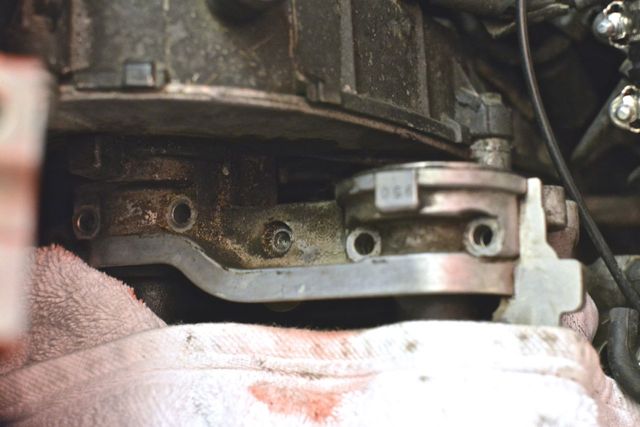
But I can't seem to budge the bearing bridge at all.
1) Am I supposed to pry the bridge up?
2) If I can budge the bridge, do I need to seal it? Some say yes, some say no.
I've read the following threads about removing the end seals:
Cam Plug Seals Hockey Pucks
How to remove the intake side cam seals
Any further help would be appreciated.
-------
Many of my Bosch-style connectors have broken boots, look crispy. I want to go in there and replace some of the connectors, all of the boots. BUT, my connectors have some kind of epoxy injected inside:
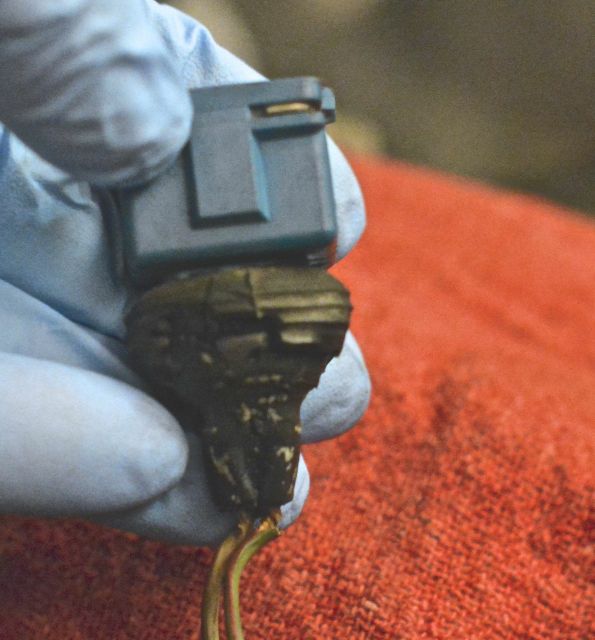
Can I salvage the connector in this situation, or if I want to refresh, does it mean that I have to change the connectors?
-------
This is the last buffer that I have to deal with- it is at the end of the "valley."
It was the remains of a bonded rubber buffer. I cut a slot in it with a dremel and used a wide flathead screwdriver to get it out. Make sure if you do this to use quite a wide screwdriver, and make sure the slot is not too shallow, otherwise you will damage your newly fabricated "screw."
I am trying to replace the six camshaft end seals.
I tried tapping on them with a screwdriver. That didn't work. (I used a hammer, which started to dent them. A kind Rennlister (Lizard928) advised me to drill a hole in the old end seals (hockey-pucks) but before doing that, I wanted to see if I could remove them in a non-destructive way.
So, I removed the four allen bolts on the front bearing bridge:
But I can't seem to budge the bearing bridge at all.
1) Am I supposed to pry the bridge up?
2) If I can budge the bridge, do I need to seal it? Some say yes, some say no.
I've read the following threads about removing the end seals:
Cam Plug Seals Hockey Pucks
How to remove the intake side cam seals
Any further help would be appreciated.
-------
Many of my Bosch-style connectors have broken boots, look crispy. I want to go in there and replace some of the connectors, all of the boots. BUT, my connectors have some kind of epoxy injected inside:
Can I salvage the connector in this situation, or if I want to refresh, does it mean that I have to change the connectors?
-------
This is the last buffer that I have to deal with- it is at the end of the "valley."
It was the remains of a bonded rubber buffer. I cut a slot in it with a dremel and used a wide flathead screwdriver to get it out. Make sure if you do this to use quite a wide screwdriver, and make sure the slot is not too shallow, otherwise you will damage your newly fabricated "screw."
Last edited by syoo8; 11-19-2013 at 07:49 PM. Reason: Answered questions.
10-08-2013, 10:59 PM
#65
Craic Head
Lifetime Rennlist
Member
Lifetime Rennlist
Member
Scott, for the piece in the valley you may be able to get a vice grip in there and turn it out. It's not in very tight, just needs to be turned and there's not much there. I have needle-nosed vice-grips that worked perfectly for that.
The connectors are available for all of the wiring in there and if the boots are shot, the connectors aren't far behind. Check with Roger at 928sRus, I'm pretty sure he has sourced all of them.
I can't help with the rest I'm afraid. Keep up the great work!
The connectors are available for all of the wiring in there and if the boots are shot, the connectors aren't far behind. Check with Roger at 928sRus, I'm pretty sure he has sourced all of them.
I can't help with the rest I'm afraid. Keep up the great work!
10-09-2013, 09:18 PM
#66
Burning Brakes
Thread Starter
An addendum to post 64 above: my hose 928 110 652 02 was cracked.
Attachment 768301
Called Roger, he told me that 928 110 652 01 is what I should use. The part is on its way.
Update December 9: I had to add another fuel vapor hose to 928 110 652 01, because the new part is much shorter than the one I needed for an 86. (It is easily sourced at a local auto parts store- make sure you get one with the same inside diameter.)
Last edited by syoo8; 12-09-2013 at 12:00 PM.
10-13-2013, 06:56 PM
#67
Burning Brakes
Thread Starter
This weekend I did a few odds and ends on the intake, anticipating the intake runners and valve covers returning to me in a few weeks from LegendGarage.
I changed the crank position sensor. Unlike the experiences of other Rennlisters, it came out very easily, with little struggle. The old one had a few metal filings stuck to it, which worries me.

The dreaded cam end seals were easy in the front, once I followed the directions of others. The passenger side front was the "old style" one-piece cam end seal.

It lifted off with no effort. It had no sealant.
I cleaned the area with Brakleen, then applied Loctite 574 to the outer rim of the "new style" replacement cam end seal.
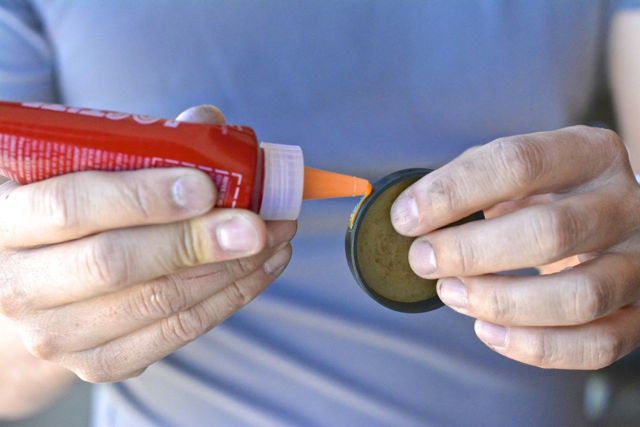
And it fit in just fine.
I changed the crank position sensor. Unlike the experiences of other Rennlisters, it came out very easily, with little struggle. The old one had a few metal filings stuck to it, which worries me.
The dreaded cam end seals were easy in the front, once I followed the directions of others. The passenger side front was the "old style" one-piece cam end seal.
It lifted off with no effort. It had no sealant.
I cleaned the area with Brakleen, then applied Loctite 574 to the outer rim of the "new style" replacement cam end seal.
And it fit in just fine.
10-13-2013, 06:59 PM
#68
Burning Brakes
Thread Starter
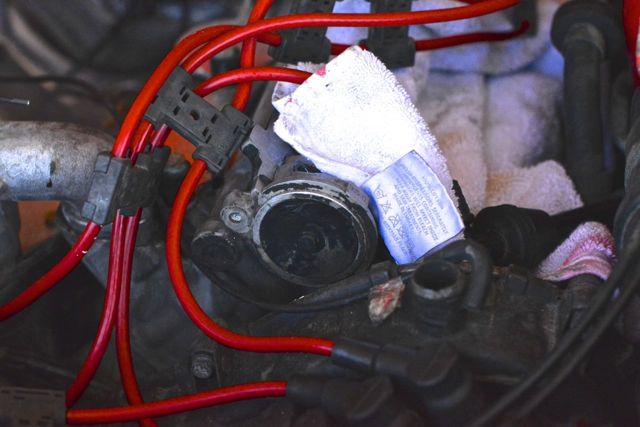
The driver's side cam end seal had obviously been replaced by the previous owner, so it was now a "new style" cam end seal. I tried knocking it out with a screwdriver, tried removing the cam bridge, but nothing worked.
Finally, I sacked up and got a 1/8 inch drill bit, suitable for metal. I drilled near the top of the existing cam end seal:
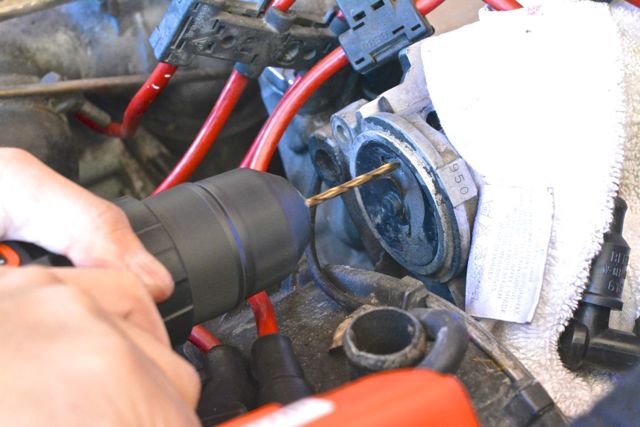
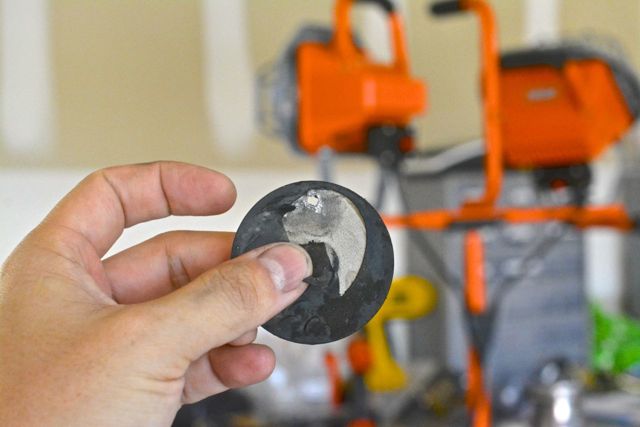
And as soon as I punched through (without drilling the actual cam itself), the thing let go. The previous owner installed this seal with no sealant, which may be why it was weeping.
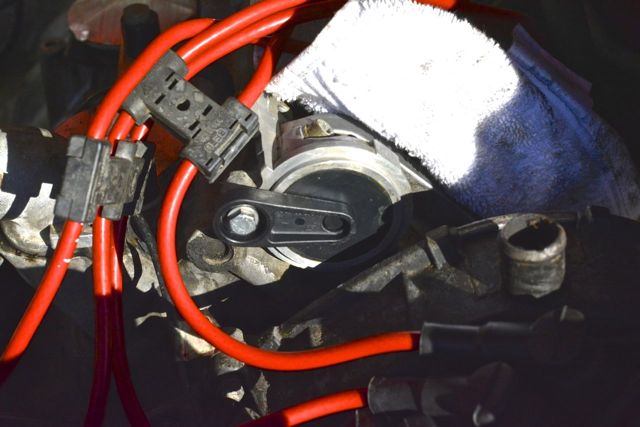
Applied Loctite 574 to a new cam end seal, pressed it in, added the attaching arm, and done.
Finally, I sacked up and got a 1/8 inch drill bit, suitable for metal. I drilled near the top of the existing cam end seal:
And as soon as I punched through (without drilling the actual cam itself), the thing let go. The previous owner installed this seal with no sealant, which may be why it was weeping.
Applied Loctite 574 to a new cam end seal, pressed it in, added the attaching arm, and done.
10-13-2013, 08:45 PM
#69
Burning Brakes
Thread Starter
Hi everyone,
I discovered a bag that held this bracket in it. (?????) The bonded rubber buffer is intact:
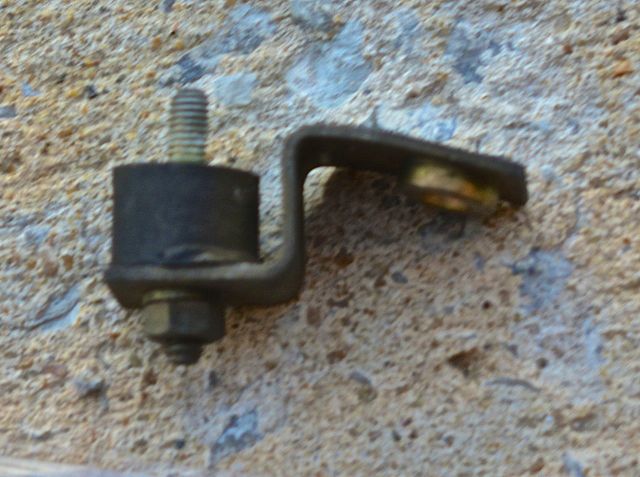
On the bag, I wrote "rear of air guide, bracket points towards back of car."
What is happening here?
Two more pieces of info:
1) The bonded rubber buffer attached to the rear of the air guide was broken.
2) There was a remnant of a bonded rubber buffer in the "rear hole" of the valley.
Any help would be greatly appreciated.
I discovered a bag that held this bracket in it. (?????) The bonded rubber buffer is intact:
On the bag, I wrote "rear of air guide, bracket points towards back of car."
What is happening here?
Two more pieces of info:
1) The bonded rubber buffer attached to the rear of the air guide was broken.
2) There was a remnant of a bonded rubber buffer in the "rear hole" of the valley.
Any help would be greatly appreciated.
Last edited by syoo8; 11-19-2013 at 07:52 PM.
10-13-2013, 11:27 PM
#70

The L bracket thing is for holding the intake air valve. The thicker washer part goes into the recess hole on the air guide where that side goes over the rubber buffer.
10-13-2013, 11:29 PM
#71
And I do not believe porsche put any sealant on those cam seals.
10-14-2013, 02:14 AM
#72
Burning Brakes
Thread Starter
 10-14-2013, 12:51 PM
#73
Craic Head
Lifetime Rennlist
Member
Lifetime Rennlist
Member
Scott,
I think that's correct.
And also: I wish I had assembled everything like that before putting it back in. In hindsight I don't think the lower air guide attachment is any easier with the rest of that stuff removed, but getting all of that on there while the TB/air guide is on the car is MUCH harder than on the bench I imagine. Well played sir.
10-14-2013, 02:31 PM
#74
I took a picture of mine on the engine stand, so not 100% sure but that does look correct.
10-14-2013, 03:16 PM
#75
Burning Brakes
Thread Starter
BC and Mike, I appreciate your responses.
A newbie note (to myself)
There are SIX bonded rubber buffers underneath the hood. SIX.
- Two that hold the air box to the fuel pressure regulator and fuel pressure damper brackets in the rear.
- Three that hold the air guide to the bottom of the "V", i.e. the engine block.
- One that holds the idle stabilizer valve to the passenger side (rear) recess, as pictured above.
Thinking that there were only five bonded rubber buffers in this area is what really threw me for a loop.