
87 and up spark plug wire routing for dummies
 04-07-2013, 10:30 AM
#1
Rennlist Member
Thread Starter

The 87 I bought last year had none of the clips attached and none of the mounting brackets. I think I have sourced them all now, but need a hand knowing exactly where the clips should be placed and how to route the wires along the front of the engine.
Without another 928 S4 sitting next to mine it is challenging to get the placement and the routing correct.
Is there a decent write up around I could follow?
Without another 928 S4 sitting next to mine it is challenging to get the placement and the routing correct.
Is there a decent write up around I could follow?
 04-07-2013, 11:09 AM
#2
Pro
Join Date: Dec 2010
Location: Palgrave, Ontario, Canada
Posts: 700
Likes: 0
Received 2 Likes
on
2 Posts
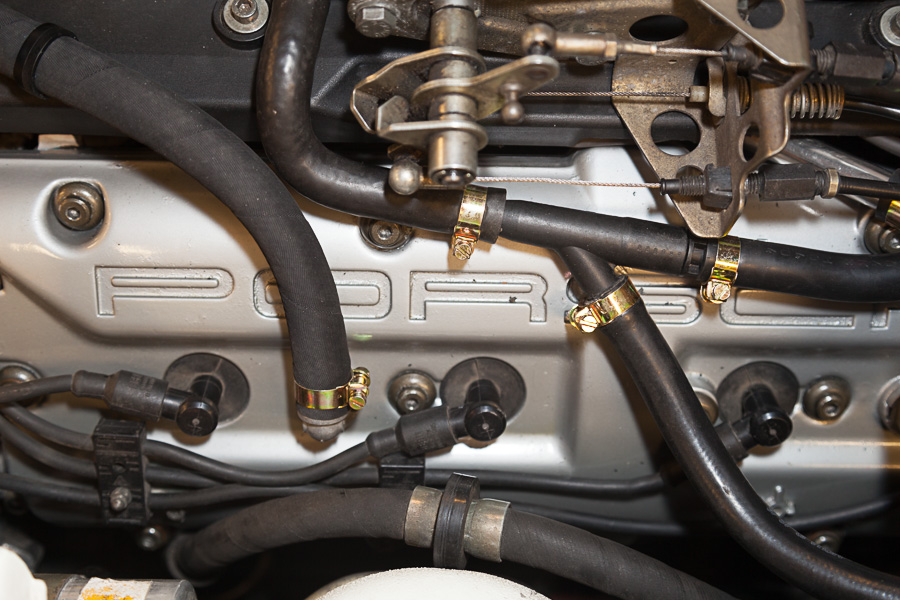
Probably not exactly what you are looking for, but I took this picture of the old wires when I removed them from my 88. I marked each of the clips as to which wires they held.
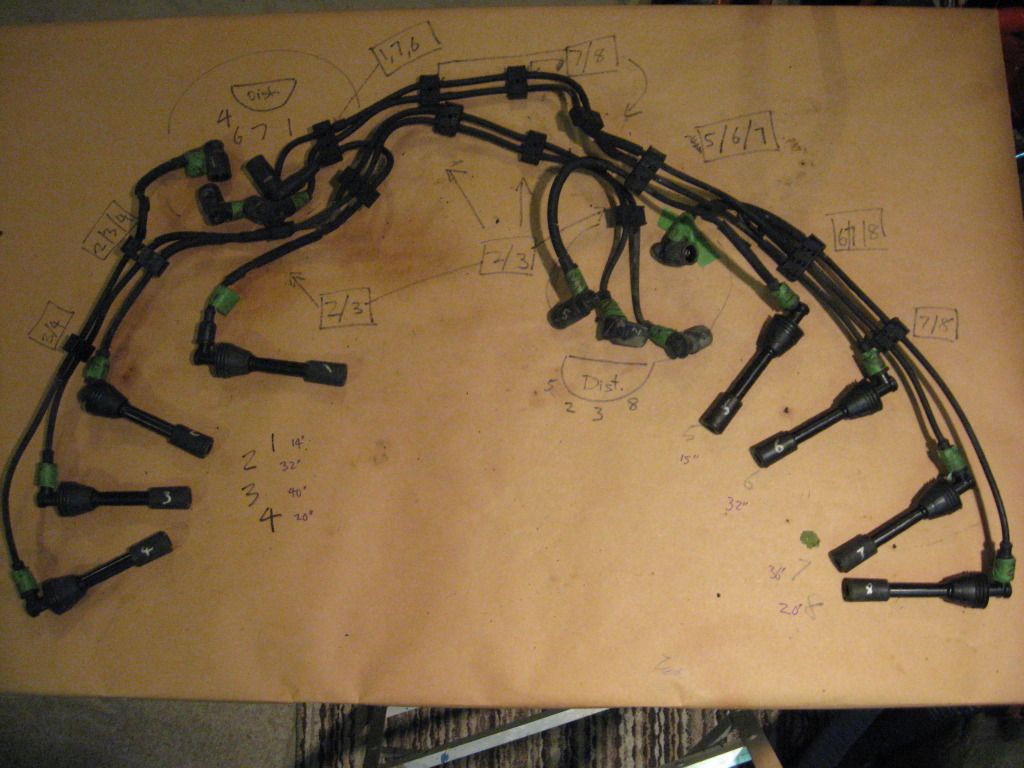
As for where the clips attached, I examined several engine pictures posted by others. The clips and leads that go over the cam covers are obvious, but those that go at the front of the engine are not.
As for where the clips attached, I examined several engine pictures posted by others. The clips and leads that go over the cam covers are obvious, but those that go at the front of the engine are not.
 04-07-2013, 12:40 PM
#3
Rennlist Member
Thread Starter
Very nice - complete with measurements.
04-07-2013, 05:38 PM
#4
Rennlist Member
Thread Starter
I knew my existing wires were too long, but...
4 and 8 wires were 38"
3 and 7 wires were 48"
Used some new wires to correct those.
4 and 8 wires were 38"
3 and 7 wires were 48"
Used some new wires to correct those.
04-07-2013, 07:00 PM
#5
Archive Gatekeeper
Rennlist Member
Rennlist Member
For the sake of completeness, here's another schematic as viewed from the front of the engine:

04-07-2013, 08:07 PM
#6
Rennlist Member
There are a couple of pics here somewhere that I think Greg Brown posted showing a complete engine ready for installation. There were nice views of all the plug wires and main harness in their proper places. Someone else may have that thread tagged or have the picture.
Mike
Mike
04-07-2013, 08:19 PM
#7
Rennlist Member
Rob, that is an excellent resource, thanks! This shows the sleeving in the correct places, also. Some wire sets include that, some do not. I suspect it is important to avoid misfires and crossfires.
I took a look at our cars and found three different arrangements for routing the wires. Here is what I believe is correct, except for the missing sleeving. This is our GT after I rearranged a couple of things...
Here are the wires on the right-side cam cover, showing the two clips:
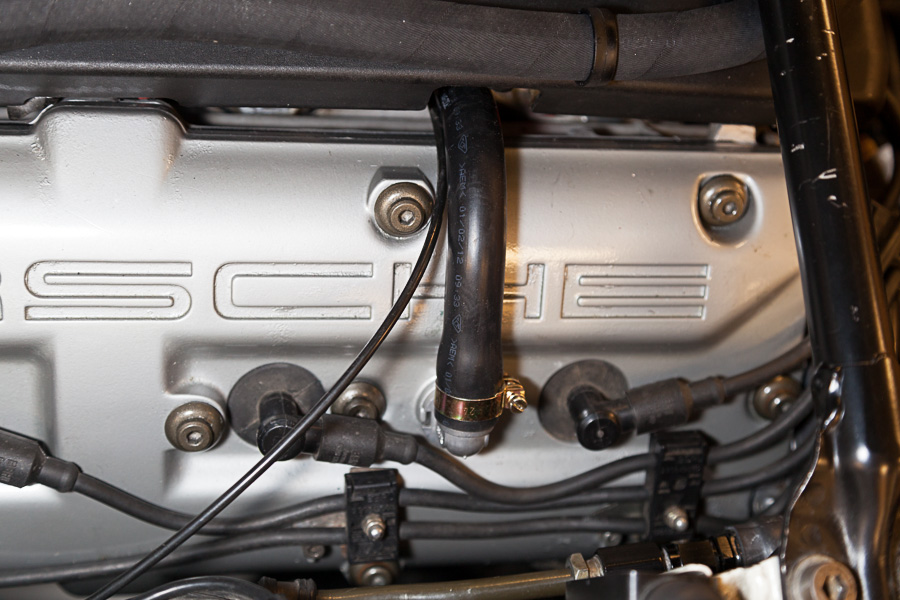
Here's how the wires hop over the right-side cam-sprocket cover (sleeving needed here):
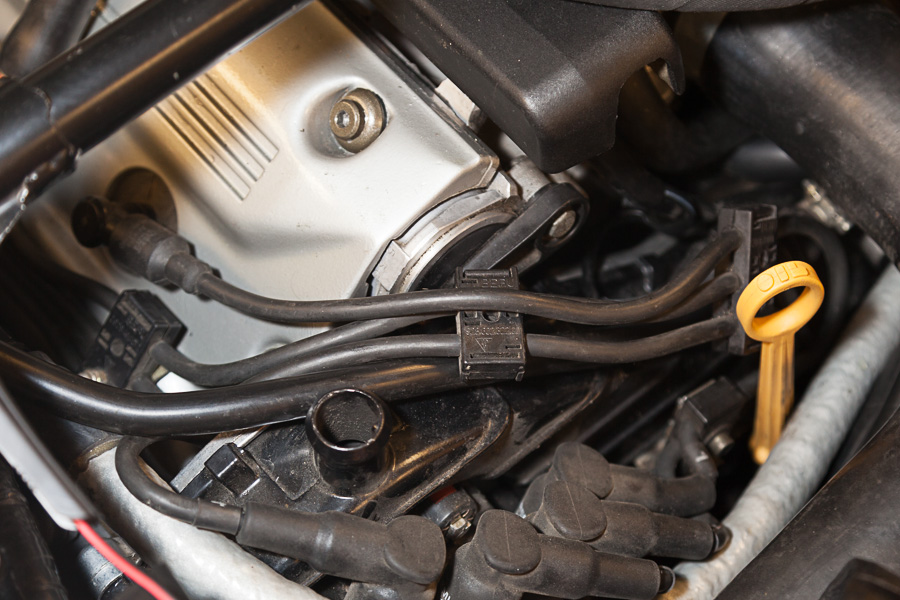
Here is what I believe is the correct arrangement on the left side, note the wires tucked between head and cam-sprocket back cover (sleeving needed here also):
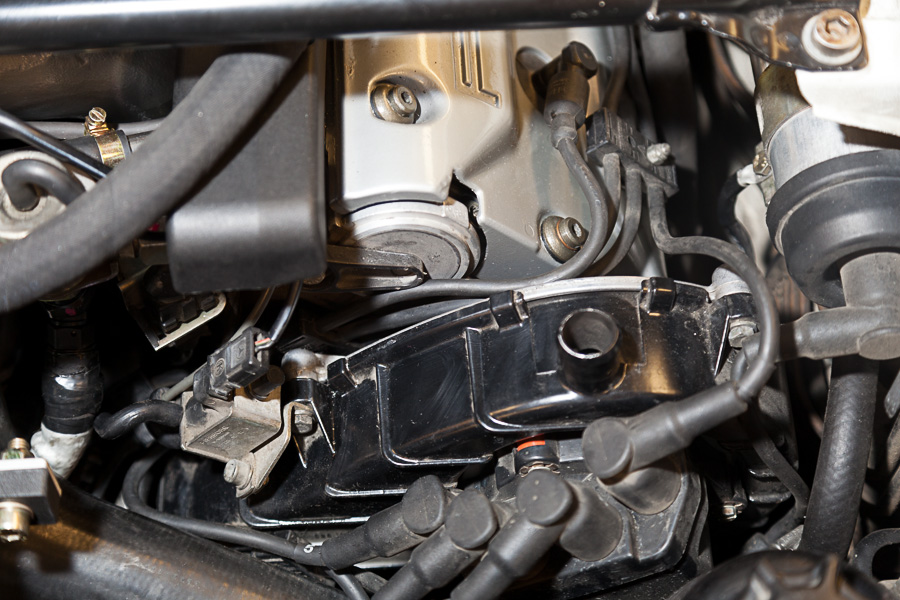
And the left-side cam cover:
I took a look at our cars and found three different arrangements for routing the wires. Here is what I believe is correct, except for the missing sleeving. This is our GT after I rearranged a couple of things...
Here are the wires on the right-side cam cover, showing the two clips:
Here's how the wires hop over the right-side cam-sprocket cover (sleeving needed here):
Here is what I believe is the correct arrangement on the left side, note the wires tucked between head and cam-sprocket back cover (sleeving needed here also):
And the left-side cam cover:
Trending Topics
04-07-2013, 09:11 PM
#8
Rennlist Member
Thread Starter
Perfect! Here is what mine looks like. Not quite identical, though. My passengerside #'s 1, 2 and 3 occupy the 3 wire clamp behind the dip stick whereas it looks you placed 1, 6 and 7 there.
Where did you get the gold anodized hose clamps?
Where did you get the gold anodized hose clamps?
04-07-2013, 09:39 PM
#9
Team Owner
OK you can make a few changes here,
on the left head 5-8 remove the #8 plug wire from the cap and turn it so it goes around the outside of the cam cover.
then remove the flappy solenoid and then tuck the bridge of 3 wires behind the cam tower,
it slides into that area then install the solenoid.
On the right head 1-4 remove the #4 wire from the cap and rout it around the outside of the cam tower like you did on the left head.
the #4 wire will also catch on the lifting clamp there is a place for it to route to if you look on the back side of the cam tower
04-08-2013, 12:29 AM
#10
Rennlist Member
Thread Starter
Roger that.
01-12-2019, 11:49 AM
#11

BUMP since I am replacing my wire set, I thought this thread deserved a bump.
when the plug wires are difficult to pull off the spark plugs, is the boot hanging up on the plug itself,
or is the problem where the upper boot seats in the top of the cam cover? dielectric grease at both points?
when the plug wires are difficult to pull off the spark plugs, is the boot hanging up on the plug itself,
or is the problem where the upper boot seats in the top of the cam cover? dielectric grease at both points?
01-12-2019, 12:48 PM
#12
Drifting
It's the upper boot on cam cover which is very tight. You can break the vacuum between upper boot and cover by carefully slipping thin screwdriver blade under the boot, or use plug boot pliers which is what I do, and twist/pull at same time.
01-12-2019, 02:08 PM
#13
Archive Gatekeeper
Rennlist Member
Rennlist Member
Plug boot pliers, pull and twist.

01-12-2019, 02:28 PM
#14
Chronic Tool Dropper
Lifetime Rennlist
Member
Lifetime Rennlist
Member

When you reinstall the plug connectors, spray silicone or DC111 is fine for where the boots fit in the cam cover wells. You can put dielectric grease around the plug insulator, but it will melt off and end up in the bottom of the plug well. Unless you expect water in those wells, don't waste your time or the grease. DC111 is a good rubber lubricant/protectant, something you should probably keep in your chemical arsenal. Else common silicone spray will get the job done. Spray some on a paper towel and wipe the inside of the well at the top, good to go.
----
FWIW, I use the same plug boot pliers that Rob shows. I have the genuine official Beru plug boot pliers, but the one in the picture works better/easier. They are commonly available at your favorite plain old local auto parts store (POLAPS).
----
FWIW, I use the same plug boot pliers that Rob shows. I have the genuine official Beru plug boot pliers, but the one in the picture works better/easier. They are commonly available at your favorite plain old local auto parts store (POLAPS).
01-12-2019, 06:02 PM
#15
Three Wheelin'
To pull the wires, try using this, made by BERU for this aplication, works great. Also good on the dist cap end.
http://www.kingsbornewires.com/product-p/zsa4.htm
http://www.kingsbornewires.com/product-p/zsa4.htm
Last edited by Jim Devine; 01-12-2019 at 06:38 PM.