Yet another top-end refresh (WAS: Trying to fix irregular/poor idle ...)
 09-22-2010, 03:51 PM
#76
Addict
Rennlist Member
Rennlist Member
Thread Starter
The bolt holes and seating areas on the water bridge are bare metal, though, so it should be nicely grounded.
Thanks for mentioning it.
 09-25-2010, 03:55 PM
#77
Addict
Rennlist Member
Rennlist Member
Thread Starter
A little discouraged at the moment, hoping I could wrap up most of getting my head (cam/valve) covers and intake back on this weekend, only to discover (thanks, Mrmerlin for pointing it out, though) that I've got the old-style rubber plug / pin oil stoppers at the rear (see "this is not what I wanted to see" in another thread).
So... while dreading what it's going to take to get the cam caps off (requiring an XZN-8 "triple square" socket that I don't yet have) and the tight clearances, I figured I'd continue doing the easy stuff.
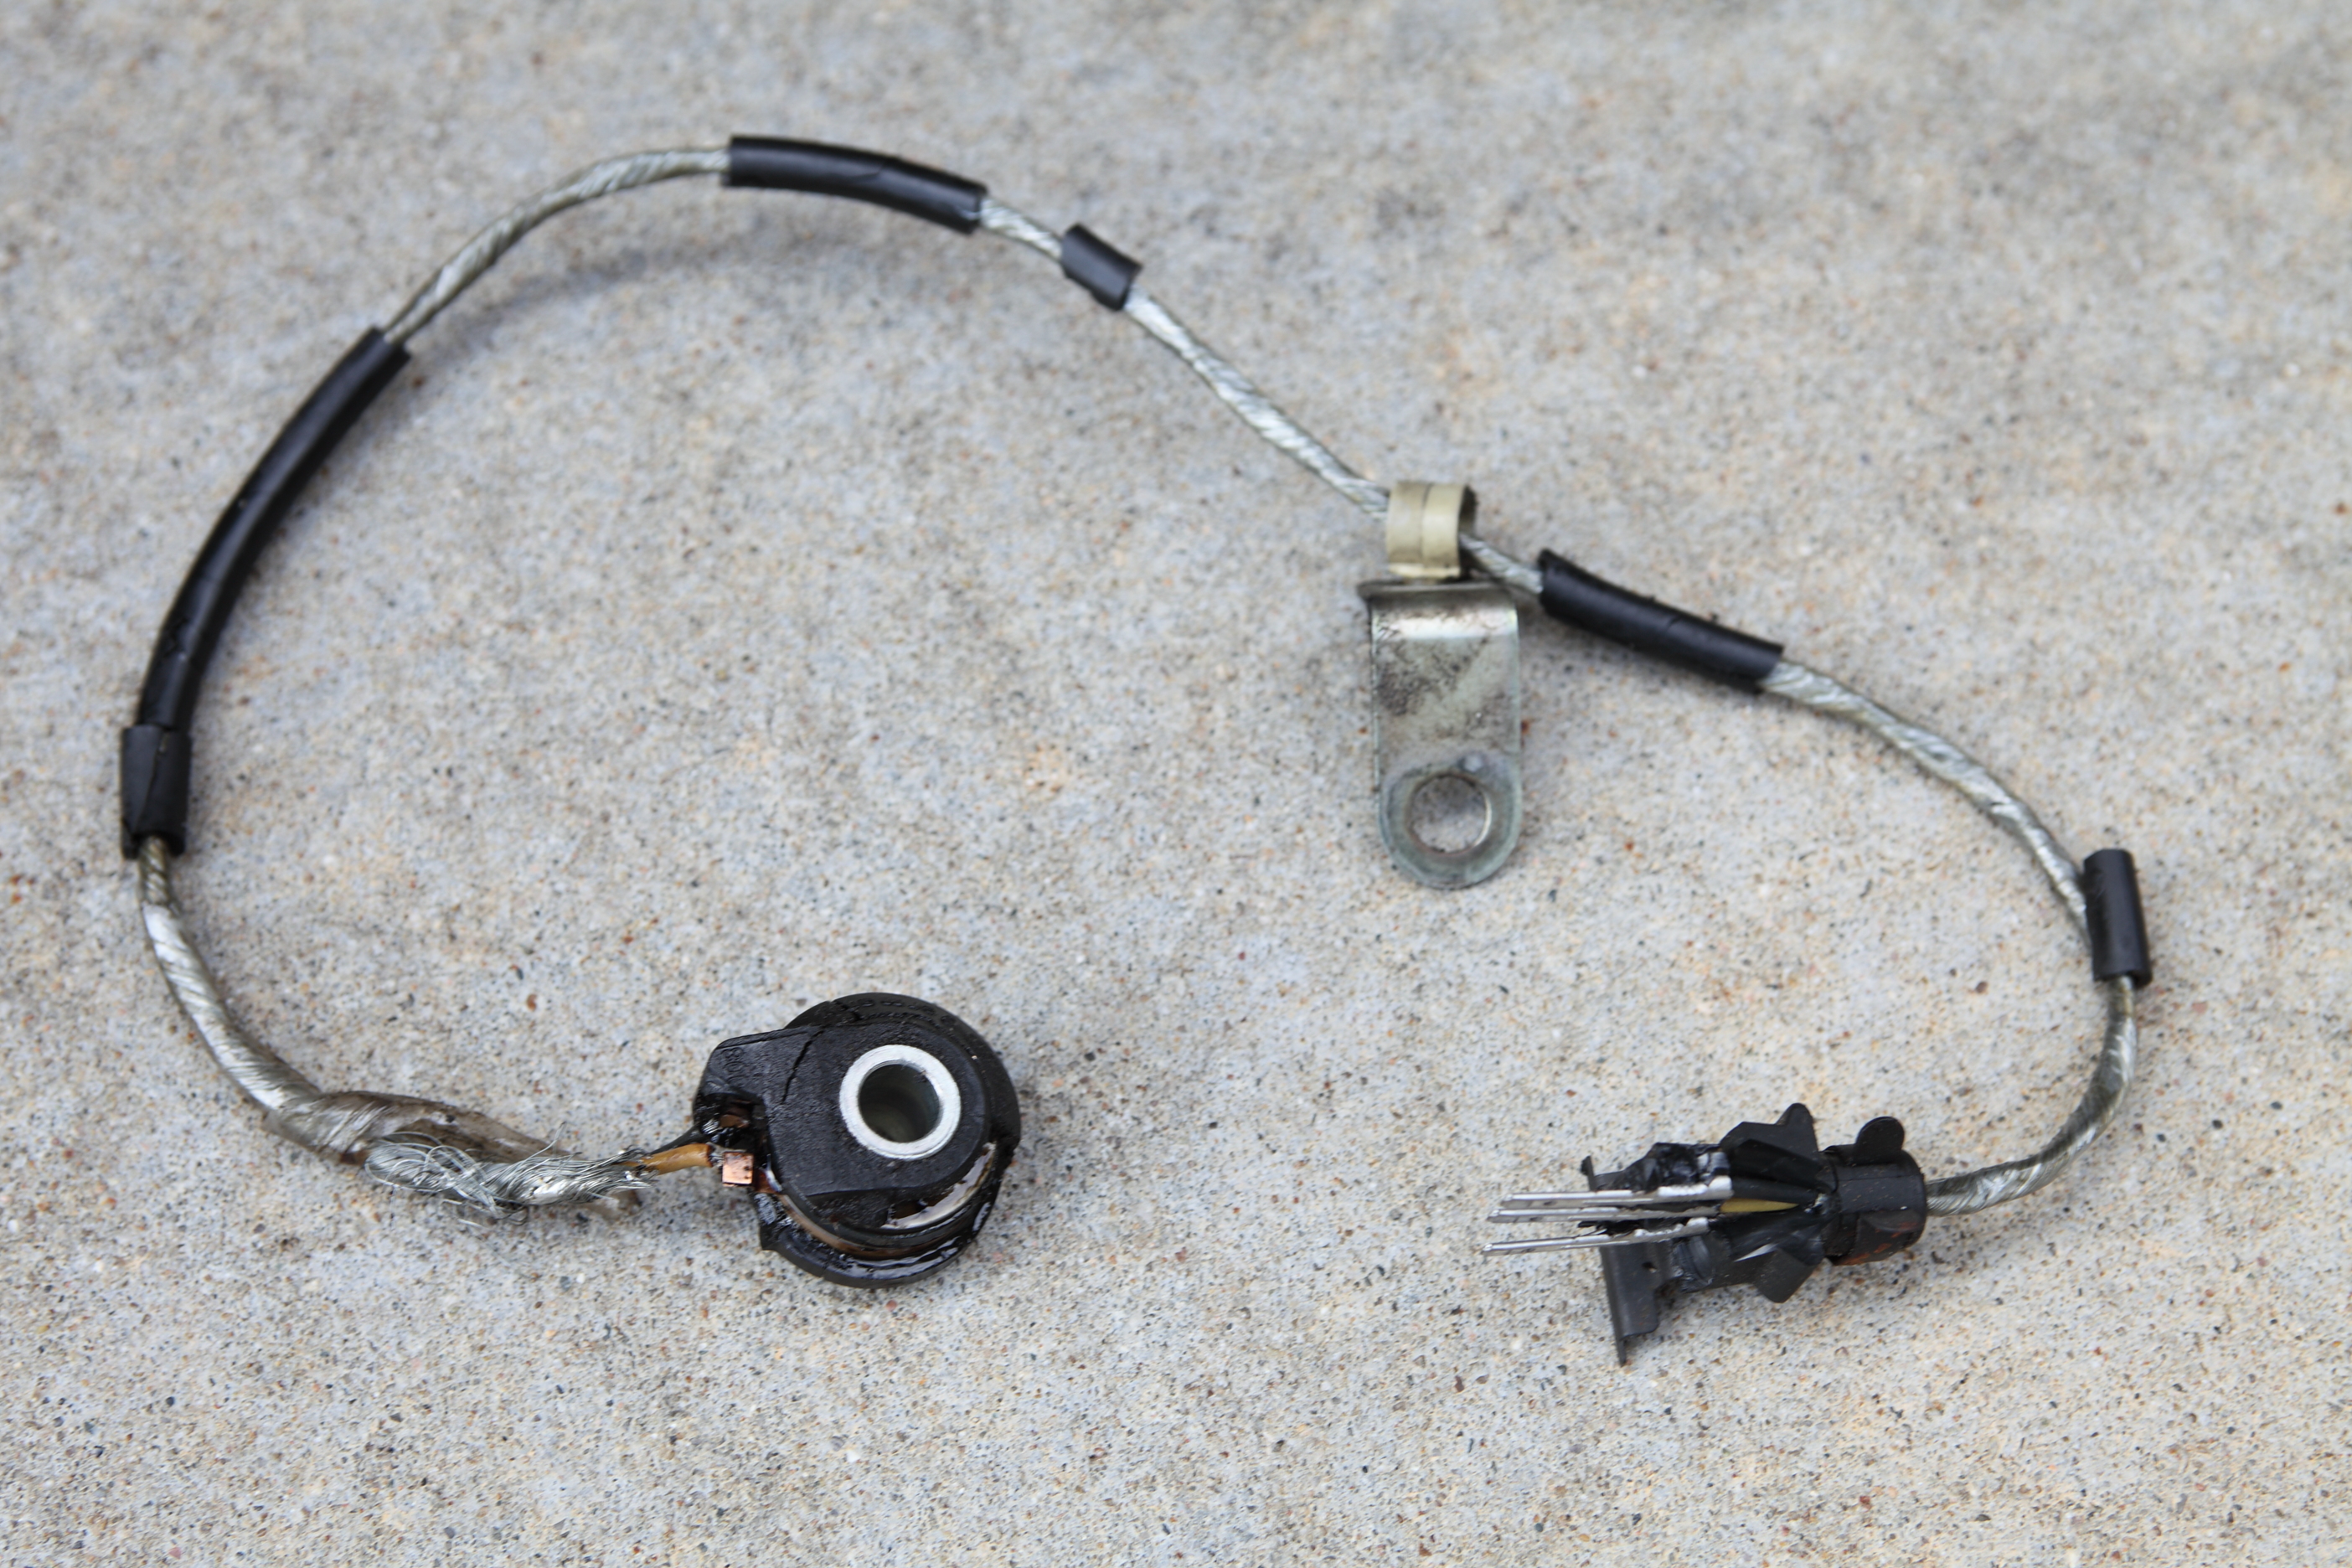
CPS, replaced.
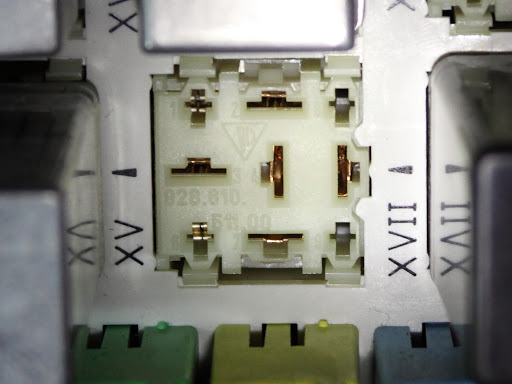
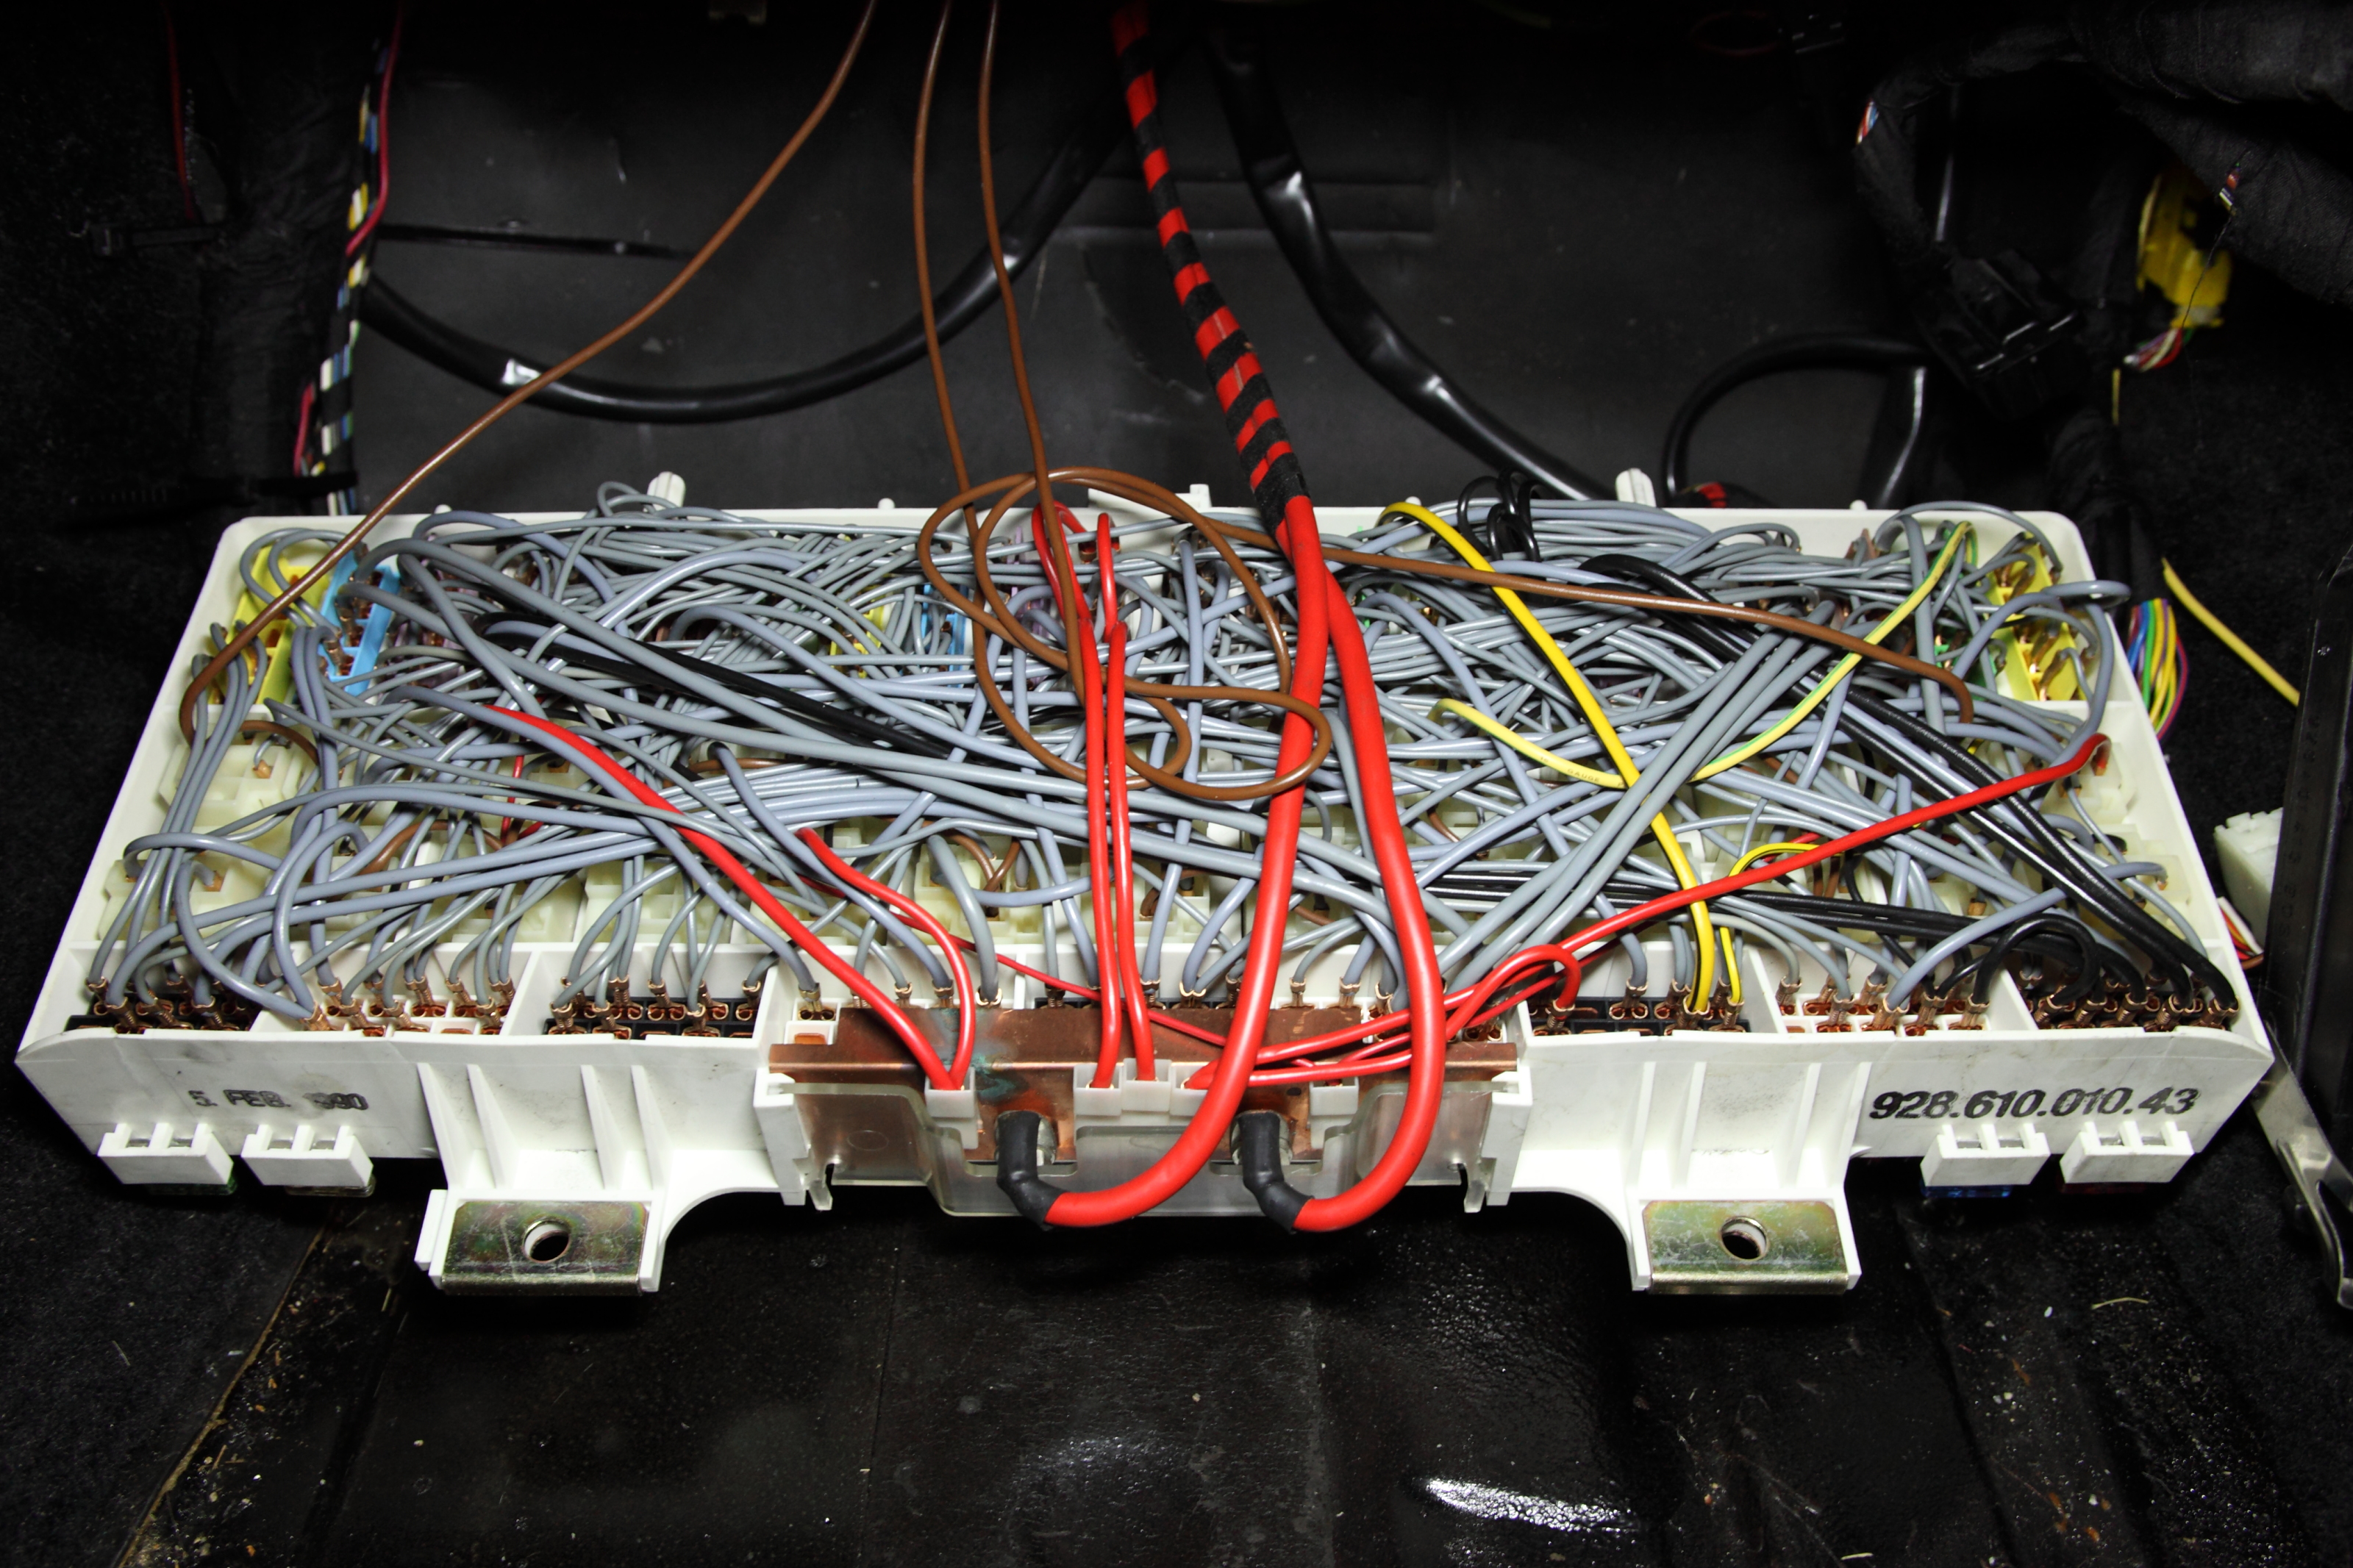
Knock sensors, replaced. Those were especially satisfying, as there was no doubt that the old ones were shot:

So... while dreading what it's going to take to get the cam caps off (requiring an XZN-8 "triple square" socket that I don't yet have) and the tight clearances, I figured I'd continue doing the easy stuff.
CPS, replaced.
Knock sensors, replaced. Those were especially satisfying, as there was no doubt that the old ones were shot:
Last edited by Ed Scherer; 05-10-2011 at 12:01 AM.
09-25-2010, 11:47 PM
#78
Addict
Rennlist Member
Rennlist Member
Thread Starter
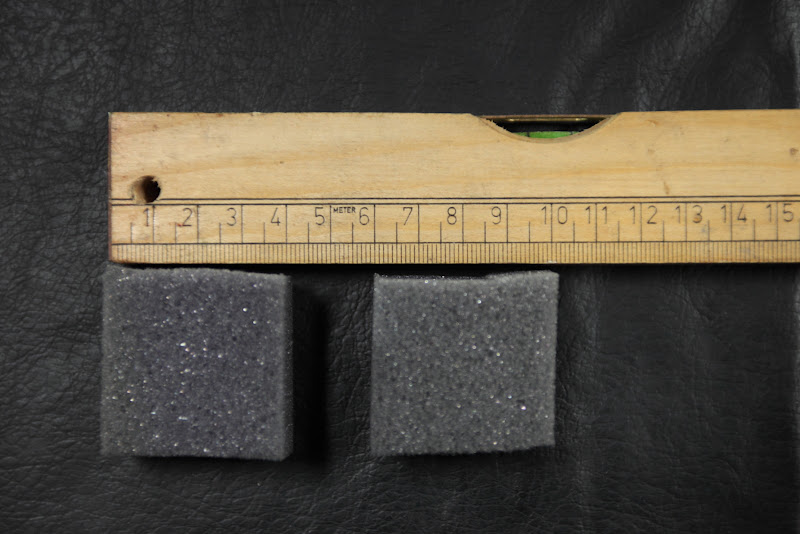
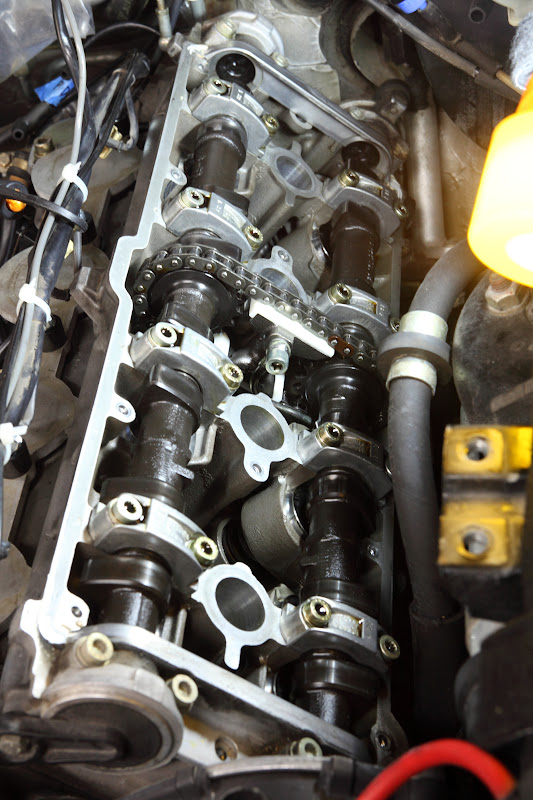
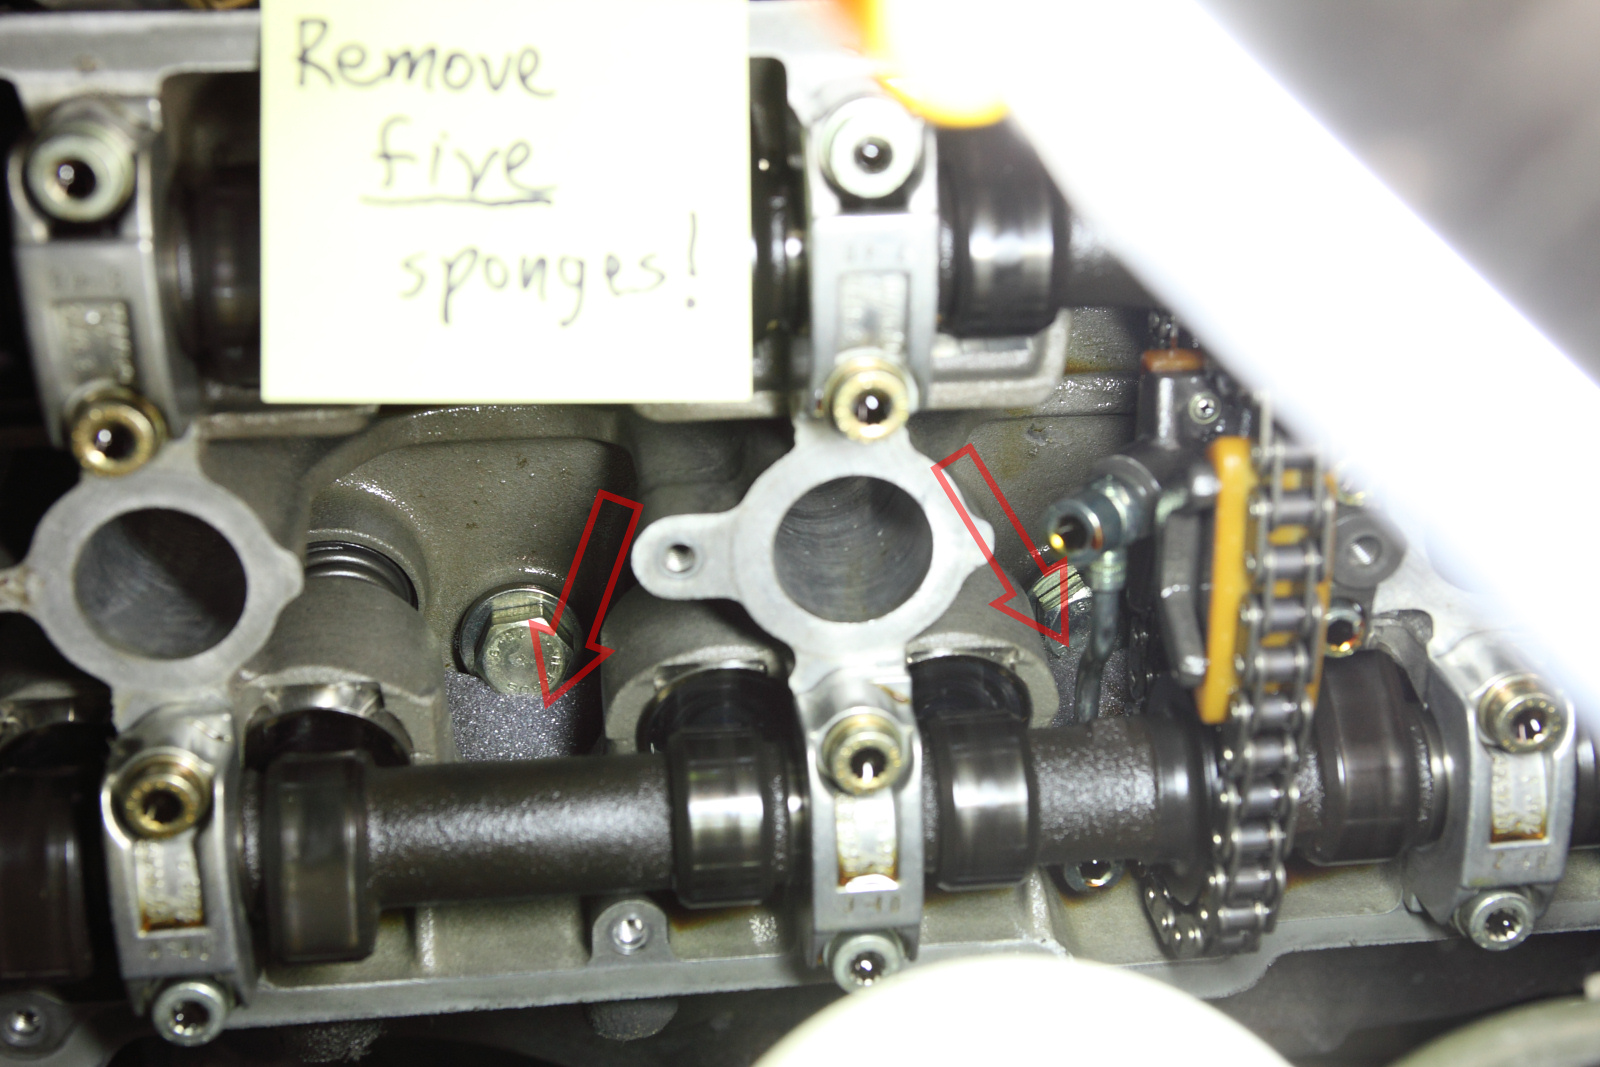
Decided to finally tackle the cam chain tensioner pads. Was worried about this (dropping stuff down an oil passageway), but after fitting some foam rubber blocks into the oil passageways, I could proceed with confidence.
IMHO, foam rubber is way better than paper towels for this; they fit really nicely and don't have all the crevices that paper towels have.
4cm by 4 cm by 2 or 3 cm chunks of foam rubber do the trick:

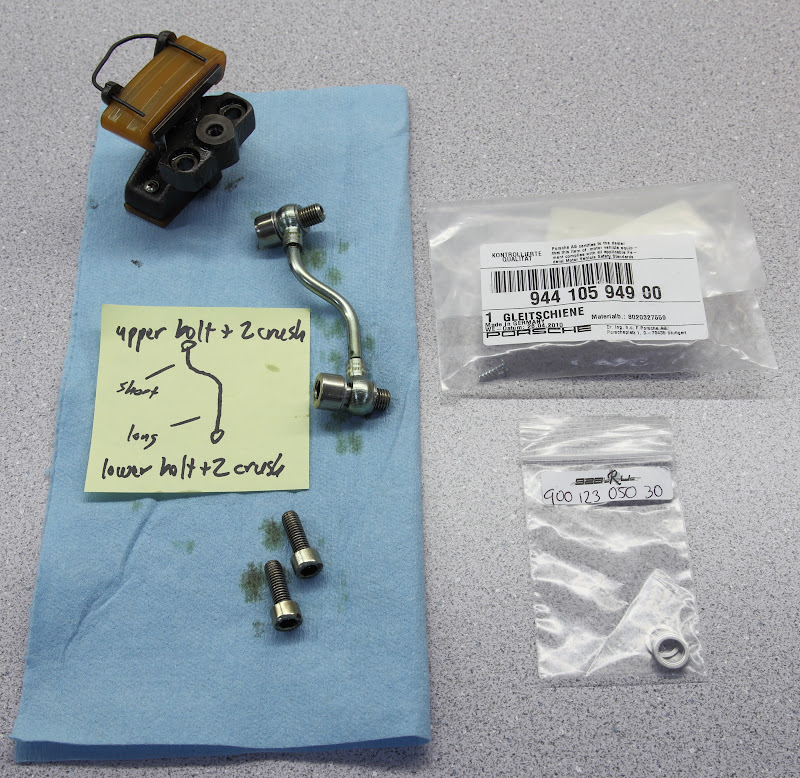
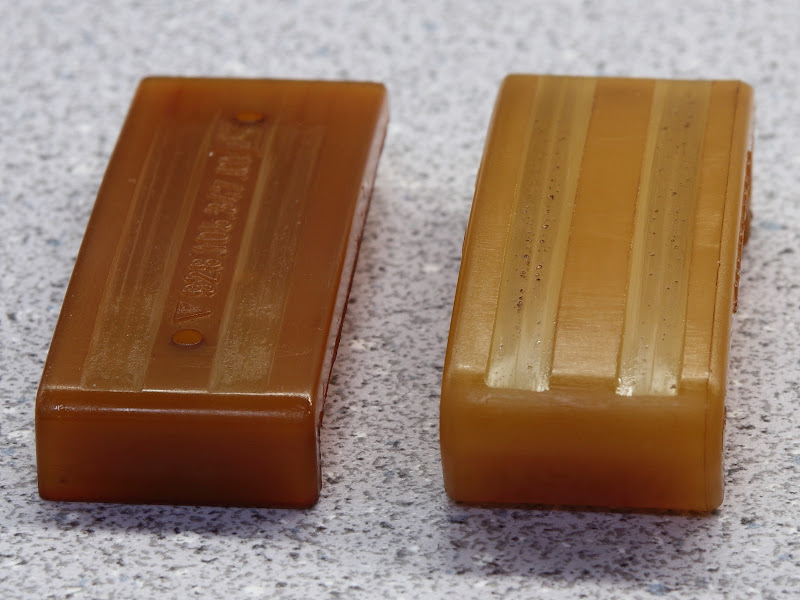
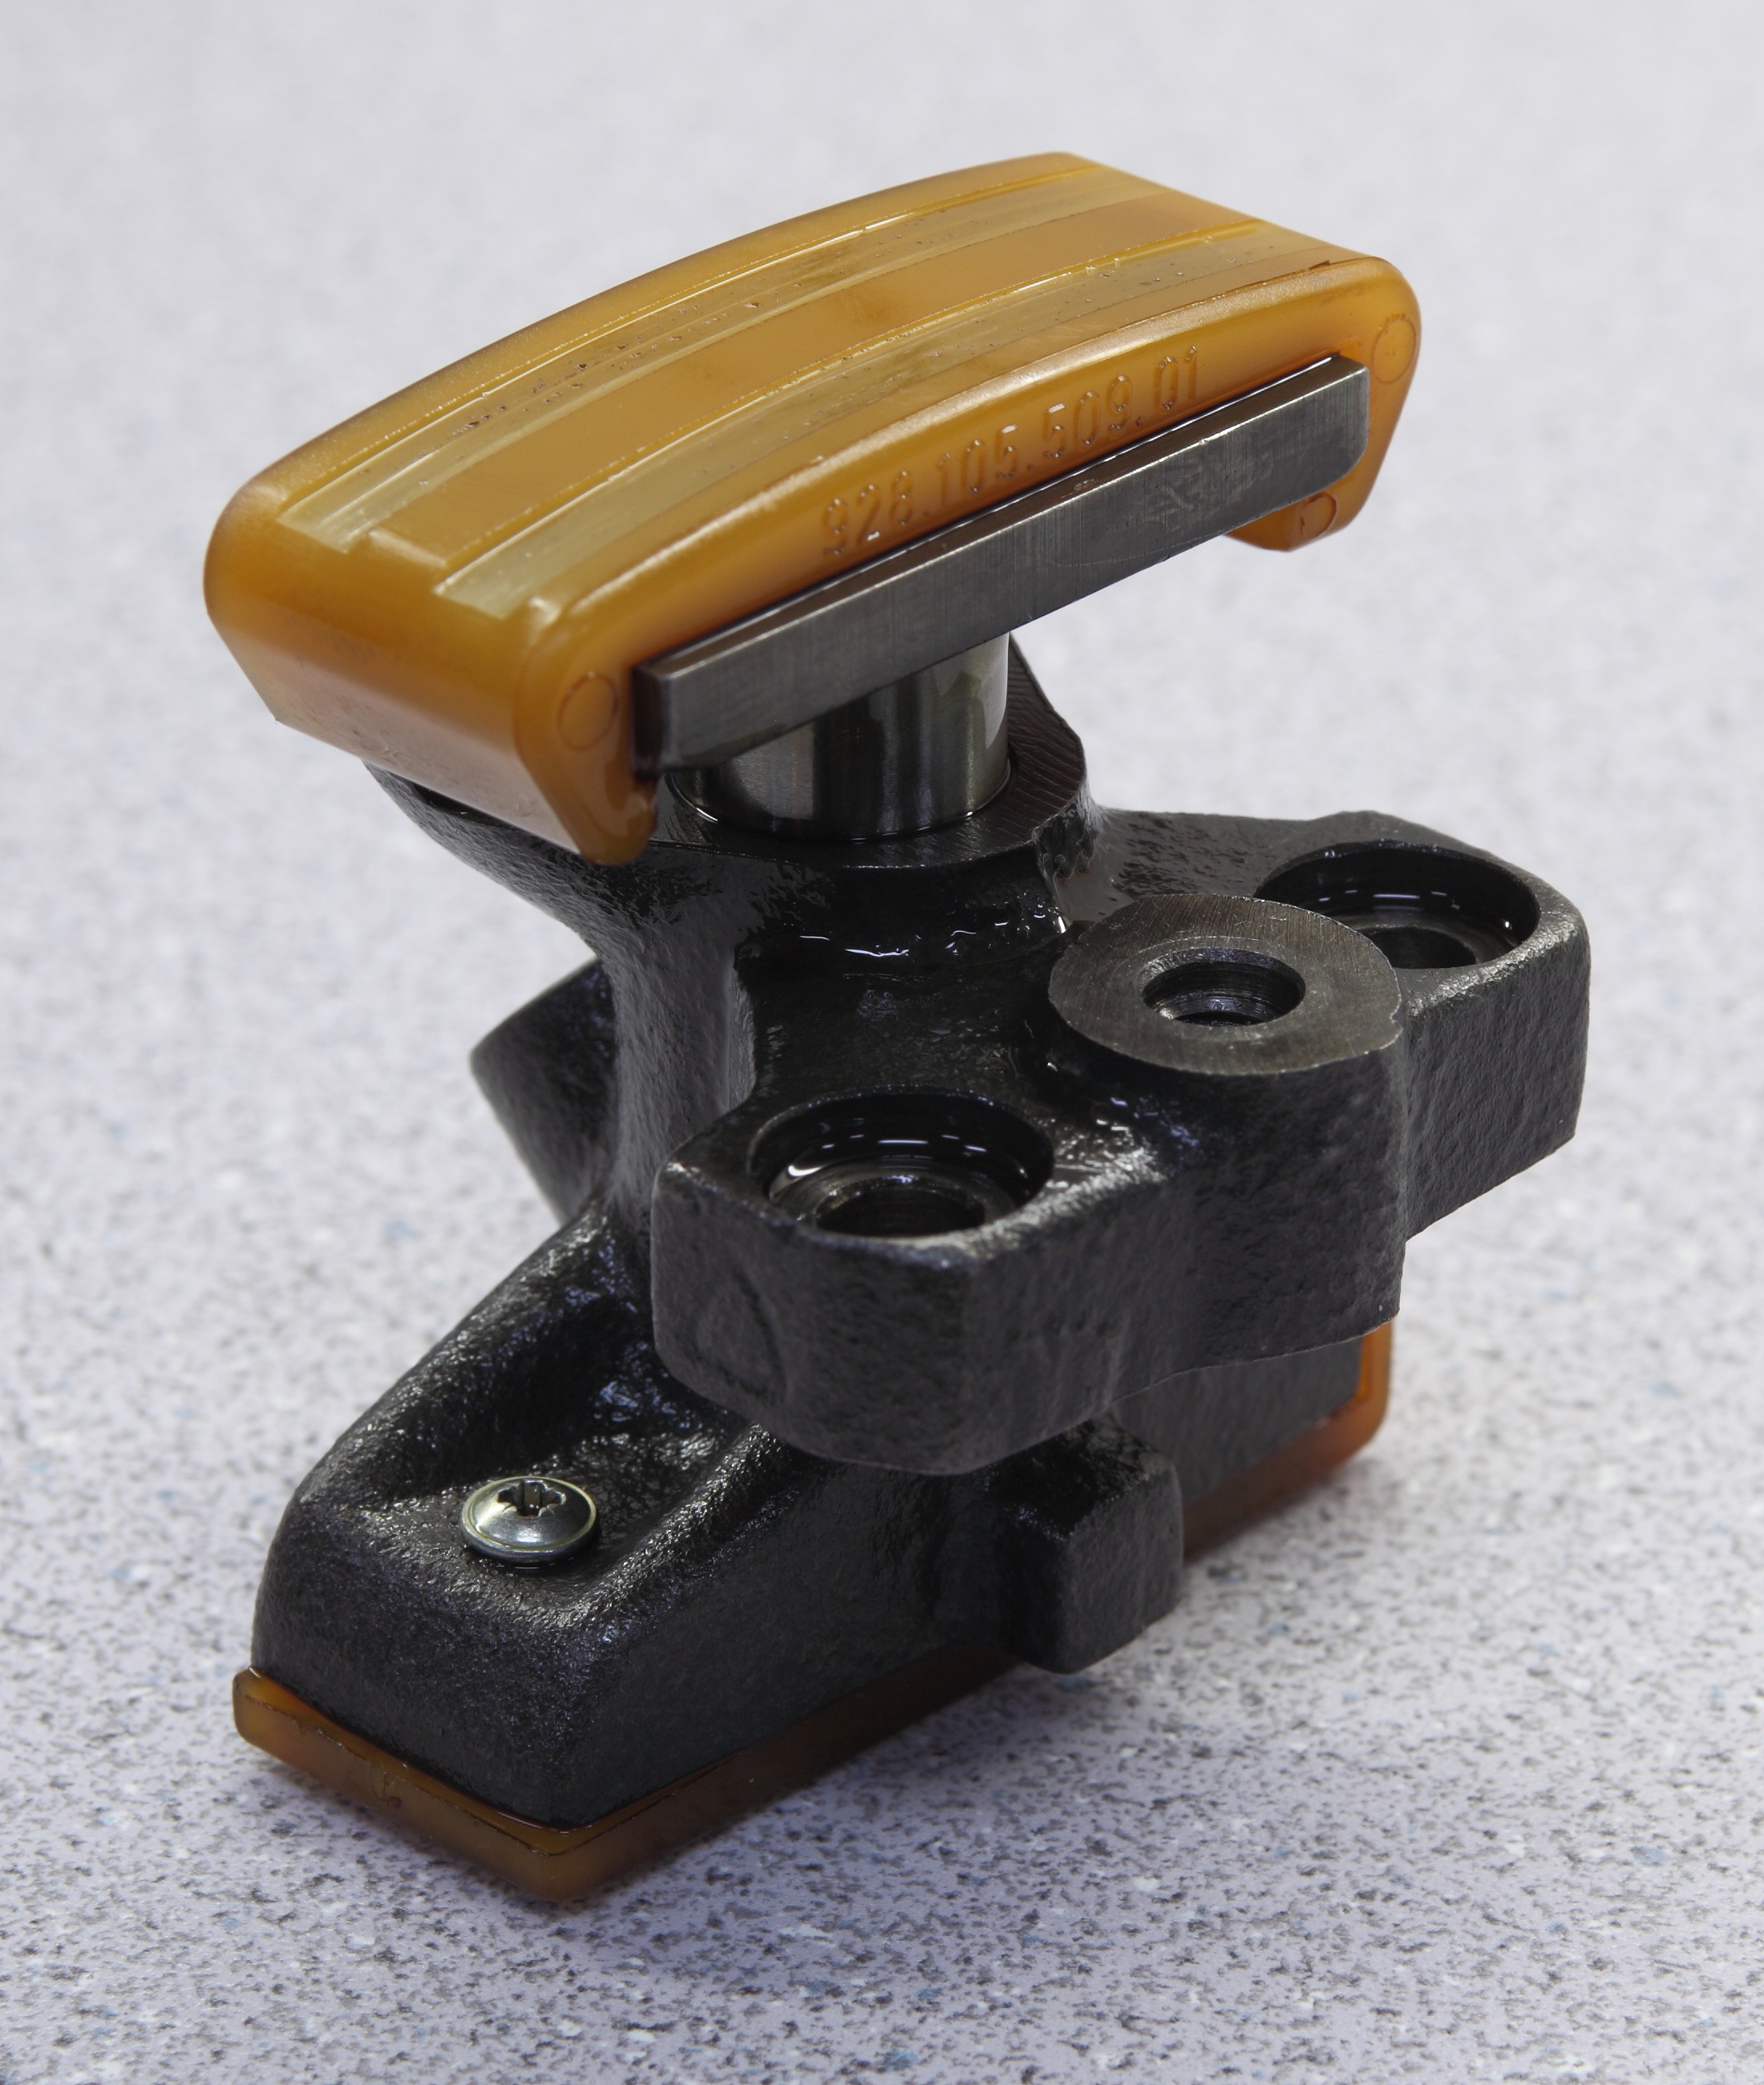
Getting the tensioner out wasn't a big deal, once I didn't have to worry about dropping stuff anymore. Here's the right-side tensioner along with the $100+ (!) replacement pads. Must be made of unobtainium.
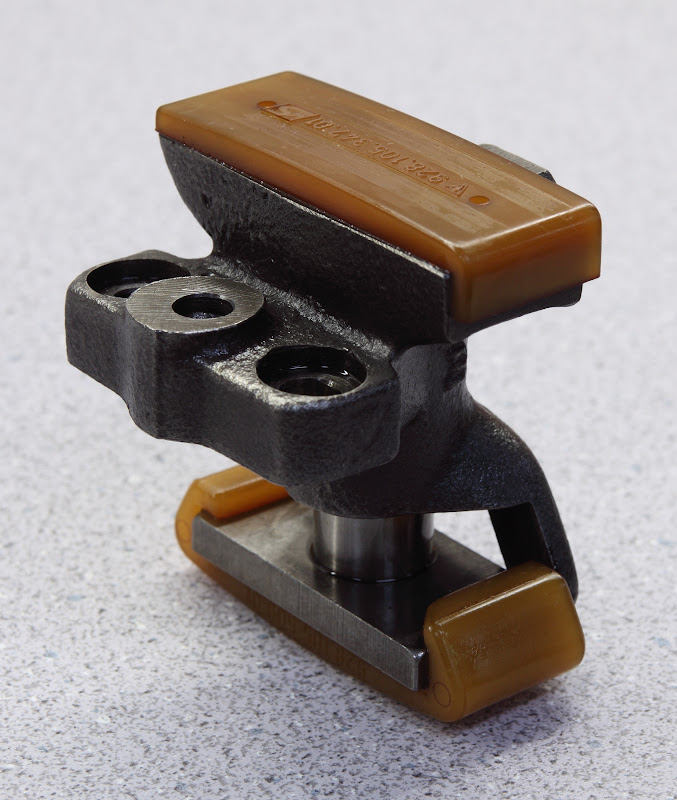
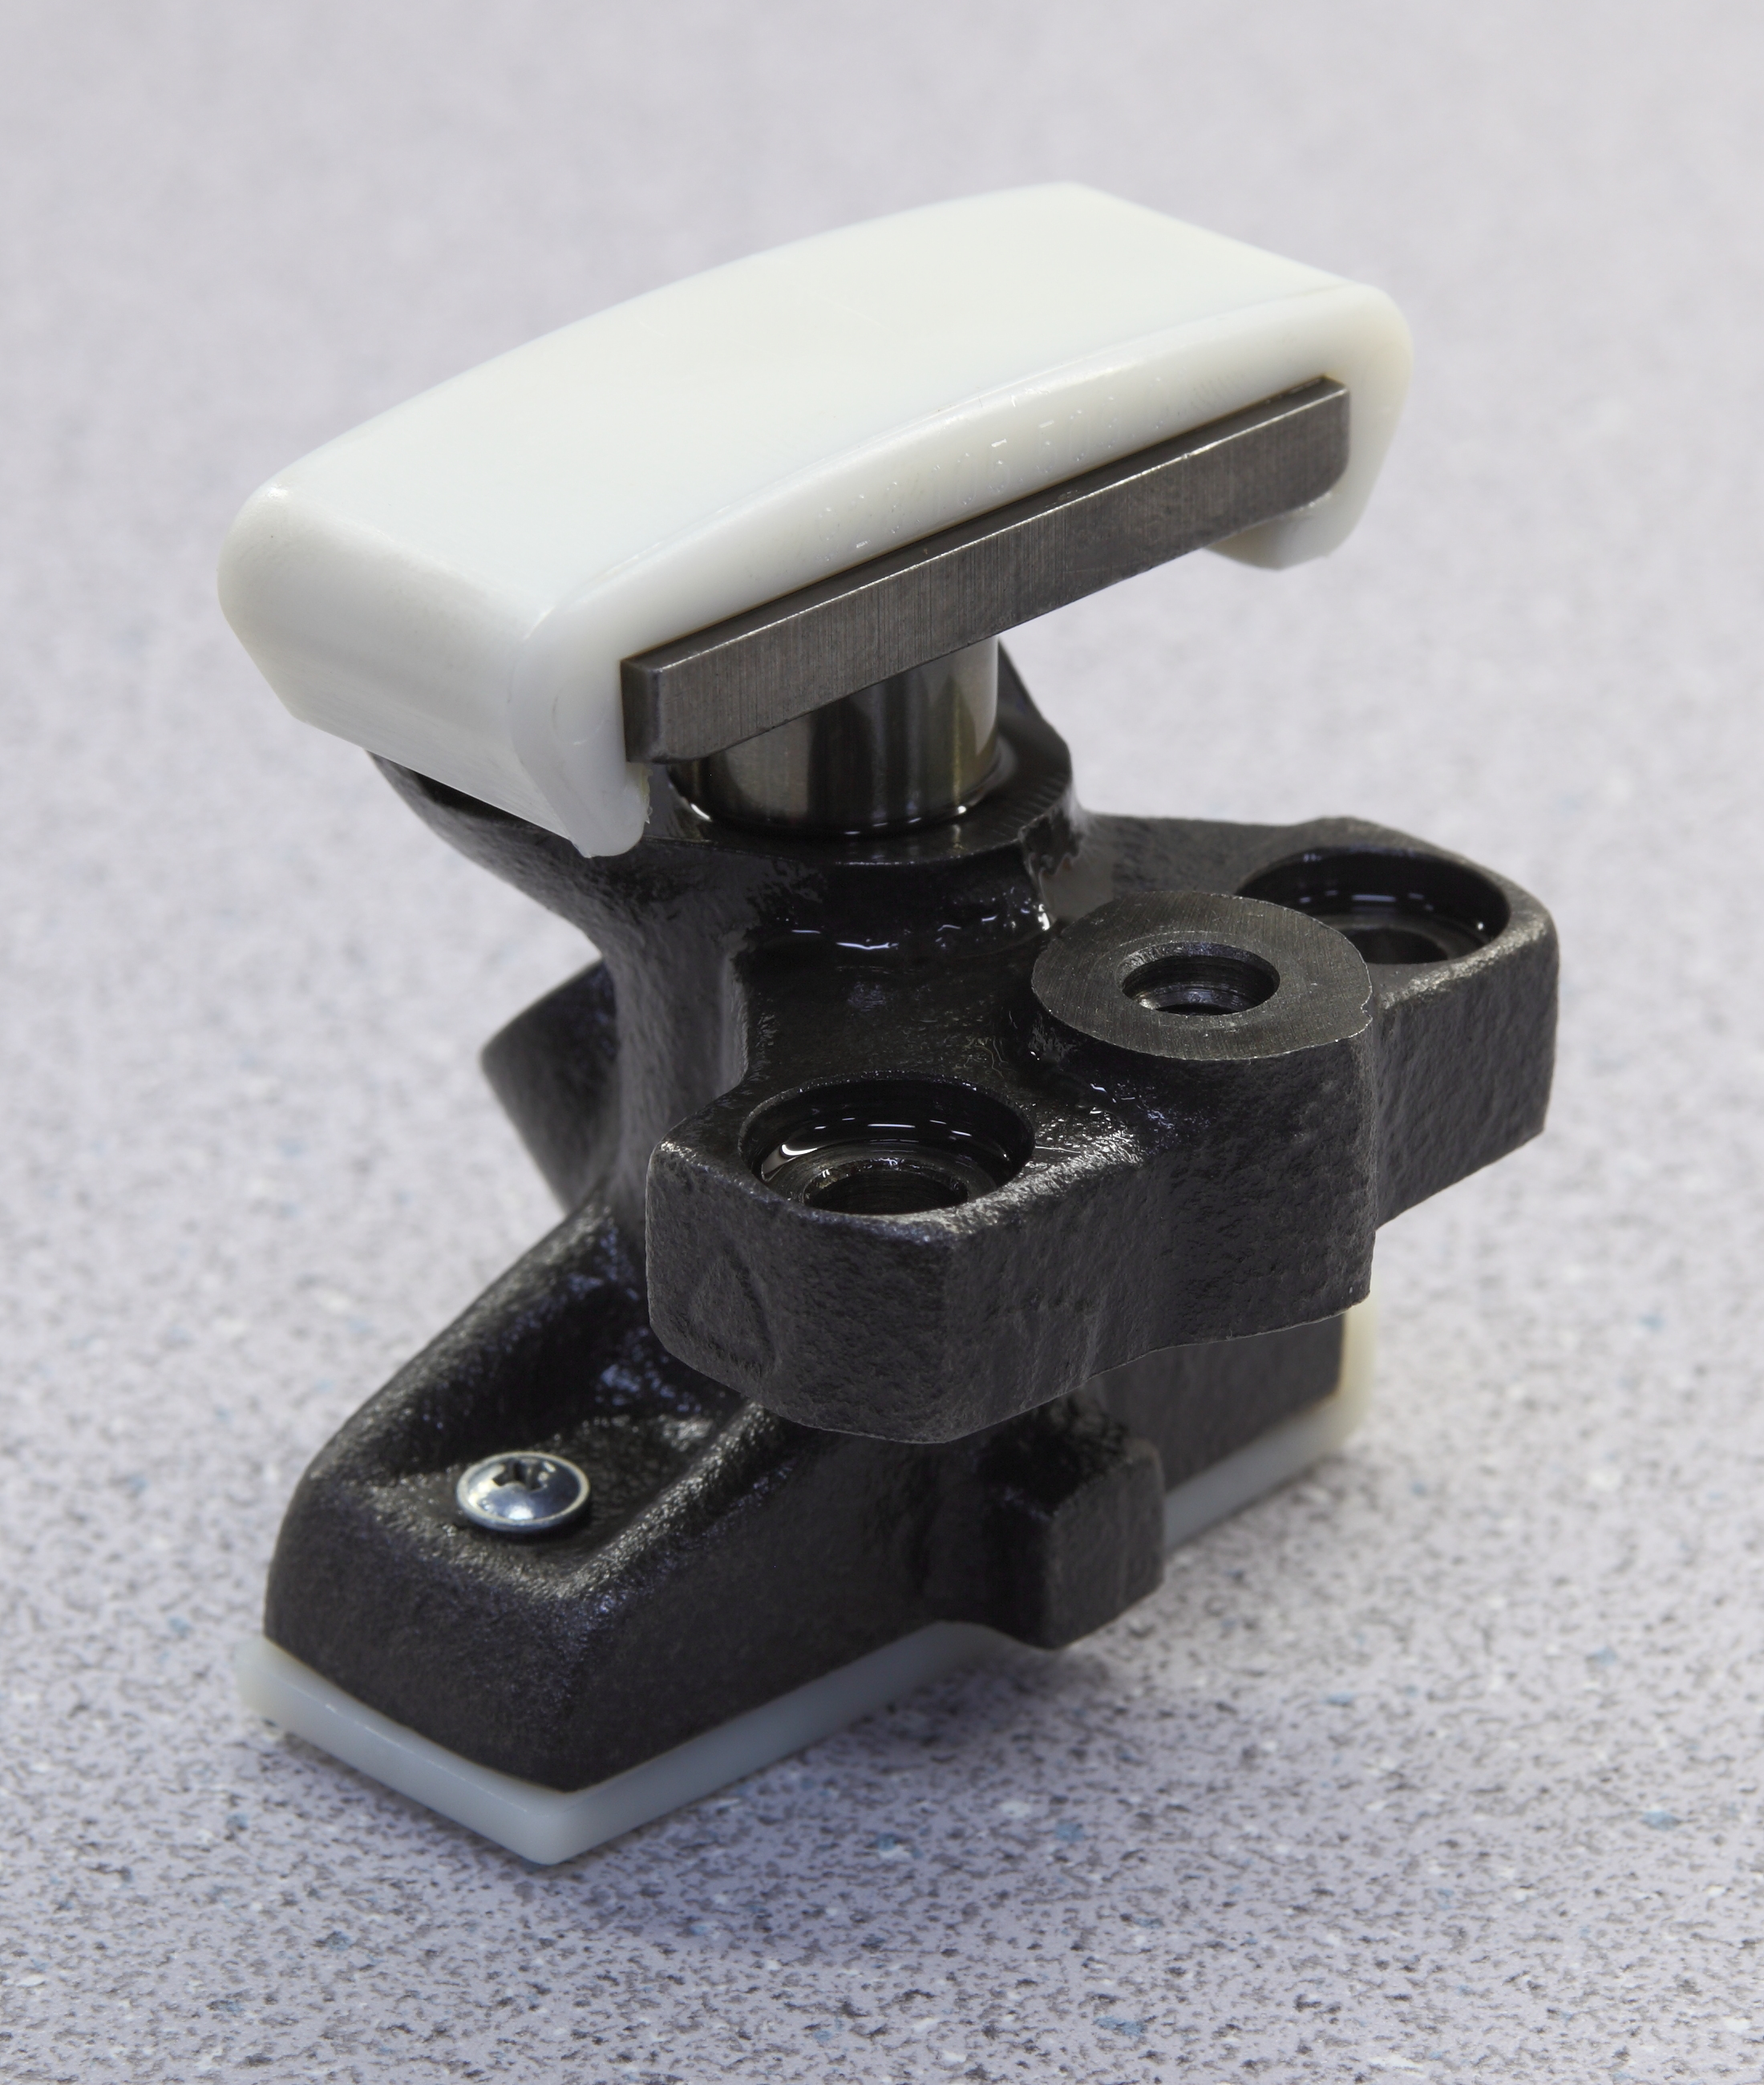
Right-side tensioner with old pads (not as worn as I'd expect for a 90,000 mile car):

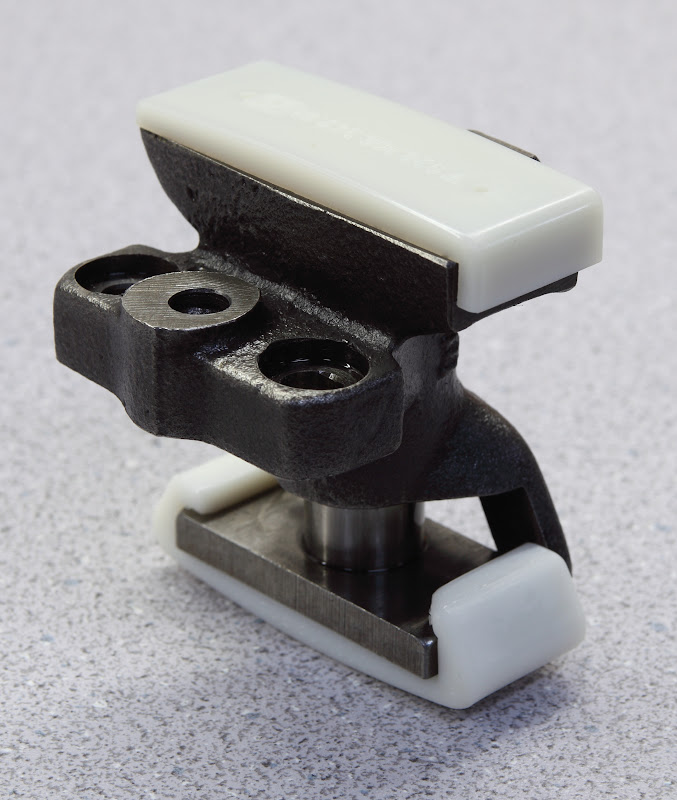
Right-side tensioner with new pads:

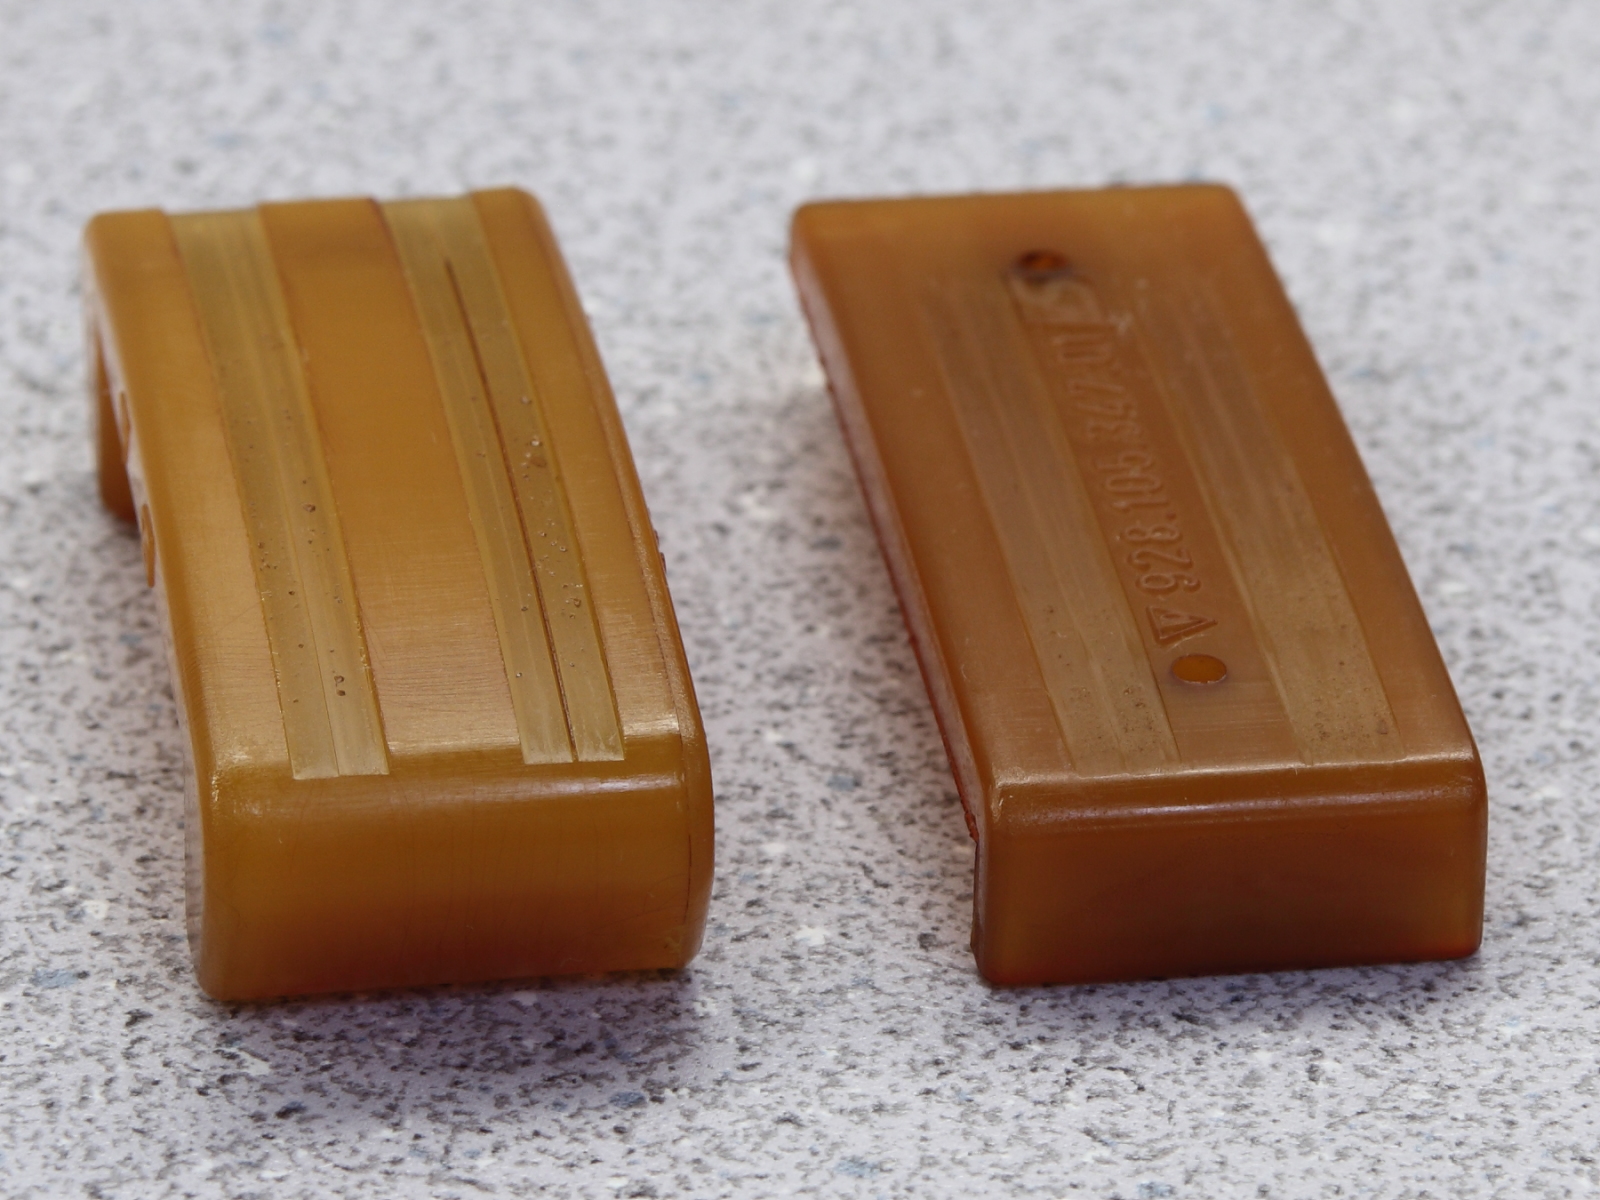
Right-side tensioner bottom and top pads:
Right-side tensioner back in and done:

Left-side tensioner with old pads; about as much wear on the tensioning and non-tensioning sides as on the right-side tensioner:
Left-side tensioner with new pads:
Left-side tensioner bottom and top pads:

Left-side tensioner back in and done:
I guess I'm over my camophobia.
IMHO, foam rubber is way better than paper towels for this; they fit really nicely and don't have all the crevices that paper towels have.
4cm by 4 cm by 2 or 3 cm chunks of foam rubber do the trick:

Getting the tensioner out wasn't a big deal, once I didn't have to worry about dropping stuff anymore. Here's the right-side tensioner along with the $100+ (!) replacement pads. Must be made of unobtainium.

Right-side tensioner with old pads (not as worn as I'd expect for a 90,000 mile car):
Right-side tensioner with new pads:
Right-side tensioner bottom and top pads:

Right-side tensioner back in and done:

Left-side tensioner with old pads; about as much wear on the tensioning and non-tensioning sides as on the right-side tensioner:

Left-side tensioner with new pads:

Left-side tensioner bottom and top pads:
Left-side tensioner back in and done:

I guess I'm over my camophobia.
Last edited by Ed Scherer; 05-10-2011 at 12:02 AM.
09-29-2010, 12:56 AM
#79
Addict
Rennlist Member
Rennlist Member
Thread Starter
Didn't have much time this evening for car stuff, so I just had some fun with cosmetics. Cleaned up half my head cover bolts before the mosquitos got the best of me (working under lights outside). Will probably apply a black oxide finish to complete them. These bolts were just too damn ugly to put back into the nice new powder coated covers without some serious clean-up.

Last edited by Ed Scherer; 05-10-2011 at 12:02 AM.
09-29-2010, 02:56 AM
#80
Official Bay Area Patriot
Fuse 24 Assassin
Rennlist Member
Fuse 24 Assassin
Rennlist Member
I haven't changed my pads yet and I have almost 160,000 on the clock. They are coming up on my next timing belt and water pump job since I'll be tackling leaky valve cover & cam plug gaskets as well.
Your pads actually look like they could go much longer, but hey it's a "while you're at it thing"
Doing great!
Your pads actually look like they could go much longer, but hey it's a "while you're at it thing"
Doing great!
09-29-2010, 08:19 AM
#81
Team Owner
make sure to get the sealing washers for those cleaned up bolts i put the washers under all of the bolt heads instead of just along the bottom edge bolts,
Roger has em IIRC you need 26 of them
Roger has em IIRC you need 26 of them
09-29-2010, 11:09 AM
#83
Rennlist Member
Join Date: Jul 2002
Location: Deep in the Heart of Texas!
Posts: 3,266
Likes: 0
Received 5 Likes
on
4 Posts
Dumb question ... what's the importance of the sealing washers on the cam cover bolts? Mine were in reasonably good condition, appeared good enough to seal and haven't seen any leaks since I did the covers.
09-29-2010, 12:52 PM
#84
Addict
Rennlist Member
Rennlist Member
Thread Starter
See Bill Ball's post showing a TSB on this for '87 MY cars. The rest of that same thread also discusses the issue. Seems like many people recommend adding the extra washers for all the bolts, not just the six specified in that TSB. And for MYs later than '87, too.
09-29-2010, 01:16 PM
#85
Under the Lift
Lifetime Rennlist
Member
Lifetime Rennlist
Member
Powdercaoting looks great, Ed. Just to reinforce the cleaning issue, I pressure-washed the daylights out of a couple of manifolds I had done from different shops, three times, and in both cases I continued to find fine gray debris on my fingers when I ran them inside the runners. You need to scrub them inside with bottle brushes and various cleaners several times until you are sure they are spotless.
09-29-2010, 01:27 PM
#86
Addict
Rennlist Member
Rennlist Member
Thread Starter
Powdercaoting looks great, Ed. Just to reinforce the cleaning issue, I pressure-washed the daylights out of a couple of manifolds I had done from different shops, three times, and in both cases I continued to find fine gray debris on my fingers when I ran them inside the runners. You need to scrub them inside with bottle brushes and various cleaners several times until you are sure they are spotless.
BTW, I tub-rinsed them following Andrew's suggestion:
Maybe I will take the pressure washer to the intake and end plates anyway, just in case.
Last edited by Ed Scherer; 09-29-2010 at 01:43 PM.
10-04-2010, 12:49 AM
#87
Addict
Rennlist Member
Rennlist Member
Thread Starter
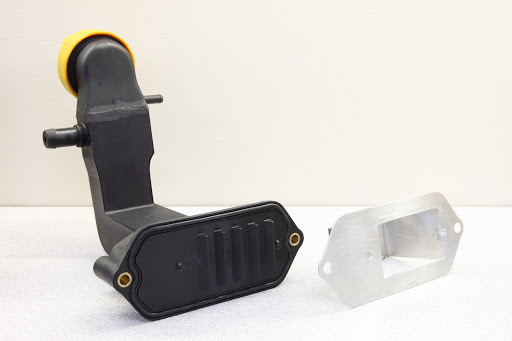
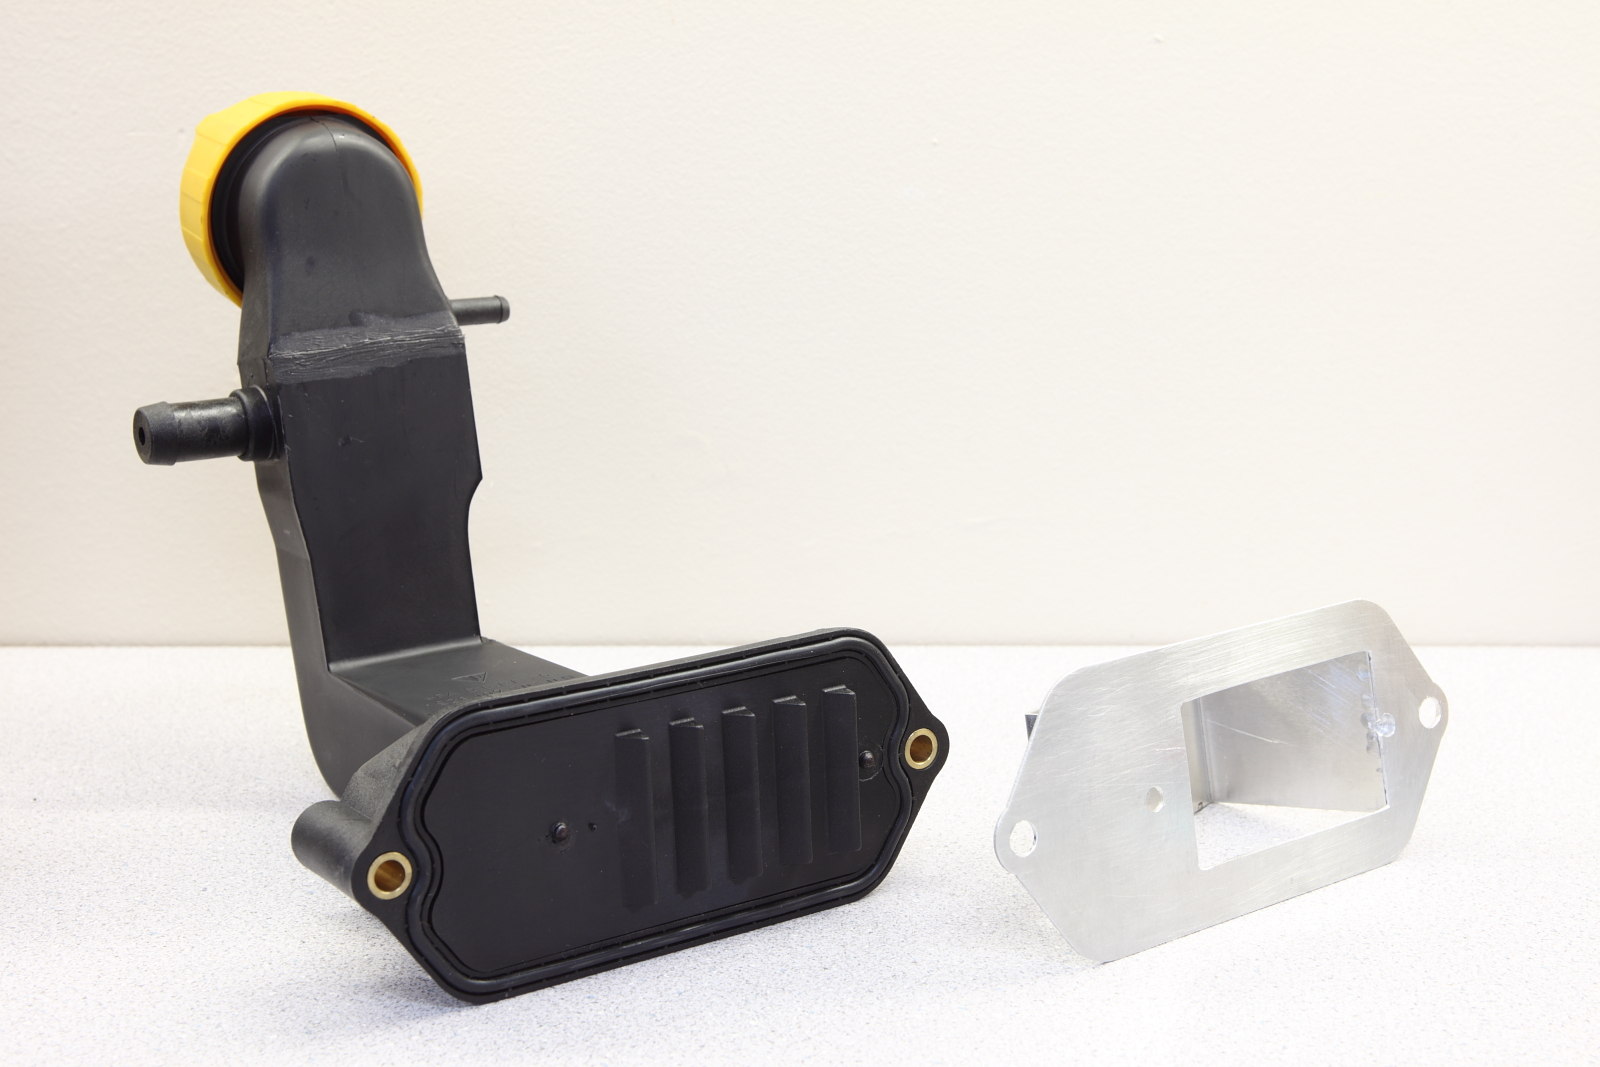
Completed the "'94/'95 GTS-style dynamic kickdown upgrade". I'll just include a few photos here; there are more details in a separate post in that thread.
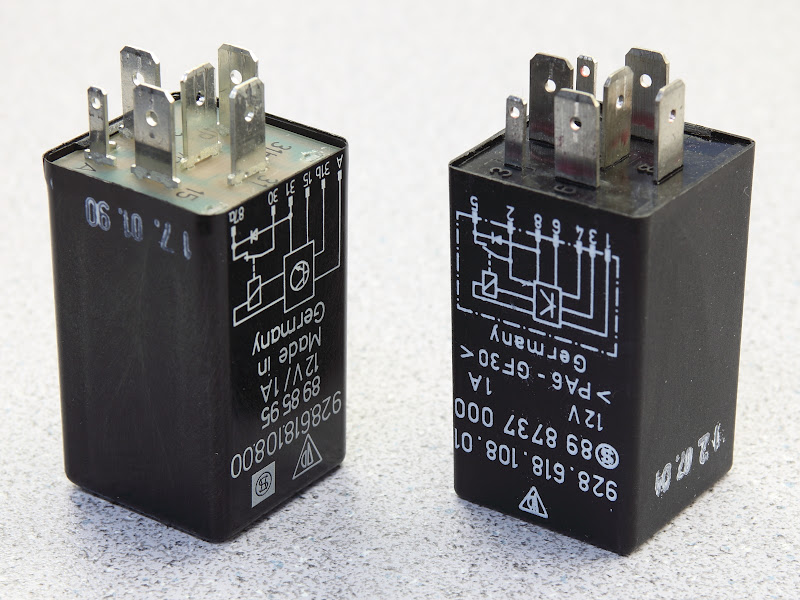


From earlier in this thread:
OK, so I installed this today, but wanted to pass along a tip: for the parts I got, I had to modify the 928 Int'l "block off plate" because of the two nipples that protrude from the bottom of the new GTS oil filler neck that I got (look to both sides of the louvers and you'll see what I mean). I had to drill a couple of extra holes to provide those nipples somewhere to go, otherwise, there's no way this would seal. I considered just grinding off the nipples, but thought that they might be plastic rivets holding the bottom on.


From earlier in this thread:
Call 928INTL ask them for the block off plate it goes under the fill tube and has a plate that blocks oil being flung up to the bottom of the fill tube, this will reduce the chance of oil leaking from the fill tube and aid in oil drainback into the sump.
I used the HB4 on both sides of this plate and also added a small bead to the O ring to assist in sealing the O ring and fill tube mount to the plate.
I used the HB4 on both sides of this plate and also added a small bead to the O ring to assist in sealing the O ring and fill tube mount to the plate.
For the record, the "928INTL block off plate" that Stan (Mrmerlin) mentioned is 928 107 707 05 at 928 International, pictured below. One is on its way.
Once again, thanks for the timely tip, Stan.

Once again, thanks for the timely tip, Stan.
OK, so I installed this today, but wanted to pass along a tip: for the parts I got, I had to modify the 928 Int'l "block off plate" because of the two nipples that protrude from the bottom of the new GTS oil filler neck that I got (look to both sides of the louvers and you'll see what I mean). I had to drill a couple of extra holes to provide those nipples somewhere to go, otherwise, there's no way this would seal. I considered just grinding off the nipples, but thought that they might be plastic rivets holding the bottom on.
Last edited by Ed Scherer; 05-10-2011 at 12:03 AM.
10-08-2010, 01:03 PM
#88
Addict
Rennlist Member
Rennlist Member
Thread Starter
I've been doing a few final cosmetic things during a couple of the evenings I had free this week. I should have everything back on the car by the end of the day on Saturday; there really isn't much left to do. Thought I'd have it done last weekend, but I've been working pretty darn slowly. I just can't resist cleaning stuff and doing various WYAIT things I notice as I go.
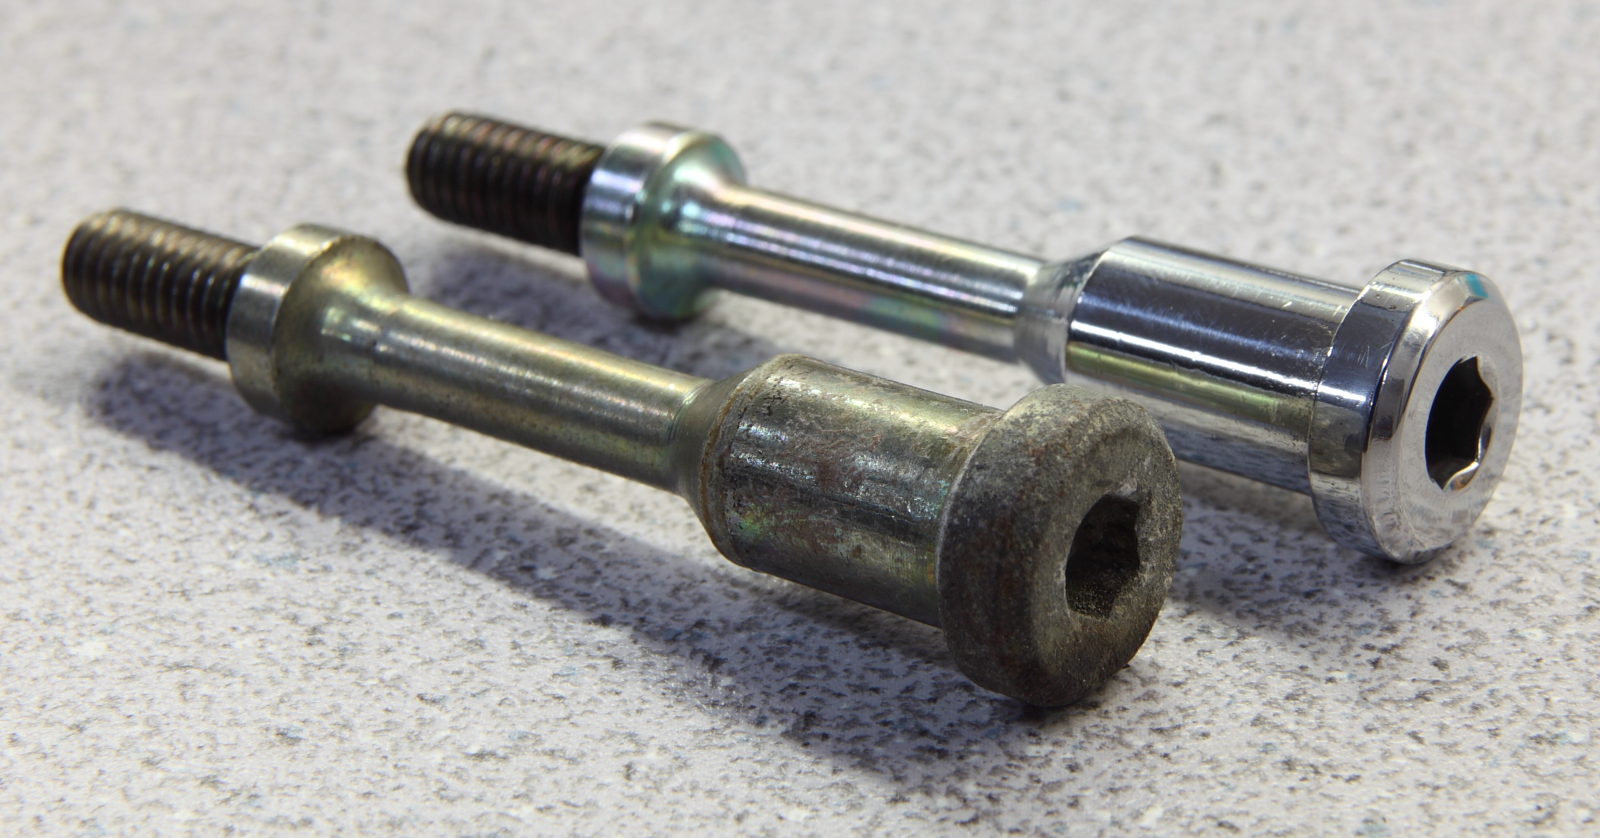
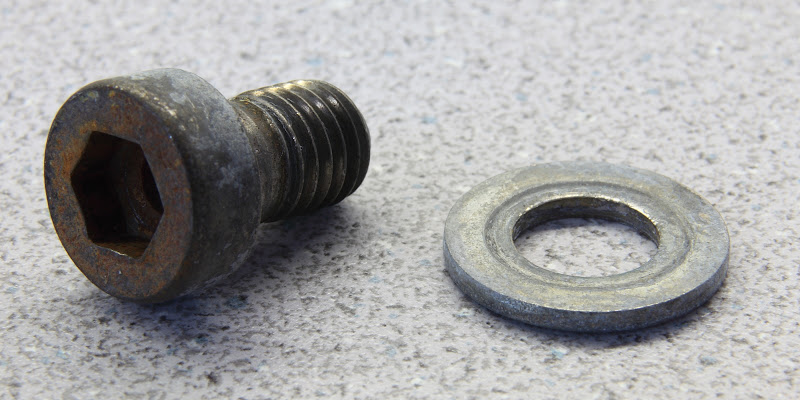
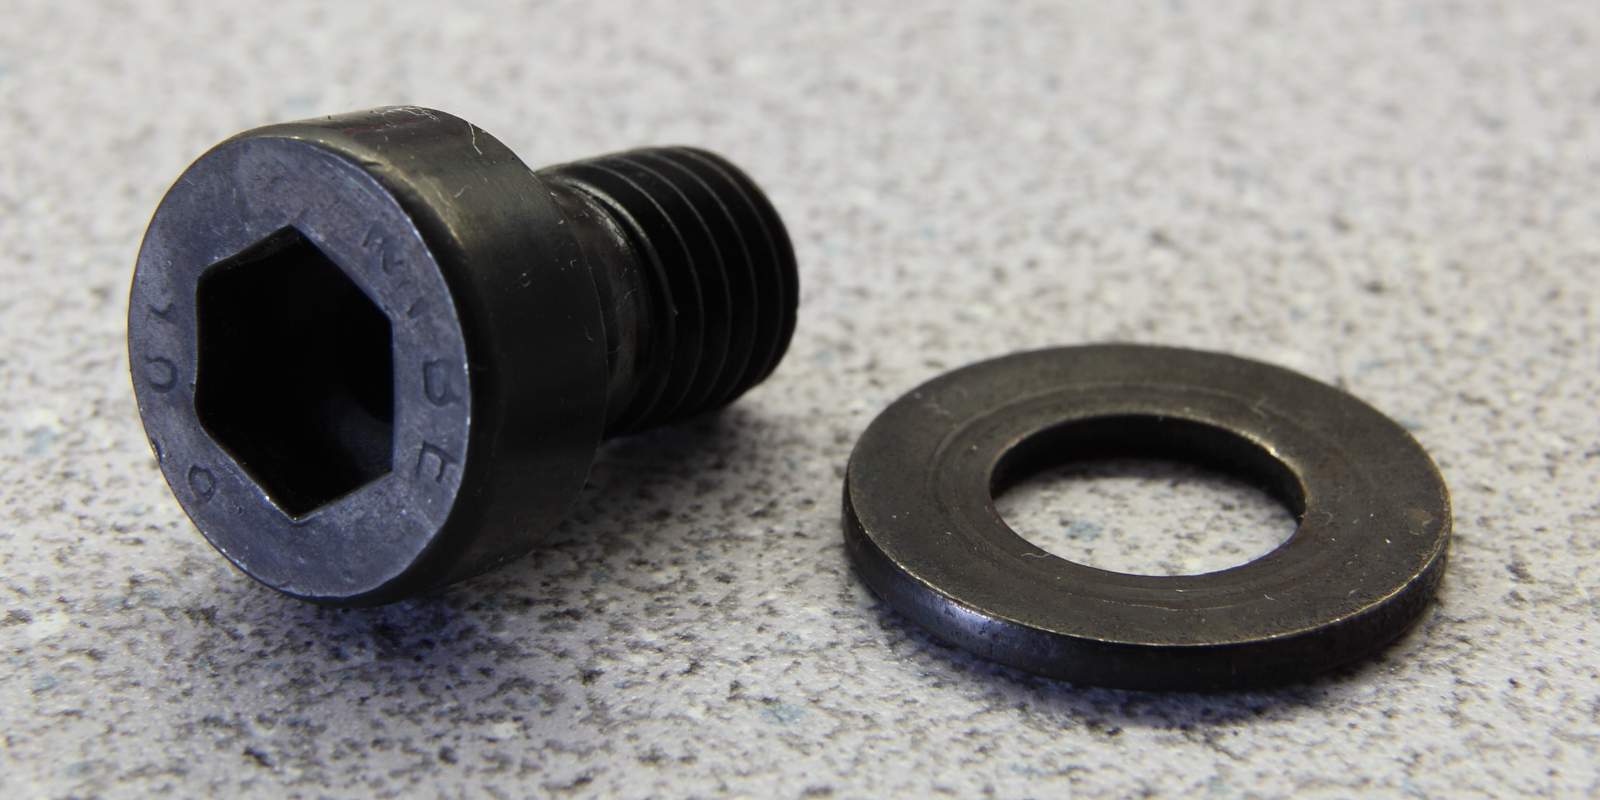
Anyway, my attempt to do a black oxide finish on a lot of the fasteners failed rather miserably (probably because of the original plating, which obviously permeates deeper than I thought). The only black oxide success I had were the cross brace cap head bolts, which were originally black oxide finish anyway, but had gotten rather rusty. The progression on those pieces went like this:
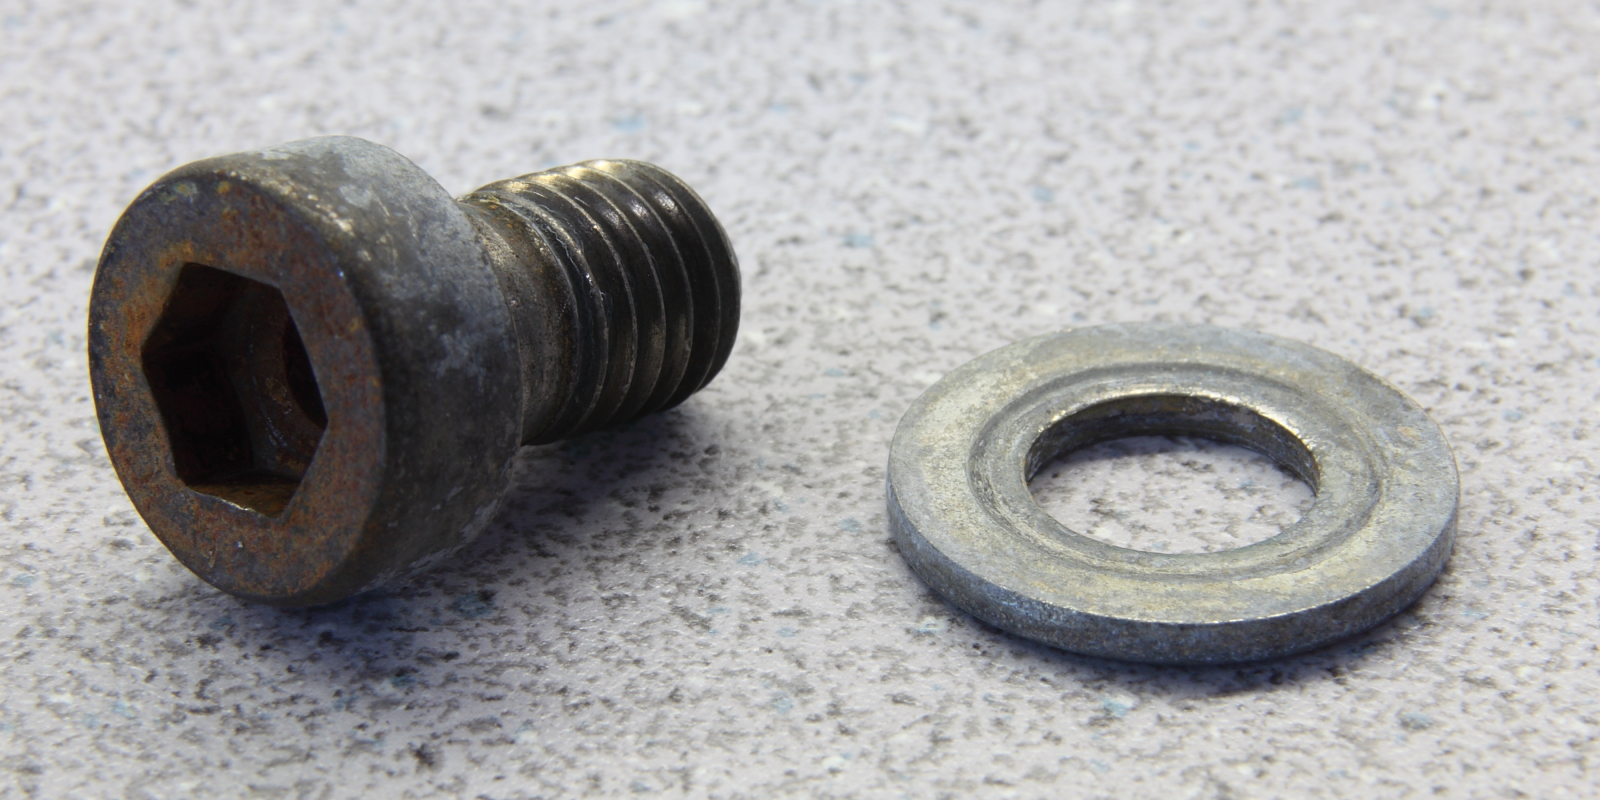
What I started with:
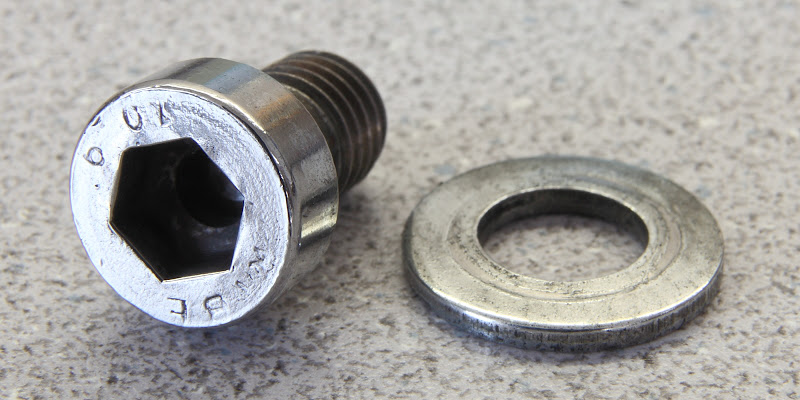
After cleaning and polishing:
After black oxide process:

Anyway, my attempt to do a black oxide finish on a lot of the fasteners failed rather miserably (probably because of the original plating, which obviously permeates deeper than I thought). The only black oxide success I had were the cross brace cap head bolts, which were originally black oxide finish anyway, but had gotten rather rusty. The progression on those pieces went like this:
What I started with:
After cleaning and polishing:

After black oxide process:
Last edited by Ed Scherer; 05-10-2011 at 12:03 AM.
10-08-2010, 01:24 PM
#89
Addict
Rennlist Member
Rennlist Member
Thread Starter
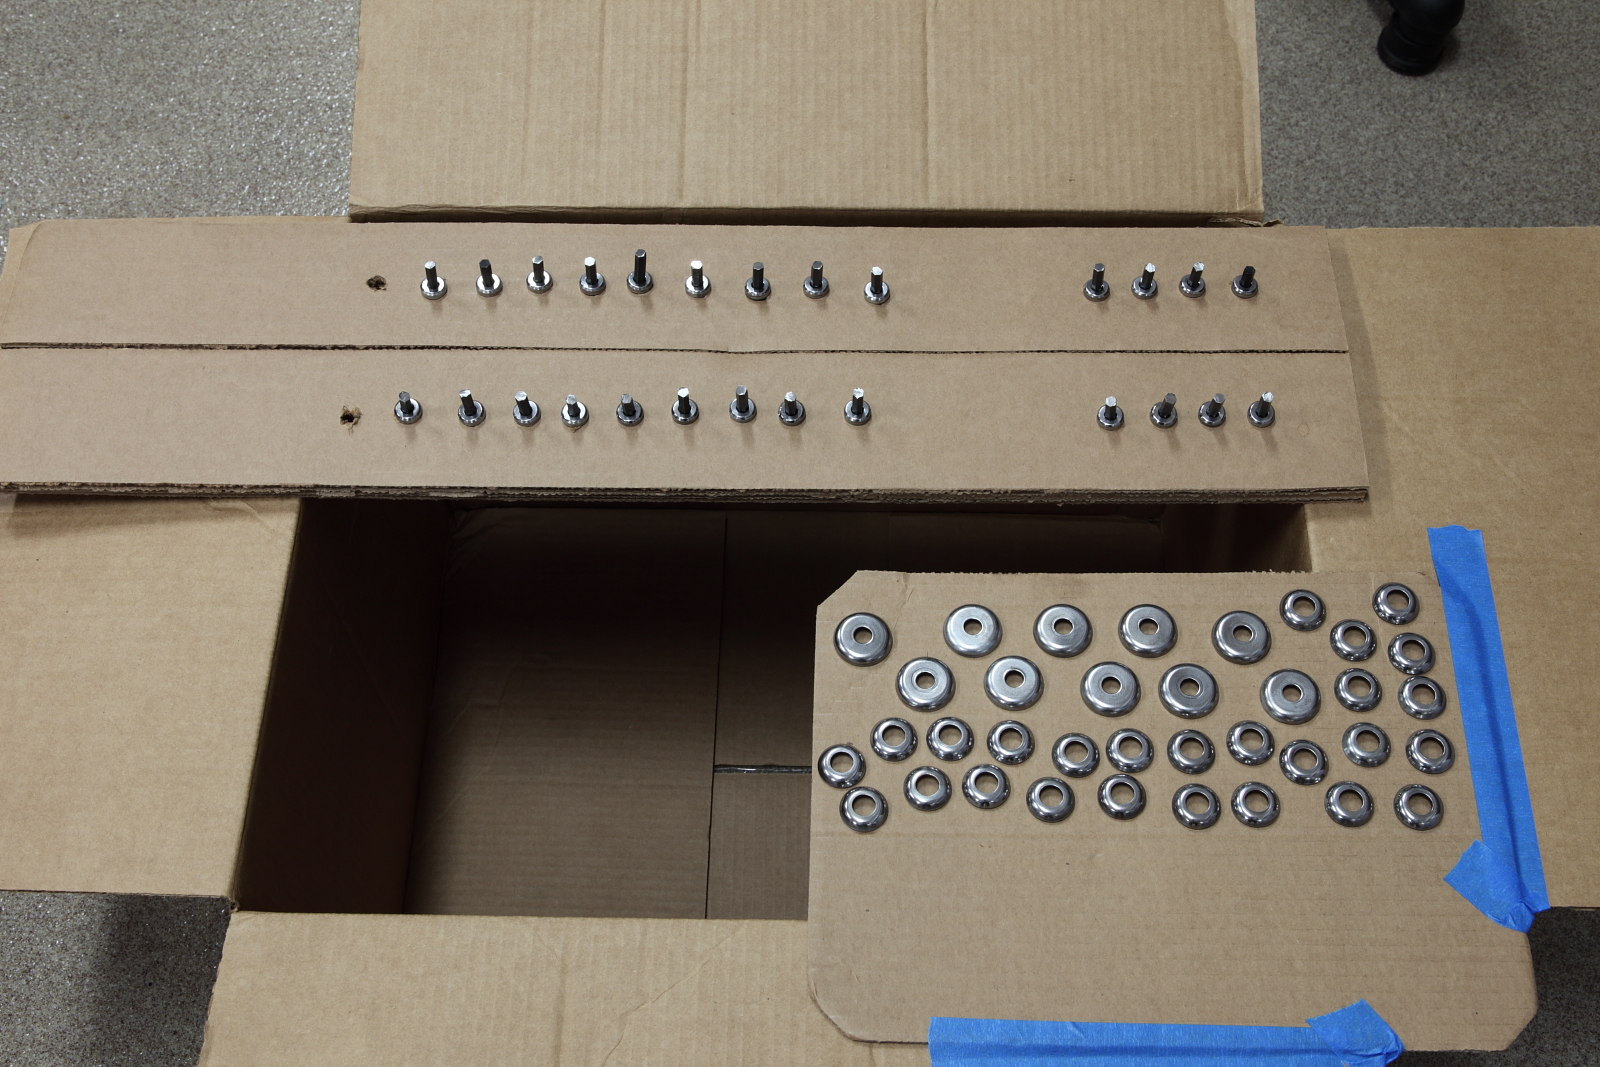
Progress on the intake and head cover fasteners (didn't do the intake nuts, since the abuse they'll take upon re-installation would probably destroy any nice finish).
After cleaning and polishing (I originally tried to apply black oxide finish, which failed; I wouldn't have polished them had I known I was just going to paint them):
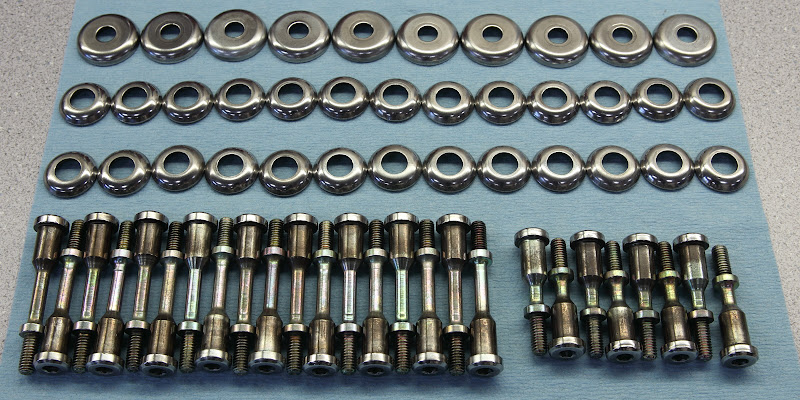
Almost ready for priming. Note fragments of 5 mm hex keys inserted into bolt heads to keep the paint out.

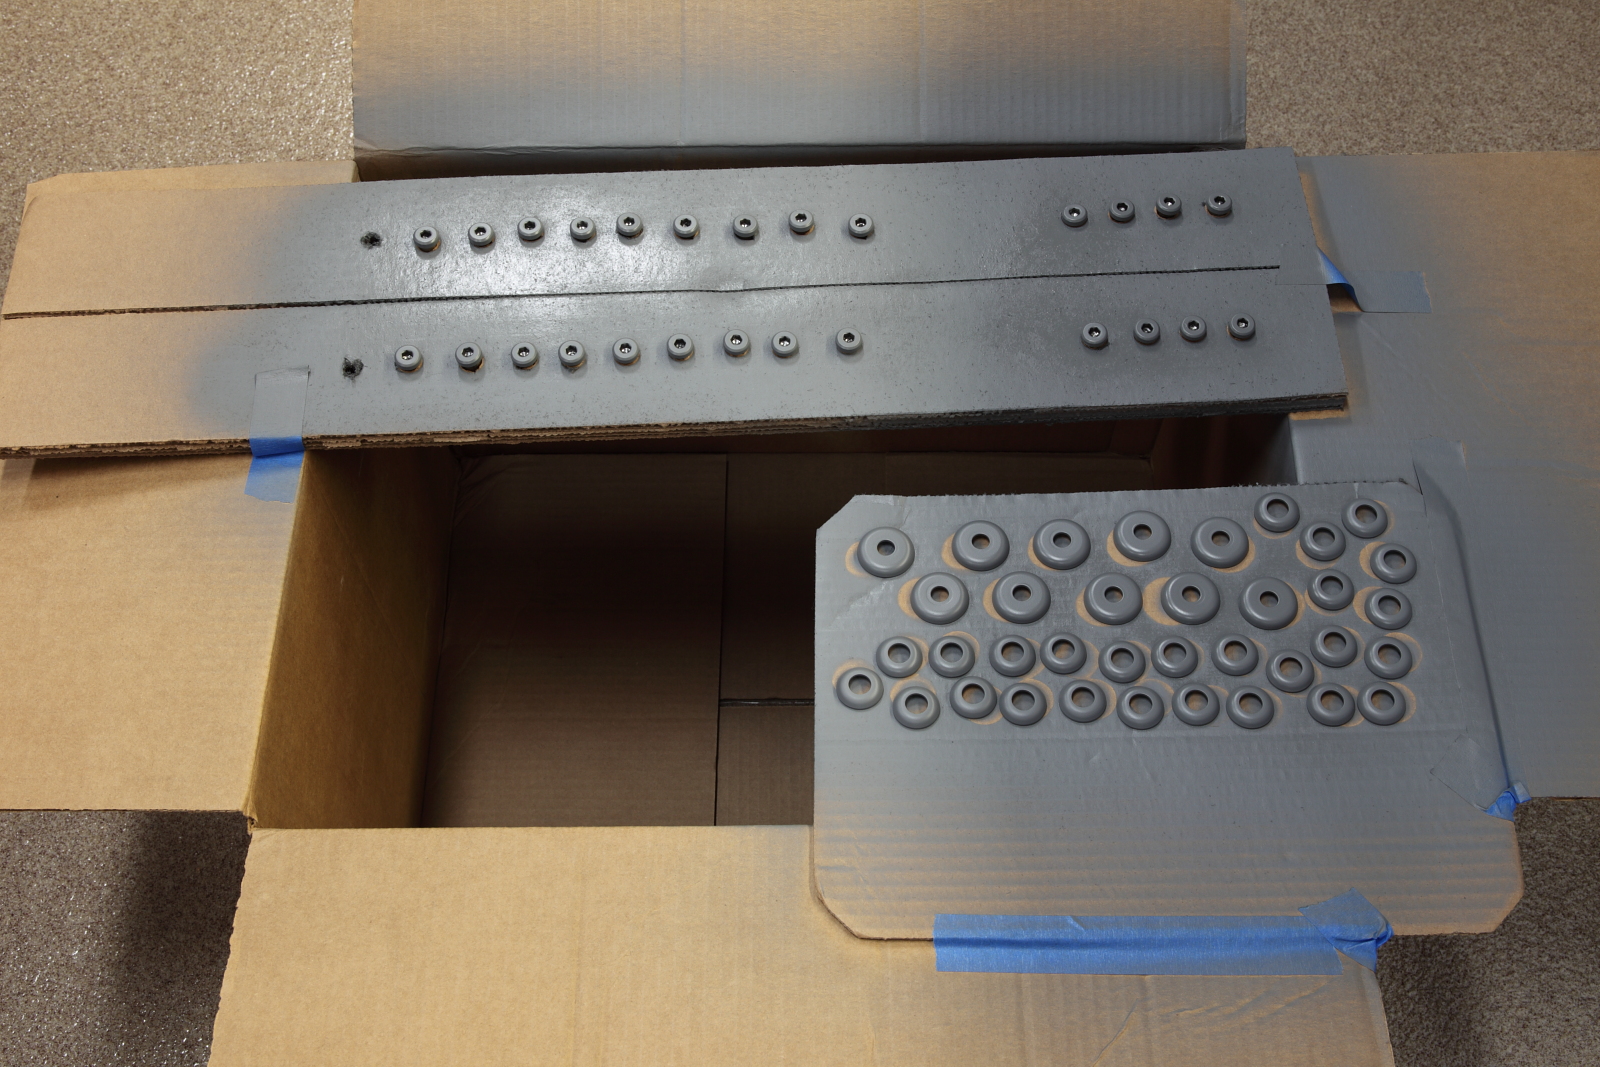
After priming with Rust-Oleum engine primer:
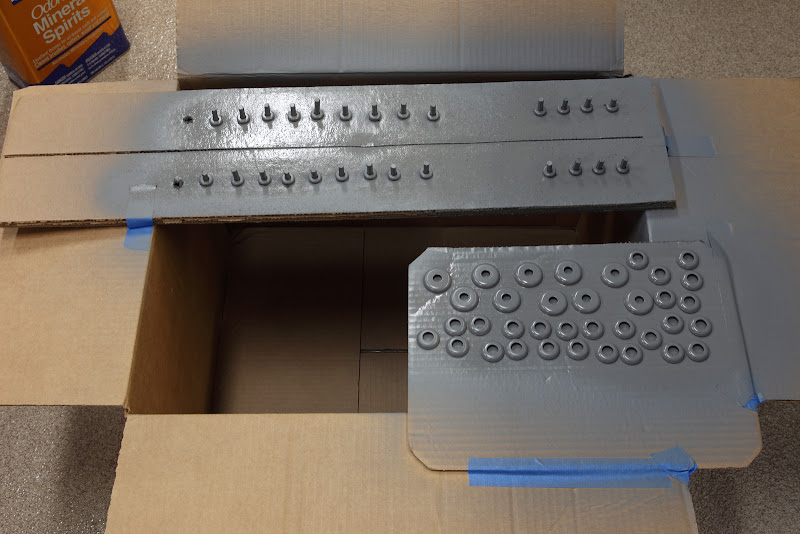
After hex key fragments were removed and everything moved a little to keep the primer from sticking. Hex key fragments were cleaned up for reuse.

A little later. Hex key fragments reinserted; ready for main coat of Rust-Oleum semi-gloss black engine enamel.
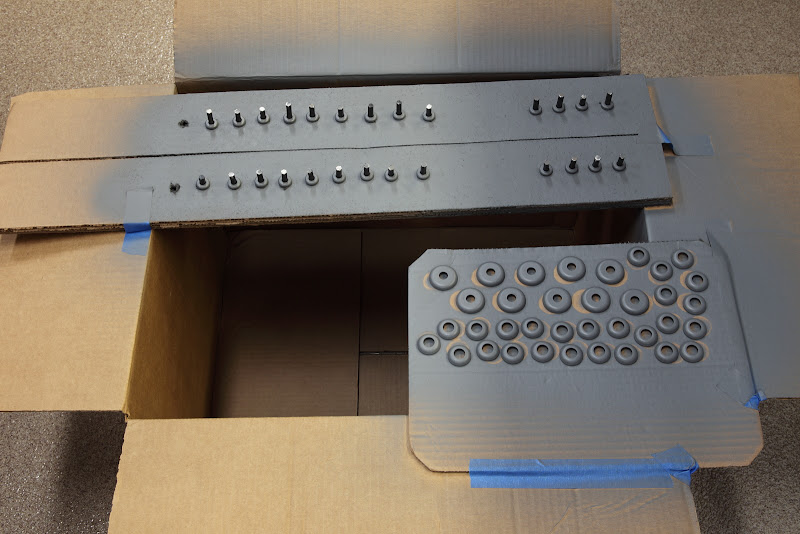
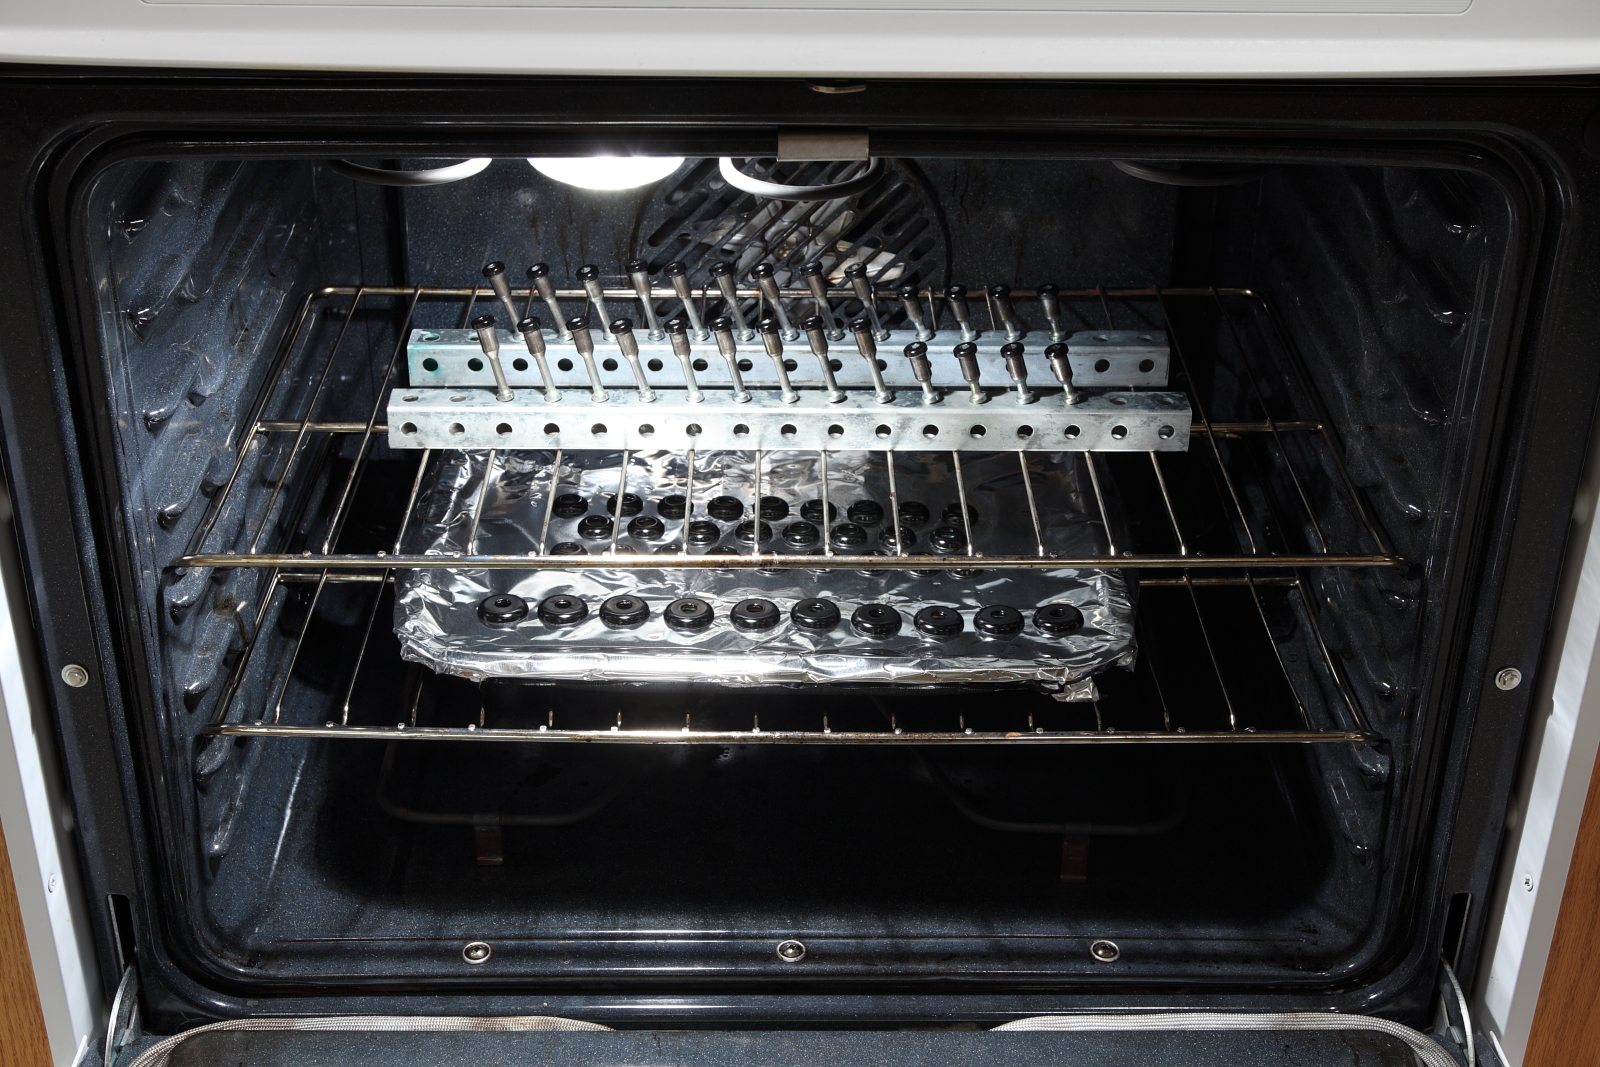
After a couple of coats of the black engine enamel:
Baked a couple of times at 180 �F (82 �C) over the next few days.

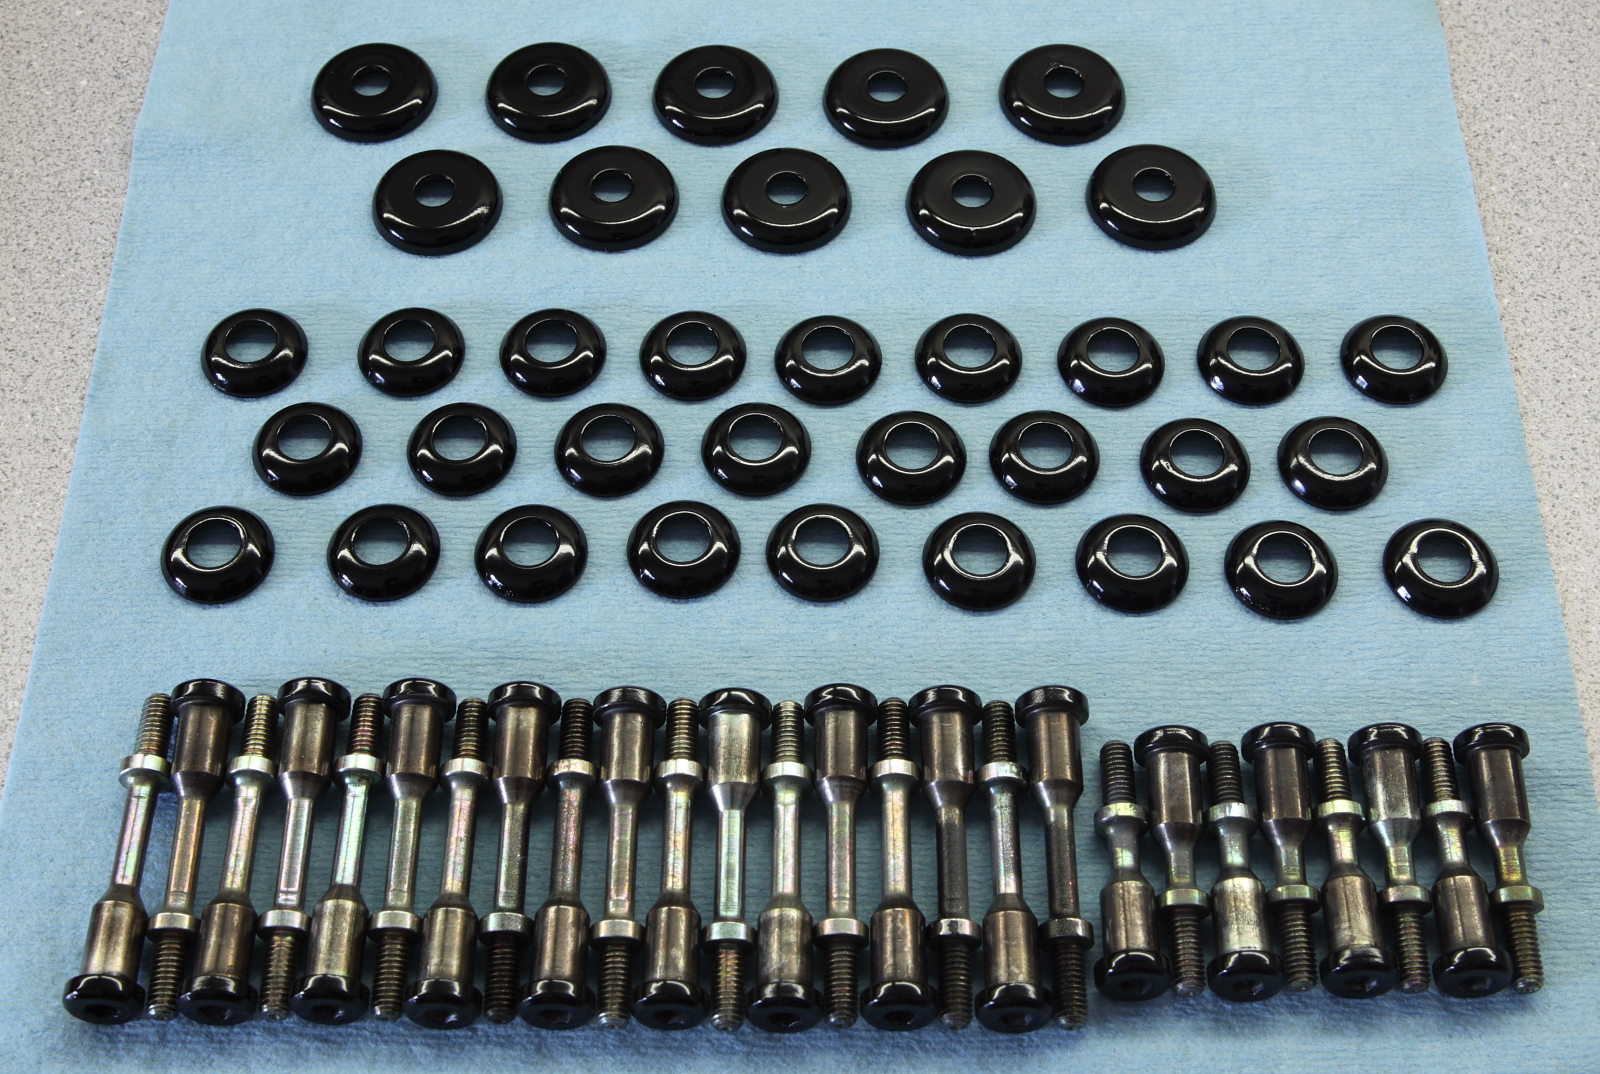
Turned out quite well:


After cleaning and polishing (I originally tried to apply black oxide finish, which failed; I wouldn't have polished them had I known I was just going to paint them):

Almost ready for priming. Note fragments of 5 mm hex keys inserted into bolt heads to keep the paint out.
After priming with Rust-Oleum engine primer:

After hex key fragments were removed and everything moved a little to keep the primer from sticking. Hex key fragments were cleaned up for reuse.
A little later. Hex key fragments reinserted; ready for main coat of Rust-Oleum semi-gloss black engine enamel.

After a couple of coats of the black engine enamel:

Baked a couple of times at 180 �F (82 �C) over the next few days.
Turned out quite well:
Last edited by Ed Scherer; 05-10-2011 at 12:04 AM.
10-08-2010, 01:41 PM
#90
Under the Lift
Lifetime Rennlist
Member
Lifetime Rennlist
Member
Hmmm.... Looks like you're on to something there, Ed. I installed it without any attention to that. Plus no extra goop, as Stan says to do. As far as I can see, mine is not leaking (yet). Oh, well. I think you and Stan are right regardless. Ill be getting back in there fairly soon anyway.
From earlier in this thread:
OK, so I installed this today, but wanted to pass along a tip: for the parts I got, I had to modify the 928 Int'l "block off plate" because of the two nipples that protrude from the bottom of the new GTS oil filler neck that I got (look to both sides of the louvers and you'll see what I mean). I had to drill a couple of extra holes to provide those nipples somewhere to go, otherwise, there's no way this would seal. I considered just grinding off the nipples, but thought that they might be plastic rivets holding the bottom on.
OK, so I installed this today, but wanted to pass along a tip: for the parts I got, I had to modify the 928 Int'l "block off plate" because of the two nipples that protrude from the bottom of the new GTS oil filler neck that I got (look to both sides of the louvers and you'll see what I mean). I had to drill a couple of extra holes to provide those nipples somewhere to go, otherwise, there's no way this would seal. I considered just grinding off the nipples, but thought that they might be plastic rivets holding the bottom on.