
Virginia's Water Pump-Damaged Block Repair Complete - Procedure w/pics
 11-29-2009, 08:02 PM
#16
Rennlist Member
Thread Starter
Join Date: Sep 2007
Location: Ridgecrest, California
Posts: 1,363
Likes: 0
Received 143 Likes
on
28 Posts
For the screw that "communicates" with the outer block (for mine, it was the 4:00 hole on the insert), I applied some JB Weld directly to the screw threads.

Then installed the screw.
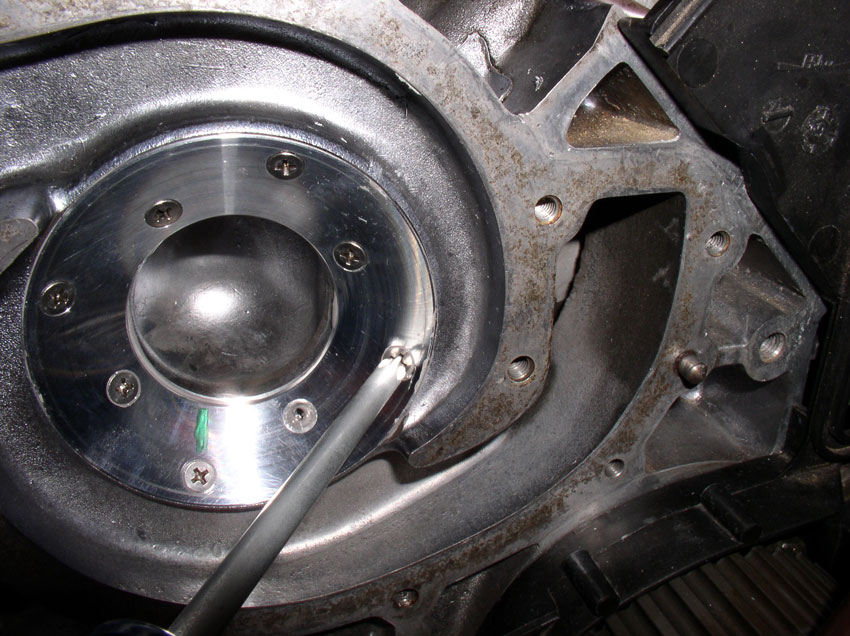
You should see a small amount of JB Weld oozing from the edges of the insert and possibly a small amount from around the screw heads. This is normal. Simply wipe up the excess.
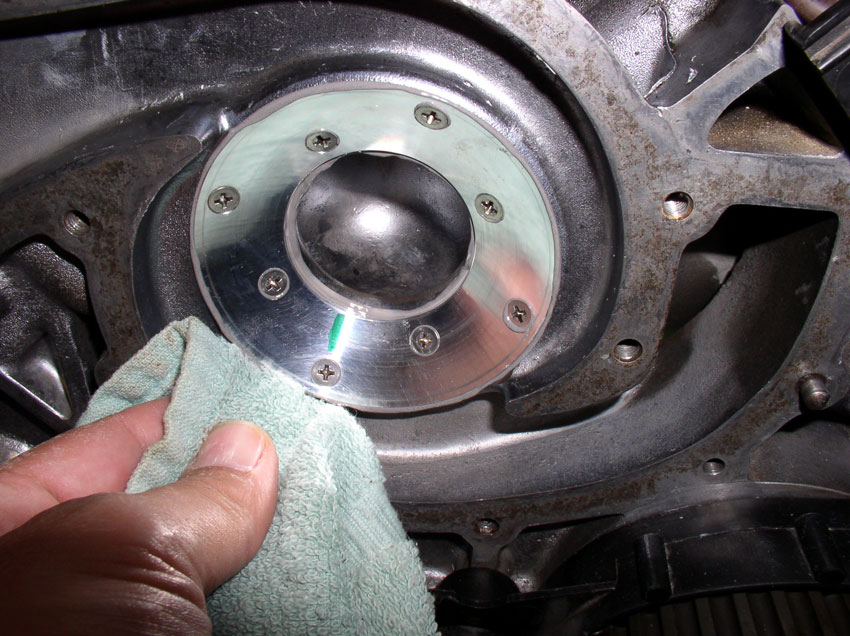
When it's cleaned up, it should look something like this picture below.

Now, fit the WP gasket in place....
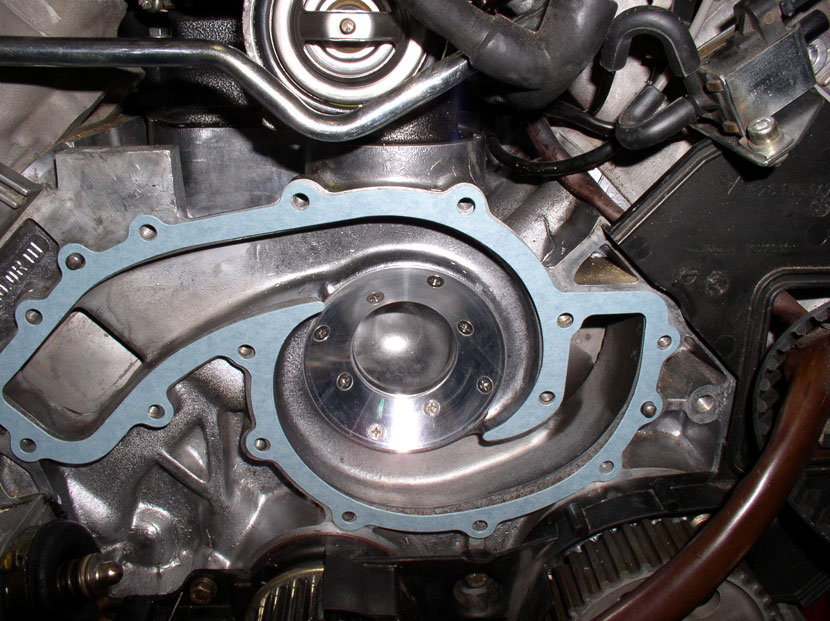
...and install the water pump.
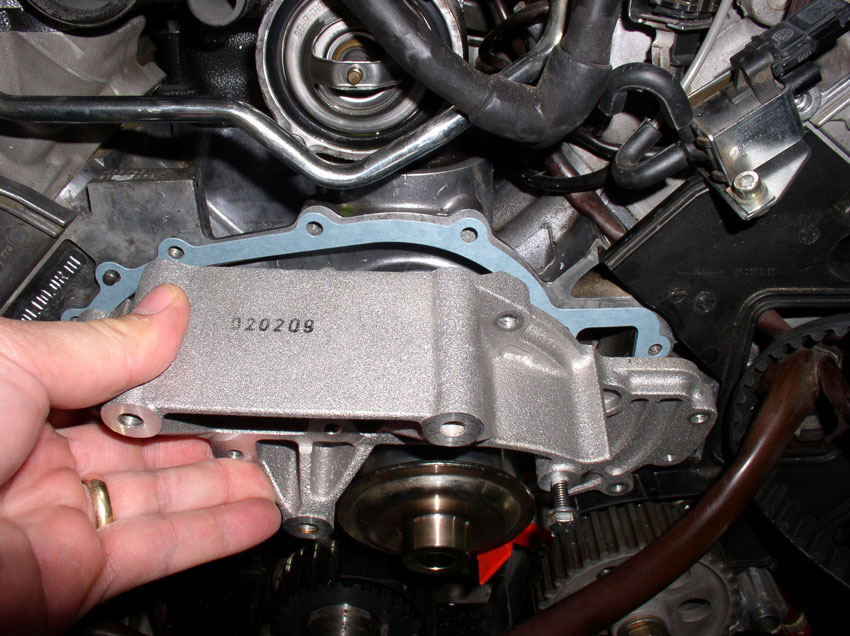
Tighten the WP-to-block bolts to 7 ftlbs. Install all bolts (except for the one that goes through the timing belt cover, of course).
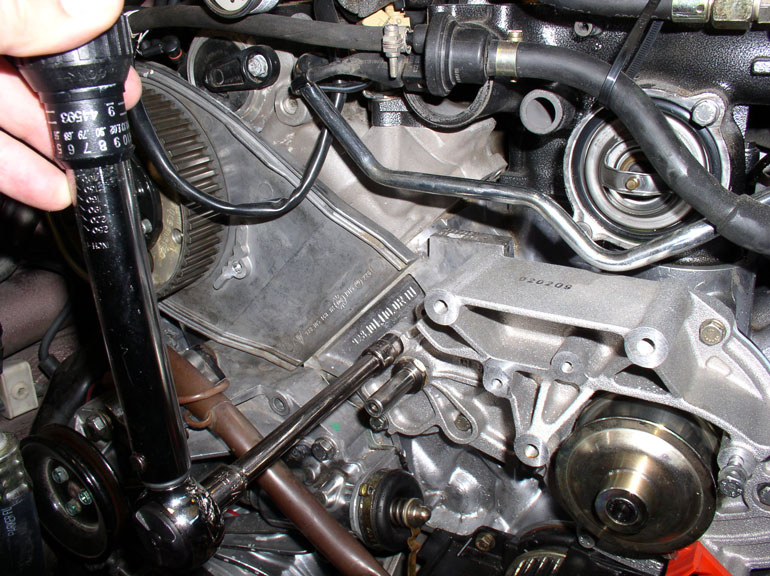
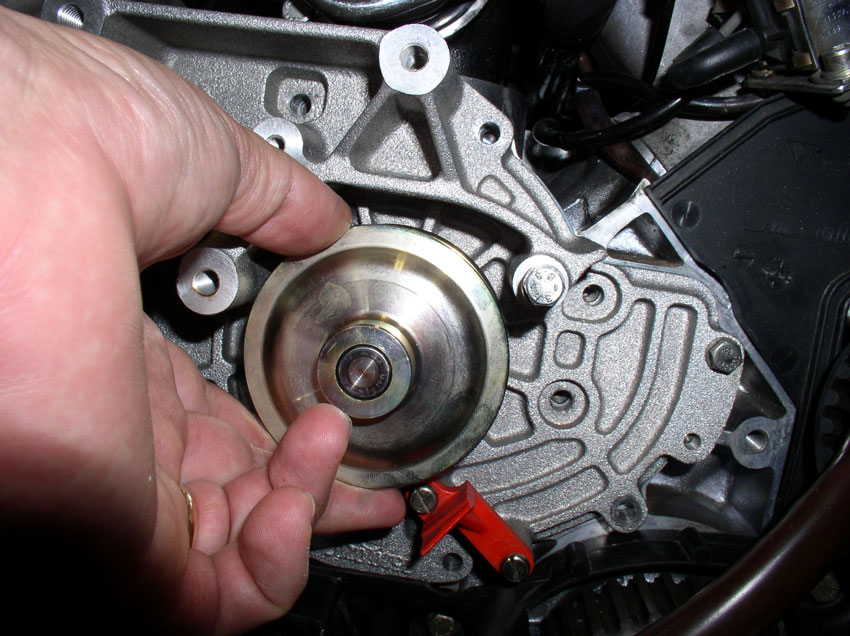
Test for free movement of the TB pulley. In my case, it moved freely with no scraping noise whatsoever.
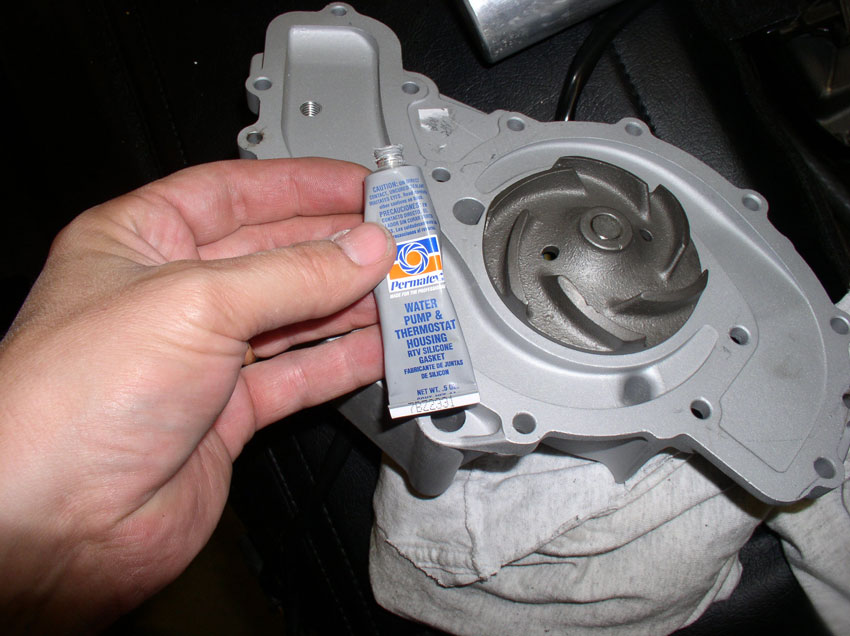
At this point, you have finished the repair and can start reinstalling the timing belt. It was at this point that I discovered that the tension applied by the timing belt actually make the water pump give a very light scraping sound for about 1/4 of a turn on each revolution of the impeller. When I took the Timing belt off, no noise. So I decided slightly more thickness was needed on the water pump gasket. There are two options, you can apply water pump gasket sealant to both sides of the gasket or you can simply install 2 gaskets dry. I opted for adding the sealant to both sides of the gasket. Here's the water pump gasket sealant I used.
After I applied the gasket sealant, torqued down the water pump, let it sit overnight to cure and reinstalled the timing belt, the scraping noise was eliminated. At this point I proceeded to reassemble the front of the engine, fill with coolant, check for leaks and start Virginia up and take it for a test drive. I have a before and after temperature gauge reading but as mentioned before, I can't reproduce the 100+ degree ambient temerature until next spring/early summer so won't know for sure how well the fix worked but I like what I've seen so far and I'm very happy with the results of the repair. Here's the pic of the "before" temperature reading. Conditions were driving up Cajon Pass, 100 degree ambient temperature running between 60-70 MPH with A/C on and one passenger.
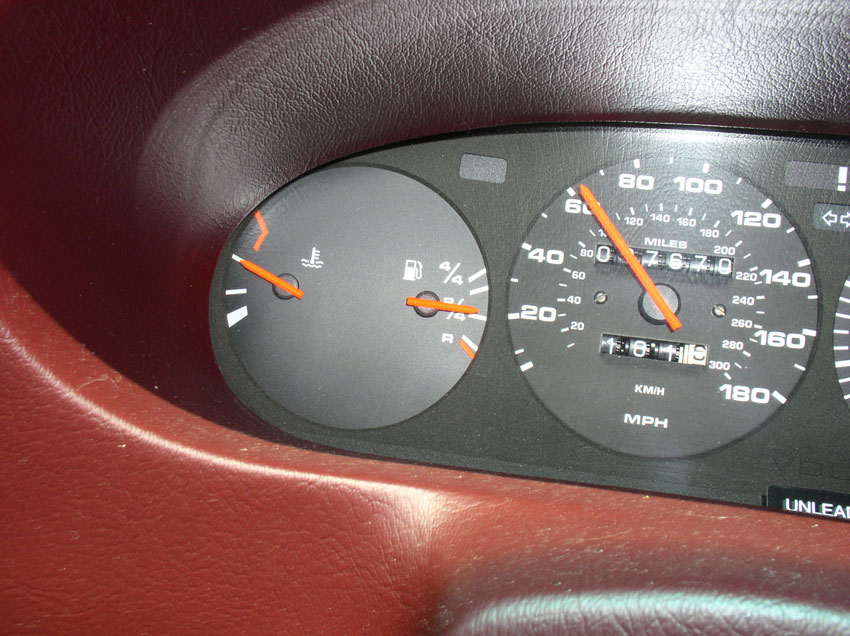
Here's the "after" pic same conditions except for ambient temperature being about 70 degrees (and I was driving a little faster - closer to 80). Therefore, it's not a true comparison before and after and I'll have to wait until warmer temps to run the test again but so far looks good.
I'd also like to thank Steve and Greg (Brown) for their efforts in developing this tool for our community to use. It was a great experience and the tool is designed very well. THANKS also to Greg (Nettles) for donating the air drill for the job - it worked GREAT! THANK YOU all!
Please feel free to comment or add to this post as I'm happy to improve the quality of this post - especially if I have missed something or incorrectly described something. THANKS for reading!
Then installed the screw.
You should see a small amount of JB Weld oozing from the edges of the insert and possibly a small amount from around the screw heads. This is normal. Simply wipe up the excess.
When it's cleaned up, it should look something like this picture below.
Now, fit the WP gasket in place....
...and install the water pump.
Tighten the WP-to-block bolts to 7 ftlbs. Install all bolts (except for the one that goes through the timing belt cover, of course).
Test for free movement of the TB pulley. In my case, it moved freely with no scraping noise whatsoever.
At this point, you have finished the repair and can start reinstalling the timing belt. It was at this point that I discovered that the tension applied by the timing belt actually make the water pump give a very light scraping sound for about 1/4 of a turn on each revolution of the impeller. When I took the Timing belt off, no noise. So I decided slightly more thickness was needed on the water pump gasket. There are two options, you can apply water pump gasket sealant to both sides of the gasket or you can simply install 2 gaskets dry. I opted for adding the sealant to both sides of the gasket. Here's the water pump gasket sealant I used.
After I applied the gasket sealant, torqued down the water pump, let it sit overnight to cure and reinstalled the timing belt, the scraping noise was eliminated. At this point I proceeded to reassemble the front of the engine, fill with coolant, check for leaks and start Virginia up and take it for a test drive. I have a before and after temperature gauge reading but as mentioned before, I can't reproduce the 100+ degree ambient temerature until next spring/early summer so won't know for sure how well the fix worked but I like what I've seen so far and I'm very happy with the results of the repair. Here's the pic of the "before" temperature reading. Conditions were driving up Cajon Pass, 100 degree ambient temperature running between 60-70 MPH with A/C on and one passenger.
Here's the "after" pic same conditions except for ambient temperature being about 70 degrees (and I was driving a little faster - closer to 80). Therefore, it's not a true comparison before and after and I'll have to wait until warmer temps to run the test again but so far looks good.
I'd also like to thank Steve and Greg (Brown) for their efforts in developing this tool for our community to use. It was a great experience and the tool is designed very well. THANKS also to Greg (Nettles) for donating the air drill for the job - it worked GREAT! THANK YOU all!
Please feel free to comment or add to this post as I'm happy to improve the quality of this post - especially if I have missed something or incorrectly described something. THANKS for reading!
Last edited by Dwayne; 11-29-2009 at 08:32 PM.
 11-29-2009, 09:14 PM
#17
Rennlist Member
Dwayne,
THANK YOU for the great writeup!! The tool is terrific, I had not appreciated until now how well designed and executed it was. And your writeup makes it all clear and straightforward.
Thank you Greg, Steve and Dwayne!!
A couple of thoughts: Does it make sense to put Loctite on the screws for the final assembly? You certainly don't want them coming loose and red Loctite in particular would serve to seal up the "thru-hole(s)". Or does the JB weld also serve to lock the screws?
I would feel quite nervous about using a ratchet handle on the tap. Breaking a tap off in aluminum is no fun (BTDT). What I was taught was to use a "T" style tap-handle so that there is no bending force on the tap, and use a half-turn-forward, half-turn back, half-turn forward motion in order to break up the chips as you cut. Then every couple of threads pull the tap out and clean out the chips. Alusil is different stuff and this may not be necessary, I don't know.
Also, does it make sense to use clay or something similar to check impeller clearance, like you would for valve/piston clearance?
Again, thanks!!
11-29-2009, 10:15 PM
#18
Rennlist Member
Thread Starter
Join Date: Sep 2007
Location: Ridgecrest, California
Posts: 1,363
Likes: 0
Received 143 Likes
on
28 Posts
Dwayne,
THANK YOU for the great writeup!! The tool is terrific, I had not appreciated until now how well designed and executed it was. And your writeup makes it all clear and straightforward.
Thank you Greg, Steve and Dwayne!!
A couple of thoughts: Does it make sense to put Loctite on the screws for the final assembly? You certainly don't want them coming loose and red Loctite in particular would serve to seal up the "thru-hole(s)". Or does the JB weld also serve to lock the screws?
THANKS for reading and the comments!
As far as Loctite, YES, I believe one could use Red Loctite on the screws (assuming it's coolant-proof). Also, I believe from the discussion, that JB Weld on the back of the insert is recommended but not required. I would have to defer to Steve or Greg on the merits of Loctite vs JB Weld. I understand the JB Weld does act as a sealing agent on the screw threads.
I would feel quite nervous about using a ratchet handle on the tap. Breaking a tap off in aluminum is no fun (BTDT). What I was taught was to use a "T" style tap-handle so that there is no bending force on the tap, and use a half-turn-forward, half-turn back, half-turn forward motion in order to break up the chips as you cut. Then every couple of threads pull the tap out and clean out the chips. Alusil is different stuff and this may not be necessary, I don't know.
Another good question on the clay. I've never used clay as a measuring tool but would be interested in learning how. The instructions do not call out for measuring the clearance in this manner so I didn't pursue. Seems like a good idea to be able to measure the clearance - I wonder if Steve or Greg has tried it? THANKS for the question.
11-29-2009, 10:42 PM
#19
Rennlist Member
Thread Starter
Join Date: Sep 2007
Location: Ridgecrest, California
Posts: 1,363
Likes: 0
Received 143 Likes
on
28 Posts
Nice work.
Are the plate retaining screws made from stainless steel? Stainless steel is not very suitable for use with aluminum due to galvanic corrosion. A good screw material choice is galvanized steel or aluminum alloy. See chart at this link...
http://www.fastenal.com/web/services...tion=Corrosion
Course, you will never need to remove the screws, so any corrosion might serve to make them unremovable.
11-29-2009, 11:26 PM
#20
Nordschleife Master

Dwayne, YOU ARE THE MASTER! Man, thanks SOOOO much for your contribution to this community and to the 928 community at large! AWESOME write up as usual! Man, I want a BOOK of all your work! Holy moly that would be valuable and AWESOME!
11-30-2009, 01:41 AM
#22
Burning Brakes
Fantastic work on designing a fix for a otherwise destroyed block. And of course another excellent write up from Dwayne.
A question.... What could happen to the insert if another bad water pump (metal impeller) were to fail? Is this a one time only repair?
Or... should only water pumps with plastic impellers be used after the rapair?
I am not critizing this in any way just looking ahead.
A question.... What could happen to the insert if another bad water pump (metal impeller) were to fail? Is this a one time only repair?
Or... should only water pumps with plastic impellers be used after the rapair?
I am not critizing this in any way just looking ahead.
11-30-2009, 09:57 AM
#24
Rennlist Member
 11-30-2009, 10:03 AM
#25
Rest in Peace
Rennlist Member
Rennlist Member
Join Date: May 2006
Location: Bird lover in Sharpsburg
Posts: 9,903
Likes: 0
Received 2 Likes
on
2 Posts
Great write up Dwayne, the only thing I would add would be a caution against using a ratchet on the taps, you really need something like a tap driver.
And your welcome on the drill.
I can not say enough about the work Greg B and Steve did on this, it works really well.
I will look and see if I have a extra t handle to send to Greg B.
And your welcome on the drill.
I can not say enough about the work Greg B and Steve did on this, it works really well.
I will look and see if I have a extra t handle to send to Greg B.
11-30-2009, 10:15 AM
#26

Very good write up Dwayne, thanks a bunch.
11-30-2009, 11:39 AM
#27
Rennlist Member
Awesome Dwayne! Your dedication to this community is unbelievable with these wonderfully documented repairs.
Thanks for posting, hopefully I will never have to use it LOL!
Thanks for posting, hopefully I will never have to use it LOL!
11-30-2009, 11:41 AM
#28
Rennlist Member
Join Date: Jan 2006
Location: central cal
Posts: 975
Likes: 0
Received 0 Likes
on
0 Posts
The screws are 18-8 stainless, so no prob with corrosion here. The epoxy does a good job sealing and retaining the screws, and I don't think the Loctite would work with uncured epoxy in the holes, so I would not recommend that. Clay would work well to check clearance- I prefer Play-Doh, myself, its easier to clean up and comes in pretty colors 
Greg Nettles made a suggestion for checking clearance that I am fiddling around with now. If I can make it work easily, we will be adding it to the kit. However, it appears that the pumps may vary enough that you should still use the pump you are installing check final clearance on...
Dwayne, thanks again for the write-up- it is excellent!
Steve


