
Shift Pattern Restore Tips (and recently added LED illumination and audio updating)
 03-29-2008, 01:21 PM
#1
Burning Brakes
Thread Starter
I recently ordered one of the leather shift boots from Paul Champagne. I had been using a used GT shifter, which worked well with the short shifter I bought from 928 Intl.
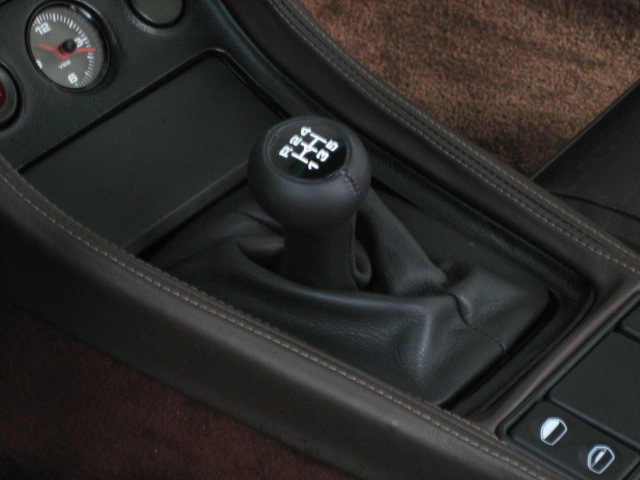
Long story short -- the old GT shifter boot was bringing down my interior, so big thanks to Paul for providing new one. The new leather looks great, but one last detail required attantion - the shift pattern that had worn off due to heavy use. Here is what I did to restore and it literally takes about 10 minutes:
- With boot removed from shifter
- I used flat white Testors model paint
- I used a small model brush to apply to the pattern relief no need to be too neat, but no need to be too messy either
- I cured the paint for about 30sec with a hair dryer
- I removed the unwanted paint by gently buffing with plastic polish -- a paper towel worked great. Do not use terry cloth as this might reach into the relief and reomove the paint you want to stay.
Here is the result:
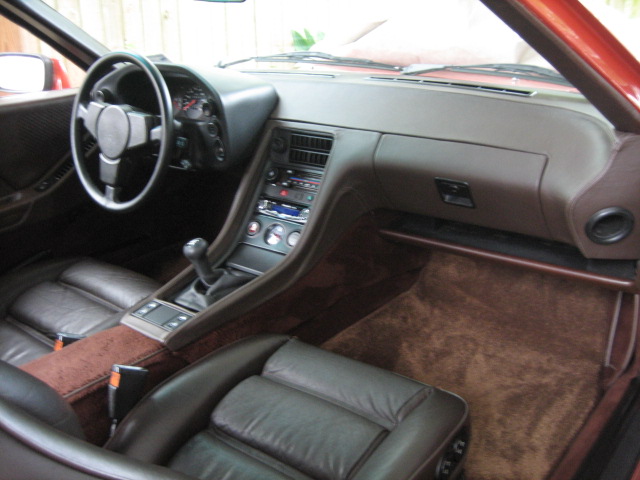
Plus a shameless interior shot:
Long story short -- the old GT shifter boot was bringing down my interior, so big thanks to Paul for providing new one. The new leather looks great, but one last detail required attantion - the shift pattern that had worn off due to heavy use. Here is what I did to restore and it literally takes about 10 minutes:
- With boot removed from shifter
- I used flat white Testors model paint
- I used a small model brush to apply to the pattern relief no need to be too neat, but no need to be too messy either
- I cured the paint for about 30sec with a hair dryer
- I removed the unwanted paint by gently buffing with plastic polish -- a paper towel worked great. Do not use terry cloth as this might reach into the relief and reomove the paint you want to stay.
Here is the result:
Plus a shameless interior shot:
Last edited by hupp; 03-29-2008 at 09:42 PM.
 03-29-2008, 01:26 PM
#2
Rennlist Member
Nice!
Thanks for posting, that technique, might be useful on other objects in the 928 as well.
And your 928 looks great, love the color, no side strips, phone dials = very cool.
Thanks for posting, that technique, might be useful on other objects in the 928 as well.
And your 928 looks great, love the color, no side strips, phone dials = very cool.
03-29-2008, 01:39 PM
#3
Racer
Join Date: Sep 2007
Location: San Antonio, Texas
Posts: 264
Likes: 0
Received 0 Likes
on
0 Posts
hupp, great idea. I have my shifter boot being done by Paul right now. When I sent it to him I was looking at that shifter pattern thinking about doing the same thing.
I guess you could just remove the shifter pattern button without removing the whole boot? It is just a plastic insert. Paint it and snap it back on.
Great idea and great results. Thanks for posting.
I guess you could just remove the shifter pattern button without removing the whole boot? It is just a plastic insert. Paint it and snap it back on.
Great idea and great results. Thanks for posting.
03-29-2008, 08:53 PM
#7
Burning Brakes
Thread Starter
Thanks for all the compliments.
And by the way: the pic posted in Paul's "Easter 5 Speed Boot Special" thread is my before picture . I could swear that is a pic of my shifter, but if it isn't my pattern looked just like this before the restore.
And by the way: the pic posted in Paul's "Easter 5 Speed Boot Special" thread is my before picture . I could swear that is a pic of my shifter, but if it isn't my pattern looked just like this before the restore.
Trending Topics
03-29-2008, 09:28 PM
#8
Burning Brakes
Thread Starter
I do not have the original speakers in the car. I have replaced all of the audio stuff, but I'm not lighting the world on fire (if you know what I mean). The original stuff was toast, so I needed something new. But my main purpose was looks, then descent sound. I wanted to keep stock-like looks while thinking forward to how my gauge cluster would look after the Jager LED kit install. Significant investment on bass and other stuff was not important because I simply do not spend too much time in this car.
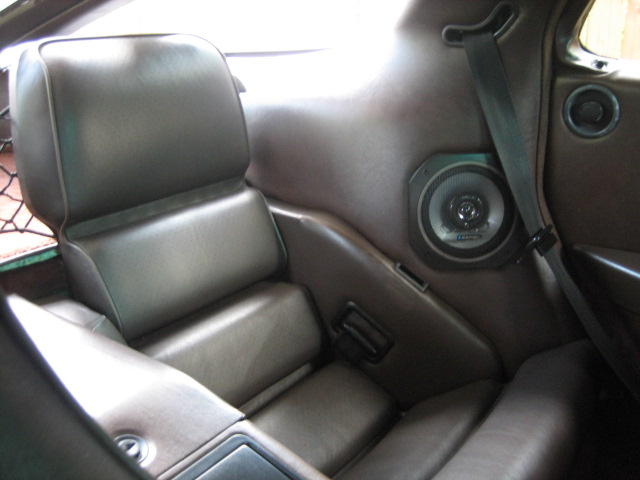
I'm running a Panasonic head, Infinity Kappa 3.5's up front and Kenwood 6 3/4's in the rear. I fastened the fronts directly to the door rather than the panel. Real tight fit. The rears required only a small amount of trimming. The system sounds alright but has no real punch. I was also able to utilize my old blau rear speaker grills.
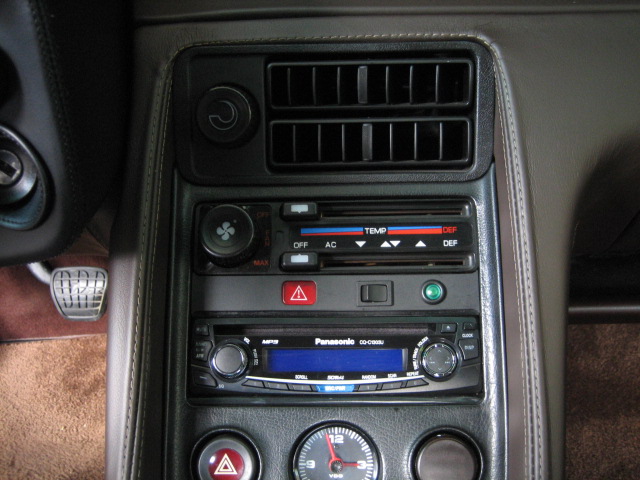
Here is how everything looks when the dash is illuminated. Note the red and blue theme across the board. (Pardon the blur, but my digital freaks out when taking these types of pics.) And the gauge needles really do "pop" like shown in the pics. The blue LED's almost have a black light effect, which really makes the needles stand out.
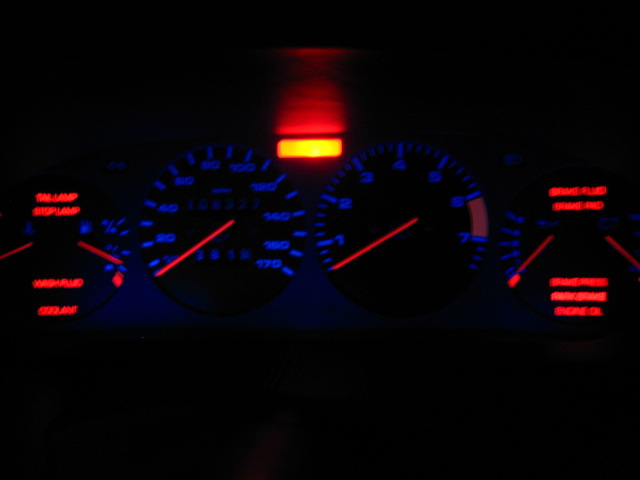
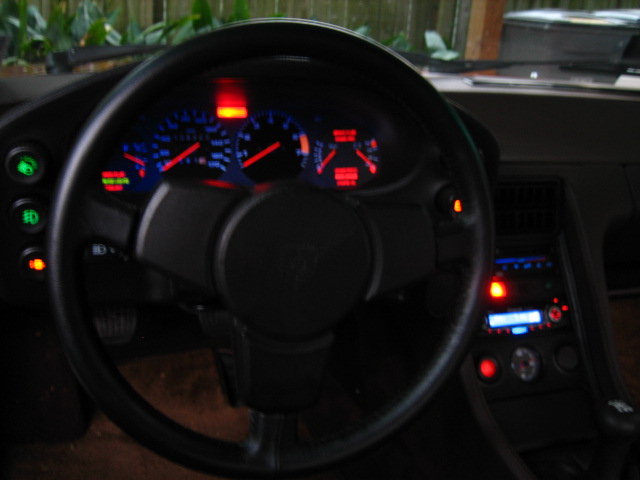
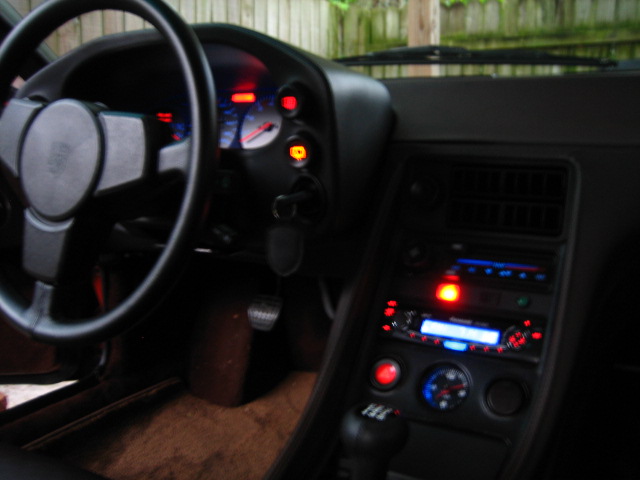
I think I am gount to install the polished rings in my cluster. This will tie in nicely with the chrome around the head unti volume and tuning *****. I should have done this before, but prying the plastic lens off the cluster housing makes me VERY nervous.
Last edited by hupp; 03-29-2008 at 09:58 PM.
03-30-2008, 12:42 AM
#9
Racer
Join Date: Sep 2007
Location: San Antonio, Texas
Posts: 264
Likes: 0
Received 0 Likes
on
0 Posts
Thanks Scott. I think what you did to your dash/pod lighting is exceptional. Can you give anymore details? I think your blue lights look like they are backlit, really makes the instrument panel/dash really work.
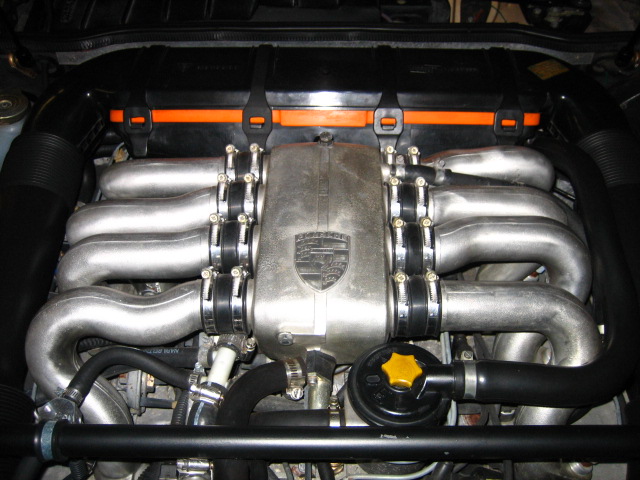
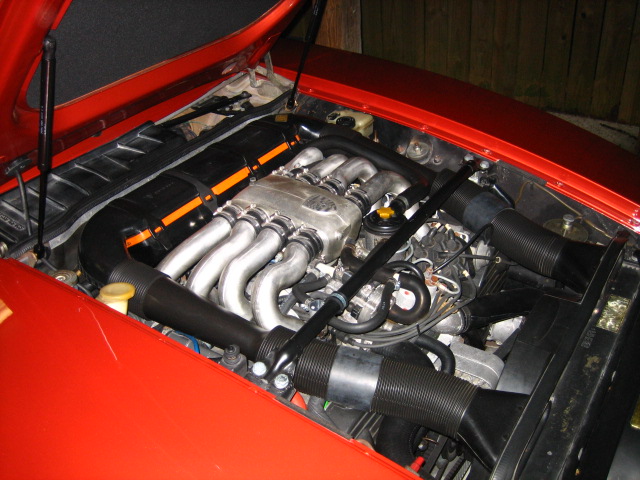
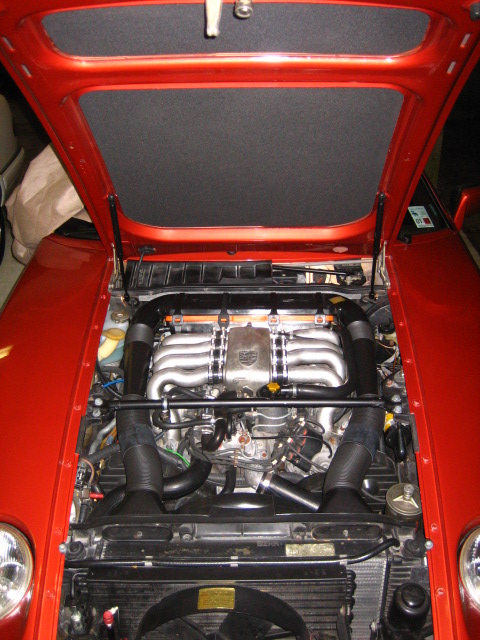
I am impressed with your work on your Shark. In fact, it is one of the best OBs on this forum. How's the engine look?
Thanks for your response.
I am impressed with your work on your Shark. In fact, it is one of the best OBs on this forum. How's the engine look?
Thanks for your response.
03-30-2008, 02:28 AM
#10
Burning Brakes
Thread Starter
Thanks Scott. I think what you did to your dash/pod lighting is exceptional. Can you give anymore details? I think your blue lights look like they are backlit, really makes the instrument panel/dash really work.
I am impressed with your work on your Shark. In fact, it is one of the best OBs on this forum. How's the engine look?
Thanks for your response.
I am impressed with your work on your Shark. In fact, it is one of the best OBs on this forum. How's the engine look?
Thanks for your response.
 03-30-2008, 07:36 AM
#11
Addict
Rennlist Member
Rennlist Member
Scott,
Your car continues to impress me!! Make sure you get a cover for that jumper post partner, you don't want to toast your wiring!!
One thing under hood that I did on my 79 that I thought really cleaned it up somewhat was getting a cowel cover for the area between the firewall and the windshield wipers. For some reason, all OB's only have a cover going half way across and it exposes the wiper motor. I picked up a later model cover and it REALLY cleaned up that area. Attached is a pic of that area. BTW, who did your pod?
One more thing, you better bring that OB to the 3rd Coast event this year you can drive to Houston and caravan in with that crew. IT's going to be down in Marble Falls again this year!
Your car continues to impress me!!
Make sure you get a cover for that jumper post partner, you don't want to toast your wiring!!One thing under hood that I did on my 79 that I thought really cleaned it up somewhat was getting a cowel cover for the area between the firewall and the windshield wipers. For some reason, all OB's only have a cover going half way across and it exposes the wiper motor. I picked up a later model cover and it REALLY cleaned up that area. Attached is a pic of that area. BTW, who did your pod?
One more thing, you better bring that OB to the 3rd Coast event this year you can drive to Houston and caravan in with that crew. IT's going to be down in Marble Falls again this year!
03-30-2008, 10:55 AM
#12
Burning Brakes
Thread Starter
Scott,
Your car continues to impress me!! Make sure you get a cover for that jumper post partner, you don't want to toast your wiring!!
One thing under hood that I did on my 79 that I thought really cleaned it up somewhat was getting a cowel cover for the area between the firewall and the windshield wipers. For some reason, all OB's only have a cover going half way across and it exposes the wiper motor. I picked up a later model cover and it REALLY cleaned up that area. Attached is a pic of that area. BTW, who did your pod?
One more thing, you better bring that OB to the 3rd Coast event this year you can drive to Houston and caravan in with that crew. IT's going to be down in Marble Falls again this year!
Your car continues to impress me!!
Make sure you get a cover for that jumper post partner, you don't want to toast your wiring!!One thing under hood that I did on my 79 that I thought really cleaned it up somewhat was getting a cowel cover for the area between the firewall and the windshield wipers. For some reason, all OB's only have a cover going half way across and it exposes the wiper motor. I picked up a later model cover and it REALLY cleaned up that area. Attached is a pic of that area. BTW, who did your pod?
One more thing, you better bring that OB to the 3rd Coast event this year you can drive to Houston and caravan in with that crew. IT's going to be down in Marble Falls again this year!
Thanks for the tips. The updated cowling is a great idea -- it has always bothered me that the wiper motor etc. is exposed.
The pod is from Paul Champagne.
BTW -- The Silver Bulit is looking pretty sweet.
07-08-2008, 07:02 AM
#13
Wow, I just found this thread searching for tips on painting the shifter, I am totally blown away by the quality of that OB interior. Hupp, did you use the LED kit from Jager? what other lights did you use for the switchgear?
Cheers
Joel
Cheers
Joel
07-08-2008, 08:20 AM
#14
Registered User

Join Date: Sep 2007
Location: Dunedin, New Zealand
Posts: 28
Likes: 0
Received 0 Likes
on
0 Posts
I went a different route with speakers. Rather than replace, I restored them using a kit that replaced the rotten foam holding the speaker. Was a reasonably simple excercise, and only the two 6 inchers and the two front door four inch speakers needed attention. Tinny sounds are gone, and (I imagine) is just like new. Perhaps it is my ears, but I think the sound quality of the old speakers, when in good condition, is okay.
Jim Reay
1991 928S4
Jim Reay
1991 928S4
07-08-2008, 07:49 PM
#15
Burning Brakes
Thread Starter
I did use the Jager kit for the gauge lighting. The switch bulbs were replaced with LED's I purchased from autoillumination.com. Each switch LED was colored per the graphic pane on the switch. For example, I used a green LED for the light switch, an amber LED for the ODO reset, etc. I can't quite remember the LED part number but it is not hard to find on the web page and they are a direct plug in..