When you click on links to various merchants on this site and make a purchase, this can result in this site earning a commission. Affiliate programs and affiliations include, but are not limited to, the eBay Partner Network.
The steel versus aluminum pulley is the one you painted red - not the one you have a magnetic probe attached to. It's that actual pulley that is important. If your pulley is aluminum, replace it with the steel version and leave the shim off.
Kevin, thanks for clarifying. All my pulleys are steel and the older square tooth style (not the high-torque curved ones). I installed without the shim so I'm good?
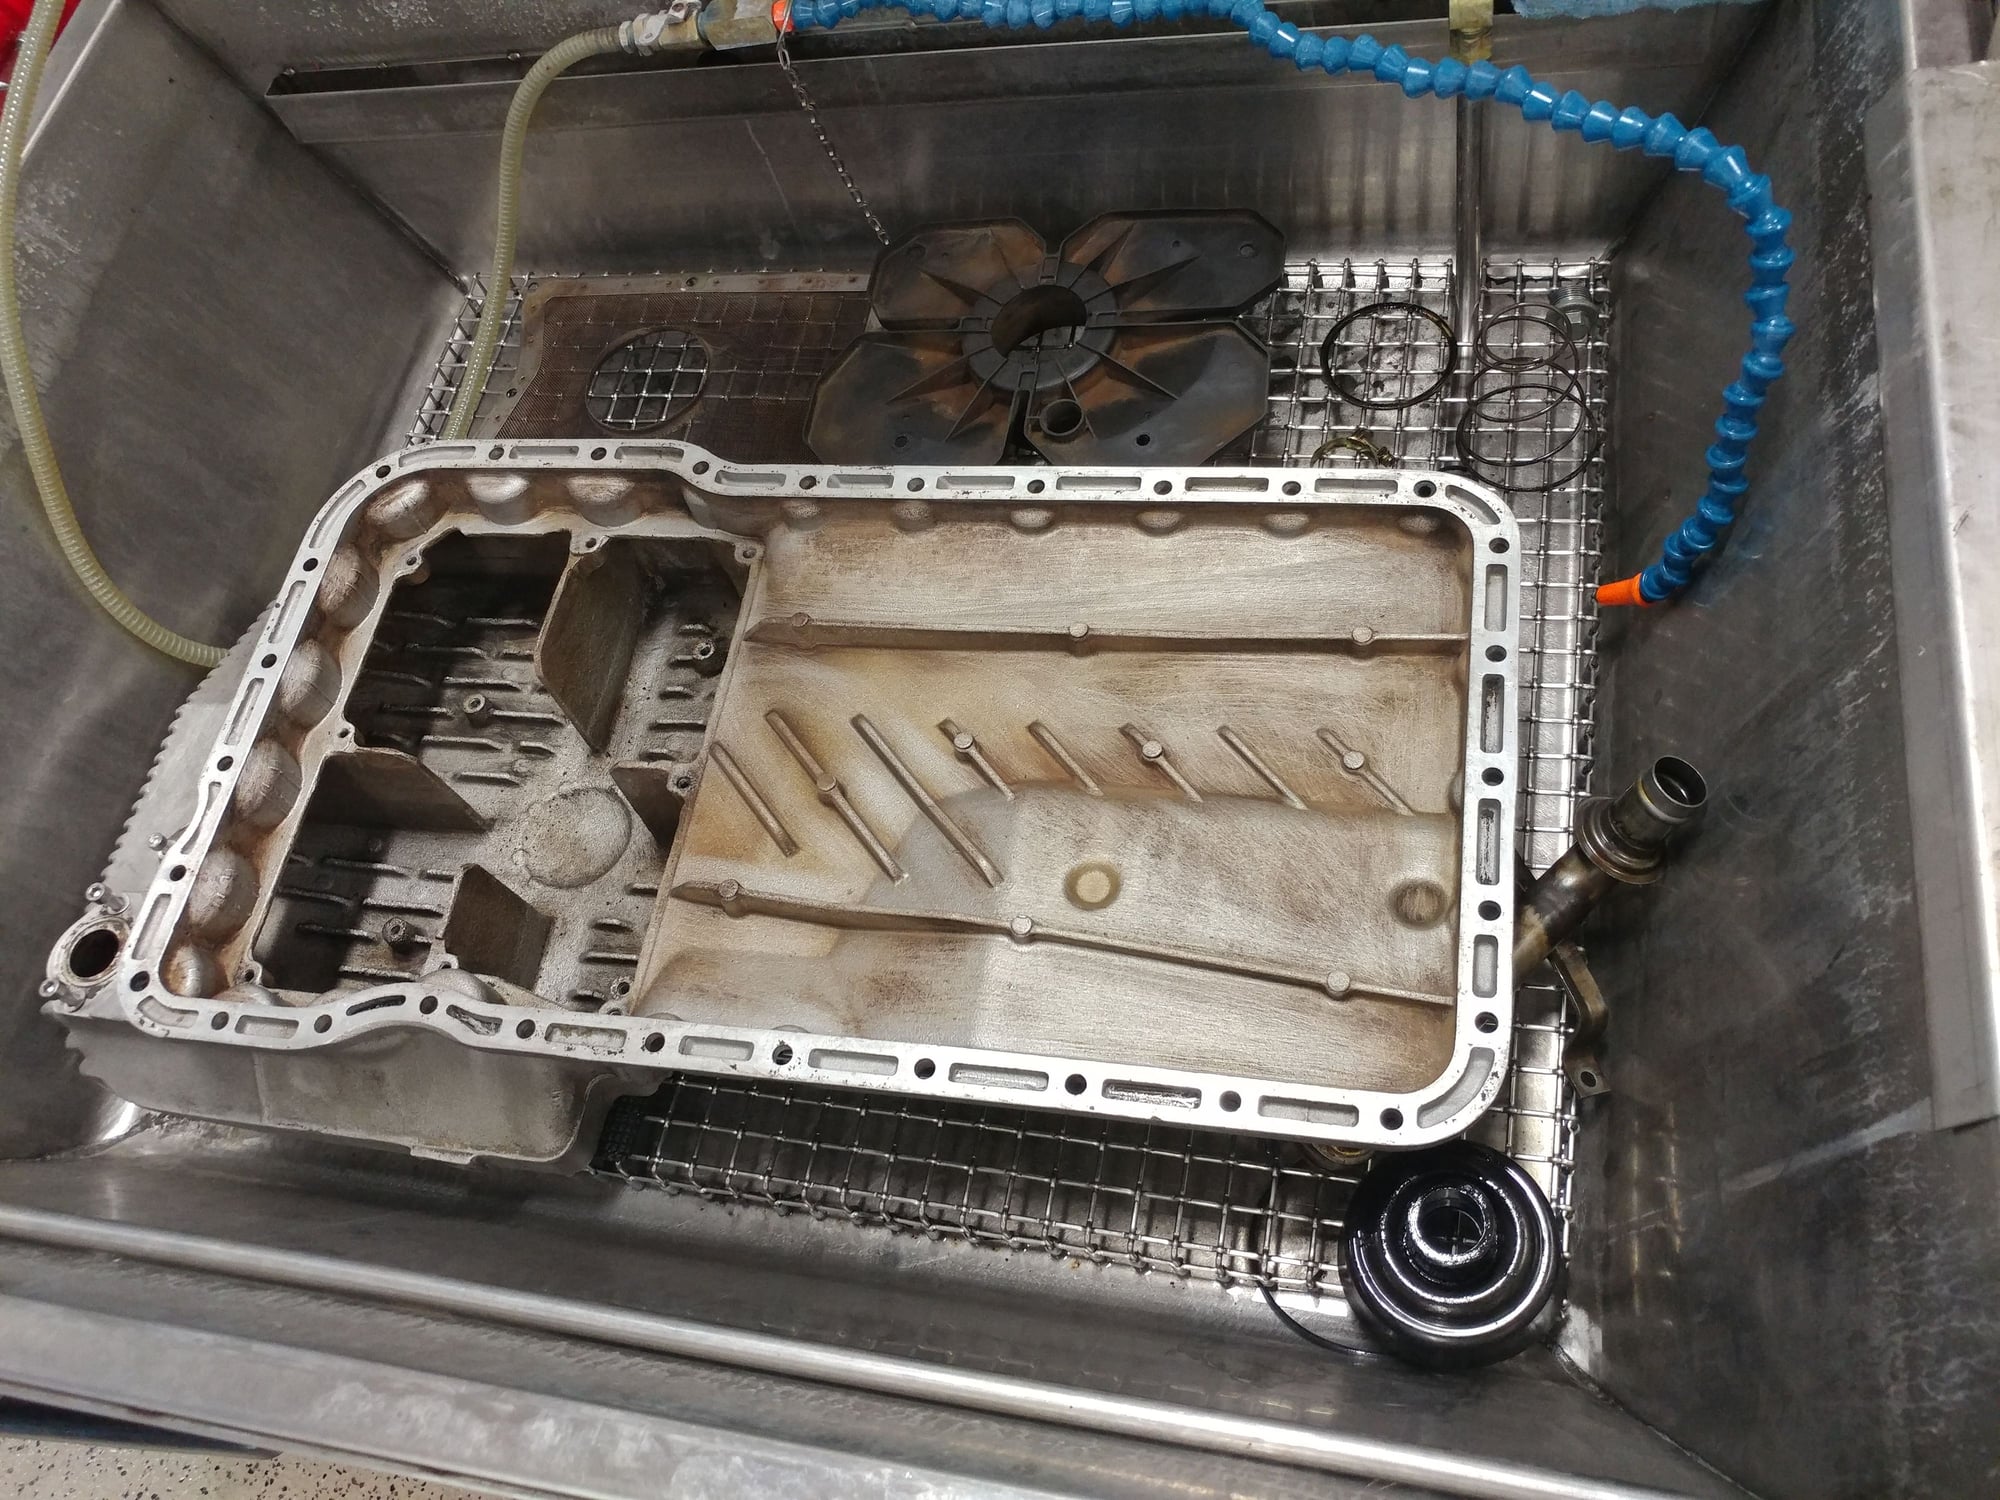
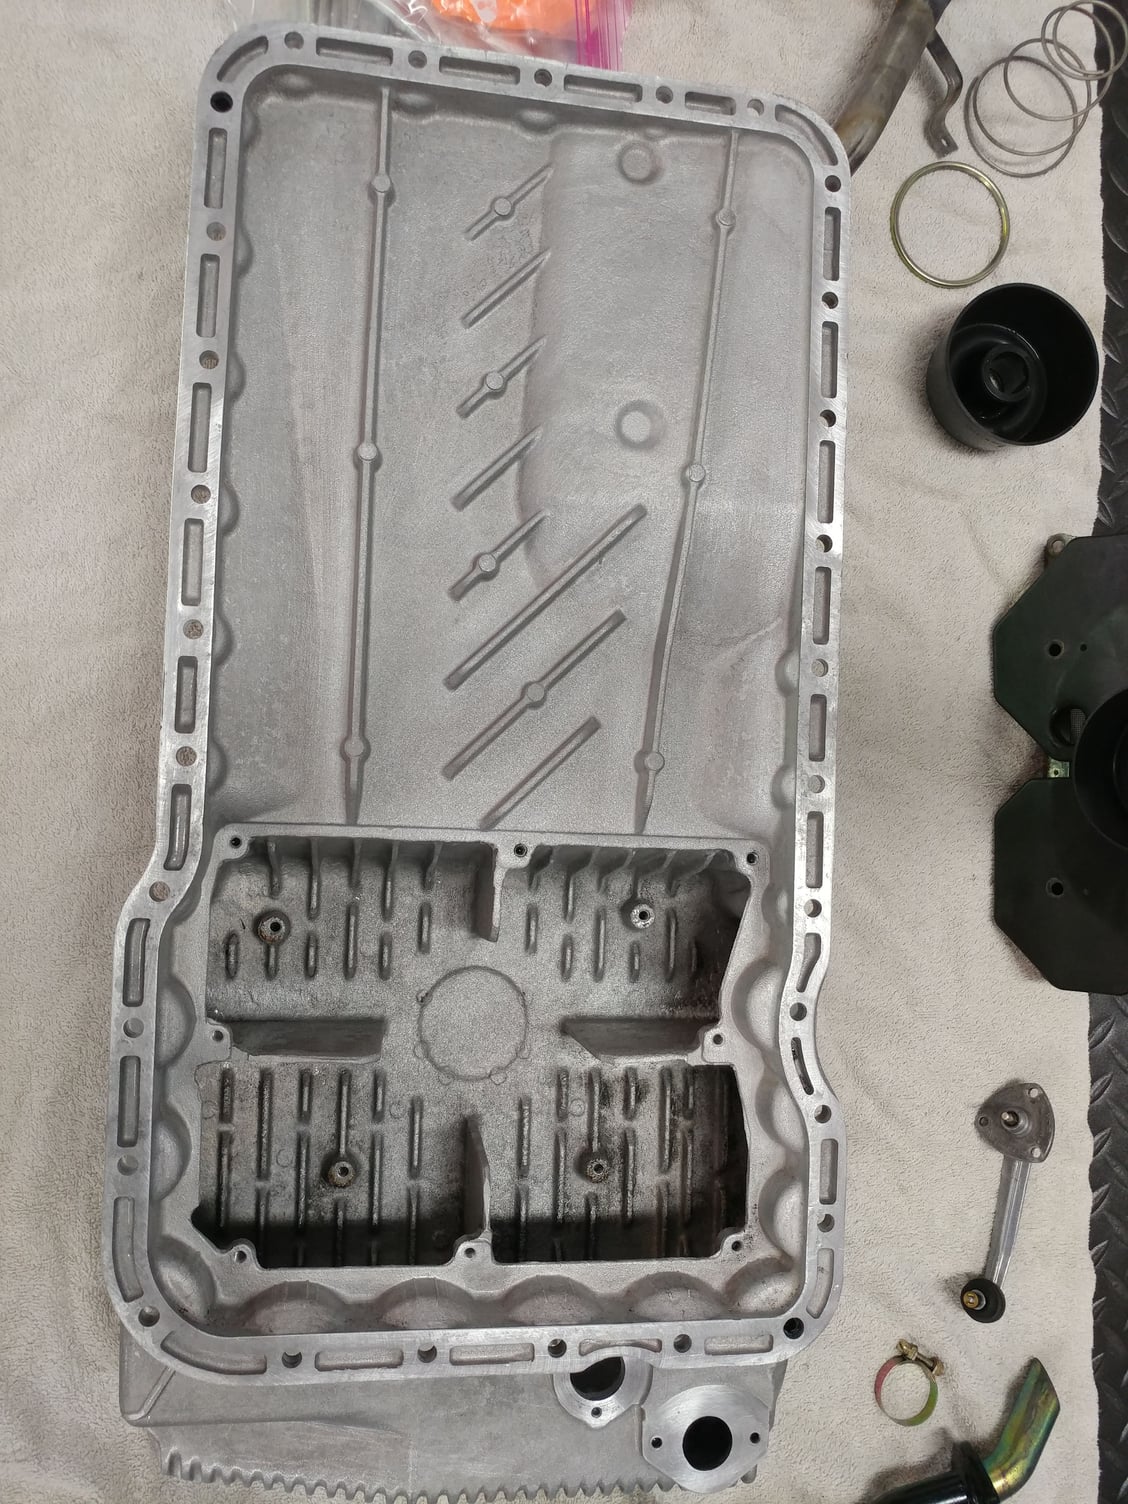
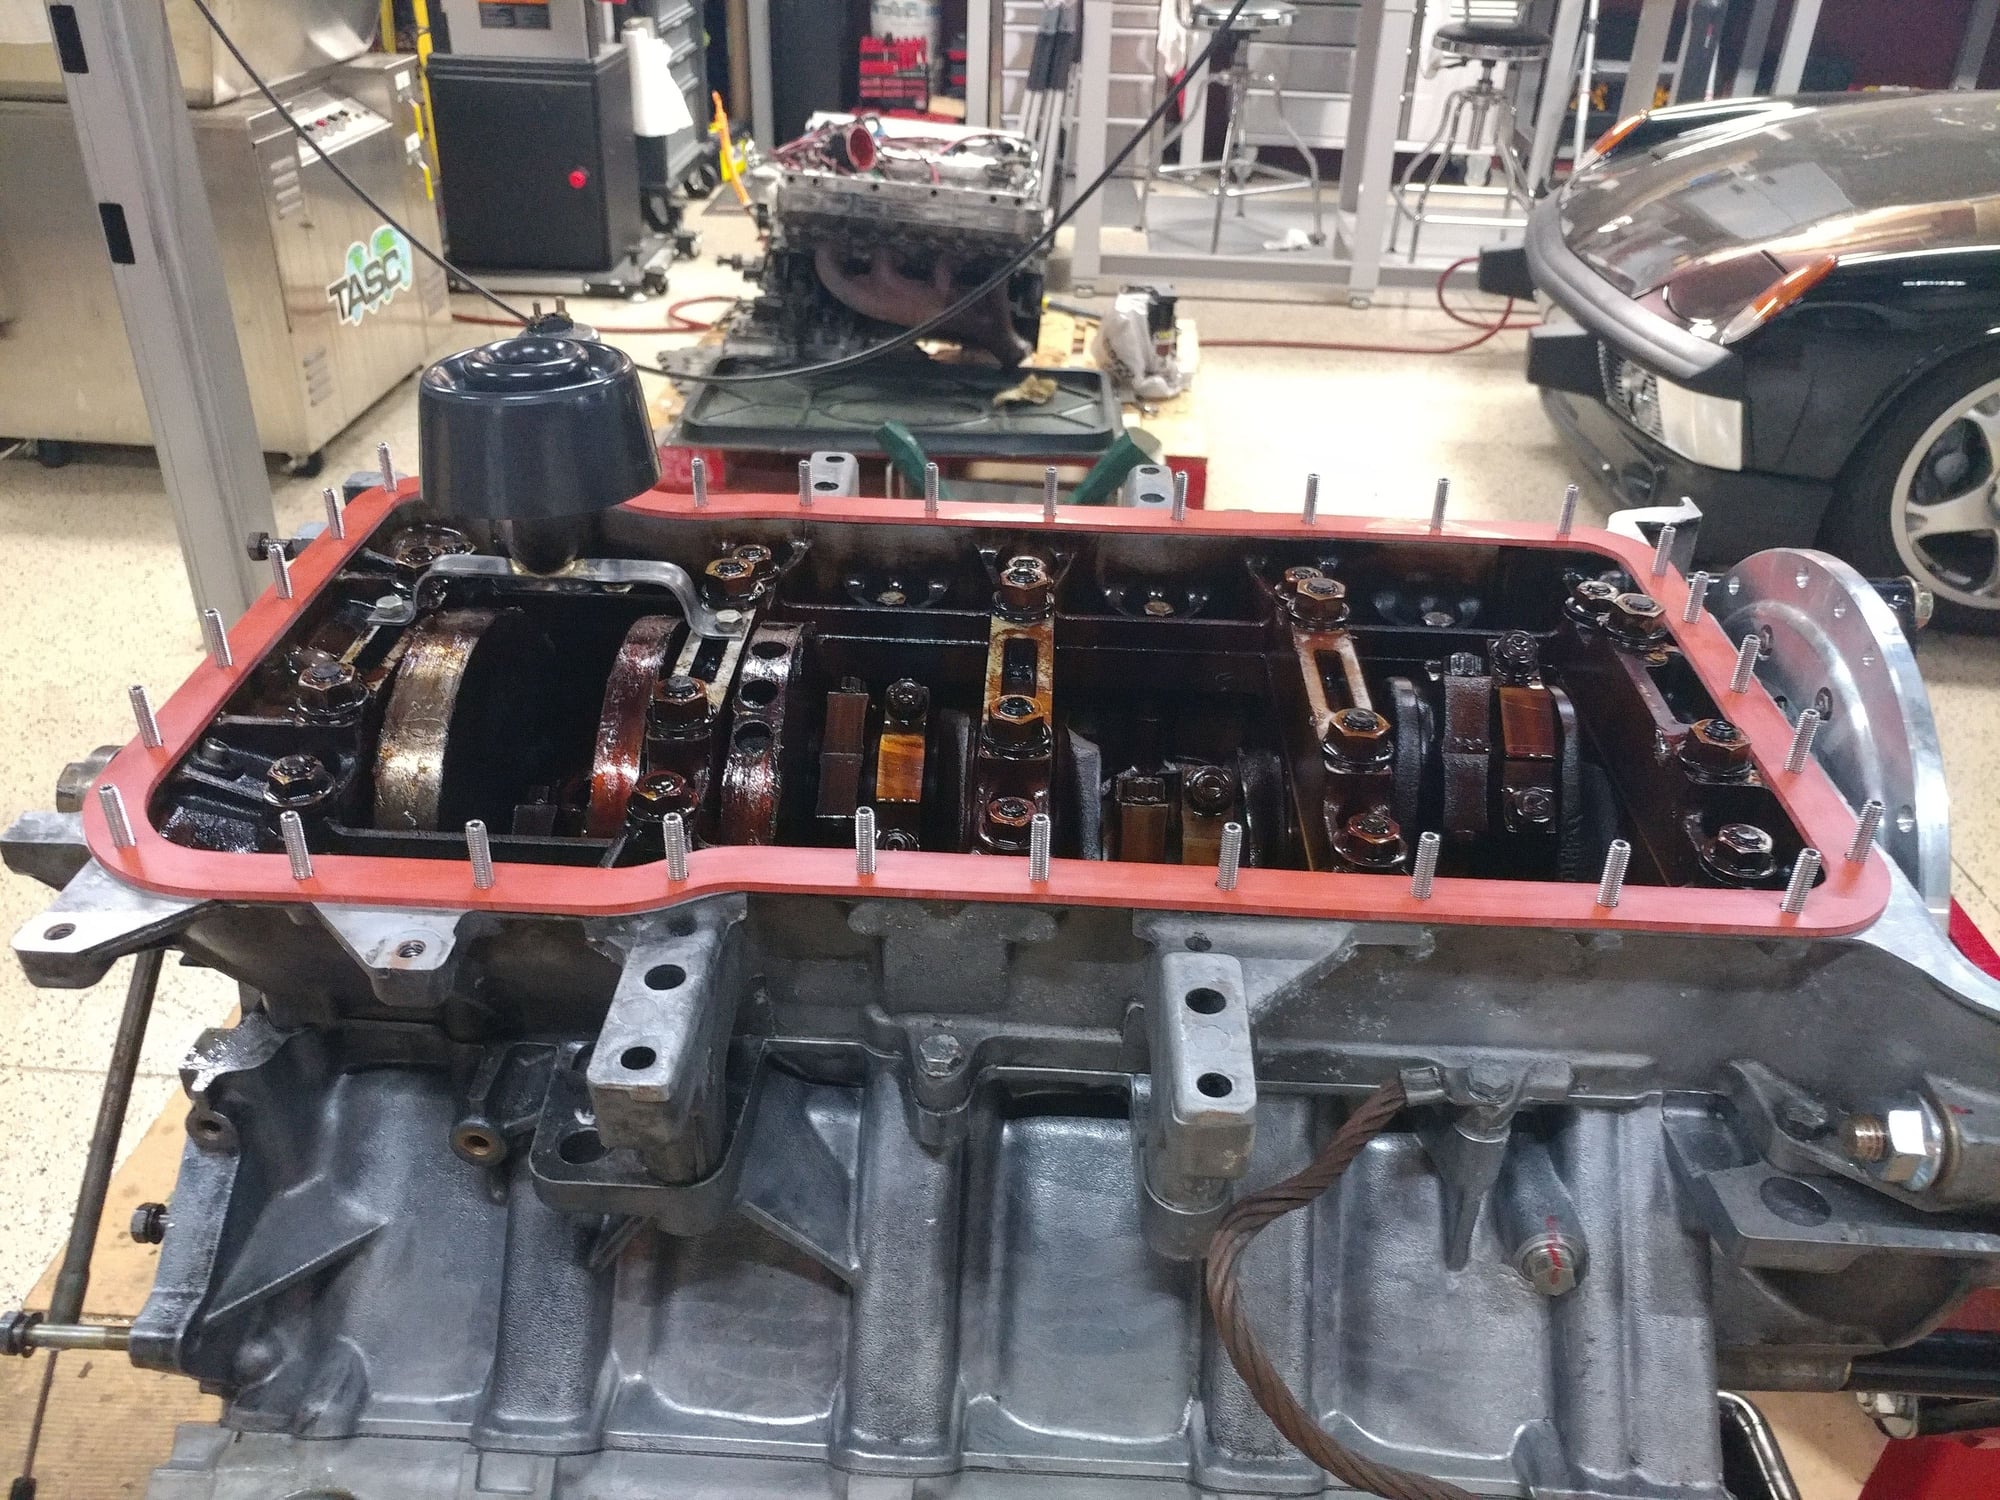
The new oil pan and pickup arrived while I was out of town this week. They weren't bad, but got a chance to really clean them up today and should be able to get the installation done over the weekend with the new silicone gasket and pan stud kit.
Turned out to be a really nice pan with only a little impact mark on the bottom near the drain plug. No tears in the windage screen, no cracks in the clover, and the rubber seal on good shape.
Complete with the "later" (superceeded) pick-up to clover leaf seal.....
Semi-retired, as of Feb 1, 2023.
The days of free technical advice are over.
Free consultations will no longer be available.
Will still be in the shop, isolated and exclusively working on project cars, developmental work and products, engines and transmissions.
Have fun with your 928's people!
Complete with the "later" (superceeded) pick-up to clover leaf seal.....
Gold treasure, instead of just silver treasure,
Ha, more dumb luck...had to buy the pickup separately as the seller of the oil pan didn't have it any longer and this one was cheaper than the others I found - $45 I think.
Nice work here , I put one of those pans in Samanthas engine,
from your photos I would remove the paint from the faces of the cam drive gear ,
since its a compression assembly you dont want the painting to act as a bearing and slowly wear off,
thus creating a space, then the bolt possibly coming loose.
The factory never painted any of these gears neither should you.
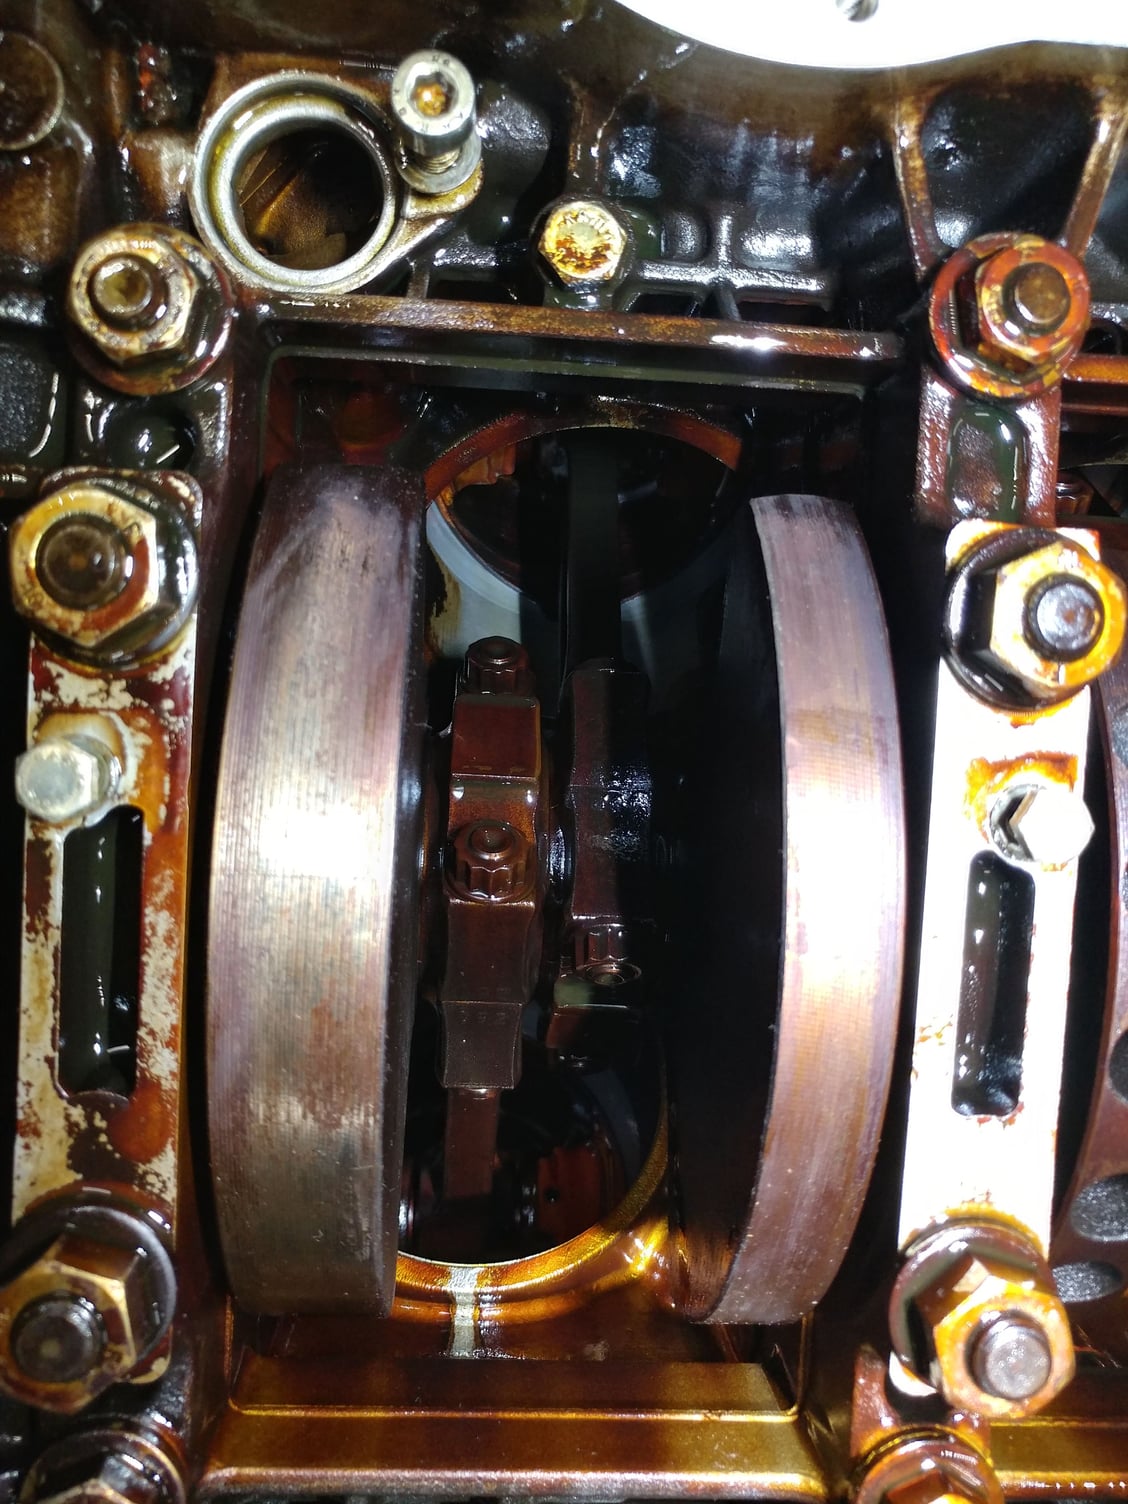
I pulled the oil pan from the 4.7L motor tonight to install the new pan, pickup, and silicone gasket.
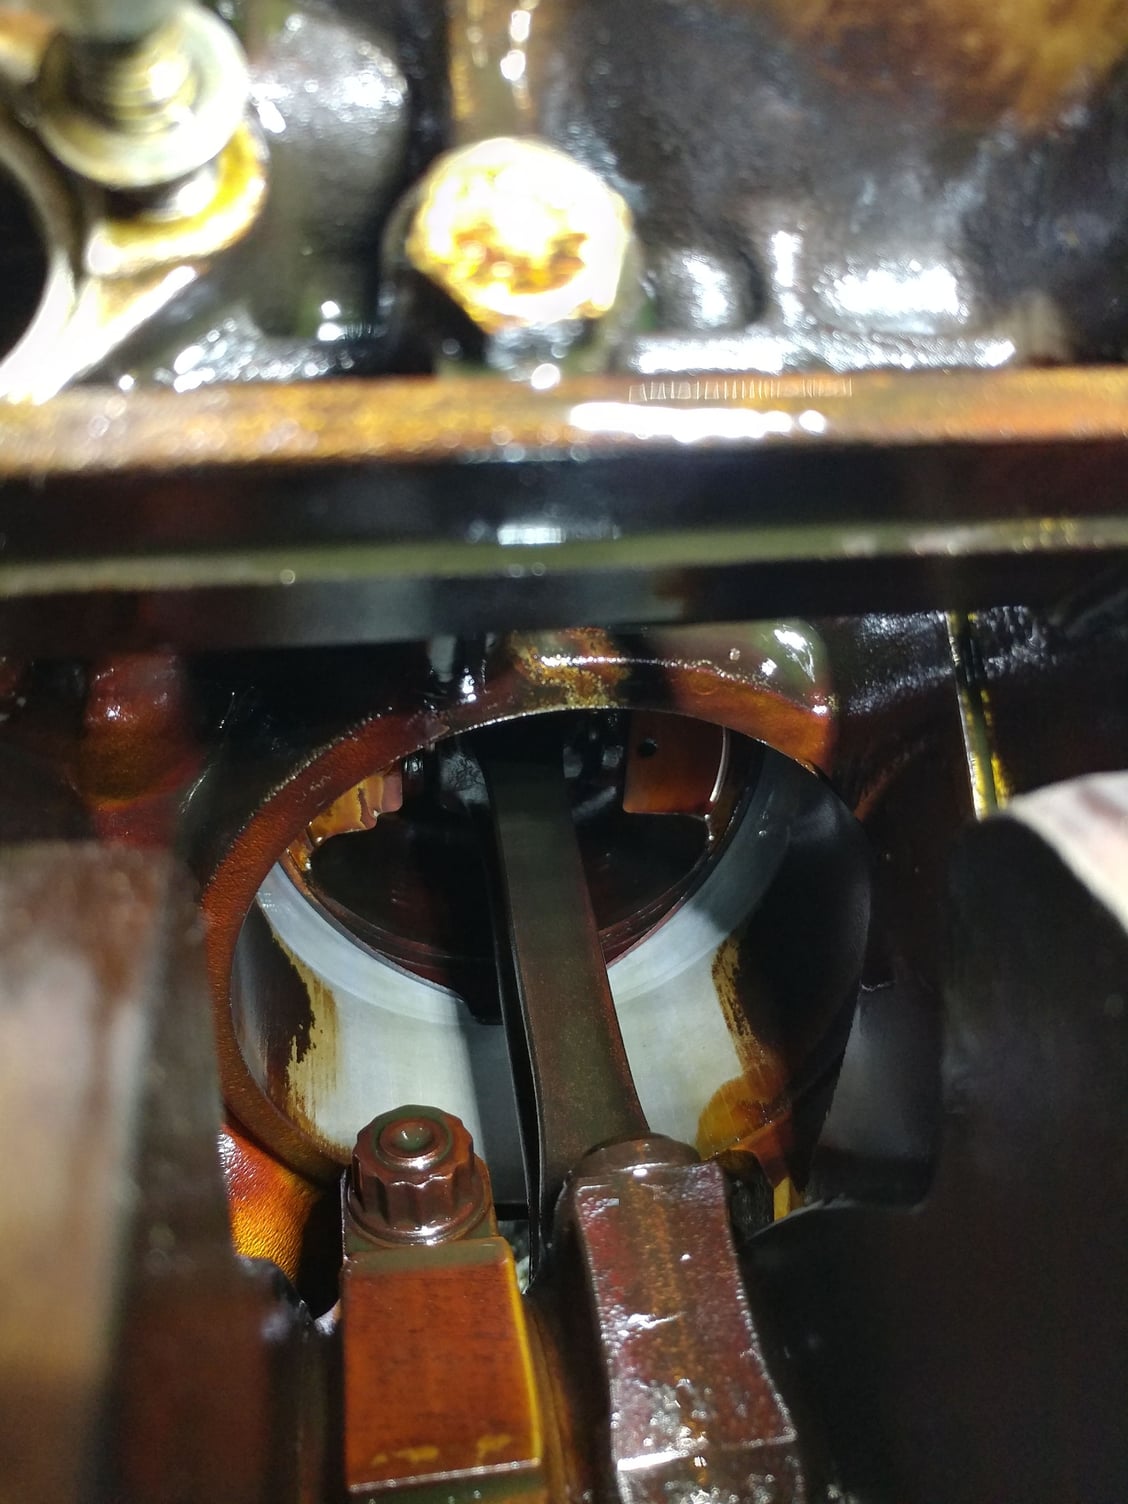
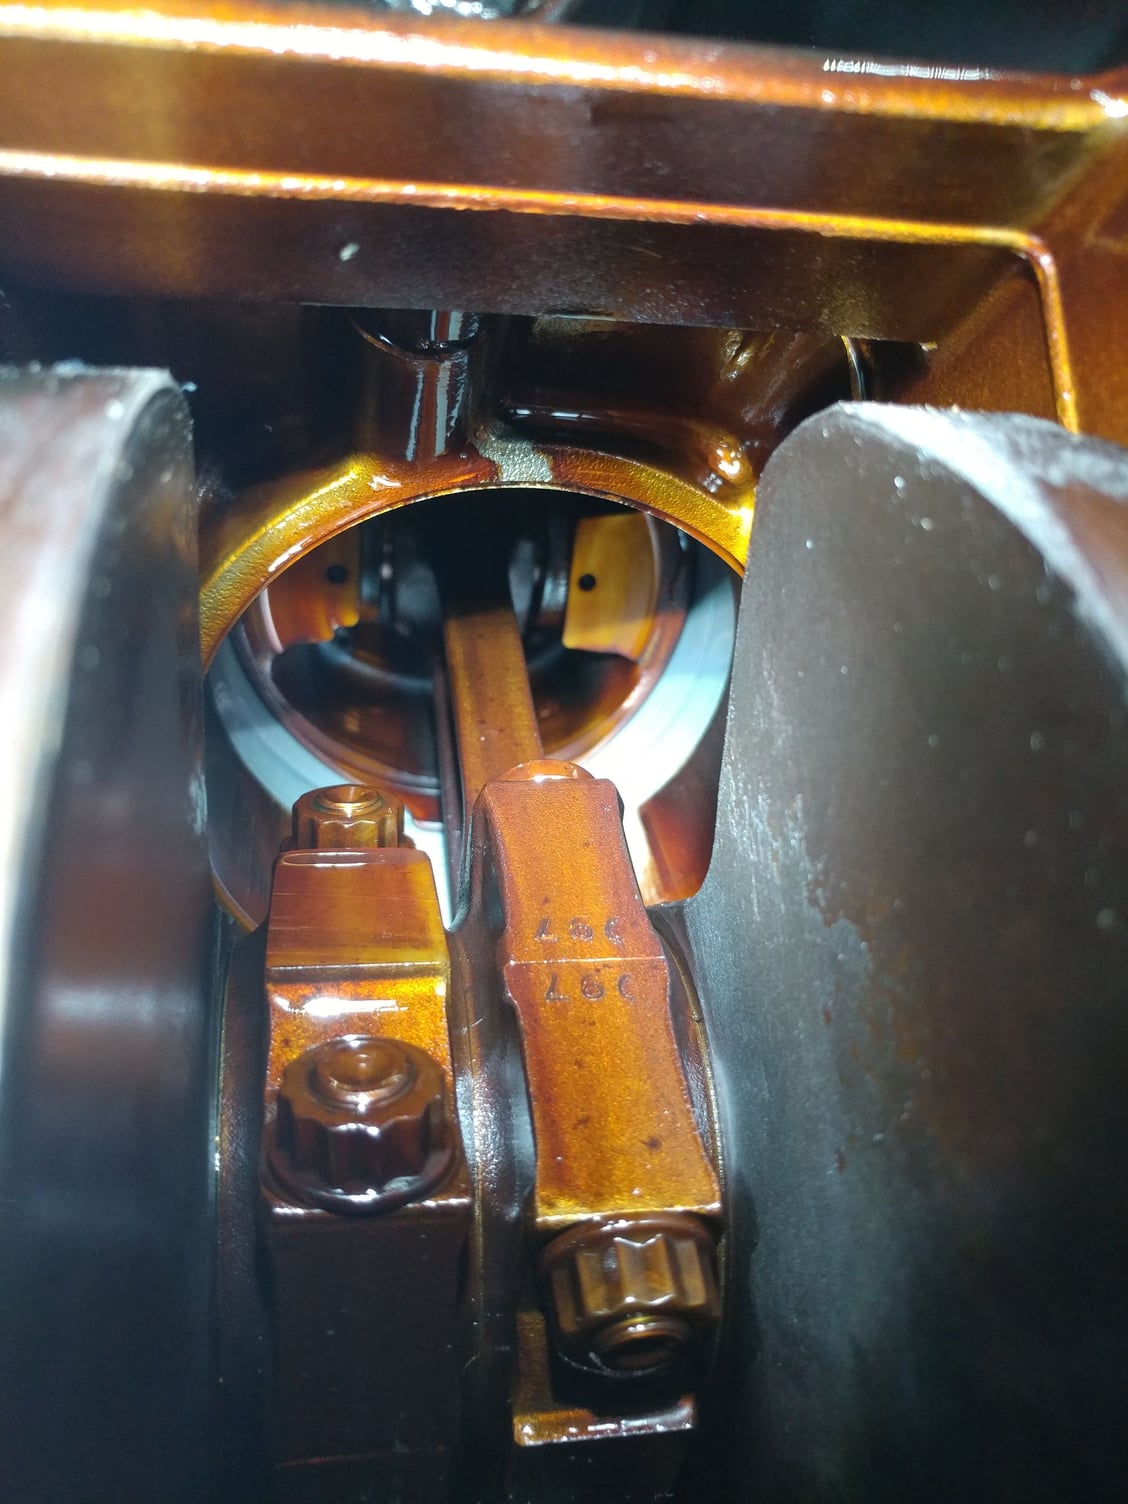
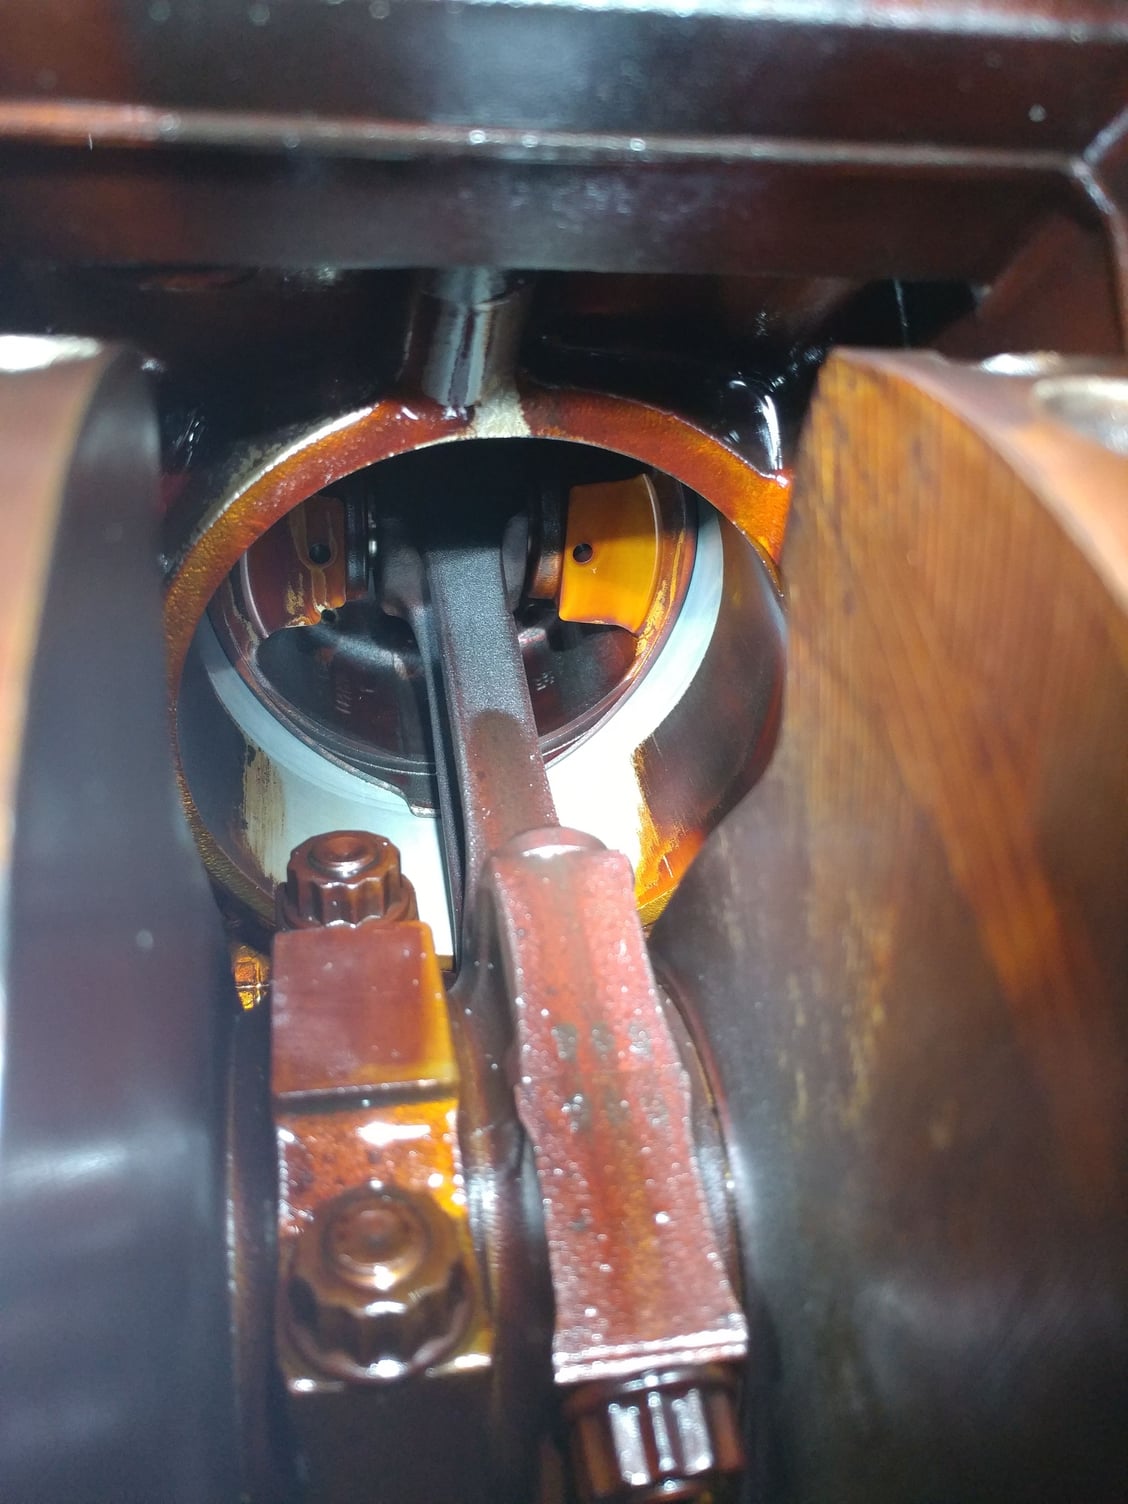
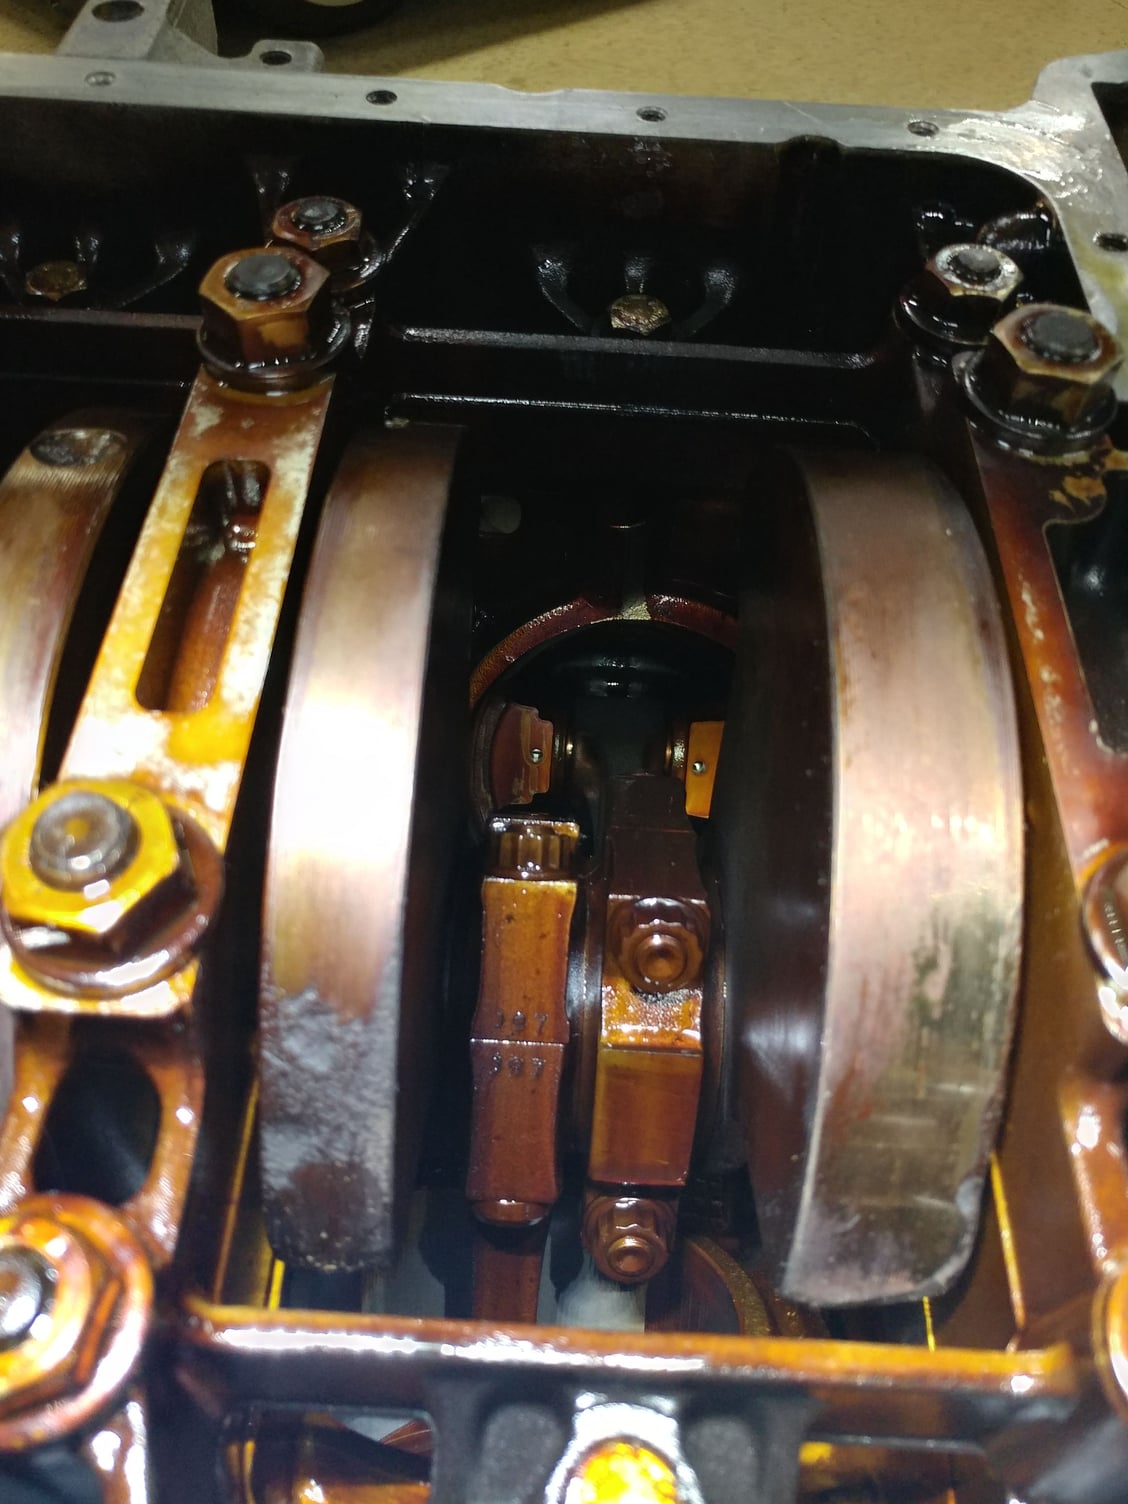
Is this wear and damage on the crankshaft OK. I assume the important part of the crank is the part where the bearings ride, which I can't see, but I would have preferred that the 2 on the one side look like the 2 on the other side without the chunks and rough spots.
I photographed what I could see of the bores as well, and they look pretty good to me.
Assuming the situation with the crank will be OK and not really having the time to lose what I could get accomplished tonight, I forged ahead with the oil pan gasket, stud kit, etc.
I cleaned all the mounting holes by spraying some brake cleaner into them while the engine was right side up, then flipped the motor and used some Q-tips to get the threaded mounting holes really clean.
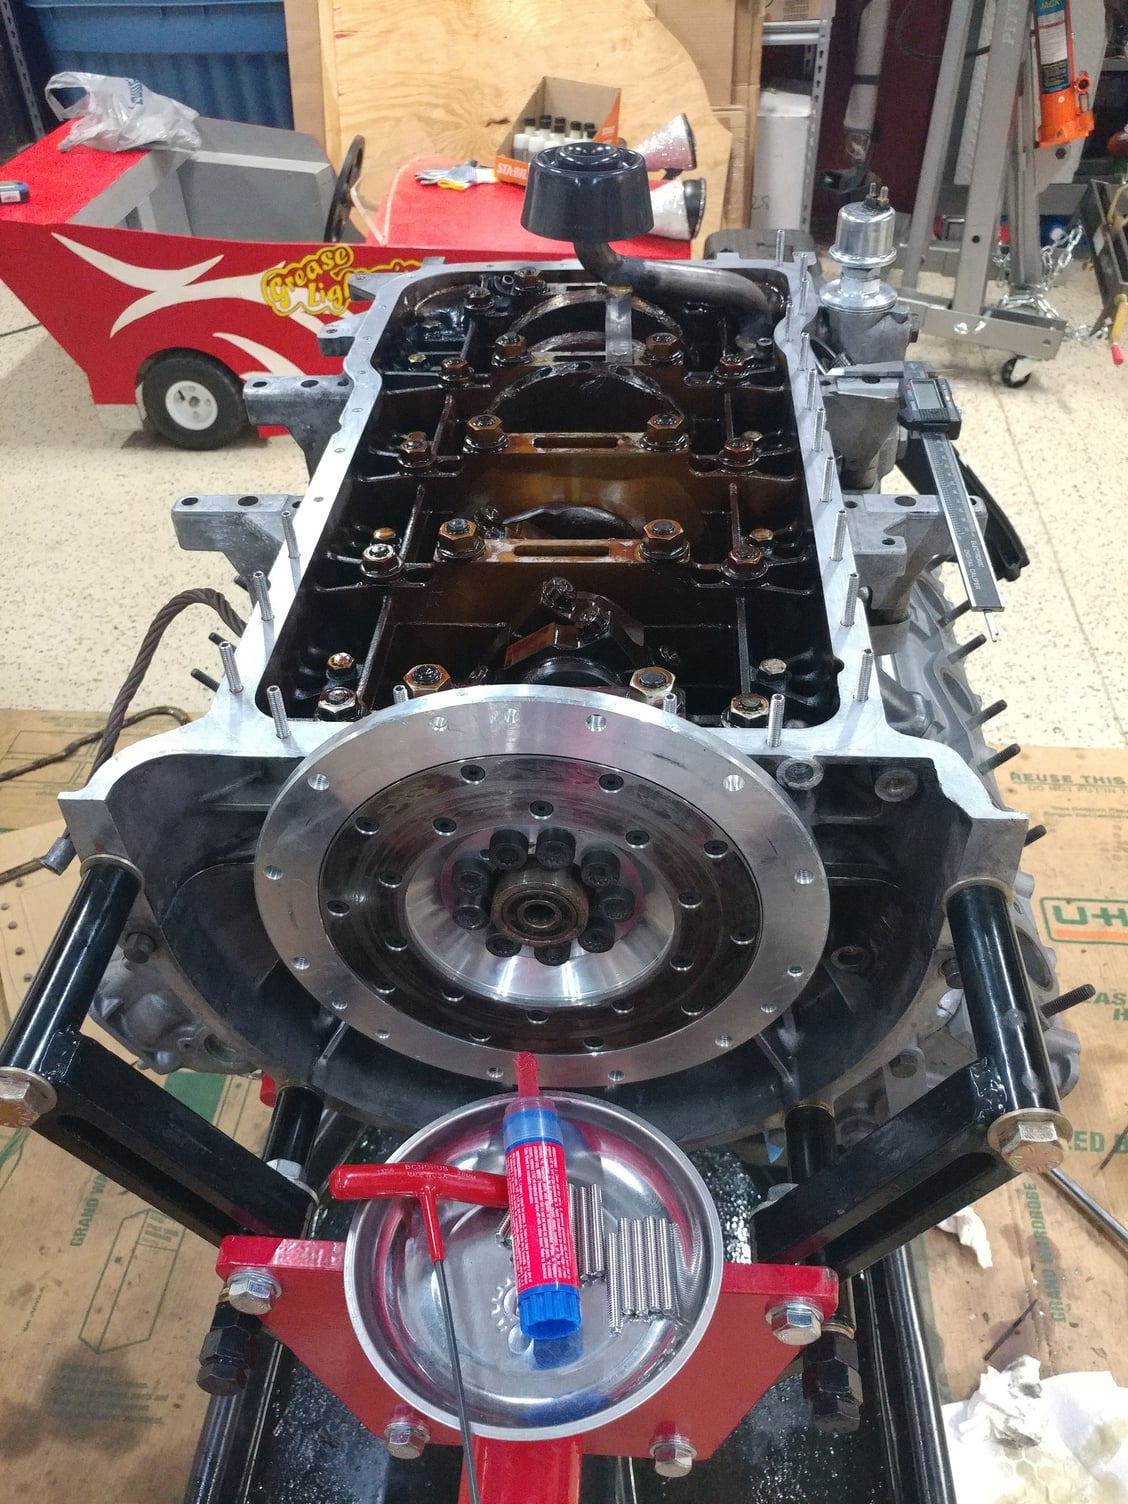
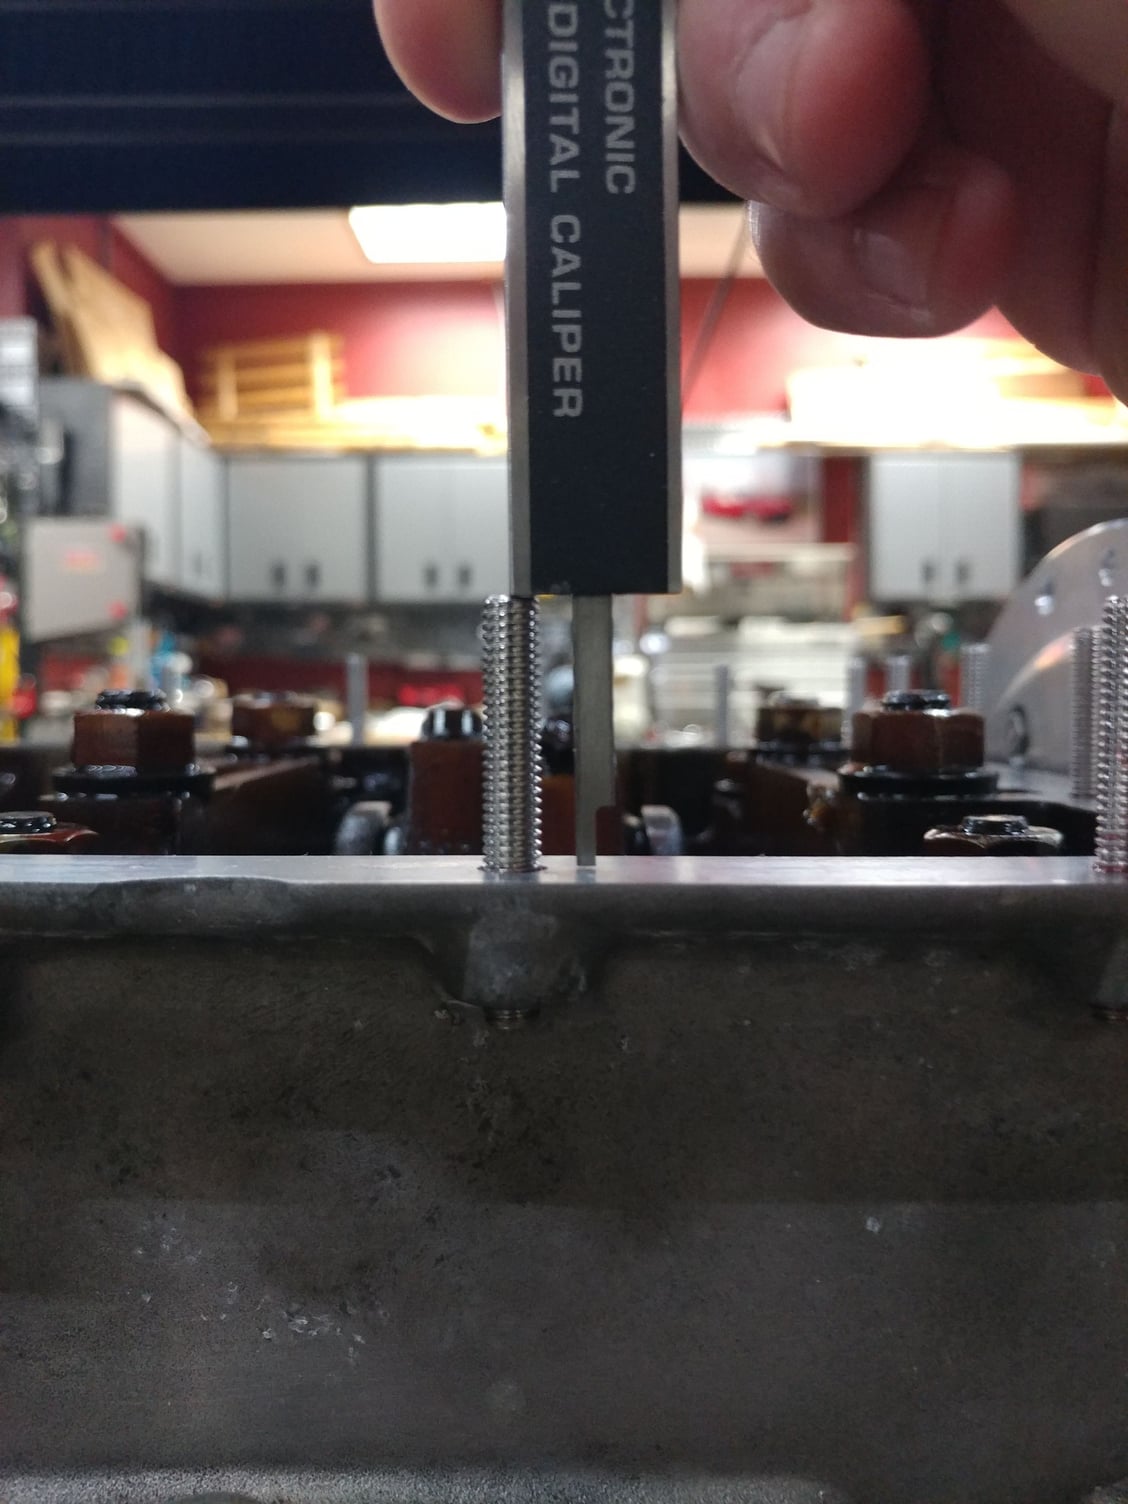
I then loctited the studs into the engine. I first put in a couple that didn't have the through hole to see at what length they bottomed out, then used a caliper to set this distance and installed all the studs to the same depth, specifically the ones with through holes where they would turn through as long as I want them to.
I reinstalled the pickup assembly into the pan I bought, cleaned up both surfaces really well, then set the gasket onto the studs and then the pan onto to gasket. Then I put on the washers and threaded the lock nuts on until I felt the resistance of the nylok portion. I'm going to let the loctite setup overnight so that when I go to tighten the nuts, the studs that don't bottom out won't turn in. This will also let the weight of the pan sit on the gasket overnight to get it nice and flat before I torque it down. I'll probably use an allen wrench to hold the stud at the same time I tighten the nut.
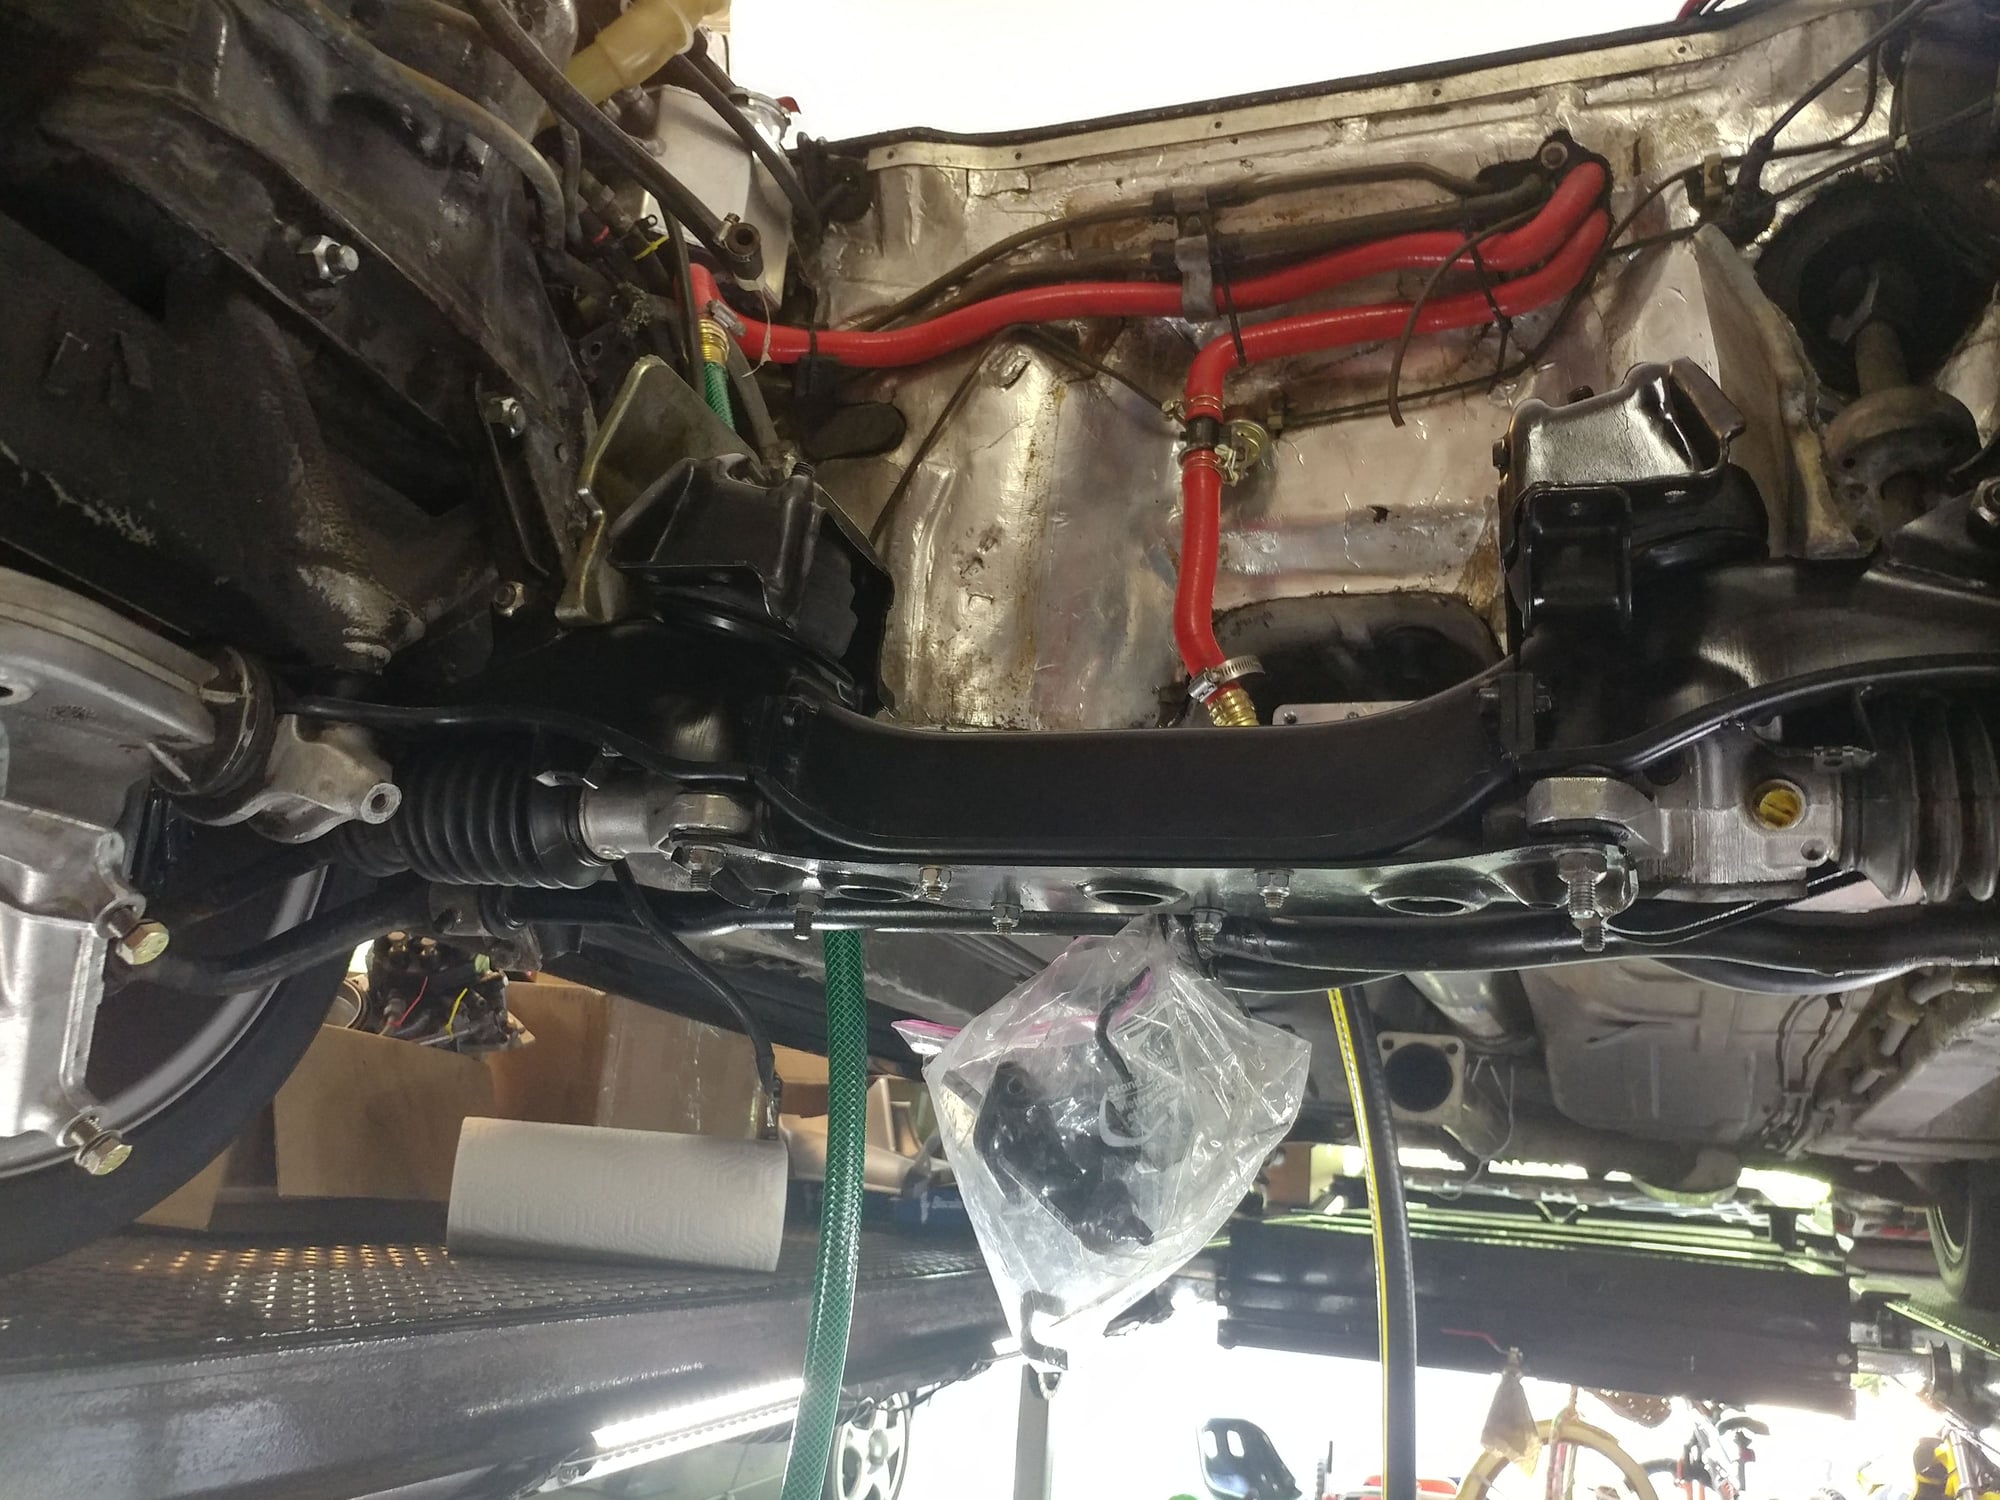
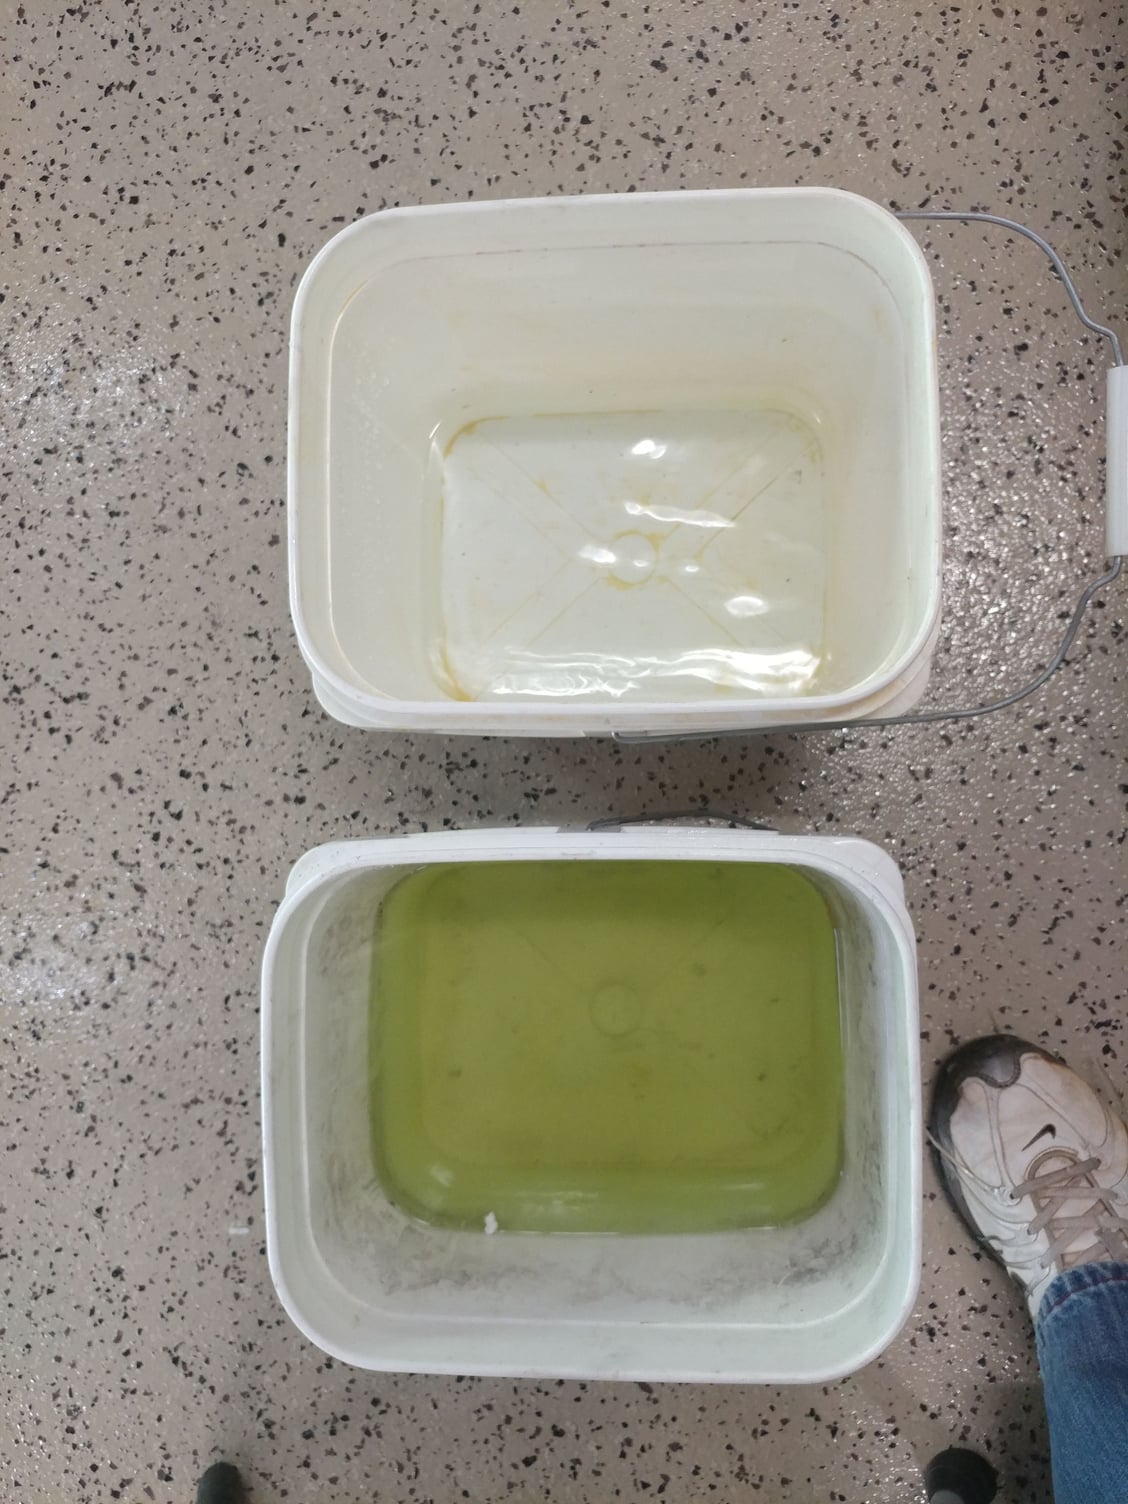
I'm also going to change my coolant to orange Dexcool from the green ethylene glycol I had been running since the orange has better anti-corrosion properties, so I put the heater control valve to full hot and flushed the heater core of the green coolant using a hose until the water ran out clear (note one bucket was green and the final one was clear).
That's it for tonight.
By the way, this Sunex engine stand is great. It effortlessly allows rotating the motor and holds it in any position where you stop the handle. There's no "flop" as you cross over the top either. Thanks GB for the recommendation in a different thread that I came across.
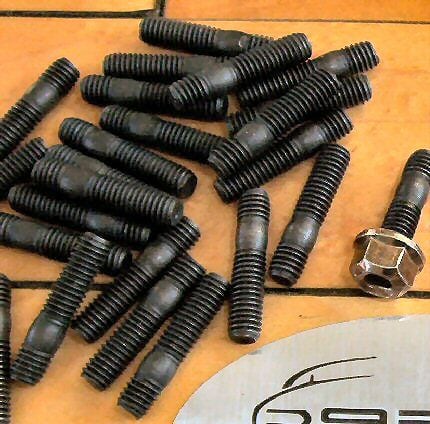
I don't see a shoulder on those studs and that concerns me. They also look long, but maybe that's just an optical illusion. The barrel on the stud should look like the barrel around a night-crawler. Without the barrel, the stud will not stop turning in. They are supposed to be installed until the barrell (aka shoulder) of the stud stops further turns, then given a little pre-torque to set the stud.
I don't see a shoulder on those studs and that concerns me. They also look long, but maybe that's just an optical illusion. The barrel on the stud should look like the barrel around a night-crawler. Without the barrel, the stud will not stop turning in. They are supposed to be installed until the barrell (aka shoulder) of the stud stops further turns, then given a little pre-torque to set the stud.
Carl, you're correct that there aren't any shoulders on these studs that came with that kit, so I'm hoping the loctite and counter holding the stud will allow them to torque down properly, since they require so little torque. If not, I'll have to replace the studs with a set like you've pictured. I'll do the ones that bottom out first to get a fell for what 30 in.lbs. of torque feels like then do the others with through holes uses what feels like a similar forces, as there isn't really a way to get a standard torque wrench on some of them anyway.
Length doesn't look too bad though, but maybe just slightly long, and only for the 4 in the center of the pan where the OEM bolts are usually shorter, as all the studs in this kit are the same length.
Being the engine guru that you are, is that crankshaft OK to proceed with?
Kevin is right, if they are too long, you will have trouble mounting the starter.
Loctite is an anaerobic product. It only congeals in the absence of air. It is the pre-torque on the threads that stretches the fastener and seals the threads against air. I think, in the absence of pre-torque, the Loctitie will not set and you will find your studs will turn when met with the self-locking nut. Try it and see.
I cannot comment on the crank, I see no pics with any bearing caps removed, and of course, micrometer readings. I strongly recommend you replace the con rod bearings right now, you will never have a better chance and its a great way to boost oil pressure. Besides - its the only way to inspect those rod journals. Replacing rod bearings is an easy job.
Mount the starter to see if the studs are too long causing an interference problem.
Good idea, but that might be hard to test with my setup. My starter mounts to the lower clutch bell housing rather than to a normal starter bracket and the engine is mounted to the stand on the flywheel side, so no way to put the upper and lower bell housings on currently. If there's intereference, I'll just have to adjust the length of those studs during reinstallation.
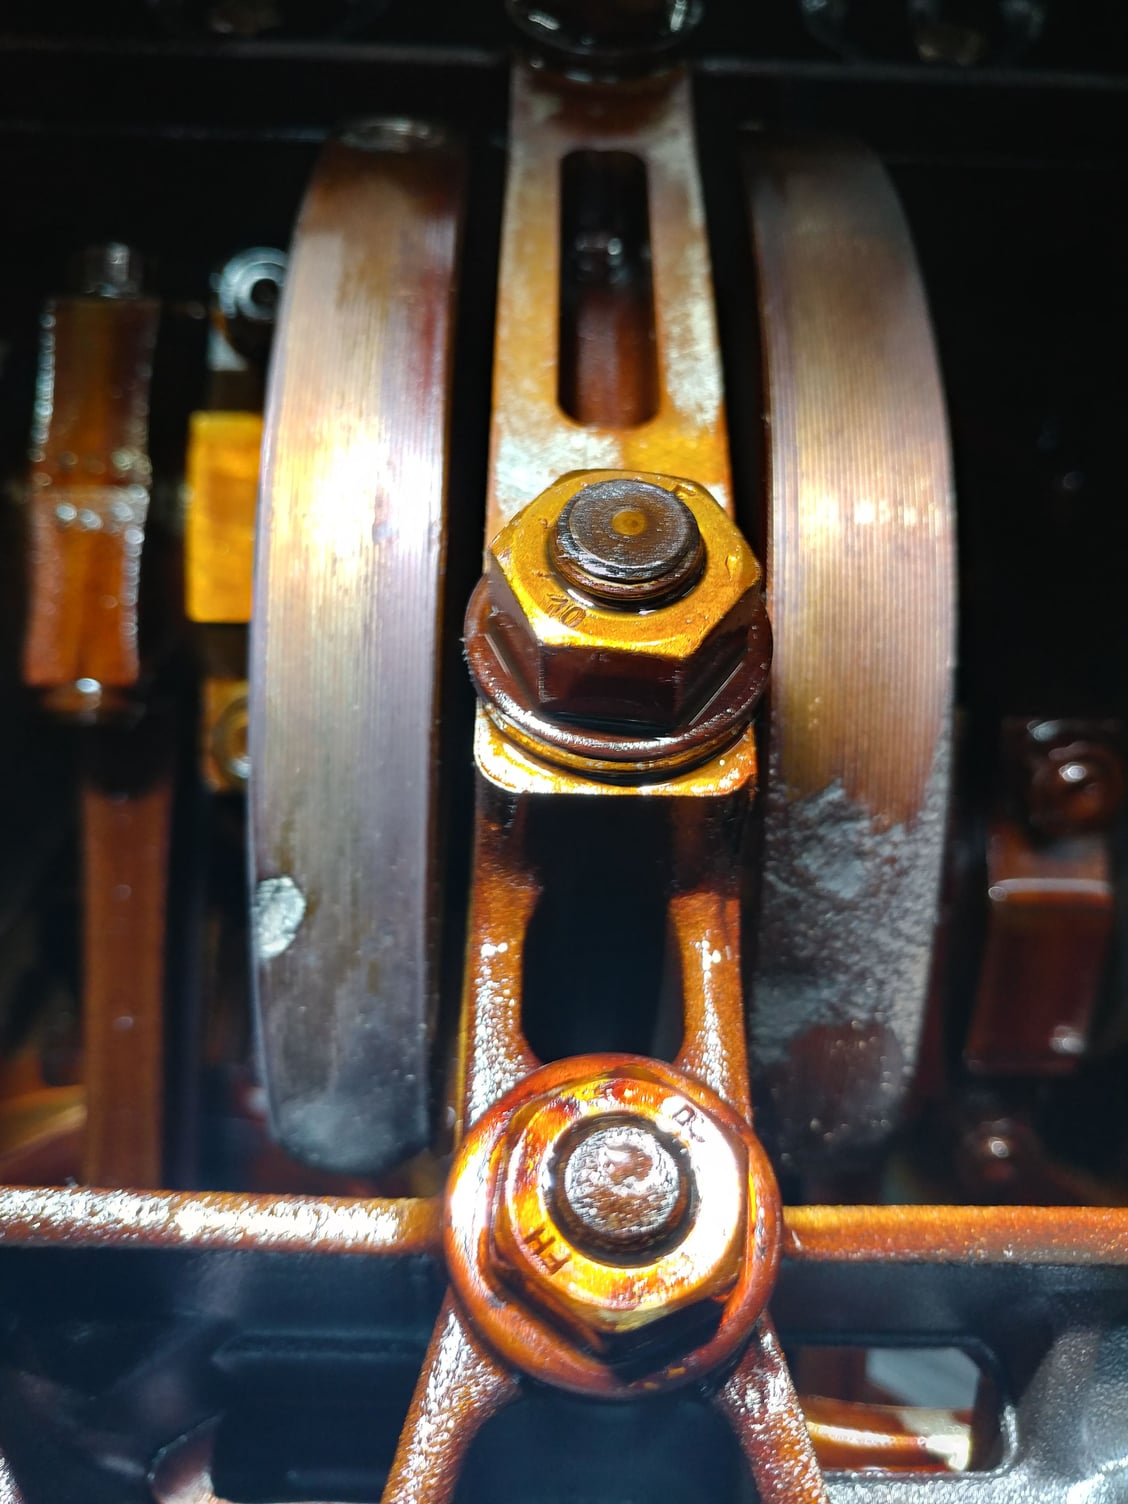
Here' my starter before I took it loose and I see the potential for interference you're talking about with the studs directly above it.
Here's the normal starter bracket I had to cut off the new motor
I cannot comment on the crank, I see no pics with any bearing caps removed, and of course, micrometer readings. I strongly recommend you replace the con rod bearings right now, you will never have a better chance and its a great way to boost oil pressure. Besides - its the only way to inspect those rod journals. Replacing rod bearings is an easy job.
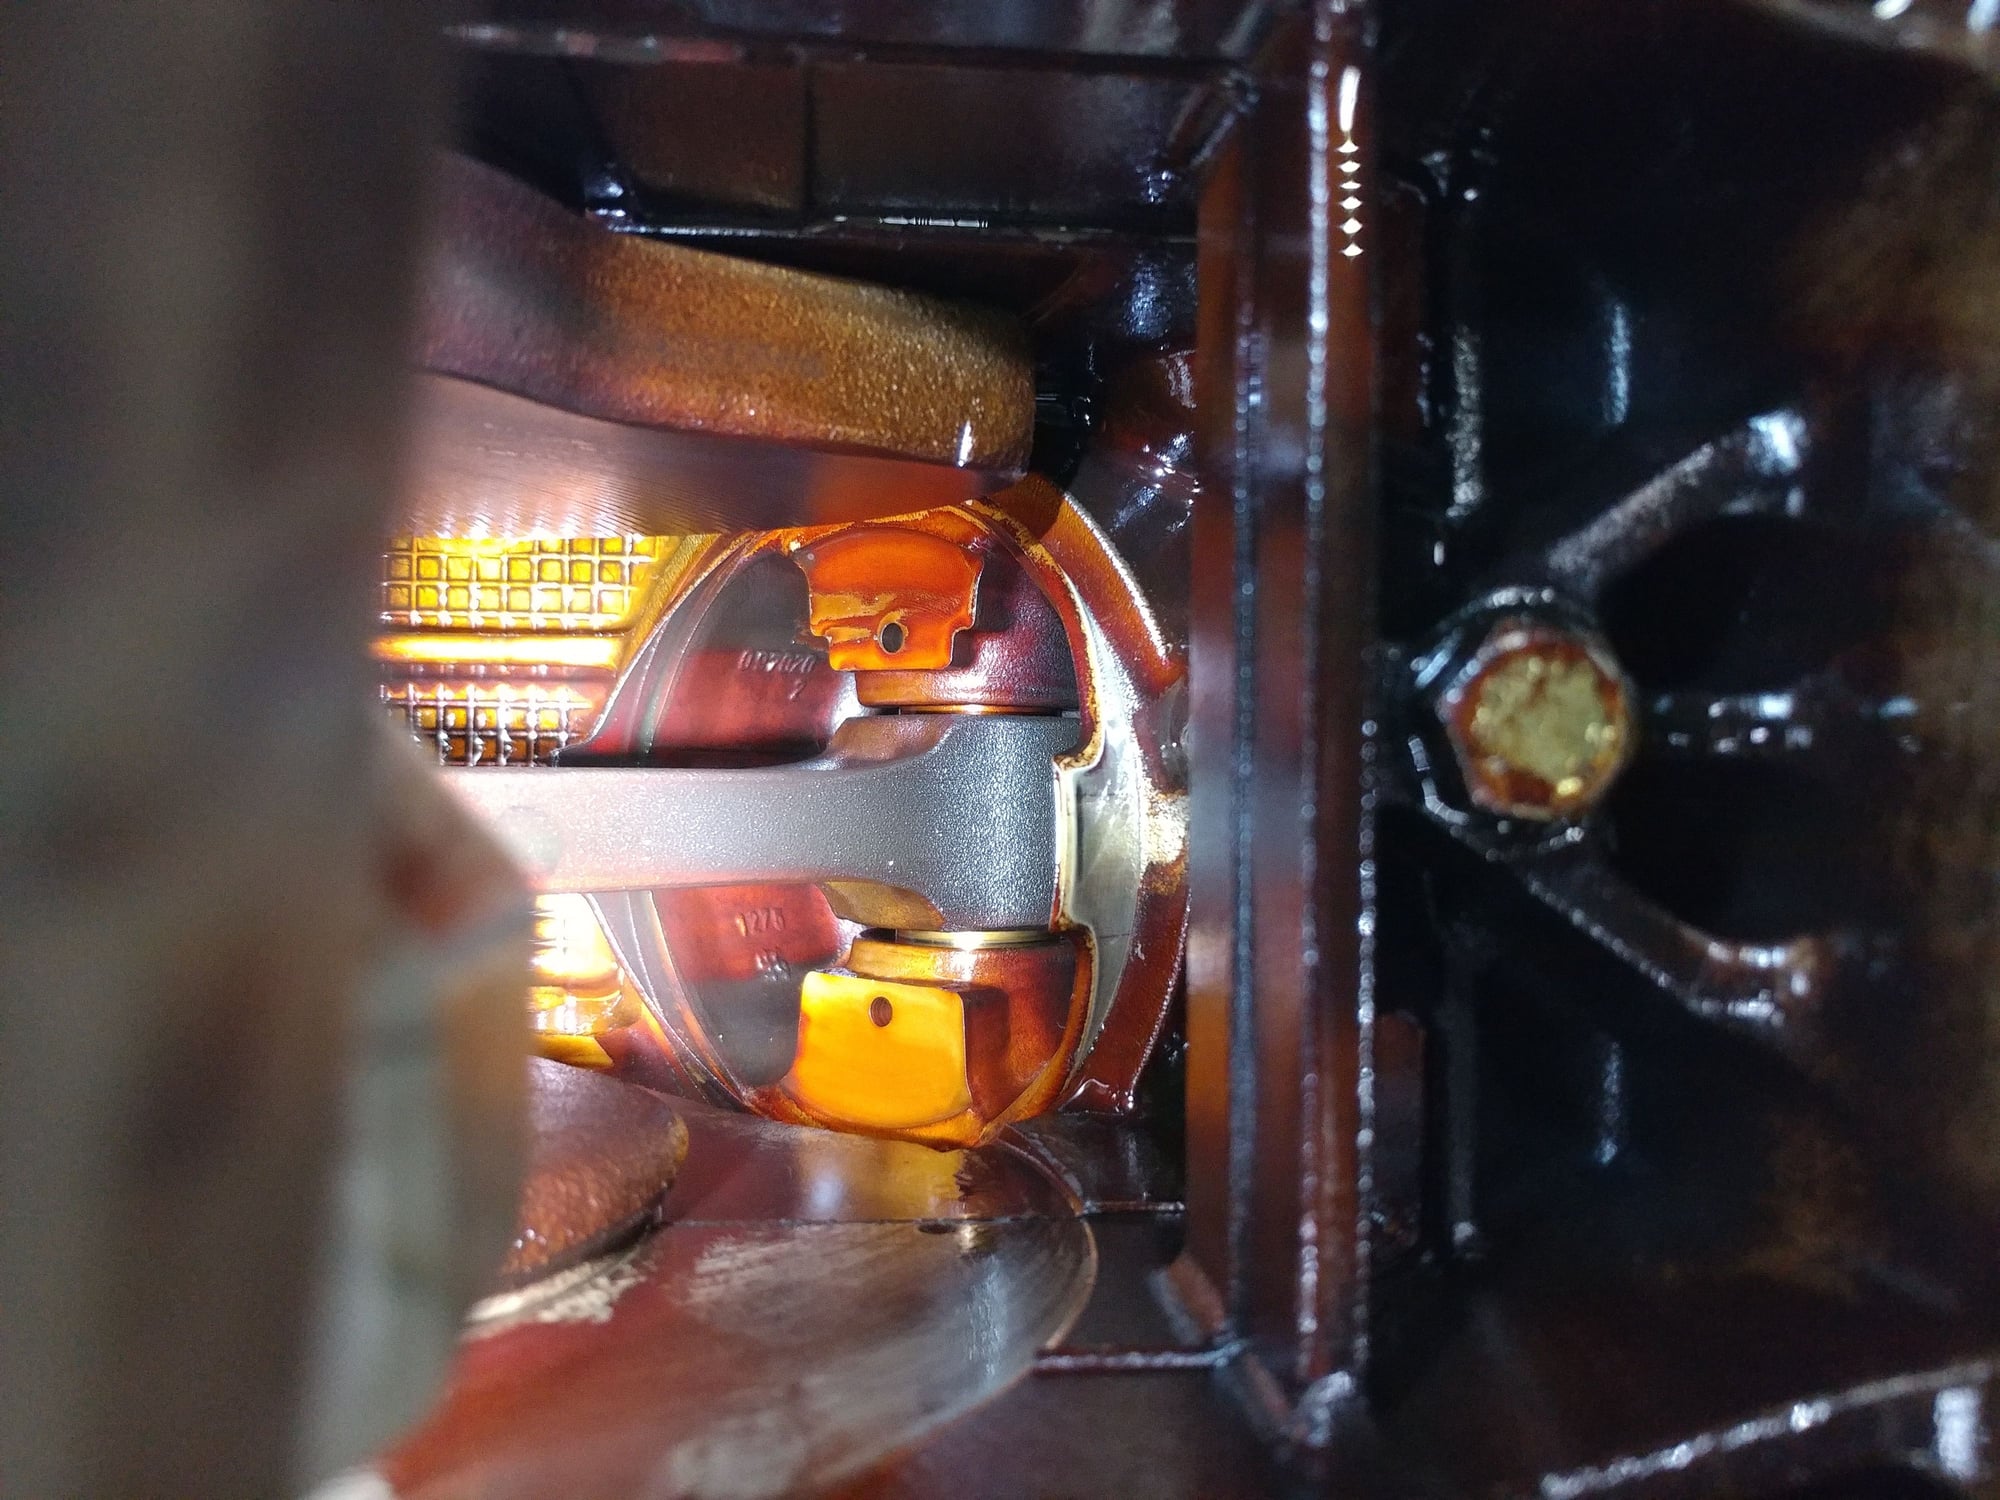
This is the part of the crank I'm referring to - it's on the counterweights and not the business portion that rides in the bearings. A few rough spots and a couple shallow chunks missing. Also, what causes damage to the counterweights since they don't come into contact with anything?
I"m not going to undertake further disassembly at this point, so won't be taking the connecting rods apart to change the bearings. Need to get the car put back together and on the road. If the project gets more extensive than this, it runs the risk of getting boxed up and setting on the lift for the summer as I"m approaching having too much else going on with work travel and the kids school year ending to have the time to continue with it.
I'm moving past the disassembly point and into reassembly. If it has a major issue after being put back together, at least it will be together and occupying less space than it currently is, but hoping for the best.
I'll be using a Break In oil once it's put back together which should help remove some of the oil build up it looks like is here and dissolve the Assembly Lube that's on some of the parts as they go back together, then running my normal Driven DT50 after that.
Those counterweight marks seem a little unusual, but the crank is forged and the major diameter of that section simply did not flow out far enough to be machined off like the rest of the counterweight. Not the best job on a crank from Porsche that I have seen, but not a failure point, either.
Disagree with your decision not to even inspect the rod bearings while you are here. At the least, pull rod caps on #2 and #6 and inspect. That will tell you a LOT. If you don't, and it has worn or damaged bearings, your time with this motor in the car could be real short. Its up to you.


 05-01-2019, 11:41 AM