When you click on links to various merchants on this site and make a purchase, this can result in this site earning a commission. Affiliate programs and affiliations include, but are not limited to, the eBay Partner Network.
928 Roofs always seem to be prone to refinish problems.. what is the best way to seal up a preparation like the one pictured? you've got bare steel, edges of galvanization, factory sealer and primer all exposed here. how do you prevent it from blowing up in 5 years?
You are correct that the flat panels are more prone to refinish issues, though this isn't a 928-specific truth as much as it is the reality for all automobiles. The fact is the panels see the most constant rate of UV exposure. UV rays break down paint jobs by process of delamination (cohesive) rather than primer interface breakdown (adhesive).
Depending on the level of film penetration by the UV rays, the metal may or may not remain protected by OEM sealers and electrostatic coating. In the case of this 928, most of the factory protection was compromised and the evidence manifests as flaking undercoats. The required correction is removing all of the compromised undercoats. From that point, the process I prefer is machine sanding until feather edging is achieved. Before replacing undercoats can begin, it is important to have a clear understanding of the different surfaces you're working with AND the products you choose as undercoat replacements. Maximum closure and adhesion is the goal. Much of the steel is still closed in the photo'd state. For the exposed steel, chemical and mechanical etching will occur provided that the technician follows the steps outlined in any pertinent TDS sheets (cleaners, equipment setup, etc.). For the remaining surfaces, mechanical etching (sand scratches) is all that will be required BUT we still have to establish that no chemical disruption between dissimilar materials can occur or else our adhesion will be compromised. Think product compatibility.
Topcoat durability will depend on the quality of those products if all of these bases are covered and all steps for primer interface adhesion are satisfied. The issue of delamination is best combated by keeping your car out of the sun. Since the 928 is an ENTHUSIAST car, this isn't and shouldn't happen.
Choose the best clear coat available! There are many products with excellent resistance to UV penetration and I always happy to direct 928ers on these matters in their refinish endeavors irregardless of my physical involvement in the process.
FUN FACT: Clear coat delam doesn't occur as conventional wisdom might suggest in that it doesn't start with deterioration within the clear coat itself. The UV rays breakdown the base coat first. As the color deterioration worsens, then the clear coat breaks down from the base coat interface.
Seems like MANY resprays result in roof, sunroof, and top of hatch issues later on from subsurface problems that were buried improperly. I appreciate your thoughtful reply, but what products have you had success with (and followed TDS to) to seal the multiple exposed surfaces left in the pics? Is there an argument to be made that once you get this far, its best to strip the entire panel to bare steel ? leaving only one surface type to get sealed properly ?
Seems like MANY resprays result in roof, sunroof, and top of hatch issues later on from subsurface problems that were buried improperly. I appreciate your thoughtful reply, but what products have you had success with (and followed TDS to) to seal the multiple exposed surfaces left in the pics? Is there an argument to be made that once you get this far, its best to strip the entire panel to bare steel ? leaving only one surface type to get sealed properly ?
I'm always careful about being too critical about the processes of others. Truth is, there are multiple proper therapies for resolving undercoat failures and I commend you for your in-depth investigation of the varying methodologies.
A bare stripped panel can absolutely be restored to a point of adequate adhesion and durability. The madness to my method is that I am going for maximum durability. Even when it means some penetration of OE corrosion protection will occur within a given panel, I still do the best I can for the remainder of that panel. Bare steel is harder to adhere to than OE undercoats or topcoats. Uniformity is the result of the new undercoat application and not a necessity beforehand with several of the BASF primers we use. The particular primer on this roof is R-M RMP27 and I have been thrilled with the results when working with this product.
Originally Posted by Kiln_Red
Maximum closure and adhesion is the goal. Much of the steel is still closed in the photo'd state. For the exposed steel, CHEMICAL and mechanical etching will occur provided that the technician follows the steps outlined in any pertinent TDS sheets (cleaners, equipment setup, etc.). For the remaining surfaces, mechanical etching (sand scratches) is all that will be required BUT we still have to establish that no chemical disruption between dissimilar materials can occur or else our adhesion will be compromised.
There is another involvement in priming over bare steel.
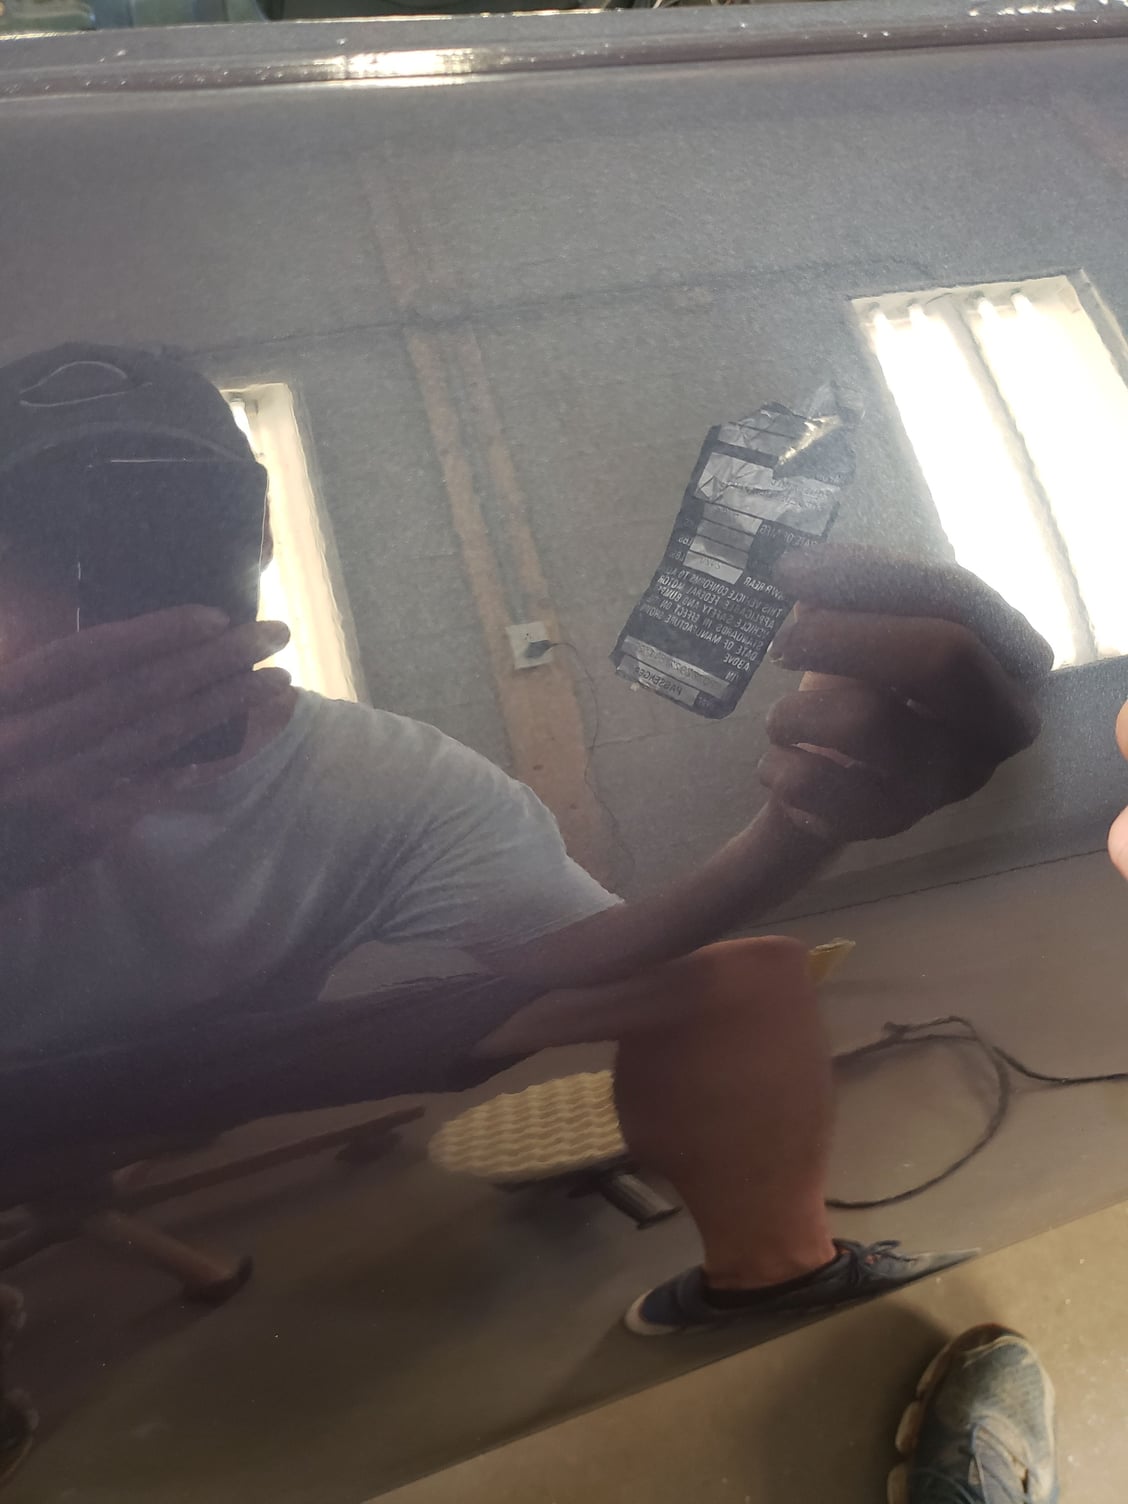
Time for an update. The plan is to send the '85 Euro back home with Brad this upcoming weekend. Working on final touches right now and captured a cool pic. You can literally read the old info label in the reflection of the clear! This is without sacrifice to leaving some amount of OEM-looking orange peel. Sure, it's flat and glossy. But, it still looks the way a Porsche should IMO. Definitely not like an old hot rod resto job, which I'm not a big fan off..
Man, oh man, it was a hot one today and it will be a slightly hotter day tomorrow.. This final sand and buff business is for the birds! It's a lot easier to prep and spray a car with everything taken apart, and really a much better job.. but it's not without its disadvantages when you go that far in. Every panel has excellent consistency to its adjacent panel now. We're getting there.. Slowly but surely. So long as my glass man and window tint arrangements don't let me down, I think we're going to make it by this weekend.
Quick update: I was able to pick the car up from Austin & Kerry this past weekend. I had a great time hanging with both of them over the long weekend and learned a lot from these two very experienced men. If you get a chance to have them work on your car, feel honored!
I have to tell you, this is the only way to paint a 928. However, it's ALOT, I mean ALOT of work to put all the small parts/accessories back on the car. This can't be underestimated. That being said, MASSIVE Kudos to Austin and Kerry (his body man) for all the work done on my car. Their attention to detail is incredible and the final product shows. This euro S2 looks killer with the federalized light delete, rub strip delete, and rear bumper-ettes delete. How Porsche intended it to look.
I can't wait to share pictures but there is still a lot more work to go before primetime...
It was a pleasure to work with you throughout the whole process and the exclamation mark for us is reflected in your satisfaction with the finished product.
No part of it was more enjoyable for us than playing host to you and Alex for the weekend. It was cool to have you guys at the shop (great kid BTW; your daughter picked a good one) and to get you guys active in some of the reassembly process.
Your '85 Euro will be a STUNNER!! I will be on the lookout for future pics.
Well after more than 2 years, the Prussian Blue Euro is 99% done. Just some minor tweaks left. In short, I couldn't have done this project without the help of the 928 community. Many thanks go out to all that provided information, tech help and resources. That being said, I put together a little video showing the journey. I hope you all enjoy!

 07-11-2019, 01:51 PM