When you click on links to various merchants on this site and make a purchase, this can result in this site earning a commission. Affiliate programs and affiliations include, but are not limited to, the eBay Partner Network.
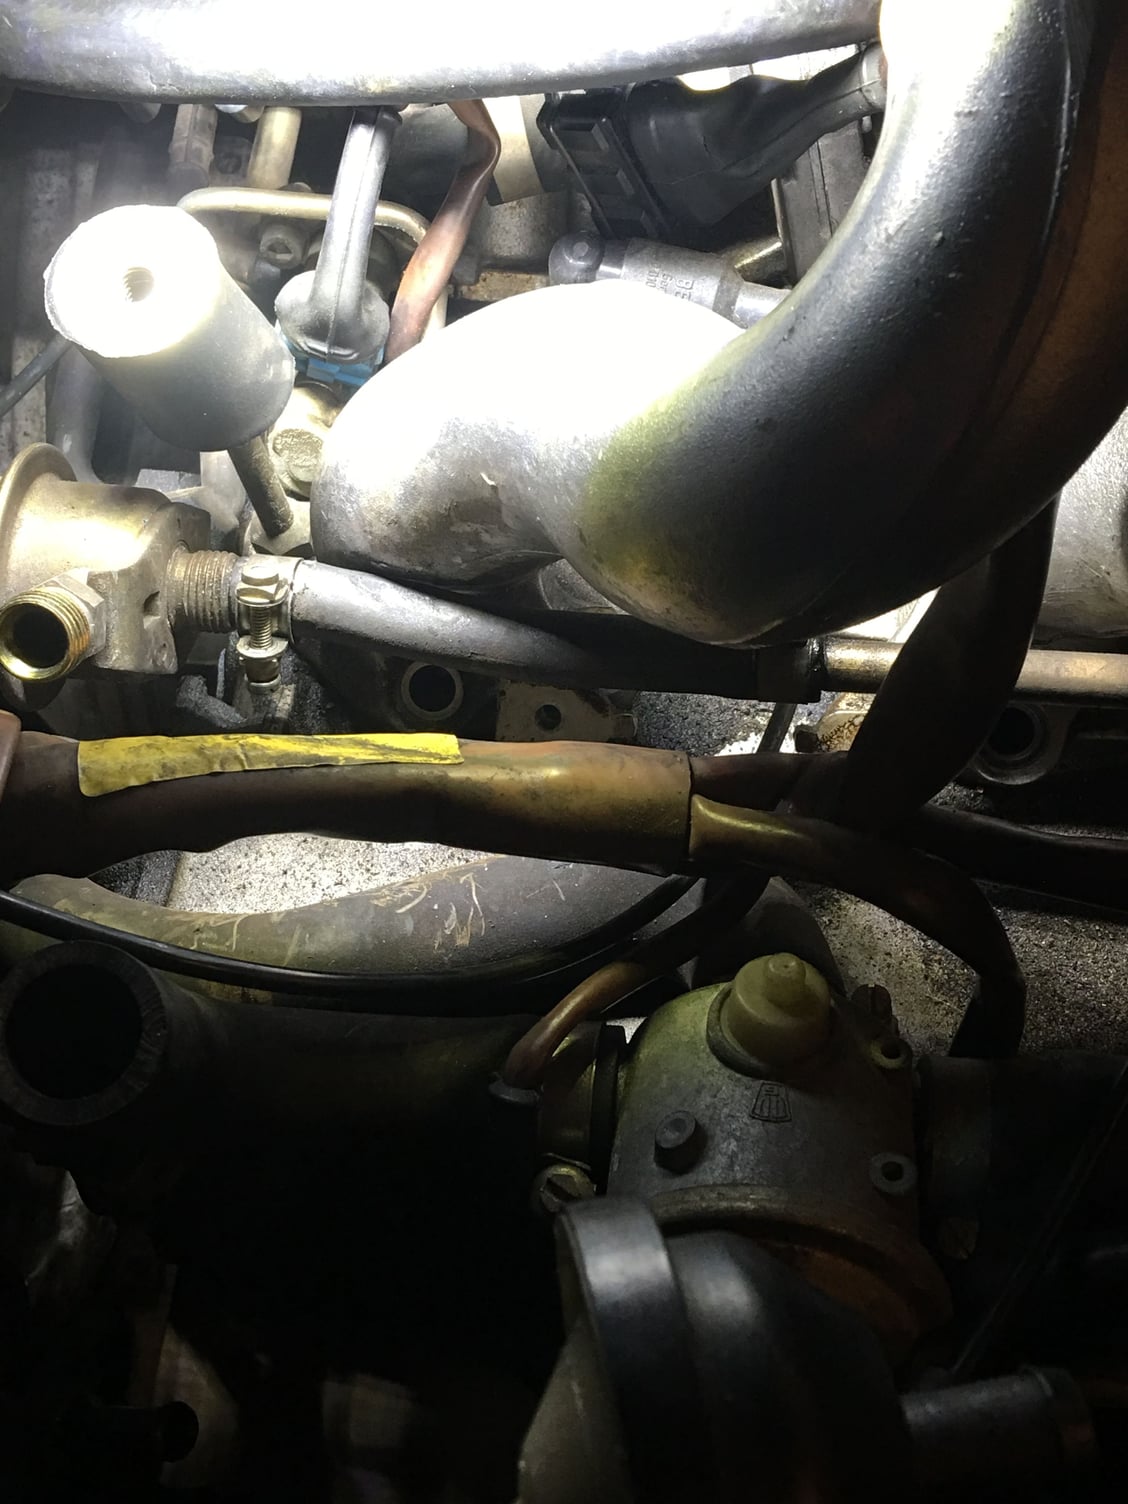
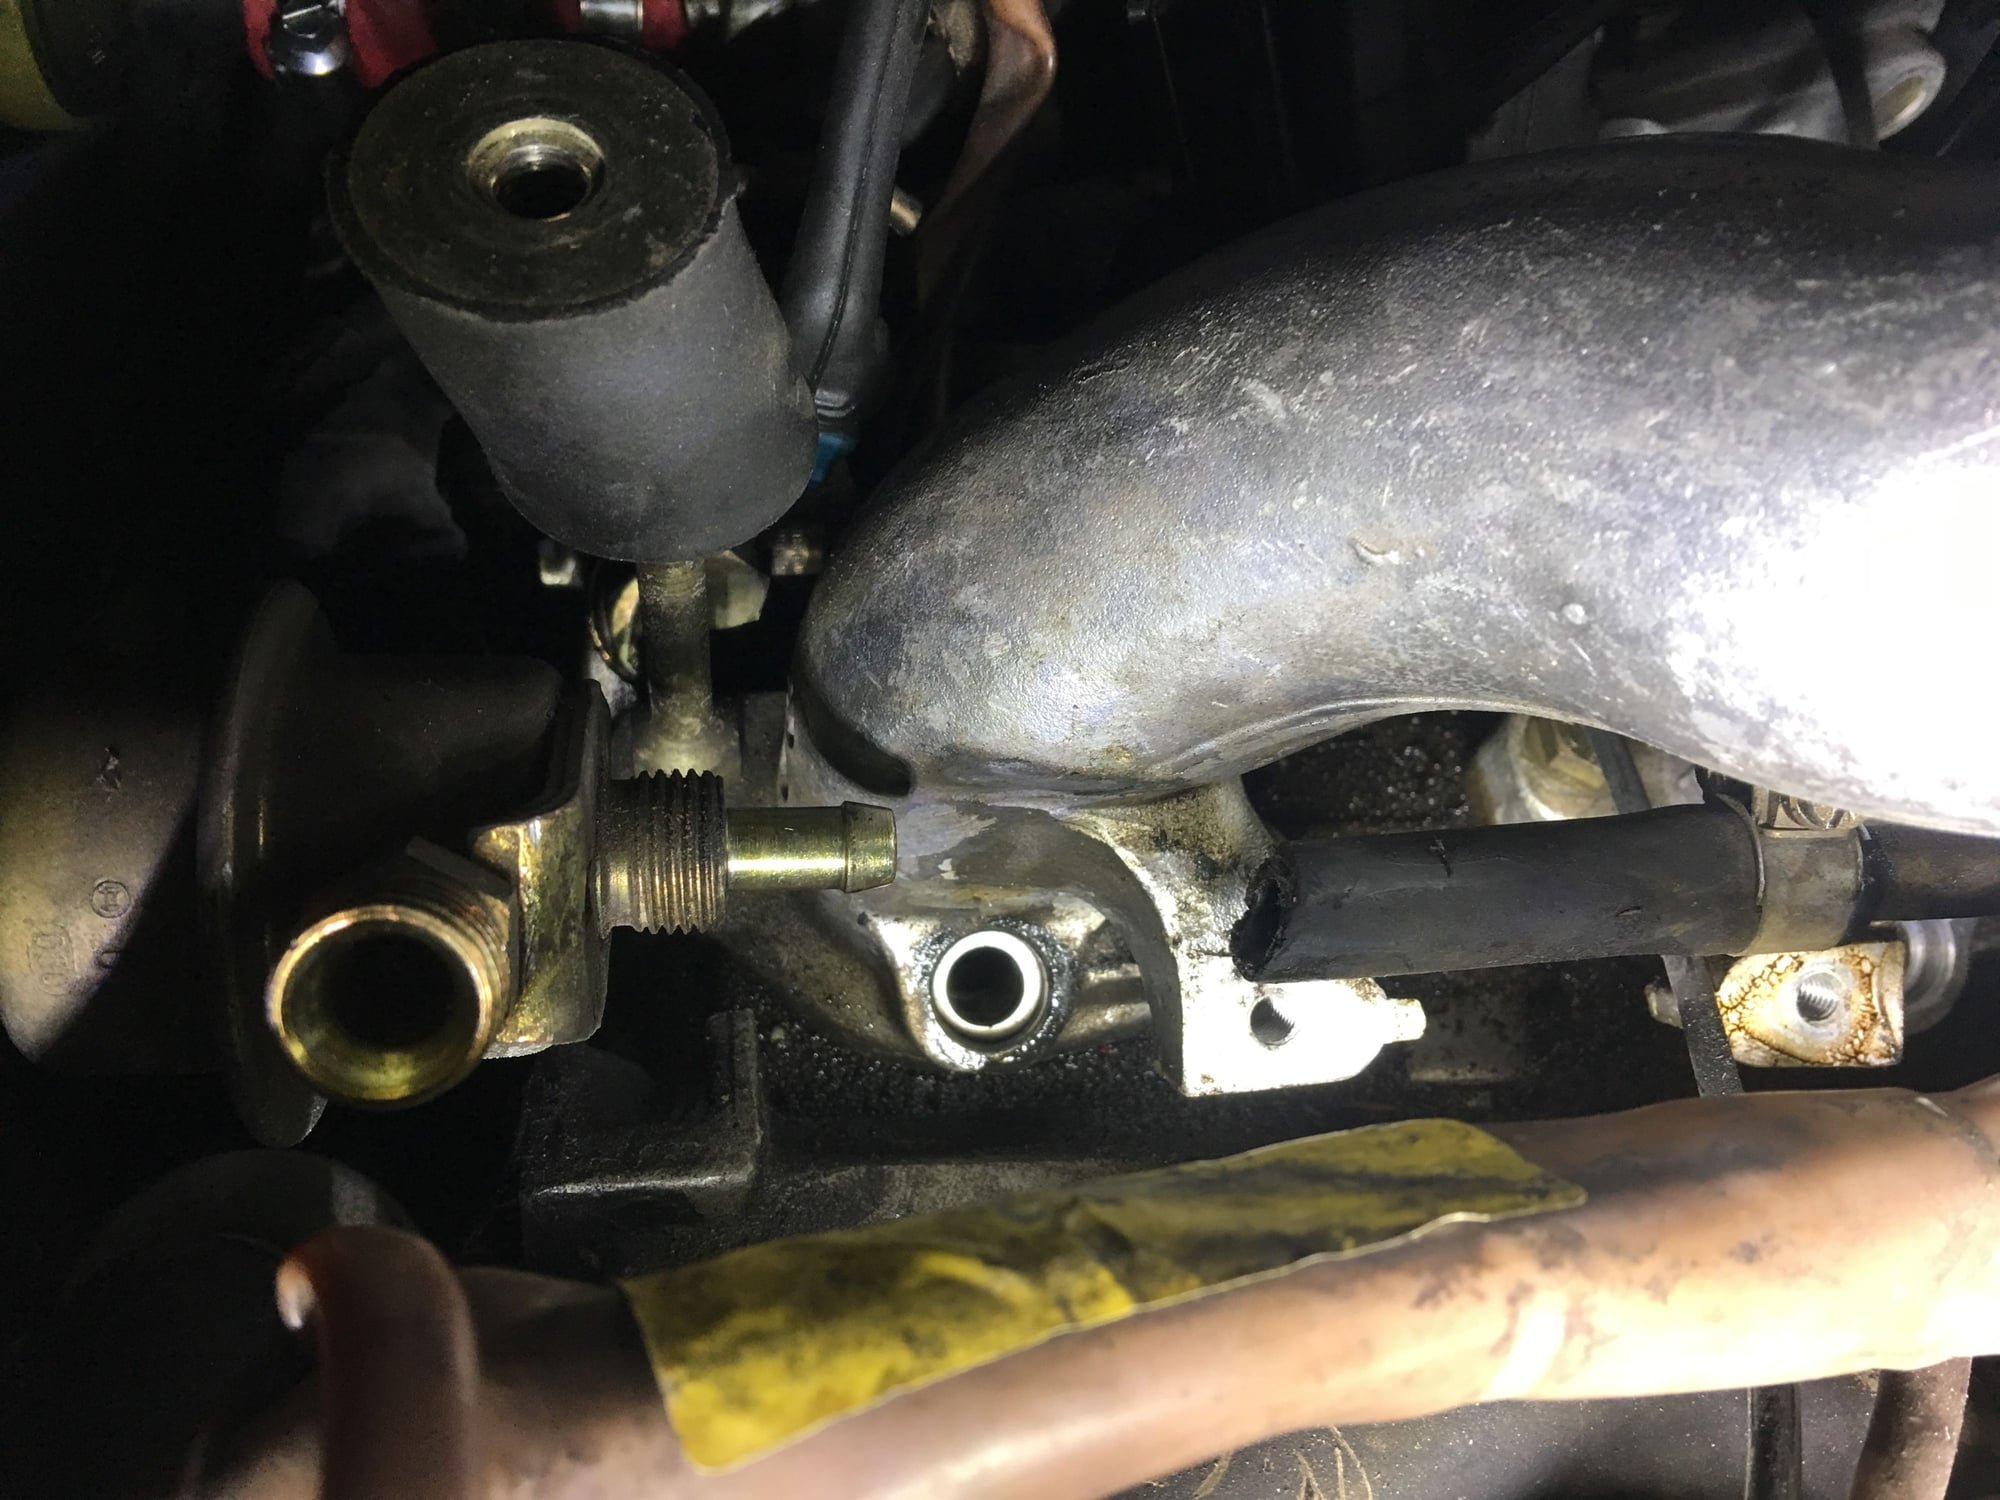
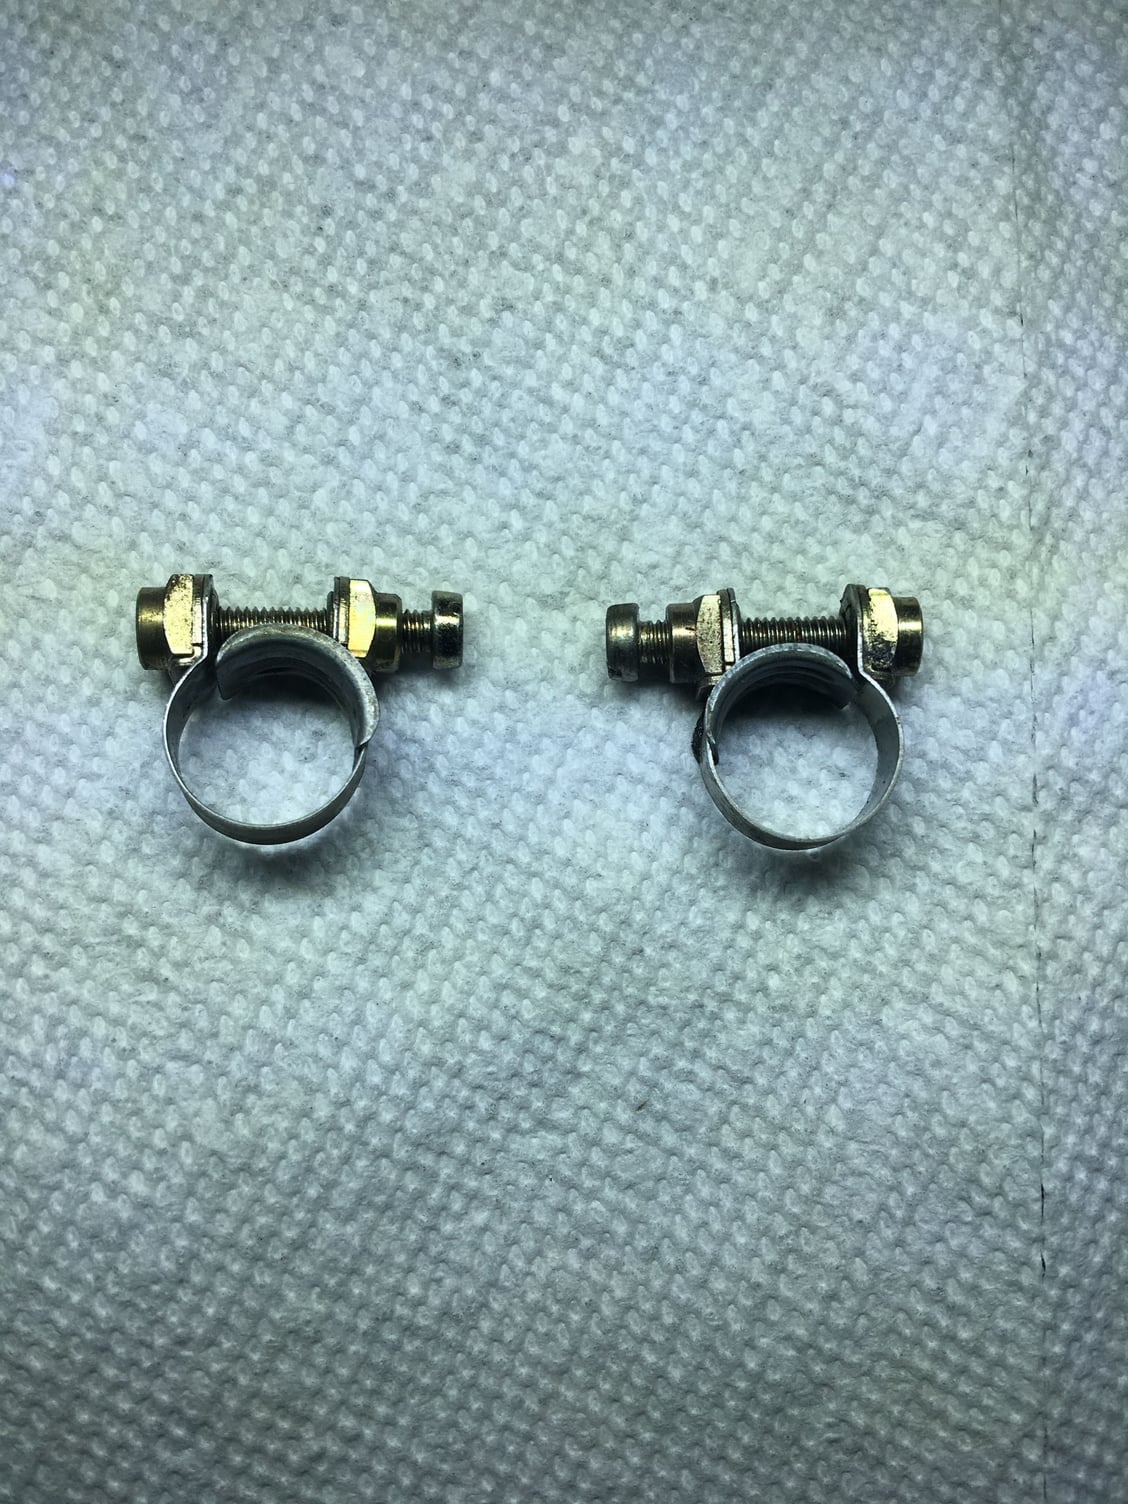
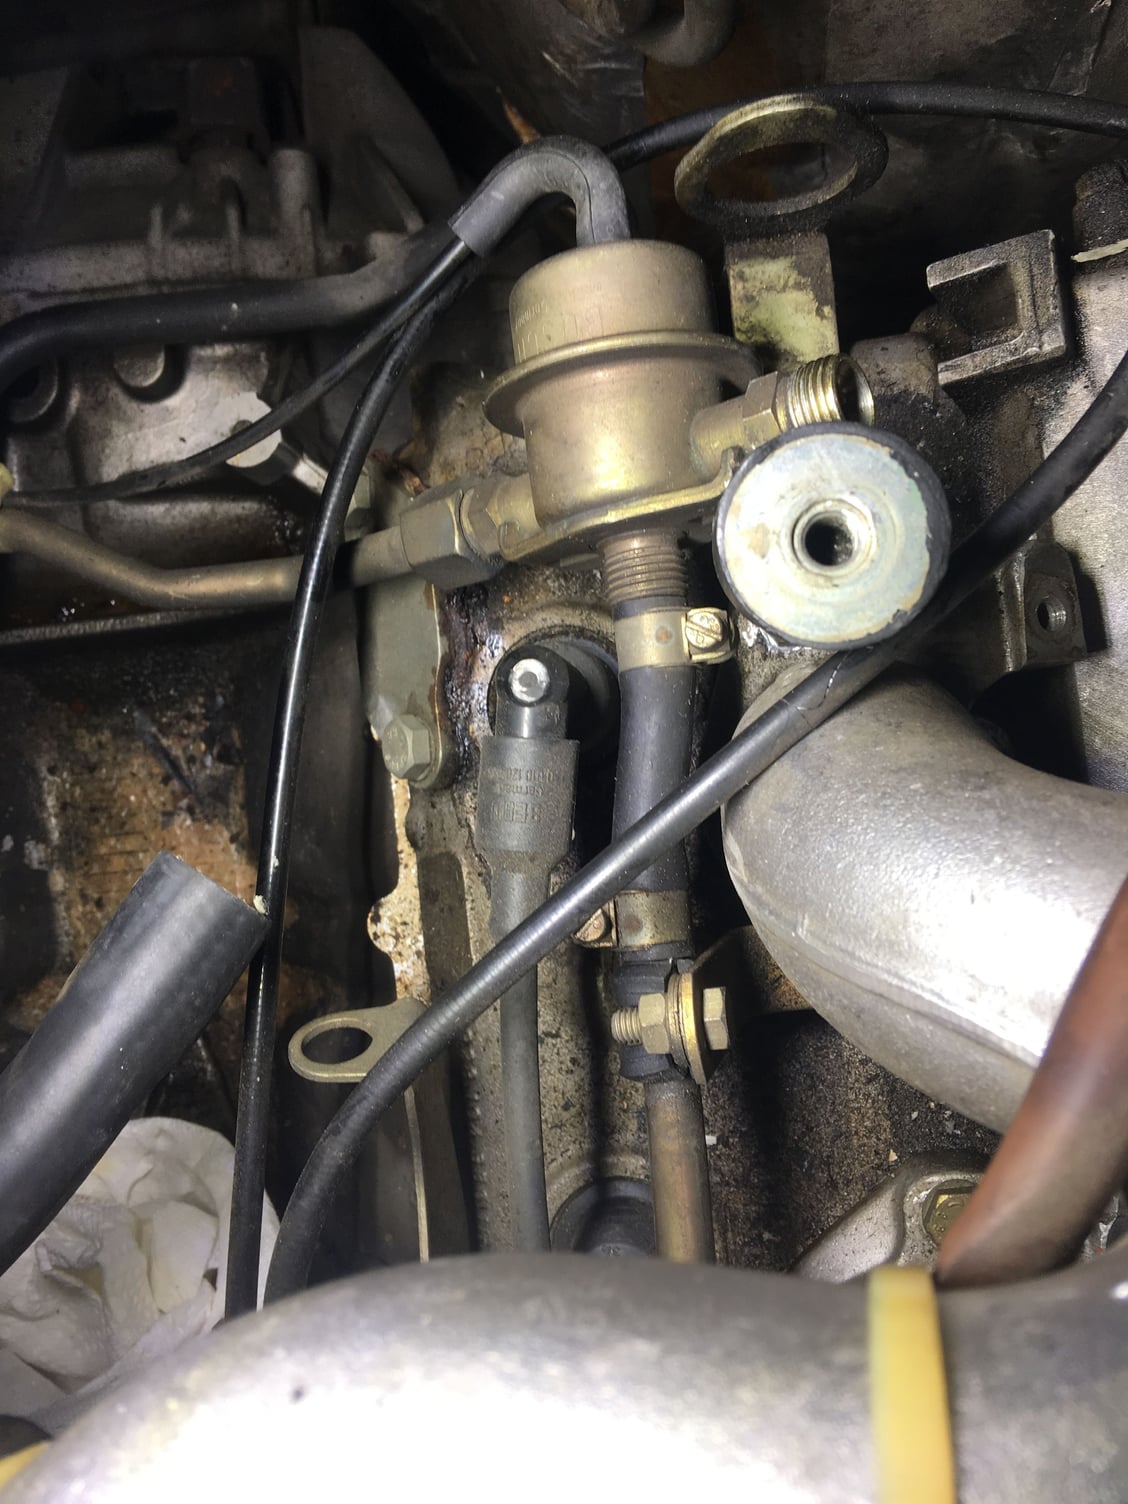
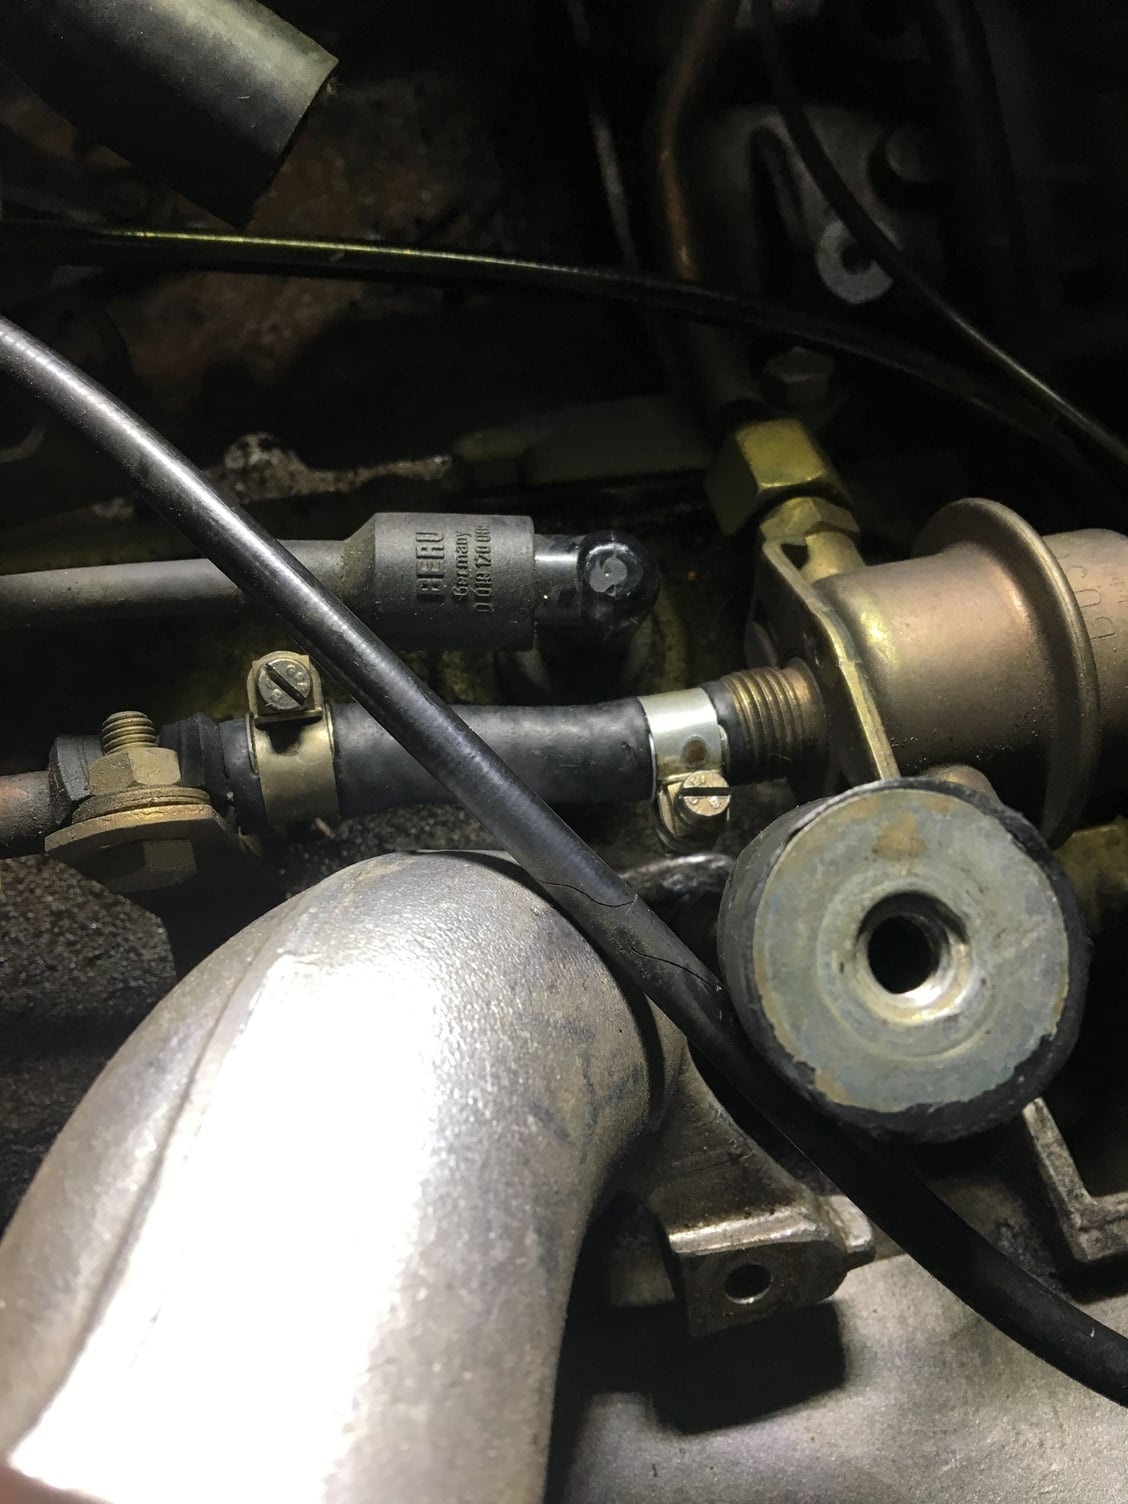
Next, got the short piece of fuel hose to the regulator on the passenger side replaced... Original fuel line from 1983! More chop-and-twist technique. I was AMAZED that the fuel line was not baked on. In fact, once I loosened the clamps, the entire hose rotated freely. It was, however, no longer flexible at all and thus removing took a chop and a good pull. The plated hardware everywhere is still in quite excellent condition. Cut a length of fuel hose as supplied by Roger (I have two or three feet of the stuff!) I flipped one of the clamps to keep it a bit more out of the way, and still plenty of clearance around the inlet tube. I left the printed information to the outside for future reference, it's even dated!!!
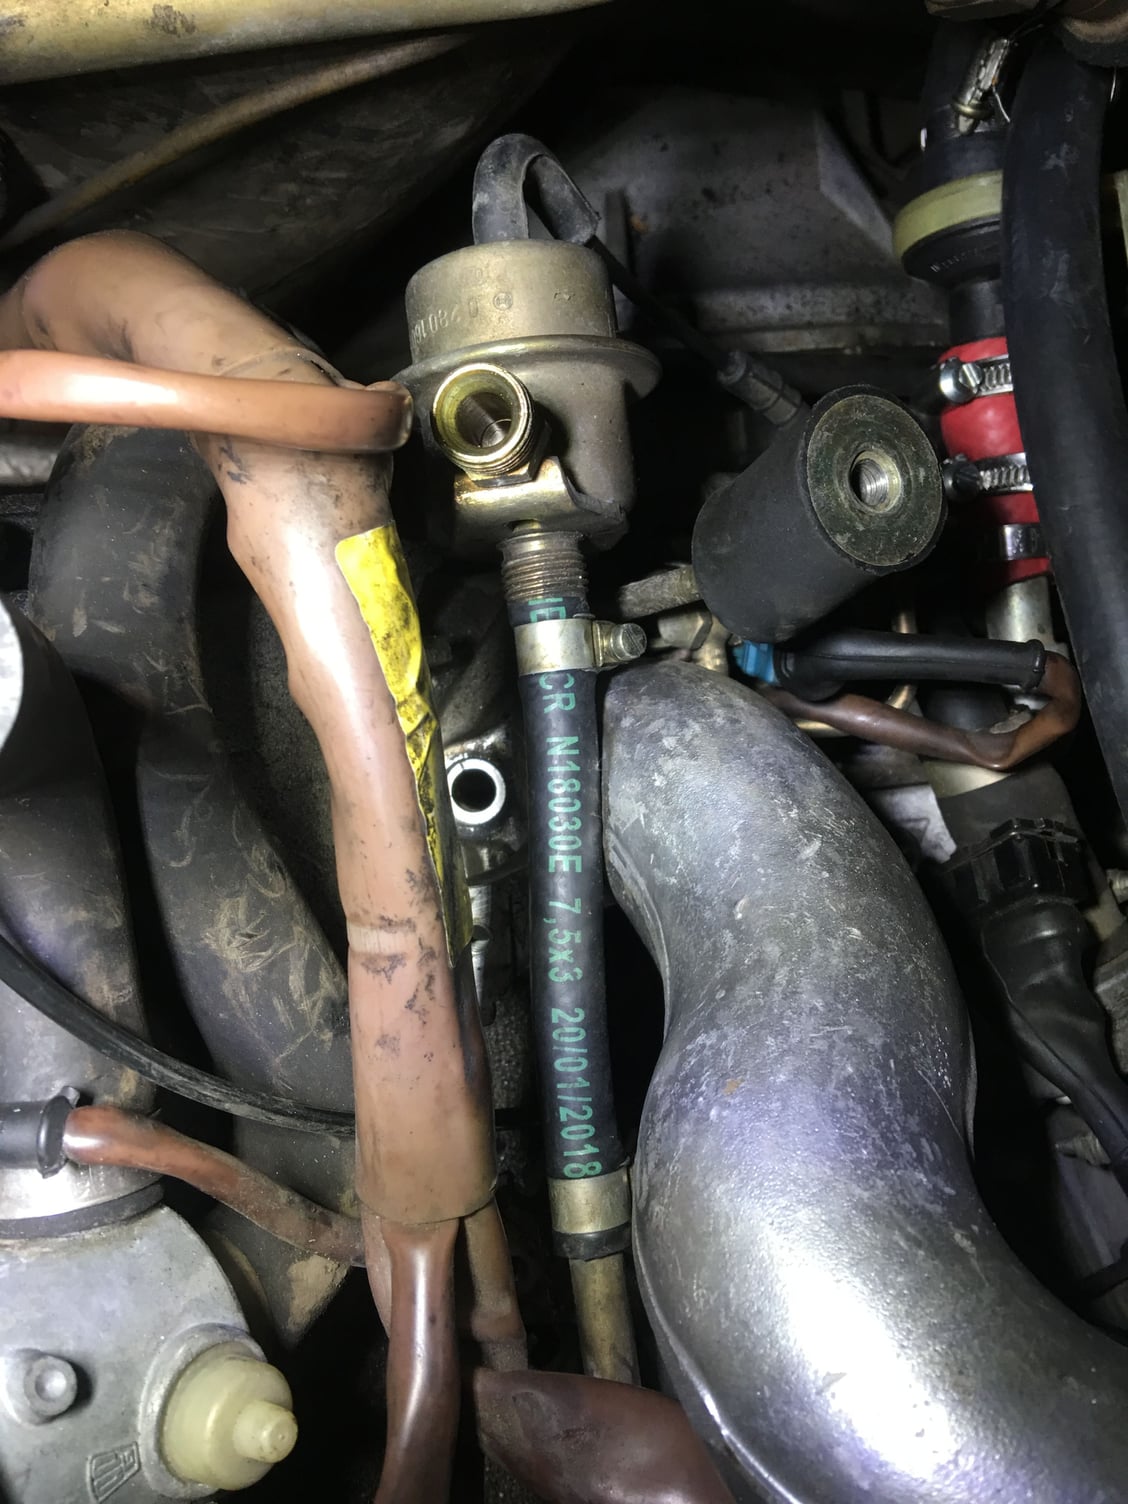
And finally, got the same line refreshed on the driver's side as well. With this... ALL the old flex fuel line under the hood has been removed. Things are looking good!!!
PS I'll clean up the messy engine as I get everything back together.
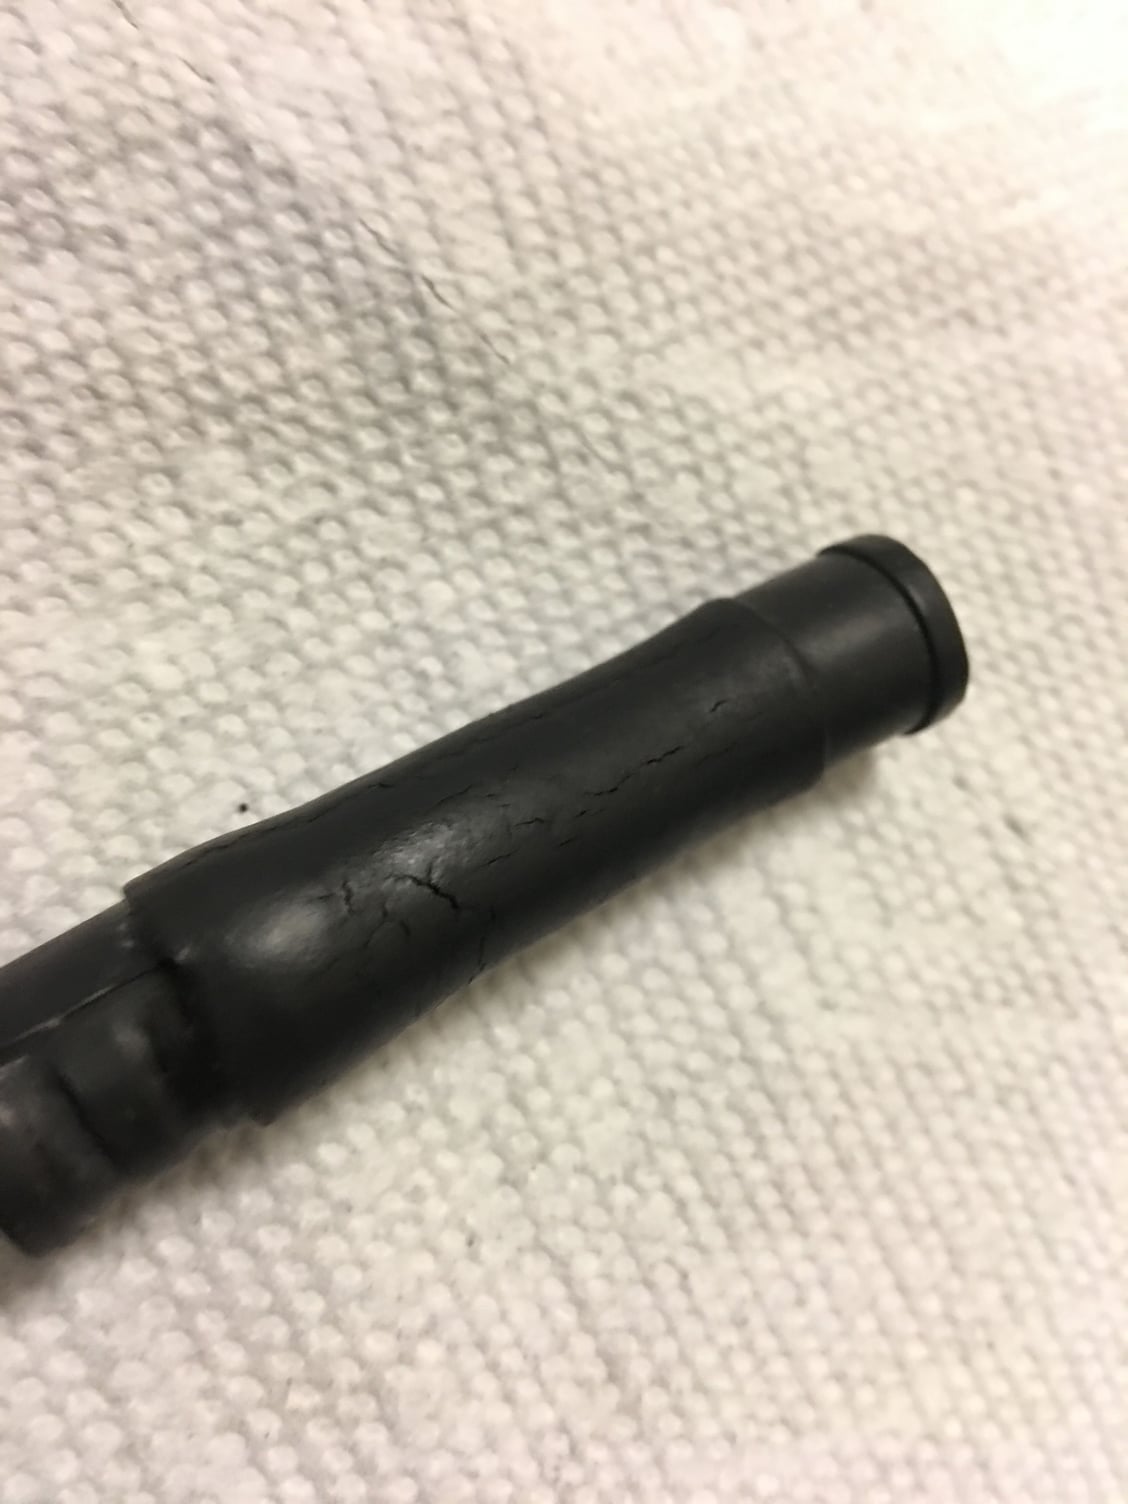
Before... Look at this tube, it's got micro-cracks everywhere. As has been the case with all the old flex fuel tube I've removed everywhere. After.
Check out the new protective pads from Roger. These are EXCELLENT. I just put them on today for the first time -- how did I ever survive without them until now?
CLASSY!!!
By way of a status update...
- New aftermarket all-aluminum CSF radiator from Roger installed
- All underhood coolant hoses have been replaced
- All underhood flex fuel lines have now been removed. Have two replacements and waiting on the third fuel line
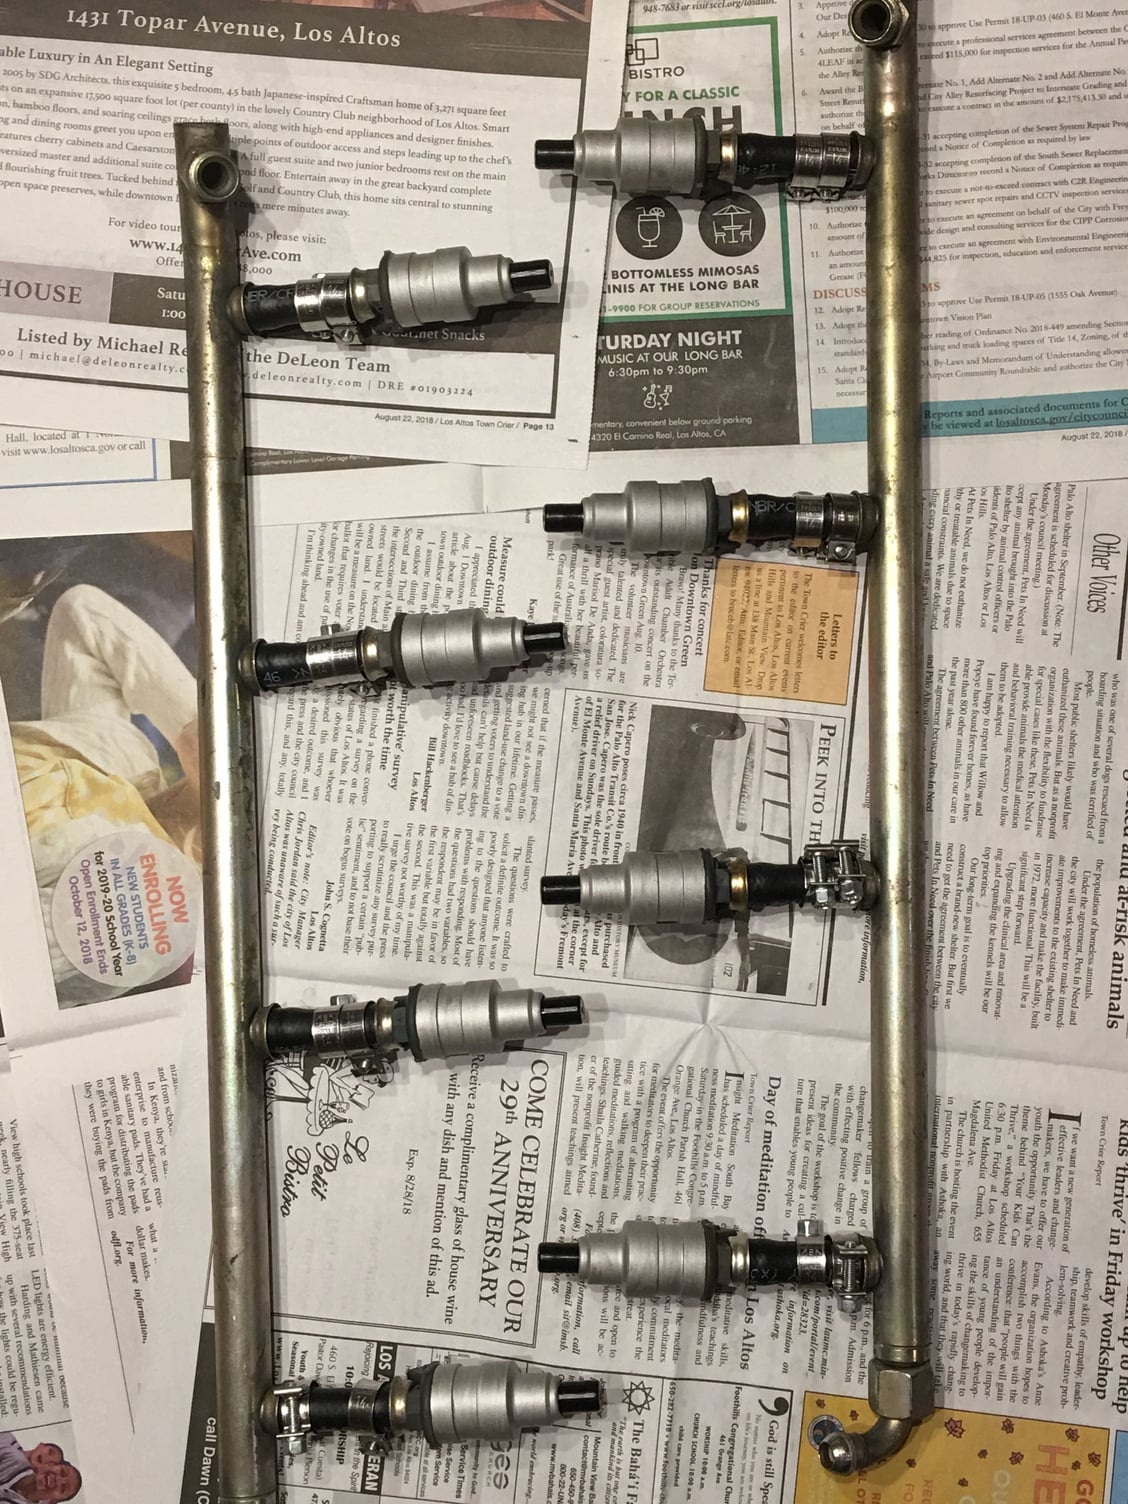
- Injectors have been cleaned/flow tested and reinstalled on fuel rails, rails ready to be installed
- New expansion tank and metal Y-pipe waiting to be installed
- New expansion tank level sender, sender cap, and sender seal on order
- S4 window washer tank, pump, sender cap and seal, and pump grommets on order (I will upgrade to the S4 style washer tank and pump)
- In-hood washer valves all replaced
- New headlight washer pump and new intensive solution washer pump (front bumper) ready to be installed
- Flex fuel cooler line on order (Roger)
- Original connectors for electrical harness extension from original pump location under expansion tank to new location at washer tank are ready (I need the authentic green/red wire and brown wire which I am attempting to source)
I think the next step will be to do the S4 style washer tank and pump upgrade, after which I can FINALLY install the expansion tank and metal Y-pipe and complete the coolant system work.
Great work, you are going all out. One thing to note, the injectors bodies are media blasted by Witchhunter and are raw steel. I didn't realize this either and they now have surface rust. Next time I will paint them.
Thanks guys! I appreciate the feedback and encouragement!!
MOOSE -- thank you for mentioning that! It didn't even occur to me that I was looking at bare metal. I'll definitely take the seals back off, clean the injectors up and paint them before re-installing!
Ok, got the injectors painted! I used Testors paint in flat steel because I liked the look of the injectors unpainted, and this color was a virtually exact match to the steel injectors. Testors is a tough enamel that adheres well to metal so we�ll see how it holds up. I�ll let it dry thoroughly and then re-assemble. Thanks for the tip, Moose!
I guess I�m increasing the scope of my project from �hoses� to �seals�. Why? Because I can! Seriously though I�m still waiting on various parts like the fuel line and of course, while waiting I started thinking of OTHER stuff to do. Why not do a general seal of the cam towers front and back? (Too hard to remove the cam towers themselves and folks much wiser than me say to not bother unless I have a confirmed tower-to-head gasket leak, which I don�t). But resealing the front of the cam towers (sprockets) means removing the belt. Why not do a belt and roller and tensioner refresh while I�m in there? And fix some oil leaks too!! ALL the cam, crank and oil seals are ORIGINAL 1983!!
I�ll remove and inspect the water pump while I�m there too. If all looks good I�ll re install, otherwise will replace.
I received a wonderful care package from Roger today. Refreshing the rollers, belts, tower seals front and back, crank seal if needed, and oil pump and oil sender seals. Oh yeah and accessory belts, it has literally been decades since I changed any. Also check out the cool silicone rear cam tower seals! The original cork seals are notorious for leaking and the silicone versions (not available from Porsche) should be a great improvement.
This will keep me busy for a while and hopefully dry up most of my oil leaks too!!
I removed the accessory belts today, got the upper covers off and the center cover unfastened, and am ready to lock the crank. Spent a lot of time cleaning as I went. Most of the accessory tensioners were just covered in oil and road grime. The AC unit seemed to be the dirtiest area. The entire AC unit was covered in what looked like wheel bearing grease. Ugh!! I think it may be a leak from the passenger cam sprocket area and flows down past the tensioner and across the mounting arm. The driver�s side had its share too. There is at least a little coming from the distributor base (new seal ready). Fortunately everything cleaned up easily as I went, though I�ll do a deeper clean once I expose everything.
The good news is that cam timing was spot on with both cams. And the sprockets from what I can see of them look to be in great shape with no bright spots. I also cracked loose the 17mm bolts on each cam sprocket, counterholding with a big crescent wrench.
I did have a bunch of oil spill straight from the pan when I removed the oil return tube, but I had a catch ready. Note to self: The oil return tube has to be rotated 180 before it�ll come out of the pan, so must re insert that way too. I was too lazy to remove the oil drain plug (and just recently changed oil) so I stuck a length of small hose I had lying around into the oil return area, got the oil started into the hose, and let that continue to drain into the catch pan until the level was about a quarter inch lower.
Looking forward to getting the remaining covers off to see where the oil is coming from. And especially curious to see what I�ll find around the oil pump and crank seal.
By the way, another member (Captain-Slow) posted this link about the tensioner in another thread. It�s a discussion about how Porsche changed the tensioner design in �83 and changed its recommended oil from 90 weight gear oil to engine oil with the new design. I hadn�t seen this before and was planning to use heavy oil but based on this will go with engine oil! http://jenniskens.livedsl.nl/technic...4/mytip416.htm
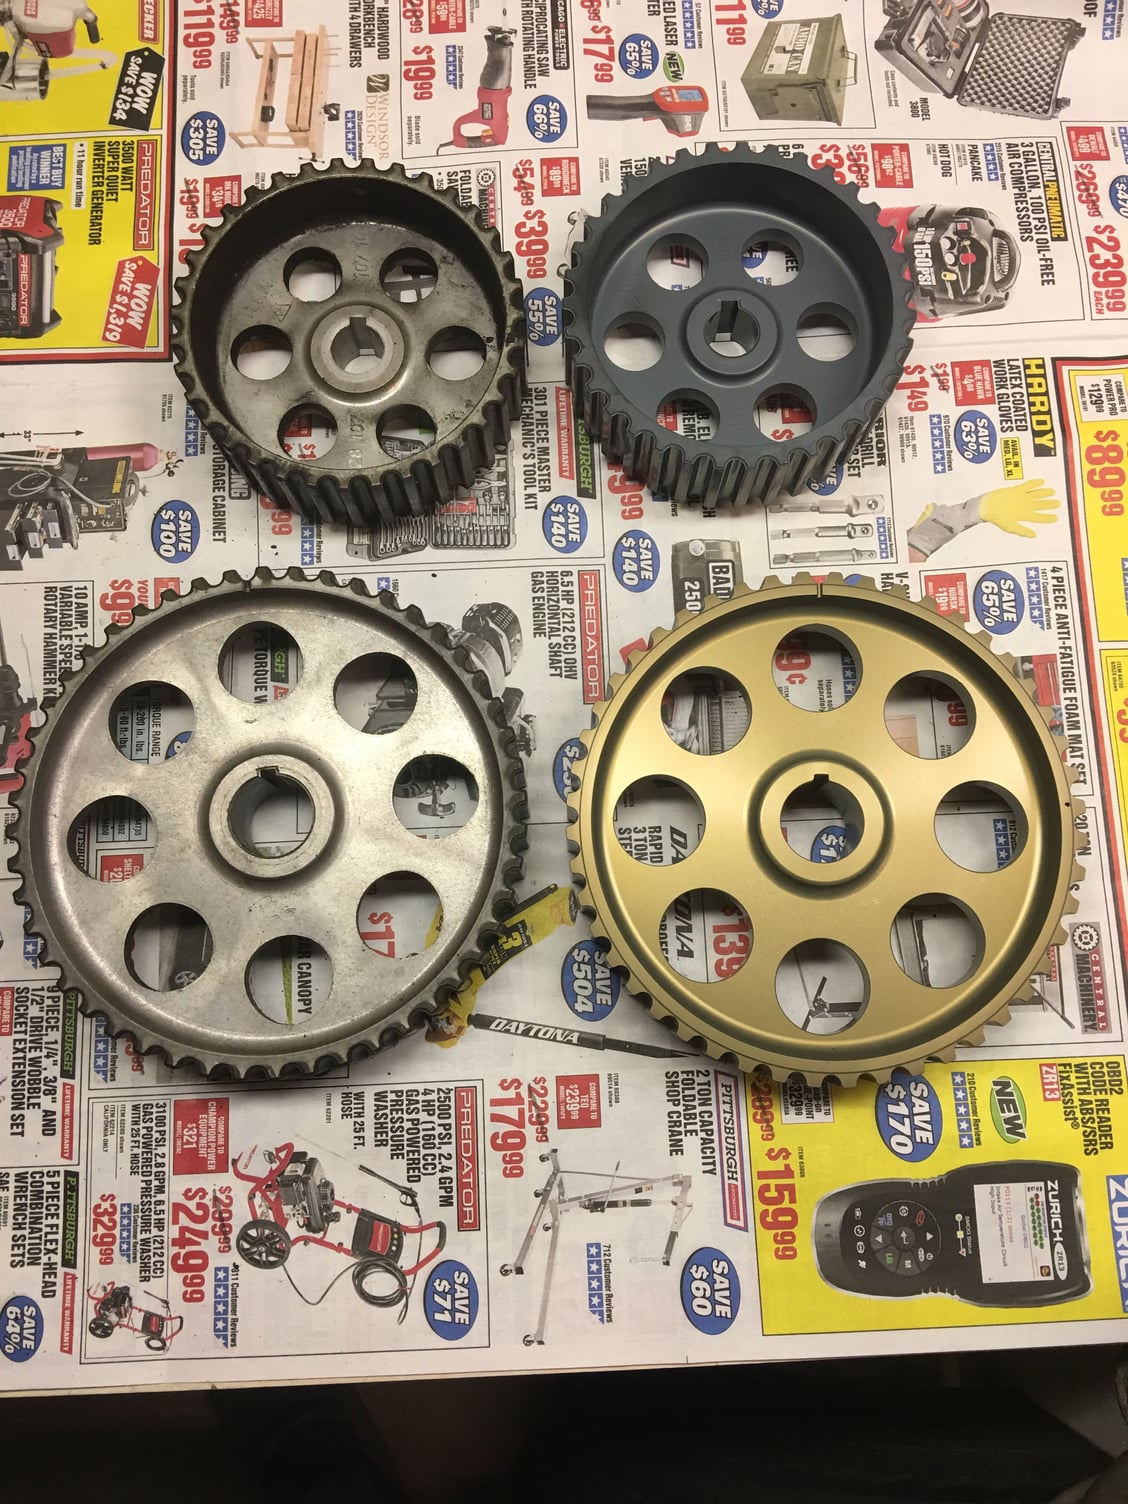
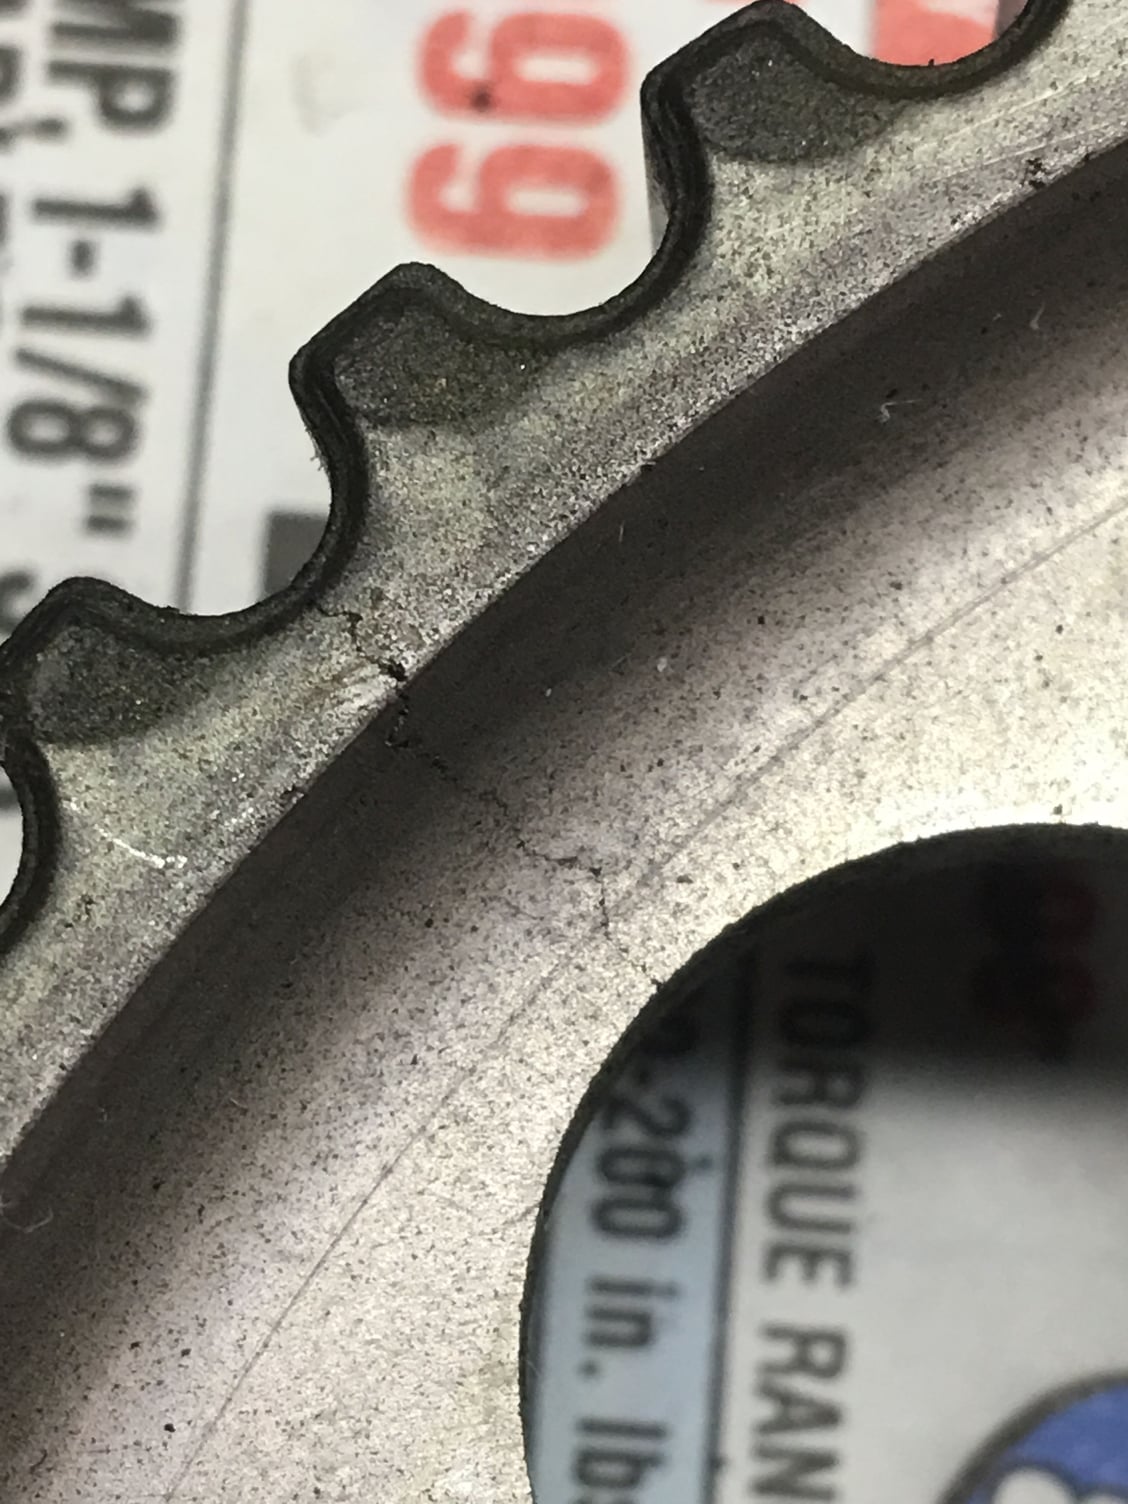
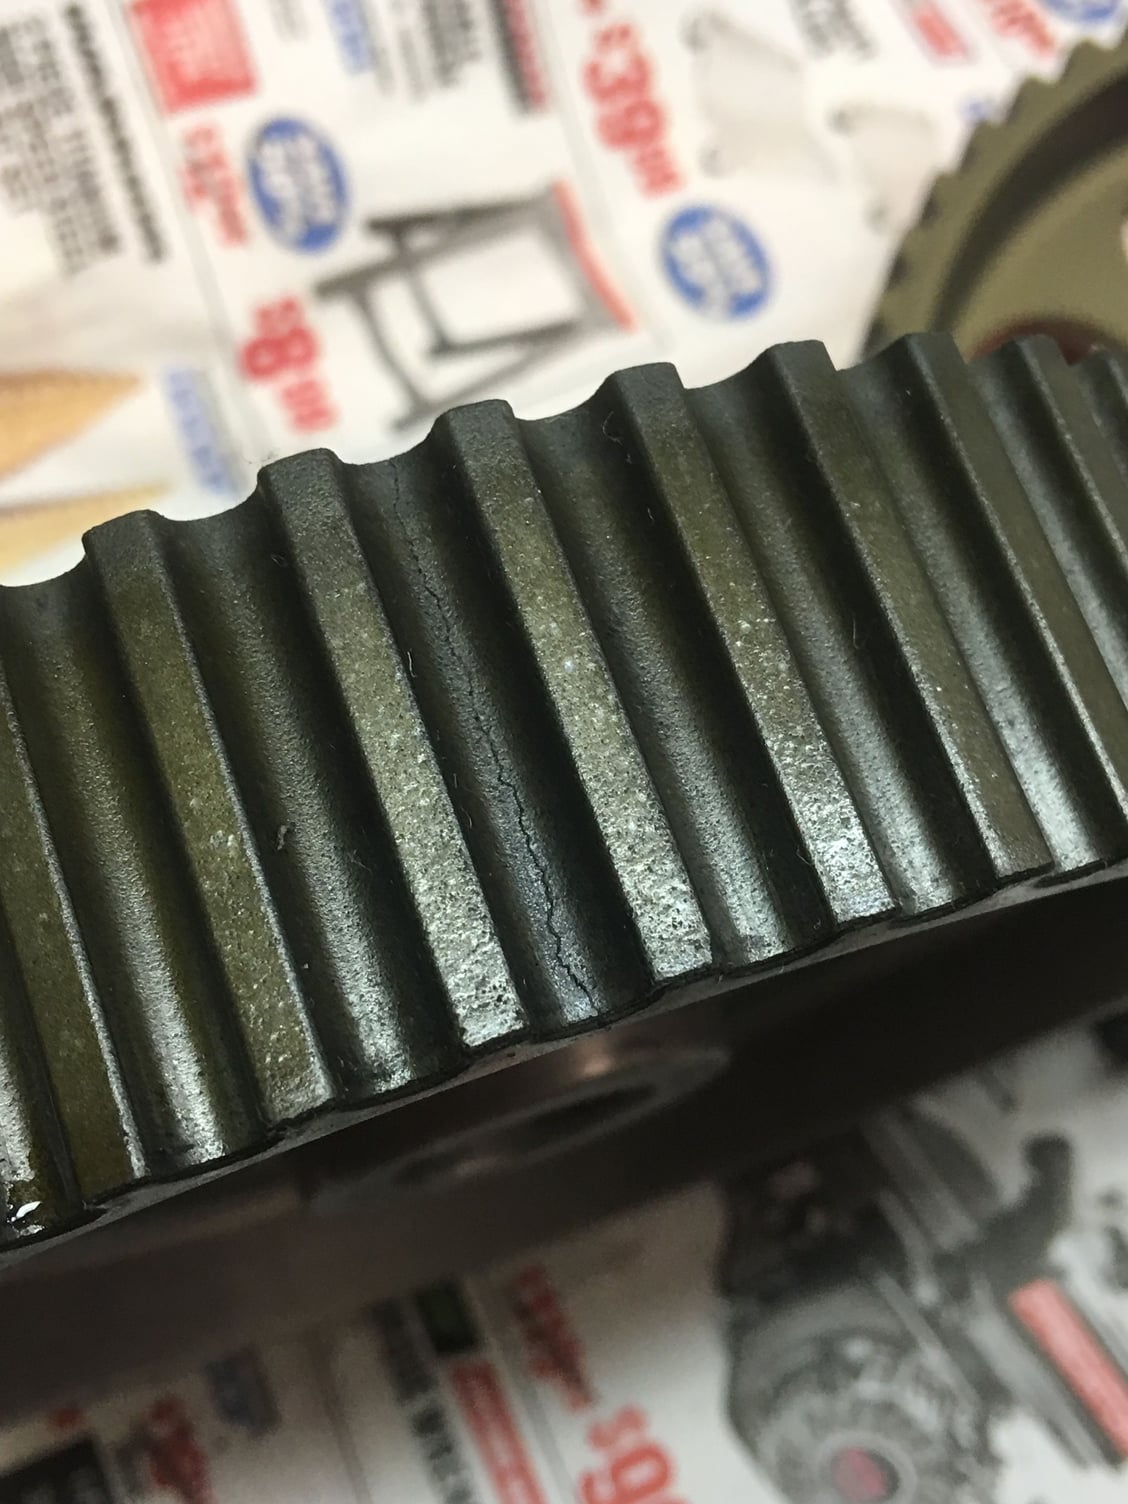
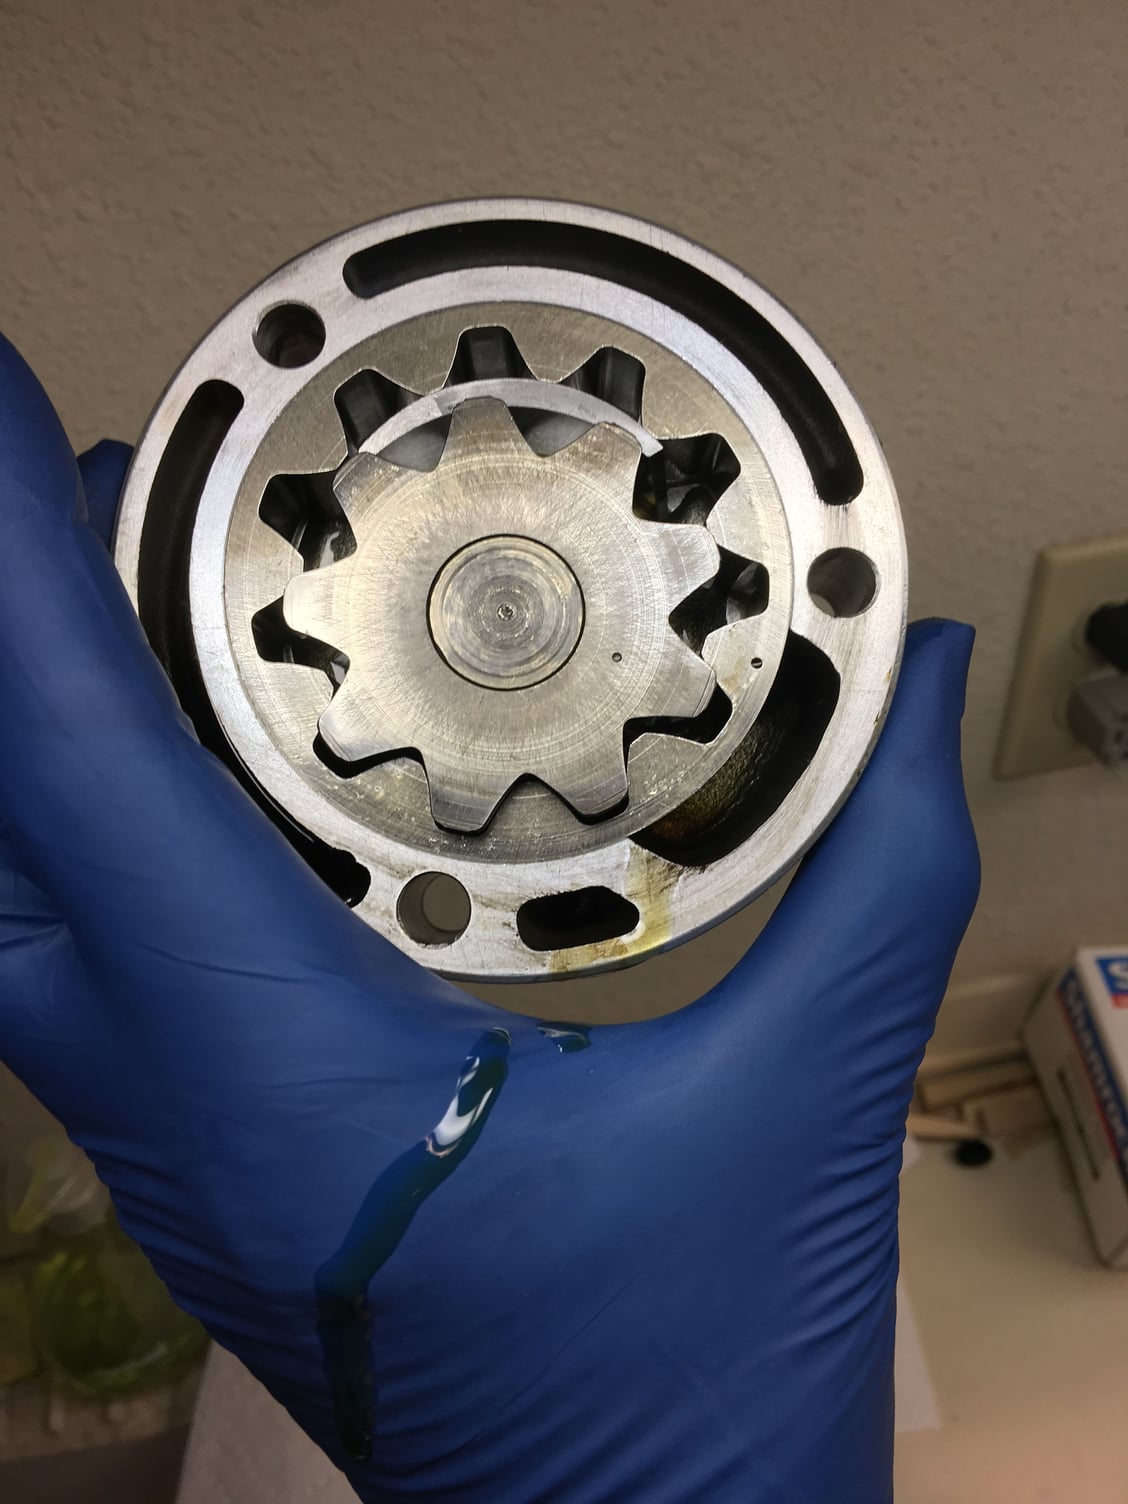
Upon inspection of the cam and oil pump pulleys, I've decided to replace them all. One of the two cam pulleys had hairline cracks -- in two places no less. The second cam pulley was fine but I'll replace it anyway. Too bad because the anodizing was in perfect shape on both pulleys. The oil pump pulley was shot, with shiny gear teeth circling about 2/3 of the circumference of the pulley. I also decided to replace the rear center cover.
Check out these beautiful brand new pulleys! I was STUNNED when I opened up the packaging and saw the beautiful golden anodizing. Not at all the color of the old pulleys -- I don't recall the originals ever looking like this. And each comes in its own individual box, thoughtfully wrapped by Porsche in tissue paper and enclosed in protective bubble wrap, for the discerning owner. I guess this stuff qualifies as man-jewelry LOL!!!
The oil pump pulley is a work of art as well. It's now steel and, I must say, quite a bit heavier than the aluminum which it replaces. But it also has an interesting surface treatment (also anodized?) and appears to be hardened. It rings like a wine glass and picks up the slightest fingerprints. I'm really impressed with the new hardware. Oh, and based on other threads here on the forum, I'll be removing the thin washer behind the original aluminum oil pump pulley.
Also, upon inspection of the water pump and some advice from Roger, I'll be replacing the water pump. It's been in over ten years, albeit low miles, and is showing signs of weeping through the weep hole which means a leak from its bearing.
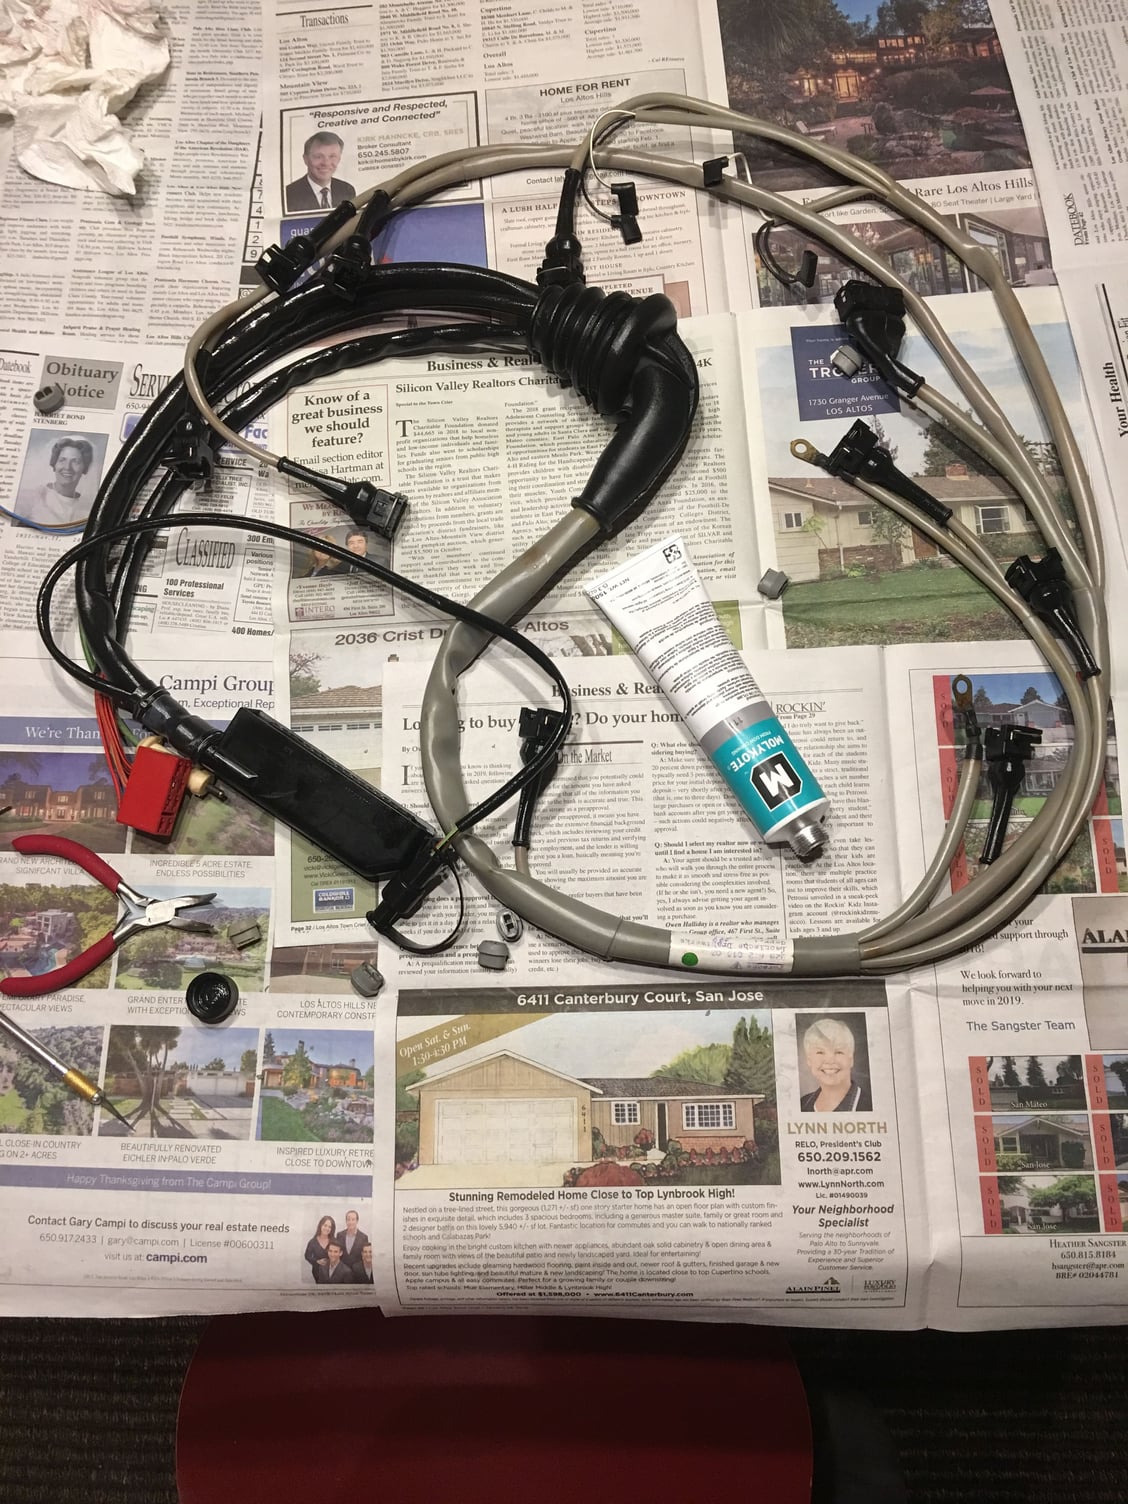
In the meantime, to circle back on the L-jet harness, the original plan was to upgrade my existing harness with the new style connectors in-place. I decided instead to do the upgrade on a spare harness, shown below, and am VERY glad that I did because the amount of effort involved to remove the old connectors was insane and can't be done properly with the harness in the car. Here's a picture, below, of the finished spare which will go in. Once I get the old one out, I'll refurbish it and upgrade not only the connector housings but the internal pins (to the better "double pin" finger style) and boots as well. See posts 31-40 here for more detail: https://rennlist.com/forums/928-foru...eapo-tool.html
As a side note, I picked up a tube of Molykote 111 silicone grease recently based on MrMerlin's advice in some other thread. I thought at first I'd only need to use it on the O-rings on the injectors. But I've discovered that virtually all rubber parts can benefit from it and the rubber really seems to absorb the silicone, making even older rubber parts like brand new (and for new parts like O-rings it also helps them prevent being torn or damaged during installation). For instance, I used it on the rubber boots on my spare harness and they became every bit as soft as the brand-new boots included in my connector kits. I also coated the boot for the AFM connector, the small rubber section of the big L-jet connector, and the firewall grommet. This stuff is staying in my toolkit. When I'm all done on this project I plan to give a light coat to the rubber door and hatch seals!!
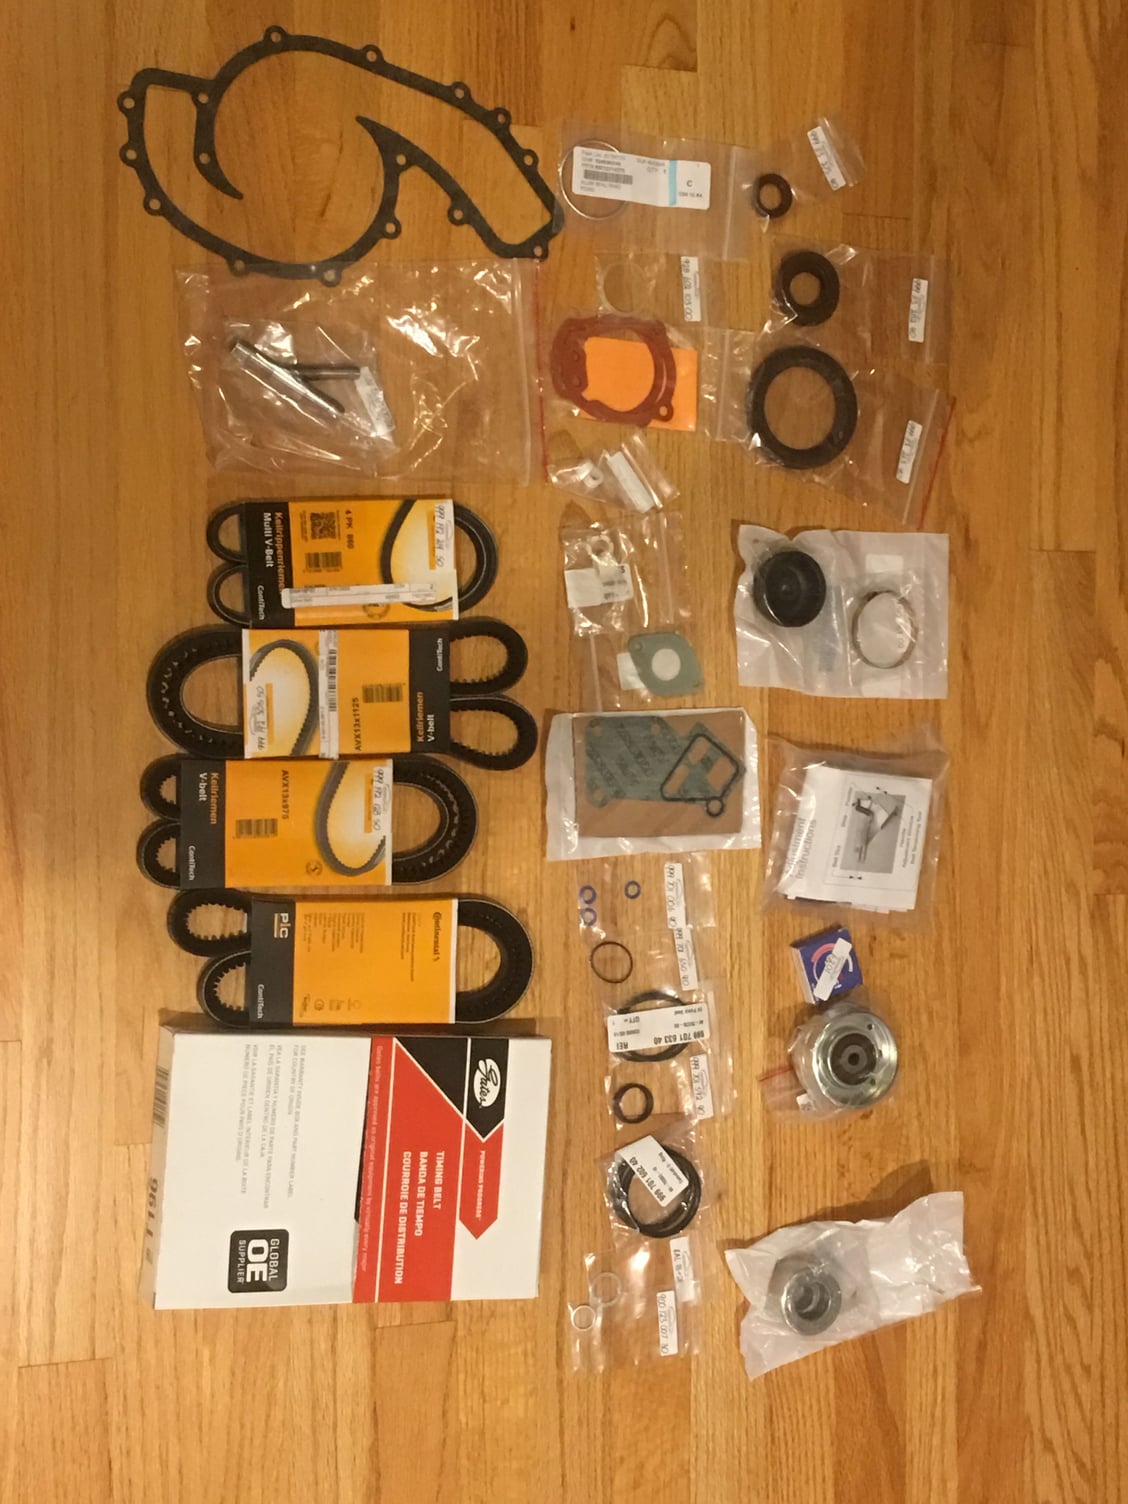
I now have stockpiled a veritable mountain of parts. Hopefully over the next few weekends I'll be able to get them all back on the car where they belong!!
New pulleys! One of the two cracks in a cam pulley If you look carefully you can see the hairline crack between the teeth Updated L-jet harness
Its good you found the cam pulley crack before it went bad.
From my experience the crack forms from the gear moving back and forth on the cam snout because the bolt has lost its clamping force.
The wood ruff key way is usually where the crack starts.
The reduced force can be confirmed when you surface the 30mm washer ,
you will see a polished surface that shows its been clamped and thus is thinner than the rest of the metal.
This can be fixed by surfacing the washer with 400 grit paper do both sides also mentioned in a the next paragraph.
Glad your trying the DC111 on every rubber bit on the car it will refresh most of the rubber.
You can put it into a syringe and inject it along the lower quarter window seal where it meets the body.
this will prevent corrosion and water ingress.
Keep it off the windows and don t use it if the car is getting painted.
Nice cam pulley gears,
I would suggest that you also purchase new cam pulley bolts, left and right are different.
You can reuse the old 30mm washers but I suggest to face them first on some 400 grit paper do both sides.
This will provide a fresh surface that will bite into the cam pulley face,
I like to add a drop of blue loctite to the bolt threads as well then torque to 48 ft/lbs
On your oil pump steel gear,
you will remove the 1mm flat washer that was sitting on the back side of the aluminum gear .
NOTE if you remove the oil pump then both of the gears will have small dot stamped into one side of their faces,
these dots must face the engine block when the pump is installed .
NOTE I suggest to use liberal amounts of STP in the pump gears,
this will provide the pump suction to pump oil from the pan,
turn the pump a few times to circulate the STP before you put it into the engine.
Hi Stan! THANKS for chiming in! Yeah, I am lucky to have found this in time. Ironically I wasn't even planning on diving into the front of the engine. Sure glad I did.
GREAT suggestion to replace the cam pulley bolts, I would never have thought of that! I'll just order new washers too, and will re-inspect the bad pulley for any evidence of rocking on the keys. Also thanks for the idea of using a syringe around the back quarter windows, that's a brilliant idea. I actually have one tiny spot of corrosion under the exterior paint at the bottom middle of one rear quarter window. I try to never let that part get directly wet. Should I try to inject some silicone grease under the rubber molding there too to try to prevent further water exposure?
Thanks for the tips on the oil pump -- I already have it out on my workbench and will be replacing its seal (and the three bolt seals), along with the multiple cam snout area seals, the silicon rear seals, and the crank seal. And will rebuild the tensioner. STP standing by for the oil pump and maybe the tensioner too!!
By the way, what's the consensus on whether to use RTV on the tensioner gasket these days? Or is the gasket with the built-in oil ring sufficient with no other sealant?
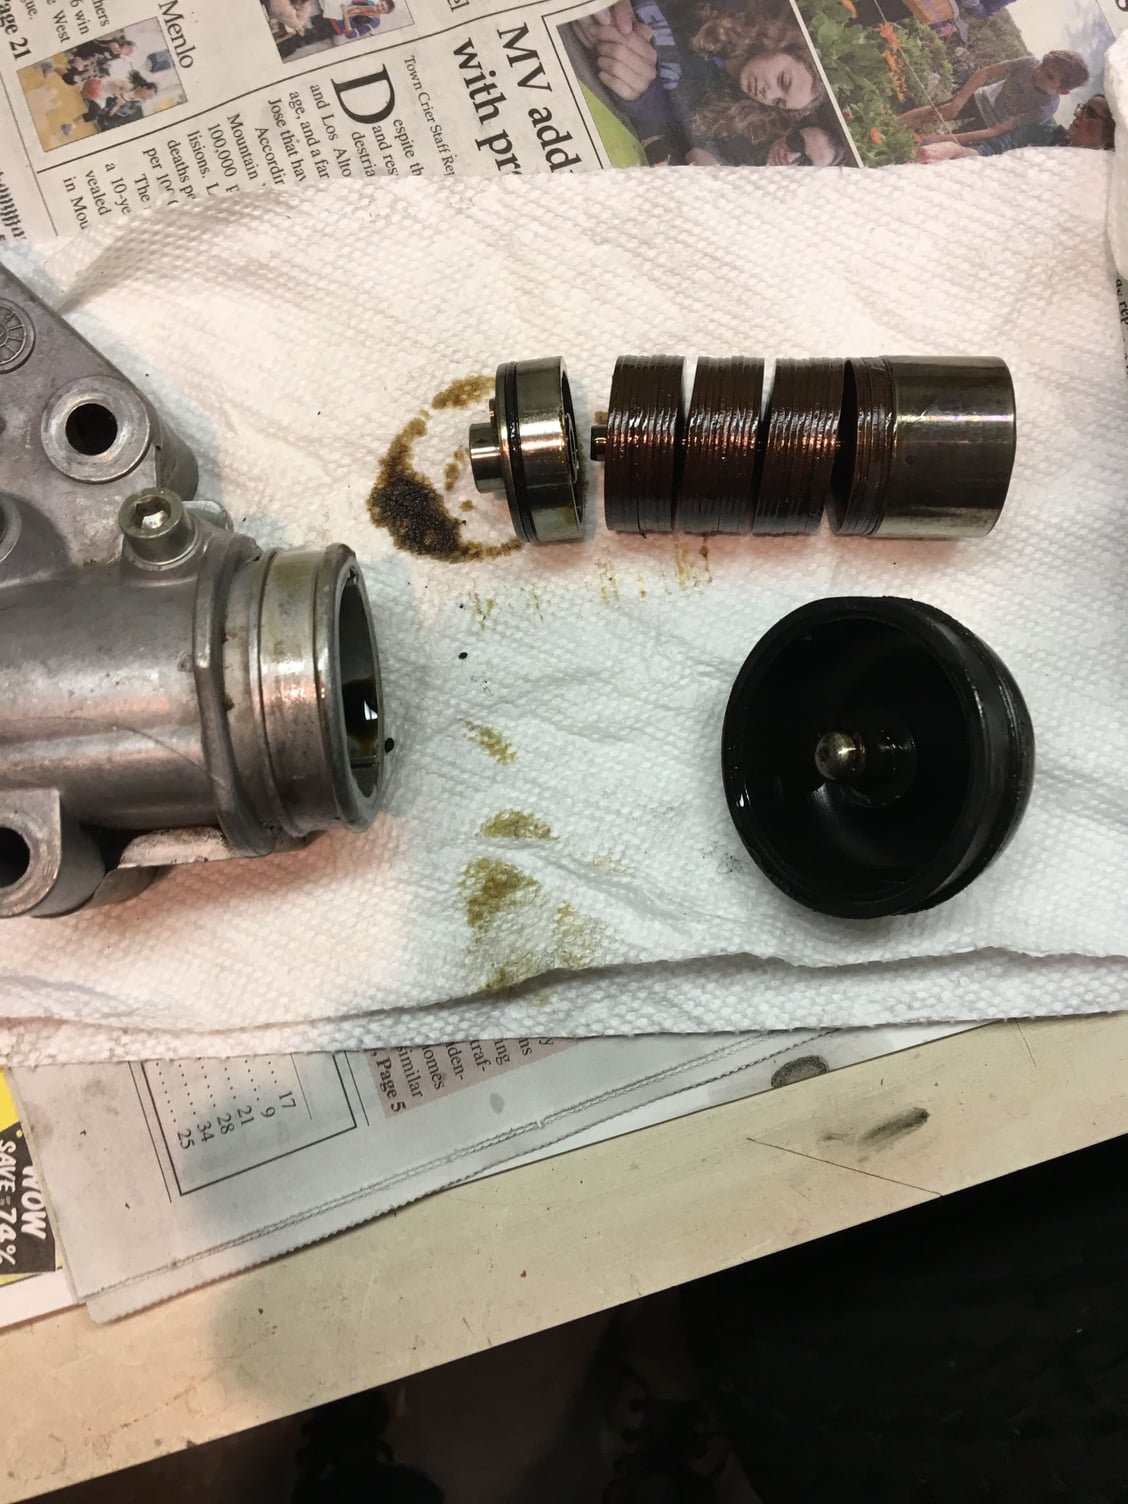
I made some re-assembly progress this weekend at last! I first disassembled, cleaned, resealed and re-assembled both the tensioner and the oil pump. The tensioner still had a little oil, though the washers were still all well coated in oil so that's good. I could tell by the smell that I had used gear oil last time. Well, I happened to have a bottle of STP on my workbench, but no gear oil, so STP it is. I cleaned out the tensioner (including the three long oil passages) and individually cleaned all the washers, maintaining order via Roger's suggestion of installing them all on a zip tie! I then coated each washer with STP, gave the inside of the tensioner a good coating, and re-assembled with a new seal, boot and clamp.
On the oil pump, it's super easy to remove the original seal behind the pulley and install the new one. Actually the only challenge here was to remove the key on the shaft because it was super tight. I finally placed it in the oven at 200 degrees for about twenty minutes and was finally able to push and rotate the key backwards (it's round on the bottom) enough to use some judicious prying with a screwdriver to get it out. You need to take the key out to remove the thin washer behind it, for use with the new steel pulley! I also made sure while cleaning that the small galleys feeding oil to the seal area were totally clean.
After getting the key out I replaced the seal, having first coated it with STP. Just make sure you press the new seal back in completely square. It's not an overly tight fit, the seal moves into position quite easily, and I gently pushed it in as far as it would go all the way round just with finger pressure.. I also used moly grease on the shaft/bushing area and on the pump gears themselves. After carefully placing the pump shaft through the new seal and ensuring that the seal seated properly on the shaft, I poured a tiny amount of STP up around the seal area, then fully inserted the pump shaft/gear along with the outer gear (dot facing outward/toward the block) and added some STP on the gears as well. I guess the moly grease and STP is a kind of belt and suspenders approach! In any event, I'm storing the pump nose down until I'm ready to install it. I will put in a few more drops of STP on the gears just prior to assembly onto the block.
Here are the "before" pics -- I forgot to take any after.
I next moved to the cam seals. I had already removed the cam pulleys themselves, so the cam main seals were visible. They did not appear to be leaking, but I knew I had some leaks coming from somewhere around the seals. These are all original, so time to change anyway.
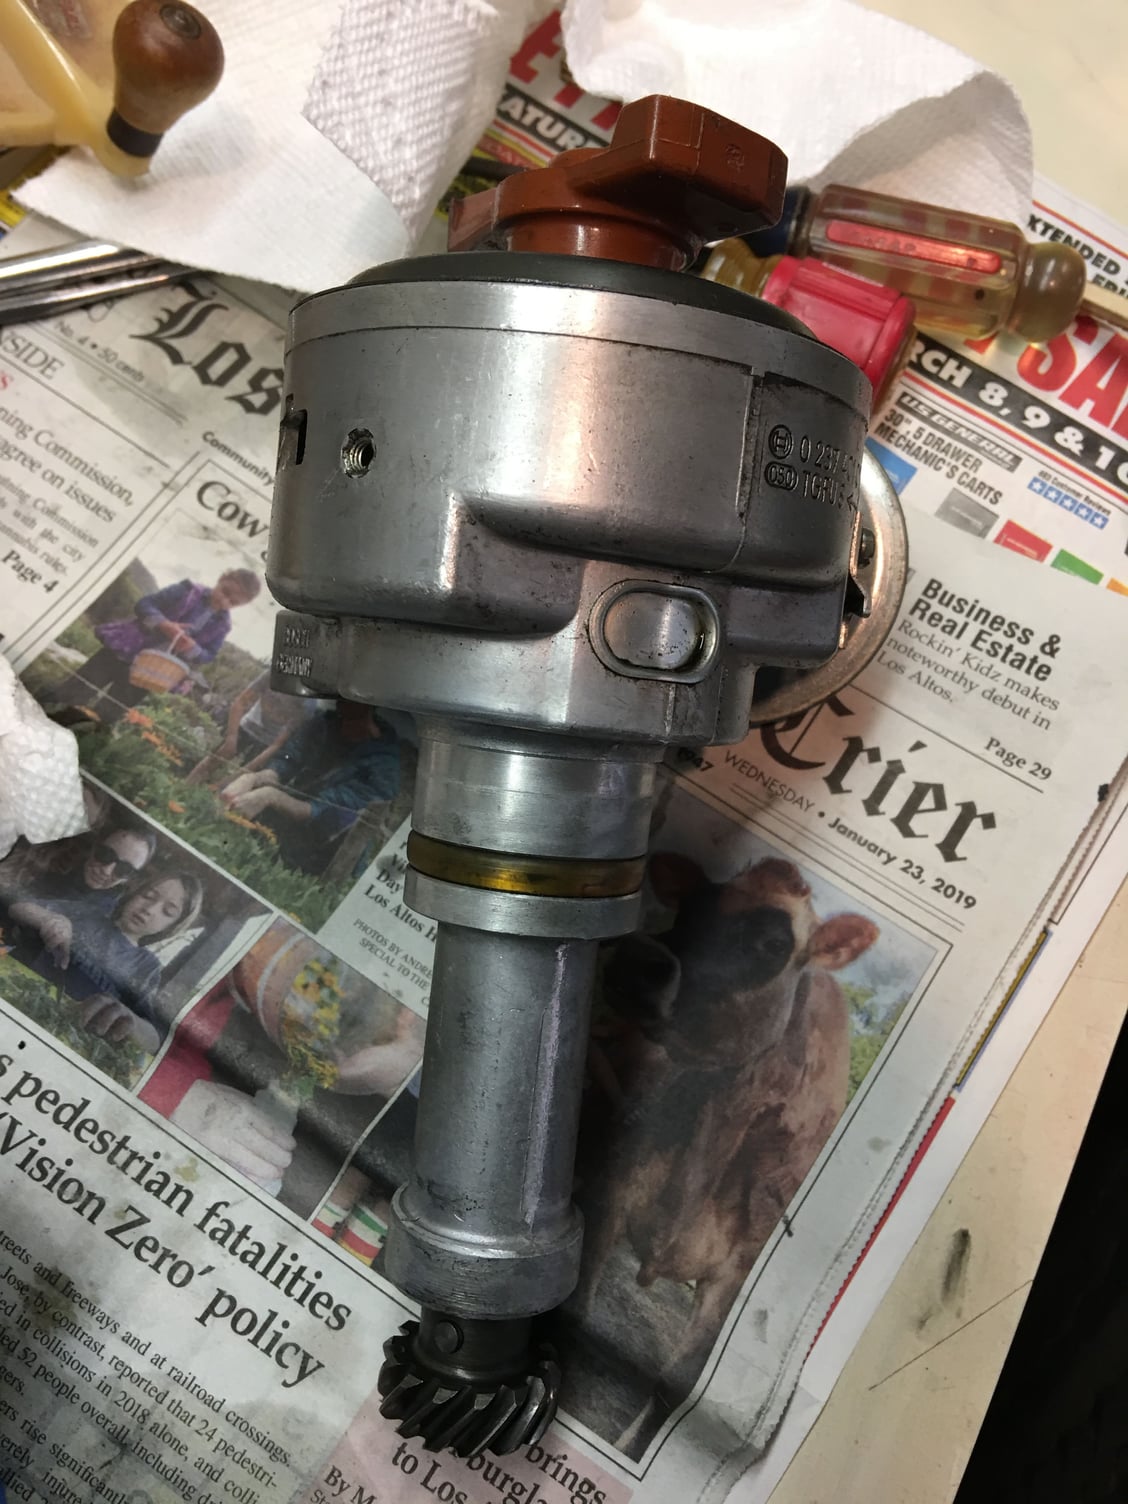
I haven't seen too many details on replacing all the cam seals for the 16V cars so will share a few here. With one exception (the keyed distributor gear and spacer) this is all pretty straightforward.
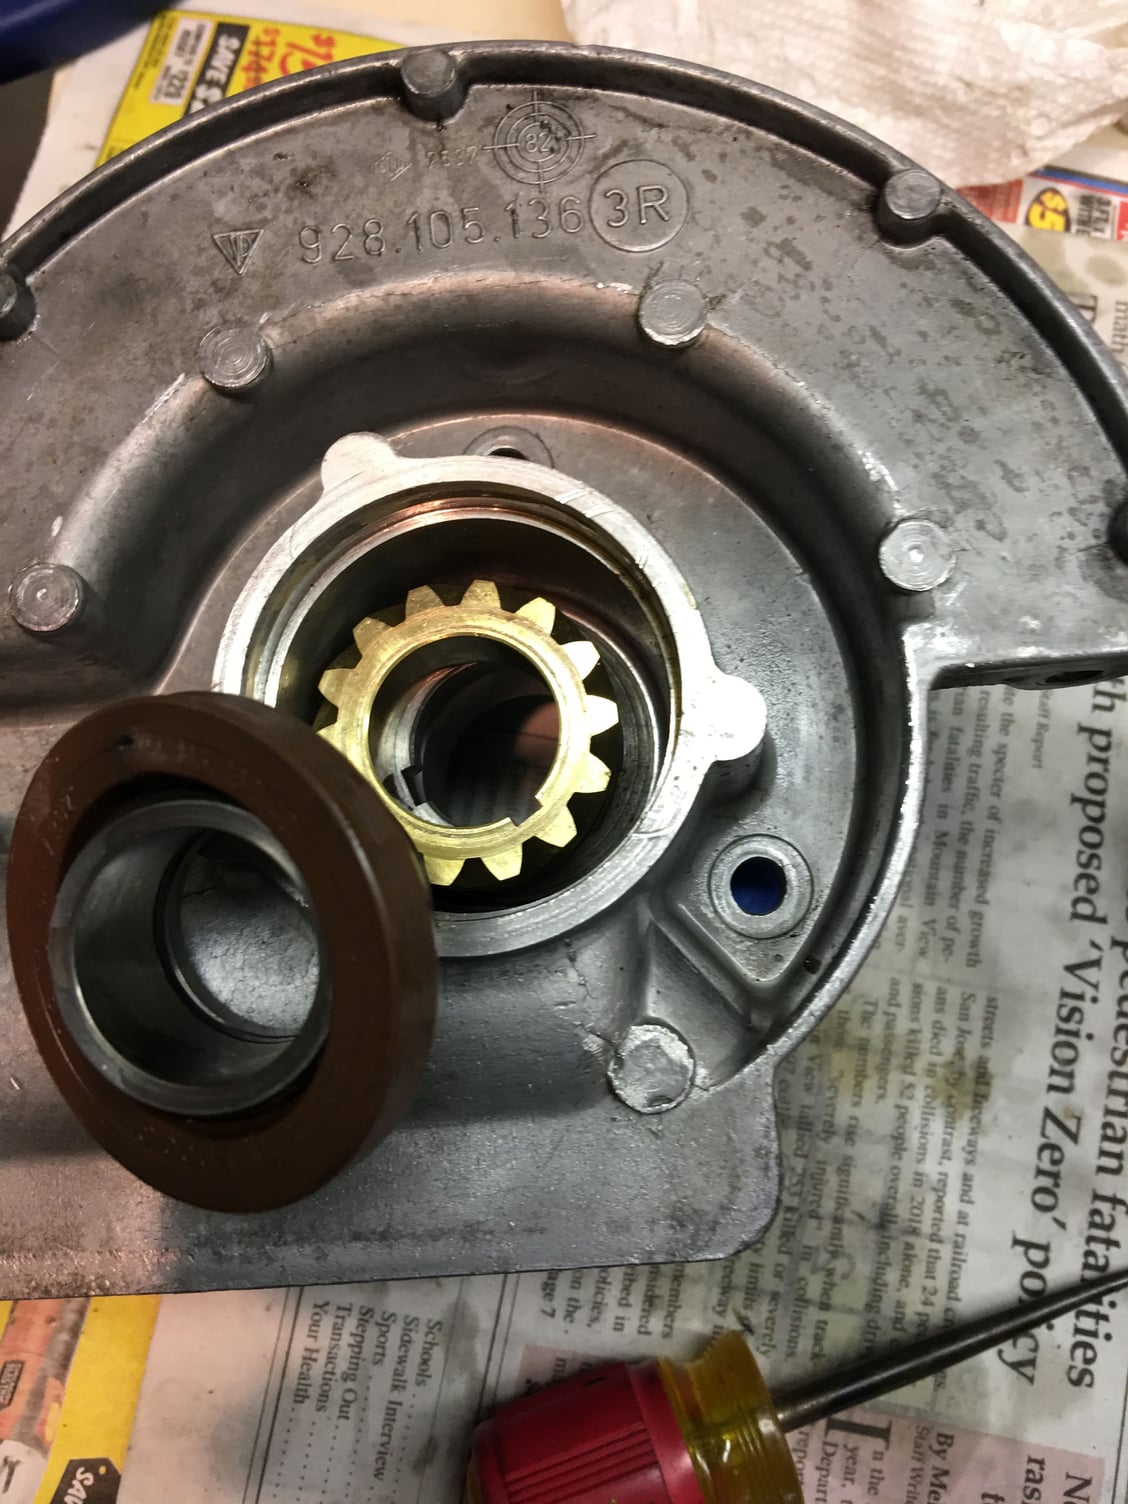
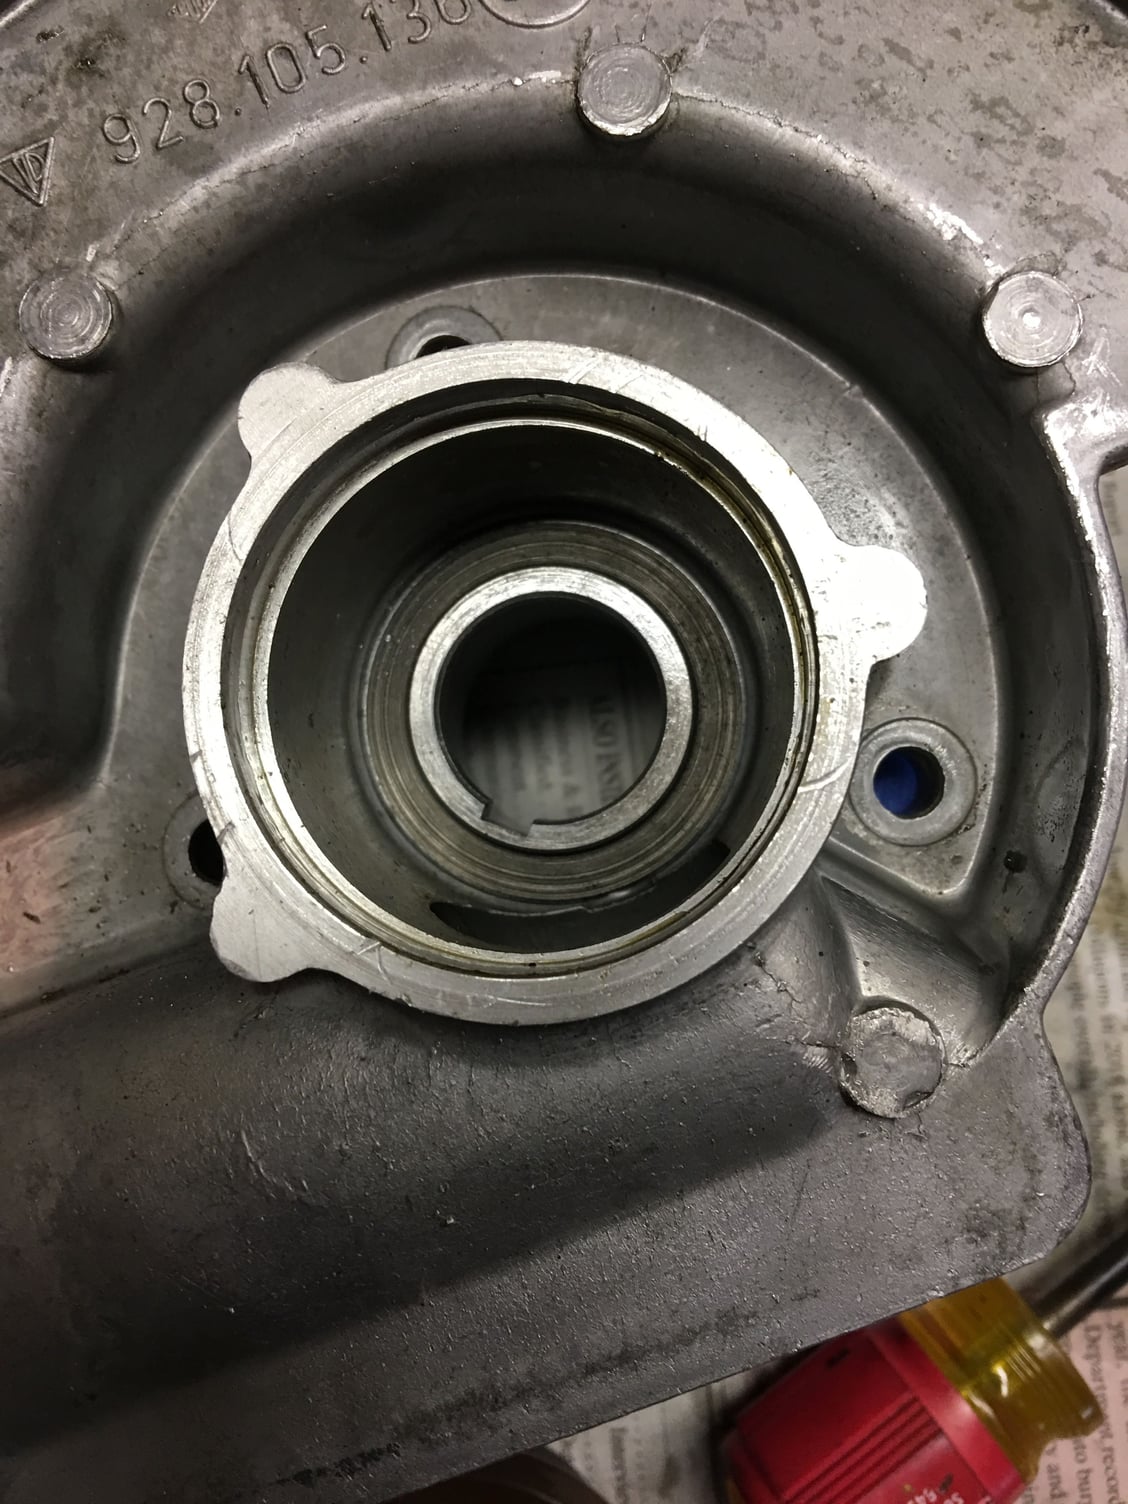
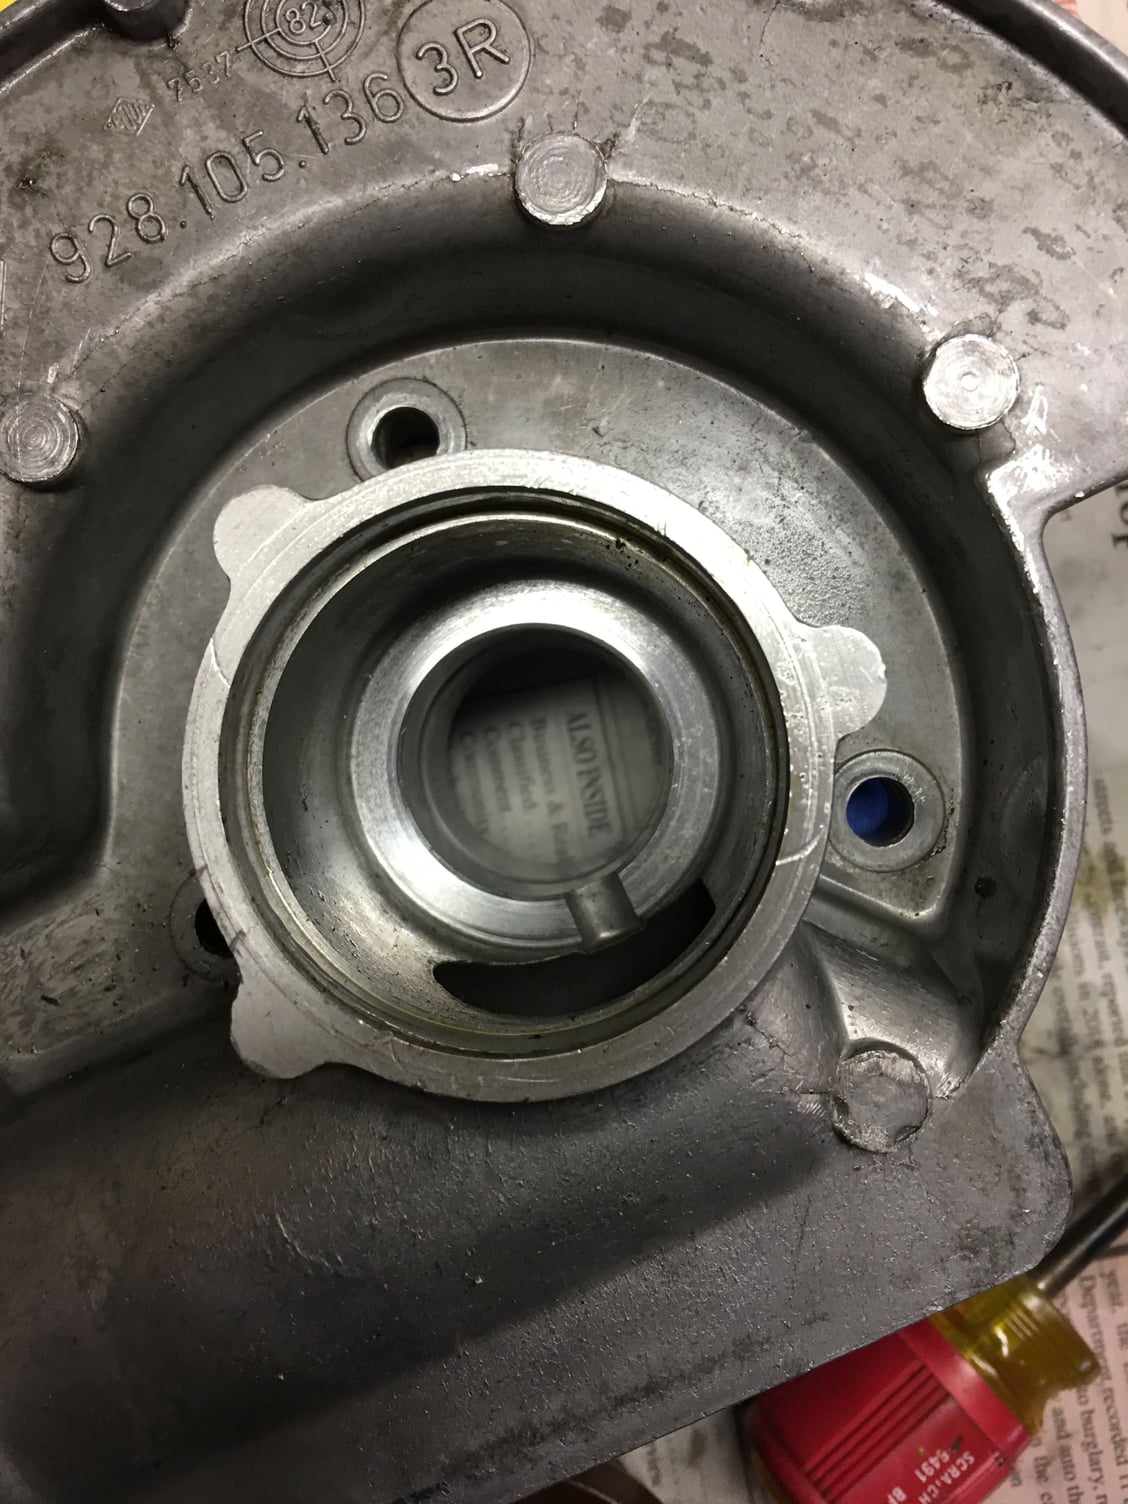
The nose of the cam protrudes from the cam tower, and on it rides one sleeve/spacer (passenger side) which in turn seals against the main seal. The driver's side has a matching sleeve/spacer, and in addition a keyed distributor gear and a keyed rear spacer as well (front to back).
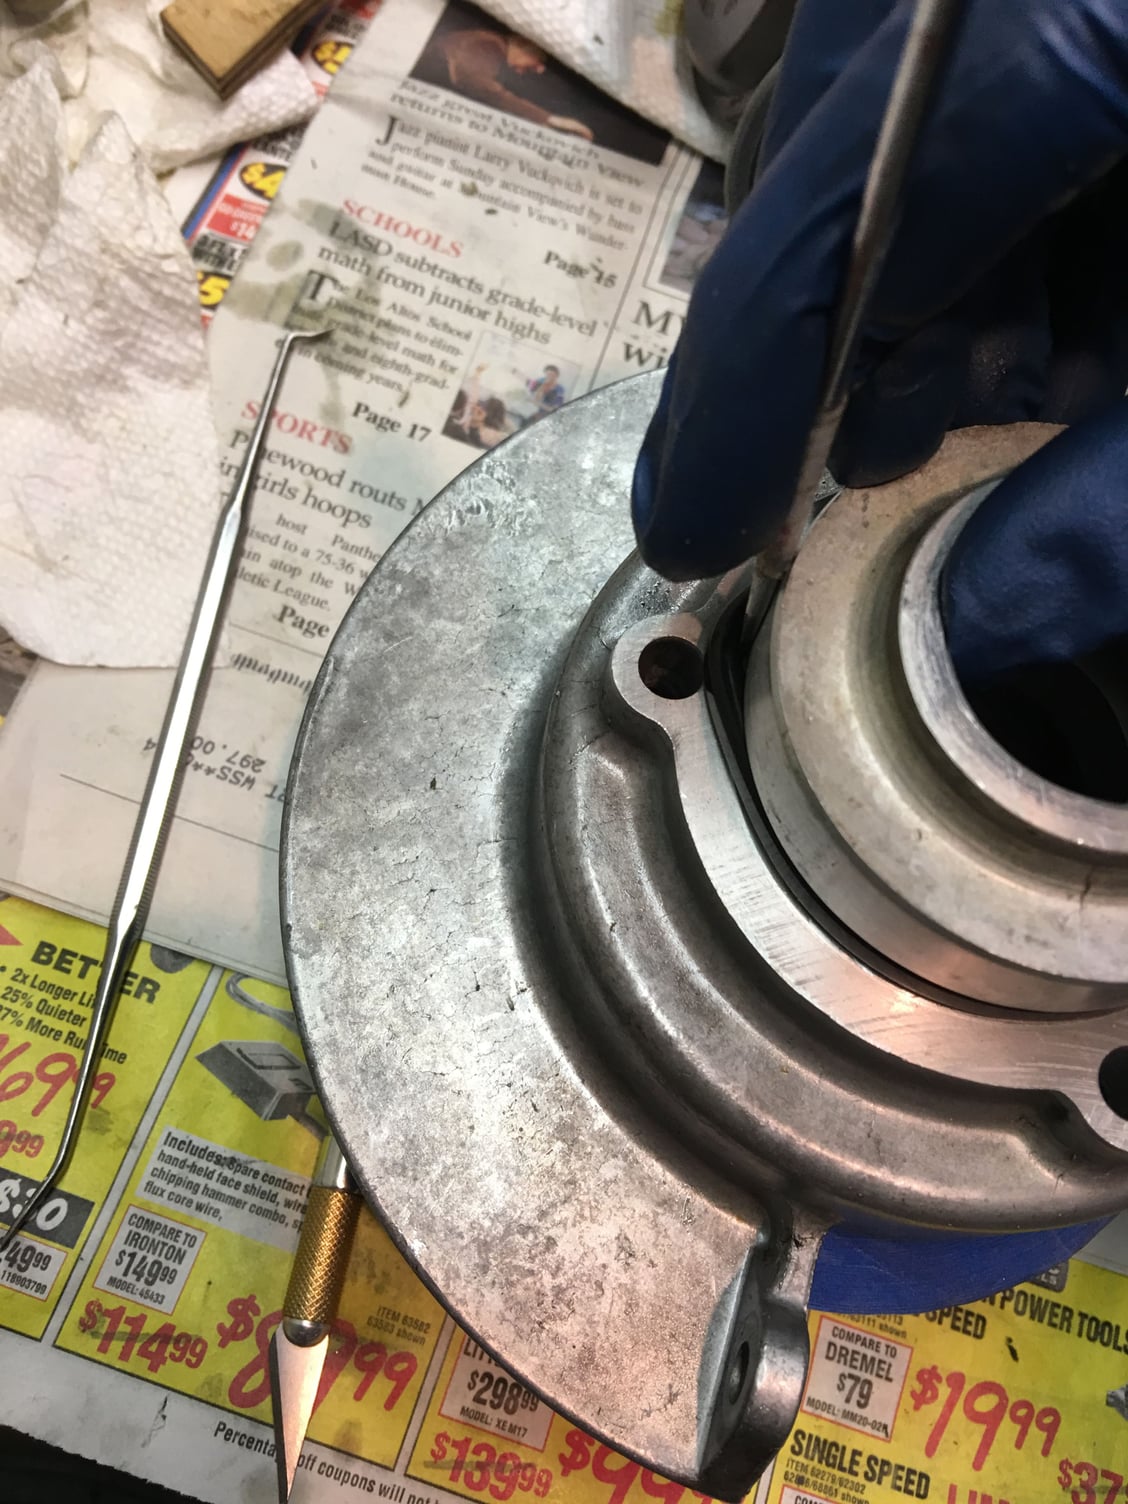
There are four seals on each cam nose assembly/housing: the main cam seal (visible once you remove the pulley and which is much like the main crank seal and oil pump seal), the rear seal which is a big O-ring on the housing where it meets the cam tower, a small O-ring type seal only about 1mm in cross section and the diameter of the camshaft that goes inside a small groove inside the spacer, and finally a fourth seal at the back of the housing (it covers what appears to be a fourth bolt hole on the front of the cam towers, though only three bolts are used to attach the housing). I believe this provides an oil passage for the distributor drive, but only on the driver side.
More details on the pics below.
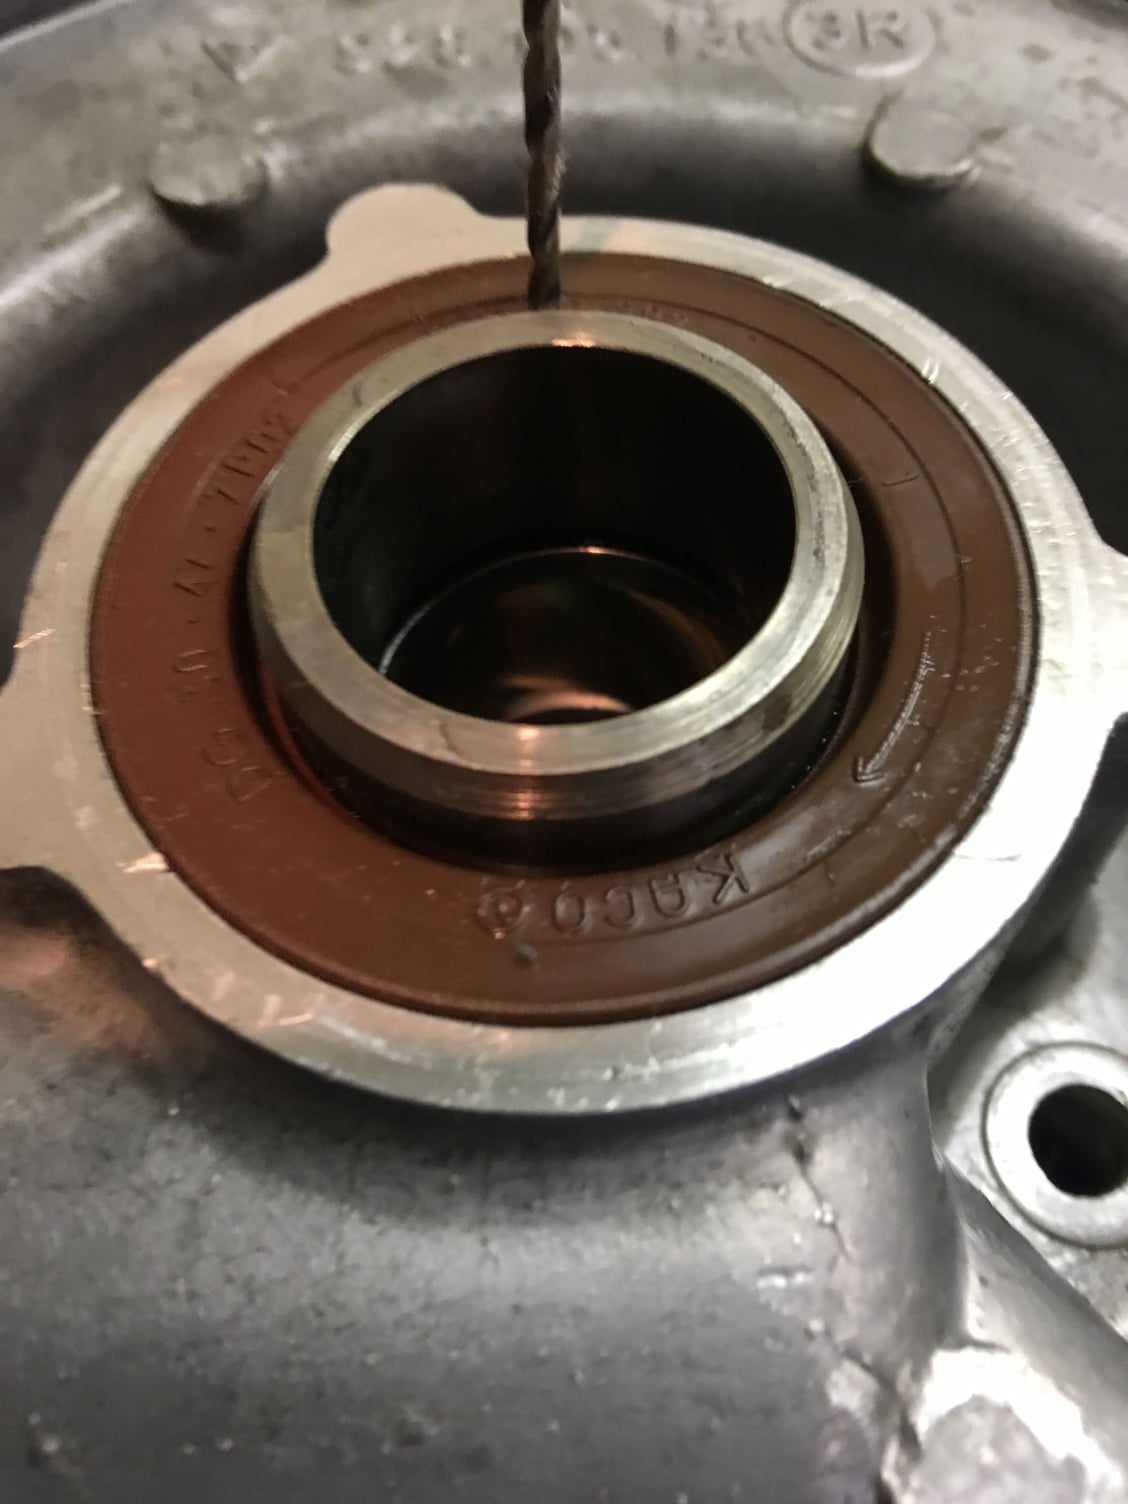
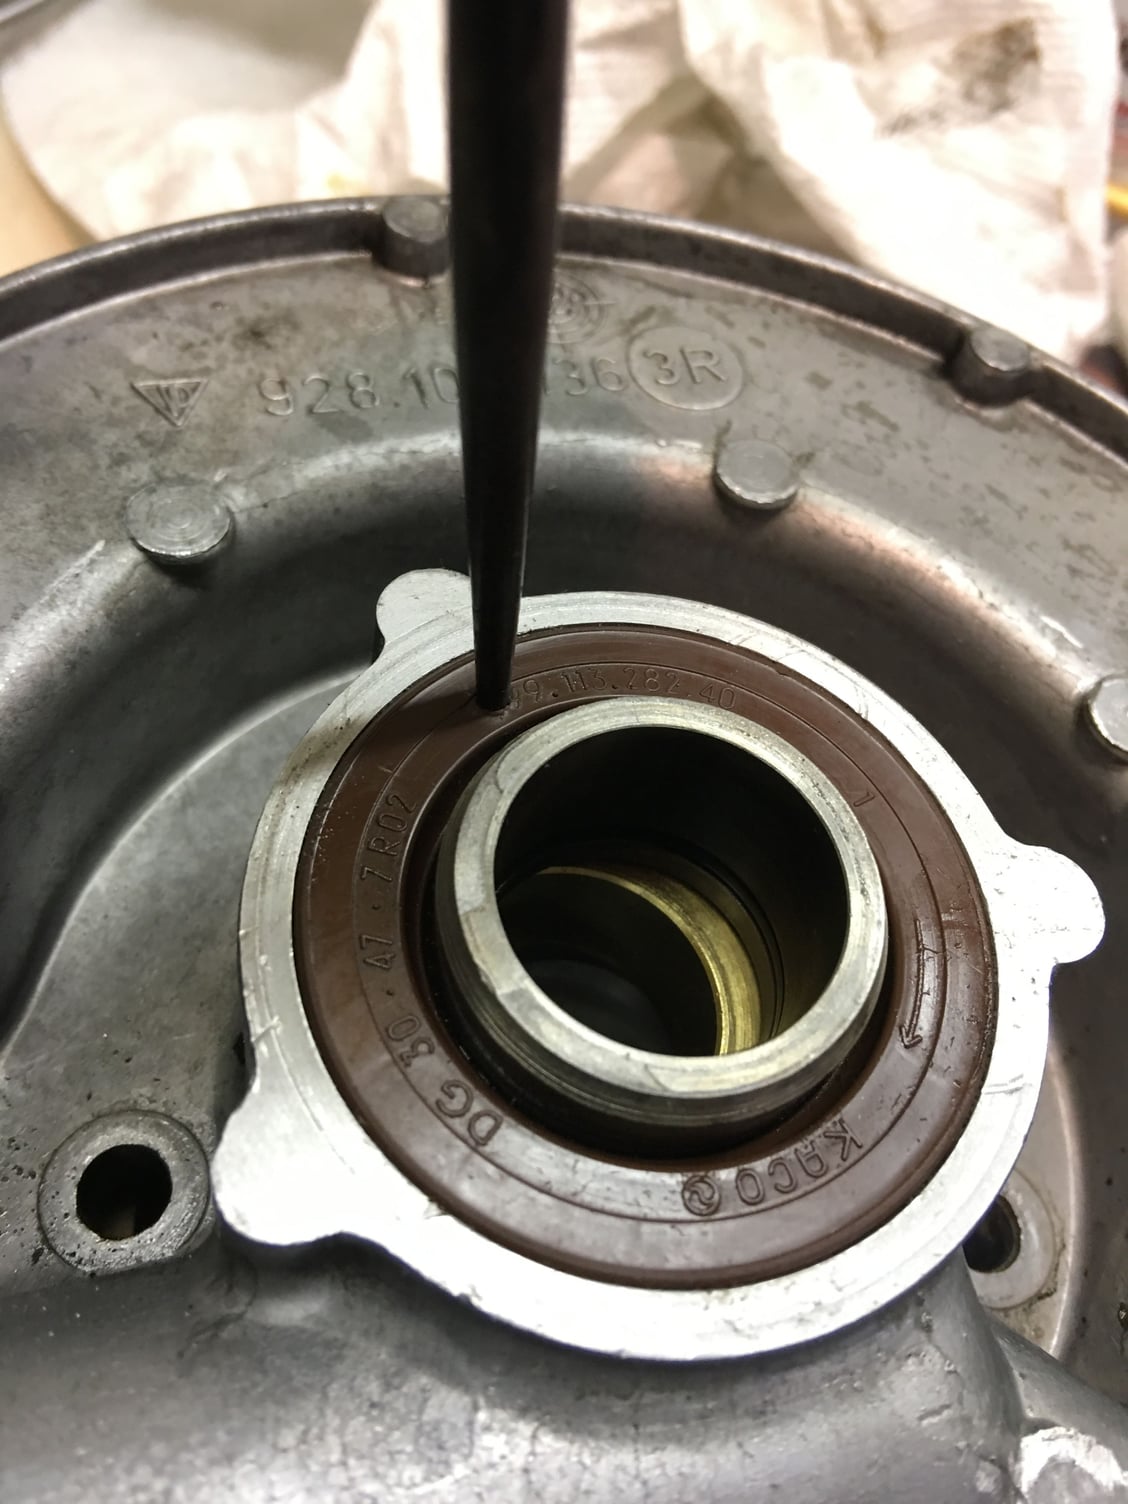
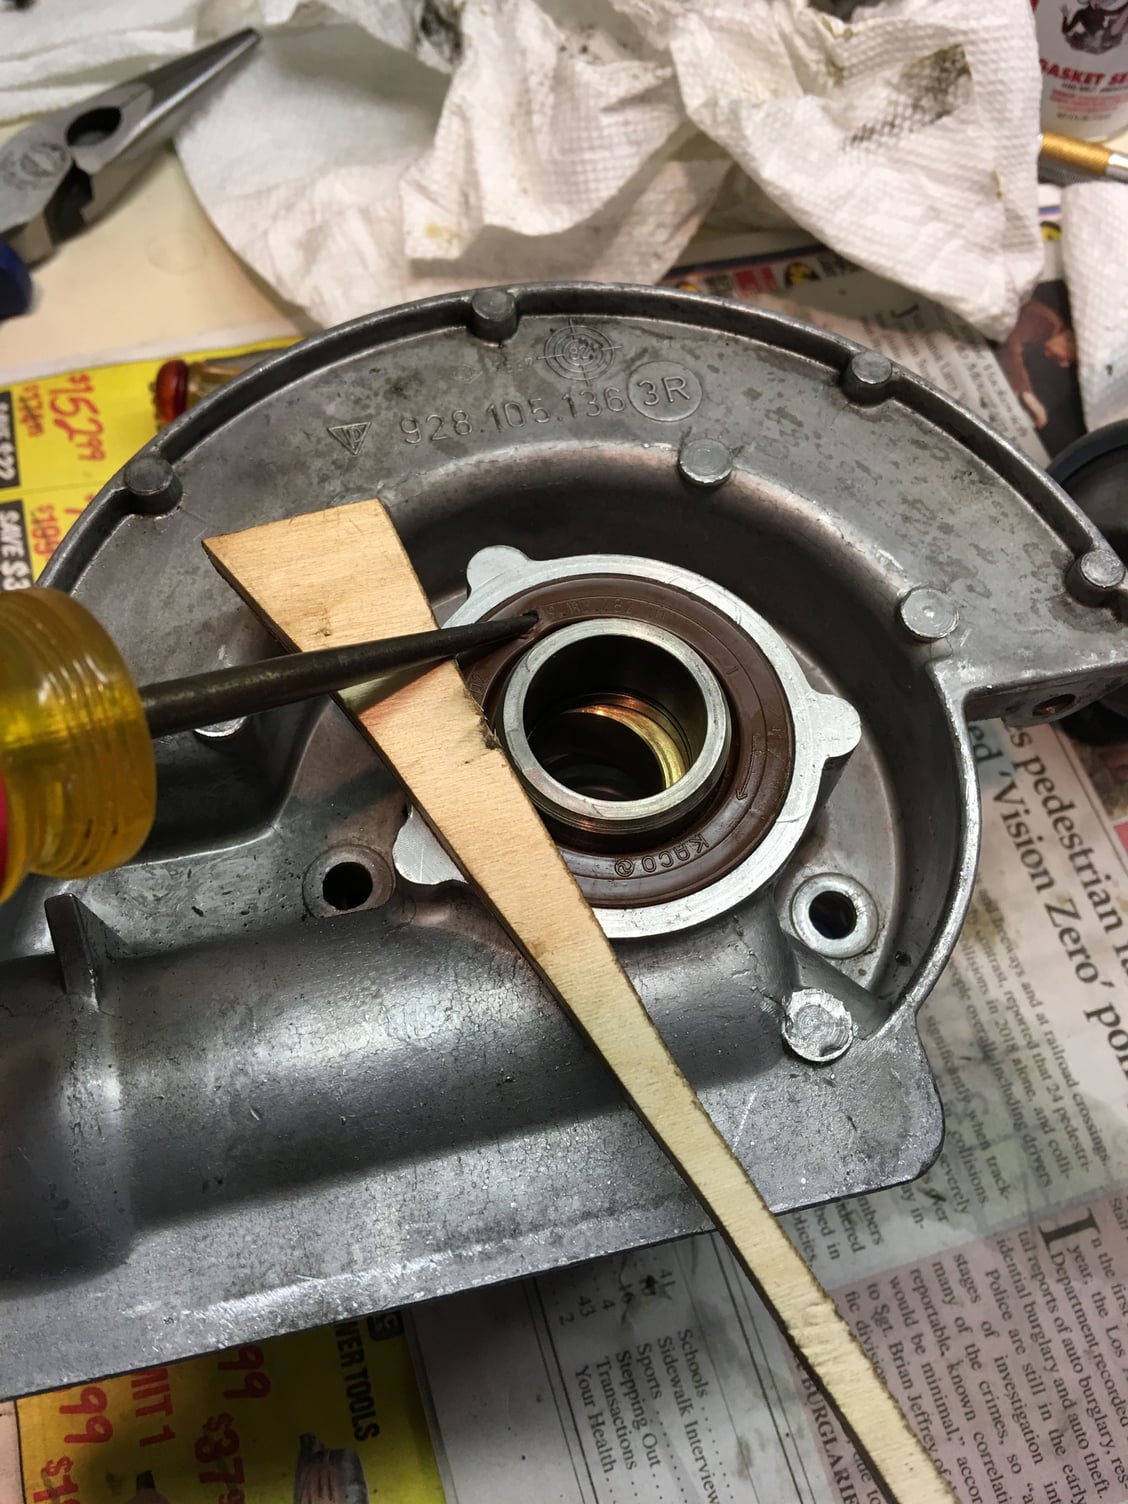
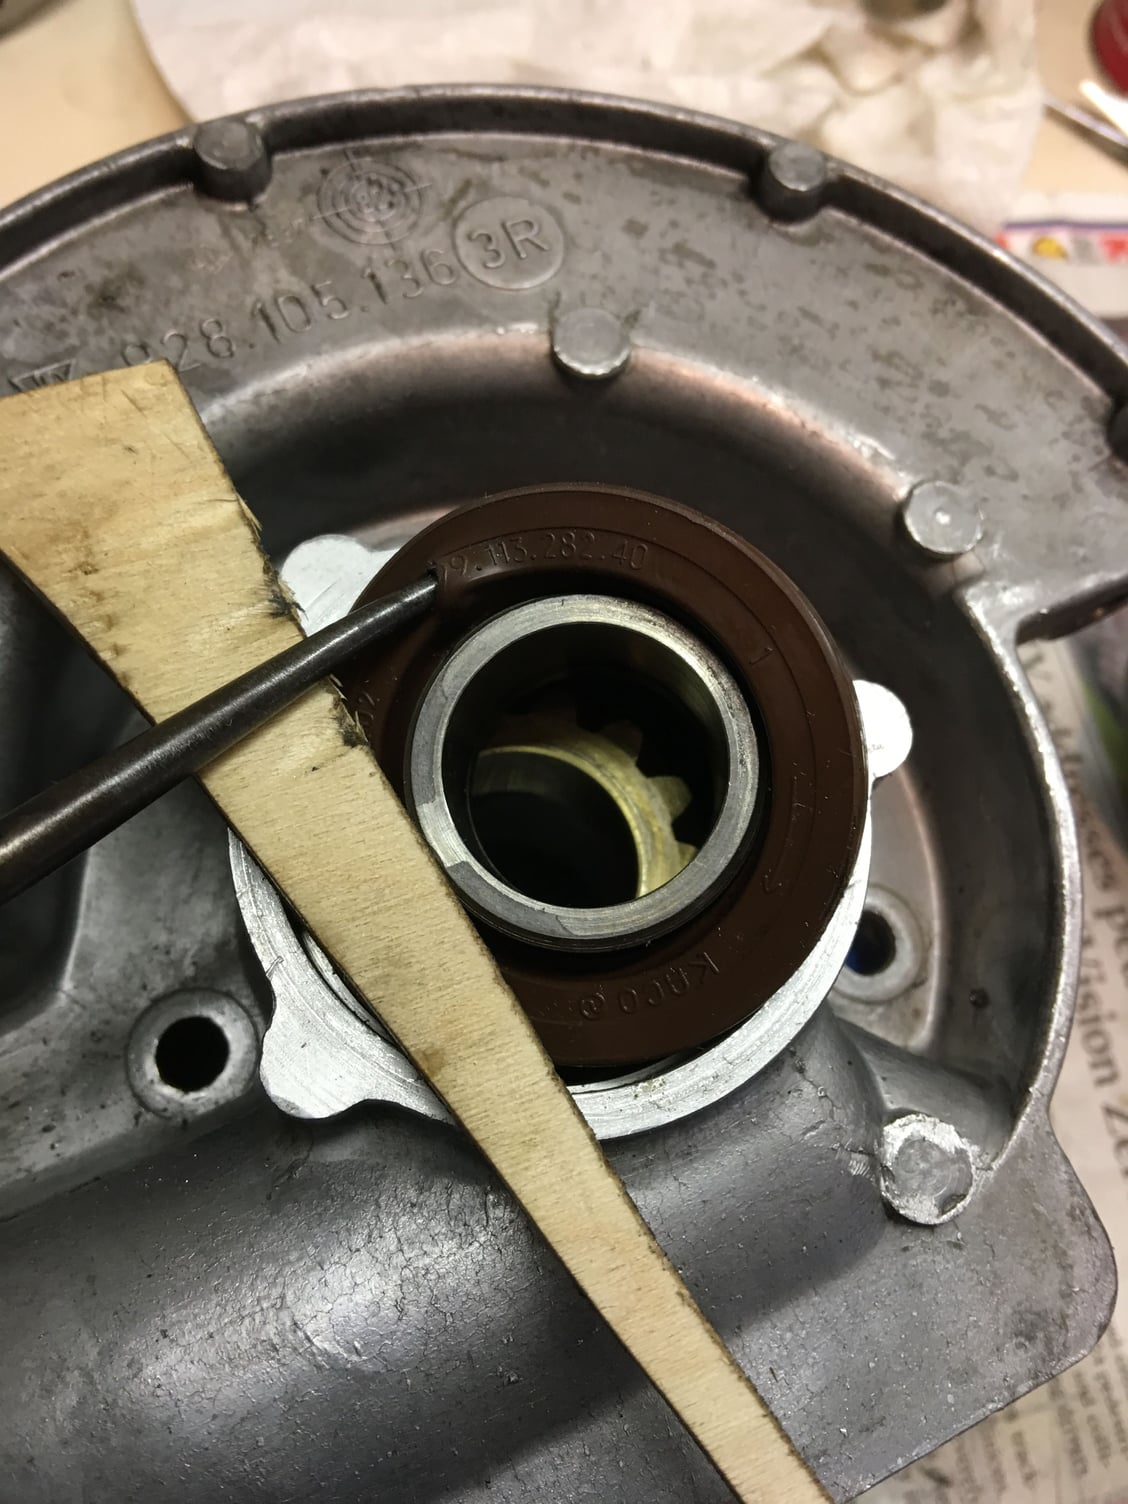
I was paranoid about scratching or deforming the seal mounting surface, so rather than digging at the edge of the seal I decided to attack it from the middle. I first carefully drilled a 1/16th inch hole... Inserted the end of an awl just a couple of mm into the metal of the seal... And started prying out, leveraging against a piece of wood. Both main cam seals popped right out this way! This is on the driver's side. The first spacer's nose protrudes through the seal. Hard to see but there's a small O-ring inside this first spacer, too. Underneath is the keyed distributor drive gear. And underneath the drive gear is a second, keyed spacer. Underneath the second spacer, the housing surface. Removing the large O-ring at the back of the housing (this one is the passenger side). Rather than slip it off the housing, I carefully sliced through it with an X-acto. Removing the seal from the back.
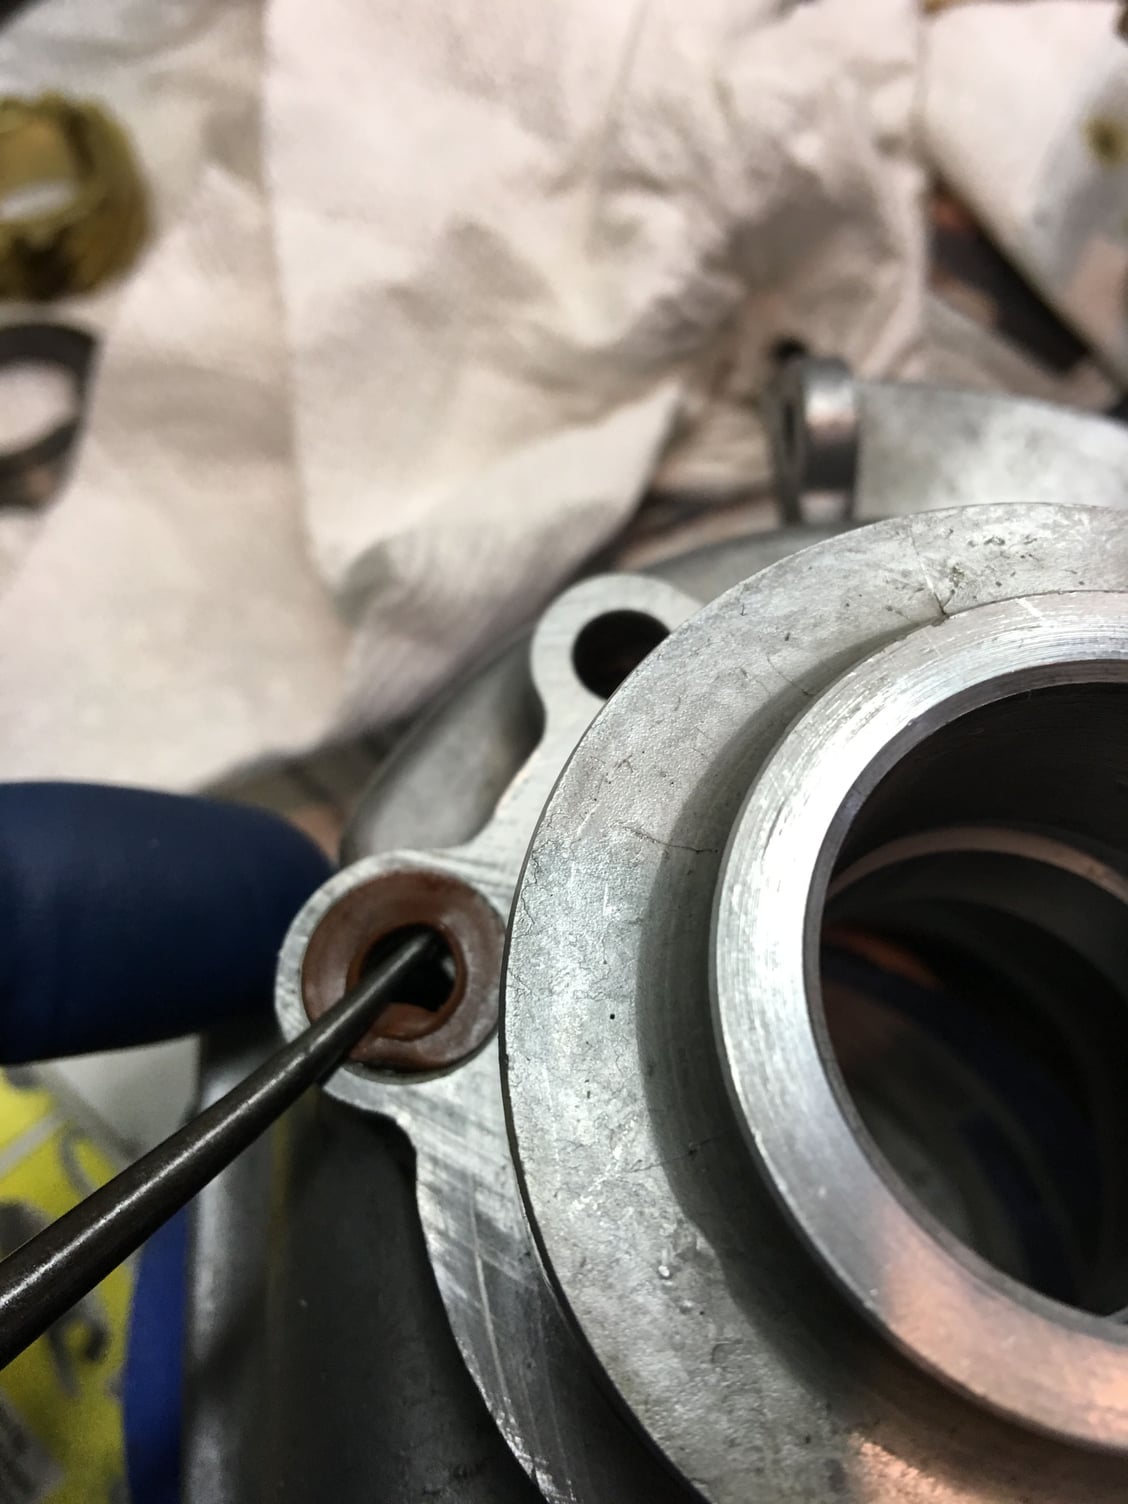
Just so it�s here, a photo of the distributor shaft seal.

 02-03-2019, 12:35 AM