When you click on links to various merchants on this site and make a purchase, this can result in this site earning a commission. Affiliate programs and affiliations include, but are not limited to, the eBay Partner Network.
I had to remove my intake to replace a malfunctioning TPS
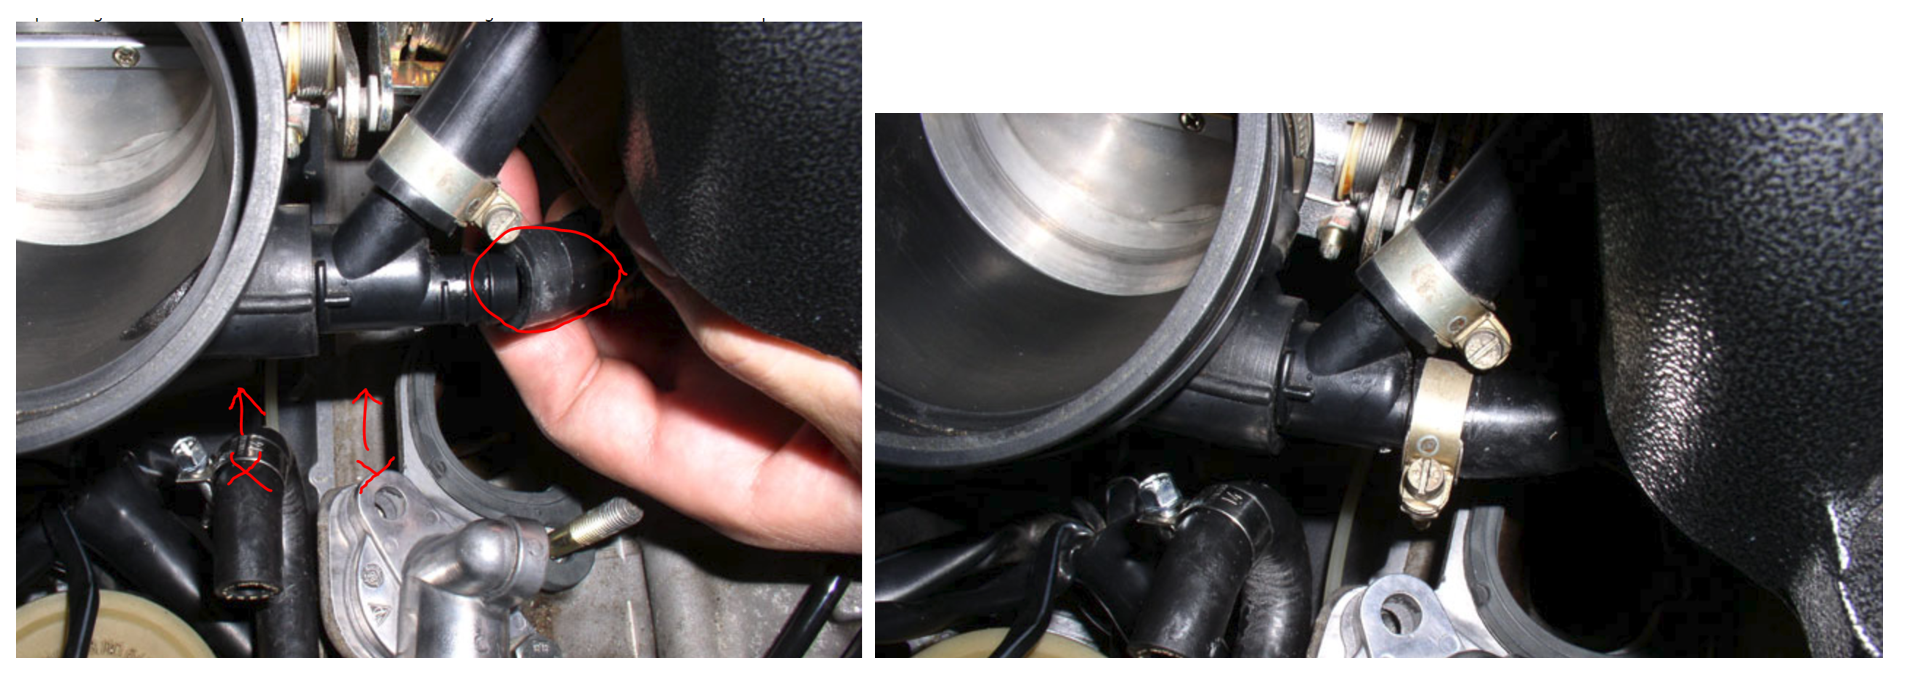
How does this long PCV hose run to the rear port of the oil filler neck; along X (below the intake) or Y (squeezed along this ridge)? (borrowed Dwayne’s photos)
Reason for asking: It is rubbing against the spring on the TB and preventing a smooth return.
This is my 5th time removing the intake (4 Intake refreshes since ownership) and I have never had this problem before.
Please and thanks
I had the exact issue with the hose impeding the TB spring. the trick is to first attach the 2 hoses to the plastic Y, but do not tighten the clamps.
make sure the clamp screws or hex heads are accessible, for tightening, once the intake is in place. you may need swivels/sockets, or a long screwdriver.
then, insert the plastic Y into the rubber boot, making sure the raised plastic line on the Y, perfectly aligns with the line on the boot. the correct orientation
of these hoses in relationship to the boot is critical. finally, with the intake in place, tighten the clamps, that oil filler hose lays under the manifold. it can be
a bit of a PITA, but with a little fiddling, you will get it. make sure to test the action of the TB lever before you tighten the intake down.
As I remember it runs under the lip of the inlet ports as per Y in your photo- can be a bit tricky getting it to fit correctly
Oh crap. Means I've got to uproot the manifold again.
Thanks Fred
Originally Posted by merchauser
I had the exact issue with the hose impeding the TB spring. the trick is to first attach the 2 hoses to the plastic Y, but do not tighten the clamps.
make sure the clamp screws or hex heads are accessible, for tightening, once the intake is in place. you may need swivels/sockets, or a long screwdriver.
then, insert the plastic Y into the rubber boot, making sure the raised plastic line on the Y, perfectly aligns with the line on the boot. the correct orientation
of these hoses in relationship to the boot is critical. finally, with the intake in place, tighten the clamps, that oil filler hose lays under the manifold. it can be
a bit of a PITA, but with a little fiddling, you will get it. make sure to test the action of the TB lever before you tighten the intake down.
you don't need to completely take it all apart. I had the EXACT issue last week, so it is fresh in my mind. (replaced my
TPS, ISV, and flappy/throttle bearings)
I took off the fuel rails, but left the injectors in place. removed all the intake bolts and gently lifted the intake up. I did not have to
unplug any other connections. I used a couple of 1 x 2 wood strips to keep the intake up, and then correctly oriented and routed the hoses.
you do need to be careful about your intake gaskets and make sure nothing gets in the ports; especially the pintle caps.
it all worked out with minimal scrapes and cussing; it will work out. PM if you need any more info.

 12-28-2018, 03:24 PM