When you click on links to various merchants on this site and make a purchase, this can result in this site earning a commission. Affiliate programs and affiliations include, but are not limited to, the eBay Partner Network.
Like Greg said, it does matter very much whether we are talking about the cradle or the upper block. I have had mixed results also depending on where the crack is... We have found that it takes a highly skilled professional welder. One of the more common requests we have is to weld up a cracked cylinder wall. Generally speaking, I don't like to try and run piston rings on the repaired area (as it will have no silicone in it) so we have either Nikasil'd over the repaired cylinder wall or bored them out and pressed in a dry ductile iron liner.
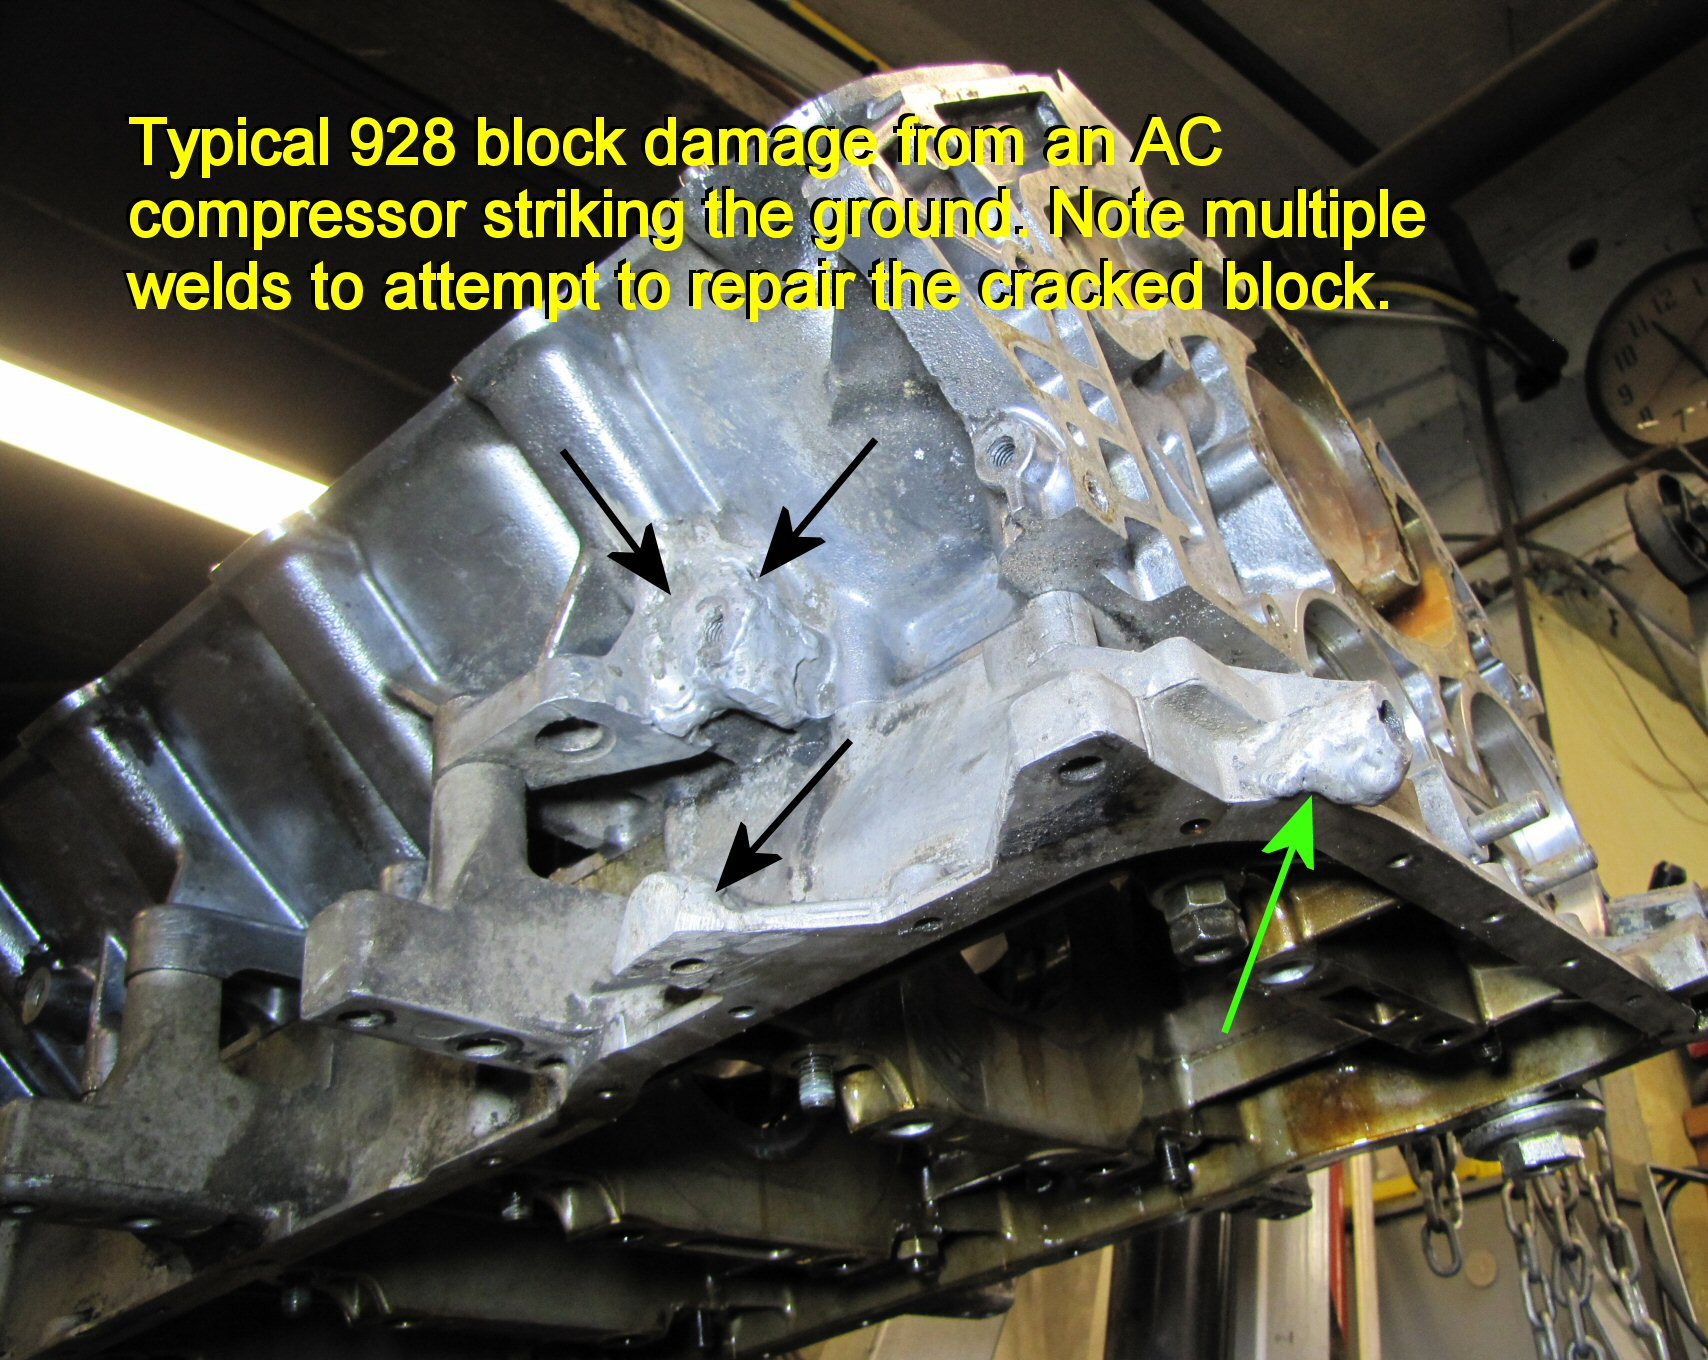
Here is a picture of an engine that arrived here a couple years ago. Its the poster child for needing Protection Plates! The AC compressor panned the pavement so hard that it broke the ears right off the block. The welds were nasty to look at, but they did hold, and the car had several more years of life after the incident. I only add it to this thread because, in certain circumstances, the Alusil block can be welded "successfully". Ugly-*** welds, but apparently strong enough.
Thanks heaps to all the responses regarding welding a 928 cylinder block.
I should say, 1 st of all, the welding is required in the centre bearing area of the engine and is in the cylinder block itself. That is the upper section. The alloy used is actually a Reynolds 390 alum that is quite common for use in the Auto industry for construction of engines where the engine is not machined for steel liners and uses steel rings in direct contact with treated aluminium bores.
Some responses have indicated that welding is quite difficult and may not be a viable option. But I would still be interested in finding out if anybody has successfully welded the 928 block. I hope this will shed a little more light on my requirement for forum readers.
Regards
Terry Fitzgerald
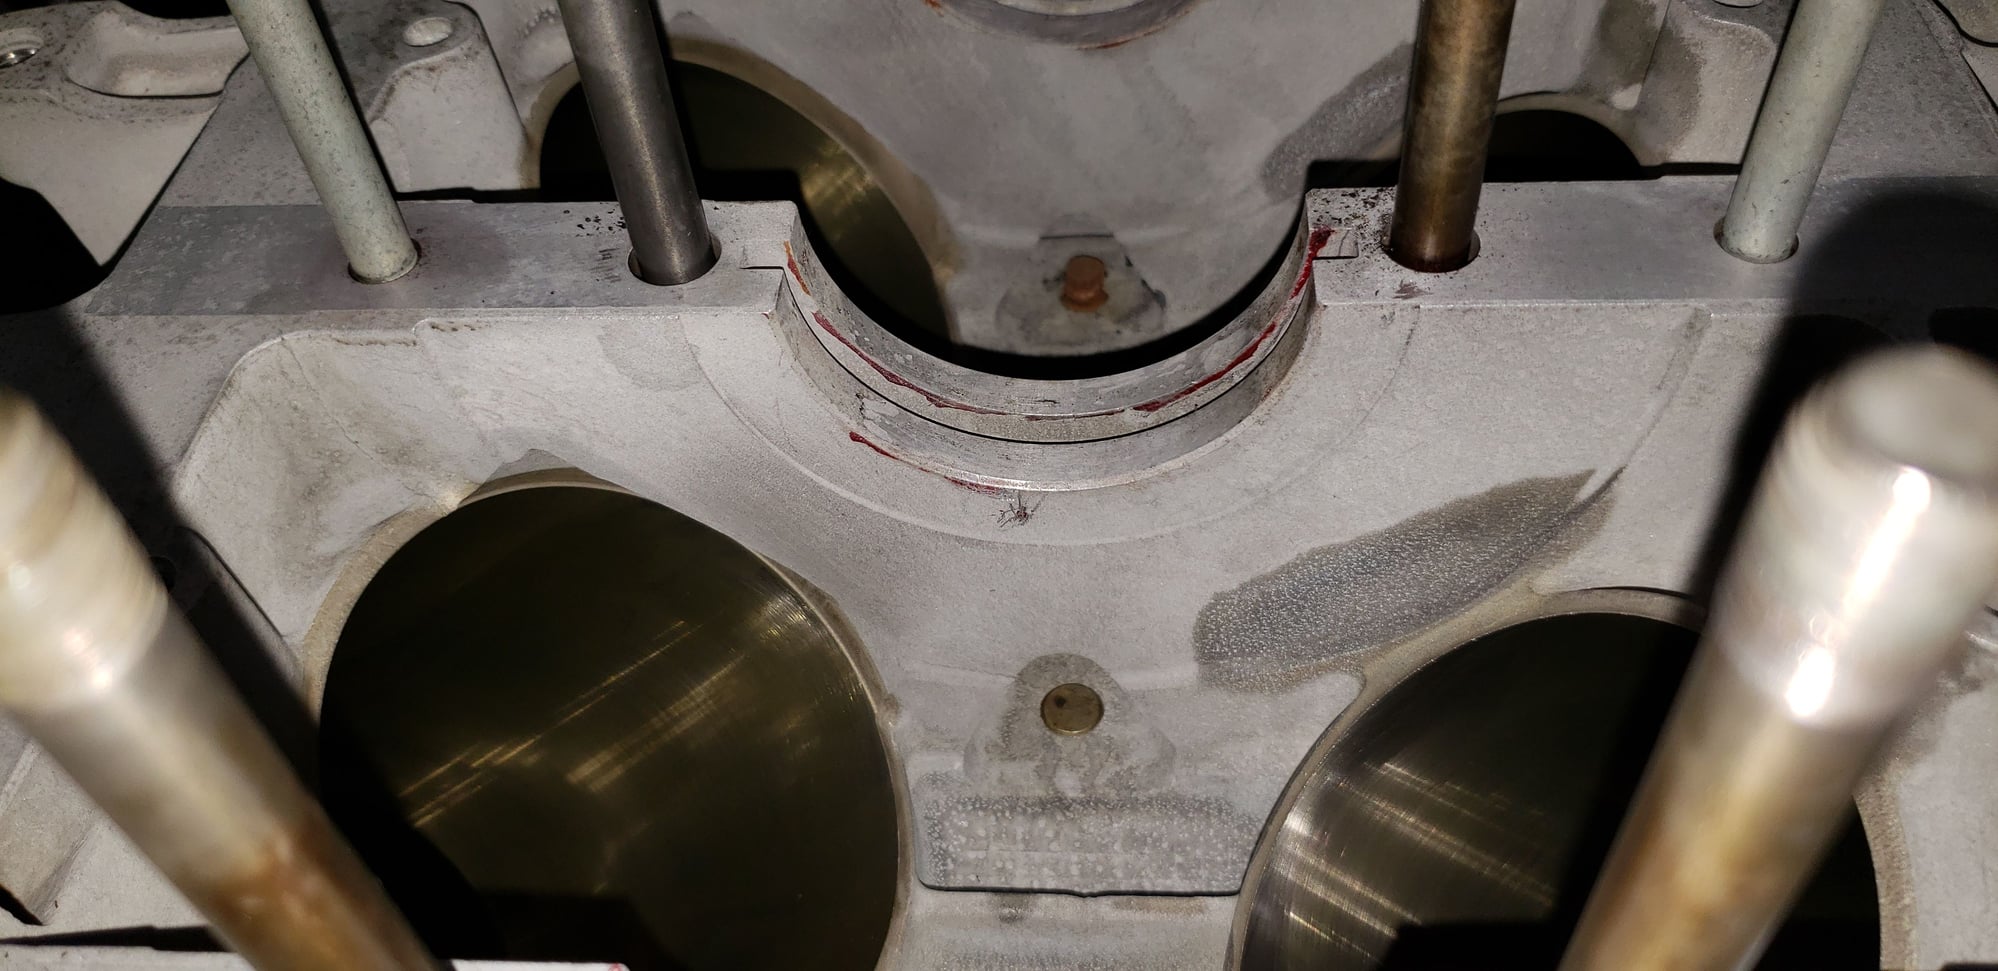
The crack in the #3 main bearing will eventually migrate up both sides of the block, into the water jackets.
The upper block section, with its' silicon content is extremely brittle....closer to glass than the content of silicon would indicate.
This crack apears in engines with TBF, commonly. I've also seen this crack appear in engines with high power output combined with "design" issues.
I'd be really interested in anyone or any proceedure that can repair this crack, but AFAIK, no one has been successful at repairing this problem.
Fortuately, S4 blocks are still fairly plentiful. I'd suggest you simply find another block/engine to work with.
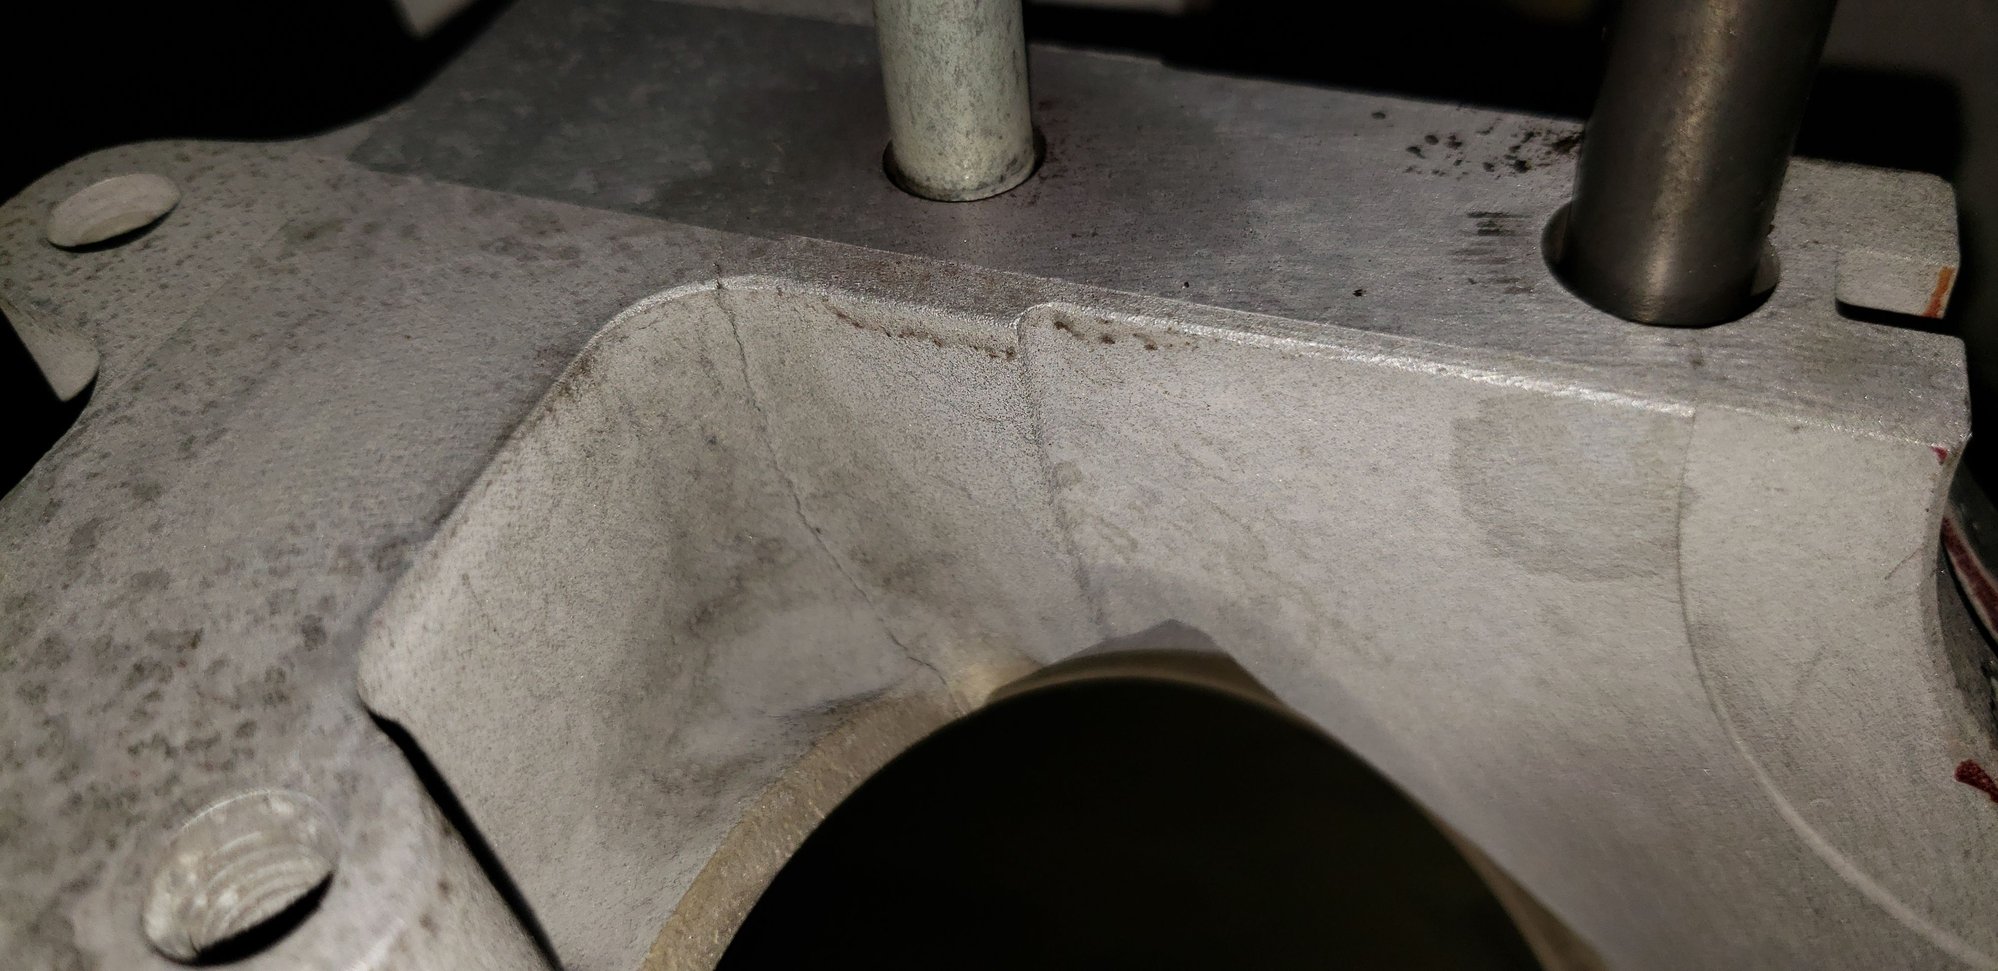
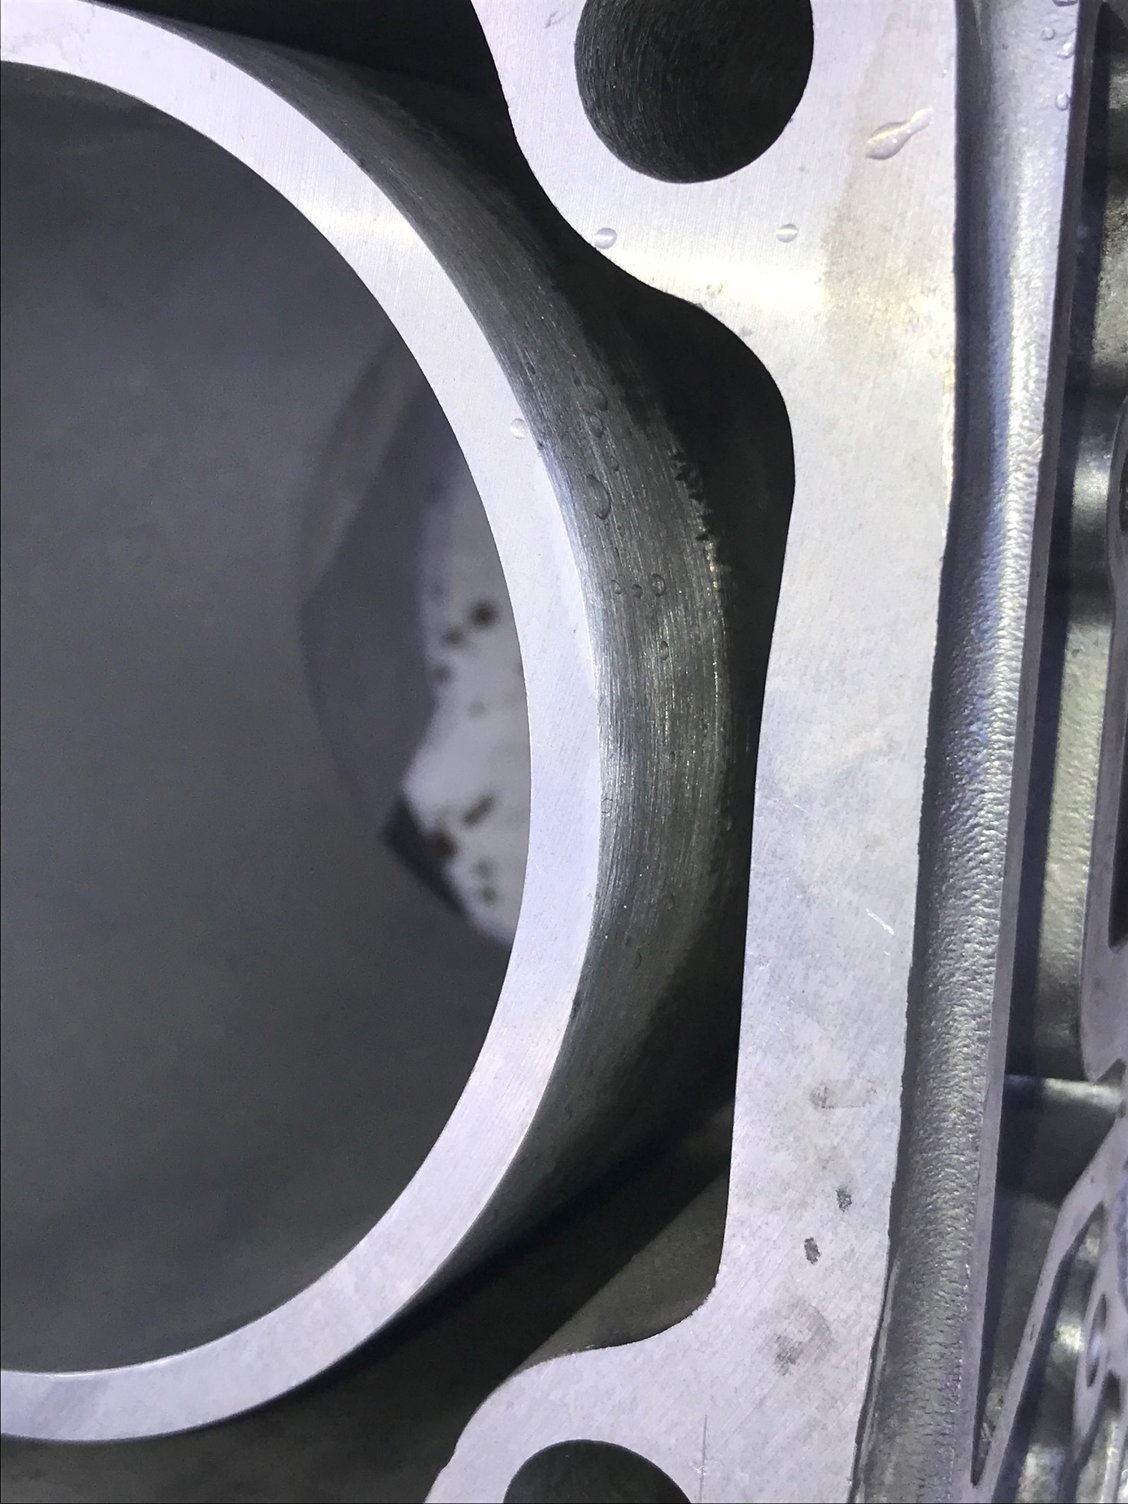
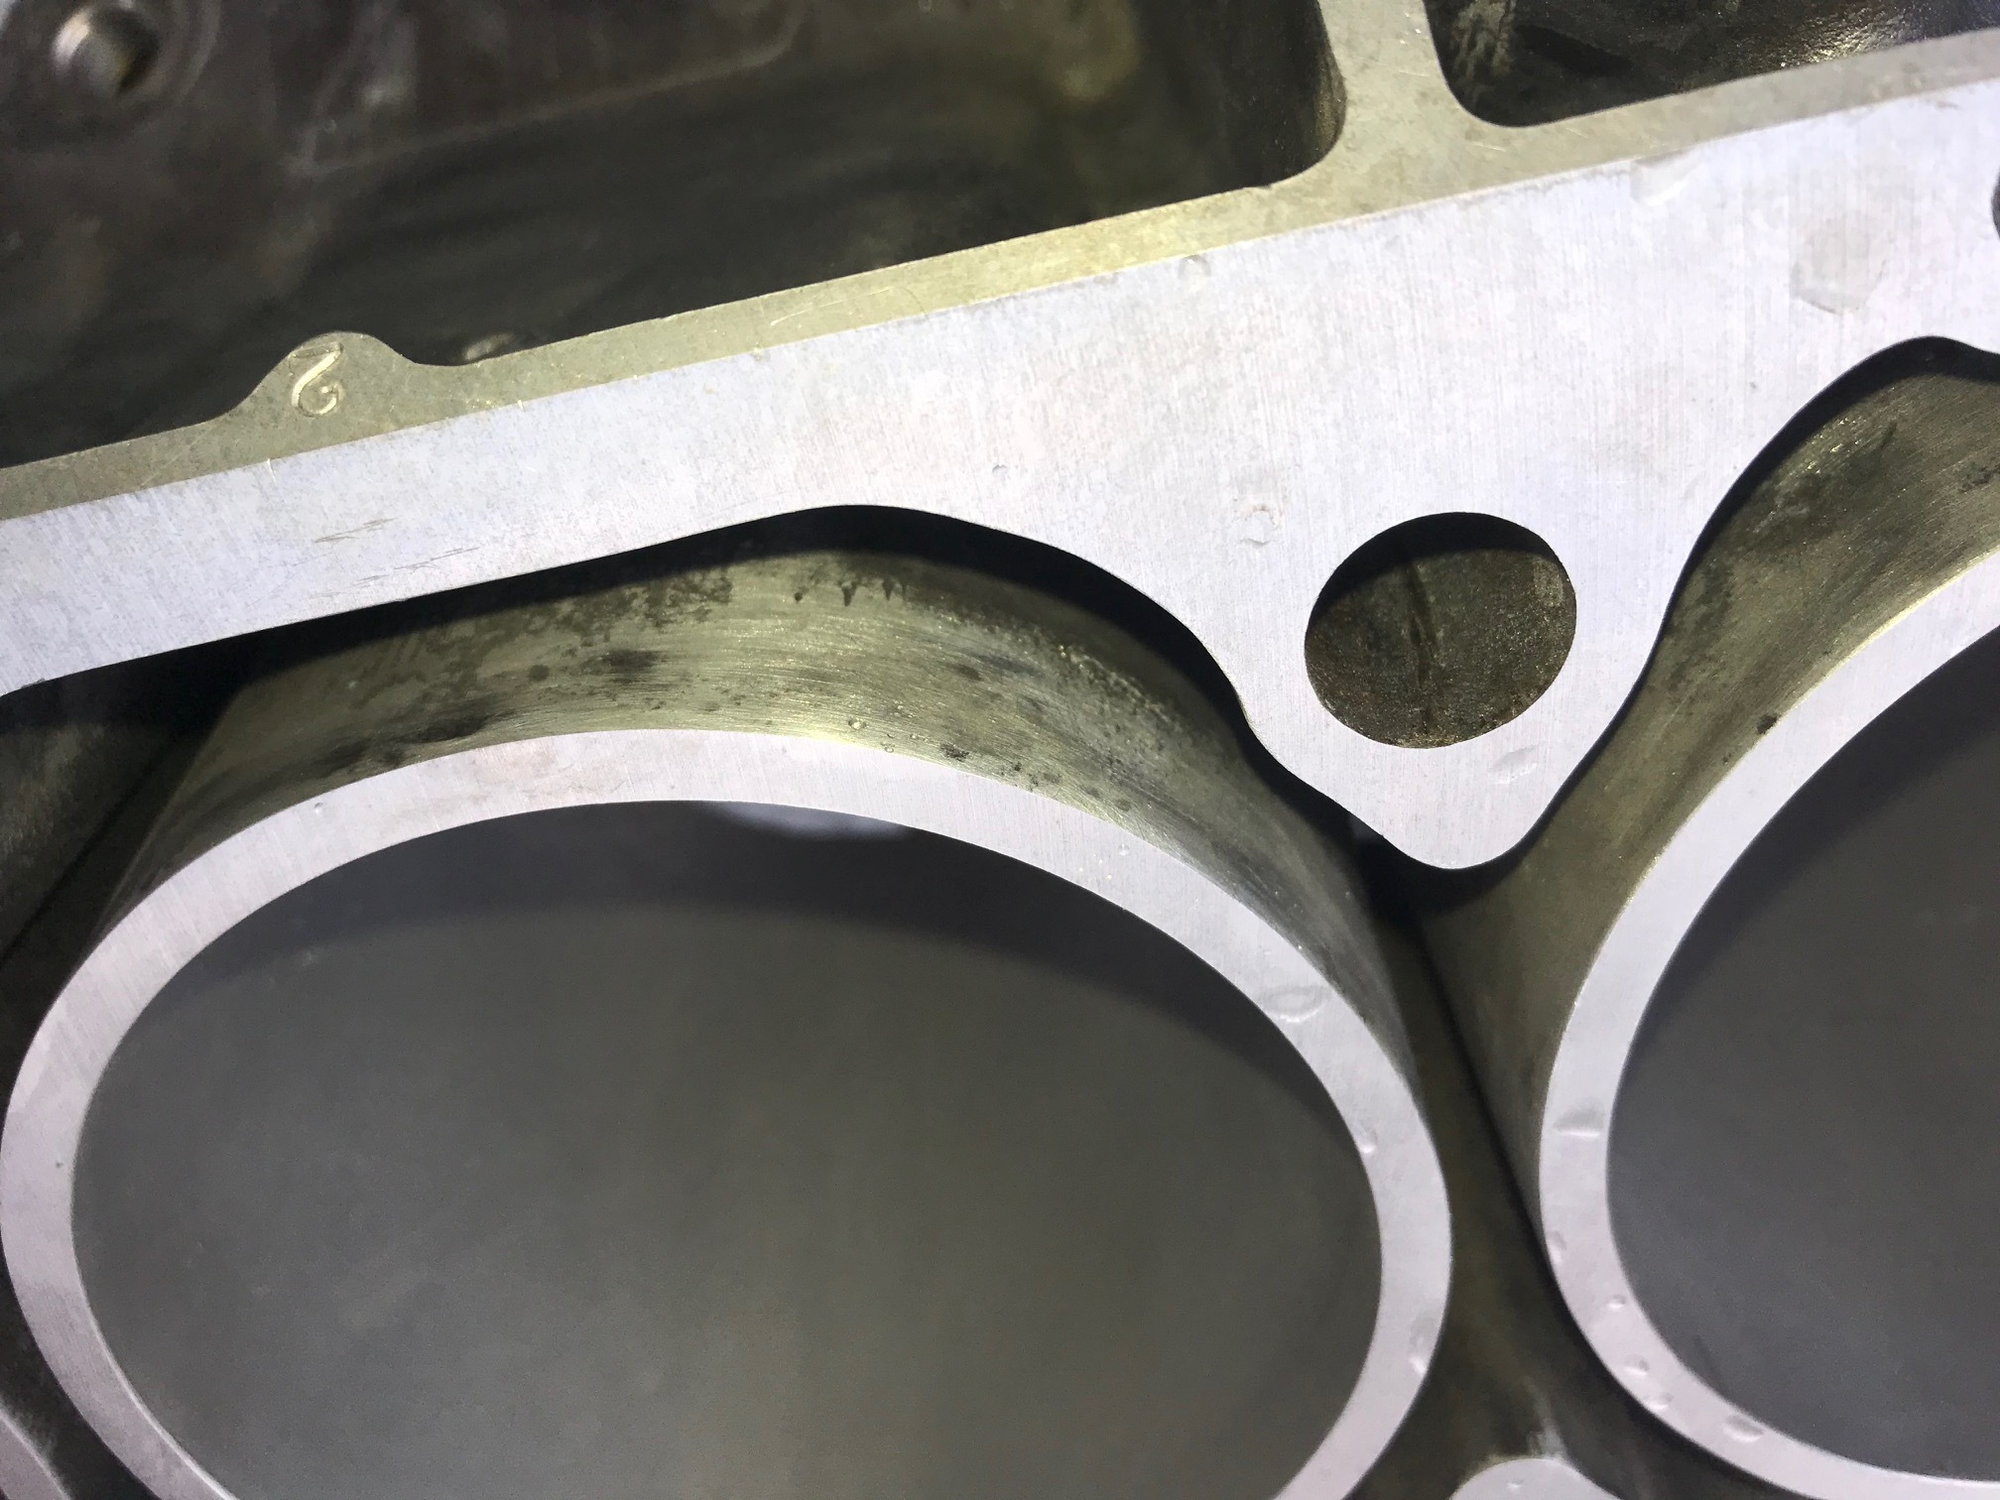
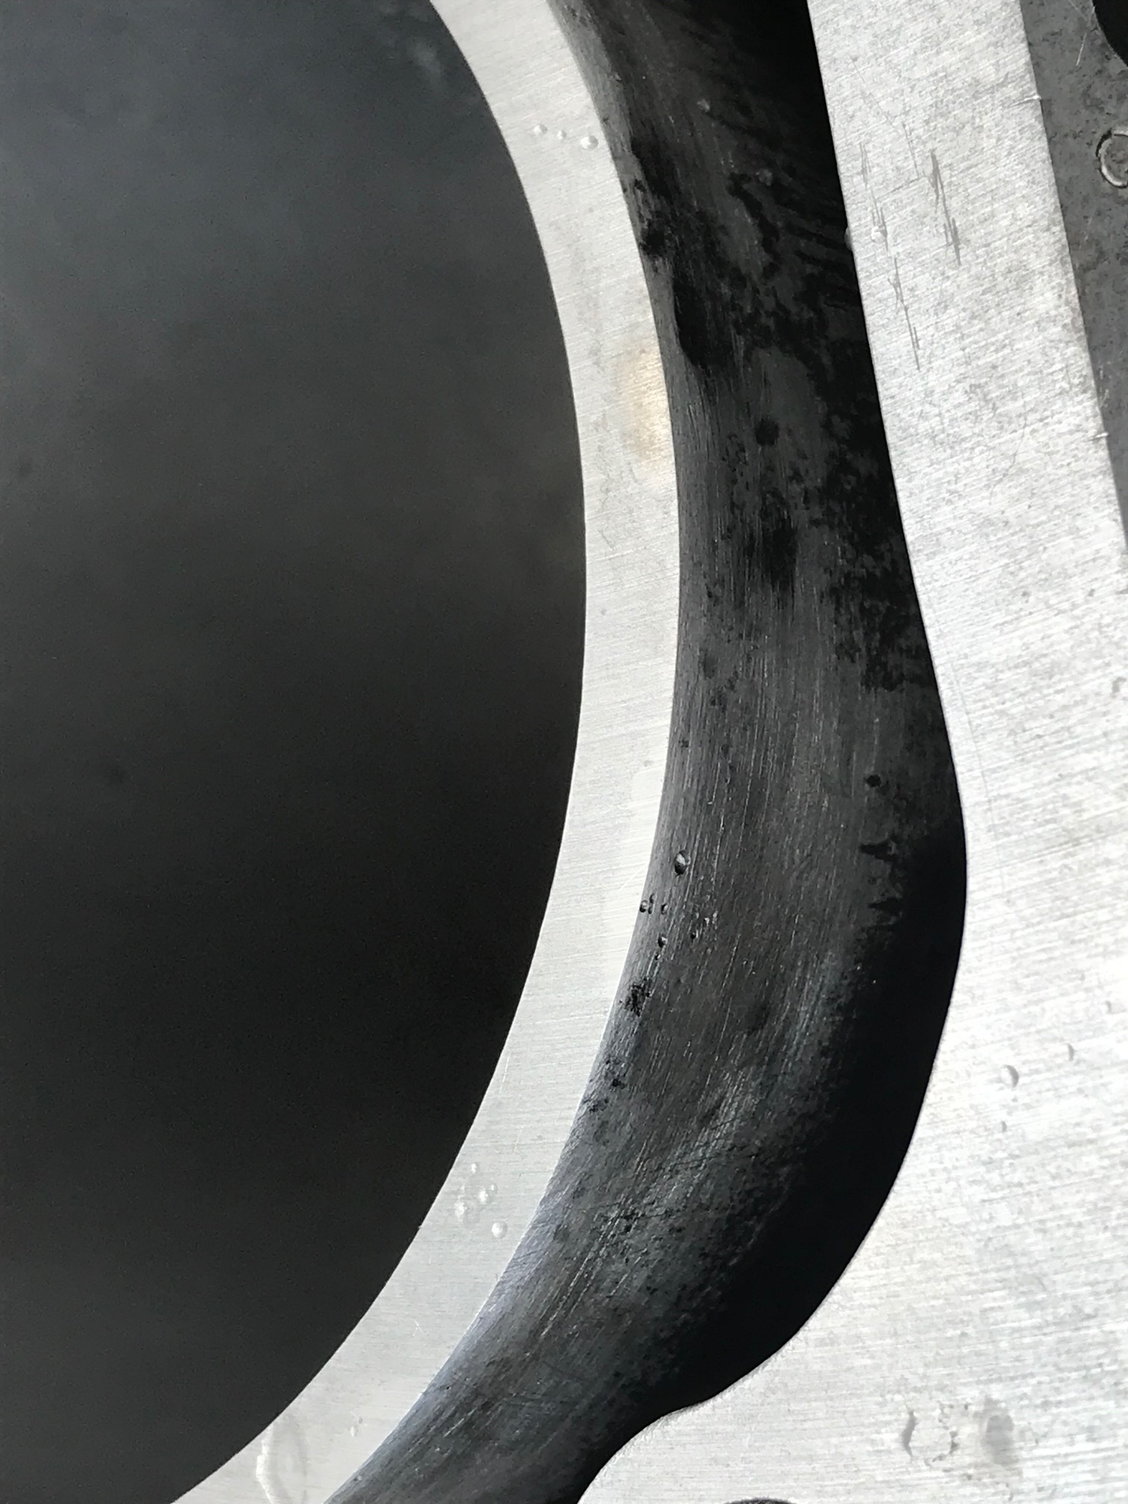
When the TBF breaks out a chunk of the casting entirely, you cant miss it. But, seeing a crack before that happens can be a bit more difficult (baring access to dye penetrant and other methods the common 928er probably does not have).
These pics show TBF cracks in the block and how hard they can be to see. Same crack shown with the block laying on the floor, and again under block stress where the crack is wider and much easier to see.
Can you see the crack? How about now? There it is!
Thanks heaps to all the responses regarding welding a 928 cylinder block.
I should say, 1 st of all, the welding is required in the centre bearing area of the engine and is in the cylinder block itself. That is the upper section. The alloy used is actually a Reynolds 390 alum that is quite common for use in the Auto industry for construction of engines where the engine is not machined for steel liners and uses steel rings in direct contact with treated aluminium bores.
Some responses have indicated that welding is quite difficult and may not be a viable option. But I would still be interested in finding out if anybody has successfully welded the 928 block. I hope this will shed a little more light on my requirement for forum readers.
Regards
Terry Fitzgerald
Hi Terry,
Yes both can be welded and we have welded both, on the block we have put back mounting points etc. Also we have welded the cylinder towers on the exterior circumference due to corrosion. The rod we use from memory is 4043.
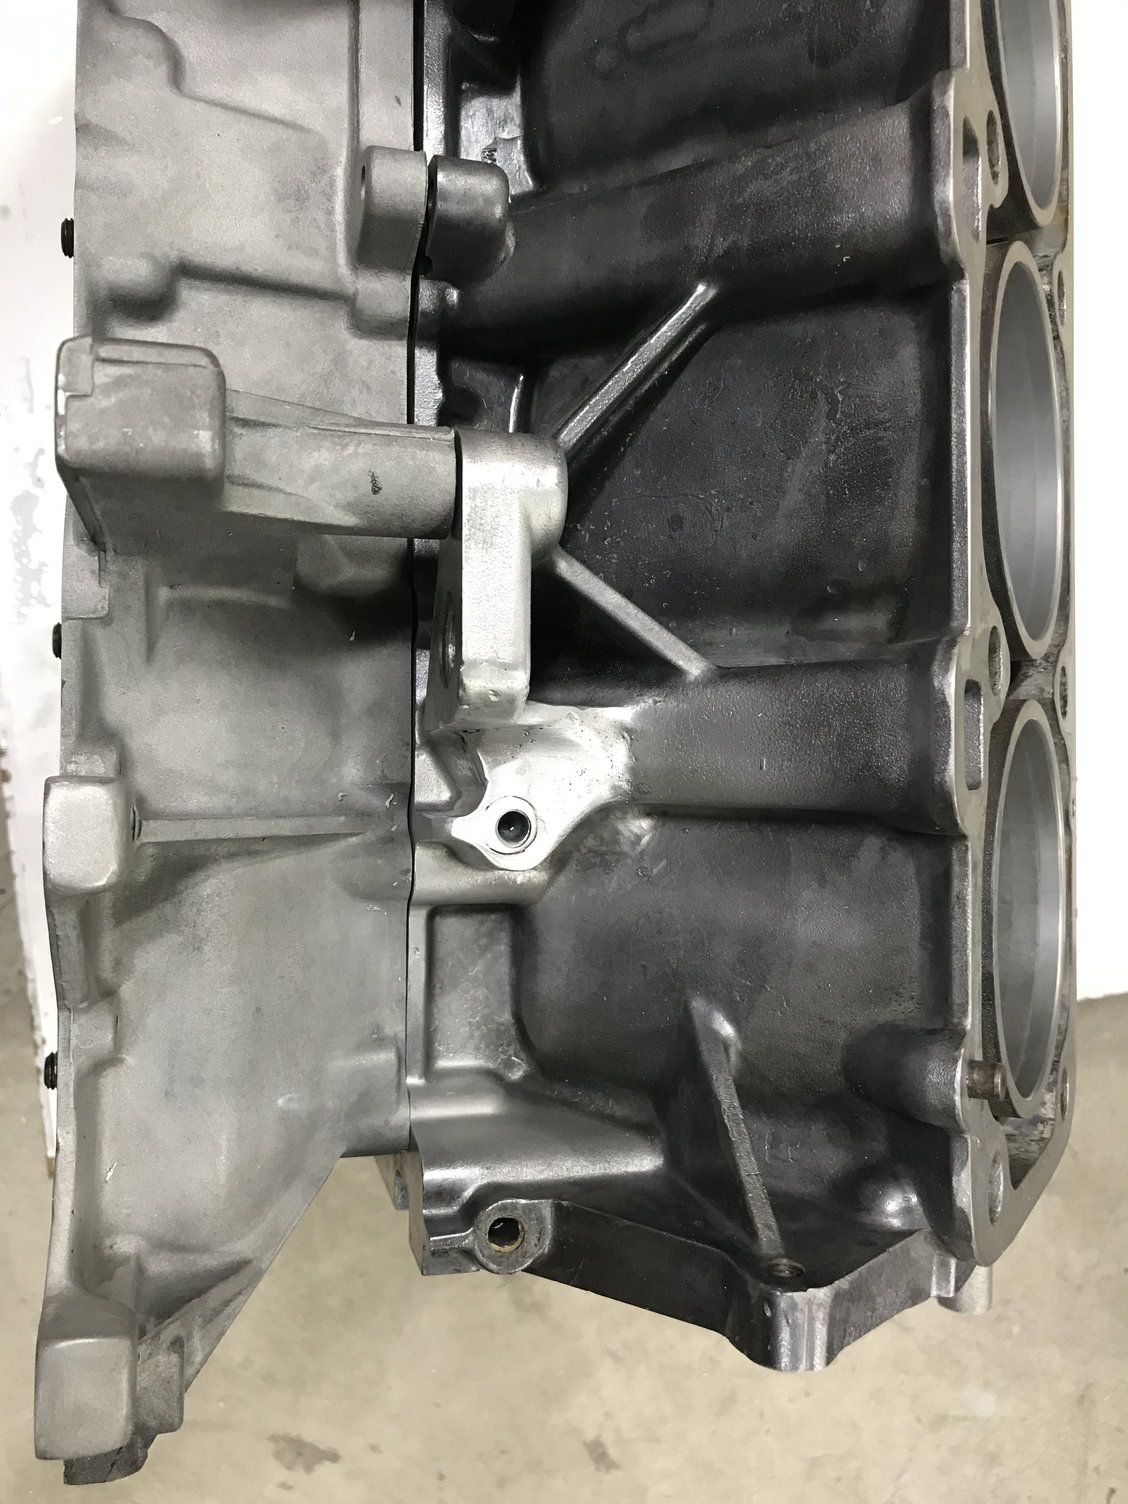
Below is my welding of the lower cradle, when I bought this engine it already had this somewhat rough repair, the photo is not the best but I’m sure you get the idea. I will sell this engine and didn’t want such an ugly repair on it.
The other thing you might notice is that the lower cradle is quite clean, cleanliness is very important.
So the cradle was welded with a high silicon rod, I’m sure the lower cradle will have a lot of silicon in it as if it didn’t the expansion ratio between it and the block would be too great.
Now there was still a couple of tiny air bubbles, this is common with the welding of castings. I could have redone it but again the outcome is unknown till you grind it back. I wanted to restore the look of the block.
Now I will say I am only a pretty average welder, I have a professional welder who does my really hard stuff. Three key issues to get right, clean the parts, heat the parts and use a helium mix in the gas. Get those three things you are well on your way to success.
From the internet regarding welding of the 928 high silicon aluminum engine block:
"Do not use 4043 or 5356.
Do NOT use 4043 or 5356 filler. Anyone that tells you its fine for use on a 30% silicon aluminum casting is obviously not familiar with that material. You will end up with an outer edge of the puddle that has a high silicon concentration, and therefore crack prone. 4047 is about the best choice of fillers that are easily obtainable as it has about 12% silicon vs 5% for 4043. The idea is to use a filler with as close of a silicon content as you can get to the base alloy. Good luck!"
Last edited by Strosek Ultra; 12-08-2018 at 04:37 AM.
When the TBF breaks out a chunk of the casting entirely, you cant miss it. But, seeing a crack before that happens can be a bit more difficult (baring access to dye penetrant and other methods the common 928er probably does not have).
These pics show TBF cracks in the block and how hard they can be to see. Same crack shown with the block laying on the floor, and again under block stress where the crack is wider and much easier to see.
Can you see the crack? How about now? There it is!
I've not yet seem a block crack like that. It's amazing it would crack in what seems to be a thicker radius area.
From the internet regarding welding of the 928 high silicon aluminum engine block:
"Do not use 4043 or 5356
Do NOT use 4043 or 5356 filler. Anyone that tells you its fine for use on a 30% silicon aluminum casting is obviously not familiar with that material. You will end up with an outer edge of the puddle that has a high silicon concentration, and therefore crack prone. 4047 is about the best choice of fillers that are easily obtainable as it has about 12% silicon vs 5% for 4043. The idea is to use a filler with as close of a silicon content as you can get to the base alloy. Good luck!"
Yes I agree I was going from memory which is the reason I mentioned that. My memory can be a bit problematic....
In fact I think we used 4047 to weld the heads too, can’t be sure as so much going on here...
S
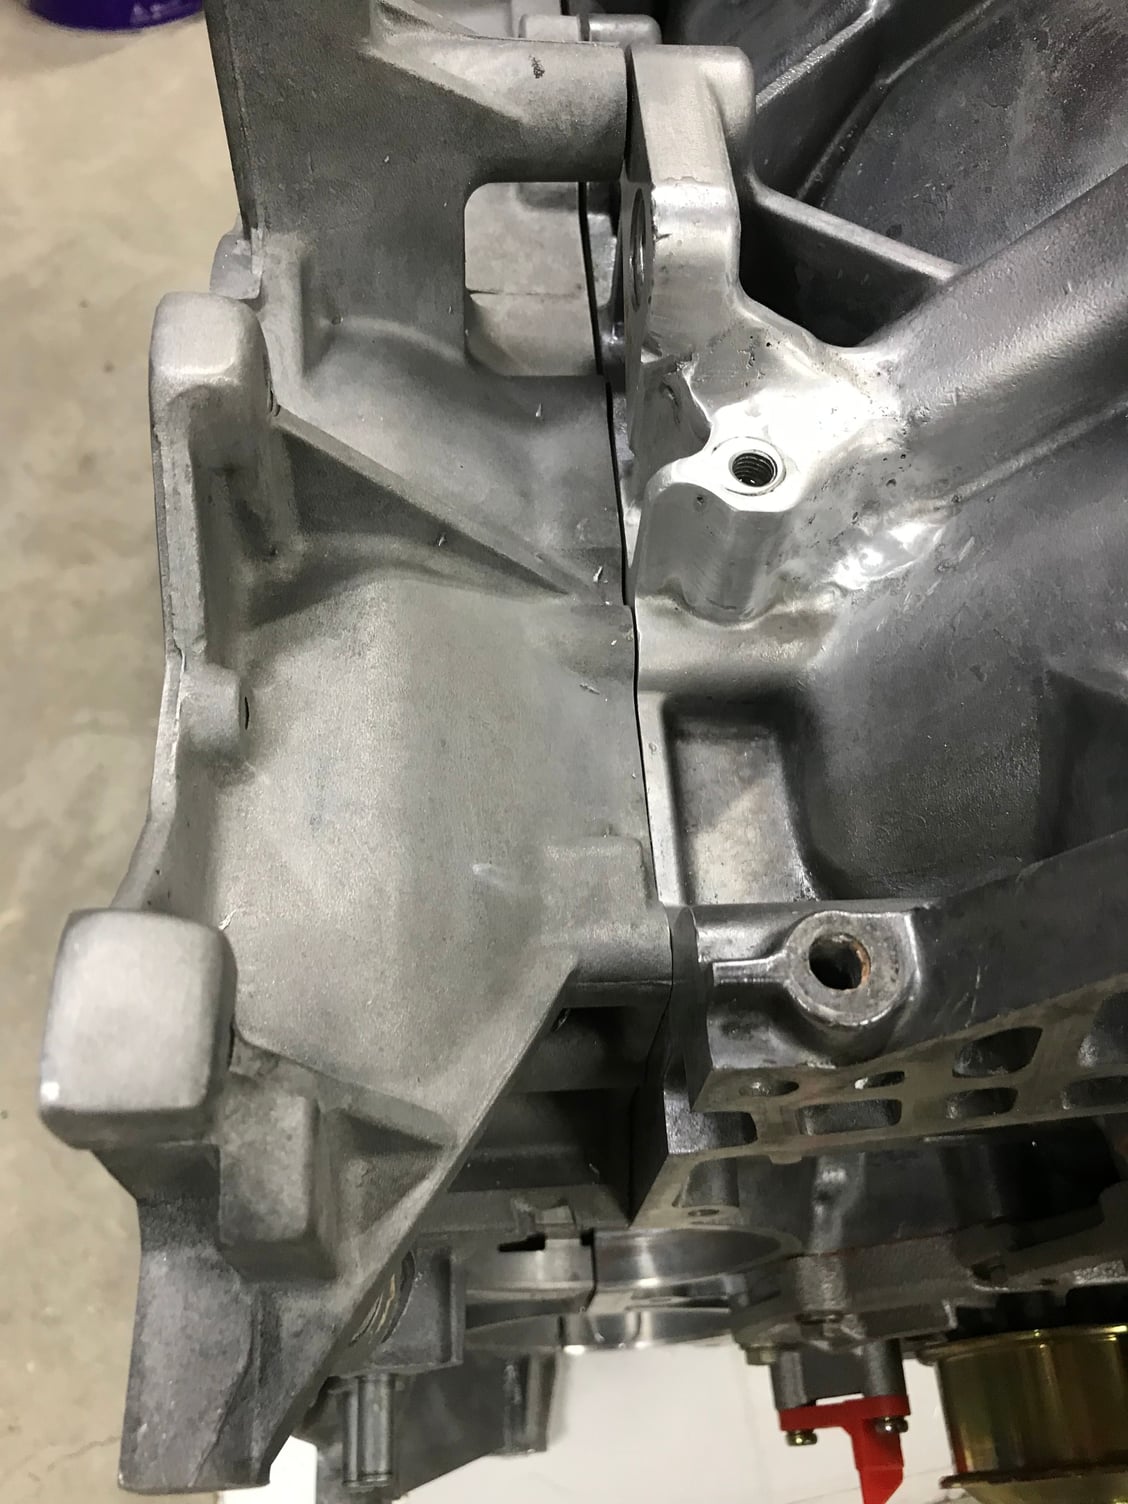
o I�m about to put this engine together and I thought I didn�t like the look of the old repair someone else did. So I was a bit inspired by this thread to make it a bit better.
The bottom part part of the block had both mounting lugs knocked off and these were built up with welds and then sand blasted.
The upper section of the block had one mounting point knocked off and this I welded yesterday. The welder was on about 180 amps and I only had argon. Helium would have really helped here.
The aluminium is really dirty, I had a 60/40 setting on the A/C balance. Again the helium would have helped burn off more oxides. Anyway it�s strong and doesn�t look too bad.
I�m selling that engine and it�s not going to be cheap so I thought I better make it more presentable. I have to say, you need the right equipment to do this job.
o I�m about to put this engine together and I thought I didn�t like the look of the old repair someone else did. So I was a bit inspired by this thread to make it a bit better.
The bottom part part of the block had both mounting lugs knocked off and these were built up with welds and then sand blasted.
The upper section of the block had one mounting point knocked off and this I welded yesterday. The welder was on about 180 amps and I only had argon. Helium would have really helped here.
The aluminium is really dirty, I had a 60/40 setting on the A/C balance. Again the helium would have helped burn off more oxides. Anyway it�s strong and doesn�t look too bad.
Greg,
Very neat looking work that seemingly proves my earlier comment that with the correct [12% Si] rods and appropriate welding technique a structurally viable weldment should be possible.
Very neat looking work that seemingly proves my earlier comment that with the correct [12% Si] rods and appropriate welding technique a structurally viable weldment should be possible.
Fred,
If my professional welders we�re doing that job it would be better again, the argon is a handicap as it doesn�t seem to burn of the oxides very well on high amps. Also their machine is better, both are Millers but they have more adjustments. Then they have thousands of hours more experience. It would be great to video what happens when you weld the block as it seems to foam up with oxides which is probably oil contamination in the metal. What I did was first weld over the previous repair and basically dump plenty of new rod material into the weld. I then die grinded off the oxides that came to the surface. This gives you a better chance when you restart as that material is not as contaminated. My belief is that the helium would probably take care of that for you.
I am going to purchase one of these machines, certainly introducing a metal repair process sans heat is appealing to me in certain applications. Seeing is believing to me, and, I saw this machine in the corner at a SEMA show years ago, I loved seeing it in action, fabulous stuff! https://www.supersonicspray.com/
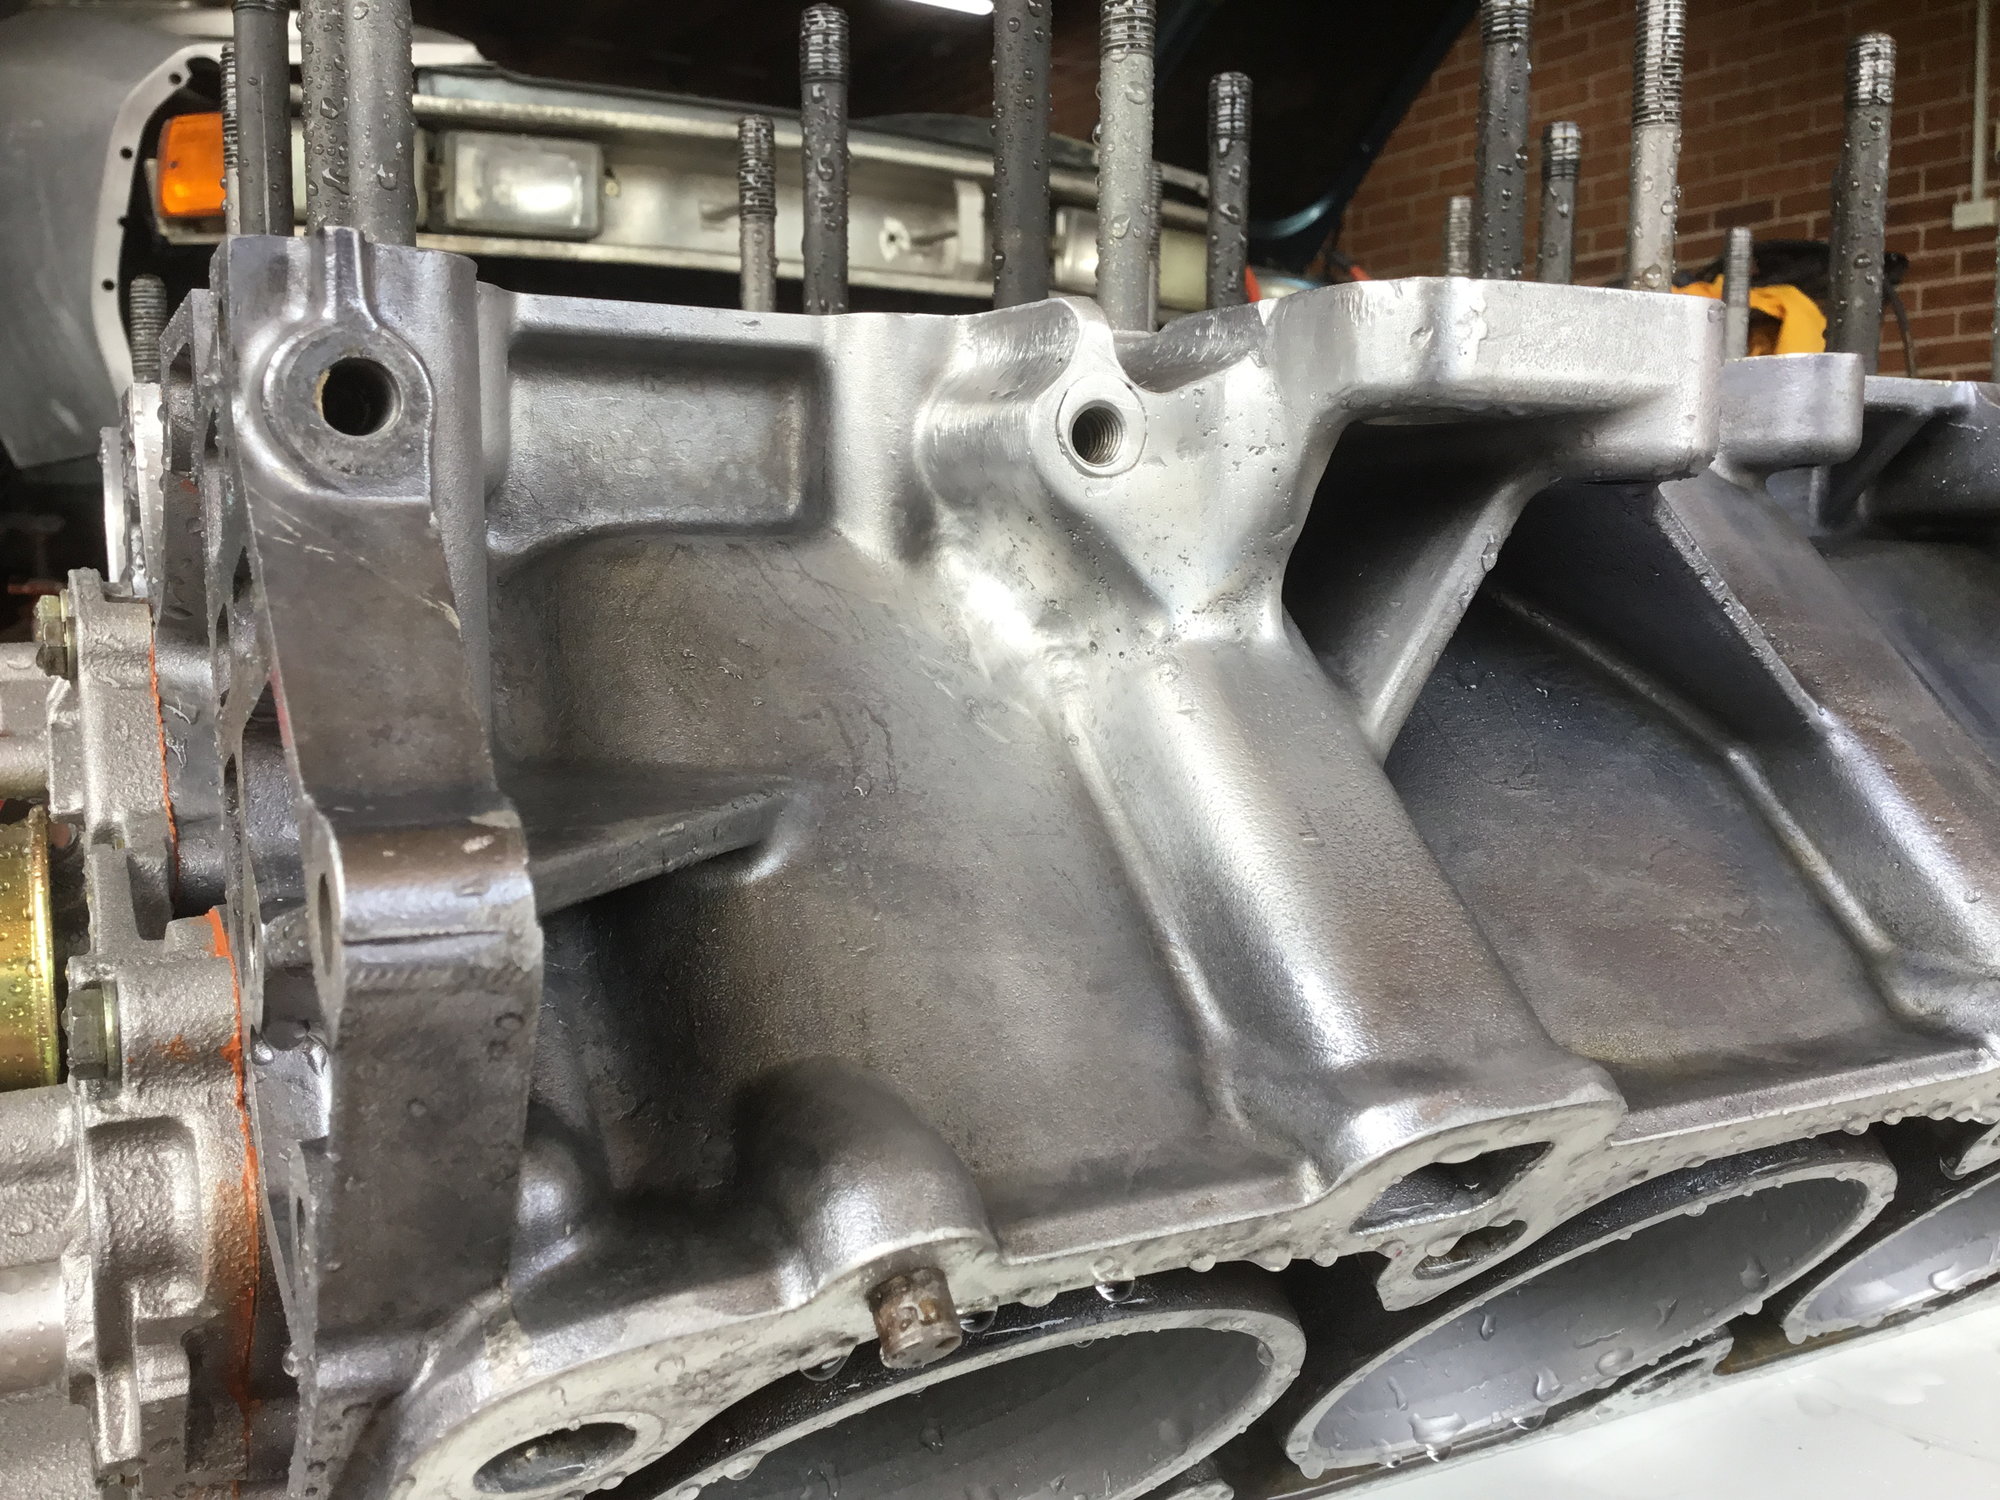
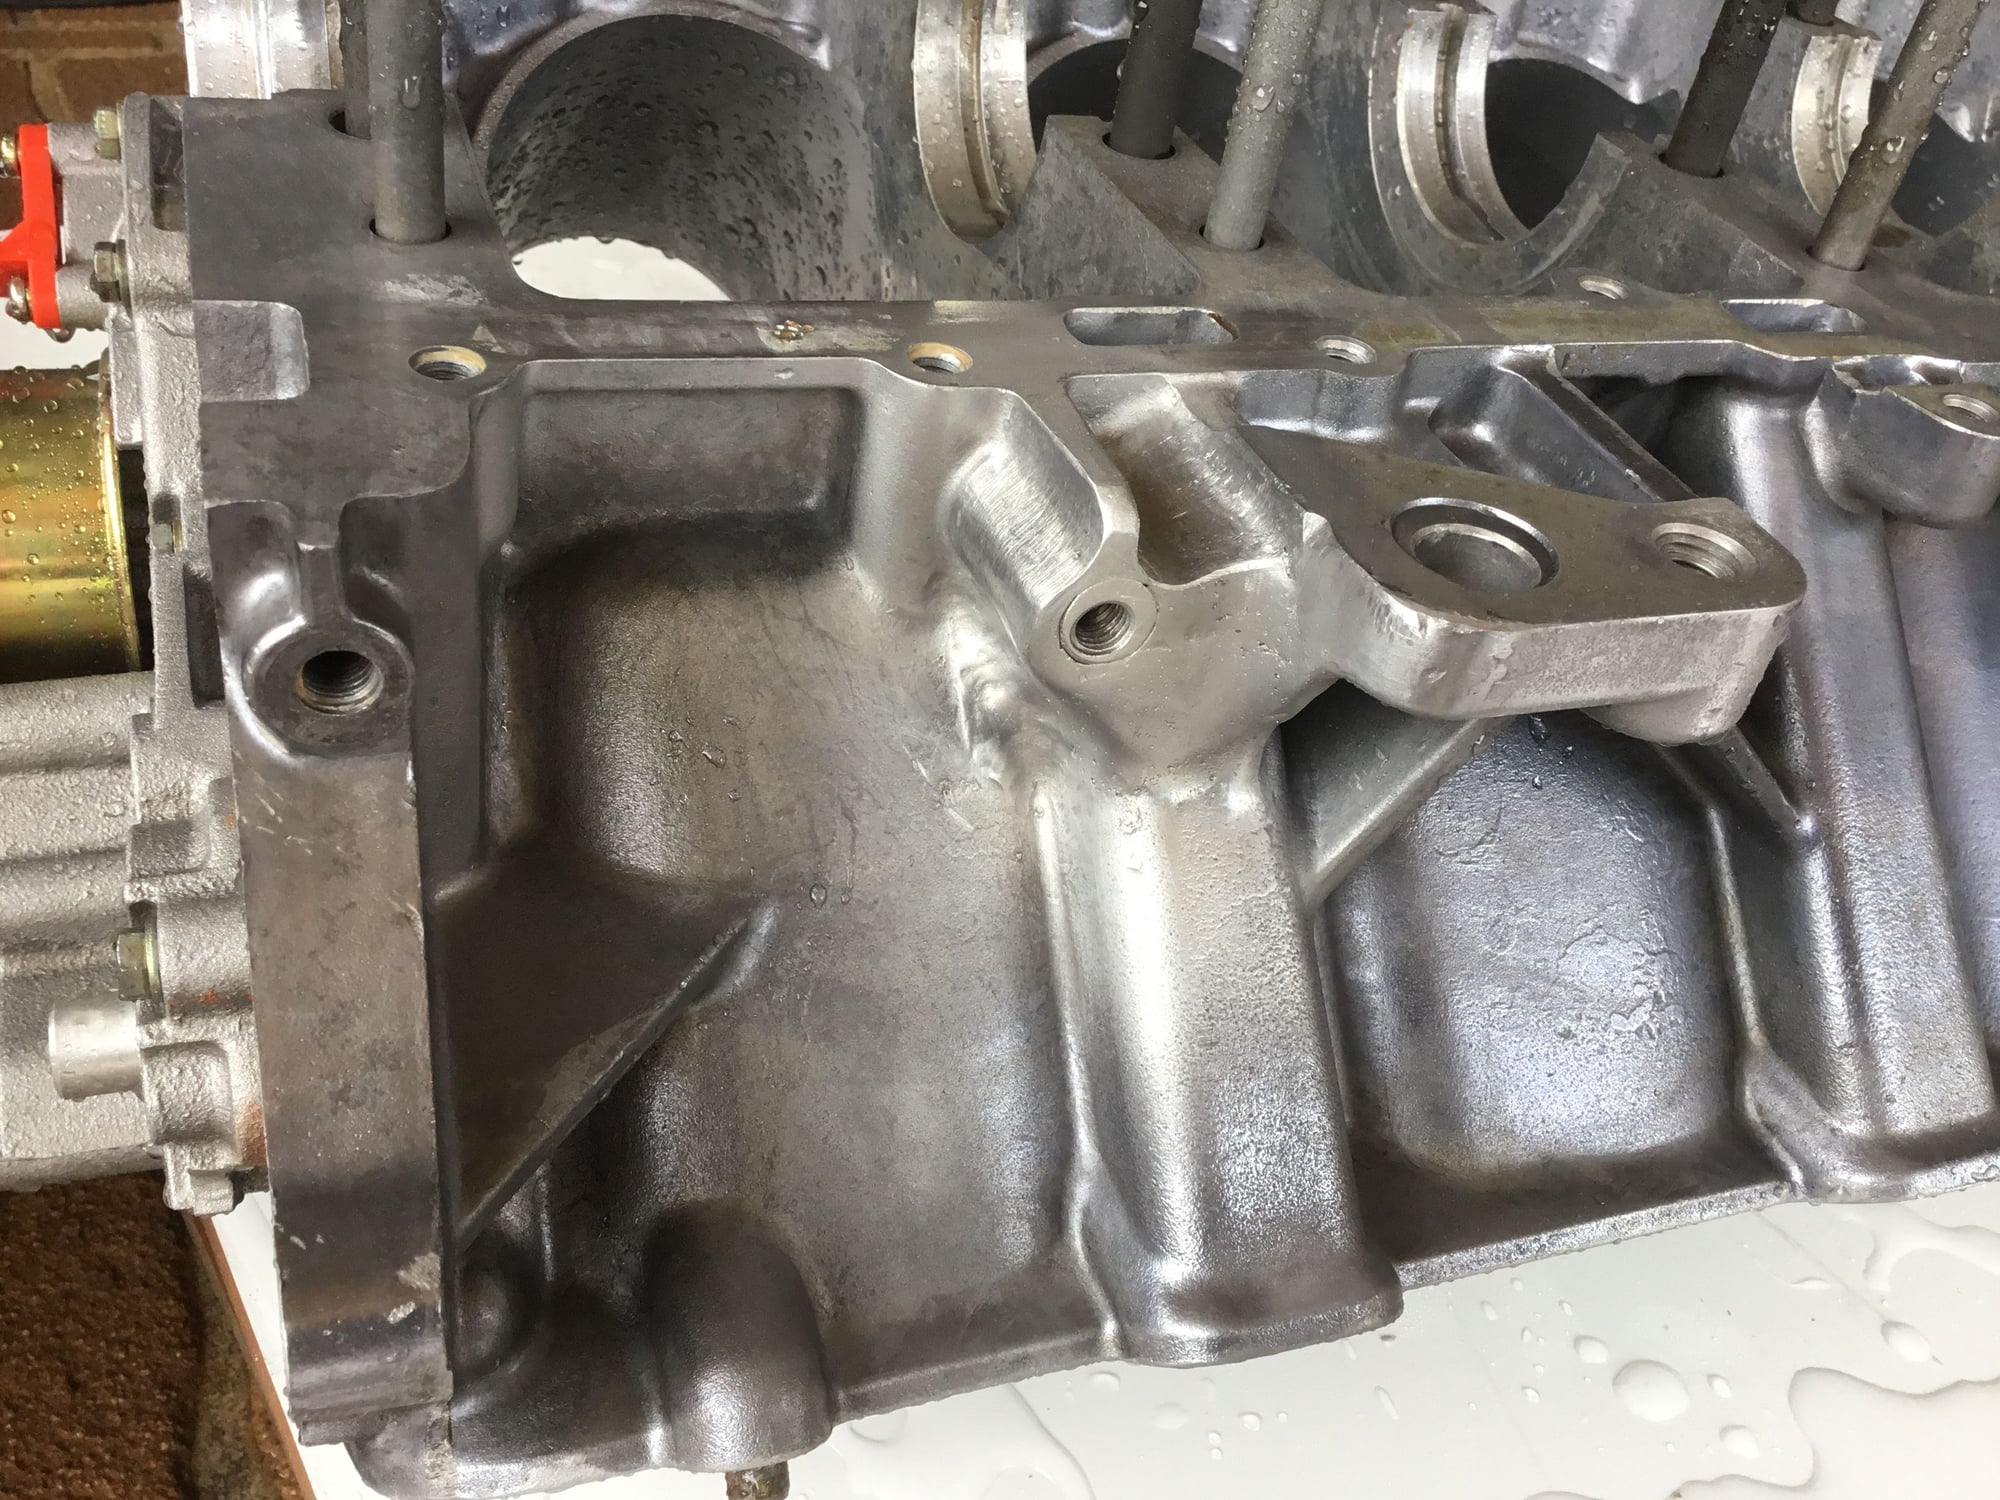
I was cleaning up the second block today and it caused me to remember these old repairs, the outside of the cylinder walls had extensive corrosion in numerous locations. I wish I could easily lay my hands on the photos of the condition of the block when I first opened it up. It was very colourful probably like my language at the time. It�s quite odd the colours it had. Regardless of that distraction the corrosion has to be fixed. Now I prepped the block for welding but I didn�t weld the corroded areas. There was too much to lose. You can see I prepped the area with a Dremel and also cleaned it up afterwards. You can make out the welded areas because there is tiny air bubbles in the welded areas. These are the little black spots. I also attached another couple of photos of the first block as they show the repaired area a bit clearer. My point would be the blocks are weldable but need lots of prep and the right equipment and tradesperson. Given the age of some of this stuff more repairs are in the future.
Those casting repairs are among the best I have ever seen. Very good job! I suppose the final telling will be after the engine runs for a while as to whether that part of the cylinder wall will behave any differently than the rest. If I understand correctly, you only added fill rod to the outside of the cylinder wall, so I expect there is enough of the original material left to control the rate of expansion correctly. If that is correct, I expect you will have no problem with this repair.

 11-30-2018, 01:01 PM