When you click on links to various merchants on this site and make a purchase, this can result in this site earning a commission. Affiliate programs and affiliations include, but are not limited to, the eBay Partner Network.
All 295s are NOT the same that is the MAXIMUM width of the bulge of the sidewall but the tire manufacturer can choose the rim width used for that measurement....so 295 is not always 295 lots of miss information about tires....And yes I have run 315s with no problems.. 275 with spacers and just for grins 205x15 race tires which were way faster than street 275s
For sure. But I've got a 245 touching metal but cant find much info on this rim. My mention of 295 is just for reference that my offset has to be something not 55. No spacers installed. Thanks
Being a Wessach, it should have the S brakes which are nice brakes for a 928 and should stop the hell out of it. You could always start with a careful bleeding. I use the Motive power bleeder and have good luck with it.
One of the nice things about the S brakes is that parts are quite cheap. If it were mine, I would think about popping the calipers apart, cleaning them up and putting in new seals, and replacing the rubber caliper hoses with braided steel. You can also get hardware kits if you want to make it a little easier. Of course inspect the pads and rotars while your are down there. Probably under $200 in total costs. Also inspect the hard lines on the bottom of the car. Sometimes they get smashed flat, which is not good for performance.
Can anyone confirm 83S brakes are different than 82 and that Weissach got 83S brakes (instead of just the S appearance package)? My survey of Pelican shows all the brake parts up to mid 86 as the same in terms of calipers, rotors, and pads. Thanks.
What are some typical sources of water in the trunk? I just found water in the spare tire area and can't find any usual threads on water in the trunk (like exhaust/gas smell in the trunk of 924/944). Obviously I could replace the hatch seal but I'm not sure sure thats what it is. Are there any drains in the trim surround on the rear glass?
In '82 there were both non S cars (CIS and old brakes), as well as the 'S' cars (L jet, spoilers and new brakes). By '83 I think it was just the S cars. I have always assumed that the wessach were S cars but I'm not totally sure. If you snap a photo of the front caliper I can tell you for sure.
In '82 there were both non S cars (CIS and old brakes), as well as the 'S' cars (L jet, spoilers and new brakes). By '83 I think it was just the S cars. I have always assumed that the wessach were S cars but I'm not totally sure. If you snap a photo of the front caliper I can tell you for sure.
Not quite.
The Euro cars were both S & non-S, all of which were CIS (K-Jet) 80 - 83.
US cars were all L-Jet from 80 on. They couldn't get the K-Jet to meet emissions requirements.
US was 'non-S' 80 - 82, but the 82 got the S brakes. US 'S' cars were not available until 83 & 84.
Spoilers were available in the US for 81 & 82 as part of the "Competition Group Package".
Weissach, being 82, was 'non-S', but had the S brakes.
Quick update on some items:
Car has S brakes
We tightened the oil pan the the drips seemed to be gone. Most bolts we maybe around 1 ft-lb? Took them to about 7
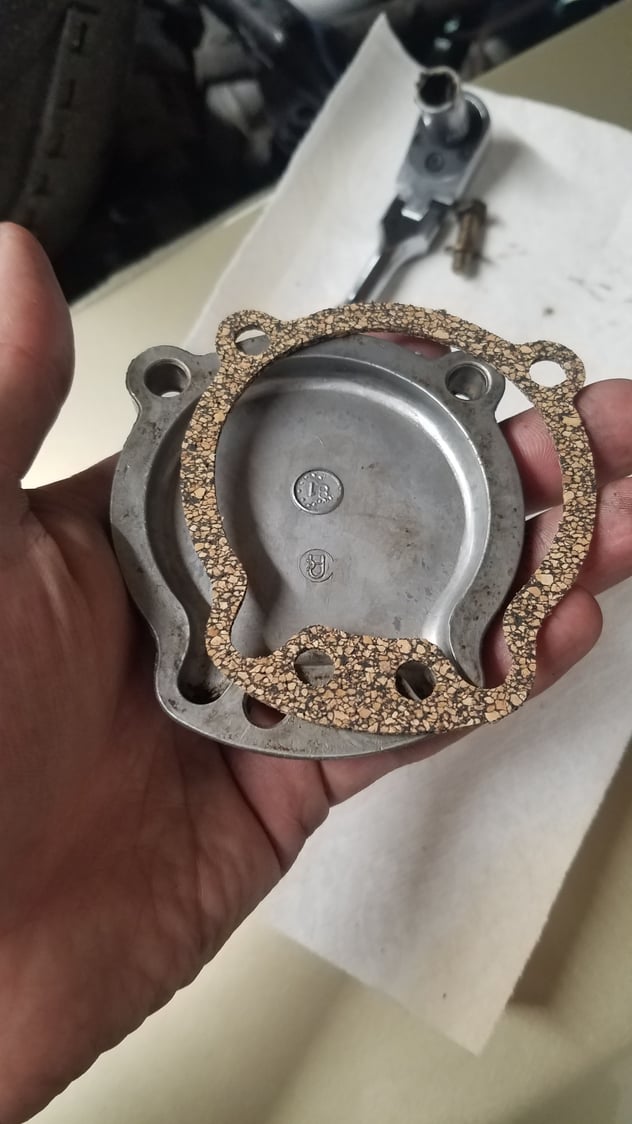
Replaced the driver side rear cam tower cap gasket (firewall). Yet to do the pass side
Auxiliary fan didn't work because it wasn't plugged in at the sensor AND relay is dead (relay in bound)
Been using Nivea on seat and yes it really does work
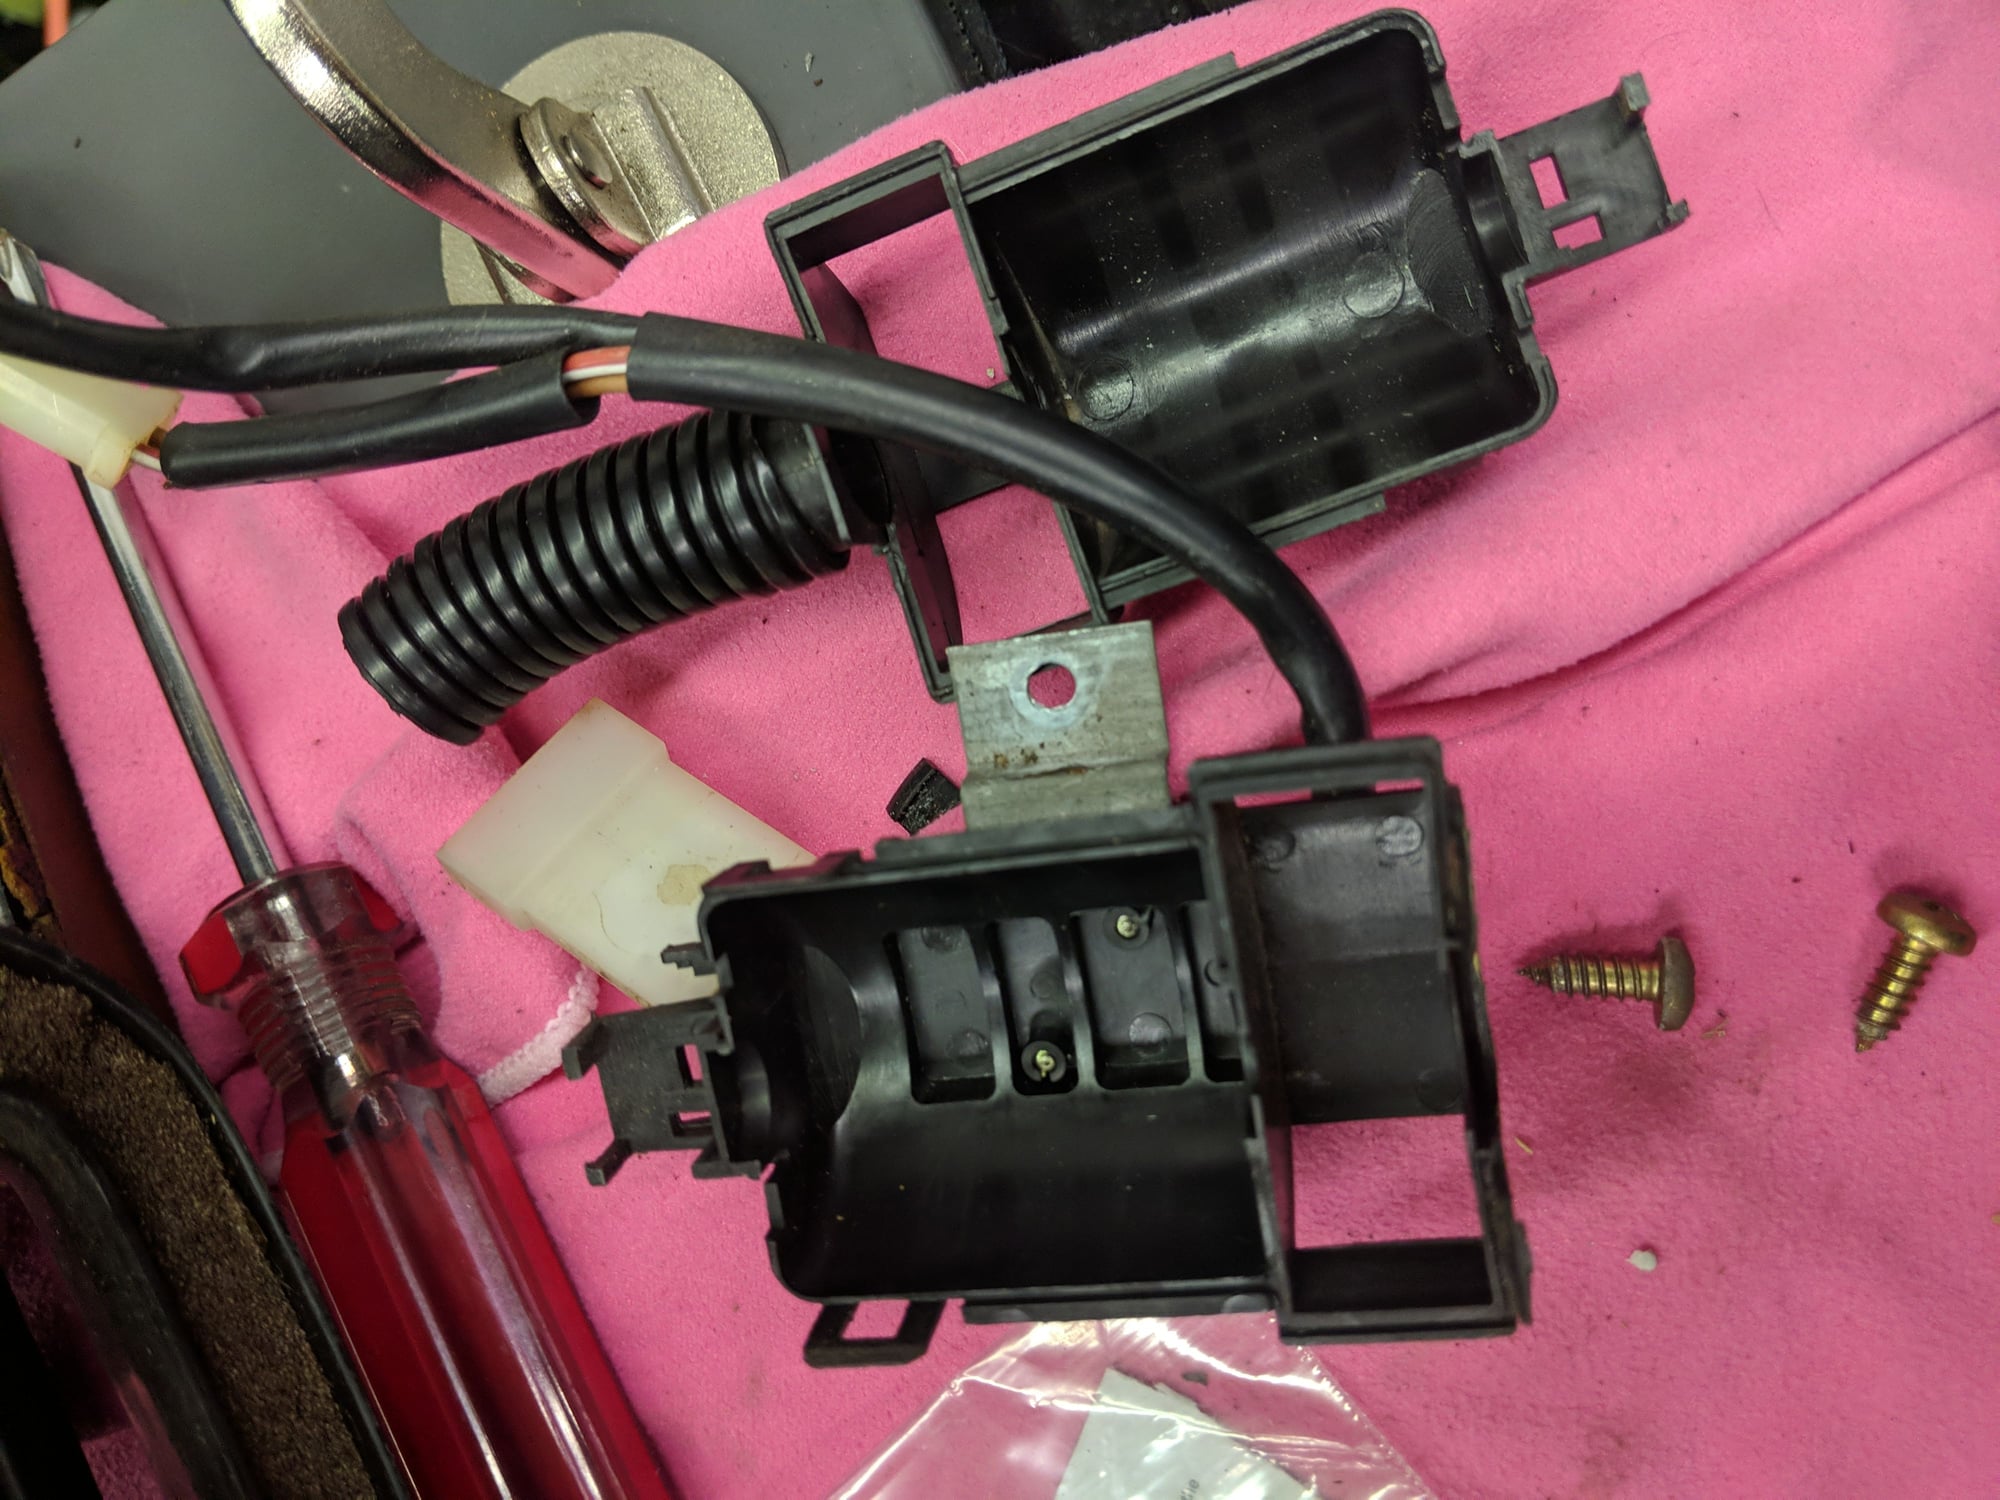
Cleaned fuses and got most systems up and running
Installed missing tail light wiring
Wiring missing behind rear pass side marker
Cut out aftermarket amp wiring and removed Denon head (Blaupunkt in bound)
Sunroof weather stripping was missing completely
I've cleaned and reoiled the mechanism
Can of DeOxit in bound
New questions: Does the sunroof weather stripping go felt side up or down?
I lost brake lights completely. I assume since the dash light is on the pressure sensor/activation switch is working and that I need to check rear bulbs/wiring
Hey the garage in post 22 Looks familure. Come on over if you want to rebuild your brakes. I rebuilt my S brakes multiple times I have lots of spare parts for them. Going to start a timing belt replacement job in my car shortly as well
Hey the garage in post 22 Looks familure. Come on over if you want to rebuild your brakes. I rebuilt my S brakes multiple times I have lots of spare parts for them. Going to start a timing belt replacement job in my car shortly as well
Many thanks to Pete for adopting my unloved 928. I have a long list of (small) items to address. Mark is getting me caliper kits, steel ball joints, tie rods, and boots. Sounds like we should do that all at once. But for now, I've lost brake lights........ Assuming that because the dash light warnings pops up that the switch is working. They both went out at the same time and the wiring diagram just leaves the switch on page 2 with F6 F7 so I'm not sure where they go next....
I tried jumpering both sets of brake pressure sensors across the parallel pins. No brake lights. I was driving last week and the stop light warning came on.
Does anyone have a simplified chart of the brake light wiring? It sounds way too complicated in other threads. That both pressure switches need to be working. The diagrams seem to disappear the wiring into the "bulb light checker" etc... Why didn't they just put a swtich on the pedal straight to the lights that works on 90% of other cars... I expected one switch to be for brake lights and one for pressure but no I'm not sure what happens to the signals from these switches once they disappear into the CE or bulb checker.
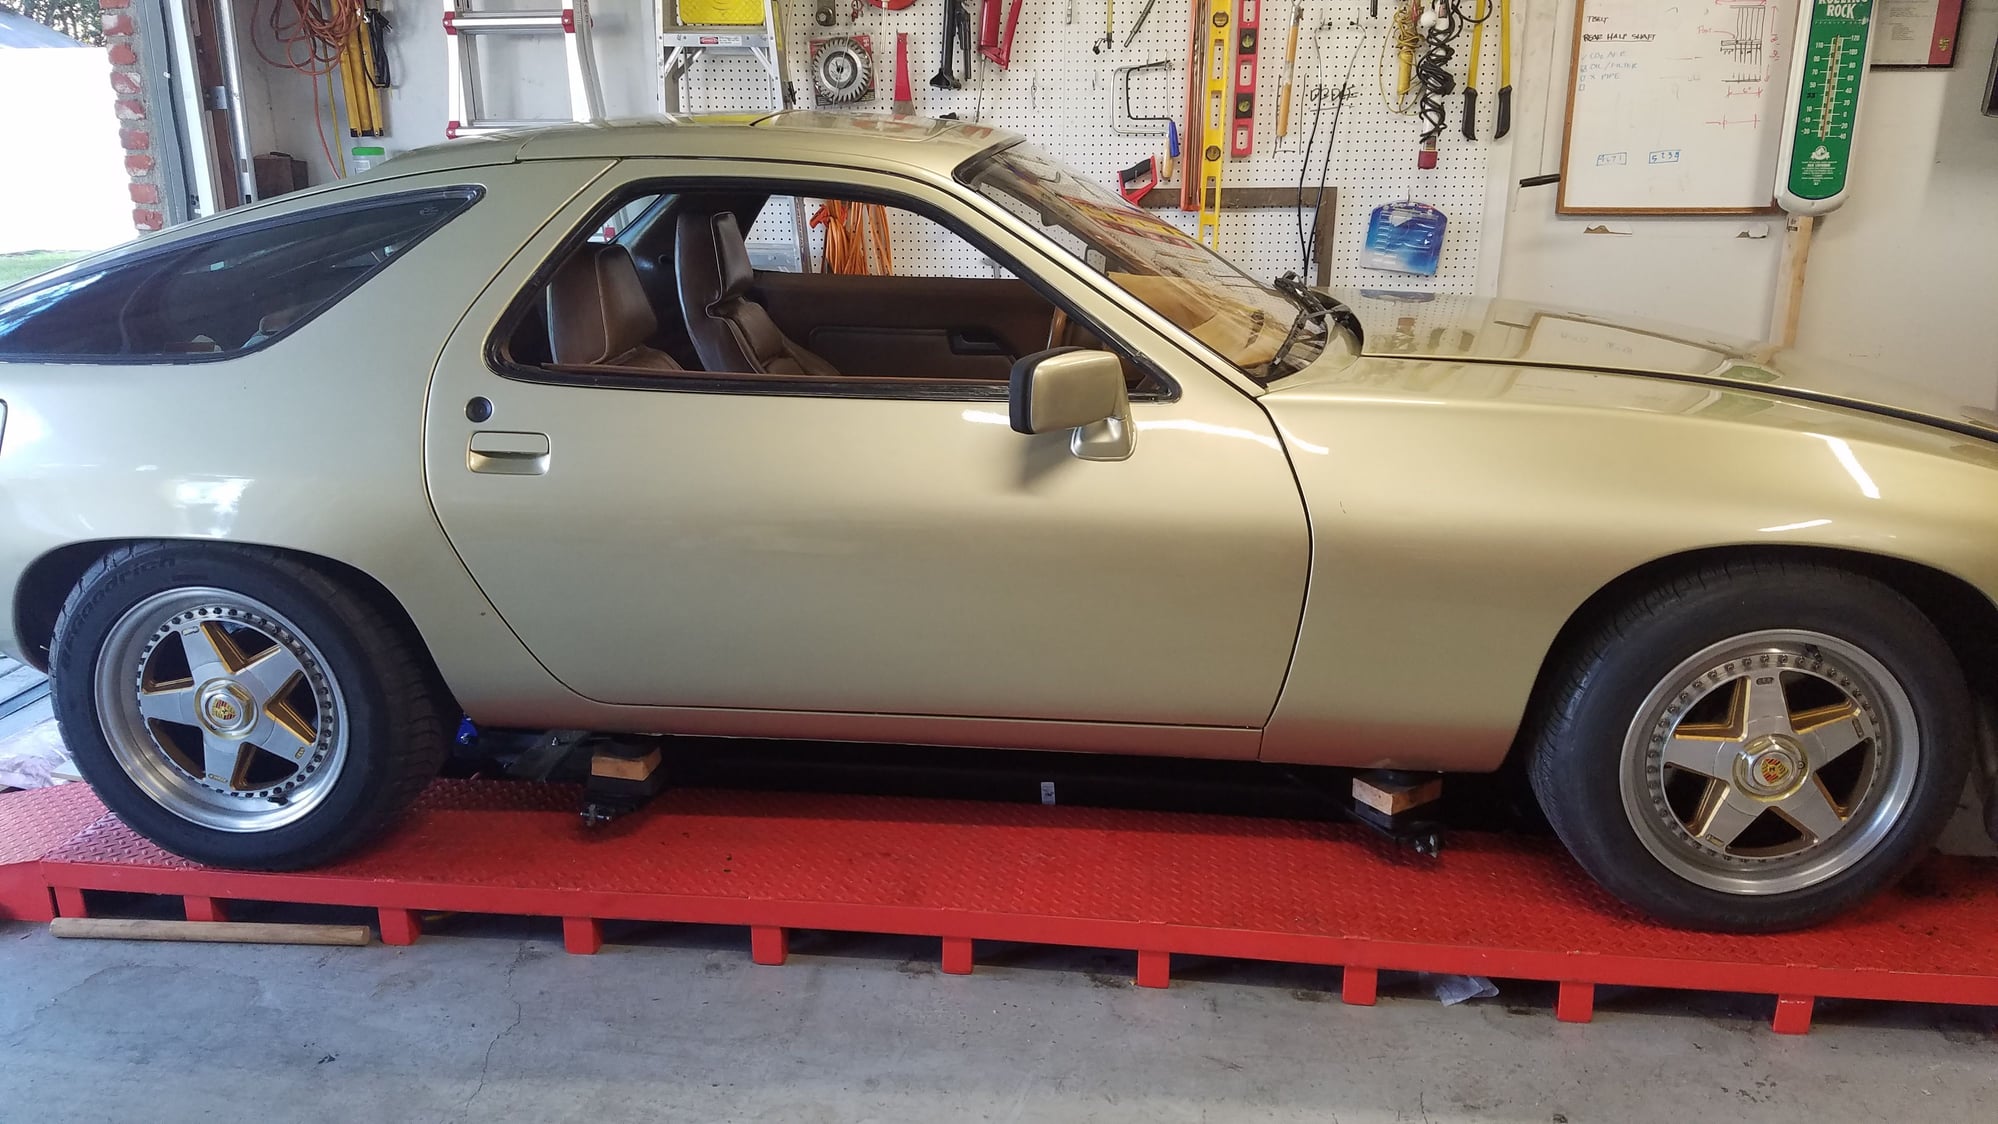
Long time no post. Haven't done a lot with the Weissach in a while. Little piddling here or there.But with CAMP 928 coming up I've had a talk with myself
I got the balljoints swapped from aluminum to steel. Did the inner / outer tie rods and steering bellows
Ordered replacement rear sway bar end links
Tried to figure out vacuum leak / climate control stuff
I have squishy brakes but booster seems to hold vacuum
Most all climate lines hold vacuum but still tracing a leak down
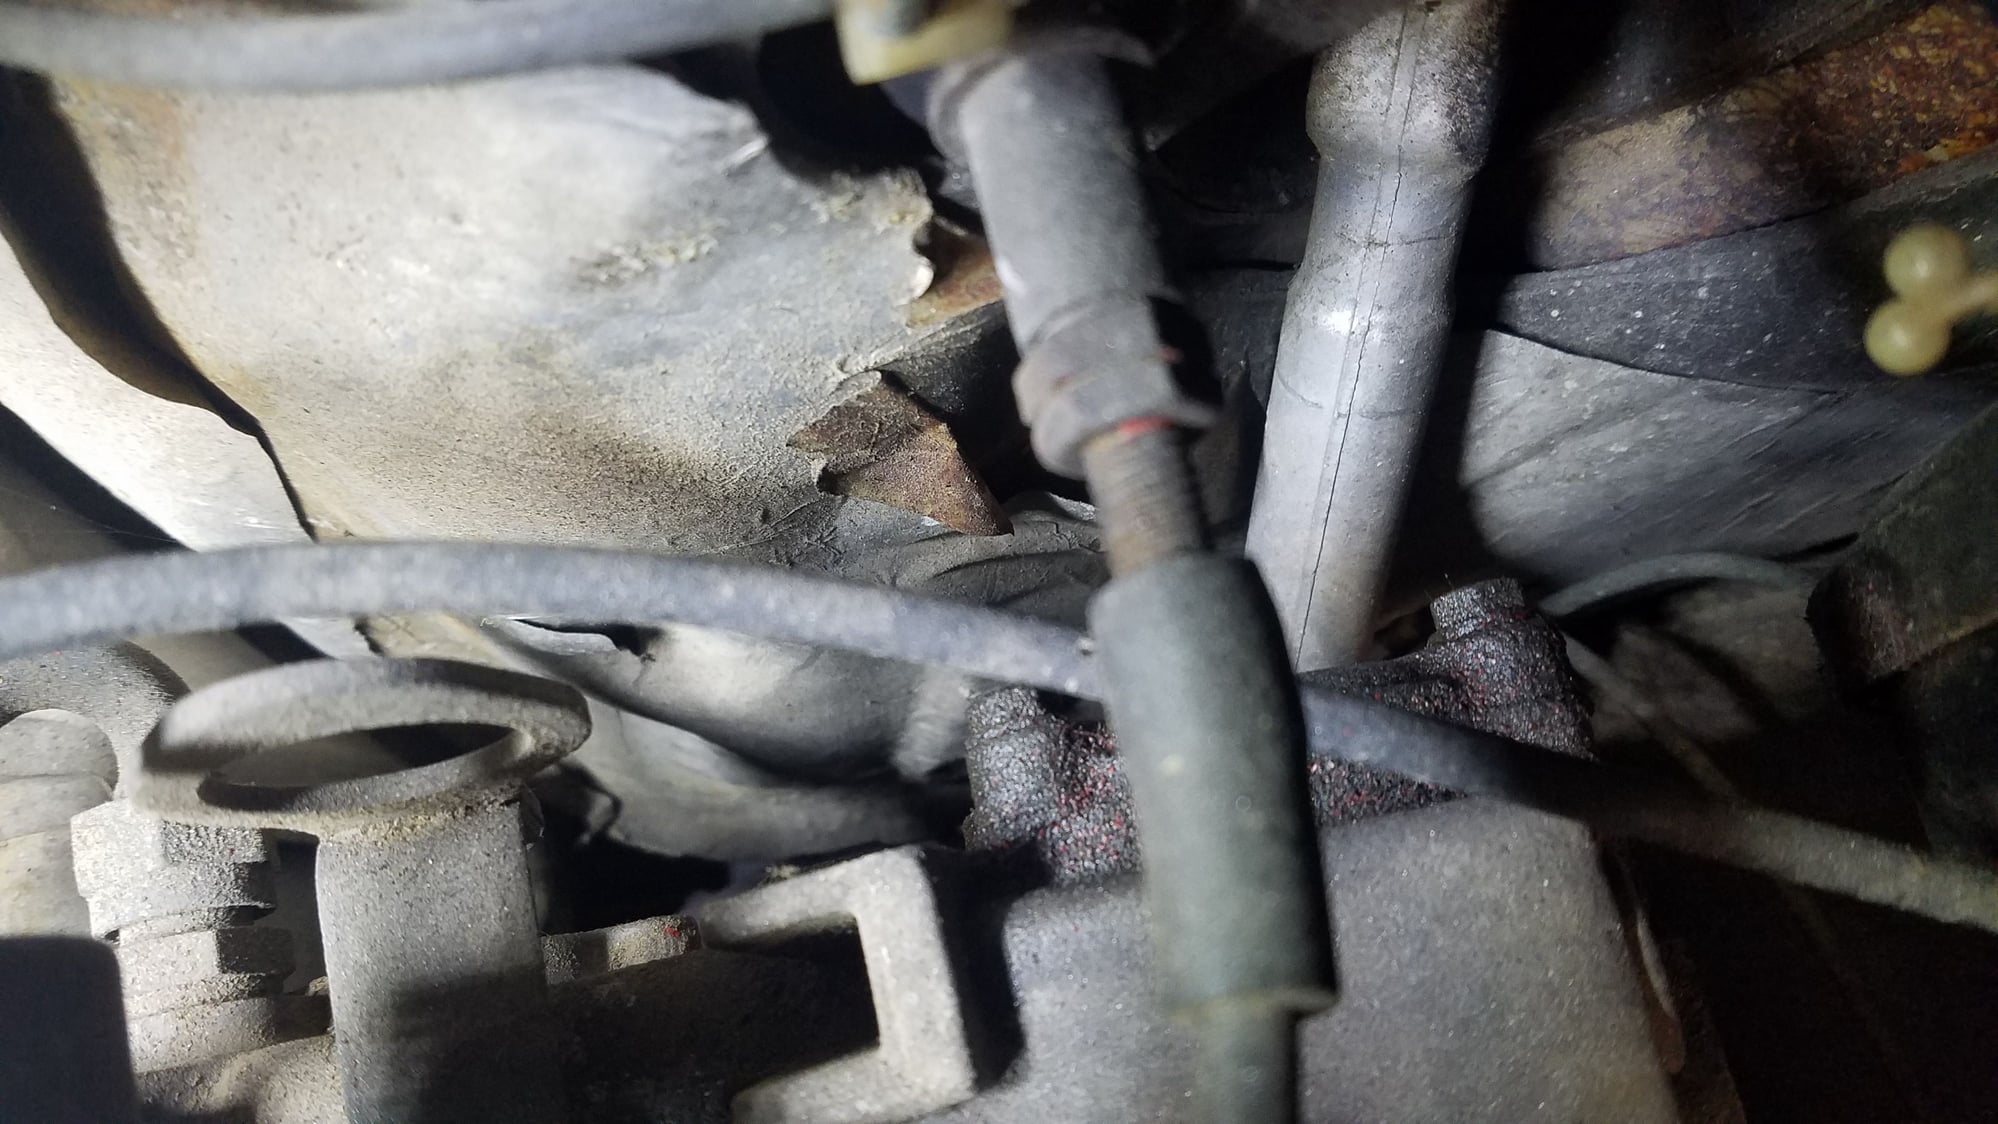
Need to look at the front cam seal or tower gasket as there is always a weep of oil on the pass manifold
Closed the sunroof with the new gasket cause I still can't seem to get it to rotate closed right. The car had no gasket when I got it and closed perfectly
Ordered seat covers from LSEAT even through I know they won't be perfect I can do the passenger seat bottom which is the only real bad area
Tried to sea foam the idle valve but still get that hunt. May need to pull it to really clean it
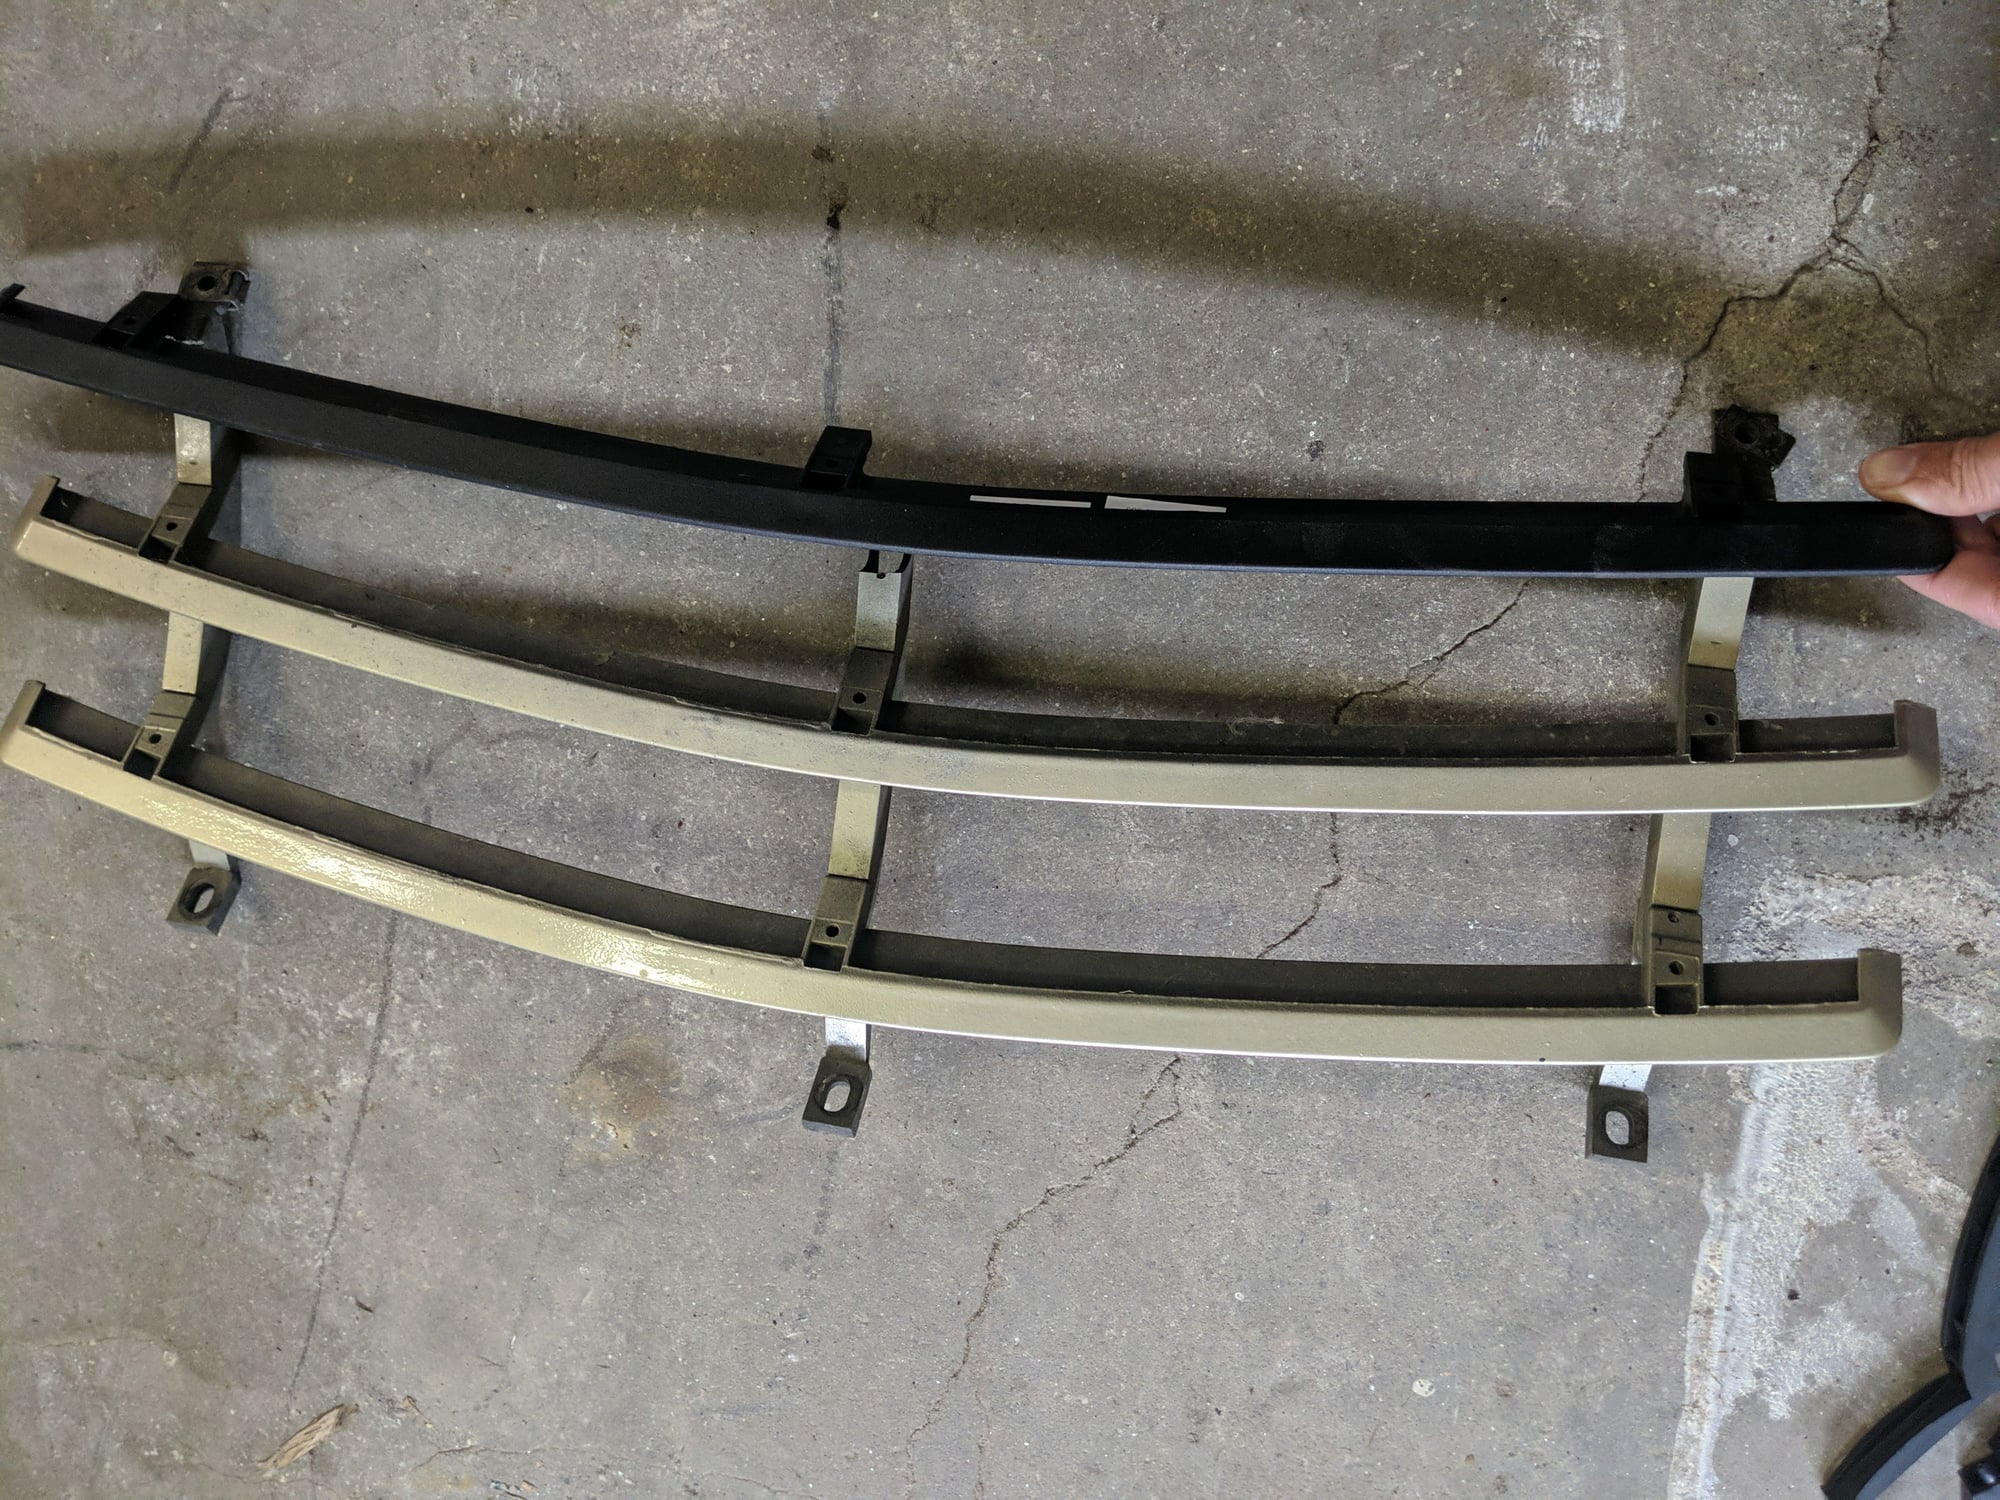
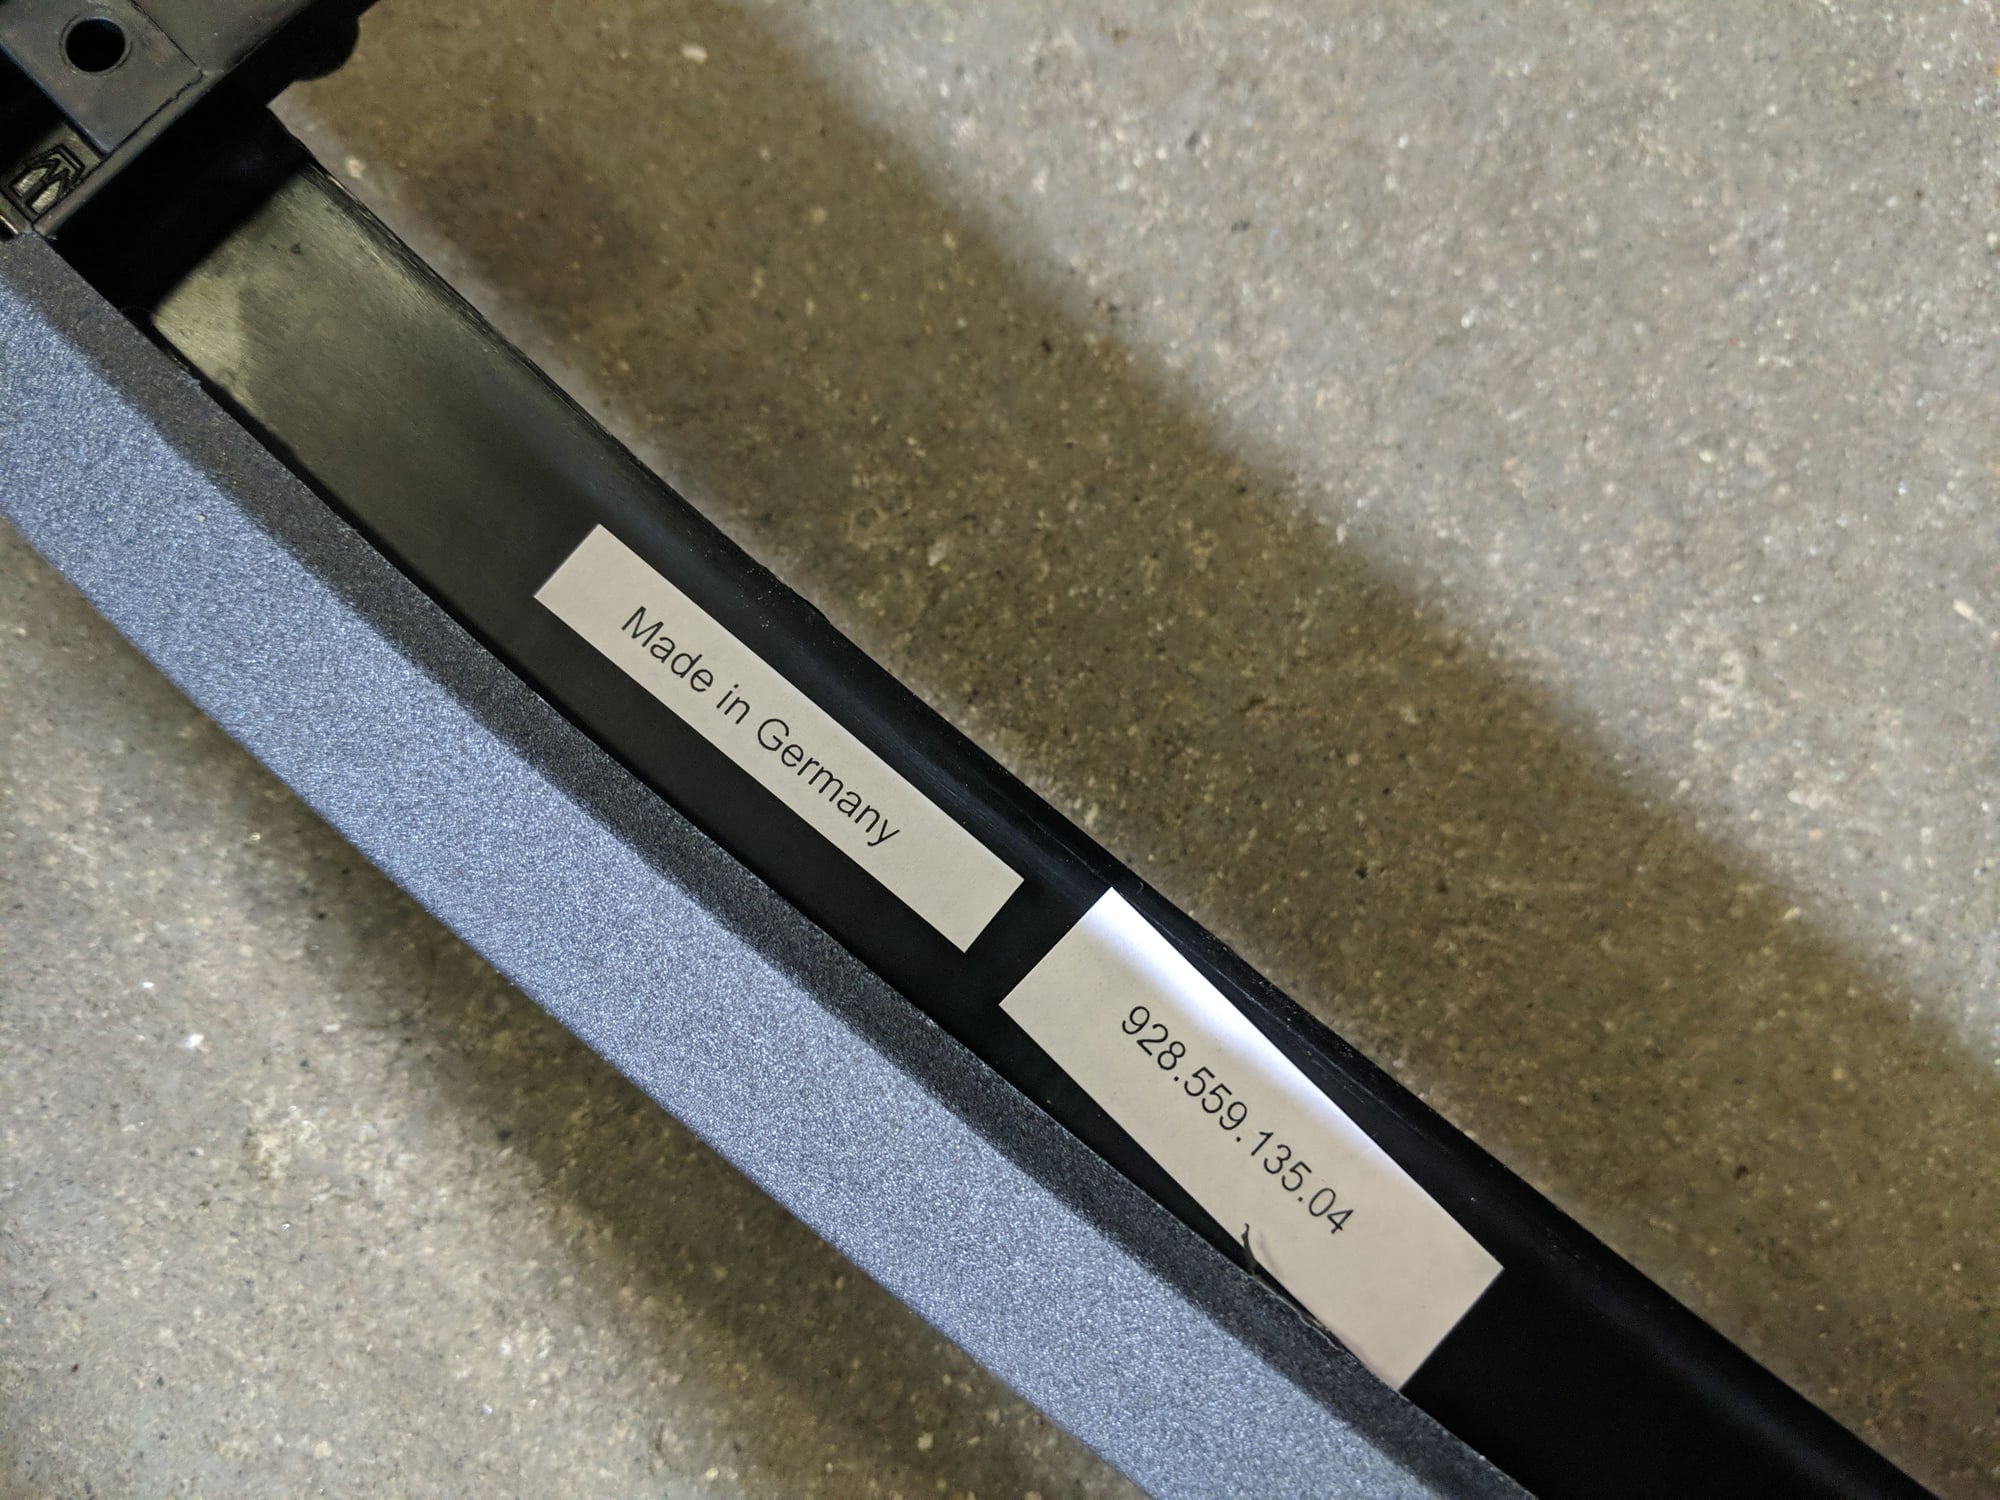
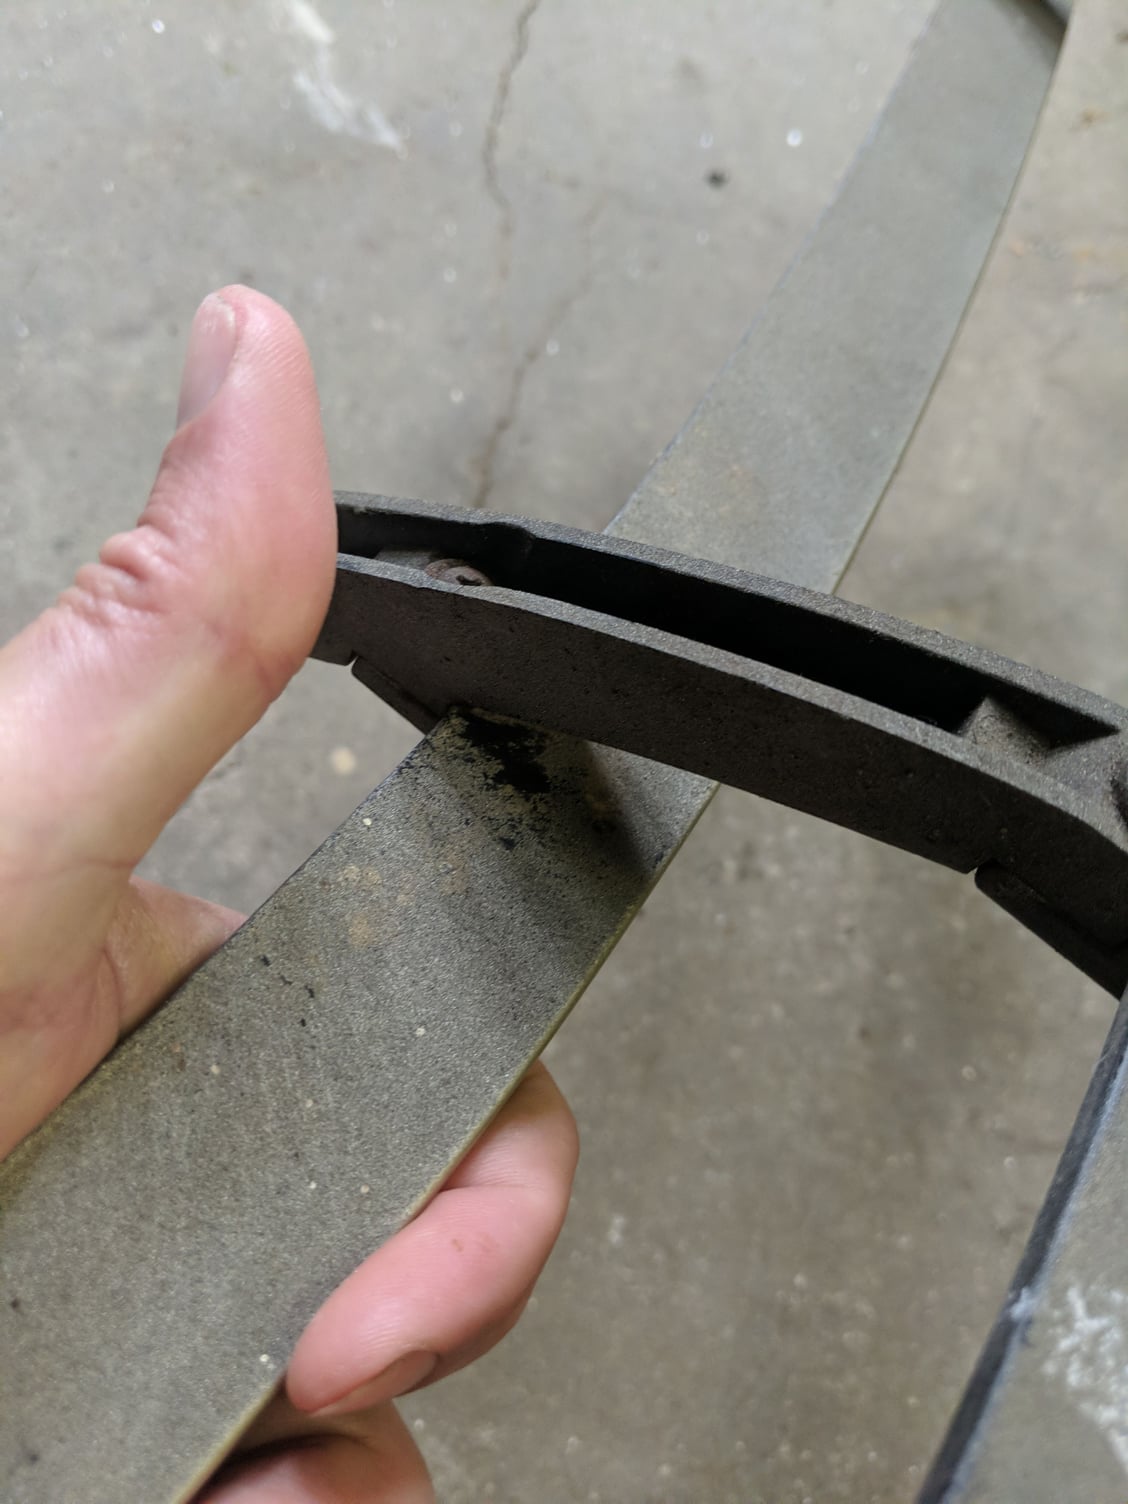
Got replacement pieces for the lower grill. The two bars I had are metal and the replacement is a later plastic. Unclear if 82 had aluminum or plastic
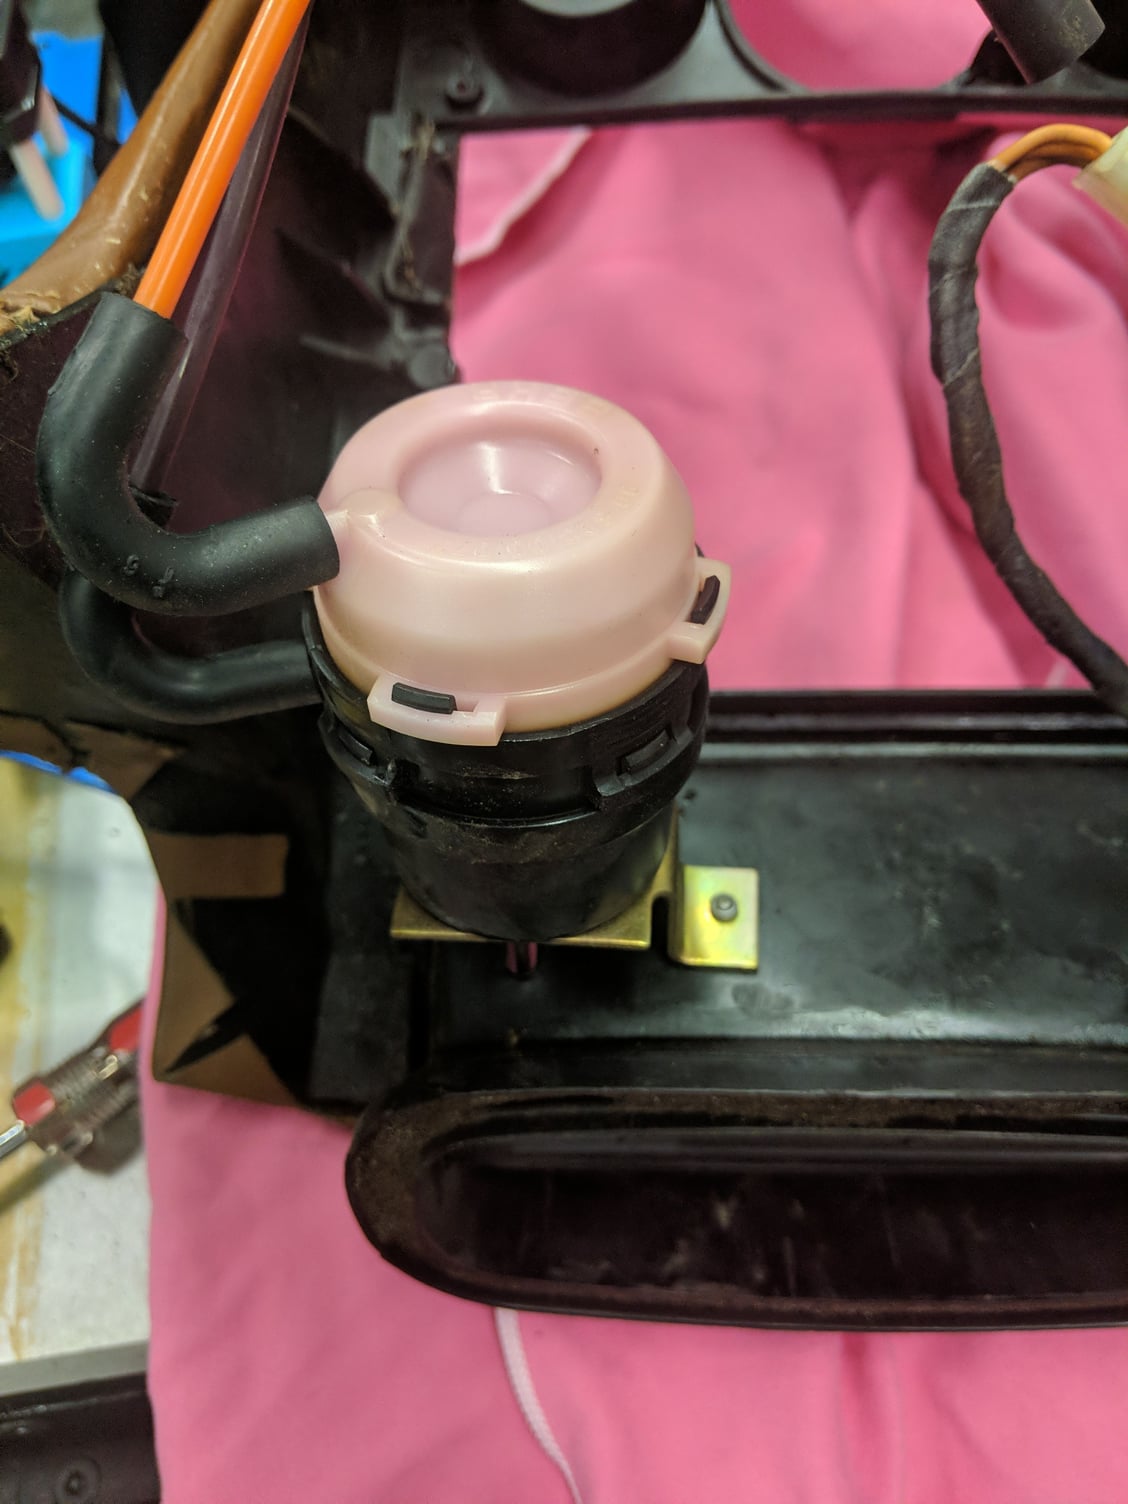
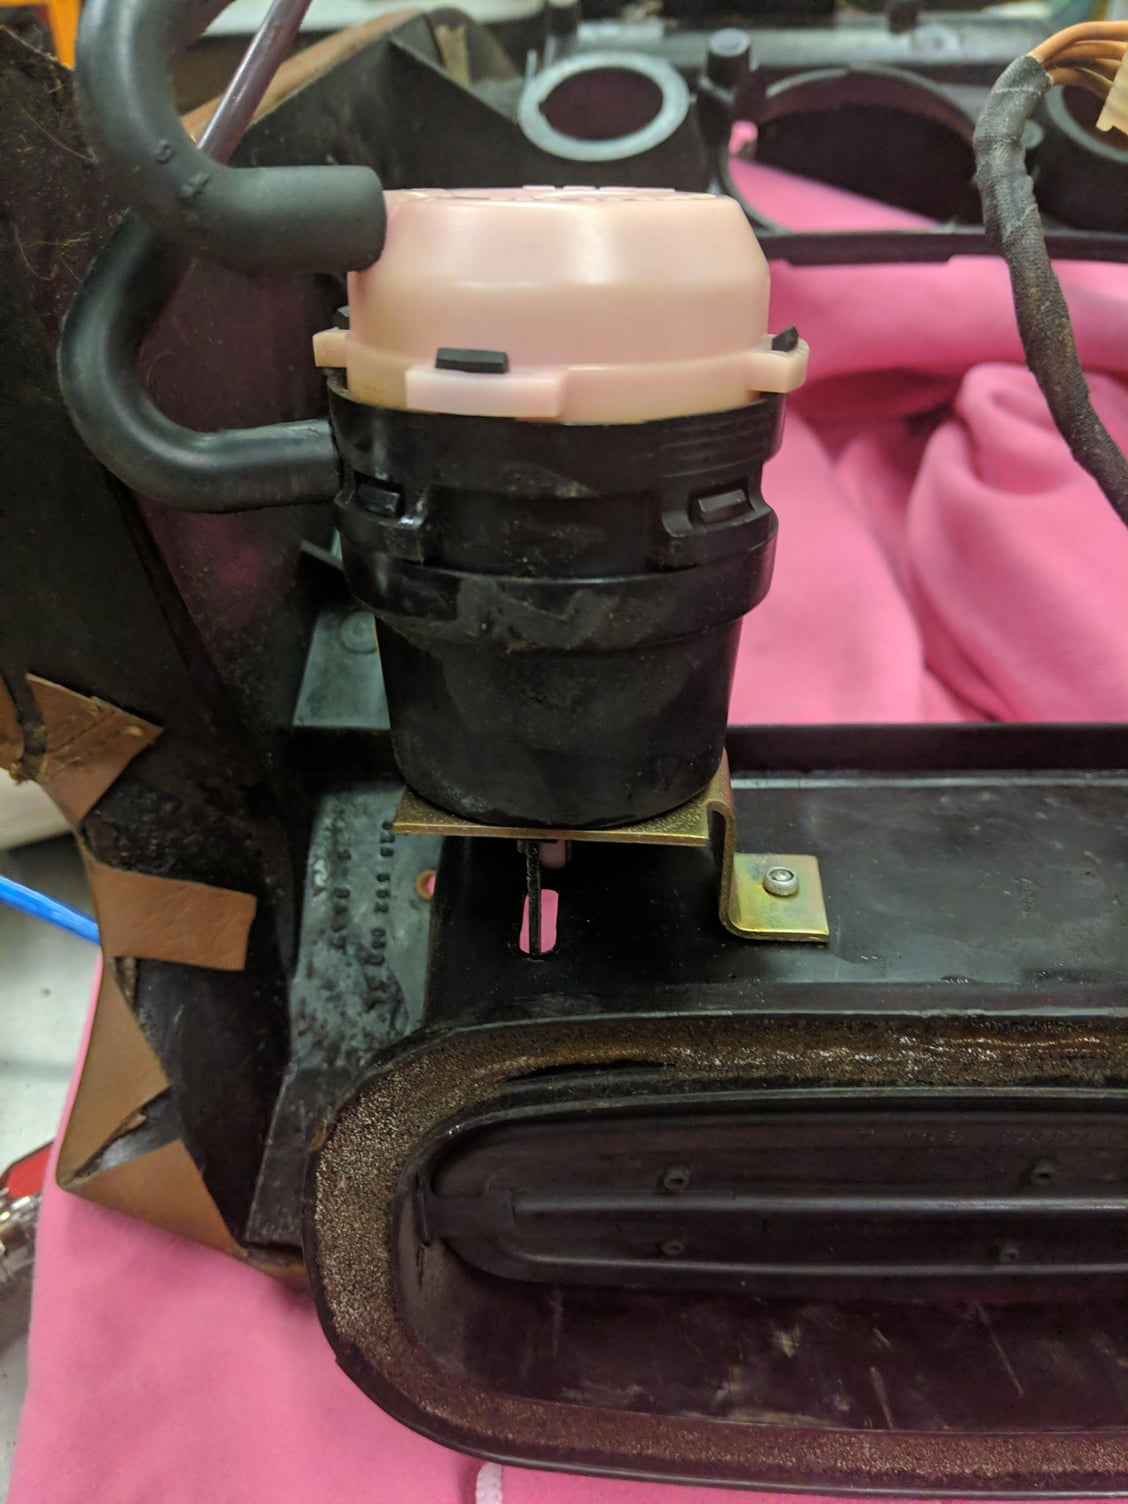
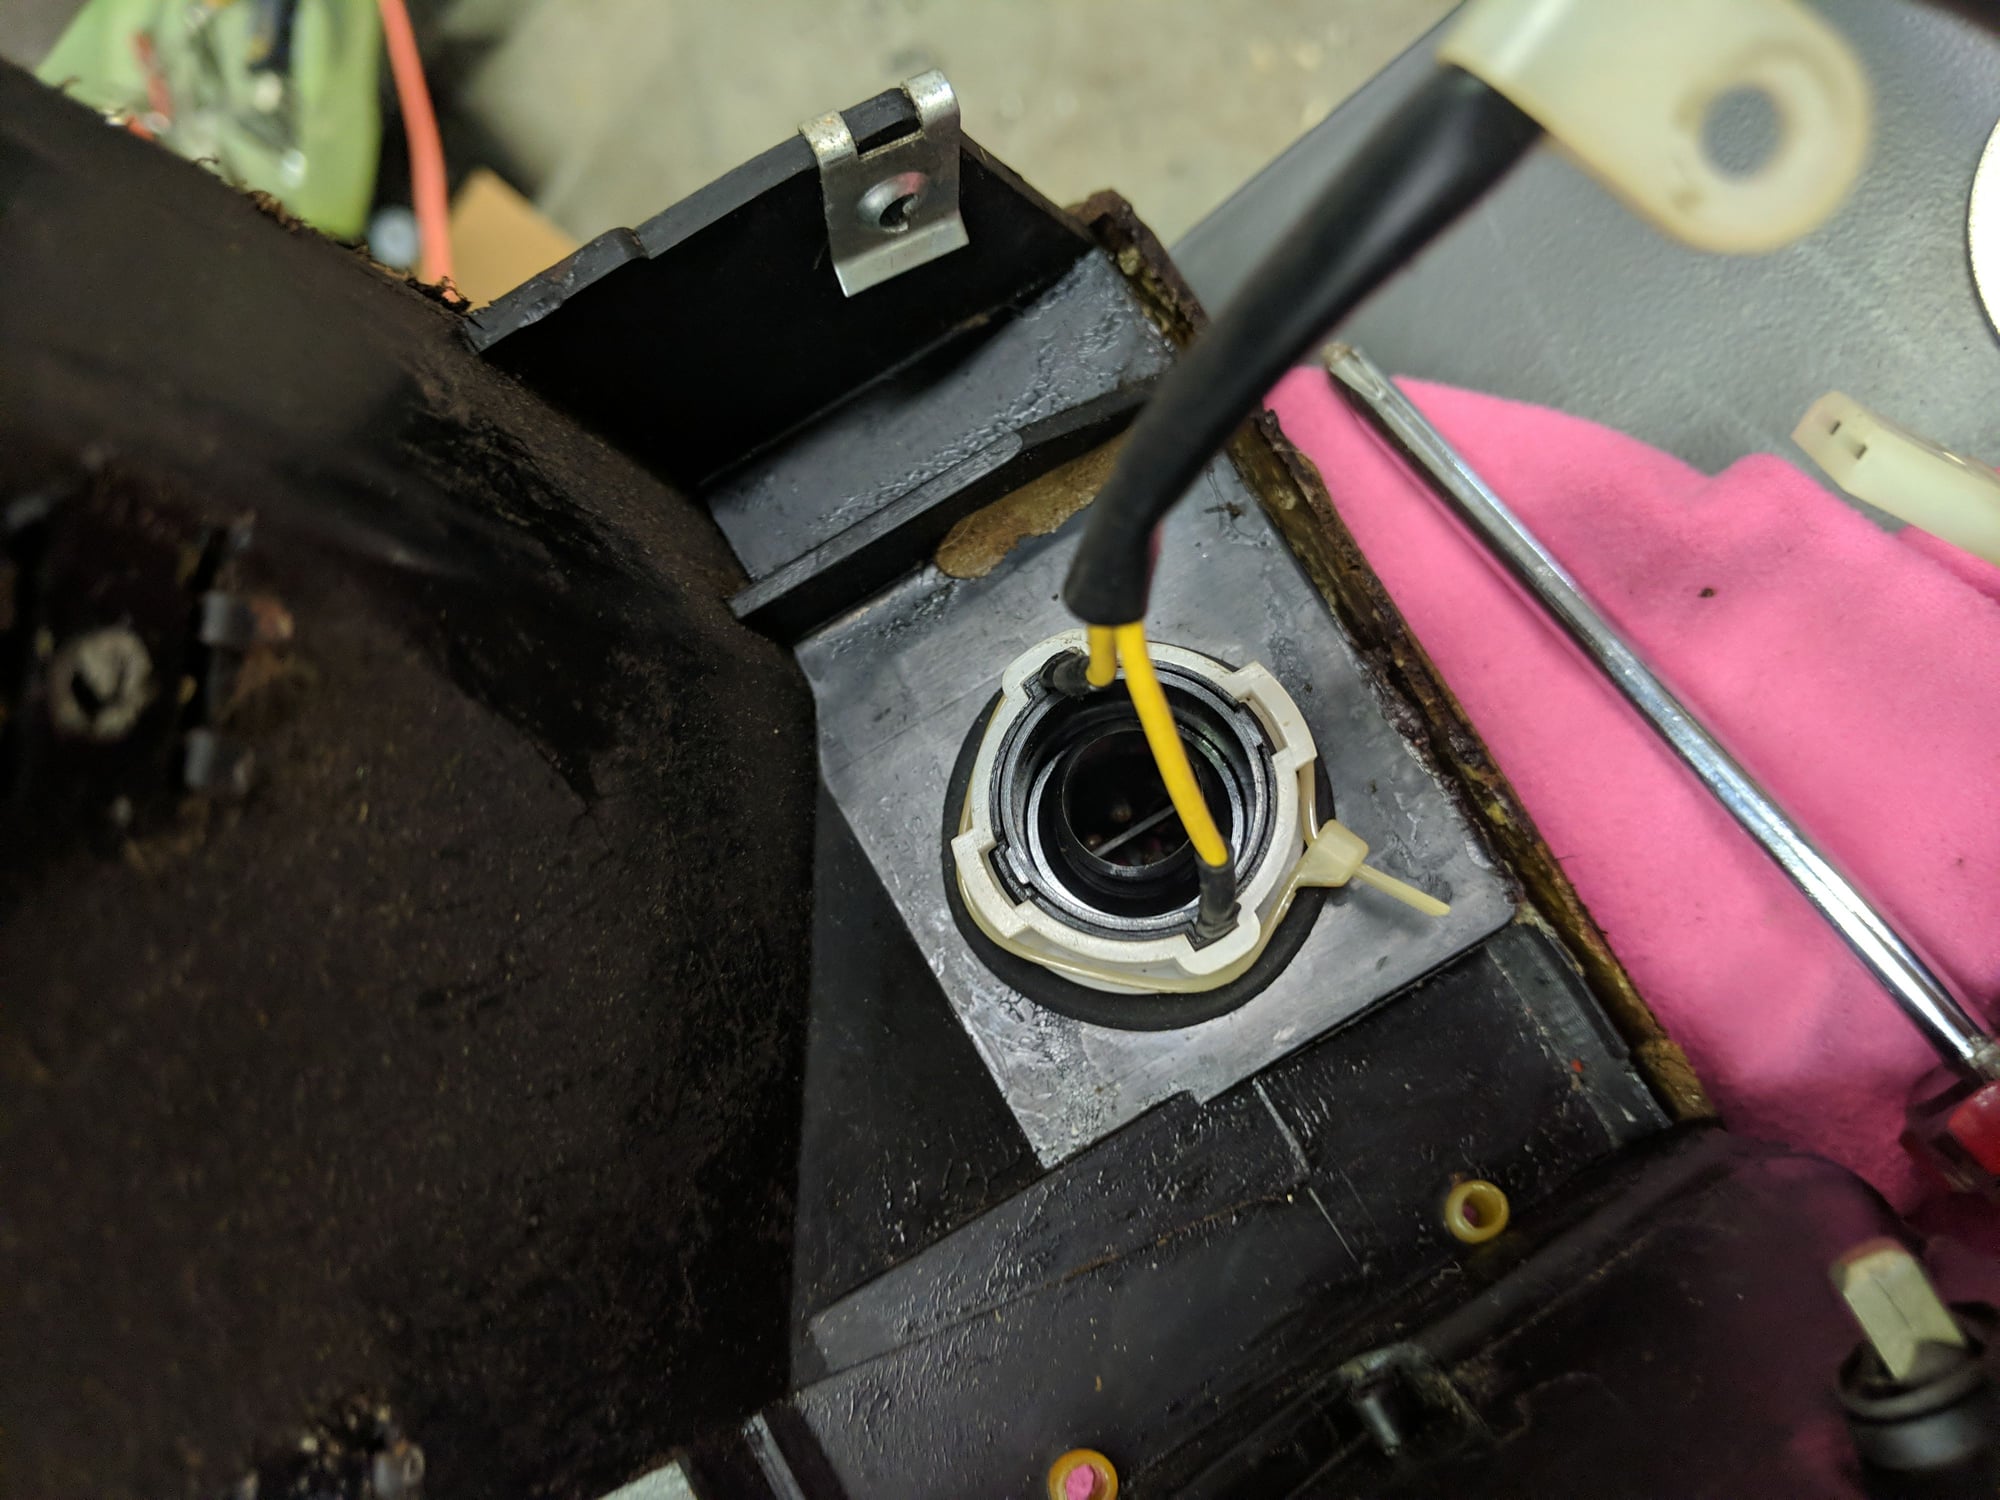
The climate control was pretty grungy and I needed to trace AC issues so thanks to Dwayne and all that have online how tos. The combi actuator PURPLE line has a slow leak down but I cannot find any holes or slits. I am considering for now, putting a check valve on orange and running both solenoids to that. Downsides?
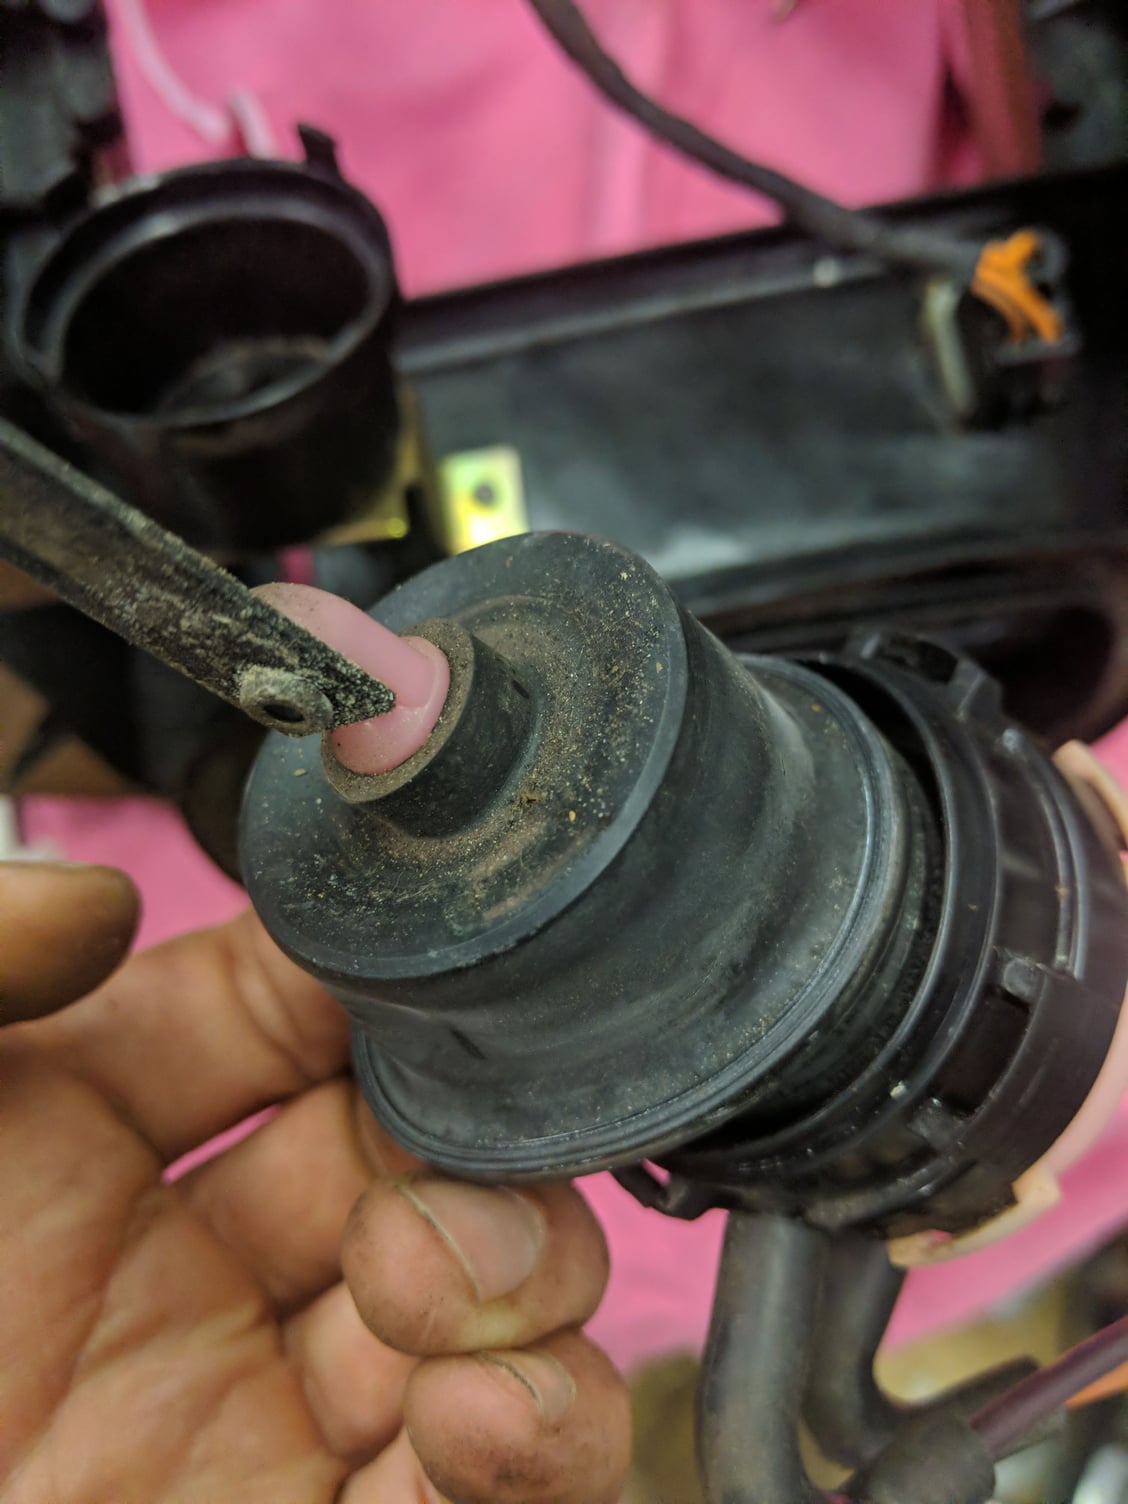
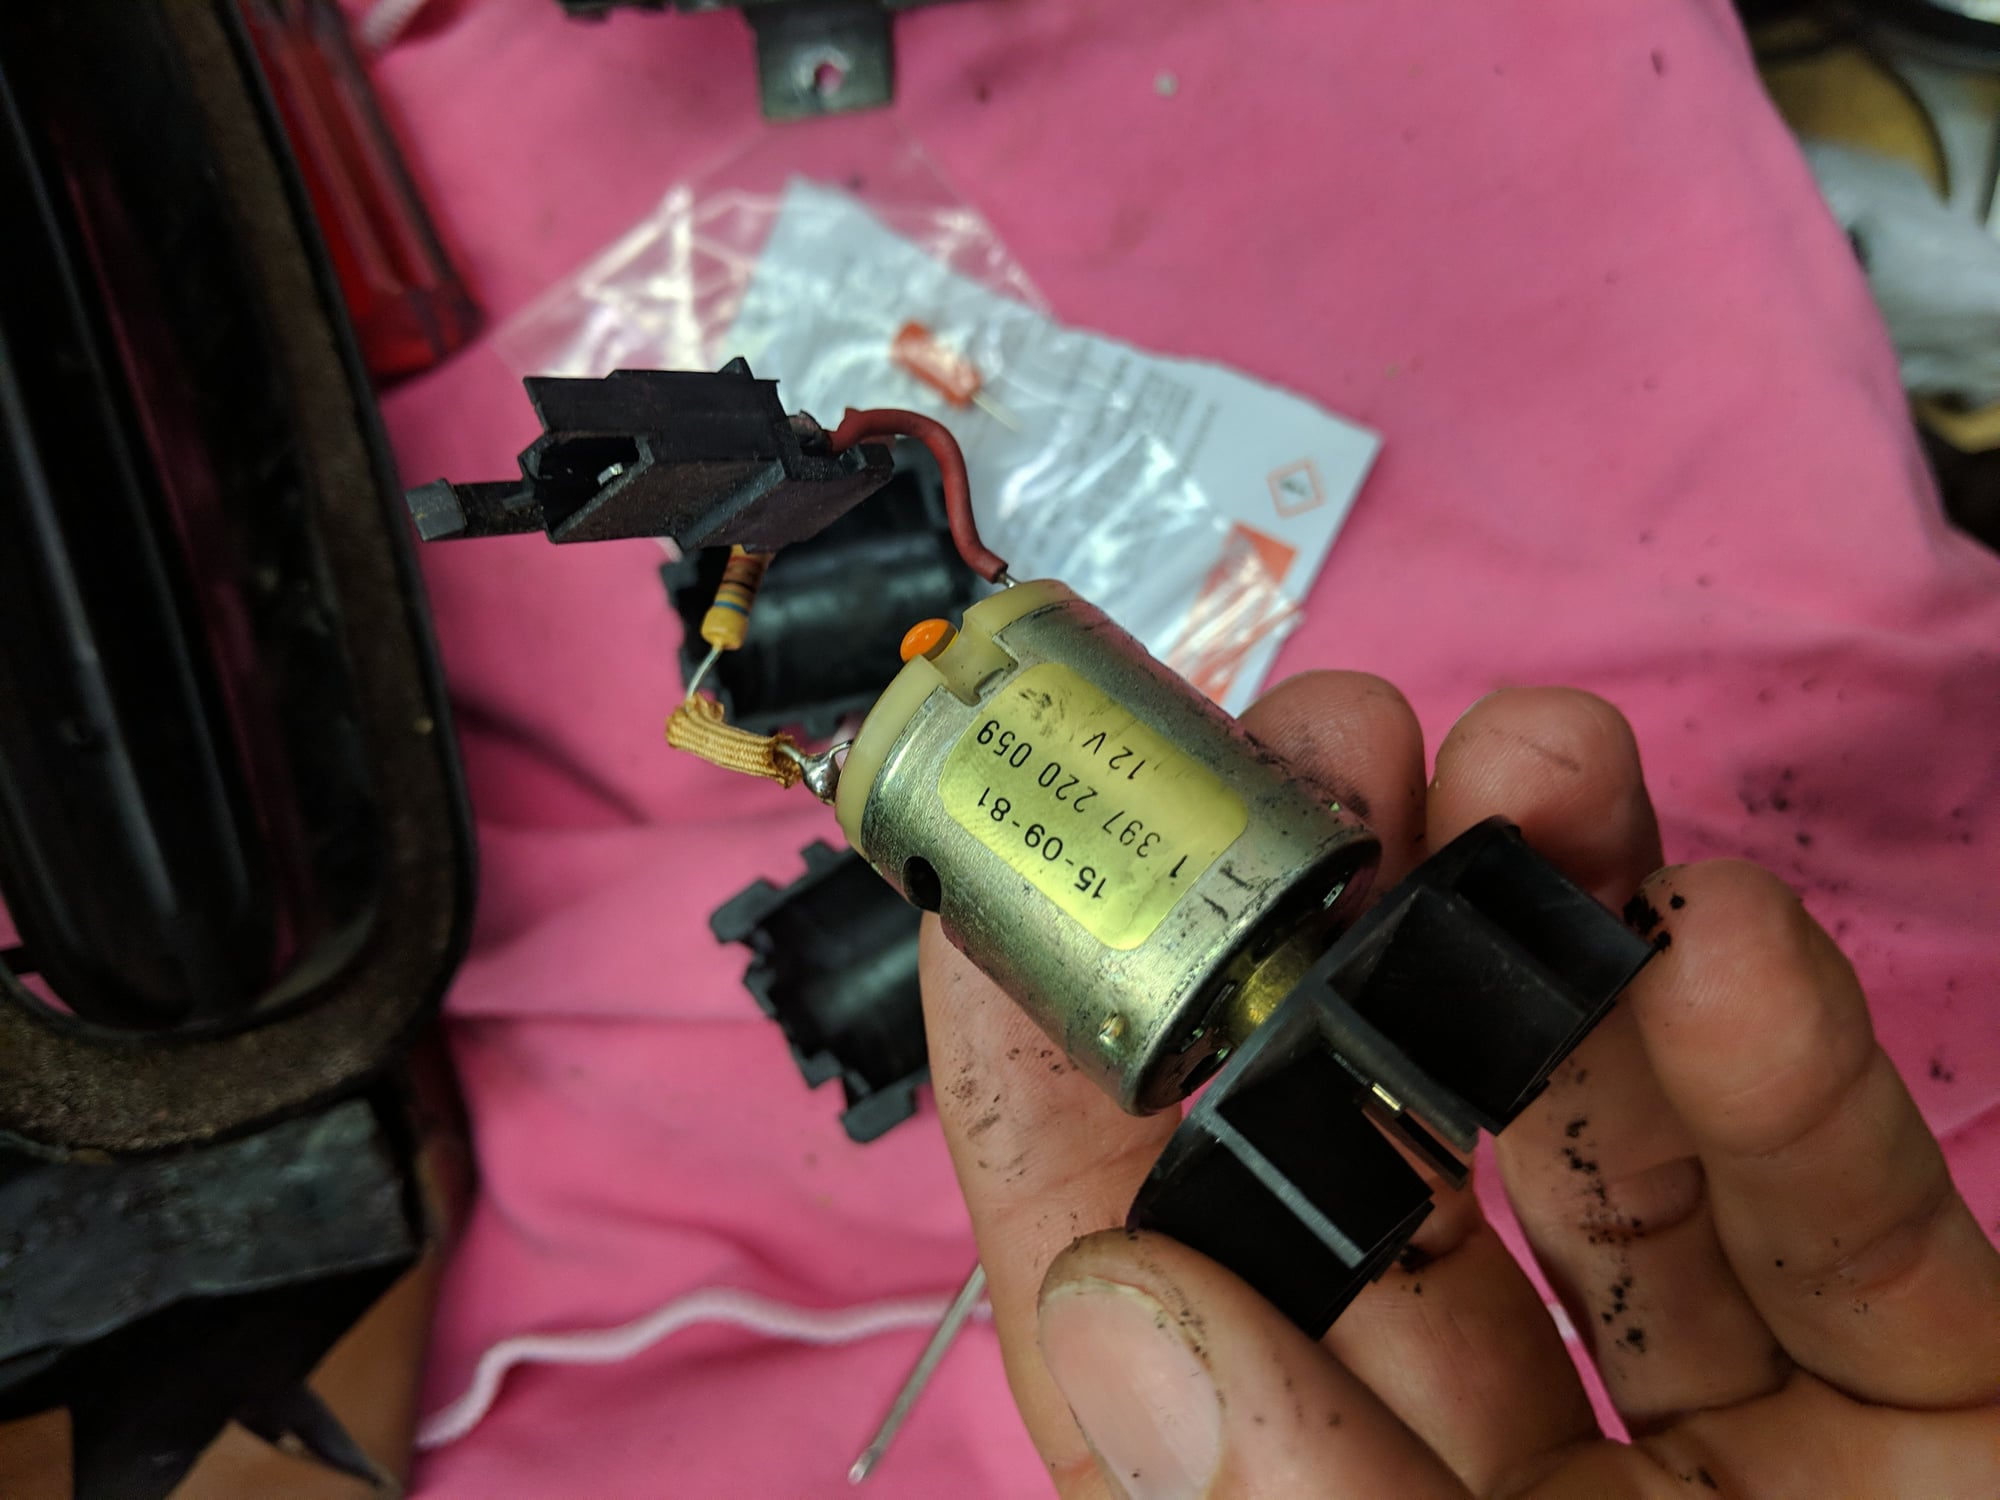
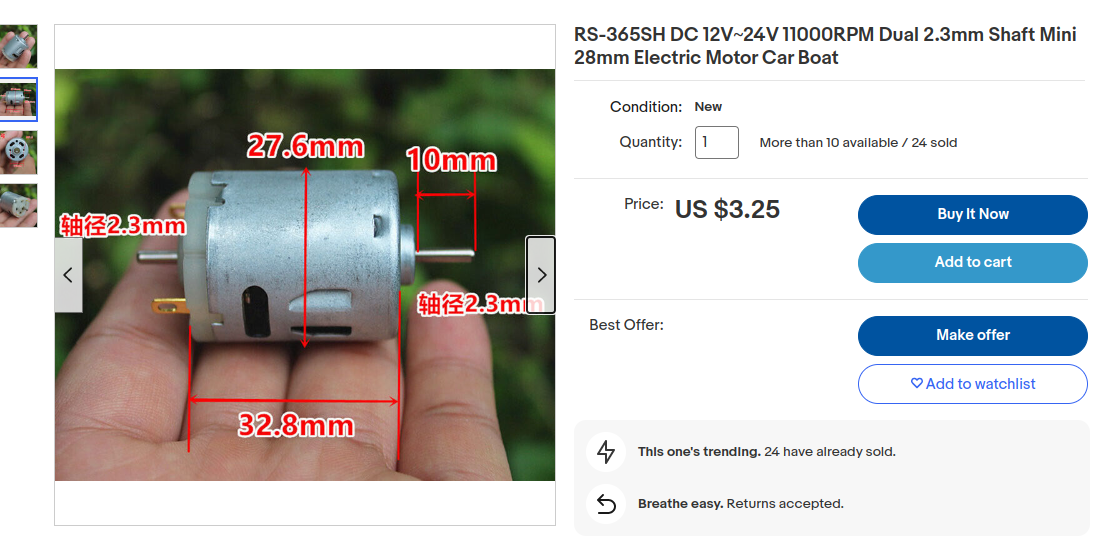
The "blower" for the indoor temp sensor is also reading 1000 ohms and doesn't turn well. So I tore that down and found a nice little 1981 motor in the there. I'm hoping this RS-365 is a direct replacement. I do not know the RPM (maybe will we if the 86 one spins) it should be but figure air is air.
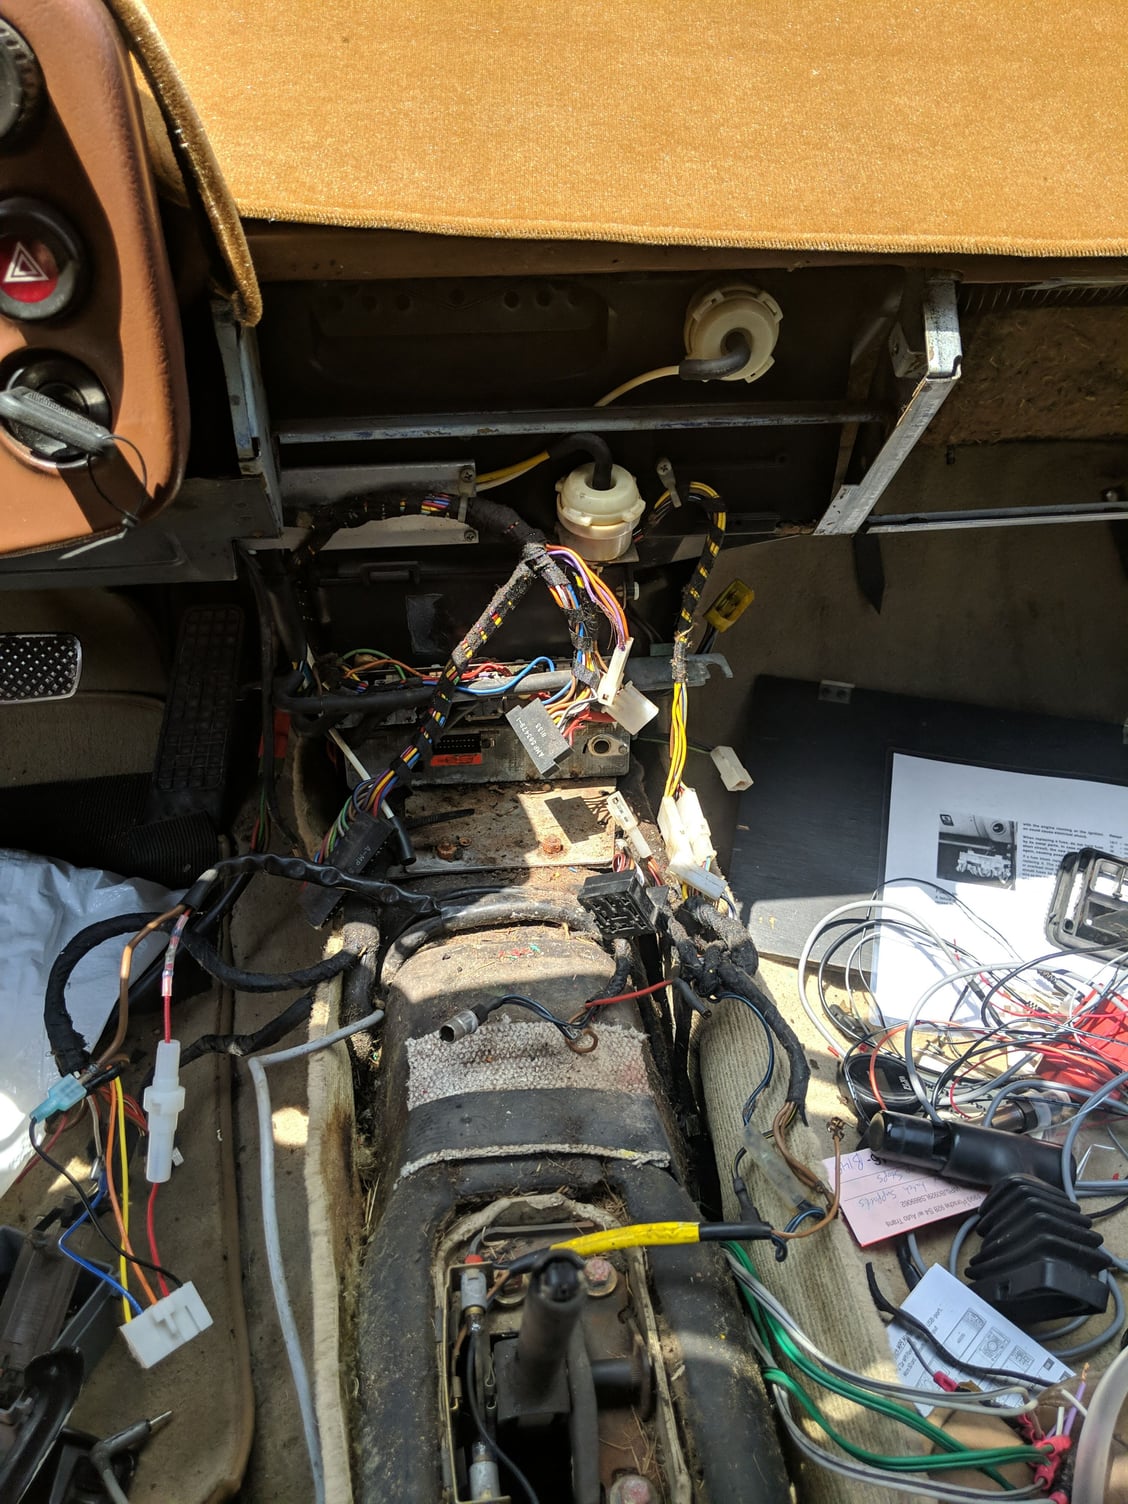
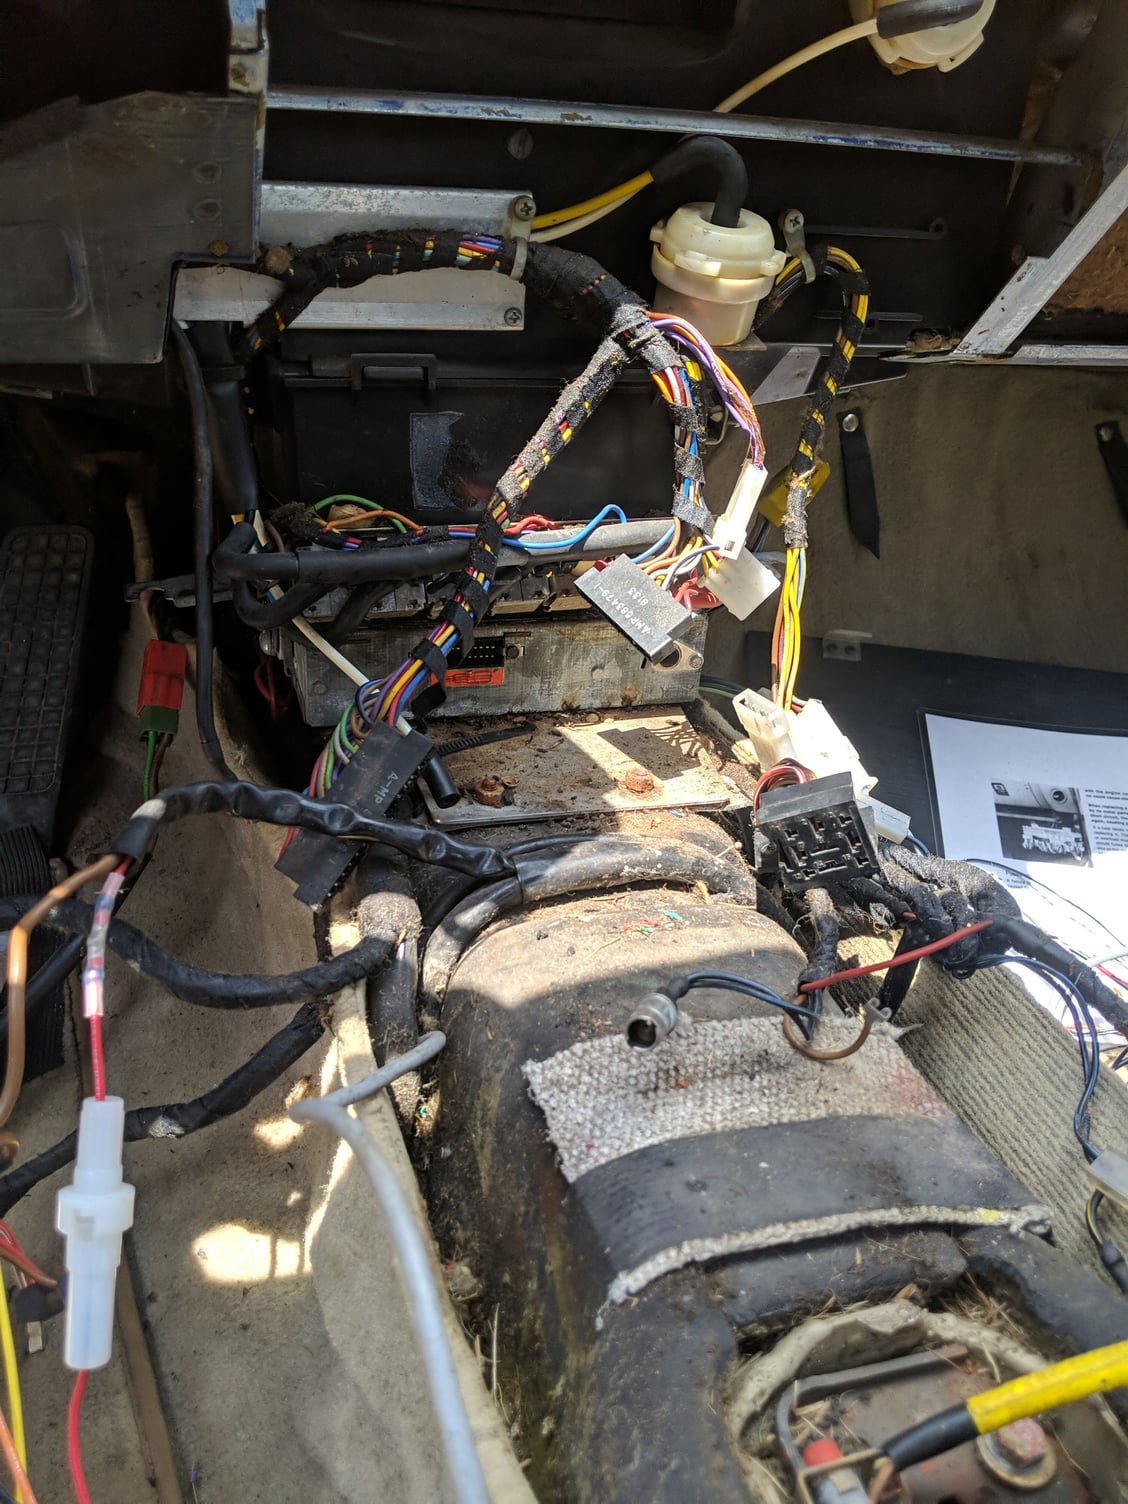
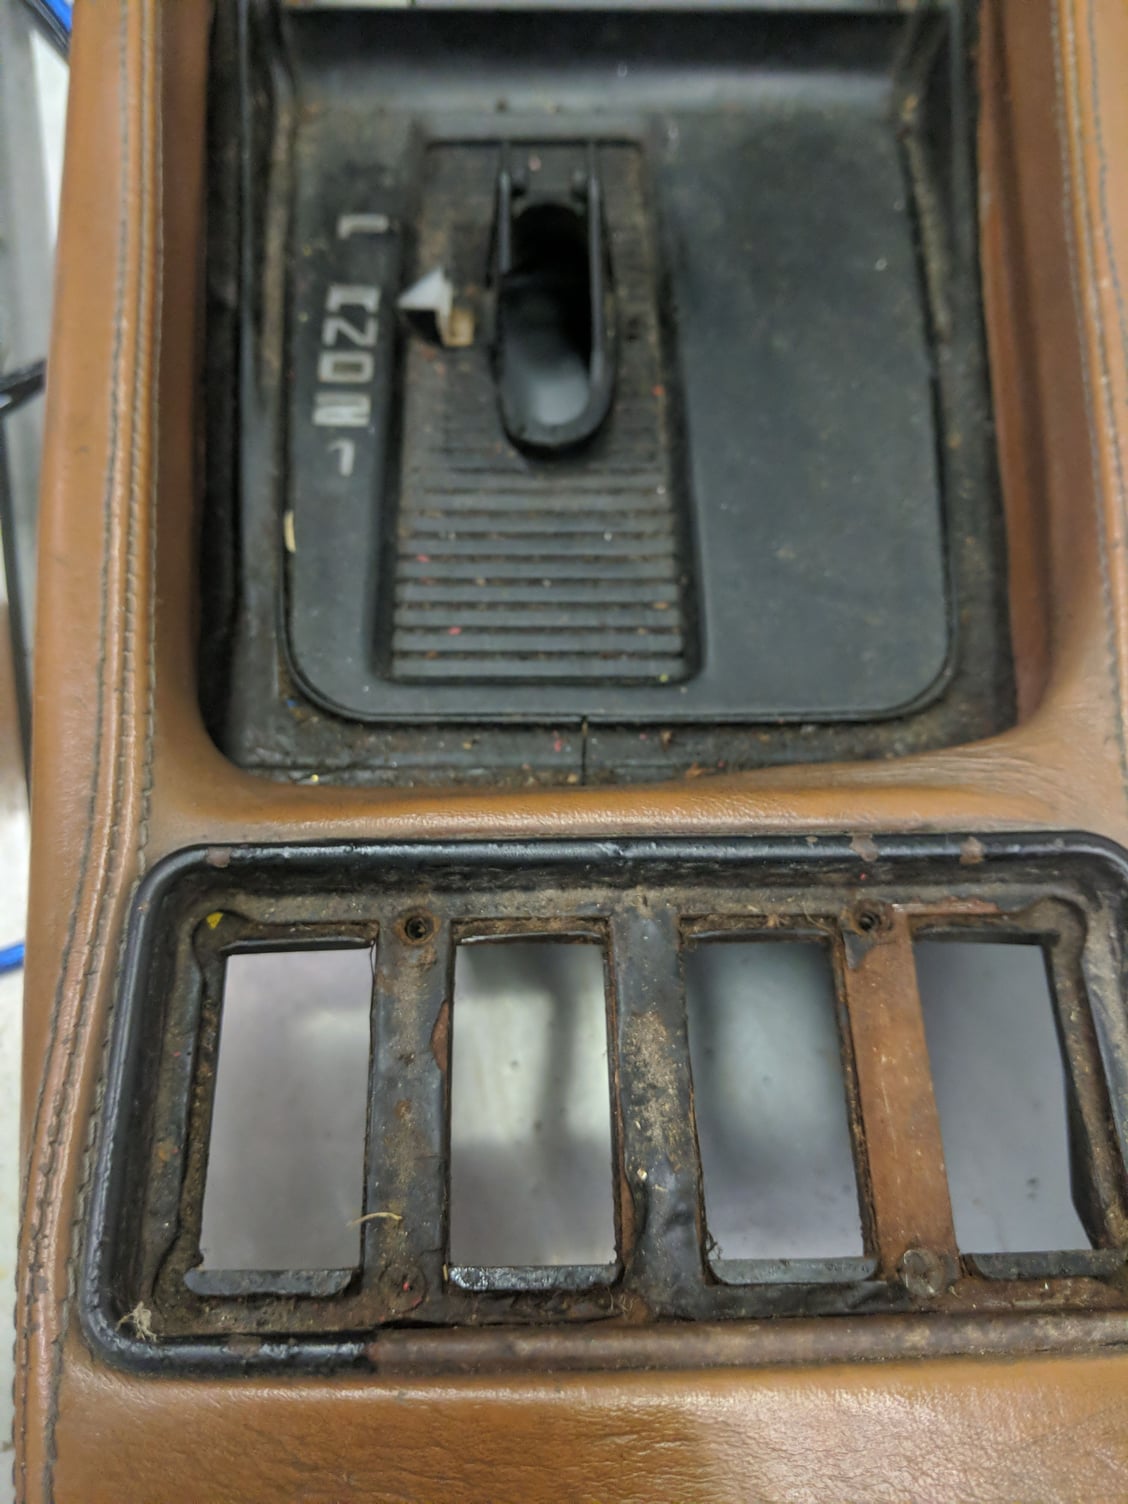
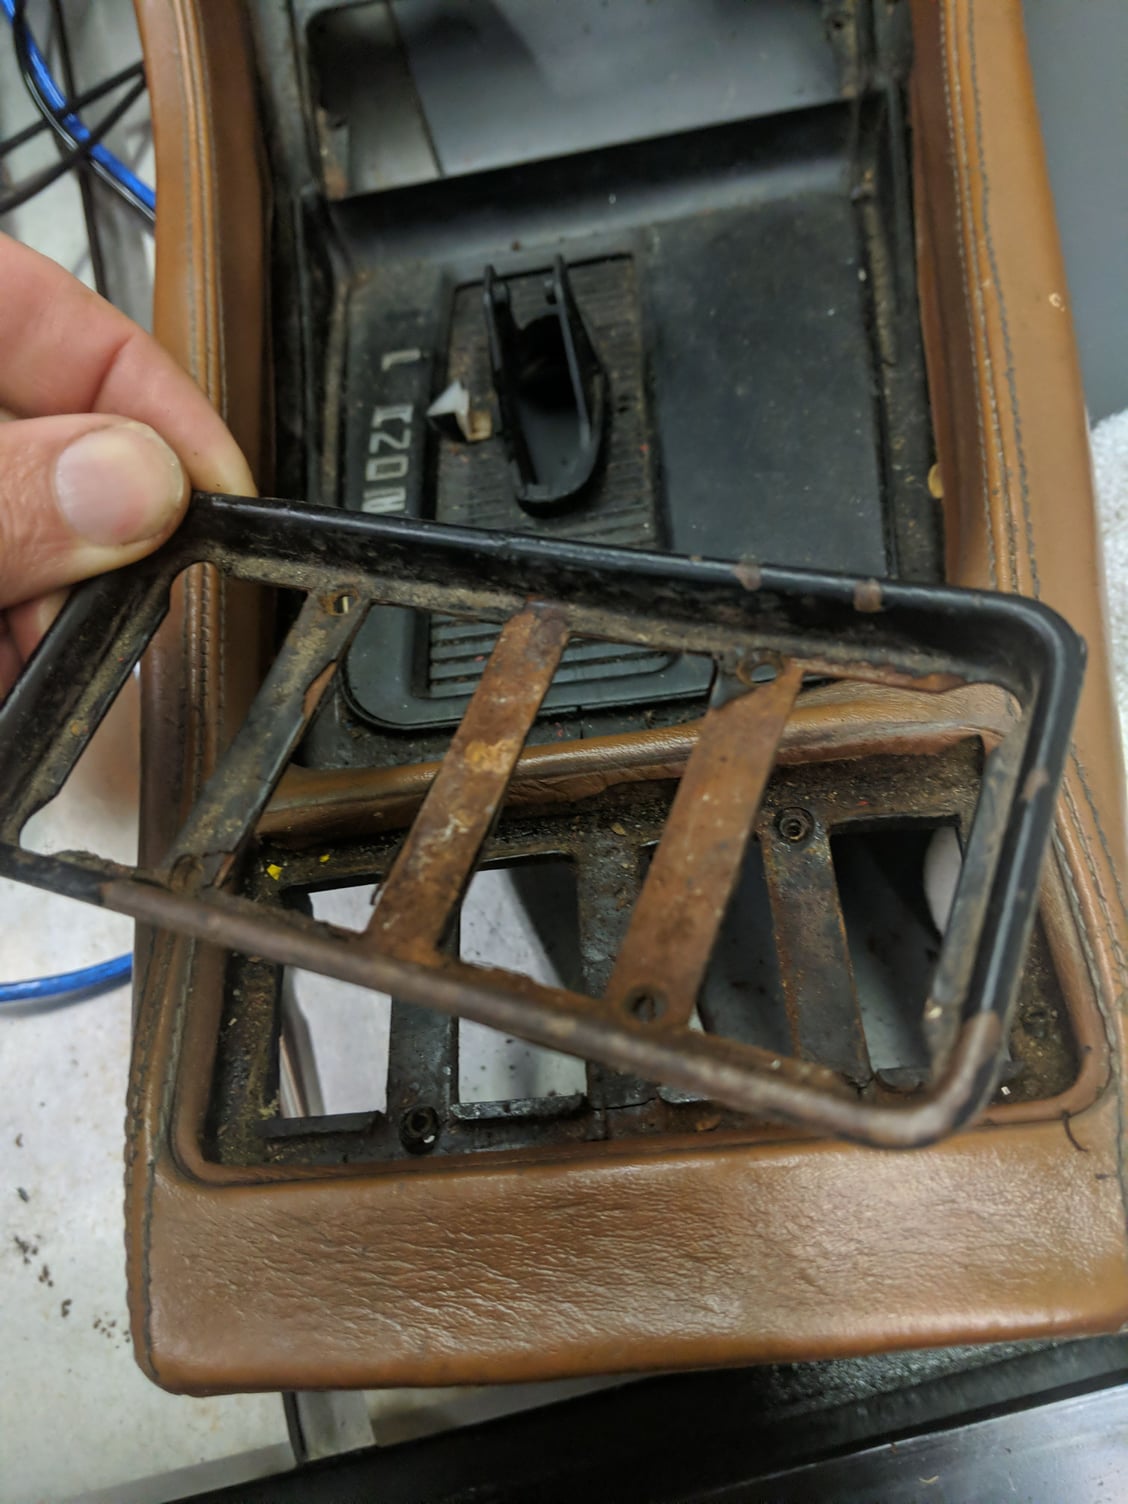
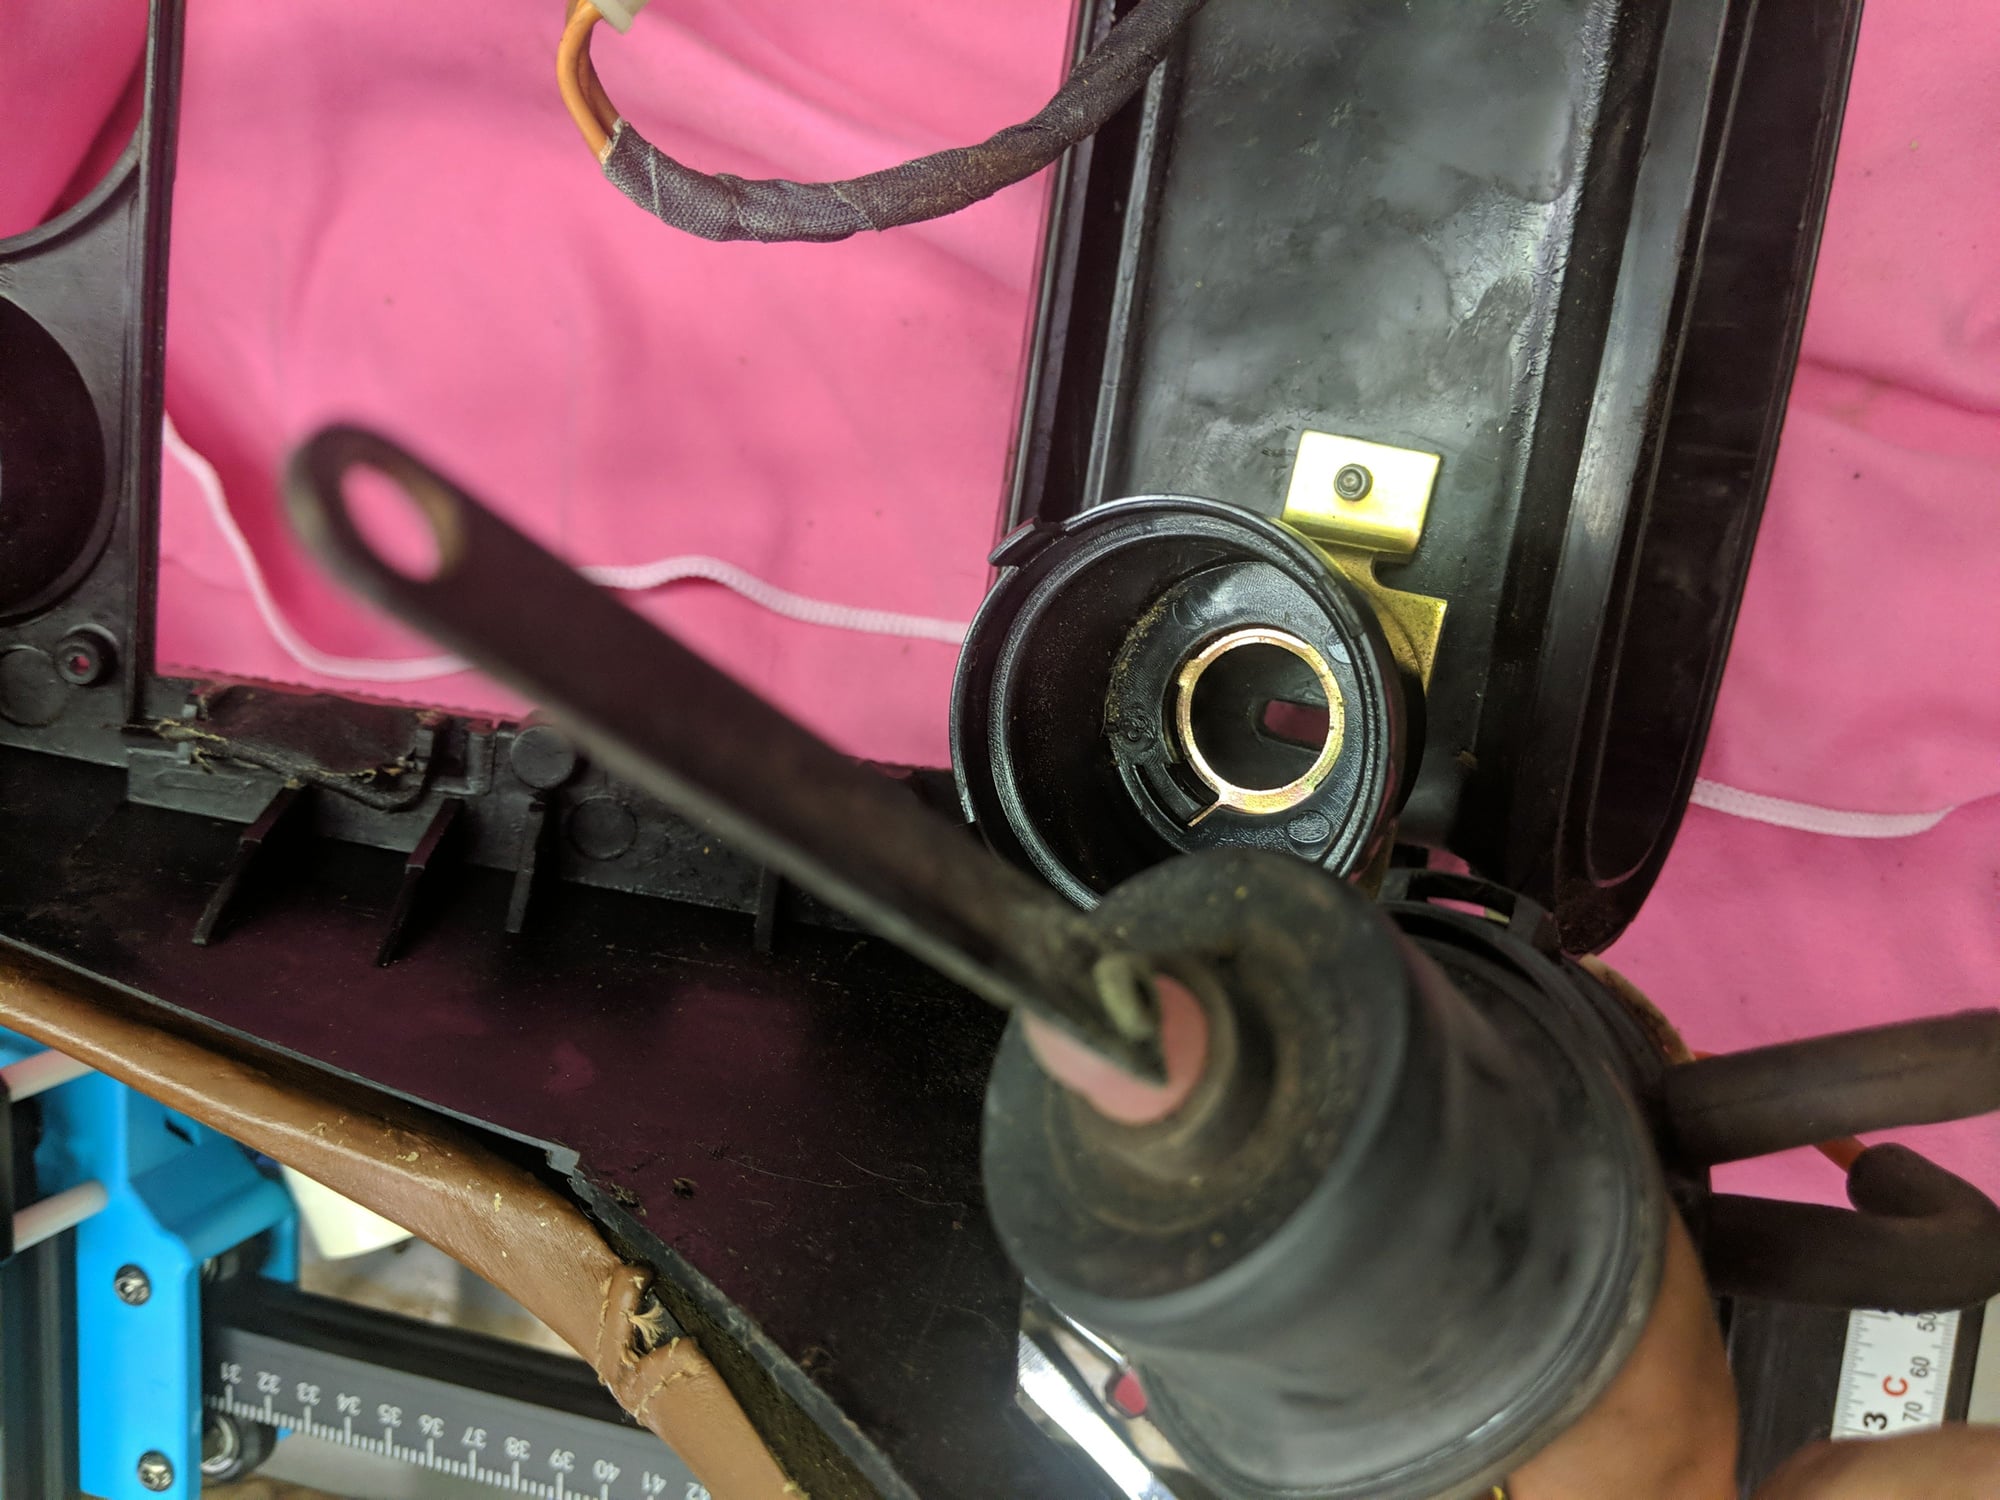
I pulled the center console which is way superior than trying to test the HVAC components in place. It was so easy I don't know I I didn't do it earlier. Plus I get to clean out the 40 years of funk down there and sort radio wiring.
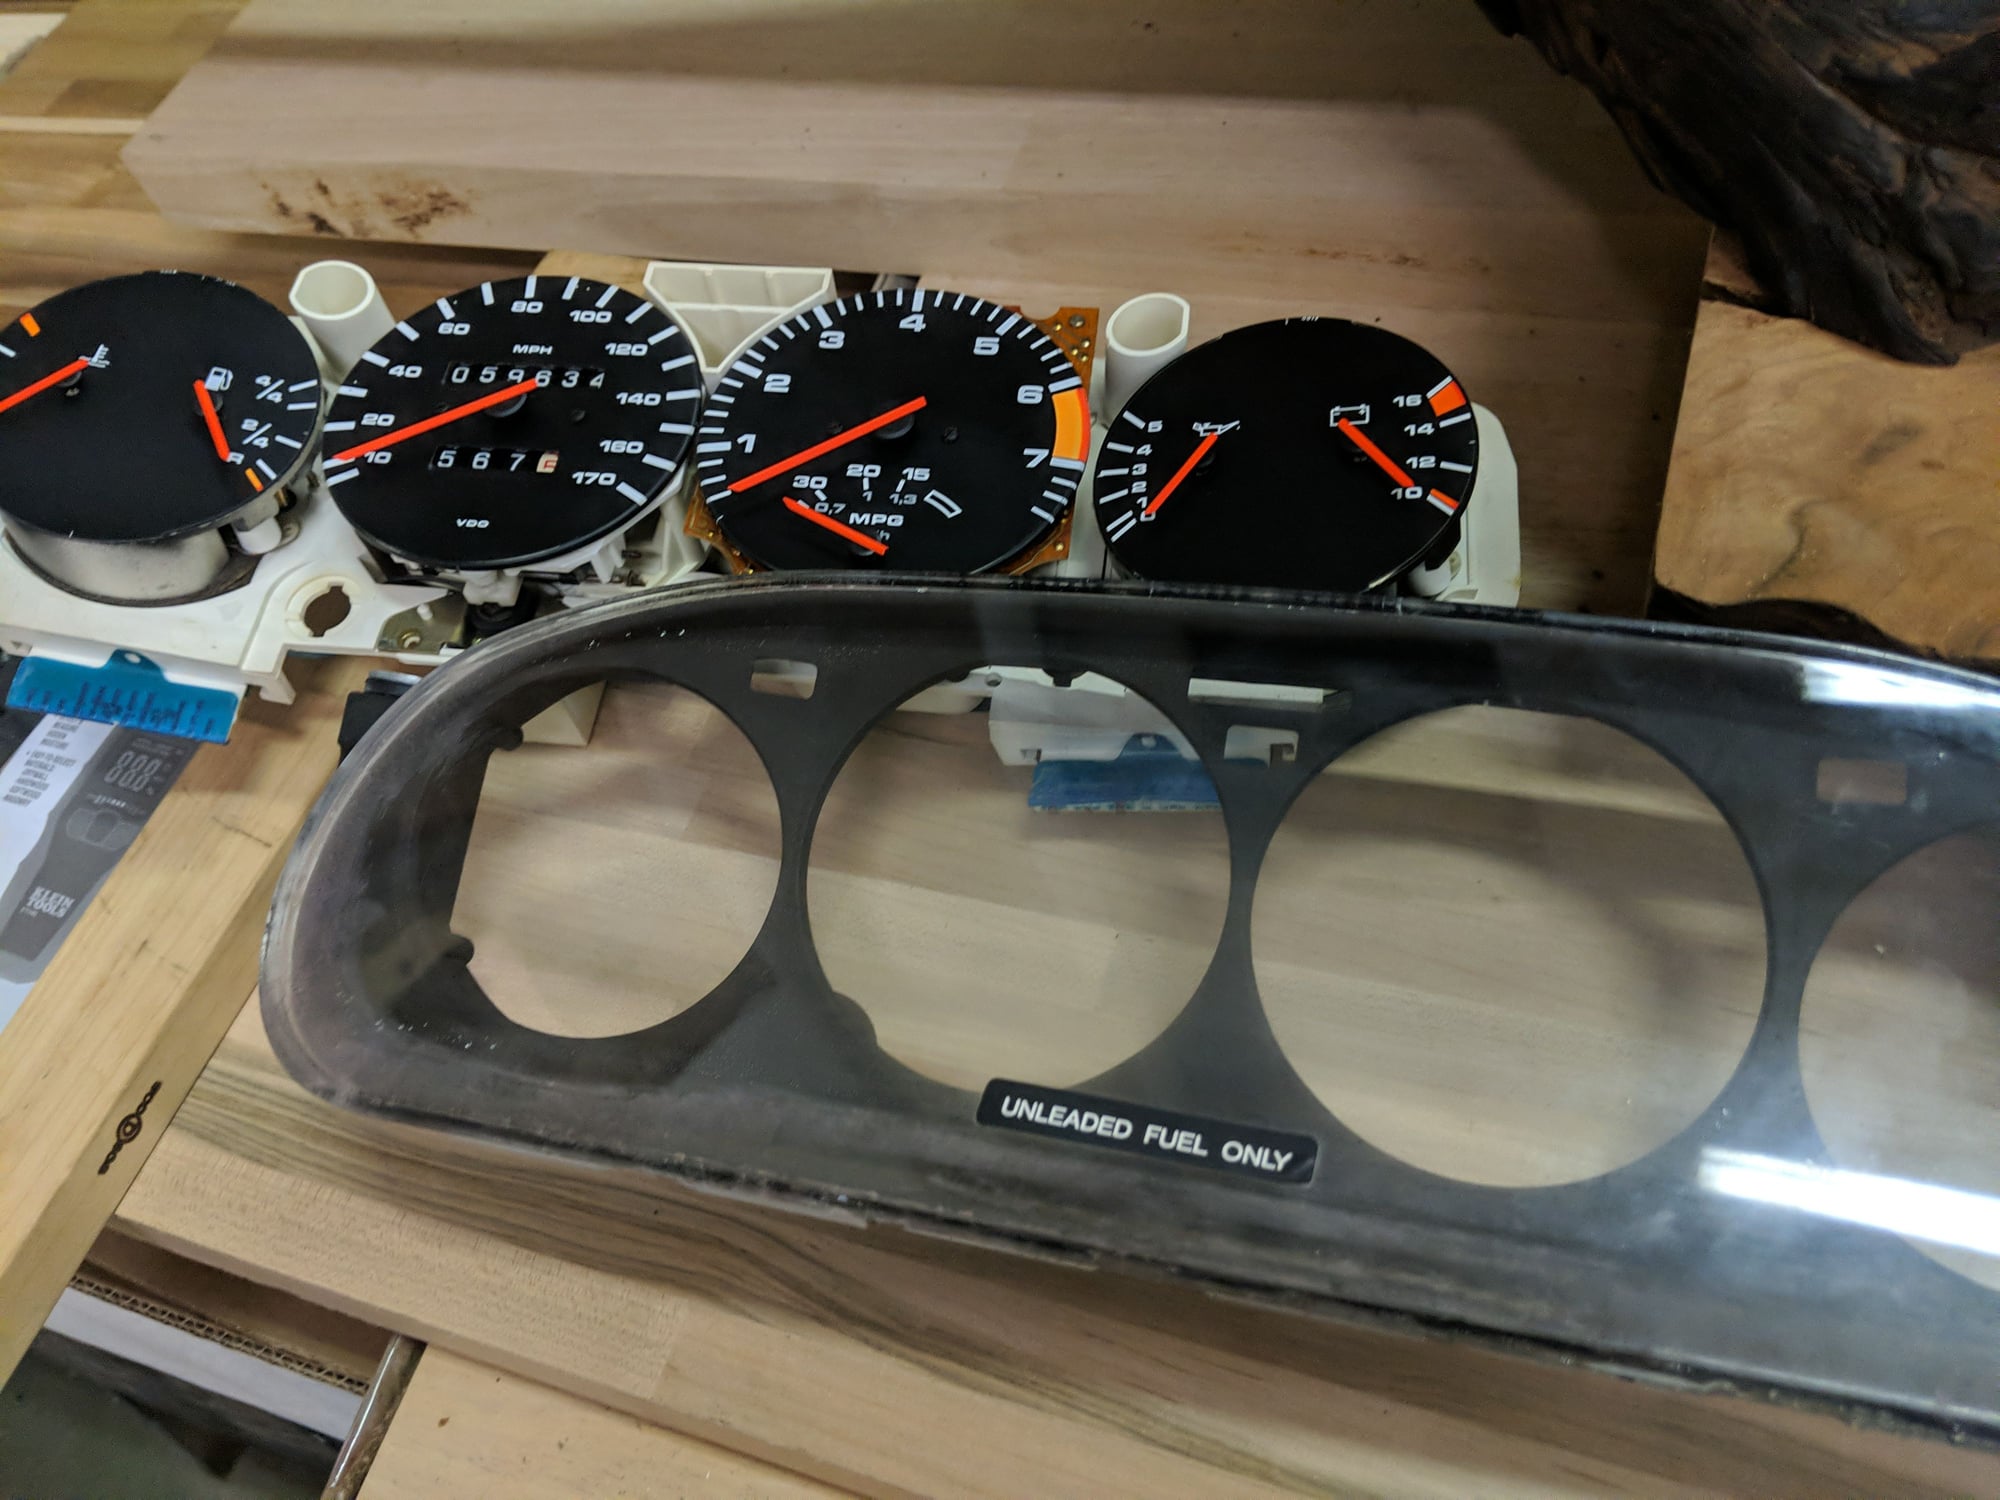
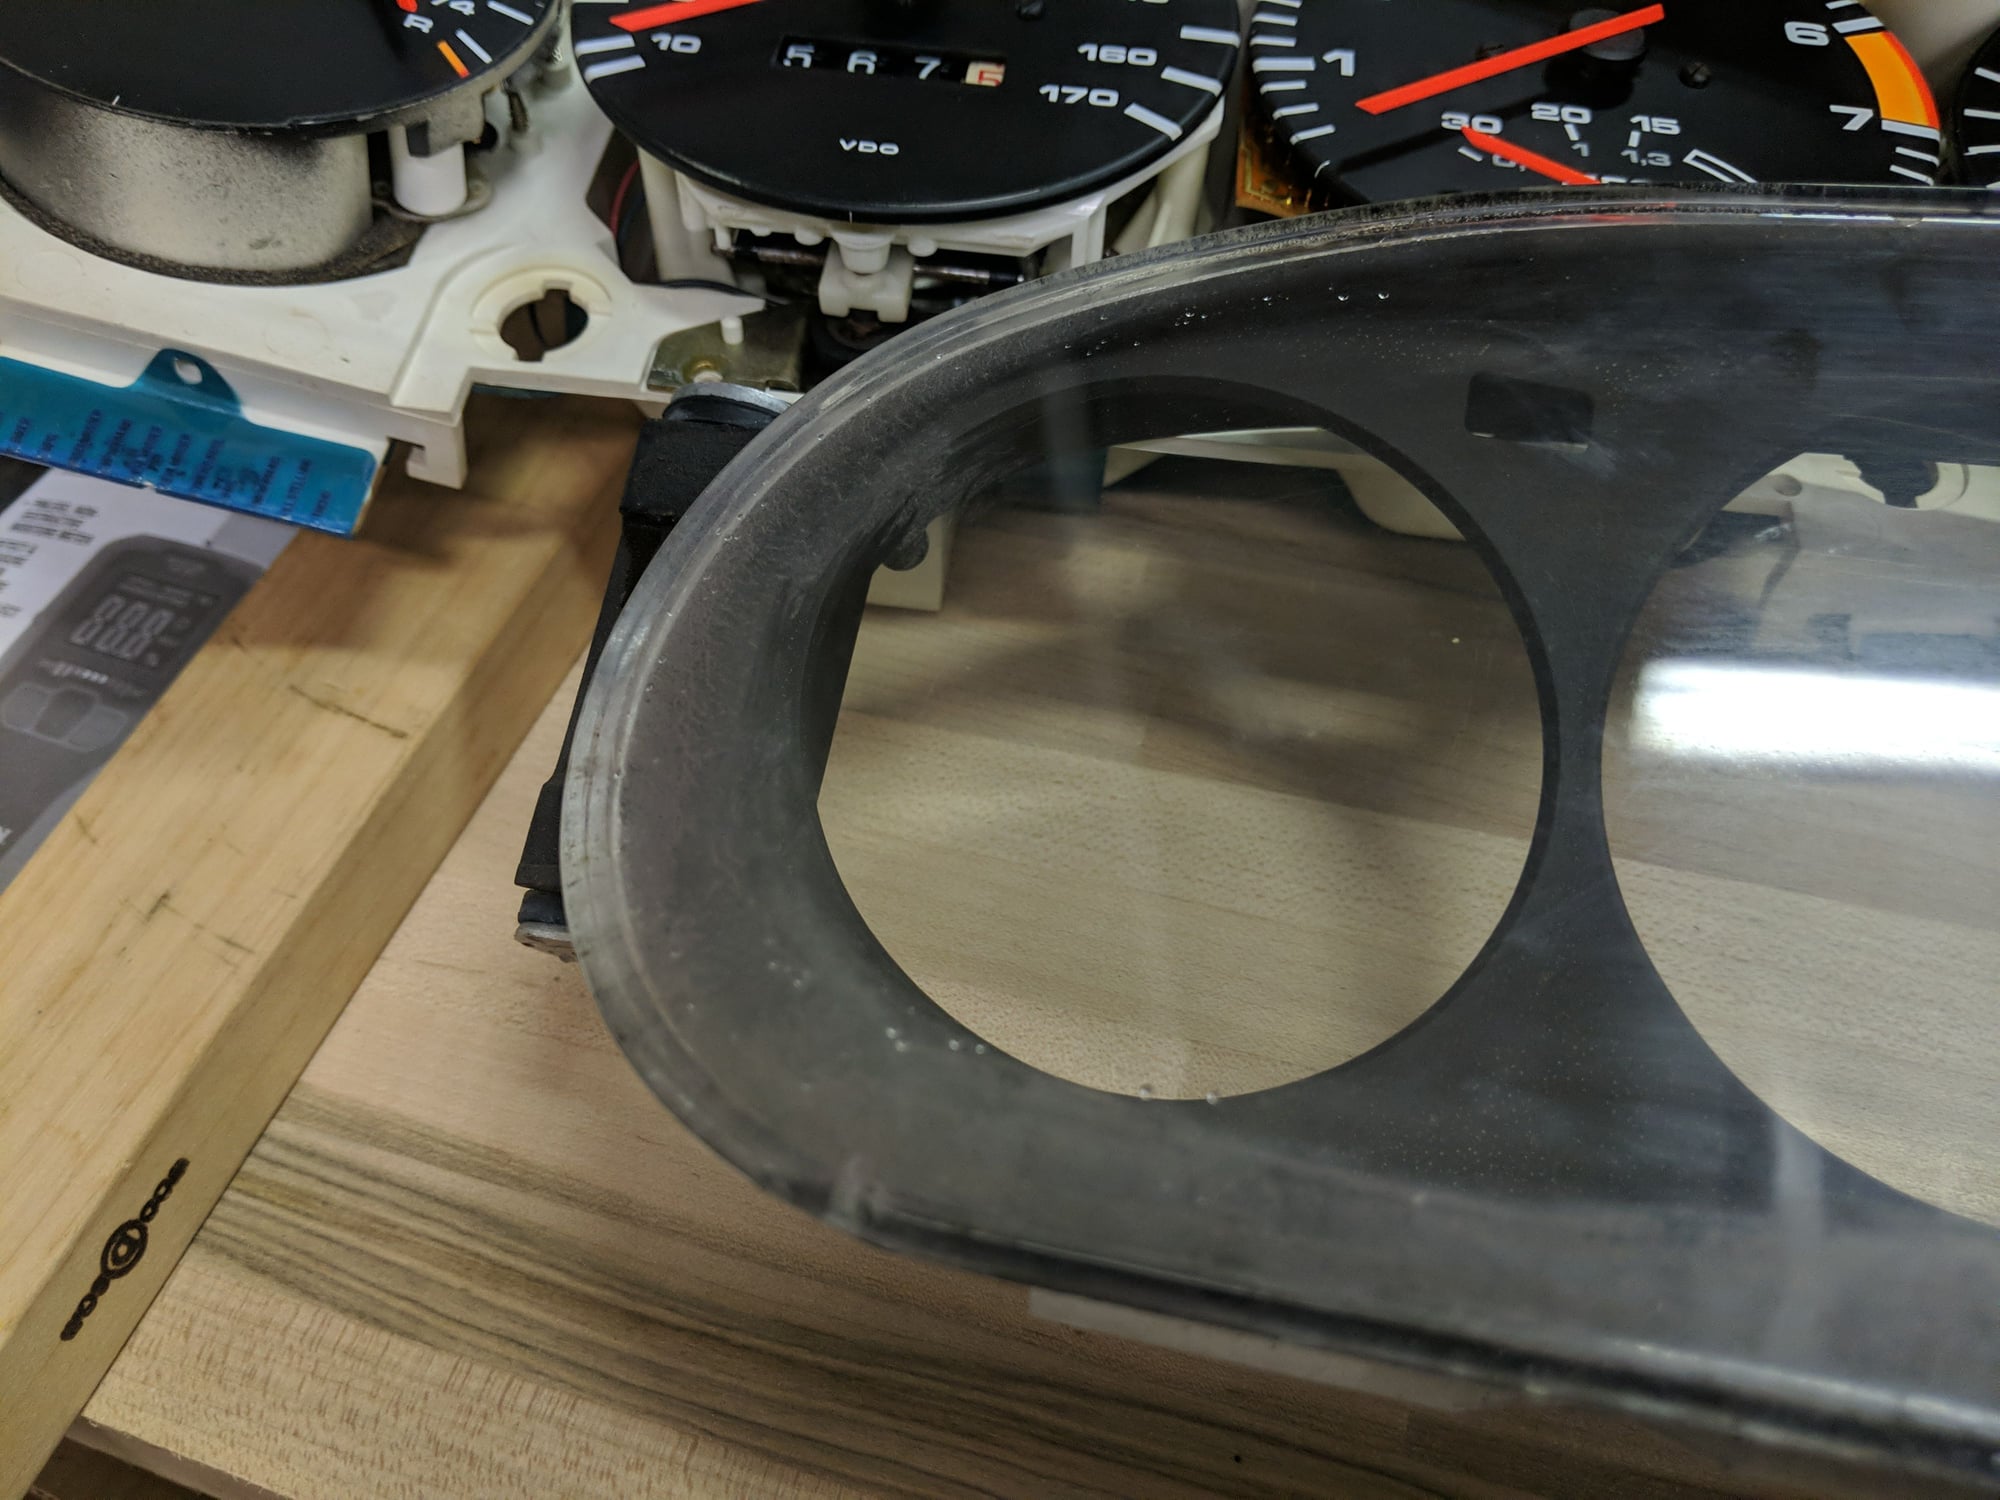
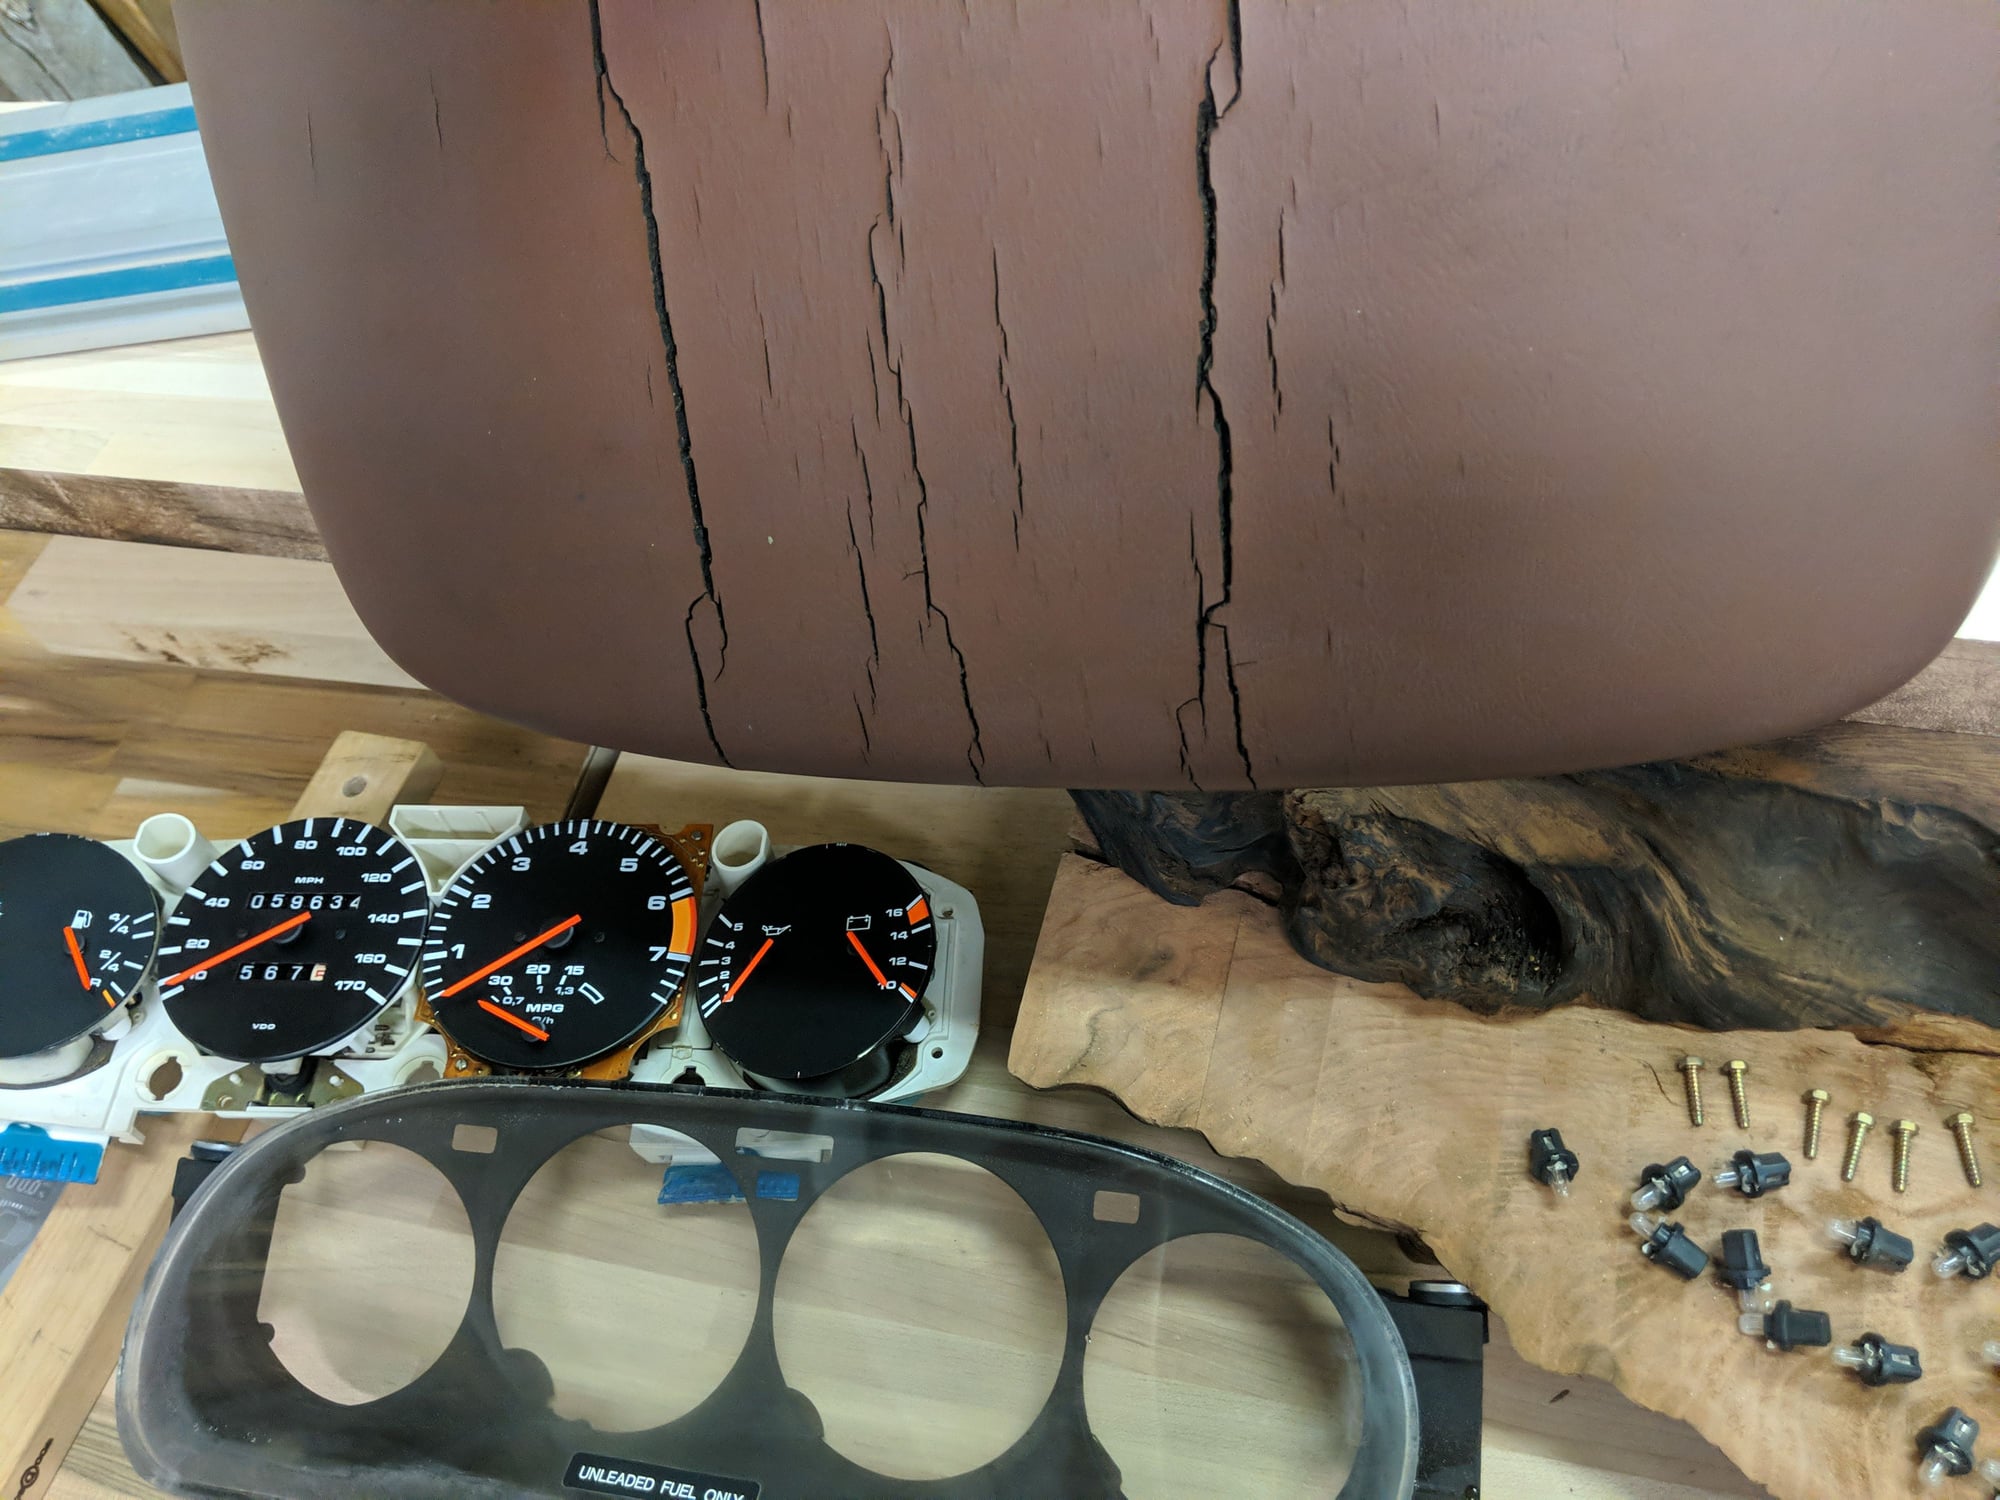
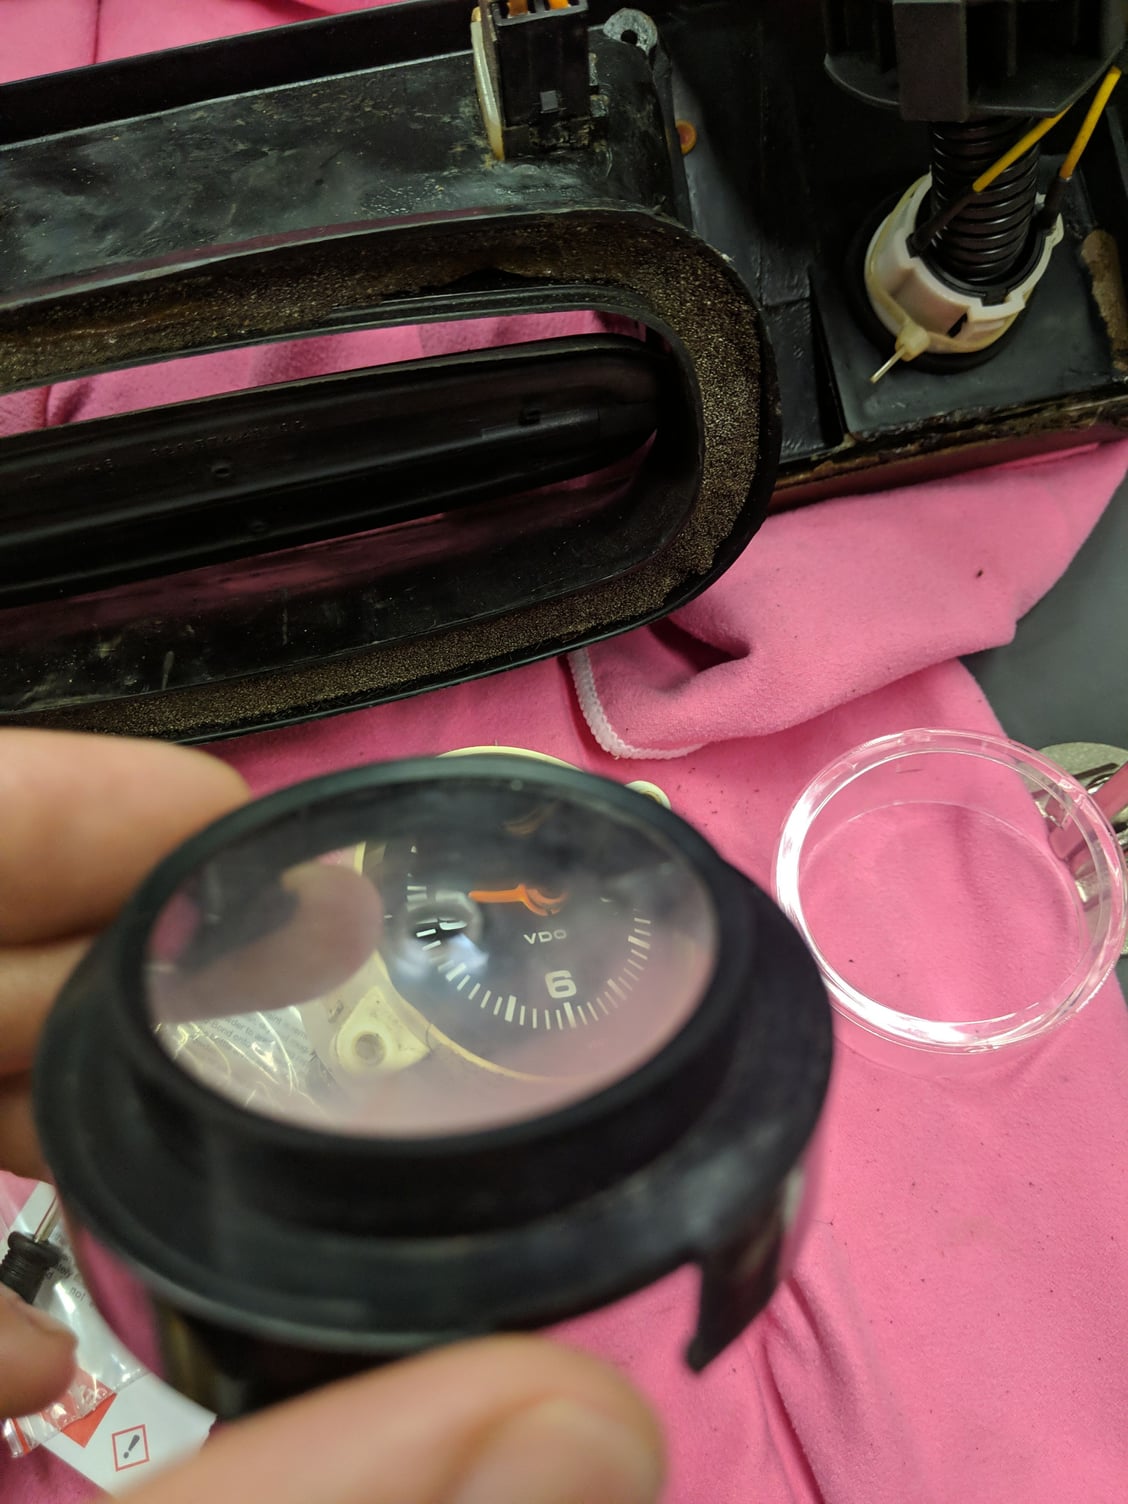
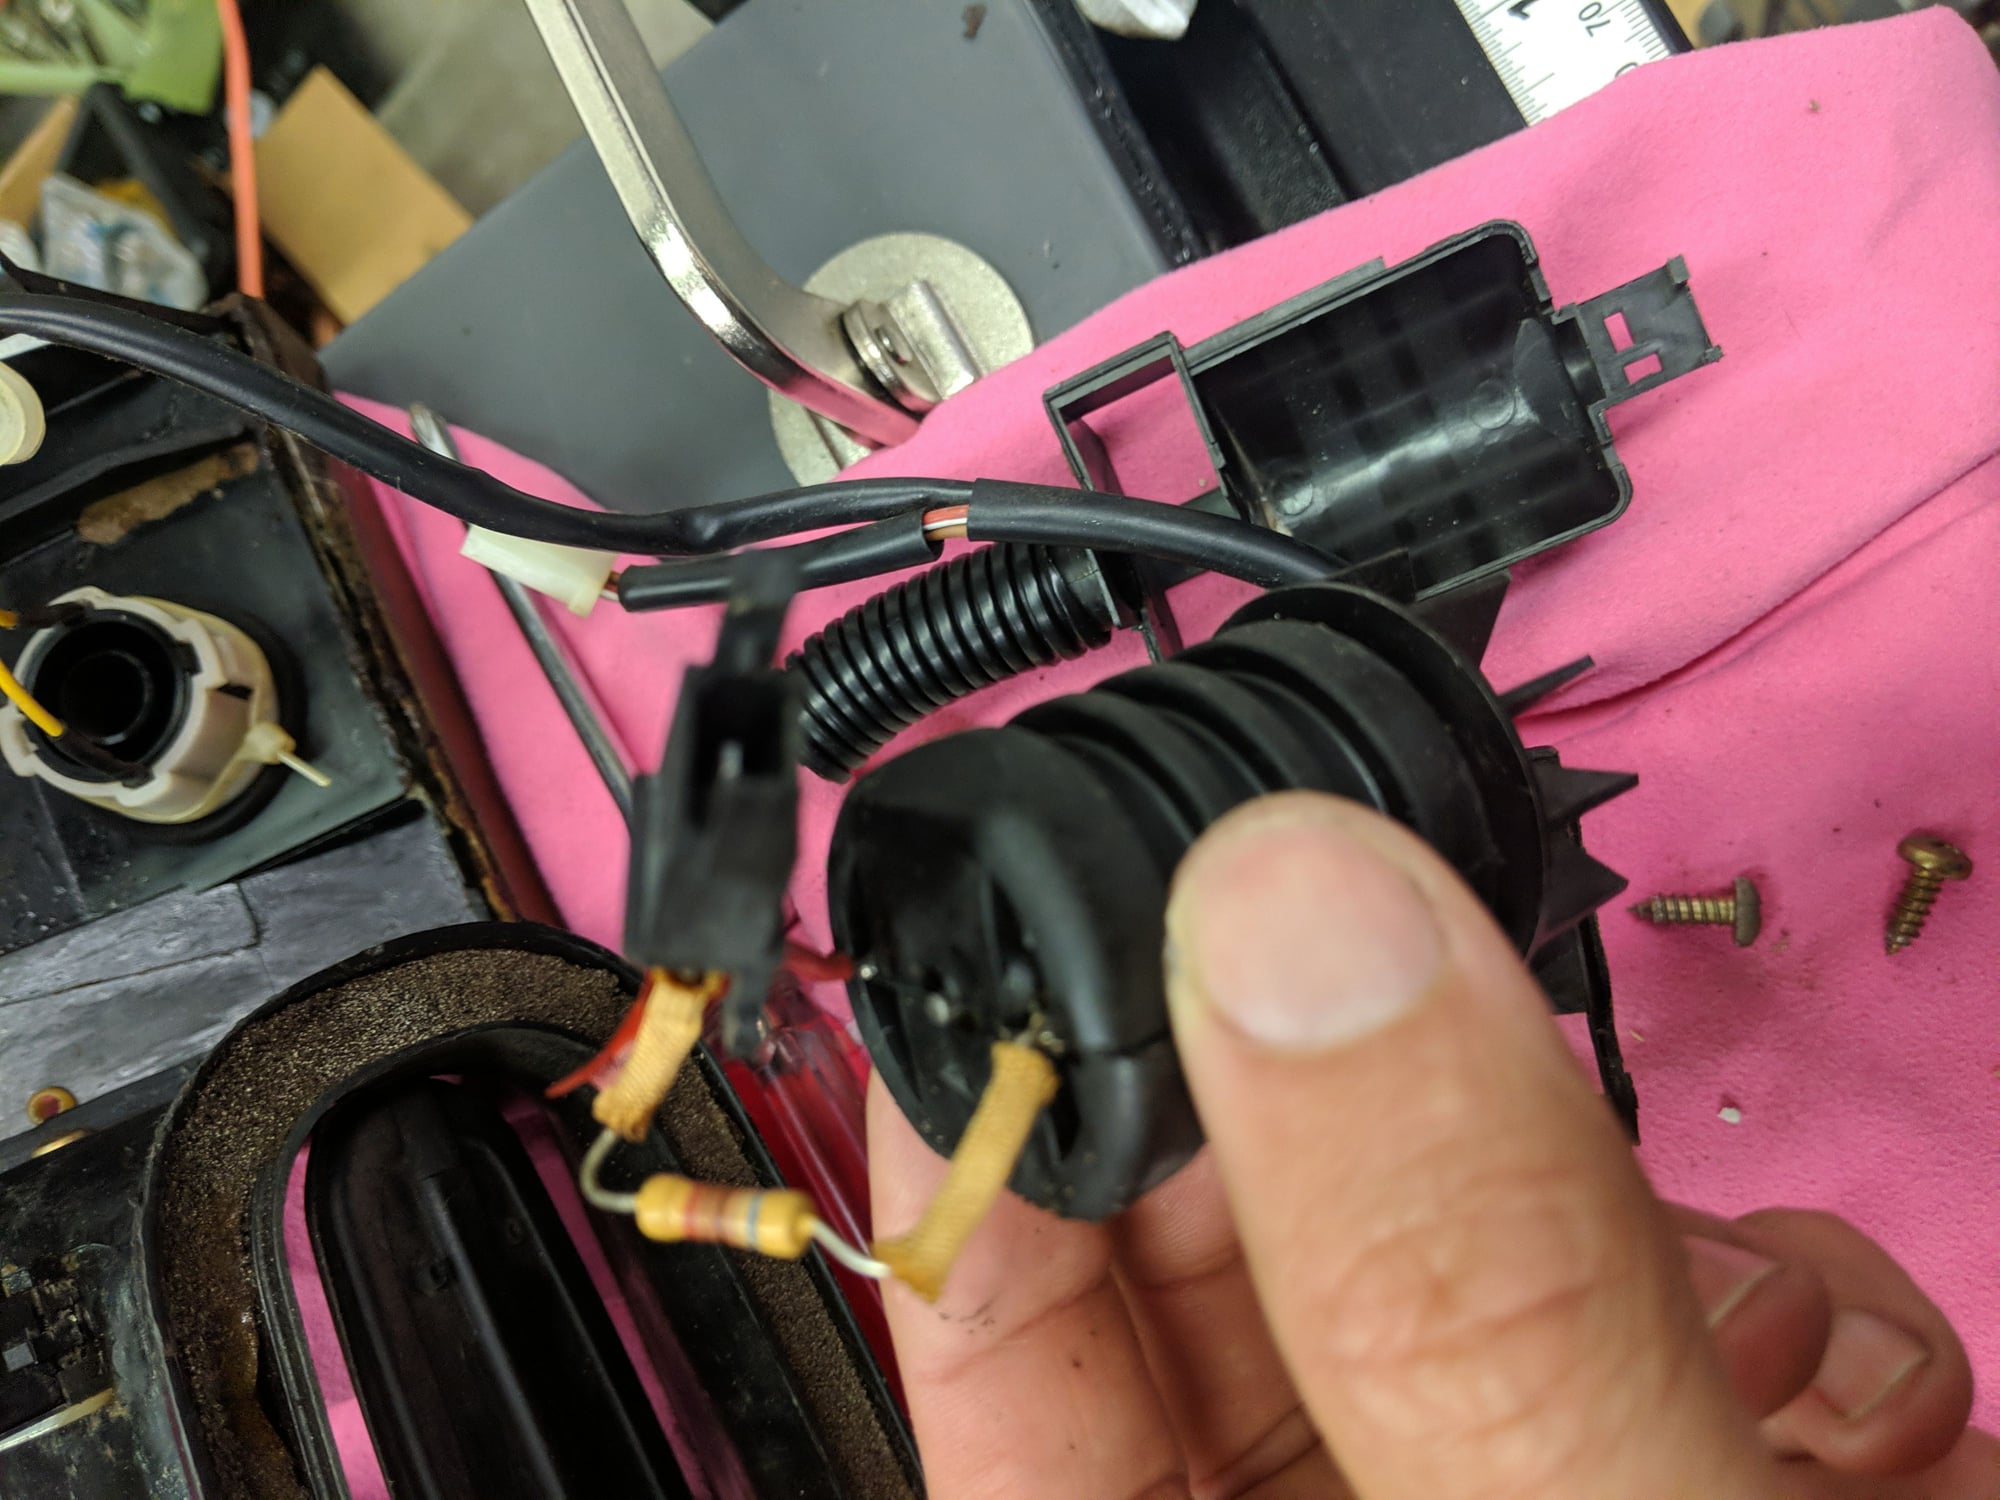
I also pulled the pod (again super easy with the Dwayne and other write ups. Hard to conceptualize until you do it once. Next time I could meet the "15 minute" rule on this one. I pulled the cluster apart and cleaned inside the bezel. Sadly, none of the bulbs were burned out as I was really hoping that was the general "dim" issue. I used to LED everything before made LED bulbs (2172) were available but hesitant for the correct vintage look AND also alot of the ones now seem cheaply made (burn out) and too bright. If anyone has done it with "warm white" and loves it, please let me know. Also a chance to repair the pod cracks and recolor (in advance of eventually getting a classic 9 skin)
I also need to figure out why I lost the tach and a couple other gauges. The guts of the cluster look really good for the age but I know I need to check/clean all those ribbon copper points.

 11-17-2018, 12:19 AM
 which were way faster than street 275s


 coming up I've had a talk with myself
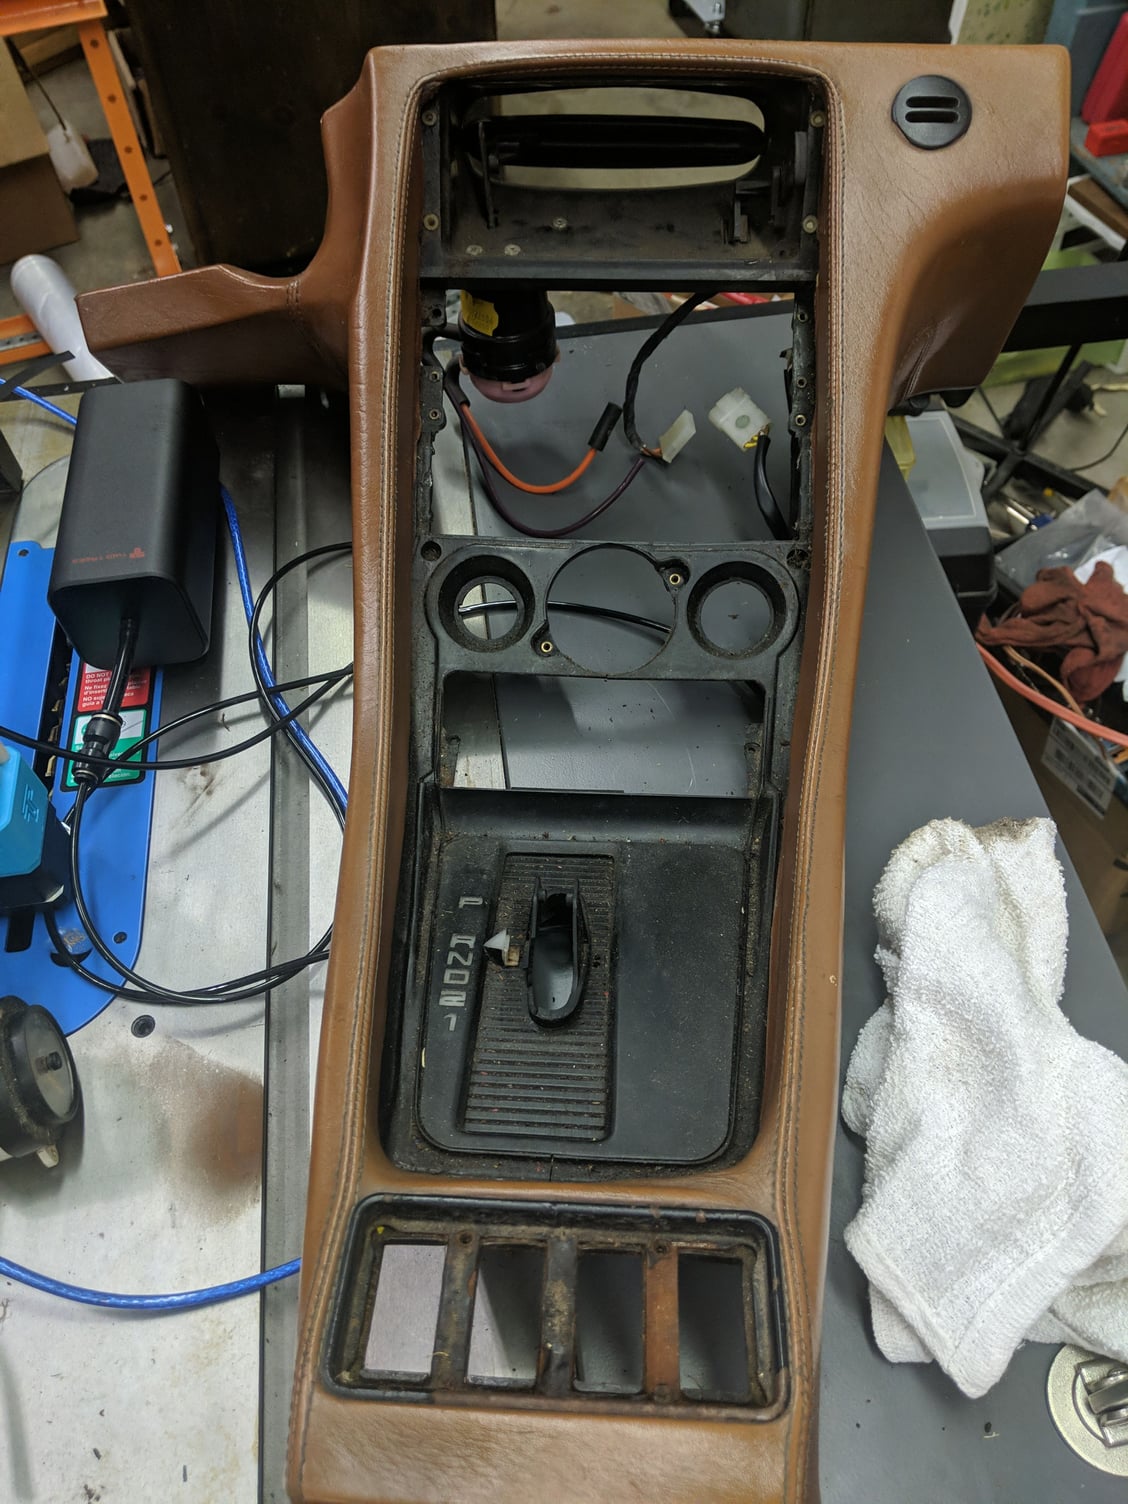


 as I was really hoping that was the general "dim" issue. I used to LED everything before made LED bulbs (2172) were available but hesitant for the correct vintage look AND also alot of the ones now seem cheaply made (burn out) and too bright. If anyone has done it with "warm white" and loves it, please let me know. Also a chance to repair the pod cracks and recolor (in advance of eventually getting a classic 9 skin)