When you click on links to various merchants on this site and make a purchase, this can result in this site earning a commission. Affiliate programs and affiliations include, but are not limited to, the eBay Partner Network.
Twisted it to get it off, replaced the bladder, now I can't seem to push on with a screwdriver.
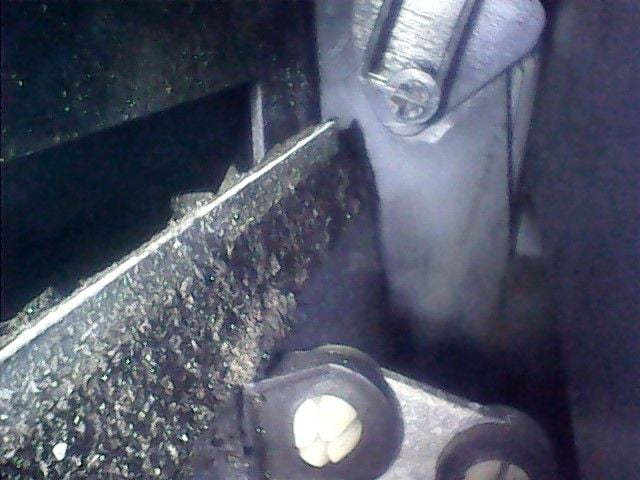
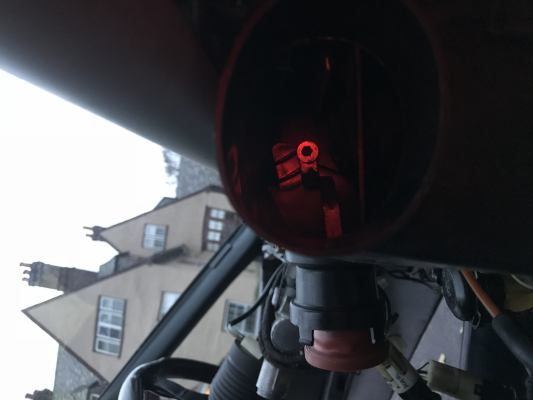
Ye olde flap arm, buried in the car
So: Did I break off the mounting ears/whatevers? And if so what are the options on fixing it and just how much do I really care about this? :-) Wondering if it's possible to get a screw on a very long phillips screwdriver and put a screw in the plastic. Or would I need to first use a very very long drill to drill a tap hole (ie: Might I break this off the flap as discussed in (https://rennlist.com/forums/928-foru...tor-arm-2.html)
This is the attachment point for the vaccum actuator arm for the comb flap right? Where you have to get to it from the side after removing the glove box?
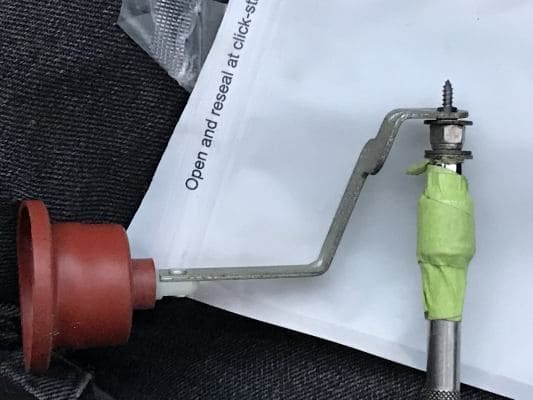
Yep. That is a $15 endoscope type camera mounted to the blower vent with jeweler's green tacky crap. Stuff is amazing, keeps small things put which is nice. I also have a flexible LED light shining in there to augment the main light. It's probably *the* most useful $15 bucks I ever spent on Ebay, that thing has a million uses once you have it.
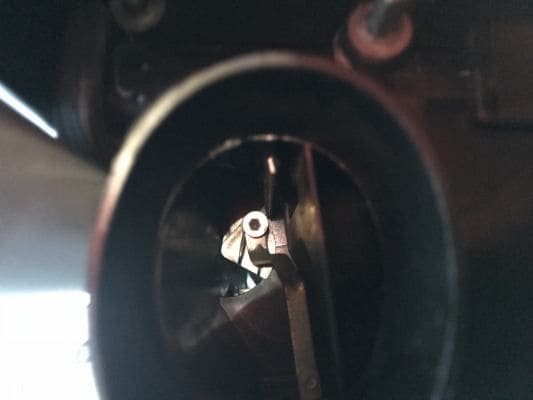
But yes, it's broken. And it is exceptionally hard plastic, so I can't thread a screw into it from the outside. In addition I noticed that the comb flap was shoved *in* and thus was stuck and couldn't move. Not sure if I broke it or it already had sheared, but either way it's toast.
I thought about taking the entire dash out so I could remove the front of the AC system and basically rebuild everything from the ground up. Then I realized I would need to pull the dash and I might as well get the reflectors so the dash lights look better. Then I realized I would need a third bladder (the larger one) to do the defroster flap which is also shot. Then I realized I could pull that plastic cover thing on the dash and send the whole thing to be factory rebuilt. And I could then put in a proper steel stud for the flap arm so I wouldn't ever hae this problem again.
Then the outside temp hit 80 degrees and I thought "Well, sod that". So I started putting the center console back in.
Halfway in I realized I had forgotten to put the spring in the comb filter servo, then just quietly got up and closed up the car. I'll try again next weekend if the temp is below 70. But I think what I will do is put the spring in the servo so I don't lose it, then close everything up, and forget about the whole comb flap. I'll use the tacky to hold it open in the summer, and same to hold it closed in the winter.
if your going to frenzy bring all the parts and maybe their will be a Saturday night dash removal party since a lot of DIY guys will be their with lots of tools and beer
Sounds like you stared over the cliff, gazed at the abyss and decided to step back.
Based upon what you wrote, a heater box R&R is in your future at some point. There's no good way to fix that bit of old plastic if it's truly screwed-up when trying to work with the heater box installed.
Well I just fixed mine as the 4 little tabs that hold the arm to the flap broke off.
I bought some thin 6 inch drills from Ebay
removed the dash ,
then access to the HVAC box was easy.
I removed the arm so i could use it to see the inside arm and drilled a small hole in the center of the old pivot point.
I got a screw that you would get from an old washer pump assembly,
found a piece of hard plastic tube to use as a shoulder for the arm,
and got 3 washers and small nut and made this screw assembly,
its fixed for life
All hope was almost lost until I saw you had successfully fixed this! Going shopping today for long drill bit,screw,etc to attempt this with dash still installed, but center console out. Will bring actuator arm with me to buy correct screw size. Is there a reason you needed the nut and two additional washers? Was it to compensate for the longer screw? Assume I can do this with a shorter screw and not need the nut and 2 additional washers?
Last edited by Darius Maximus; 07-11-2021 at 10:37 AM.
What might not be obvious is that there is a thin piece of tubing on the screw this to take up the play on the hole in the actuator rod
Note the screw is from a washer pump it holds the gear case assembly together
it�s long and thin so it can fit into the plastic arm and not break the plastic arm
the washers and nut are used to take up the clearance to hold the arm against the plastic
i glued the screw into the socket or it would have fallen into the HVAC unit
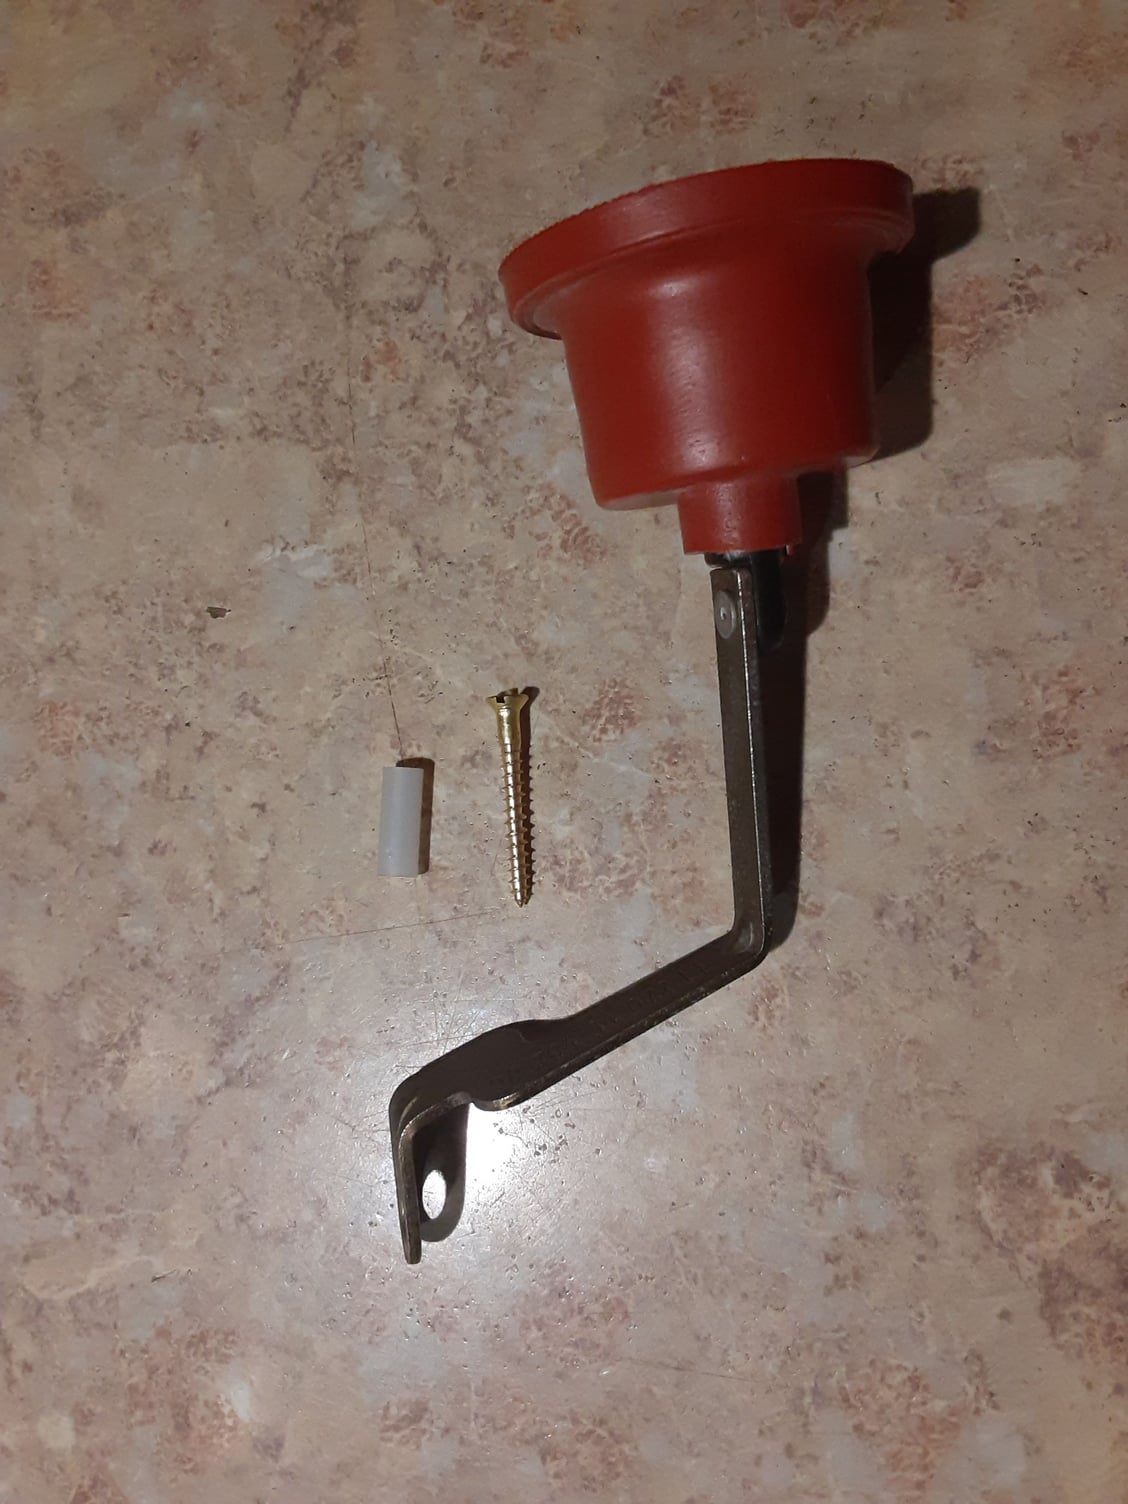
Not sure I understand the need for 3 washers and nuts? I found a nylon sleeve that fits perfectly inside the hole for the actuator arm. I will cut to shorter length.
A #4 screw is perfect for the inside of the sleeve. (The one shown is too long).
Can't I just use these and be done? Perhaps I am missing something. Thanks.

 09-16-2018, 01:33 PM