When you click on links to various merchants on this site and make a purchase, this can result in this site earning a commission. Affiliate programs and affiliations include, but are not limited to, the eBay Partner Network.
I was finally able to get back to the car, and get the fuel filter changed out, only to find that the plug in the fuel system is further forward, as there is still no fuel pressure at the WUR test point. I'll be going ahead and digging into the fuel distributor plumbing to see where the pressure stops, this week.
One part arrived at the local P-dealer, and my 14 pin connector now has a back cover (and is no longer at risk of having one of the pins pulled loose as I move around the engine bay, working on other things...)
Other than that, electrical system is coming together, as hazard flashers and turn signals now work again, as do the headlights and most of the other electrical systems.
Some of the gauges are not working yet, so I'll be pulling the cluster to clean the flexible circuit contact points, and to verify that the connectors are clean and making good contact.
Other than the obvious usage of PB Blaster or equivalent, does anyone have any suggestions for freeing up rusted seat tracks? The seats are both pushed all the way back, so there isn't a problem for me to sit in it, but I would really like to be able to adjust them, and to remove them for cleaning and leather repair (eventually...)
Fingers crossed it is just the the screen in the FD inlet fitting. FD rebuild is not that hard to do, but if the car does not run perfectly afterwards I am always left doubting my work.
Seats - easiest removed (unbolted) when on max height before you try to get an allen key in there. Usually undo the rear bolts when seat is fully forward, and the reverse for the front bolts....good luck with that. You might need a compact , thin wrench that only takes allen keys.
Re the pod. Early cars have 3 connectors to the pod foil - L,C,R. These have soft blade contacts to the foil, and if probed with a meter to check circuits, its easy to bend the blades enough to lose contact - BTDT. I had to retension the blades with an angled dental pick to restore contact. Before you go in there , check behaviour of the gauges - if any of them move when you turn on something (other than volts) there is an earth problem . on my 83 there are 3 contacts for earth on the R connector. On my car the temp gauge moved when I turned on sidelights because the poor earth sent the pod light current out through temp sender ground. All fixed when I fixed the earth contacts in the connector - retension and deoxit.
jp 83 Euro S AT 57k
With this being a manual seat equipped car, I don't appear to have any option for a max height, or at least none that I've found. I can tilt the seat back front/rear, or slide the seat bottom (if it weren't rusted stationary).
I may just have to put up with the smell and soak the slides in PB Blaster or AeroKroil one of these nights, and let it soak.
If the 79 is like the 78, with manual seats, the bolts are 10 mm, with a washer on top, and a plated steel rectangular block below in the rail. There are a total of 4 bolts - one on each corner front and aft. I had to grind a 10mm socket down to fit in the tight space, and use the narrowest ratchet I could find - a small one - 1/4", narrow business end. You will need to get that seat forward as far as you can to remove the rear bolts. You'll also need a telescoping magnet to retrieve the front blocks from the seat rail, as they'll fall in after you remove the bolts.
Of course, if you have electric seats with the alan bolts, then I'm not sure if you can get the rear bolts out with the seat all the way back.
I finally got the air filter housing off and bled the fuel supply line from the filter to the fuel distributor, and then the rest of the lines to and from the WUR, and to the injection pipes.
Once I cycled the air metering plate a few times, I started to hear the squealing of the injectors, one by one.
A bit of further fussing about with it, and it was running, fairly smoothly and at about 1100 RPM.
A short intermission to put out a bit of smoldering leaf litter on the passenger side of the cross member (CO2 extinguishers, fun for the whole family! No fire, and no mess left behind...)
Once I was sure that all the leaves were either vacuumed or blown clear, I fired it up again.
The engine appears to have a blown passenger head gasket(?), as it got hot very quickly, and the started a sputtering sound, which shortly after popped something behind the passenger timing belt cover area, and started steaming and pouring coolant on the floor.
I'm looking for other things in that area that could be leaking so heavily, but am definitely open to any suggestions.
Depending on my findings and expected complexity of the repairs, I will be considering whether or not to fix this engine or to refresh the 81 engine that was in the wrecked car and switch it into the car.
While I was joking about having a project for the winter, it looks like it will be more true than I expected!
Last edited by Hey_Allen; 11-13-2018 at 01:33 PM.
Reason: typo corrections
After poking and prodding at the car a bit, I hooked up a 10 PSI regulated air supply to the cooling system, intending to see if it would hold air at all.
To no great surprise, it does not, instead venting it behind the right side timing cover, on the front of the head.
Looking at drawings of the engine, and pictures of the area when people have timing covers off, it seems possible that one of the freeze plugs was either loose or rusted and blew out, but I won't know until I pull the timing belt and look.
Now, knowing that this engine had overheating issues before it was parked ten years ago, and that the spare engine was pulled from a running car that was wrecked, is there any particular reason to tear into this one beyond curiosity?
I'm planning to start working through the timing belt change procedure, but am open to suggestions of things to test before tearing into it and going beyond the point that they can be tested.
Personally, I'm wondering if the overheating might be attributed to a failed water pump, as it was replaced at that time, but I have no information about what brand was used.
Barring finding anything obvious to account for the engine pressurizing and blowing something in the cooling system (even thought he coolant reservoir cap was only clicked to the vent position, just before it would have released entirely...), I'm thinking that my next step will be to start looking at a refresh of the '82 engine, and deciding whether to swap the CIS intake system to that engine.
IMO its pretty much always worth looking. You just never know what you are going to find. I'm guessing it is a blown head gasket, but I often think that the clues I have are more conclusive than they are, and it does not cost a penny to take a look.
That said, I learned things by getting it running, that I would likely have found only after pulling, and reinstalling it, unless I'd done a full rebuild.
With the issues that it's exhibiting I suspect that it's done for, but have not given up on it entirely since I want to see if the overheating is due to a spun impeller first. If it is, I don't know that the cost of repair is justifiable, especially with another 16 valve engine sitting on a cradle behind the car!
If I resort to swapping them, the second one will get a thorough inspection, cleaning, and refresh before it's installed, since I have no idea of it's actual condition, other than it was running at the time of the accident. It is currently covered in paint sanding dust, as well as the usual grime from normal engine operation, so I'm taking the slow and cautious approach, rather than just stuffing it in the car and trying to crank it up.
While I have not been updating here, I've gotten a little bit of electrical cleanup done, as well as some minor general maintenance, but nothing much due to the cold weather and the holidays.
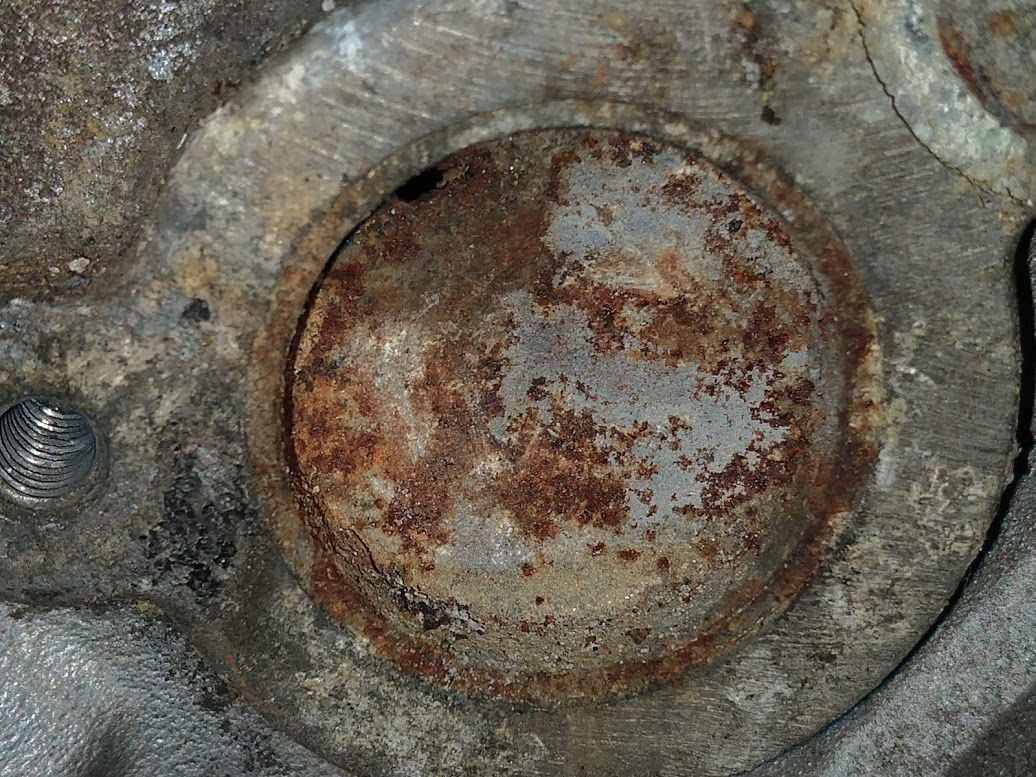
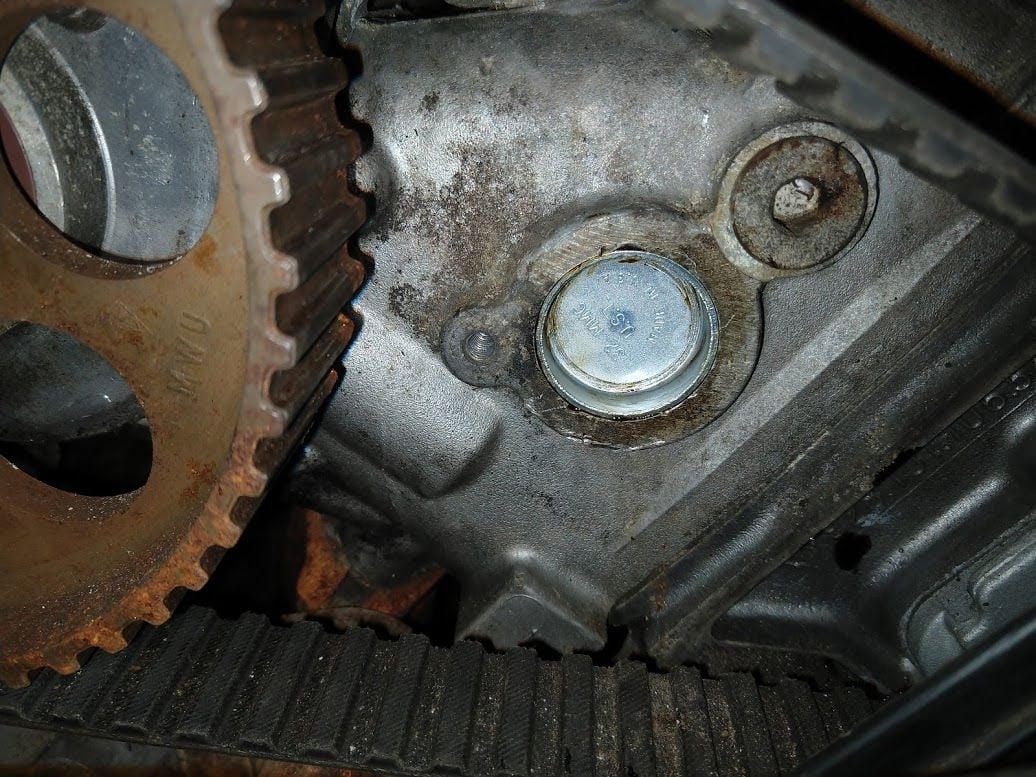
That said, I finally pulled the timing belt guard mounted behind the sprocket on the right head, and was able to confirm that the casting plug on the front of the head was the culprit of the coolant leak that I experienced.
It took some doing, but I was able to remove the plug, and replaced it with a 32mm plug sourced through a local auto parts store. The dealer in my area is SLOW to get parts, and this was one that I wasn't absolutely sure which part it was, as the PET online was a little ambiguous.
Cross referencing the parts that I was searching, and tentatively sure of, I found on discussion about the diameter of the part not being right, and that the member here kept getting plugs that were undersized, but which gave the diameter that the part number was supposed to be (32mm).
That said, the plug was replaced, though I found that there was some scale and sediment in the head, in the passage behind that plug, so it's going to need some thorough flushing of the cooling system.
I'll probably be pulling the coolant bridge and cleaning anything I can up there, as well as flushing down through the block with the drain plugs out. 10 years of neglect was definitely beyond the general 2 year recommended change interval that I've heard elsewhere!
Be awfully carefully when removing water bridge. Given the condition and state of the coolant - I'm sure those four bolts are super crusty. I would start giving them heavy doses of pb blaster now and let them soak for a a couple of weeks. Apply some heat to them and any other tricks before making one turn. Those bolts can and will twist off - leaving you with limited options. Proceed with caution...
An alternate possibility would be to try to flush down through the water bridge, using it as the common point on the top of the engine, but leaving it in place.
Since it's not currently leaking, your warning makes that an attractive option to consider...
I will caution you about flushing your engine
I would suggest you fix the leak replace the heater control valve and short hose
the coolant bottle cap and a new thermostat and put it together and run it wit fresh xerox zo5 coolant and distilled water
Mote flushing the engine can remove parts of old headgaskets this can I turn cause them to leak if they are not already leaking
Based on what you found inside the core plug the headgaskets may need to be replaced
For now just put back together

 11-05-2018, 04:07 PM