When you click on links to various merchants on this site and make a purchase, this can result in this site earning a commission. Affiliate programs and affiliations include, but are not limited to, the eBay Partner Network.
how do I remove power seats from my 84 parts car? There is no power on the vehicle. Any starting points / tips will be appreciated . I am going to put them into my 79 Euro.
It looks like there is some sort of cover over the seat rails...I assume the power connector is under there...? I could probably rig up something from a battery....
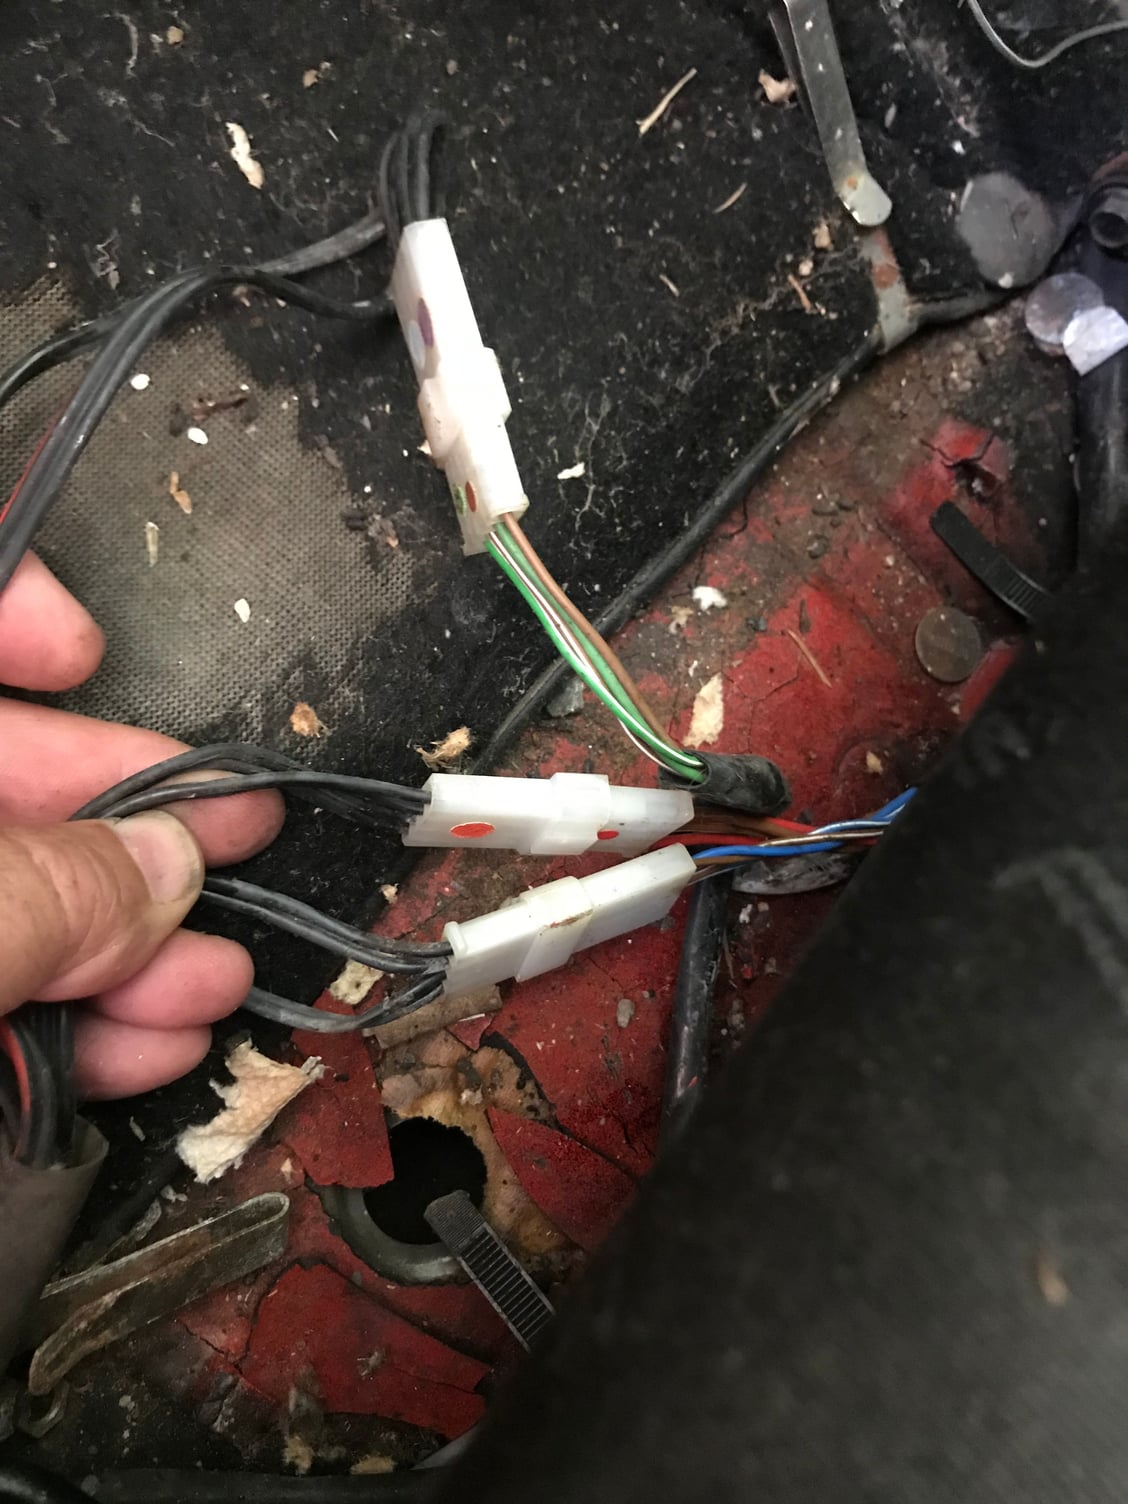
two pin pin connector provides power to entire seat (from underneath). Pretty sure it is brown and red-brown on copper.
on the side of seat, the switch towards the front is the front back motion. You probably could take the switch panel off the side and disconnect the front switch from its connector in the side of seat and power just the front back motor.
the middle switch moves the seat base up and down and the switch in back moves the backrest motor.
It it is helpful to have the seat all the way up (middle switch) to access all 4 Allen head bolts
The 2 larger gauge wires in the multi-pin connector are power and ground. When I installed the GT and then 997 seats into my car, I removed those wires from the connector and made an adapter harness to not have to modify the factory wiring
Option 1 - Pull the plastic cover. There is a little white gear with an allen head bolt in it. You can turn the bolt, which turns the gear, which moves the jackscrews and moves the seat. Be careful, there is a tooth missing (on purpose) and the gear 'skips' every time it goes around. Be gentle. This is a VEEEEEEEEEEERY slow process. Not recommended (although it is the 'official' way to do it).
Option 2 - Unbolt the little bracket that holds the stupid and virtually useless gear. Pull the cable. Remove the clip that holds the cable for the other side. Remove that cable. Attach a drill to each cable. One will spin 'forward' the other will spin 'reverse'. The 'reverse' spinning one will loosen the drill chuck up. It also has the potential to 'unspin' the cable, so go easy. I got tired of rechucking the cable and ended up using a pair of vise grips on that cable. Drive the drill on the other cable a few spins, manually spin the vise grips a few turns. If you get too far out of synch, the seat will bind. This is how I did it.
Option 3 - When you pull the plastic cover, you will see the three motors. Forward/back is the middle one. You will see the wires that run the motor. Attach 12v to the connectors and the motor should run. Reversing polarity reverses the motor. I have used this method (sort of) when my switch worked one way but not the other. I used the switch to run it all the way back (?) and then simply reversed the wires going to the motor to run it the other way. This was done using the seat power, not external power. But the principle is the same.
If you find you need any seat parts, motors or whatnot let me know, I've got a few things to give away, just too busy with other projects to post a list here.
Thanks bro. I’ll find out if I have any needs next week when I tear into it....main goal is getting them out. The drivers bolster has some damage, so I need to get it to a shop for repairs.
Is the wiring non-functional? I see it's a parts car. If possible, replace the batt or fix wiring first so you can move the seat as needed? Otherwise the manual process is not that hard, just don't overcrank the plastic gear, i.e., monitor the seat rails for any binding or debris lodged in there. Stray nuts and stones will find their way in there and mess with your process. If the gear gets stripped, you have to figure another way to turn the cable and that could be a mess.
The CE panel is gone, all computers gone, harnesses cut, gone, or burned. I will use a battery, some wire, and direct connect. 1st order of business will be figuring out how to get the plastic covers off
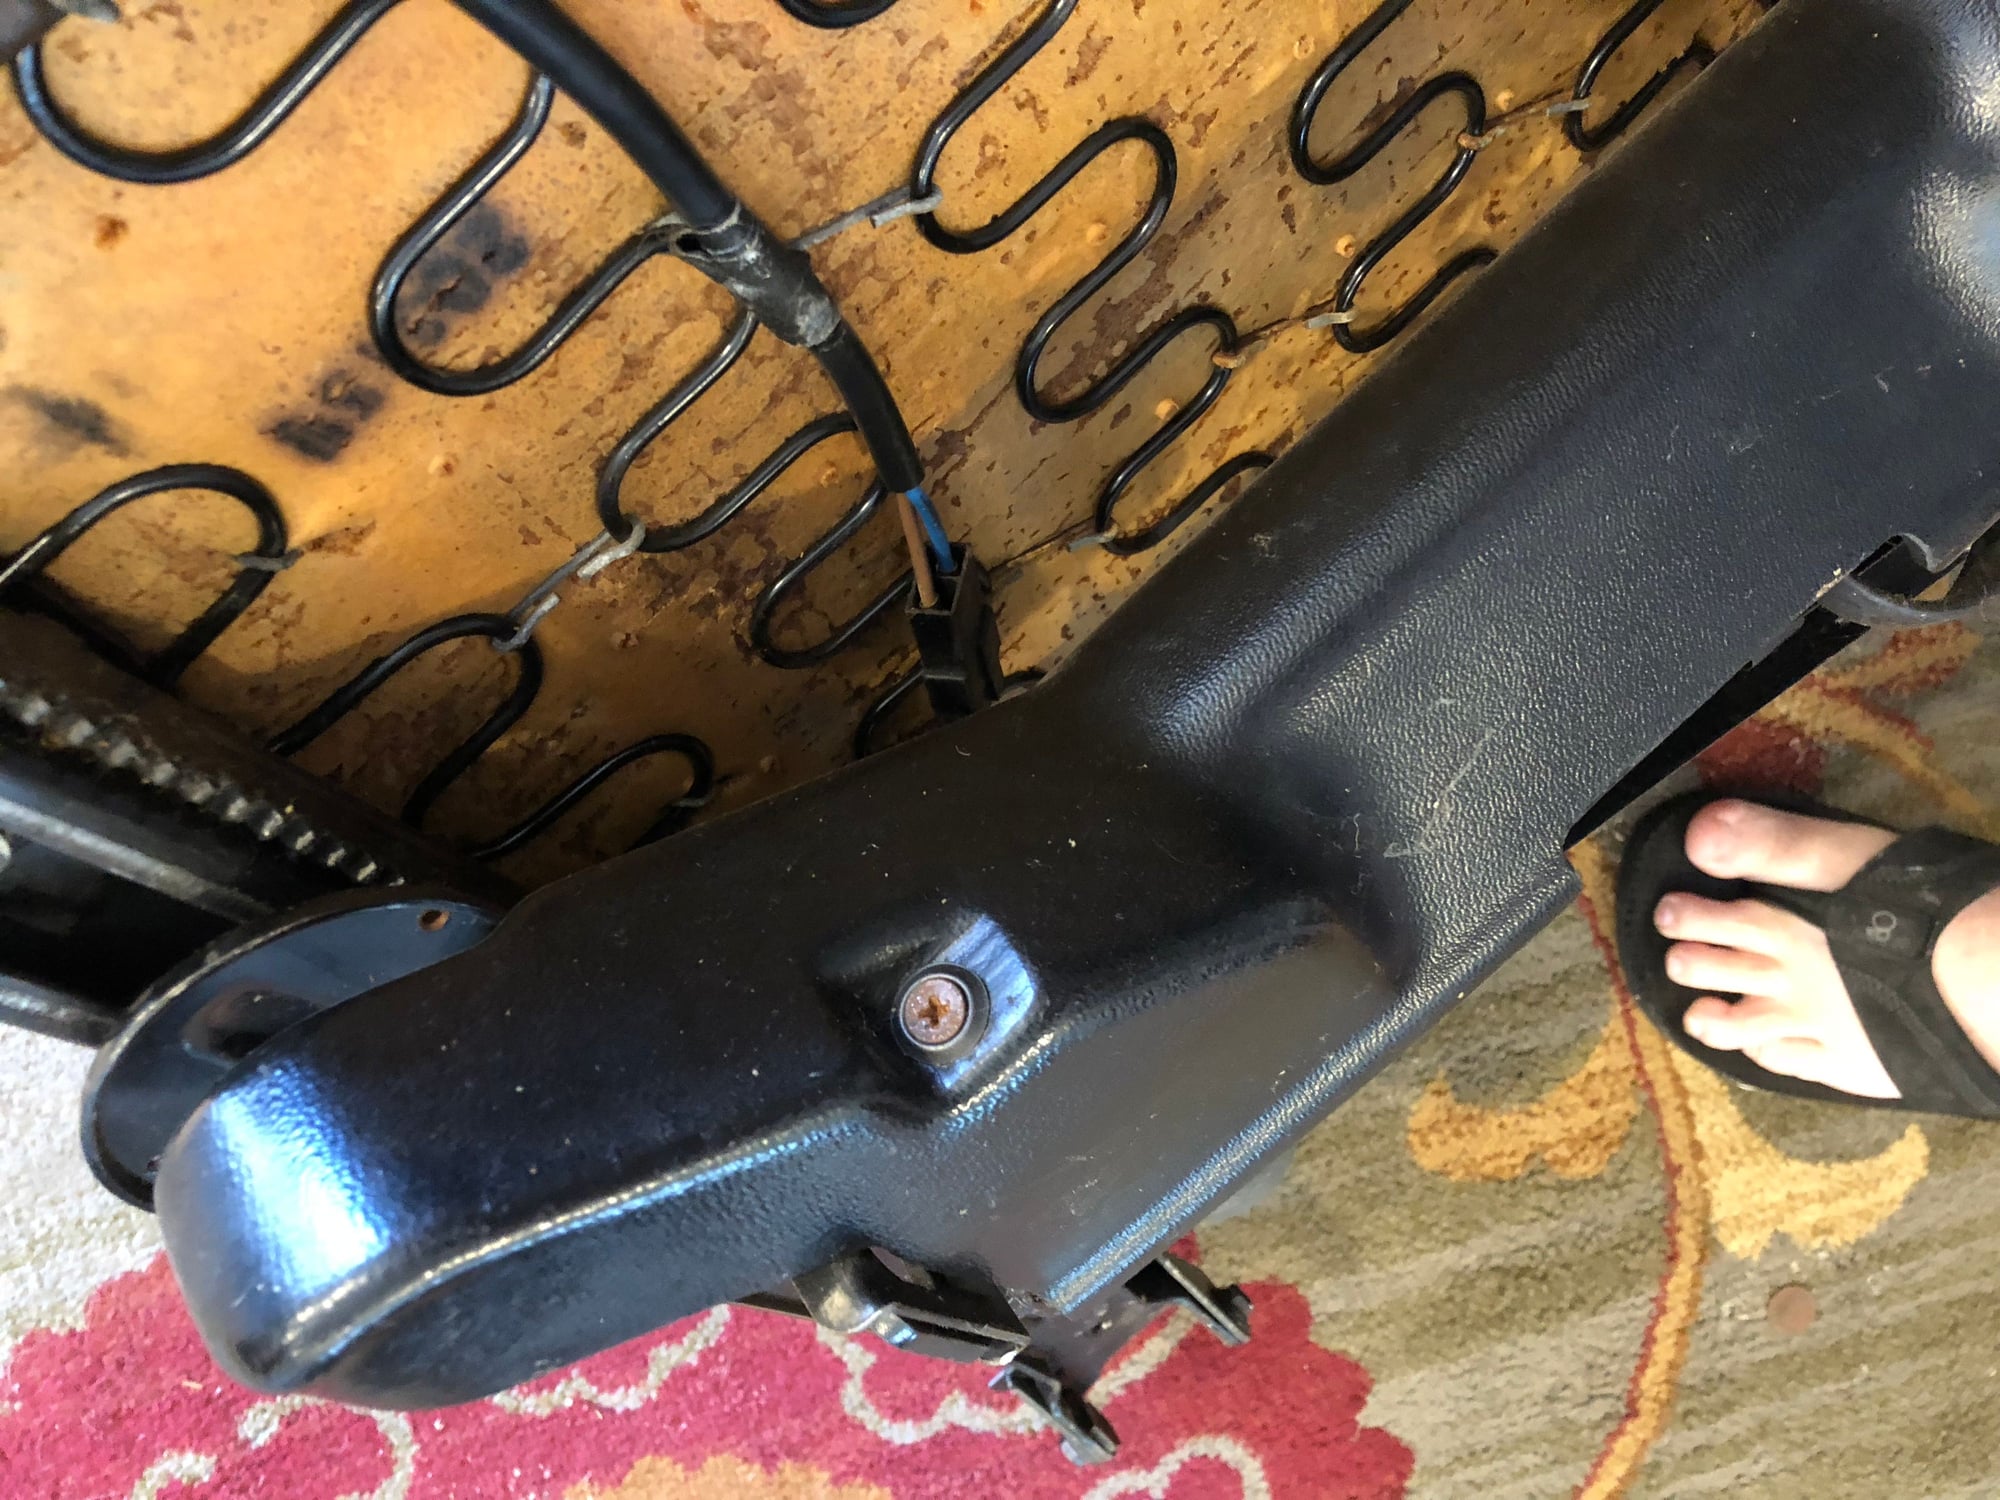
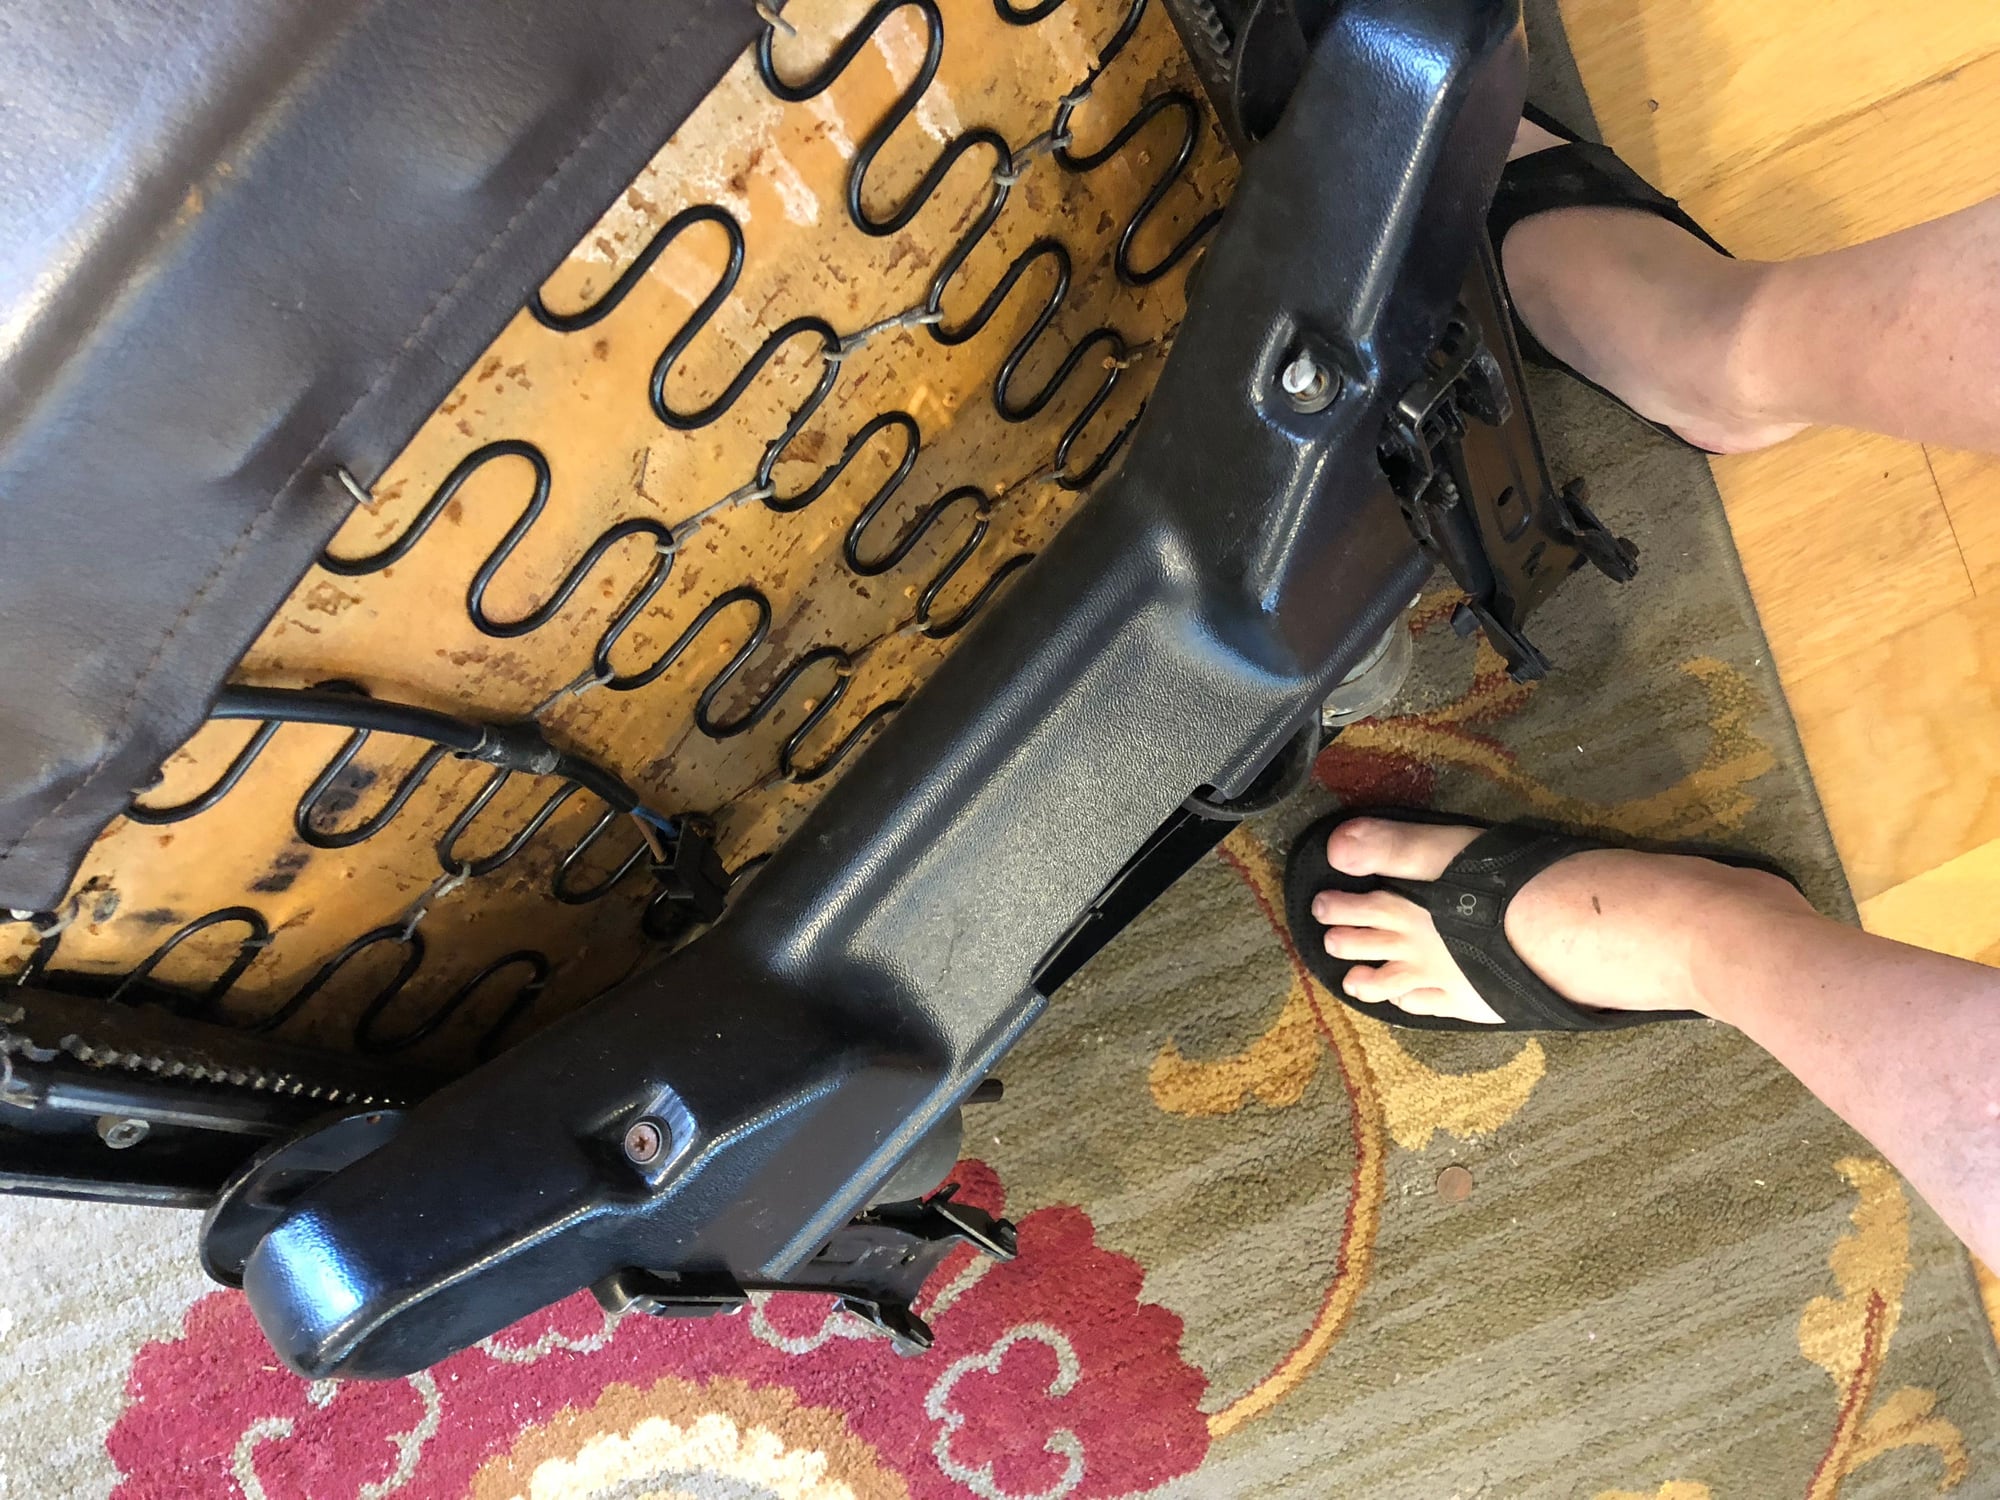
Just thought to post this. These photos show the screws you can see for the plastic cover on the bottom of the seat. The other two are facing �down� relative to the these - needless to say there are only two screws holding my cover on now.
You should not need power. If you look underneath the seat on the side closest to the tunnel you will see a black rod about 3/8" in diameter. Put a socket and extension on it to lengthen it and move it towards the tunnel. This action disengages the motor gear from the track rack. Now slide the seat forward or backwards to reveal the 5mm socket head capscrews. Remove the 4 screws and the seat will be free. Un plug the main power supply and remove the seat.
Not sure, but I found the rod, and am able to move the seat backwards and forwards, I can easily remove the front screws, but when I slide it forward until it stops, the rear screws are not exposed. The seat still needs to slide forward app 2 more inches. Is it possible it was all the way back at it�s last position. I was going to hook up a battery and power the seat directly, but I found 3 cables... don�t know what to do now....

 07-15-2018, 12:22 PM