When you click on links to various merchants on this site and make a purchase, this can result in this site earning a commission. Affiliate programs and affiliations include, but are not limited to, the eBay Partner Network.
When I bought the car, the PO took care of some of this stuff, so I had hoped to be able to avoid doing this for a bit longer, however I replaced the ISV to fix a high idle issue, and the issue isn't fixed...so I decided I needed to just do it right. I'm pretty sure I have a leak involving the oil fill tube as well, so might as well take care of it.
I have not yet decided if I'm going to bother removing the cam covers...that seems like something I could do without tearing the whole top off in the future if I needed to.
I've also not decided what to do (if anything) about the crappy finish on my intake. I SHOULD get all the factory crap off there paint them, but I'm hesitant. Where it's peeling, the stuff comes off pretty easily, but where it's not, it's going to be a tussle. And I've VERY leery of putting them in a blasting cabinet, for fear of the blast media residue wreaking havoc.
So far, I've removed stuff down to the water bridge. Two of the bolts came out easily with a low-power impact driver. The other two aren't budging. I have them soaking in PB Blaster, and I haven't tried putting a wrench on them. I am trying to avoid shearing them, obviously. What's safer? Putting a long-handle wrench on them, or moving up to the big daddy impact wrench? Also an option: Leaving them be. I don't think I actually have any coolant leaks coming from there.
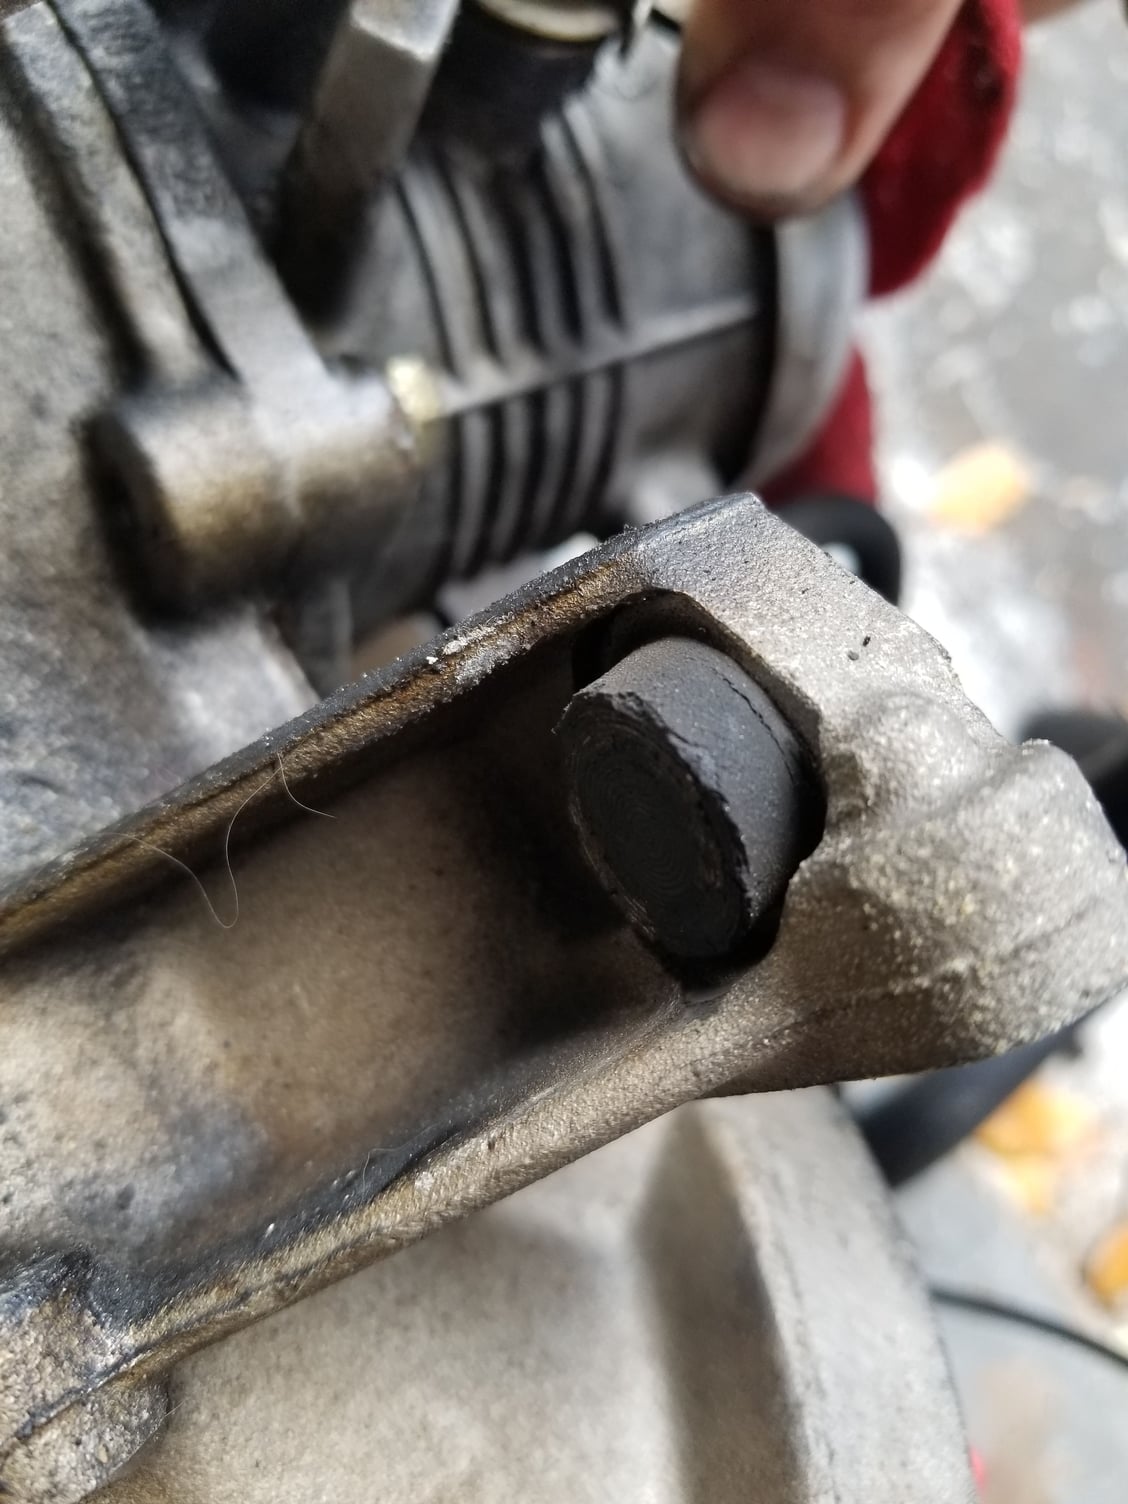
Finally...something is odd with my air guide/throttle body assembly. The three nuts I'm supposed to remove to get that out didn't need to be removed. They are apparently doing nothing. It almost looks like something sheered off, but...very weird, that all three are like this?
"Mount" at bottom of air guide
Third mount point at the back of the V looks like these. Are they supposed to be studs?
Jeff - I felt the same about my intake. I finally decided to get it coated. I will clean it and clean it and clean it.... I'll run my boroscope into all the nooks and crannies, and through the pipes. The shop explained what they will do to minimize the amount that gets in. This job is such a slippery slope. I'm not getting anything plated. I'll wait until it's all back together and then decide which pieces and clamps really look bad next to the "new" intake.
Good luck Jeff. This is one of those rite of passage tasks. I'm finding I really understand the engine better at this point. It's rewarding on a lot of different levels.
Jeff, the air guide mounts are 'buffer' mounts. Rubber bonded isolator studs. Yours are sheared. Mine were sheared. Pretty much all of them shear. They are easily replaced and relatively cheap.
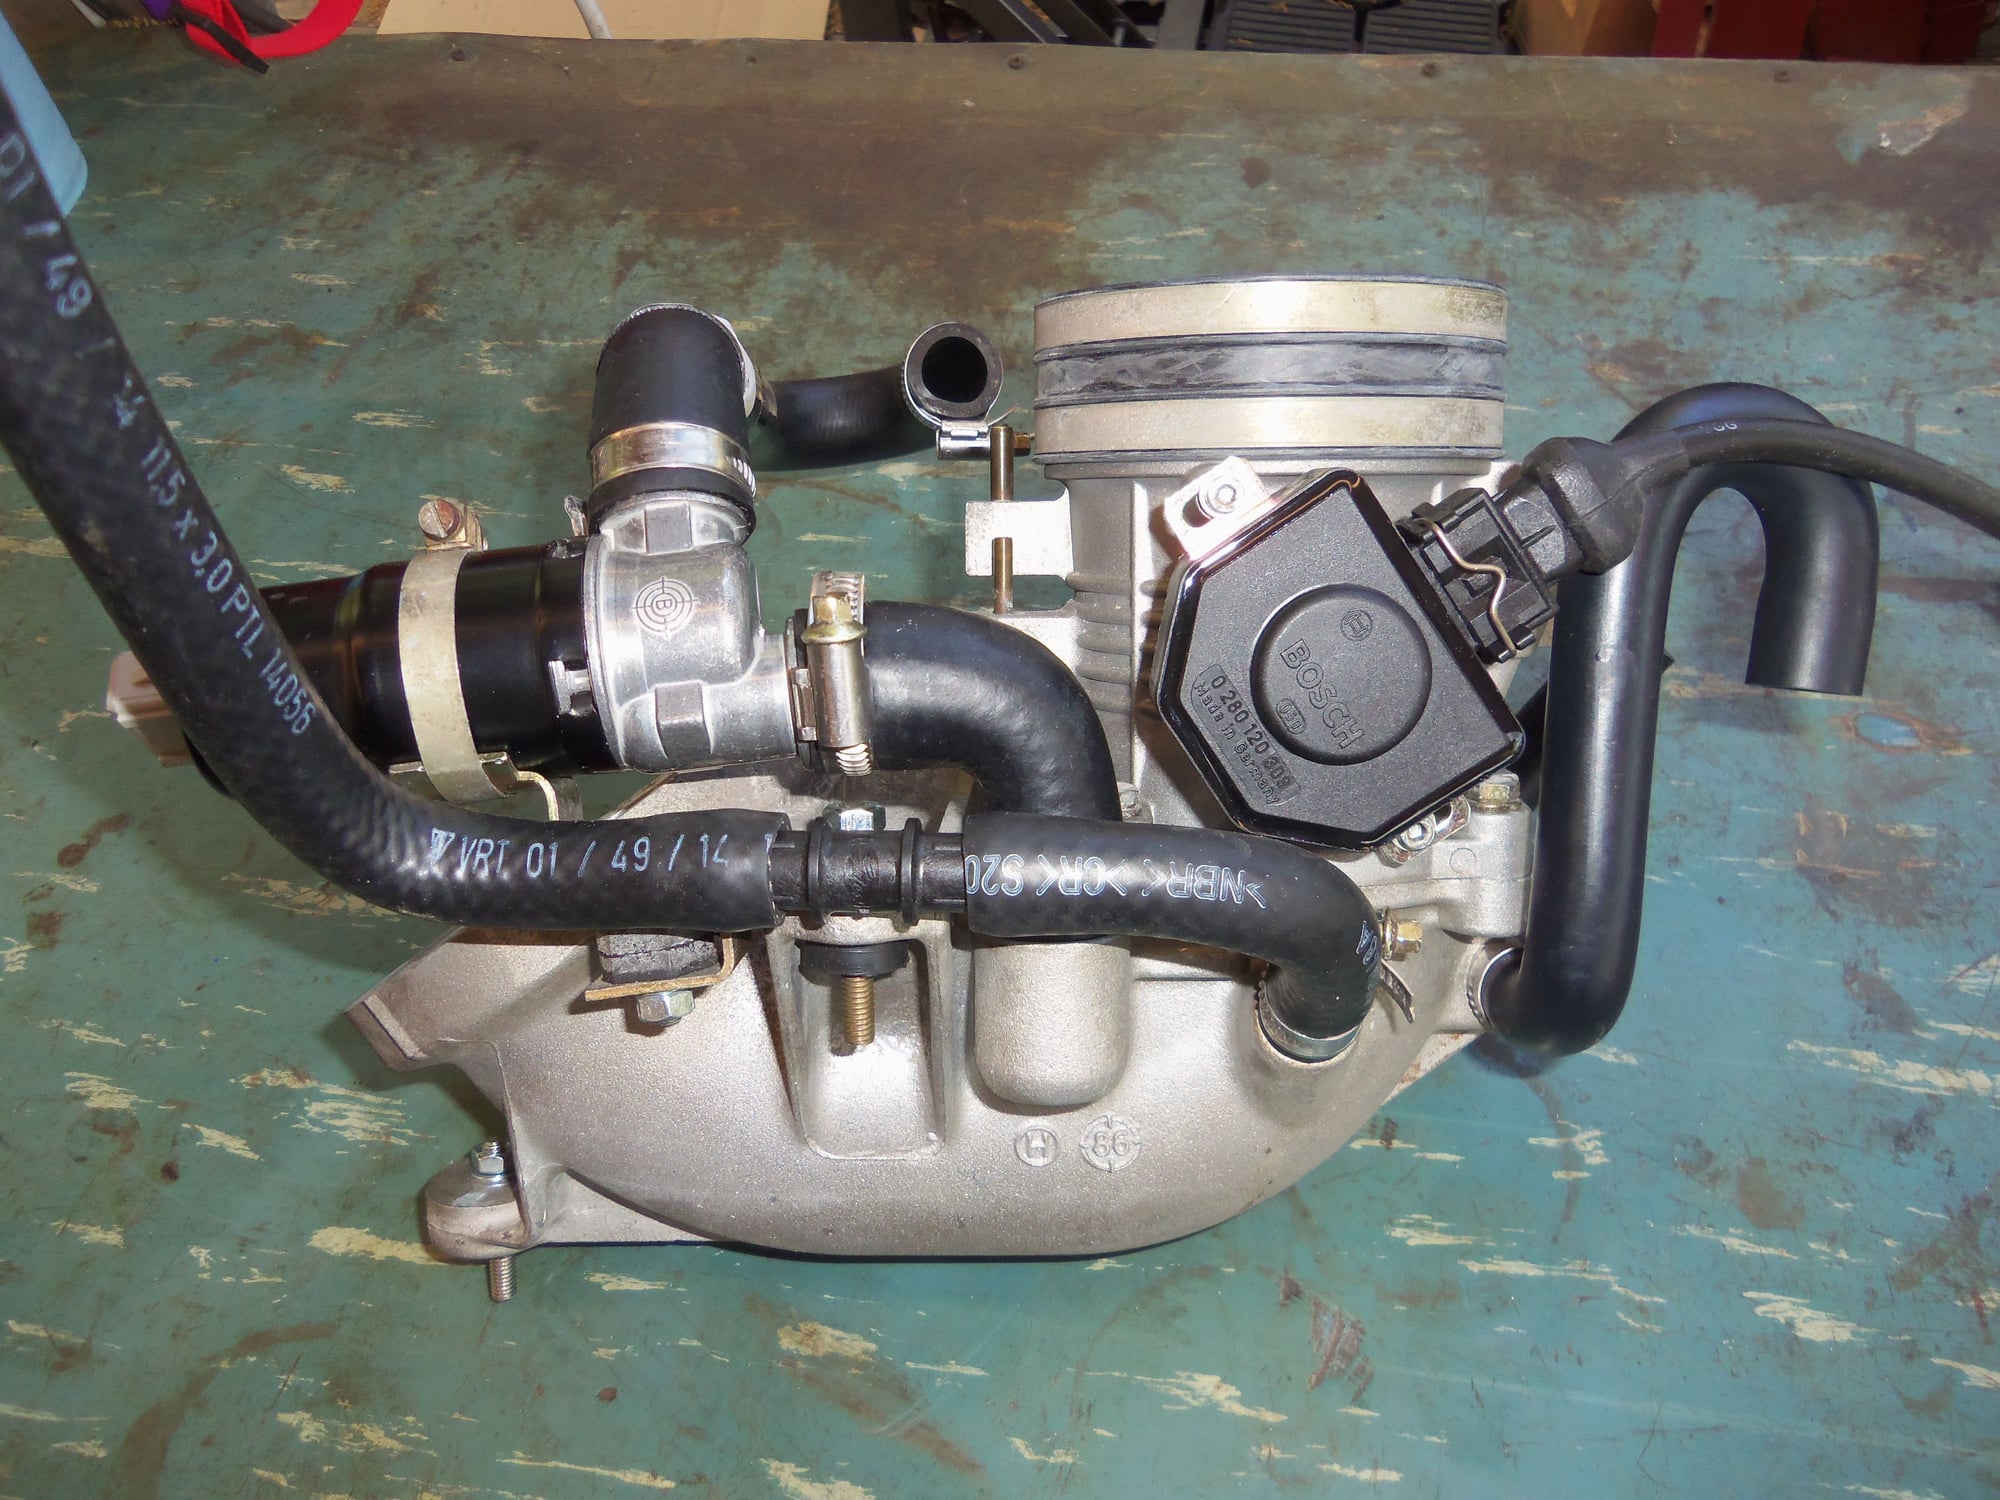
Mounts for ISV and air guide. ISV mount on the left is hex shaped. Single mount in the middle is for the mounting point under the MAF end of the air guide. Two mounts on the right are for the two mounting points on either side of the air guide under the throttle body.
Can see ISV mount peeking out from under the hose. Also see the air guide mount under the MAF end and one of the side mounts.
Regarding the possibility of refinishing the intake tubes and air boxes...a friend does have a blasting cabinet with a variety of media choices. While I'm VERY leery of this, is there a preferred media that is safer than others? He says he has sand, glass, walnut husks and something called "black beauty"...
I'm going to ask this question, even though I suspect you're all going to yell at me
I seem to have the metal intake gaskets here....they're "glued" down with some bright blue sealant on the bottom side, nothing on the top. The replacement gaskets that I got are paper, I think. Am I better off reusing the metal ones? I'm concerned about creating problems where there were none by removing the (allegedly) superior metal gasket, scraping off all that sealant, and putting paper gaskets in it's place.
Jeff, I used the paper gaskets during my upper refresh and have had no problems to date.
On your question of refinishing your intake runners and inlet headers, make sure you ask if the Shop has experience with the magnesium material it is made of. One of the important steps is to "bake out" the old oil/grime to insure the powder coating actually sticks correctly. Plus after you get it back from the Shop, make sure you vigorously wash out the insides to remove any remaining blasting material. I washed mine out 6 times over 2 hours using fresh water/detergent each time.
Pretty much unanimous reply that the paper gaskets will be fine. However, I was cautioned to verify the bottom mounting faces of the intake pipes were truly flat.
As for the metal gaskets, to my understanding, they are not reusable. There is an embossing that crushes to seal when the manifold pipes are torqued down.
The metal gaskets are available new again. $80 each, and you need 4.
Paper it is! I hate scraping old gasket sealer but such is life...
Regarding the refinishing of intake parts..I wasn't going to use a shop. I have access to a blasting cabinet, so I was going to strip the paint myself and then paint them, using Alodine (how many of those wipes are needed, anyone know?) and then primer and paint, maybe something like that VHT crinkle finish high temp paint? Thoughts? I see some threads on here where people have done this with fairly good results...
So, I'm reading that you're not supposed to use any sealant on the intake, just the gasket? I'm concerned because there's a blue sealant with the metal gasket that is on there now...hopefully this was done out of ignorance, not necessity...

 04-01-2018, 10:11 PM