When you click on links to various merchants on this site and make a purchase, this can result in this site earning a commission. Affiliate programs and affiliations include, but are not limited to, the eBay Partner Network.
SOLVED: These must be the oil passage block-off pins...where do they go?
I've inspected the plastic plugs holding the original pins in place. All are in great shape. Will leave them alone until I see the oil pressure drop described by others.
Last edited by Captain_Slow; 05-07-2018 at 10:20 PM.
Reason: Found a thread with info I needed
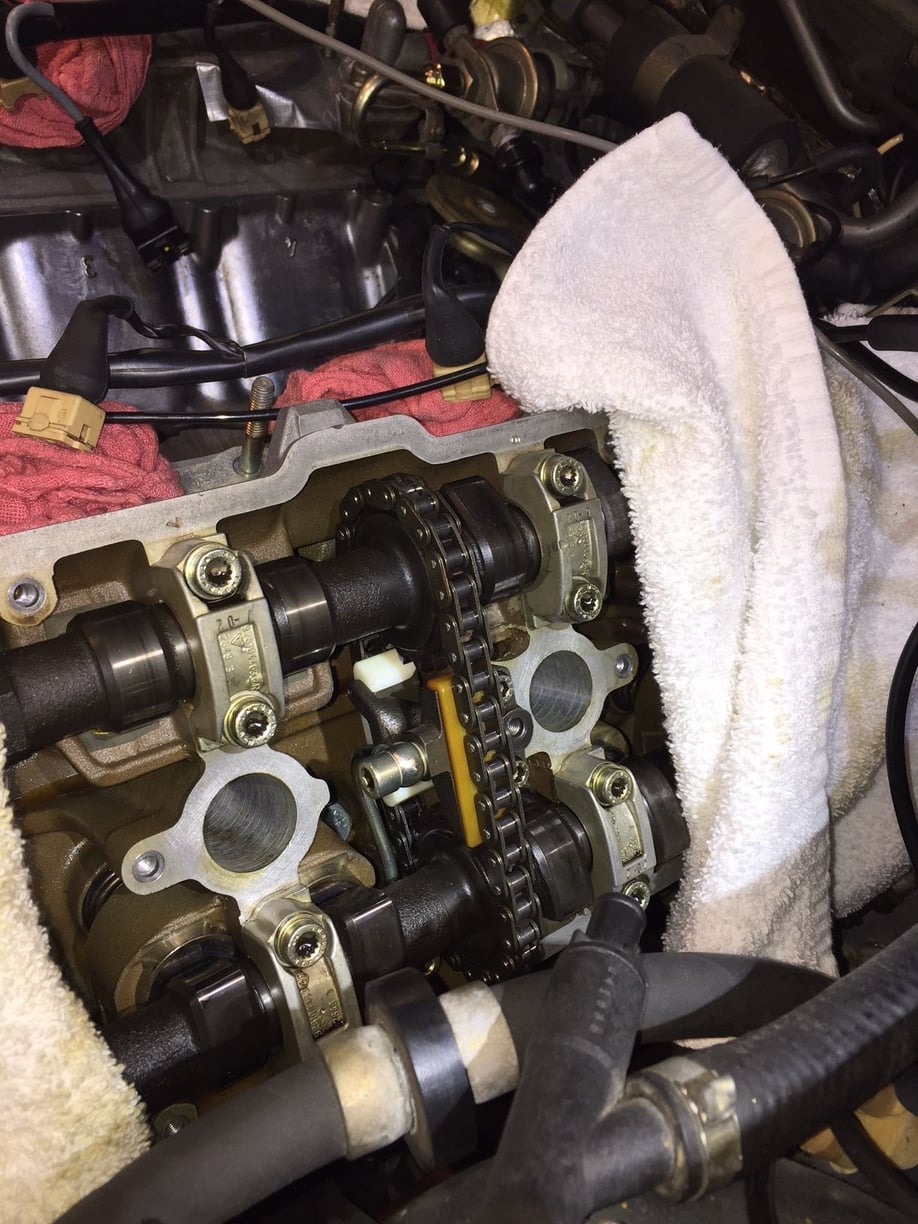
On the driver's side, what's UP is DOWN. The sprung/hydraulic piston faces DOWN into the head, while the static pad is UP. This made it a bit more difficult to compress the piston before trying to slide the tensioner out. To compress it I removed the oil pipe but left the tensioner bolted in place. Using my left hand and hooking four fingers under the chain and pad on the moving piston I pulled up (just kinda leaned back for a few minutes at a time). Eventually it compressed enough to coax it out without damaging the static pad. Nearly identical amount of wear on both pads as on the passenger side - very little on the static pad, much more on the moving pad. To reinstall the tensioner I had to bend the binder clip tool much more, as shown below. I forgot to take a picture with the oil pipe reinstalled. It was a bit easier to remove and replace than on the right (passenger) side.
Last edited by Captain_Slow; 05-09-2018 at 09:30 PM.
Reason: add finished photo
Intake back together - question about making the 19mm flappy stop.
I don't think my car ever had the flappy stop. Even now with it all back together it works fine. I hadn't thought through making the thing. It seems easy enough - cut off the head of a 19mm bolt and drill an off-center hole that will fit snuggly on the rolled pin. Then I started to think of how I'd actually do it. 1. I could put the cut off bolt head in my vise and drill a hole slightly off center and hope I was drilling close to perpendicular to the bolt head. Or, 2. I could put the bolt head on a drill press - nice control of the bit to make a well placed perpendicular hole. But how would I clamp the small bolt head to the drill press table? Well, it's something to think about while I'm putting the cam covers back on.
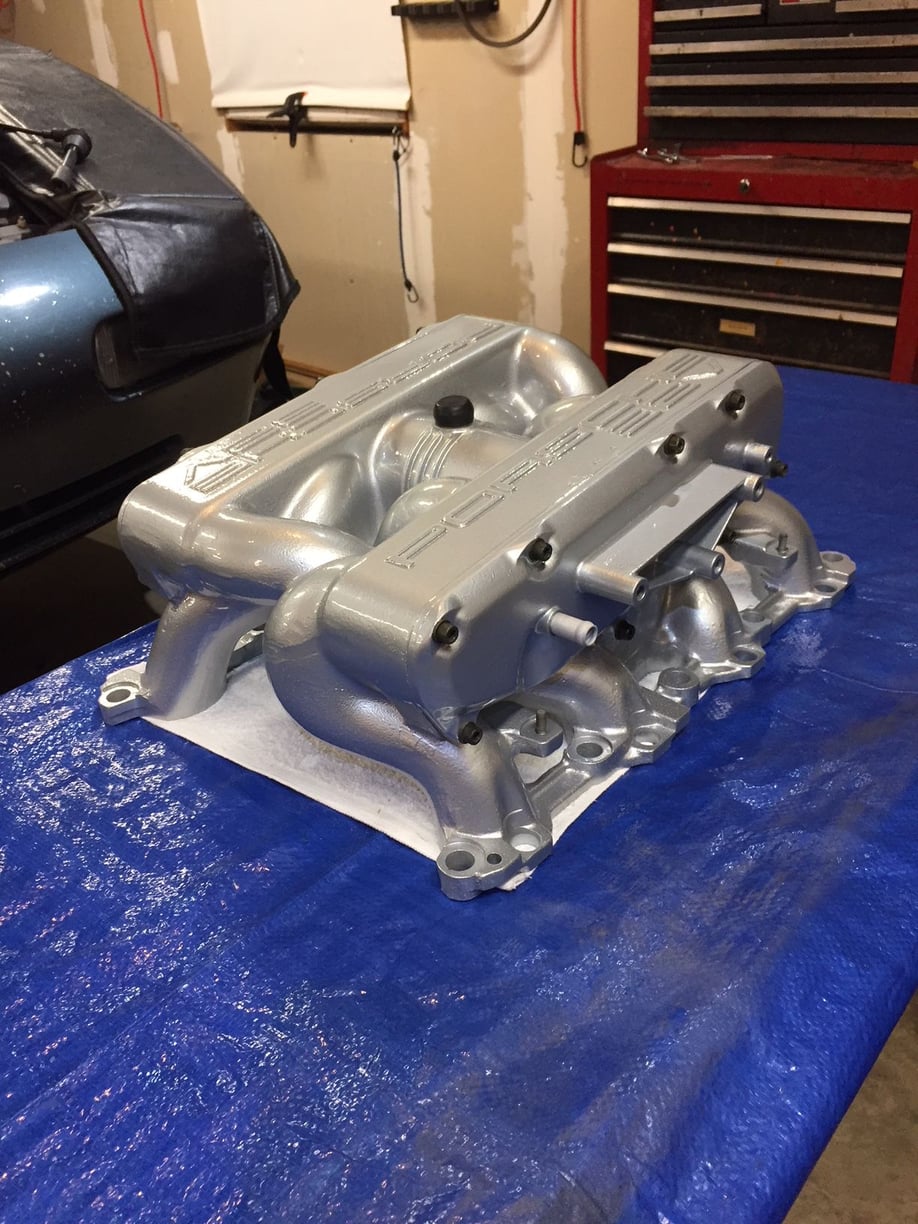
Here's the finished intake:
Last edited by Captain_Slow; 05-13-2018 at 09:04 AM.
There are cheap vises with flat bottoms, just for drilling and milling. Cheap vices also take many forms, so choose wisely. But if you were to order a vice from Roger, you'd receive something that would satisfy the male lust for tools. In American usage, a vise to satisfy a vice.
The offset hole is to allow adjustment, of course, but the hex shape of the head is not helpful. Better to round it over, or find something round to begin with. Not that important, though.
Very good progress. You're giving yourself plenty of time to avoid mistakes. One step forward, no steps back.
Funny...I didn't catch my misspelling (fixed now). I had 28 occurrences of "asses" in my masters thesis, too! Luckily, I noticed one of the asses...and even more lucky to be able to quickly find/replace all of them.
Last edited by Captain_Slow; 05-13-2018 at 10:05 AM.
Thanks Chris! I just realized we talked about getting together over cars this winter or early spring. All I can say is -- mission creep. When I started I said I wouldn't powder coat. I hadn't even thought about cam chain tensioners. This is the mother of all WYIT jobs. There's temptation to expand it further - I have a new coolant tank, new washer filler neck, and new PS hoses. Time now for me and the boys to make breakfast for mom.
The intake looks great.....Make a good breakfast for your family.
Jon please tell me that you did infact replace the oil block off pins since you had the cam covers off,
this job takes all of 50 mins to do both sides.
And it takes about 4 hours and 50 mins to RnR the cam covers and the cam caps and swap in the pins.
Why run the engine with a known defect in the oil system?
Once all of these little jobs are done you only have to drive the car.
The coolant bottle will come out easier now with the cam cover off,
put a towel over the head to keep out dirt, same thing with the filler neck.
Stan - You're right...I looked at the black pucks where the longer cams would fit and they looked perfect, so I assumed I may have several years before needing to replace them. But it doesn't make sense to do this later and break the seals on the cam covers if I have the covers off now.
The pins seem like an easy job, but the posts about the process are lean on specifics. Everything I touch during this refresh job is a personal frontier - all places I've never been. I'd appreciate some of your classic guidance and experienced tips/tricks to make it go smoothly.
The coolant tank and filler neck look much more accessible with the cam covers off. I was hesitant due to potential contamination of the heads. I do have them well covered. So...the mission creep continues
Replacing the intake bearings went well enough, so hopefully the throttle body bearings will benefit from the experience.
Jon
Originally Posted by Mrmerlin
The intake looks great.....Make a good breakfast for your family.
Jon please tell me that you did infact replace the oil block off pins since you had the cam covers off,
this job takes all of 50 mins to do both sides.
And it takes about 4 hours and 50 mins to RnR the cam covers and the cam caps and swap in the pins.
Why run the engine with a known defect in the oil system?
Once all of these little jobs are done you only have to drive the car.
The coolant bottle will come out easier now with the cam cover off,
put a towel over the head to keep out dirt, same thing with the filler neck.
Last edited by Captain_Slow; 05-13-2018 at 07:47 PM.
Jon if you need more specific guidance please post it to this thread and I will respond.
BTW your doing a great job and I would suggest to not worry too much about mission creep ,
everything your doing will need to be done eventually, and when it does the car will not be drive-able till your finished.
So think of it as proof testing your machine to remove future kinks that will prevent you from using it as intended.
In a few weeks you wont remember all of the things that you fixed,
as you will be screaming down the highway, looking at the scenery flypast
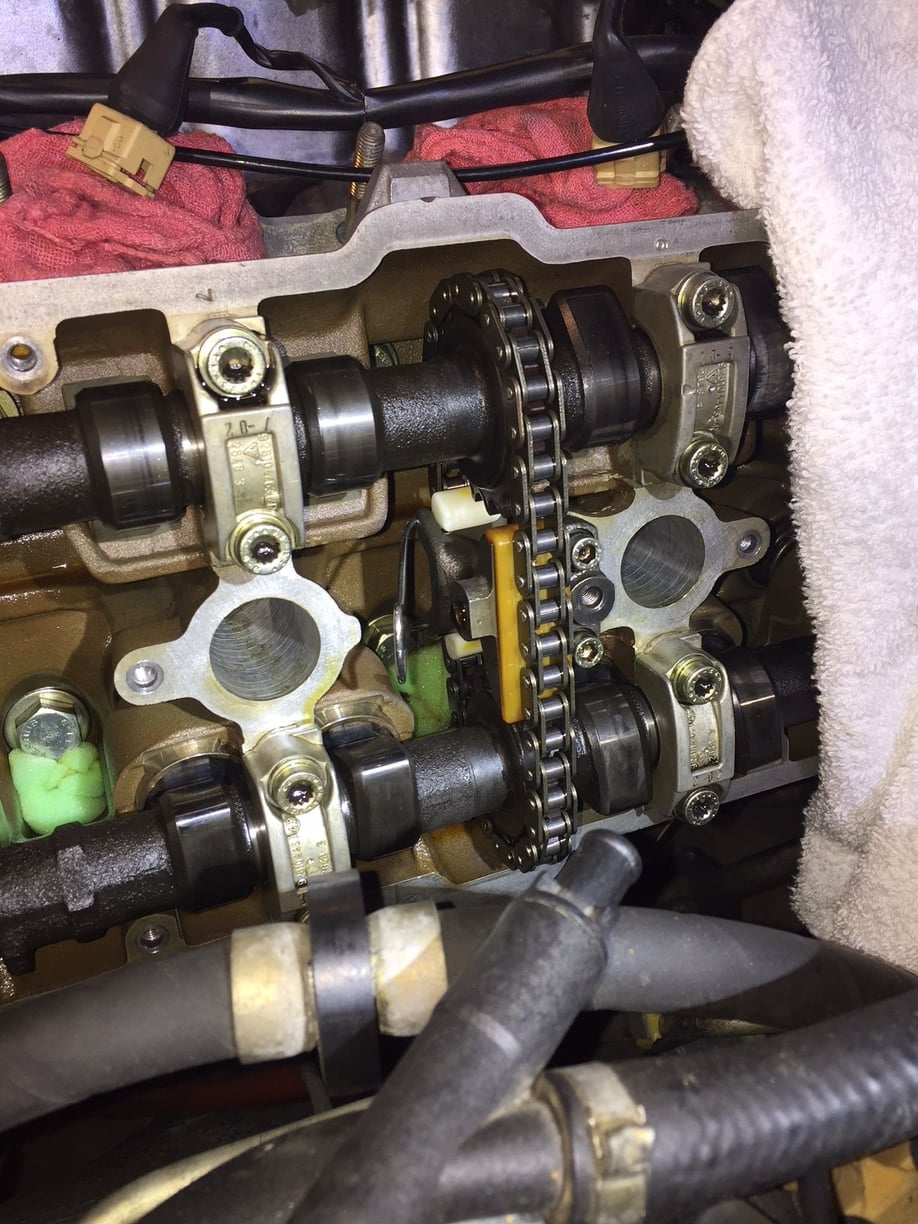
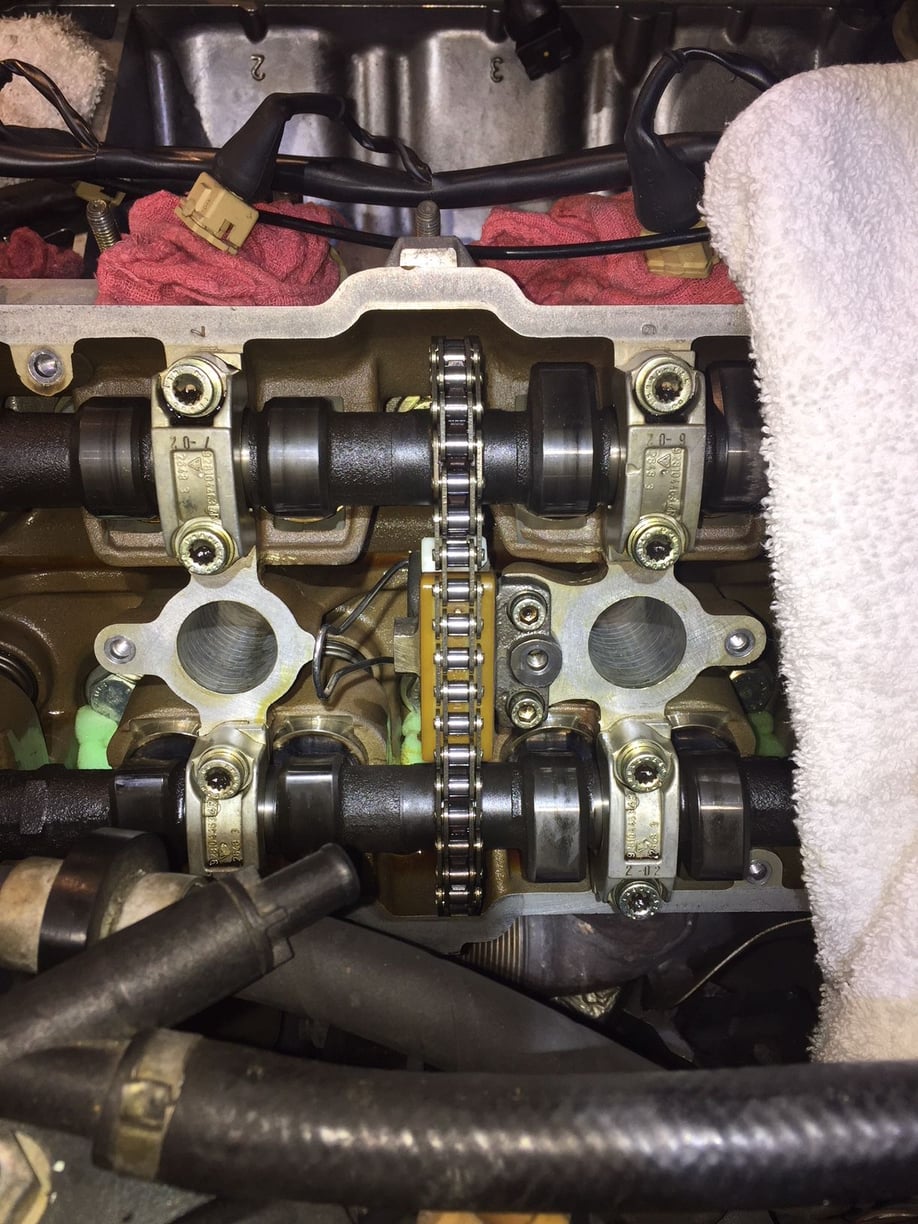
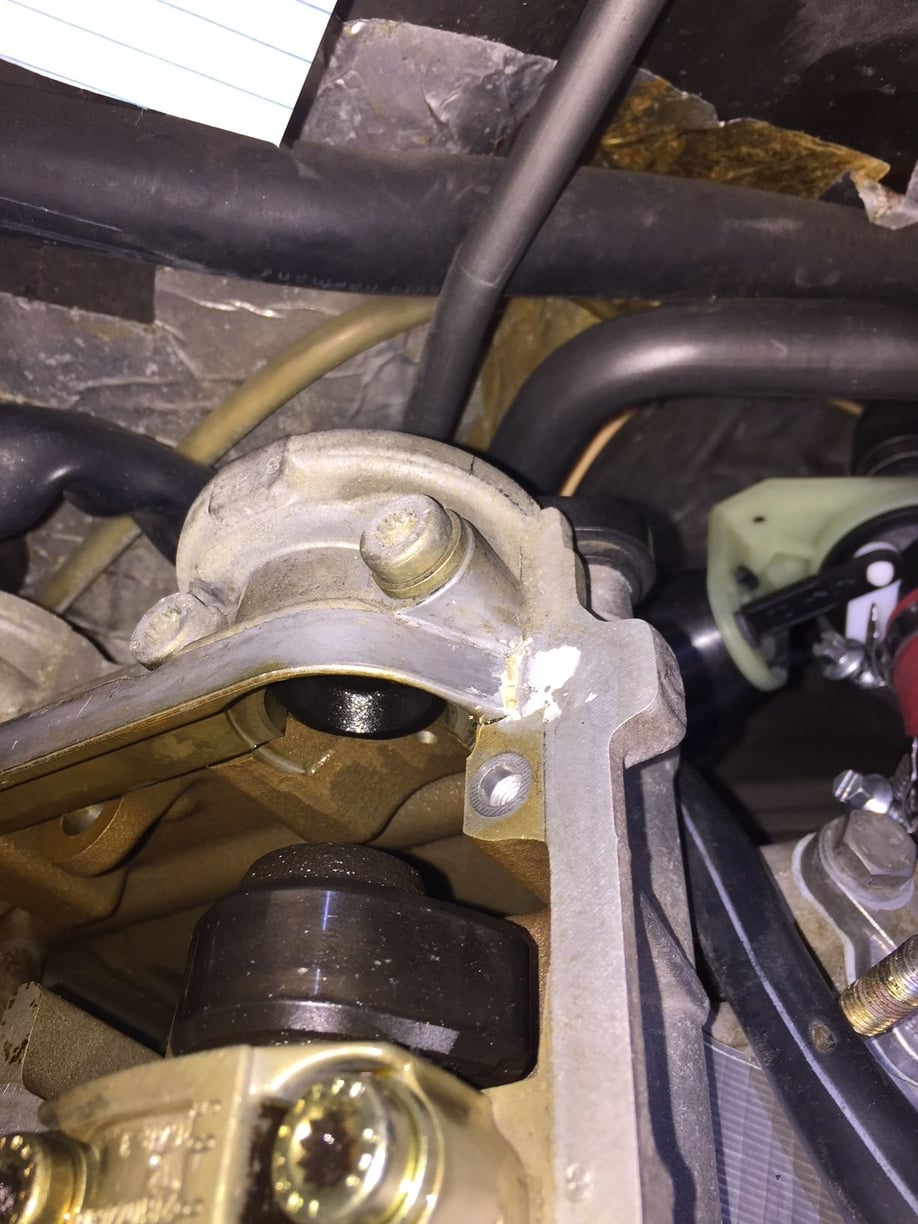
At the back of the heads there are brackets that clamped the ends of the older longer cams, and oil passages from the heads that provided lubrication from below.
These oil passages were plugged with metal rods covered with rubber and are like arms coming off the black plastic plugs that are easily seen with the cam covers are off.
I'm assuming the process is simply to unbolt and remove the brackets, remove the black plastic plugs (carefully pulling upward to be sure the appendages that plug the oil passages come come with the plastic plug)
After that I'm not exactly sure what happens. I read something about tapping the aluminum pins into the oil passages to wedge them in place. Does the plastic plug piece become unnecessary with the use of the aluminum pins?
I'm sure instructions exist as part of a TSB. I'll do some more searching.
I think I ran across this but at first read I couldn't visualize it. I found some photos of the area that made things clearer. Thanks for finding this...
Thought I'd remove the pins while waiting for Loctite 574
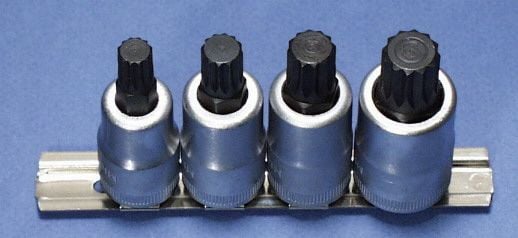
Discovered I'll need a new type tool similar to a Torx head socket to do the job. I'm not sure it is even a true Torx head. The bolts shown below appear to have many more (and smaller) splines than a Torx head. If you know the size and where to get them, please tell. Thanks.
Looks like these Stahlwille bits are the type needed. Just $118 for the four at Samstagsales. Uhh...no. I hope there are other options.
Last edited by Captain_Slow; 05-15-2018 at 10:16 PM.
Reason: add photos

 05-06-2018, 03:35 PM