When you click on links to various merchants on this site and make a purchase, this can result in this site earning a commission. Affiliate programs and affiliations include, but are not limited to, the eBay Partner Network.
Those parts look great the important part on the cam covers is the sealing groove hopefully they blasted and coated this area as well as the spark plug sealing area on the underside of the cover.
I would advise you wash these parts in hot water with detergent soap and then blow dry,
do this process 3 times start to finish to guarantee the parts are really free from grit.
I bet you'll be up late every night until you get these beauties re-installed.
(Don't let the cam cover gaskets get away from you.)
3rd quarter grades are due tomorrow and the National Geospatial Intelligence Agency (NGA) GIS Fair is May 1. I'll be after school helping students most of this week and next leading up to NGA. I may have time fix the female CPS connector wires, and possibly remove/replace the bearings from the intake and throttle body and reassemble the flappy mechanisms for each, but the big push comes after May 1. Before the cam covers go on I'll replace the "top" tensioner pads (couldn't afford the top and bottom set...for some reason the price of the set is silly).
Originally Posted by Mrmerlin
Those parts look great the important part on the cam covers is the sealing groove hopefully they blasted and coated this area as well as the spark plug sealing area on the underside of the cover.
I would advise you wash these parts in hot water with detergent soap and then blow dry,
do this process 3 times start to finish to guarantee the parts are really free from grit.
That's the plan. Would you recommend a large dark or light colored plastic bin to do the washing in? Whichever will make any media grit stand out.
Last edited by Captain_Slow; 04-15-2018 at 01:47 PM.
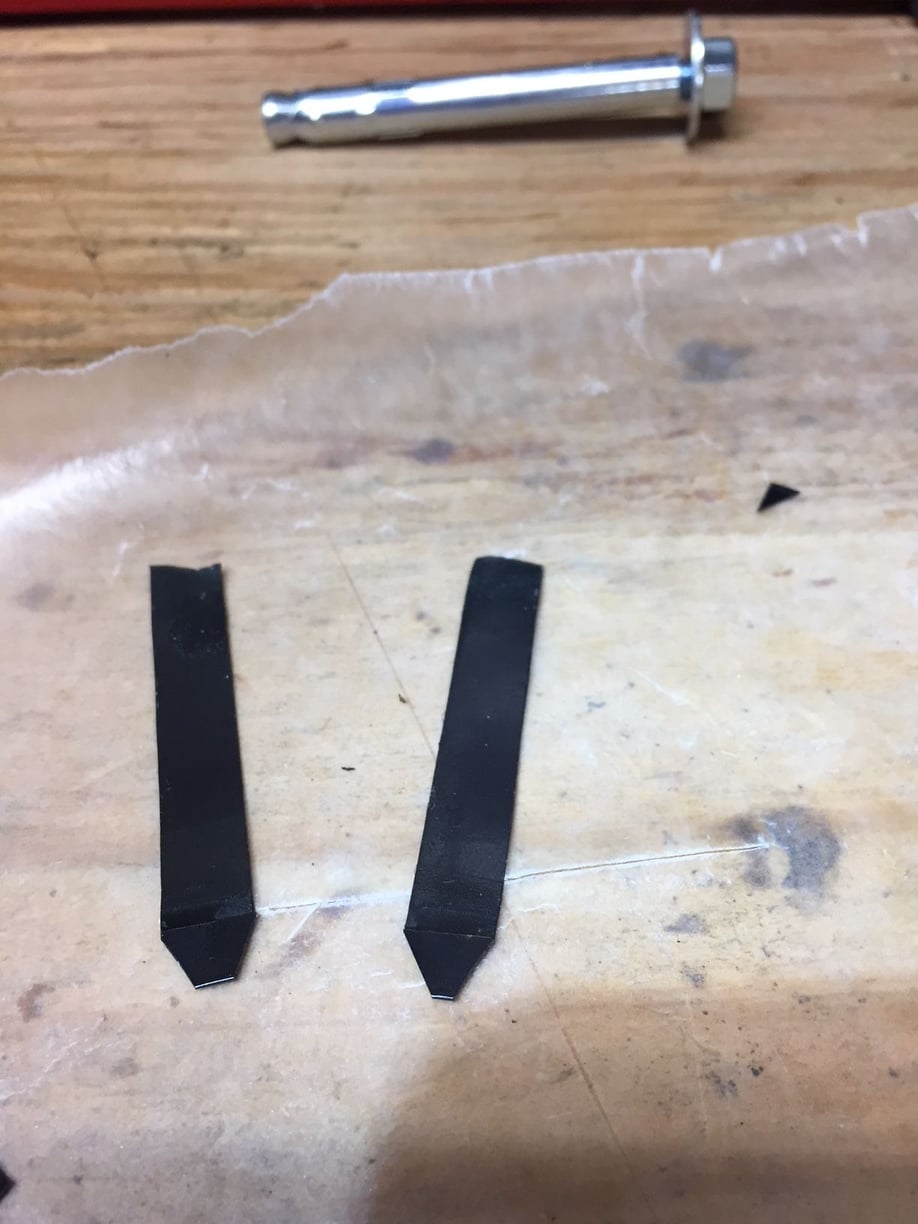
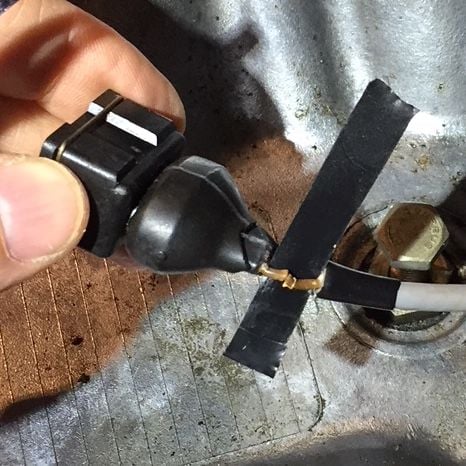
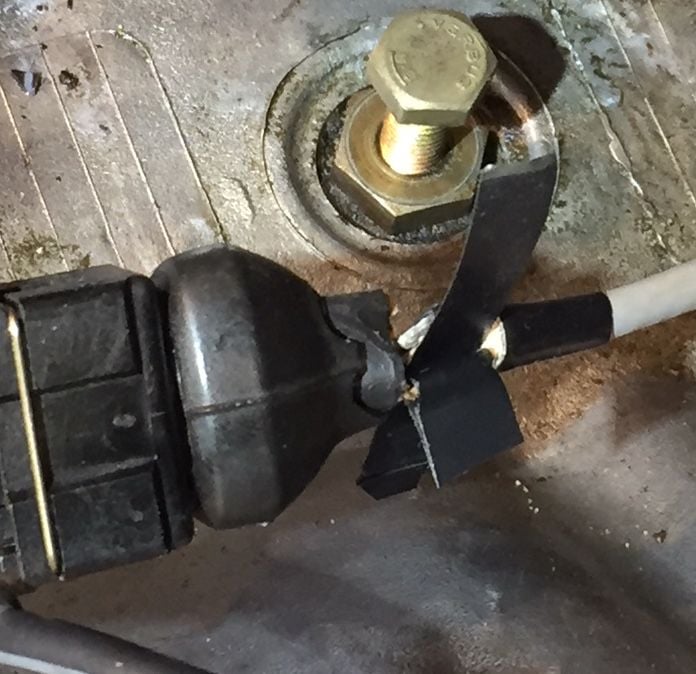
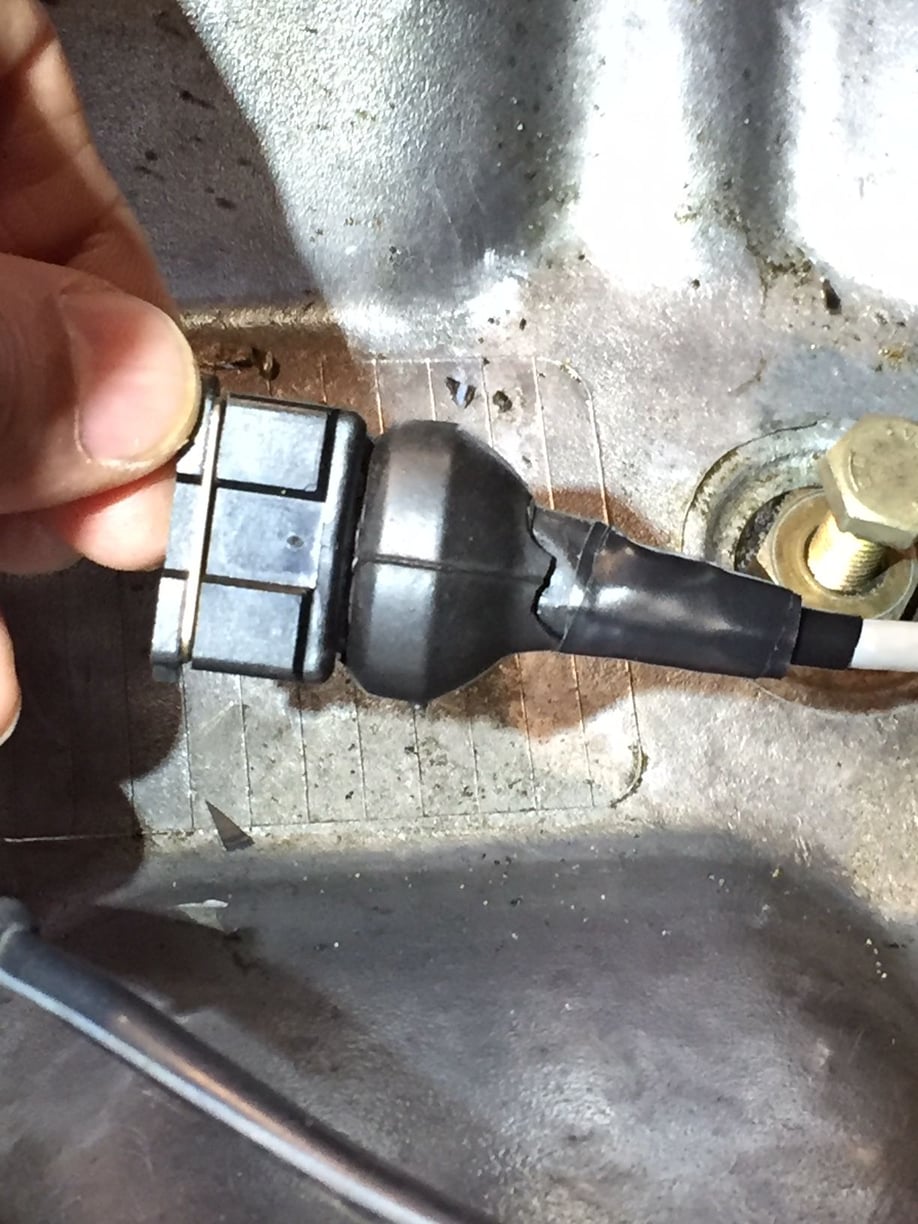
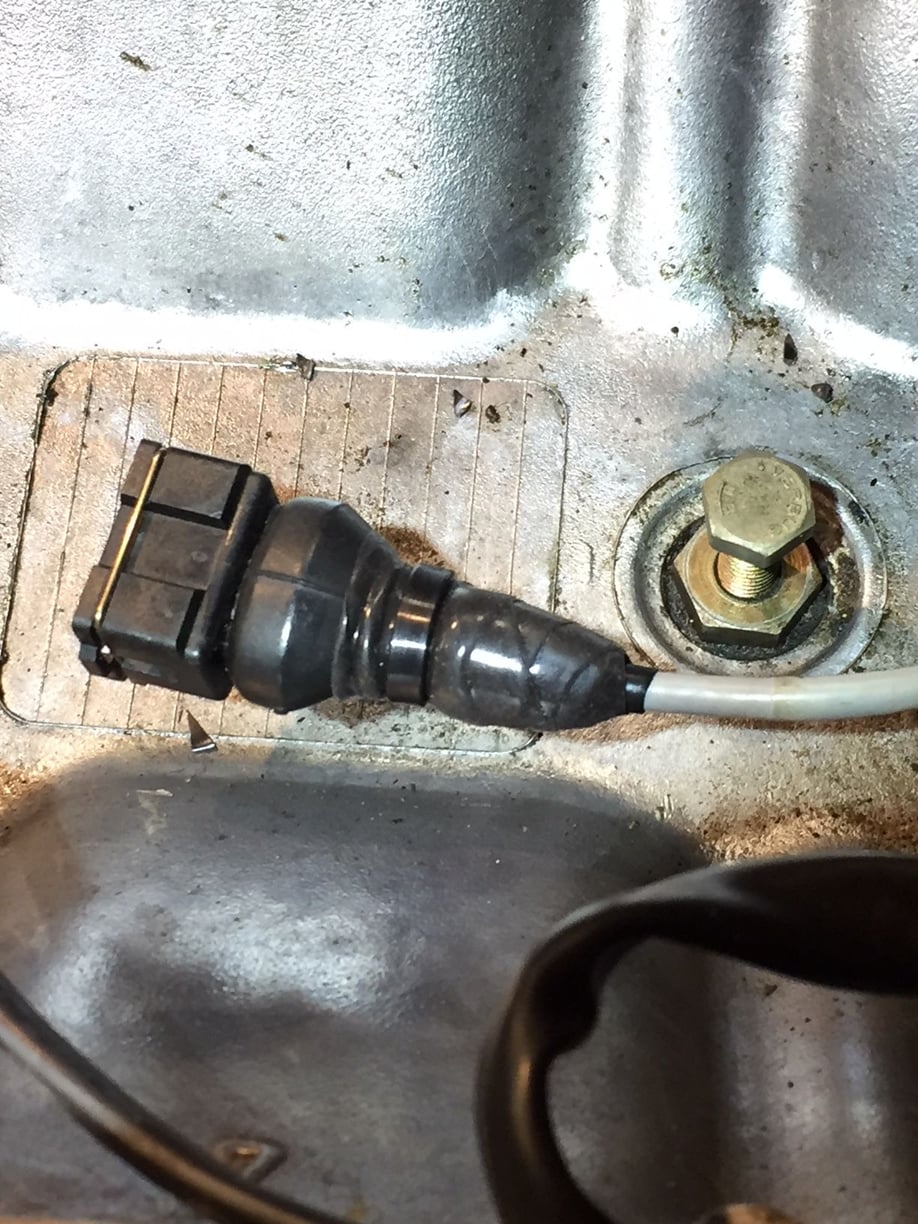
The pics tell the tale. The key was folding over the electrical tape on itself to create a smooth tip to slide between the wires, then to grasp. I wrapped the repair work with electrical tape, then wrapped again with self vulcanizing tape. I put one zip tie to make sure the tail of the vulcanized tape doesn't lift. It feels like it will hold up well.
What do you mean about coating where the gasket is located on the valve covers and inside/under the spark plug rings? On this guide it doesn't show that and my parts are at powder coat now.
"Those parts look great the important part on the cam covers is the sealing groove hopefully they blasted and coated this area as well as the spark plug sealing area on the underside of the cover."
Here is the link I'm referring to, am I reading this incorrectly?
Thanks for the additional input so if I need to let my powder coat shop know it will be okay. They were going to leave the channels underneath bare magnesium...
NGA GIS Fair was great...now back to the refresh...need some torque specs
Put the new heater valve and short hose in. Roger included new clamps (same as original) with the hose. The OEM hose and valve I removed were in good shape. The valve worked perfectly with a Mity-Vac attached. Still, decided to put the new one in and make the old one a spare.
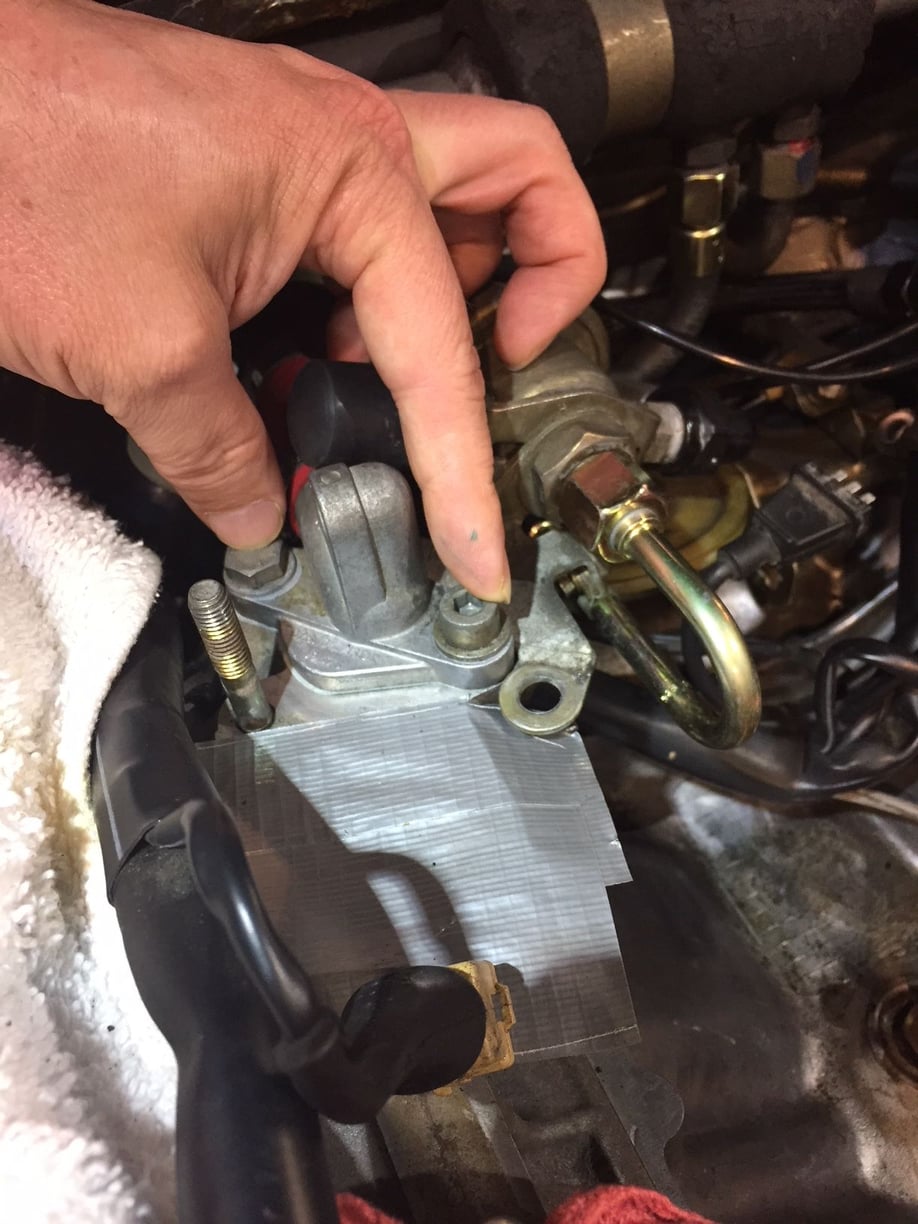
Dwayne never mentions the torque on the bolt (thumb) and Allen head bolt (finger). Anyone know what the spec is? I realize I have to put the damper bracket under the Allen head.
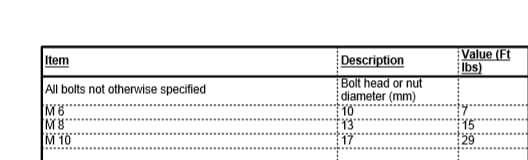
Thanks Bertrand! I'm hoping Dwayne comes back to these later when the air box brackets are installed. The chart is helpful. I suspected the torques for each of the different bolt head diameters are fairly consistent.
Got the new CPS in and harness connection back together, and replaced the gasket for the left (drivers) rear coolant port. Nibbling away at it a little each evening.
Dave - Tell me about the tightening in two stages for the water bridge bolts. Is it simply go half way all around then to full torque the second round?
Dave - Tell me about the tightening in two stages for the water bridge bolts. Is it simply go half way all around then to full torque the second round?
The WSM/Spec Books call for tightening the water bridge bolts to 10 N-m and then to 20+2 (20-22) N-m. I use a cross-pattern even though the WSM doesn't specify.
On the rear, if you bolt the heater hose outlet and the cover plate first to 10 and then to 20 there is no way that won't be right.
That written, since the valve and plate are not subject to the large expansion of the engine block and don't 'tie the heads together' - unlike the bridge - you can just go to 20-22 N-m and be done.
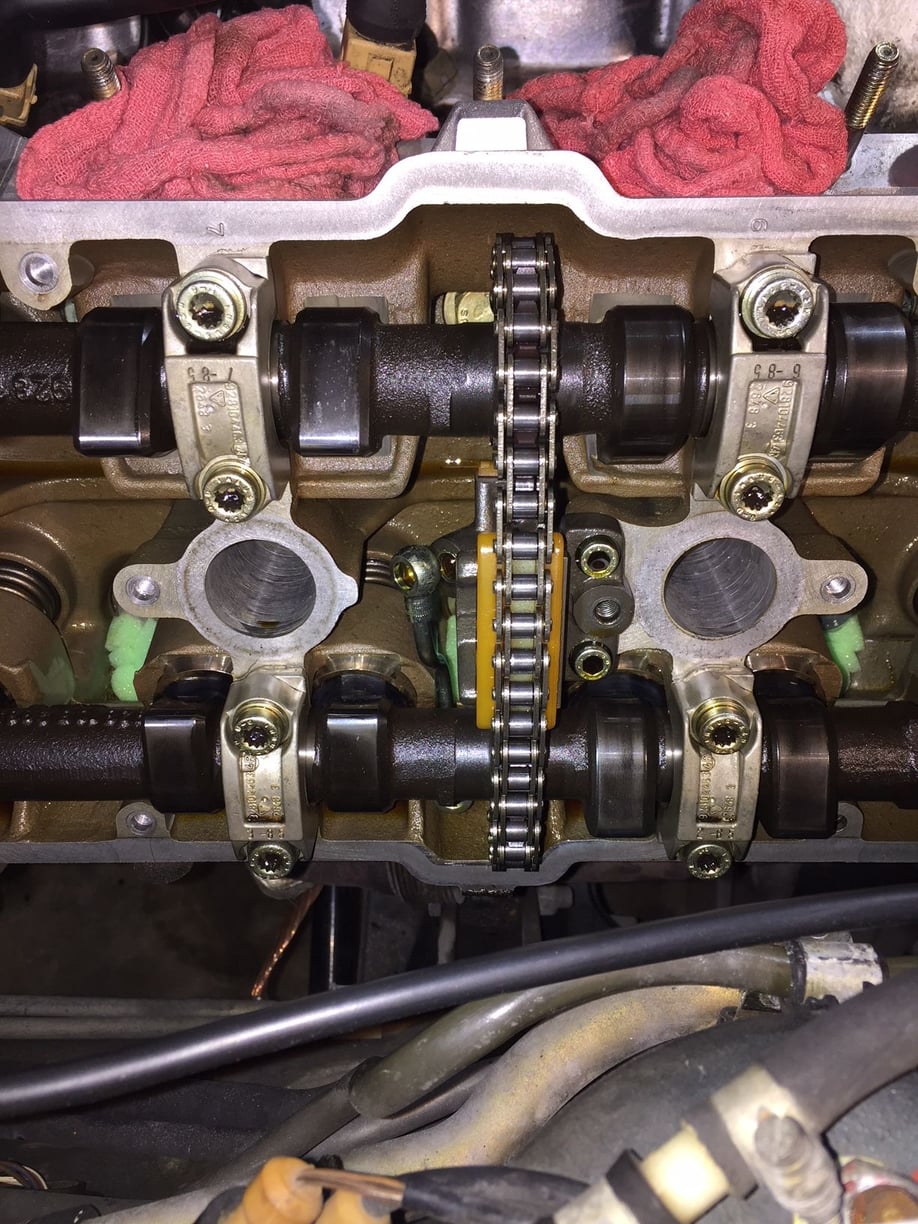
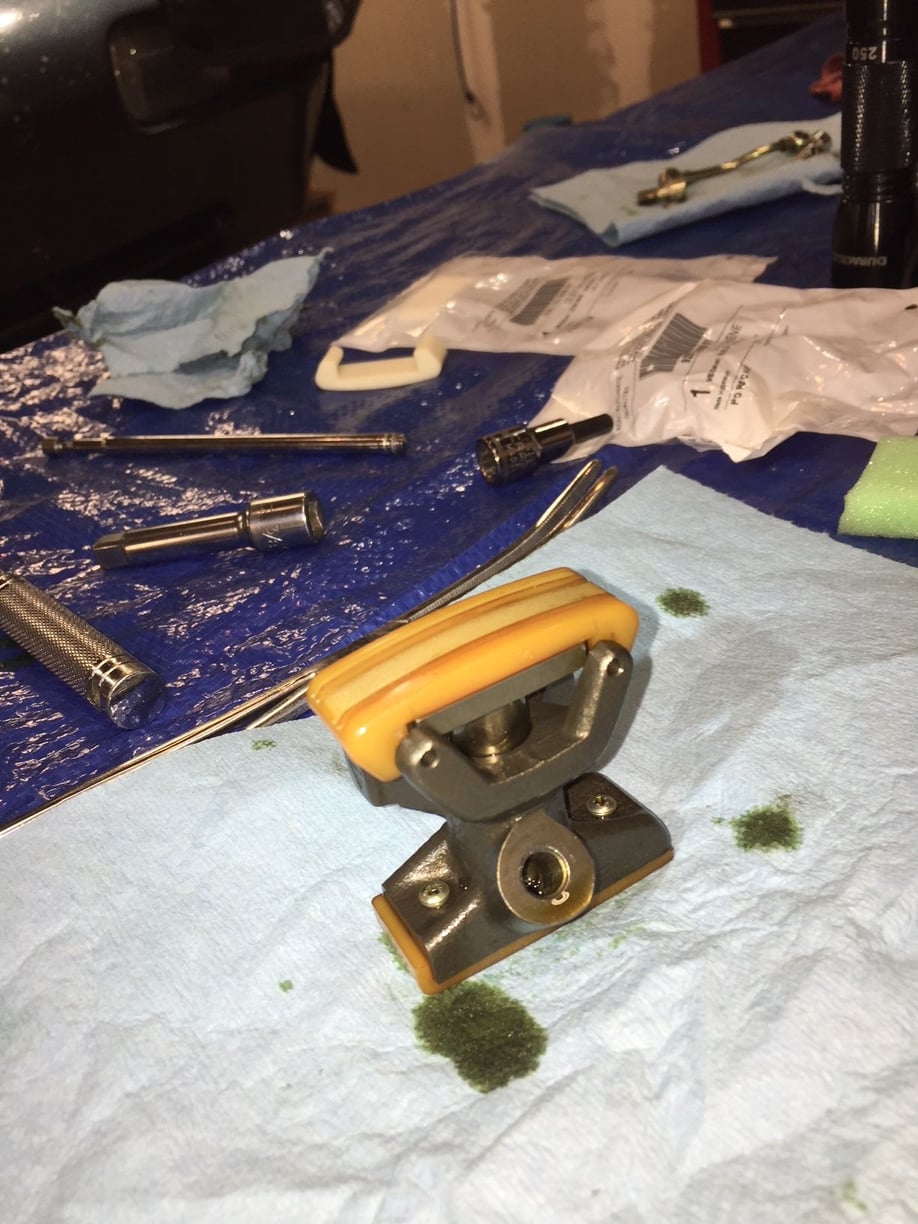
Don't look down! First attempt to replace cam chain tensioner pad
I've been dreading this one....the fear of a washer bouncing somewhere in the abyss of moving parts below.
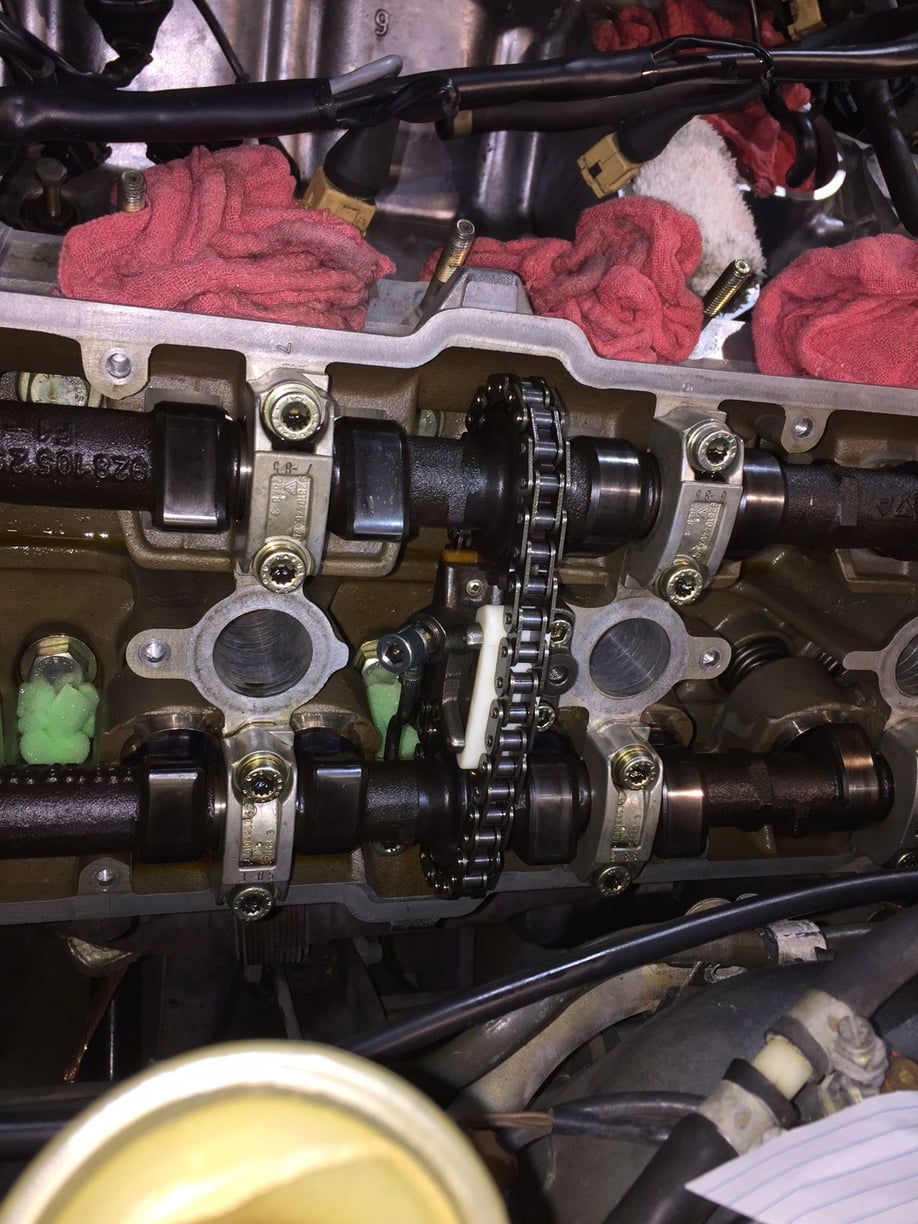
I started with the right (passenger) side...
Notice the pieces of foam stuffed in the oil return ports.
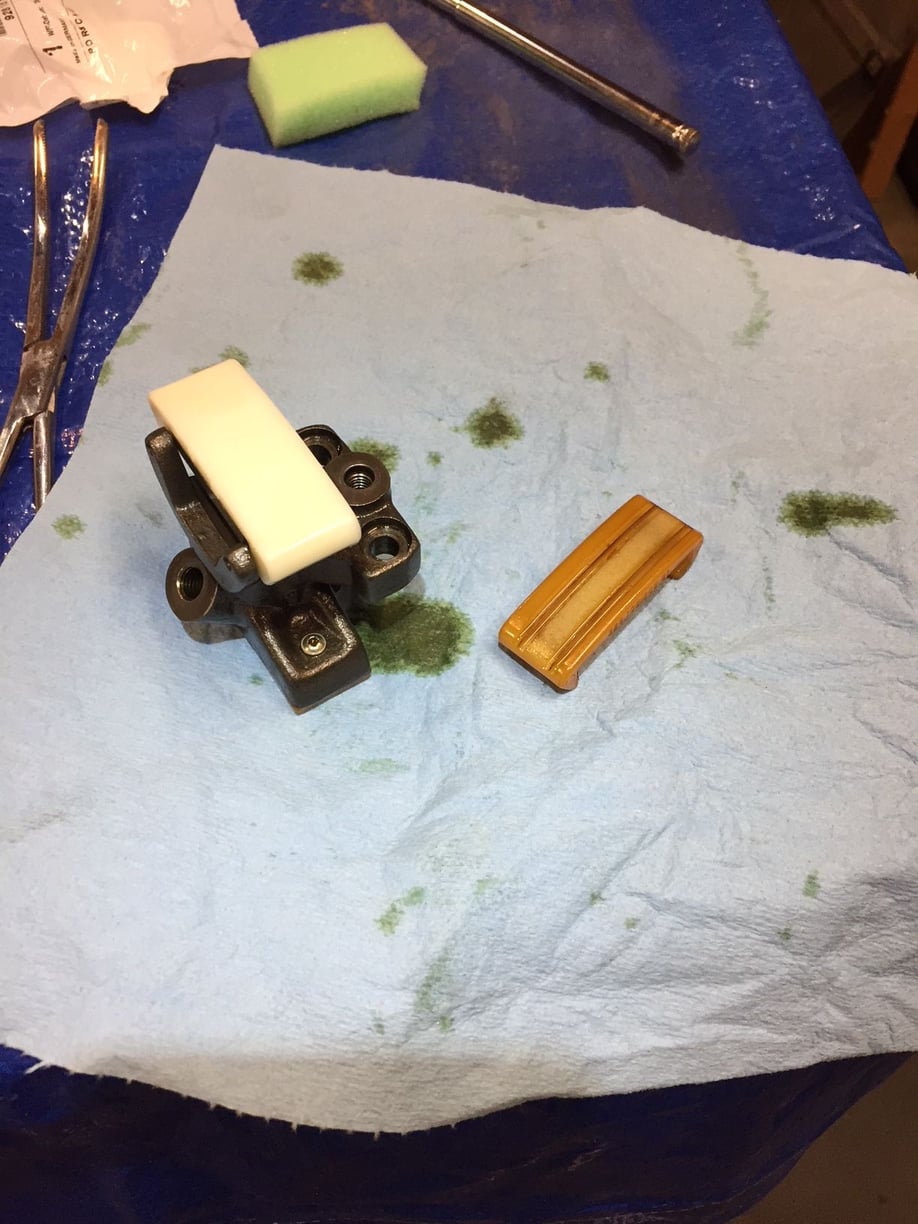
Forgot to take a picture of the non-moving pad, but it had minimal wear.
Oddly, pushing hard to compress the piston feels like it does nothing, while just applying firm steady pressure results in oil seeping out of the feed port..allowing replacement of the pad.
I was worried the S4 tensioner didn't have a spring inside to at least hold the chain taught enough to start the engine and refill the piston with oil. I was relieved to find there IS a spring in it. No worries...it's not going to launch anything.
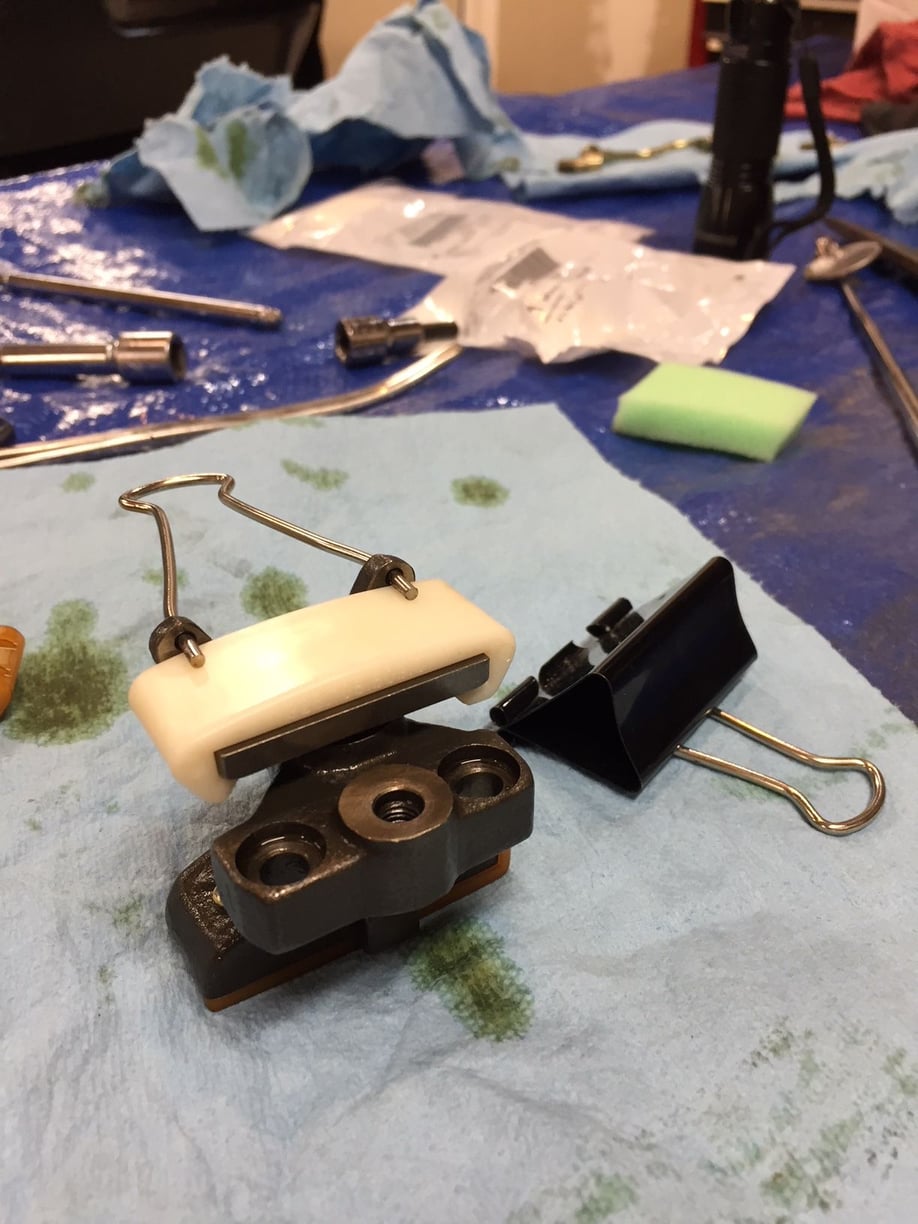
I got this idea from Rob Edward's nice pad r&r thread. Put one of the clip arms in a vice and used needle nose pliers to shape it. I highly recommend this little MacGyver hack. It does help with the installation by keeping the piston compressed.
Bend the binder clip arm upward about 20 degrees and installing the tensioner is as easy as it looks...one hand holding the handle, the other starting the first bolt on the tensioner base.
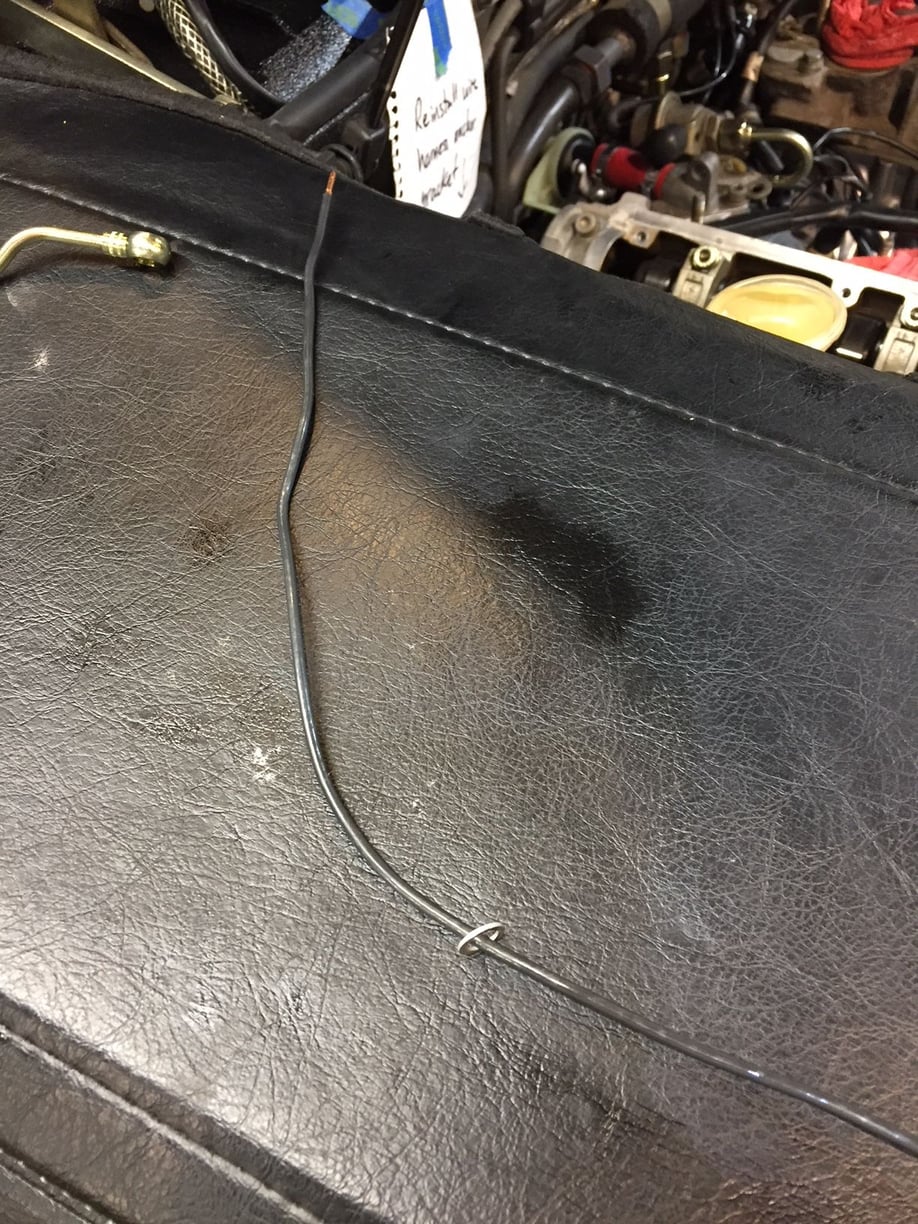
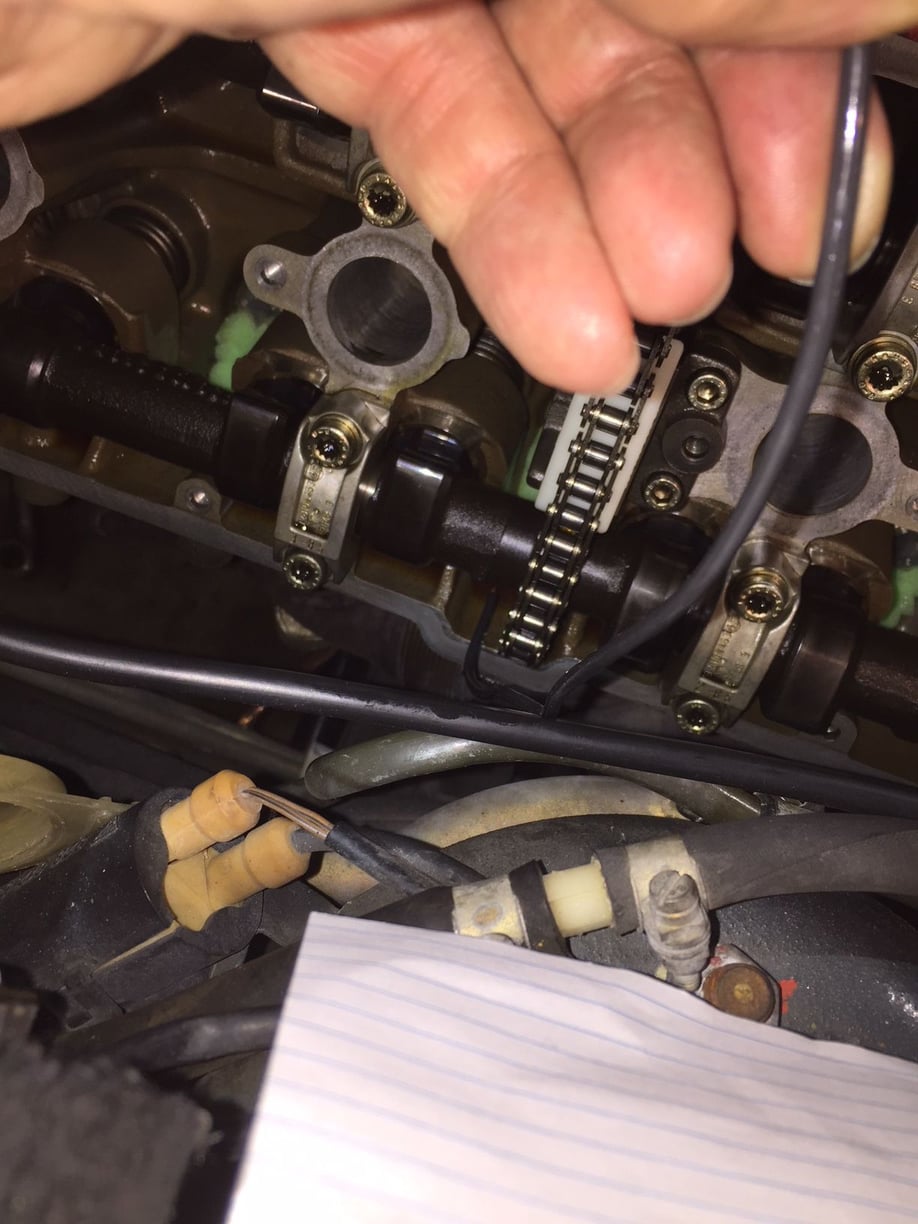
Then it was time to put this back...and it's little washer friends. Take a couple deep breaths...and here's a trick for getting the bottom washer in place on the lower banjo fitting....
A piece of thick solid core wire (or a metal coat hanger). Slip the washer on it, then place the end of the wire IN the lower banjo-bolt hole..let go of the washer and it falls into place.
Hard to see...the washer is in place. Carefully remove the wire so the washer doesn't get launched.
Remember to take the pieces of foam out.
I started around 4:30. Done by 7:00. Enough anxiety for one day. Tomorrow...the other side.
Looking forward to getting past these tensioner pads. I want to put the cam covers back on. I can't say I'm heading for the barn until I have replaced the intake and throttle body bearings and have both "flappy" mechanisms back together (with no parts leftover)..


 04-15-2018, 10:54 AM