When you click on links to various merchants on this site and make a purchase, this can result in this site earning a commission. Affiliate programs and affiliations include, but are not limited to, the eBay Partner Network.
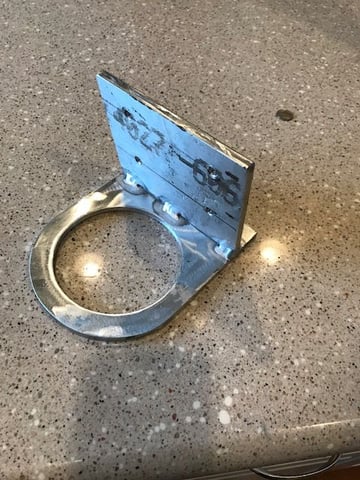
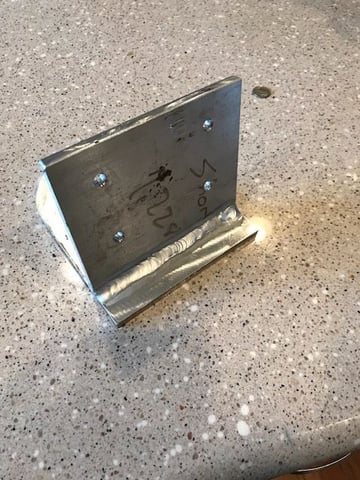
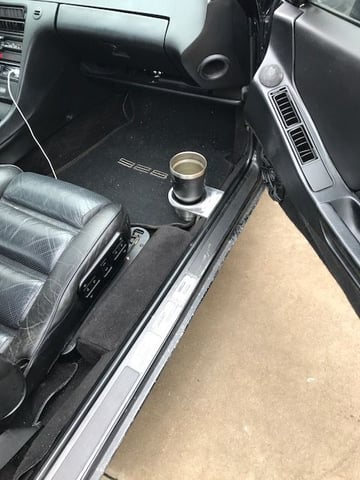
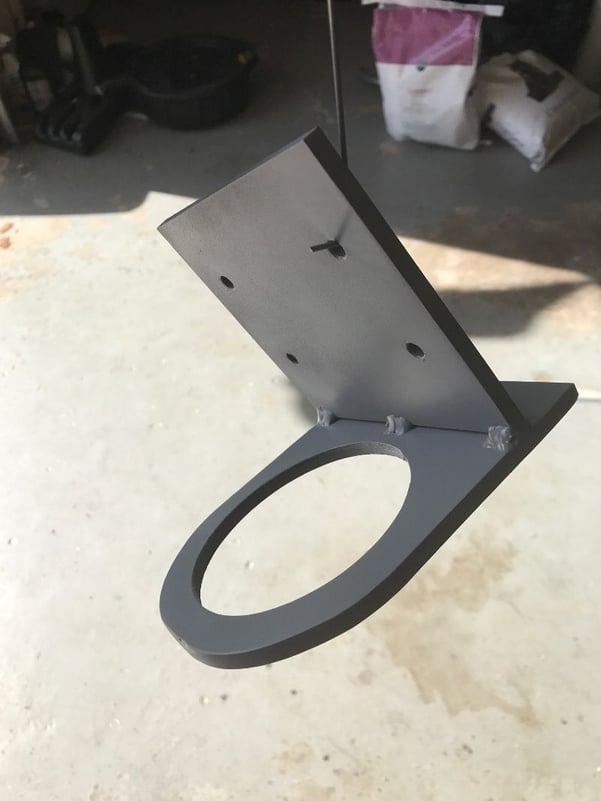
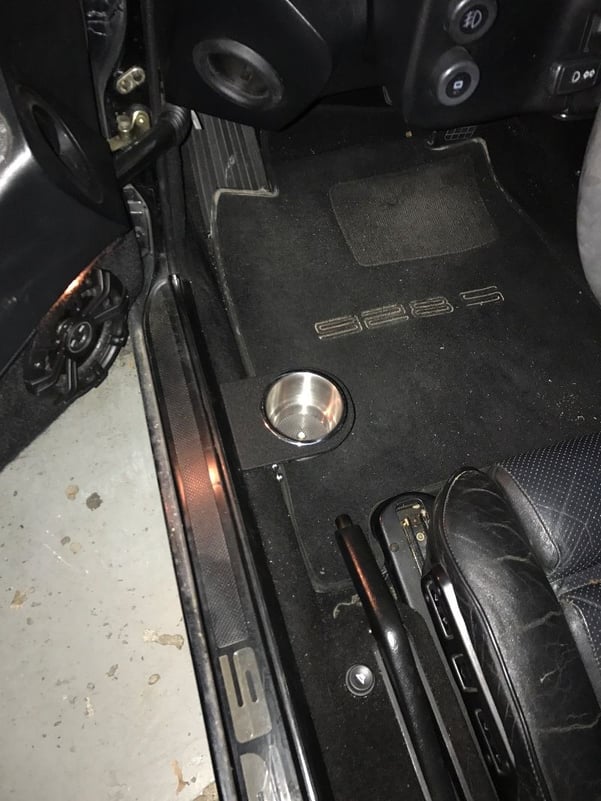
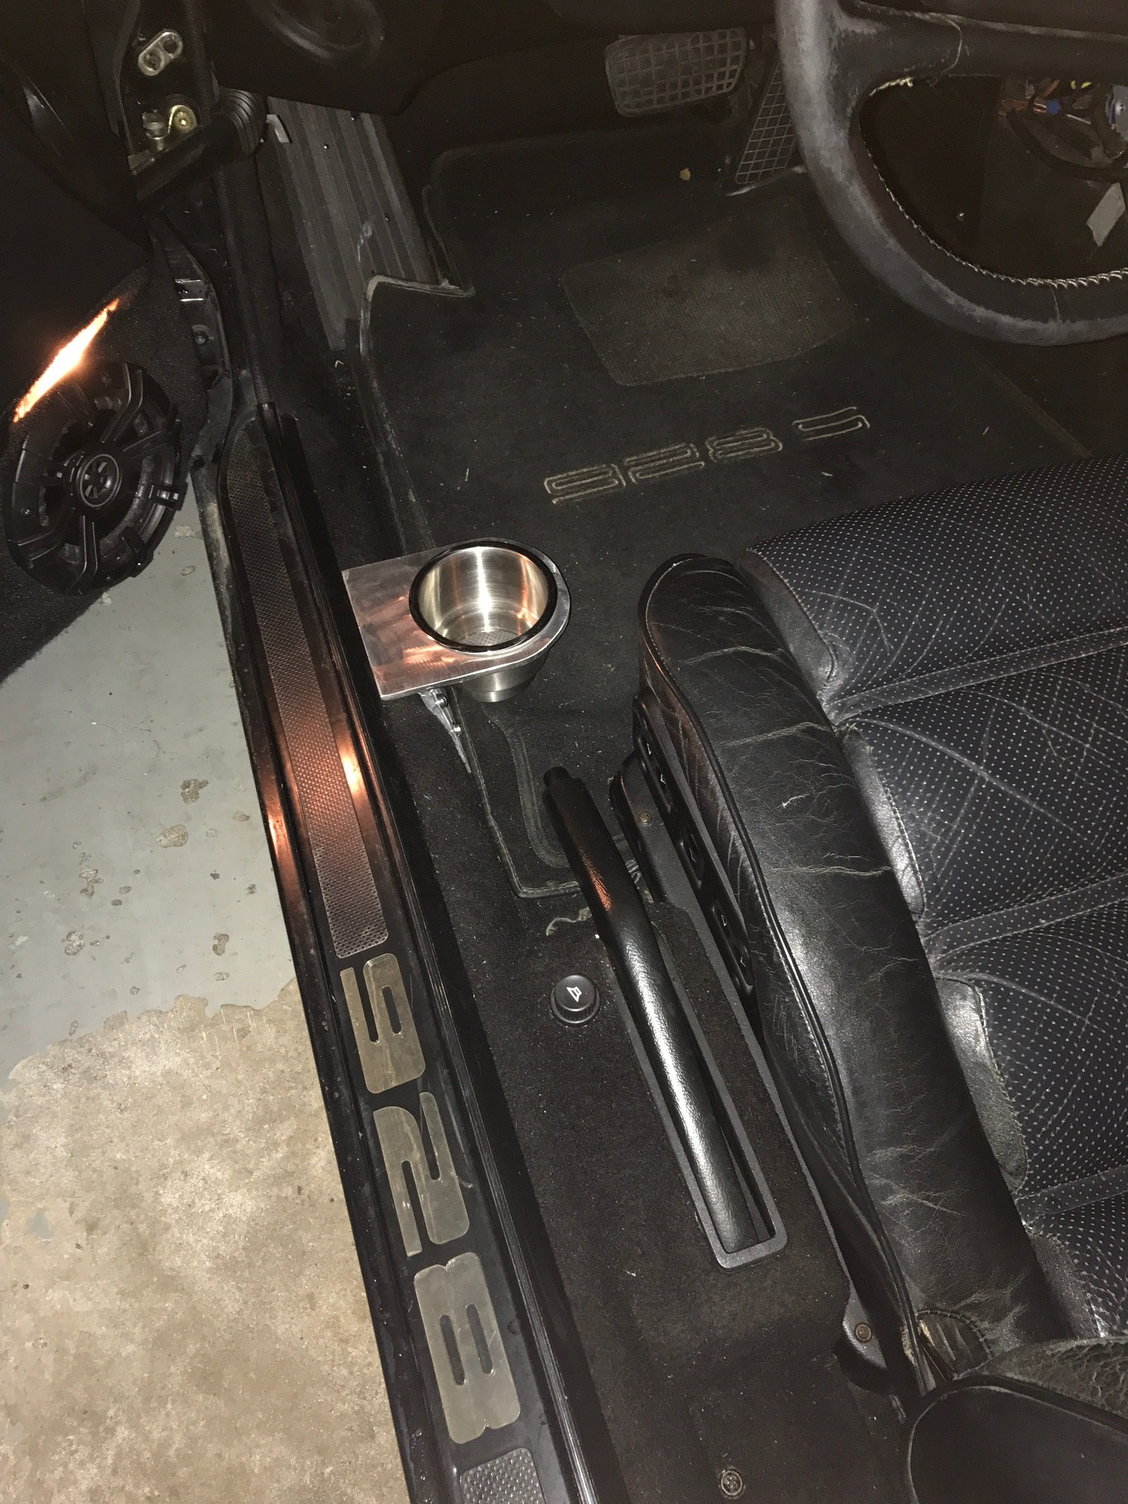
Apparently all the work I put into the suspension on the 928 was not a priority for my daughter as she has been hounding me for a cup holder. I've searched on what others had done and didn't like what I was able to find so I decided to make my own. Purchased some 5.00" x 0.25" T6061 and went to town. Won't lecture on why I chose the location that I did, but it seems to work out and I had two criteria from my daughter. It had to work in the position she sets the seat, which is all the way forward, and it had to hold her water bottle for cheerleading and her tall Starbucks cup. Only thing remaining is to paint or powder coat black and make one for the passenger side. Took me about 2hrs in total to make in my garage and the pieces are TIG welded together.
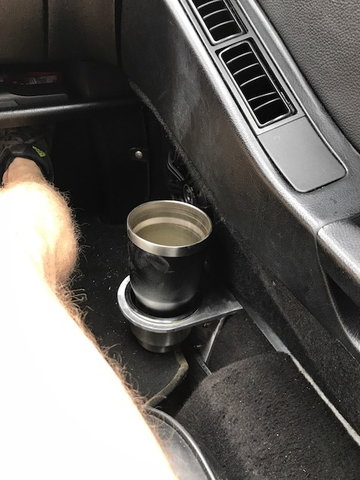
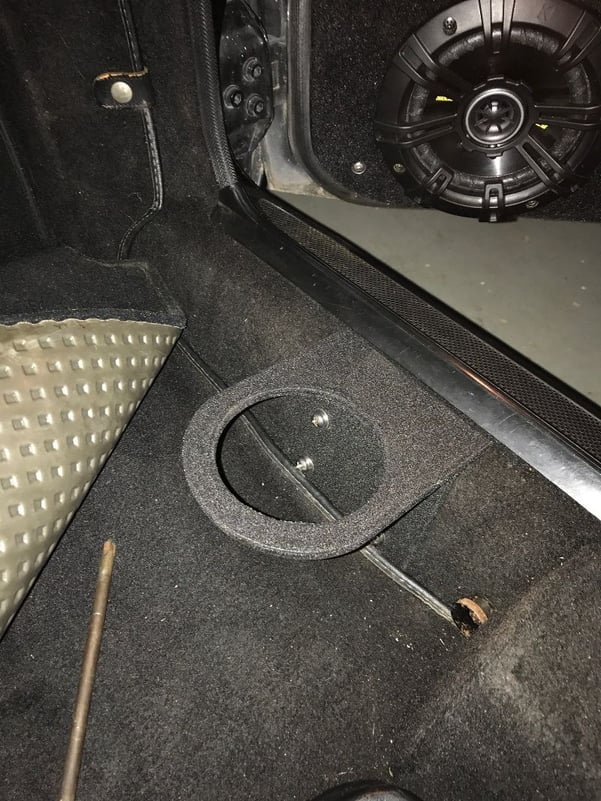
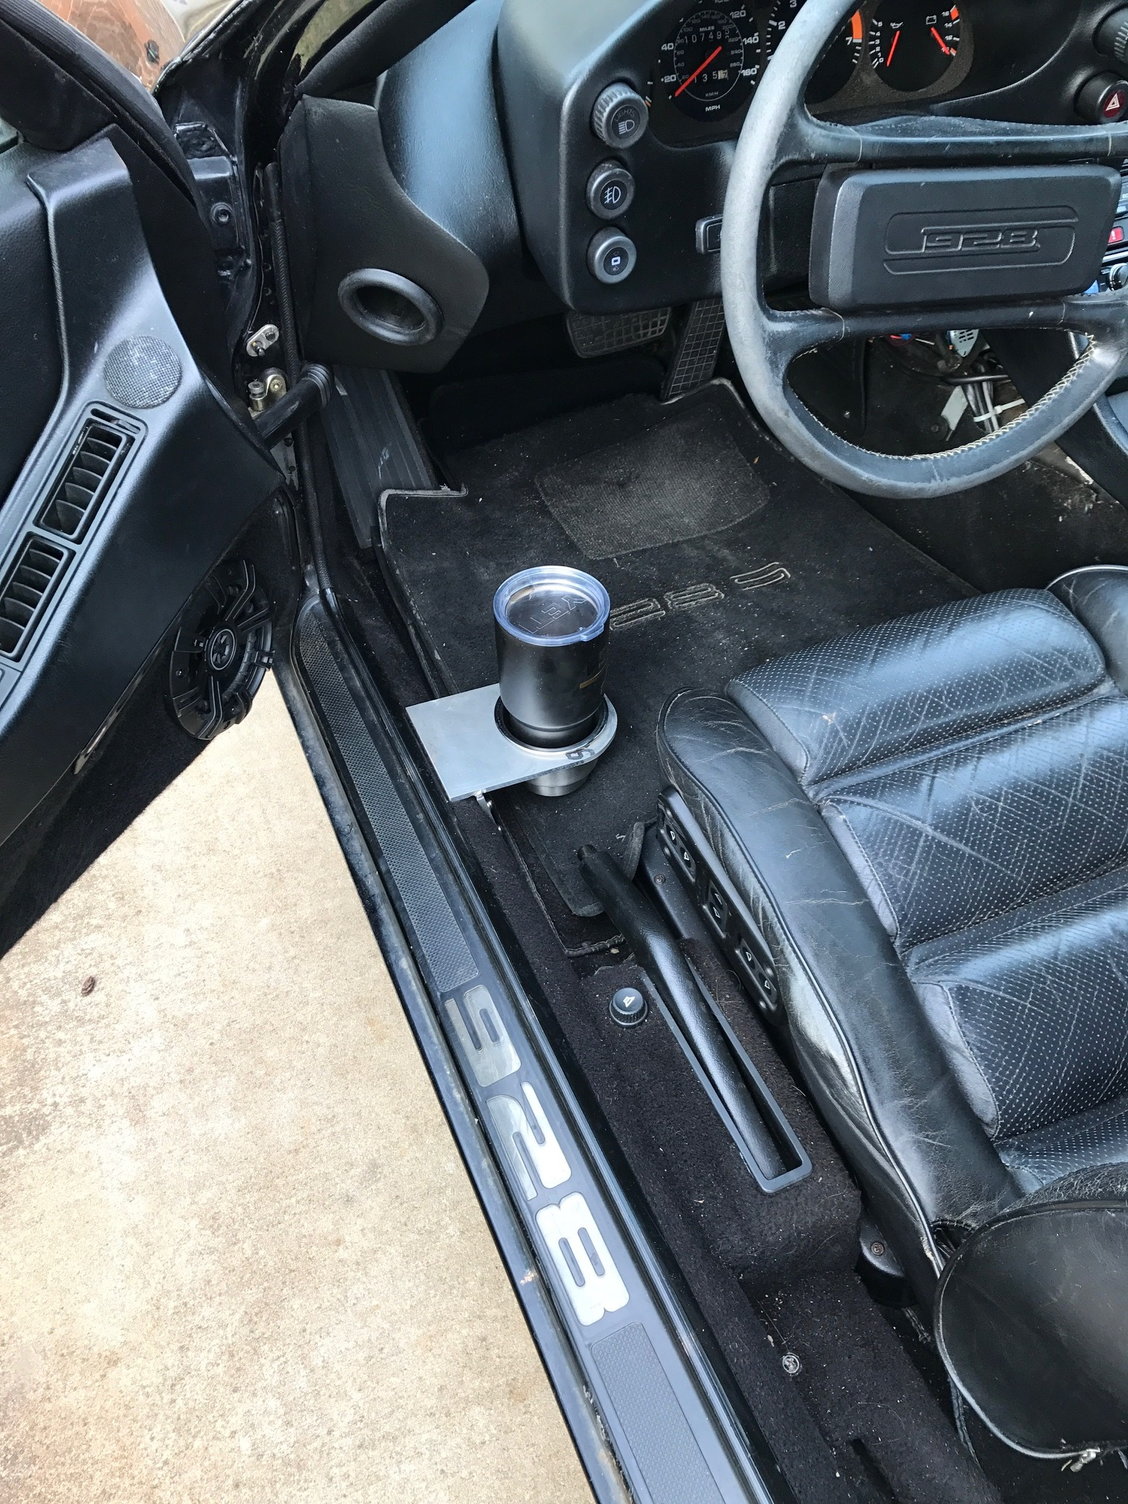
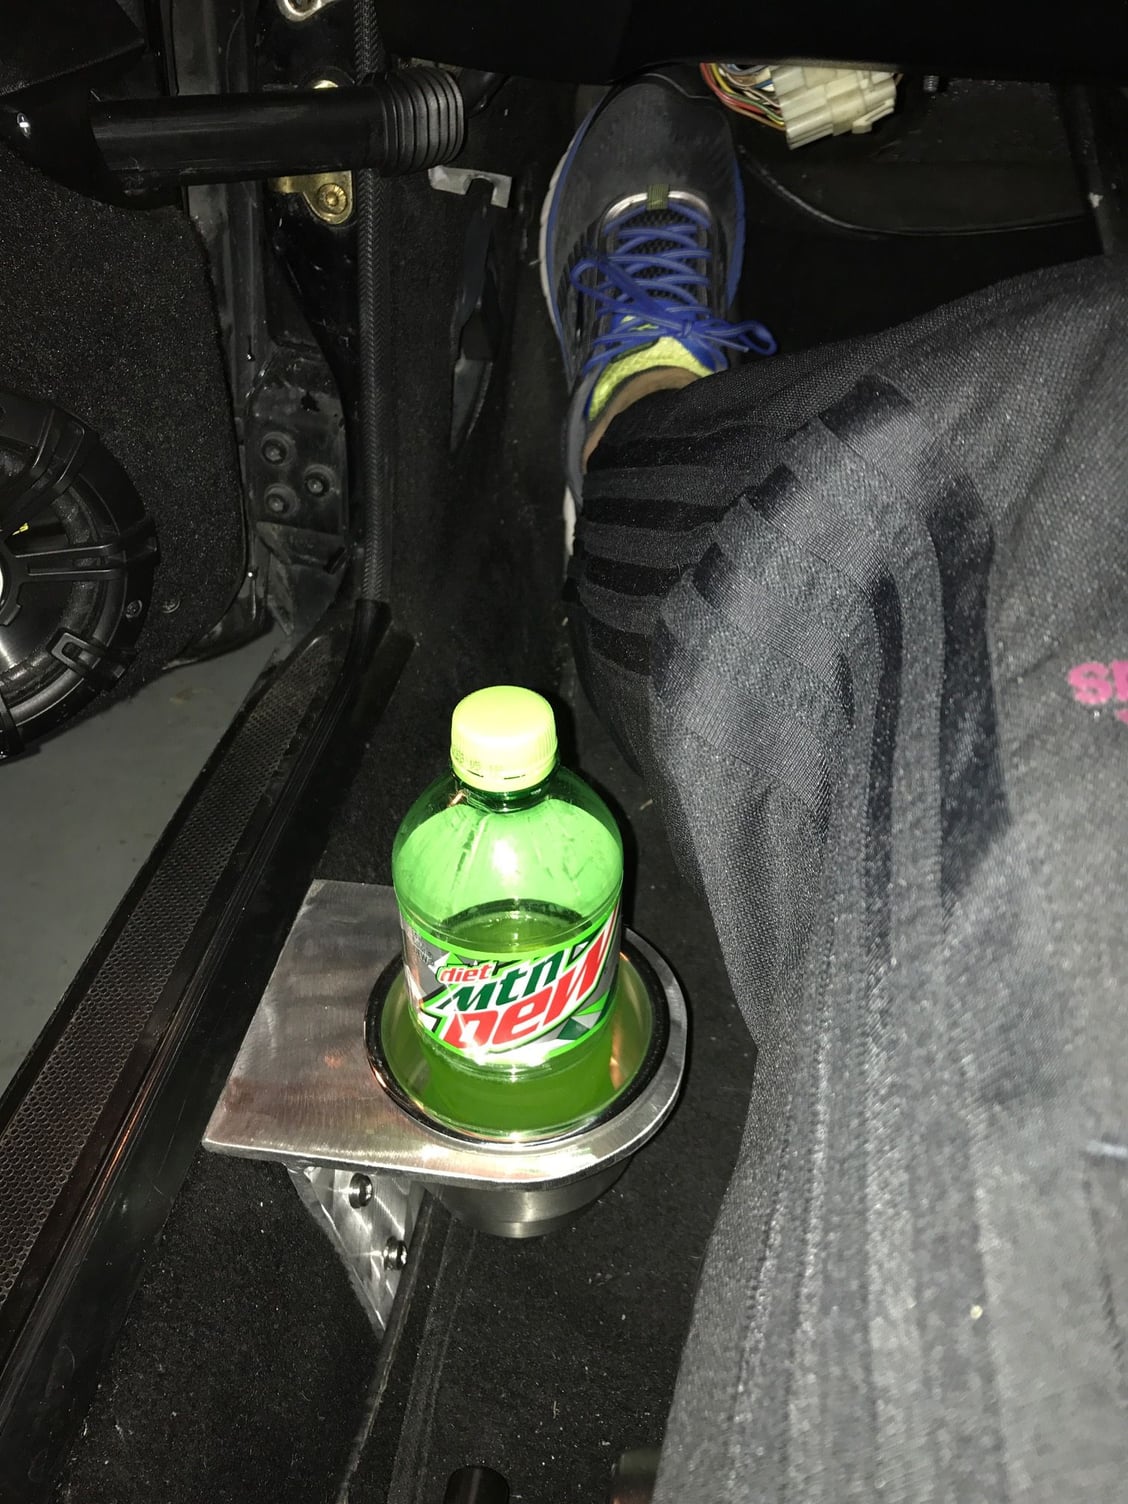
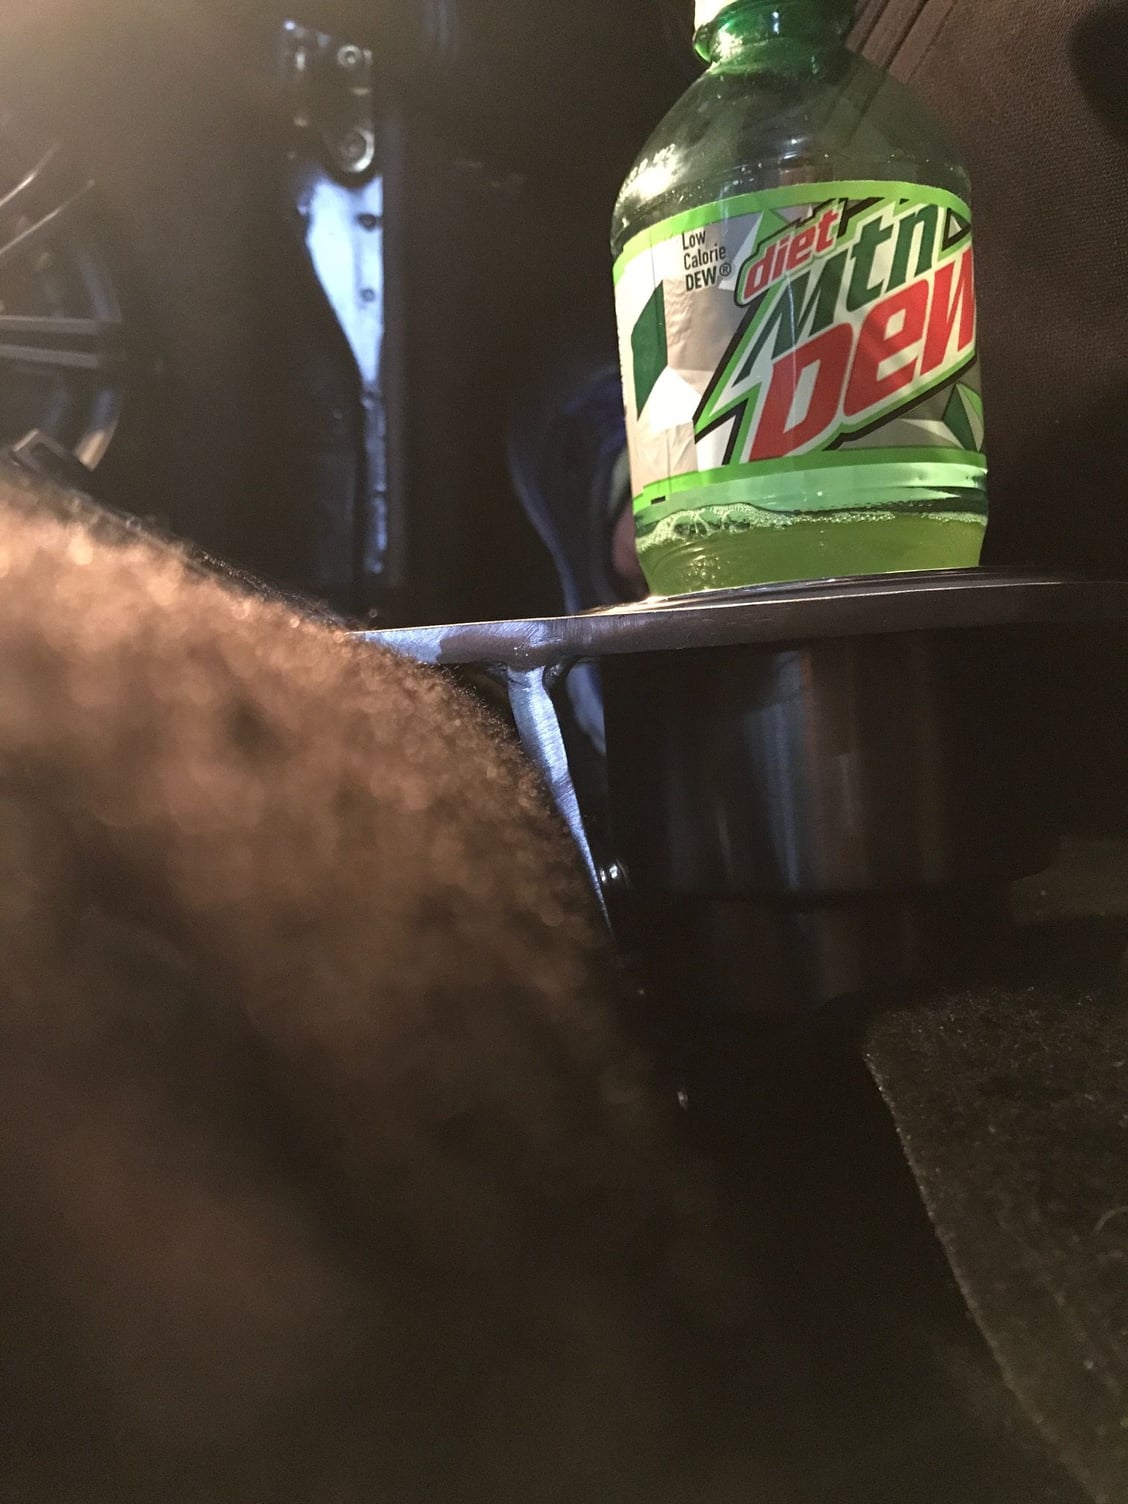
It's the winter look! I am actually reworking it because when I put my foot on the rest pad my leg was slightly rubbing the Yeti. I told my daughter that I will make it work for the Yeti and beyond that (water bottle for cheerleading) she is on her own. This allows me to move the cup ~1.25" closer to the door and still have plenty of clearance for the Yeti. I'm going to have my buddy cnc waterjet cut the pieces and weld them so they will be 100% professional so I have 1-2 extra sets if anyone is interested. Not looking to make any money so I'll sell at my cost.
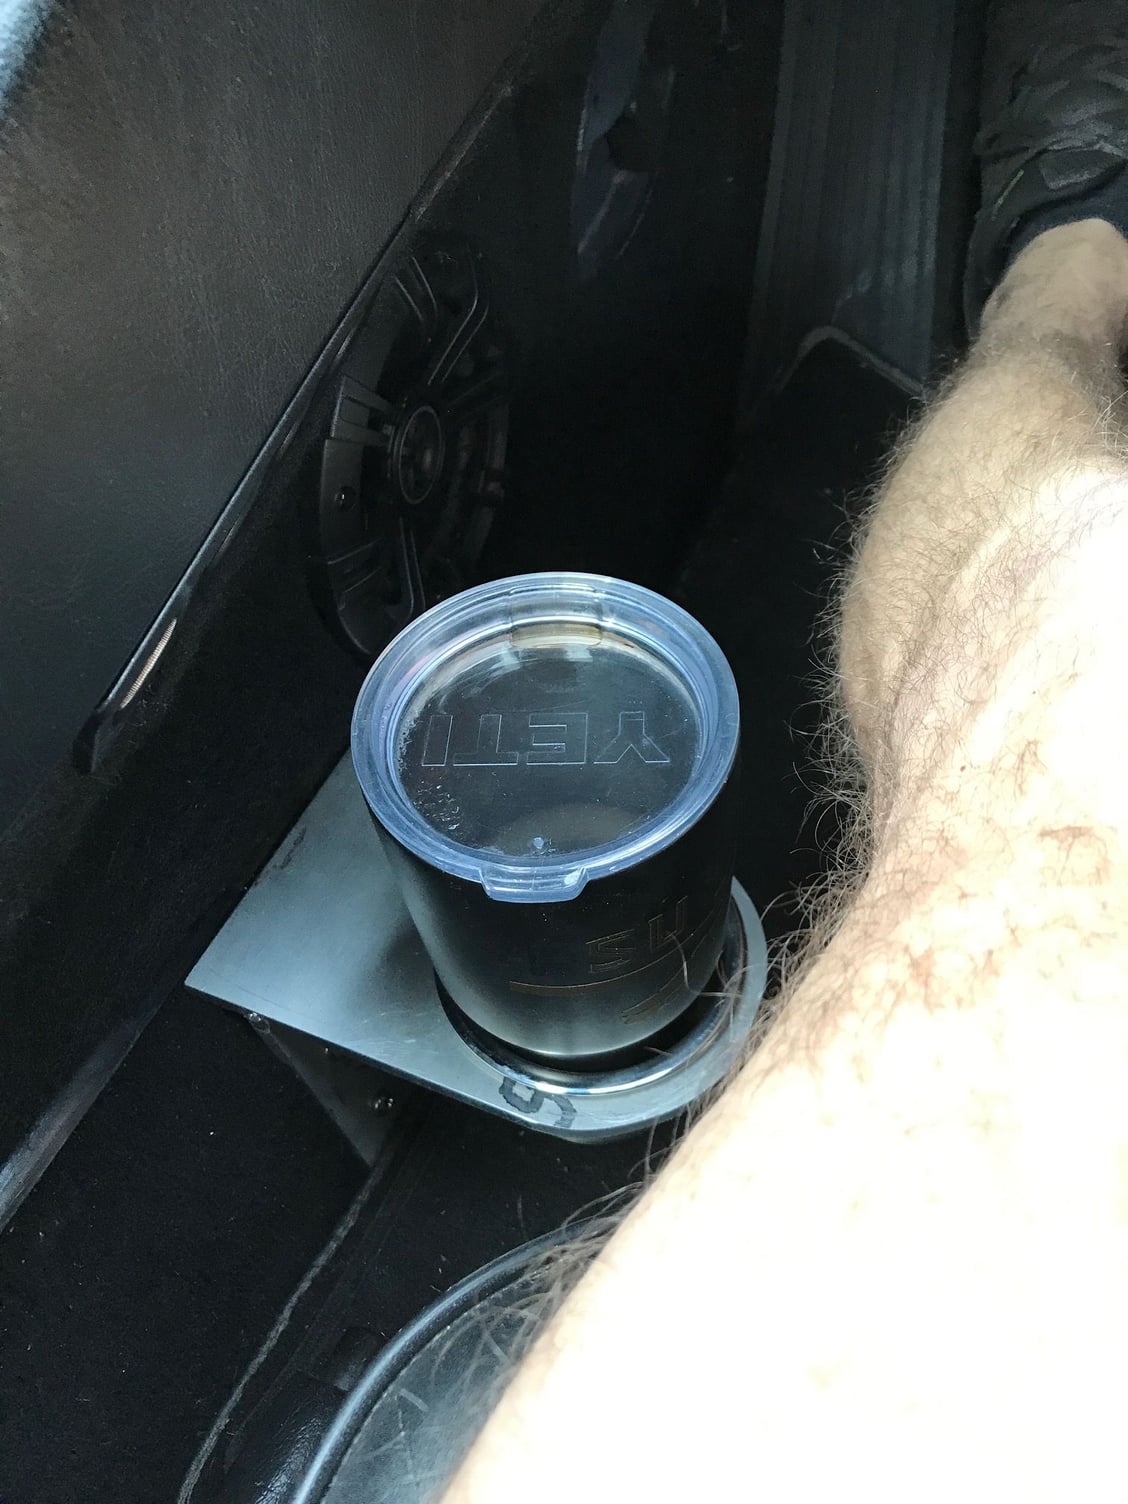
I was able to modify the cupholder today and moved it ~1.25" closer to the door. I could have gone a bit farther, but I didn't want the cup insert to hit the mounting plate. I think this solved my issues and the Yetti fits with plenty of clearance to the door. Additionally, my leg has plenty of clearance for a drink when my foot is on the rest. It doesn't appear the DS cupholder will work on the passenger side so likely need to make custom from scratch instead of copying the DS piece. Next step, fabricate the PS cup holder and have them powder coated wrinkle black.
I previously searched that thread so I am aware of that setup. After looking at your idea and comparing to my idea, I have determined that my idea is better and I win.
However, I'm guilty of wanting a drink now & then, so I guess it's kinda ok. I really like the one down by the door sill. I would never have thought to put one there & it's a great location. Keeps the passenger from sneaking a drink out of your cup, too!
However, I'm guilty of wanting a drink now & then, so I guess it's kinda ok. I really like the one down by the door sill. I would never have thought to put one there & it's a great location. Keeps the passenger from sneaking a drink out of your cup, too!
Thanks for the positive feedback. My GTR has three cup holders (2 front and 1 rear) and my EVO IX has four cupholders (2 front and 2 rear). Both cars make over 600hp and you get thirsty when you drive.
The project is officially over! Got a quote from the powder coater and they wanted $100...NOT.
Time for PLAN B
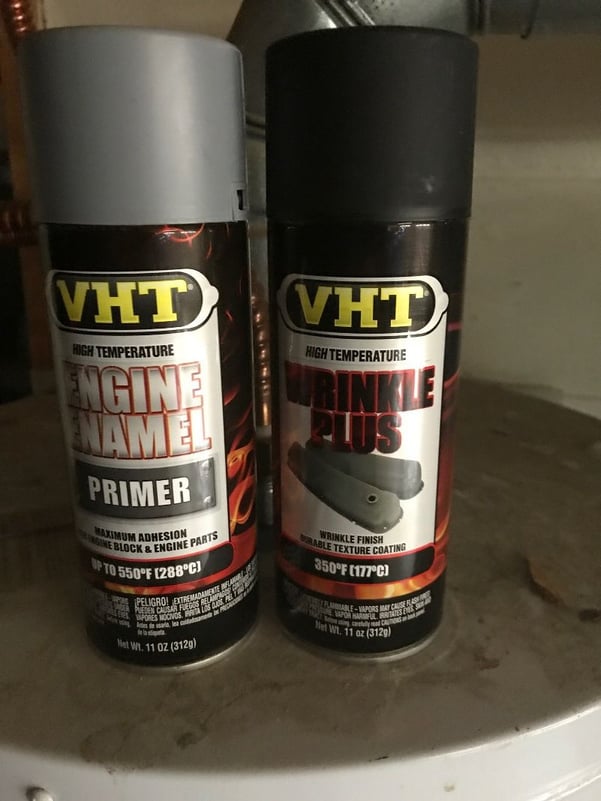
After some light sanding and hitting it with a Scotch Brite pad (not approved by Porsche "experts"), I then wiped down with acetone before applying two coats of primer.
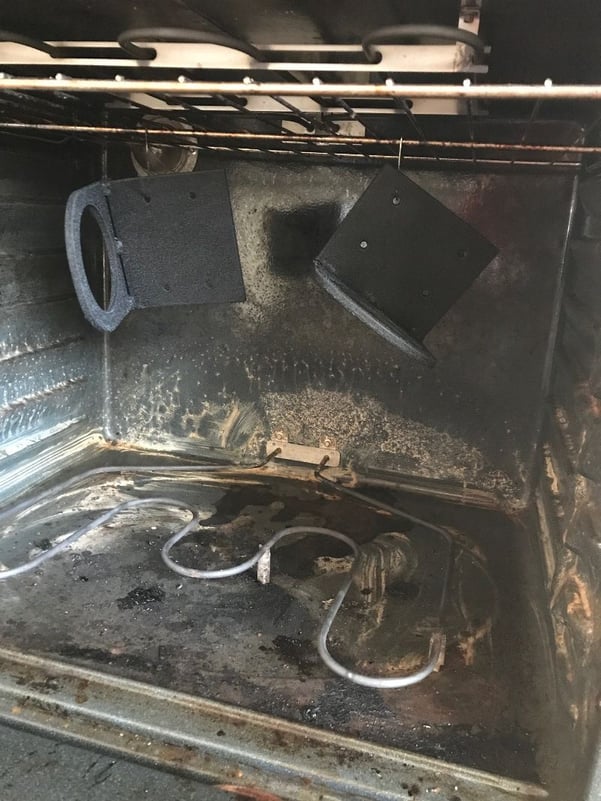
I then applied 3 coats of the wrinkle plus paint and hit it with a heat gun for about 5-7 minutes to start the wrinkle finish. I then placed in the oven 30min@200F, 20min@250F, 10min@300F.
SHHHHHH, wife wasn't home.
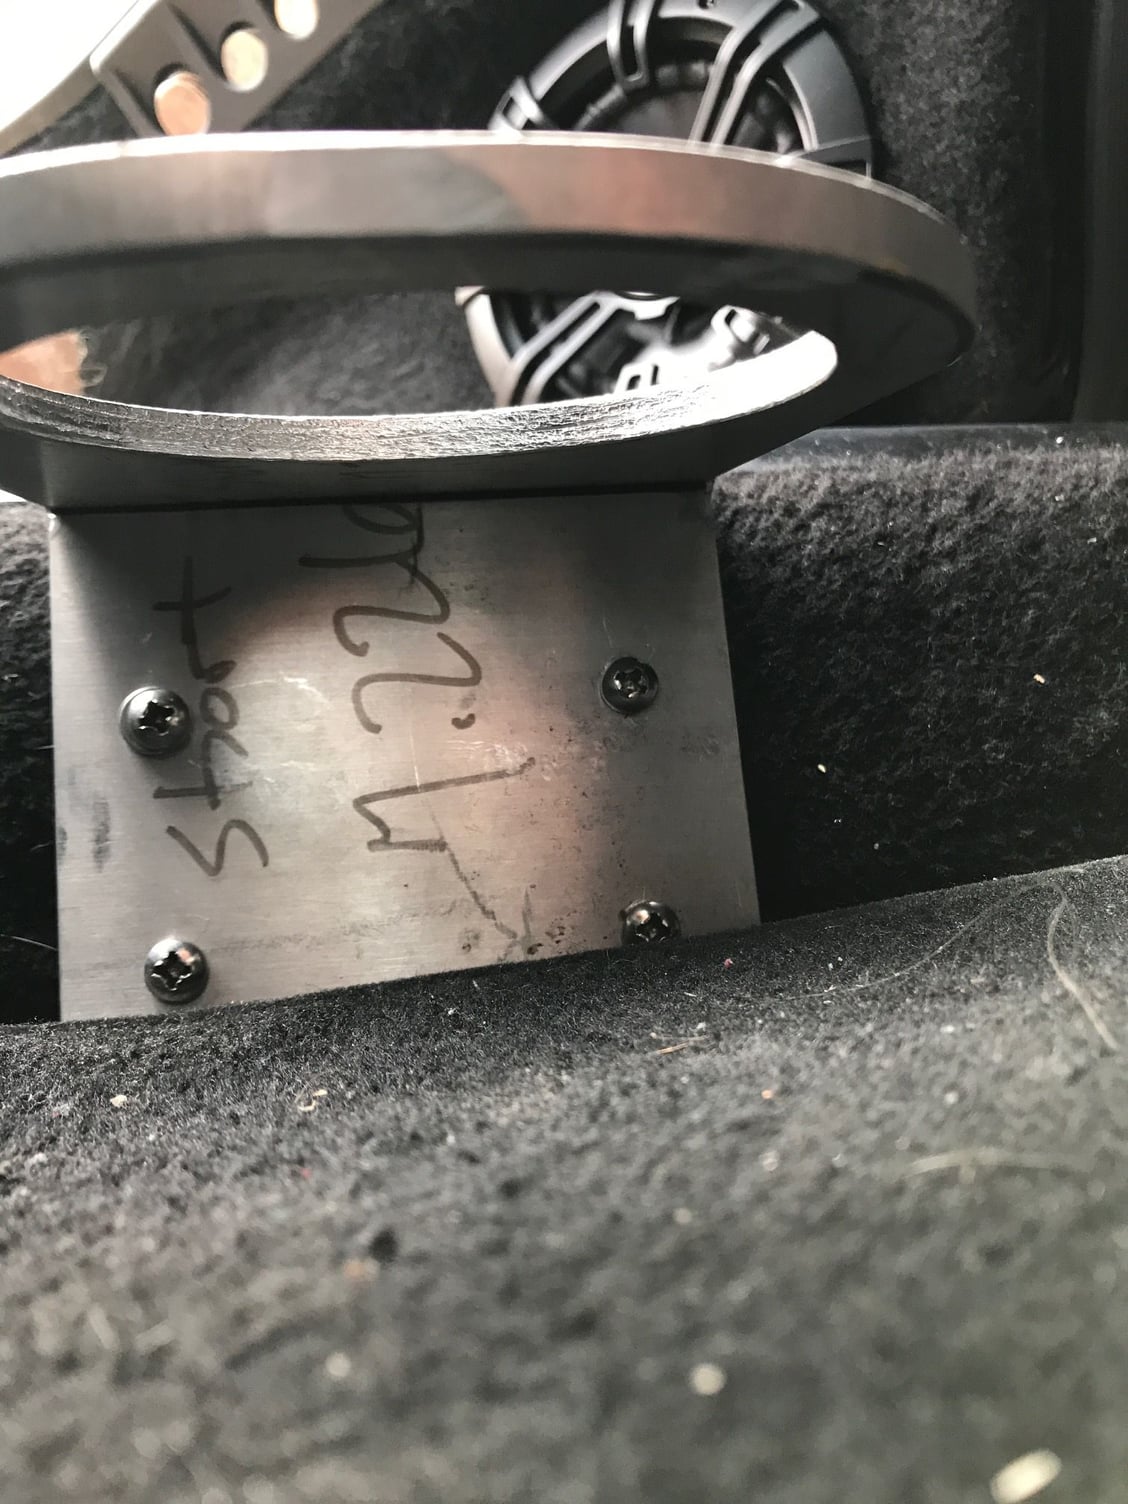
Let it cool for 2 hours and then installed with fresh stainless fasteners. It's like a chameleon!

 02-03-2018, 06:09 PM


 T
T