When you click on links to various merchants on this site and make a purchase, this can result in this site earning a commission. Affiliate programs and affiliations include, but are not limited to, the eBay Partner Network.
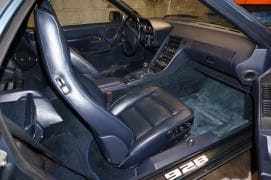
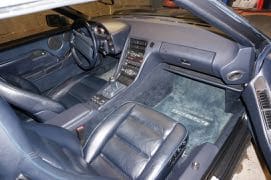
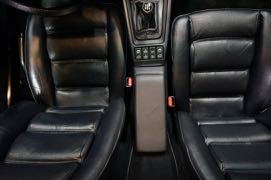
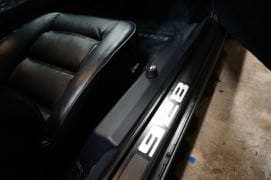
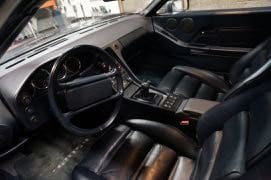
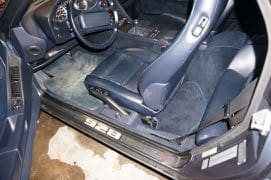
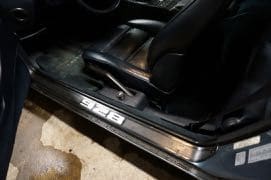
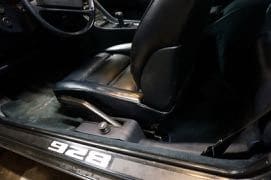
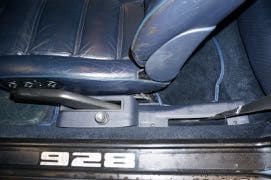
Here are some final shots of my interior after everything was put back together. As a recap, I recovered the dash and armrest. I also vinyl clad the seat hinge covers, and accessory covers on the door sills which are normally covered in carpet. Since the dark blue interior often looks black in artificial light, I tried to get shots with and without the flash. The shots with flash make it look too blue an the different angles and materials look different but in reality everything looks the same shade. I could not be happier with the results considering I am a total novice. If you look closely you will see some mistakes:
1. wrinkle in foam on armrest showing through the top pad.
2. small bubble from not enough glue in the concave sections of the dash at the A pillar.
3. not enough padding on the driver side parking brake cover.
I think covering the accessory covers in vinyl is actually preferred over carpet. What do you think? Too much of a deviation from stock?
Rover/BMW CD43 made by Baupunkt. It's a great solution for me. It has the correct look, It has a digital tuner, and an Aux input for bluetooth adapter. The big buttons are easy to use. You can read more in my write-up here: https://benno928.wordpress.com/2017/05/03/radio-head/
I was eyeing those on eBay for a while. I haven't jumped because I tend to listen to digital audio from thumb drives rather than the radio, CD, or even Bluetooth. However, they look absolutely perfect.
I was eyeing those on eBay for a while. I haven't jumped because I tend to listen to digital audio from thumb drives rather than the radio, CD, or even Bluetooth. However, they look absolutely perfect.
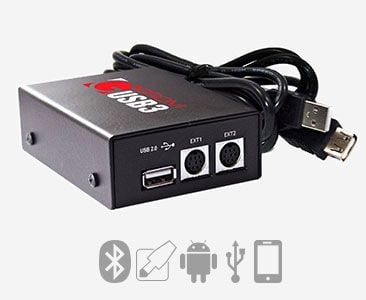
The head unit has an input for CD changer which you can easily convert to headphone jack. once you identify the +/- input leads on the harness. Alternatively there are input adapters that have multiple sources of inputs. Mine has Bluetooth, headphone, and USB inputs. I have this one which seems to be ok but I do get some distortion from BT so maybe I have a bad one or maybe this is cheap. The other inputs are fine. https://www.ebay.com/i/121543181090?chn=ps&dispItem=1
I love the work in this thread! Underneath all the old cracked leather and foam what is the dash actually made of? Is that fiberglass? I'm looking at a project 928 and the dash is in Baaaaaaaad shape. I'm a very handy and capable guy. Just wondering how to straighten a warped dash before all the awesome covering work in this thread, it looks amazing!
The dash is constructed of steel sheet metal shell covered in an injection molded foam, underneath a cosmetic plastic that is bonded to the foam. In my dash project, I removed the top layer from the foam which was good for fixing the cracks but made for some difficulties in getting a good bond with the Weld-wood adhesive. I'd recommend not removing the top layer and try and fix the dash crack with the covering intact.
You mention warping, do you mean the surface is buckled near the cracks, or do you mean the entire dash is bent? If the former, you can cut out the raised ridges and fill it using the filler I used. If the dash is severely warped or bent, you can re-bend it. Post some pics!
Also, I would recommend using a stronger contact adhesive like the DAP Landeau cement for the tough areas, vent holes, concave sections, wrap around edges. This cement is trickier to work with, But the smooth surface of the dash cover is easier if you have.
If you are in need of of a replacement dash, I have a pre 89 core available
here are some pics of the car... I�m looking at two project 928s this is one of them. I�m a real diy try anything first before I hire someone kind of guy, not afraid to tackle it. Just looking for the best way or if it�s even possible to bring this back. The other car has a dash in much better shape but it might be sold by the time I can get it. I want to do this one guards red or victory red with a black/tan interior. So many guys say it�s all about the interiors on these cars and I understand if they are getting someone else to do the work. The seats I�d want to send out no question. But after seeing your work I think I could repair the dash and other interior panels to save a lot of money. Let me know what you think of this poor mess.
you said it�s easier than body work. I�m quite experienced at that. Could this be the worst dash of them all? Lol
You definitively have a dash in poor condition. But it looks like you have a leather dash cover that has shrunk form sun and heat. The leather dashes have covers over the afore mentioned foam and plastic cover.
My recommendation is that you remove the dash from the car and then remove the brown leather over and then re-assess the condition of your dash and how you want to pursue recovering.
You can play around with recovering yourself as I have or use a pre-made cover made by someone. I can recommend the covers made by Classic9.
@olmann you were asking how my dash recovering turned out...
I kind of remember seeing this post when you first did it. Very nice work!
As you mention later the Weldwood Landau adhesive is the superior adhesive. Also, when working vinyl steam is best. For leather, the heat gun is best.
When I repair a dash with cracks I will remove the vinyl surface layer and then V out the cracks and repair with a closed cell expandable foam. I then cover the dash with a 1 mm closed cell foam. That will allow for expansion/contraction on the heat cycles and also keep any repaired cracks from showing back up. I prefer the 1 mm foam as it will still give you the OEM fit and finish without the puffiness you sometimes see on repaired dashes.

 04-08-2018, 01:08 AM