Notices
928 Forum 1978-1995
Sponsored by:
Sponsored by: 928 Specialists

Quick Sunroof question

Thread Tools
 
Search this Thread
 
Old 01-22-2018, 01:10 PM
  #16  
drscottsmith
Three Wheelin'
Thread Starter
 
drscottsmith's Avatar
 
Join Date: Jul 2016
Location: Duncan, SC
Posts: 1,330
Received 98 Likes on 70 Posts
Default

Thank you sir - will check all of that!

-scott
Old 01-22-2018, 04:08 PM
  #17  
9two8
Three Wheelin'
 
9two8's Avatar
 
Join Date: May 2007
Location: Newcastle upon Tyne. England
Posts: 1,365
Received 71 Likes on 40 Posts
Default

Just in case you need it Scott, here's an interesting how to...,

https://drive.google.com/file/d/0Bzv...ew?usp=sharing

Ken
80 928 S
5 Speed
UK
Old 01-22-2018, 04:18 PM
  #18  
Wisconsin Joe
Nordschleife Master
 
Wisconsin Joe's Avatar
 
Join Date: Jan 2013
Location: Kaukauna Wisconsin
Posts: 5,925
Received 302 Likes on 231 Posts
Default

Originally Posted by 9two8
Just in case you need it Scott, here's an interesting how to...,

https://drive.google.com/file/d/0Bzv...ew?usp=sharing
That is the one I was referring to that is in the New Visitor sticky.
Perhaps the best writeup on the sunroof anywhere that I've seen.
Old 01-22-2018, 04:31 PM
  #19  
drscottsmith
Three Wheelin'
Thread Starter
 
drscottsmith's Avatar
 
Join Date: Jul 2016
Location: Duncan, SC
Posts: 1,330
Received 98 Likes on 70 Posts
Default

Got it -

Thanks all!

-scott
Old 01-23-2018, 09:30 PM
  #20  
drscottsmith
Three Wheelin'
Thread Starter
 
drscottsmith's Avatar
 
Join Date: Jul 2016
Location: Duncan, SC
Posts: 1,330
Received 98 Likes on 70 Posts
Default

I have been working step by step through the write up in the stickies.

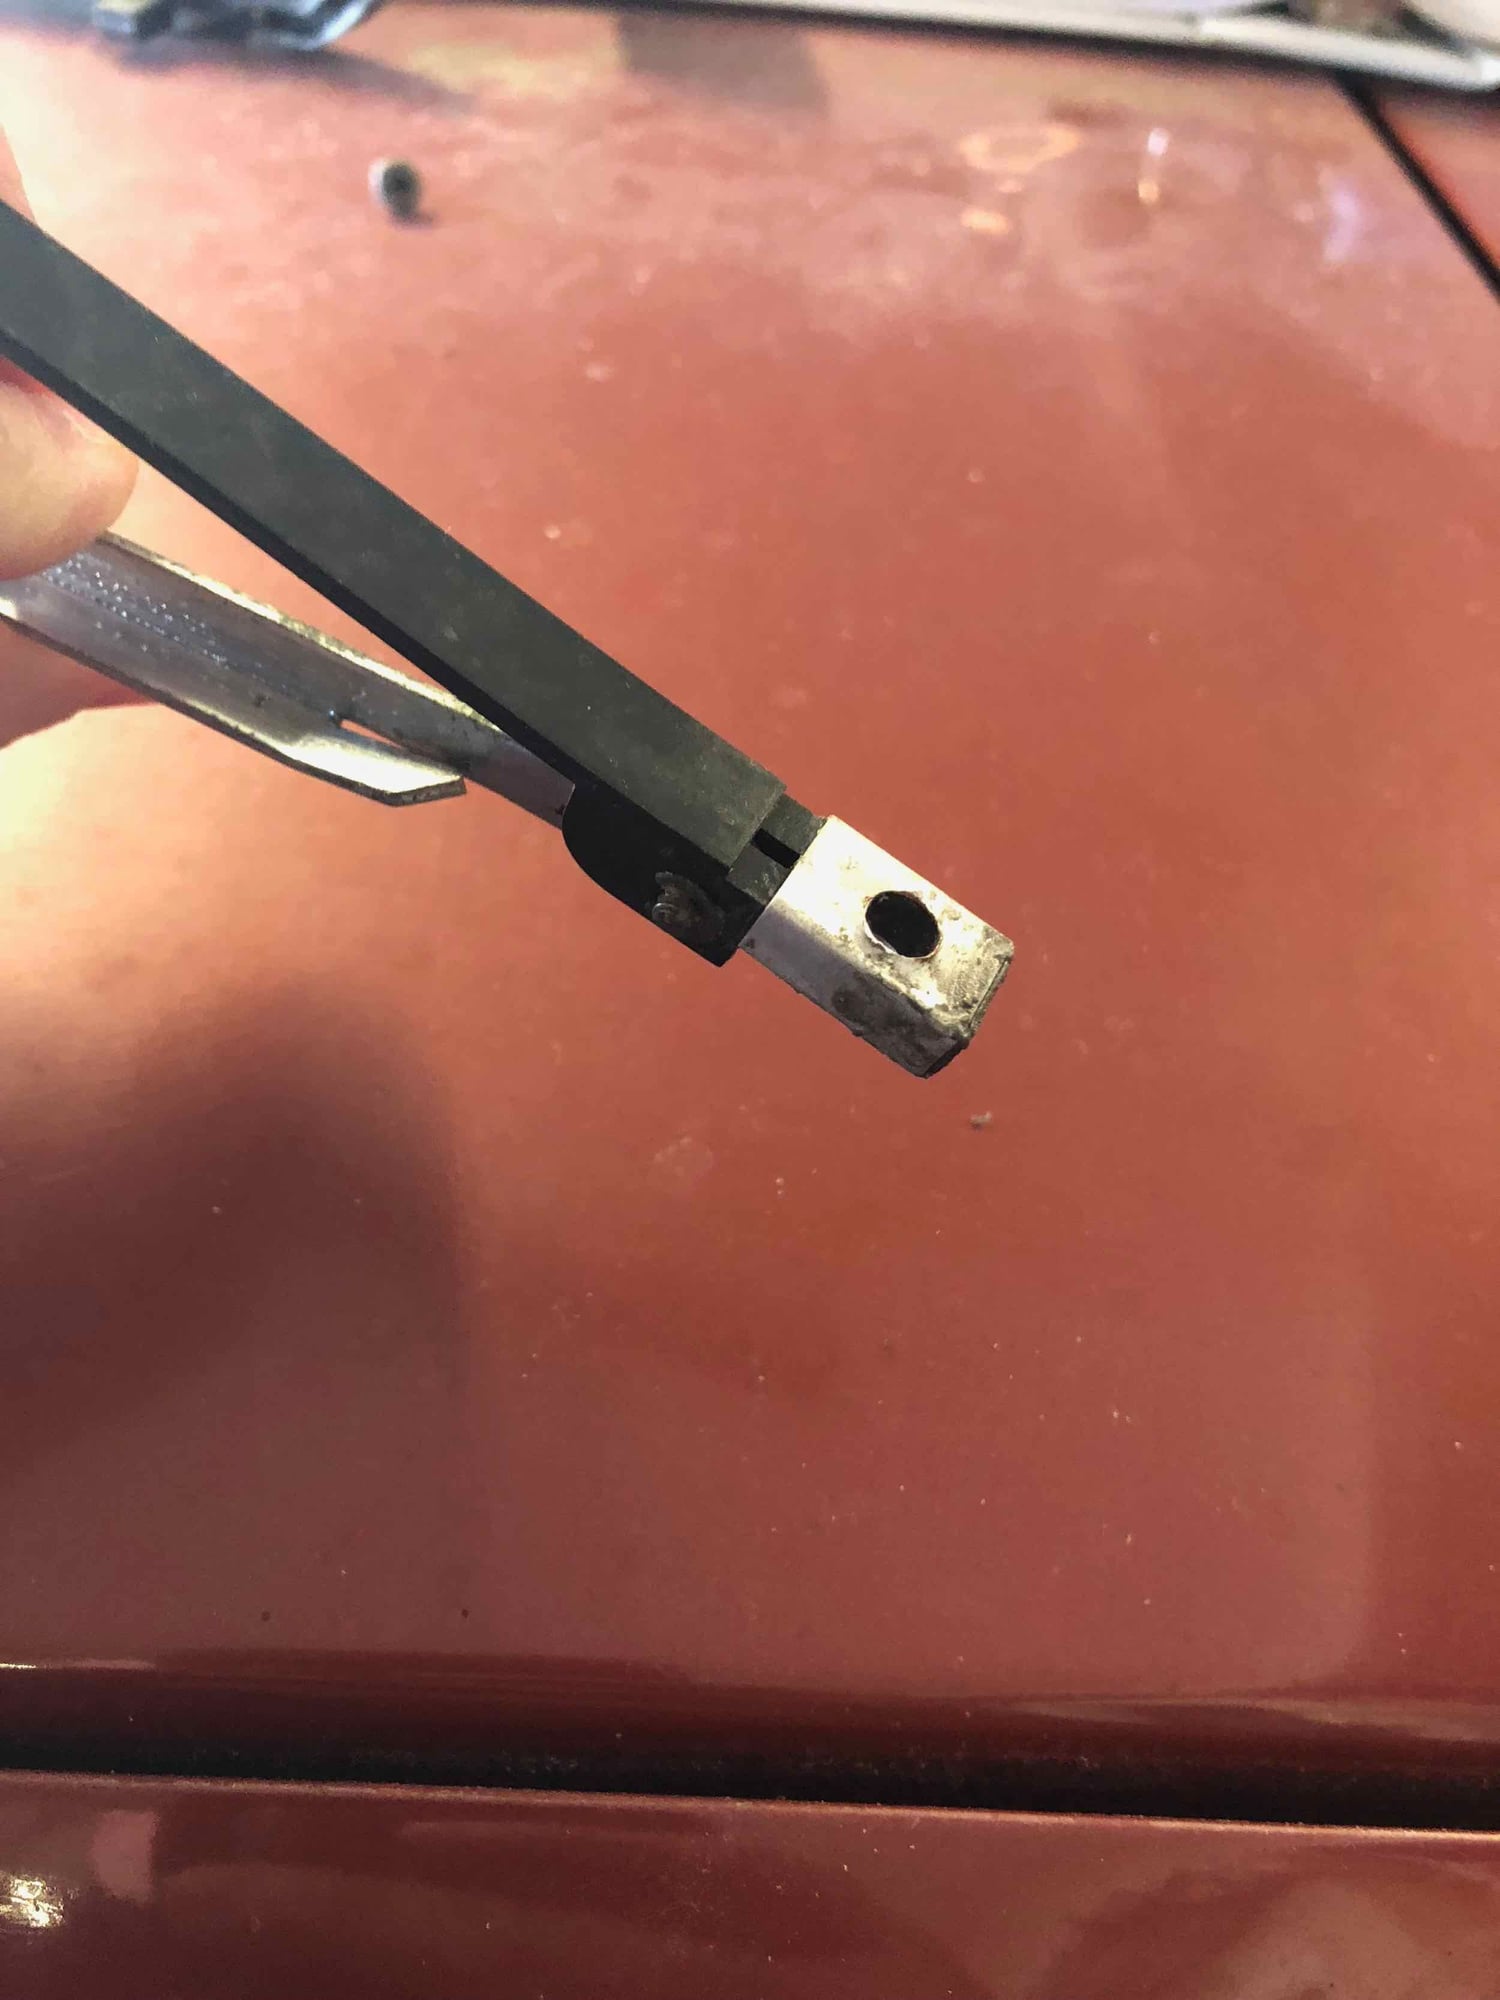
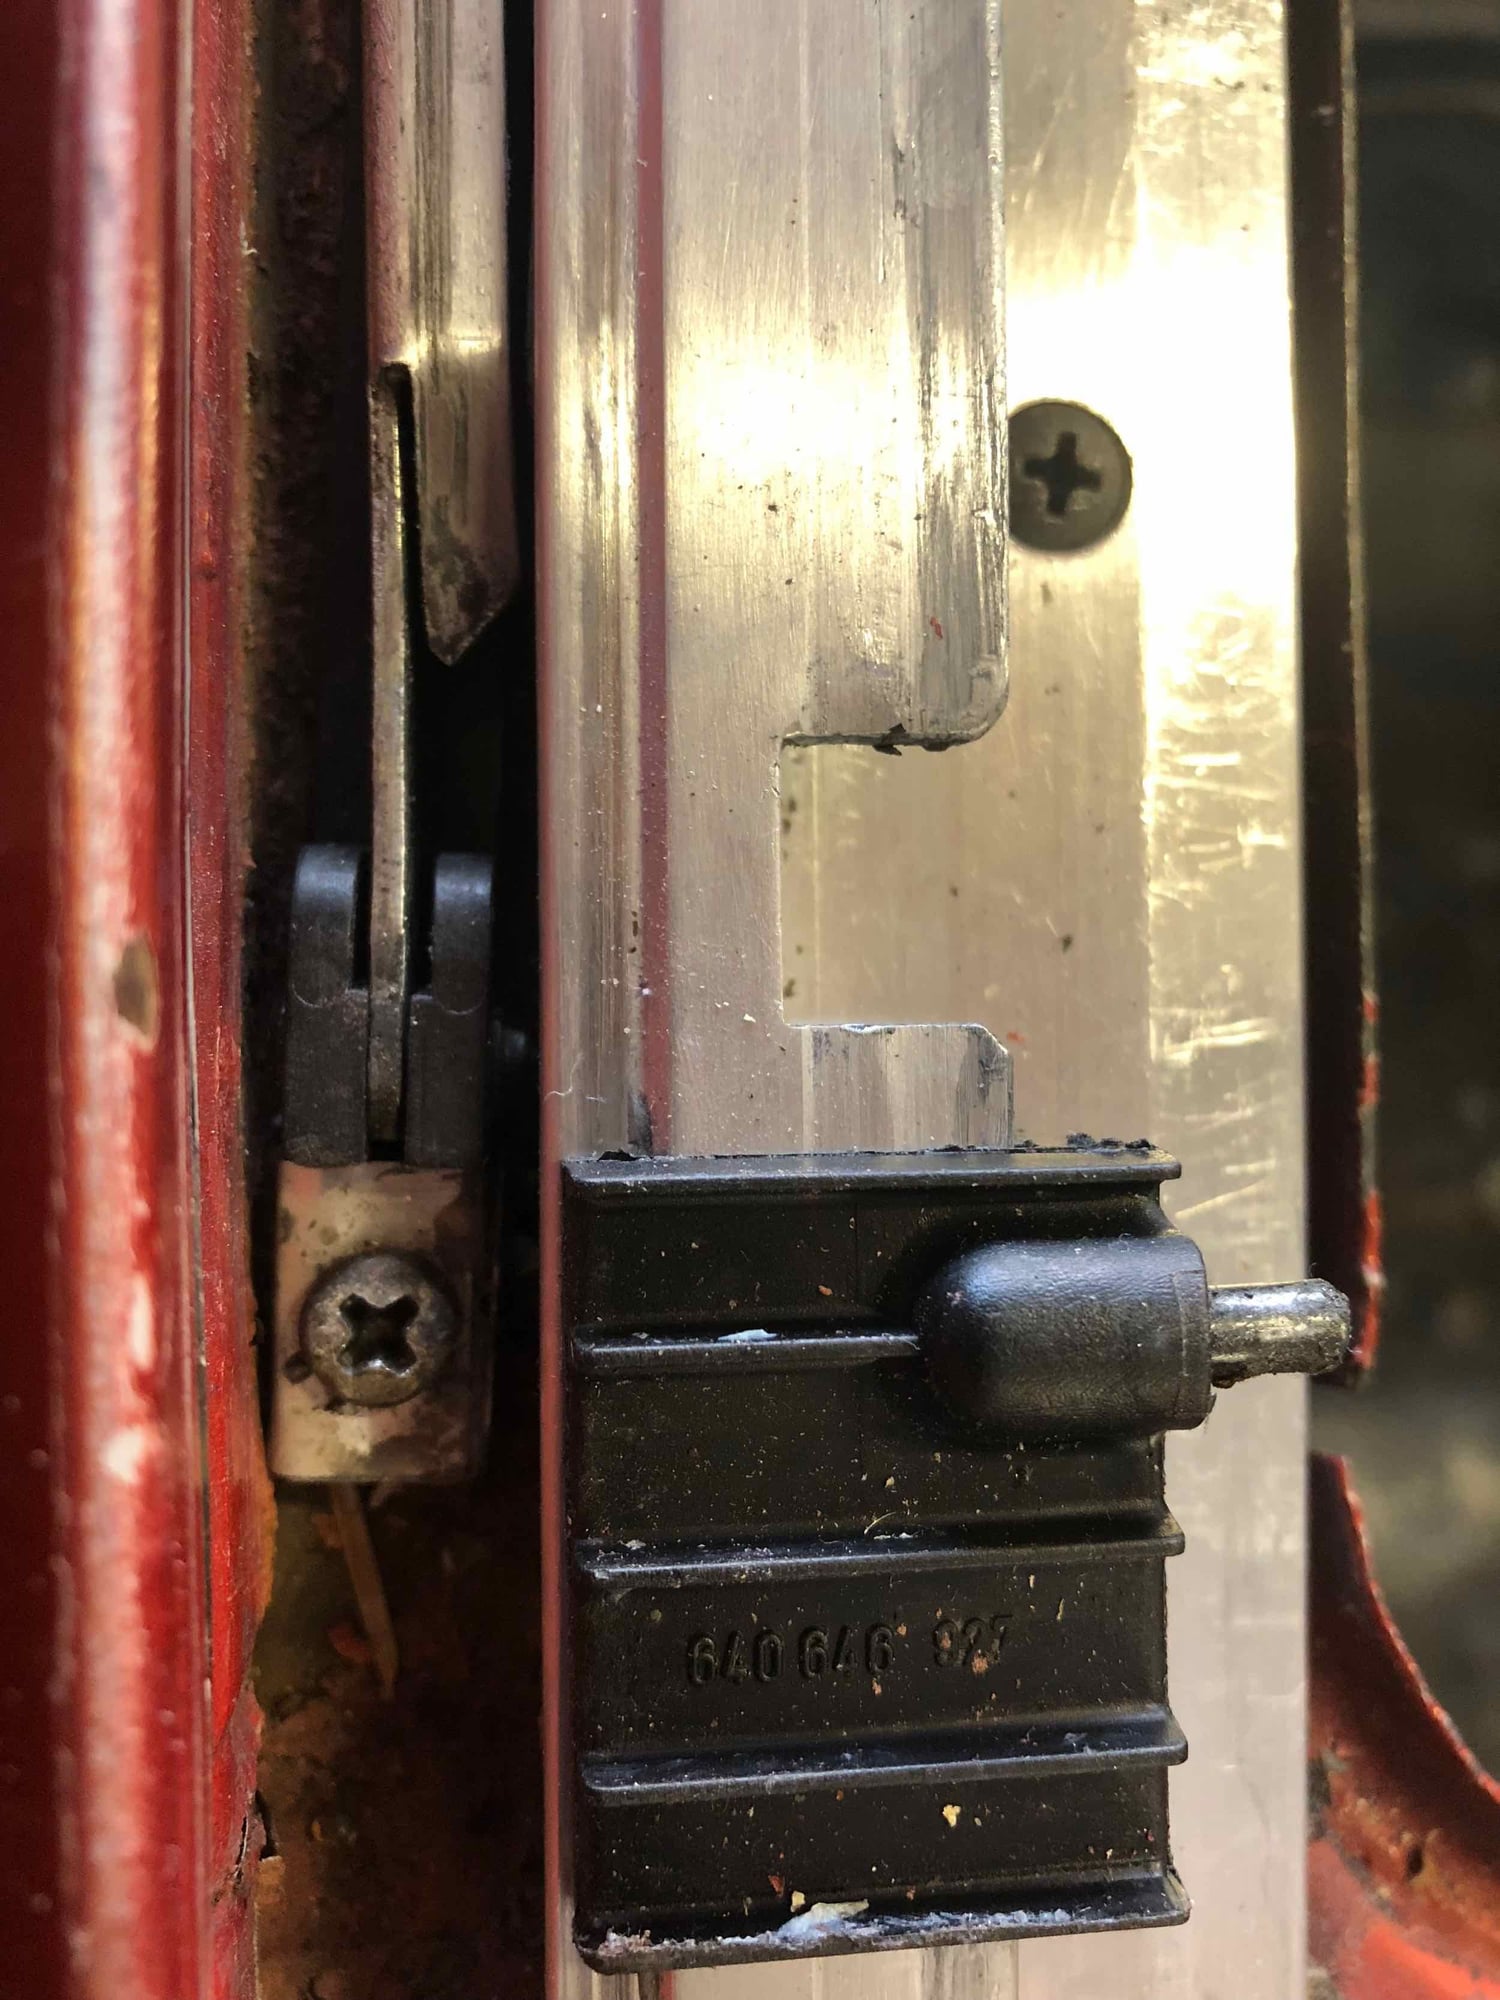
What exactly should things look like when “closed”? Pic below is where I “think” the transition block and cable should be when closed...pin on cable tight against stop pin in block.

should the front carrier rail be aligned with the end of the aluminum track when closed or a little ways back?

i know I am overthinking this...but it seems like there is almost no room for error with adjustment of this thing.

thanks all
Old 01-23-2018, 11:47 PM
  #21  
Speedtoys
Rennlist Member
 
Speedtoys's Avatar
 
Join Date: Sep 2010
Location: Boulder Creek, CA
Posts: 13,582
Received 1,034 Likes on 623 Posts
Default

Thats where it should be closed, thats where the shuttle flips 'up' to close the rear of the panel.
Old 01-25-2018, 10:01 AM
  #22  
drscottsmith
Three Wheelin'
Thread Starter
 
drscottsmith's Avatar
 
Join Date: Jul 2016
Location: Duncan, SC
Posts: 1,330
Received 98 Likes on 70 Posts
Default First things first

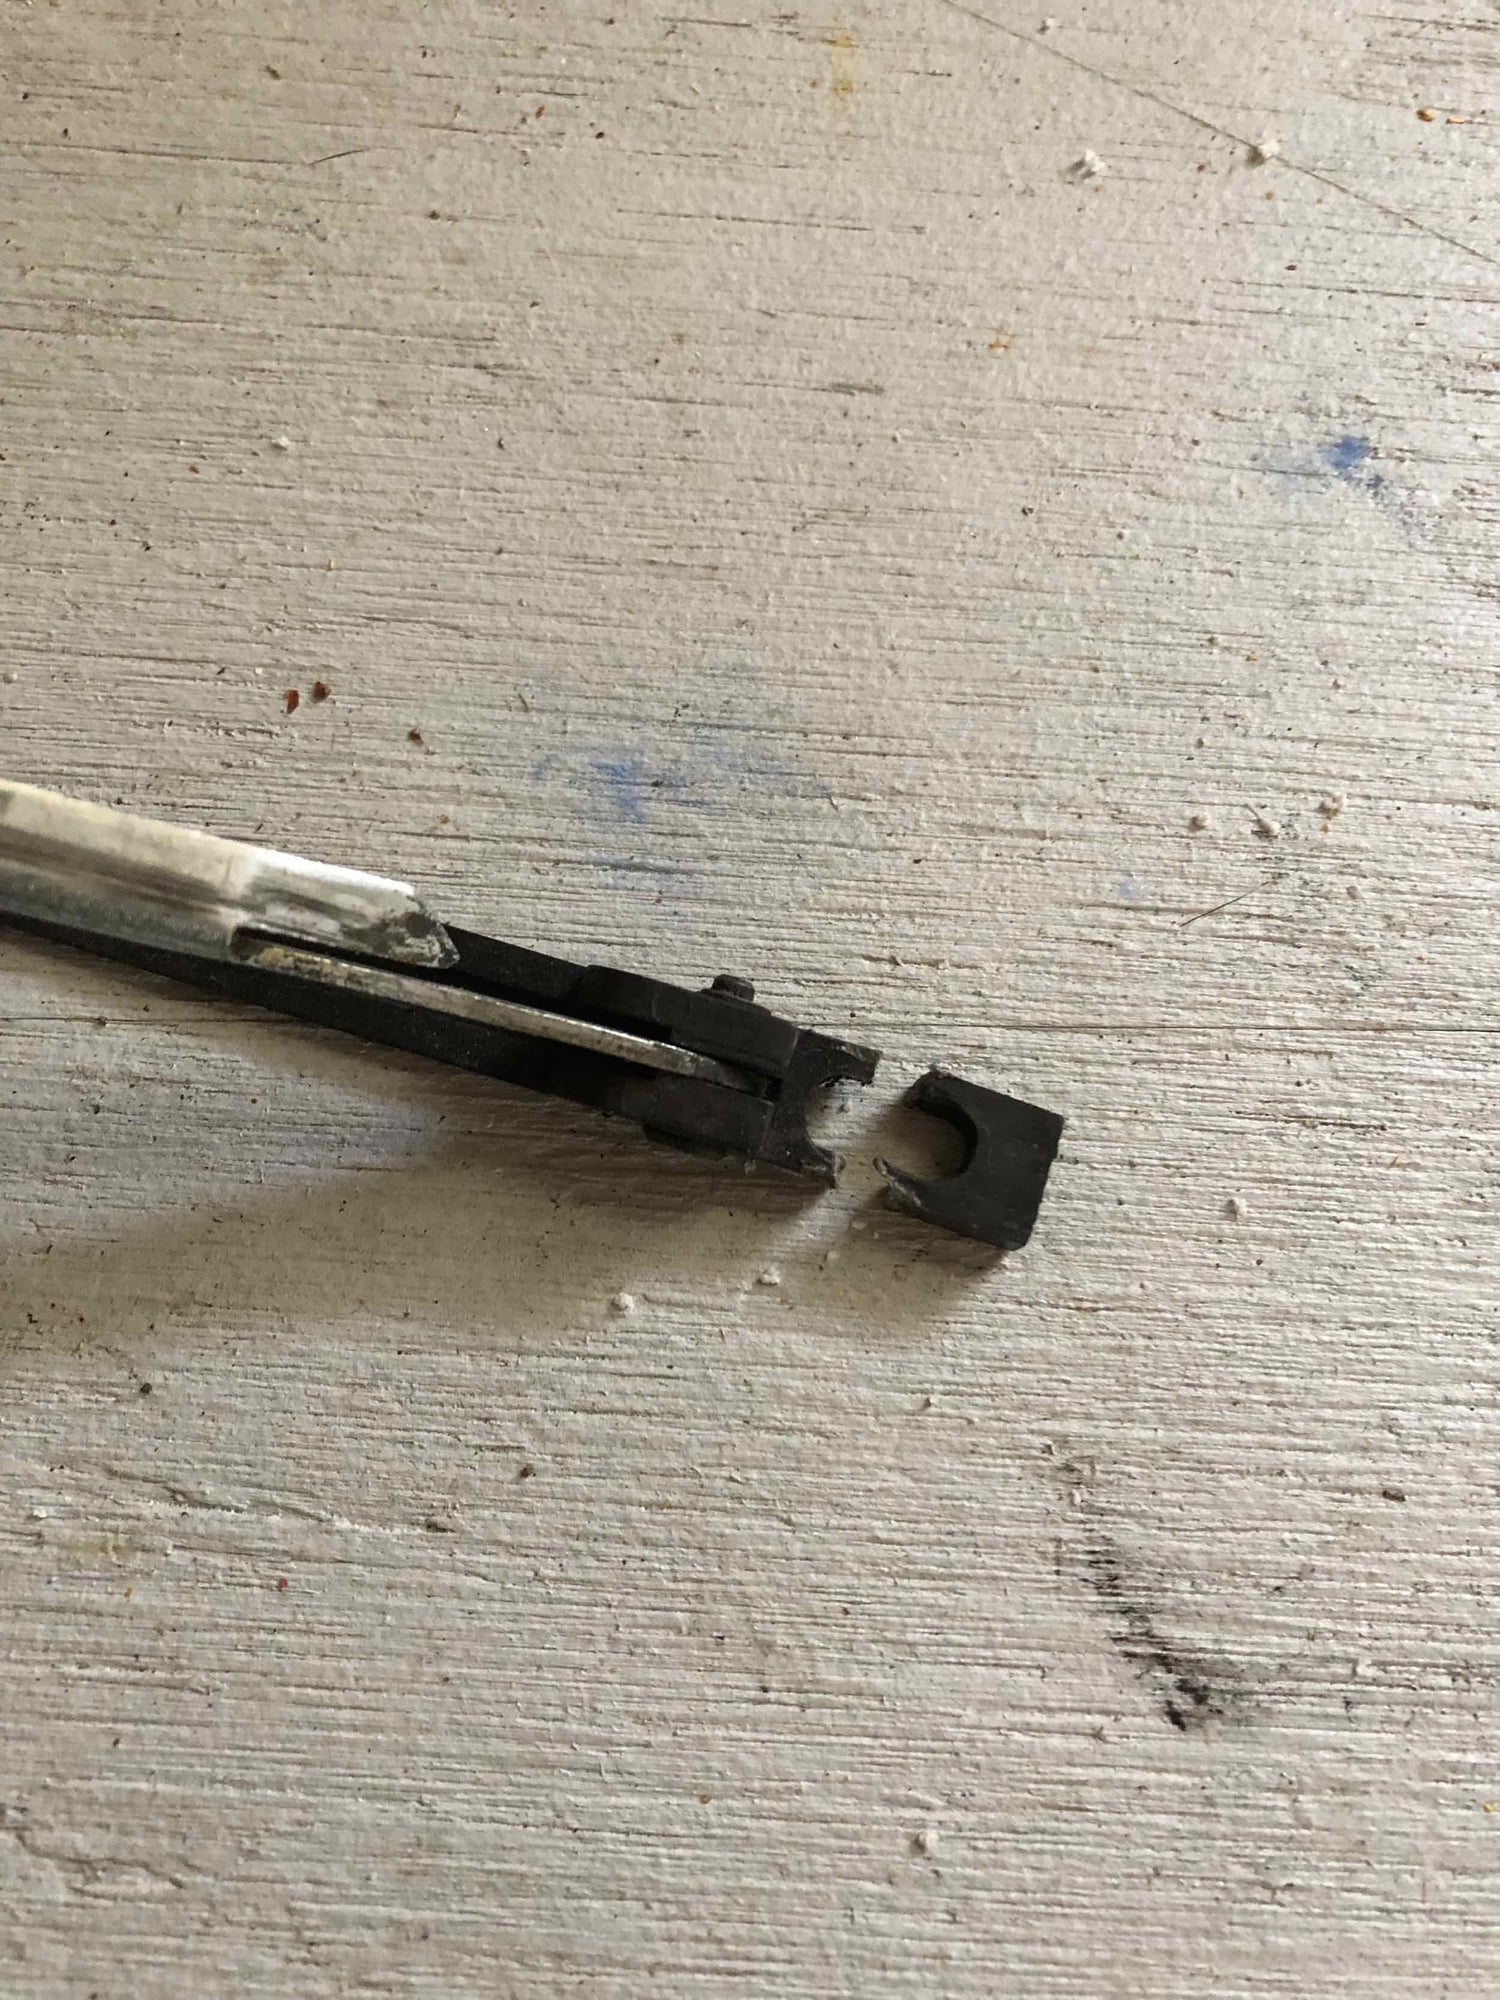
So before I can do any more testing, I realized that the bracket/spring that raises and lowers the wind deflector on the driver's side had broken once again. When it broke the first time, I tried to JB weld it back together, but I suspect there is just not enough surface area on either side of the hole to allow a good bond. So it broke again.

I suspect this is a common problem since there is a lot of stress put on a thin piece of plastic as the roof opens and closes. So I am trying a fix.

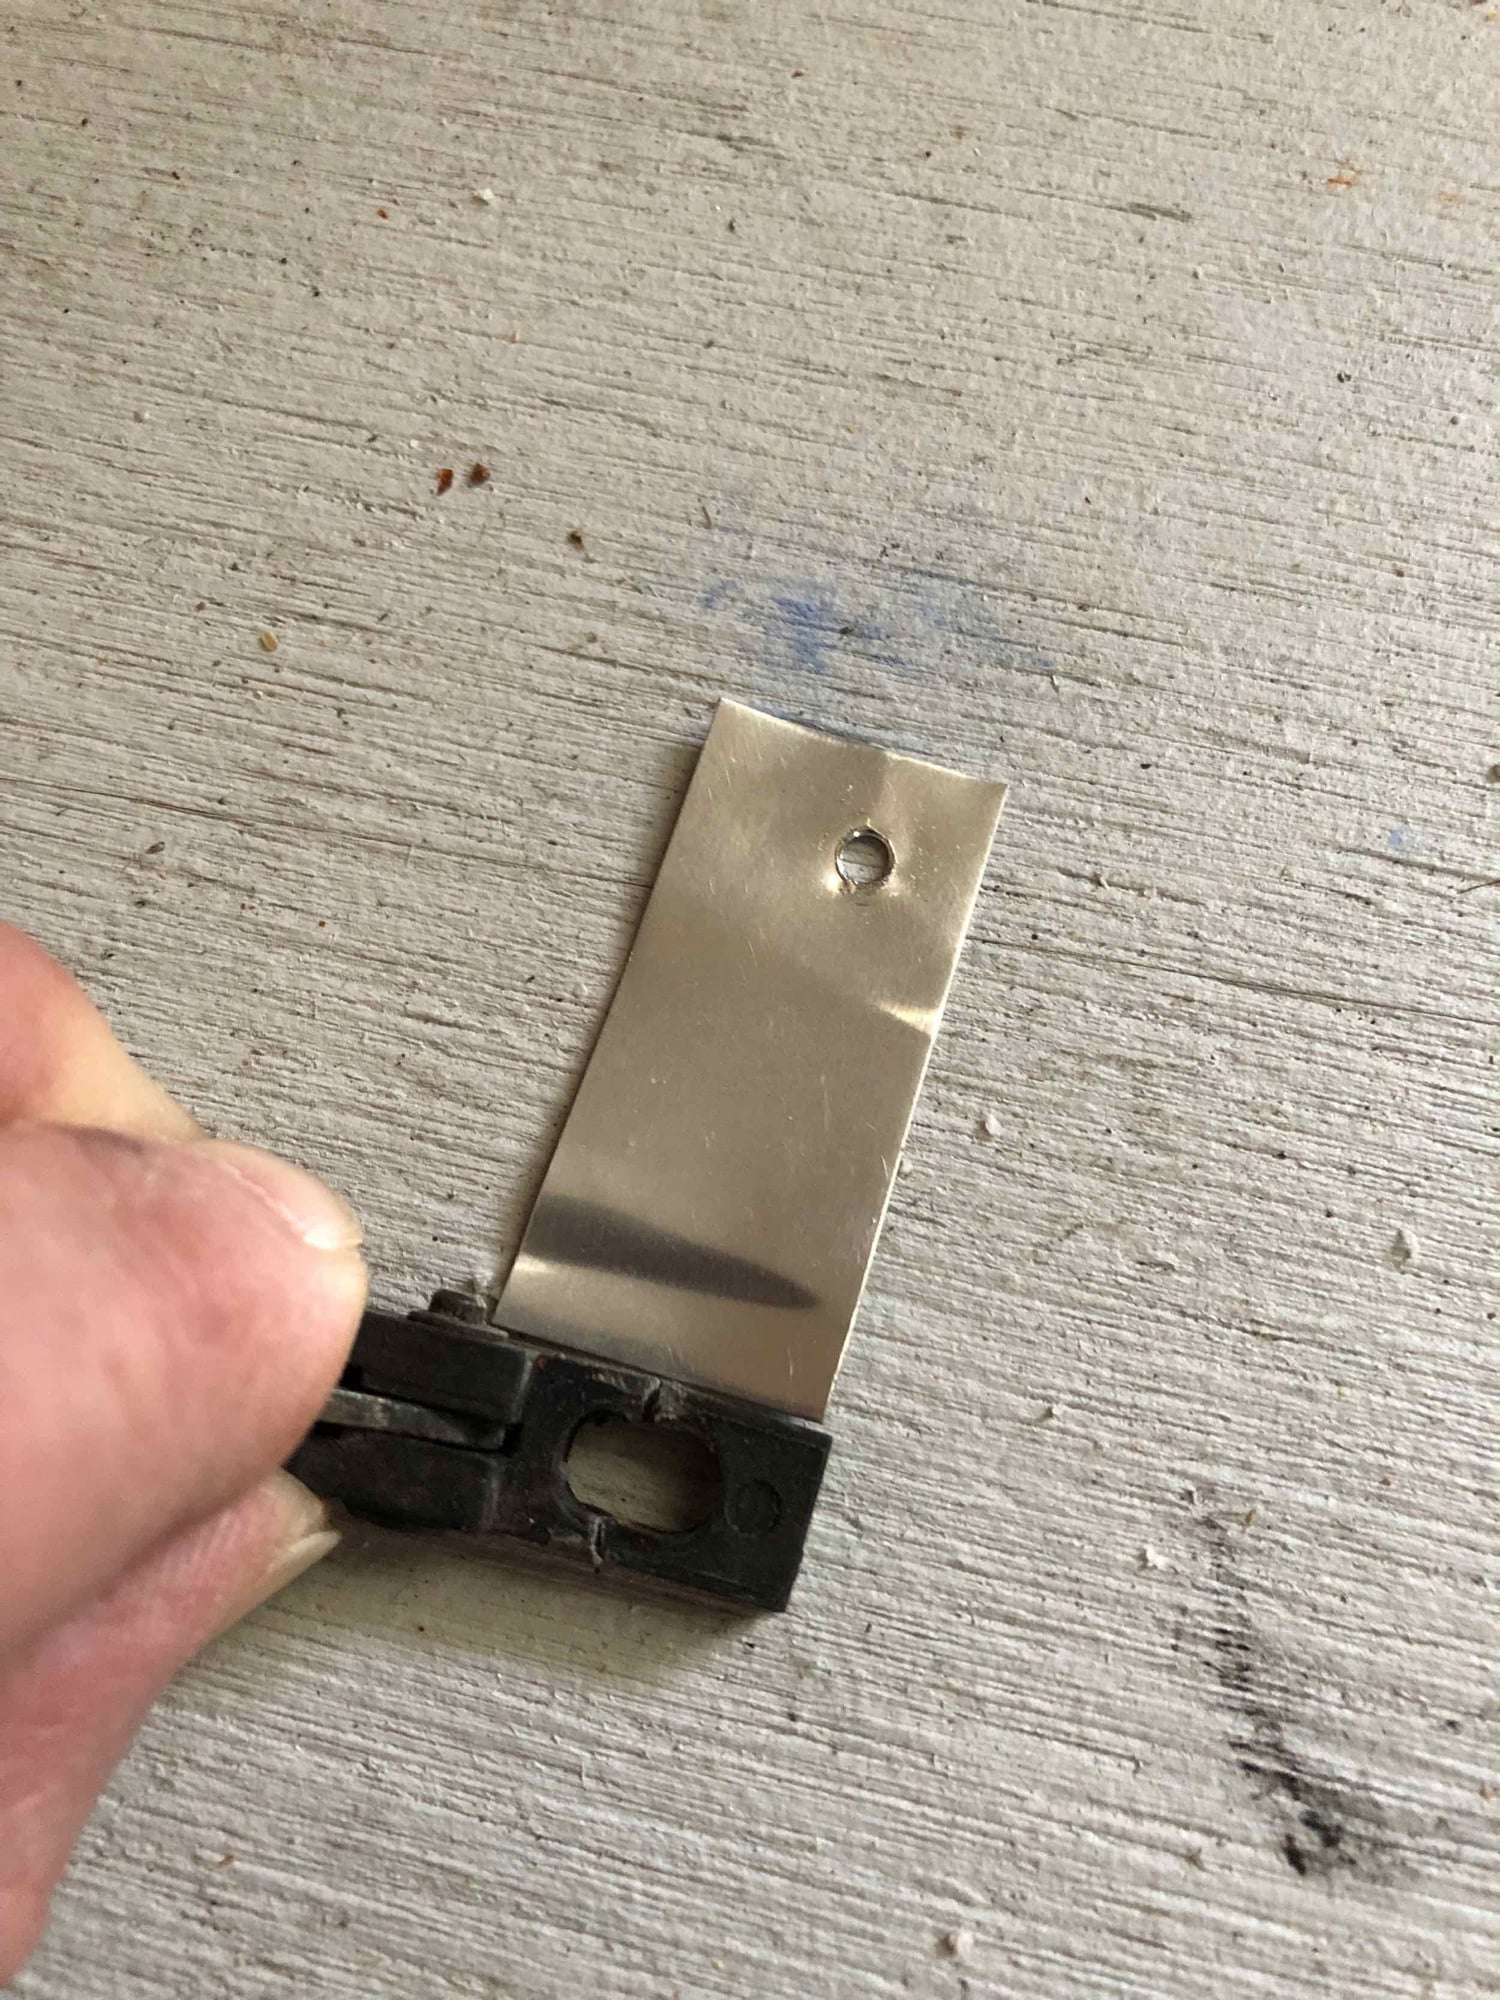
I took some thin aluminum sheet and encased the plastic part of the assembly to provide reinforcement. My only concern is that the aluminum I had lying around may be too thin, but we'll see. I have another idea in place if this one fails. Once the JB Weld cures we'll see if it works.


I am assuming this is a common breakpoint for all. My first thought would be to find someone who could remake the plastic part from milled aluminum...that is a ways off


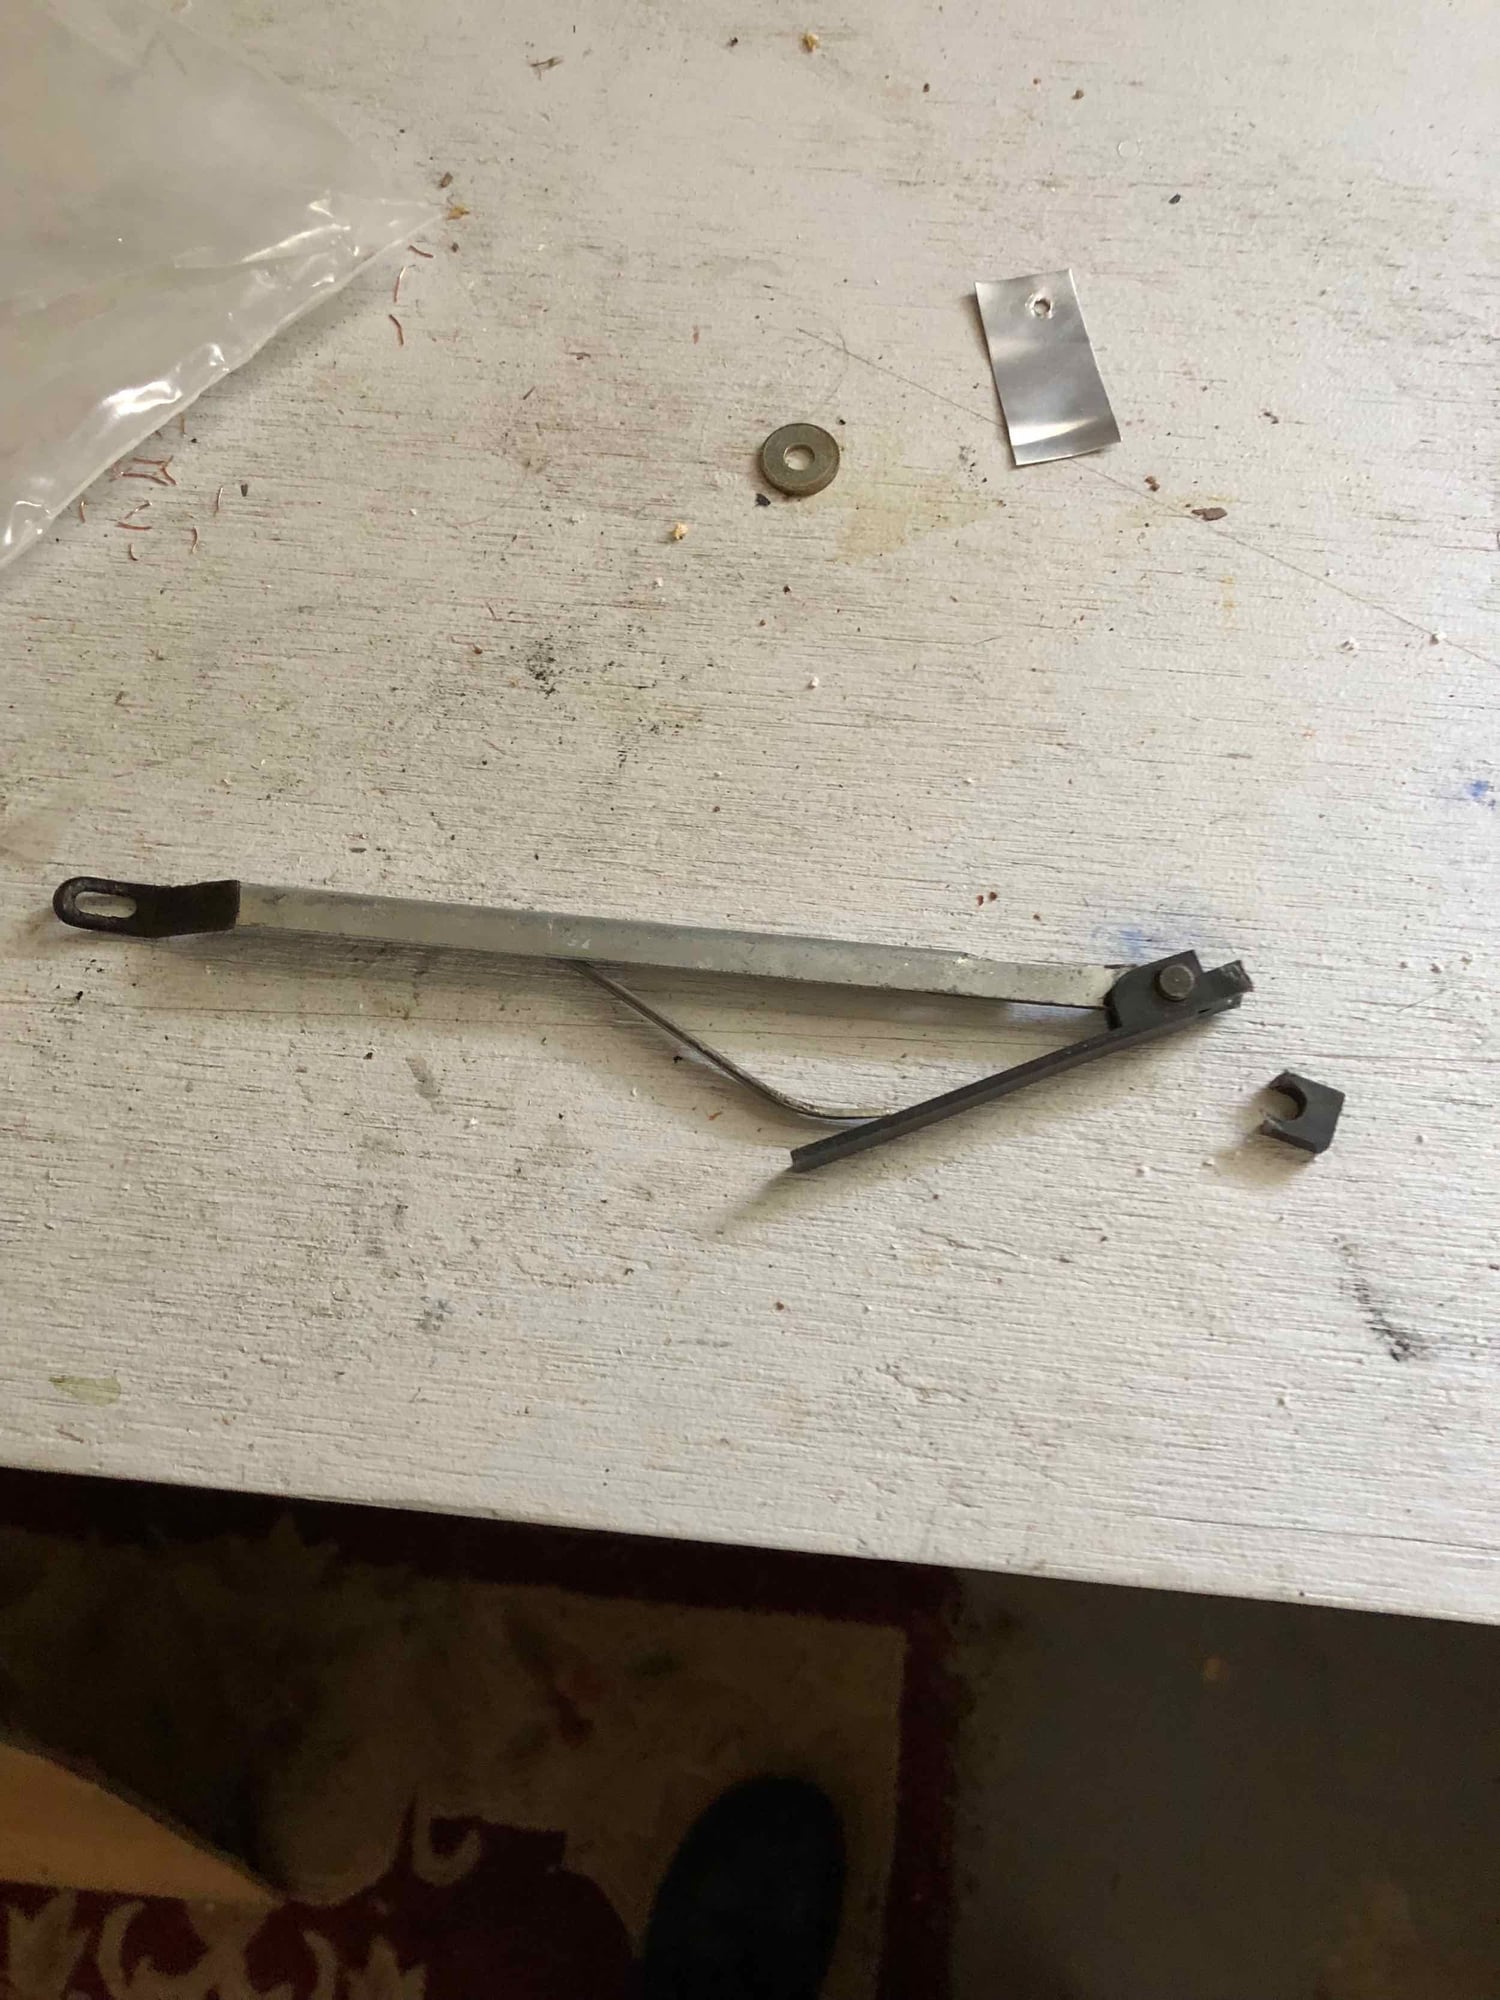
The whole bracket - driver's side


Thin aluminum sheet will increase the surface area of the JB Weld coating around the plastic block rather than just on the broken segments.


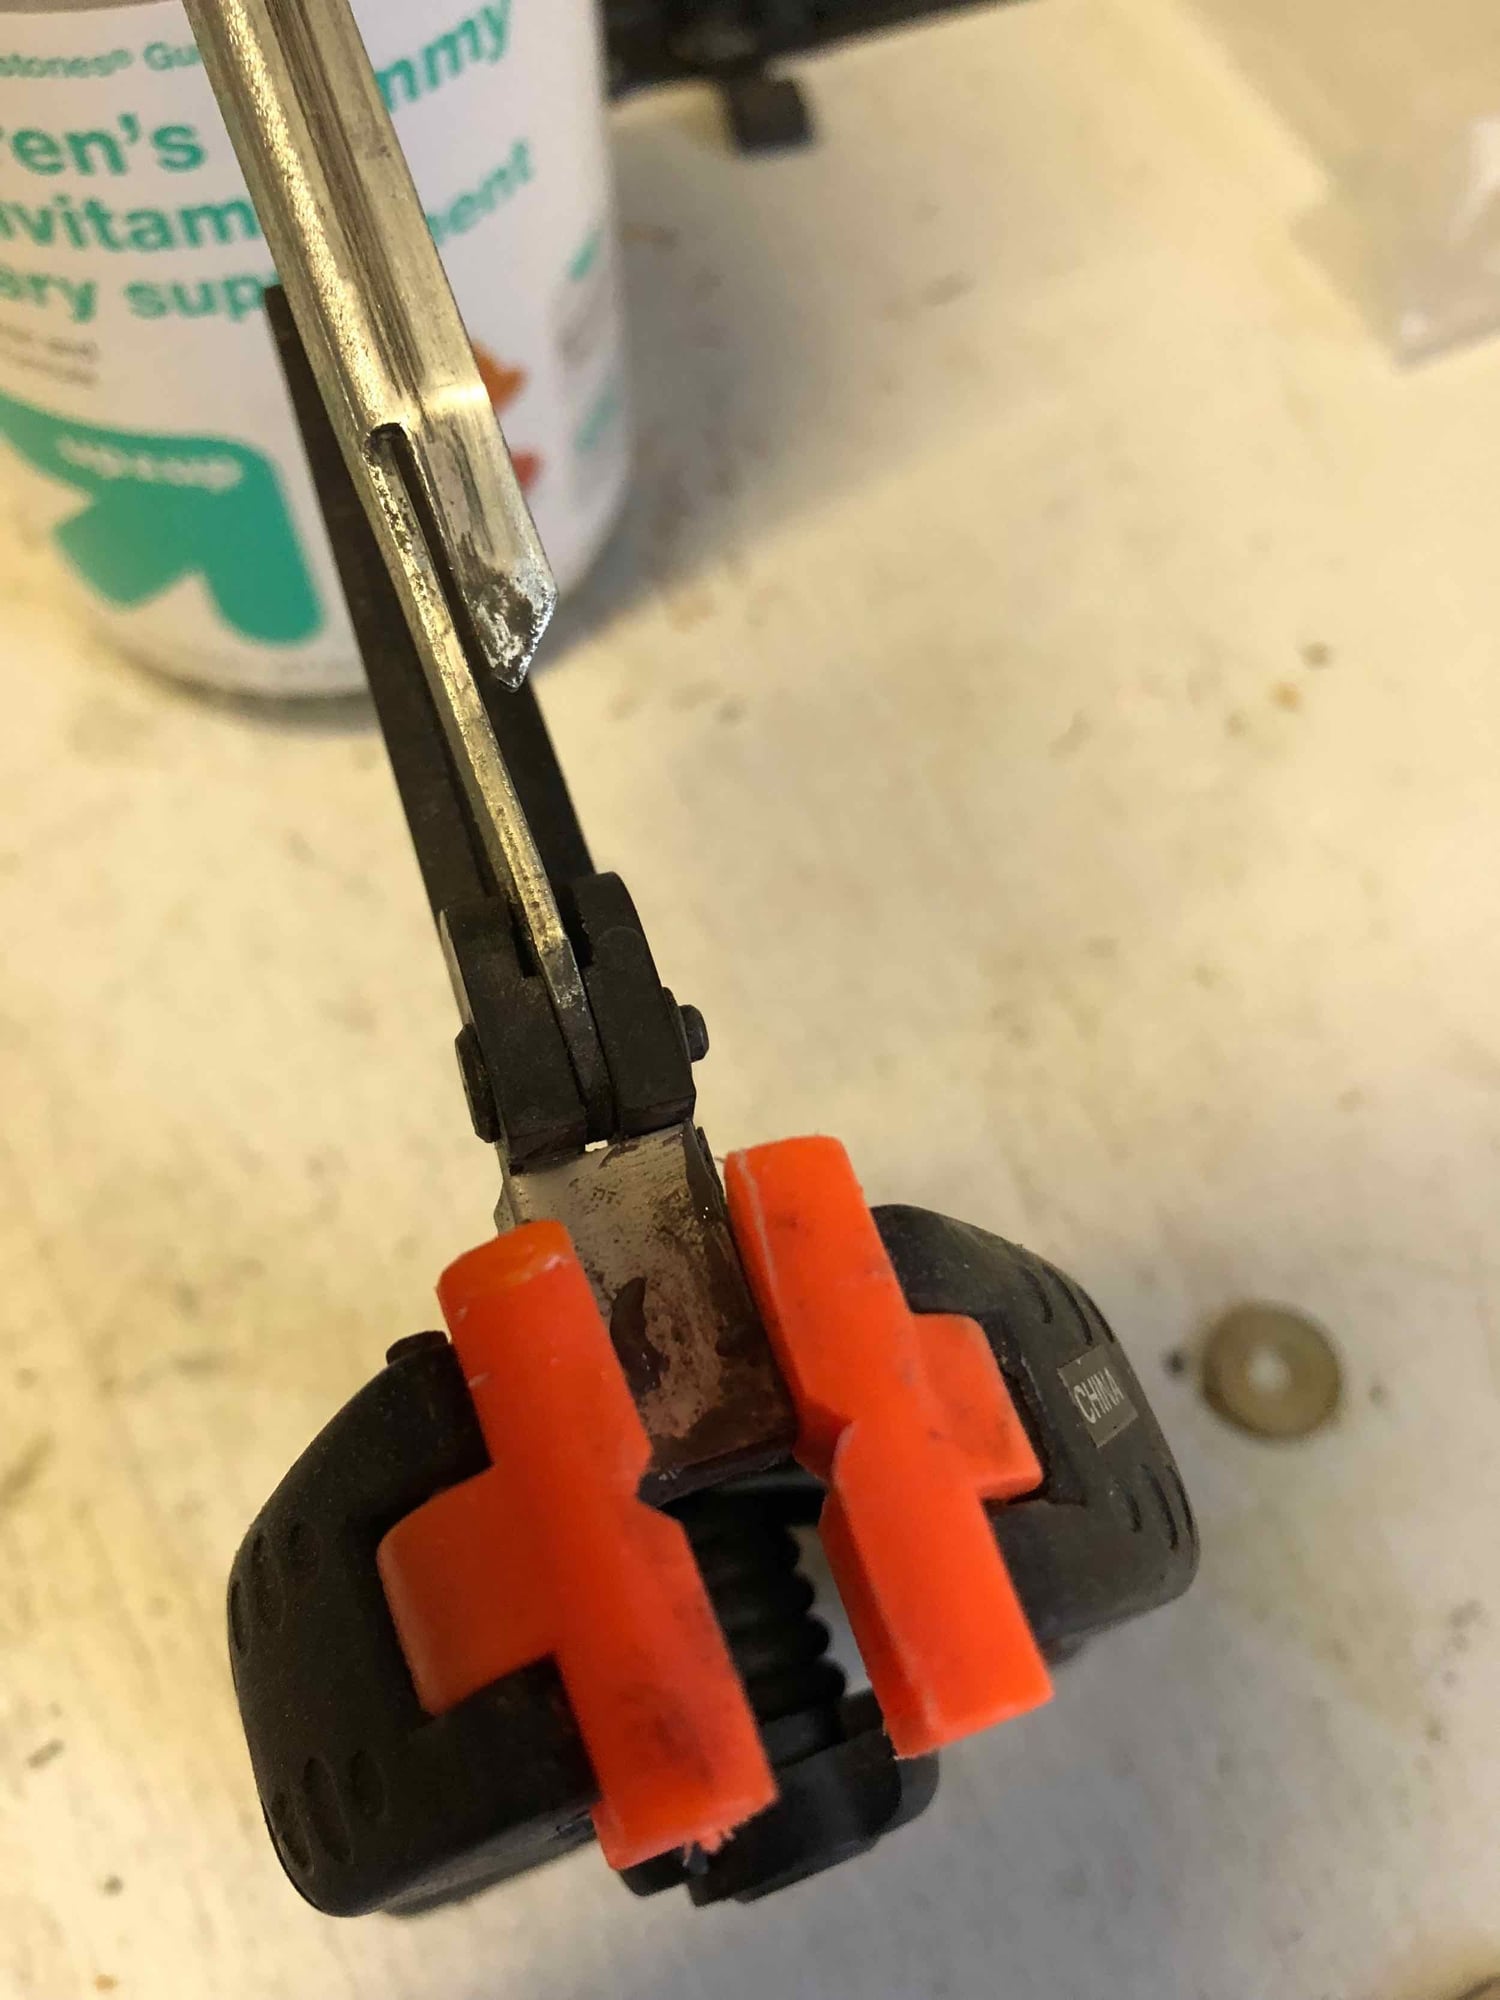
Measured and cut. JB Weld is applied all the way around.


Set with a clamp. When cured, I'll cut the holes in the aluminum sheet for the screw with an exacto knife.
Old 01-25-2018, 03:01 PM
  #23  
drscottsmith
Three Wheelin'
Thread Starter
 
drscottsmith's Avatar
 
Join Date: Jul 2016
Location: Duncan, SC
Posts: 1,330
Received 98 Likes on 70 Posts
Default Bracket Finished

Here is the latest. Hole was cut and mounted perfectly back in place. Did not have any time at lunch to fiddle with the panel but maybe this evening.
-scott

We'll see if it holds up to abuse.


Screwed in place.
Old 01-25-2018, 11:59 PM
  #24  
skpyle
Rennlist Member
 
skpyle's Avatar
 
Join Date: Jul 2014
Location: Blacksburg, SC
Posts: 2,886
Received 469 Likes on 212 Posts
Default

Nice work, quite creative.


Quick Reply: Quick Sunroof question


All times are GMT -3. The time now is 11:02 AM.