When you click on links to various merchants on this site and make a purchase, this can result in this site earning a commission. Affiliate programs and affiliations include, but are not limited to, the eBay Partner Network.
I want to disassemble the hatch lock to rekey it. The instructions that I have seen talk about removing 2 phillips screws but there is only a pin on mine, is this because it is an early car without an alarm? I assume that the pin has to been driven out. Anything special about this version of the lock? Can it be rekeyed like the later locks? It is a '78 euro.
Last edited by elgy; 05-19-2022 at 07:58 AM.
Reason: added info
All the write-ups that I have seen so far seem to be locks with alarm, my early non alarm is very different.
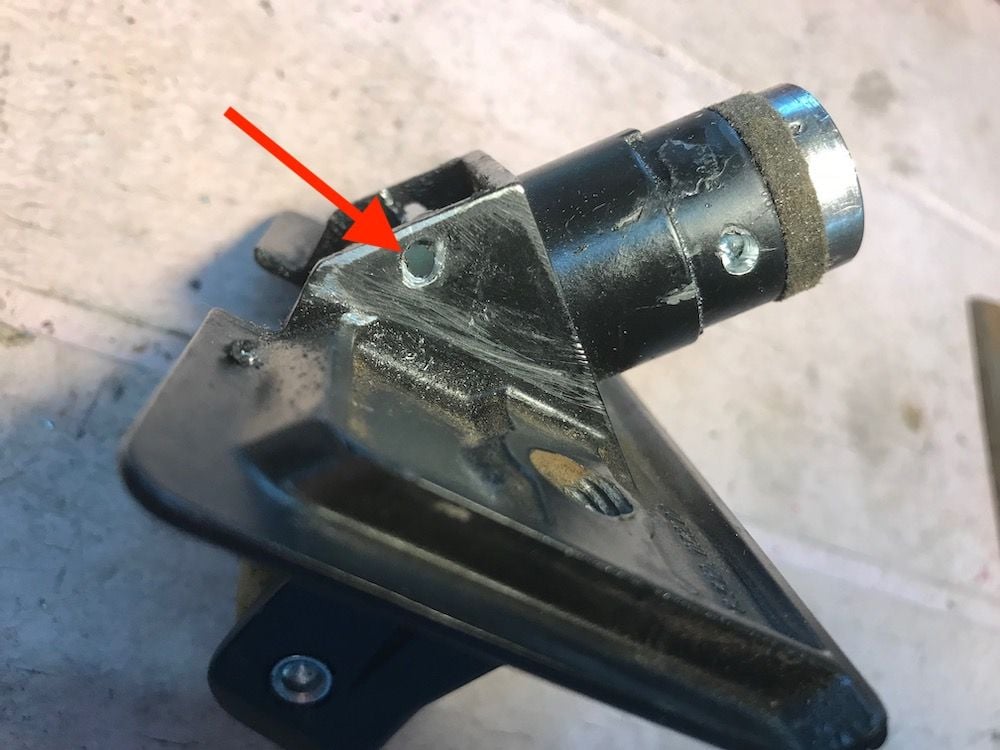
The pins I was asking about in the original post, that the phillips screws replace in later locks, are indicated by the arrow.
They have to be drilled out, it is not a single pin that goes from side to side that can be driven out.
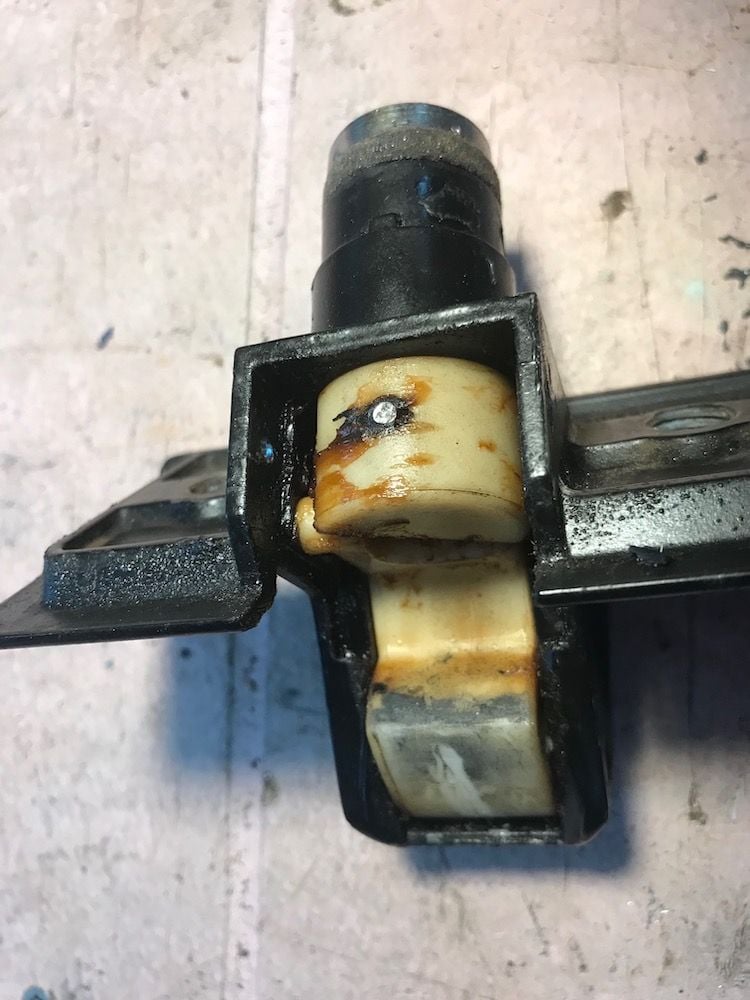
Once opened the mechanism is is totally different. The problem now is to remove the cam that is on the shaft that comes out of the lock and is held in place with a pin in the middle of the nylon cam. The pin seems to be at an angle to the shaft. I assume it has to be drilled out which is going to be a challenge to do without the drill bit wandering off into the nylon. My other assumption is that lock pulls out from the key end once the cam is removed.
I put this project to the side because I thought I might be able to get new keys made, since I had taken pictures before the one key I had disappeared. Stuart at keys@keys4classics.com warned me that "the key... presents some uncertainty, because of poor cutting" but I told him to go ahead anyway and I would not expect him to guarantee the work given what he was working with. I received the keys and they didn't work, so I got back to taking the lock a part to modify it.
This link is quite useful, except the suggestion to drill out the pin... I think my method is superior.
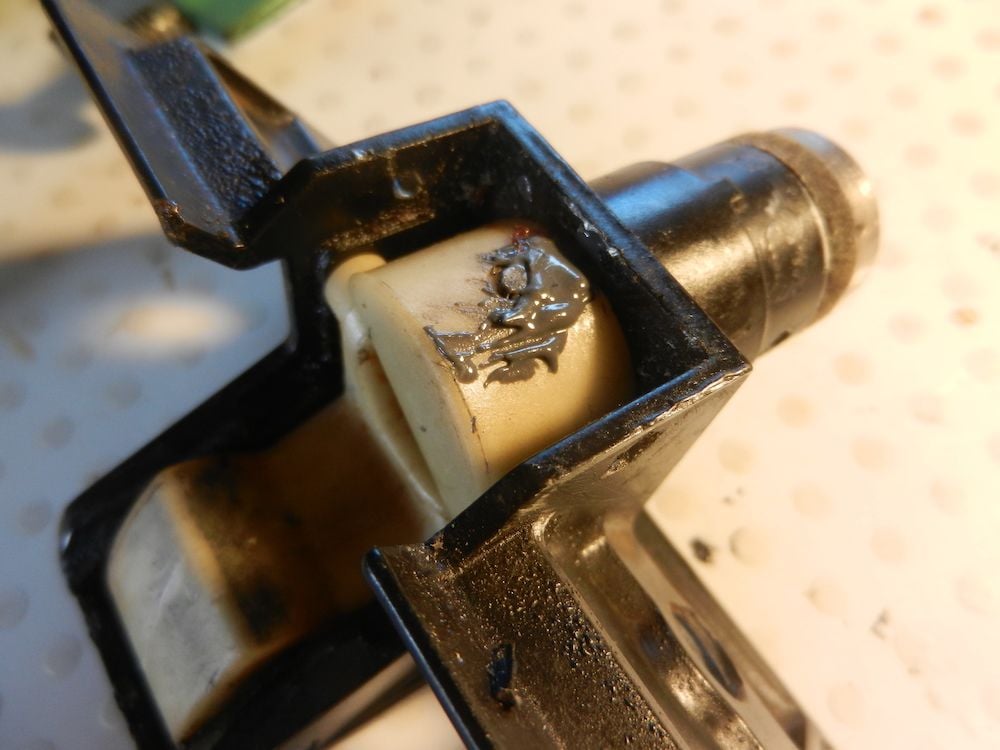
My solution to the problem posed above, i.e. removing the nylon cam from the shaft, was to cut a slot in the cam to allow it to be pulled off the shaft. I used a drill and my dremel to do this. Once the cam is off the pin can be pulled out with pliers.
The plan is to put the cam and pin back and fill the slot with JB Weld. The JB doesn't have to stick to anything it just has to take the form of the slot and keep the cam in place.
The lock mod was easy, I replaced one blade and gently filed another and now the key turns nicely.
Last edited by elgy; 07-07-2022 at 10:26 PM.
Reason: correction
I put this project to the side because I thought I might be able to get new keys made, since I had taken pictures before the one key I had disappeared. Stuart at keys@keys4classics.com warned me that "the key... presents some uncertainty, because of poor cutting" but I told him to go ahead anyway and I would not expect him to guarantee the work given what he was working with. I received the keys and they didn't work, so I got back to taking the lock a part to modify it.
This link is quite useful, except the suggestion to drill out the pin... I think my method is superior.
My solution to the problem posed above, i.e. removing the nylon cam from the shaft, was to cut a slot in the cam to allow it to be pulled off the shaft. I used a drill and my dremel to do this. Once the cam is off the pin can be pulled out with pliers.
The plan is to put the cam and pin back and fill the slot with JB Weld. The JB doesn't have to stick to anything it just has to take the form of the slot and keep the cam in place.
The lock mod was easy, I replace one blade and gently filed another and now the key turns nicely.
Thanks for the update. I also got sidetracked and this is a prompt to get this finished. I'll do the same if I can't find an engineering shop willing to drill out the pin.
I still find it interesting that my 87 non-alarm has the same locking mechanism. Wonder if it came with it, or is there something in it's history that caused it to have an early lock.
Thanks for the update. I also got sidetracked and this is a prompt to get this finished. I'll do the same if I can't find an engineering shop willing to drill out the pin...
Now that I have taken mine a part I don't think drilling the pin out is a good idea. At best it would destroy the pin unnecessarily and the pin might start to turn in its socket making drilling problematic. An option to my method is to us a dremel cutting disk to cut through the plastic at a 45 degree angle to the pin and then us a small screwdriver to pry the pin out.
Here is my lock with the cam filled with JB Weld.
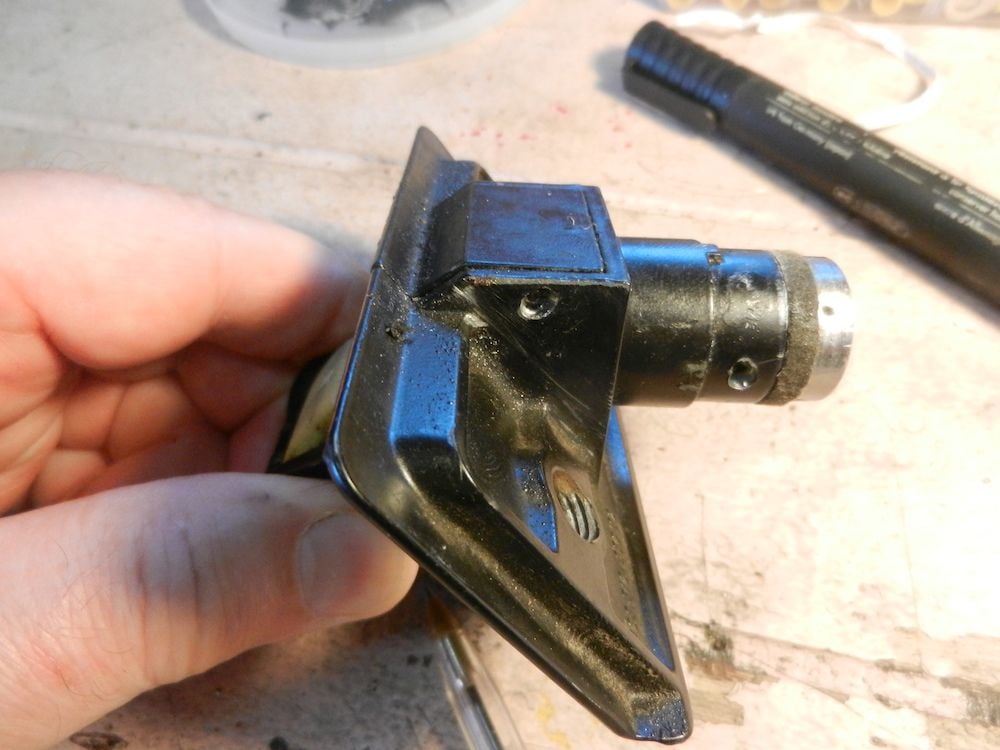
The last step was to see to the other pins that were drilled out.
I put a single self tapping screw in the hole you see on the left to hold the little cover in place. There were originally 2 pins, but the cover is not stressed so one should do it. The pin that was in the hole on the right is not really needed since the barrel is held in place by the cam and the latch mechanism.
Now that I have taken mine a part I don't think drilling the pin out is a good idea. At best it would destroy the pin unnecessarily and the pin might start to turn in its socket making drilling problematic. An option to my method is to us a dremel cutting disk to cut through the plastic at a 45 degree angle to the pin and then us a small screwdriver to pry the pin out.
Here is my lock with the cam filled with JB Weld.
The last step was to see to the other pins that were drilled out.
I put a single self tapping screw in the hole you see on the left to hold the little cover in place. There were originally 2 pins, but the cover is not stressed so one should do it. The pin that was in the hole on the right is not really needed since the barrel is held in place by the cam and the latch mechanism.
To clarify... the pin that was in the hole on the right in the above photo has to be drilled out to remove the barrel. I does not have to be replaced as noted in the original post.

 05-19-2022, 07:57 AM