When you click on links to various merchants on this site and make a purchase, this can result in this site earning a commission. Affiliate programs and affiliations include, but are not limited to, the eBay Partner Network.
Just wondering what all this re-plating and time cost compared to buying new, new lamps are about $450.00 each right?
New units also come with all the plastic and metal bits behind the reflector, never purchased one so I'm asking
Thanks for sharing as I have at least one or two with broken glass boxed up laying around,
Kristine wanted me to toss them as "they as broken, what good are they.."
Can't wait until she sees them in her oven
FYI, I replaced a shattered lens on one of mine with Roger's lens. Roger's lens is plastic. I assume its polycarbonate, which would be plus. It's pretty painless if you have a wife who will let you use her oven. The morimoto butyl rope needs to be pulled to reduce it's diameter and you need to heat it some to do that or it will pull back because it has memory if not heated. Once you lay the thinned strip on the reflector, put the whole assembly into the oven and push the lens on after the appropriate bake time. There's a ton of you tube videos on this and info at http://www.theretrofitsource.com
I did this rehab too but am going a different path.
I had purchased a pair of the plastic lens from Roger more than a year ago. I also purchased a mini D2S morimoto projector to use instead of the bulb.
I cheaped out and didn't buy their LED version. Doh!
How did the optics turn out when it was back in the car? Normally a projector would have a smooth lens not an optical one.
The projectors lit up beautifully, not as much scatter as I thought.
It was also not blinding to incoming traffic because the projectors concentrated the lights where aimed.
Personally, I prefer it over the plain bulbs.
As I said earlier, I am pursuing getting clear lenses. Was even trying to grind/polish down the plastic one from Roger.
Work in progress
Just wondering what all this re-plating and time cost compared to buying new, new lamps are about $450.00 each right?
New units also come with all the plastic and metal bits behind the reflector, never purchased one so I'm asking
Thanks for sharing as I have at least one or two with broken glass boxed up laying around,
Kristine wanted me to toss them as "they as broken, what good are they.."
Can't wait until she sees them in her oven
Dave
Nickle plate was $80, and the VDA coating is the same. Glass beading & labor is free. Metal work on the buckets probably would have cost me ~$100.
I'll have about $200 into the project, and they should look like new.
I'm not so sure you can buy new H4s for $450. Seems even harder to find early ones without the "pip"
Aluminized done (is that even a word?) and the lens is back on with the adhesive suggested above. I sure hope that stuff holds!
I do have some glass polishing compound that I'll use on the outside of them, which should also help. They're not as bad as they look in the photo.
Can't wait for it to warm up a bit so I can try installing these in the car! I need to research the hydraulic adjusters and see what I'm lacking to get that operational.
Nice. This is exactly what I had thought of to possibly do. How well does this work with the OEM H4 lens on it?
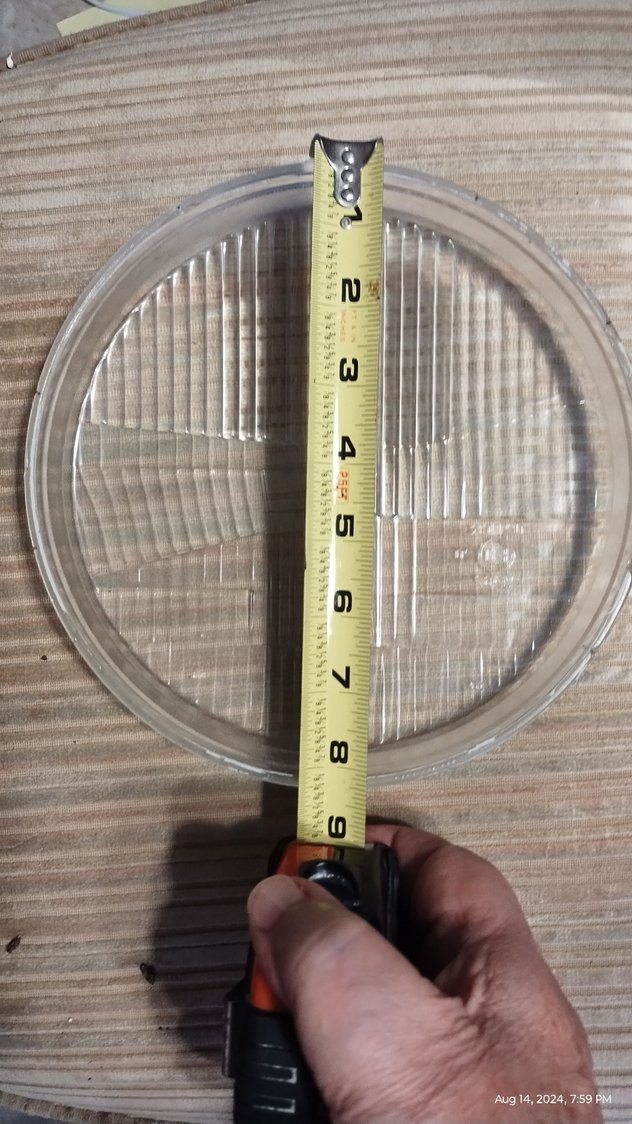
It might be possible to use something like this clear lens cover from an off road light application in 8" diameter. What is the exact diameter of the H4 glass lens part?
OD on the lip where it fits into the reflector is 8.25"
Keep in mind these are the "new" run of lights that came back into stock after years of NLA and do not seem to be made the same way as the original lights. These lights have a rolled lip on the reflector housing that clamps the lens to the reflector which, together with the sealant, makes them waterproof. From what I can tell, the rolled lip is a new feature which prevents you from just heating the reflector in the oven to loosen the sealant to pry off the lens. On these, you have to cut the rolled lip free, then heat the reflector to finish the job.


 01-12-2018, 02:45 PM