When you click on links to various merchants on this site and make a purchase, this can result in this site earning a commission. Affiliate programs and affiliations include, but are not limited to, the eBay Partner Network.
I hear what you say about the strap. I am not concerned about it snapping if using a heavy duty one, but I see the point of not being able to adjust it. I'll use the eye bolt setup. Thanks.
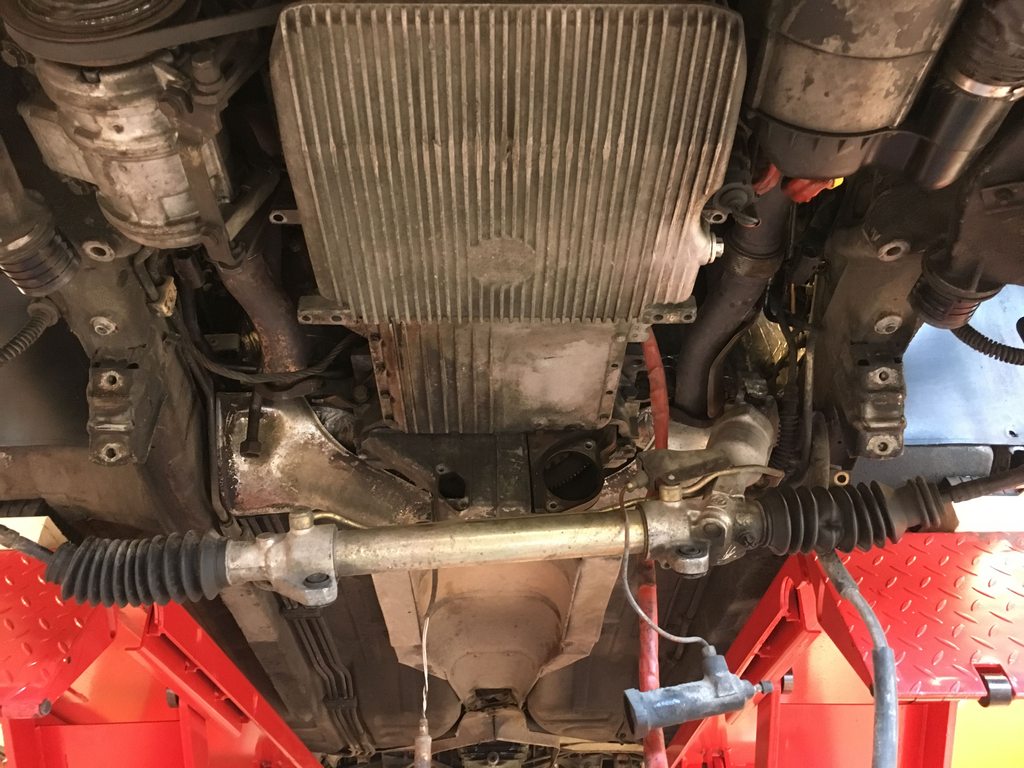
I removed the all the power steering hoses and pump etc on that side and the air-con compressor and bracket the other side and removed the radiator. Then got them from underneath with a long breaker bar towards the front of the car.
Thanks for explaining. I think I'll take my chances in future with the horizontal support bolts!
I happened to find one for sale locally for cheap as the guy was done his repairs and didn't have to space to store it. Now I have it stored for future repairs when necessary. The home-built wood style will do the job as well.
I went home made style. Lift support, check. Pre lift height with old mounts measured. And steering rack is lowered. That is all for today. So far so good. I also see the steering rack rubber is showing signs of age, no holes, but I think I'll replace them too while I'm at it.
Please add another 2x4 to that cross bar its holding up 500 LBS,
one is asking for trouble.
ALSO put some hardware into the side braces to the cross bar so they dont move ,
maybe you have them coming from the bottom?
Sorry to interrupt, but I cannot tell if the engine bay strut brace is in place or removed in the course of lifting the engine for subsequent crossmember removal. I never gave it much thought until now, but is it OK to have the lower crossmember out as well as the strut brace. I could see where the front of the car could move from lack of support.
Thanks and again sorry,
Dave
Please add another 2x4 to that cross bar its holding up 500 LBS,
one is asking for trouble.
ALSO put some hardware into the side braces to the cross bar so they dont move ,
maybe you have them coming from the bottom?
From bottom
Originally Posted by j.kenzie@sbcglobal.net
Sorry to interrupt, but I cannot tell if the engine bay strut brace is in place or removed in the course of lifting the engine for subsequent crossmember removal. I never gave it much thought until now, but is it OK to have the lower crossmember out as well as the strut brace. I could see where the front of the car could move from lack of support.
Thanks and again sorry,
Dave
Good point, I hope someone will clarify. Mine is out..
the chassis bar being out shouldnt damage anything the whole idea was that the windshield might crack if the bar was removed.
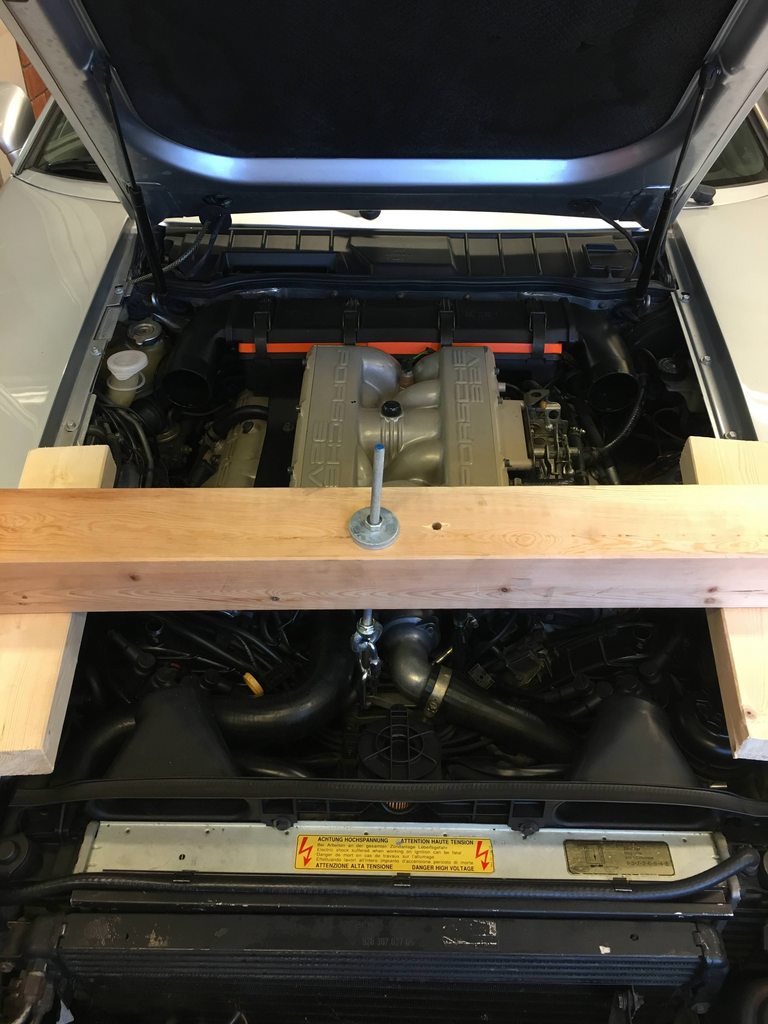
In the picture with the single piece of 2X4 and the eye bolt going through.
that needs to have the wood doubled or better use a 4x4.
WARNING The single board spanning the engine bay might not be strong enough to hold 500lbs thus the engine could fall
the single piece could fail as its not being used in the strongest direction of the wood,
and you also want to attach the edges of the cross bar to the boards sitting in the fender channel so the board wont slip..
Ideally you might also put a bolt into the crossmember tube bolt hole for each channel board to hold it in place as well as securing the cross brace .
The crossbar is not a critical piece while there is no load on the suspension. The warning about lifting the car with the crossbar removed is aimed at lifting from one front jack point only, where there's risk of twisting the body structure. Using the scissors lift as the OP illustrates, no worries about that crossbar being out.
Stan's mention of the bridge structure is spot-on. A couple 2x6's made into a crossbeam is much better, with a top 2x6 "plate" for the bolt and washers to pull on.
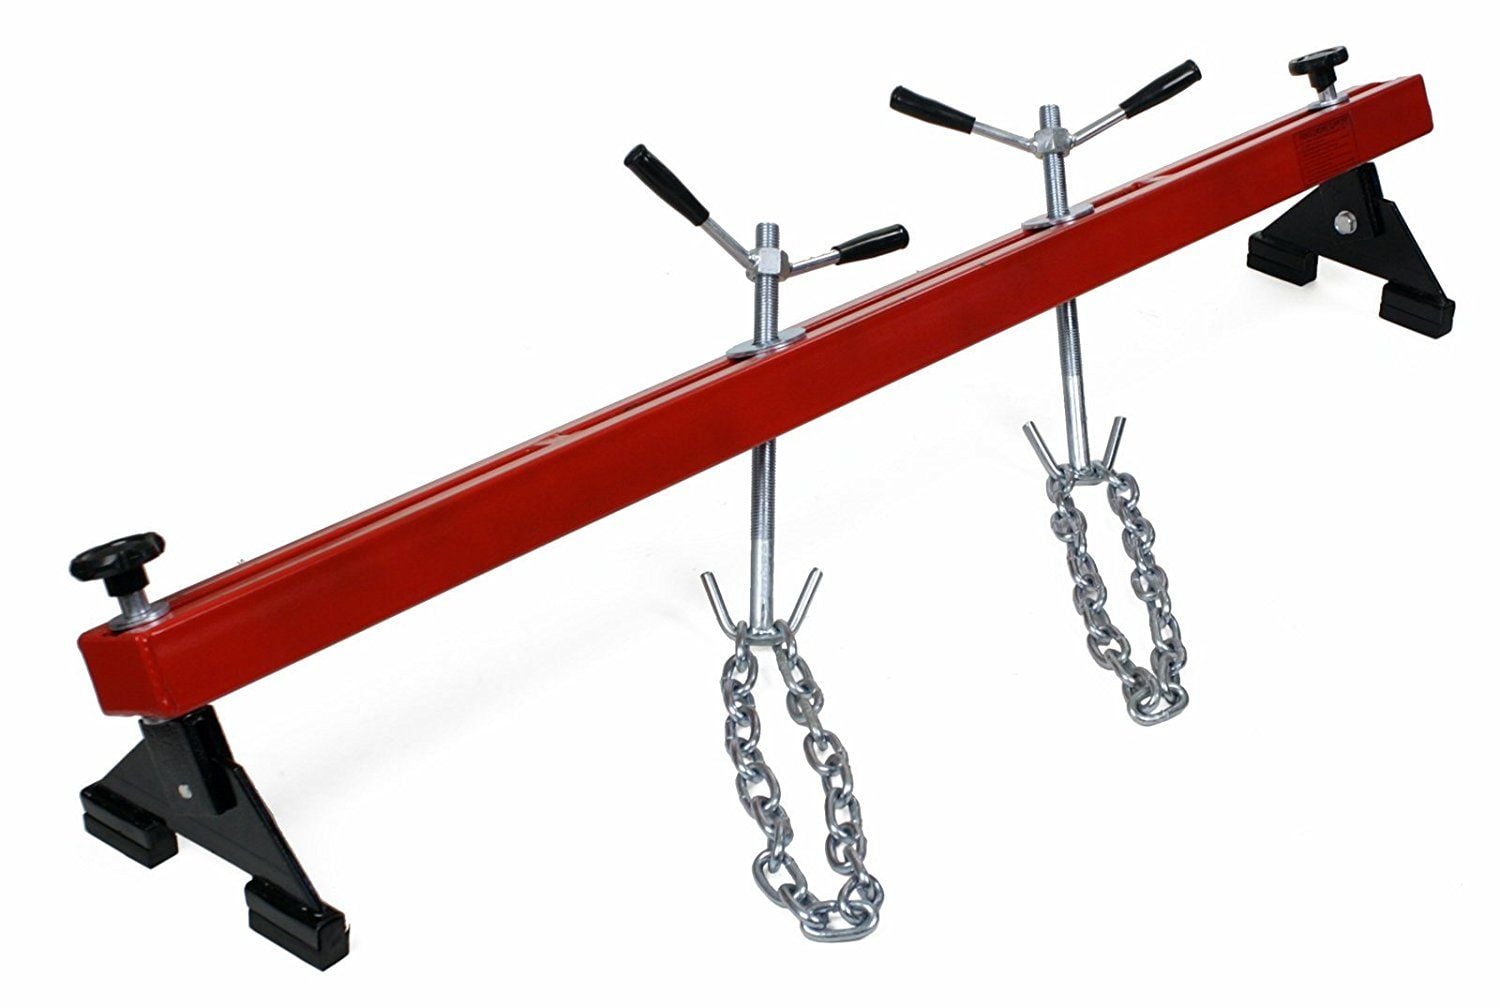
While I was in SoCal, we had access to a real metal engine support for clinic events similar to the one illustrated in post 18 above, thanks to Rob Edwards' generosity. After receiving asylum in Oregon several years ago now, I decided to mix a 25%-off Harbor Freight holiday coupon with a gift card to add one of those supports to my own tool inventory. They sell for around $75 if you time the purchase well, and remove all the casual fear I have about my structural calcs and the variability of lumber strength. There's nothing quite like working under the car with masses of critical stuff supported on makeshift structures. Sometimes you get to hear the first crackles that signal impending failure. You have time to get the first "oh..." out as you try and squirm out from underneath. Sometimes you don't. In my limited experience, the gravity is faster than my lateral squirming. Invest well in your personal safety, live long enough to enjoy the fruits of your work.
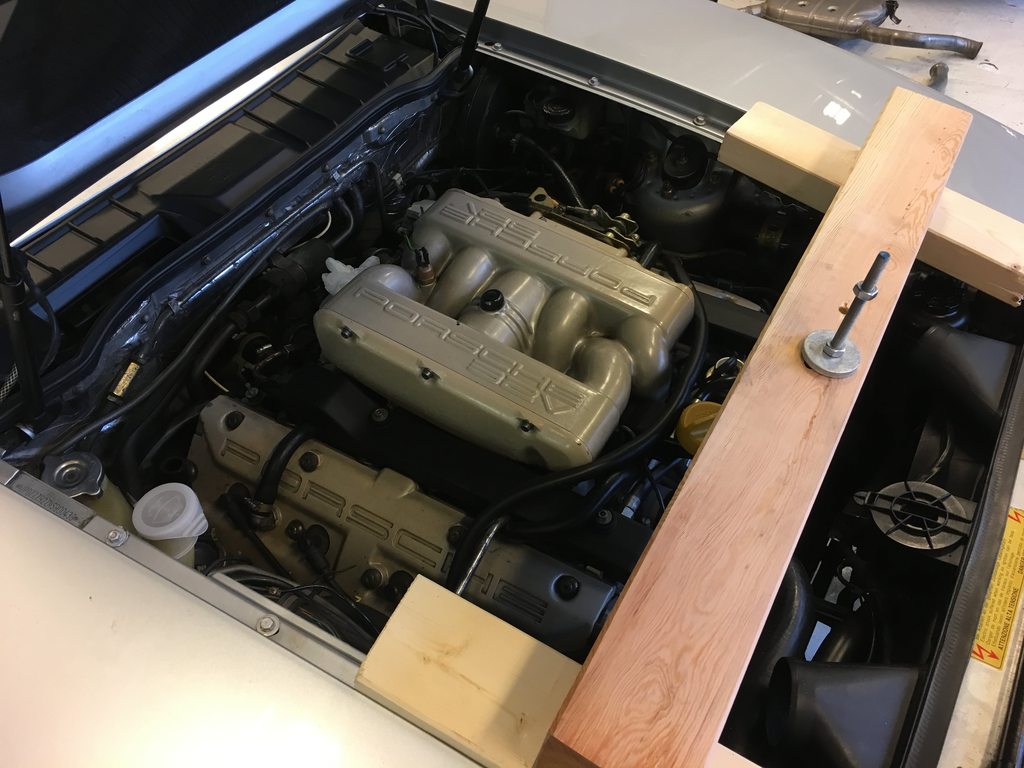
I'm having trouble seeing where it might fail. The 2x4s are lined parallell to the fenders in a "V", it is a snug fit, and it can not go anywhere neither back(upwards) or forward. And looking at the support in action, I'm having trouble seeing how it could fail. Well maybe I'll find out the hard way.. At least I have added a couple of cargo straps as a kind of failsafe.
Anyway, the engine is lifted (without any drama, yet..) and the old mounts are out.
Next I guess will be trying to get to all the oil pan bolts and remove the pan. Any tricks there?
Great progress. I'll be watching.
Thanks for sharing.
Dave
So you trust that HF support? I've thought about picking up something like that for when I eventually do it. I just wasn't sure if that were more trustworthy than something DIY. Pelican has a similar device for over $400! Yikes...
Originally Posted by dr bob
The crossbar is not a critical piece while there is no load on the suspension. The warning about lifting the car with the crossbar removed is aimed at lifting from one front jack point only, where there's risk of twisting the body structure. Using the scissors lift as the OP illustrates, no worries about that crossbar being out.
Stan's mention of the bridge structure is spot-on. A couple 2x6's made into a crossbeam is much better, with a top 2x6 "plate" for the bolt and washers to pull on.
While I was in SoCal, we had access to a real metal engine support for clinic events similar to the one illustrated in post 18 above, thanks to Rob Edwards' generosity. After receiving asylum in Oregon several years ago now, I decided to mix a 25%-off Harbor Freight holiday coupon with a gift card to add one of those supports to my own tool inventory. They sell for around $75 if you time the purchase well, and remove all the casual fear I have about my structural calcs and the variability of lumber strength. There's nothing quite like working under the car with masses of critical stuff supported on makeshift structures. Sometimes you get to hear the first crackles that signal impending failure. You have time to get the first "oh..." out as you try and squirm out from underneath. Sometimes you don't. In my limited experience, the gravity is faster than my lateral squirming. Invest well in your personal safety, live long enough to enjoy the fruits of your work.
So you trust that HF support? I've thought about picking up something like that for when I eventually do it. I just wasn't sure if that were more trustworthy than something DIY. Pelican has a similar device for over $400! Yikes...
Mine worked perfectly the one time I used it. Rob's is a different color and more $$ from a different vendor, but to my expert eye looks to be the same tool. It rather effortlessly managed the weight of the S4 engine at the front bracket, including a few turns tightening to accommodate the slightly taller Volvo mounts. I had the car on the lift this time, vs the last time I did the mounts with the car on stands and the engine supported from below with a separate cradle and jack. That particular job pushed me to add a lift in the garage; I'm getting too old to be wrestling filthy engine and suspension parts around under the car on stands.
After that episode, I bought cases of engine cleaner to donate to clinic car owners to use before the car came in the driveway. I was about 50/50 success on that one. One clinic car owner came back proudly with 11 of the 12 cans unused; he did most of the work himself, having missed the point of the engine cleaner. If you are getting close to this surgery, invest in at least half a case of spray "Foamy Engine Bright" or similar, and use it all before you do any more than drop the belly pans.
The engine support thing is a tool I don't plan to use a lot. Still, it's the right tool for the job, and removes any doubt about how well a DIY work-around might fare. It shows up as an available community resource here, although the local fleet of candidate 928 users is pretty darn tiny here in the high desert of central Oregon. Pretty much new in box right now, with the only sign of use being a thin film of synthetic red grease on the threads of one of the J bolts. I'll use it for the Timing Belt/Water pump/Tensioner project on the Honda Pilot DD sometime next year. It will pay for itself again.

 01-05-2018, 10:27 AM