
My first motor mount/oil pan gasket/steering rack bushing job. Worklog. 92 GTS.
 01-10-2018, 07:10 PM
#31
Nordschleife Master
That's a 4x4 in the pic. I do hope that the 2x4 "feet" are attached to the 4x4. It doesn't take much, but there should be some sort of attachment to make sure they can't slip.
I did the same thing 4x4 with 2x4 feet and eyebolts), but I did 2. Front and back lift hooks of the motor. I'm pretty sure that only one would have been adequate, but I like the idea of redundancy when I'm climbing under the thing.
I also removed both the upper strut brace across the engine and the crossmember at the same time. I wouldn't want to raise or lower the car with those removed, but it didn't have any real effect with the car on liftbars (nothing moved in any way when they were off).
 01-10-2018, 07:13 PM
#32
Drifting
The most useful tool is a flexible gear-head wrench. I forget if it's 8mm or 10mm (I think 10mm). When the bolts are coming out but too loose for ratchet to operate, just push your thumb under the bolt head to create some friction. If you don't have a ratchet then it can take forever turning the bolt one flat at a time!
It's filthy at the front if the gasket has weeped. After you have the pan down, you can make it surgically clean which makes the reassembly mucheasier since you have a better view of the bolt holes!
Use thin wire to secure the gasket through a couple of bolt holes at two or three strategic points around the edge, then just snip the wire when you get to installing the bolts in those holes.
Don't forget to disconnect the oil level warning wire from top of front of pan before pulling off the pan the pan.
An unpleasant job, but done properly you can forget it for another twenty years!
01-11-2018, 04:51 AM
#33
Pro
Thread Starter
01-11-2018, 06:38 AM
#34
Drifting
No the rubber boot has a pretty firm fit onto lip of the contact at top of pan, so you want to work this out of the lip, then pull straight up on the single connector.
Check the wire wire for fraying and for integrity of solder to the terminal. I wasn�t happy with mine so replaced with a crimped insulated terminal which was nice tight fit onto oil level switch pin.
Check the wire wire for fraying and for integrity of solder to the terminal. I wasn�t happy with mine so replaced with a crimped insulated terminal which was nice tight fit onto oil level switch pin.
01-11-2018, 12:26 PM
#36
Pro
I had no concerns using this tooling or questions about it's sturdiness. After years of working in the the heavy equipment business I have seen much worse. The product I have was well made and worked perfectly. I never felt uneasy while under the load, and when I finished I inspected everything for signs of stress...none were wound. Personally, I would trust this tooling over wood cribbing.
Last edited by gbarron; 01-11-2018 at 02:48 PM.
01-11-2018, 02:04 PM
#37
Pro
Thread Starter
Thanks. It was hardended and very tight fit. had to rip it in two parts before lowering oil pan. When pan was down, it still was extremely hard and tight, had to cut it off.
01-11-2018, 02:22 PM
#38
Pro
Thread Starter
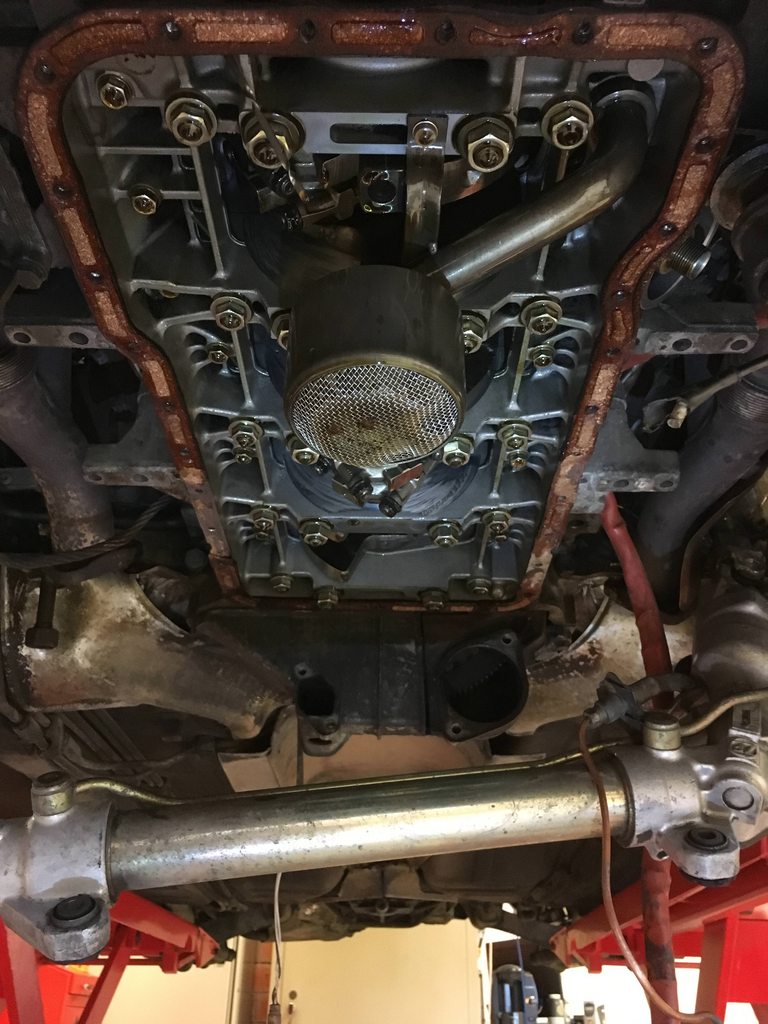
Progress made. Oil pan down, everything looks very good inside engine from what I can see. Some bolts were a bit hard to get to, but overall not very difficult. I thought at first after removing all bolts that I would have a nightmare getting the pan off because it seemes so stuck in the gasket itself. I carefully used a steel spatula with a small hammer to start separating where I could get space for the hammer, and then a plastic kind of pry bar to smack it loose afterwards. Not a fun job, but not that hard either.
Anything I should look for, measure, etc, while having this huge open heart wound?
I will carefully rinse the block and pan surfaces with a razor blade and make sure everything is clean. I have decided to go for the original cork gasket. The factory gasket seems to have held up pretty well for 25 years, so I'll be happy to do it again in 2042.
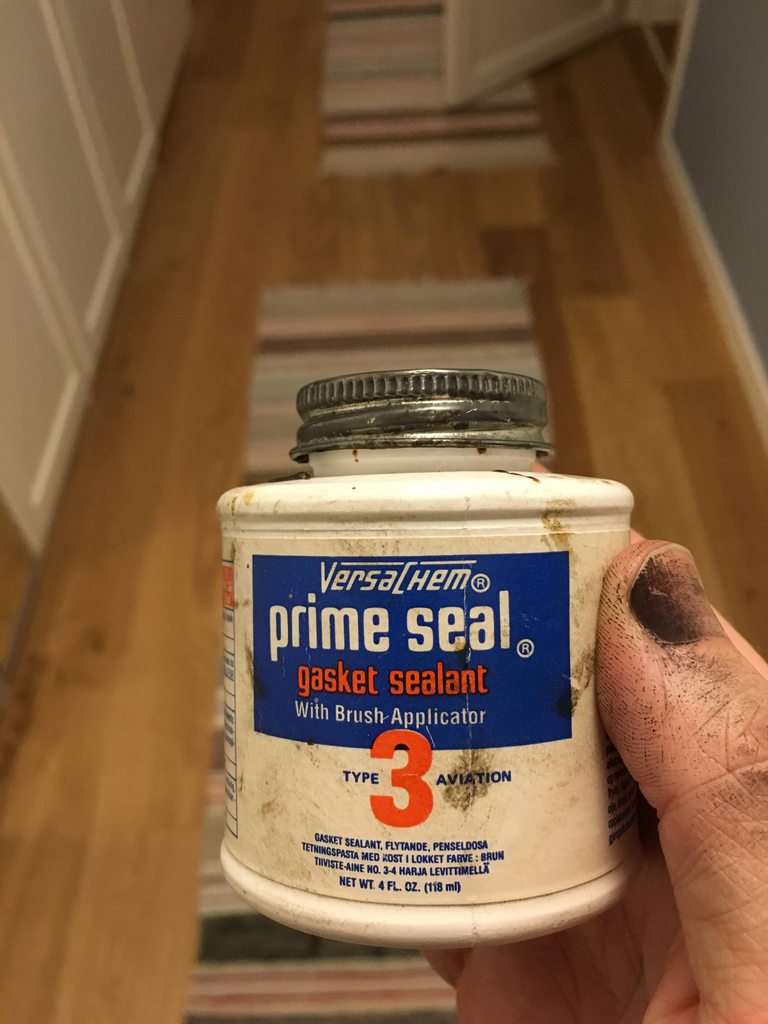
Should I use any sealant with the gasket? I have a can of "prime seal" (see photo), should I use it with the cork gasket?
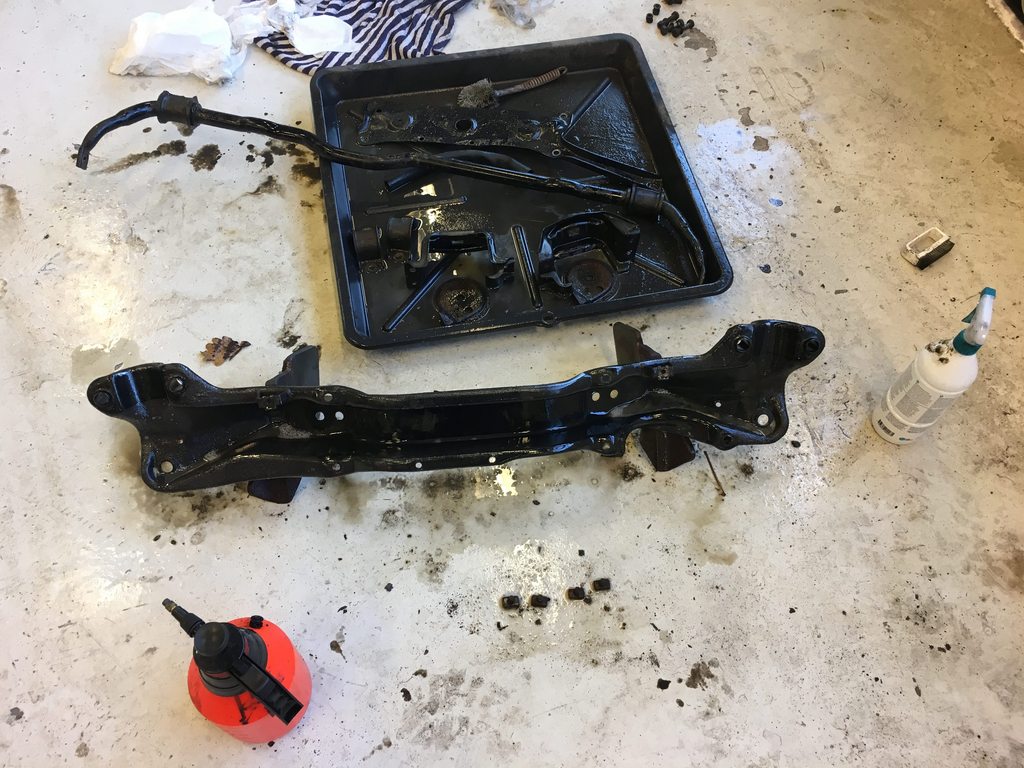
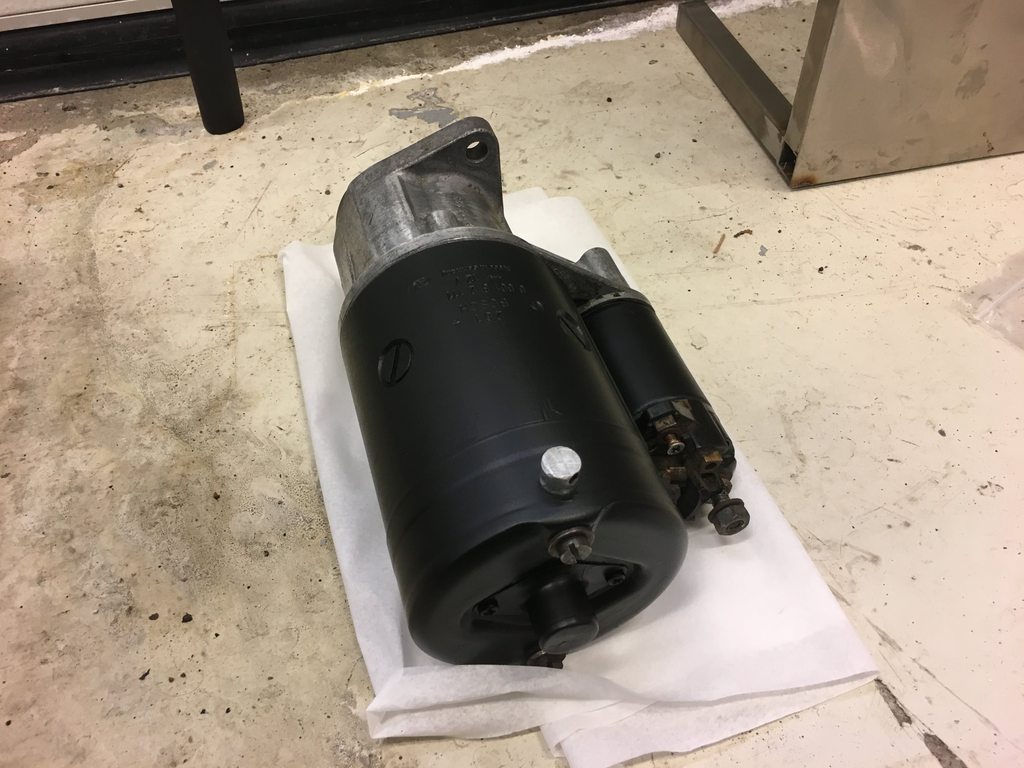
I also took time to wash parts and give the starter a fresh coat of paint while out.

Anything I should look for, measure, etc, while having this huge open heart wound?
I will carefully rinse the block and pan surfaces with a razor blade and make sure everything is clean. I have decided to go for the original cork gasket. The factory gasket seems to have held up pretty well for 25 years, so I'll be happy to do it again in 2042.
Should I use any sealant with the gasket? I have a can of "prime seal" (see photo), should I use it with the cork gasket?
I also took time to wash parts and give the starter a fresh coat of paint while out.
01-11-2018, 05:44 PM
#40
Chronic Tool Dropper
Lifetime Rennlist
Member
Lifetime Rennlist
Member

No Gasket Sealer on the sump gasket. Make sure it's clean on both faces and you are good to go with everything clean and dry. Using sealer means you get to chisel the gasket off one surface or the other when you replace it next time.
01-11-2018, 06:01 PM
#41
Drifting
I would cover up the ‘open heart wound’ with big plastic bag or something, once you’re done with any inspections. You don’t want dust blowing up into the block.
01-12-2018, 02:22 AM
#42
Pro
Thread Starter
There is something scary about touching the internals (that are already working) of the engine. It just feels so wrong for me to begin wrenching in there. Probably just psychological, but I think I will stop here. haha.
01-12-2018, 10:38 AM
#43
Pro
Thanks. This O-ring, is it common to change it while in there? Is it known to cause issues? Much work to replace?
There is something scary about touching the internals (that are already working) of the engine. It just feels so wrong for me to begin wrenching in there. Probably just psychological, but I think I will stop here. haha.
There is something scary about touching the internals (that are already working) of the engine. It just feels so wrong for me to begin wrenching in there. Probably just psychological, but I think I will stop here. haha.
01-12-2018, 04:01 PM
#45
Pro
Yes, that's the one. Also, a good time now to replace the 2 gaskets used on the top side of the oil pan since you have it off...1 for the blocking plate (928 107 169 01) and the one under the oil level sensor (928 606 213 03). Cheap insurance!