When you click on links to various merchants on this site and make a purchase, this can result in this site earning a commission. Affiliate programs and affiliations include, but are not limited to, the eBay Partner Network.
Curt , little mezzanine area 12x8 accessible with my 4 post elevator . if you can fab up some hanger system for storage it would be great . Near a lift so you have a elevator
wow you are sure moving quickly with this project ! The outside of mine looks good , but still a long way on the inside
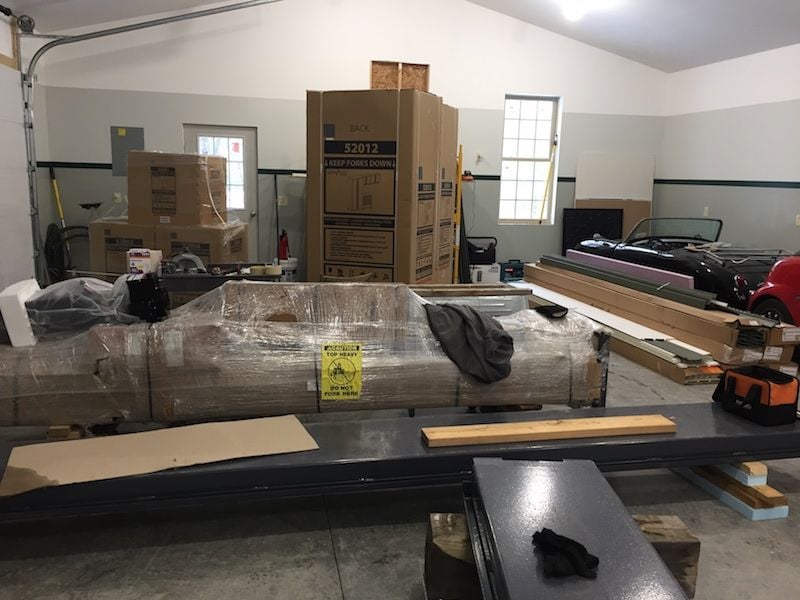
The lifts have arrived! With dollies and engine hoist, I shouldn't have any trouble with the four-post lift. Only the runways are heavy. For the two-post lift, I'll try to get two strong friends over to help at the same time. More likely, I'll use the four-post lift to raise the columns of the two-post lift part way, then hope that adrenaline kicks in.
Otto: I ordered the tiles you recommended, enough to cover the third of the floor on the entrance side, stall #1. A dark green and light gray checkerboard pattern. Coming tomorrow.
I also ordered cabinets, arriving in three weeks, to go in the back corner of Stall #1, which will be deluxe - the showroom.
Between the lifts, tiles and siding, I should focus on siding since it's warm and sunny. But the critical path for moving old Porsches into the garage is getting the lifts installed.
My millwright equipment, ready. Wheel dollies, plus four $10.99 furniture dollies from Harbor Freight. Camp 928 attendees might notice that I've re-purposed two campfire benches.
Get one end in and on a dolly. Shift hoist to the other end, push in and set on second dolly.
My life will have purpose - for the next few days, anyway.
Nice going, I used the carpet dolly's too but not the engine hoist, we broke the lift down on the trailer, however it was in the high 50's .
Like you found the heaviest part is the Runway with the Ram attach underneath, everything else is two man work.
If you haven't done so already, watch some YouTube Vids on assembling them, the hardest part I found was running and attaching the cables.
And If you are doing it yourself, feel free to reach out and PM me I can give you some pointers as its only been a few months.
I've enjoyed many Youtube videos on the subject, especially those that feature idiots ordinary guys doing the installation, yet succeeding. I have everything unpacked for the four-post lift. I am intimidated by the cables. I'm pausing to read the instructions, again.
I unexpectedly received the cabinets this week (New Age, Pro 3 - sold online by Home Depot), and not the tiles. Out of sequence. Those two tall boxes weigh 500 lbs apiece - they stuffed a base and two wall cabinets inside each of the two locker cabinets. The delivery guy was gigantic, fortunately. And a car guy - he said he always loved the 928.
Could be worse, even more stuffed - the tiles and the split-unit AC are coming.
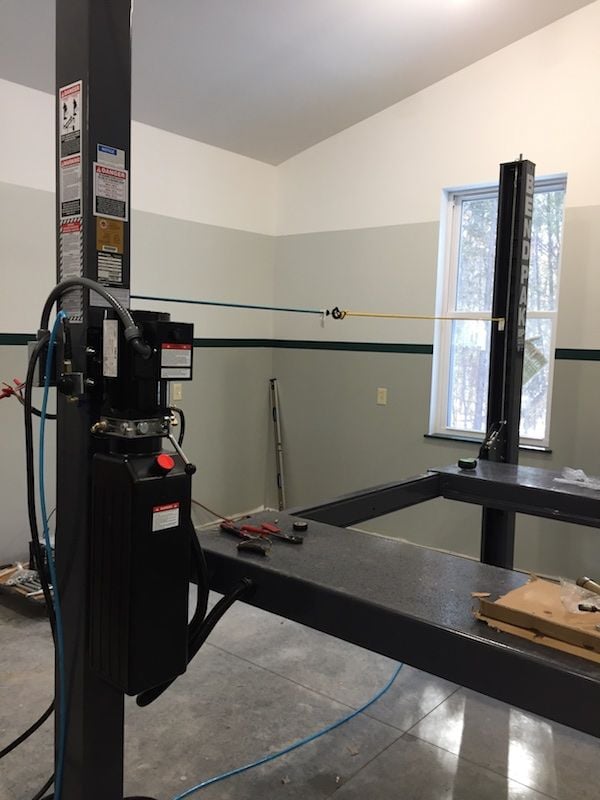
I'm proving to be a genuine ordinary guy idiot on the four-post lift assembly. It doesn't help that the manual is atrocious. For example, this morning I failed to install a clearly-indicated pad on the power unit, but also a bracket not mentioned in the manual. I've had no witnesses, though: with dollies and an engine hoist, it can be done solo. The cables are in! Ironically, I've been on a creeper a lot during the past two days. But I have only wires and tubes left to do. Then on to the two-post lift, which I think will be a lot easier. I'll use the four-post lift to get the columns up about half-way.
Yes they do fill up sooner than later
The Rubber anti-vibration pad? yep I had left it off too and had to re-do mounting the motor assembly, LOL
Yeah that manual is written for lift installers, mostly focused on layout and not assembly, getting the cables to make the 90deg turn from columns to the risers was the hardest for me, I had troubles getting them past the per-installed pulleys.
When you do one over time the way mine has been, you end up doing a lot of "stuff" moving, you just need to shift the boxes around
I'm extremely envious of the amazing shop spaces that some have! I went thru the planning & construction stages with my dad, and one thing that I can affirm is that you learn SO much through the process; mostly what you should have done. A guy almost needs to build one garage first as practice. And they are never big enough.
Lift off! Lift off a very challenging assembly, at 12:23 PM, January 15.
Some final touches remain. One to go. Curses upon the writers of Bend Pak manuals. The section on commissioning an assembled lift is particularly unintelligible.
Ben: this is actually the second garage I've built, so fewer mistakes. More purpose-built, though, so the jury is not out.
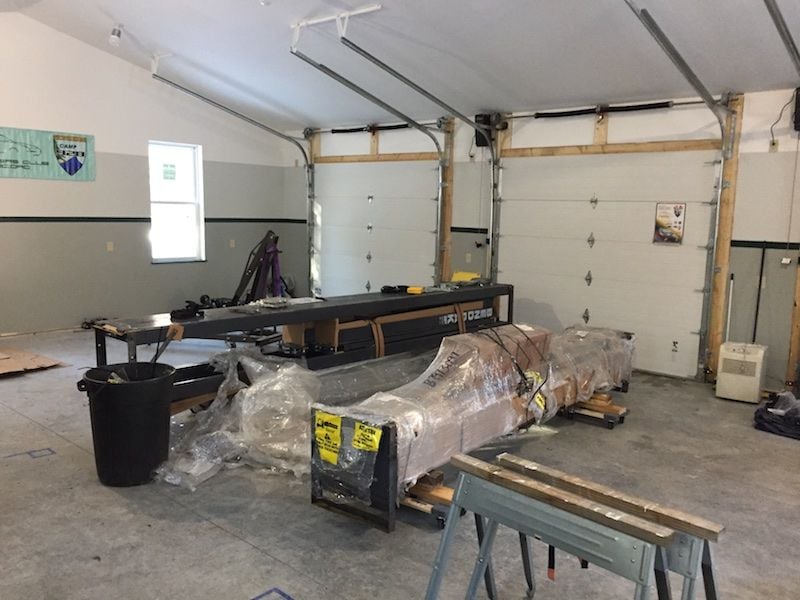
Dave: note the shock cords on the cables. Slack management, to keep the cables in the sheaves.
Keep it rolling along, and glad you did not crush anything/anyone/yourself installing those lifts!
I like your wainscoting, and I already know how functional it must be for withstanding collisions. I think I'll see where rub strips are needed, then put 'em up.
A friend came over last night and we set up the columns for the two-post lift. No animals or small cars were harmed during this production, but it was a little sketchy. I need to pick up a 3/4" SDS bit, then it's fun time with the hammer drill. Meanwhile, let's not have any earthquakes, or super volcanos (we're actually pretty active here, but just little ones).
Apparently, there are many ways to use a lift incorrectly.
Great job on getting all of that coordinated. That's a lot to shuffle around in a shared space.
I don't recall having any trouble with assembly of my 4 post Bendpak, so it might just have to do with familiarity of those types of instructions. I couldn't say one way or the other if they seemed good or bad. I just remember that it took a lot longer to assemble than I had anticipated, but it went smoothly.
Are your cables not retracting when you operate the lift, or did you just use the bunjees during installation to help with setup?
Something to consider is placing something under the four posts for the lift. I use thick rubber matts that are designed for commercial gyms. It keeps the posts from shifting and protects the floor. I can get you specs and a link if you're interested.
The last barbecue grill I purchased came assembled, so perhaps I've lost my skills at interpreting bad instructions. Or perhaps I was foolish in looking at them. It really is a simple machine, but every other paragraph is a warning about severe injury or death.
I used the bungee cords for peace of mind while first taking up the slack in the cables, to keep them on the sheaves. It's all nicely adjusted now, good clickity-clacking of the lock pawls. Hard rubber pads sound like an improvement. And I moved one car onto it from my remote storage. It's no good owning a vintage car if you can't keep it near.
With help, I've got two-post lift assembled. And odd electrical thing: after wiring the garage with #10 wire, they want it connected to #14 wire going to the overhead safety switch. I know the electrical code is for protecting buildings, not equipment. The real oddity is that there is a motor contactor (relay) that the "up" button operates (at low current) - I'm planning to wire the safety switch in series with that. Don't let me forget to give the concrete anchors their final torquing. Speaking of torque, this stall will soon be the scene of torque tube shenanigans.
I have stall #1 cleared for the interlocking-tile vinyl flooring. Then I move in the base cabinets (wall cabinets already up), and it's pretty much finished inside. Oh - I've got to figure out what to use for countertops.


 01-06-2018, 04:08 AM


 .
.