When you click on links to various merchants on this site and make a purchase, this can result in this site earning a commission. Affiliate programs and affiliations include, but are not limited to, the eBay Partner Network.
Help me understand what I am seeing with my timing belt...
Hello Gentlemen,
I need some advice and perspective from those far more experienced than me.
I am knee deep in an impromptu intake refresh. As part of that, I am checking timing belt tension and checking cam timing.
This engine had a new timing belt, rollers, water pump, rebuilt tensioner, new oil pump, etc...back in April of 2016. According to the invoice for parts and labor, everything that was supposed to be replaced, was. It has covered maybe 2000 miles.
So, it is due for a belt tension check. As well, I am checking cam timing in preparation for adding Porken's S300s chip set.
Well...I am seeing some things that I don't understand.
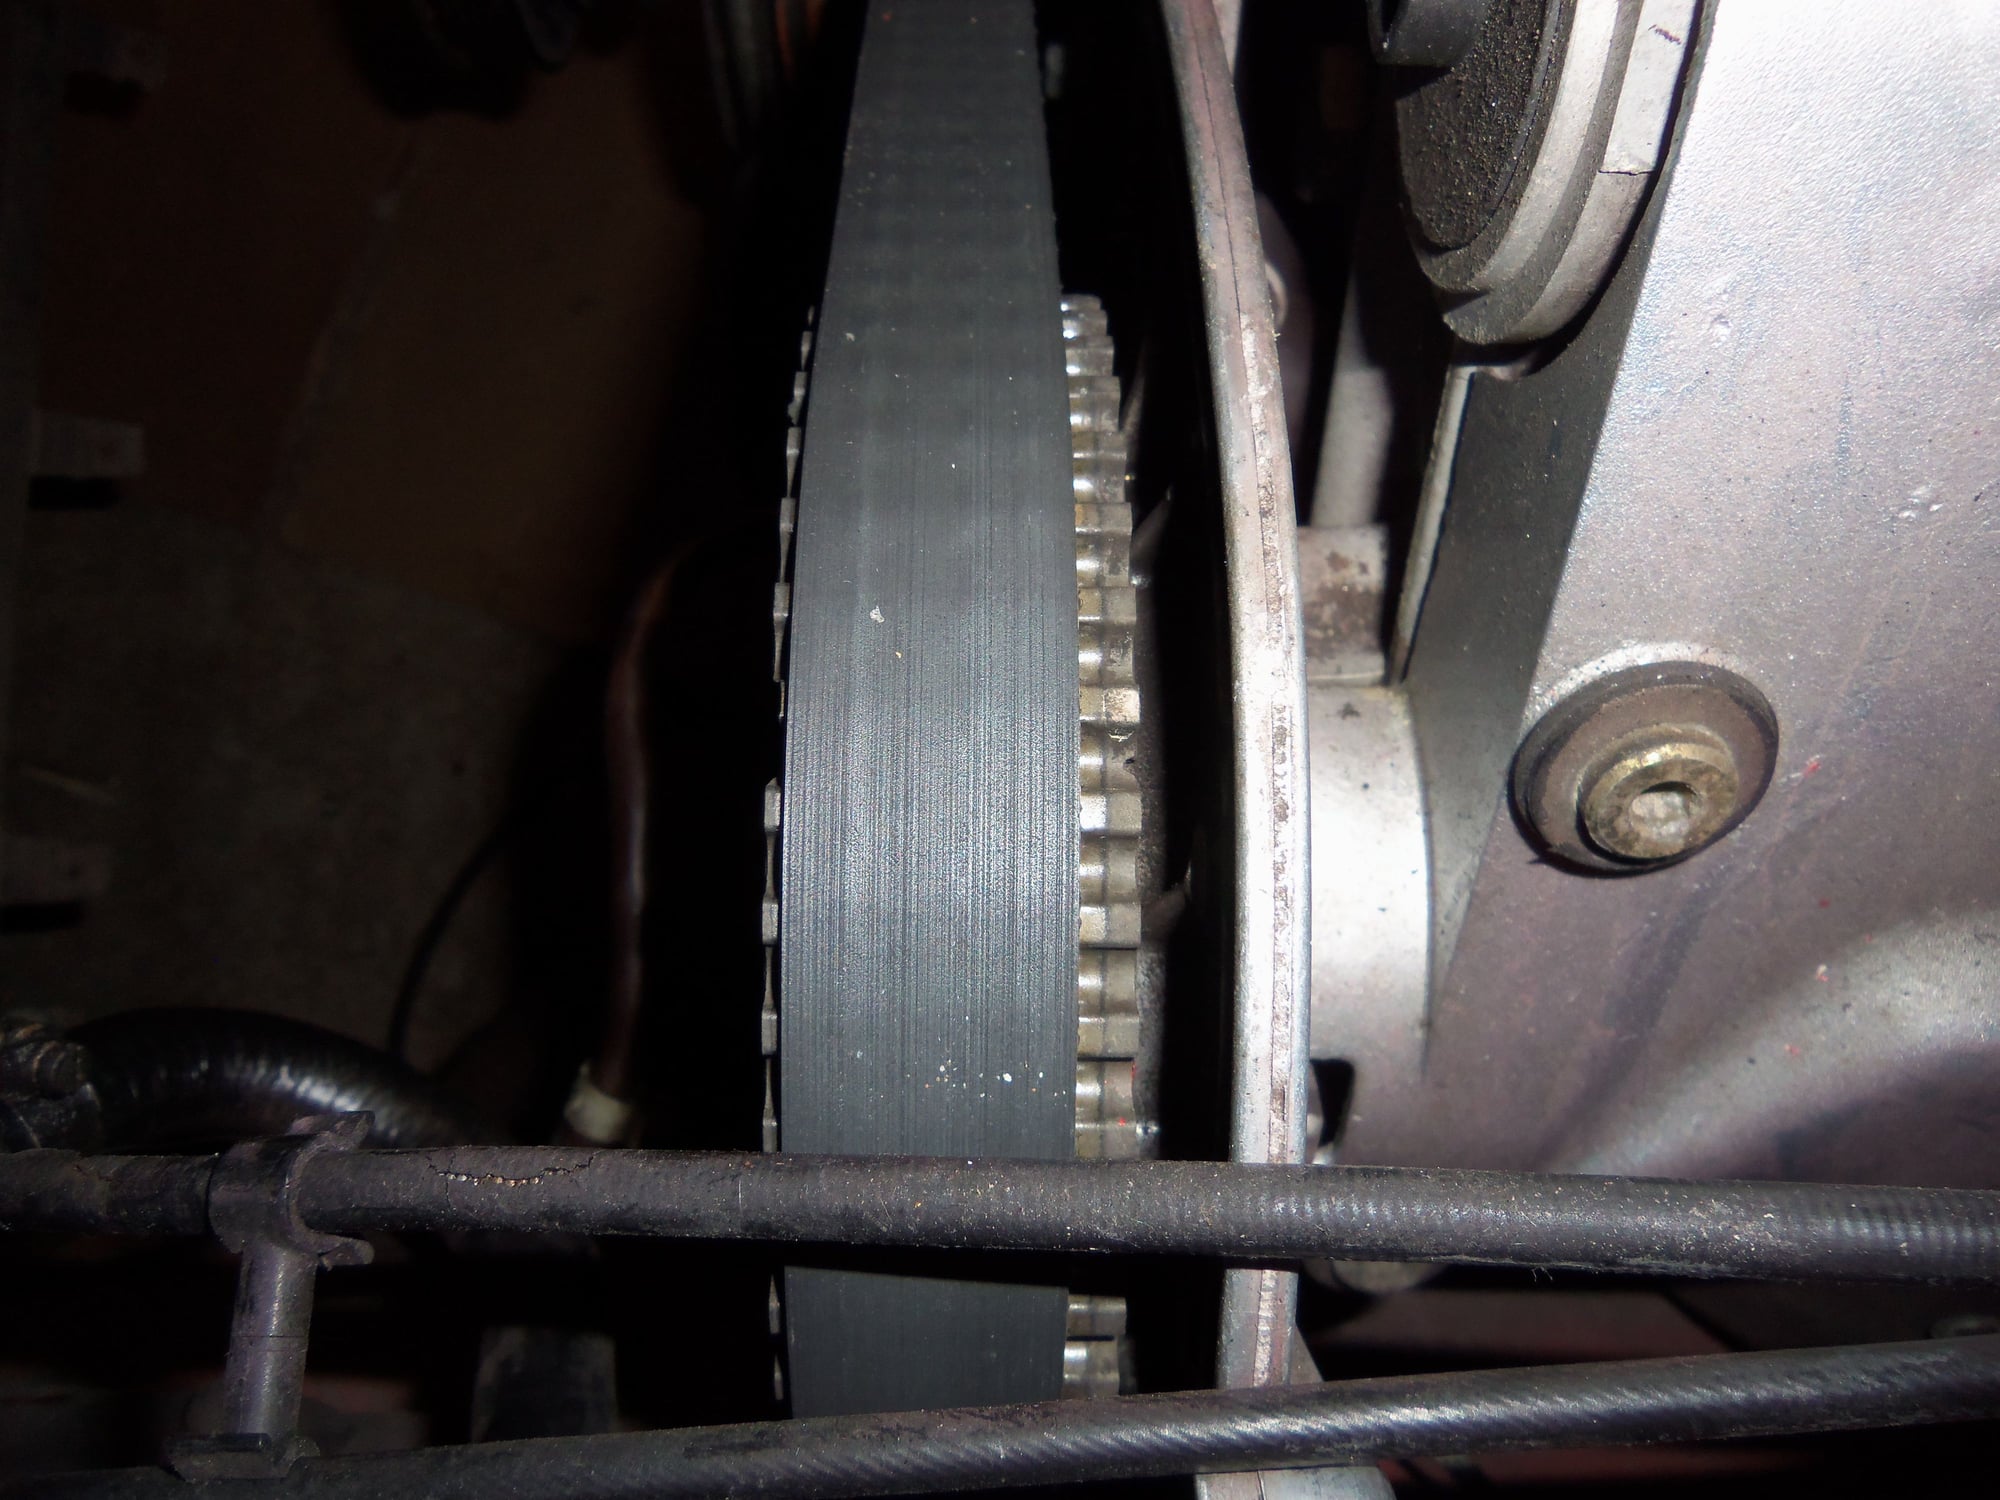
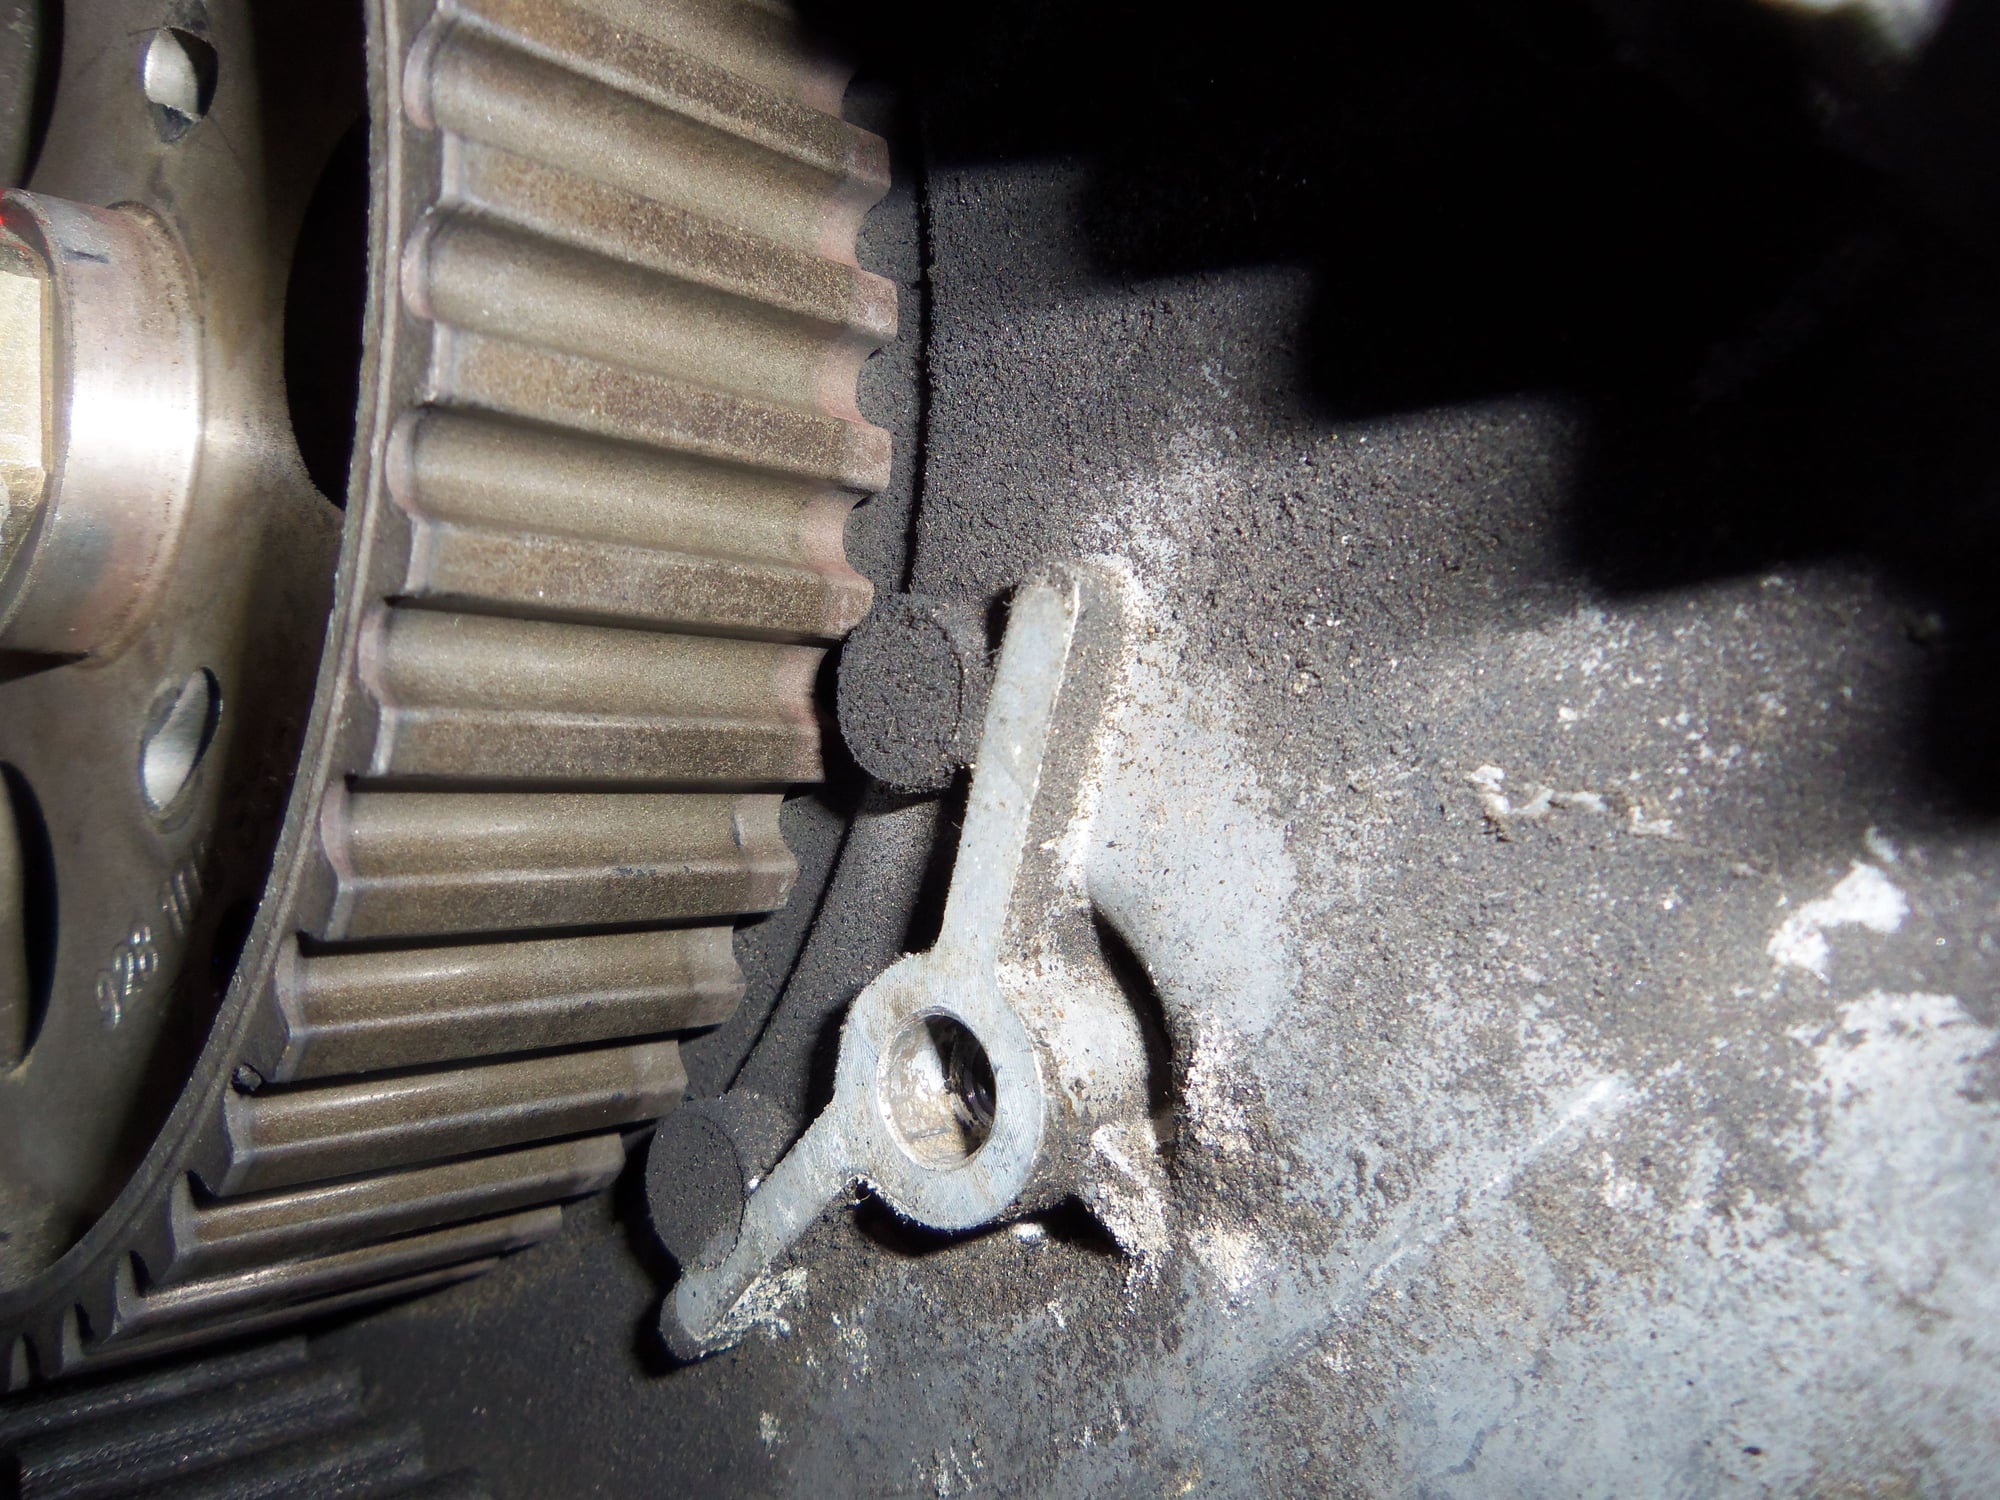
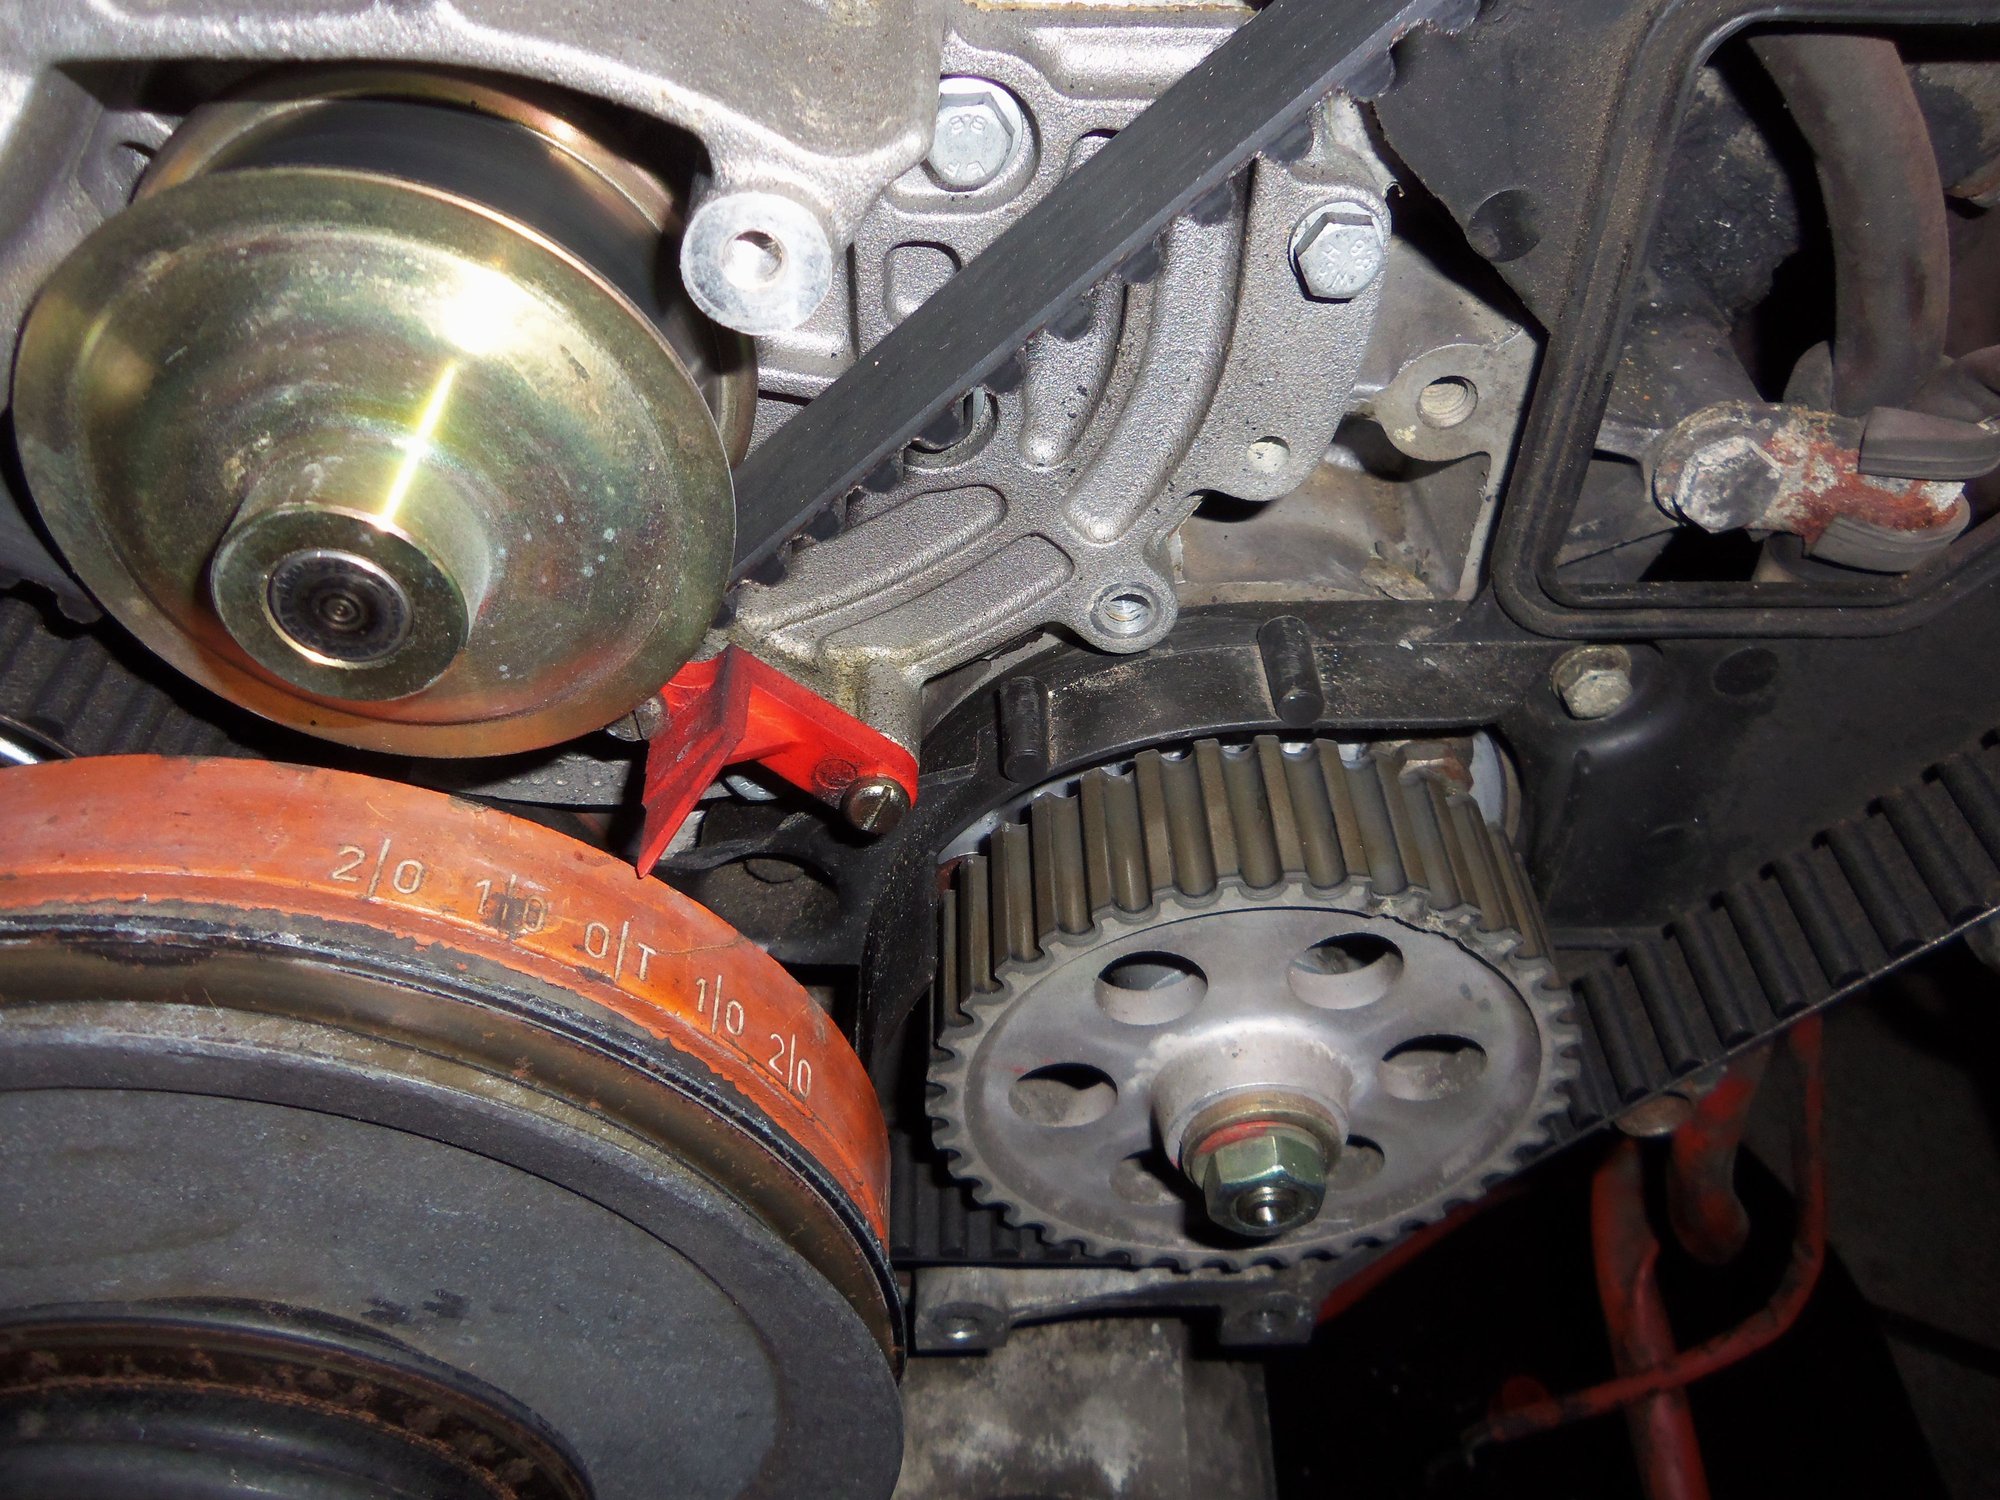
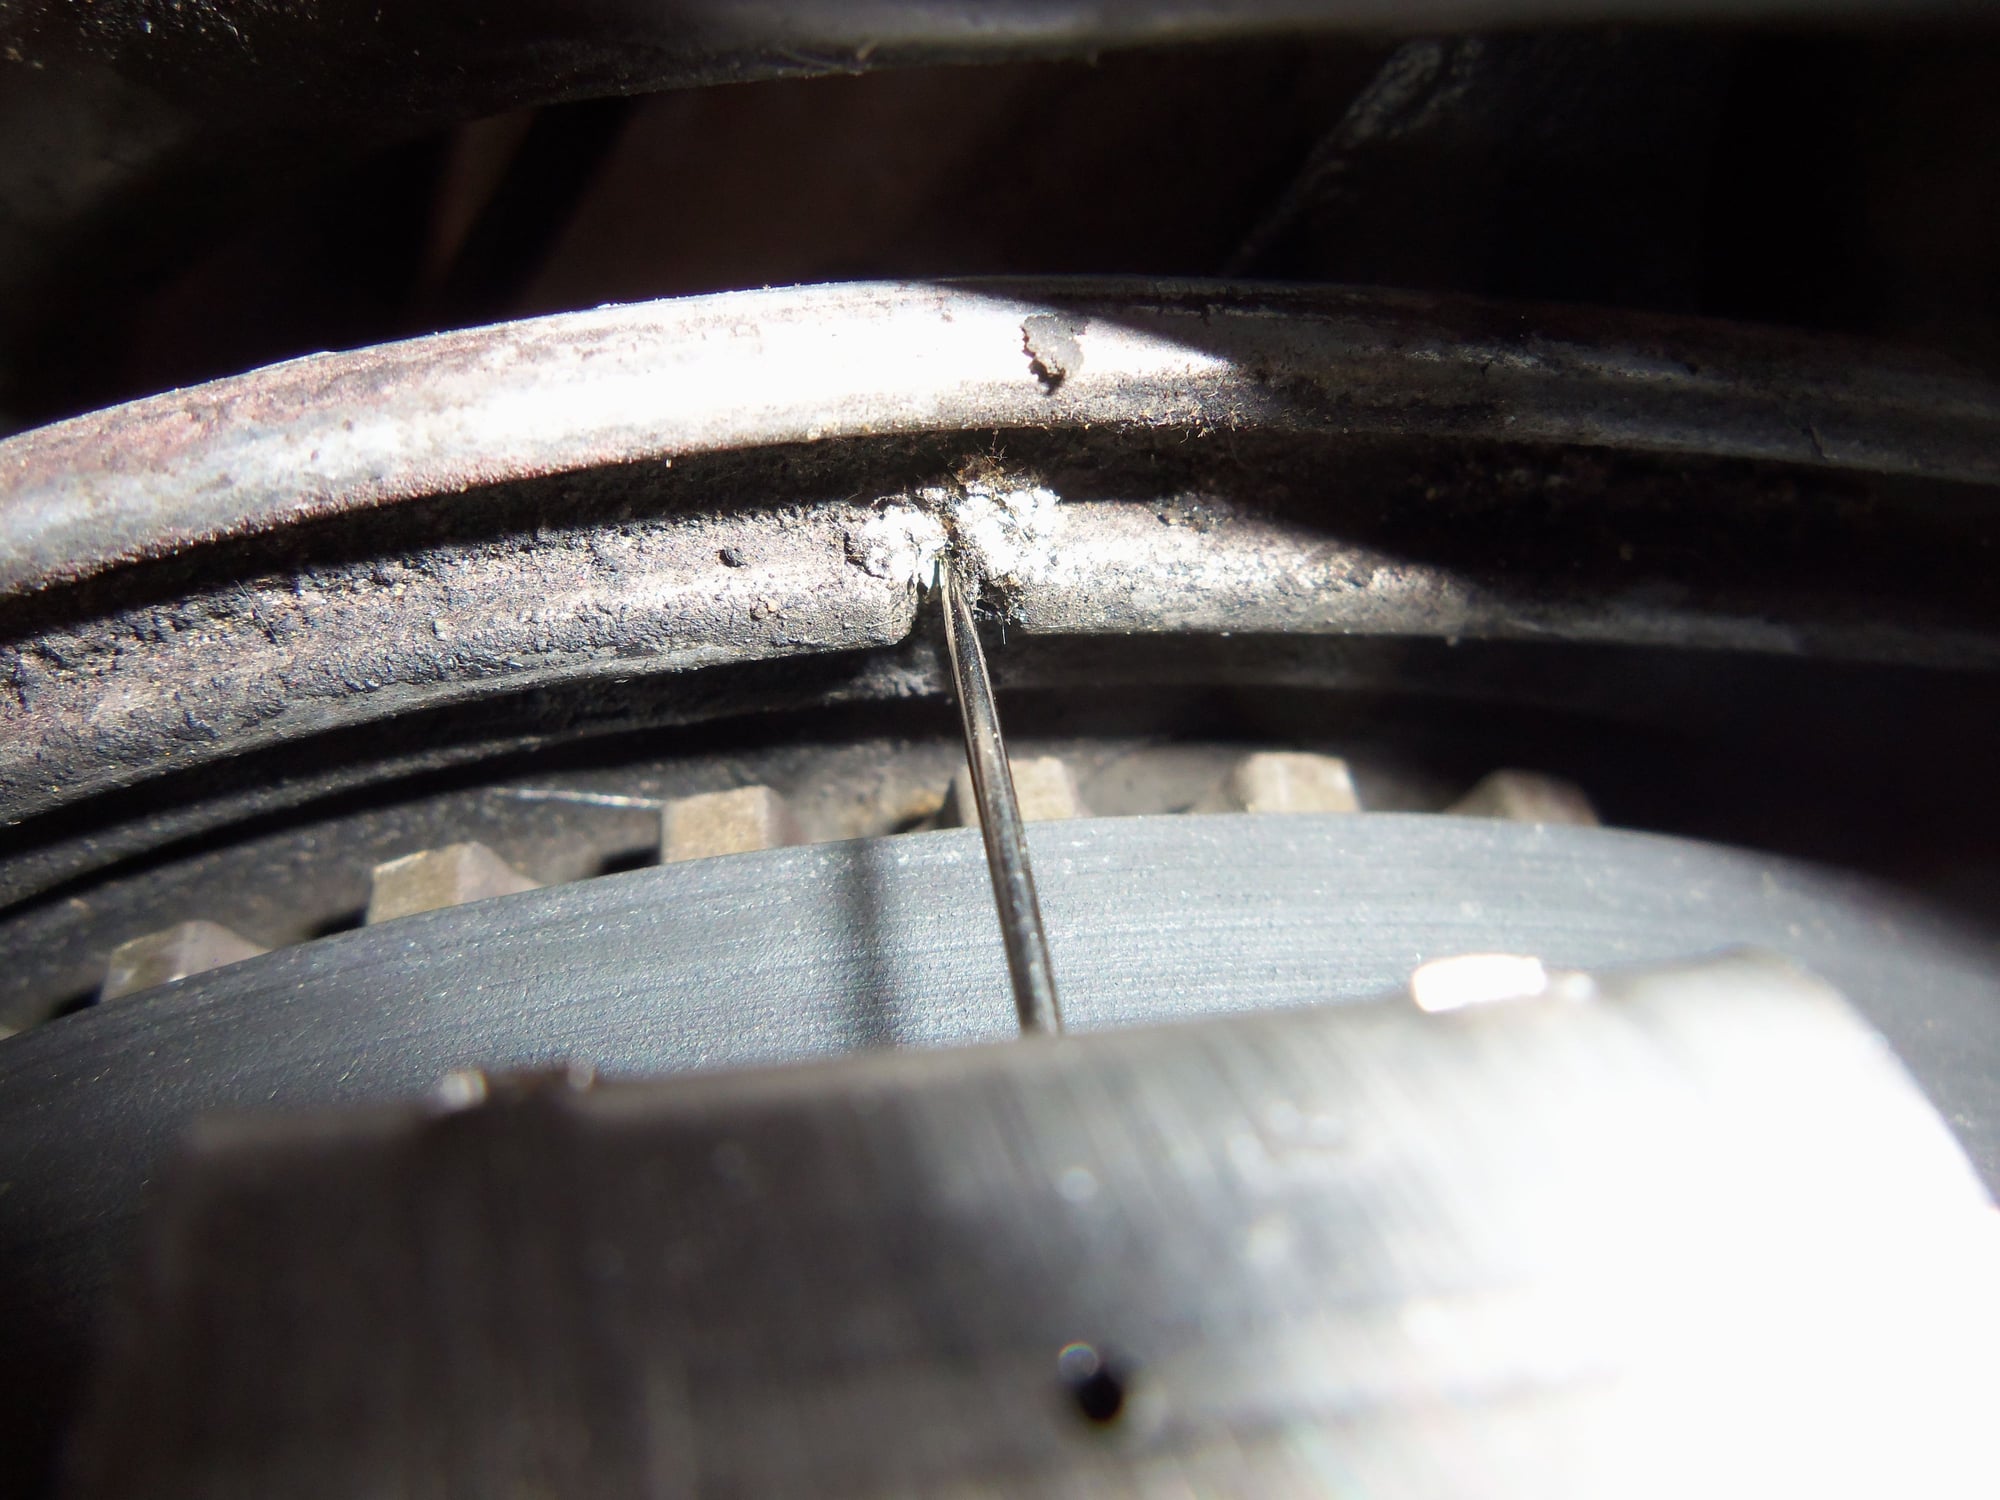
The belt is not tracking in the middle of the driver's side cam sprocket.
Note the shiny areas towards the rear of the sprocket. I don't know if that is where the belt WAS riding, or it that is where the previous belt was riding.
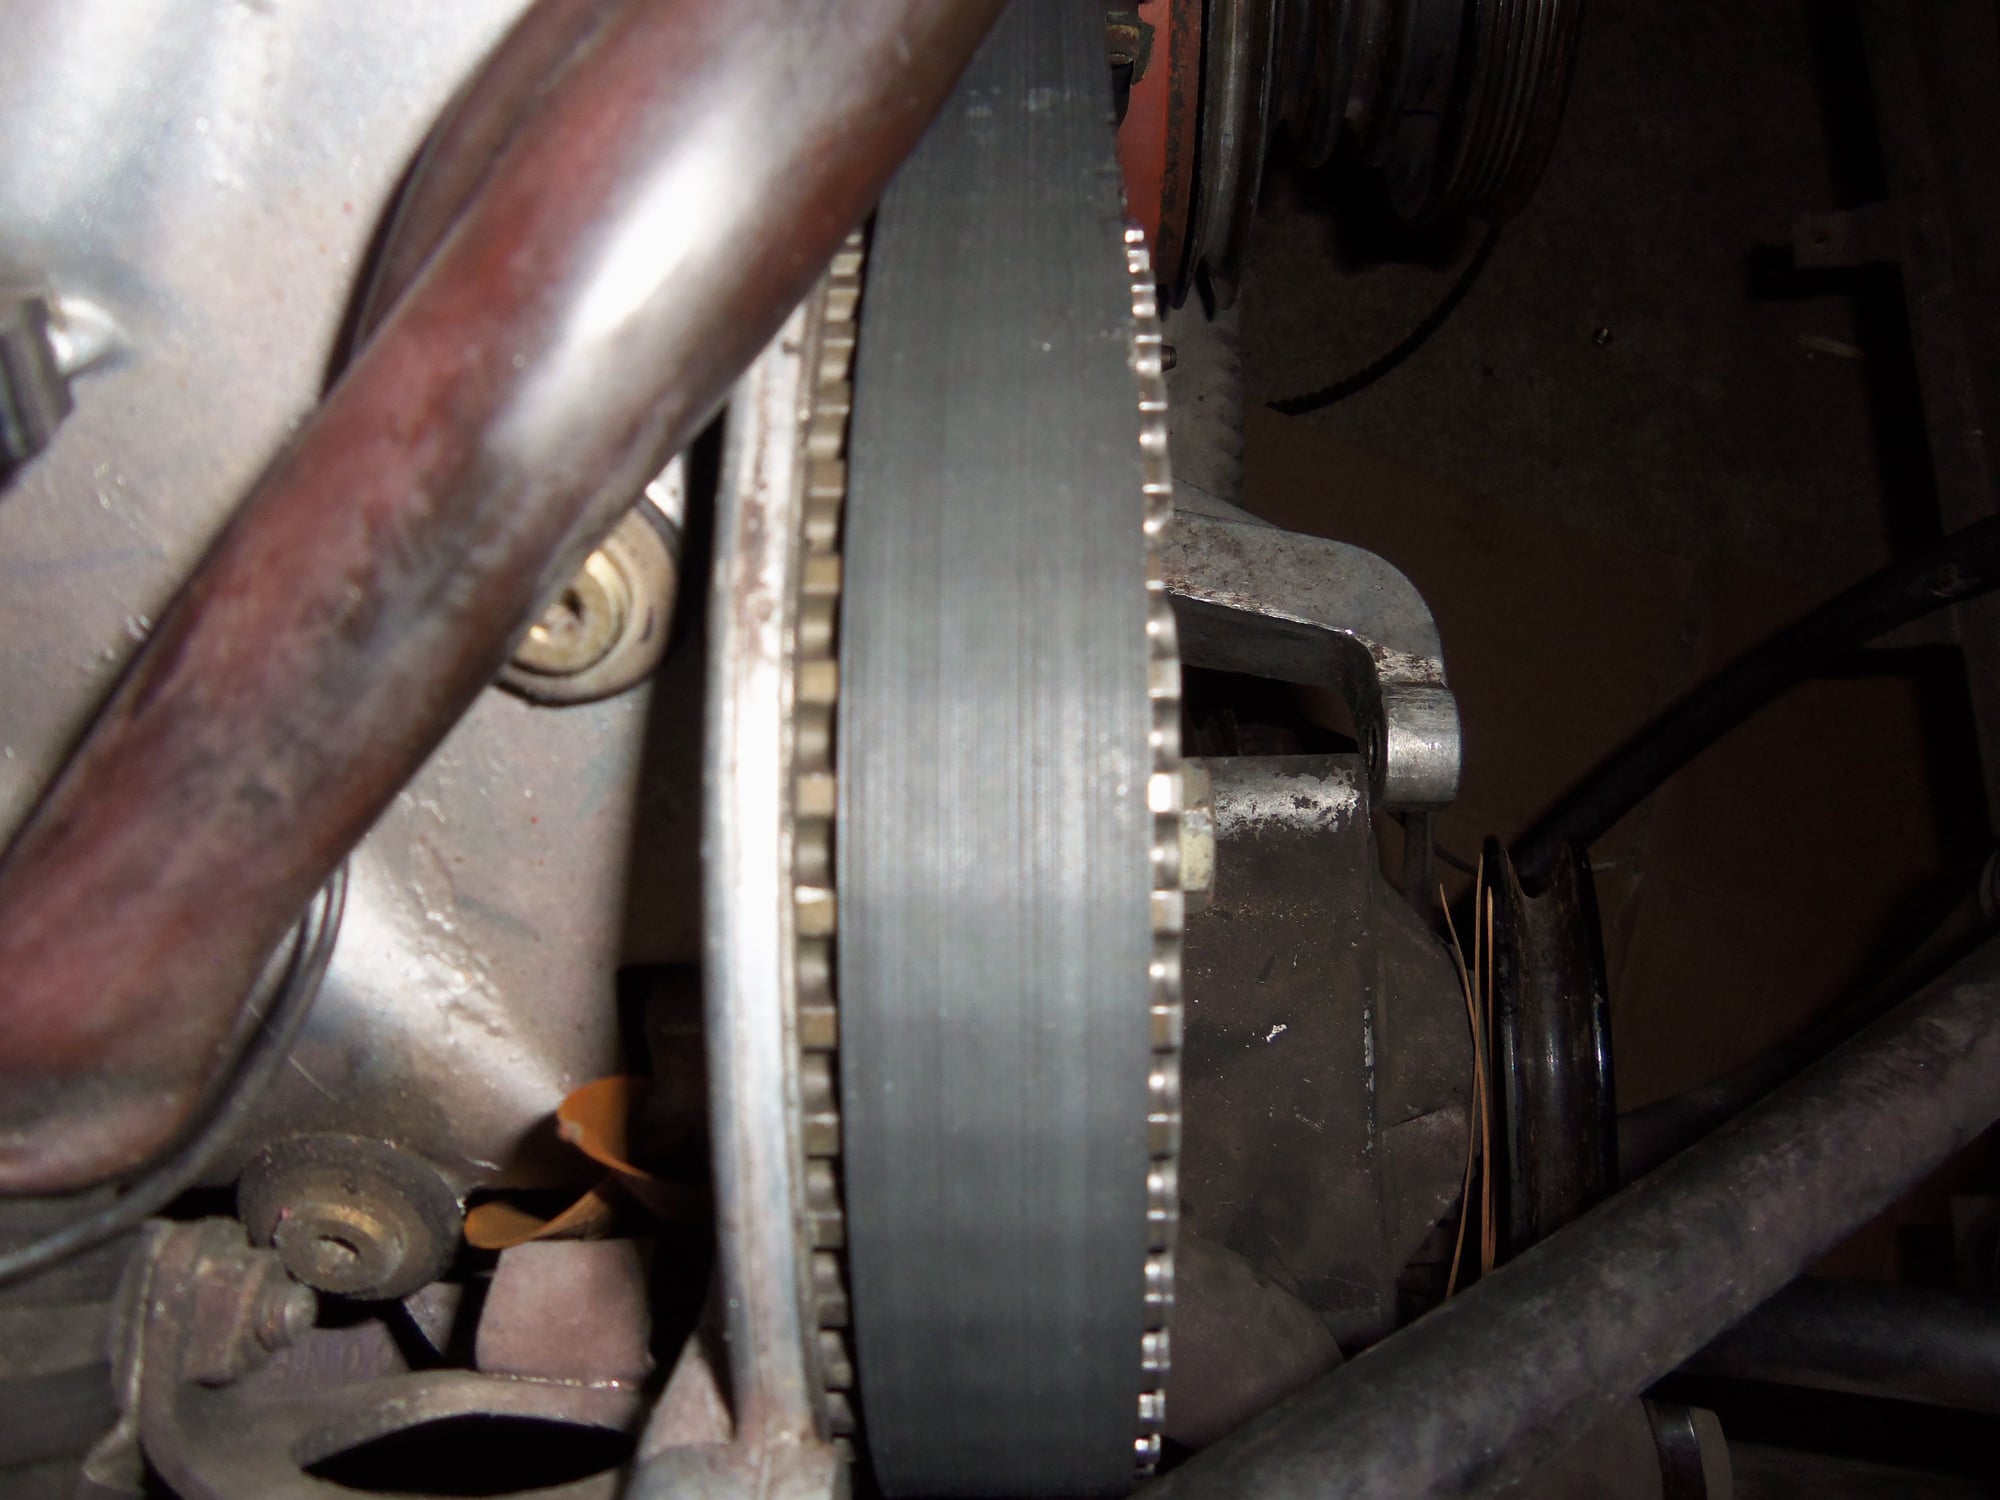
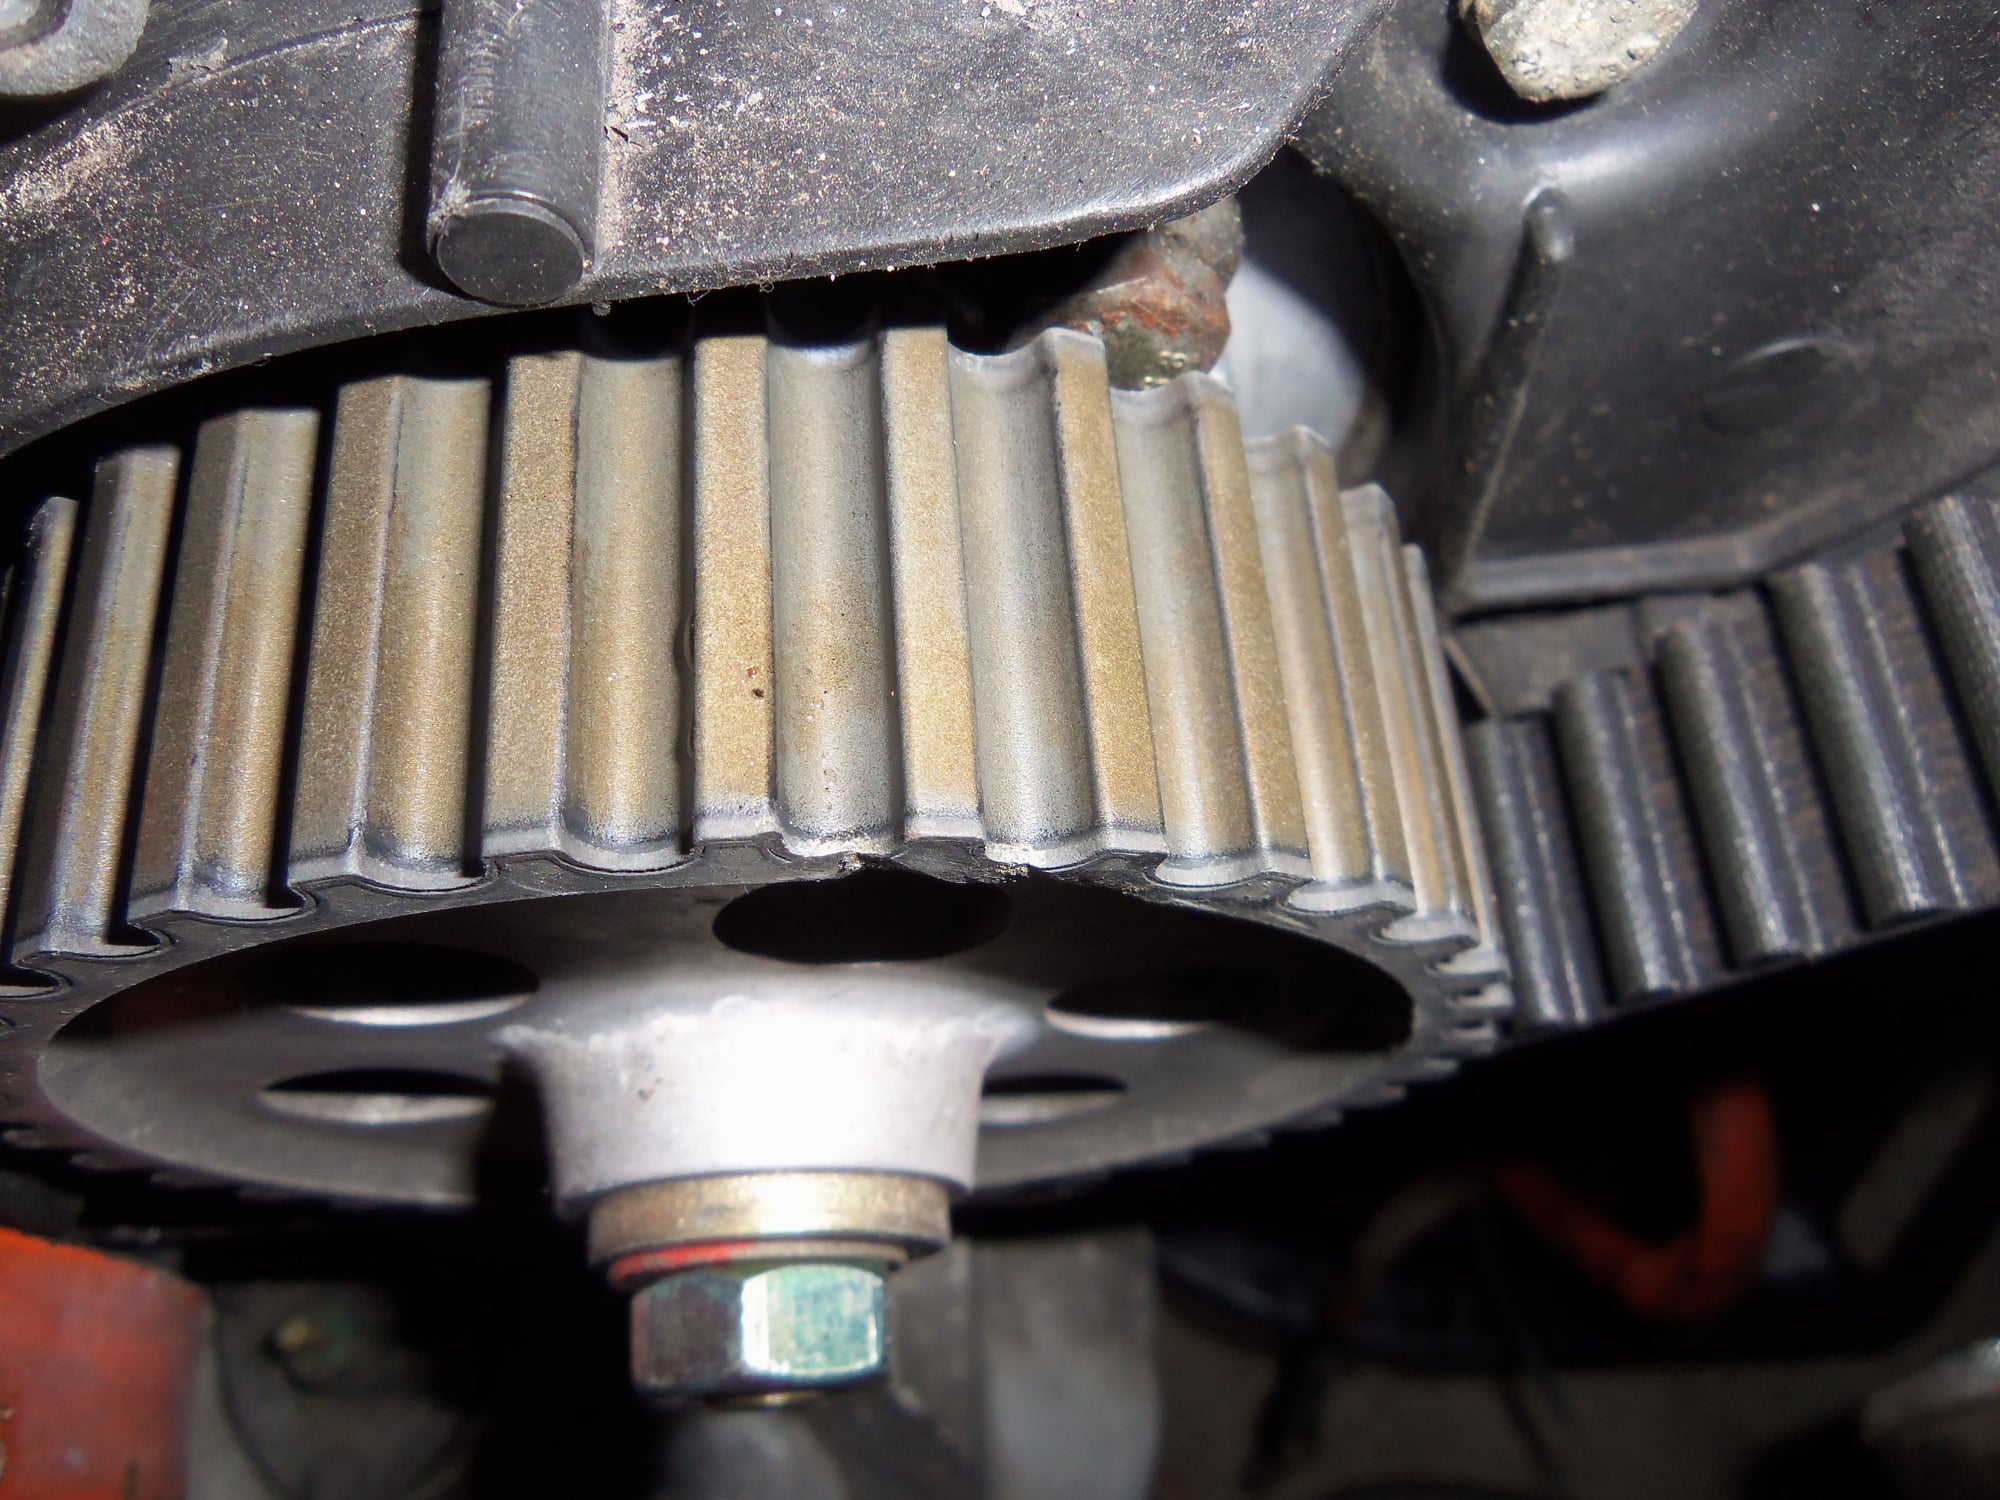
The belt is not tracking in the middle of the passenger's side cam sprocket, either. However, it is not as bad.
Not centered, but not off by much.
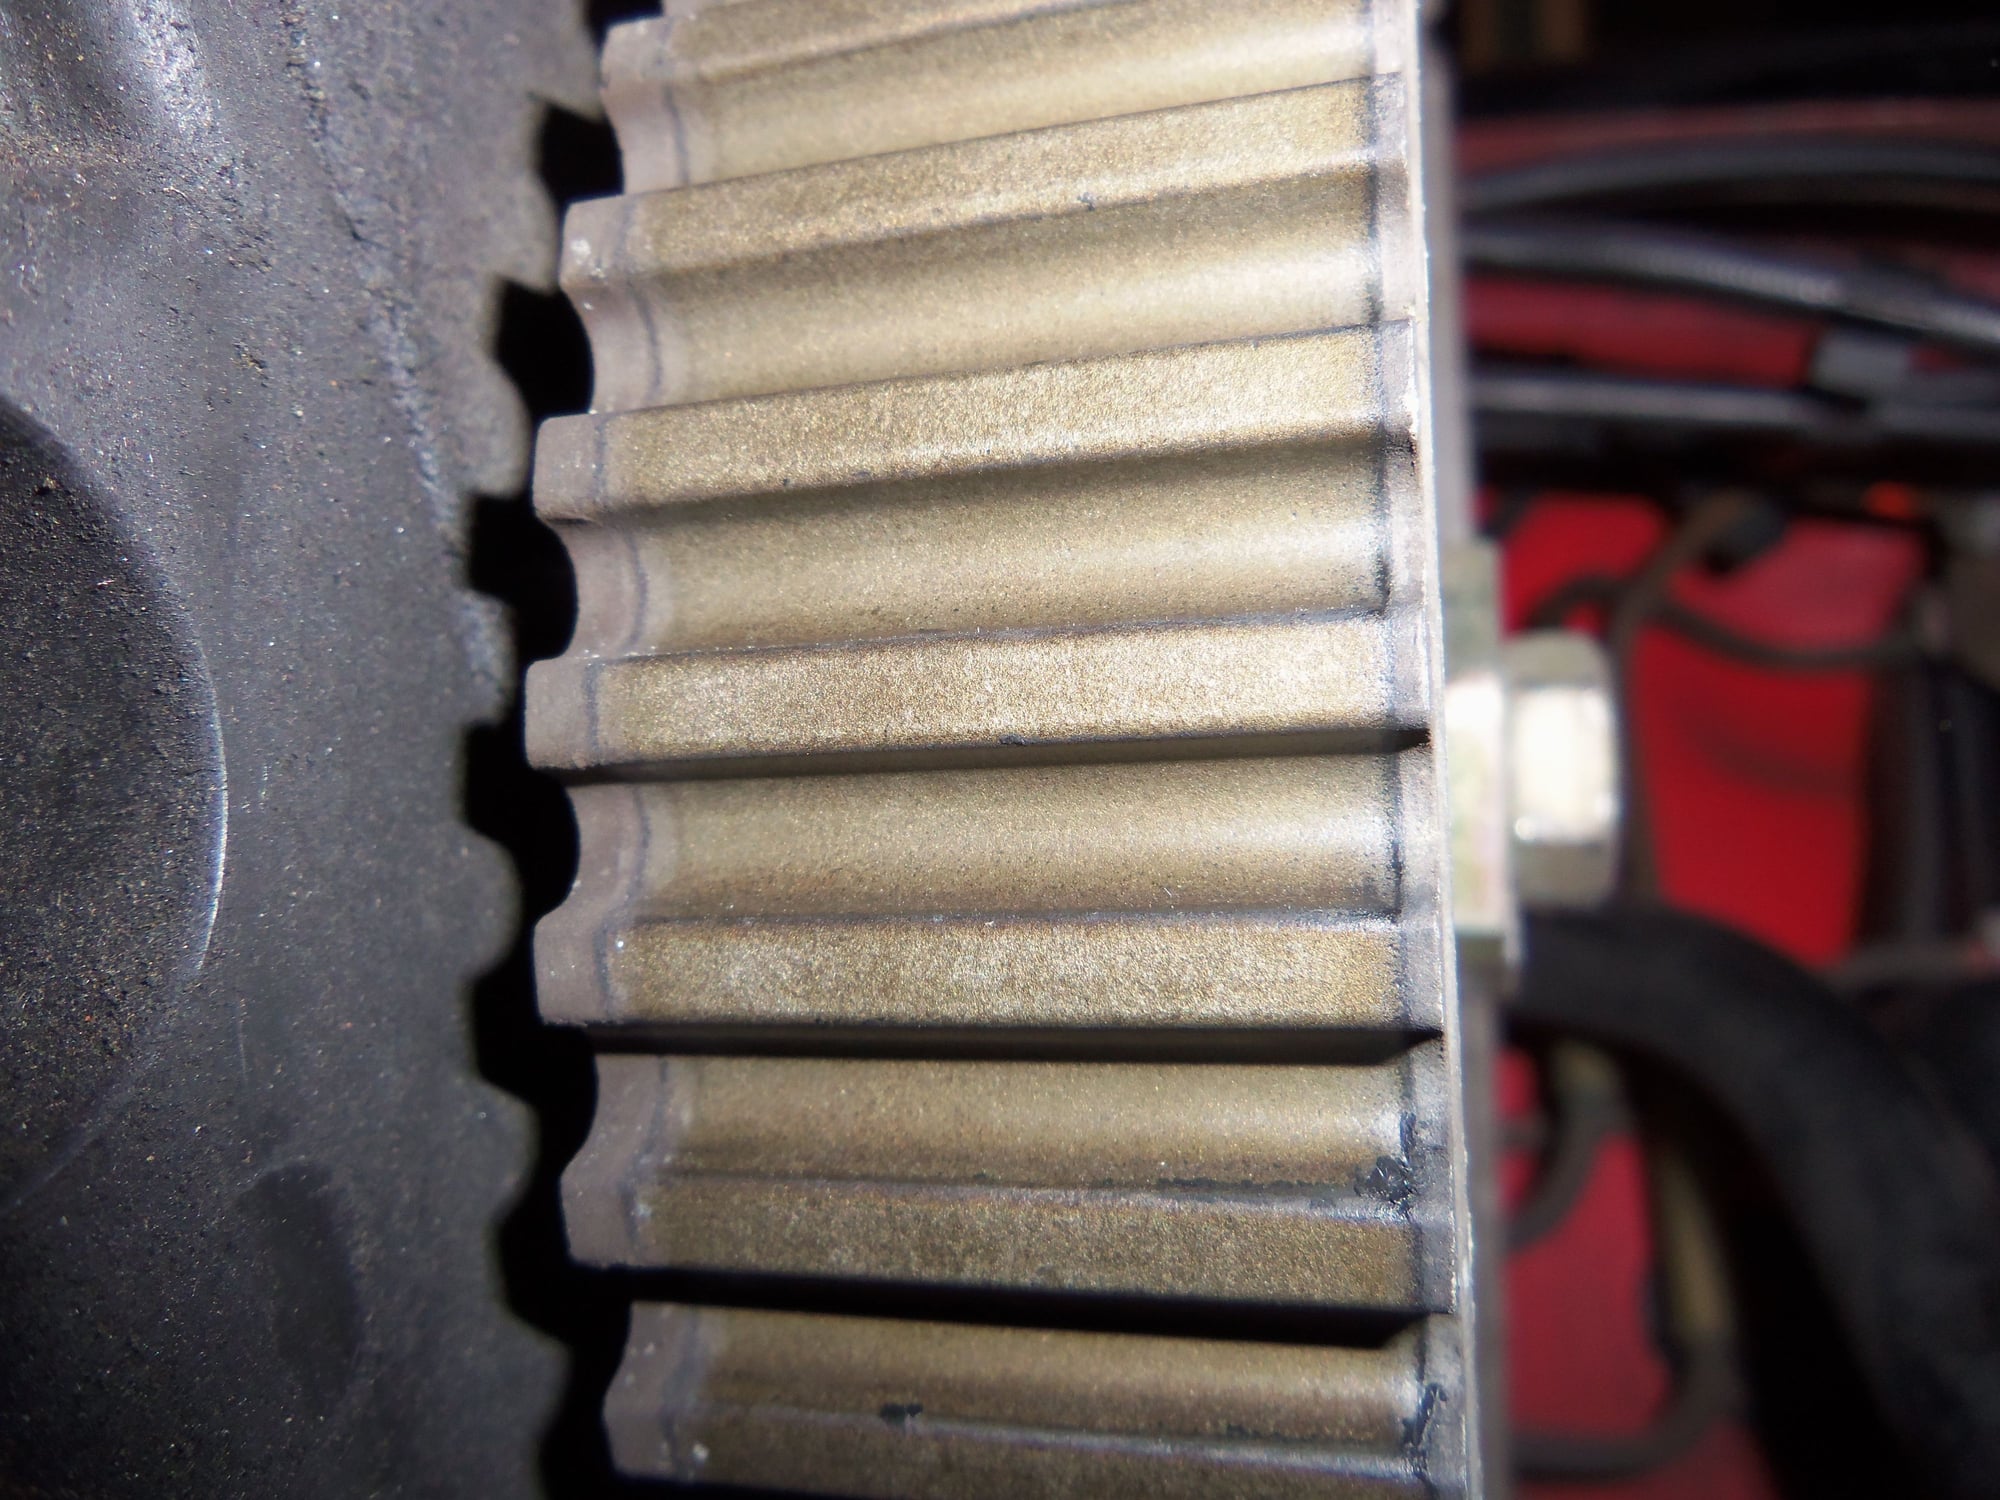
Sprocket wear does not look bad:
Driver's side cam spocket, wear doesn't look bad.
Driver's side sprocket, no real wear on tops of the teeth.
Driver's side sprocket, a little shiny aluminum peeking through at the trailing edges of the teeth.
Passenger's side sprocket, wear doesn't look too bad.
Passenger's side sprocket, no real wear on tops of the teeth.
Oil pump sprocket, wear doesn't look too bad.
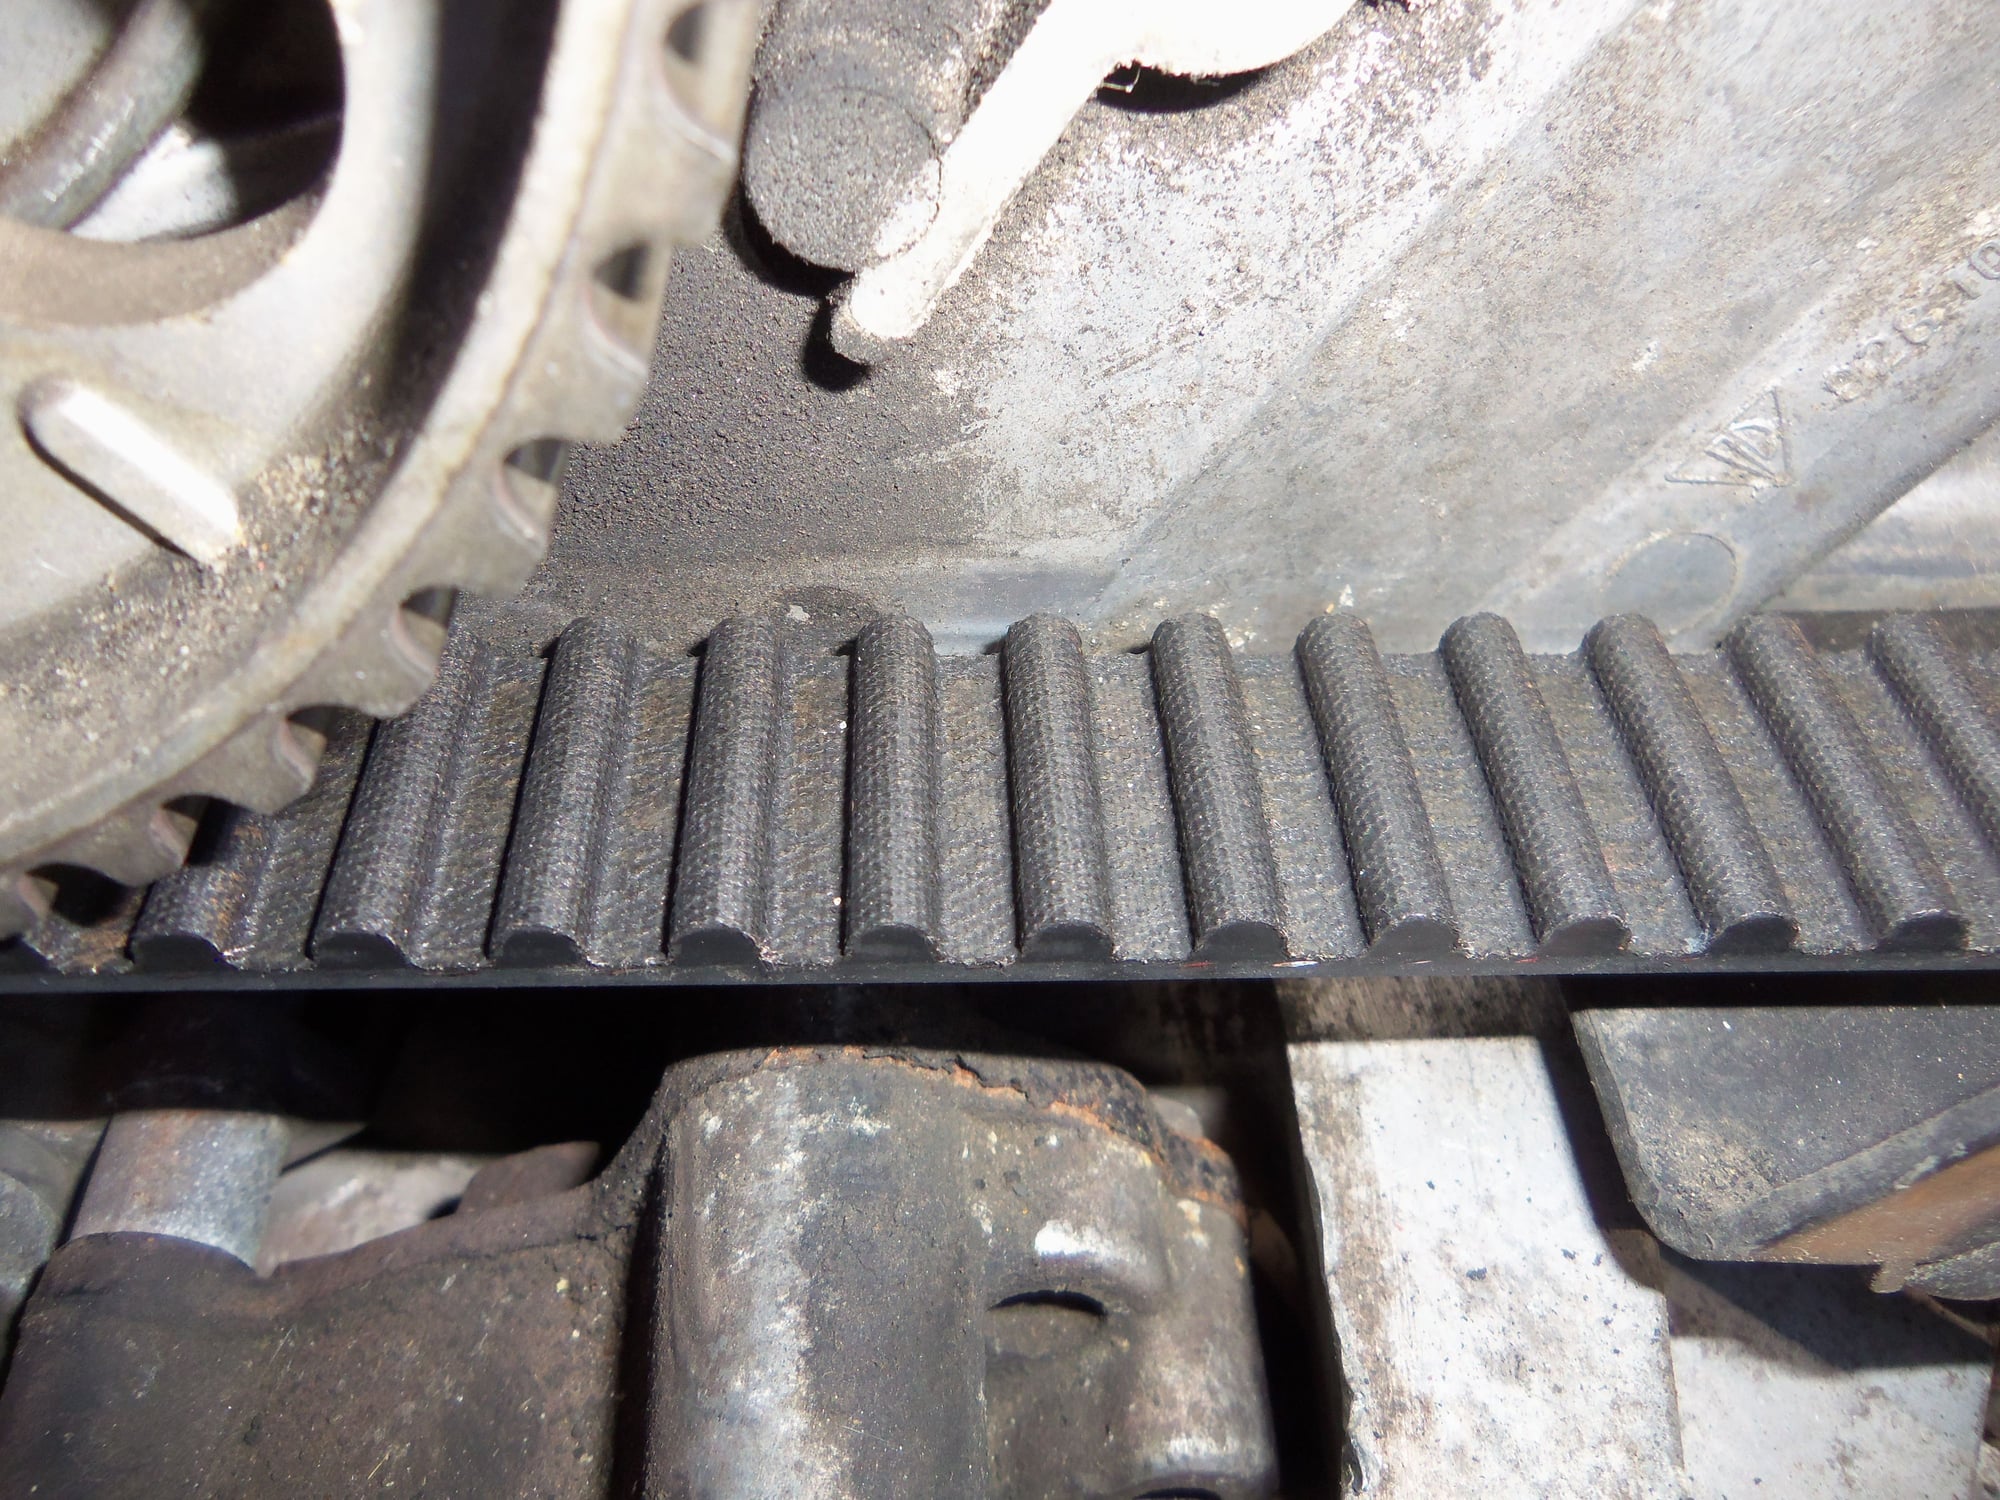
Belt doesn't appear to be chewed up or wearing funny.
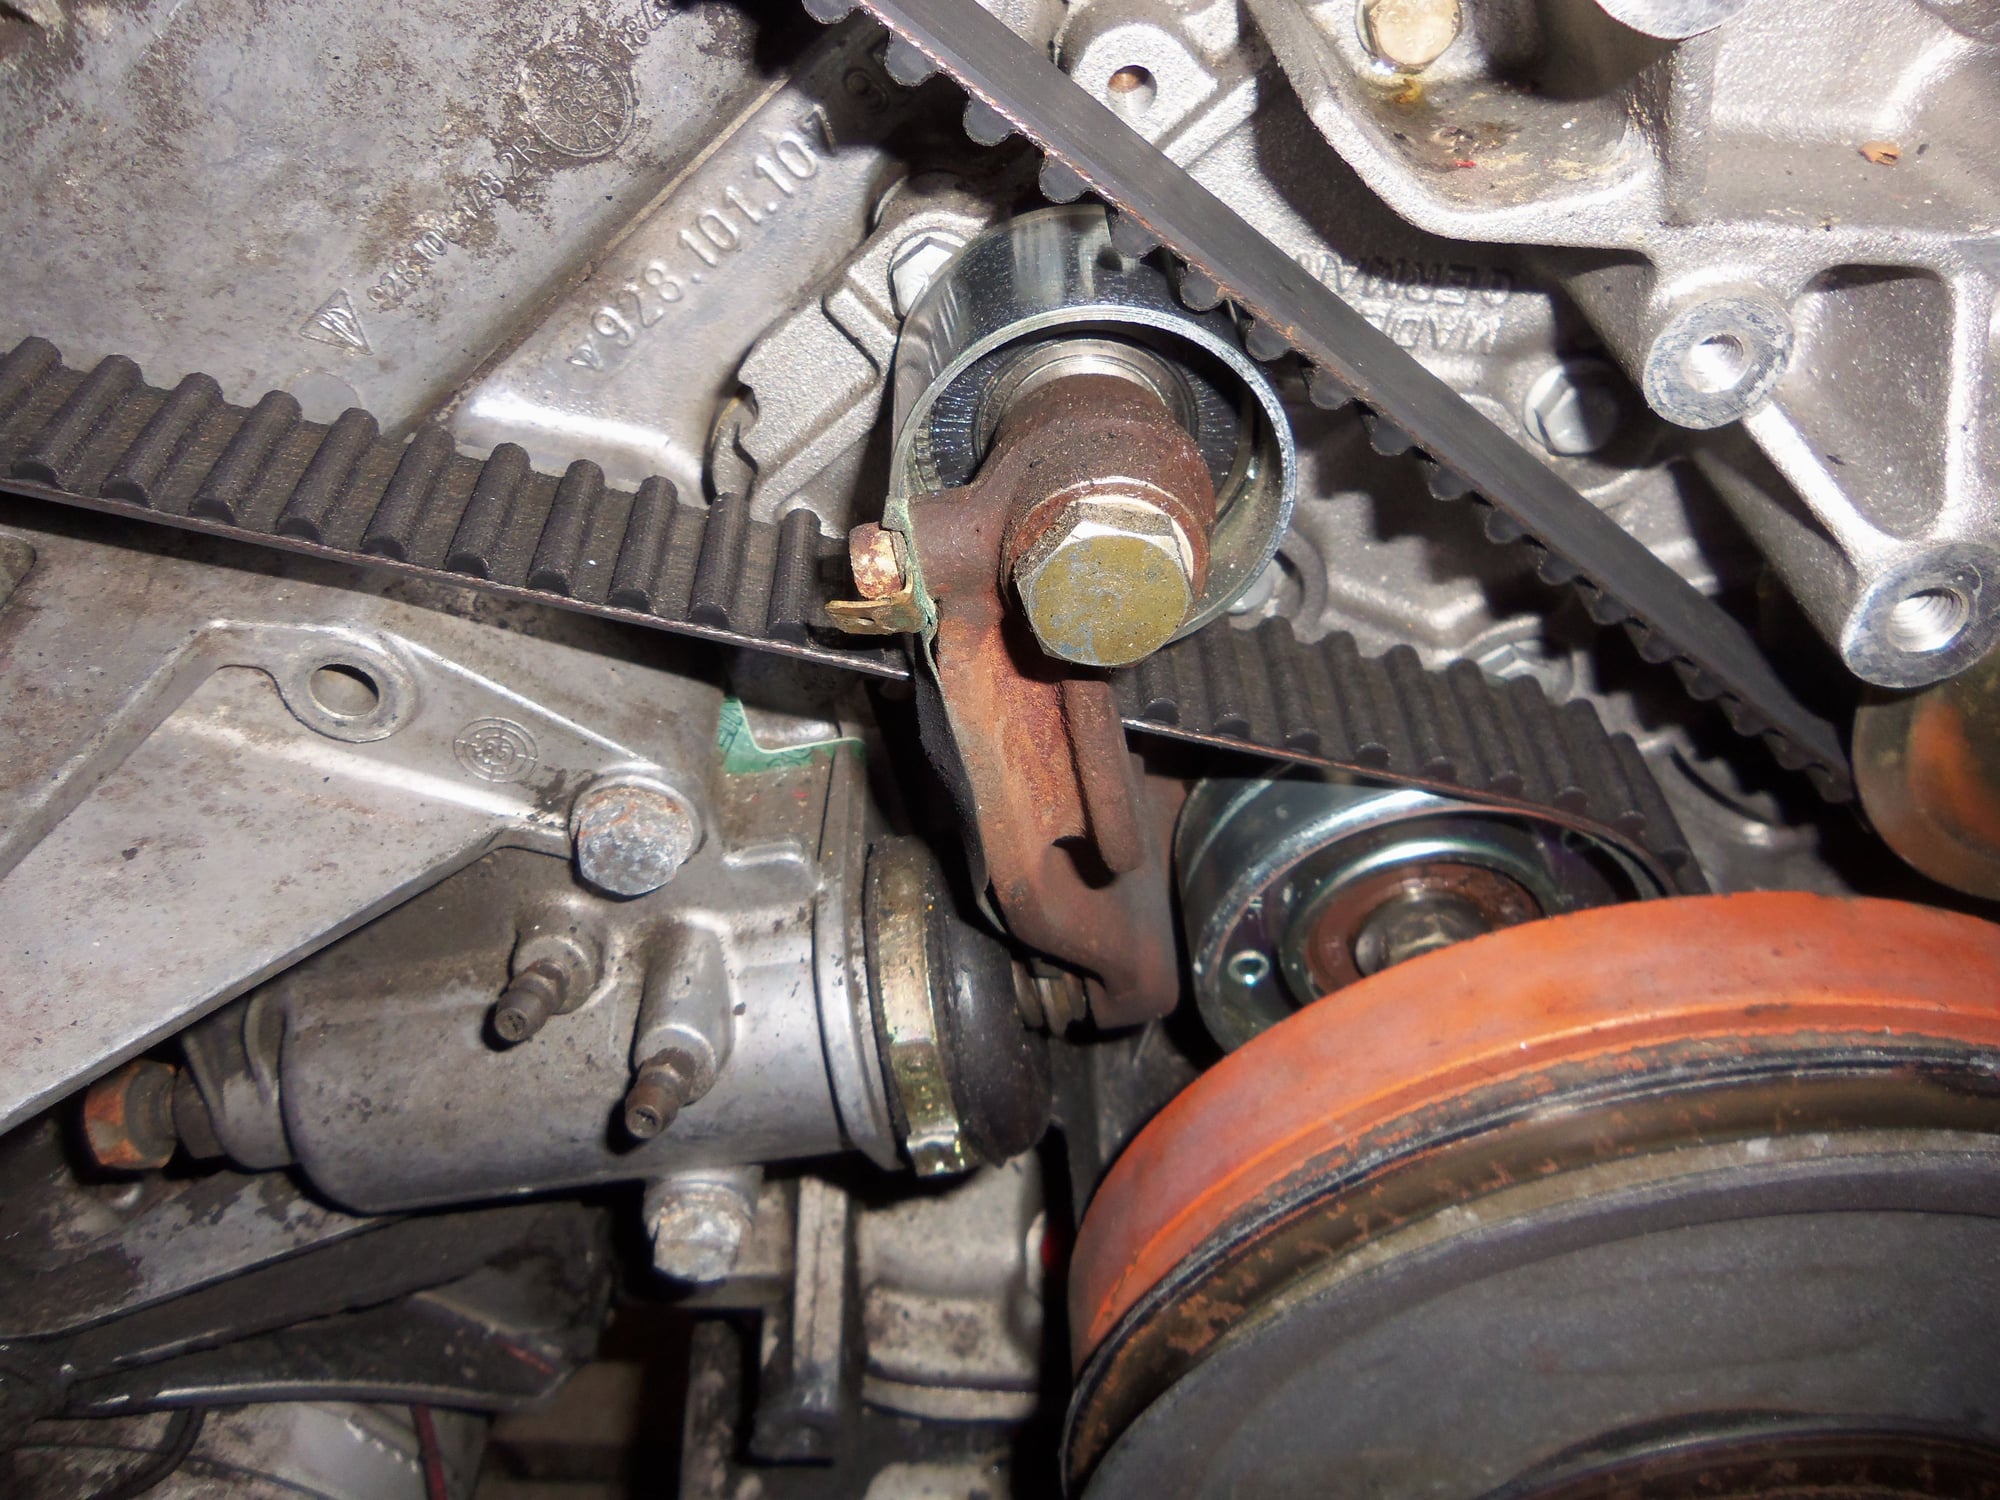
Tensioner and rollers.
Water pump and oil pump sprocket.
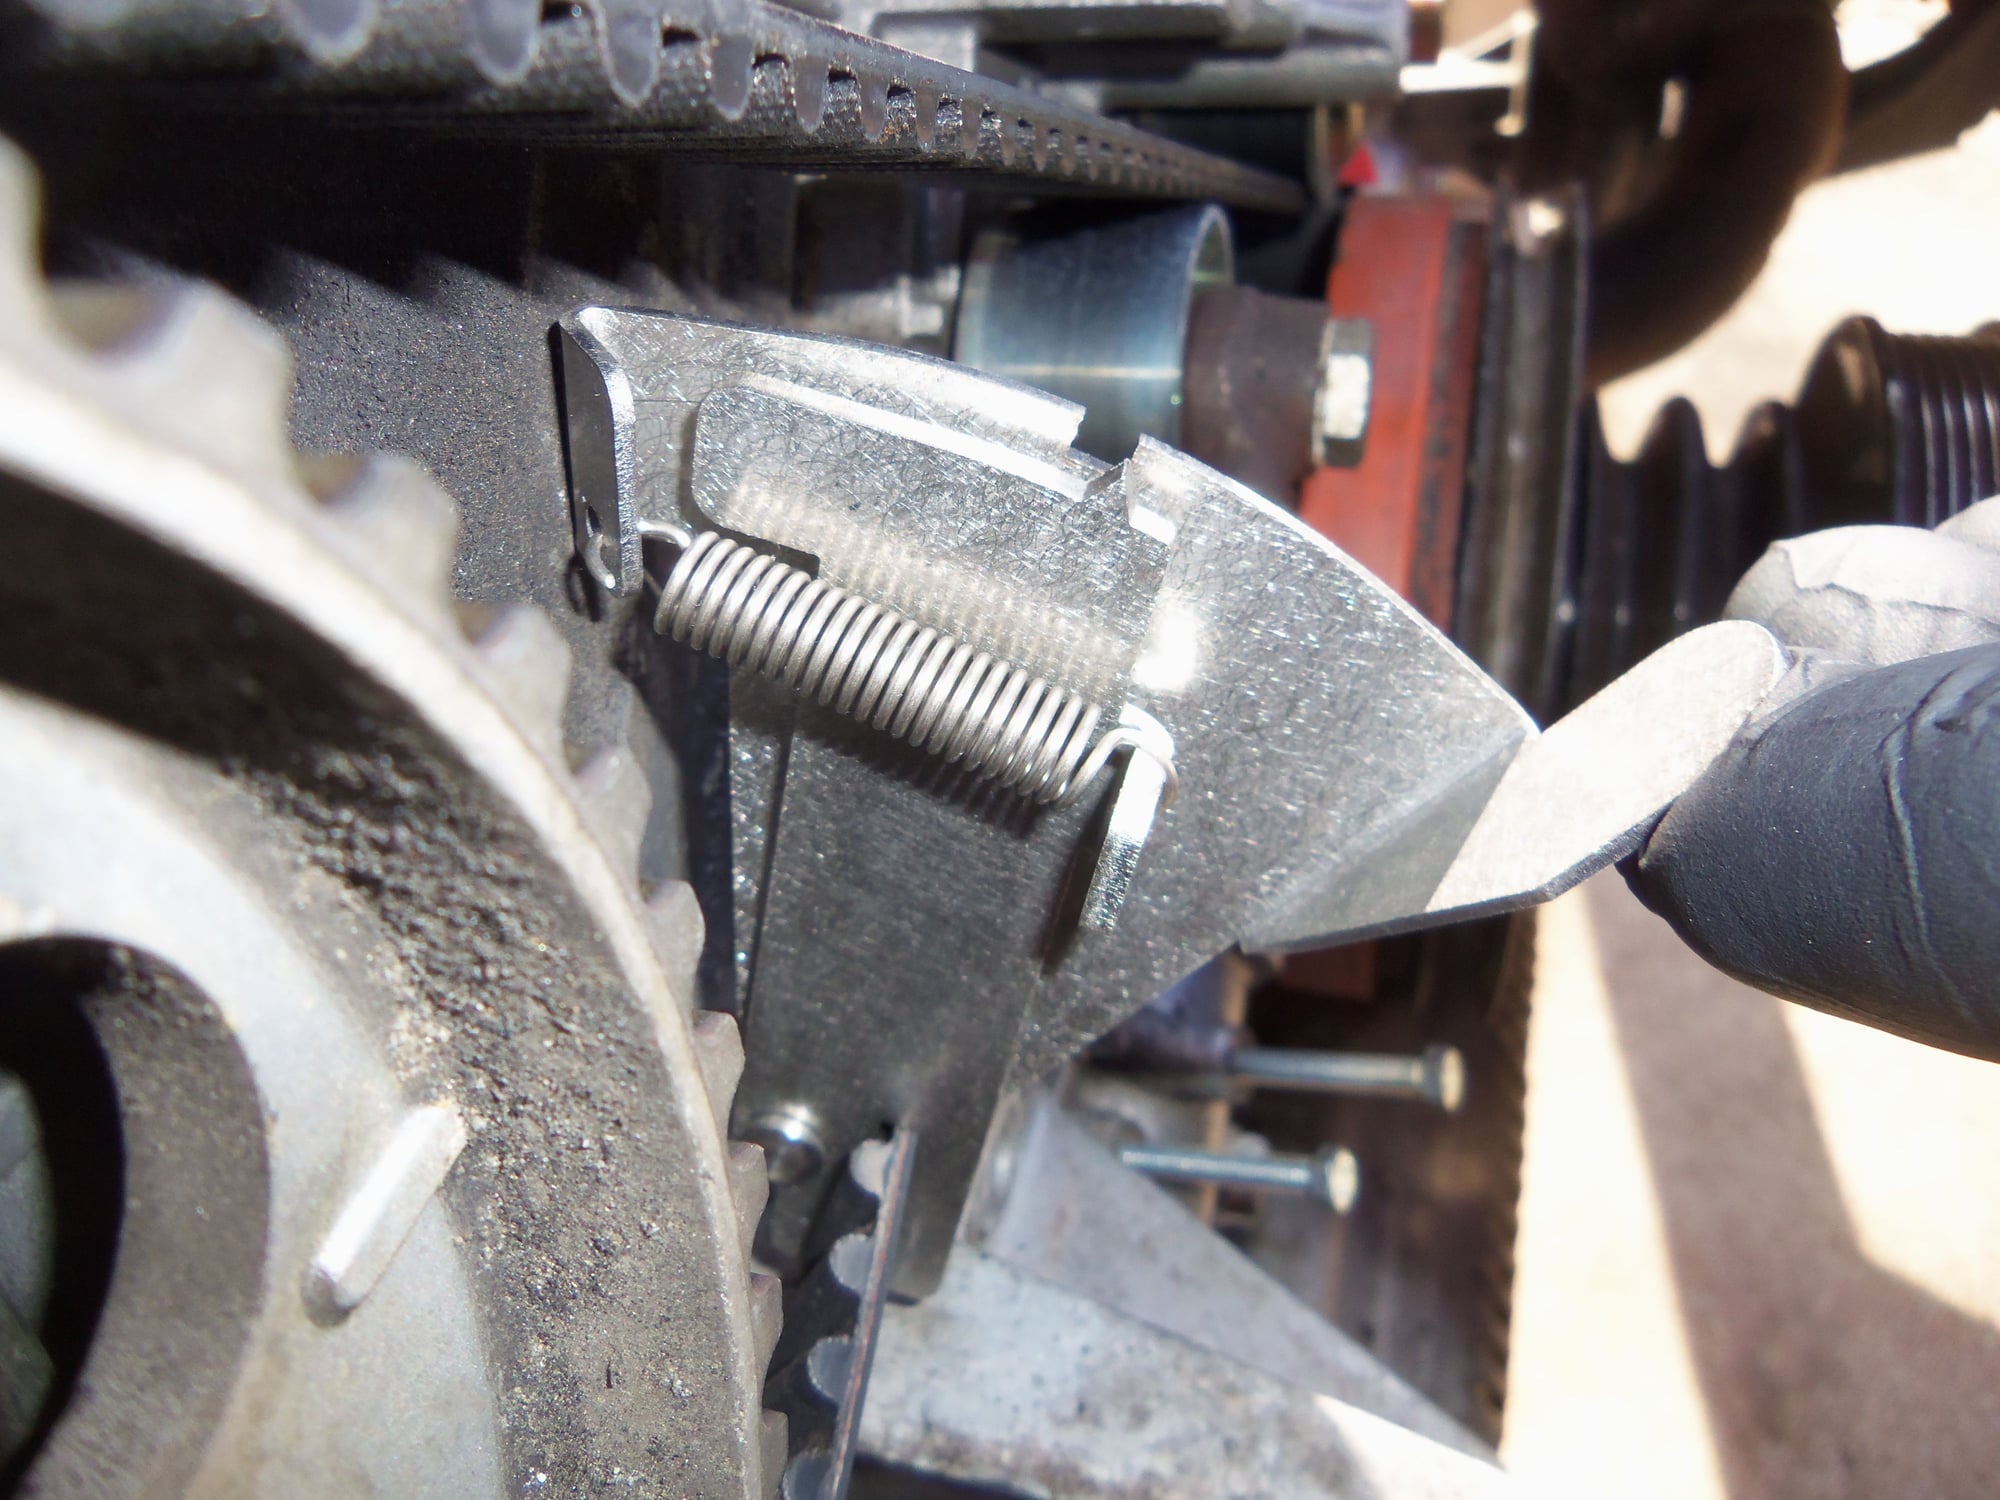
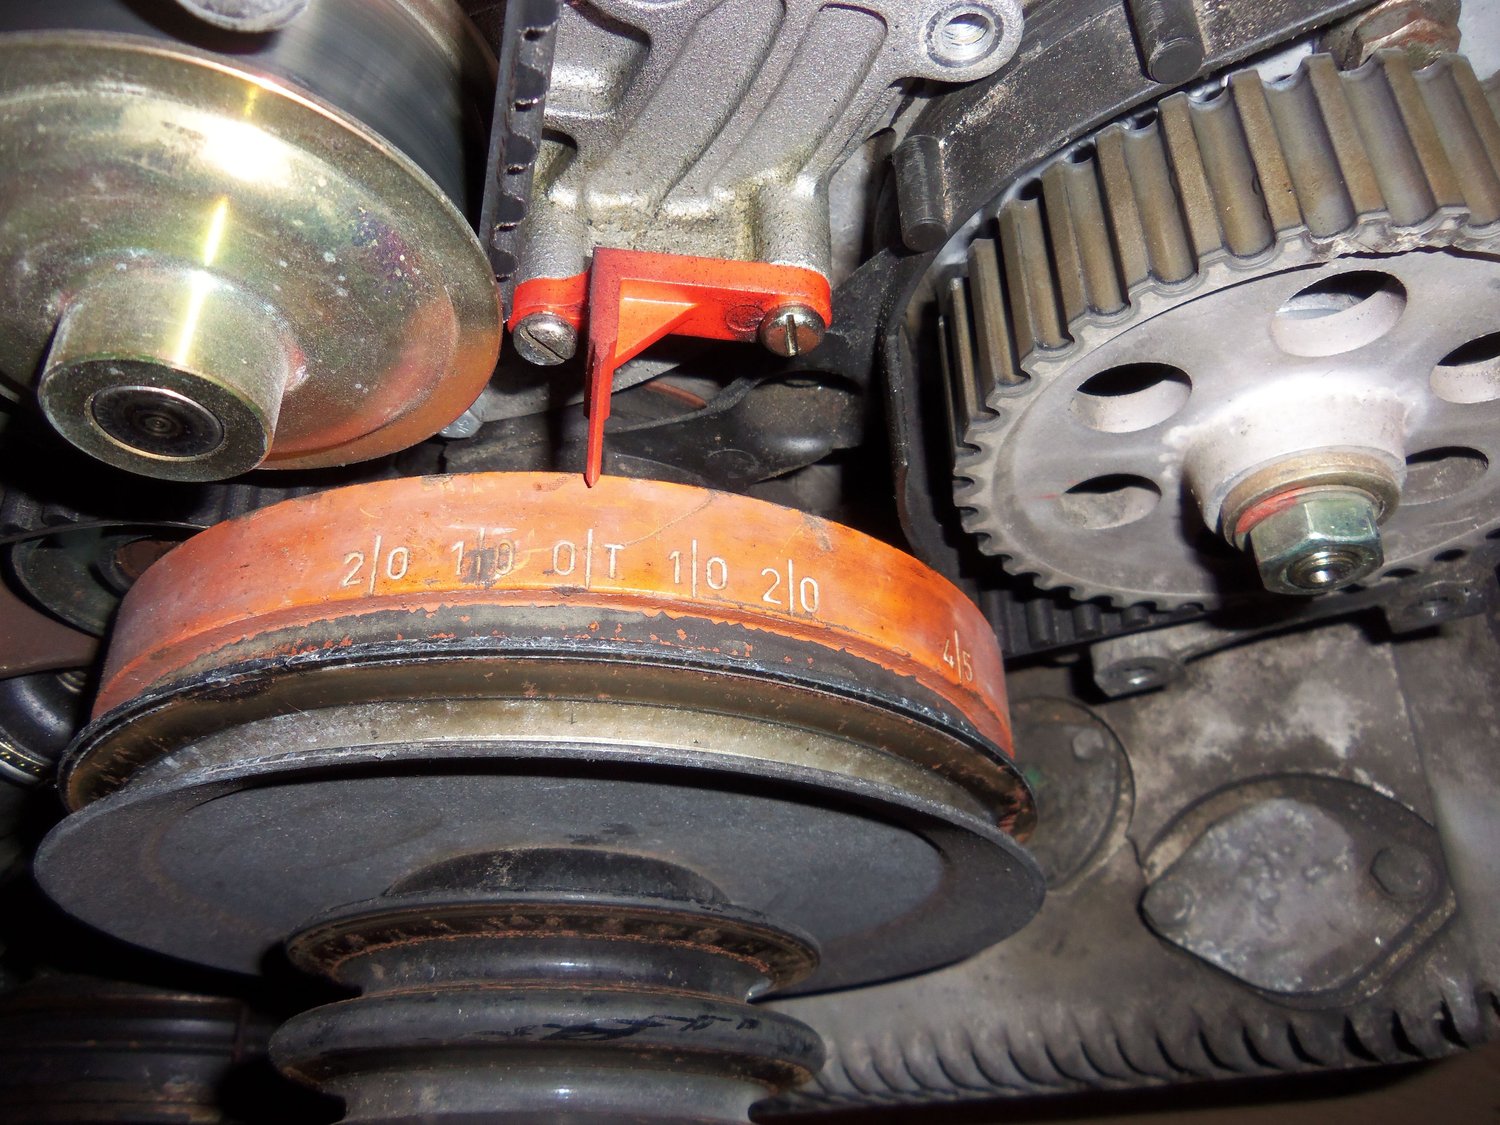
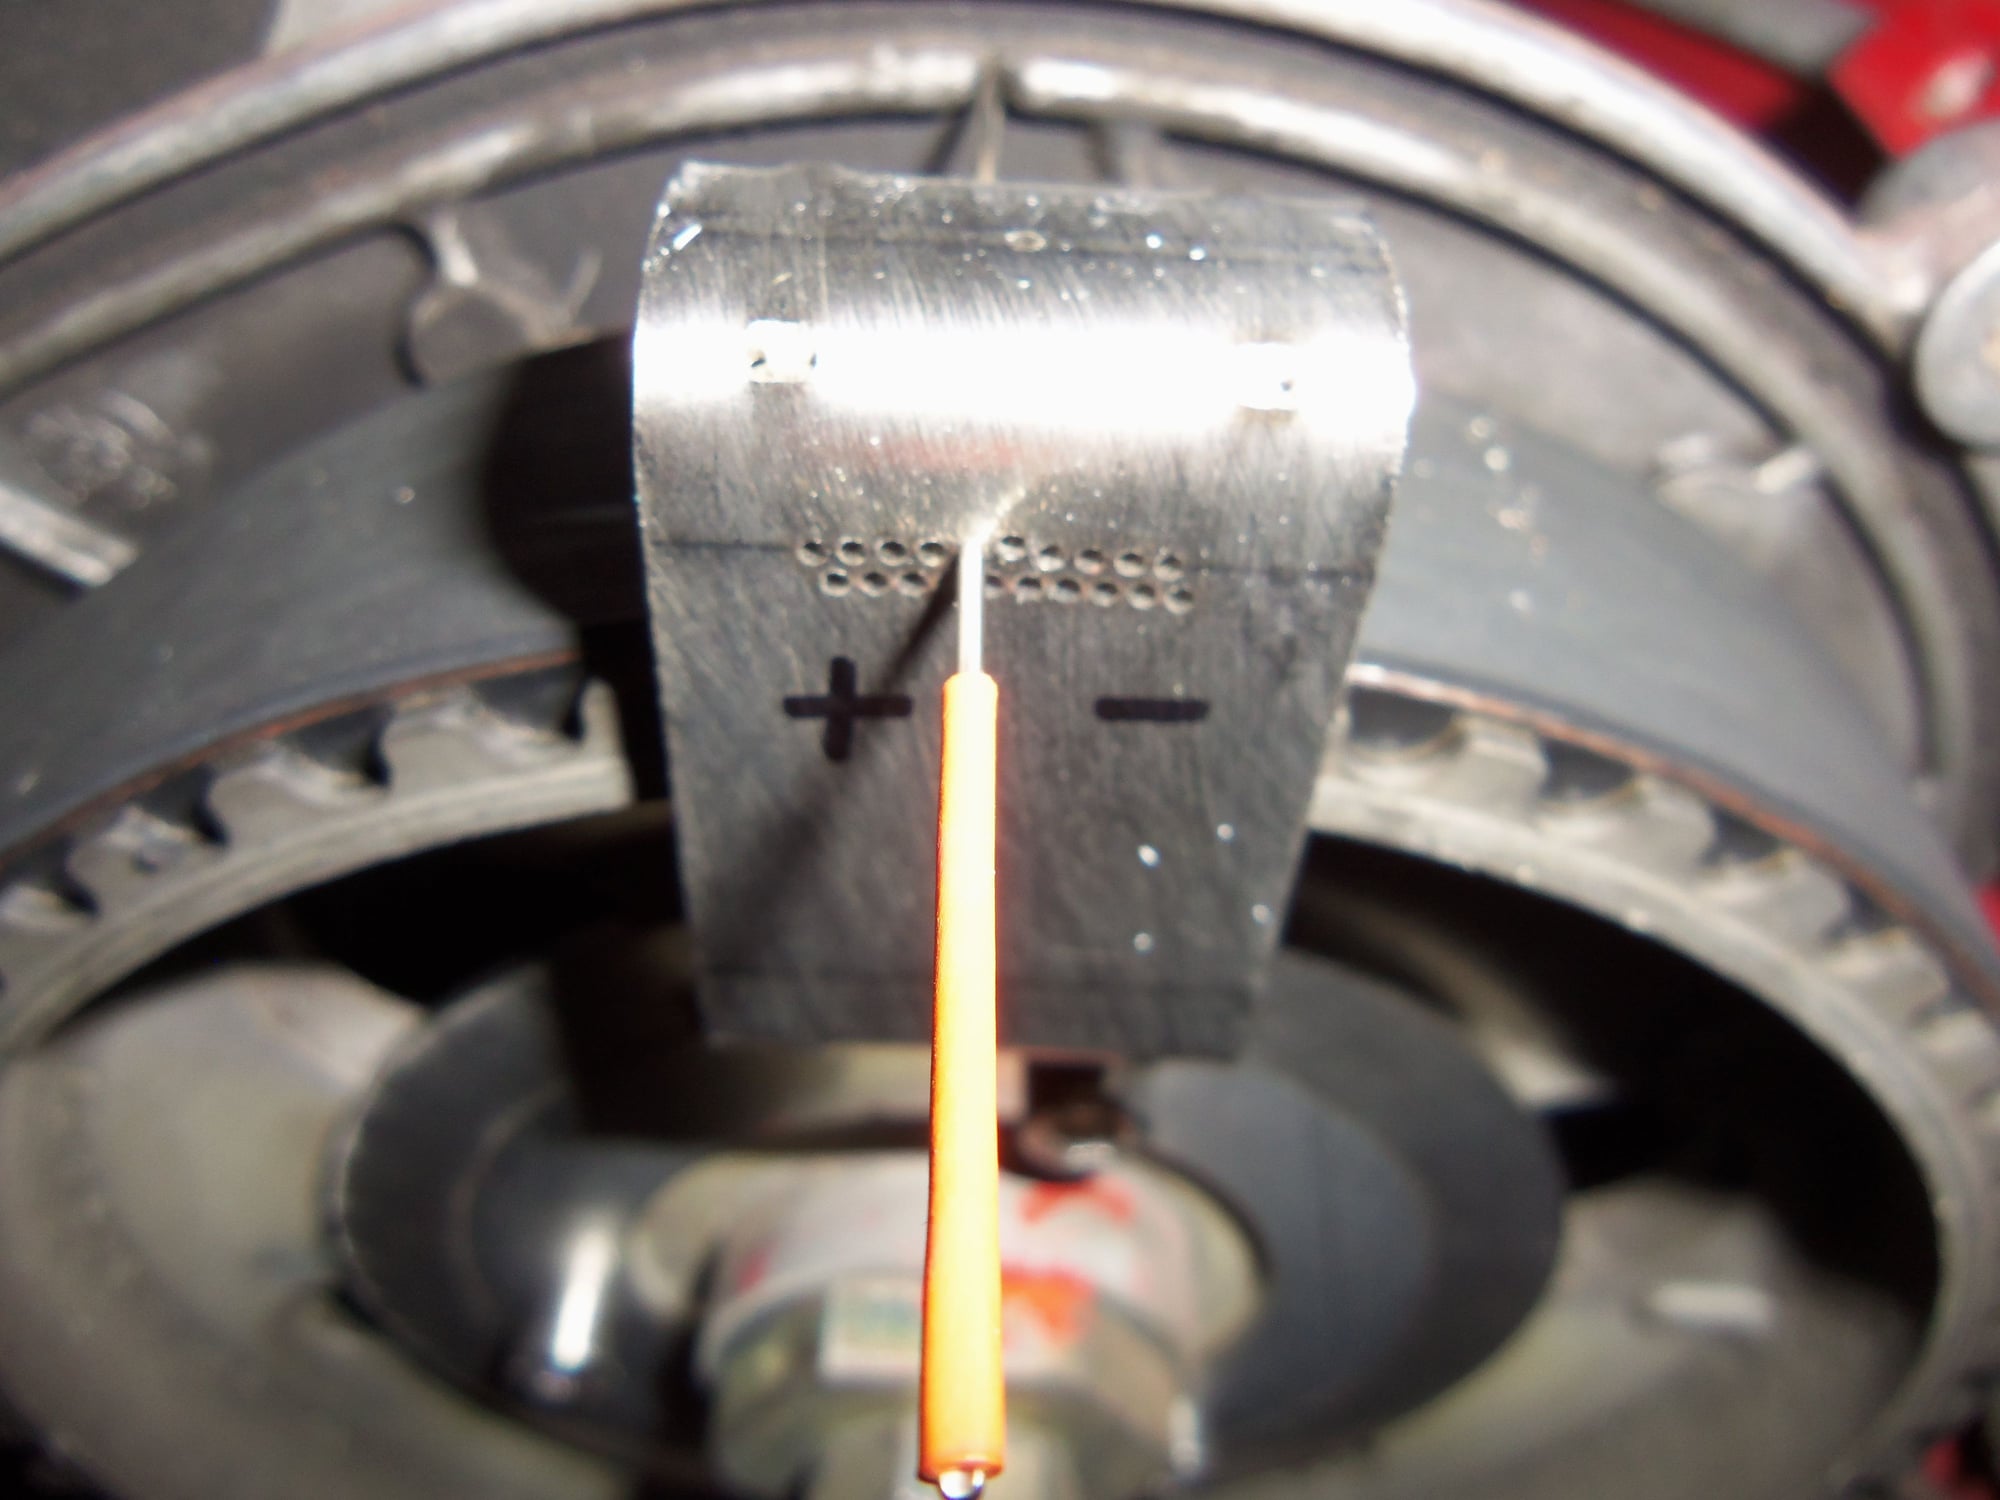
I checked belt tension with the Kempf tool, following the instructions. It is wasy too tight. Please look at this photo and verify I am doing this correctly:
Pointer way outside window towards radiator equals belt is way too tight...
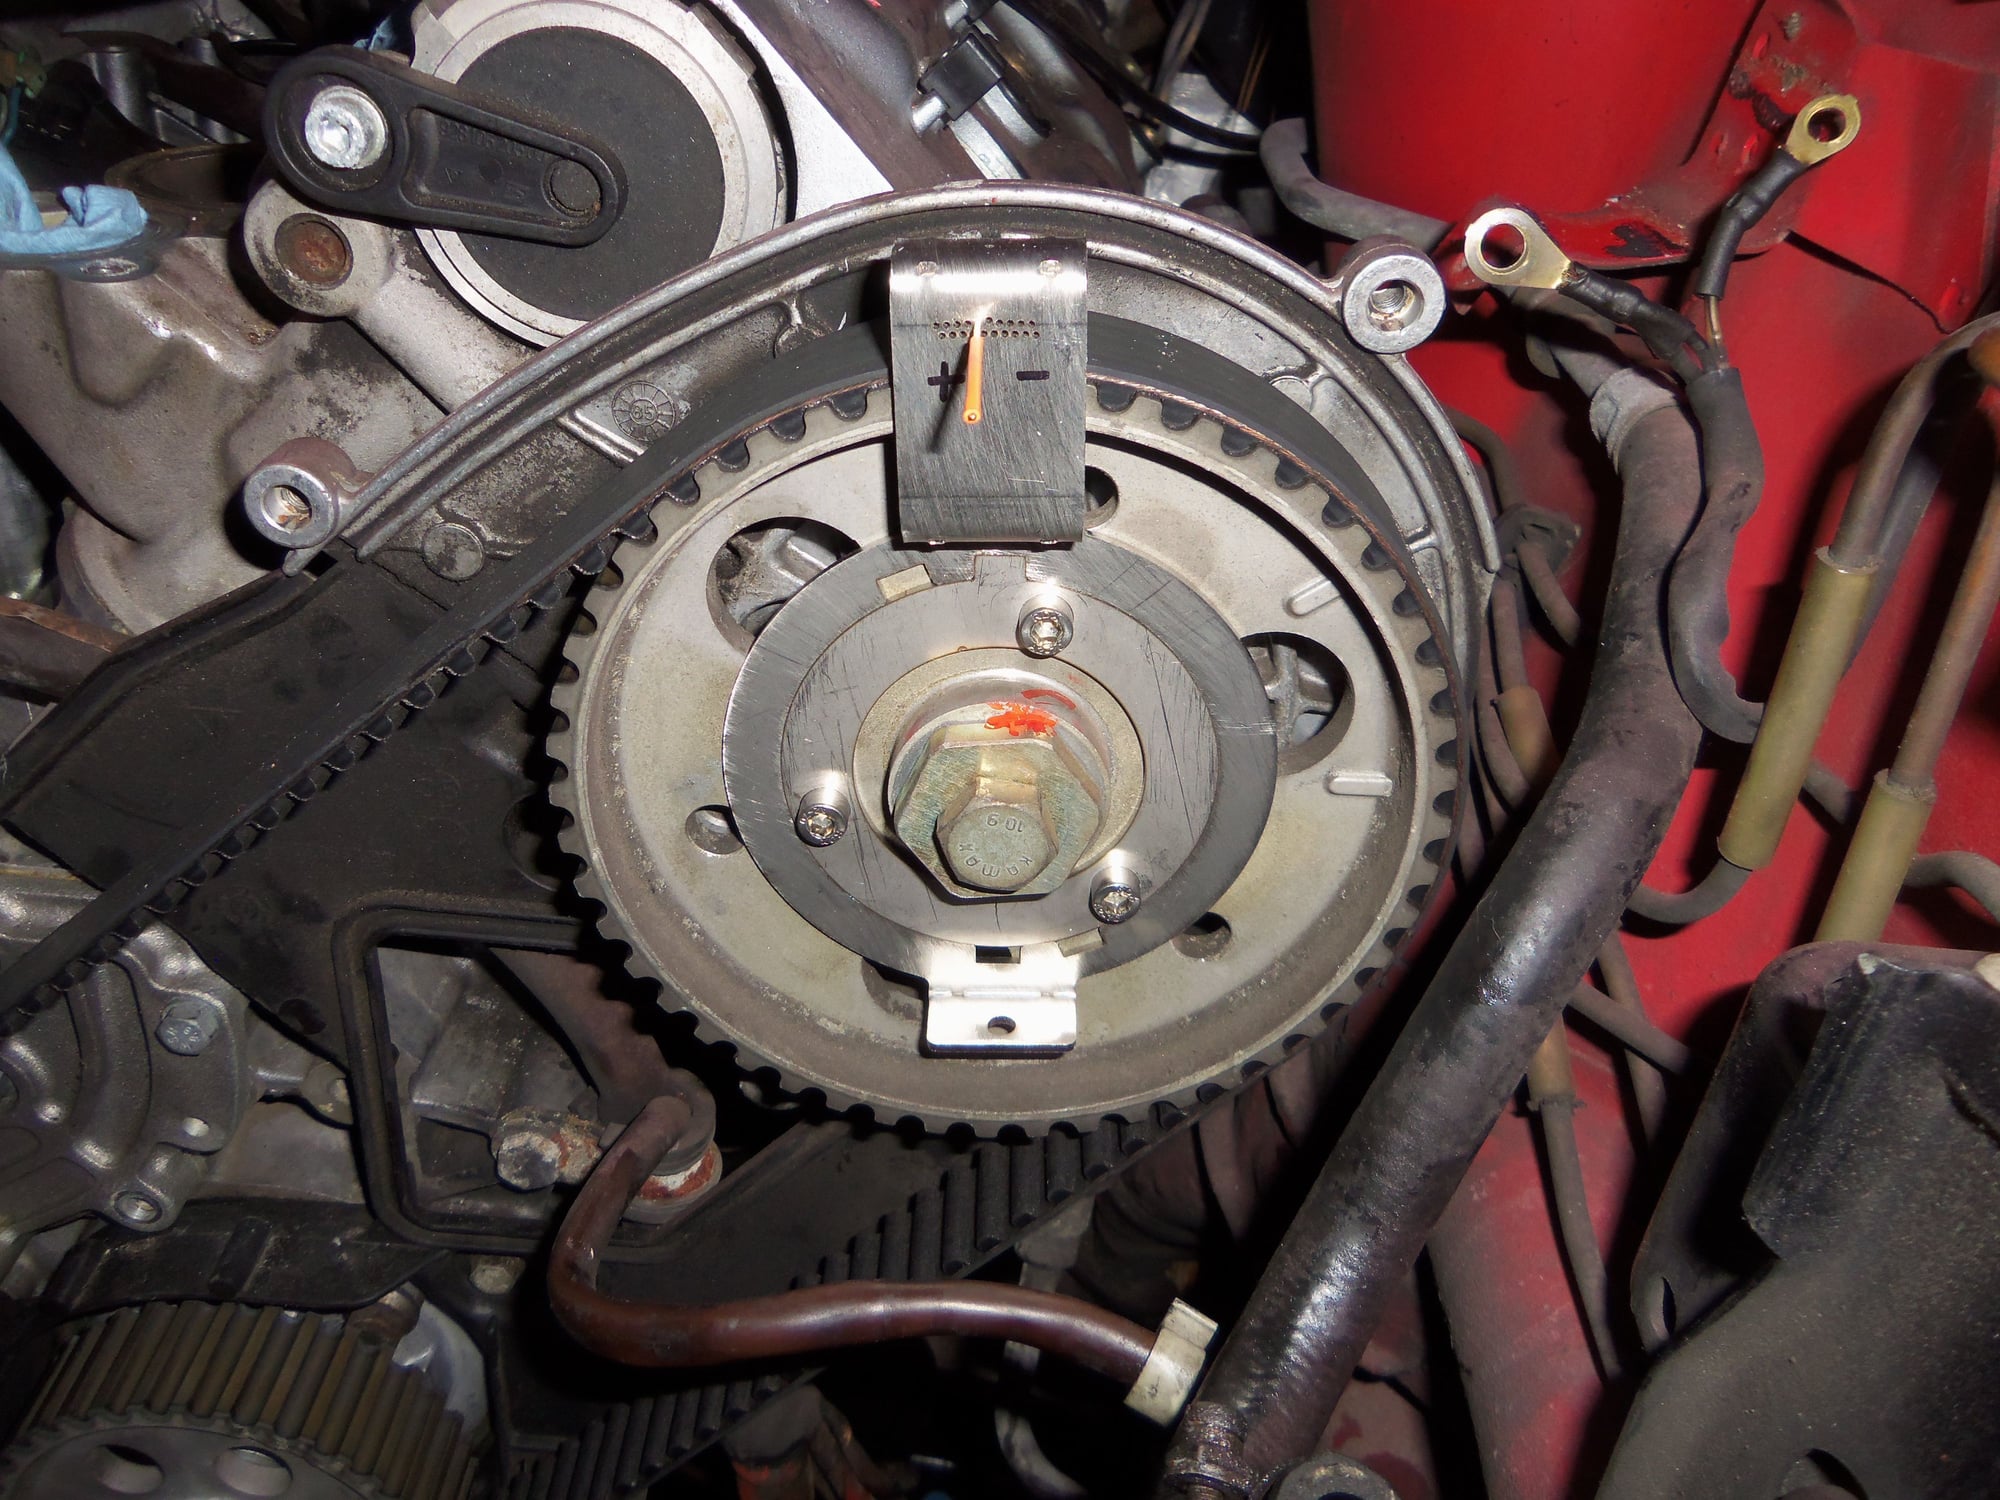
I checked cam timing with the 32Vr tool set, following the instructions in the extra manual co-authored by Mike Frye.
I set the crank to TDC 0/T
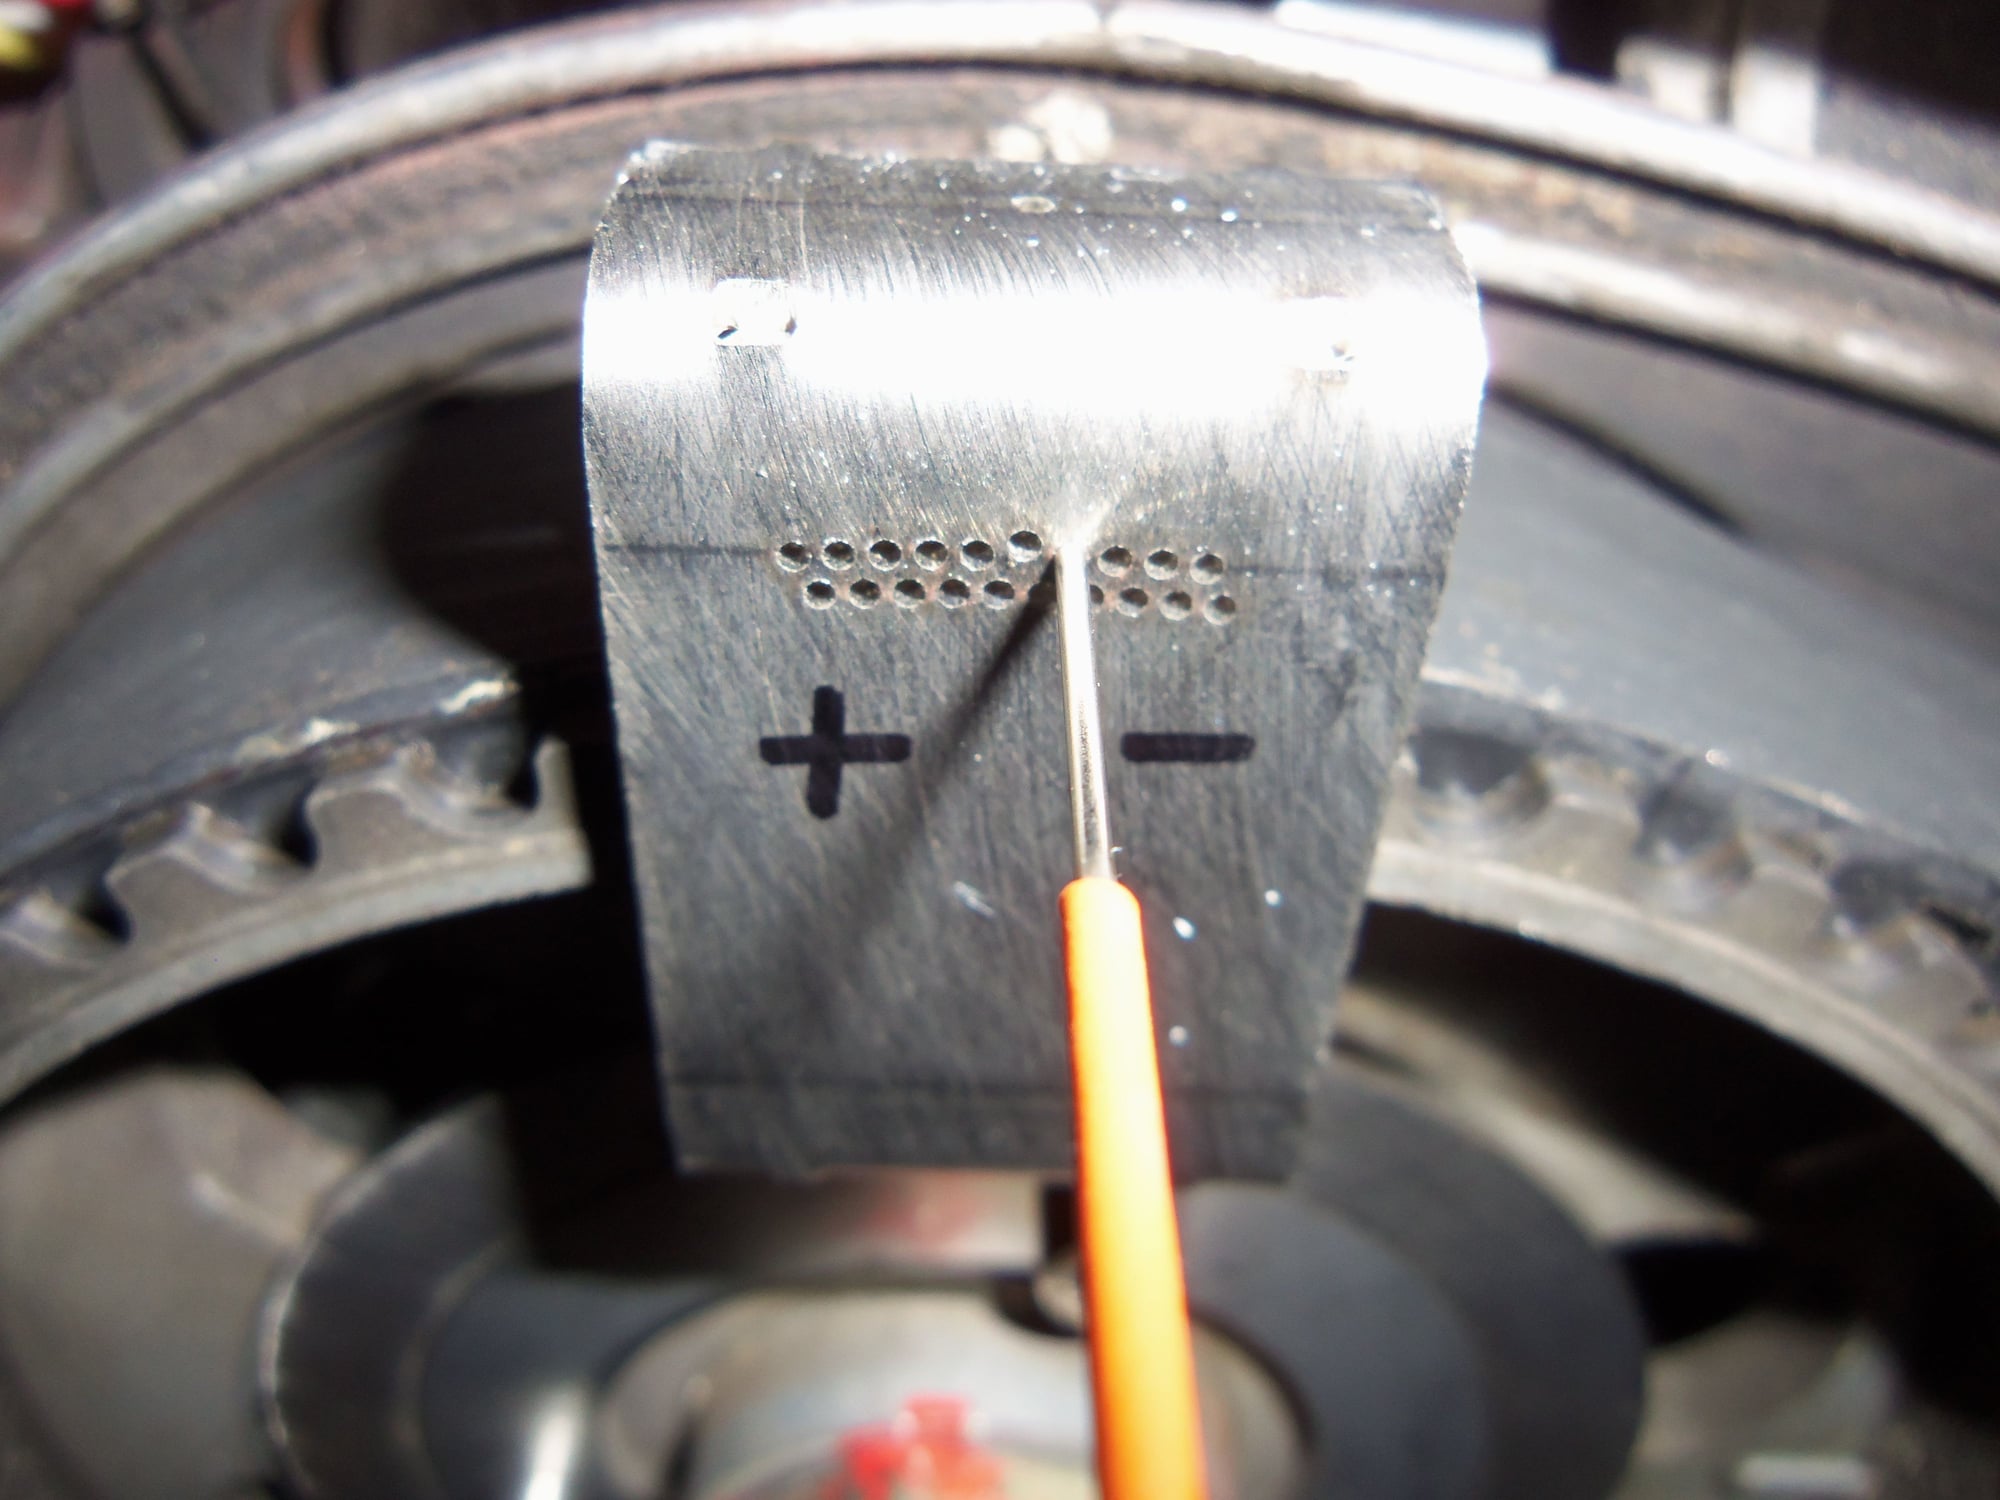
I found that the driver's side cam was advanced 2 degrees.
2nd hole in zigzag pattern is 2 degrees, on the advanced side, as per the manual.
Needle is in the deepest part of the V notch.
I found that the passenger's side cam was retarded 2 degrees.
2nd hole in the zigzag pattern is 2 degrees, in the retarded direction, as per the manual.
Needle is sitting in the deepest part of the V notch.
I noted a couple of other things that concern me:
-the tensioner has no oil in it
-there is no wire for the belt tension warning
I will refill the tensioner with STP. I can deal with that.
I have no idea where to look for the belt tension wire. The bridge is in place from the nose of the tensioner rod to the roller arm. The little wire was connected to the roller arm to the socket in the front of the lower timing belt cover. There just wasn't anything plugged into that socket.
What am I looking for? I have looked all over the engine harness, and have found no extra wires. The only wire coming off the front engine harness is for the A/C compressor.
So...for those of you still reading along, here are my actual questions:
1) What do I do about the belt tracking on the driver's side cam sprocket?
2) Is the belt tension being too tight just that, too tight? Do I adjust the tensioner until the Kempf tool in in the middle of the window? Or, am I missing something here?
3) When I adjust cam timing, I set the driver's side cam at 0 degrees, and the passenger's side is good at 2 degrees retarded for a cold engine. Correct?
4) Where do I find the belt tension warning wire?
The target using the 32VR tool is to have zero on the 5/8 bank and minus 2 degrees on the 1/4 bank this with a belt that is already stretched and with a cold engine so your data suggests an adjustment on the 5/8 bank is warranted to achieve the stock settings. Do not expect some huge difference - I doubt you will physically perceive any difference.
Your reading on the Kempf tool looks way out. I take it you are on TDC for number 1 cylinder [as suggested in the 32VR pics] and not the other stroke. As I understand it is important to have No1 on the firing stroke to get the accuracy of reading required. There seems to be a consensus that having the belt at the uper end of the range is the way to go. I set mine in the middle and have had no issues that I know of and no belt tension alarms.
Regarding the belt tracking I cannot add much value other than wondering if excessive belt tension may impact the way the belt tracks but doubtless others more knowledgable can advise you on that one.
The wiring for the alarm I am struggling a bit to understand what you have written but then I have not had my second cup of coffee yet! The wiring routes from the tab on the tensioner arm and where it comes through the timing belt cover there should be a push in connector. From the timing belt cover it should run into the harness that carries the fuel injector and temp2 cables back to the LH, not what we refer to as "the engine harness" that carries amongst other cables the a/c solenoid cable.
Seth,
In picture 10, you can see the spade connector that the wire from the center timing belt cover connects to. In picture 12, you can actually see the little wire that connects to that spade connector. What I don't see in any of the pictures is the wire with the connector(right by your index finger in picture 12) that plugs into the outside of the center timing belt cover that actually electrically connects the tensioner arm to the front engine wiring harness. The wire normally breaks off the harness in approximately the same place as the AC compressor wire.
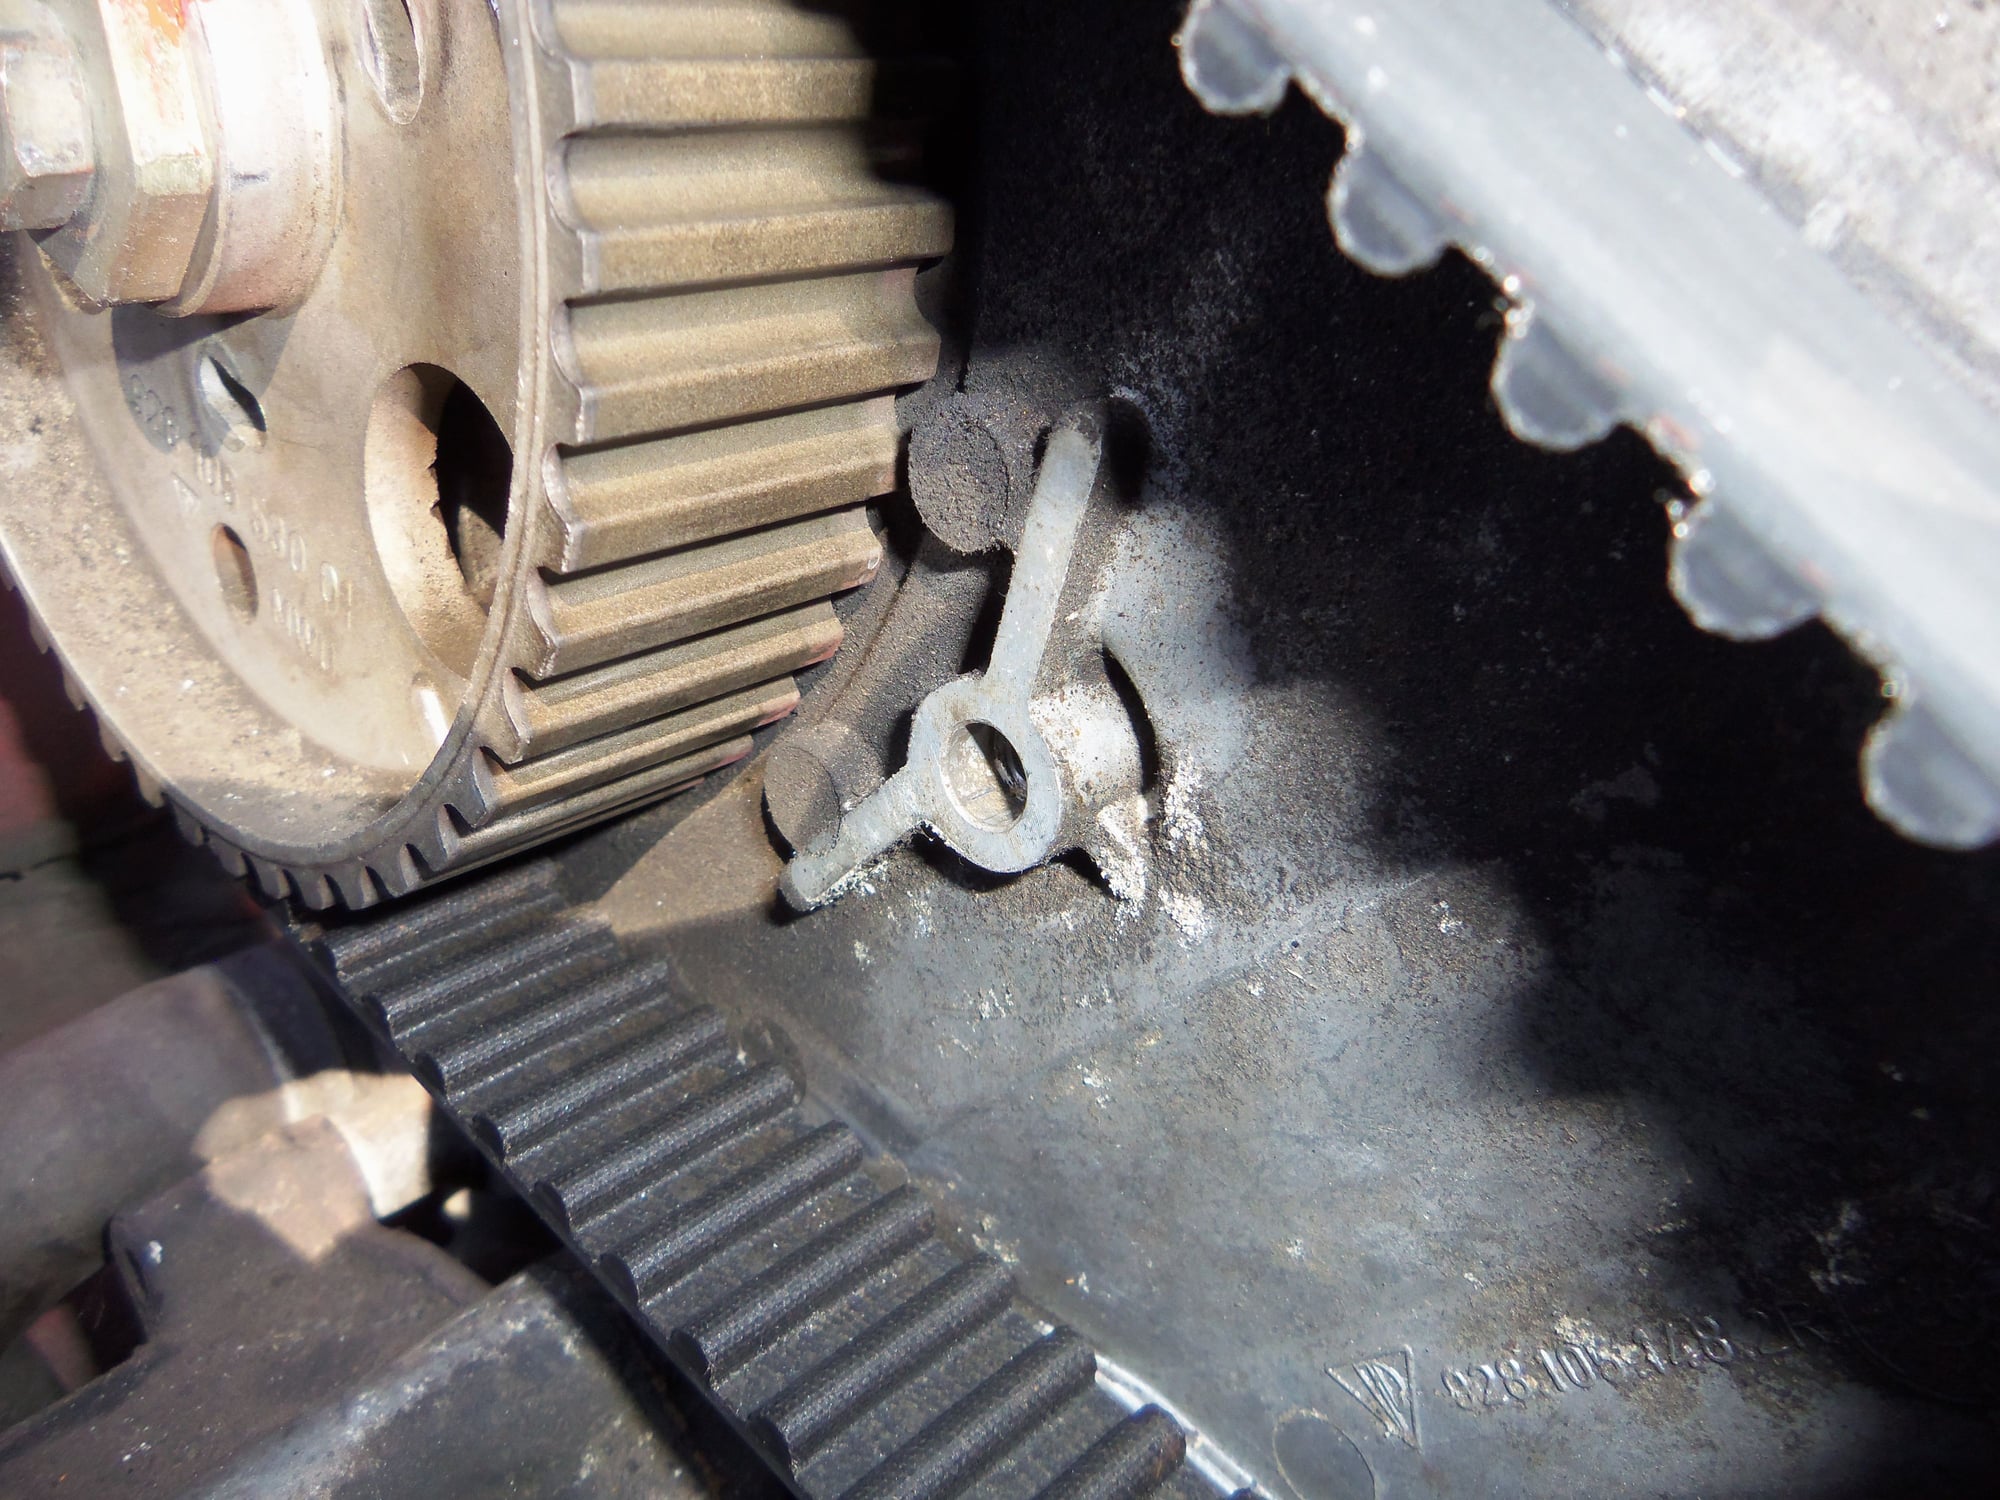
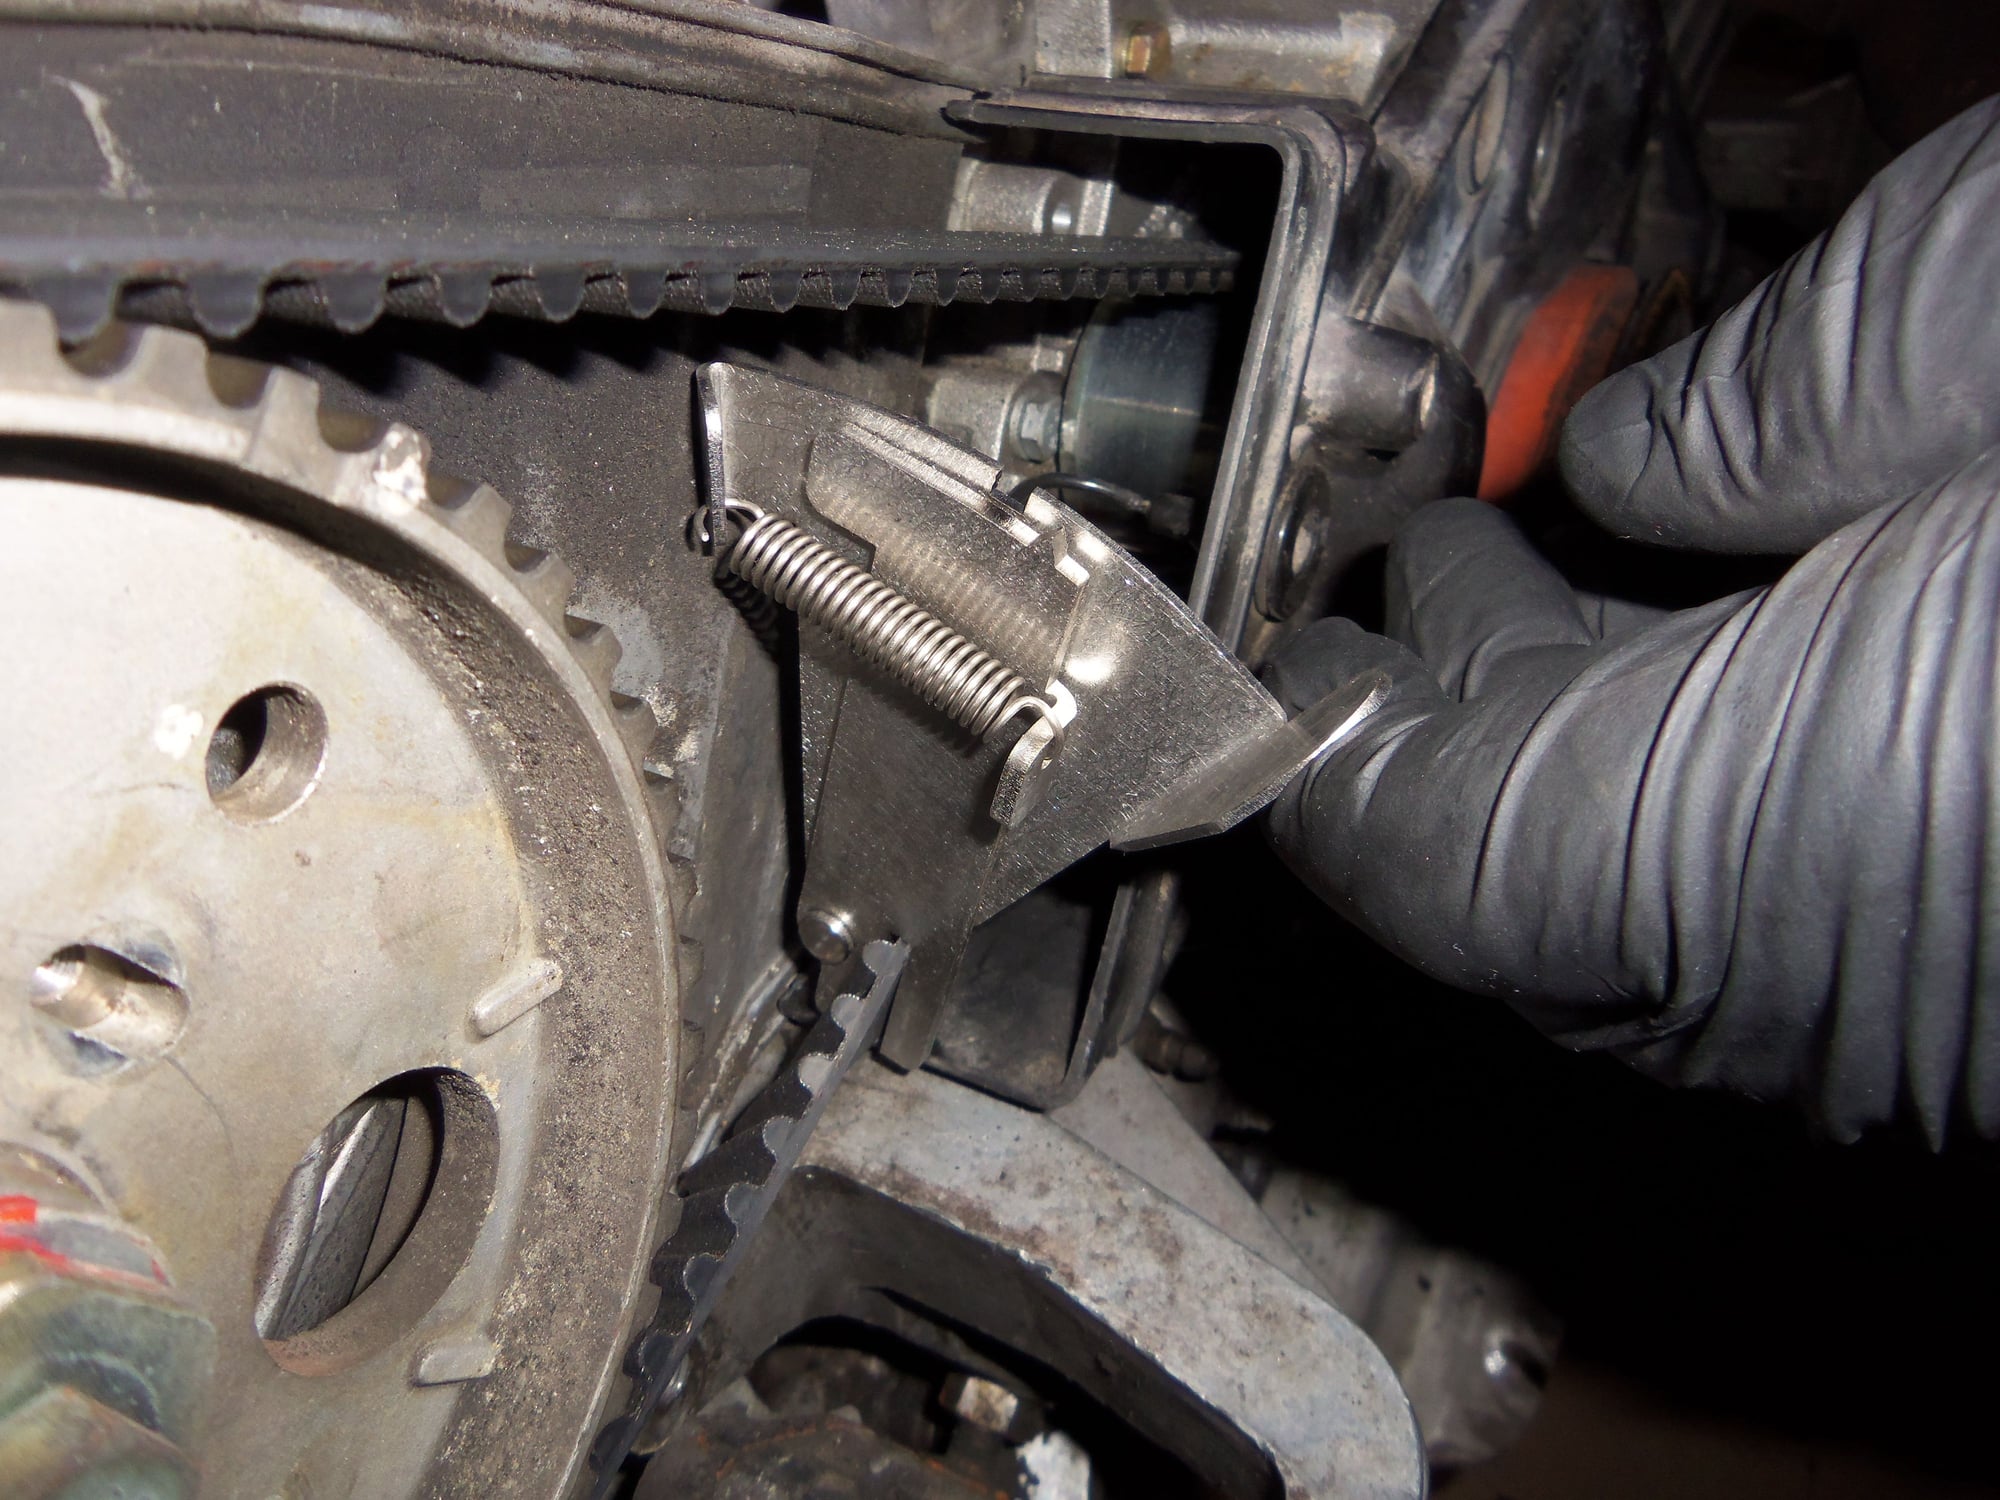
Do not start the car!!! Replace the pivot bolt of the tensioner arm immediately!!! Look where the tensioner roller and the TB tracking. You caught it in time!!!
Looks to me like the whole tensioning system (tensioner, lever arm, roller, pivot bolt, and wiring) needs a solid refresh. I bet the last belt change didn't include new bushings in the lever arm, Over-tightening the tension was the attempted fix to keep the belt on the sprockets.
Publish the name of the shop so that other 928s do not meet the same fate.
1 - As other have written: pivot bolt is bent.
2 - Make sure to rotate the crank twice between each belt tension measurement.
3 - Don't worry about +/- 1 or 2 degrees of cam timing.
4 - Somewhere, the harness-side of the circuit is grounded. No matter how certain you are, when you are done, that you reconstructed the circuit, do not trust the it unless you test it. (... by disconnecting it from the center belt cover, not by loosening the belt ...)
Do not start the car!!! Replace the pivot bolt of the tensioner arm immediately!!! Look where the tensioner roller and the TB tracking. You caught it in time!!!
Call Roger for the parts...
That or the circlip is missing from the main tensioner roller.
I'd also guess that the water pump pulley has been jacked out of center from the way the belt is tracking on the drivers side.
I saw that pivot bolt at 3 in the morning and thought it looked bent, but I just wasn't sure that my eyes weren't playing tricks on me right then. I decided to wait to see if anyone else chimed in about it. I knew we could count on you guys. Thanks Schocki for stepping up.
before you remove the tensioner pivot bolt ,
drain the block or you will ruin that new bearing as coolant will soak into it.
NOTE when loosening the bolt watch to see if it comes out straight or has an eccentric movement.
NOTE if no eccentric then the bolt is probably OK,
and your picture could be causing the illusion of the bolt head not looking straight.
Your belt tension is too tight .
So loosen belt tension and reset it.
NOTE turn the engine over a few times then check it.
NOTE then look at the valve timing it may change due to belt tension reduction.
I would replace the boot and clamp and rear gasket of the tensioner if the boot is old.
NOTE the gasket should have some Hondabond 4 on it to assist in sealing.
Seth, I agree the tension is to high but I fail to see how the pivot bolt could get bent. Disappointment with the work they did. Not filling the tensioner & no warning wire WOW. I'm trying to decide to send this thread to Auto Assets to Chip. Let's see what else is found.
Agree on the Pivot Bolt could be bent, looking at the pic it looked to me that the plastic sleeve's were not replaced and have broken.
The Belt should not track in the middle of the gears but should track closer to the front edge of the gears and not wobble, I'm guessing yours was wobbling???
Also look at the tensioner Arm for signs of the belt touching it, I don't believe it was as the belt was not running on the front edge of the 1-4 gear.
Replace all with the PK-tensioner and be done w/ that crap!
Well...sheeee-yat. In for a penny, in for a pound. I will figure this out and make it right.
OK guys, thanks for all the responses! I am going to work through them one by one, then post more findings.
FredR: I agree about adjusting the driver's side cam shaft. I do not expect a big difference, I just want to get the timing spot on.
As for the belt tension, you have brought up the flaw in my methodology. I put it on the wrong TDC. When I initially did the check, I just rolled the crank over to TDC and checked belt tension. Later, when I went to check cam timing, I had to roll the crank over another full turn to TDC to get the sprocket marks to line up.
See my next post for the revised belt tension.
Sorry for any confusion. The wire was present from the roller arm to the little socket on the back side of the lower plastic timing cover. What was missing was the actual wire from the wiring harness.
See my next post for where I found it...
soontobered84: You have accurately described the situation. Thanks for the heads-up on where to look for the broken wire stub. I will do so.
See my next post for where I found the belt tension warning wire...
Schocki: WILL DO! I am not starting this engine any time soon. I will replace the pivot bolt. Turns out, that appears to be the only part not replaced when the tensioning system was rebuilt.
Oh yeah...I know Roger. I have paid him more in parts than I paid for the car...
Thanks!
The Forgotten On: I will sh*t myself if I find a cracked camshaft nose. However, I think I will be OK, as I screwed up using the Kempf tool.
See my next post for the revised tension.
Thanks! I am going to make this right.
ammonman: That is the b*tch of this situation. I have an invoice in front of me that tells me all that had been done.
For safety's sake, I am removing everything for cleaning and inspection, then put it back together. Correctly.
Mrmerlin: The cooling system is already drained as I am replacing ALL the coolant hoses and clamps.
I will pay attention when I remove the tensioner pivot bolt. I cannot tell if it is bent now, but I will pull it and find out.
According to the invoice, the tensioner pivot bolt was replaced.
The boot, clamp, and rear gasket appear to be new. I am going to get a new clamp and rear gasket for disassembly and inspection of the tensioner assembly. I don't have any Hondabond. I do have dreibond. I will get some Hondabond.
I will readjust the belt tension.
See my next post for the revised tension reading.
worf928: It has not come to that yet, but it may.
I will remove the bolt and inspect it. According to the invoice, the bolt was replaced. What causes this bolt to get bent?
Thanks for the heads-up on rotating the engine twice between measurements.
2 degrees advanced will not be an issue on the driver's side cam?
I found the belt tension warning wire.
See my other post on where I found it.
Thanks for your advice!
SeanR: I will find out about the roller circlip when I get the balancer off. It is coming off for replacement with one of Greg Brown's ATI Superdampers.
Please elaborate on the water pump pulley. Am I to suspect failure of the water pump as well?
buccicone: I am not throwing rocks right now, I don't want this to turn into bashing. I am just getting an idea what is going on.
As for the belt tension, that was operator error. Please see my next post for the revised tension, as well as where I found the belt tension wire...
davek9: I will pull the pivot bolt and find out. According to the invoice, the bushings were replaced.
I am not sure about the wobbling. I never watched the belt through the cover vent hole with the engine running. I didn't see anything obvious when turning the crank by hand. Would a wobble be visible when turning the engine with the starter?
OK, I am a dolt on the belt tension. As FredR said, it needs to be on the correct TDC. When I first did the belt tension, I just rolled the crank over to TDC and used the Kempf tool. That got the way too tight reading you have seen.
I should have realized I screwed up when I had to roll the crank over one more full turn to TDC to get the cam sprockets to line up with the timing marks.
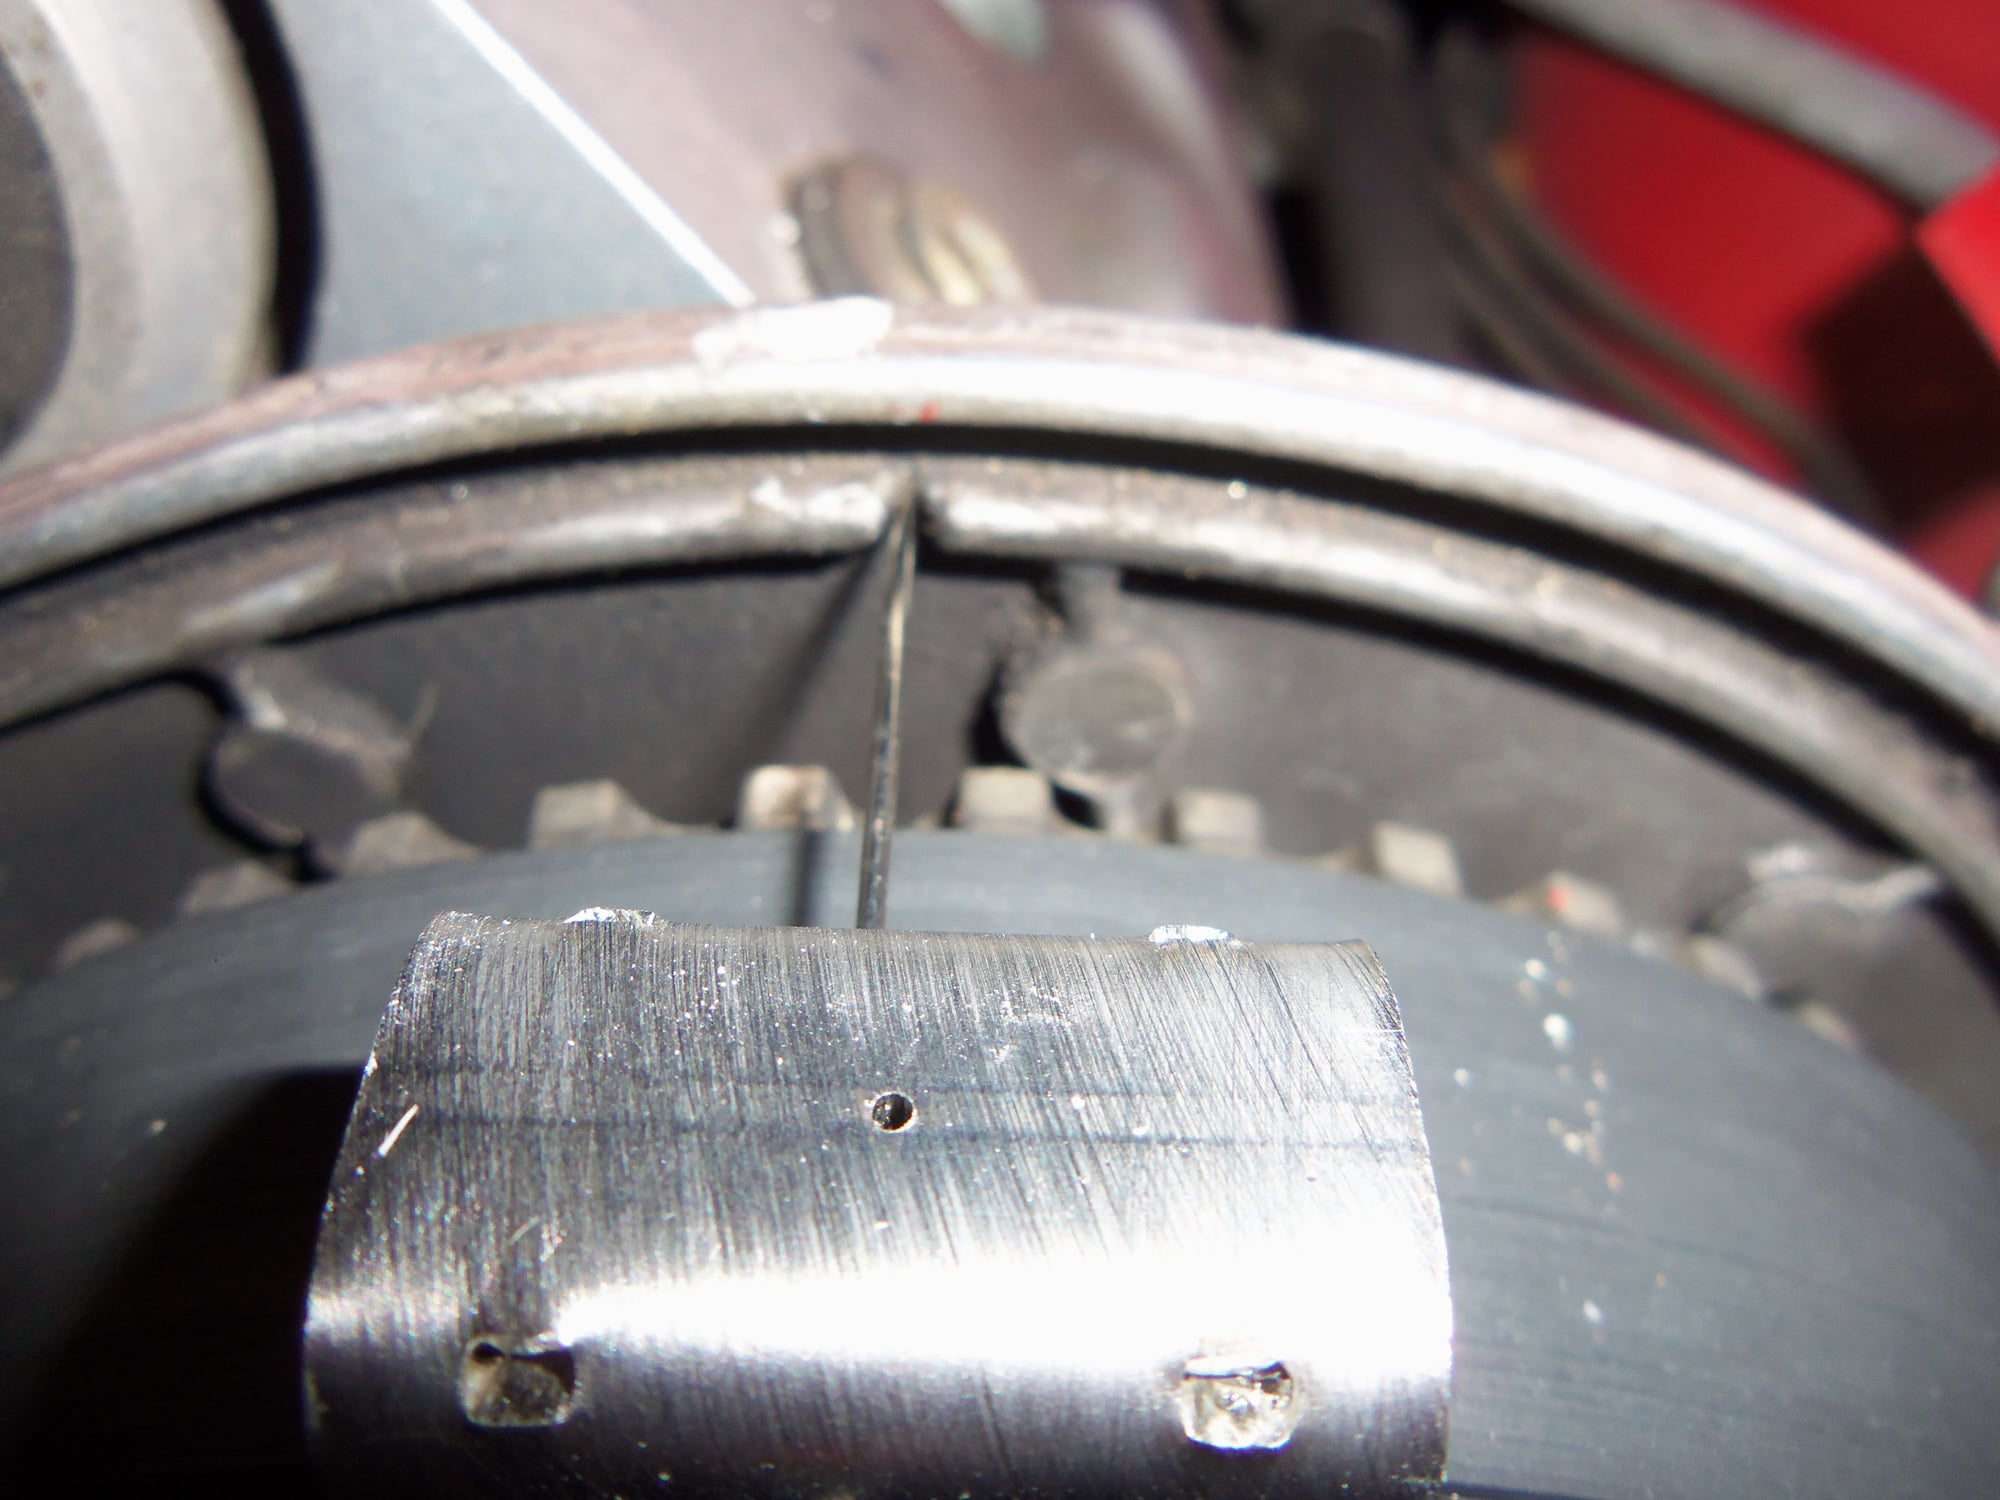
So...I took belt tension in the wrong place. This morning, I rolled the crank over two times to TDC, ensuring the cam sprocket timing marks lined up. This time, the belt tension was better. It is still too tight, being right at the edge of the window, but better than it was.
Much better, though still a tad bit too tight.
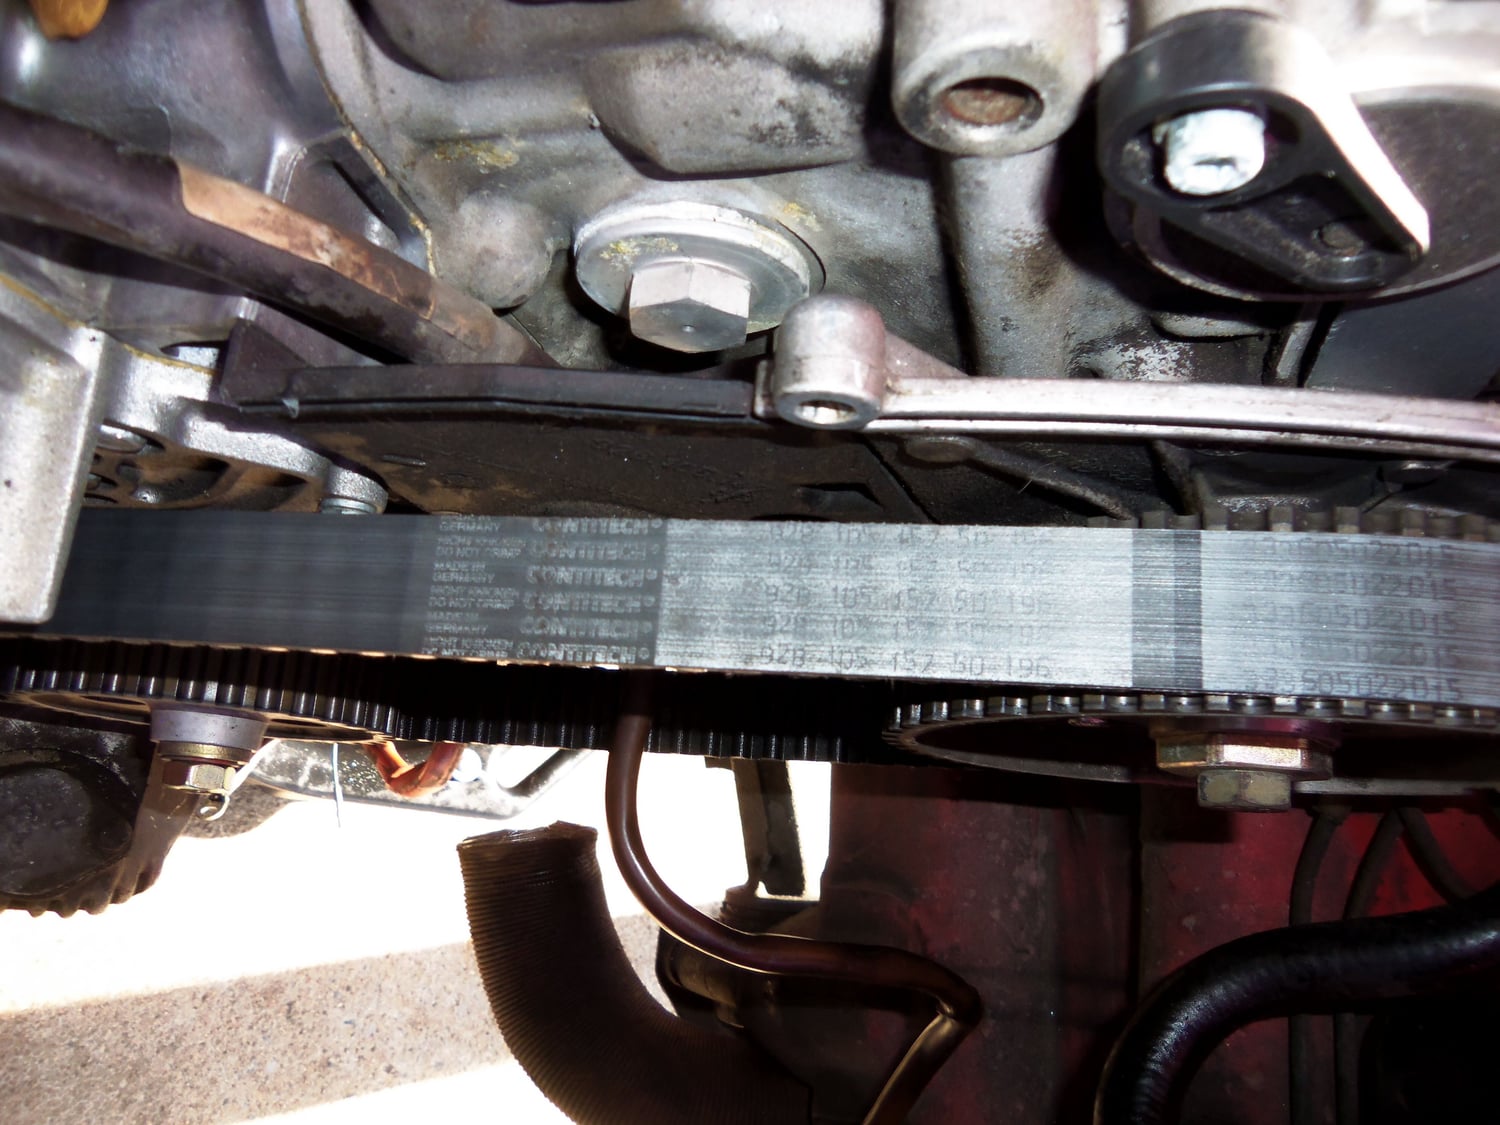
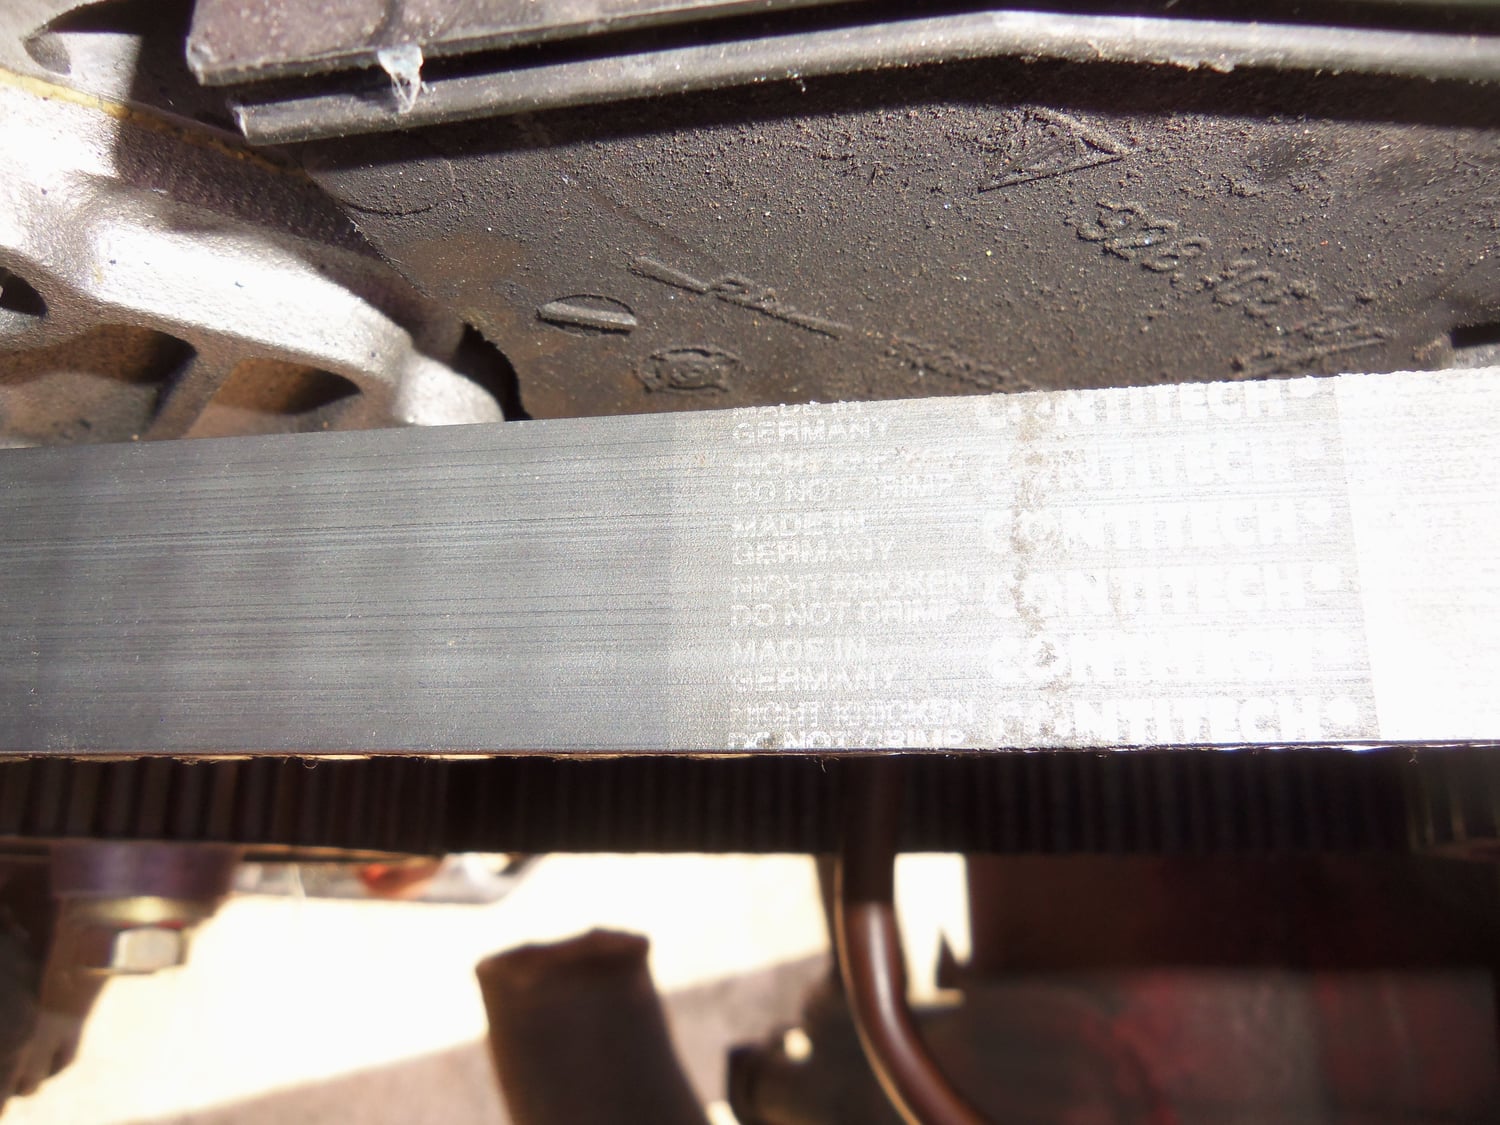
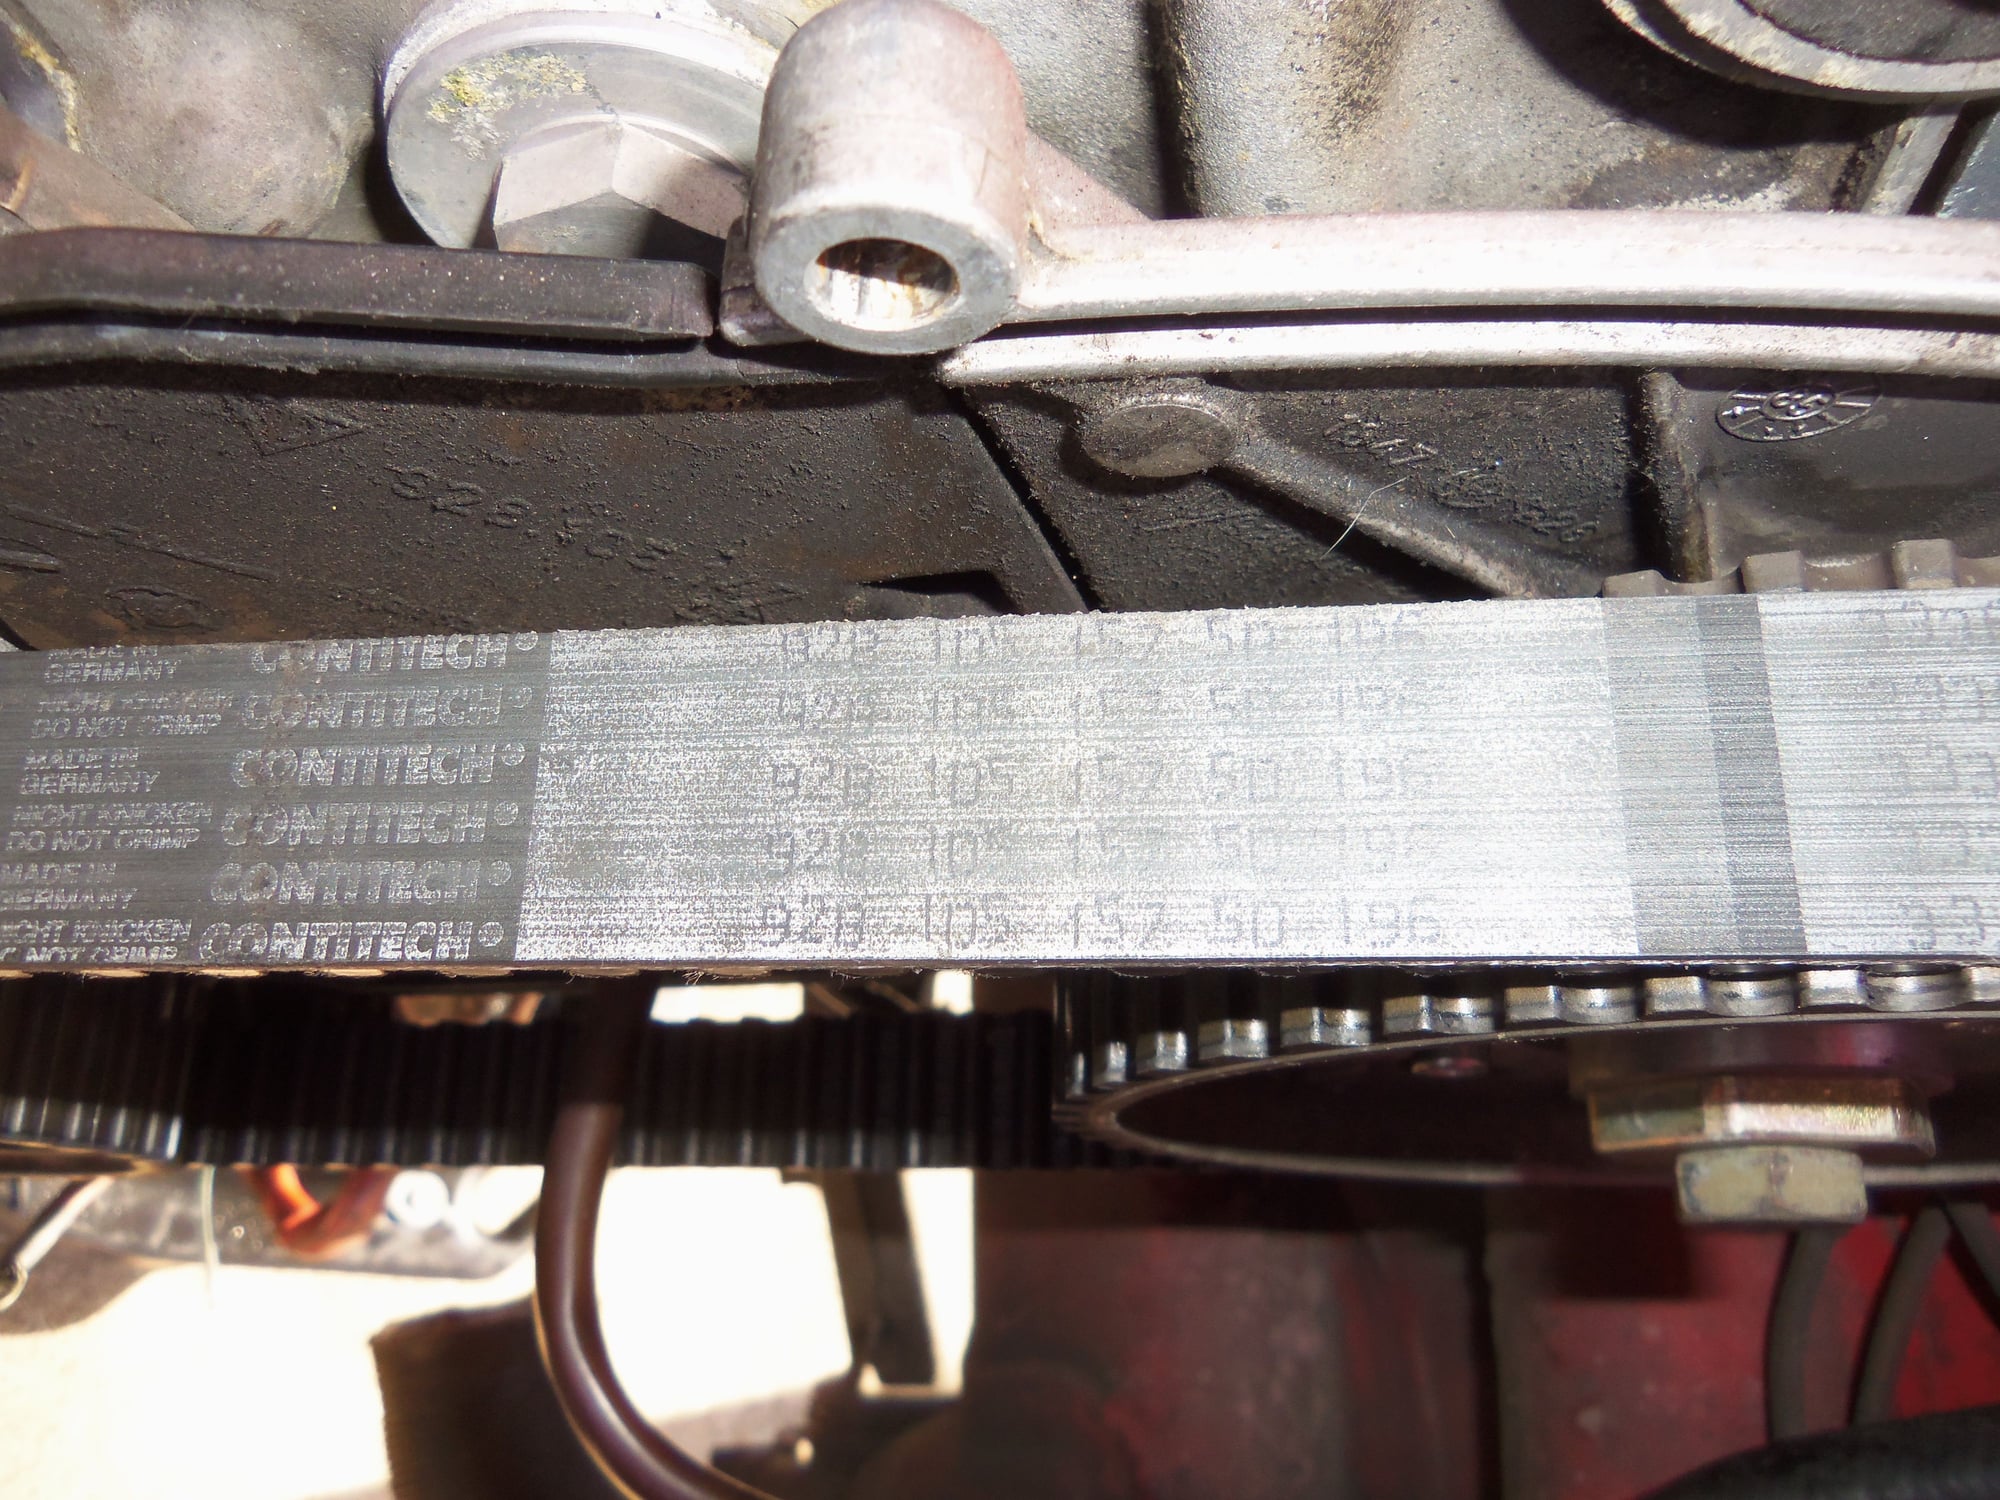
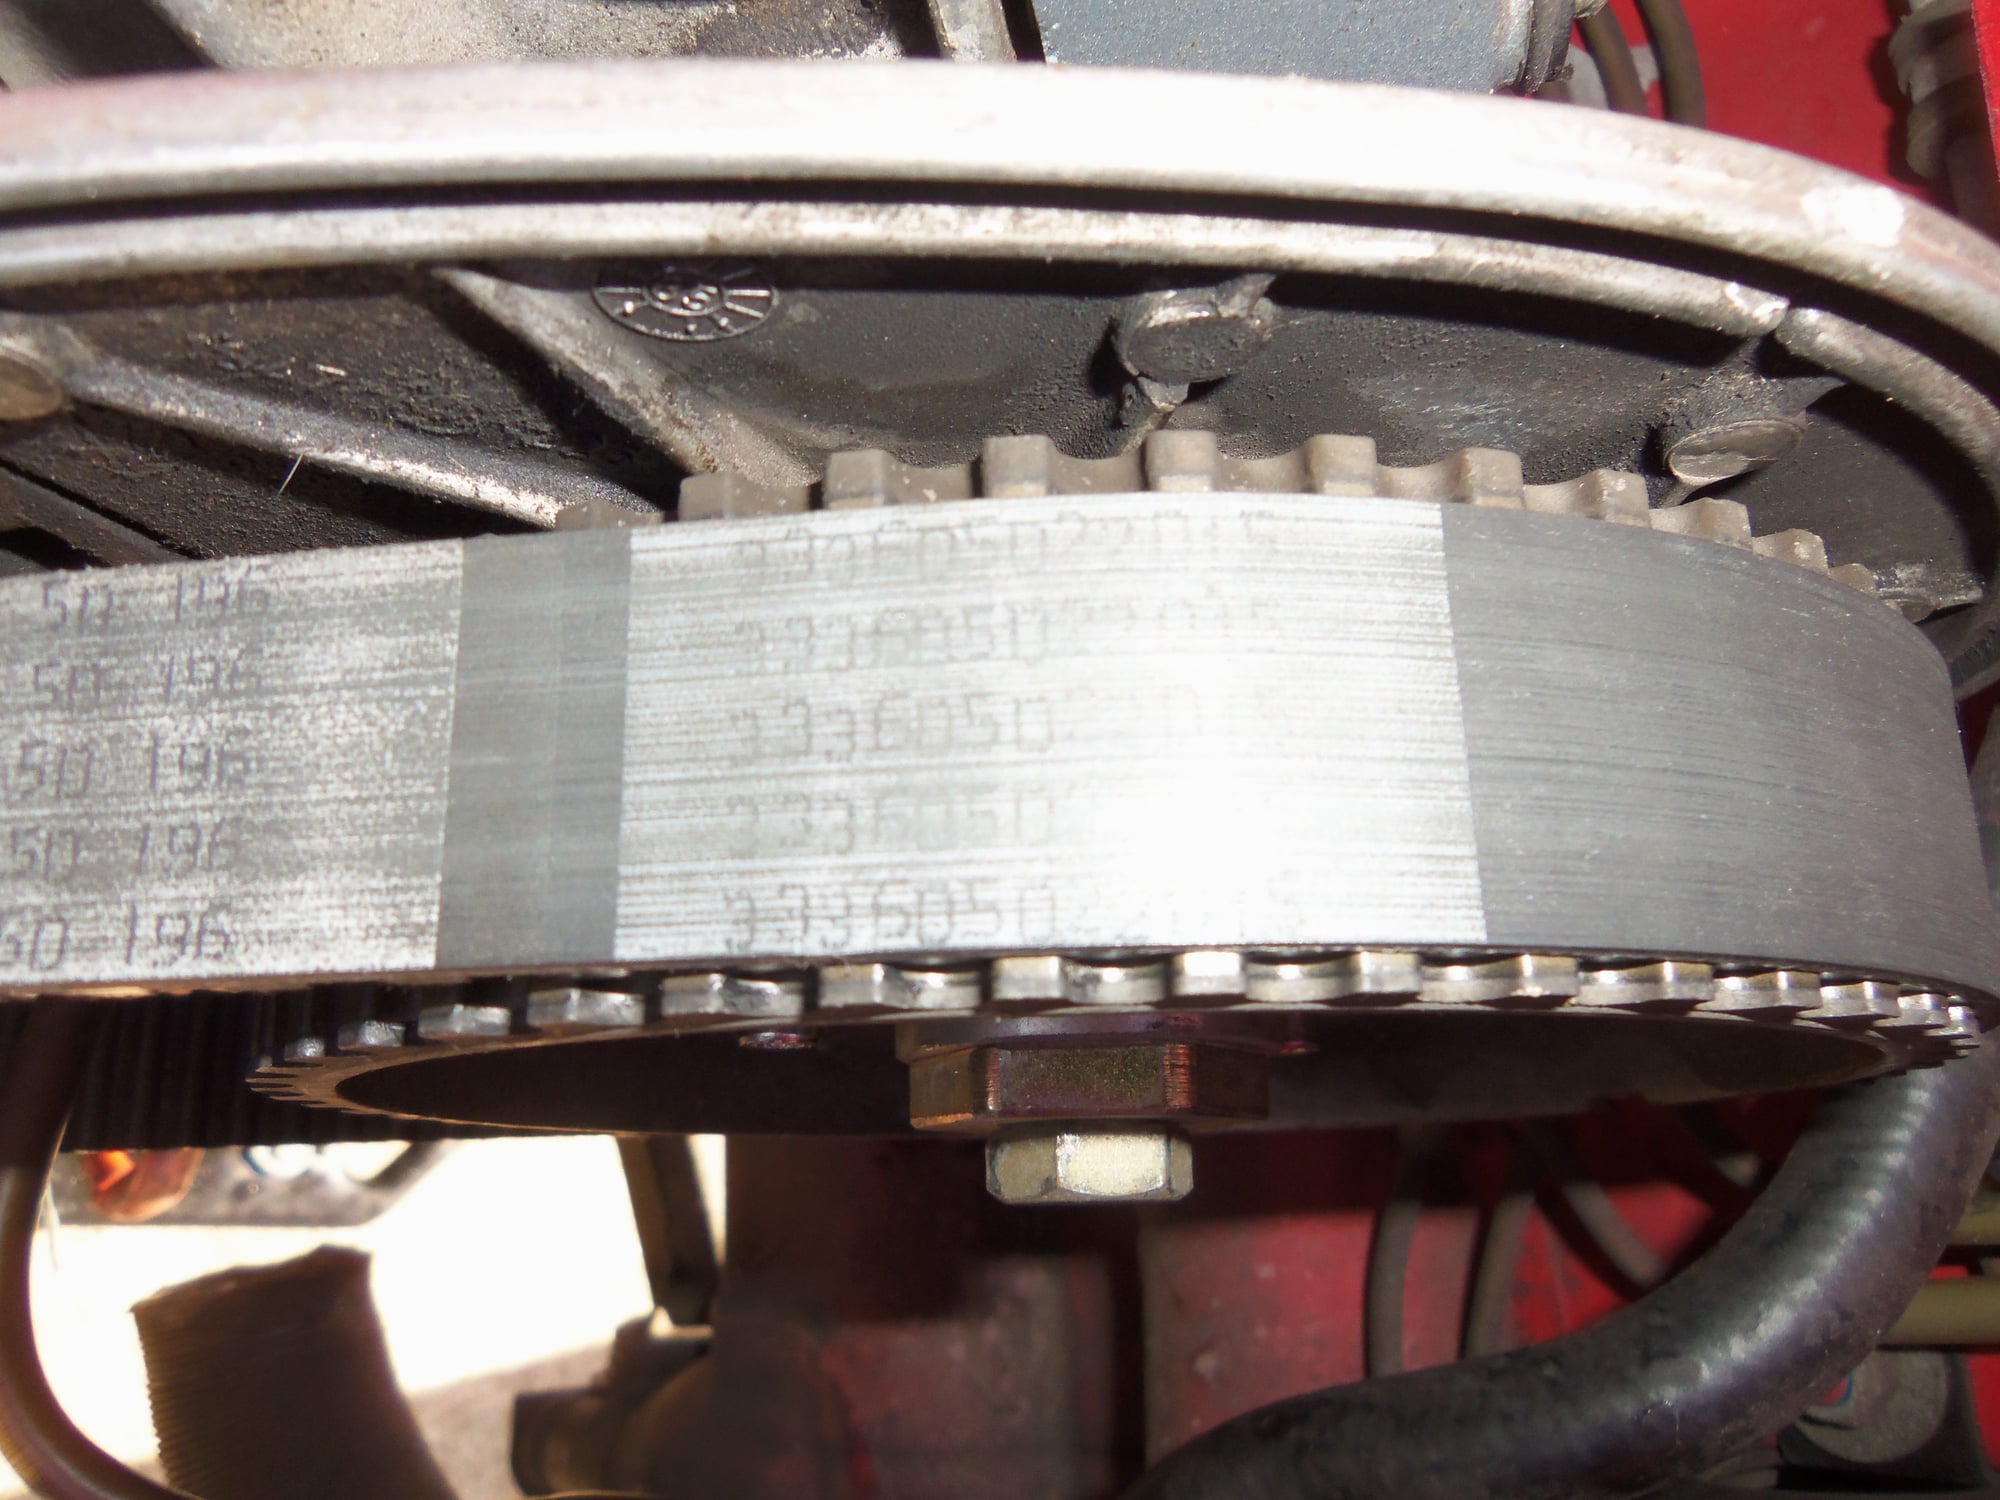
I rolled the crank over to inspect the outer surface of the belt. To my eyes, it didn't look bad, but I don't know. I did find the markings. They have a little wear on them.
Question: Is Contitech the same as Continental? To my understanding the Continental timing belts stretch and are to be avoided. The invoice lists the belt as 928 105 157 50 Timing Belt, for $90.31. I believe that is the OEM Porsche belt?
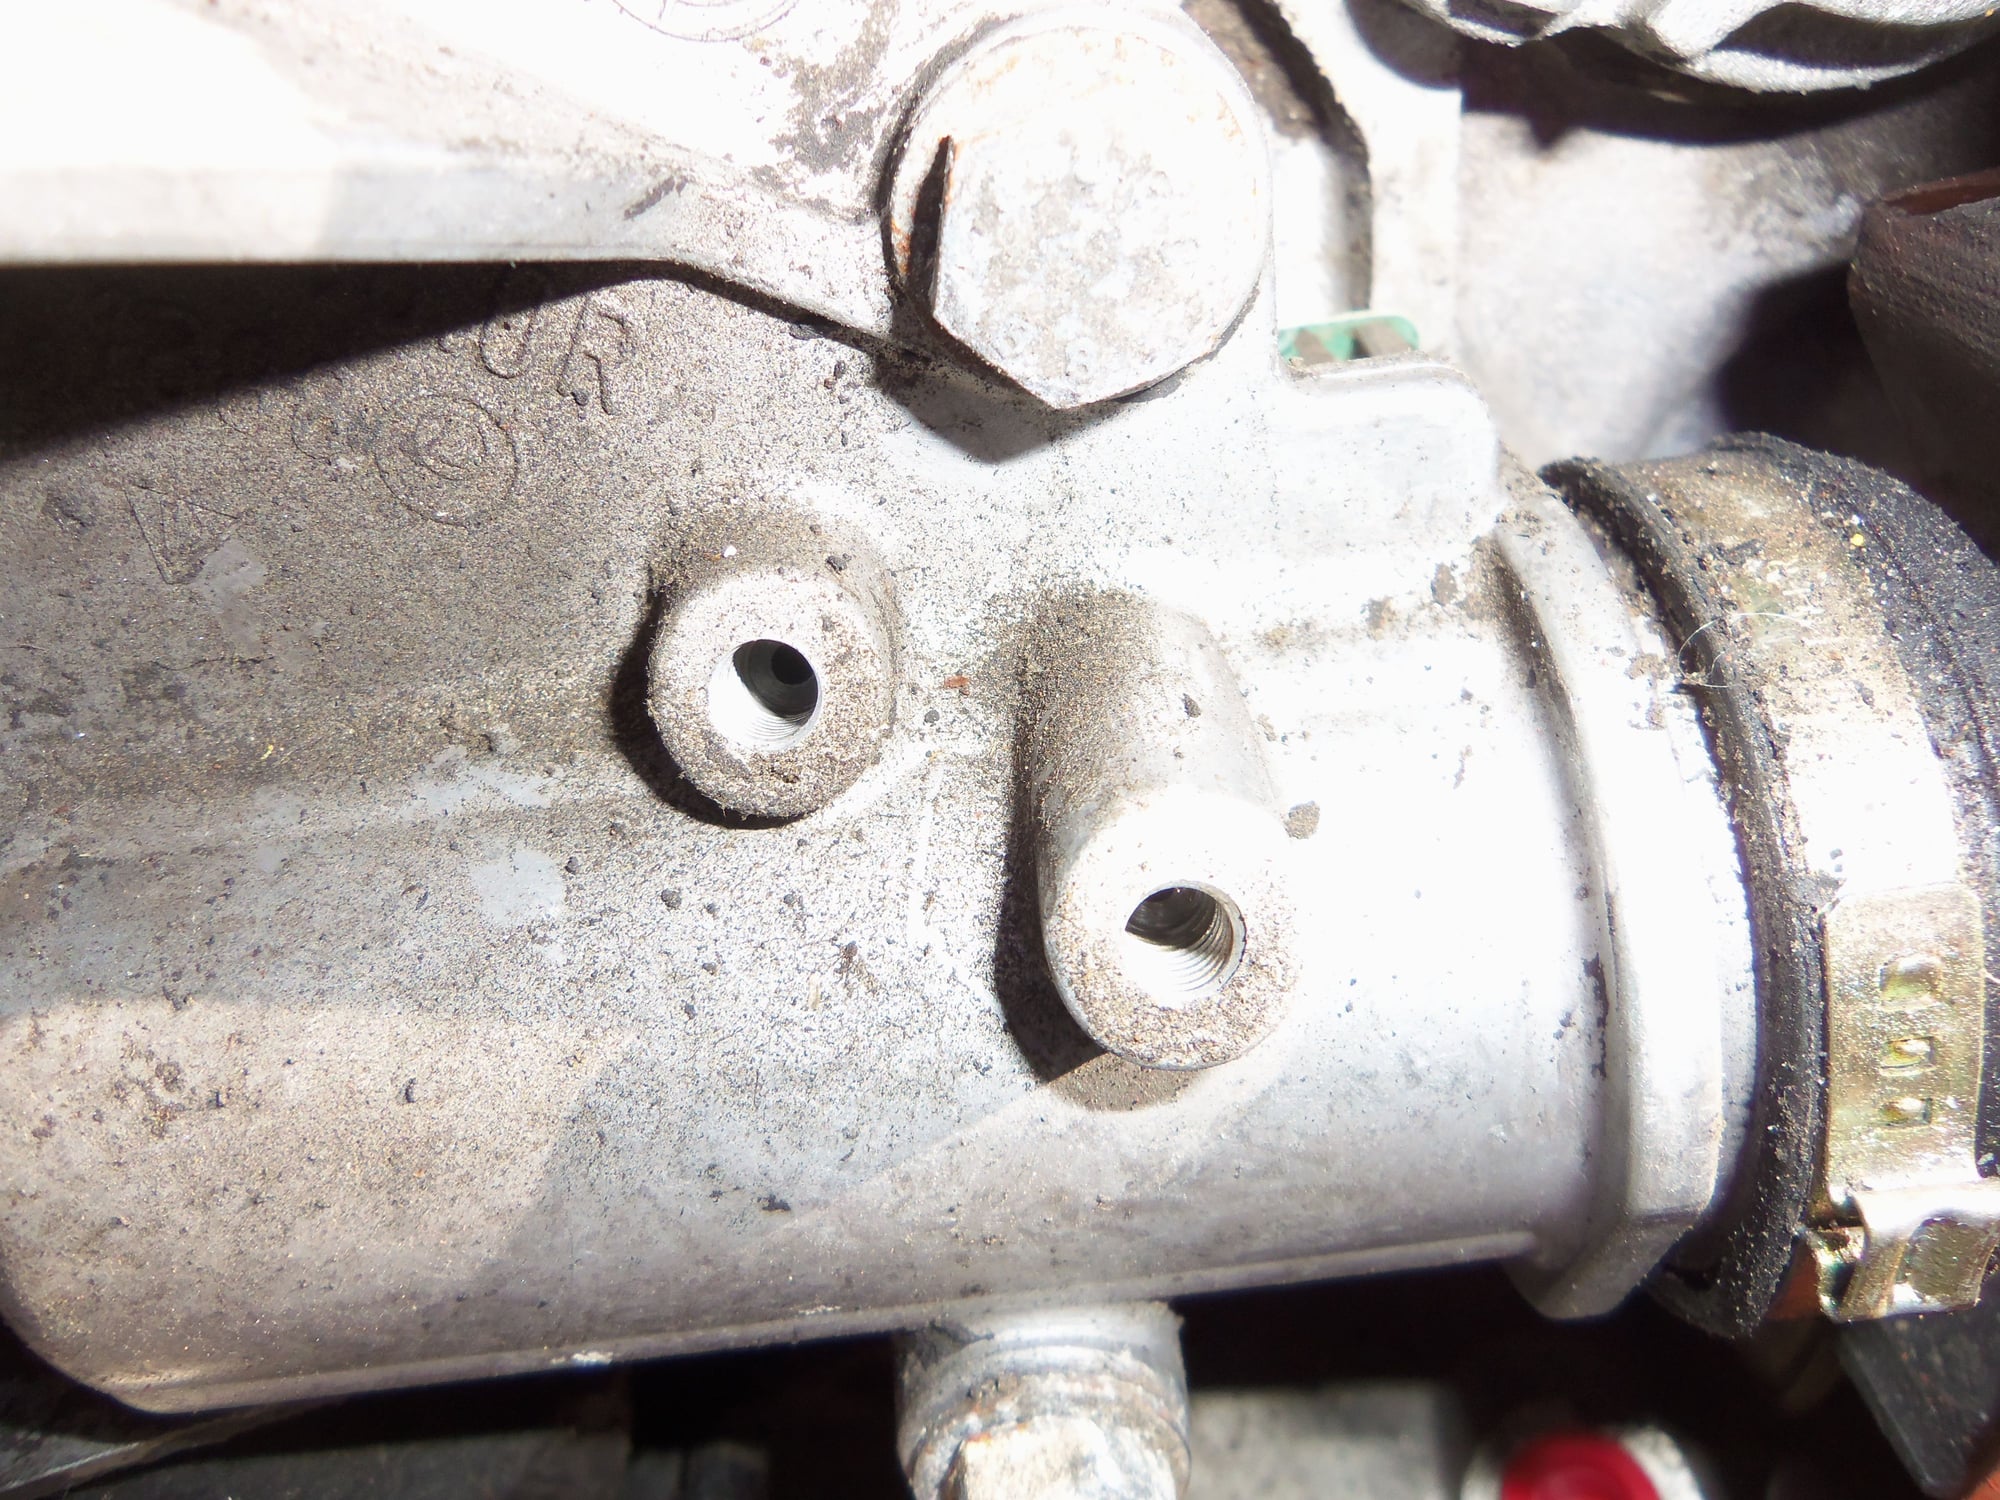
Also, here is the tensioner. No oil dripping from the ports, and no oil residue on the bleed/fill screws.
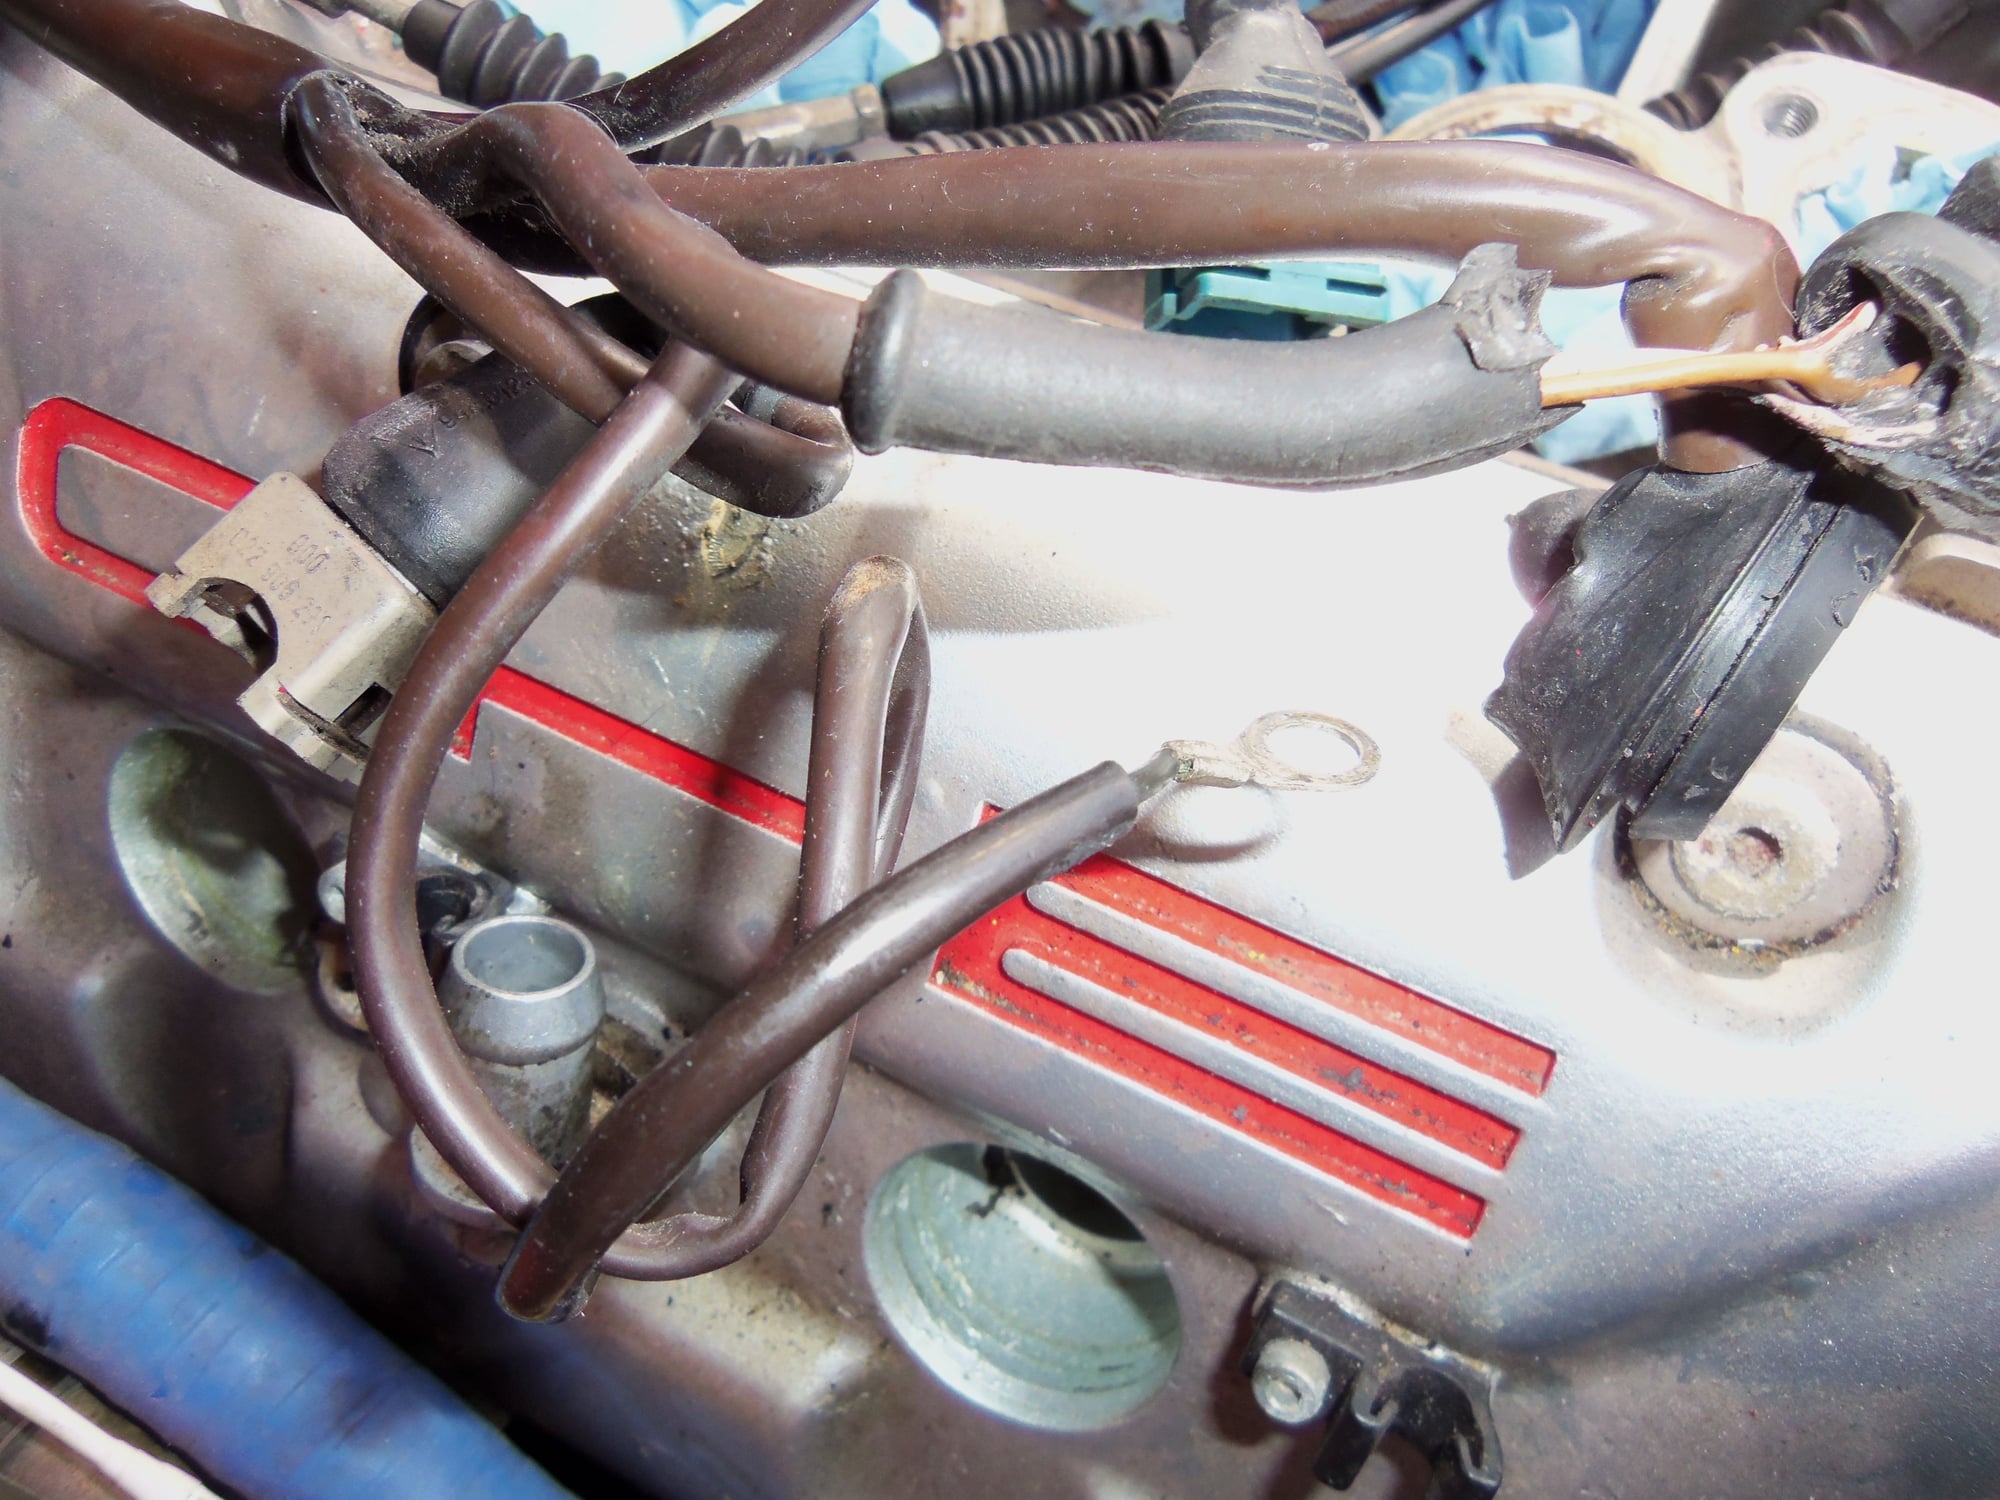
I finally found the belt tension warning wire. Turns out, I found it last week and didn't know it. When I was disassembling the top of the engine, I found a wire grounded to the bracket that carries the diagnostic connector. It had a raggedy looking ring terminal that did not look OEM. I just assumed it was yet another ground. I did wonder why the wire was soooo long to go to the ground point nearby. But, I didn't think anything of it.
Now, I have to order a terminal kit to reattach it to the socket in the front of the lower plastic timing cover.
Lovely...
Right now, I have the crankshaft set at 45 degrees BTDC. Monday, after work I will put the flywheel lock in place. My intent is to continue disassembly, in accordance with the John Kelly S3 timing manual.
I will thoroughly inspect each component as it comes off and post photos here for evaluation.
OK, silly question: In keeping with my 'in for a penny, in for a pound' mentality, should I get the cam and oil pump gears coated now? I am in here, and they don't show bad wear...

 02-10-2017, 01:03 AM


 When I initially did the check, I just rolled the crank over to TDC and checked belt tension. Later, when I went to check cam timing, I had to roll the crank over another full turn to TDC to get the sprocket marks to line up.