When you click on links to various merchants on this site and make a purchase, this can result in this site earning a commission. Affiliate programs and affiliations include, but are not limited to, the eBay Partner Network.
Nice, you have the right cam profile tools, you don't need to do the plunge or anything. Just set it up with the profile tool, then do the finish with the V32R thing for the cam gears. Sweet! I was hoping this would work out that way.
Loctite 57x is fine for the seals. OK, I have a new tube ready.
As for the washer on the cam bolts, ask Roger, he will guide you. From the pic, they look like they would benefit from the washer under the bolt head, but check with him to be certain. Excellent, I will double check with Roger.
Originally Posted by ltoolio
C'mon. Be honest with us. Did you really think you'd hold up on that statement when you said it? No. Not really.
Had to stop early this evening due to tornado producing storm cells blowing into my area. Yay.
I did get down to the point that I am ready to start pulling the cams.
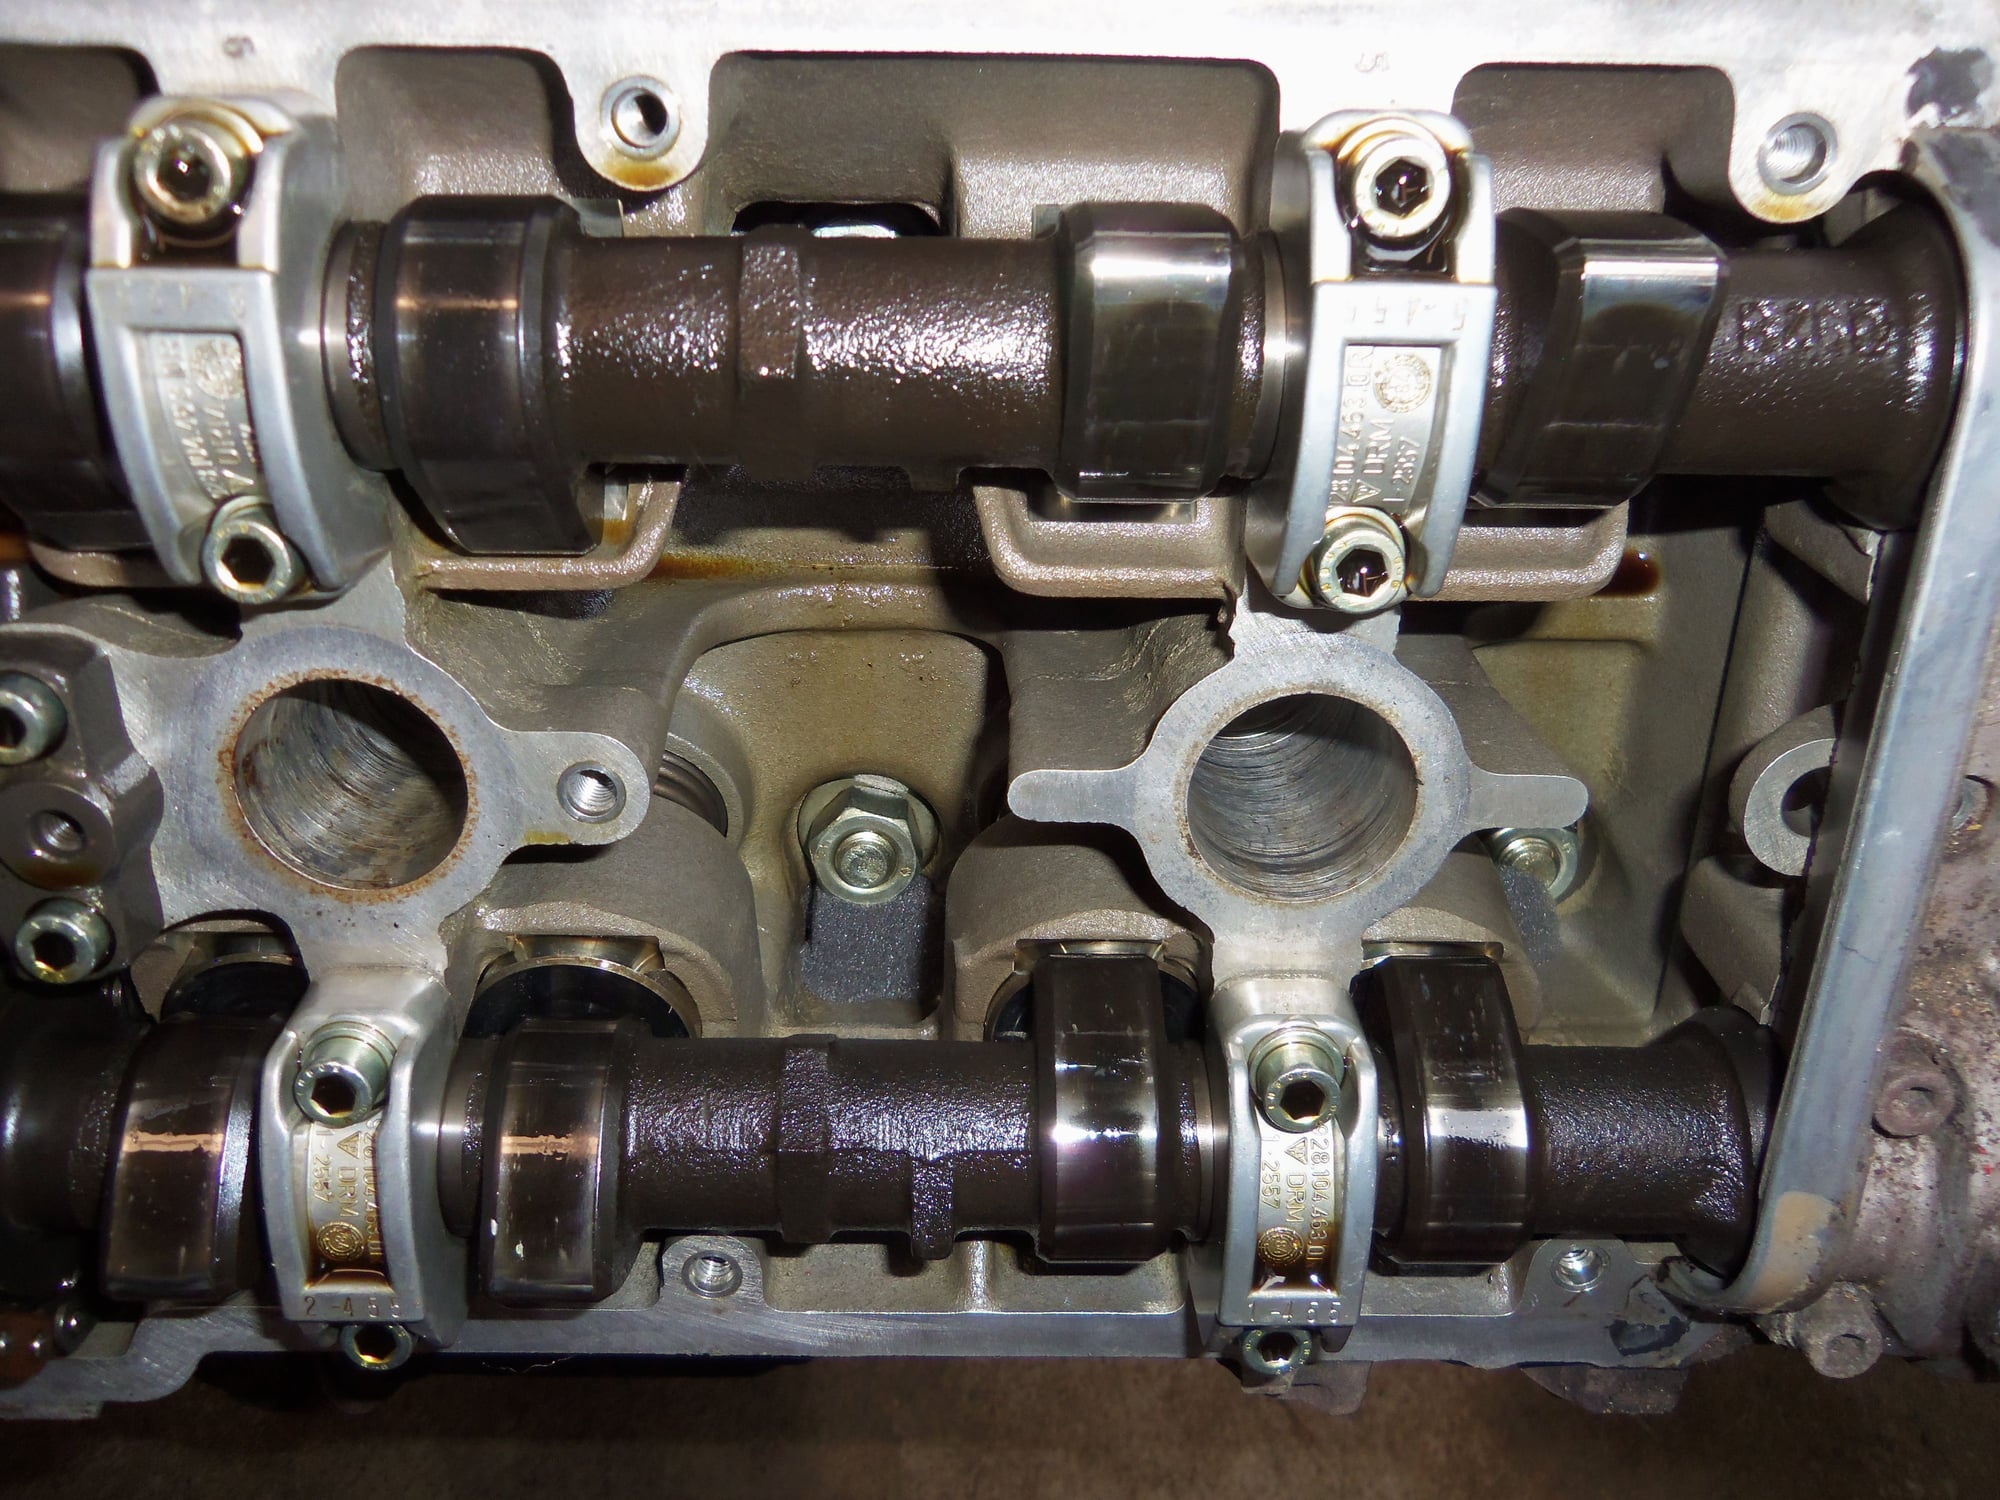
With the crank locked at 45 degrees BTDC, I removed the timing belt and tensioner arm.
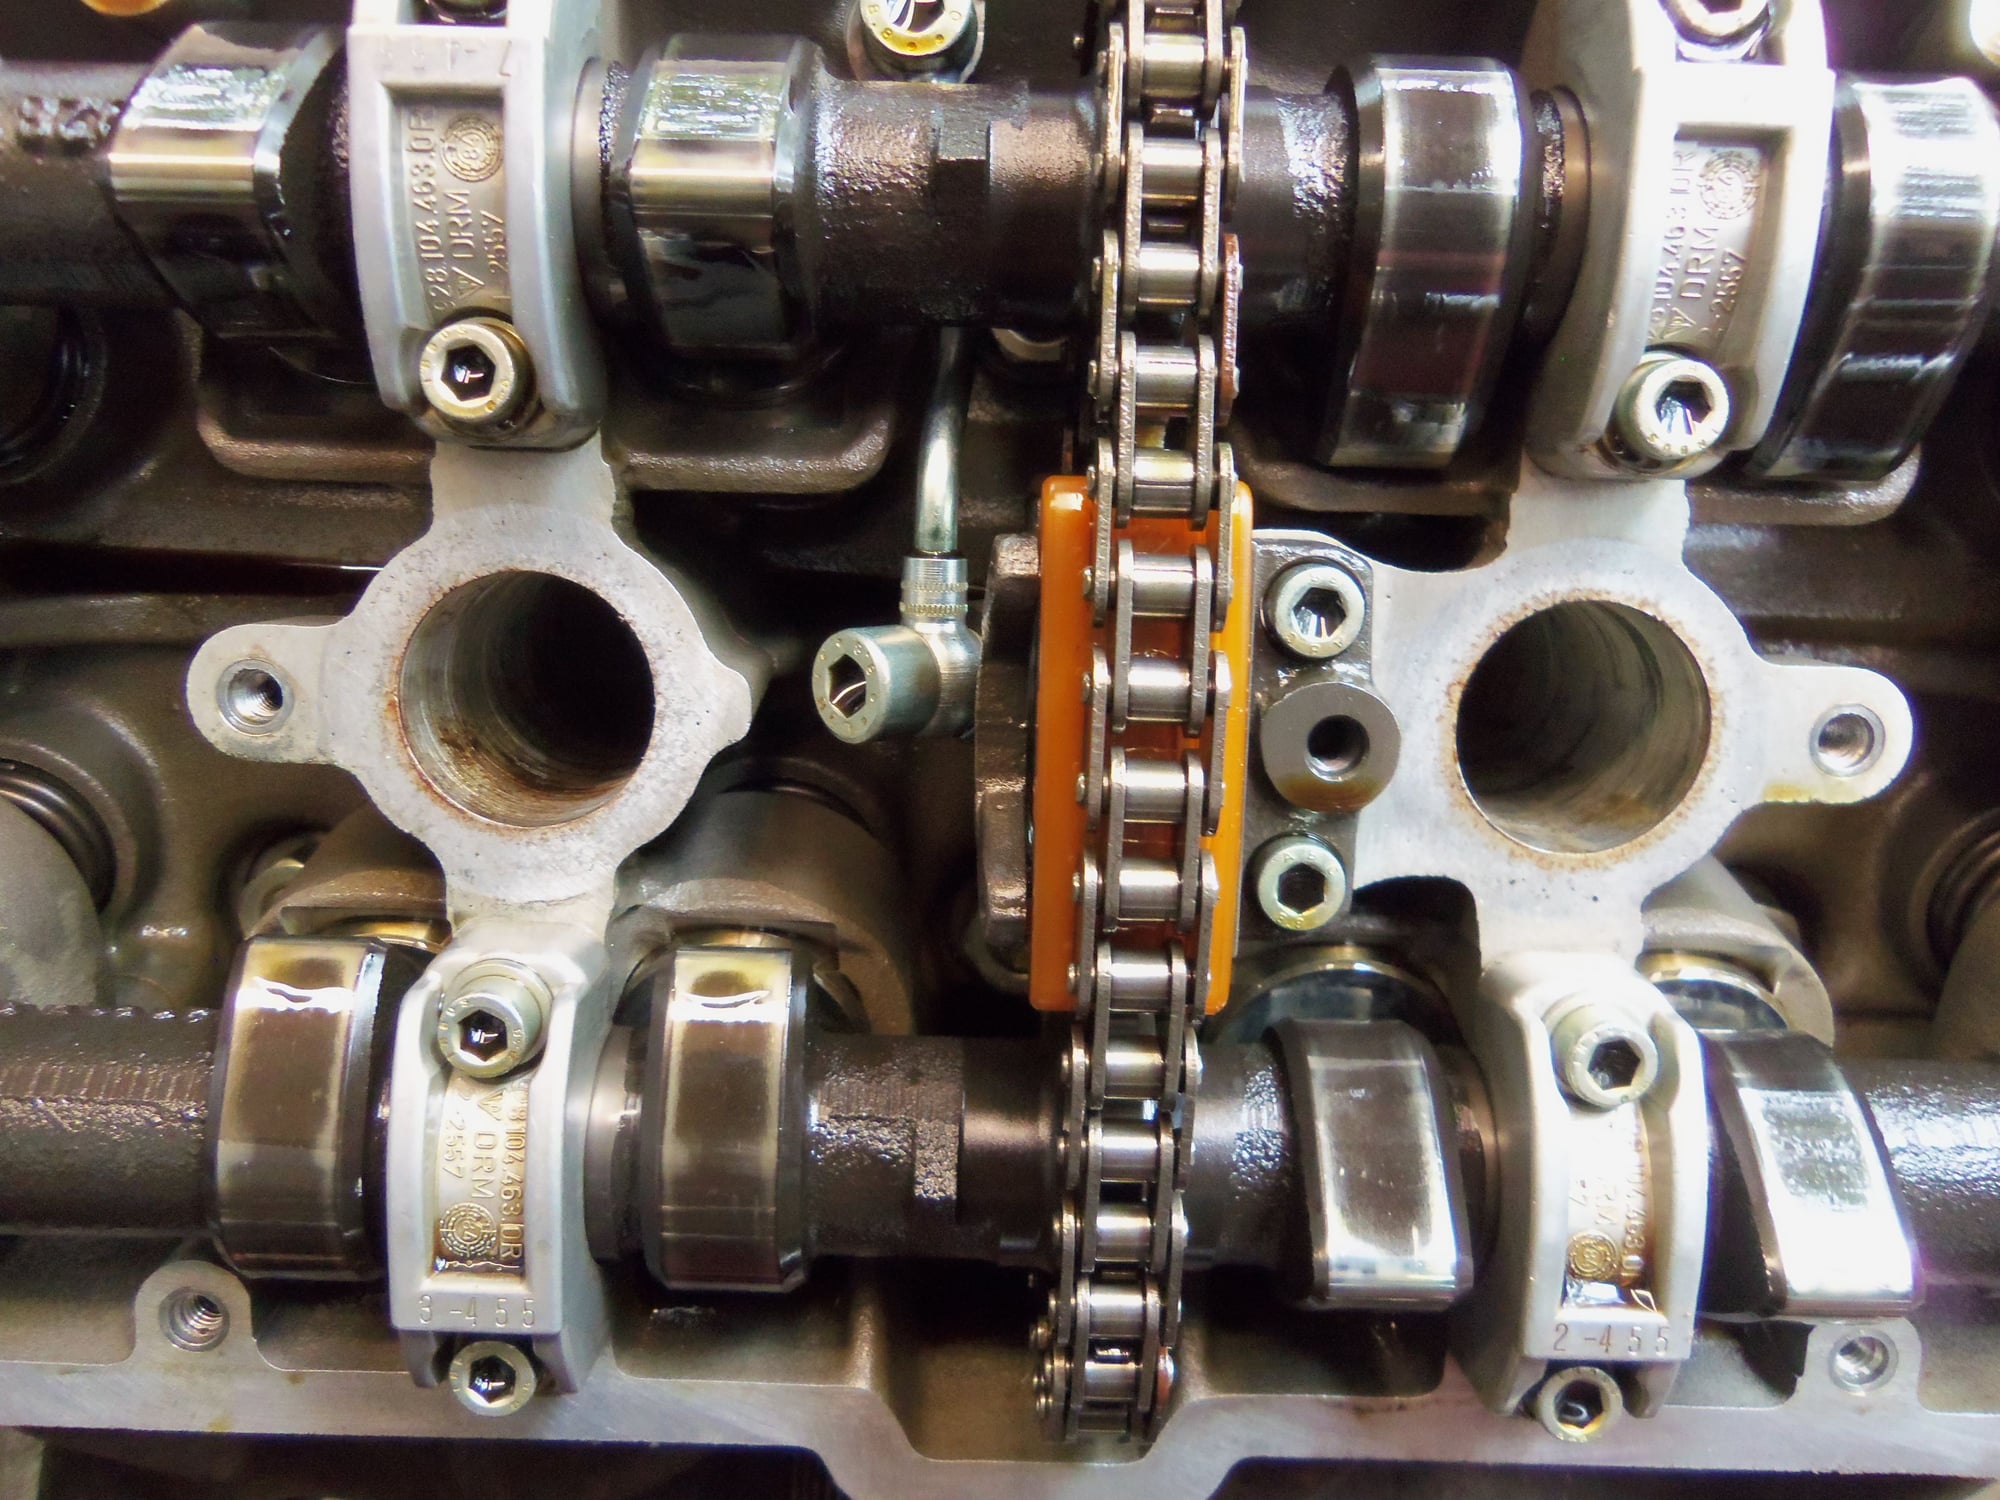
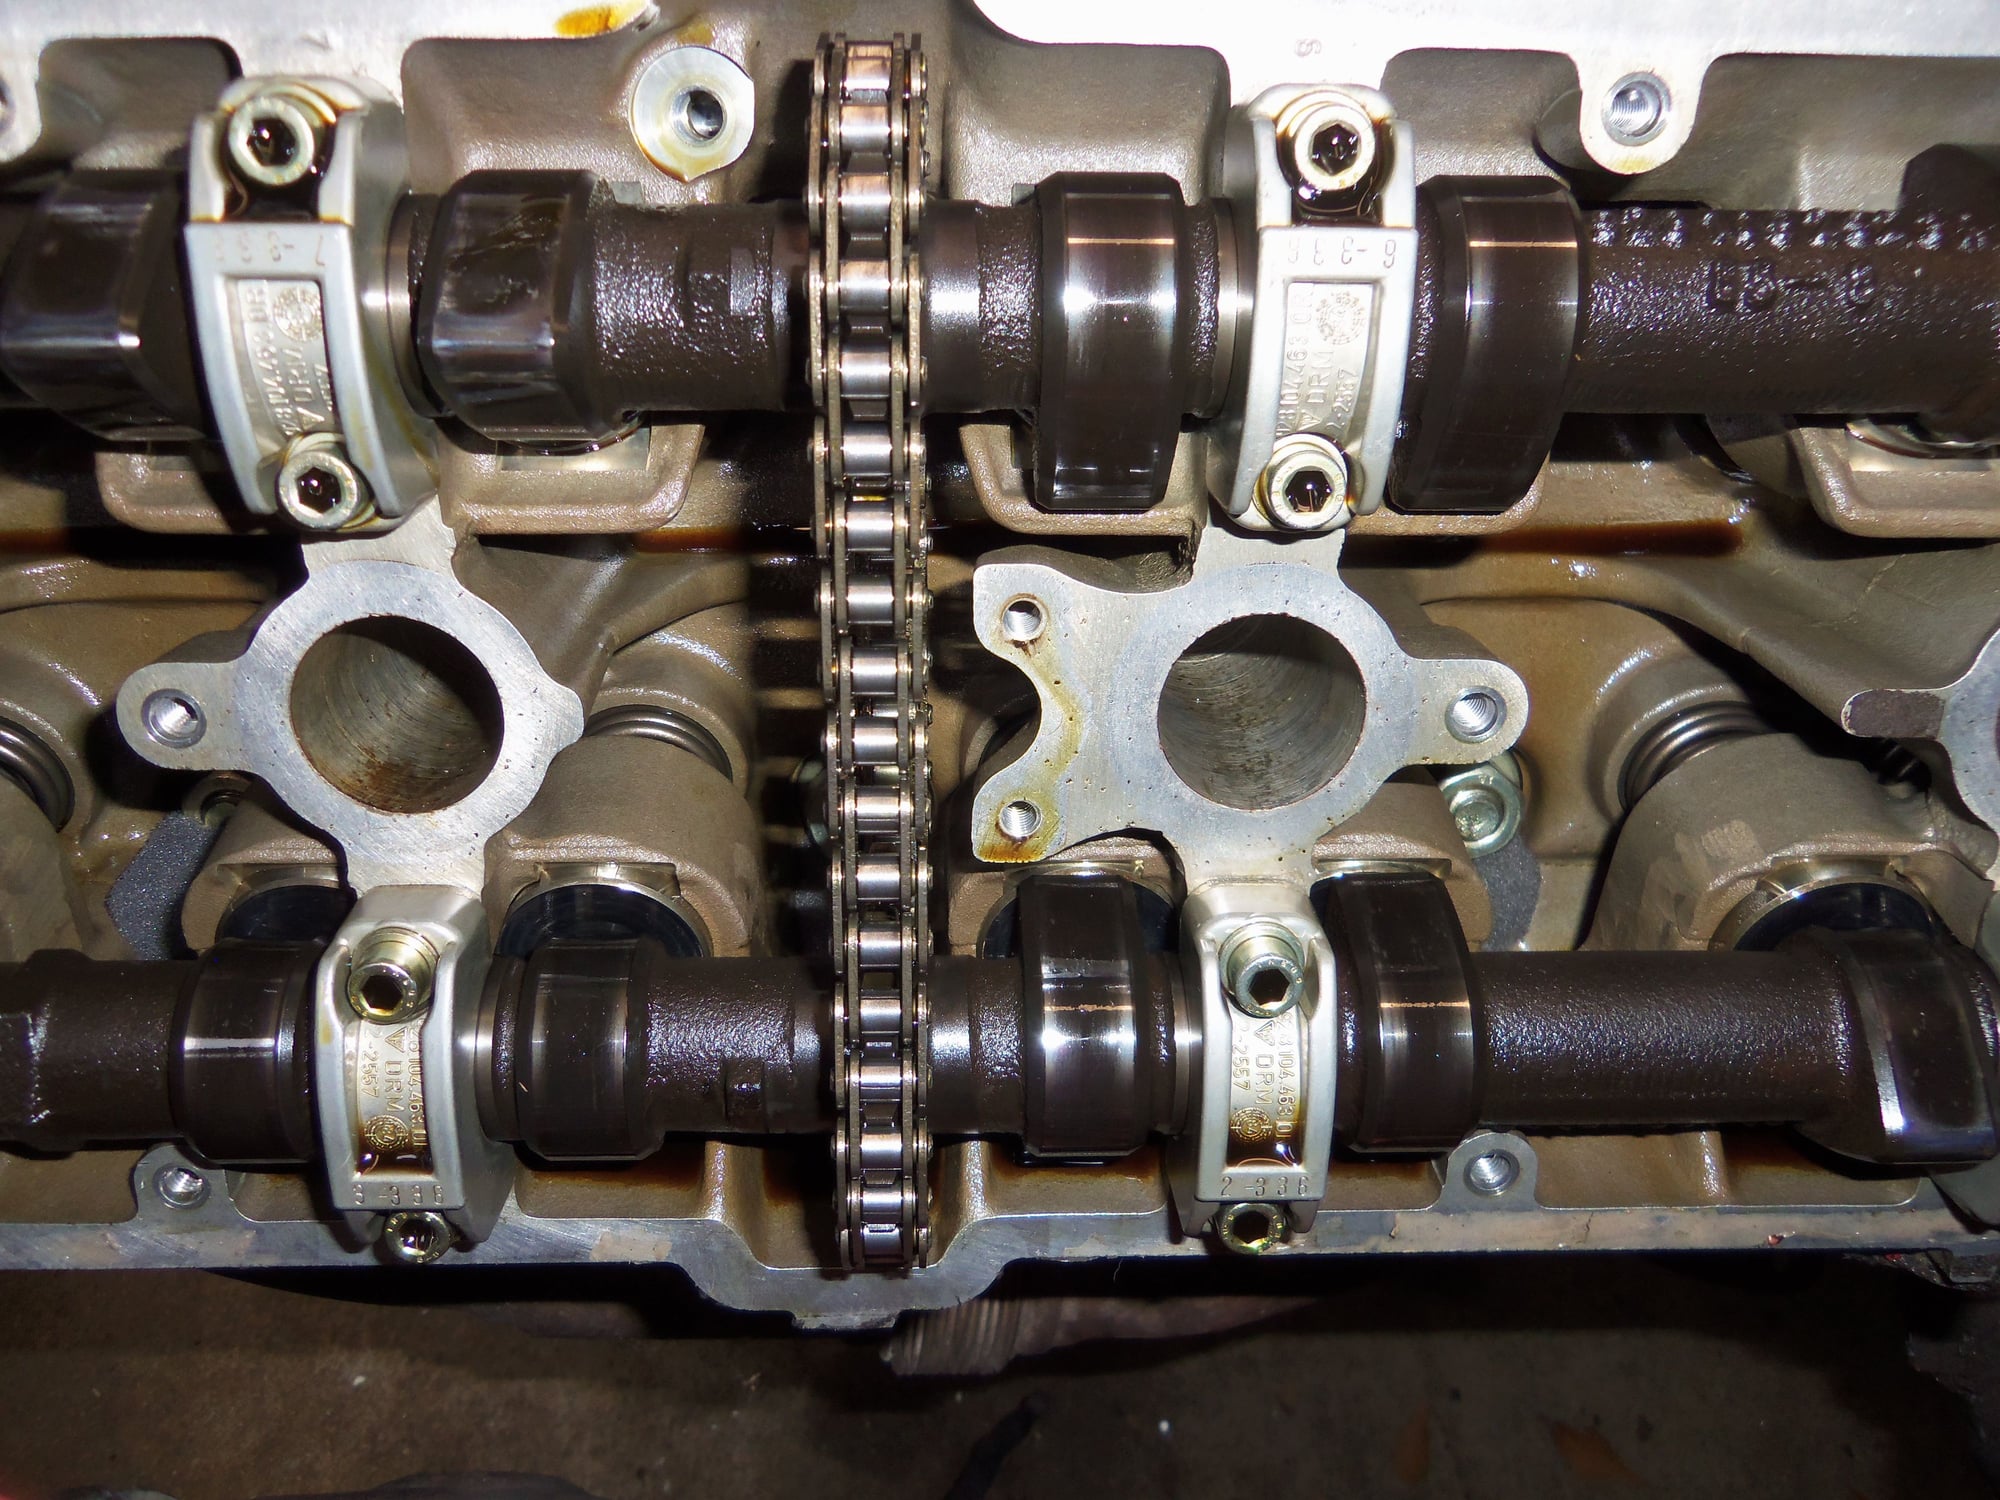
I spent quite awhile turning the passenger's side cam sprocket with a 30mm box end wrench trying to get the colored links to line up with the alignment nubs on the camshafts. They never did. Then I realized it didn't matter. I turned them so the nubs were up(perpendicular to the cylinder head). I took photos of the nubs, and the orientation of the cam sprocket.
Both alignment nubs are up.
Will use this to help reorient everything when I put it back together.
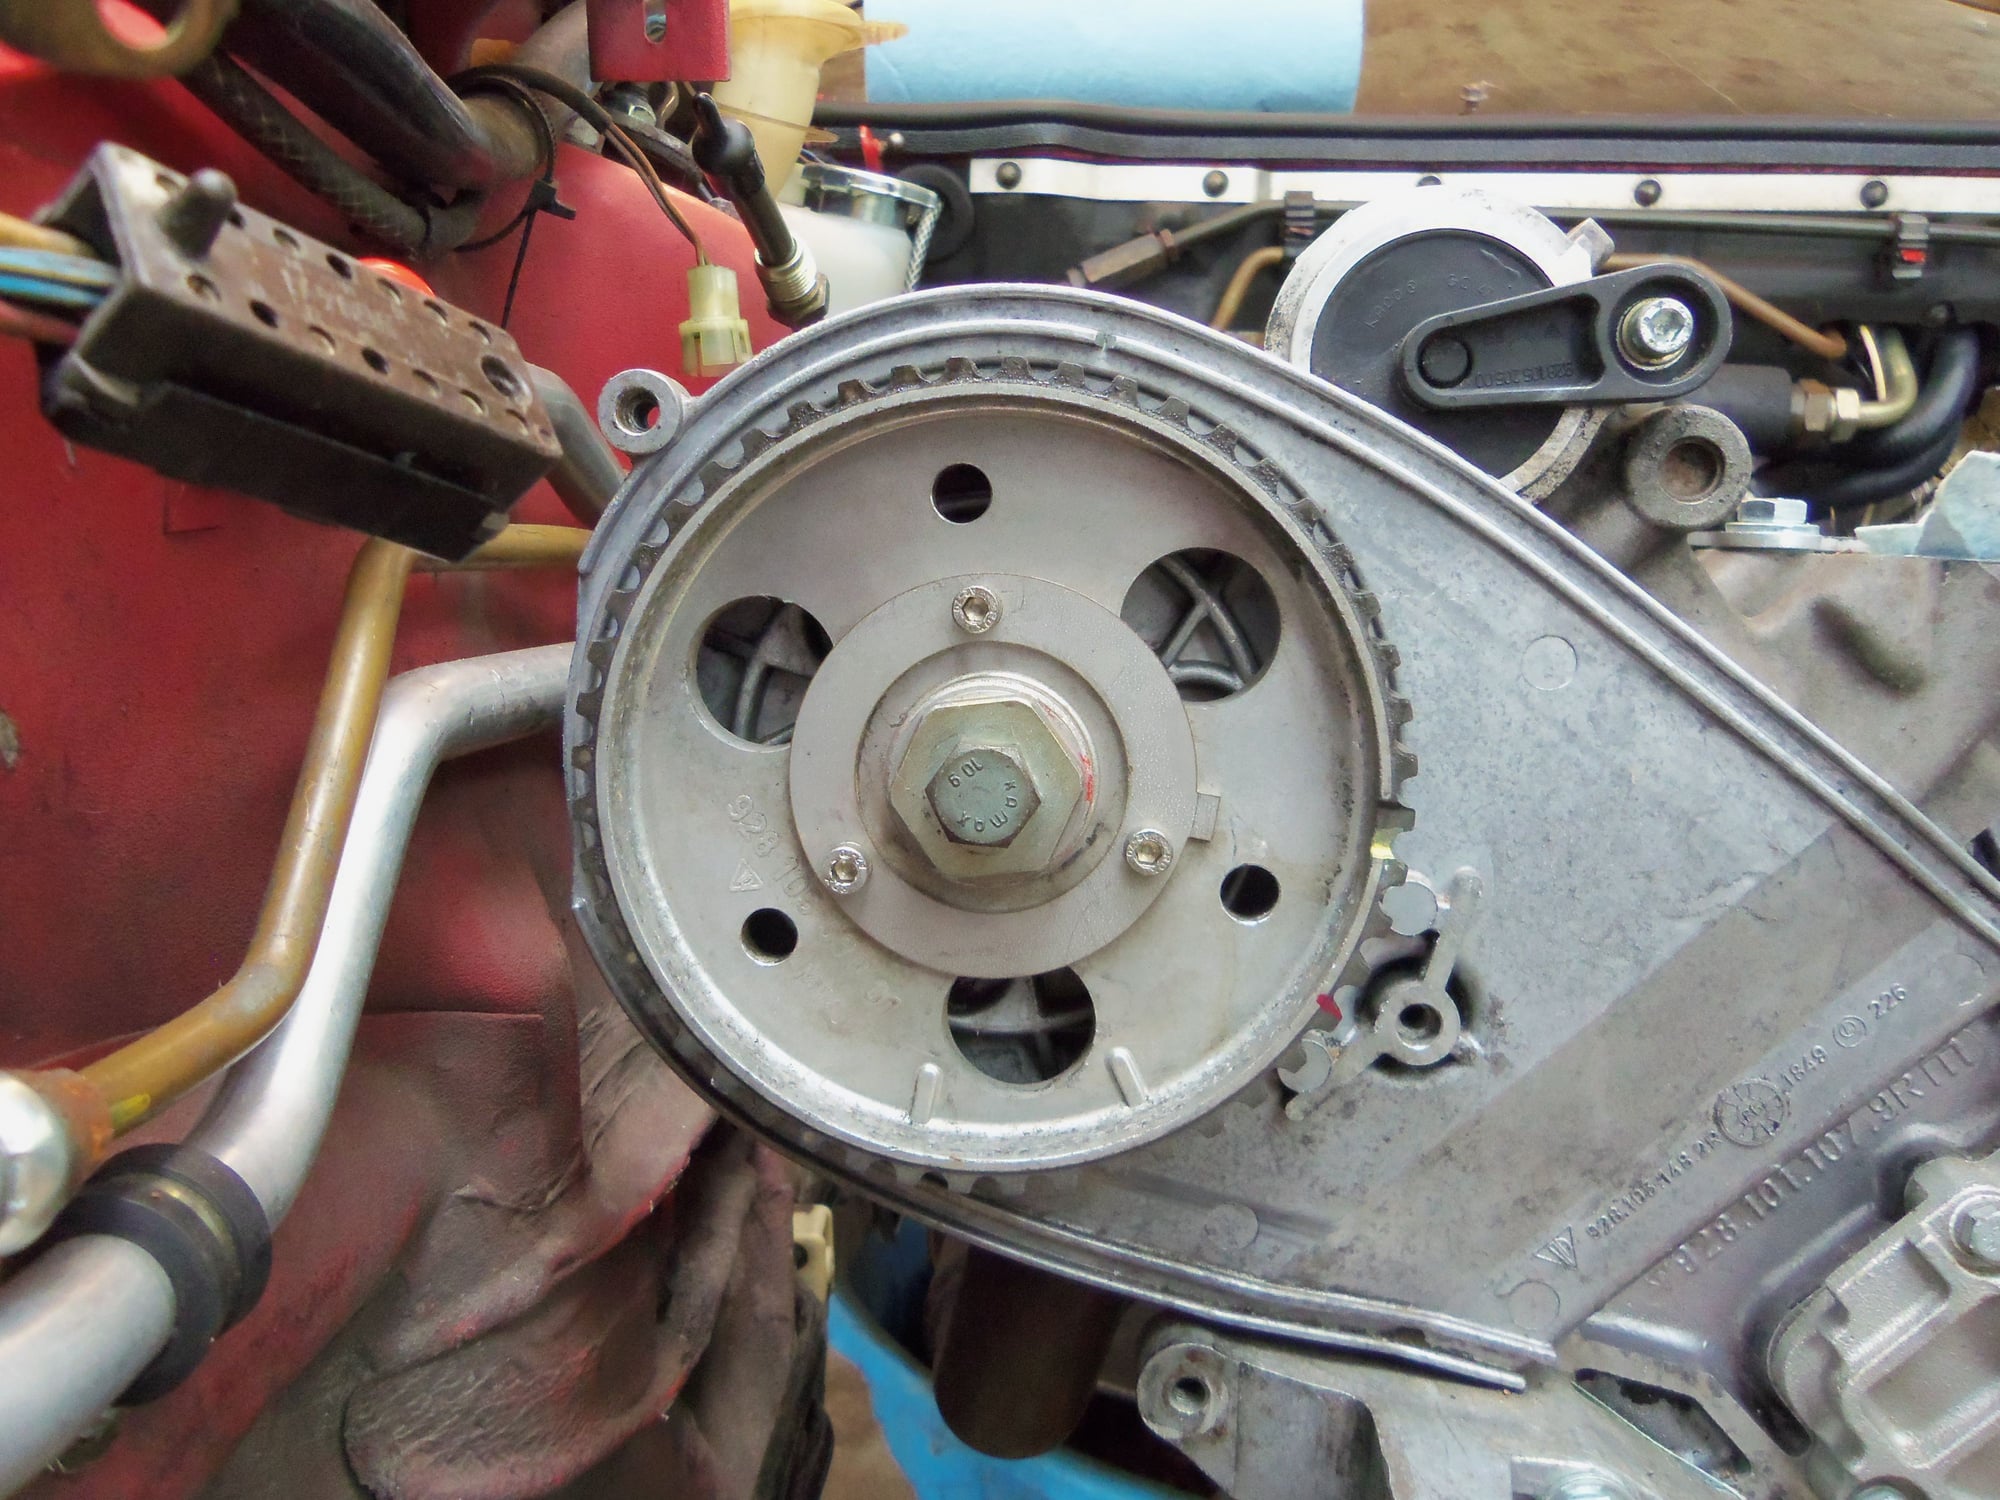
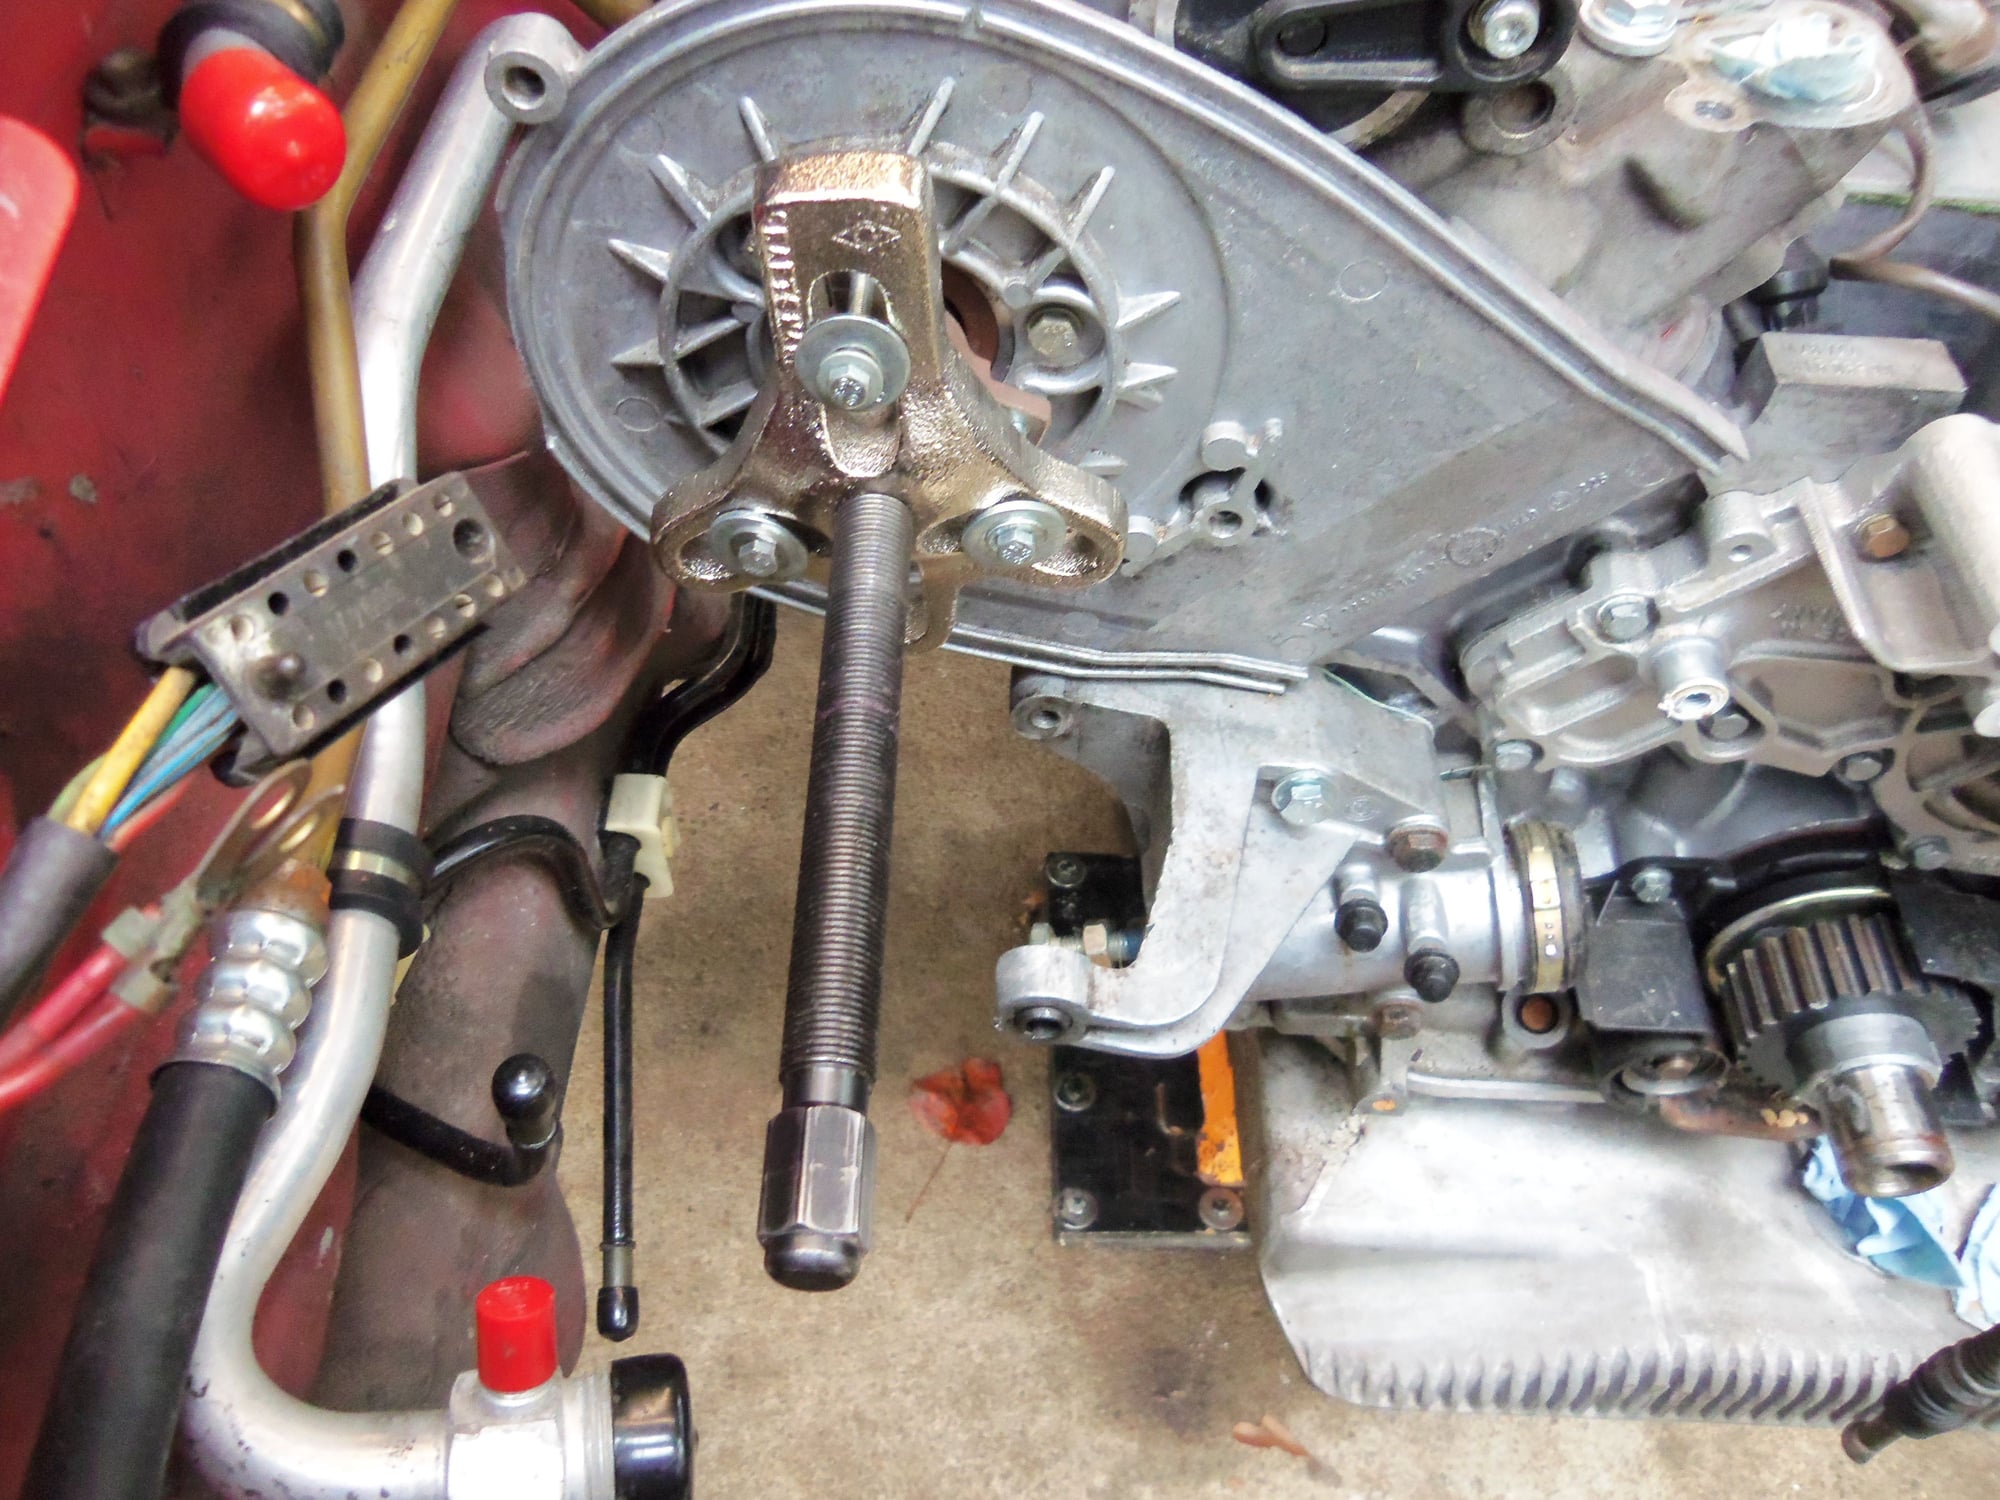
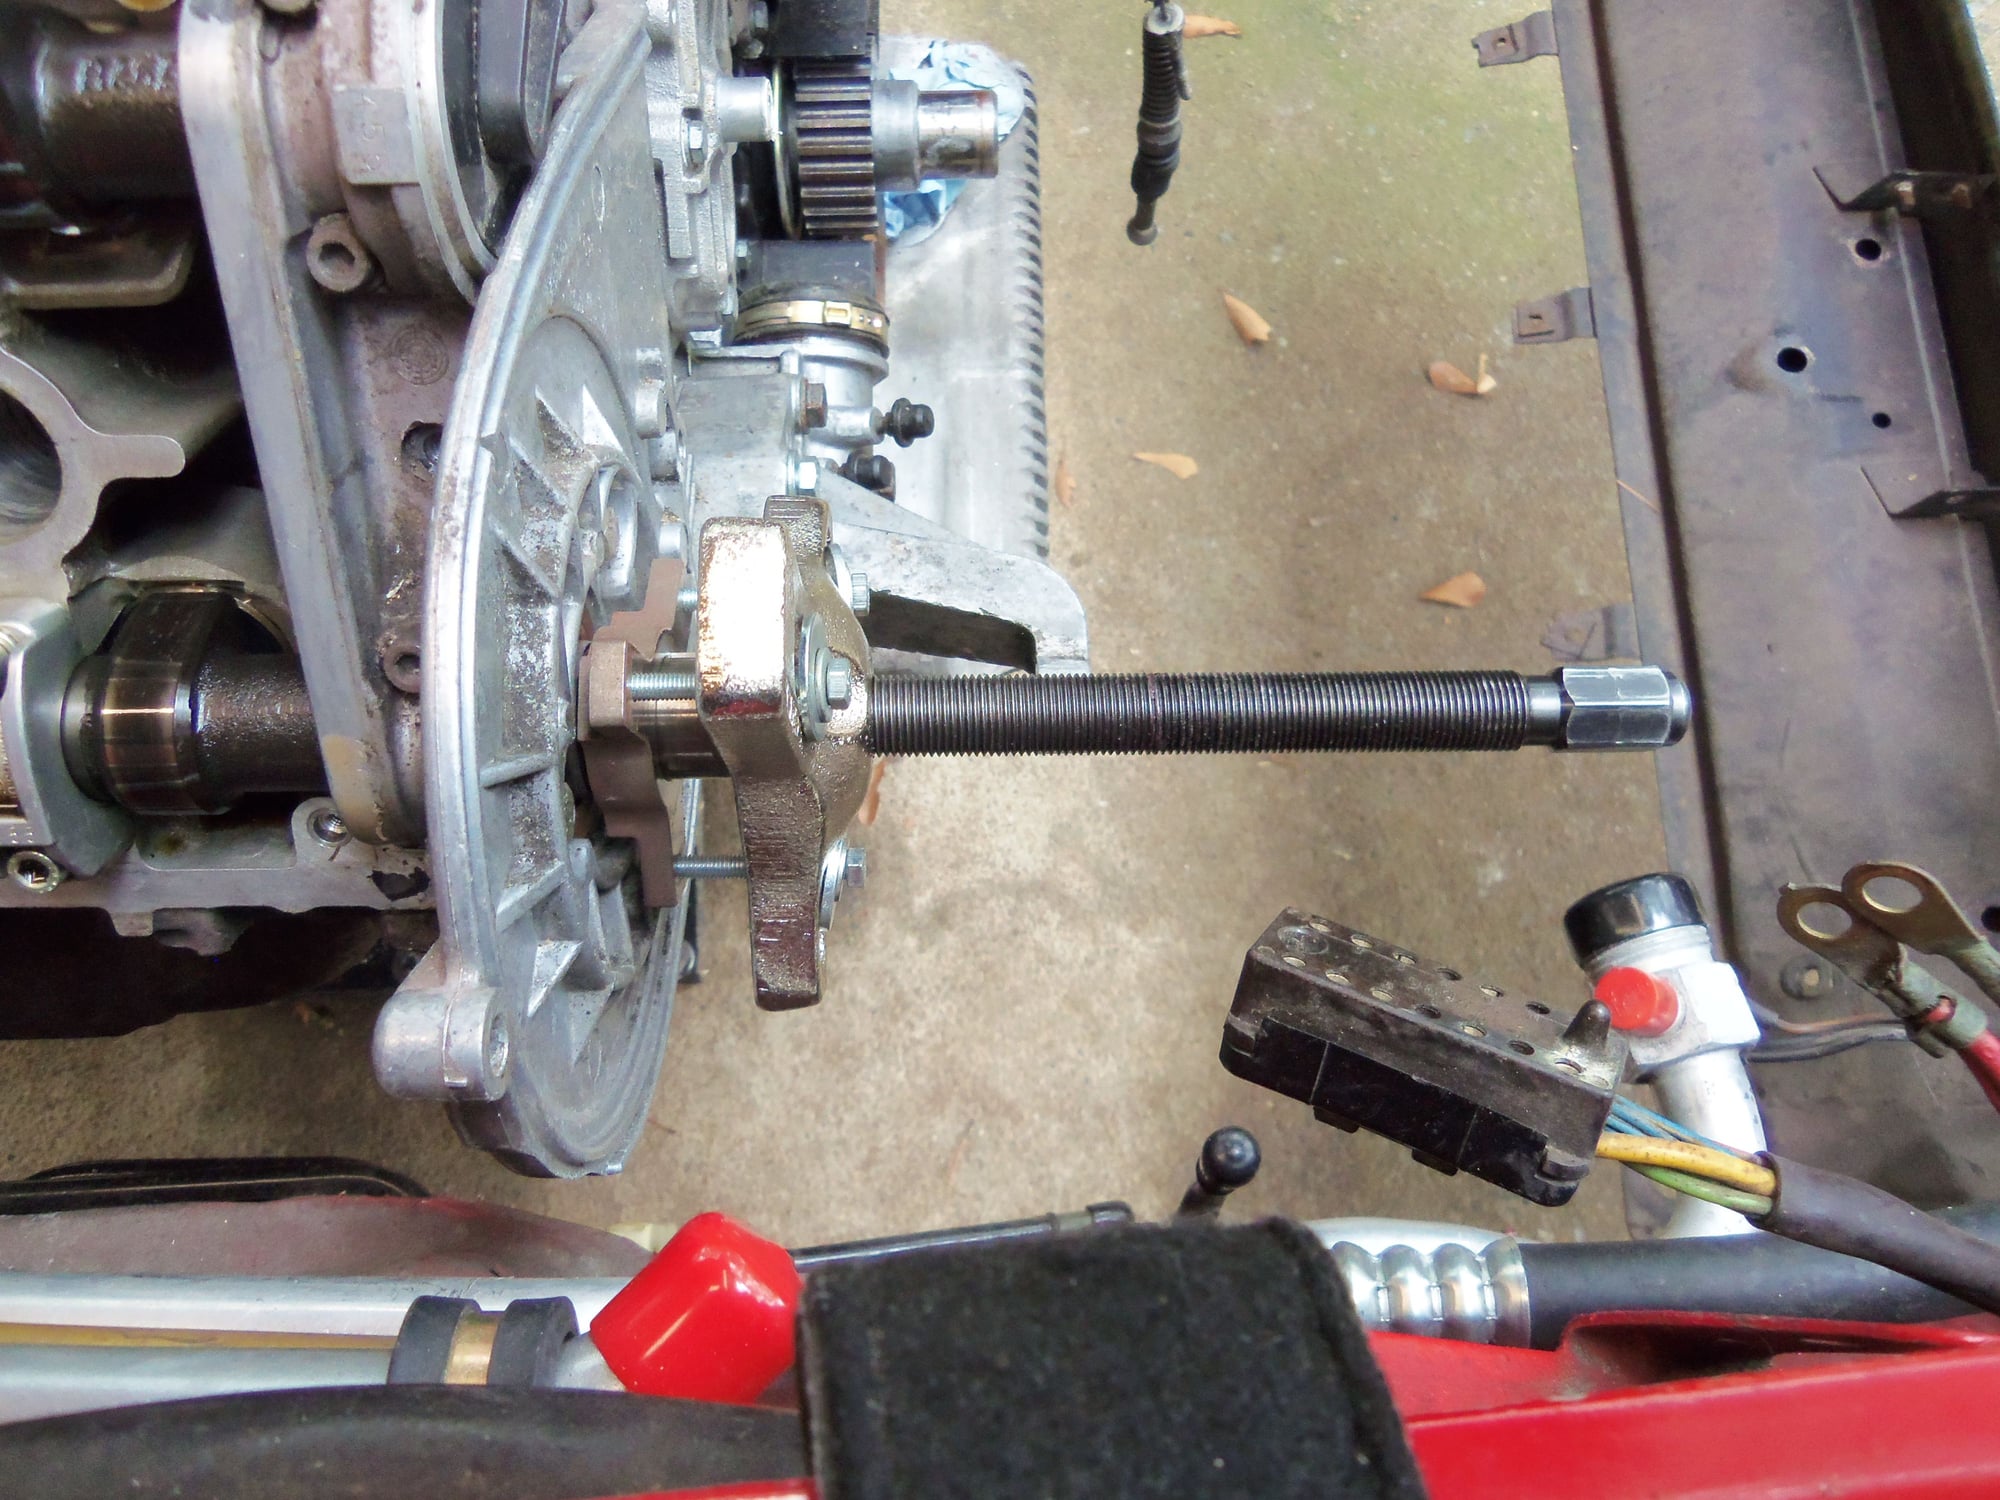
I pulled the cam sprocket, then used a puller to remove the hub from the nose of the exhaust camshaft. It took me a bit to find long enough 6mm bolts, but I made it work.
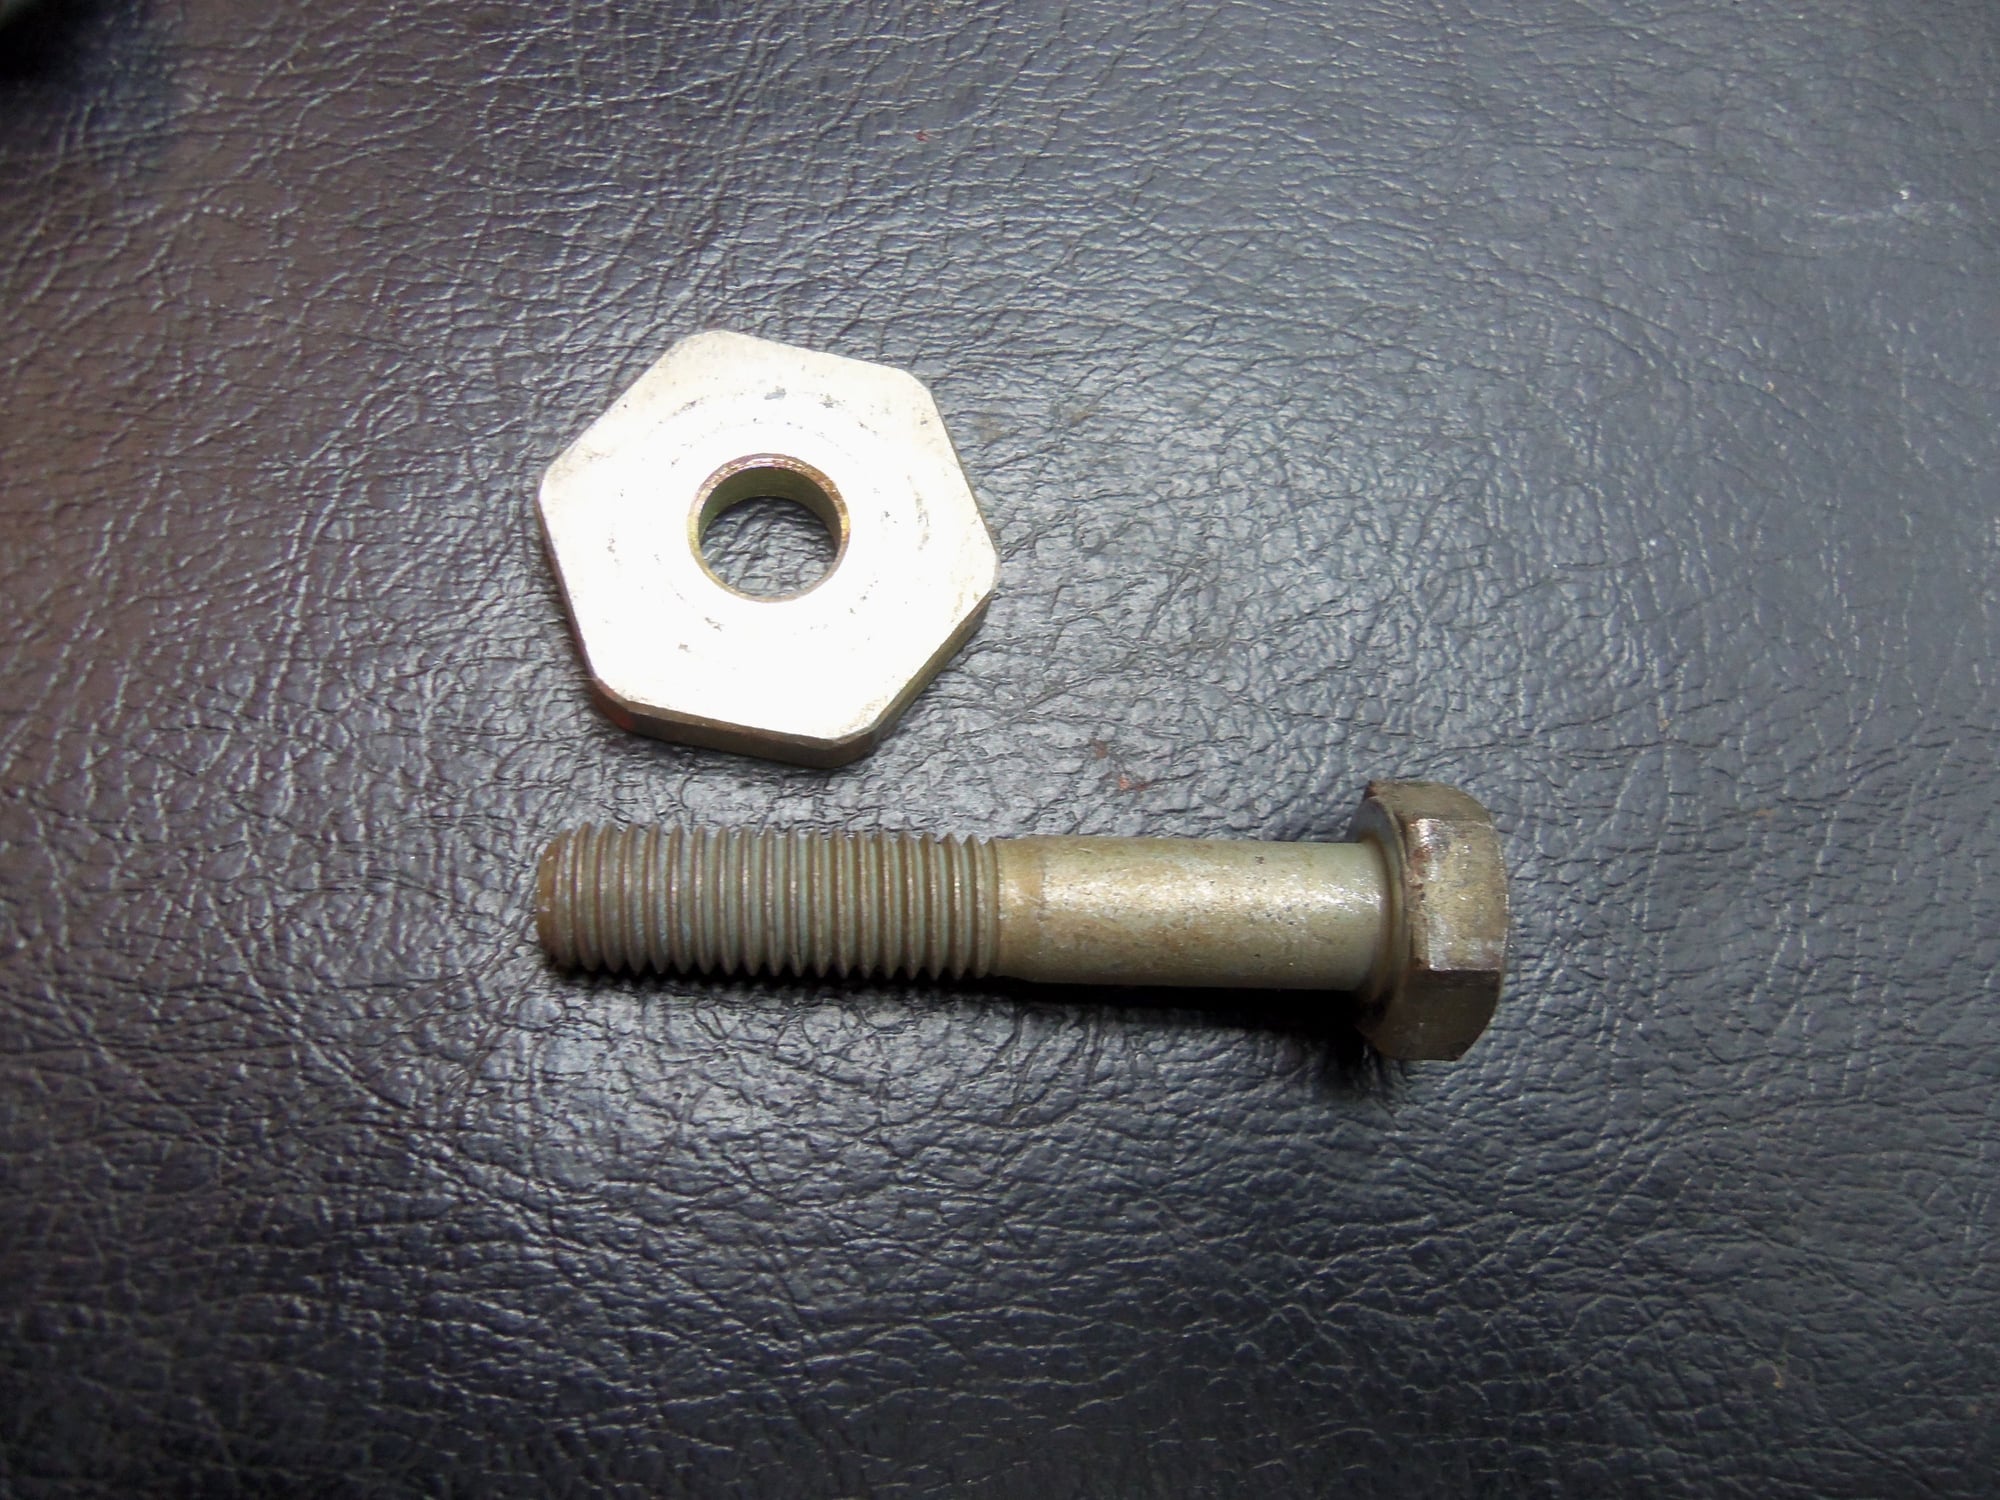
Cam sprocket bolt and hex washer.
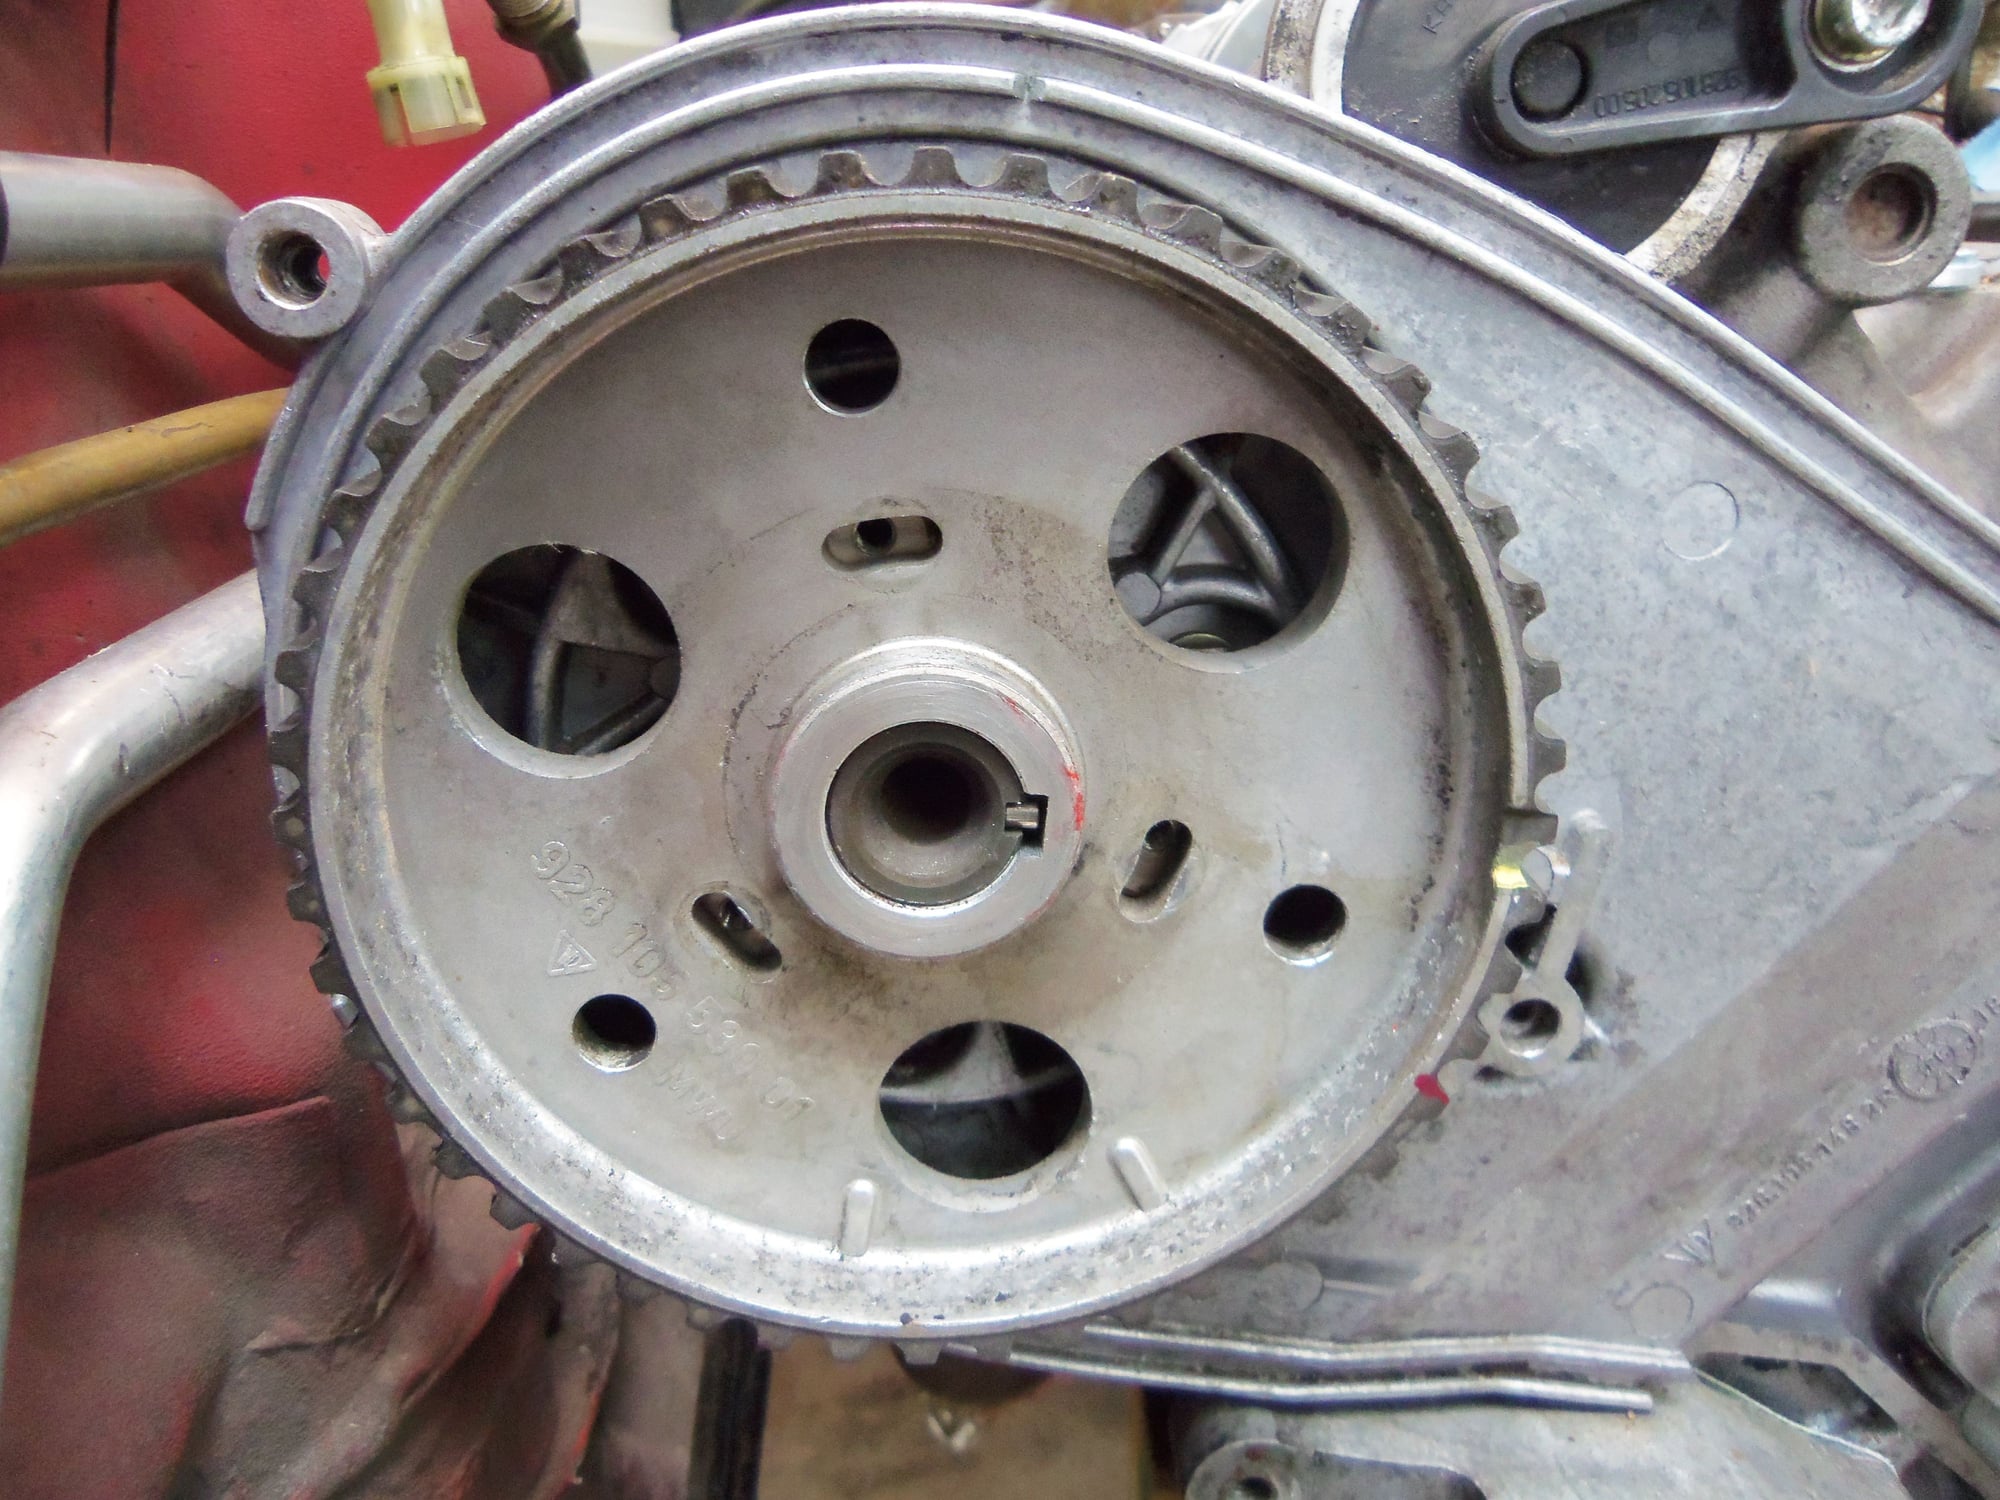
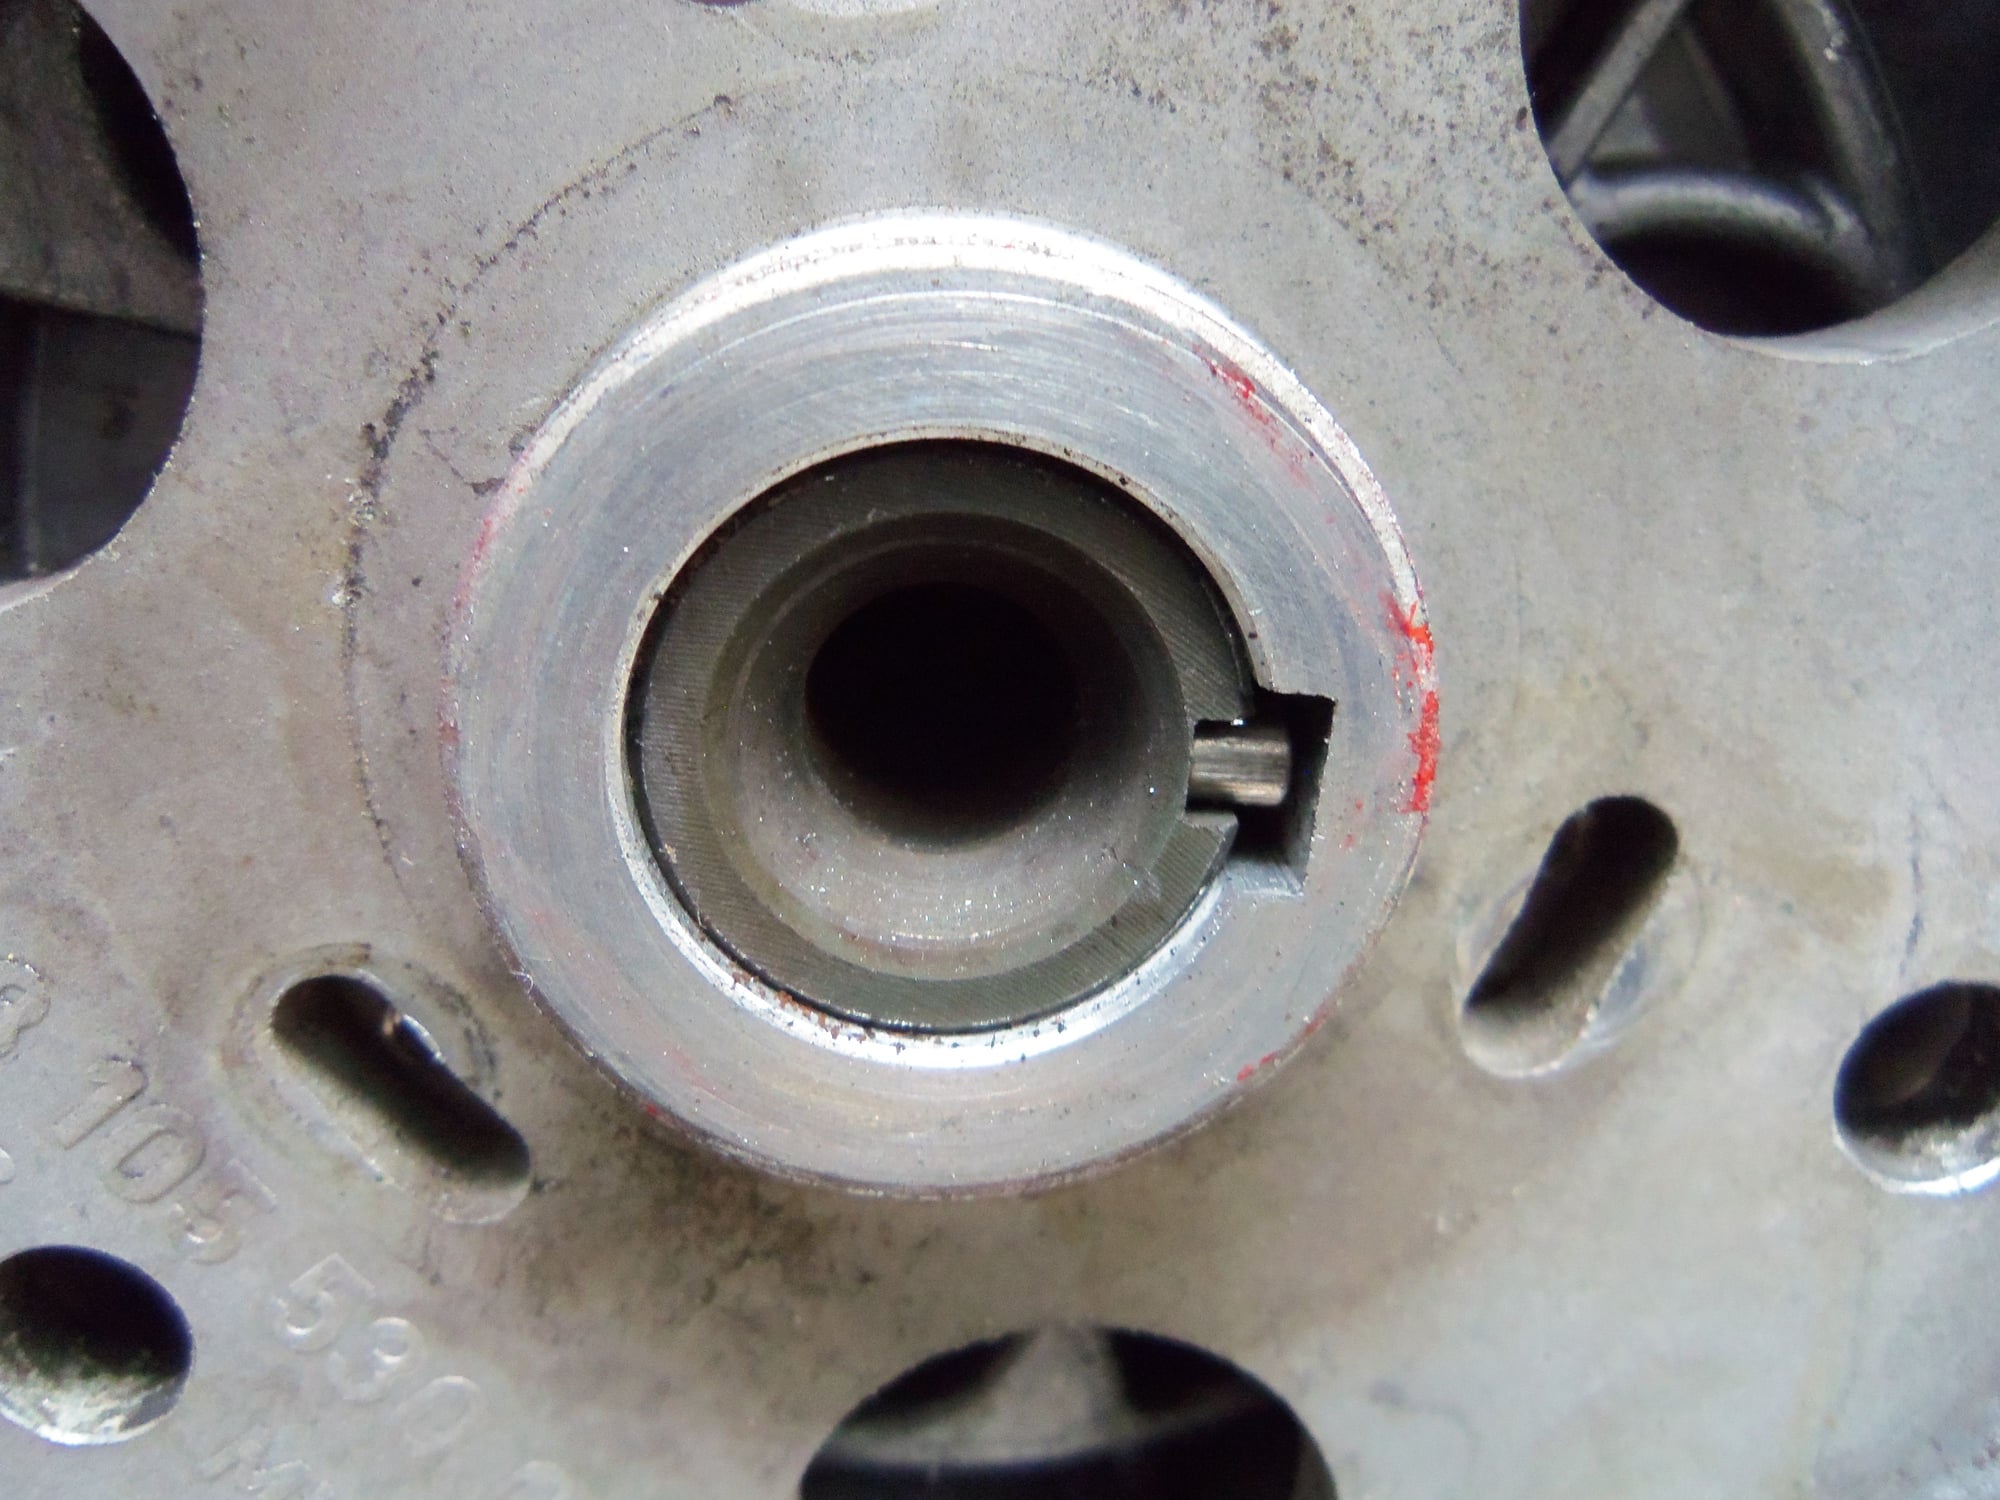
Did not realize the cam sprocket was keyed also. So, pretty much only one way to reassemble all this.
Keyway in sprocket is oversized to allow adjustment.
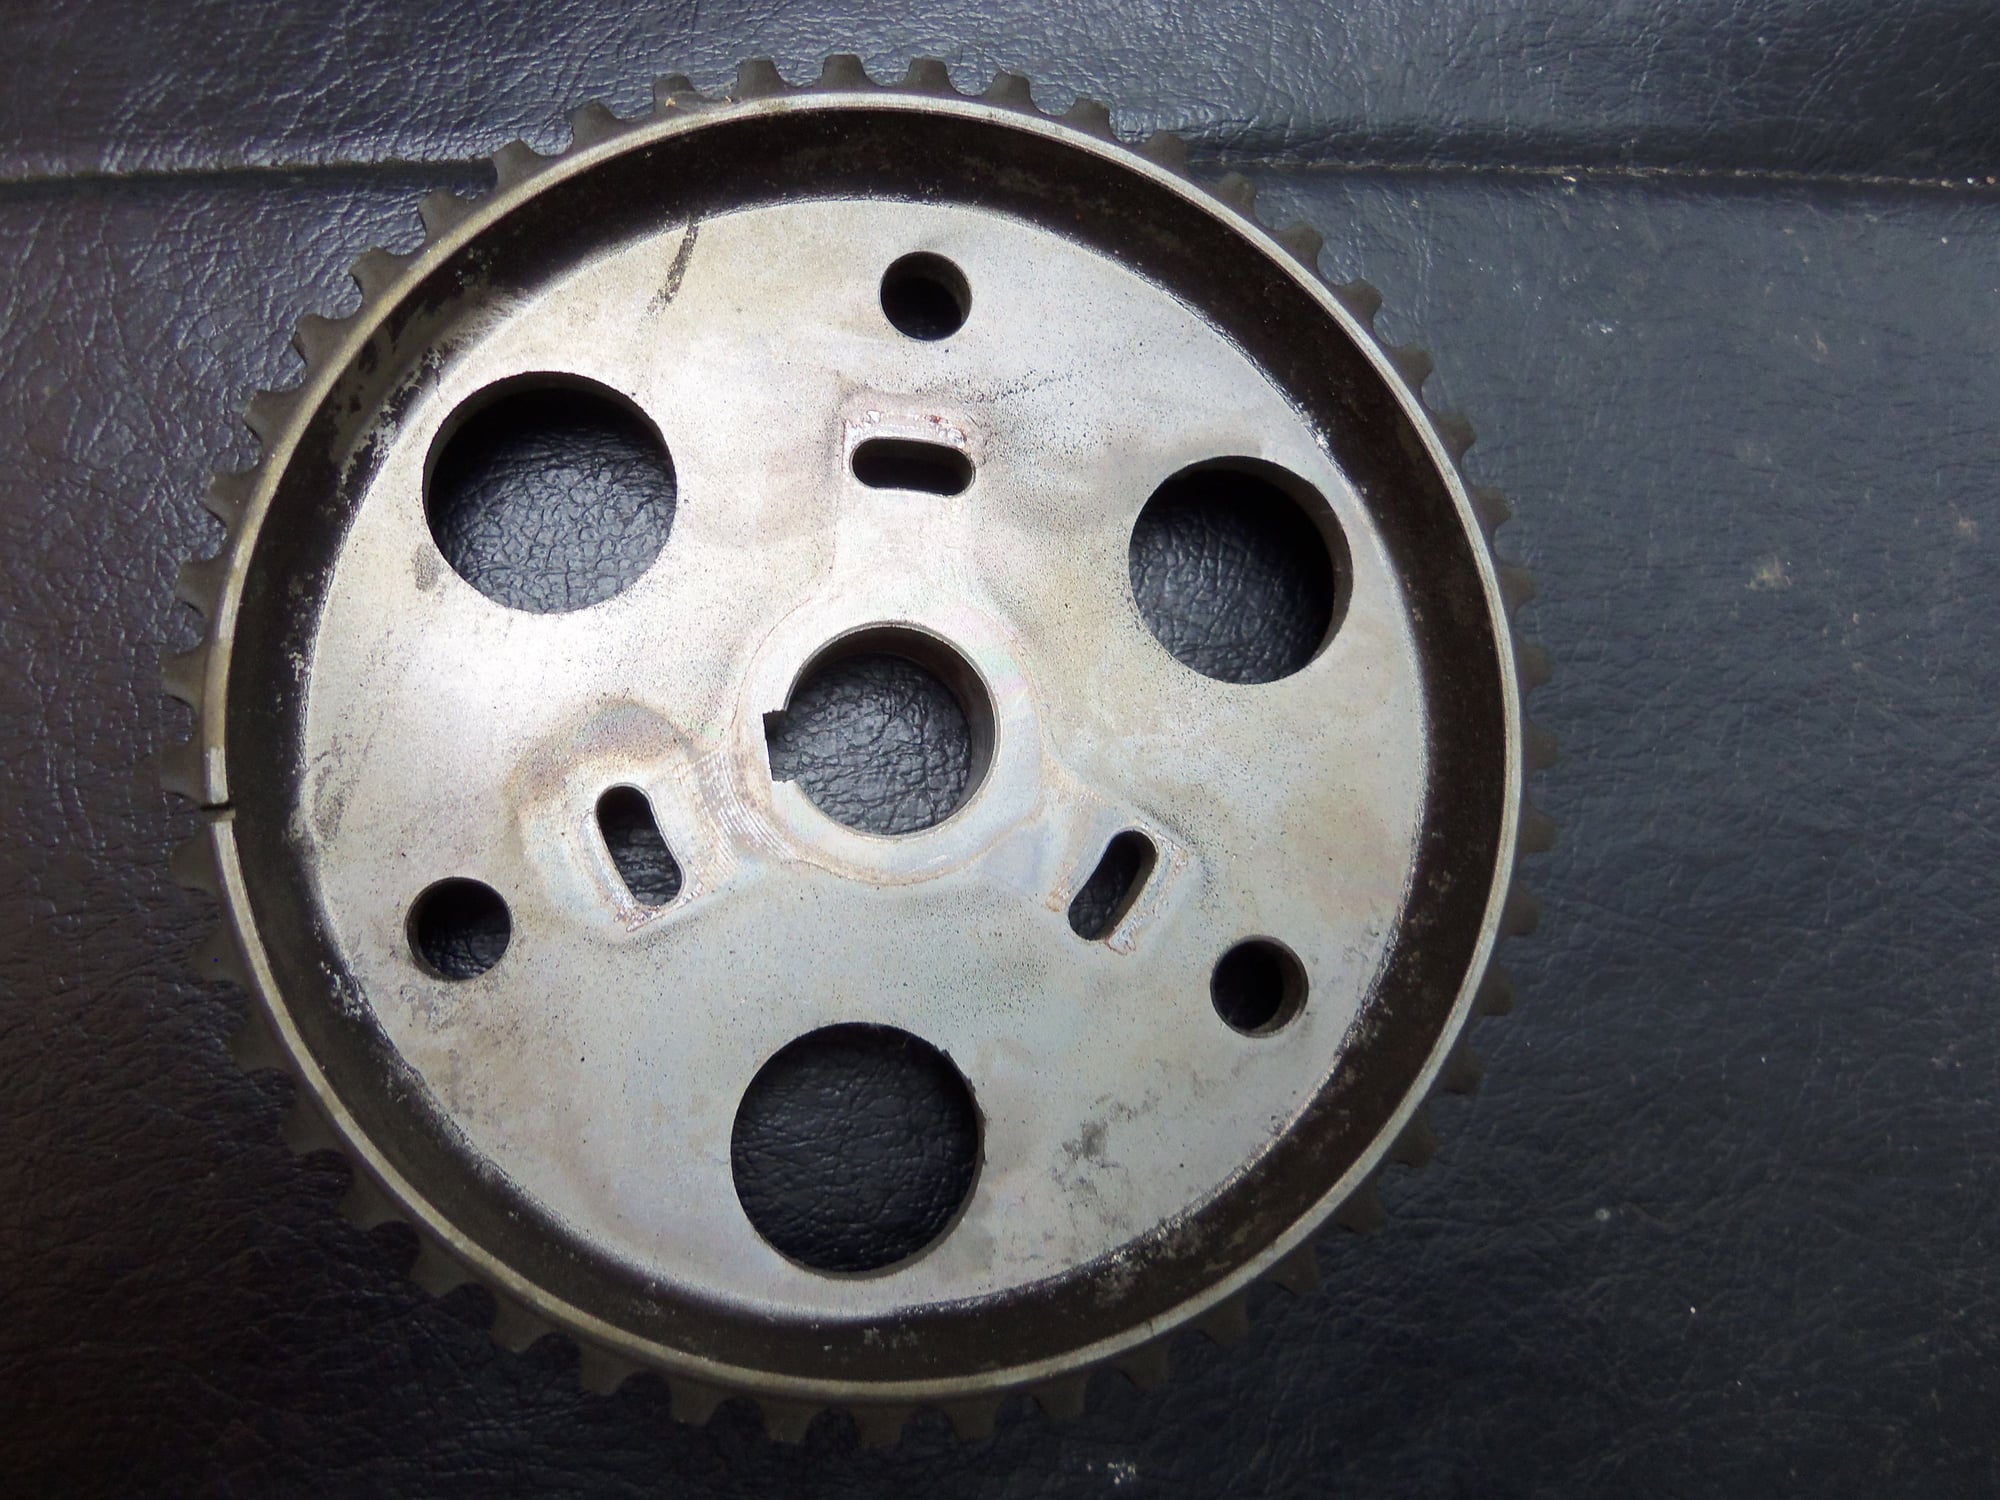
Backside of cam sprocket. Just because.
Cam sprocket hub and key.
Puller rigged up to remove the hub. DO NOT PRY!
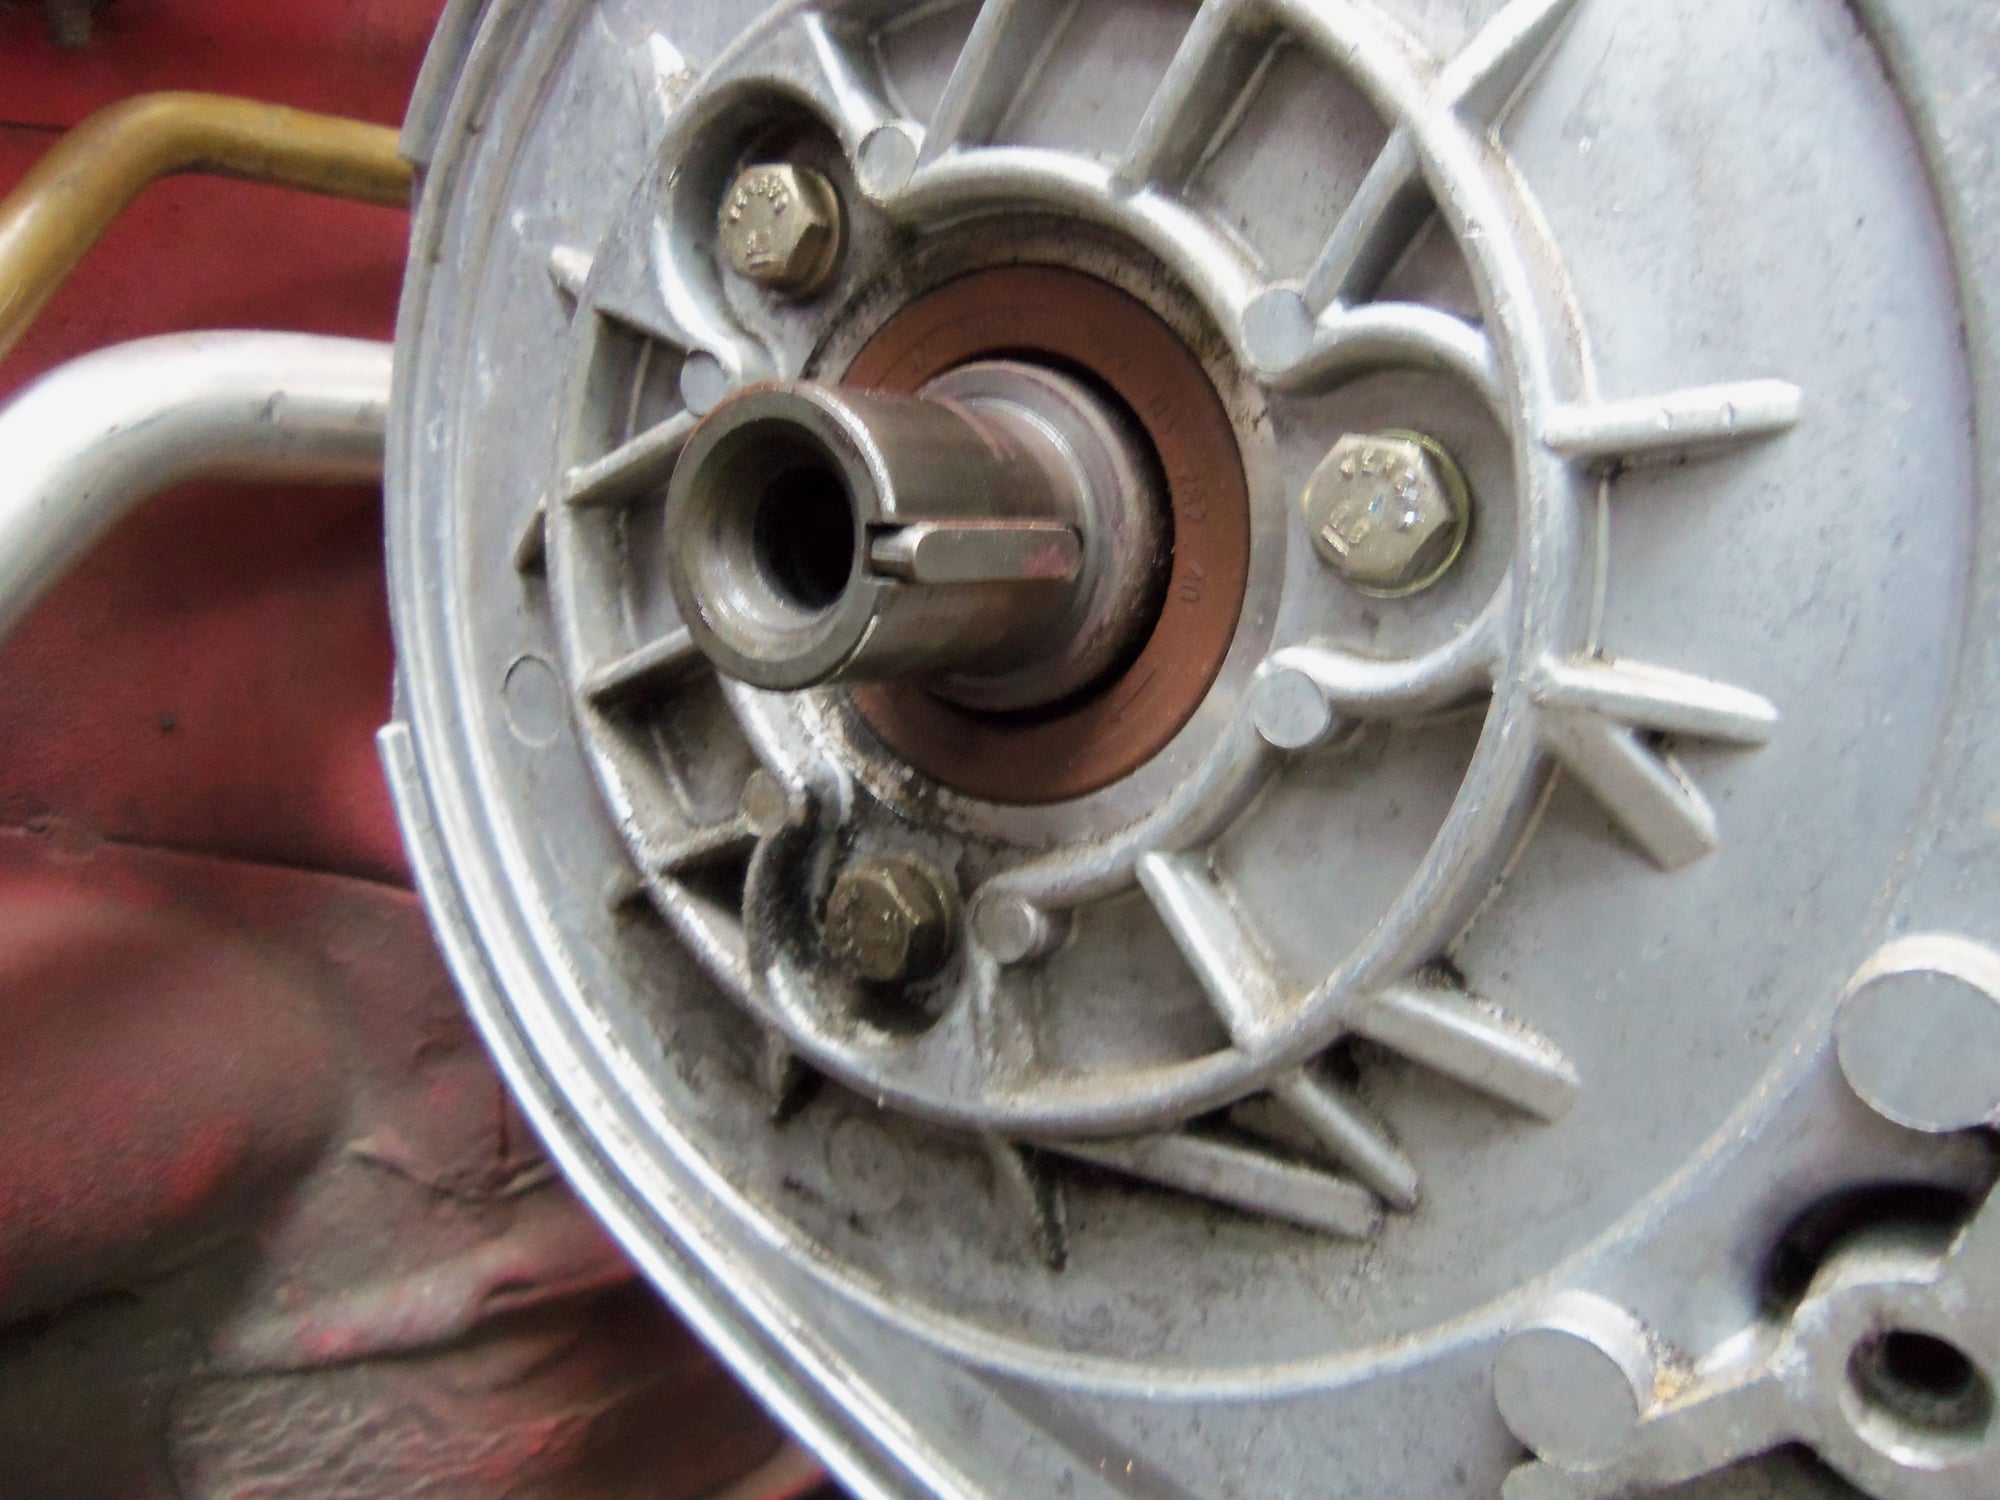
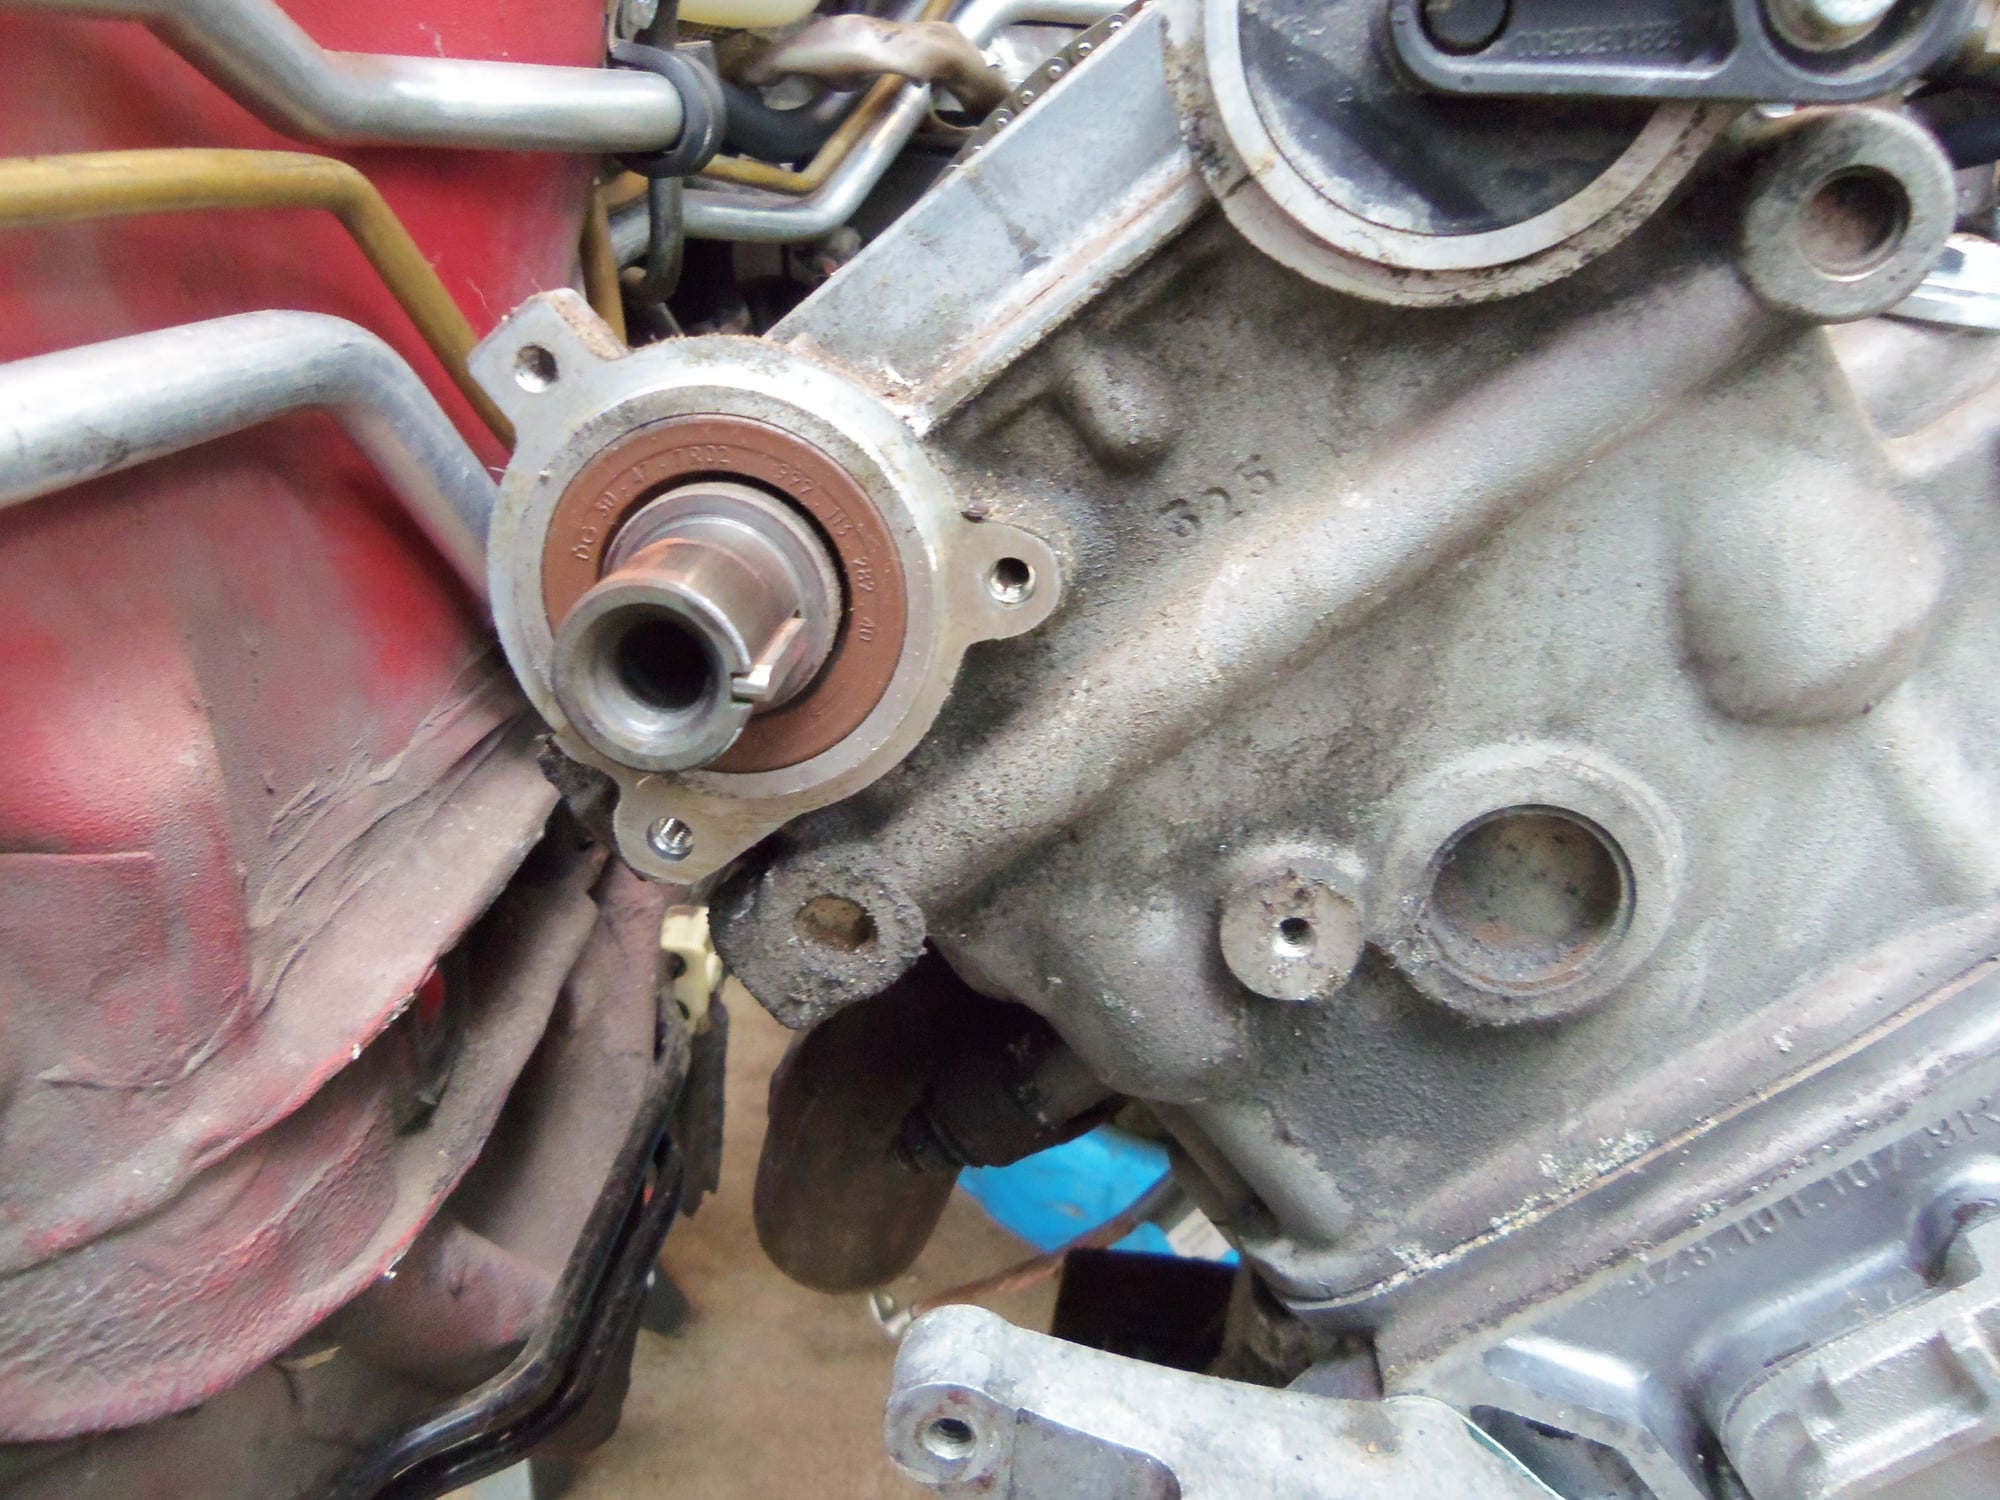
Nose of the cam is undamaged, and the key isn't mangled.
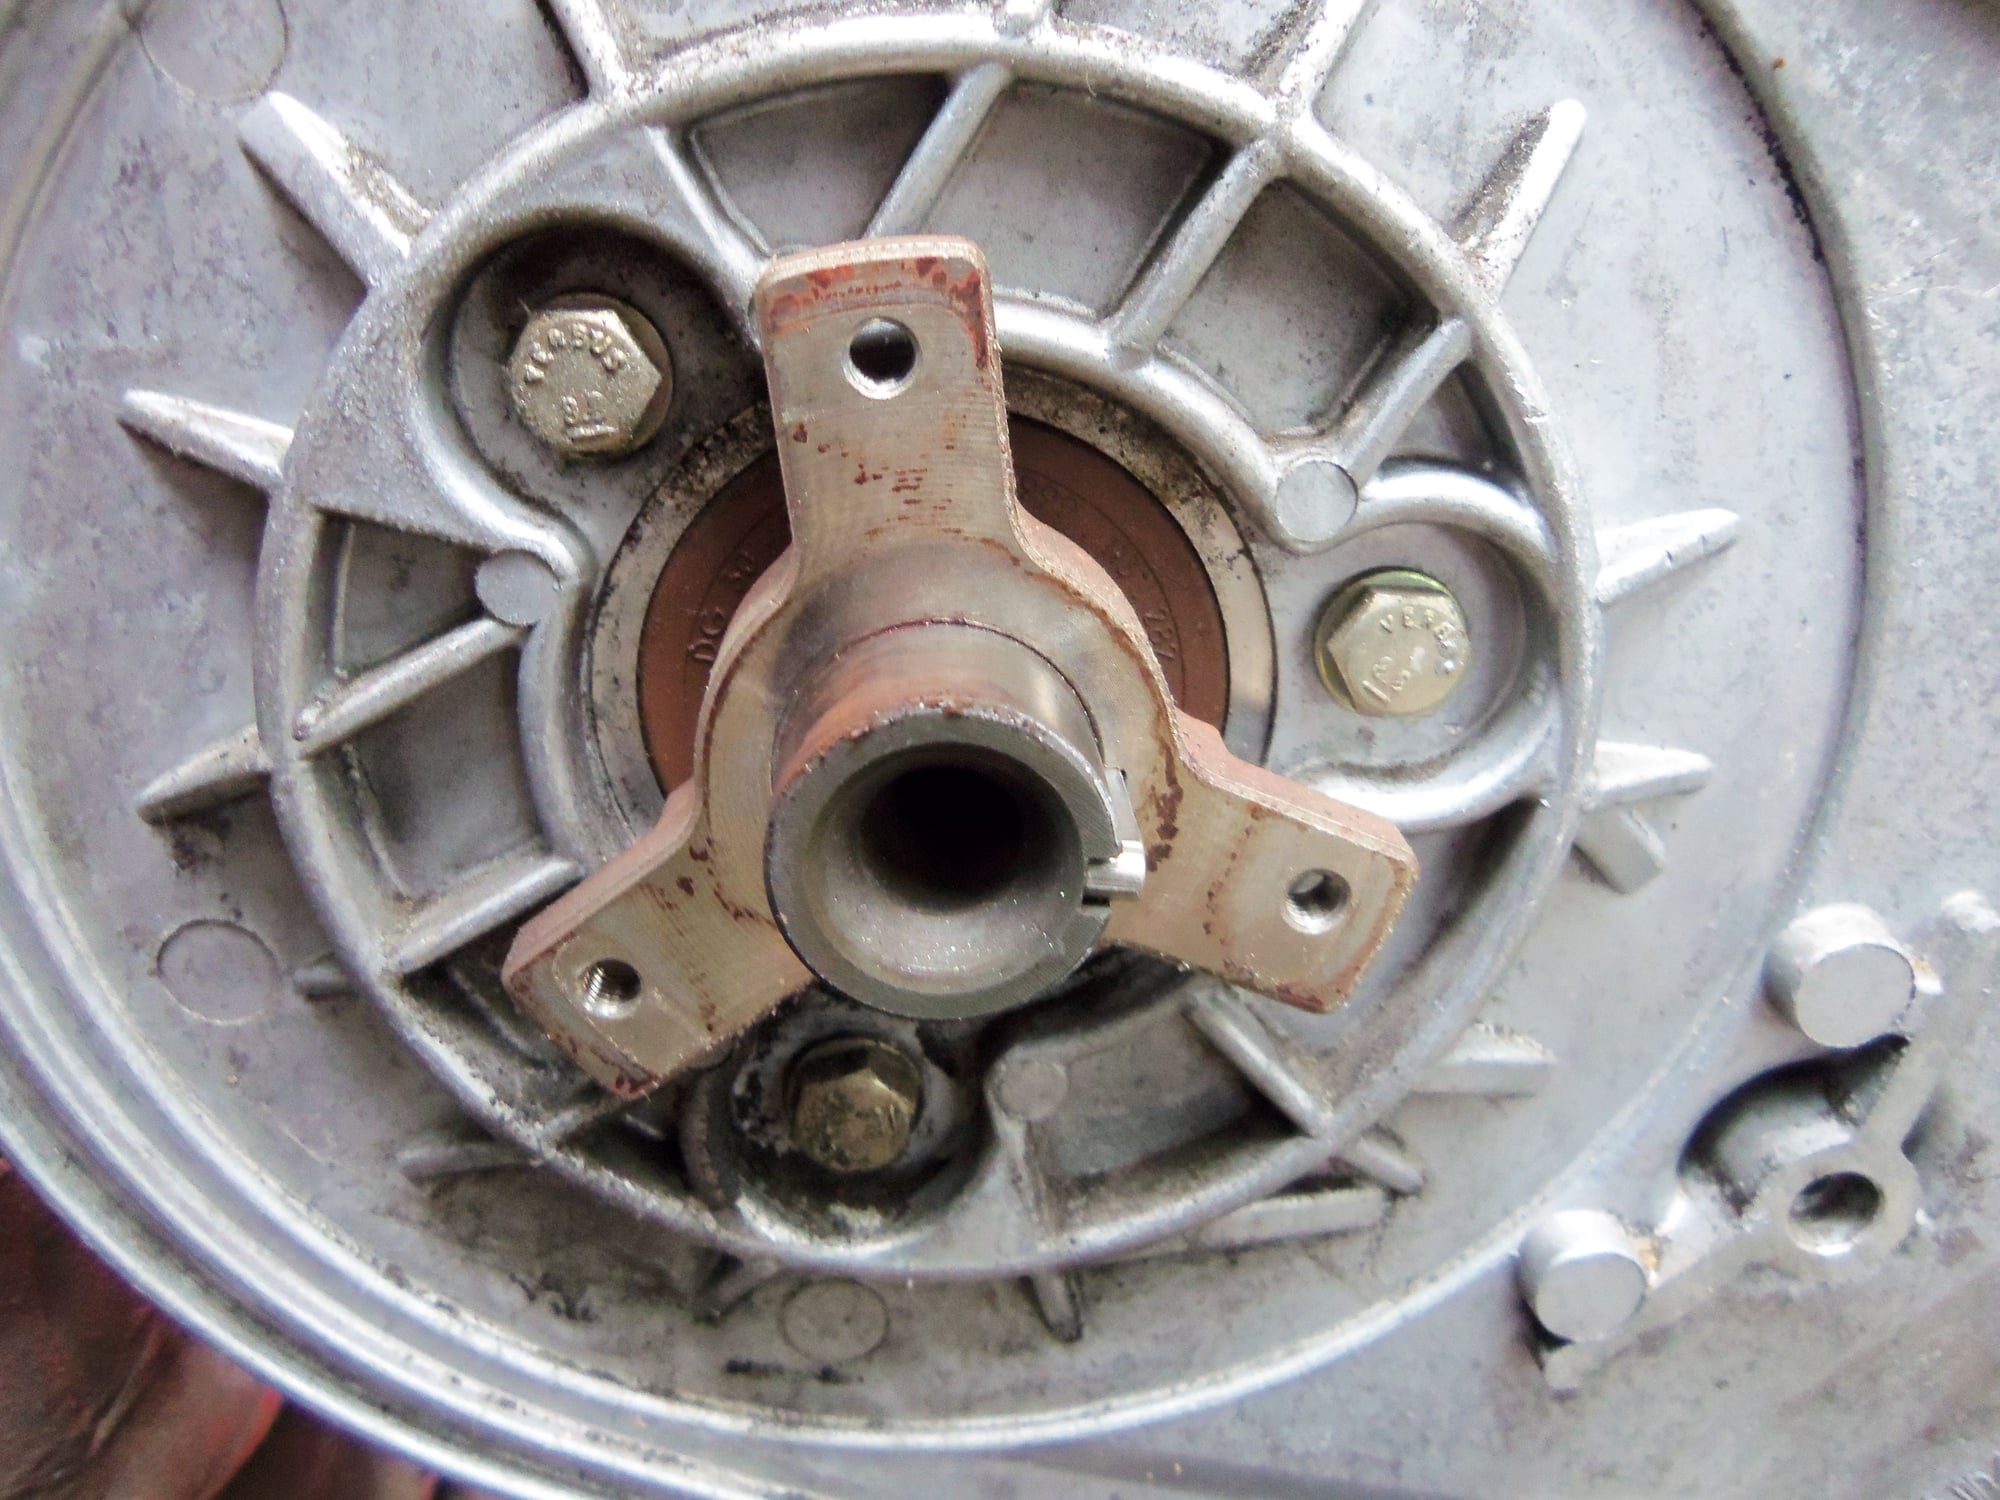
Camshaft hub.
Embarrassment here. Thought the camshaft seal was part of the sprocket back plate, ala' 16V engines. Nope. This explains why I could not find any kind of a seal in PET between the back plate and the head.
I did the same thing to the driver's side. Photos would look the same and be redundant.
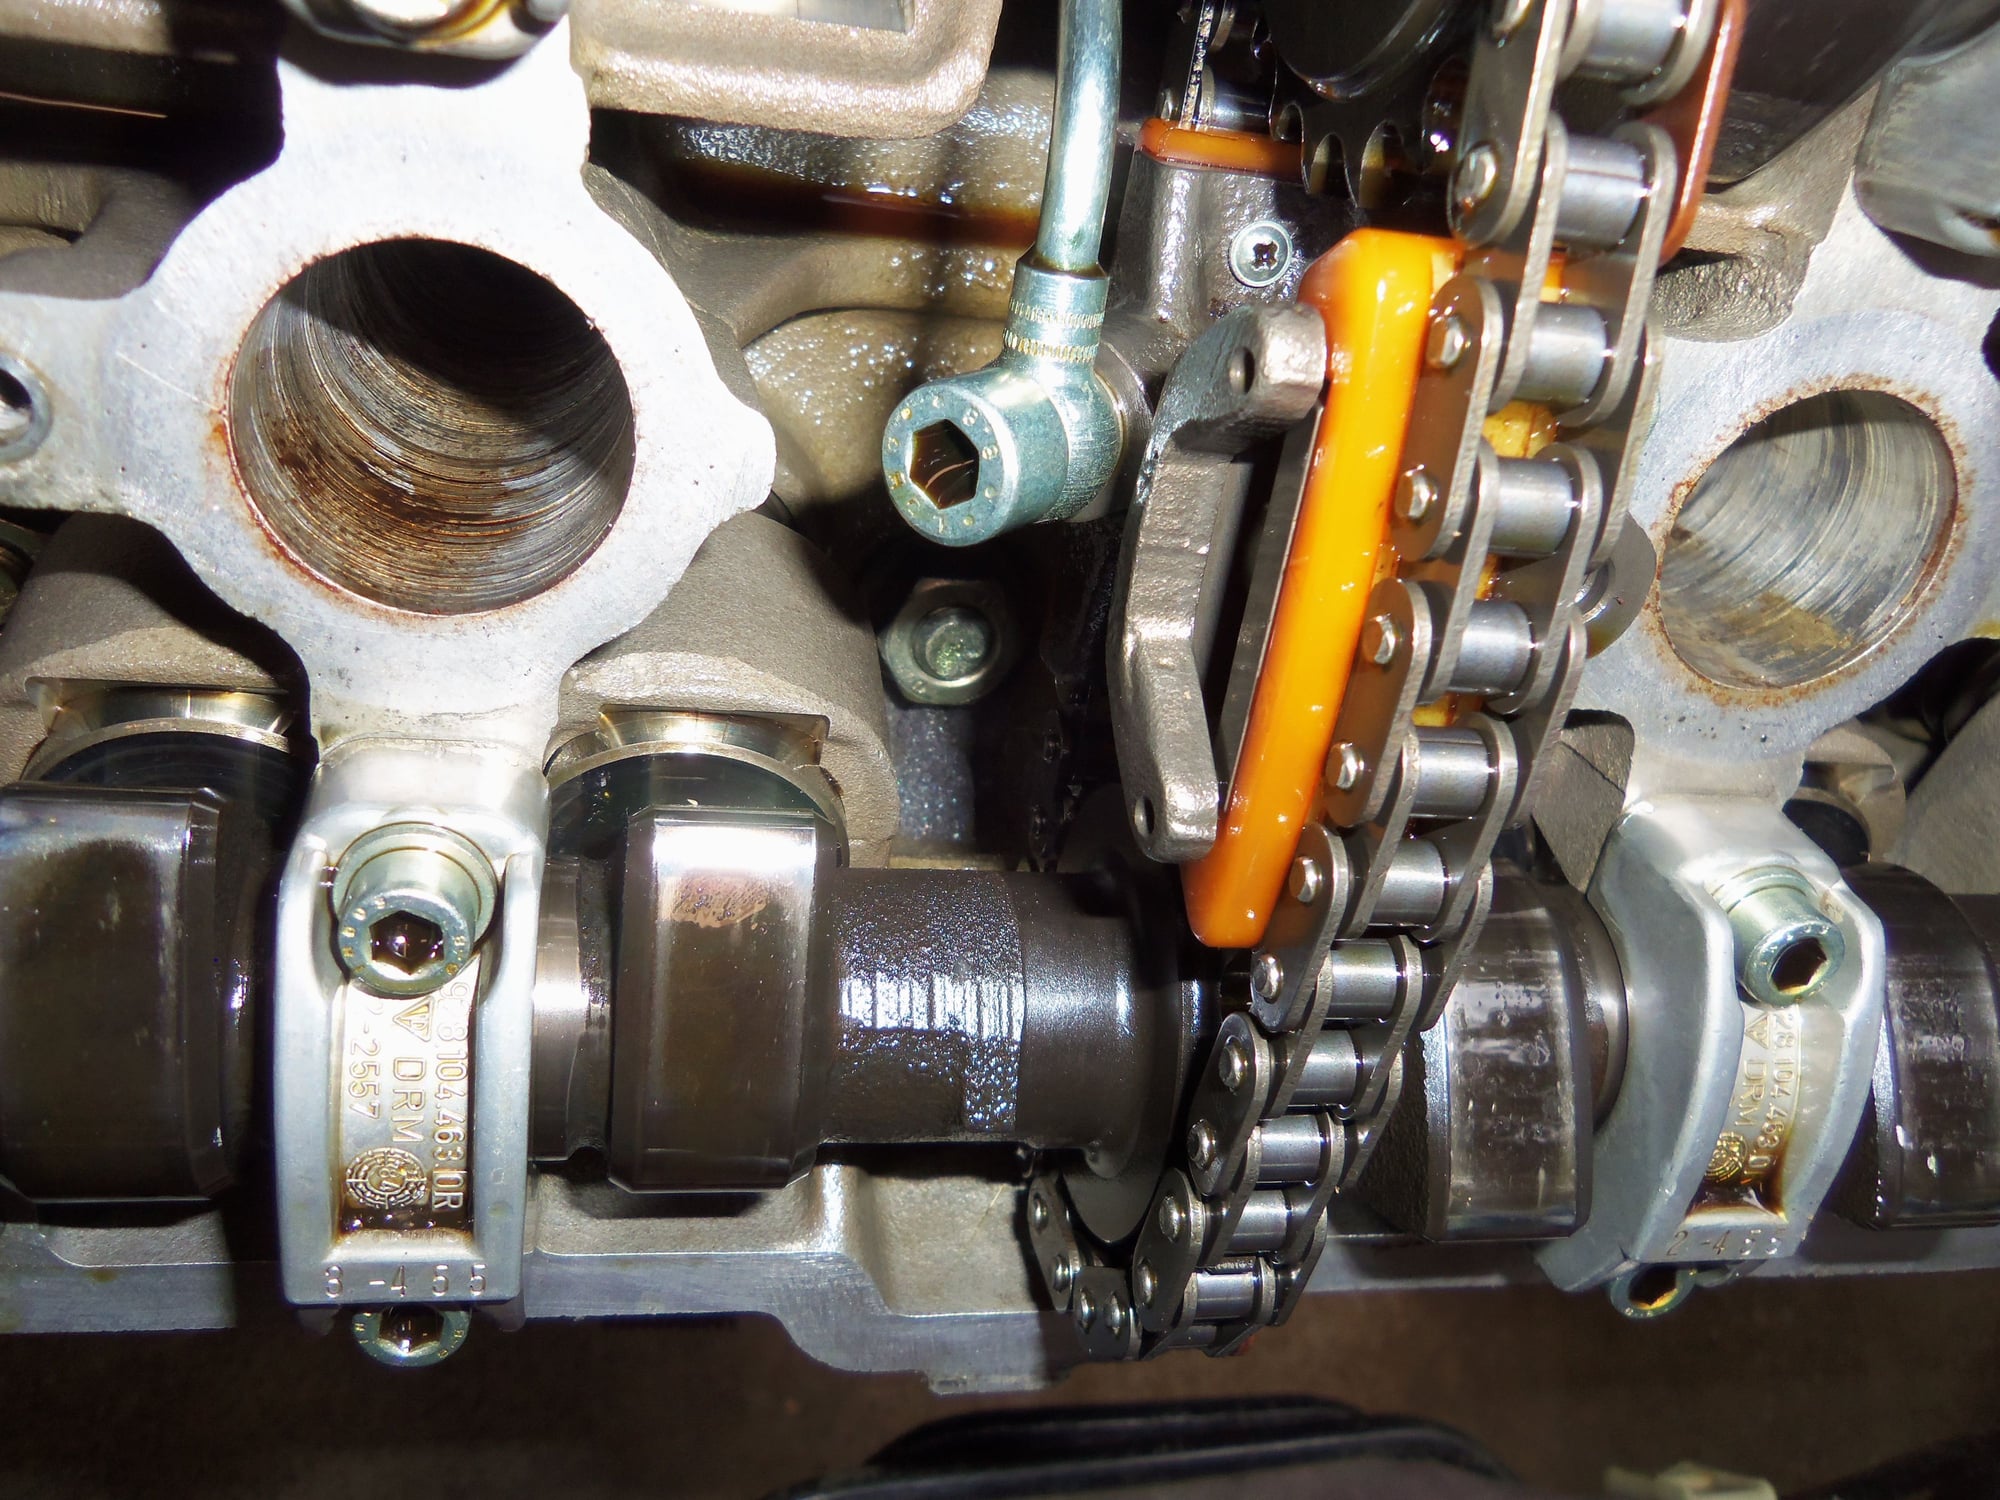
With both sets of camshafts lined up, sprockets/hubs/back plates pulled, I removed the chain tensioners.
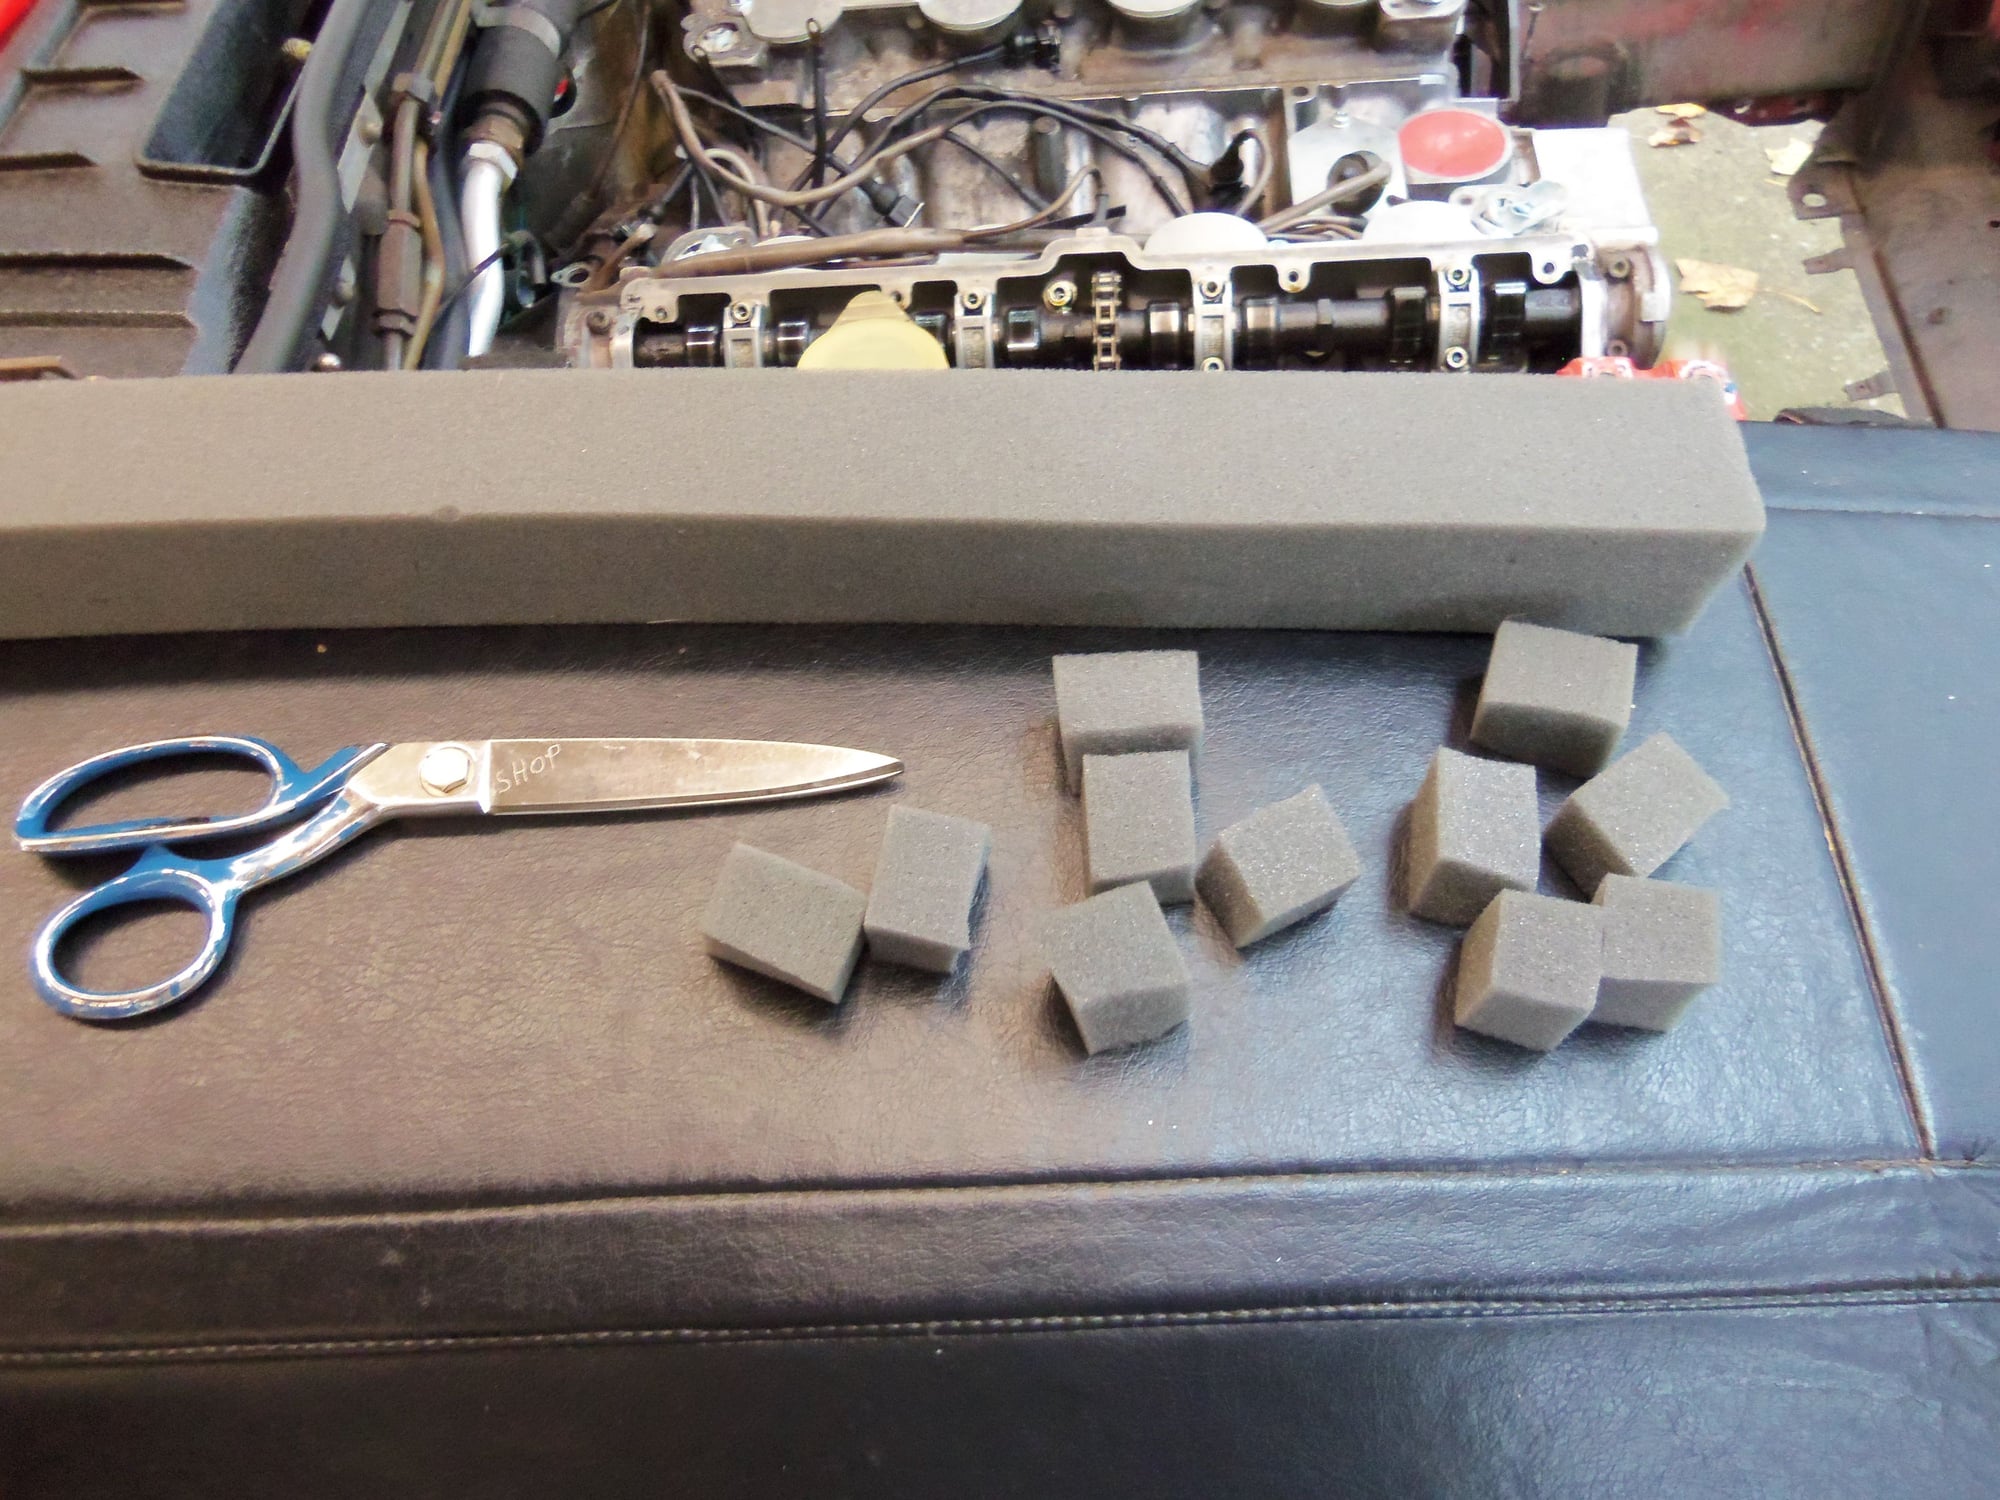
First, I cut up foam into little blocks and stuffed them into the oil drain ports at the bottoms of the cylinder heads.
Foam cut into small blocks. Totally stole this idea from someone on Rennlist.
Note foam block stuffed into oil drain back port.
You can just see the block of foam under the head nut, under the cam chain.
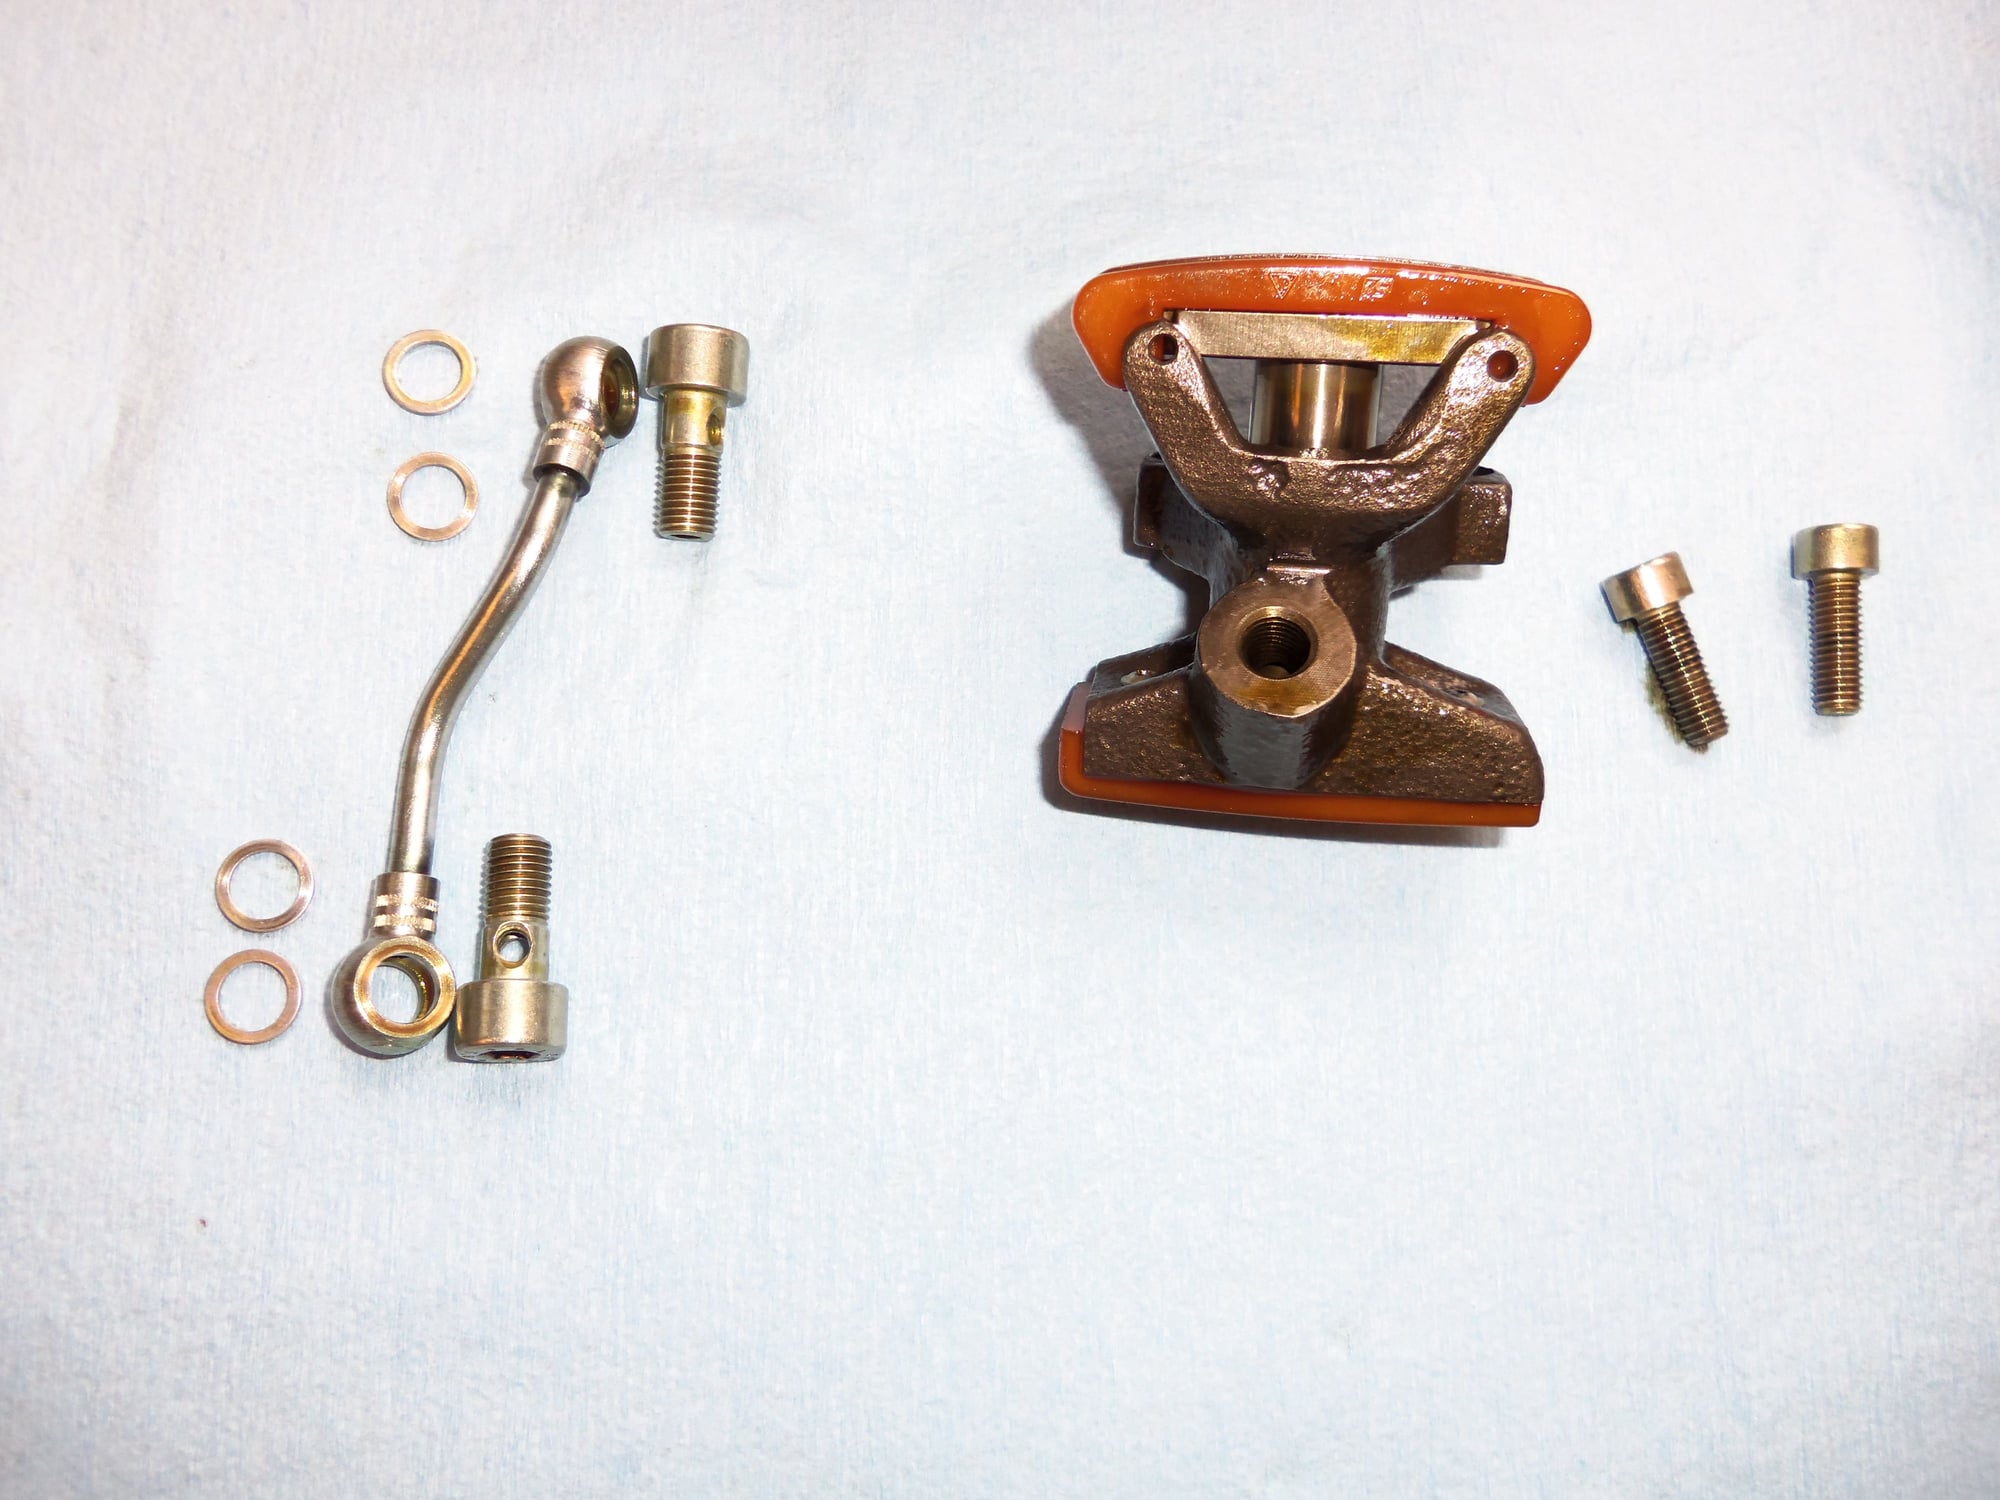
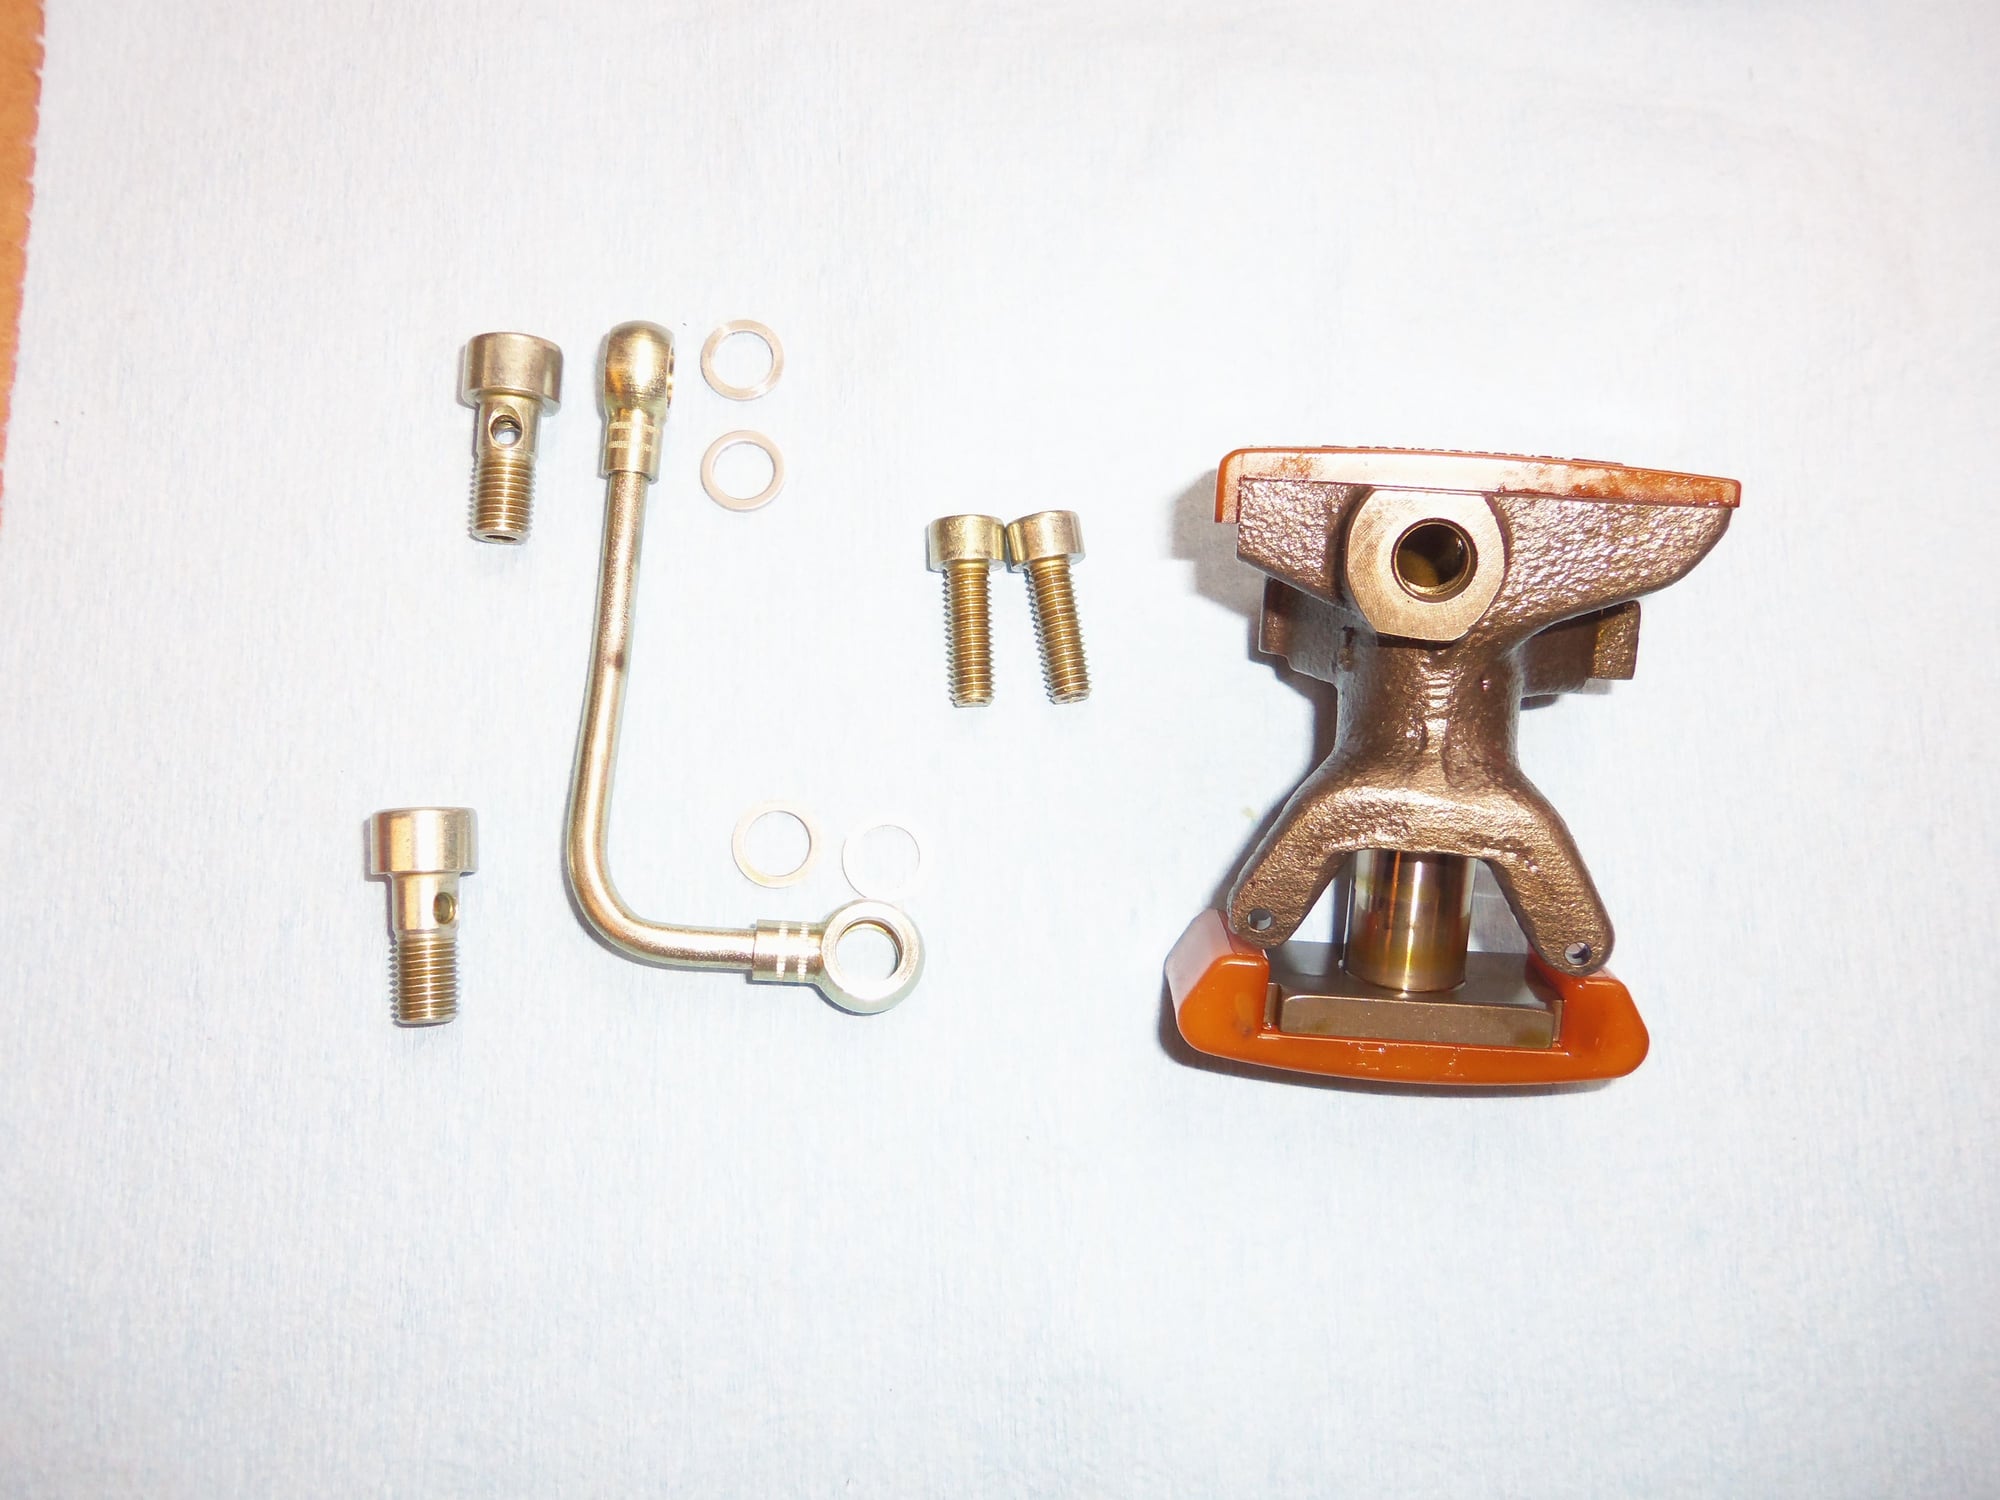
Both cam chain tensioners came out without much fuss. Being paranoid about the little sealing washers, I had a hooked pick handy. As I removed the banjo bolt and moved the line, I hooked the sealing washer next to the head/tensioner and pulled it out. Did not drop any of them.
Turns out what I thought was a spring was just hydraulic springing inside the tensioner. I think. Either way, there was no spring inside either tensioner. Which I believe is correct from reading other Rennlist posts about S4 tensioners.
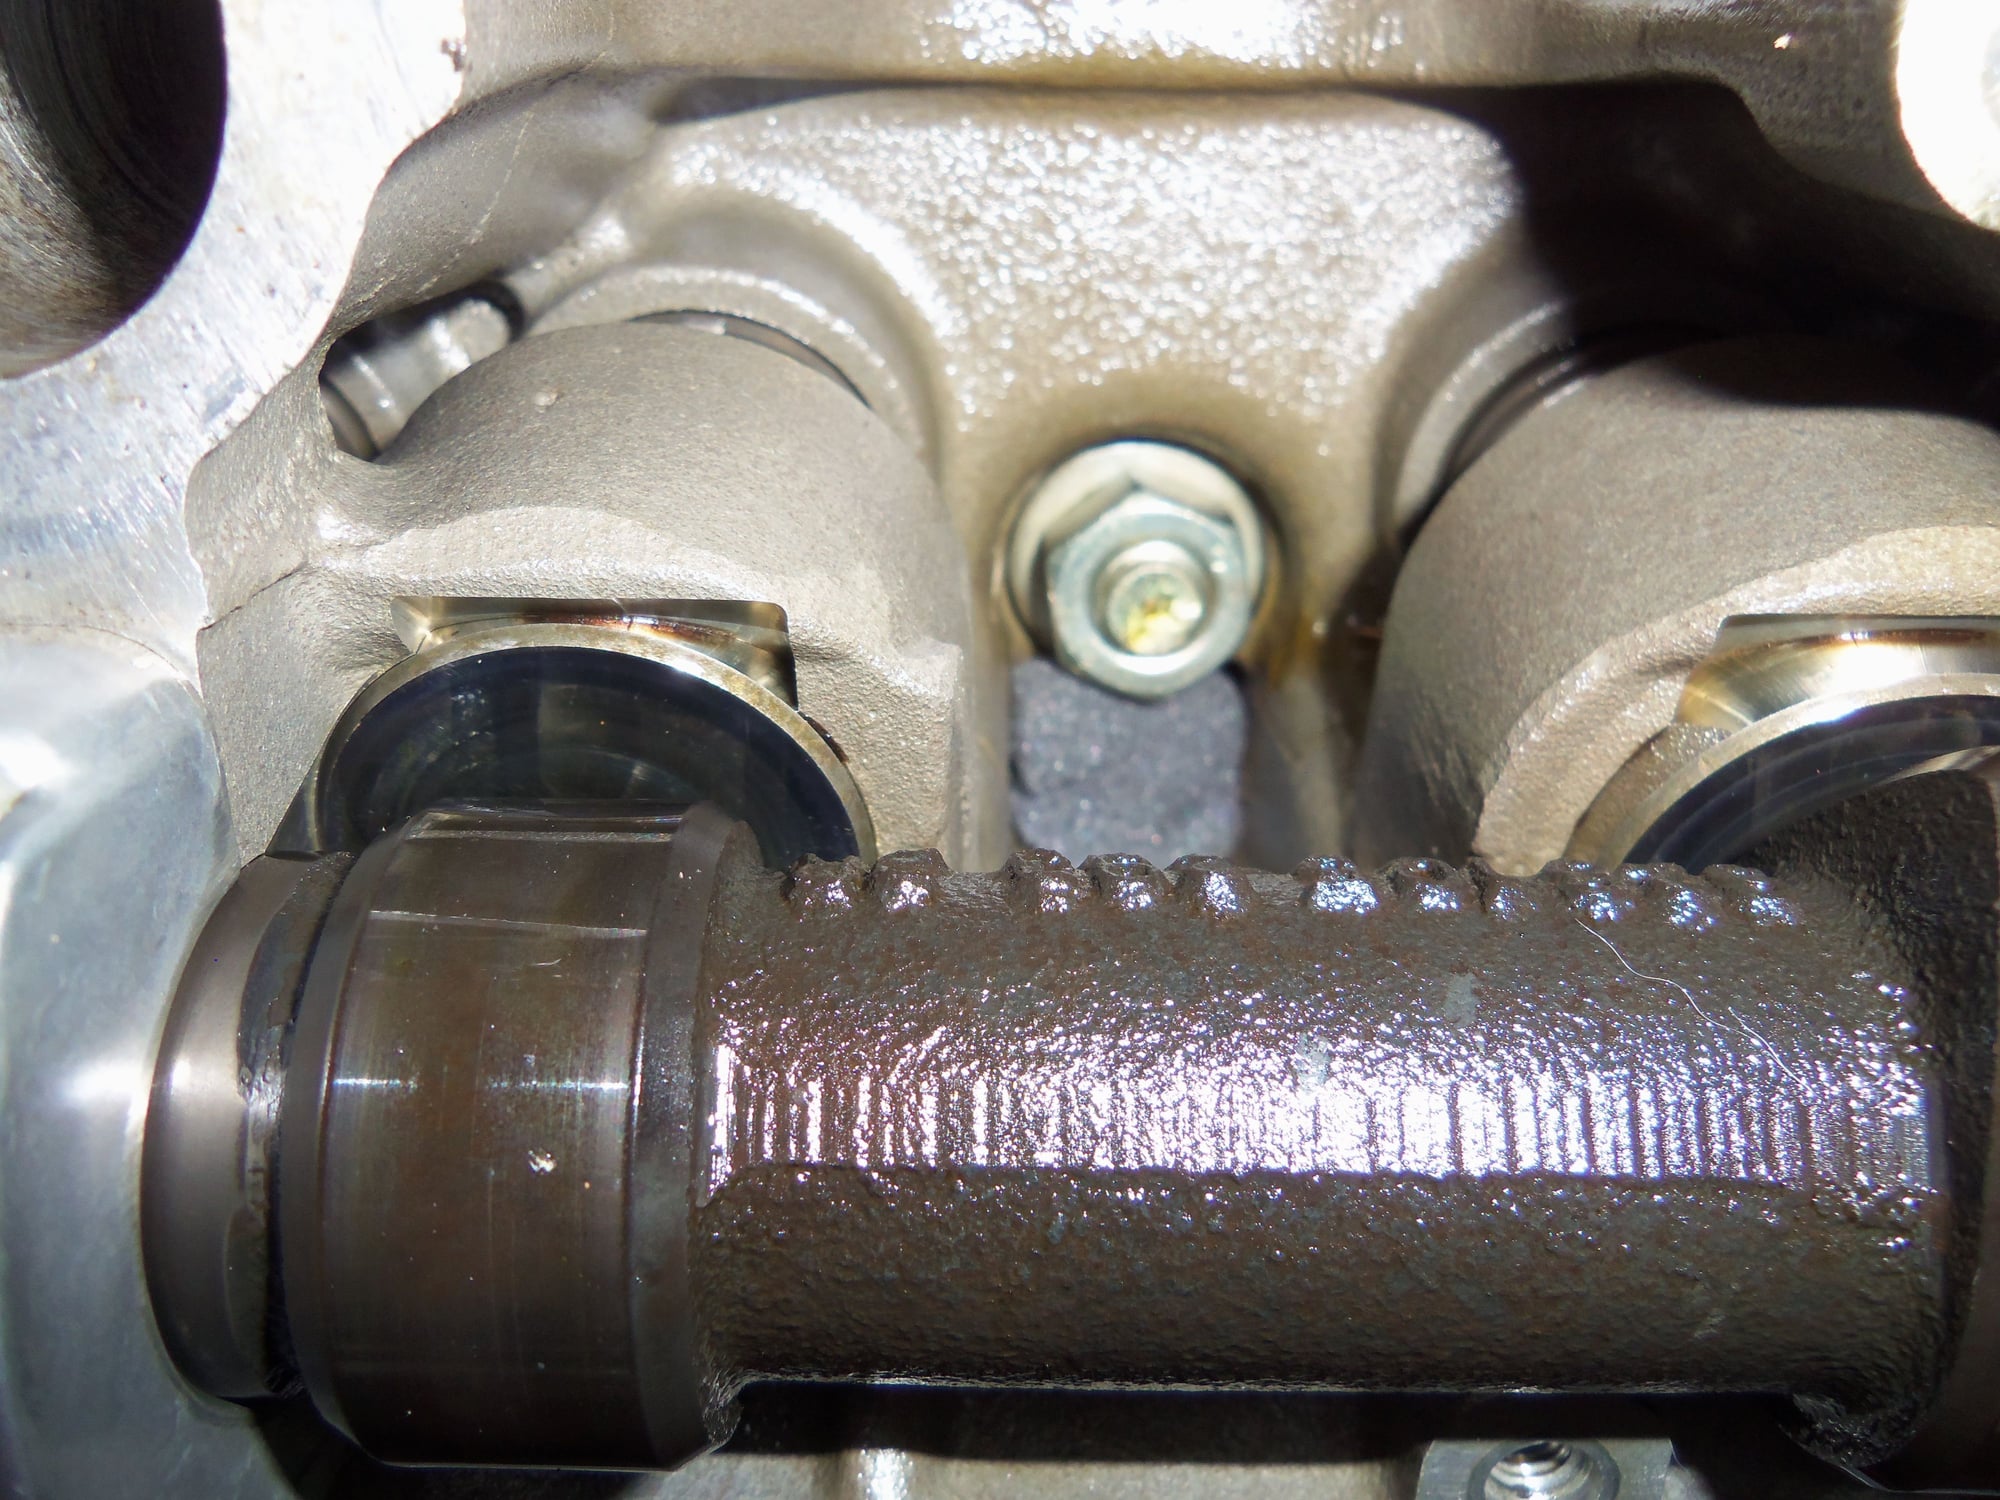
The bottom pads had some significant wear in them, but they are all getting replaced.
EDIT!!! CORRECTION:This information is incorrect: "Turns out what I thought was a spring was just hydraulic springing inside the tensioner. I think. Either way, there was no spring inside either tensioner. Which I believe is correct from reading other Rennlist posts about S4 tensioners." There IS a spring inside the body of the S4 tensioner. It is internal and does not come out when the plunger is removed. ONLY the earlier S3 tensioner has the spring that comes out when the plunger is removed from the tensioner body. If you are a newbie, do NOT go by whether the tensioner is spring loaded for your determination on which it is, S3 or S4.
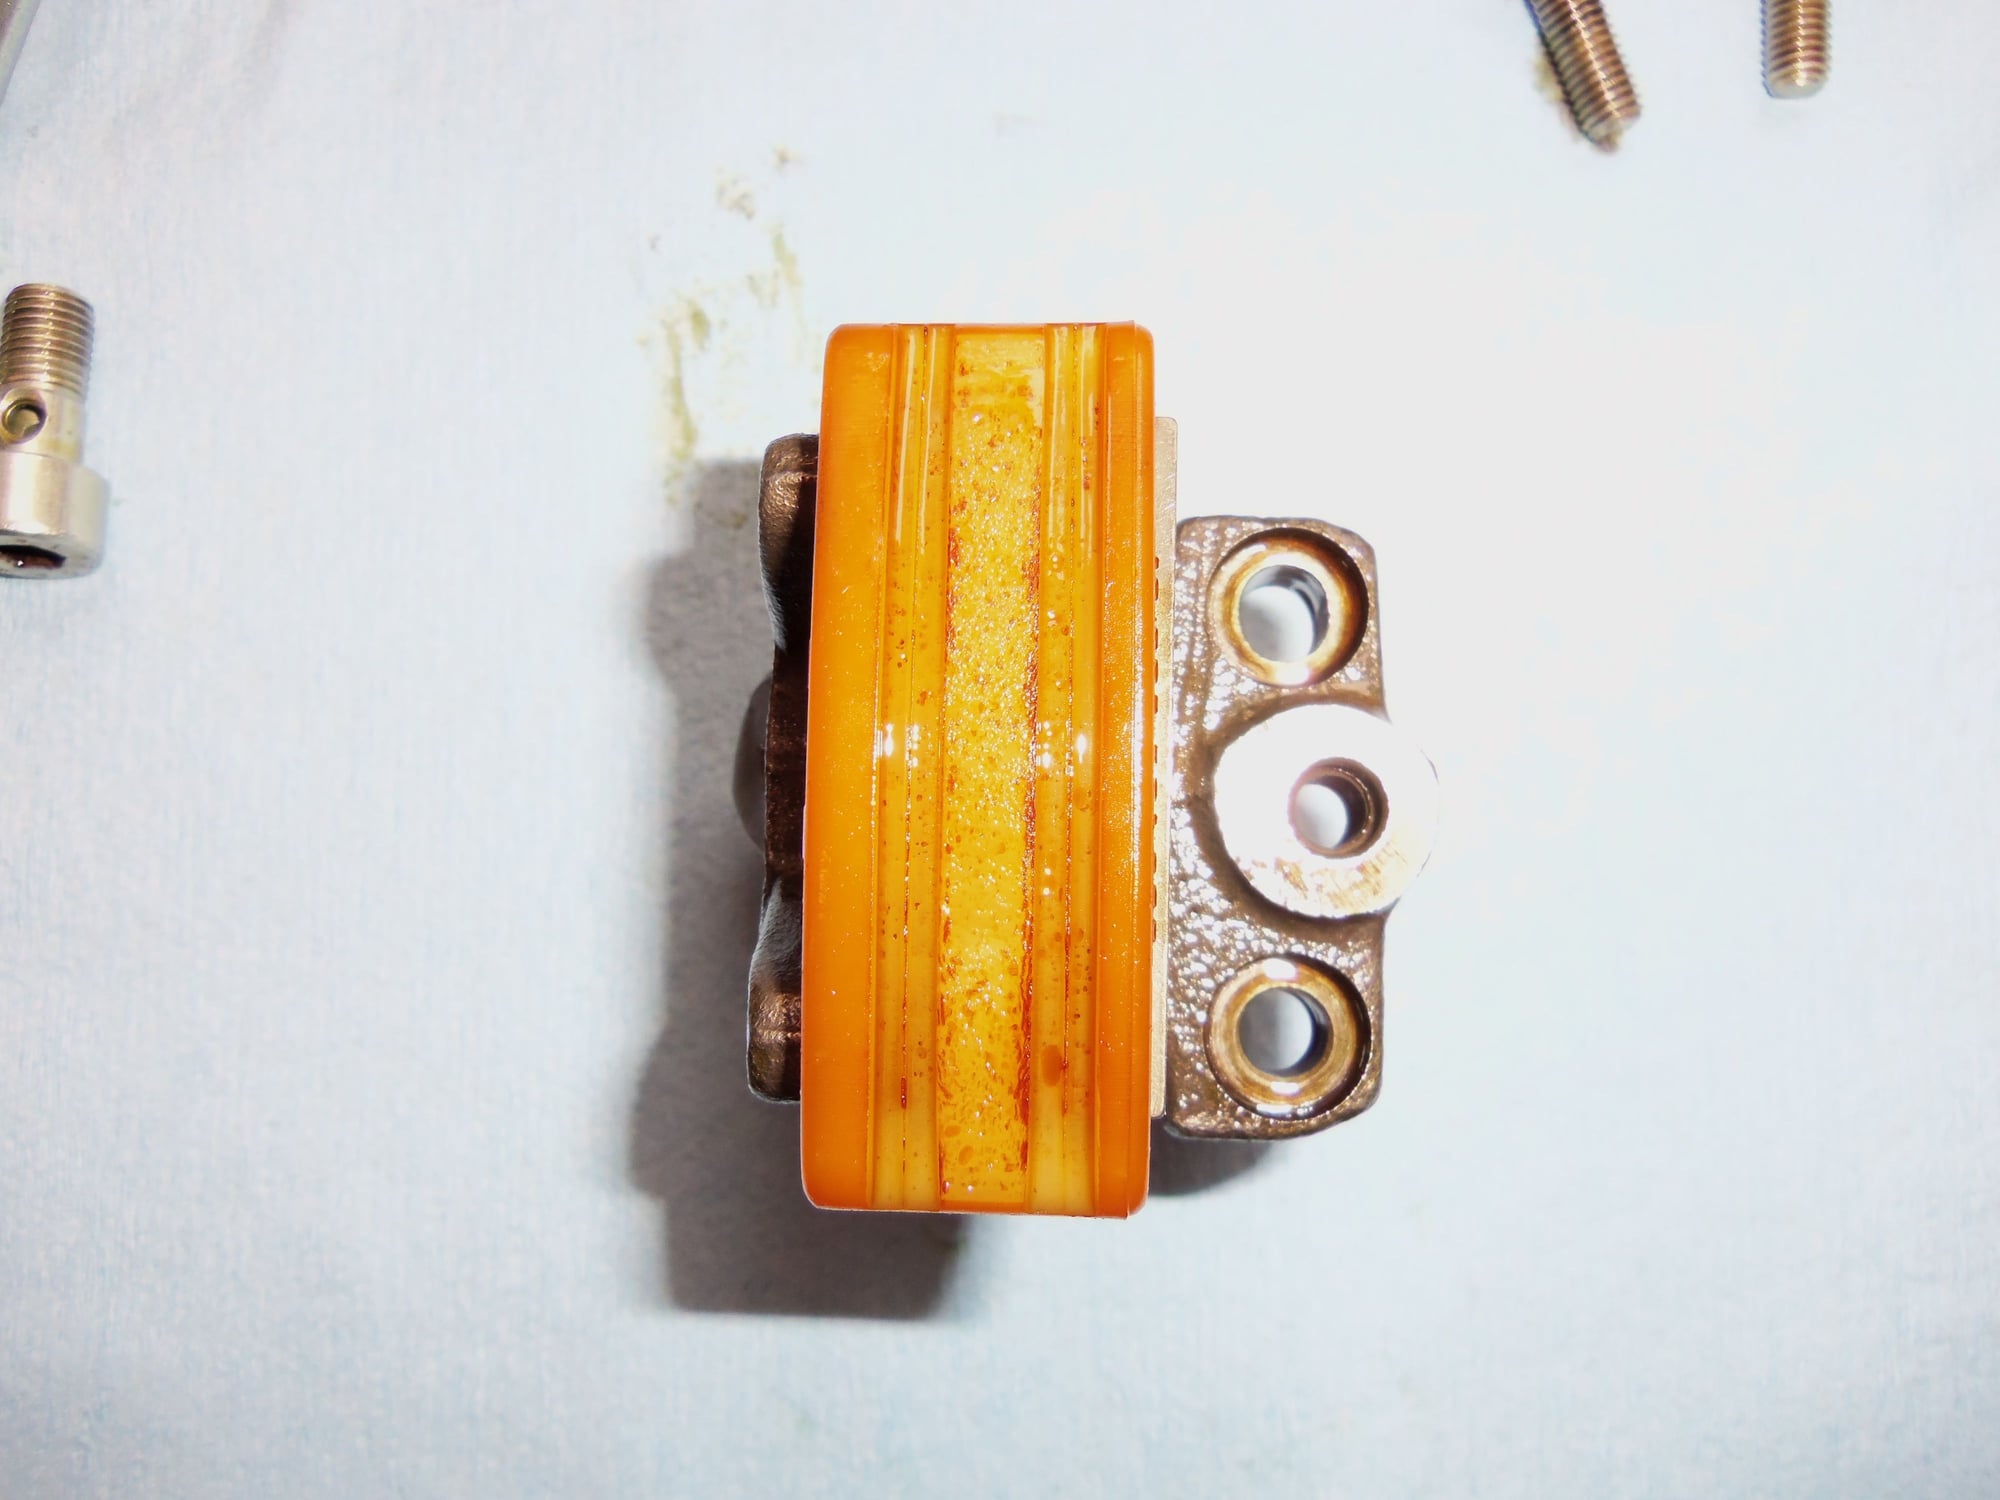
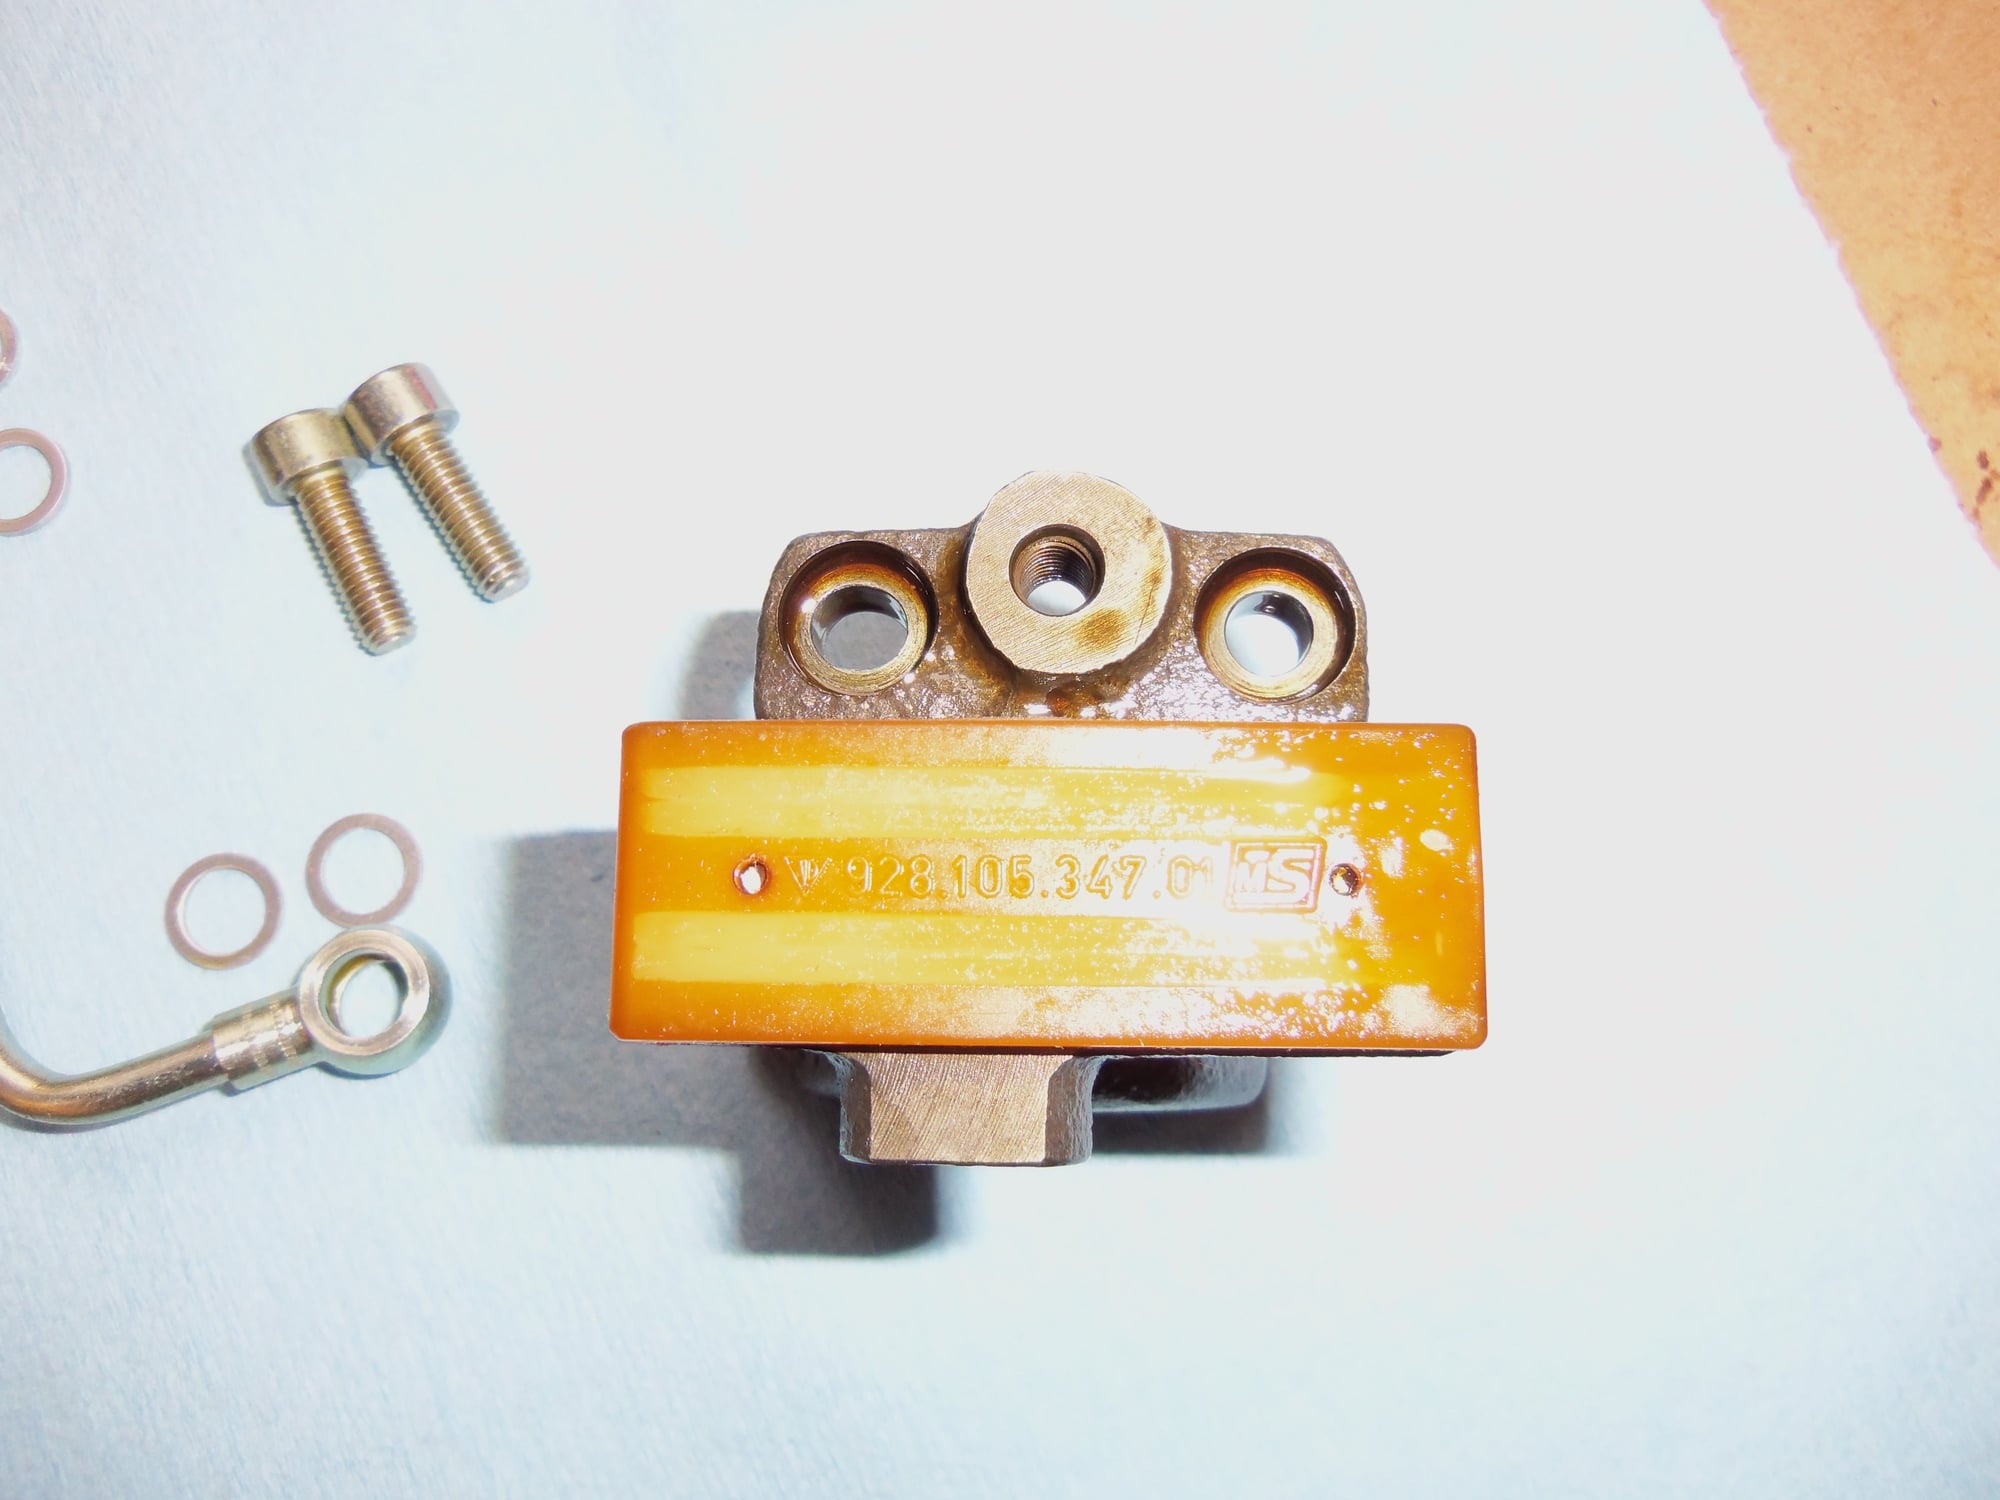
Passenger's side tensioner, for cylinders 1-4. With the S3/S4 hybrid oil line.
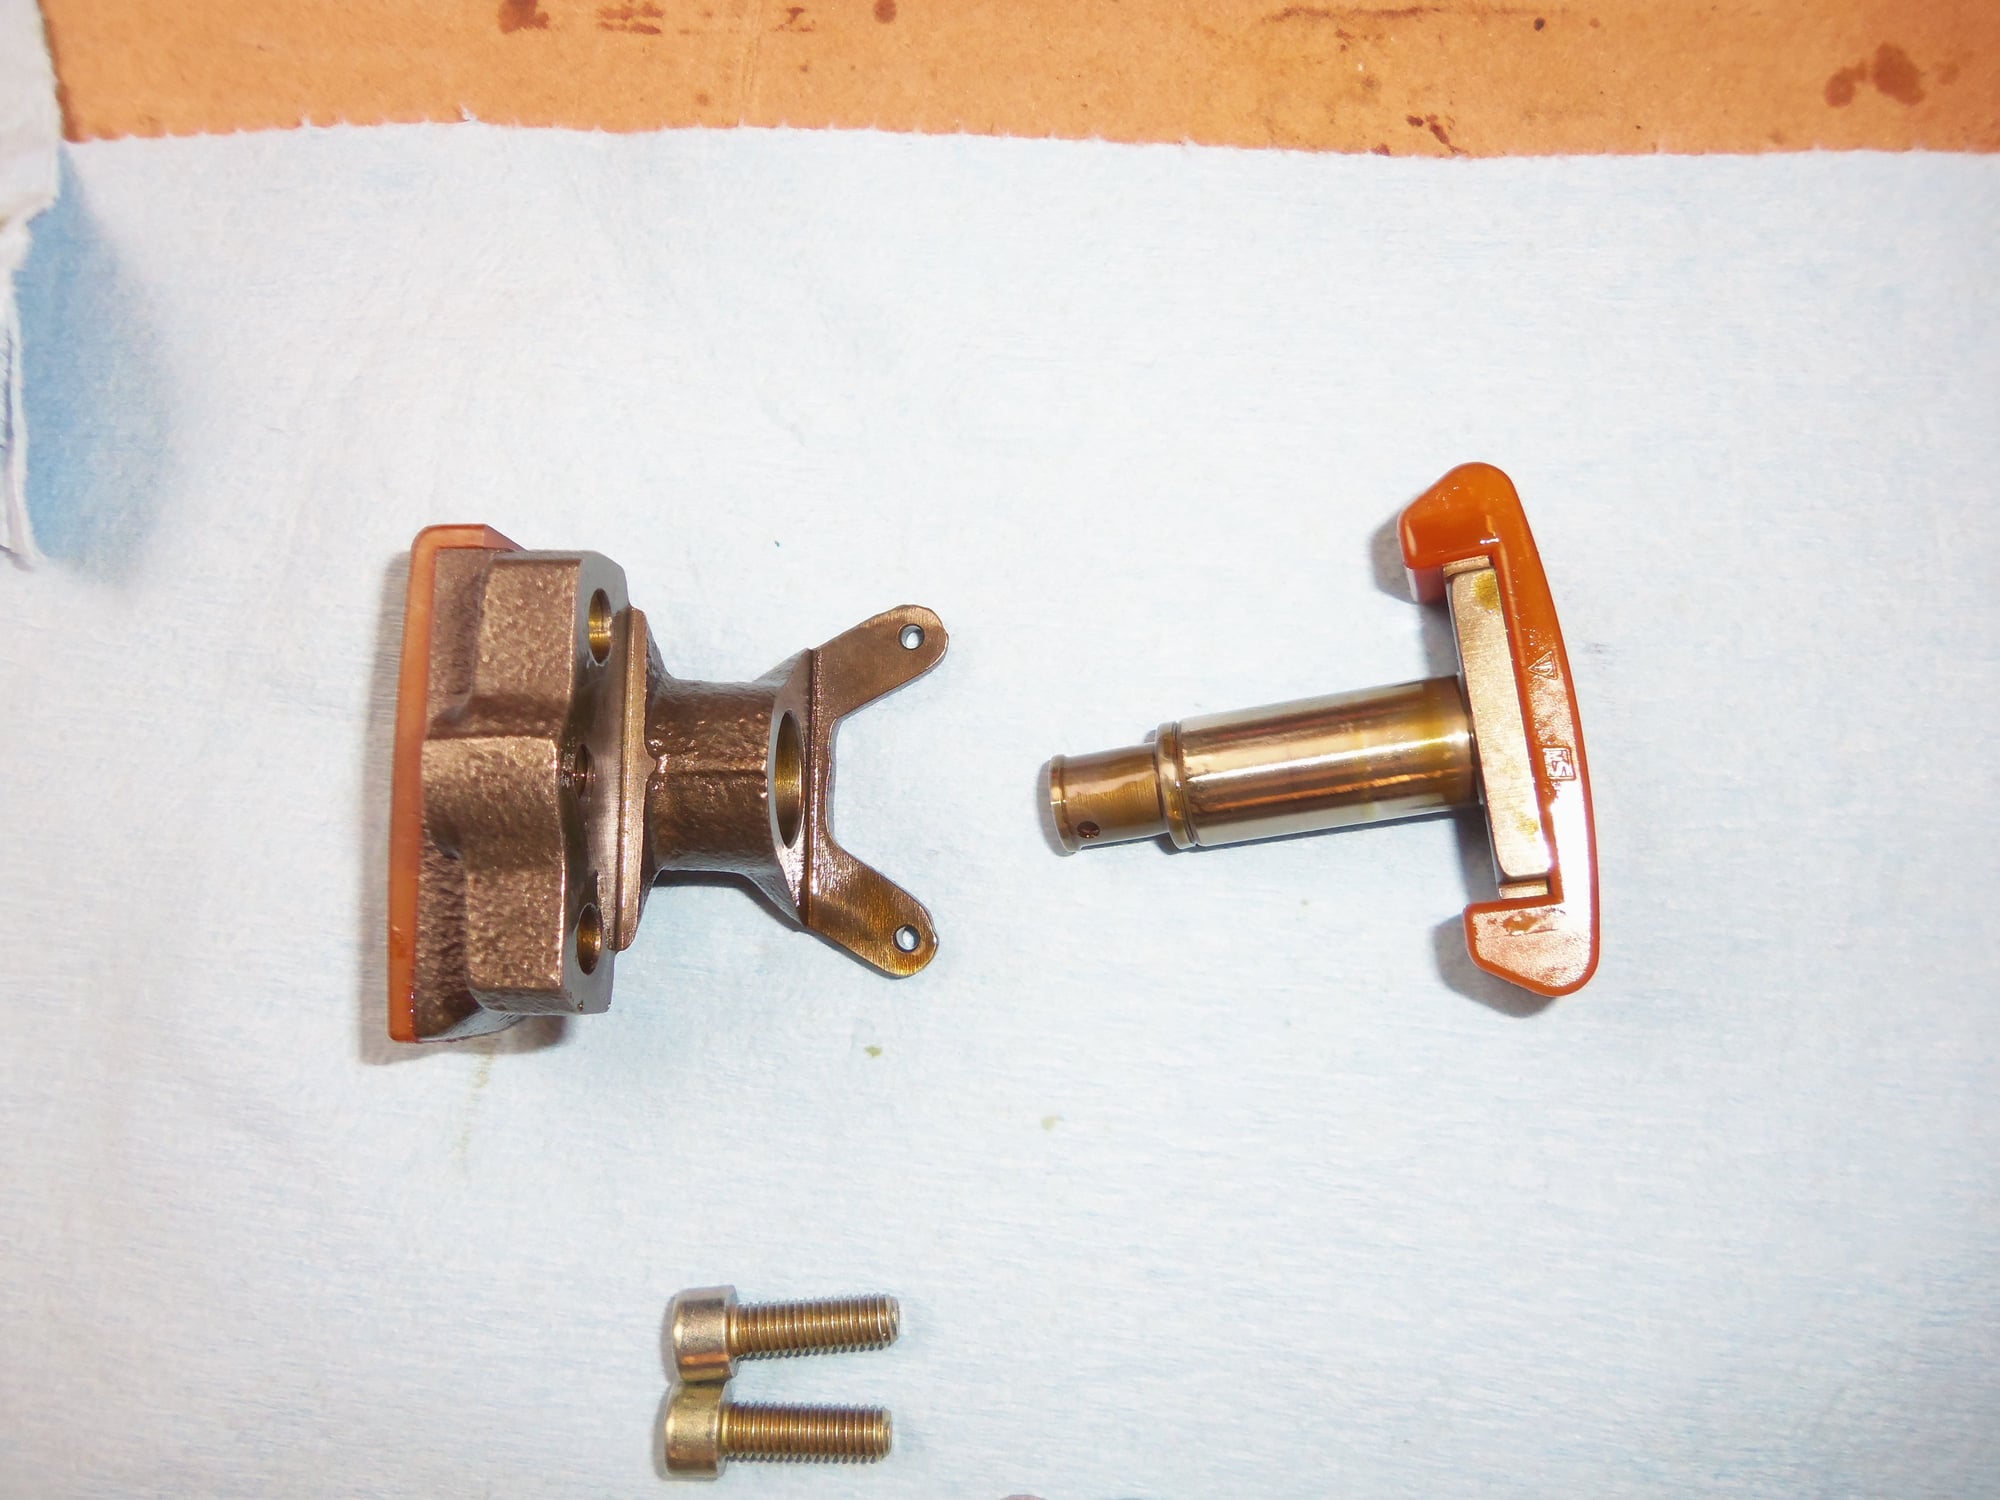
Grooves in top pad. Forgot to take photo of bottom pad.
Plunger removed.
Passenger's side cylinder head.
Driver's side tensioner, for cylinders 5-8. With the S3/S4 hybrid oil line.
Bottom pad has significant grooving.
Did not realize that the 5-8 tensioner was mounted upside down as compared to the 1-4 tensioner.
Driver's side cylinder head.
For giggles, I whacked one of the cam bearing cap bolts with a small brass hammer. Using a new, tight fitting 5mm long arm hex key, I tried to loosen the bolt. It was tight, but loosened up no problem. Hopefully this is a portent of things to come for the rest of the bolts.
The last thing I was able to do before the rain rolled in was remove all 6 brackets for the cam end plug seals. Those were a bit of a beyatch. I was able to do them from the top, though I had to sacrifice my good 10mm/11mm offset wrench to do it. I would loosen the bolt, then use a 1/4" drive 10mm socket to unscrew it. Pain in the ***, but it worked.
FWIW, the Red Witch was updated with the later cam end plug seals that have the separate bracket back in April of 2016. This was done as part of the servicing when I bought the car. So, it is a bit of a b*tch having to replace them again. But, I will do so to prevent the old ones from leaking from being removed and reinstalled.
Hopefully the weather is better tomorrow.
Now, I am going out to clean the disaster that is my shop.
Sooo...I have been rereading the WSM about camshaft removal. I am confused and have a question.
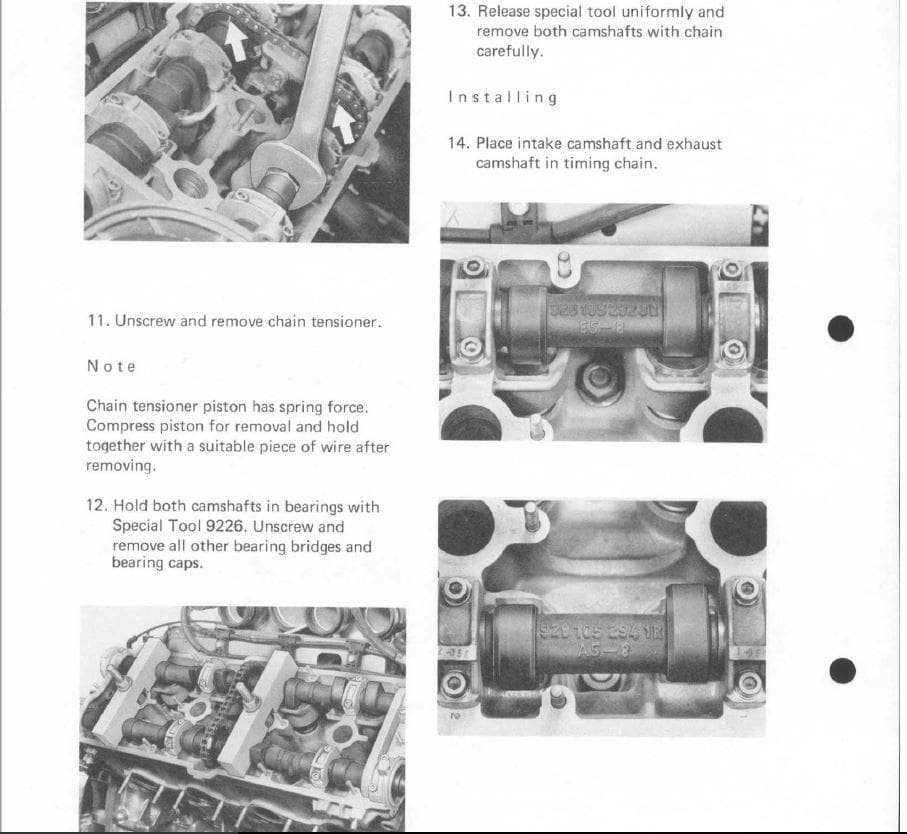
In post #13, I put photos of the cam tool set that I have, 9226. This is the factory tool to support the camshafts while removing the bearing caps. OK, fine.
Looking in the WSM, Section 15, page 15-126, it mentions using this tool.
I am really missing something here...
EDIT: Yep, I'm an idiot. I was missing something. Looking at the undersides of the bridge tools, there are recesses. I mistook that as you install the bridge tools OVER the cam bearing caps. So, while reading the WSM, I found myself wondering when to remove the caps under the bridges?
Looking closer at the photo at the bottom left corner of the page, the bridges are installed IN PLACE of two sets of cam bearing caps. The recesses are for the alignment dowels around the bolt holes. Oops.
So, procedure is remove two sets of caps. Install bridges. Remove other two sets of caps. Slowly release bridges.
Nice.
Thanks for reading. Sorry if I have wasted your time with this particular post. Carry on...
This a great primer for those of us who are erstwhile DIY hacks and your attention to detail is exemplary. If your day job goes ***** up you also have a future as a photographer to boot.
Good to see you are going the whole hog as it were. I reckon you have dodged a bullet looking at the grooves in that top pad. Do show some pics as you refurb the pads.
I have a similar project in my sights at the moment. I have a set of S3 cams to modify and may well stick them in my S4 motor so happy to pick up any learning from your efforts.
Anything published on this list is for the benefit of everyone so no way are you copying anything untoward- anything but- you are contributing and then some!
Yeah, your posts are great. Looking forward to see how the chain replacement goes. I wimped out on that last time I was in there, because they looked pretty good, and I couldn't figure out how to get the cam bearings off. I guess the loctite was holding them on.
Looking at those pictures brings back some old memories...
My thought: Having had the pads break on a 944S 11+ years ago with about 160k miles on the engine I can say switching them out is simple: Take off the oil line, remove the bolts from the tensioner, pull out, replace, squeeze, put in, snug down bolts. Simple as pie.
Repairing the head, replacing 14 valves, exhaust cam, chain, tensioner, belt, cam gear, and all the other stuff because the pad cracked and ripped the tensioner off the head is not simple as pie. Took about 6 months working in the morning after feeding my newborn to get it running again.
Edit: 186k miles? Wow. It has been said that the 928S valve system has less wear because the engine turns more slowly than a 944S, but that's 12 years longer and 26k miles more than on my 944S. Might indicate that wear is more of an issue than age on that particular part. Hm.
Now that I know the 86.5 engines have the 87+ tensioners (I didn't know that....) I will put it on my calendar to replace those pads in the spring. With 105k miles that would be a simple task while I have the pipe organ off for a rubber R&R anyway, and I was planning on swapping the valve head gaskets anyway. But I thought the 86 engines had the old style ones that are NLA....
My thought: Replace the tensioner pads at 120k or so, chain at 200-240k miles. Chain is pretty low stress (I don't think the chain broke on my car, it is strong but you bet I replaced it :-), the weak point is that nylon/whatever pad...
This a great primer for those of us who are erstwhile DIY hacks and your attention to detail is exemplary. If your day job goes ***** up you also have a future as a photographer to boot.
Good to see you are going the whole hog as it were. I reckon you have dodged a bullet looking at the grooves in that top pad. Do show some pics as you refurb the pads.
I have a similar project in my sights at the moment. I have a set of S3 cams to modify and may well stick them in my S4 motor so happy to pick up any learning from your efforts.
Anything published on this list is for the benefit of everyone so no way are you copying anything untoward- anything but- you are contributing and then some!
I read this thread for the first time, yesterday.
It's a disaster.
All I could do is shake my head, close it, and hope that no one that was ever going to do any of this work never read it.
There's so much misinformation, mixing of pieces an S4 has, which an S3 doesn't have (and visa versa) I was hoping someone would either erase the entire thing, or go back and correct all the mistakes.
Semi-retired, as of Feb 1, 2023.
The days of free technical advice are over.
Free consultations will no longer be available.
Will still be in the shop, isolated and exclusively working on project cars, developmental work and products, engines and transmissions.
Have fun with your 928's people!
I did a tensioner pad and cam chain replacement on my 1987 928 S4. I have a PDF document that outlines the procedure. Drop me a line at info at electronikrepair.com and I'll send it.
I used chain part number 944.105.501.05 which is a stronger racing cam chain.
I swear that every time Iwis puts a chain in a "racing" box, the guys on the assembly line are laughing their asses off, while the business office is slapping themselves on the back. The standard chain and the "racing" chain are identical in every way, shape, and form.
Further digging now has me wondering about the 'check valve for hydraulic valve tappets.'
WSM Section 17, page 17-10 covers this. As well, check out this screenshot:
1) Repl the chains. Worn chains strain the teeth of the cams, and saving the cams is all-important goal.
2) On exchange, there is an added ring washer that goes under the cam cover bolts, to provide greater tension to the rubber bushing, and the rubber seal to the head. Ask Roger for a set of these washers, or simply use a machine washer directly under the bolt head, over the metal cap, and rubber bushing. 1987-1995 only.
3) Cams are brittle, no, I mean Brittle. When you remove the caps, remove them slowly and evenly to prevent putting strain on the shaft from the spring pressure. Same on install, go down evenly with the cam caps, and insure the caps go back on their original journal. Use some lifter lube on the lifter faces too.
4) If you decide to take the check valve setscrew, plug, spring, and ball out to clean, make sure you don't drop anything along the way. (1987-1995 only.) The bits will go right down the return gallery to the oil pan, and they you are well and truly flucked. I can see the plug in the well, I don't know where the setscrew is, but it may not be serviceable unless you drill that metal plug out and find the pin behind it that holds the plug in.
5) Replace the o-ring on the plug, and make SURE your setscrew/pin engages the detent on the plug, or oil pressure will push the whole thing right back out again, and will break your cam. Ask me how I know. (1987-1995 only.)
6) After you are all done putting the cams in, you will need to index them to the cam gear for proper cam timing. The directions in the WSM are garbage. They are completely written in gibberish for a job which is not that hard. For all that is holy, find an alternate method. Just find the plunge depth setting for the lobe to index, set that plunge depth, and then lock the gear with tension on the belt. Roll it around a couple rotations, check your plunge depth, adj as needed and close it up. The WSM method is useless. (The WSM is the PERFECT way to do this job and is exactly like it needs to be done and is the ONLY way to get the cam timing exactly correct! It is difficult to understand (the way they worded it) but it is the only exact way to do this job. There is an aftermarket tool which is generally accurate to within 1-2 degrees. (Which is probably close enough for most applications.) On engines which I may want to play with the cam timing, I set the cams up using the factory method and then use this aftermarket tool to get a reference point. Whatever these numbers are (for each cam), I write on the cam gears. This enables me to change the cam timing, in the future, without removing the valve covers.....extremely handy tool, for this purpose! When I index cams, I put a small piece of matchbook cardboard under the front journal cap to keep the cam from moving as I lock the cam gear to the cam. Of course, you have to remove it before spinning the engine around. Ask me how I know. (If you simply use 3-5mm screws (with washers), you can lock the cam gear to the cam triangle. (The WSM explains this.) If you are using the aftermarket cam tool, you simply snug down the allen headed screws and nothing will move.)
7) You may want to provide another crankcase vent from the side that doesn't have a direct vent and recirc. The 928 doesn't make a lot of crankcase blowby, but one side has to push the gasses down and through the crankcase, and back up the other side. (Crankcase venting sucks on all 928 models.) Adding another vent will help keep air out of the oil. And route it where?
8) Don't forget those round plug well seals and renew them as well as the new cam cover gasket. The plug well seals get hard over time, and leak worse than the large seal, right into the plug well. I hold them on with some liquid gasket maker while putting the cam cover back on. None of the new plug well seals are thick enough to seal properly....no matter who you buy them from! Use Drei Bond on both sides. (Yes, they will want to "pop" off and this is a pain, but stretch the rubber a bit and they will stay in place.) Do this just before you install the valve cover. Immediately after the valve cover is installed and tightened down, take your finger and smear the excess that pushes out around to help this area seal.
9) There are a couple of black cam plastic caps used on the head. The heads are machined symetrical so they can be used on either side. Repl those cam end caps.
All I could do is shake my head, close it, and hope that no one that was ever going to do any of this work never read it.
There's so much misinformation, mixing of pieces an S4 has, which an S3 doesn't have (and visa versa) I was hoping someone would either erase the entire thing, or go back and correct all the mistakes.
Here's the key question: Does the 86.5 heads match the 87 heads or the 85/86 ones?
I'd check, but that will wait till spring when I don't have acorns falling into my engine bay.
'86.5 heads are the same as all other '85 and '86 heads.
If the valve covers have the "updated" allen headed hardware (from the factory), they should also have the '87 style tensioners and special oil lines required to adapt the '87 tensioners to the '85/'86 heads. They also used the S4 style end plugs instead of the early version with the square O-ring.
Your pictures are good. I love the foam pieces you made to plug the oil return galleys. You're doing pretty good. Good idea to change the chains at this mileage, especially since you are already there. The cams are not like "glass" brittle. They are cast iron and cast iron doesn't flex much. As long as they come out (and go back in) square (and don't get hung up in the front where the "thrust" surfaces are), you will be fine. Leave the lifters alone.....unless you plan on taking them completely part (they do come apart) and ultrasonically cleaning out the "inner sludge trap" multiple times.
This stuck out and will confuse the heck out of future readers:
According to various threads I had read, S3 tensioners were spring loaded, S4's were not.
This means I am scrooged. I have to get a set of used S4 tensioners, new pads, and figure out what to do about the oil lines.
This put a serious crimp in my happiness. Don't get me wrong, I am going to to this, just didn't want to have to reinvent the wheel. I am not going to be this far in and not replace the tensioner pads.
S4 tensioners are also spring loaded.....as you have figured out.
Save your money and just get a picture of the cam profile tool with a ruler next to it. Then printed it and resize it until the ruler is accurate. As for the cam hold down tool, not needed, just loosed the caps slowly and make sure to do it in several steps.

 10-08-2017, 03:55 PM