When you click on links to various merchants on this site and make a purchase, this can result in this site earning a commission. Affiliate programs and affiliations include, but are not limited to, the eBay Partner Network.
At FRENZY, I told people that I had drawn a line in the sand, no more projects on the Red Witch until I get her back together.
I lied.
I have decided to replace the tensioner pads for the cam chains. I am undecided on whether to replace the chains as well.
The Red Witch has 168,*** miles on her. The tensioner pads have been in there for 31 years. They have some wear grooves in them, but are not worn out. However, they are 31 years old.
I have read posts about it is not the wear in the pads but the fact that they are brittle with age.
I am doing this because access could be no better, short of the engine being on a stand. I am knee deep in a top end refresh, TB/WP/OPG/MM job. I am replacing the brake master cylinder and booster. Access to the cam covers is excellent.
Once the Red Witch goes back together, access will not be excellent. As well, I will feel real sh*tty if the tensioner pads fracture and cause issues down the road. Because I could have prevented them now.
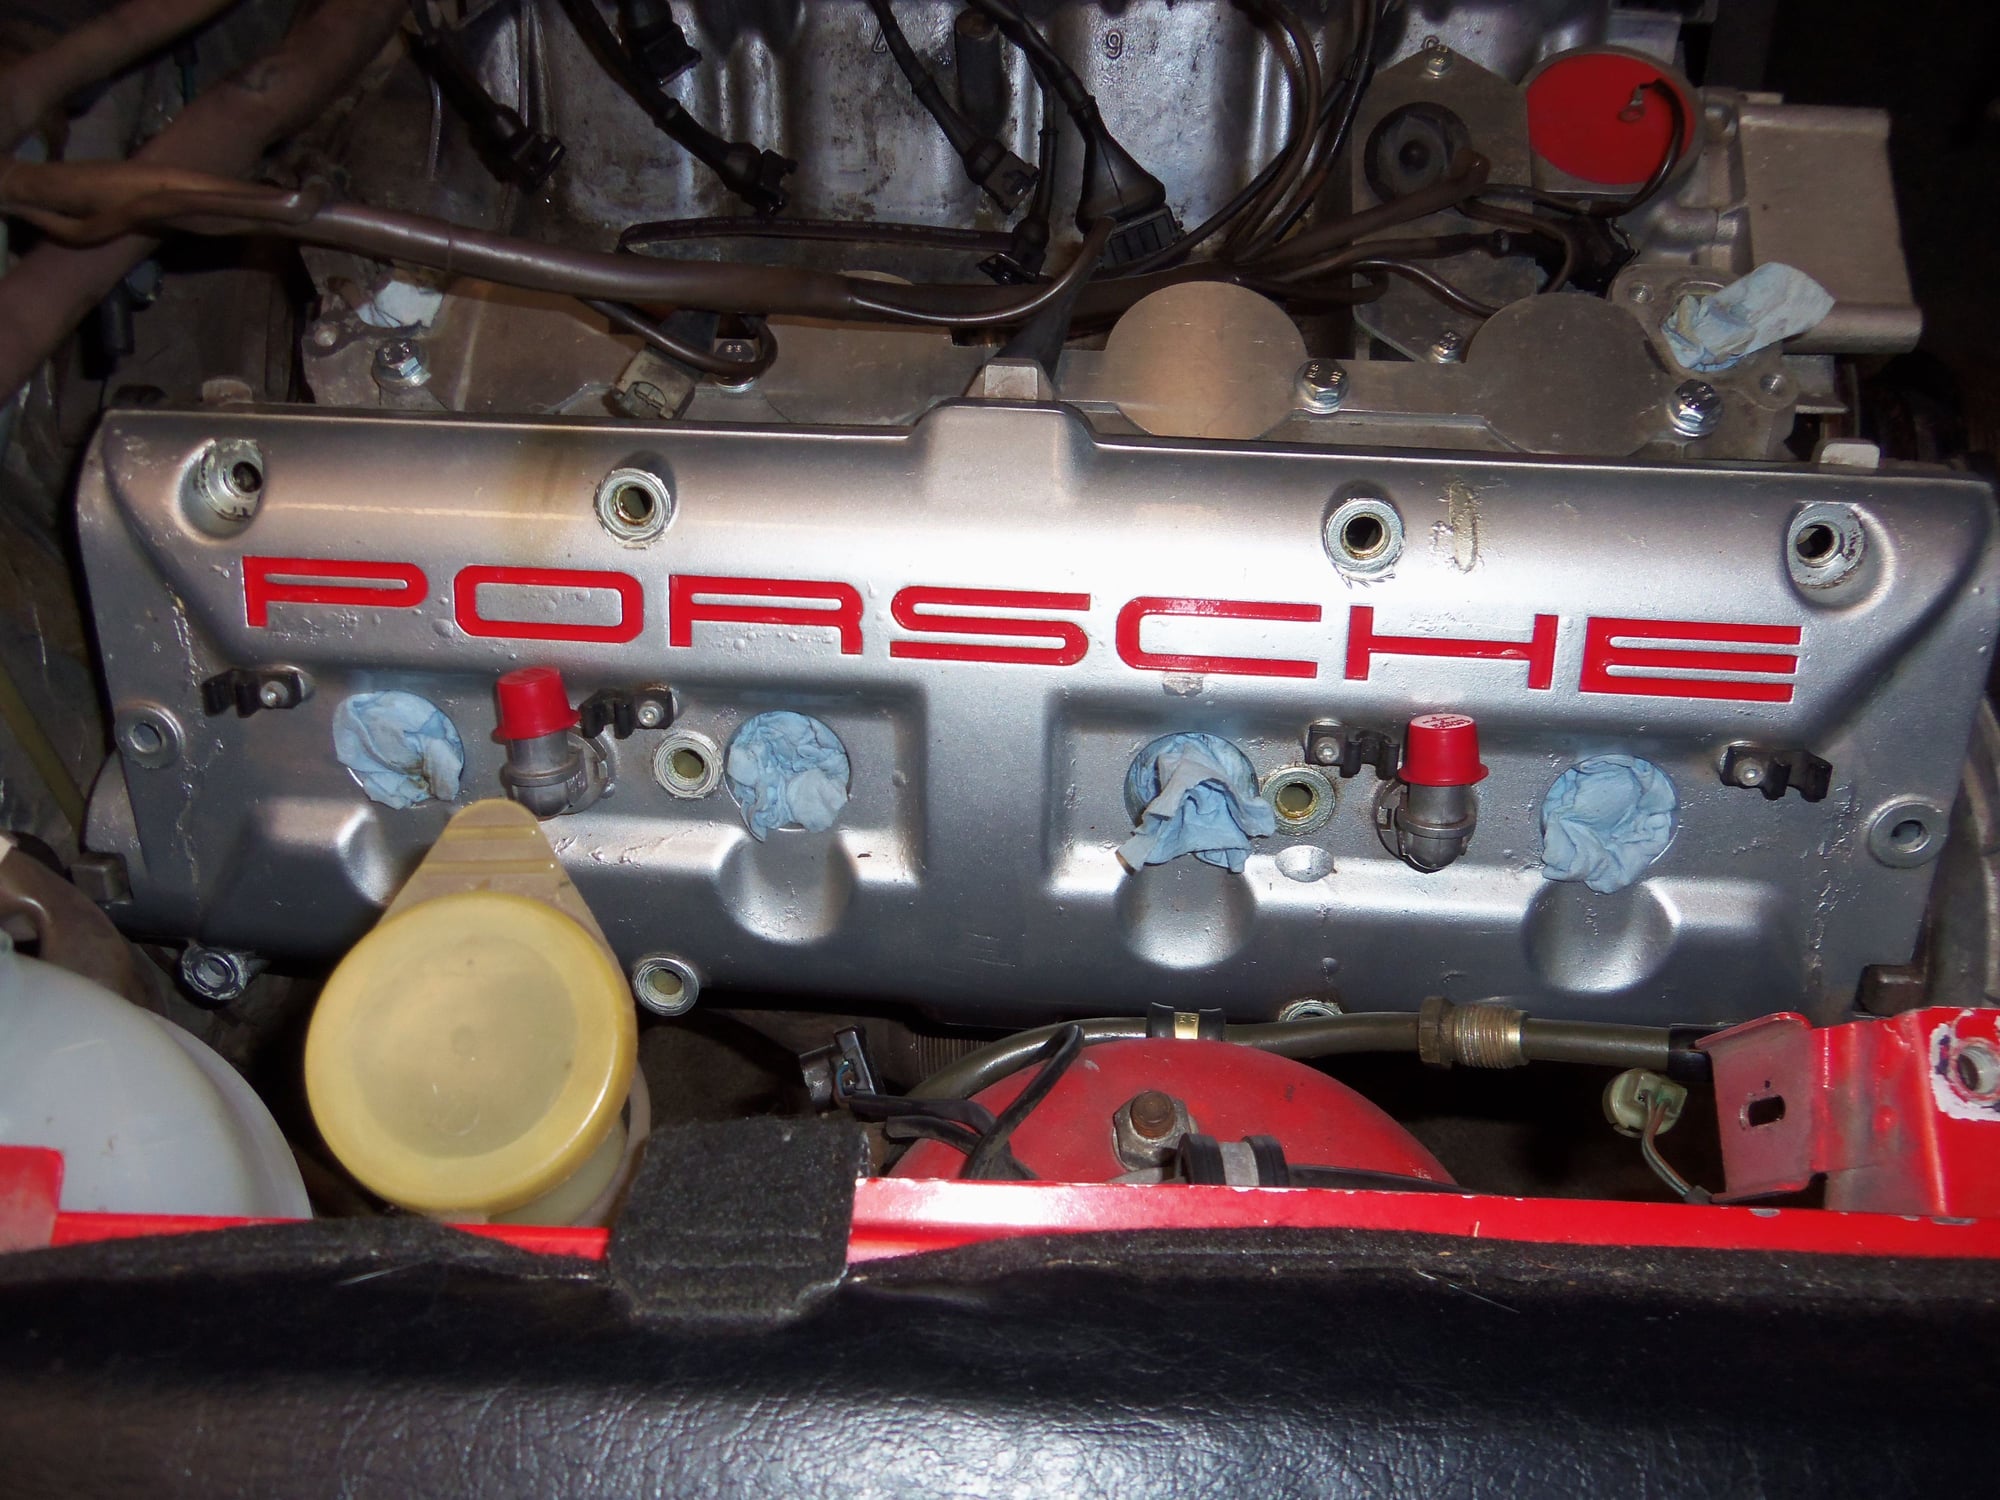
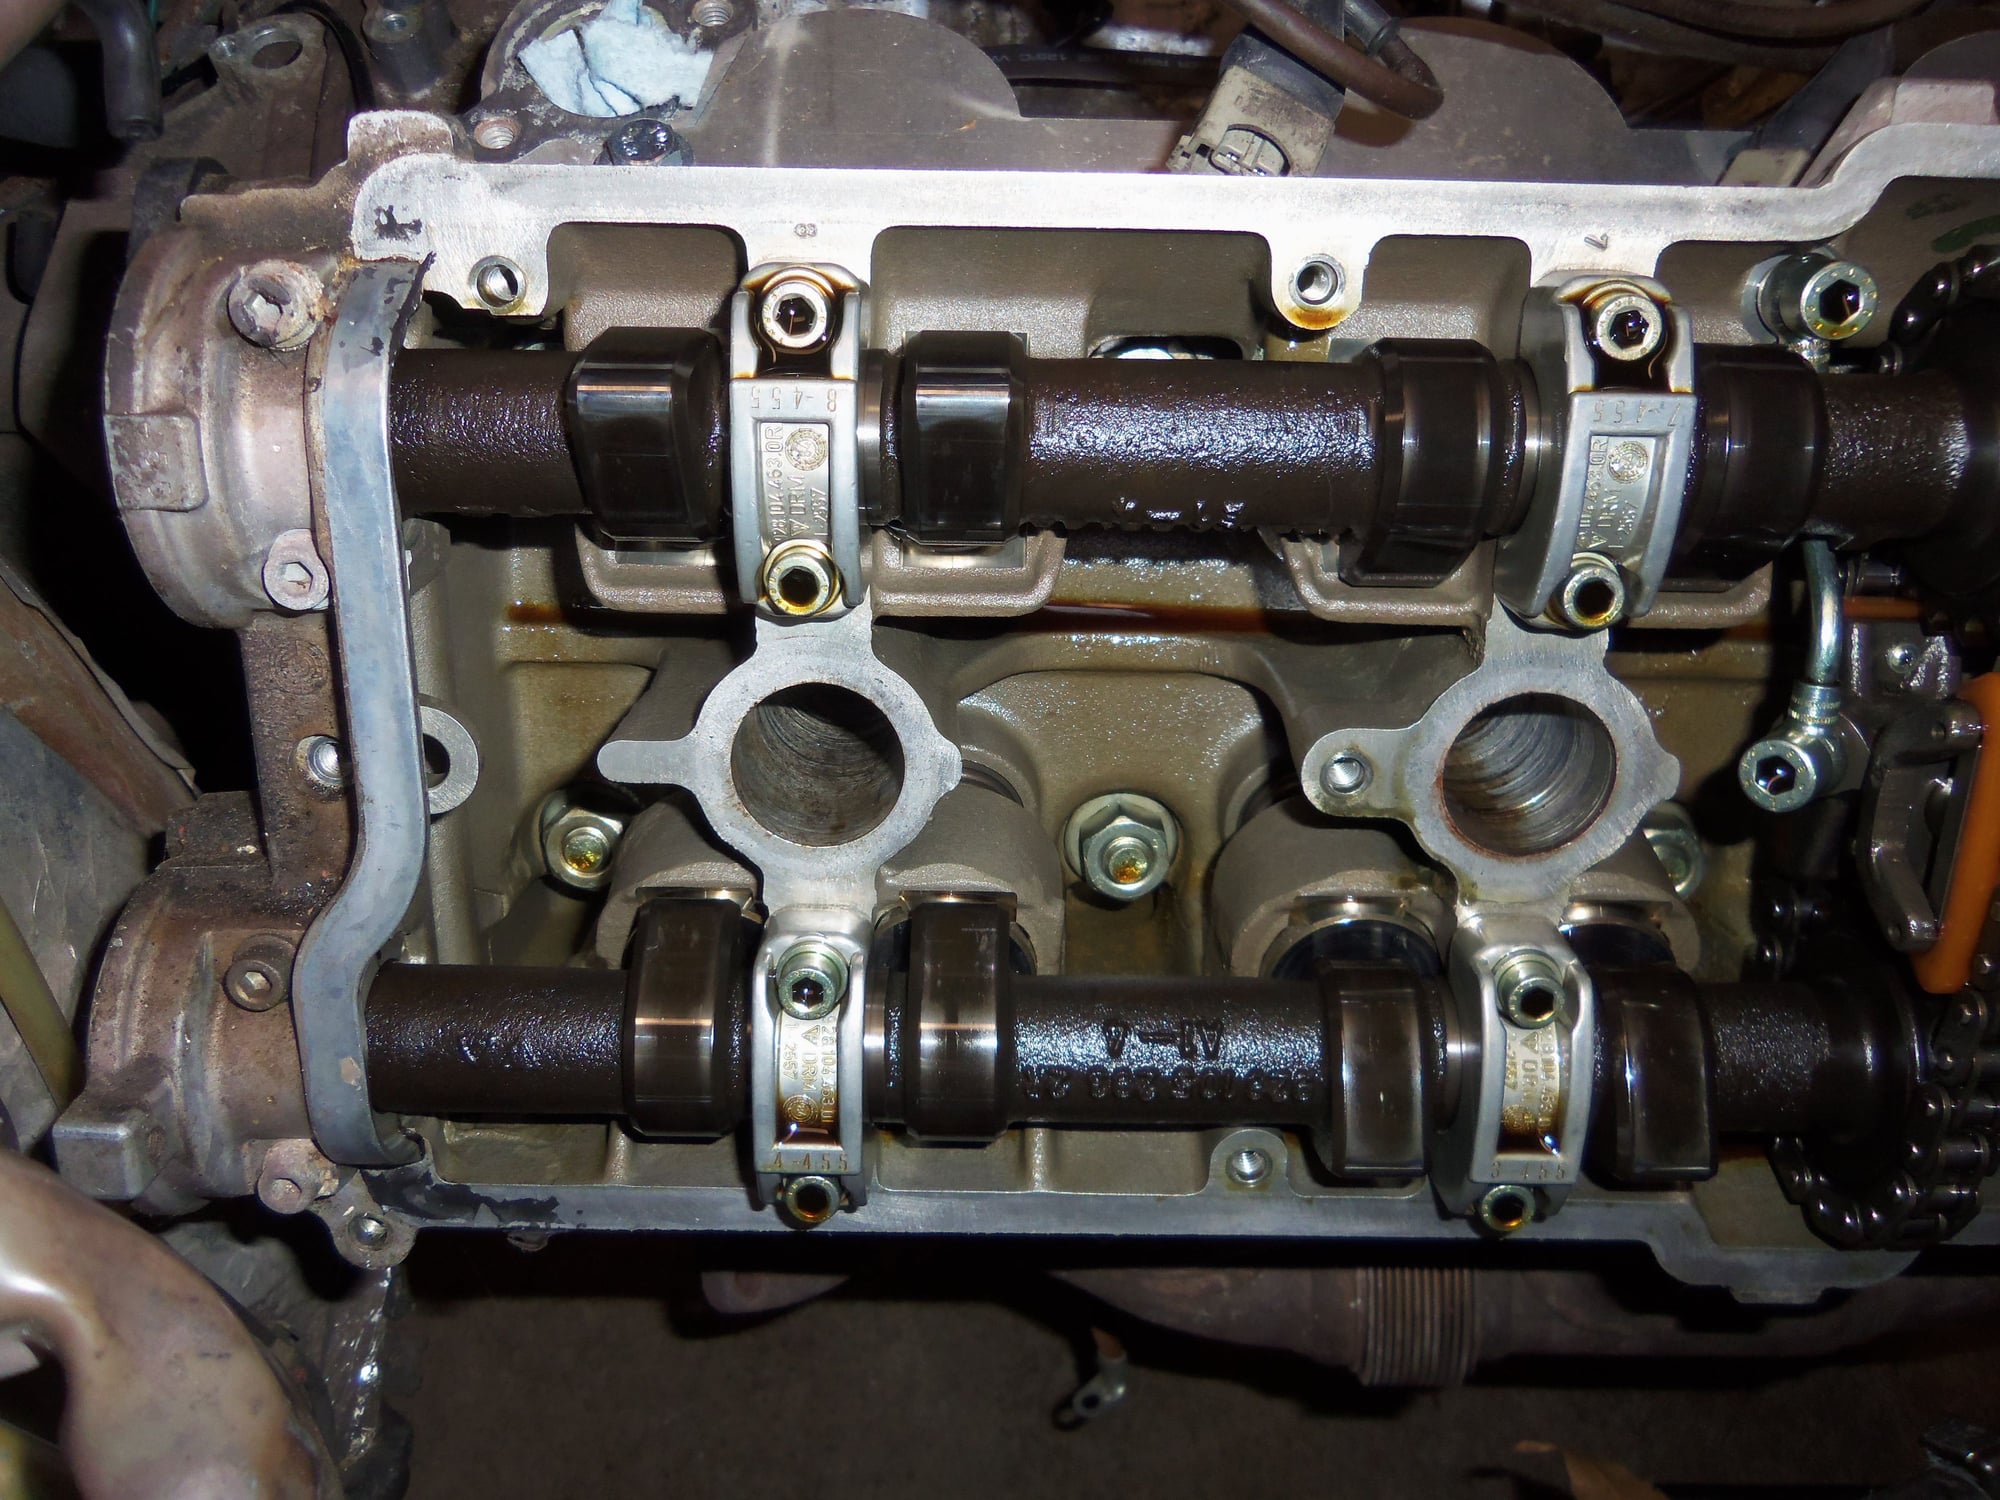
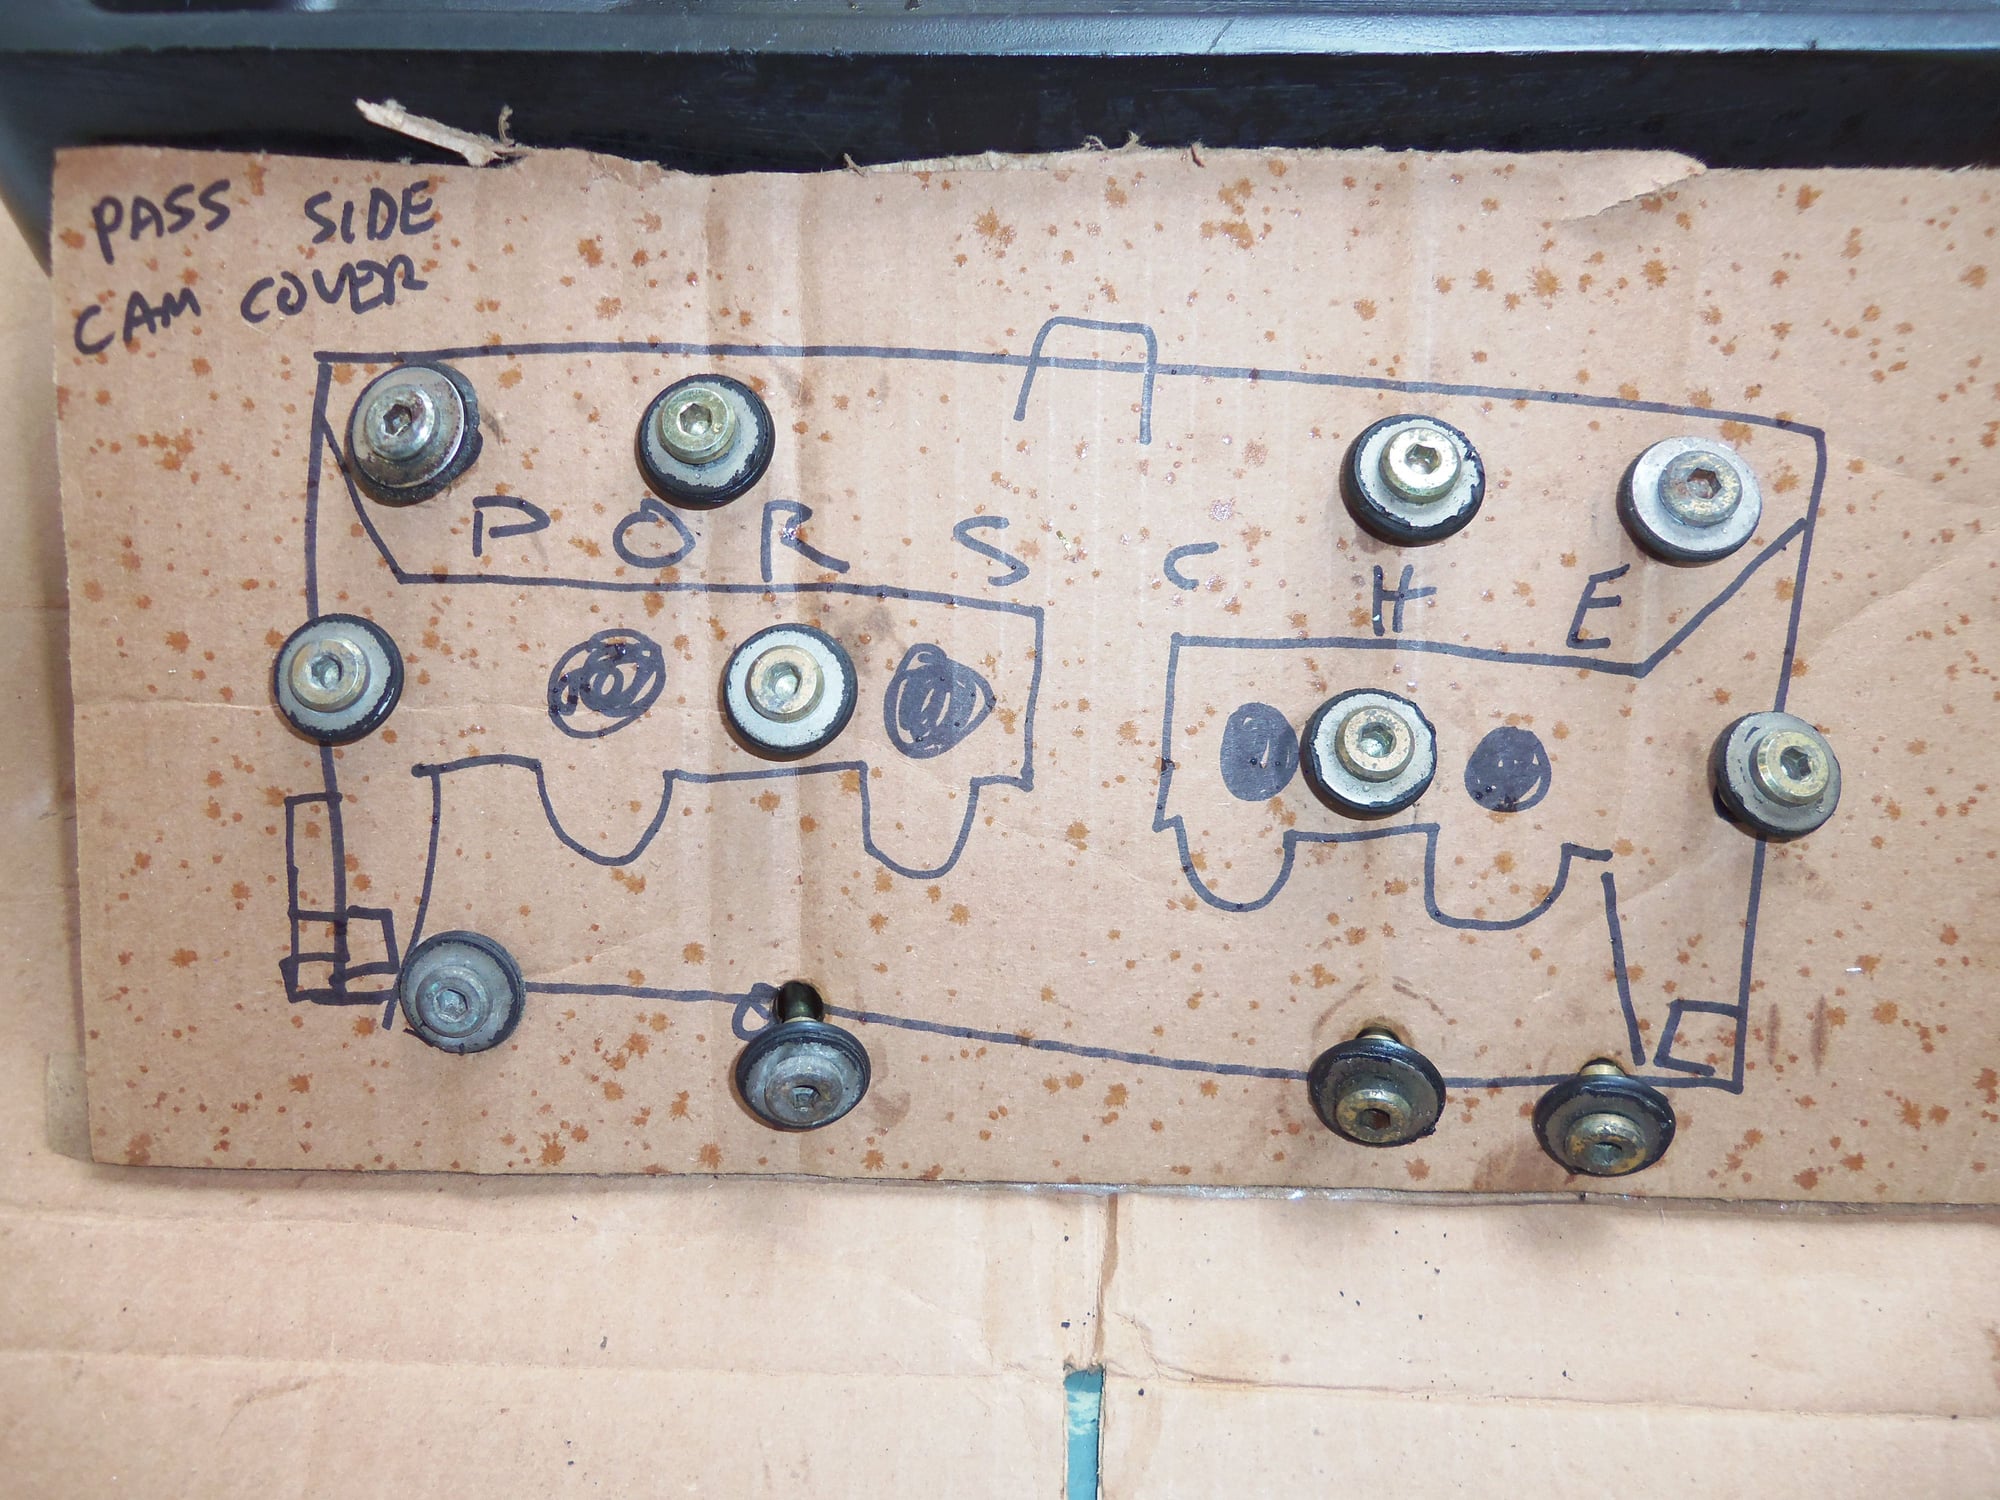
Tonight, I pulled the passenger's side cam cover. It had not been leaking or seeping in any way. All the bolts were still tight. All the bolts came out, they were the S4 style, but with lengths for S3.
Note, I had locked the crank at 45 degrees before TDC prior to commencing this work.
With a gentle tap, the cover came up and off. Thankfully, I was greeted with the sight of a clean cylinder head. There was no crud build up, or major discoloration.
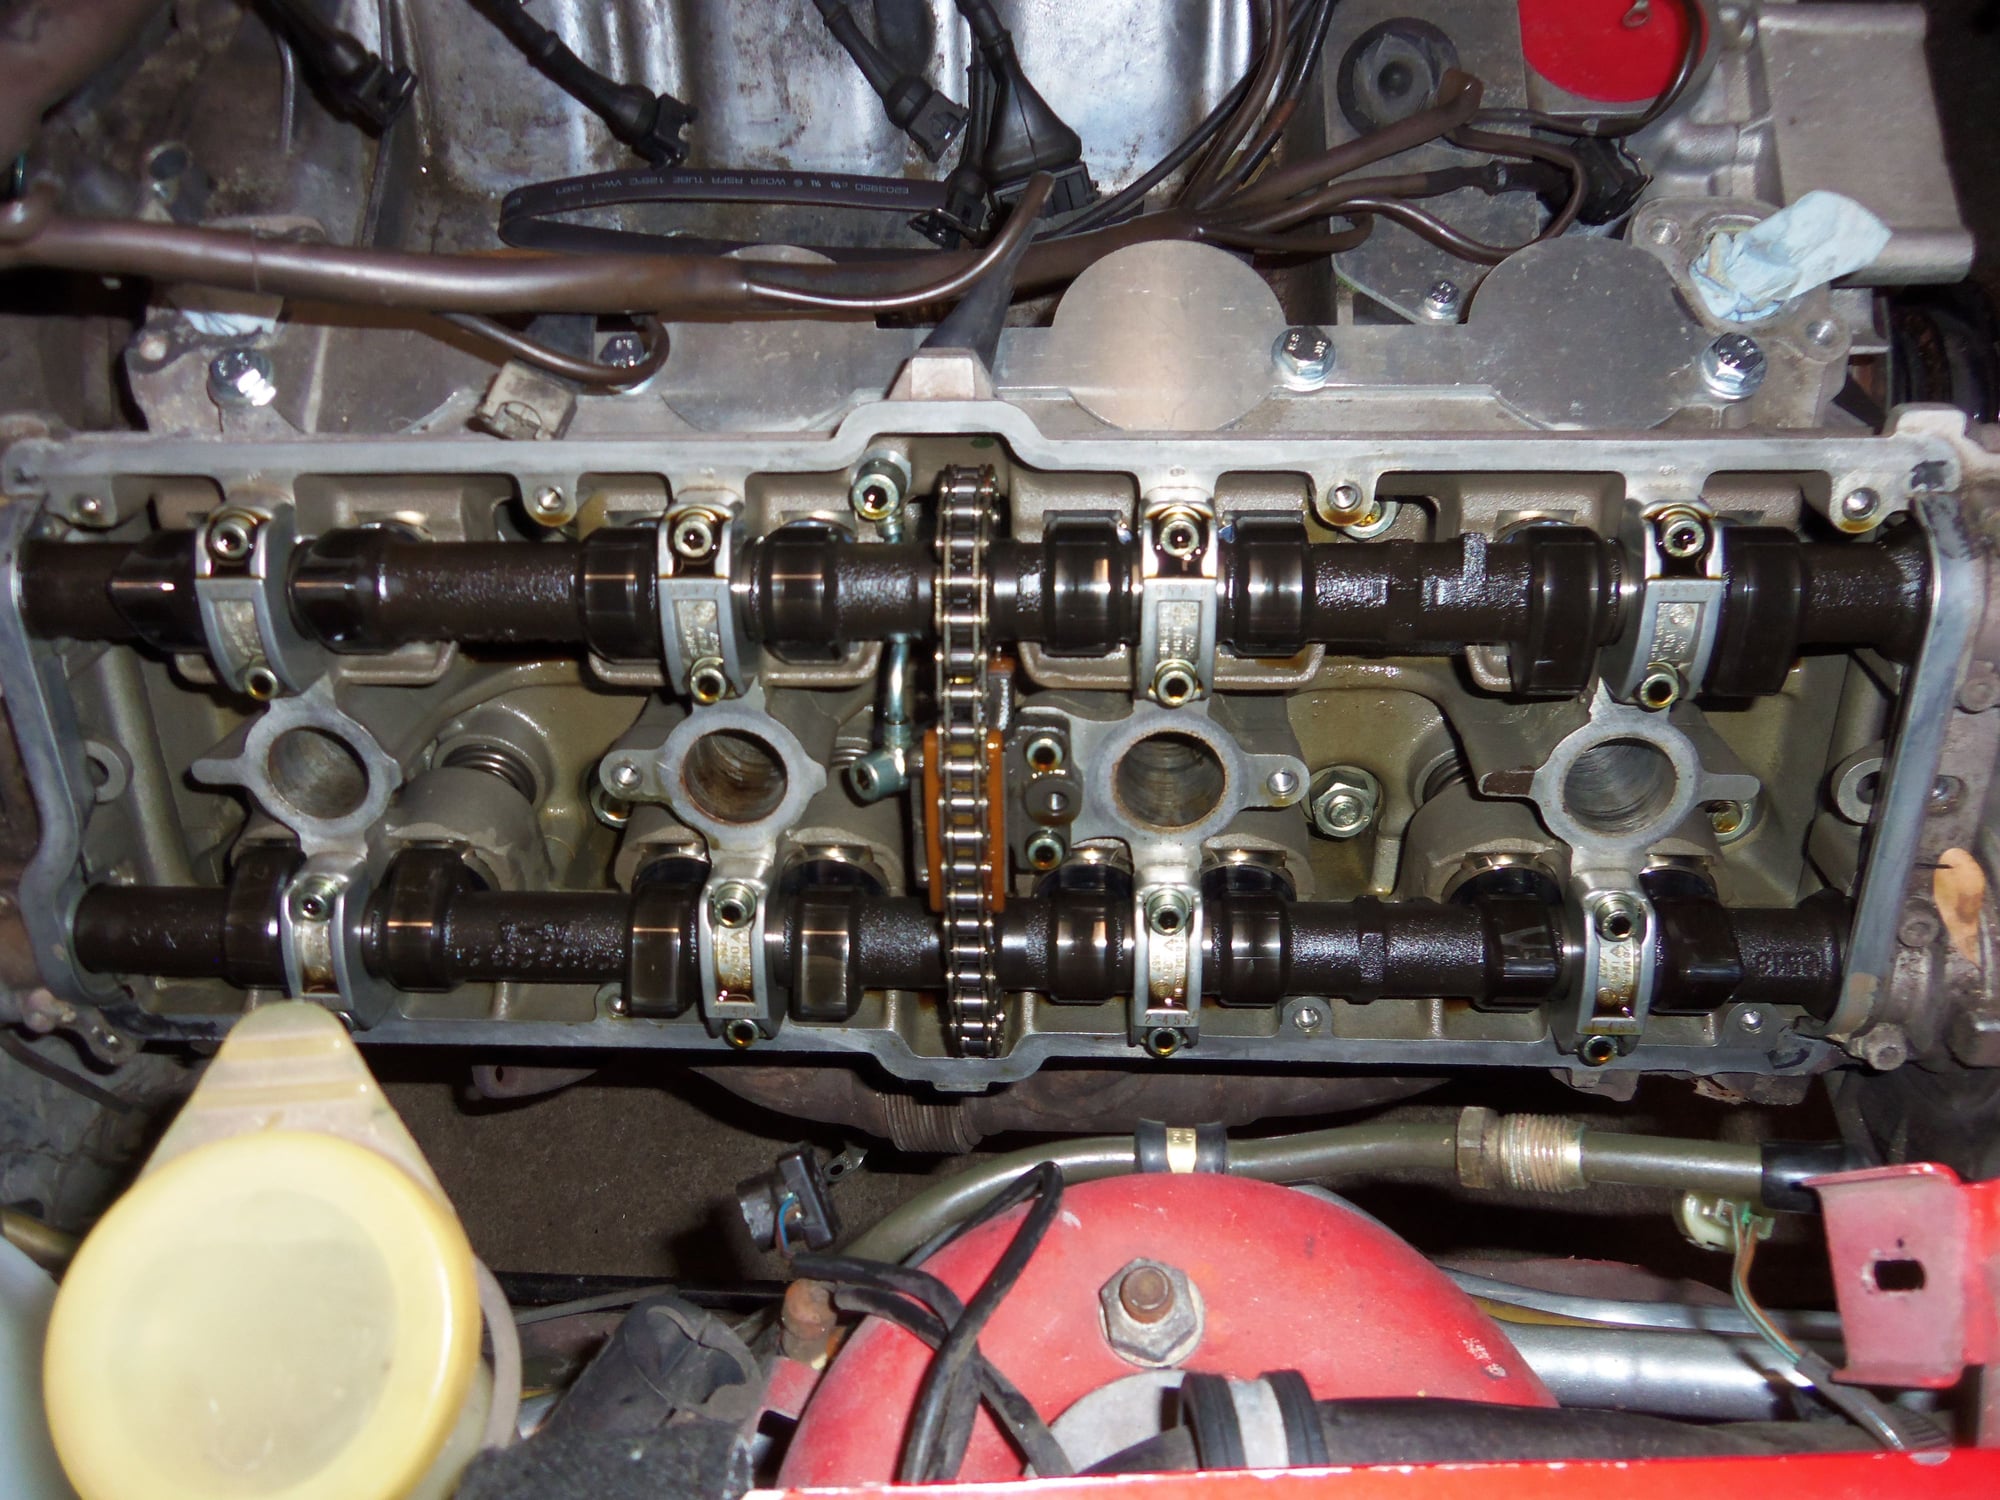
Nothing looked amiss. The tensioner was tight against the cam chain. All the lobes on both cams looked OK. In as much I did not see any carnage or scarring on the lobes. The noses that I could see did not appear to have any bad flaws or wear.
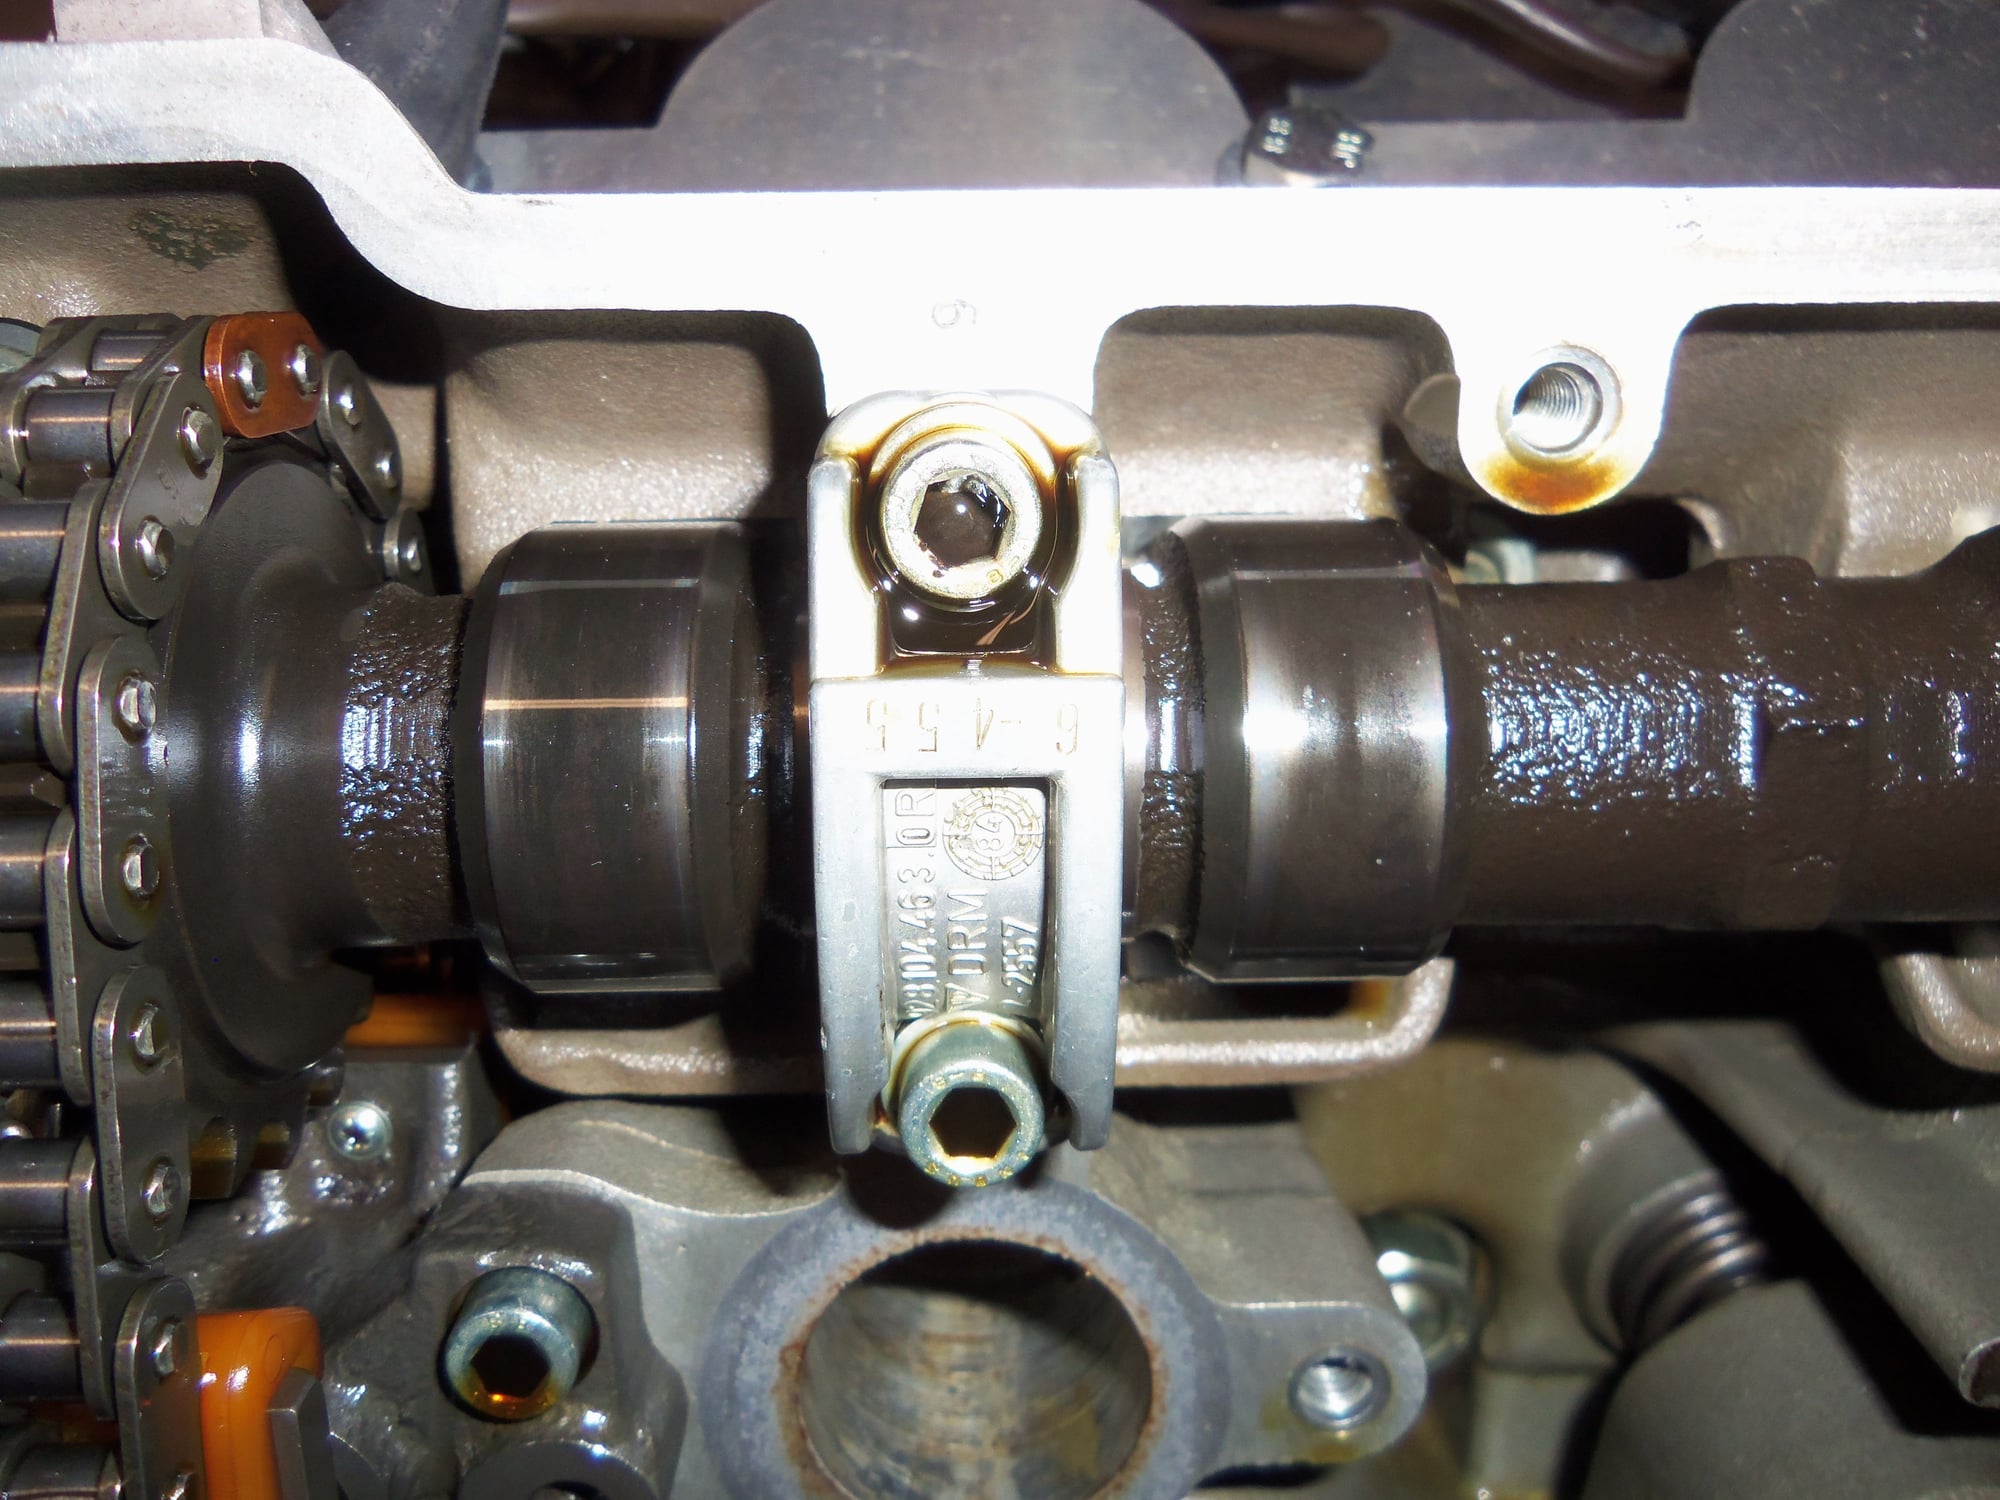
I did see a bit of a pisser. Earlier this week, I blew $32 on a Hazet 990-8 XZN 'cheesehead' 8mm socket for removing the cam bearing caps if I decide to replace the cam chains.
Inside the head of the Red Witch, I am greeted with plain 6 point socket head cap screws. Dammit.
Oh well, if and when I work on an S4, I'll have the Hazet socket for the cam bearing cap screws.
It looked to me like the Red Witch did have the later S4 chain tensioner, as 1986.5's are supposed to have. Then I pushed on it. It was spring loaded.
According to various threads I had read, S3 tensioners were spring loaded, S4's were not.
This means I am scrooged. I have to get a set of used S4 tensioners, new pads, and figure out what to do about the oil lines.
This put a serious crimp in my happiness. Don't get me wrong, I am going to to this, just didn't want to have to reinvent the wheel. I am not going to be this far in and not replace the tensioner pads.
EDIT AND CORRECTION!!! This information is INCORRECT: "...S3 tensioners were spring loaded, S4's were not." S3 tensioners have a relatively massive spring that comes out when you separate the plunger from the body of the tenioner. The spring in the S4 is intenal and does not come out. So, DO NOT go by whether the tensioner plunger is spring loaded for your determination of S3 or S4 tensioners installed in your engine. If you are a newbie, DO NOT follow the above information. Go to the thread I link in a few lines, and do the visual test. Much better.
Sorry for any confusion.
So...I searched Rennlist again. I found this thread by Rob Edwards:
In his photos, the tensioner shown for his GT looked suspiciously like the tensioner in the Red Witch. Hmm...
Reading further, Hilton posted a photo of an S3 tensioner in post #20.
BINGO! That did NOT look like the tensioner in the Red Witch.
The Red Witch DOES have S4 tensioners. Yay! All I have to do now is replace the pads. Can do!
See the photos below:
Cam cover, with all the S4 style bolts removed.
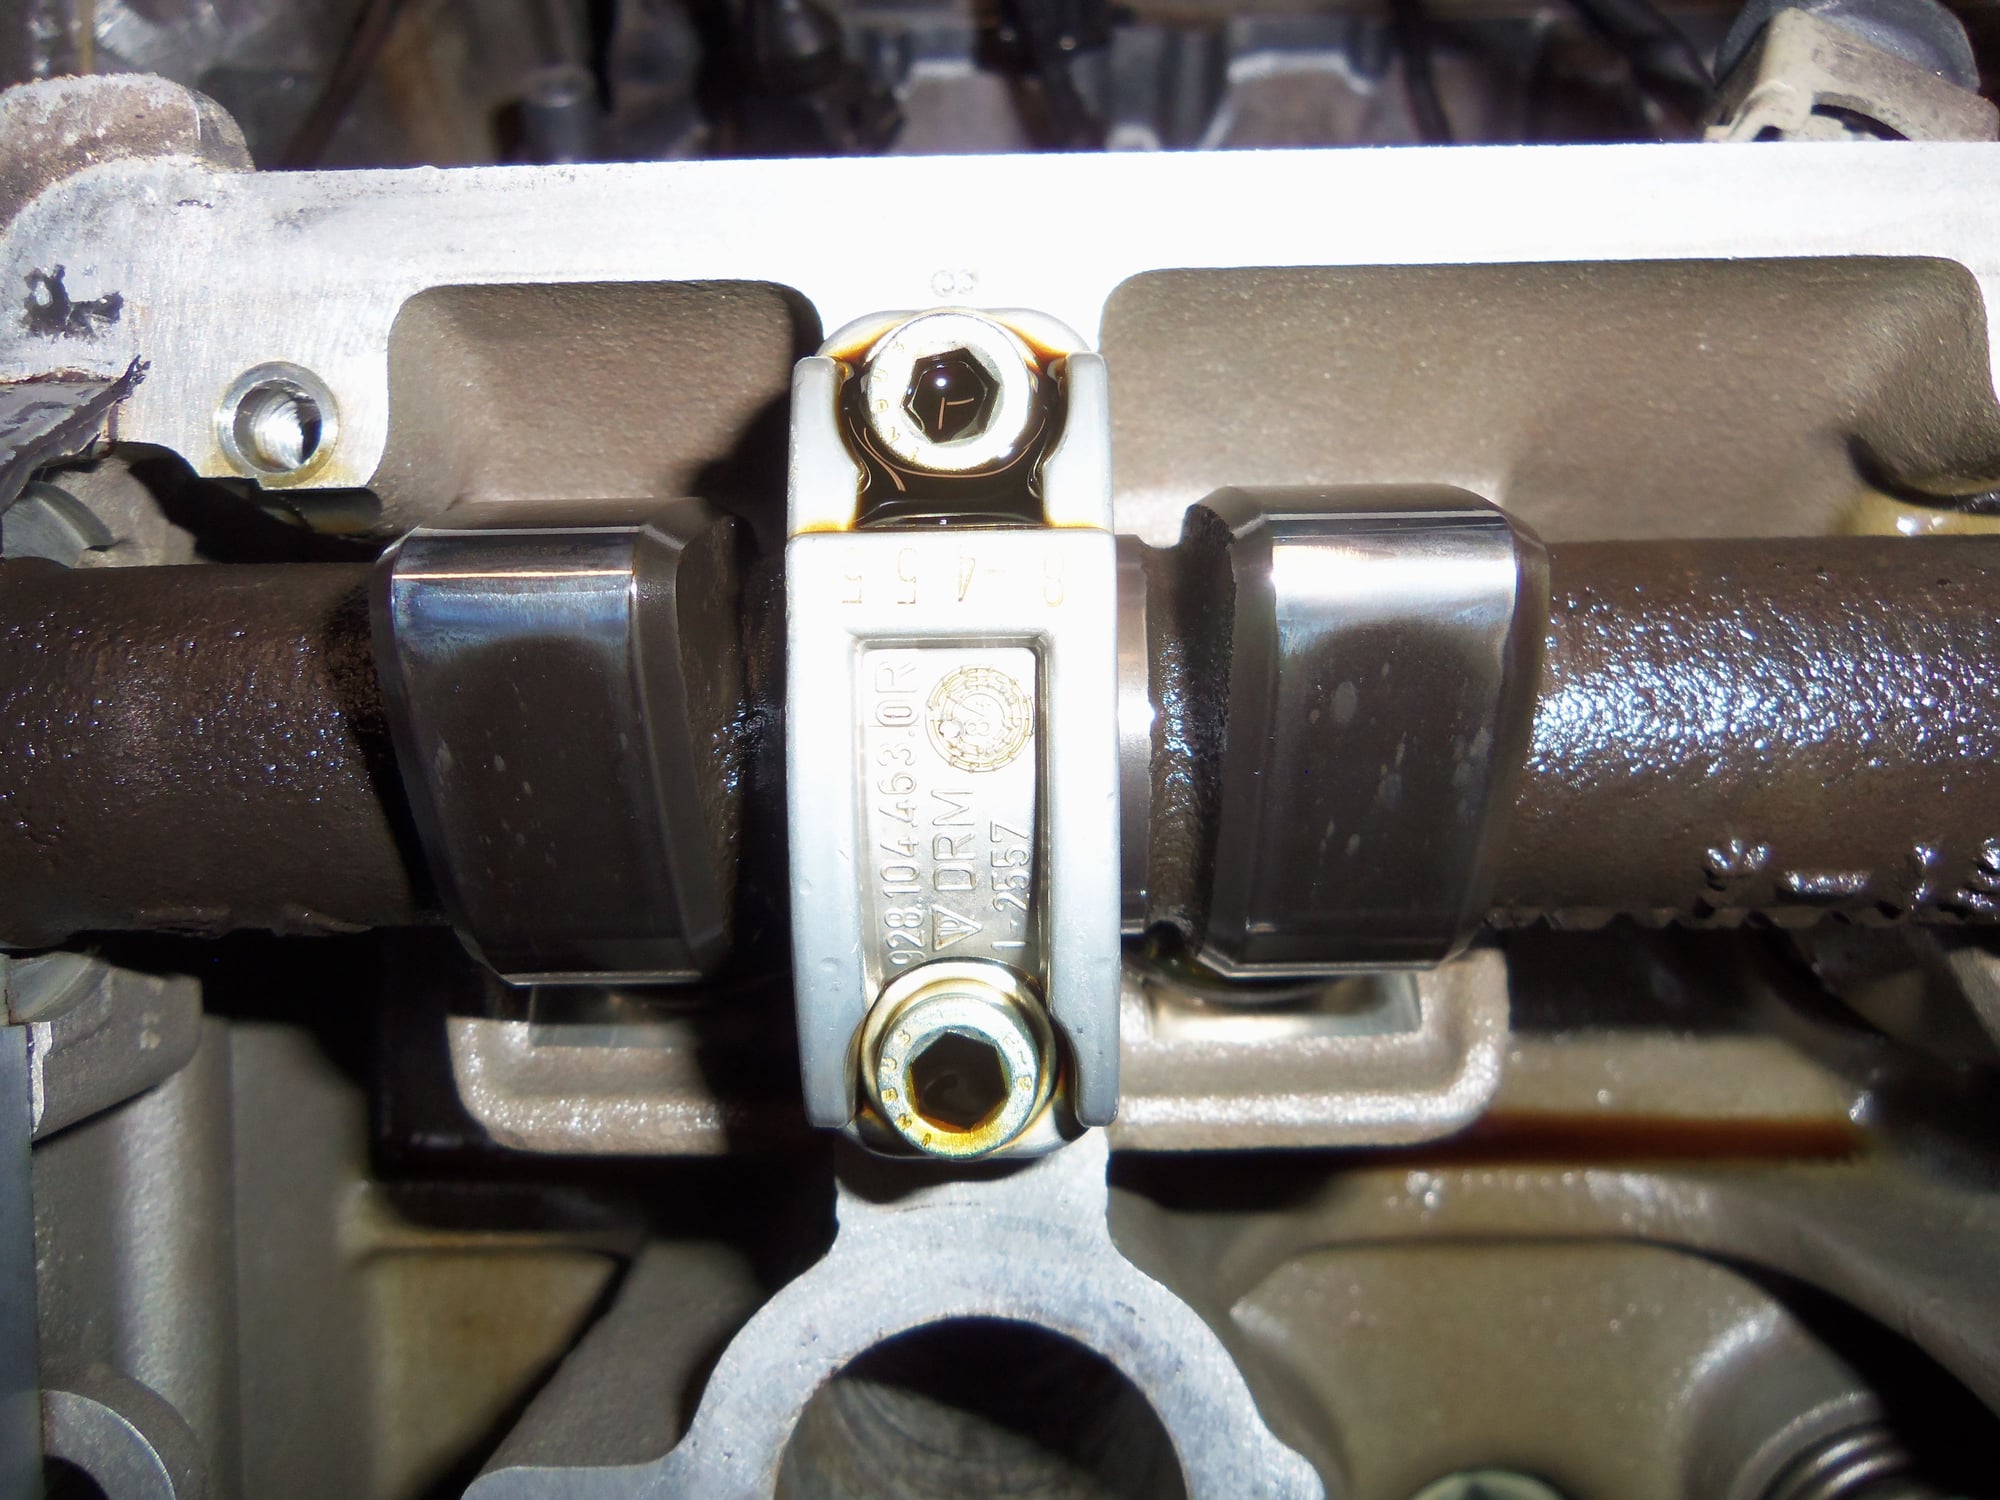
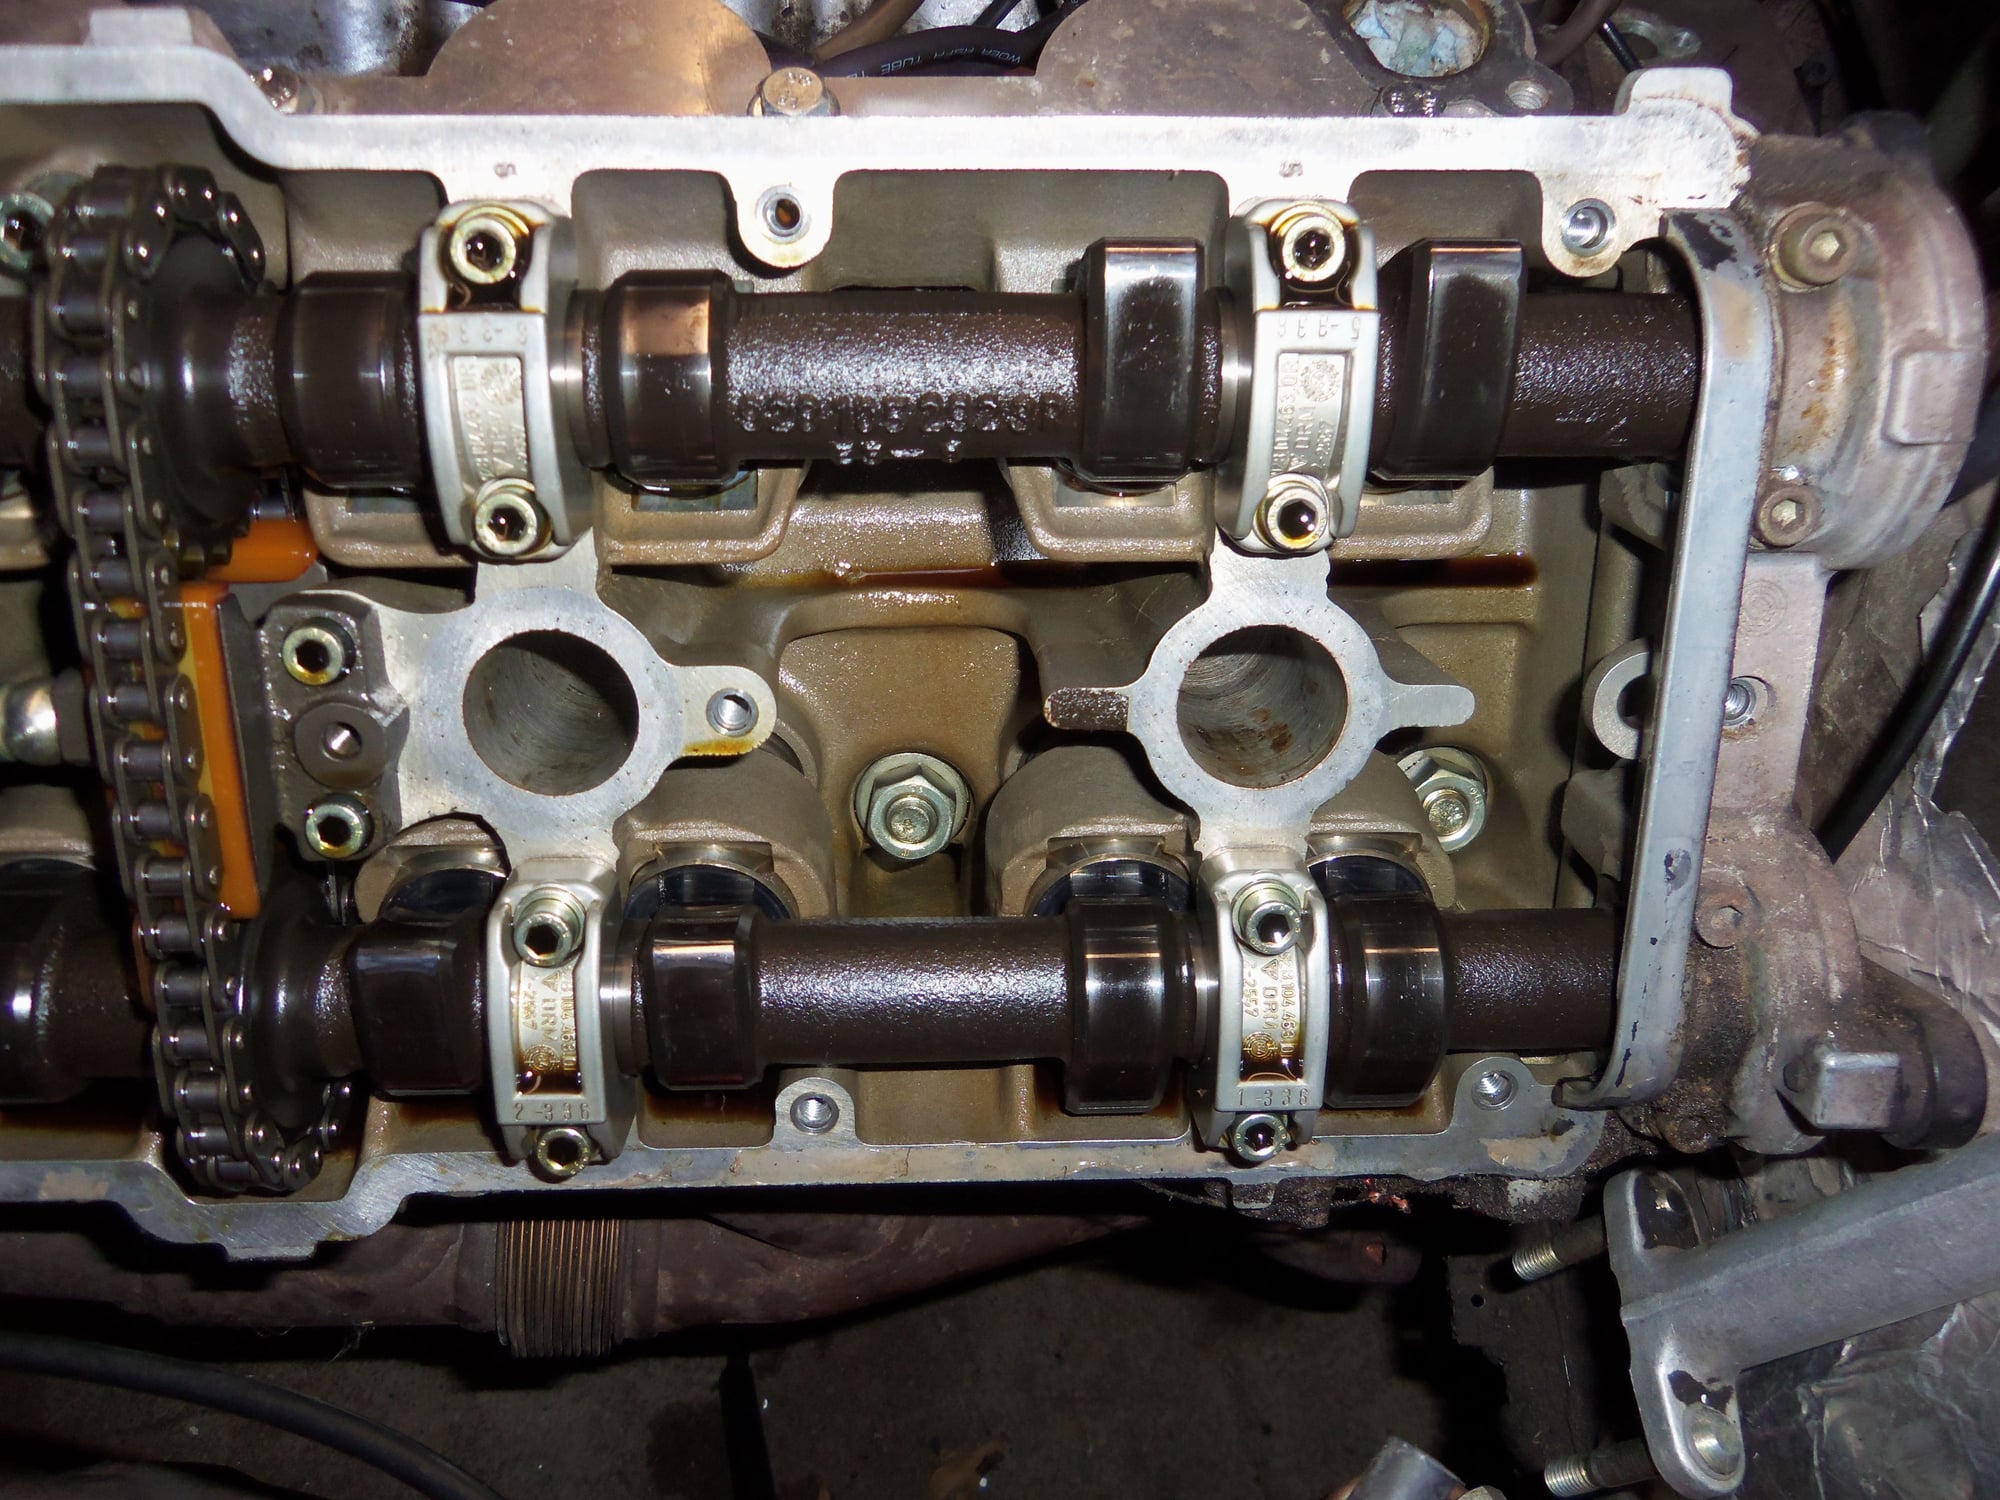
Passenger's side cylinder head and valve train.
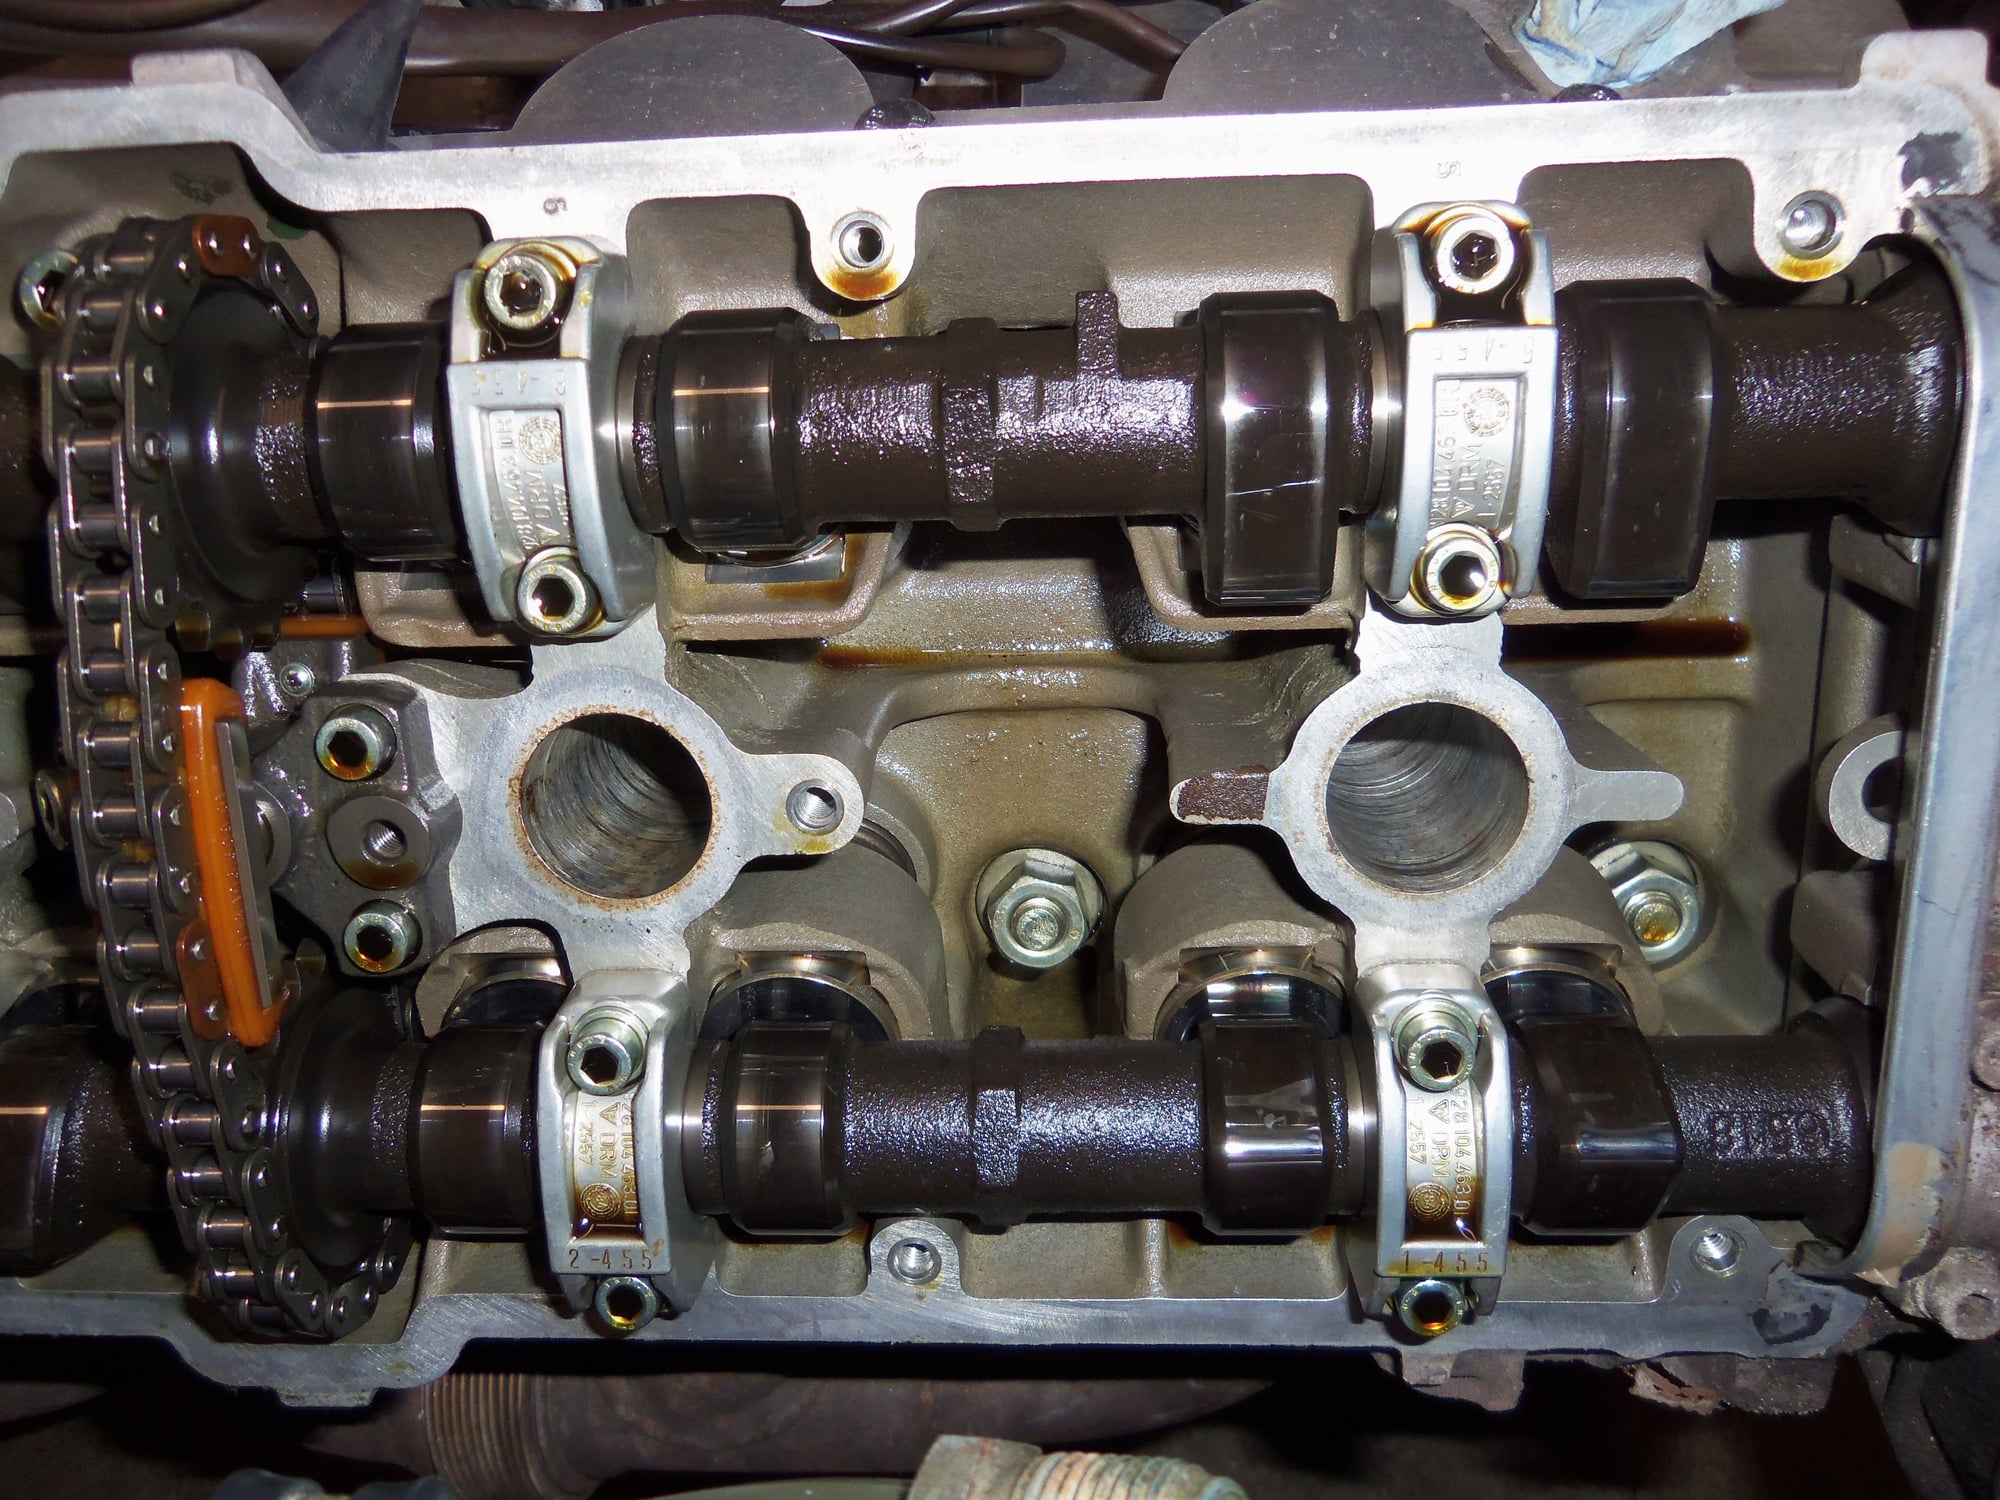
Cylinder's 1 and 2. Cam lobes don't look too bad, to me.
Hmm...NOT 'cheesehead.'
Cylinder's 3 and 4.Cam lobes don't look too bad, to me.
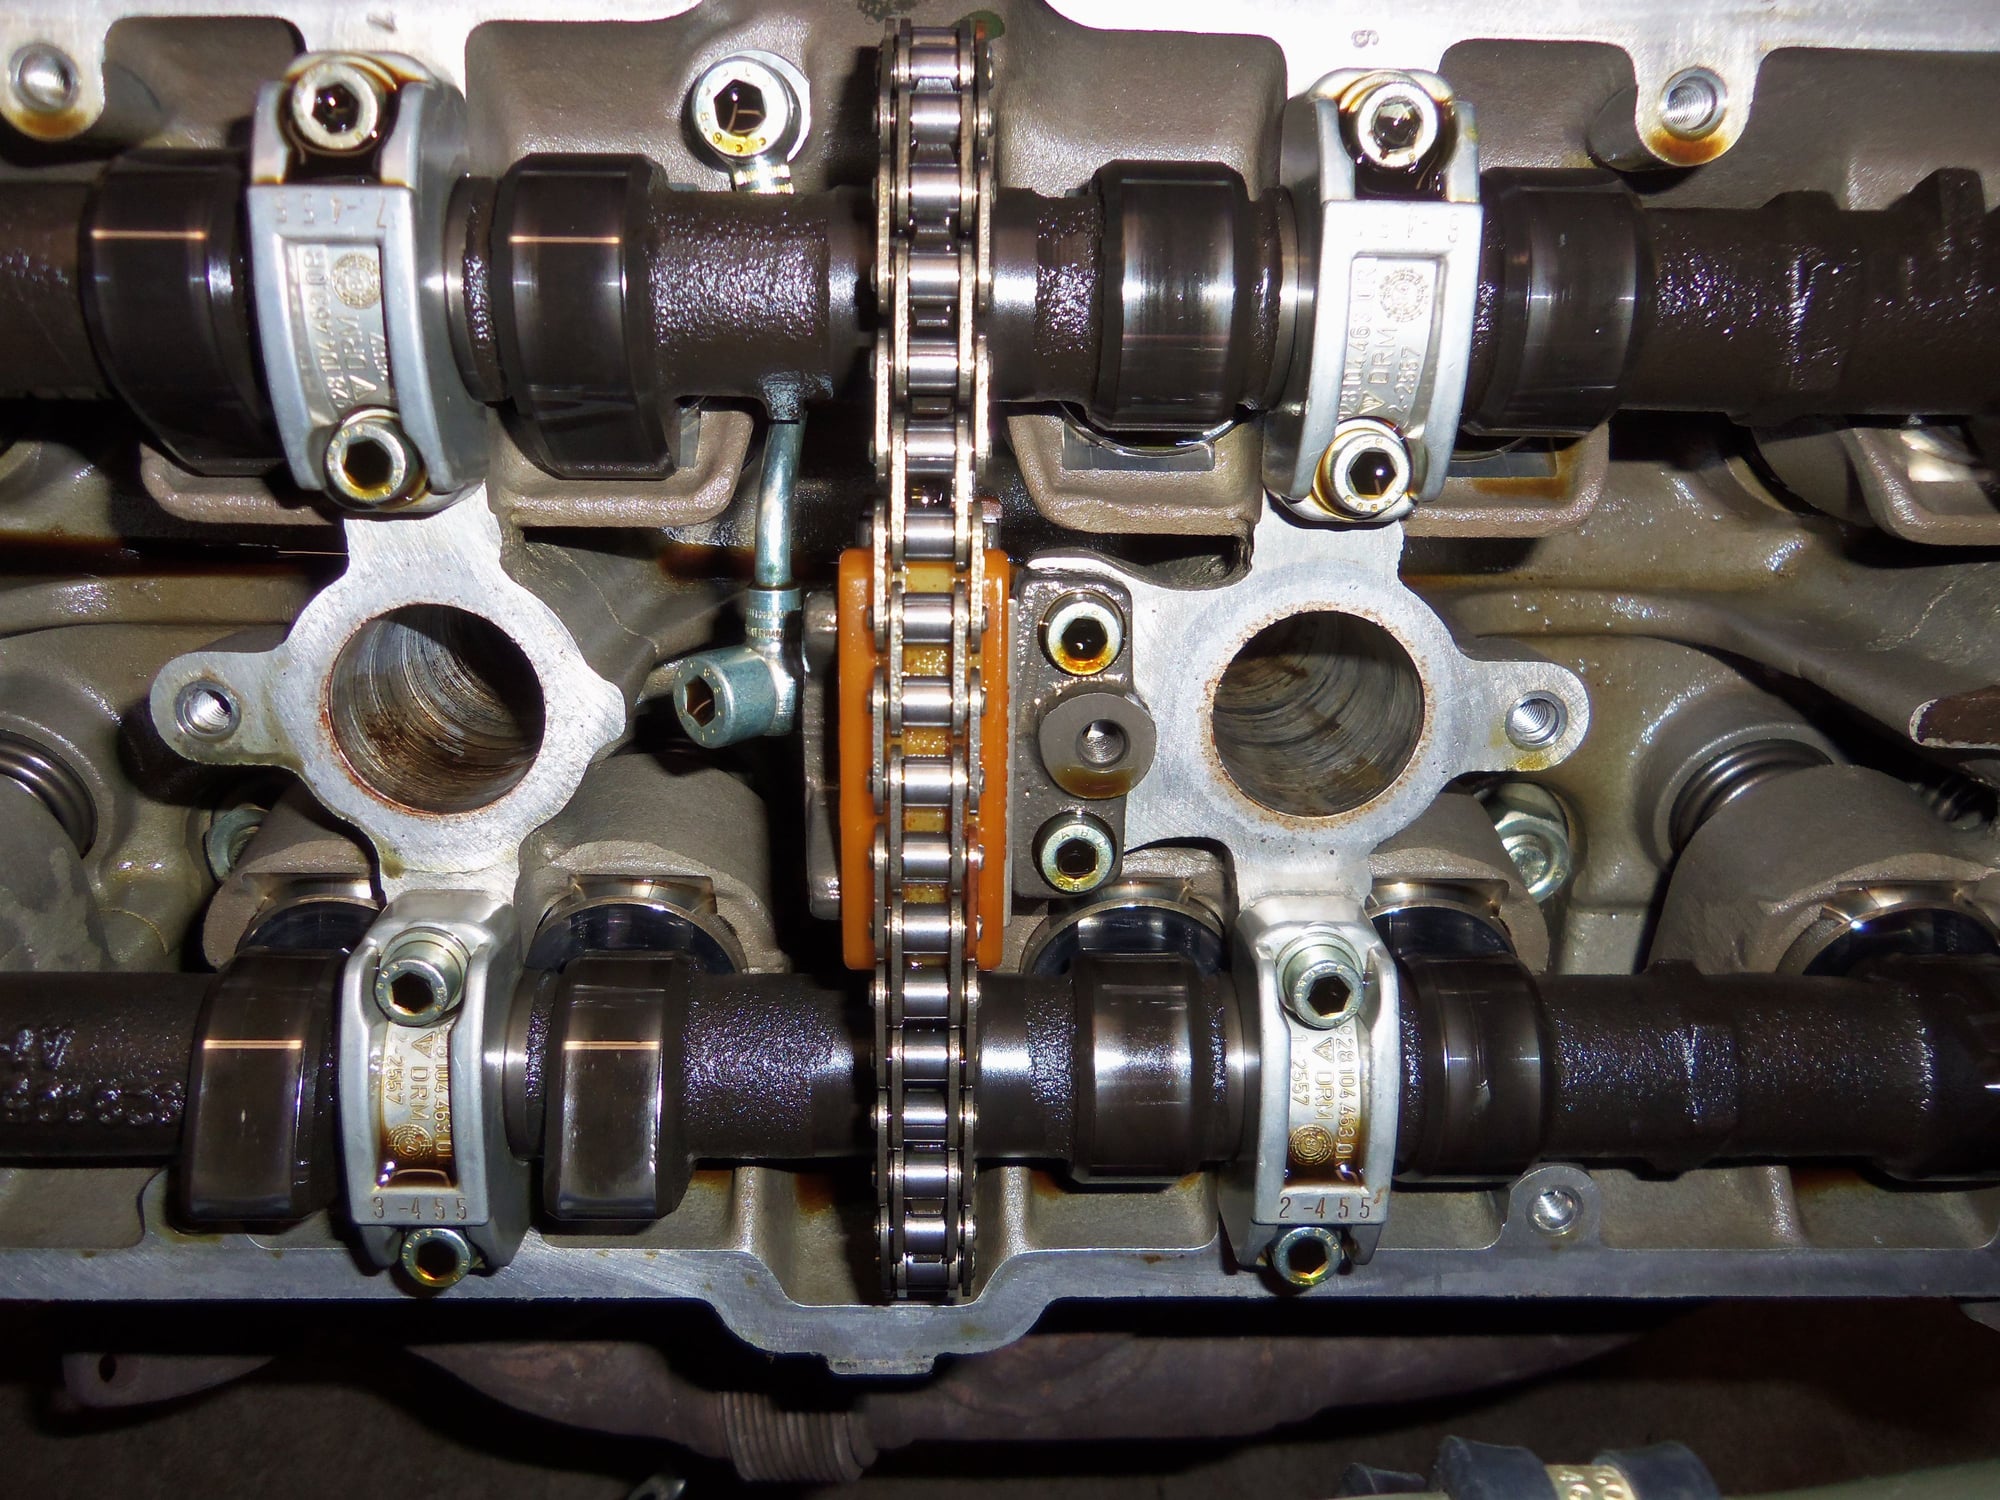
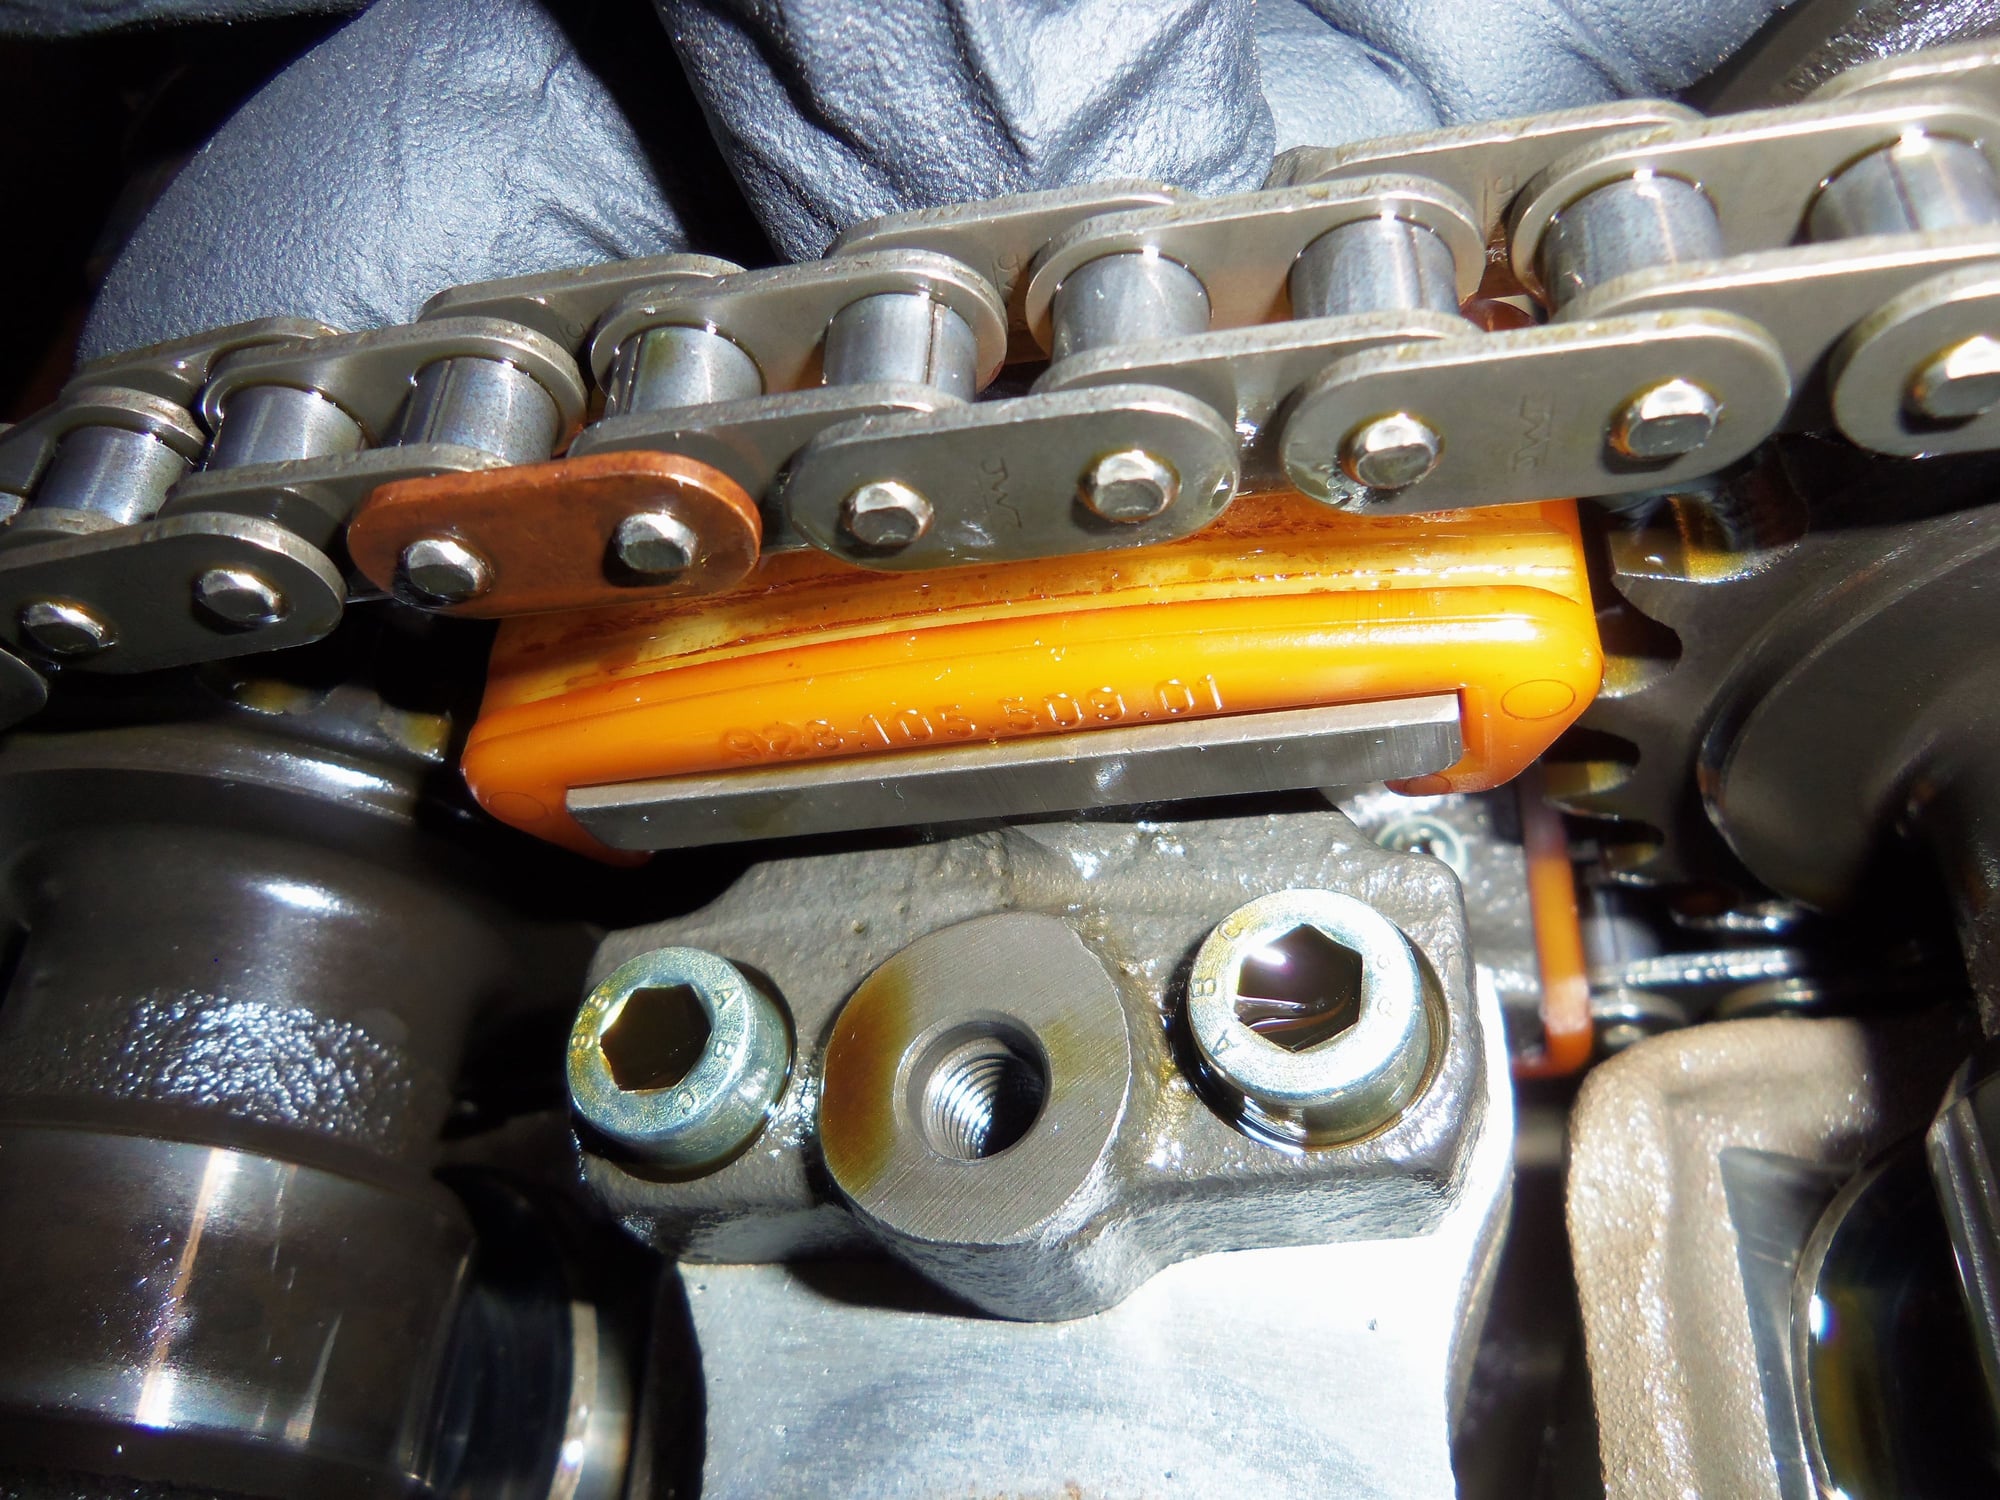
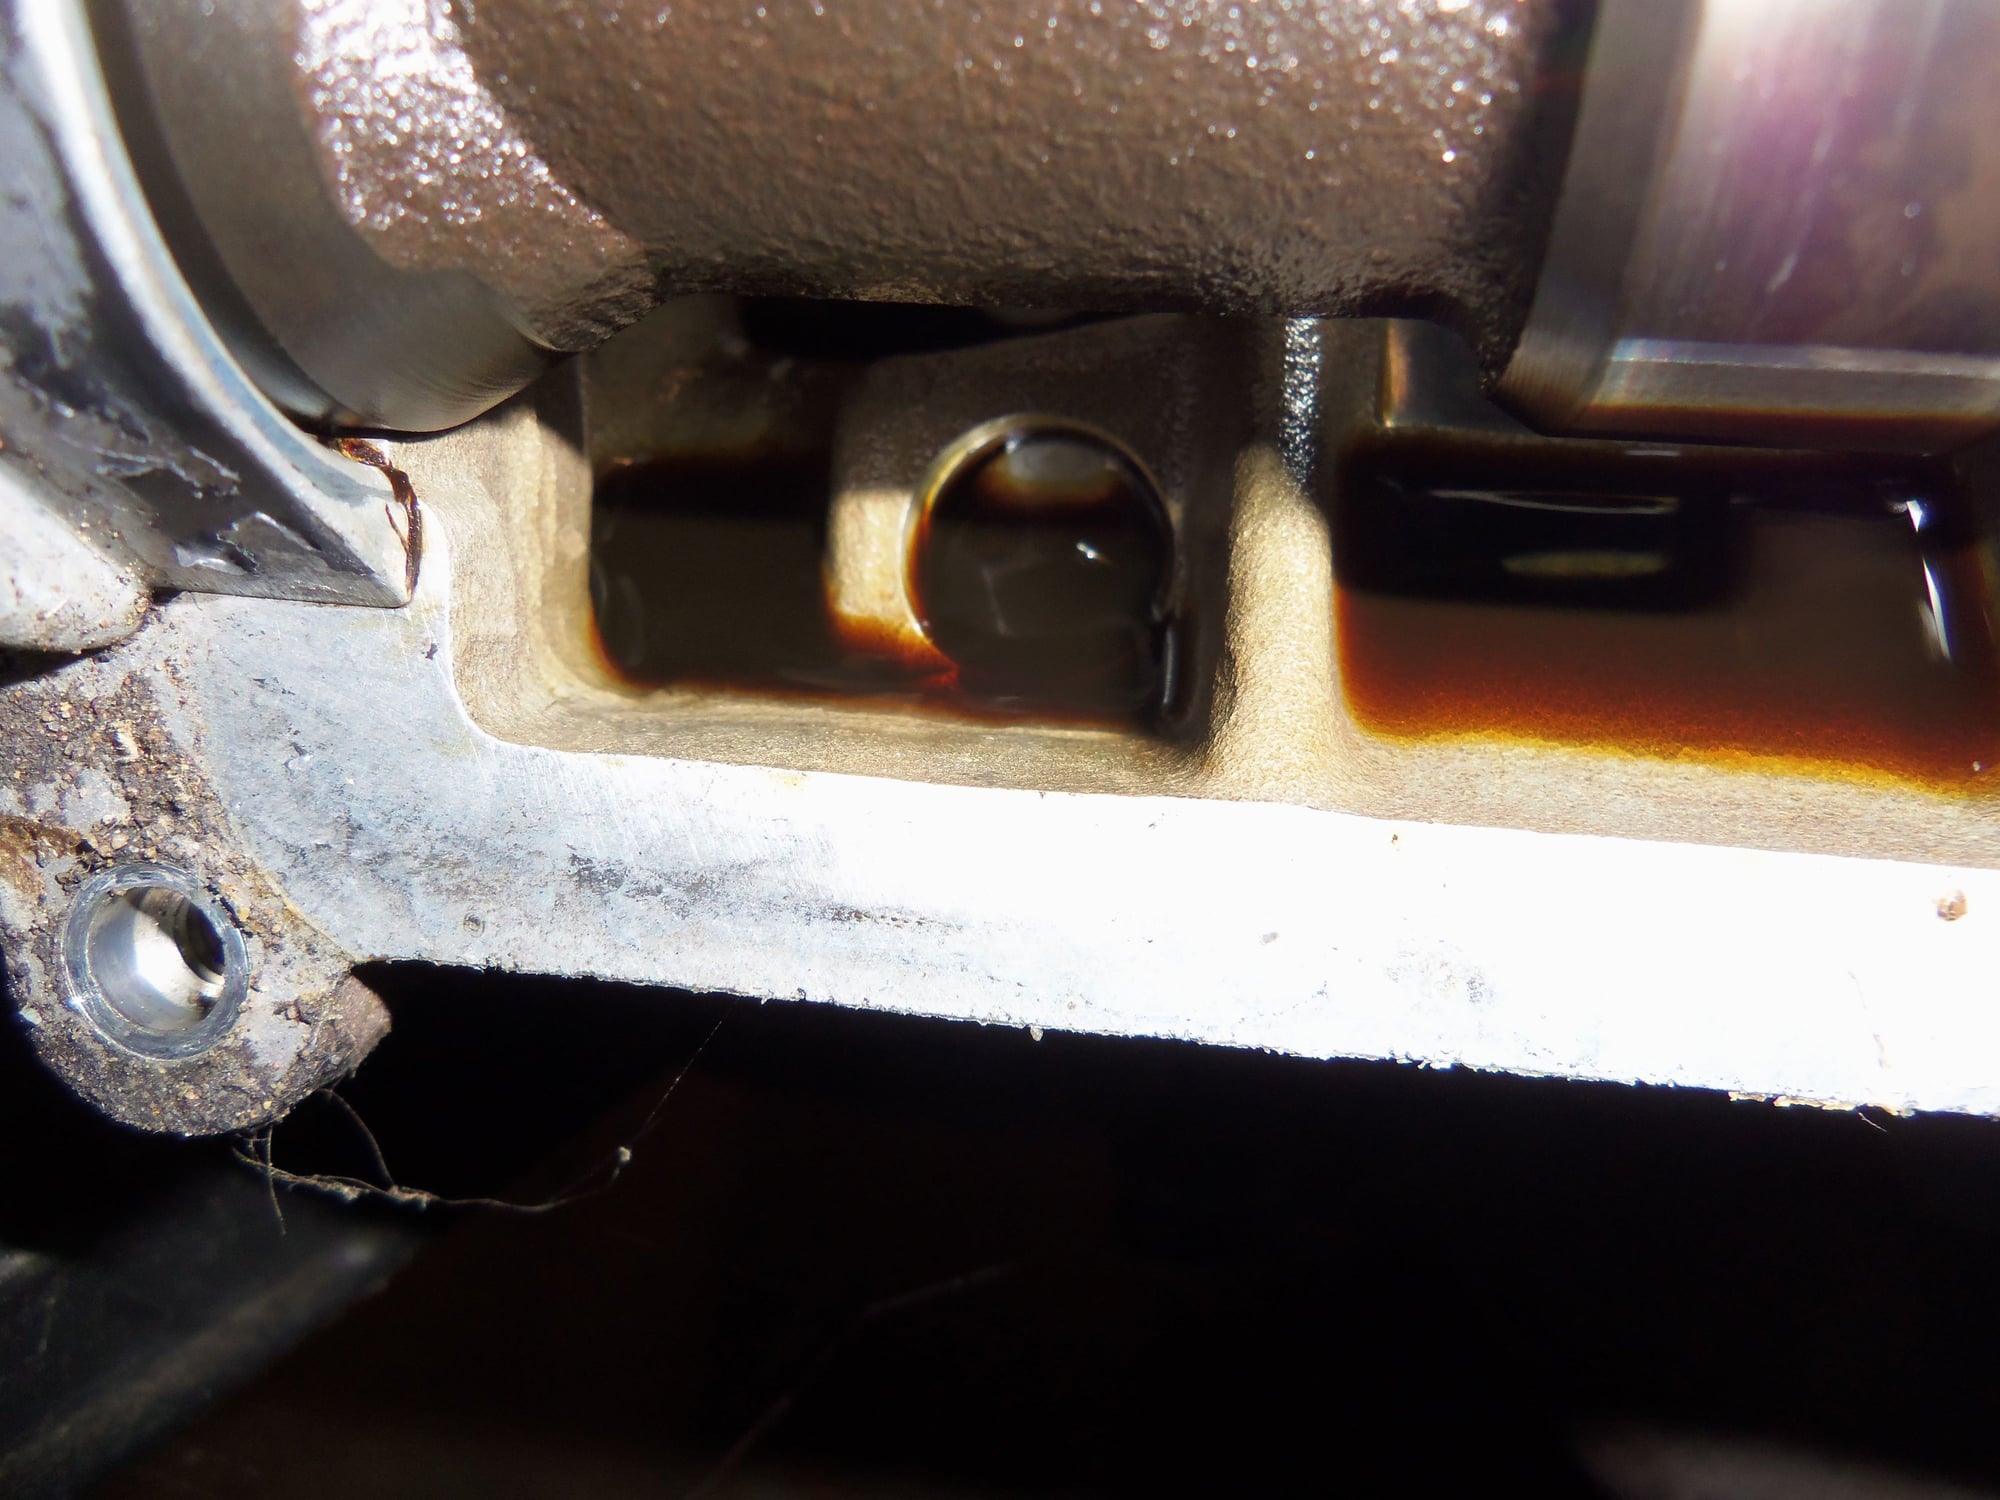
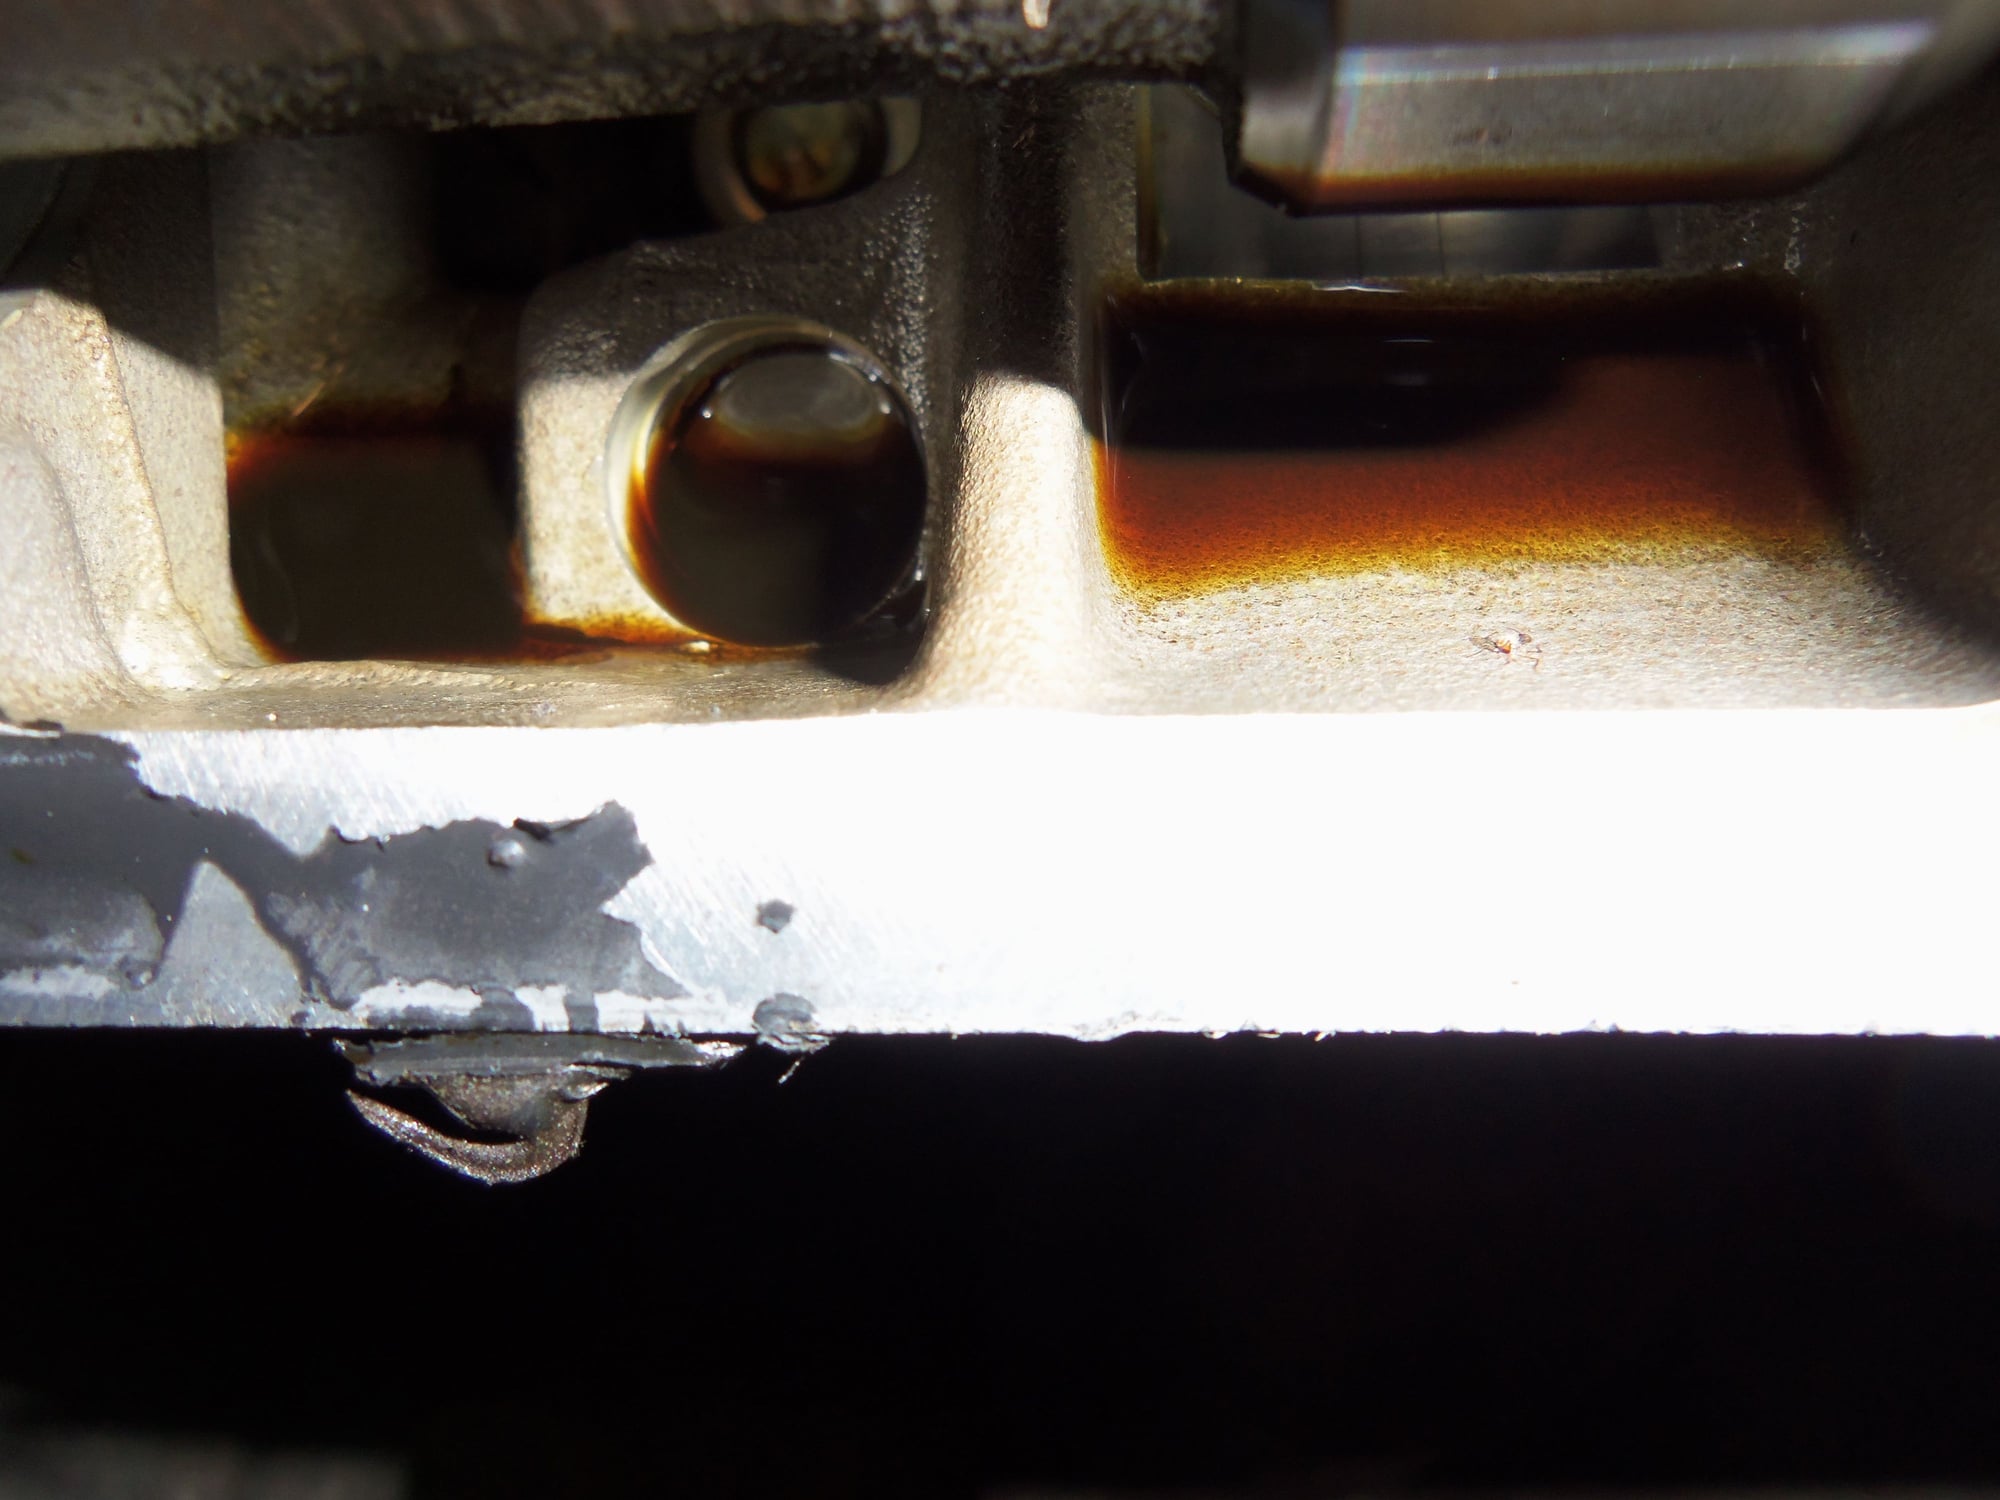
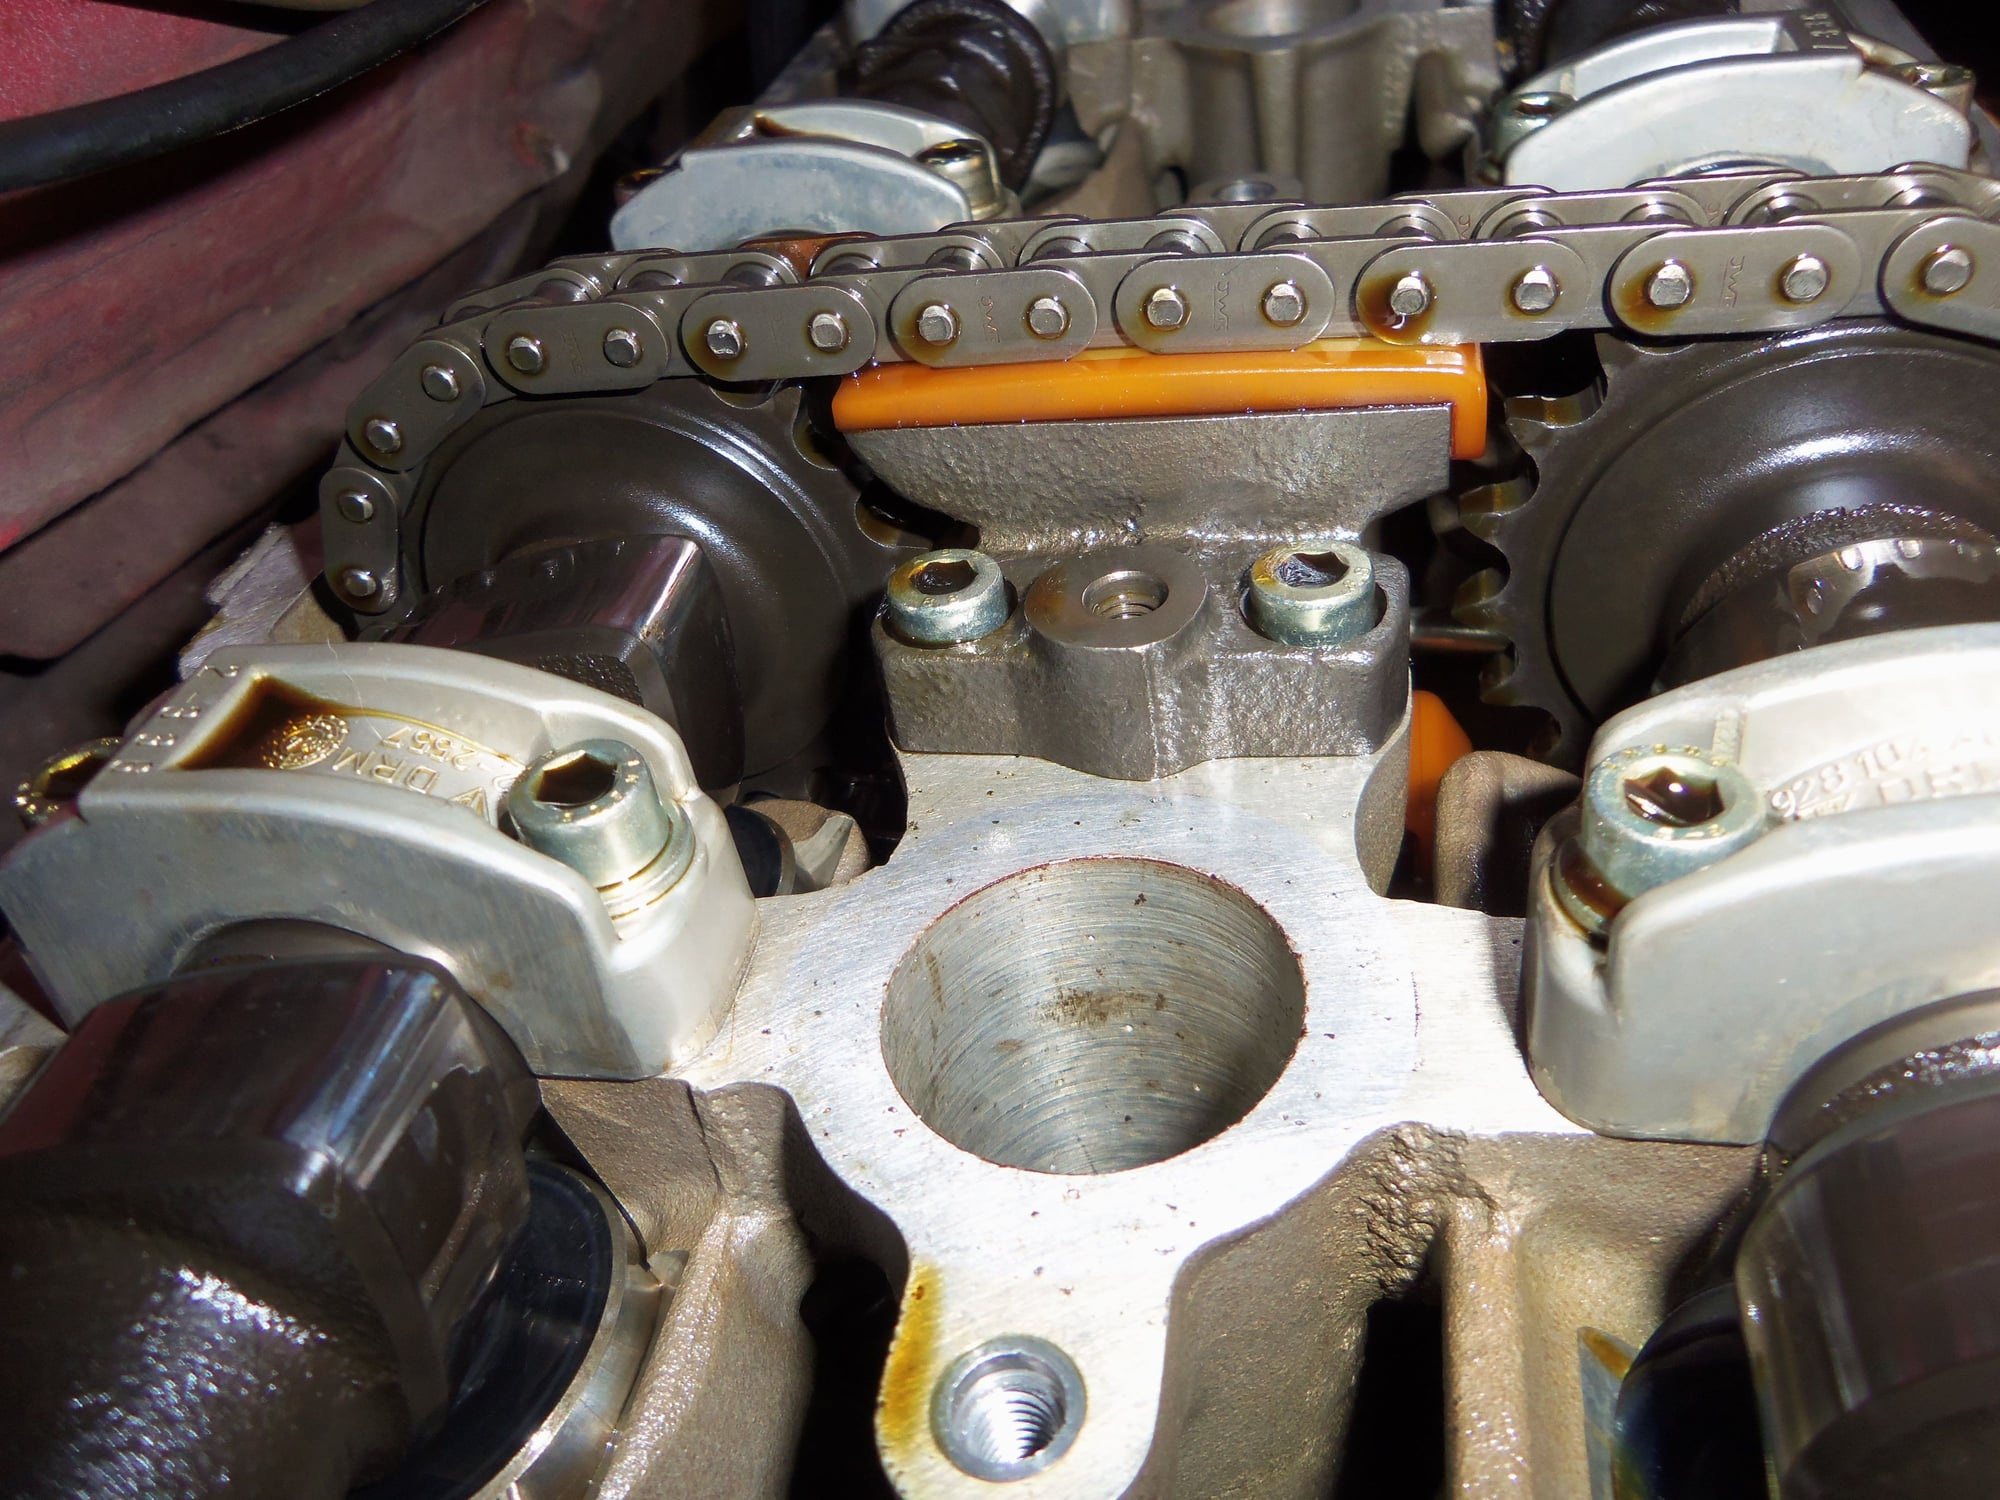
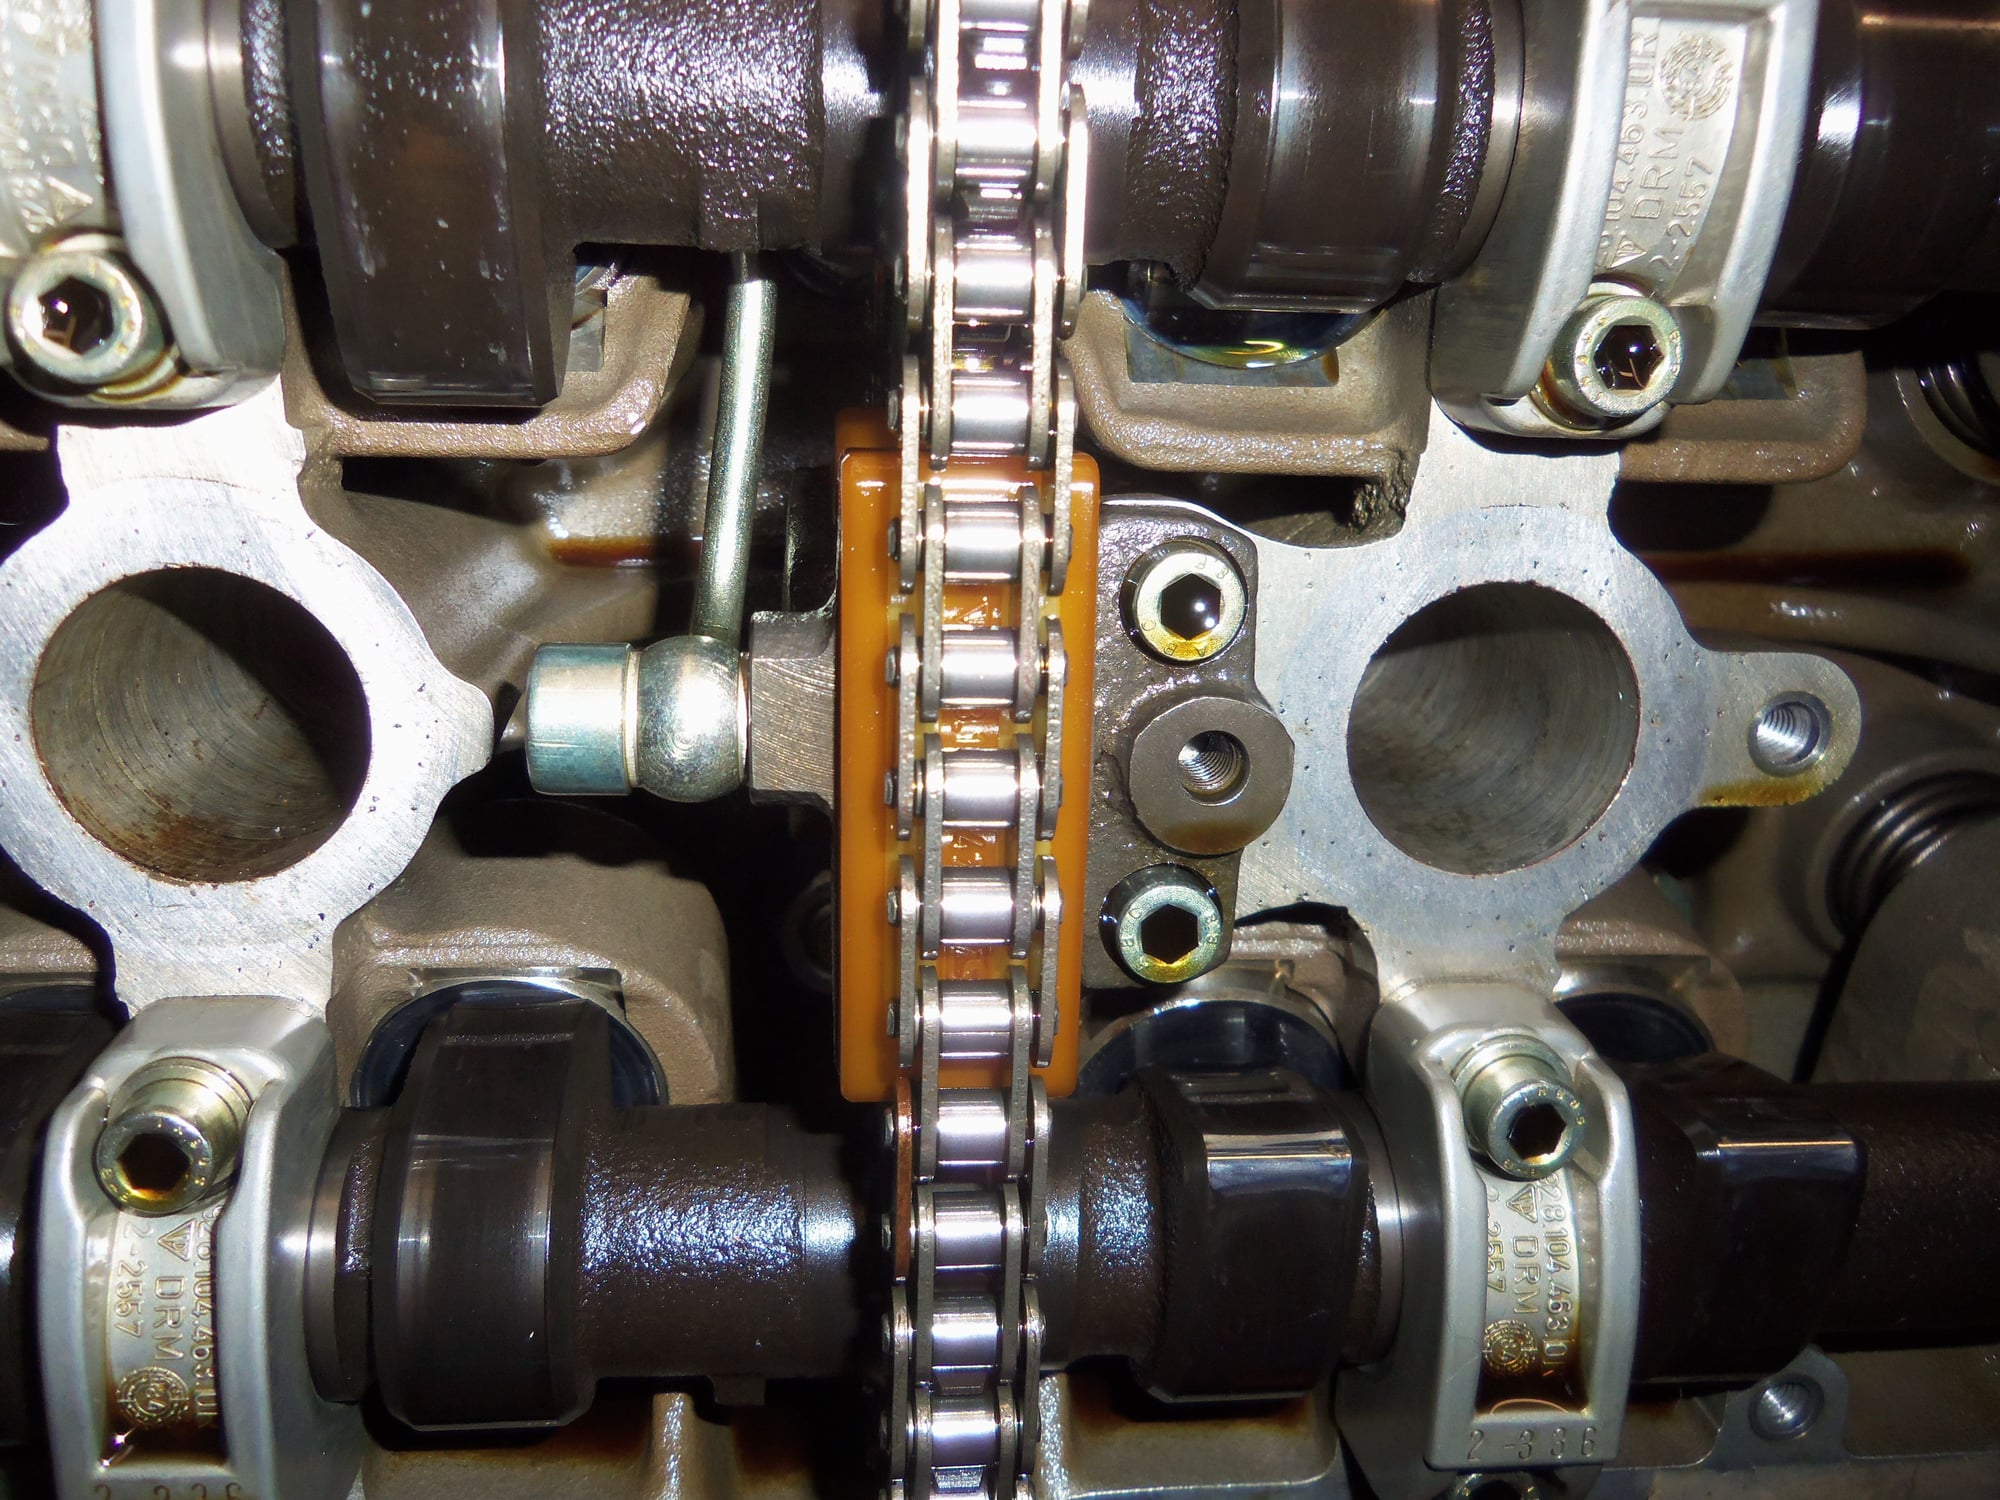
Top of cam chain tensioner.
Front side of tensioner. Note that you can just about read the pad part number: 928 105 509 01. That is an S4 part number.
Back side of the tensioner.
Close up of grooves worn in tensioner top pad. Can see part number clearer on side of top pad.
Another view of grooves worn in tensioner top pad.
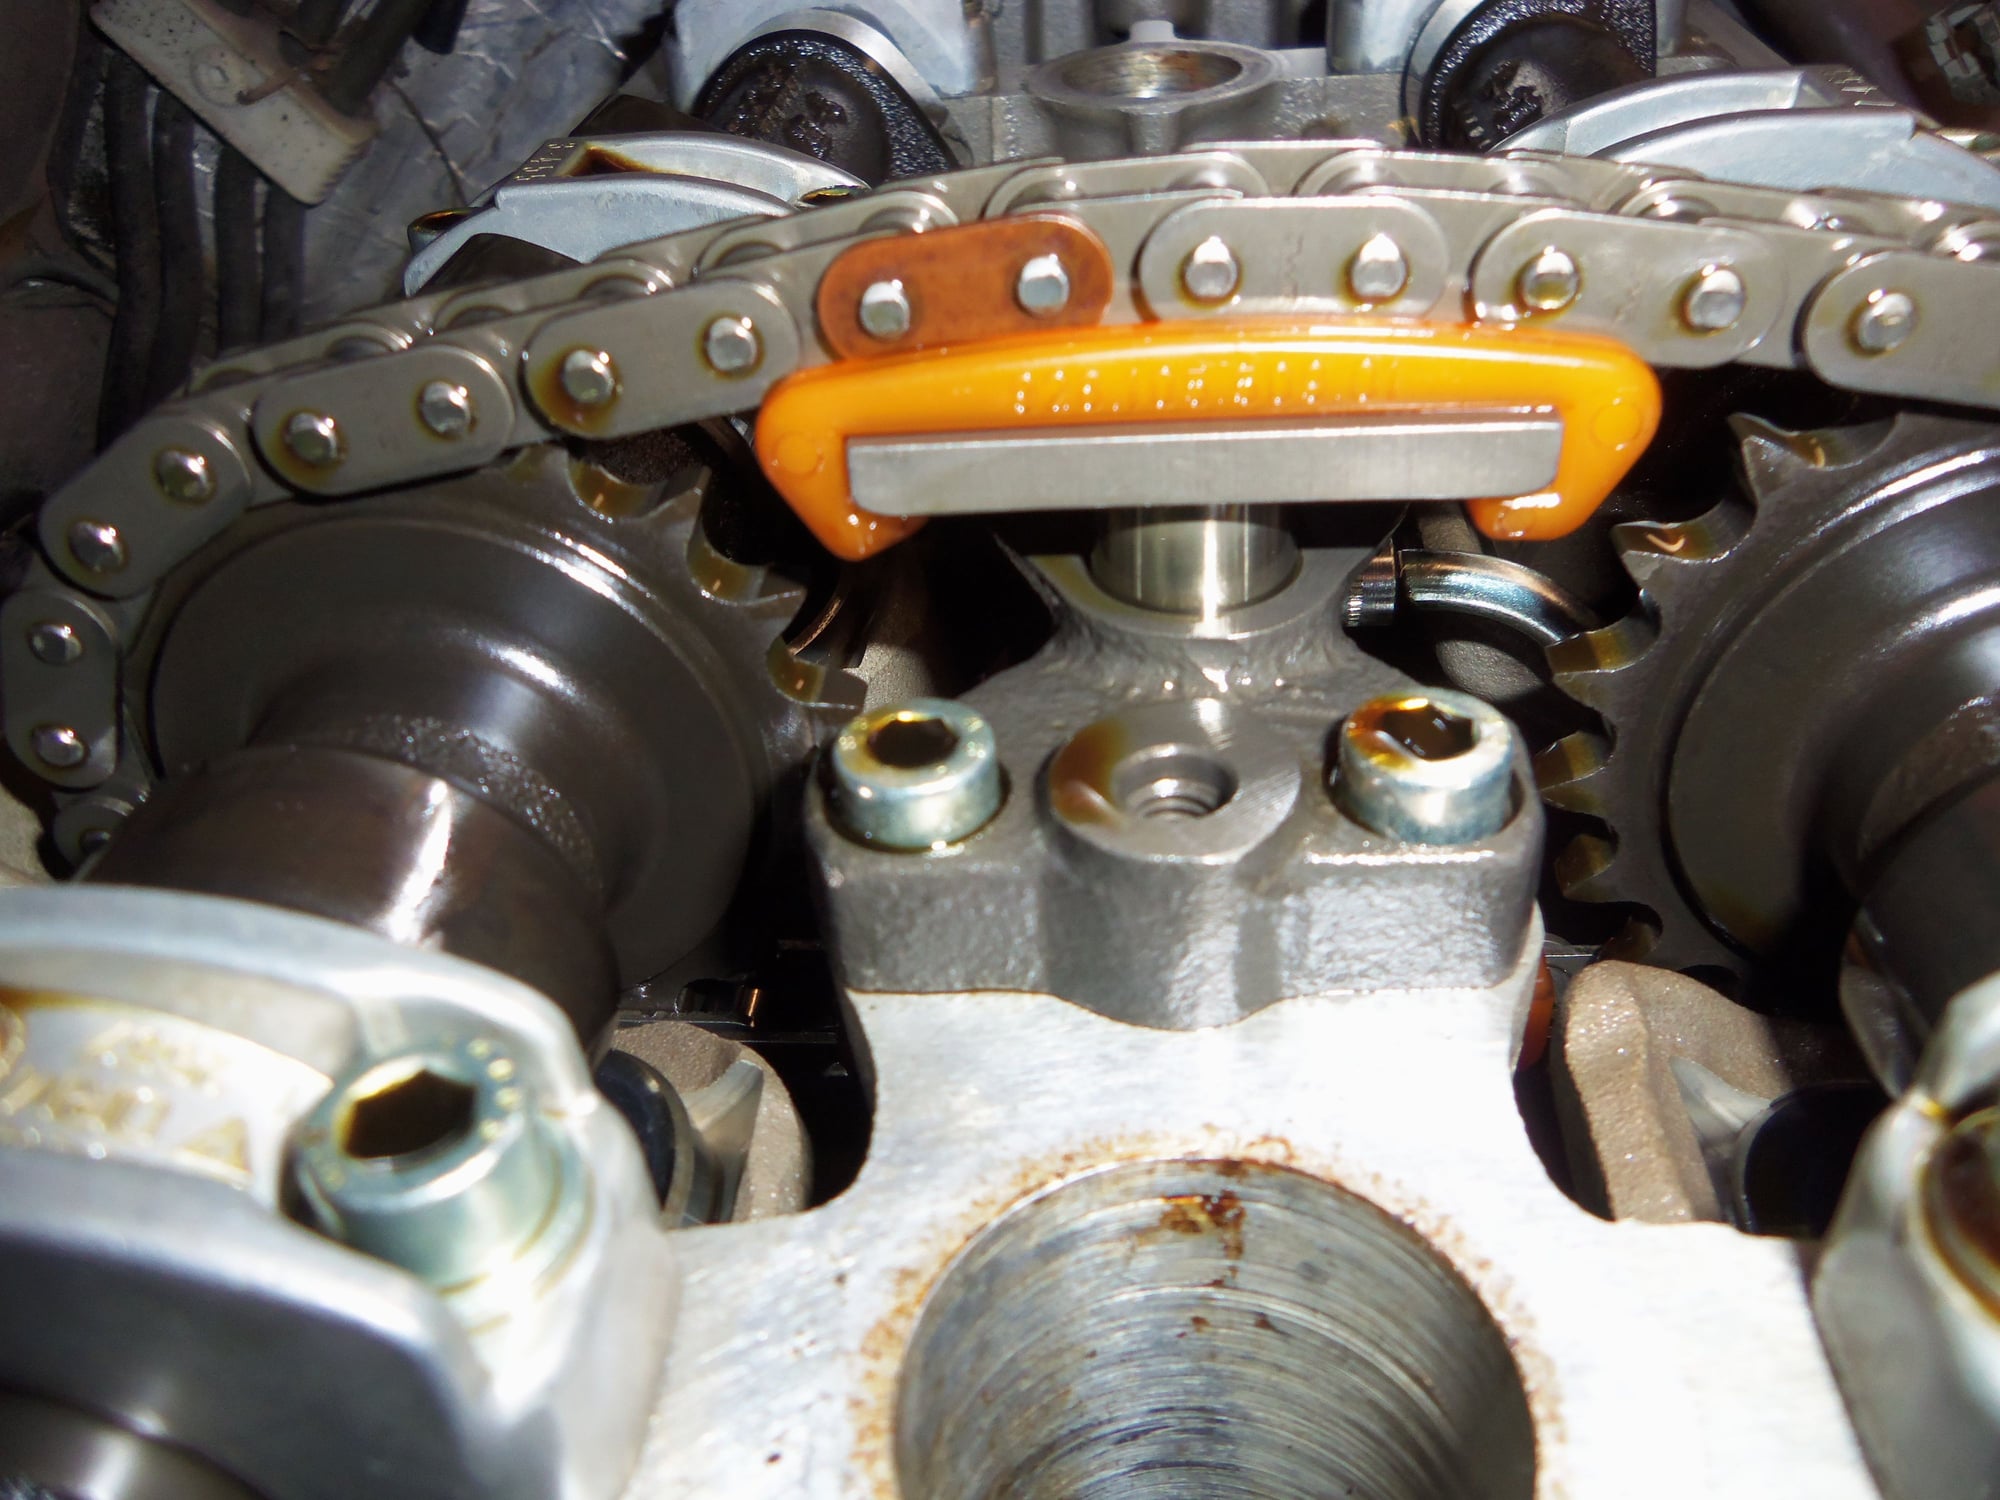
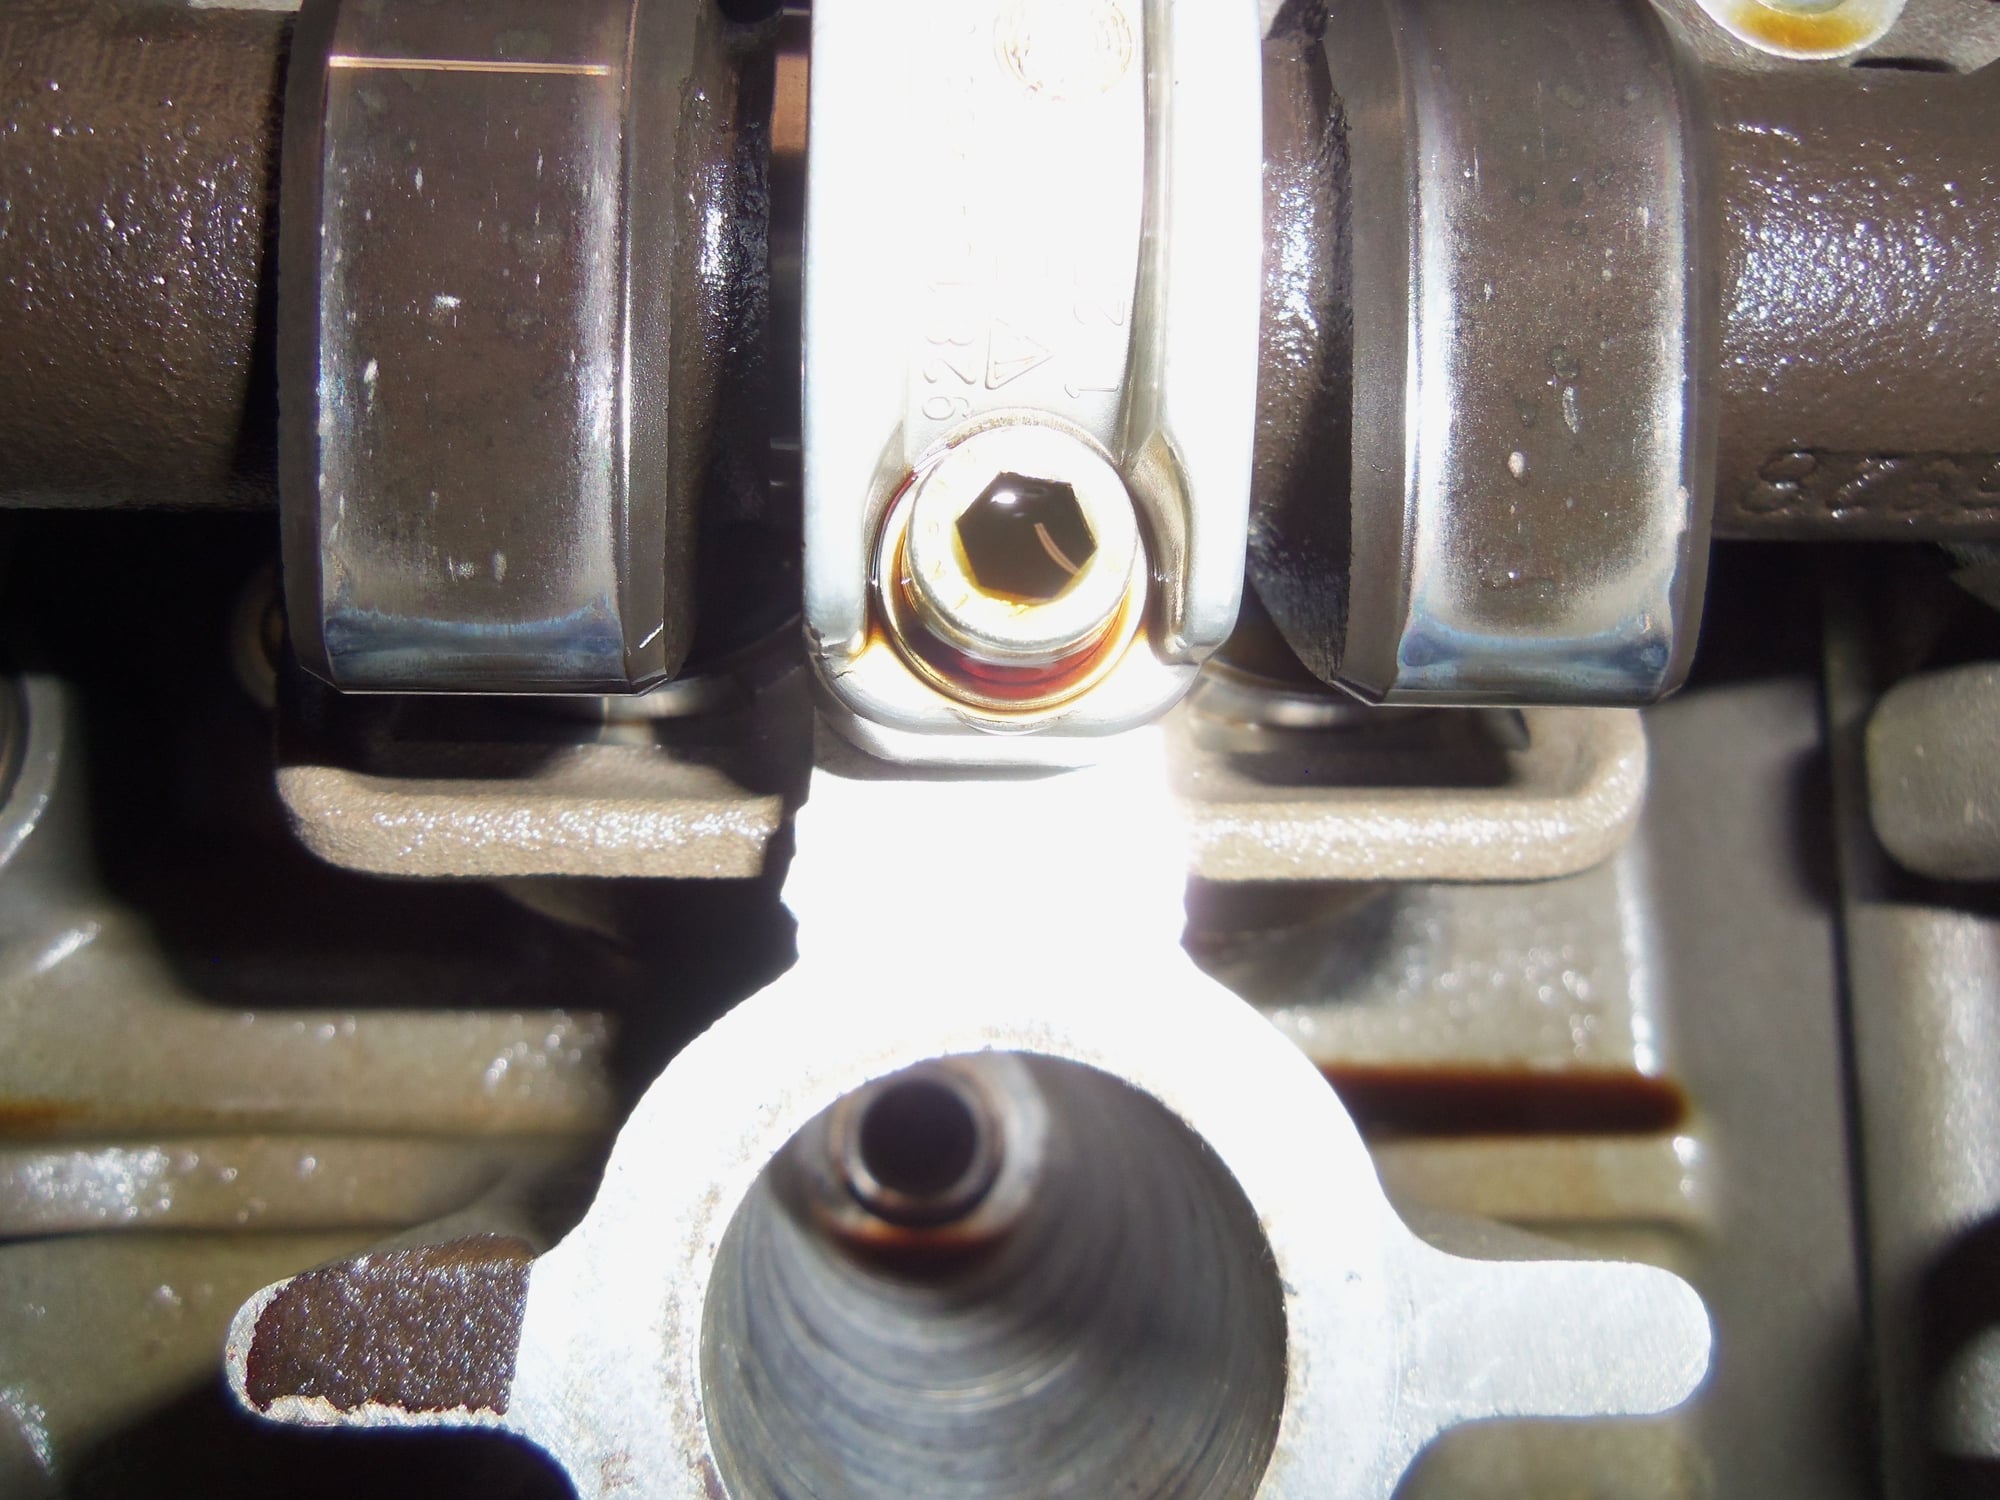
Noses of intake cam lobes for cylinder 4 look good, at least to me.
Ramps and noses of intake cam lobes for cylinder 1 also look good to me.
I noticed when I was removing the cam cover bolts, that not all of them had the little O-rings that sat down in the bolt holes in the cam cover. The end bolts on either side of the middle row only had the rubber backed steel washer, and no O-ring. With the cam cover off, I could see why. Those bolts thread into the head outside of the cam cover sealed area.
Threaded hole for front middle row cam cover bolt.
Threaded hole for rear middle row cam cover bolt.
Alright, this is all well and good. However, what do I do about the cam chains themselves? I have read Rennlist posts about the chains implying they are a wear item. I would think after 168,*** miles, that would constitute 'worn.'
On the other hand, I have not read anything about chain breakage, other than from catastrophic collateral damage.
I do understand that replacing the chains involves removing the camshafts, replacing the front camshaft seals, resealing the front and rear cam bearing bridges, and replacing all six cam plug seals.
I am open to any and all advice...
Last edited by skpyle; 10-10-2017 at 11:31 AM.
Reason: Because I am an imbecile and called Rob Edwards Rob 'Williams'... As well, corrected wrong information that I had posted.
I did a tensioner pad and cam chain replacement on my 1987 928 S4. I have a PDF document that outlines the procedure. Drop me a line at info at electronikrepair.com and I'll send it.
I used chain part number 944.105.501.05 which is a stronger racing cam chain.
The IWIS Racing chain is what the Porsche chains used to be like. Then they went cheap and made them with smaller weaker links.
Definitely do the tensioner pad/cam chain swap now as it will be peace of mind in the long run.
Many a 944 has met its end due to aging pads and chains. Even though the 928 isn't as susceptible due to normally operating at lower rpms, it isn't out of the question.
I didn't get these photos last night, so I am including them now. These are the S4 style cam cover bolts for 1986.5 S3, with the O-rings and rubber backed sealing washers.
Custom, high-tech bolt holder and organizer.(Ignore the spatters. It started raining this morning.)
Two bolt lengths correct for late S3 only, though S4 style. Front and back of rubber backed sealing washers.
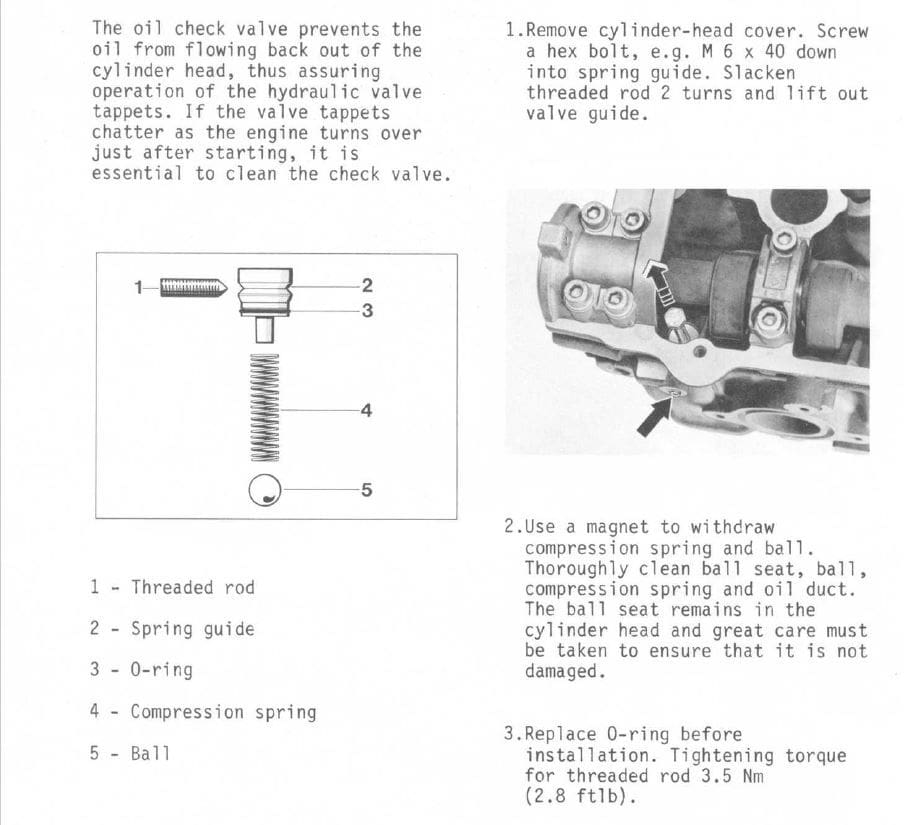
Further digging now has me wondering about the 'check valve for hydraulic valve tappets.'
WSM Section 17, page 17-10 covers this. As well, check out this screenshot:
So, more research to do.
EDIT!!! CORRECTION: The above information about the hydraulic tappet check valve from the WSM does NOT apply to S3 cylinder heads. It applies to S4 and later heads ONLY. For the S3 heads, there is no external set screw, and the check valves are not easily removable. So, if you are a newbie, DO NOT FOLLOW THIS INFORMATION.
Last edited by skpyle; 10-10-2017 at 09:46 PM.
Reason: Correcting incorrect information.
EDIT!!! CORRECTION: Pay VERY close attention to this post. It PROVES that S3 cylinder heads do NOT have the easily removable and serviceable hydraulic tappet check valves. Refer back to Post #5. If you are a newbie, do NOT look for the serviceable check valves on your S3 heads, because they are NOT there. ONLY the S4 and later cylinder heads have the easily serviceable check valves.
Hmmm...I won't be cleaning the oil check valves in the heads. Because there are none.
I searched through threads on Rennlist about these check valves. I learned to replace the springs as well as the O-rings for the check valves.
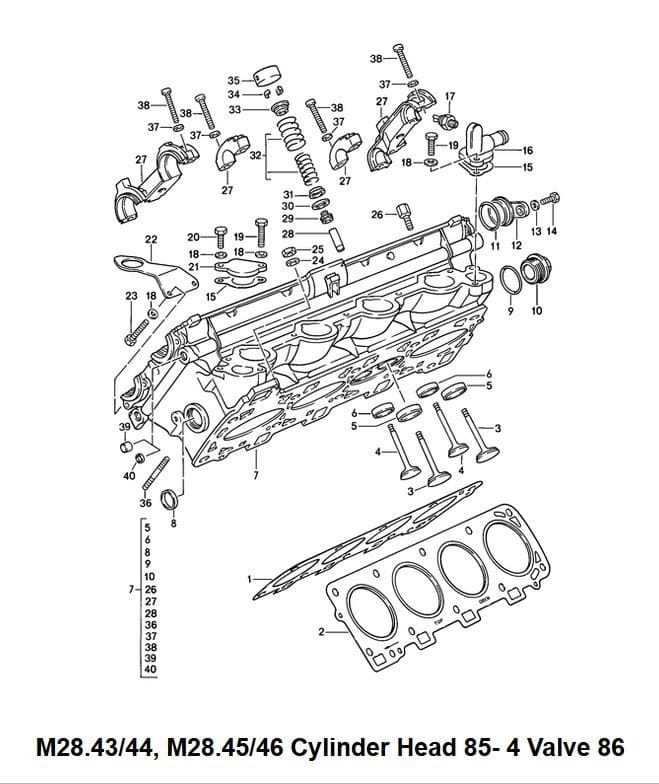
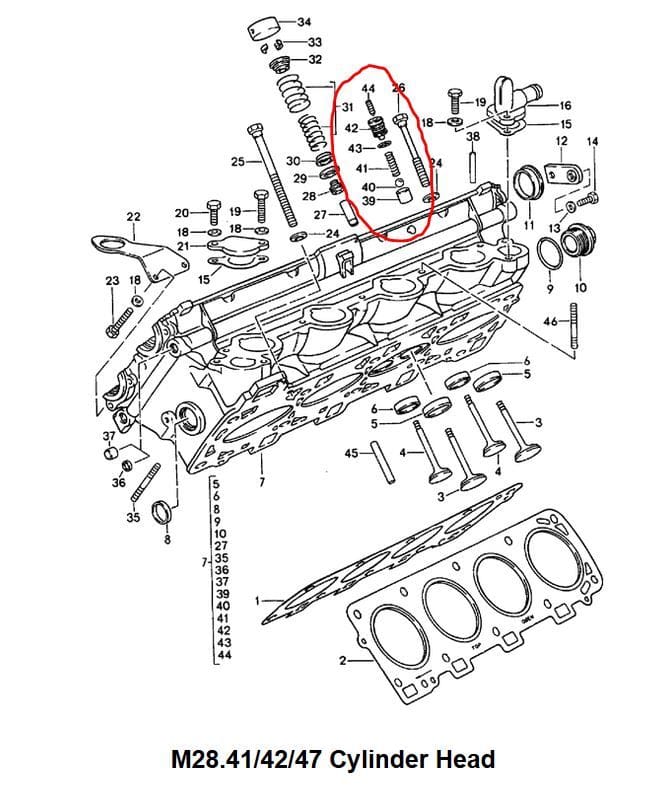
So, I went to PET looking for them. Nothing for 1985-86 heads. I looked at PET for 1987-91. Found them.
No check valve assembly.
Check valve assembly circled in red.
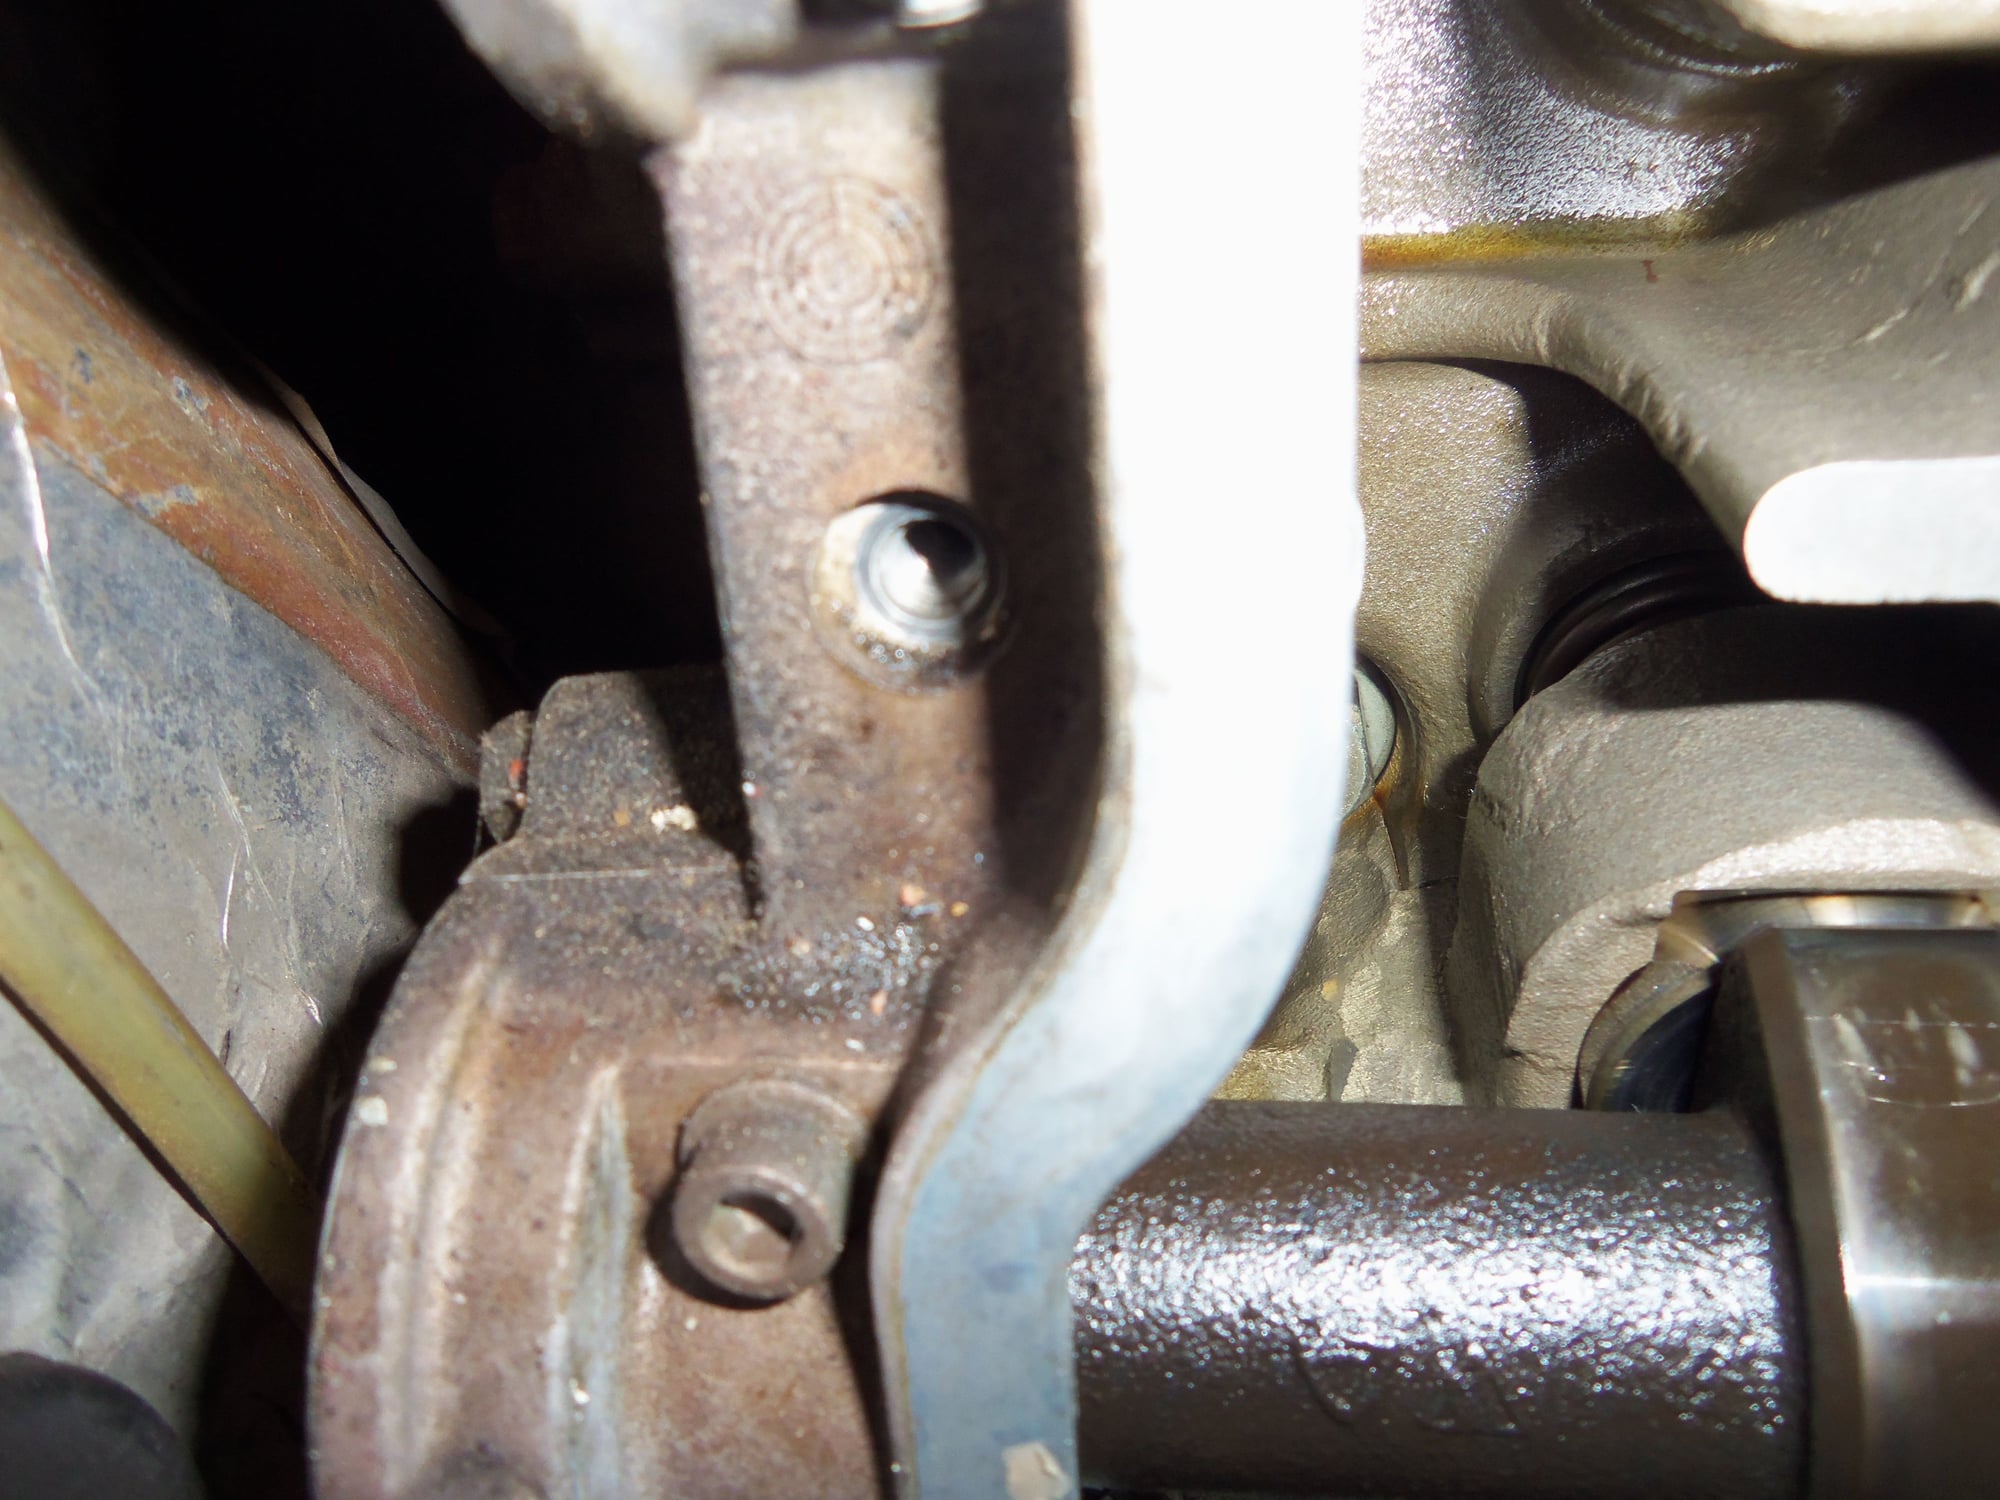
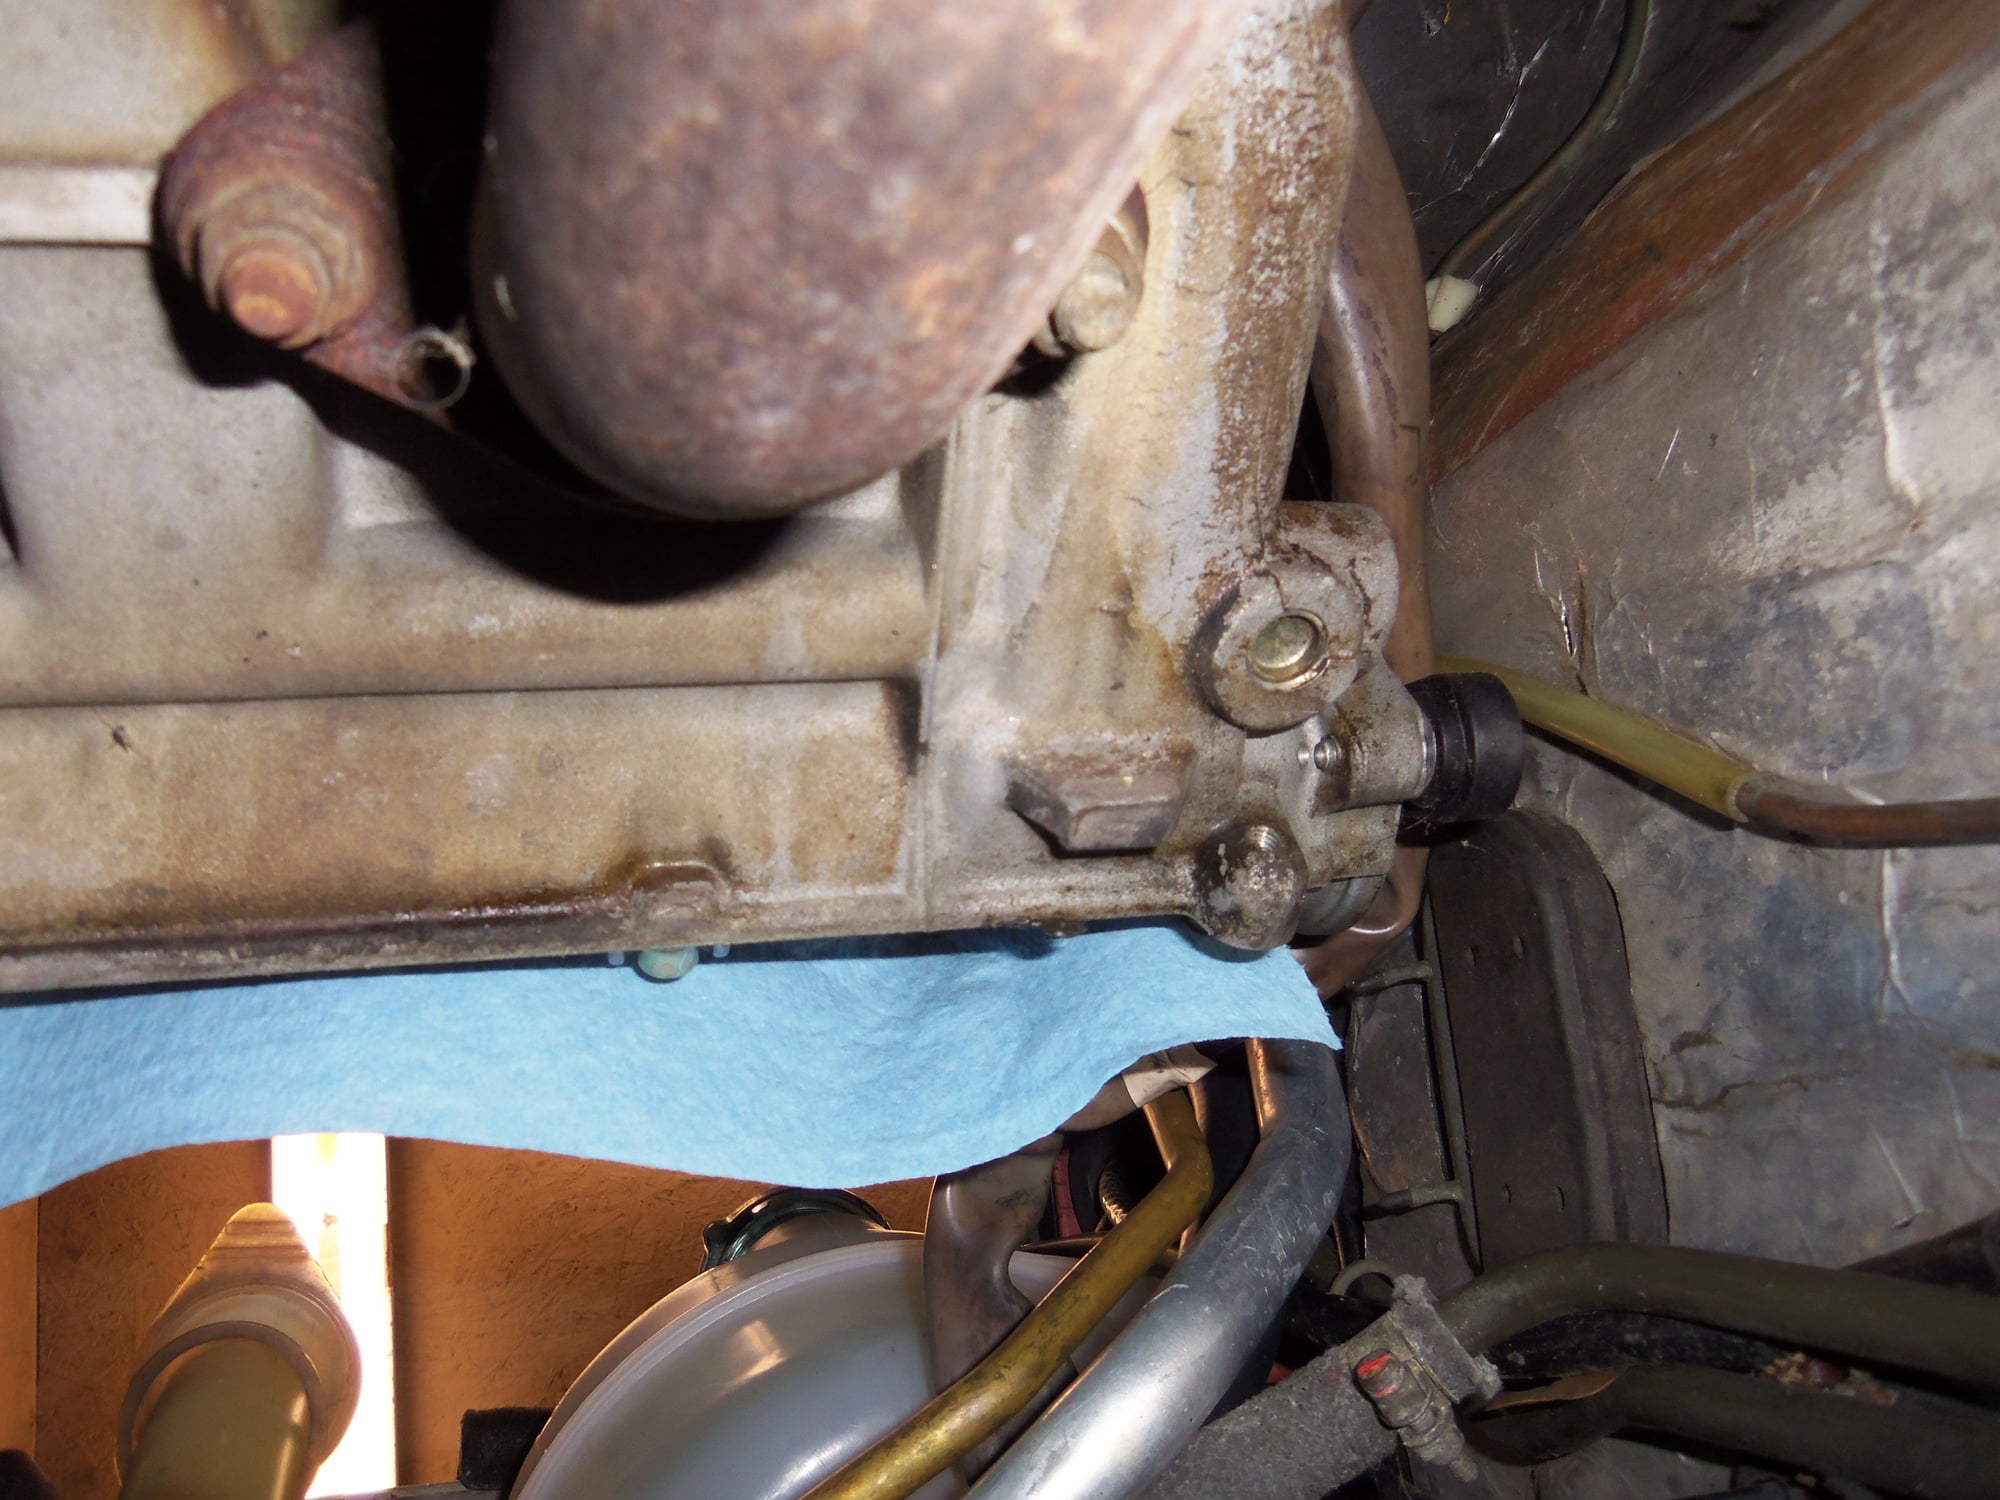
As well, I inspected the cylinder heads on the Red Witch. There is a bore down at the bottom rear of the passenger's side head and a matching bore at the bottom front of the driver's side head. There does not seem to be anything in the bores.
Bore at bottom rear of passenger's side cylinder head.
Bore at bottom front of driver's side cylinder head.
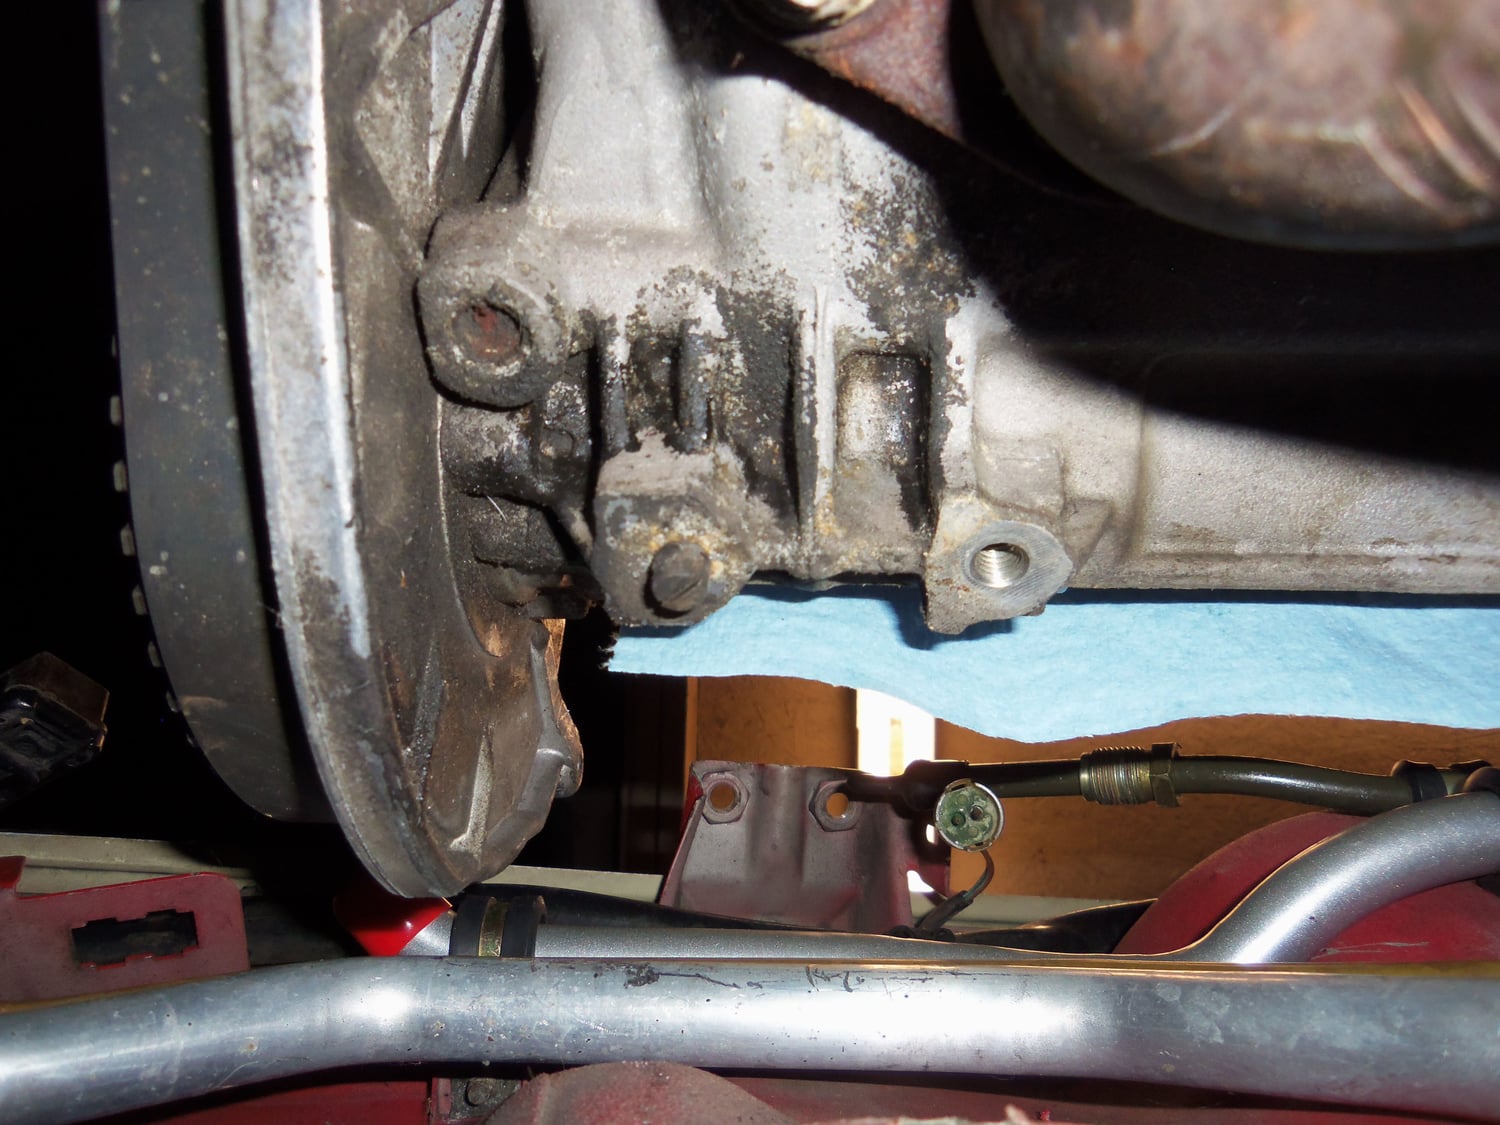
I looked at the outside of each head, below the sealing surface of the cam covers, above the exhaust manifolds. I found no little retaining screws. All I found were the holes and dowel pins for the engine lifting eyes at the opposite ends of the heads as the bores.
Rear edge of the passenger's side cylinder head. No retaining screw.
Front edge of the passenger's side cylinder head. Only have the hole and dowel pin for the engine lifting eye.
Front edge of driver's side cylinder head. No retaining screw.
Rear edge of driver's side cylinder head. Only have the hole and dowel pin for the engine lifting eye.
So...I am going to say that the Red Witch does not have serviceable check valves for the heads. I probably should have noticed that all the threads that I read were for S4 engines...
Last edited by skpyle; 10-10-2017 at 09:50 PM.
Reason: Correcting incorrect information.
Tonight I was able to remove the driver's side cam cover.
It went relatively smoothly. I found pretty much the same as was in the passenger's side. That is good.
Driver's side cylinder head.
Cylinders 5 and 6.
Cylinders 7 and 8.
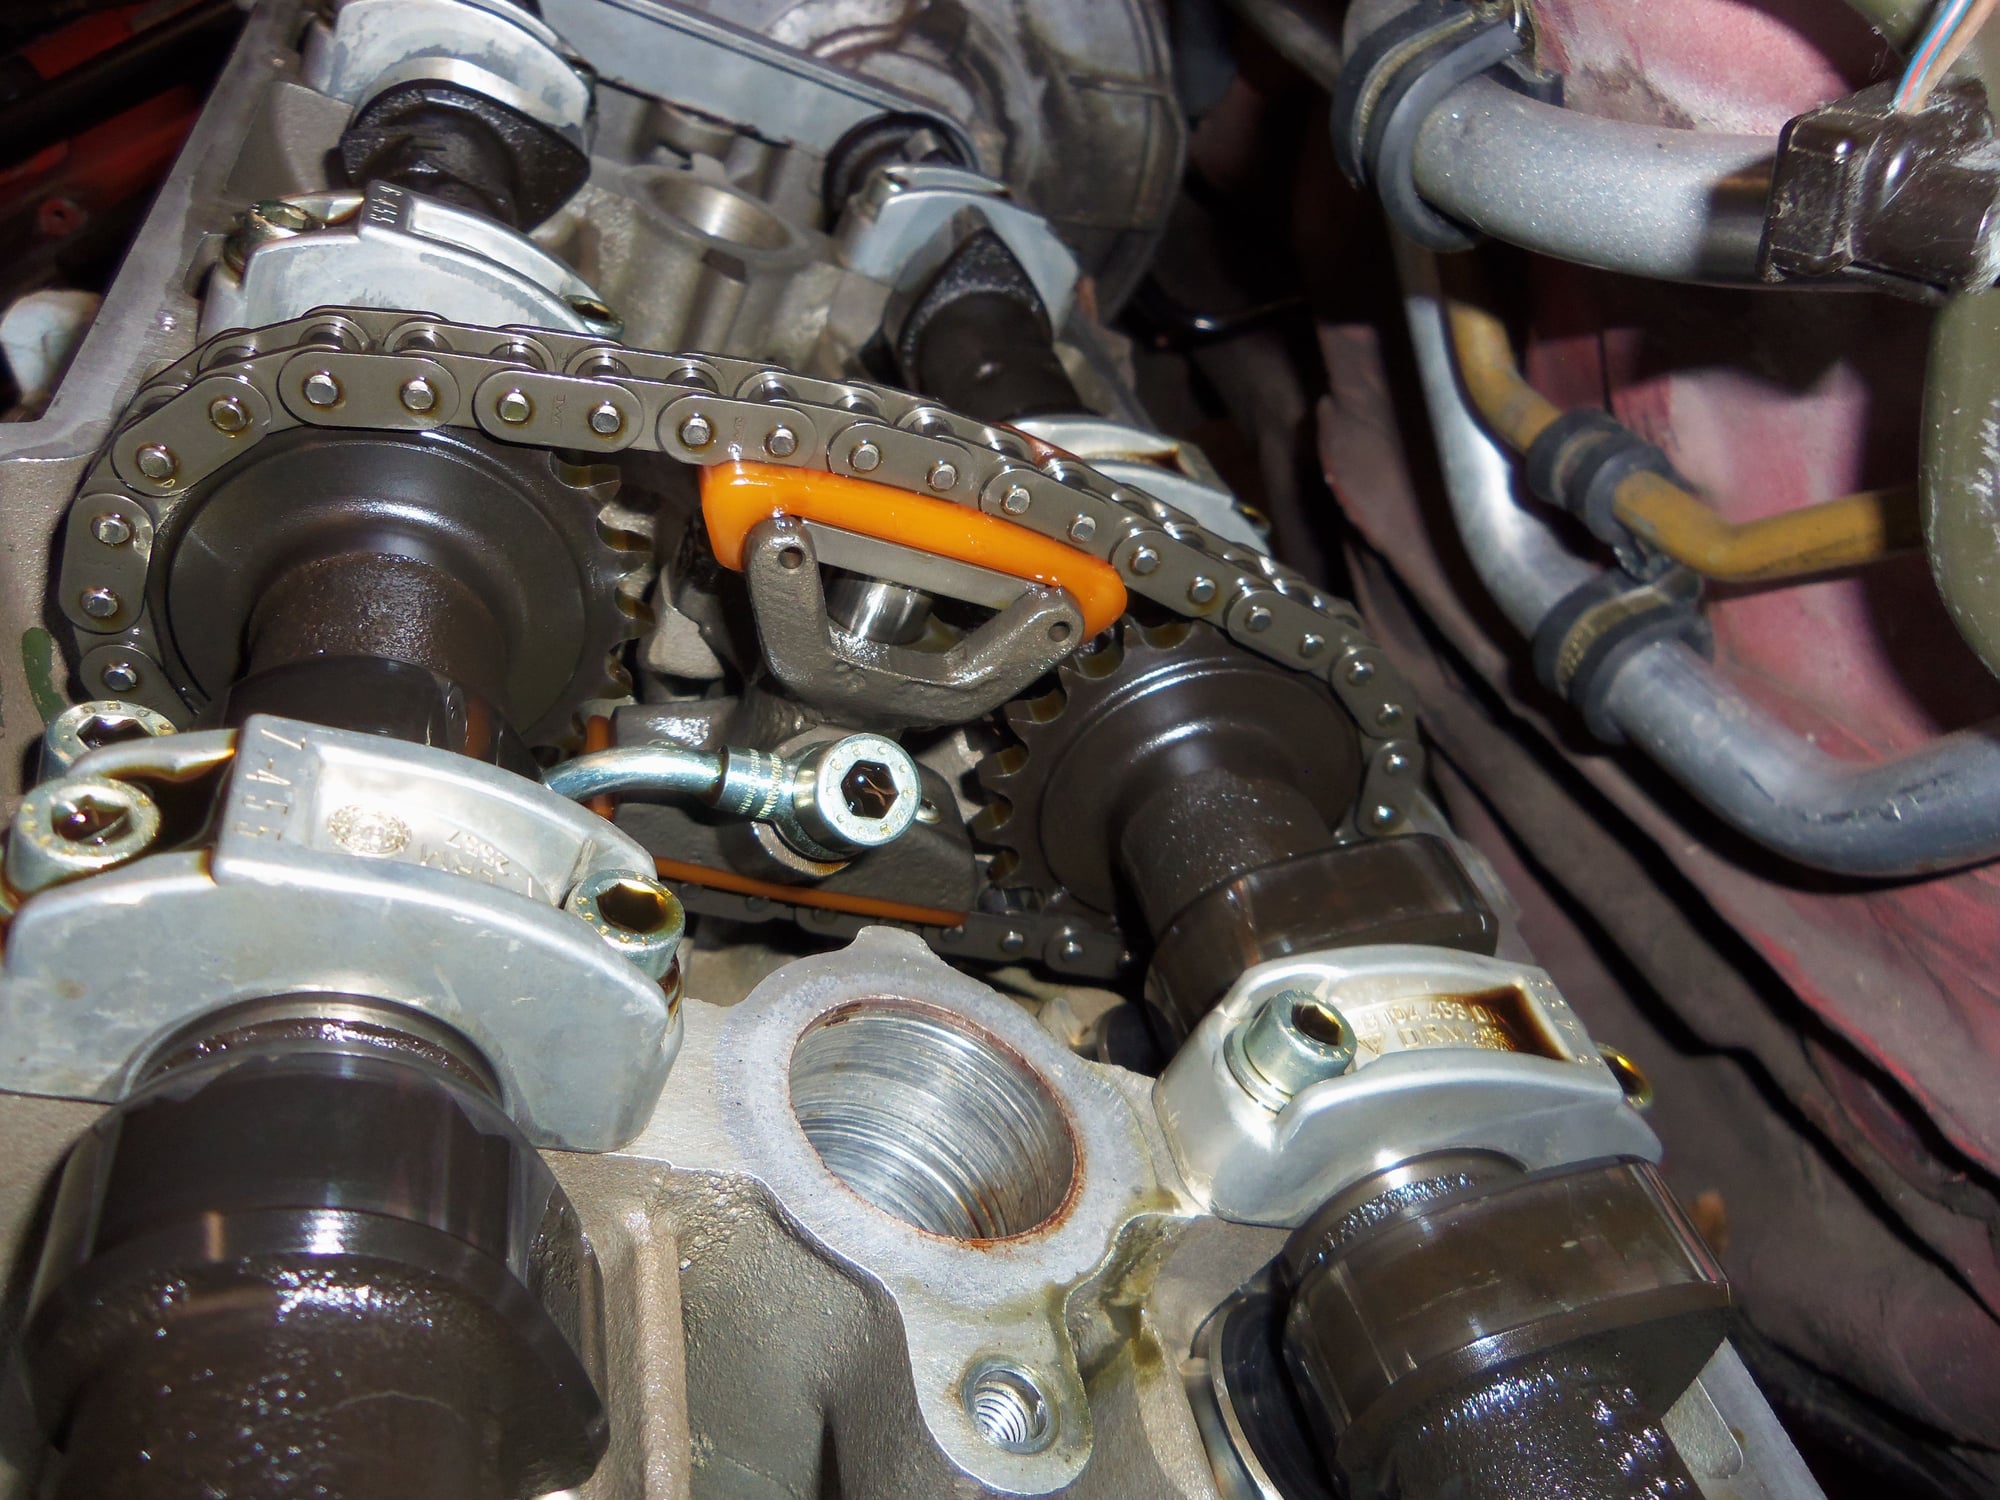
Front side of tensioner. I had forgotten it was mounted upside down as compared to the passenger's side.
Back side of tensioner.
Top of tensioner.
Noses of intake cam lobes for cylinder 5 look good, at least to me.
Noses of exhaust cam lobes for cylinder 7 look good, at least to me.
Tomorrow, if the rain holds off, I hope to get the tensioners and oil feed pipes removed. I will use the 'cut up foam into blocks and put in the oil drains in the heads' trick I found here on Rennlist. Even though I can get the oil pan off easily, I don't want to have to go fishing for wayward sealing washers.
I am still waffling back and forth about replacing the cam chains...
PRO:
-they do wear
-now is a good time to change them and access is good
CON:
-not a common item to break
-requires resealing front and rear cam bridges on both heads
-requires replacing all 6 cam end plug seals
-requires replacing cam seals. I am now unsure if the seals get replaced BEFORE or AFTER the camshafts are reinstalled. On that note, is it possible to remove the camshafts without damaging the seals?
-if camshafts come out, lifters come out for inspection and/or cleaning. That is a whole 'nother can of worms. I have read posts on getting all the disgusting amount of crud out of the lifters. As well, I have read posts about letting sleeping crud lie in the engine and don't disturb it.
1) Repl the chains. Worn chains strain the teeth of the cams, and saving the cams is all-important goal.
2) On exchange, there is an added ring washer that goes under the cam cover bolts, to provide greater tension to the rubber bushing, and the rubber seal to the head. Ask Roger for a set of these washers, or simply use a machine washer directly under the bolt head, over the metal cap, and rubber bushing.
3) Cams are brittle, no, I mean Brittle. When you remove the caps, remove them slowly and evenly to prevent putting strain on the shaft from the spring pressure. Same on install, go down evenly with the cam caps, and insure the caps go back on their original journal. Use some lifter lube on the lifter faces too.
4) If you decide to take the check valve setscrew, plug, spring, and ball out to clean, make sure you don't drop anything along the way. The bits will go right down the return gallery to the oil pan, and they you are well and truly flucked. I can see the plug in the well, I don't know where the setscrew is, but it may not be serviceable unless you drill that metal plug out and find the pin behind it that holds the plug in.
5) Replace the o-ring on the plug, and make SURE your setscrew/pin engages the detent on the plug, or oil pressure will push the whole thing right back out again, and will break your cam. Ask me how I know.
6) After you are all done putting the cams in, you will need to index them to the cam gear for proper cam timing. The directions in the WSM are garbage. They are completely written in gibberish for a job which is not that hard. For all that is holy, find an alternate method. Just find the plunge depth setting for the lobe to index, set that plunge depth, and then lock the gear with tension on the belt. Roll it around a couple rotations, check your plunge depth, adj as needed and close it up. The WSM method is useless. When I index cams, I put a small piece of matchbook cardboard under the front journal cap to keep the cam from moving as I lock the cam gear to the cam. Of course, you have to remove it before spinning the engine around. Ask me how I know.
7) You may want to provide another crankcase vent from the side that doesn't have a direct vent and recirc. The 928 doesn't make a lot of crankcase blowby, but one side has to push the gasses down and through the crankcase, and back up the other side. Adding another vent will help keep air out of the oil.
8) Don't forget those round plug well seals and renew them as well as the new cam cover gasket. The plug well seals get hard over time, and leak worse than the large seal, right into the plug well. I hold them on with some liquid gasket maker while putting the cam cover back on.
9) There are a couple of black cam plastic caps used on the head. The heads are machined symetrical so they can be used on either side. Repl those cam end caps.
I am still waffling back and forth about replacing the cam chains...
-not a common item to break
-requires resealing front and rear cam bridges on both heads
-requires replacing all 6 cam end plug seals
-requires replacing cam seals. I am now unsure if the seals get replaced BEFORE or AFTER the camshafts are reinstalled. On that note, is it possible to remove the camshafts without damaging the seals?
-if camshafts come out, lifters come out for inspection and/or cleaning. That is a whole 'nother can of worms. I have read posts on getting all the disgusting amount of crud out of the lifters. As well, I have read posts about letting sleeping crud lie in the engine and don't disturb it.
You were posting while I was composing.
-It's not about breaking, it's about wear on the cam teeth.
-Yes, you have to reseal those end cap journal bits. Tough, it's part of the job.
-Seals go on after the cams are in
-Lifters,, well - what do you want to do? If you take them out to clean, make sure you put them back in the same bore. There is no 'inspection' for them. Some people run a quart of Dextron in the engine for a few hours because it's a natural cleaner, more than regular oil. I don't know about this, but it's something I've heard. I cleaned mine by dropping them in a warm bath of carb cleaner for hours, then drain, repeat. After that, it's best to drop them in a container of oil, with the vent up for a few days, to try to get some oil in them before install. But - They will eventually fill when the engine starts and runs for a while. It'll be noisy.
Hello docmirror, thank you for your opinions! I appreciate them. I will reply in your quotes:
Originally Posted by docmirror
I have a few opinions.
1) Repl the chains. Worn chains strain the teeth of the cams, and saving the cams is all-important goal. OK, that makes sense. New chains it is!
2) On exchange, there is an added ring washer that goes under the cam cover bolts, to provide greater tension to the rubber bushing, and the rubber seal to the head. Ask Roger for a set of these washers, or simply use a machine washer directly under the bolt head, over the metal cap, and rubber bushing. To my understanding, that is for the S4 cam cover bolts with the large rubber stopper type seals. My S3 has flat washers with flat rubber seals bonded to them, then O-rings that sit in the bolt holes in the cam cover. I am not sure if an extra washer would be of any benefit in this application. I will mock one up and go from there. Please see the photos of the bolts in post #5.
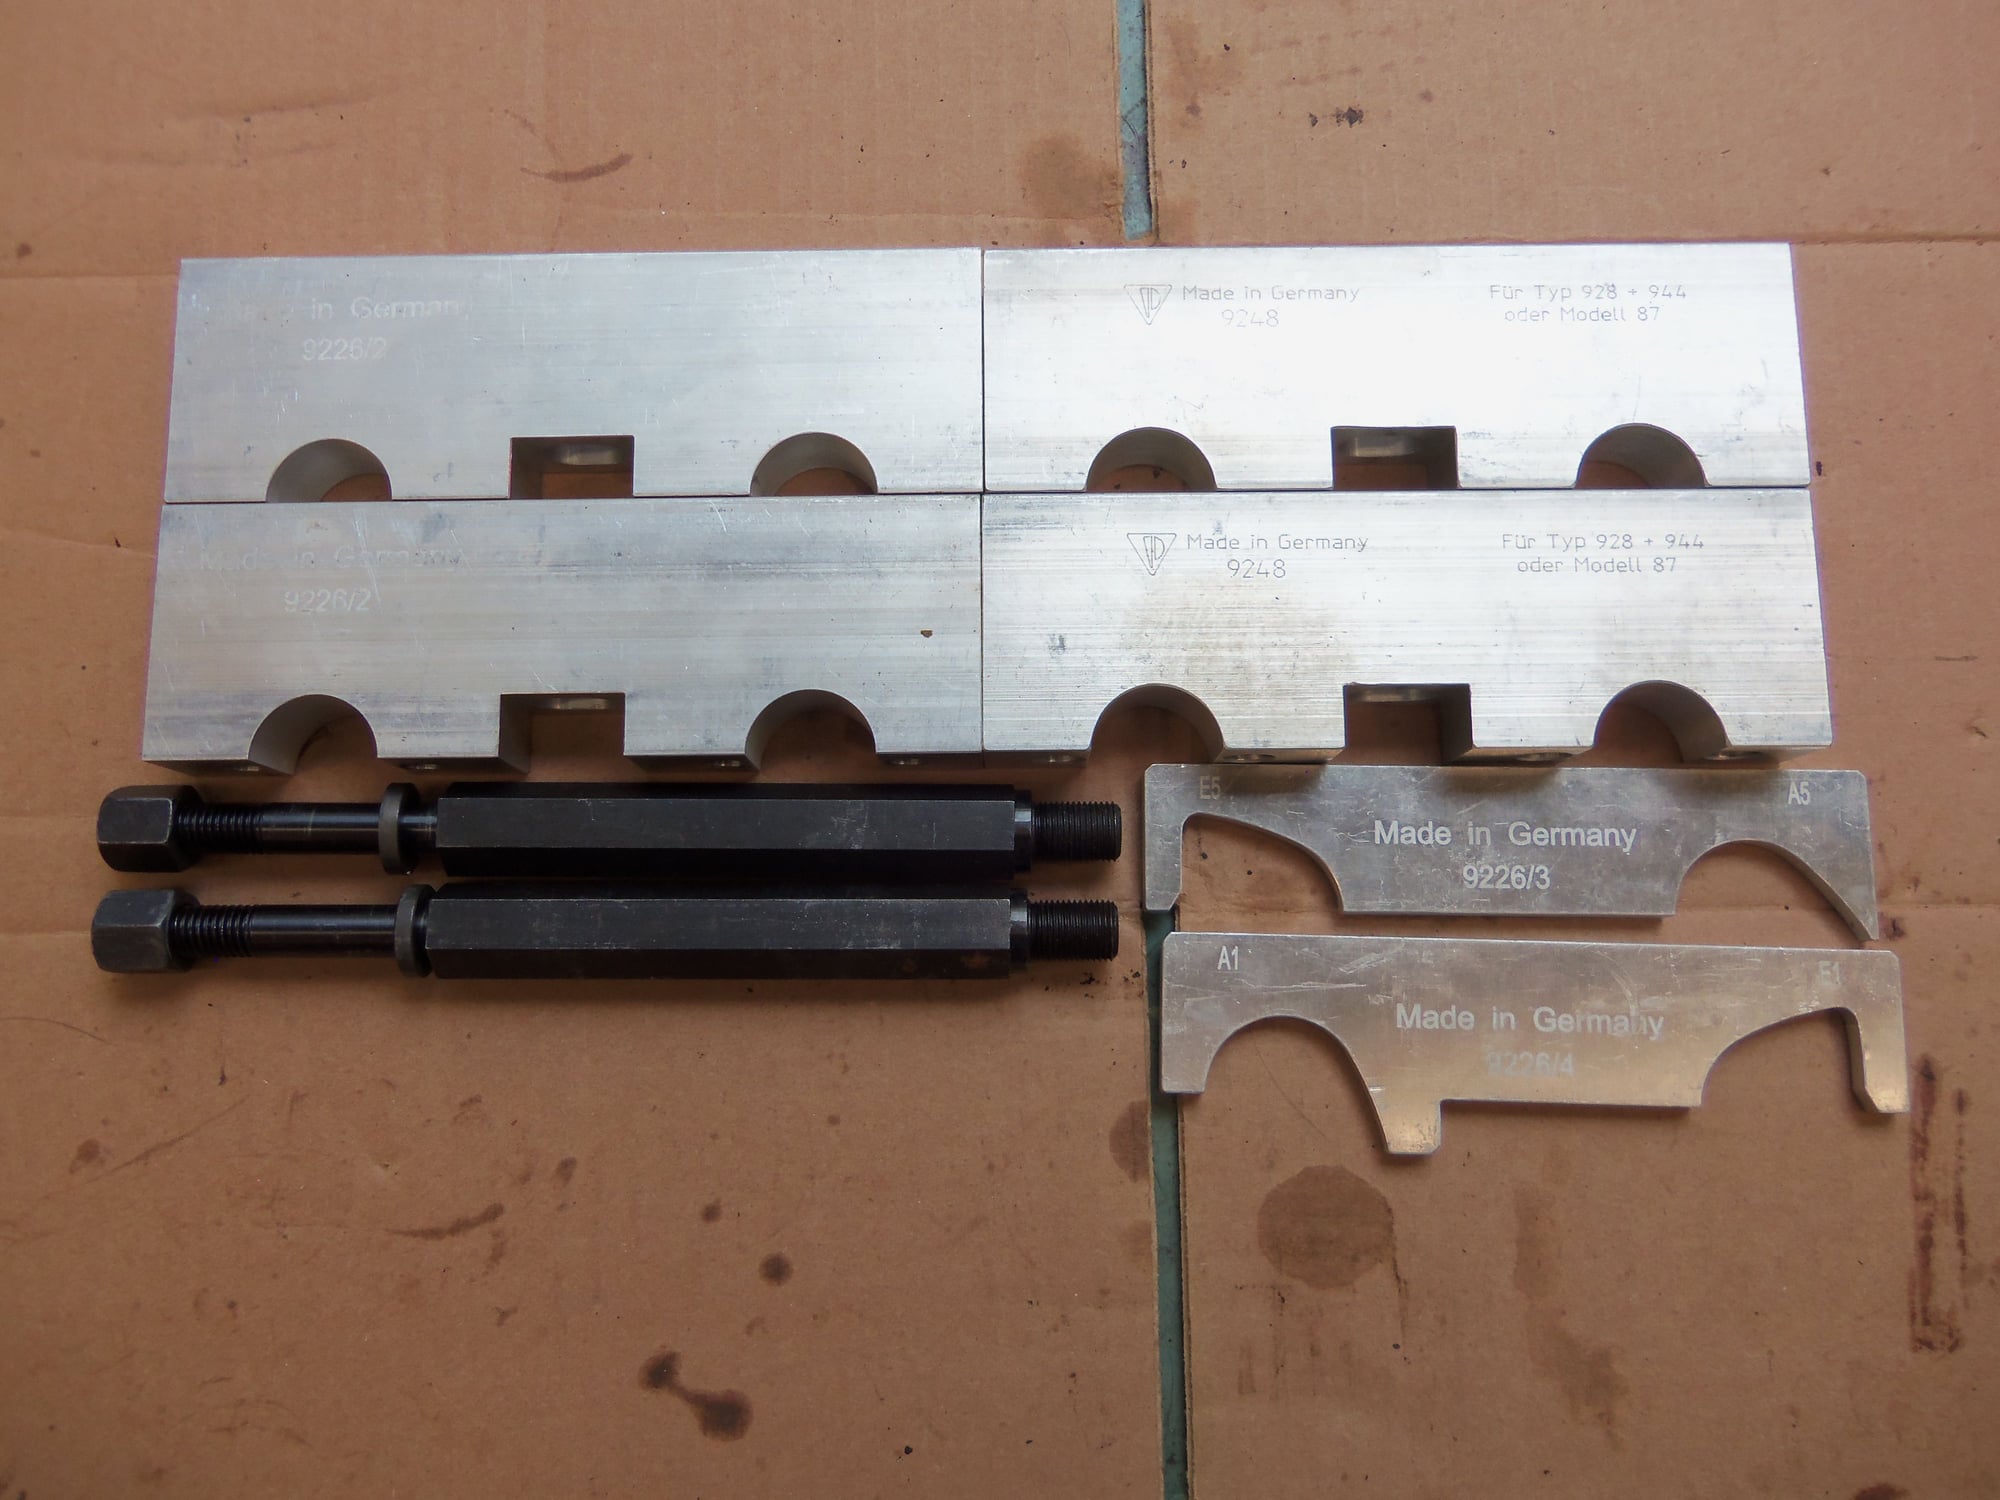
3) Cams are brittle, no, I mean Brittle. When you remove the caps, remove them slowly and evenly to prevent putting strain on the shaft from the spring pressure. Same on install, go down evenly with the cam caps, and insure the caps go back on their original journal. Use some lifter lube on the lifter faces too. I have read this caution over and over on Rennlist. I am taking it, and yours, to heart. I have picked up a set of cam tools, 9226 and 9248. I will photo each cam cap to verify its code number, and put them back together the same way. I plan on using red Permatex engine assembly lube on the cam journals and lobes upon reassembly.
4) If you decide to take the check valve setscrew, plug, spring, and ball out to clean, make sure you don't drop anything along the way. The bits will go right down the return gallery to the oil pan, and they you are well and truly flucked. I can see the plug in the well, I don't know where the setscrew is, but it may not be serviceable unless you drill that metal plug out and find the pin behind it that holds the plug in. I don't think I am going to remove the check valves if it involves drilling. I could not find any set screws on the outside edges of the cylinder heads. I will leave that sleeping dog lying. Please see post #8 for details.
5) Replace the o-ring on the plug, and make SURE your setscrew/pin engages the detent on the plug, or oil pressure will push the whole thing right back out again, and will break your cam. Ask me how I know. Ouch. I don't want to know.
6) After you are all done putting the cams in, you will need to index them to the cam gear for proper cam timing. The directions in the WSM are garbage. They are completely written in gibberish for a job which is not that hard. For all that is holy, find an alternate method. Just find the plunge depth setting for the lobe to index, set that plunge depth, and then lock the gear with tension on the belt. Roll it around a couple rotations, check your plunge depth, adj as needed and close it up. The WSM method is useless. When I index cams, I put a small piece of matchbook cardboard under the front journal cap to keep the cam from moving as I lock the cam gear to the cam. Of course, you have to remove it before spinning the engine around. Ask me how I know. I have read the 'timing procedure' in the WSM. Yikes! My intent is to match mark the cam sprockets to the hubs, and take lots of photos. I plan on using the Porken 32Vr to time the cams correctly to the cam sprockets. If nothing else, I am going to set the cams in position as per the WSM with the colored links and alignment nubs on top, note the positions of the cam sprockets, and put it all back together the way it was. Thanks for the reminder of the card stock under the cam cap. I haven't done that in years since giving up motorcycles.
7) You may want to provide another crankcase vent from the side that doesn't have a direct vent and recirc. The 928 doesn't make a lot of crankcase blowby, but one side has to push the gasses down and through the crankcase, and back up the other side. Adding another vent will help keep air out of the oil. Thank you! This dovetails with suggestions I am receiving on my companion thread about that. I am going to install more oil separators and adapter elbows to have a full set in each cam cover. Then go from there.
8) Don't forget those round plug well seals and renew them as well as the new cam cover gasket. The plug well seals get hard over time, and leak worse than the large seal, right into the plug well. I hold them on with some liquid gasket maker while putting the cam cover back on. Sorry, forgot to mention those. I am definitely replacing the spark plug well seals! Thanks for the suggestion on the sealant for holding them. I was concerned about keeping them in place while maneuvering the cam covers into place.
9) There are a couple of black cam plastic caps used on the head. The heads are machined symetrical so they can be used on either side. Repl those cam end caps. Yep. Going to replace those, just because. They were all replaced in April of 2016 as part of the servicing when I bought the Red Witch. I am going to replace them again to ensure they don't leak from being removed.
Originally Posted by docmirror
You were posting while I was composing.
-It's not about breaking, it's about wear on the cam teeth. Understood. New chains are going in.
-Yes, you have to reseal those end cap journal bits. Tough, it's part of the job. OK, I can live with that. Loctite 574 or something else?
-Seals go on after the cams are in OK, thanks. Do I have to remove the seals before removing the exhaust cams? WSM was a little vauge on that.
-Lifters,, well - what do you want to do? If you take them out to clean, make sure you put them back in the same bore. There is no 'inspection' for them. Some people run a quart of Dextron in the engine for a few hours because it's a natural cleaner, more than regular oil. I don't know about this, but it's something I've heard. I cleaned mine by dropping them in a warm bath of carb cleaner for hours, then drain, repeat. After that, it's best to drop them in a container of oil, with the vent up for a few days, to try to get some oil in them before install. But - They will eventually fill when the engine starts and runs for a while. It'll be noisy. I want to make sure the lifters are clean from 168,*** miles of use. That sounds good in my head, but I am not so confident of reality. I have read a post by Rob Edwards about soaking the lifters in Simple Green in a heated ultrasonic cleaner. I have a heated ultrasonic cleaner, and know how to use it.
I like your idea of carb cleaner first then oil later. What type of carb cleaner did you use?
I am kicking around the idea of running a bottle of Swepco 502 through the engine for a bit.
Keeping the lifters in order is paramount. Ask me about removing the intake cam housing on a GM 2.3L Quad-4, and watching most of the lifters fall out the bottom and roll out into the yard...
Thanks again for your opinions and advice. New Porsche 928 saying from the House of Pyle: "In for a penny, in for $100."
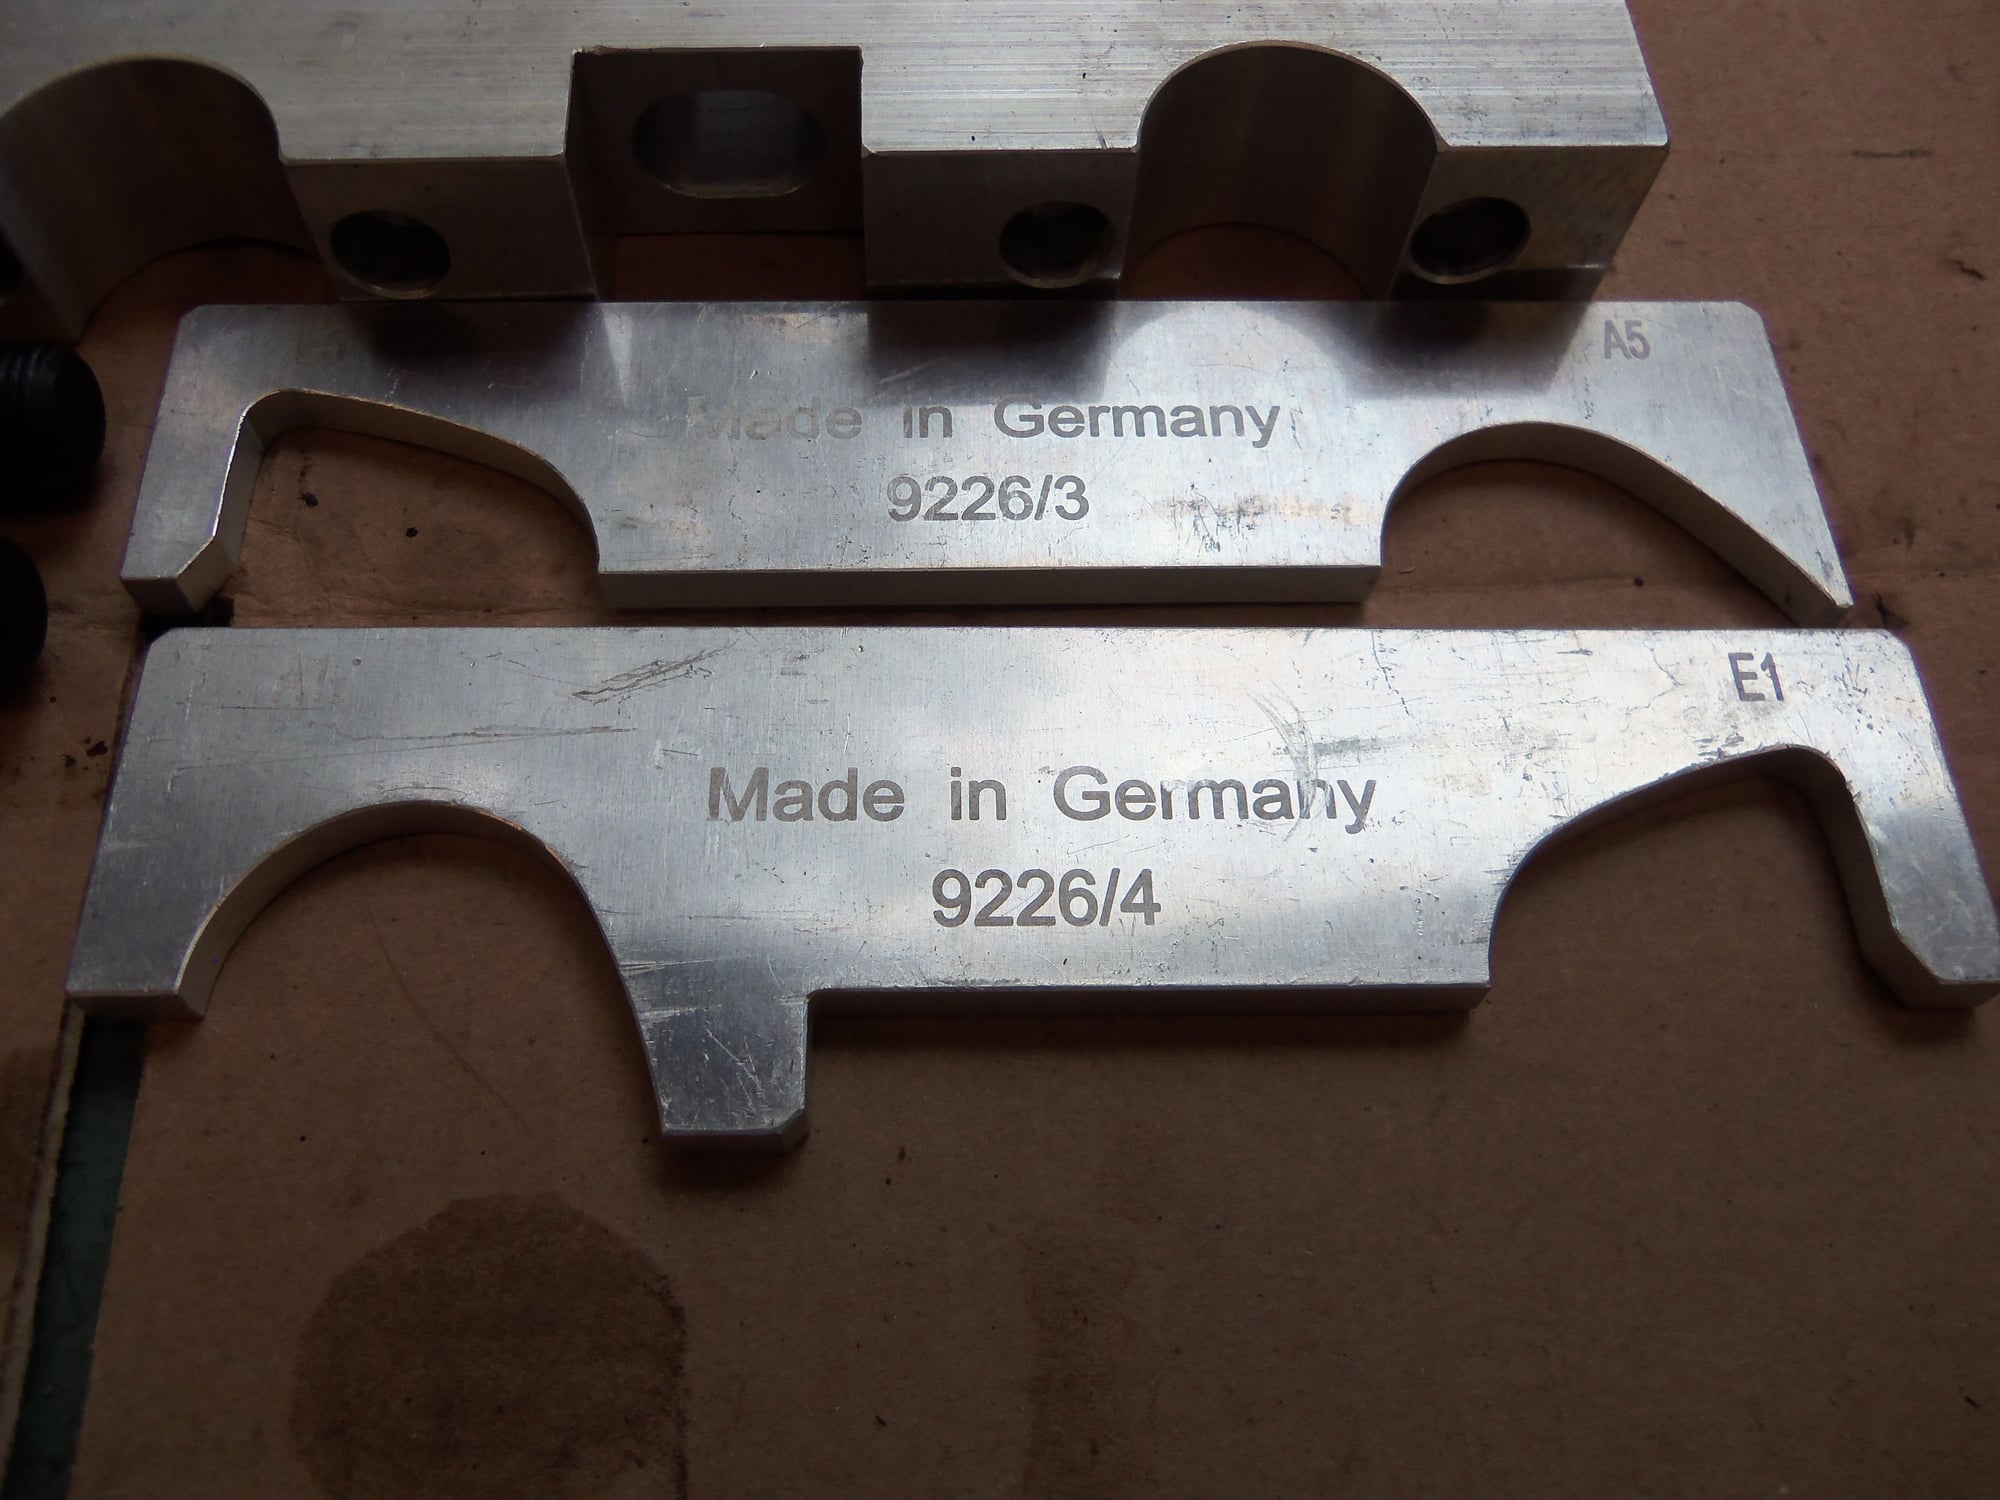
Here are the cam tools I was talking about:
Cam tool sets 9226 and 9248
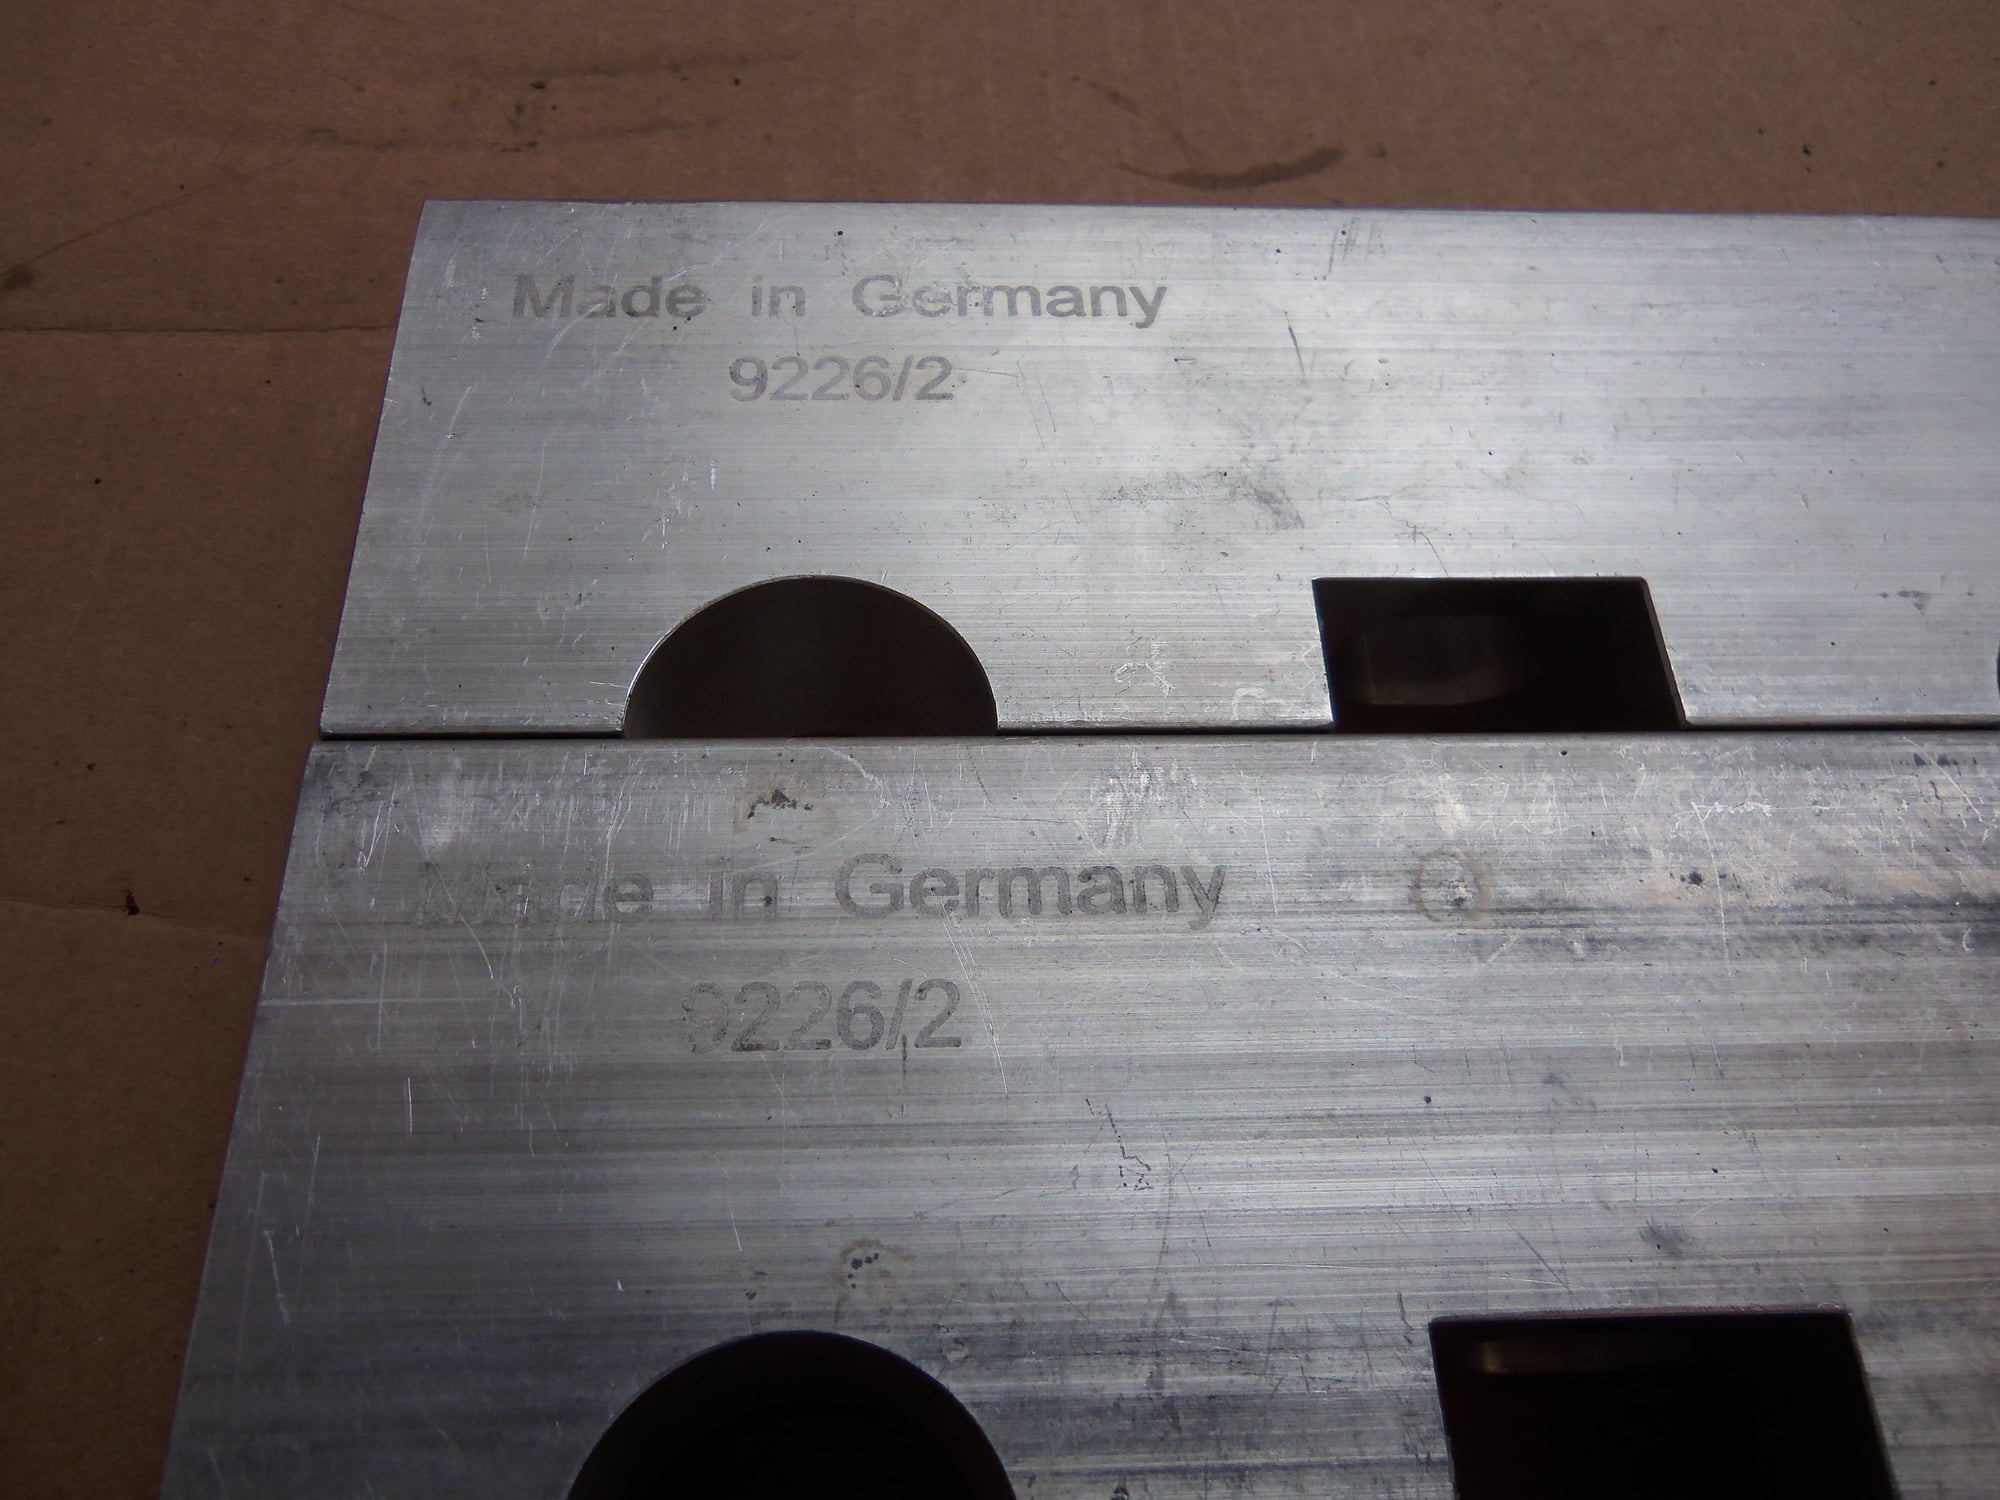
9226/2 hold down blocks for 85/86 engines.
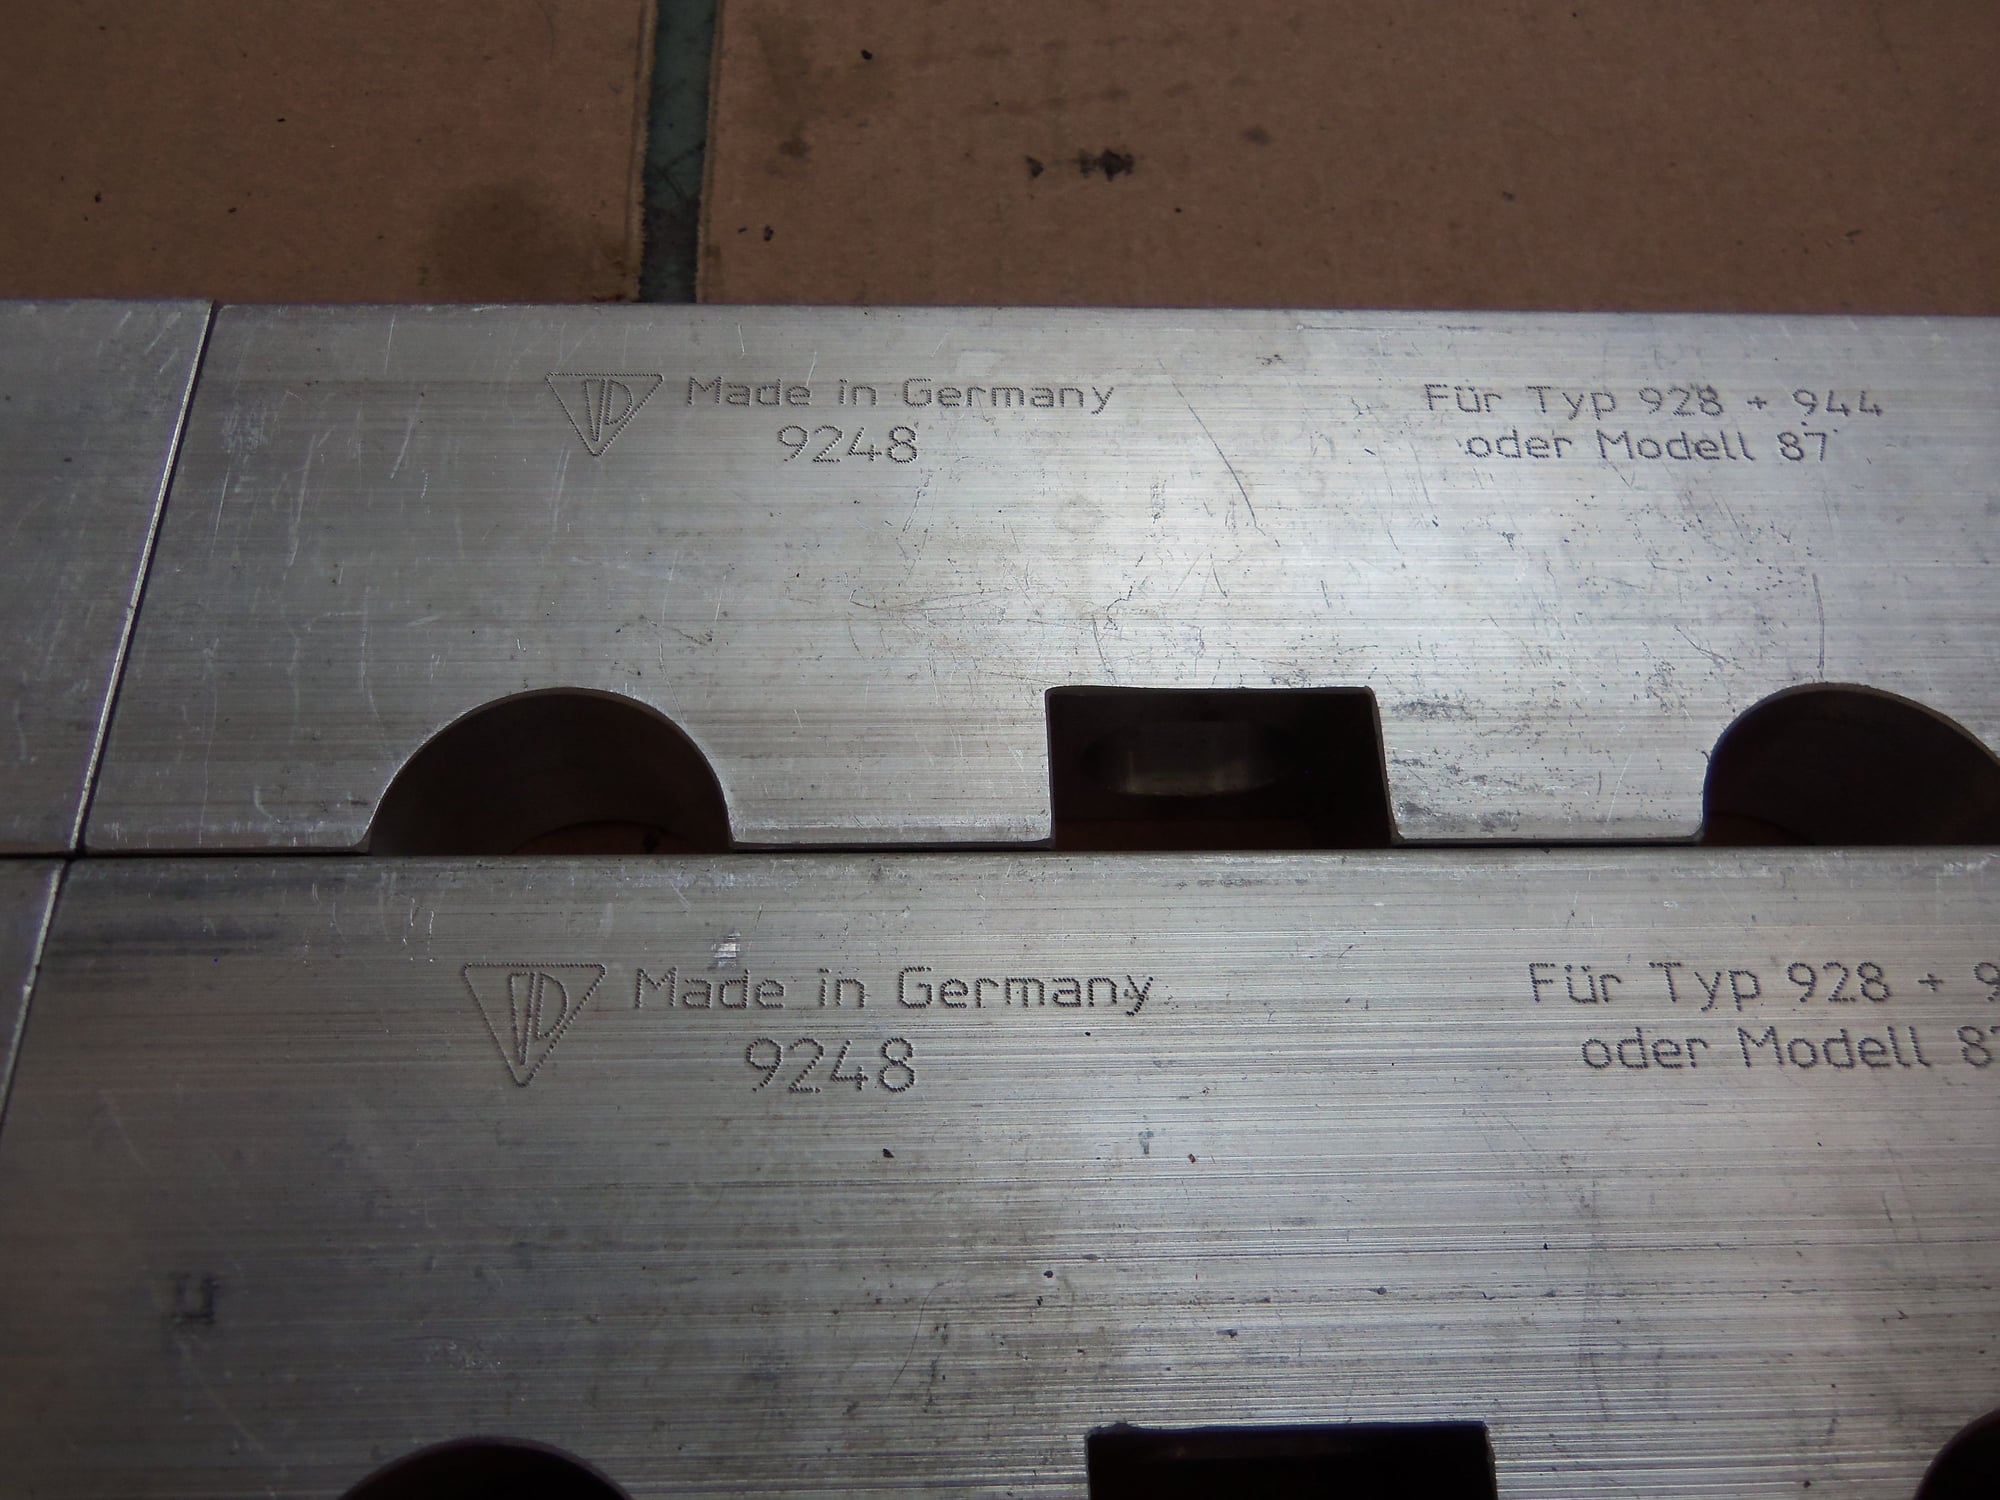
9248 hold down blocks for 87-on engines.
Lobe profile gauges 9226/3 and 9226/4. Supposedly work excellent on 85/86 cams, not so much on 87-on.
On my way outside now to start disassembling the cams and such...
Nice, you have the right cam profile tools, you don't need to do the plunge or anything. Just set it up with the profile tool, then do the finish with the V32R thing for the cam gears.
Loctite 57x is fine for the seals.
As for the washer on the cam bolts, ask Roger, he will guide you. From the pic, they look like they would benefit from the washer under the bolt head, but check with him to be certain.

 10-07-2017, 01:21 AM