When you click on links to various merchants on this site and make a purchase, this can result in this site earning a commission. Affiliate programs and affiliations include, but are not limited to, the eBay Partner Network.
Despite everything I did to get this permanently fixed, my battery tray is leaking again. About 3 years ago I had the whole thing cut out and a solid piece from a donor car welded in. I thought it was a pretty good job, but I've discovered a small leak.
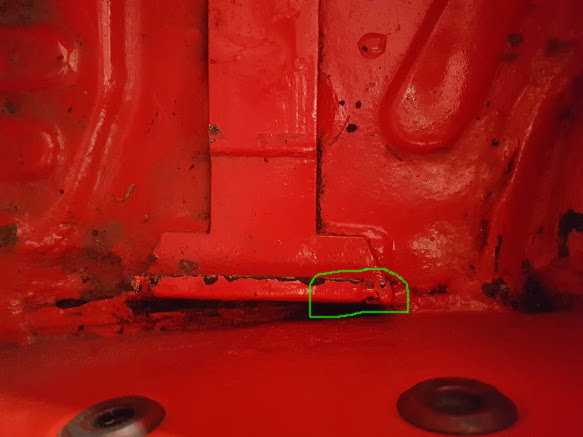
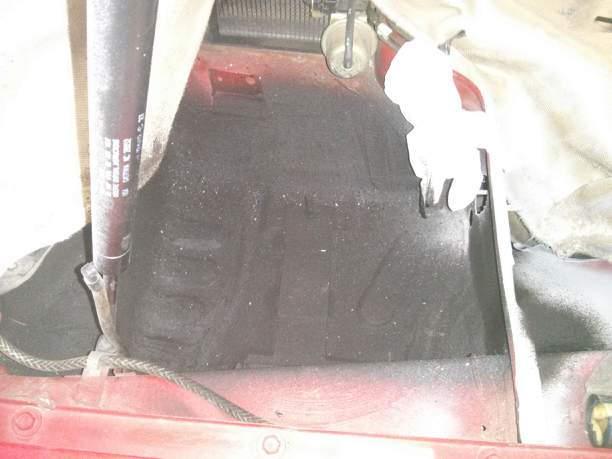
I've narrowed it down to this spot (100% sure about this - I poured water here and nowhere else and it leaked through). The funny thing is, it appears totally solid from the top. There's no indication that anything is wrong - nothing feels like rust under the paint.
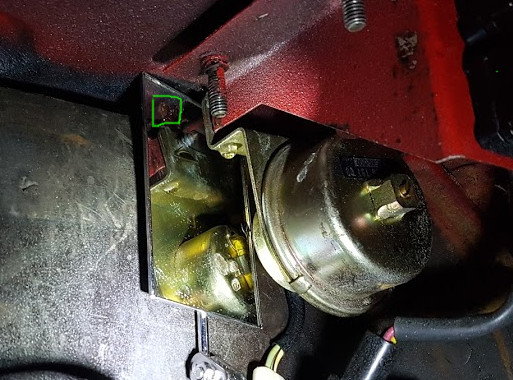
But from inside, I can see it dripping from this spot directly above the altimeter (not very clear in the pic but it shows the location in the mirror).
I think I can see traces of rust on the underneath, but it's very hard to get a good view due to the bracket that holds the ABS unit, altimeter and a couple of wiring harnesses. The bracket itself doesn't come off so there's not much I can do there.
What are my best options here? Should I try to seal it from the top with something, or do I need major surgery again? It's nothing like it was before. The whole tray was rotted out the last time. This time I can't find anything like that, and I'm wondering if it's just that the welds weren't totally sealed as opposed to the tray rotting away. There's definitely a little rust visible from the inside but it's hard to see how bad it is.
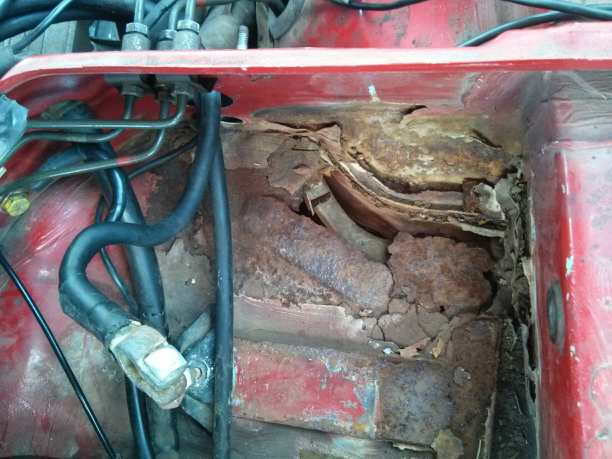
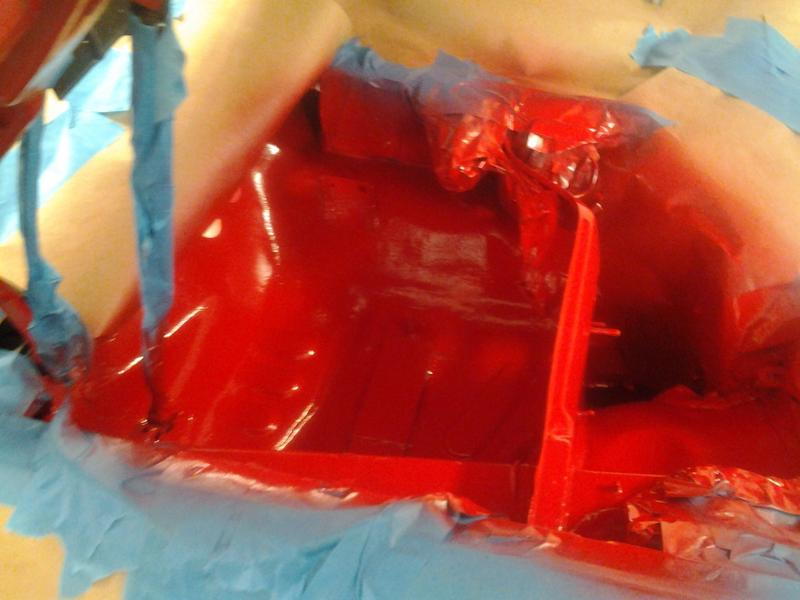
Bummer, sorry about that. Mine looked good from the top too but had a rust hole under the battery bracket that was not visible. Was that entire area replaced and/or is that where it was welded in? If that�s the replacement piece, you�d think any rust would have been noticed when it was installed, so maybe the weld seams were just not sealed up properly? I used Wurth brushable seam sealer on mine, and highly recommend it. (Just be careful where you buy it. It has a short shelf life and the first two cans I bought were already expired.) If you�re pretty sure it�s rust free (after removing paint, etc.) then I�d be inclined to treat it with a rust encapuslator for good measure and then apply a liberal coat of Wurth Seam Sealer to the whole floor and all the little crevices. If you think there is rust lurking underneath, these pictures of mine might help. If you sand off the paint, the spot welds reveal themselves and you can use a spot-weld bit in a drill to pull off the bracket without drilling holes in the tray. The holes act as perfect alignment pins and plug weld holes when you put the bracket back in too� For paint, I used a 2-part SprayMax can. It�s a true automotive catalyzed paint that withstands solvents much better than normal rattle can paint.
Thanks, that pic helps a lot. I wasn't sure exactly how the bracket is integrated with the floor of the tray but seeing it removed gives me a pretty good idea of where my leak is. It's at the opposite end to yours (near the fender) and probably much smaller than that. I had another look from underneath, and there's definitely some visible rust, but it also looks like 2 pieces of metal were joined there, perhaps not properly.
I gave the guy 2 complete rust-free battery trays to work with and I'm not sure exactly how he divided them up but I it looks like there is a seam where this leak is.
Yeah, I can vouch for two things in this process -- 1) exposed welds will develop flash rust in a matter of days if not sealed, and then keep on rusting if not caught, and 2) it's very hard to make a 100% leak-free seam without seam sealer. If yours is leaking at a seam, I'd try treating the rust with a neutralizer and then going heavy with Worth seam sealer -- and then watching it like a hawk...
Yeah, I can vouch for two things in this process -- 1) exposed welds will develop flash rust in a matter of days if not sealed, and then keep on rusting if not caught, and 2) it's very hard to make a 100% leak-free seam without seam sealer. If yours is leaking at a seam, I'd try treating the rust with a neutralizer and then going heavy with Worth seam sealer -- and then watching it like a hawk...
Yeah I don't think they used seam sealer. They used a 3M rubber coating before paint, but obviously that hasn't worked out too well.
Unfortunately the rust I can see from below is inaccessible due to the ABS/altimeter bracket. I could probably spray or brush something on there, but there's no way I can clean it up first which I imagine is necessary for proper treatment? So I might have to go with the cutting/welding approach again. I want a repair I can rely on 100%.
When I did mine, it was also after original owner had a body shop "fix" it. They welded in a few small patches, missed the big one under that battery bracket, coated the entire battery tray floor with clear RVT silicon, then painted the silicon red! It took forever to get all that silicon out... Your rubber coating sounds like a similar brilliant idea someone had. I cut out a few spare battery boxes to study before tackling mine, and it was very clear that Porsche relied heavily on brushable seal sealer in this area. The later the car, the more seam sealer they seemed to use...
My rust was also right over a bracket. In my case it was the bracket that holds up the back of the glove box. All of those brackets are just spotted welded on -- in some cases in only one or two spots. I took the bracket off by drilling out the spot welds from the top. The rust had gotten to the bracket, so I had to cut off the rust and weld a tab onto the bracket to replace the rusted part. It is in such an unseen area, I wasn't too worried about how it looked as long as it worked. Here's an "after shot" once the battery box was done and the bracket reattached...
I ended up putting seam sealer around that bracket too, just to seal the metal-on-metal areas. I used "weld-thru" primer, but didn't want to rely on that only...
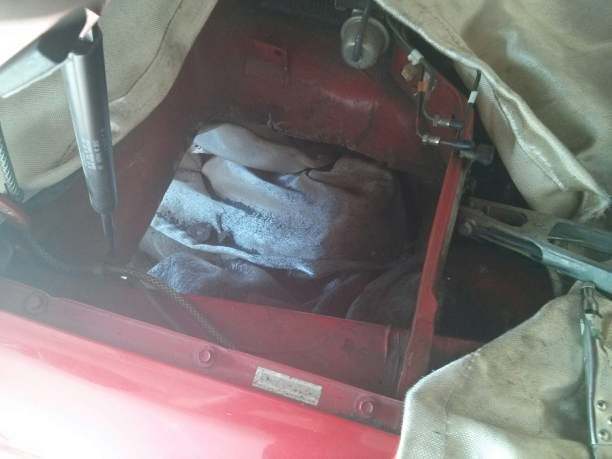
I managed to find a few pics of the previous repair on the guy's website. They don't show much that helps, but funnily enough, the pic of the altimeter bracket shows that the area that's now leaking is the one spot that has not been sprayed with the rubber coating. Although I doubt that's the issue, I wonder if it indicates that it was neglected in other ways too. He might have just removed the bracket from one tray by cutting out a section of the floor, to transfer it to the other one (I can't remember if both trays I gave him had the same brackets).
Tom, for a repair like yours, do you need pretty advanced welding skills, or do you think a beginner could do that welding? I am thinking about doing this myself. I don't have a welder and I've never used one, but I wonder if I could teach myself enough to pull this off.
That's a hard question to answer about the welding. I'm by no means a "good" welder, but have been practicing more and more lately so was able to do this. I can do basic MIG and TIG welding now, but opted for MIG for this project because access and visibility was limited (and it's kind of the tried and true rust patch welder...). If you wanted to try, MIG is easier and relatively cheap to get into. You can get a decent 110V MIG welder with gas for $500 or so... The super cheap ones rely on flux core wire, and no gas, which I'd avoid for this. It splatters and makes a mess compared to gas shielded MIG welding. Welding sheet metal adds it's own challenge, as it's easy to melt though the metal and/or warp the metal to smithereens. Having said all that, welding is a great skill for any car guy to have -- I find myself fixing and fabricating parts all the time now, mainly because I can. If you got a decent little welder and spend a month or two practicing on metal of the same thickness, watching youtube videos, reading up on weldingweb.com, etc., it's something most can do well enough for this purpose. After practicing on the same type of metal long enough, you'll probably have a pretty good sense when you are ready (and when you aren't....).
Edit: that also looked like a much bigger repair than mine, so might involve a lot more metal and body work if the problem isn't limited to one little spot...
Last edited by Tom M'Guinn; 08-28-2016 at 02:23 PM.
I've never used that stuff so can't say, although I noticed they use it in conjunction with spot welds in their video. If you just have to patch a single area like mine, I bet you could make a forever repair using pop-rivets, plenty of rust proofing, and a healthy layer of Wurth Brushable Seam Sealer. Or fiberglass. Or POR-15. Or some combo thereof...
Now that battery bracket may pose an issue though. If you need to remove it to get to the rust, the best functioning and looking way to put it back is to plug weld it and grind the welds flush.
Yeah I was thinking about the bracket. It could happen that it needs to come off again and I wouldn't want to make that difficult by using adhesive. Even so, if that was the only part that had to be welded I still think that would simplify the job.
I've arranged to take it to shop that does classic restorations for an assessment, so I'll see how that goes. These guys do major rust repair all the time so I'm leaning towards them.
Well I've shown it to a couple of shops and they both recommended basically the same thing: apply seam sealer to the top, and don't worry about the underneath. Neither of them seemed to be very concerned about the rust visible from below. These 2 places and the one that did the original repair are the only ones I can find that do this kind of work. So I'll have to go with this option at least for now, even if it's only while I wait to find someone who can do a better job. I suppose I might as well do it myself since it doesn't involve any metal work.
Well I've shown it to a couple of shops and they both recommended basically the same thing: apply seam sealer to the top, and don't worry about the underneath. Neither of them seemed to be very concerned about the rust visible from below. These 2 places and the one that did the original repair are the only ones I can find that do this kind of work. So I'll have to go with this option at least for now, even if it's only while I wait to find someone who can do a better job. I suppose I might as well do it myself since it doesn't involve any metal work.
Don't worry about active rust? Sounds like a couple of shops that (understandably) don't want to get involved. In their defense, it's kind of a labor of love to do right, but still....
If you go that route for now, I'd slather the rust with Loctite's Rust Neutralizer (or similar). It will turn the existing rust into a hard black crust and stop the rust dead in its tracks. If you then cover it all with Wurth seam sealer, it will likely last a long time...
The trouble is the rust is in a spot that's inaccessible. I'd have to remove the bracket for the altimeter/airbag module etc. which I can't really do. Maybe I could spray it into that area but it probably wouldn't be very thorough.
The trouble is the rust is in a spot that's inaccessible. I'd have to remove the bracket for the altimeter/airbag module etc. which I can't really do. Maybe I could spray it into that area but it probably wouldn't be very thorough.
That's the problem with rust Are there any other shops around? If you leave it in there, it will grow eventually. Eastwood makes an internal-frame rust product that sprays as an aerosol out the end of a flexible tube. That might help. Or maybe pour the liquid stuff in there and let it soak, maybe with towels or something underneath to prevent it from dripping through -- so it soaks and gets into all the nooks and crannies. Still seems temporary, but better than nothing...
 08-27-2016, 03:01 PM


 Are there any other shops around? If you leave it in there, it will grow eventually. Eastwood makes an internal-frame rust product that sprays as an aerosol out the end of a flexible tube. That might help. Or maybe pour the liquid stuff in there and let it soak, maybe with towels or something underneath to prevent it from dripping through -- so it soaks and gets into all the nooks and crannies. Still seems temporary, but better than nothing...

