When you click on links to various merchants on this site and make a purchase, this can result in this site earning a commission. Affiliate programs and affiliations include, but are not limited to, the eBay Partner Network.
if unlikely you will ever reverse the mod, could you just tack weld (or red loctite) the t bar bolt?
I don't see why not, but the washer will take being bent up and down once to get the bolt out, then reversed once to put it back in, at least that's my experience. Setting up a tack weld would be more difficult, red loctite? Don't know. Maybe just as solid? Somehow I put more trust in mechanical safeties.
The retainer is there, you can barely see it in the photo.
Good to know Lion, it's a very important part of the mod. I wanted to draw special attention to it for others considering it. Maybe I'm paranoid, but the idea of suddenly loosing steering precision on a road course isn't attractive to me
I just wanted to compliment you on your color choice and overall fashion sense.
You probably would not make that statement after meeting me. As for the color choice - it is not in the top three of my favorites. But, being that we got the car for $1800, the color is of little consequence... plus it is basically my wife's car. I broke the engine in her first one, at a RallyCross. IMO - The best ones are red...
... but I am working on (wait - planning) a new RallyCross car that will pull parts from at least three different cars. The front fenders and hood will be goldish (from Herbie), the doors and center region will be red (from Penelope) and the rear/main shell is black. Think of the German flag.
Good to know Lion, it's a very important part of the mod. I wanted to draw special attention to it for others considering it. Maybe I'm paranoid, but the idea of suddenly loosing steering precision on a road course isn't attractive to me
Yeah - I think that has already happened to Nico, which is why there is urgency to getting a new rack in the car.
This video shows what I fear has happened - though the rack in the car has not been de-powered. Go to about 5:40 for the mess:
Yes, there's a guy in Colorado, I think he calls himself "The Machine Shop", who makes this modification using a weld instead of washers. My understanding is he welds the roll pins to the pinion shaft and removes the spools completely, but I've never seen one of the racks in person.
I talked to him a while ago about modifying a 928 rack, hope to be sending him one soon.
Originally Posted by Scott at Team Harco
Yeah - I think that has already happened to Nico, which is why there is urgency to getting a new rack in the car.
This video shows what I fear has happened - though the rack in the car has not been de-powered. Go to about 5:40 for the mess: https://www.youtube.com/watch?v=gcgb-SGf_jw&t=91s
Hopefully that was due to the guy doing a poor job of reinstalling the t-bar and bolt. Maybe he over-torqued it, or left the tabbed washer off...
This has me a bit concerned.....not sure how lack of the tabbed washer could cause the bolt to break unless it got loose and that extra play weakened the bolt head.
What grade is that bolt? Maybe a good idea to upgrade that to a grade 8 when doing the conversion.
This has me a bit concerned.....not sure how lack of the tabbed washer could cause the bolt to break unless it got loose and that extra play weakened the bolt head.
What grade is that bolt? Maybe a good idea to upgrade that to a grade 8 when doing the conversion.
If the tabbed washer is not installed, and installed effectively, the bolt can potentially work loose. That's the whole idea of the tabbed washer. More than likely, if the bolt loosens, it will find something to catch and then get snapped off - as seen in the autopsy.
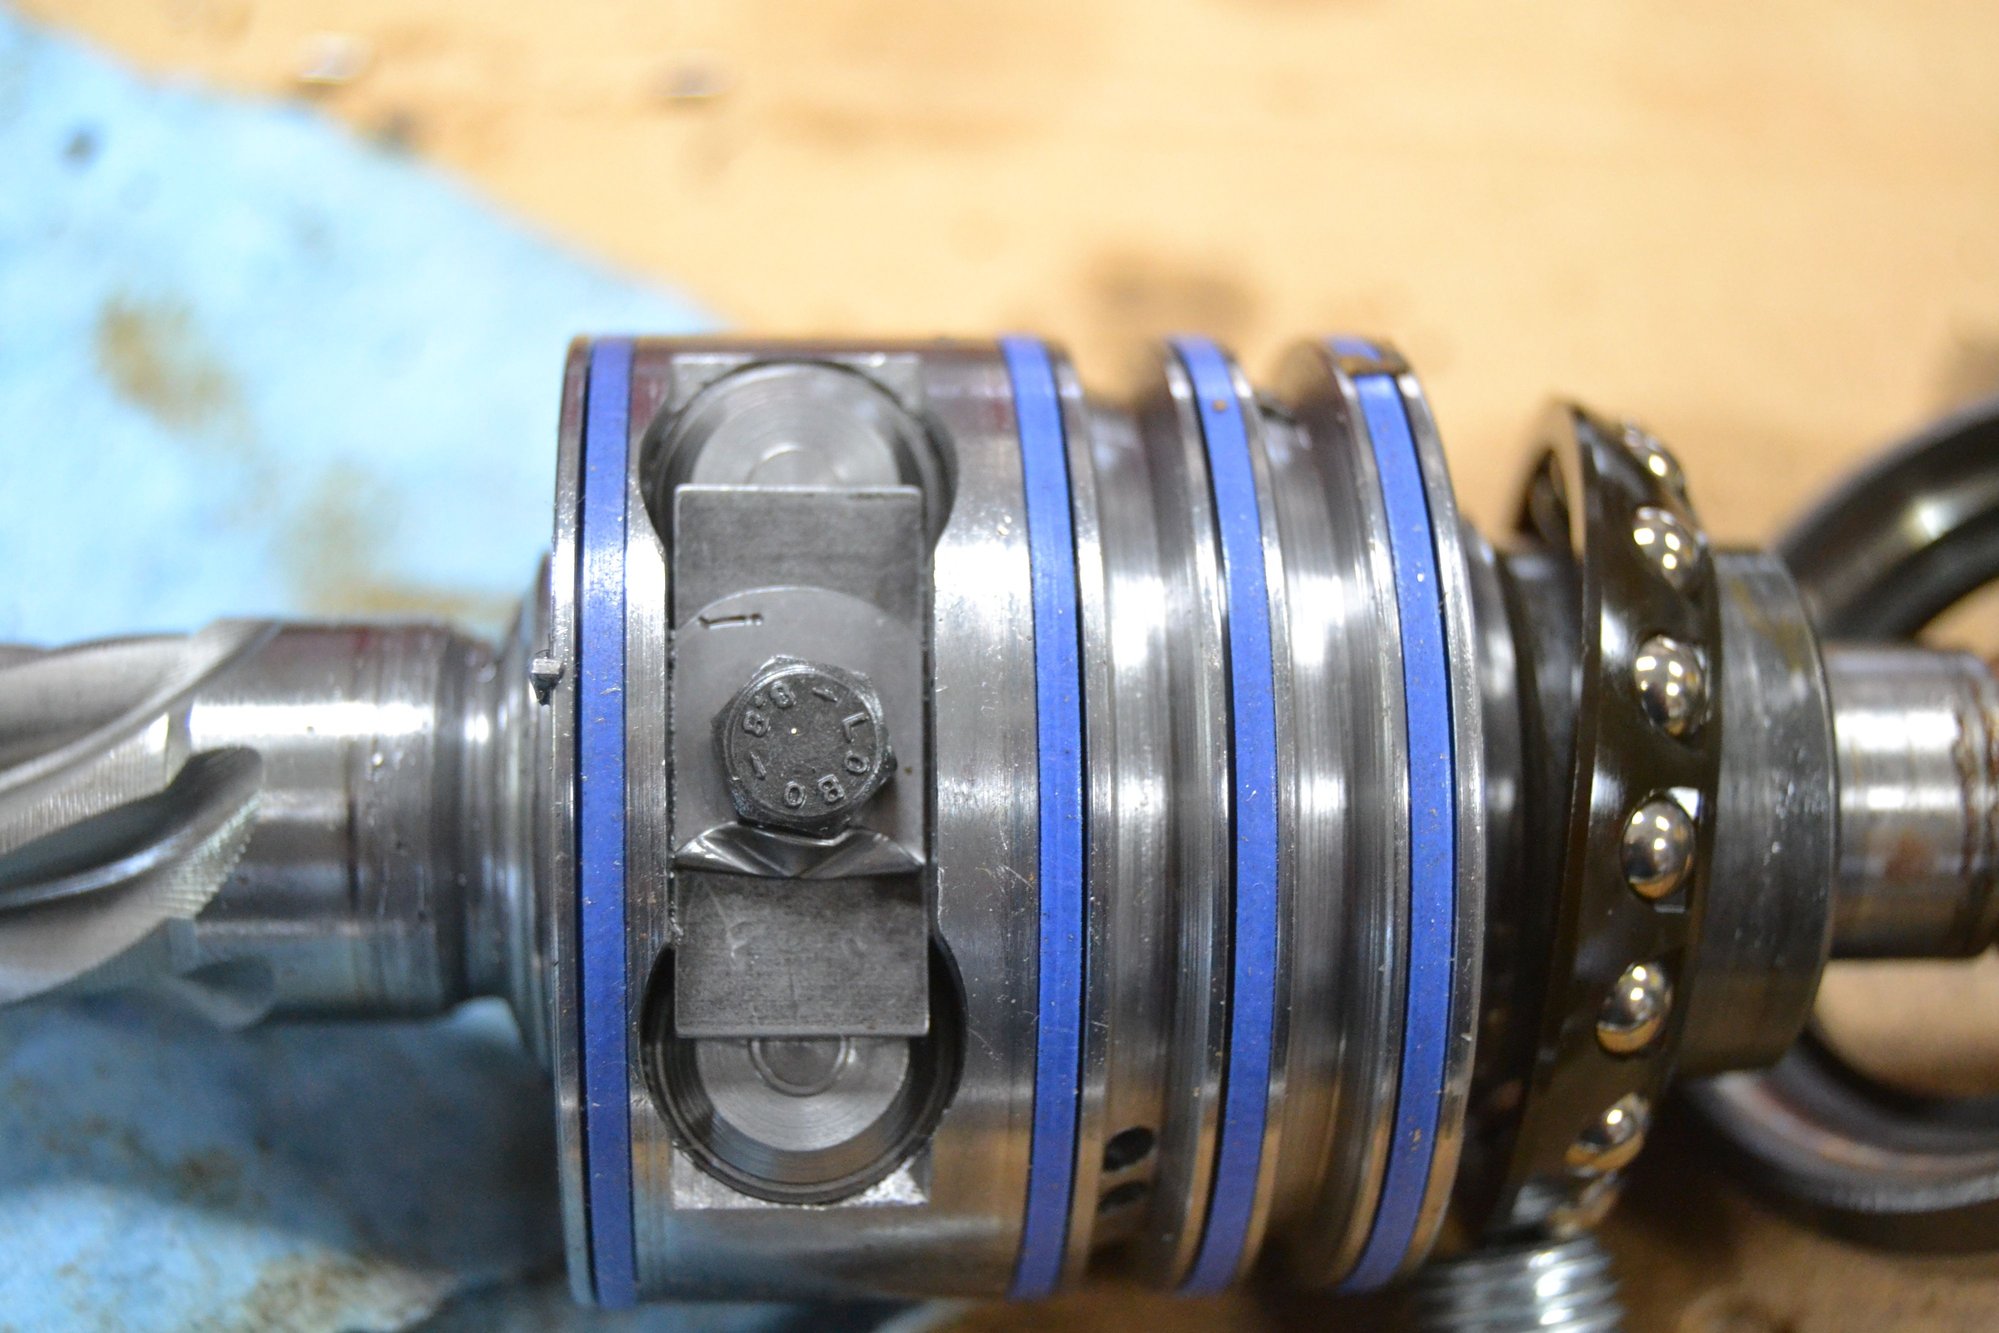
I think that bolt is hardened. Probably a metric 10.9 (equiv to SAE 8). I'll have mine apart soon and can confirm. Being an M6, the torque spec cannot be very high. Again, the idea behind the tabbed washer. I'll be looking closely at this and may also use red Loctite to give it the belt and suspenders treatment.
Edit: Bolt is 8.8 and M5
Last edited by Scott at Team Harco; 04-30-2018 at 10:35 AM.
Hopefully that was due to the guy doing a poor job of reinstalling the t-bar and bolt. Maybe he over-torqued it, or left the tabbed washer off...
Pretty scary video, I may accelerate my plans to install the factory manual rack sitting in my shop.
I did a couple of freeze frames on the video after 5:40, where he shows the parts he pulled out of the pinion housing, and I only count 4 washers, all of them look round. I don't see anything that looks like the safety washer. My guess is the bolt backed out as far as it could, then scraped on the inside surface of the pinion housing, eventually roughening it enough to produce friction and slowly work harden, then snapped the head off. I'd have thought the driver would notice slop in the steering before the bolt snapped, maybe he just ignored it.
The little bolt is an M5 and grade 8.8 (about SAE grade 5)
Took the rack apart that came from Penelope (which I believe was originally rebuilt for Herbie). Discovered that the rebuilder must have forced the thrust bearing into place. No only was it severely damaged, but the thin spacer was broken in many places. Oooops.
I didn't notice the little washer shown in the second photo until I was messing around fitting and playing with ideas for the spacers. Then a second one appeared out of nowhere. Do these go between the buttons and the springs?
Then I went to work on getting the old rack out of Nico. Discovered another major issue. The two bolts holding the left-side mount to the crossmember were sheared off! That certainly would account for the strange steering dynamics. Fortunately I have spares of everything. But this is silly. Not sure if one of the previous owners did that or if it was me. I don't recall doing engine mounts on this car - but that could account for those bolts being removed (and possibly not installed and torqued properly). DOH!
I have tentatively used JB Weld to bond little washers to the underside of the buttons. By using the beveled edge of the washers to nest in the recessed region of the spools, I am hopeful they will not float around. Other wise, I would be concerned with the pieces moving about a little and possibly even making contact with the housing bore. My concern now is that they my not fill the gap completely. Are there any known good dimensions to work from in this regard?
The little washer in the second photo is the one sitting between the two spool ports, about where the bolt would go? If so, that looks like one of the shims that go under the cap and over the spring. They get replaced by washers under the caps when the springs are removed.
As far as the other washers go, I didn't bond them to anything, just stacked them under the caps until they were thick enough to make firm contact with both the spools and the cap when the t-bar was bolted over the top of them.
I had one of the rack/xmember bolts shear off years ago too.
really weird steering feel.
This was both on the same mount. Weird is an appropriate word.
I had to check some old notes on this. I did replace the engine mounts on this car. And in the dusty cobwebs of my mind, I recall having trouble getting those bolts installed. May have crossthreaded them and then ran a tap in there. Don't recall for sure - regardless, it's fubared. Will grab a crossmember I've had for a long time, and use it. Need to disassemble most of the front end anyway to replace a bunch of parts, so dropping the crossmember will not be a big deal. Should be starting fresh and clean when done.
Last edited by Scott at Team Harco; 04-30-2018 at 02:10 PM.
The little washer in the second photo is the one sitting between the two spool ports, about where the bolt would go? If so, that looks like one of the shims that go under the cap and over the spring. They get replaced by washers under the caps when the springs are removed.
As far as the other washers go, I didn't bond them to anything, just stacked them under the caps until they were thick enough to make firm contact with both the spools and the cap when the t-bar was bolted over the top of them.
Regard,
The other Scott.
OK - that's what I figured when two appeared from nowhere. The first one was discovered where it is shown in the photo, but there were no witness marks on the T-bar or on the housing to lead me to believe they originated there.
I get your point about making firm contact. I am still concerned that the button caps could walk a little unless there is very firm pressure. And I am concerned that too much pressure could lead to other issues (e.g. unable to clamp the t-bar down fully against the housing). A dimensional stack-up would be good to work from.
Will grab a crossmember I've had for a long time, and use it. Need to disassemble most of the front end anyway to replace a bunch of parts, so dropping the crossmember will not be a big deal. Should be starting fresh and clean when done.
For anyone who may be interested, I just happen to have a spare S2 crossmember circa 1989 looking for a new home. I was supposed to return it to Lindsey as a core but I took too long installing the 3 piece I got from them and they don't want it anymore. Accepting all reasonable offers, I need to get it out of my shop.

 04-25-2018, 06:23 PM