When you click on links to various merchants on this site and make a purchase, this can result in this site earning a commission. Affiliate programs and affiliations include, but are not limited to, the eBay Partner Network.
Hey guys, long post with a lot of boring info lol so in my threads I like to detail a lot of the small things just because i know when i first got into cars i hated how people left out all the details that would have allowed me to follow and replicate for my car. so i try to be thorough. I know i also open myself up to the nit pickers who want to tell me how i'm doing it all wrong but thats ok. there are so many ways to get things done and know for me and my cars... i'm happy with my results so no worries if someone doesn't like the way i'm doing something lets just keep it friendly.. we are a small breed in todays world with electric cars and phones becoming the new hobbies and no one daring to work in there garage anymore so we are family gotta help each other out. shucks i remember being 22 and hated how it took me forever to figure out what "WOT" meant when i was trying to tune the first motor i rebuilt lol. anyway...
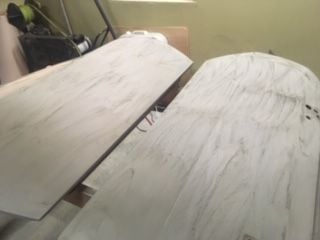
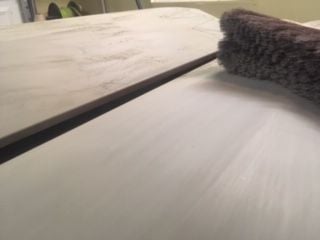
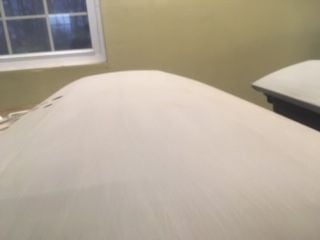
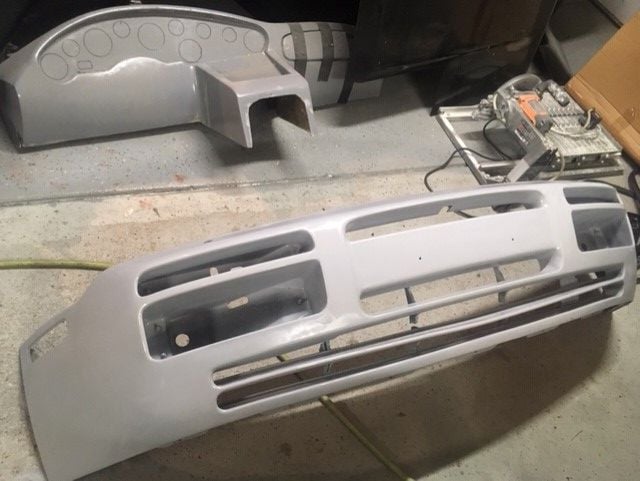
so the first few pics are of the doors, mirrors and headlight covers. i just wanted to show how they looked after sanding on the primer. they came out very clean and straight and i think the black will look very clean on them. i like to use a self etching primer for my first coat and if needed i will use a sandable/filler primer. these luckily other than three small dings in the doors filled with bondo came out great.
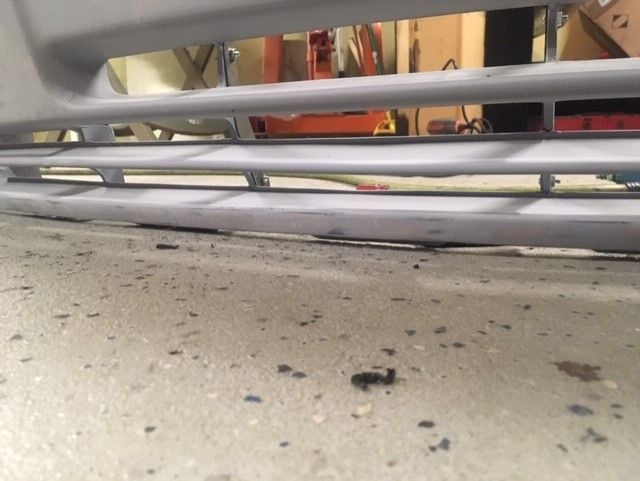
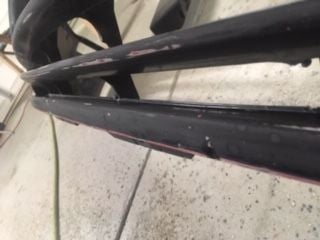
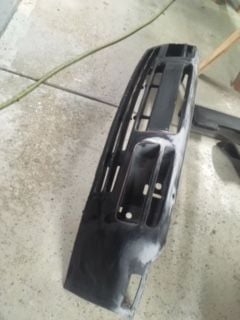
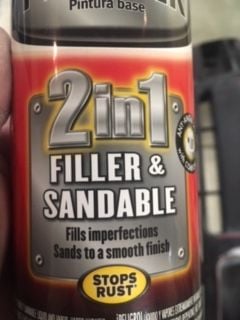
After the doors is the front bumper.... lol if anyone wants to donate a front bumper to the owner I will be much obliged lolol its ruff.. i mean real ruff lol i tried to capture all the pits and scrapes in the pics but it doesn't do it justice. i have my work cut out for me on the bumper. so far i have about 2 hours of sanding into and my first coat of filler primer along with some bondo over the small stuff that i would trust bondo on a plastic bumper with. its coming along and it will look primo when finished but its a job for sure. also going to need to make some bracket out of some 0.060 sheet metal along the grill supports so its low profile to the eye but strong enough to keep them back together. i'll post pics of those as i make them. should be starting with some black paint by the middle to end of the week.
thanks for watching guys
Brian
That bumper has taken a bit of a beating, haha sorry man. It has almost 30 years and 65k miles of mixed track and road abuse :/ I tried looking for another bumper nearby and most of them are a bit rough since these cars sit so low and they're all close if not over 30 years old. Don't worry too much about the scrapes down near the bottom as I plan on driving this car and it will more than likely get a bit scratched again. I have to learn to stay away from parking curbs
On a side note, what do you think about those holes up top that were meant for the headlight washers? Too much of a pain to fill? My car didn't come optioned with them. Finding those caps used is impossible as they desintegrate as soon as you touch them, and I could not find them new
I haven't posted pics up yet of the worked bumper but I've already done quite a bit more work to it and its looking quite nice. might consider a clear bra or a dyi bump guard when you start driving it again.
I've already purchased some plastic bonding epoxy for the holes I'm going to test a little bet and see how it does. shouldn't be a big deal to fill those holes.
having some friends over from church tonight so I wont be posting any more pics till probably Wednesday. I have another 911 coming in about a month for a paintjob so your car just moved up on my "get it done" list lol so this thread will speed up as I spend more time on the car. gonna pull that fiero project out of the garage you seen so I have more room and can get more done quicker. your clear coat has arrived and I should be picking up the black paint on Tuesday.
for those curious I use and recommend "Nason" paint. I used to live by "kirker" paint (company who makes "Summit" paint) and still would recommend them but since I've started using Nason.. it just seems to have a better texture/viscosity/smoothness.. if any of those make sense. T knows what I mean being an EPA spy in all that lololol I've used high end paint before, once did one of my Camaros in laborghini orange... $800 for a gallon and just my opinion... some of those prices and claims don't live up. just my opinion, it comes down to how well you can spray it vs the product its self. I once did a Camaro with walmart rattle cans just to prove it could be done to my friends at work... came out amazing. they would not accept I did it with spray cans.. lol i'll find a pic and post it, it was amazing.
ok i'll stop rambling now lol thanks for reading guys
Brian
I'm looking forward to seeing the pictures of your garage prepped for the spray event.
Should look something like this lol
I think towards the beginning of the thread I posted a link to my 911 build where I painted it the same way. I'm sure some will say its impossible to get a good paint job in there but my rebuttal would be all the cars I've done this way and how good they look. but I love constructive criticism and I try to never be to proud to learn new stuff. I will say, I have repaired paint jobs for friends who had theirs done in paint booths by "pro's" as well in my garage/barn etc. like T mentioned... theirs painters and buffers (not to be confused with fluffers) and I'd say I'm a combination of the two
I have made entire parts/car enclosures inside another building using PVC pipe, elbows and tees with the one time use autobody plastic masking as the material.
Take apart the PVC when done (don't glue) and just throw away the plastic.
I once worked at the largest auto dealer in my state, they had Porsche, Audi, Toyota, and Oldsmobile.
Huge body shop with 3 full time painters.
Needless to say, this dealer had 3-4 top of the line for the time paint booths.
More often then not, weather permitting, (not an all over), they did the spraying one car length removed from the building, right out in the open.
Some of the best jobs I have ever seen, experienced guys, some of the best in the field at the time or they wouldn't have been there.
Hey guys just a quick update. been busy so haven't been able to get to paint yet. trying to hurry and get the fiero in the other side of my garage back down on wheels and started so I can move it out before another Porsche gets here at the end of the month. the fiero has a 3.8sc motor swap done and I was relocating the coil packs and cut a gas line so I'm replacing that so I can move it... anyway lol
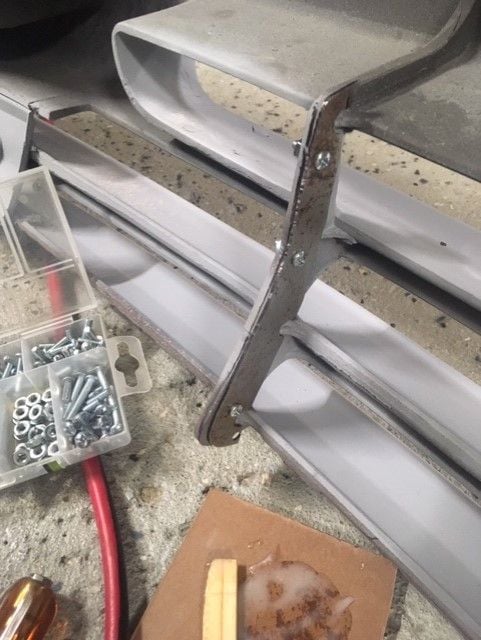
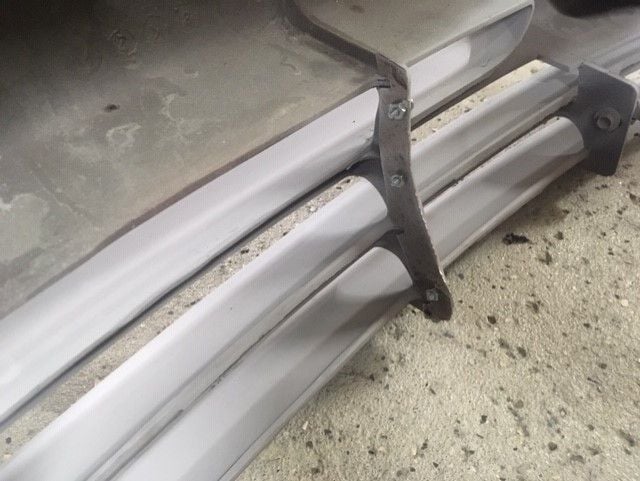
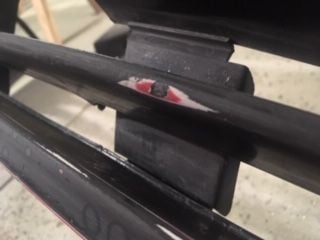
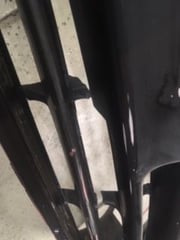
so I made some little brackets to hold this grill together so it wont sag. nothing special or creative just a quick fix so the owner can save the next guy who paints this bumper from having to sand off his fingerprints like it did trying to get the road rash out of it lol I'm just giving him a hard time over this bumper lol its all good. so I've sanded on the surface a couple times now on the A side to get it smoothed out, just about done and then i'll move on to the light buckets so they look decent.
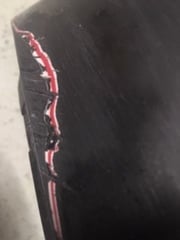
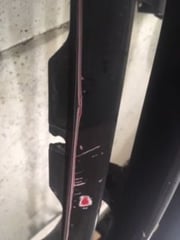
owner wanted those holes on the top that where for lights filled in so I looked around for some plastic bonding epoxy and found some at Meijer, tested it and it seemed to do pretty good so I supported the holes from the back side and filled them from the front side about 3/4's of the way up leaving just a little bit left to fill with bondo. the pic below is just the start(it will look better in next post). I think its going to work alright. I know the bumper is not plastic per say and is usually made of polyeurothane/propolene/thermoplastic etc. and there are some products out there for the various materials. I said that to say.. don't beat me up on this... it should work lol
I have made entire parts/car enclosures inside another building using PVC pipe, elbows and tees with the one time use autobody plastic masking as the material.
Take apart the PVC when done (don't glue) and just throw away the plastic.
I once worked at the largest auto dealer in my state, they had Porsche, Audi, Toyota, and Oldsmobile.
Huge body shop with 3 full time painters.
Needless to say, this dealer had 3-4 top of the line for the time paint booths.
More often then not, weather permitting, (not an all over), they did the spraying one car length removed from the building, right out in the open.
Some of the best jobs I have ever seen, experienced guys, some of the best in the field at the time or they wouldn't have been there.
T
spot on with this post. in high school my friends brother worked for a body shop. a very popular one in the imlay city area for there custom paint jobs. went with him one day to the shop and seen them painting a bronco out in the driveway behind the shop cuz they were crowed inside the shop with cars.. looked amazing!!! I mentioned something to the effect of "isn't it supposed to be in the booth so it looks good" he just laughed and ignored me .... story of my life lol I push this view to basically say to those who cant justify dropping $6k for a paint job but scared to do it them selves... just do it guys. life is short, live and learn and have fun along the way. or pay me a lot less to do it for you lol
What you did there re. the bumper hole fill will "work" but over time it's going to show some shrinkage at the intersection of the original bumper material and your filler.
I do something similar when converting the rear bumpers to "smooth" when deleting the rear rubber bumperettes.
What you want to do if possible is epoxy in aluminum disc shaped on a grinder or file to press fit in the space with thumb pressure.
Recess the filler slug about the thickness of a dime below surface.
Dress the area around hole, including scratches in the aluminum slug with 120-180 grit roloc.
Cut 1 piece of matt/cloth the size of the hole and one the size of your sanded area in the bumper surrounding your slug.
Epoxy in both your cloth/matt pieces starting with the one sized for the recessed hole then the larger one.
Sand flush, prime.
All material shrinks, some way less % than others, this way, the bulk of the void that used to be a hole is filled with the metal disc.
Less filler, less shrinkage.
 12-02-2018, 10:54 PM


 and no one daring to work in there garage anymore
  gotta help each other out. shucks i remember being 22 and hated how it took me forever to figure out what "WOT" meant when i was trying to tune the first motor i rebuilt lol. anyway...
 lol if anyone wants to donate a front bumper to the owner I will be much obliged lolol its ruff.. i mean real ruff lol i tried to capture all the pits and scrapes in the pics but it doesn't do it justice. i have my work cut out for me on the bumper. so far i have about 2 hours of sanding into and my first coat of filler primer along with some bondo over the small stuff that i would trust bondo on a plastic bumper with. its coming along and it will look primo when finished but its a job for sure. also going to need to make some bracket out of some 0.060 sheet metal along the grill supports so its low profile to the eye but strong enough to keep them back together. i'll post pics of those as i make them. should be starting with some black paint by the middle to end of the week.
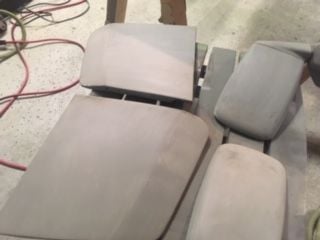


 lol
lol