Notices
914/914-6 Forum 1969-1976
Sponsored by:
Sponsored by:

After a 25 Year Break, 914 Ownership Again

Thread Tools
 
Search this Thread
 
Old 01-05-2020, 10:28 PM
  #106  
bkrantz
Rennlist Member
Thread Starter
 
bkrantz's Avatar
 
Join Date: Oct 2012
Location: SW Colorado
Posts: 6,070
Likes: 0
Received 1,112 Likes on 669 Posts
Default

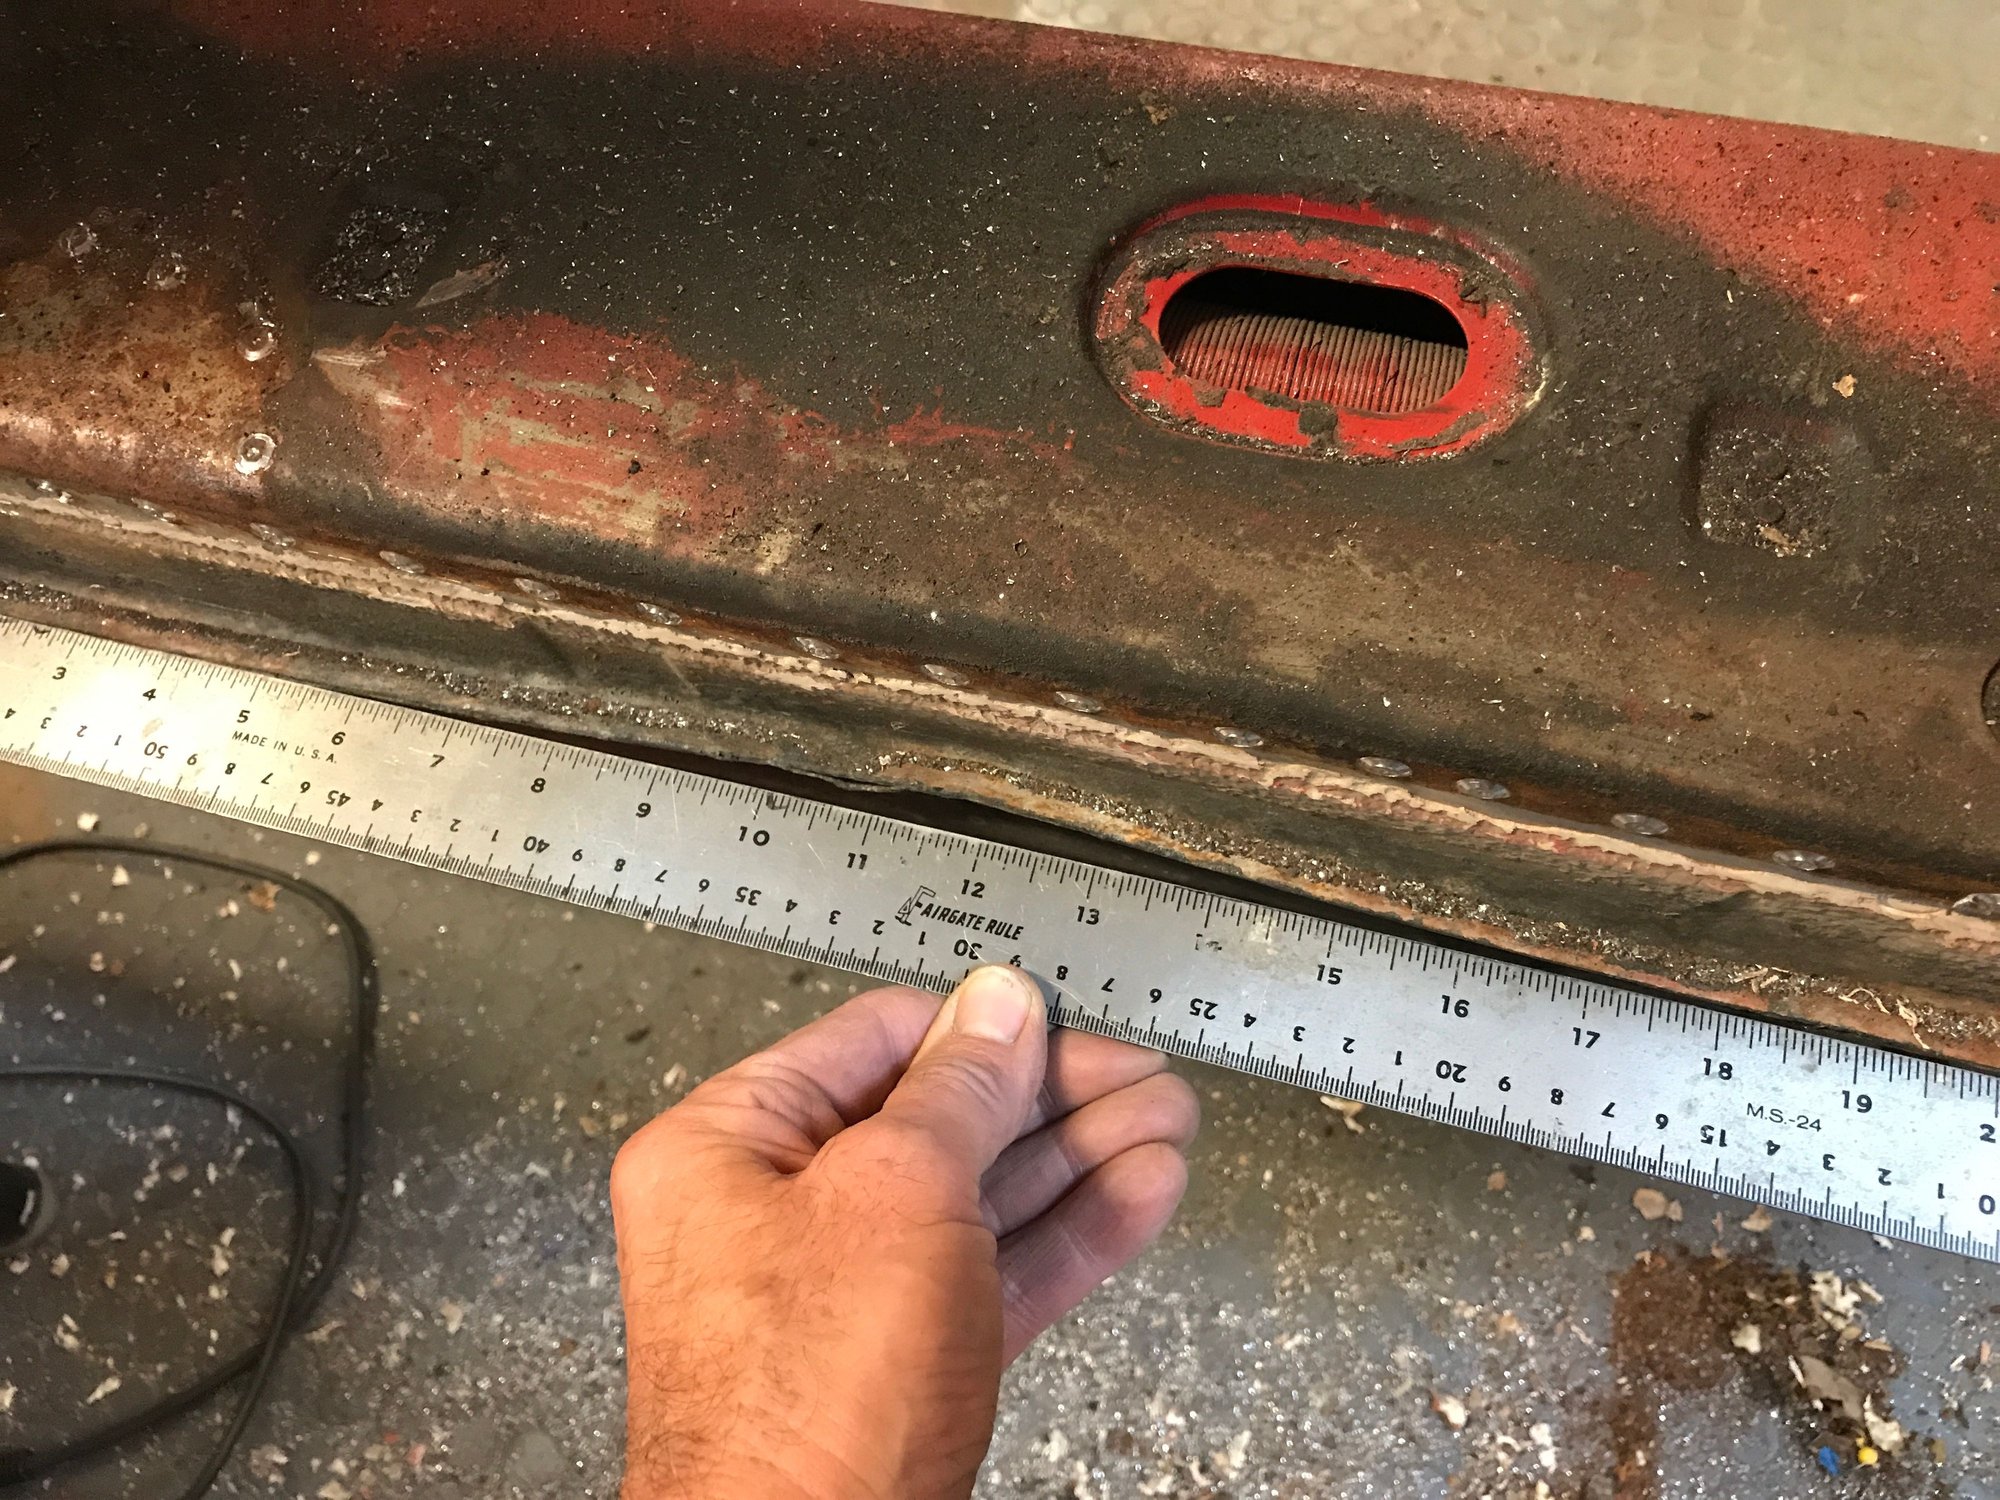
Several things to do before installing the new floor, including straightening a dent in the bottom of the right long. Somebody probably jacked the car up the dumb way.


Old 01-06-2020, 10:38 PM
  #107  
bkrantz
Rennlist Member
Thread Starter
 
bkrantz's Avatar
 
Join Date: Oct 2012
Location: SW Colorado
Posts: 6,070
Likes: 0
Received 1,112 Likes on 669 Posts
Default

Hope you guys are enjoying all my posts...

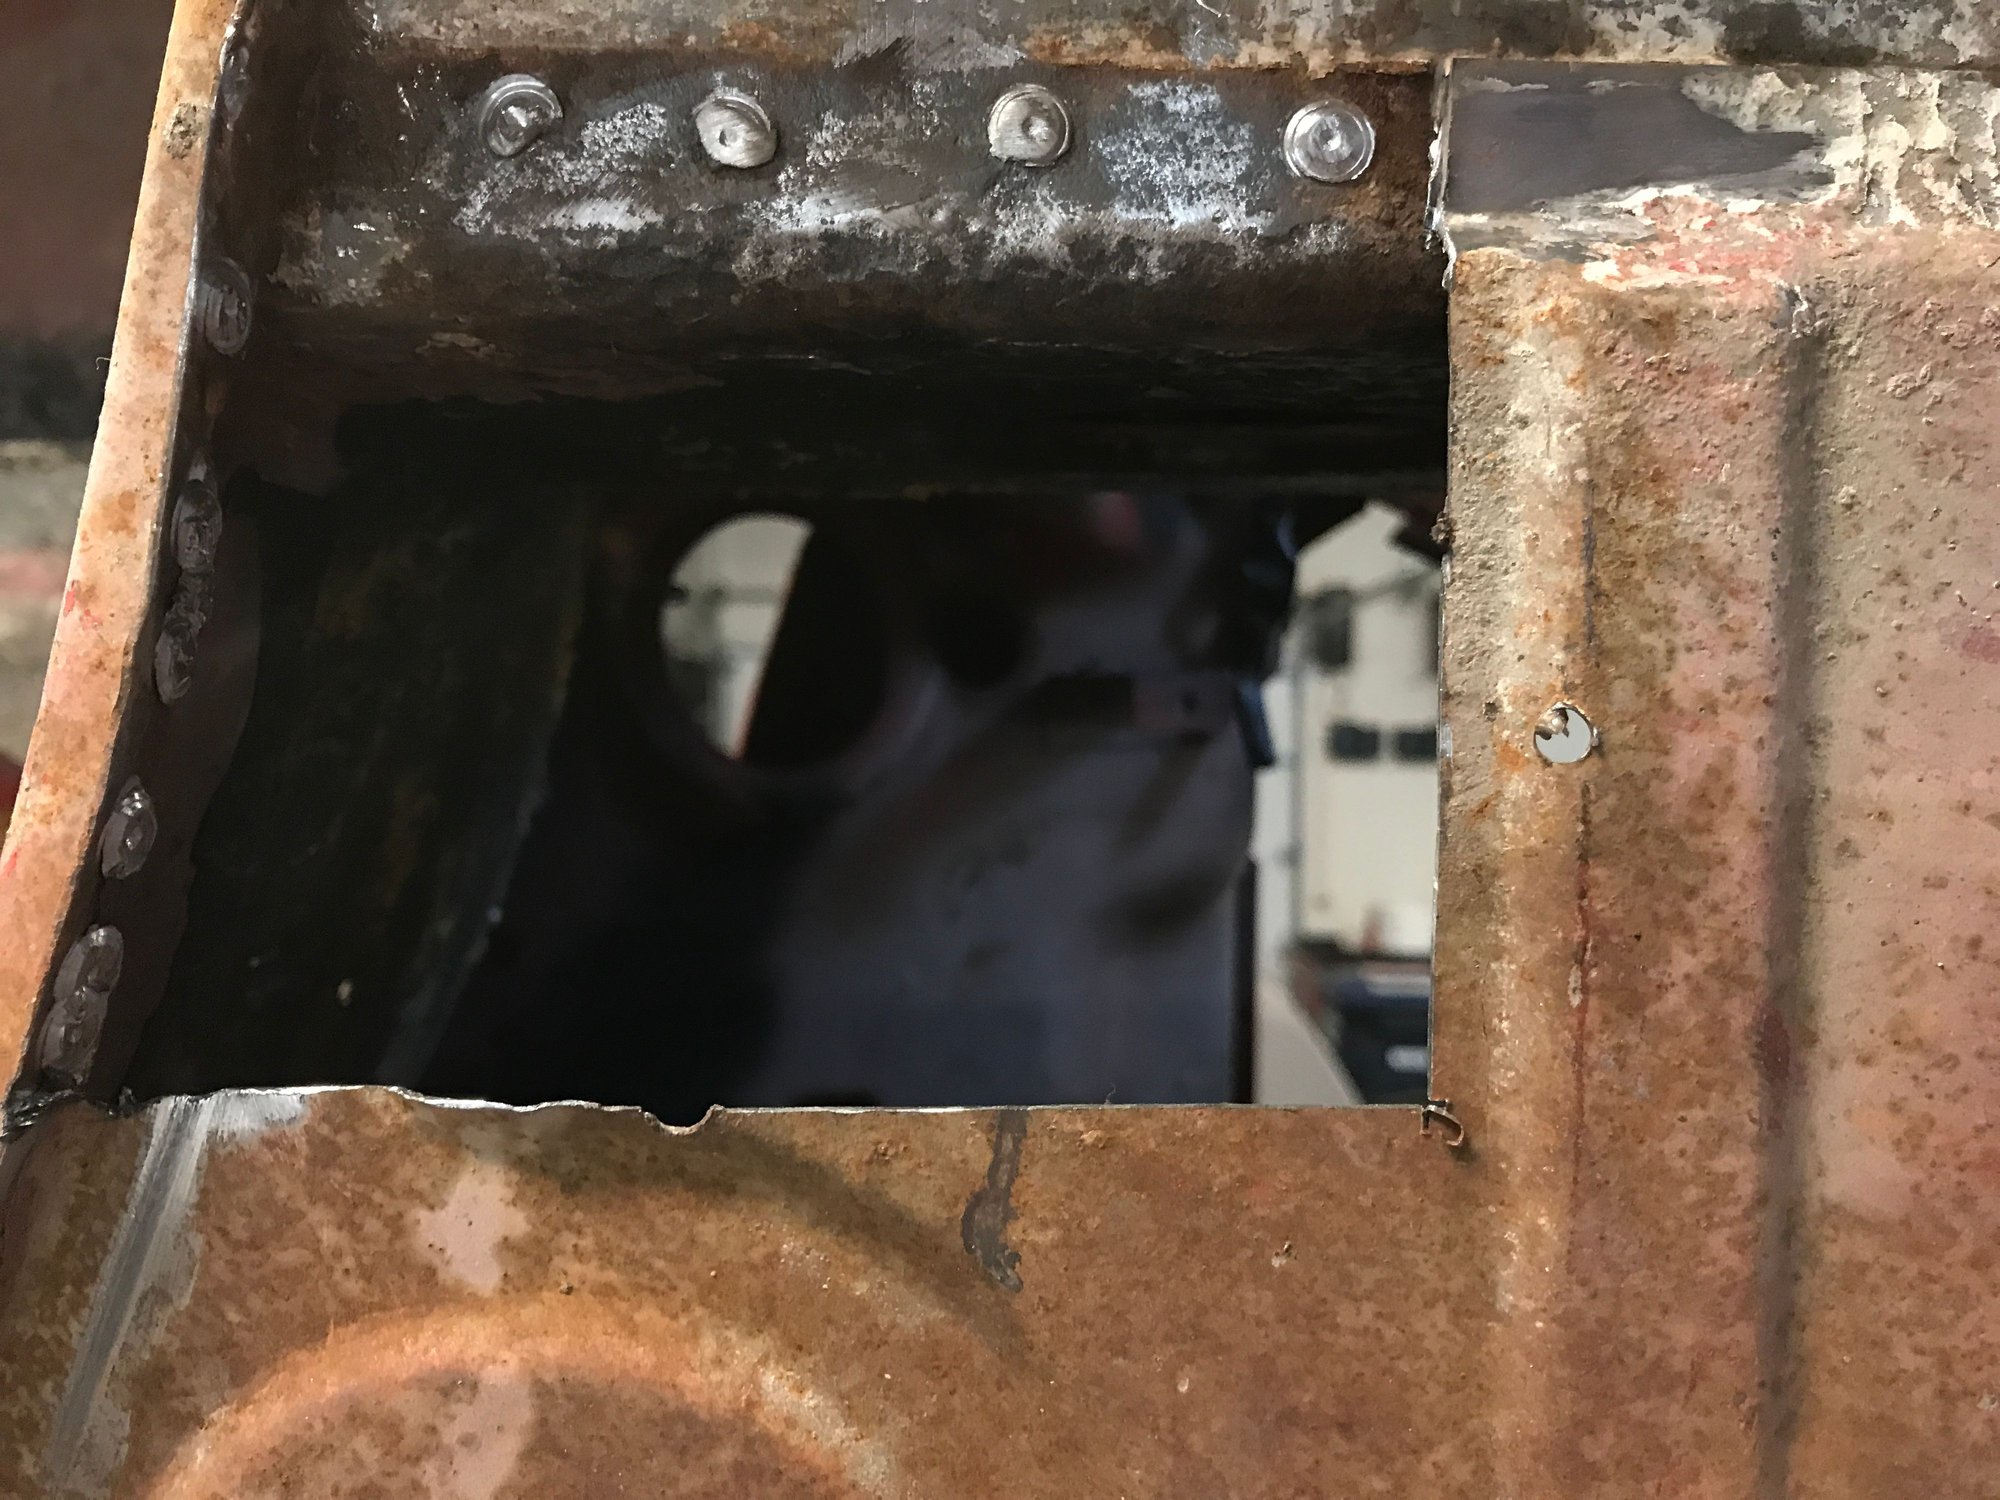
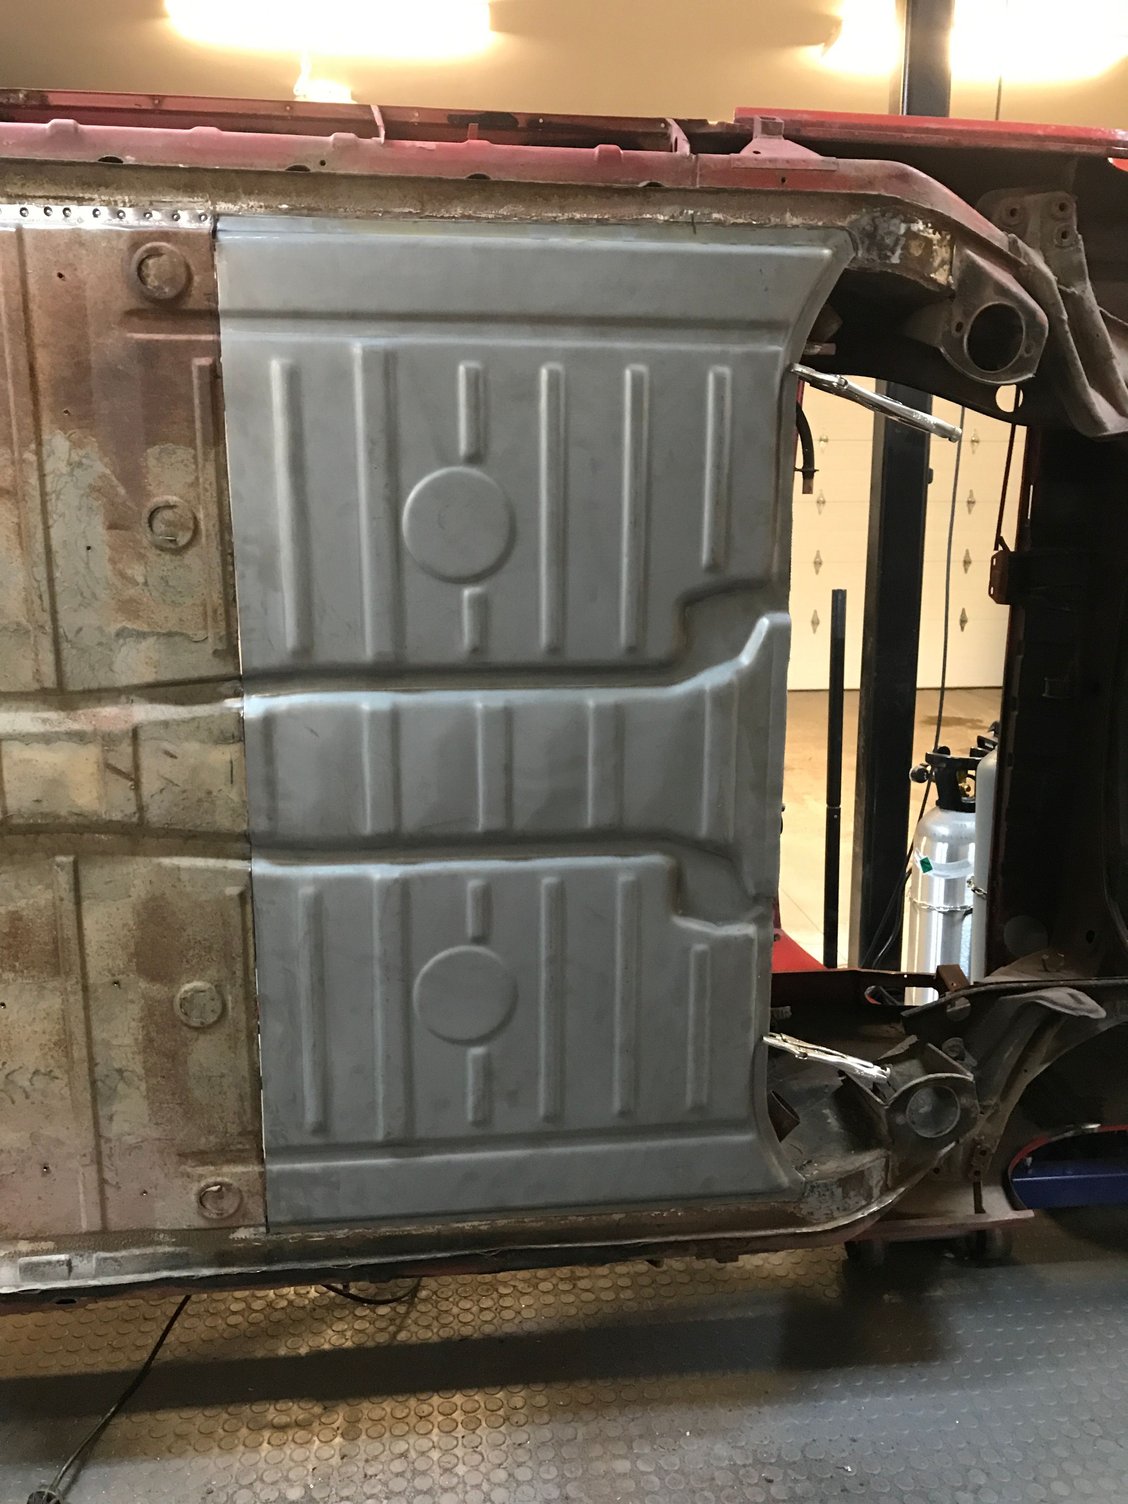
Anyway, today I took care of a few more things around the floor. Here's the small patch of the left front corner removed, leaving solid metal including the sill (just some surface rust).

Old 01-06-2020, 10:40 PM
  #108  
bkrantz
Rennlist Member
Thread Starter
 
bkrantz's Avatar
 
Join Date: Oct 2012
Location: SW Colorado
Posts: 6,070
Likes: 0
Received 1,112 Likes on 669 Posts
Default

And the right front corner. The sill has a small rust hole adjacent to the floor panel seam.


Old 01-06-2020, 10:41 PM
  #109  
bkrantz
Rennlist Member
Thread Starter
 
bkrantz's Avatar
 
Join Date: Oct 2012
Location: SW Colorado
Posts: 6,070
Likes: 0
Received 1,112 Likes on 669 Posts
Default


Good news! The rust-through is very localized, and from the outside in. This will take a small simple curved patch.
Old 01-06-2020, 10:47 PM
  #110  
bkrantz
Rennlist Member
Thread Starter
 
bkrantz's Avatar
 
Join Date: Oct 2012
Location: SW Colorado
Posts: 6,070
Likes: 0
Received 1,112 Likes on 669 Posts
Default

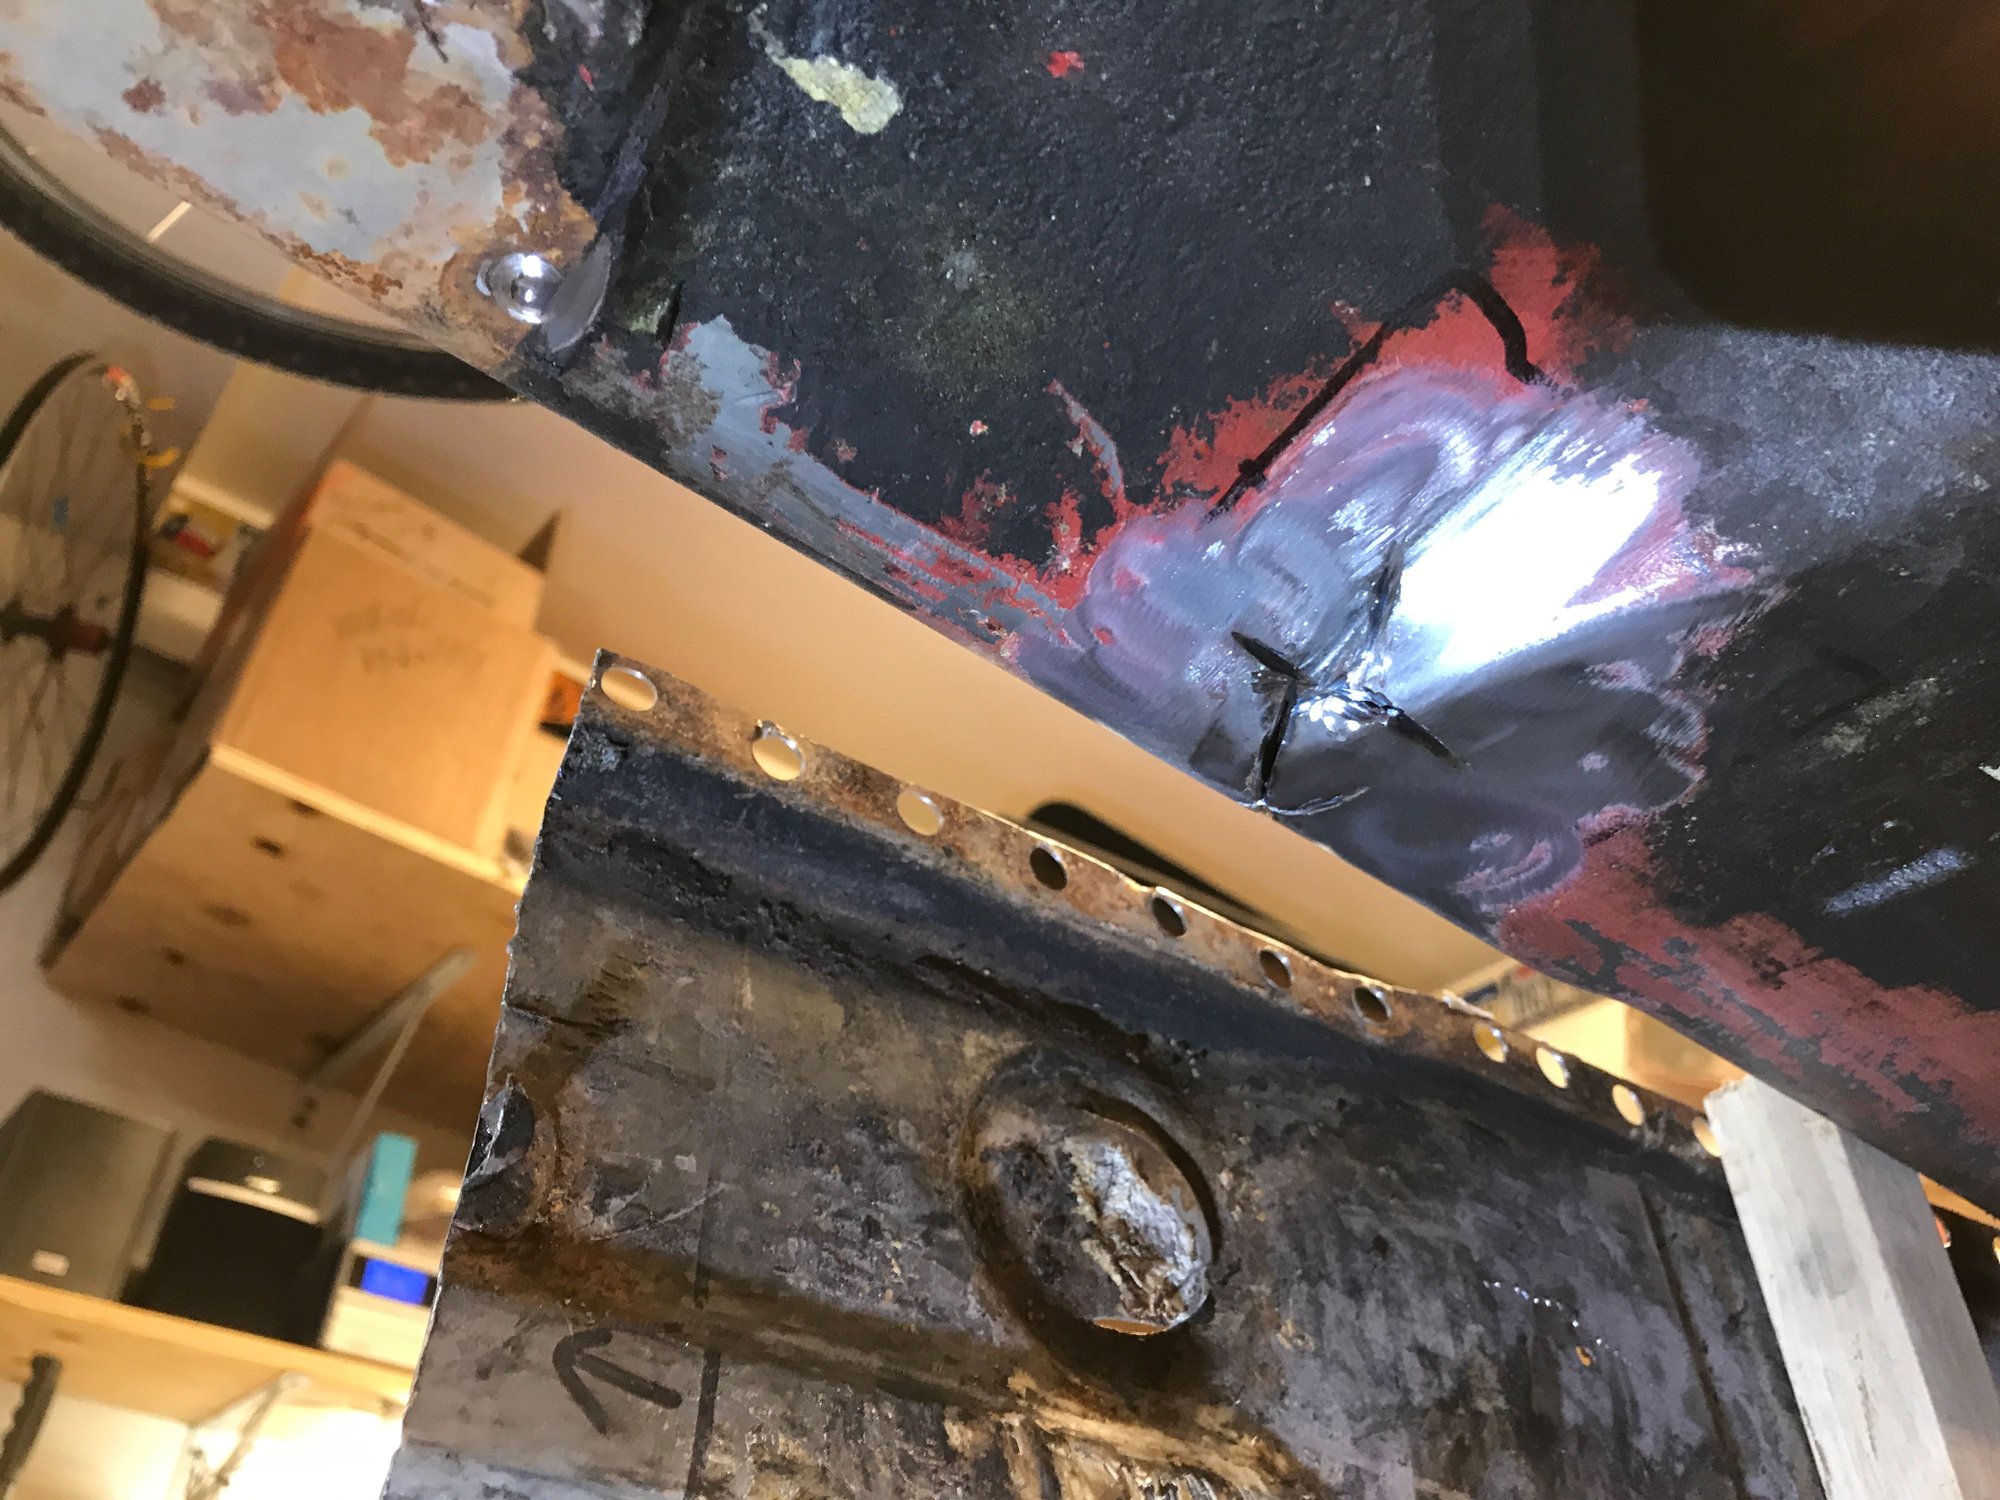
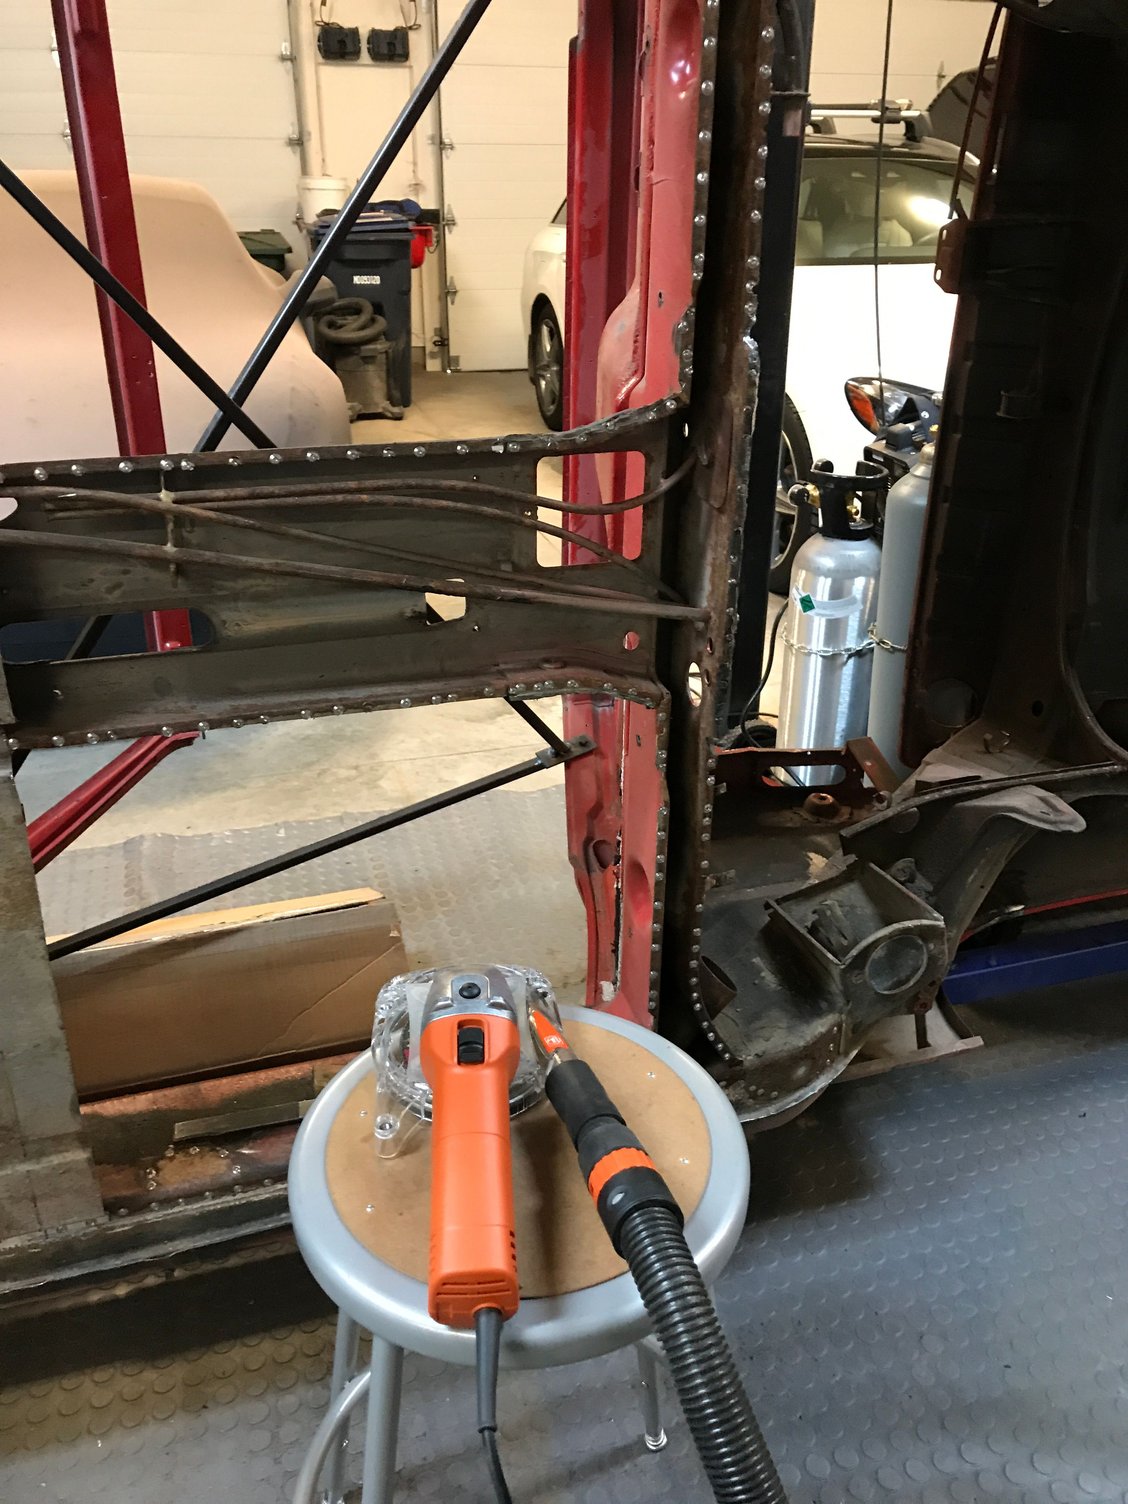
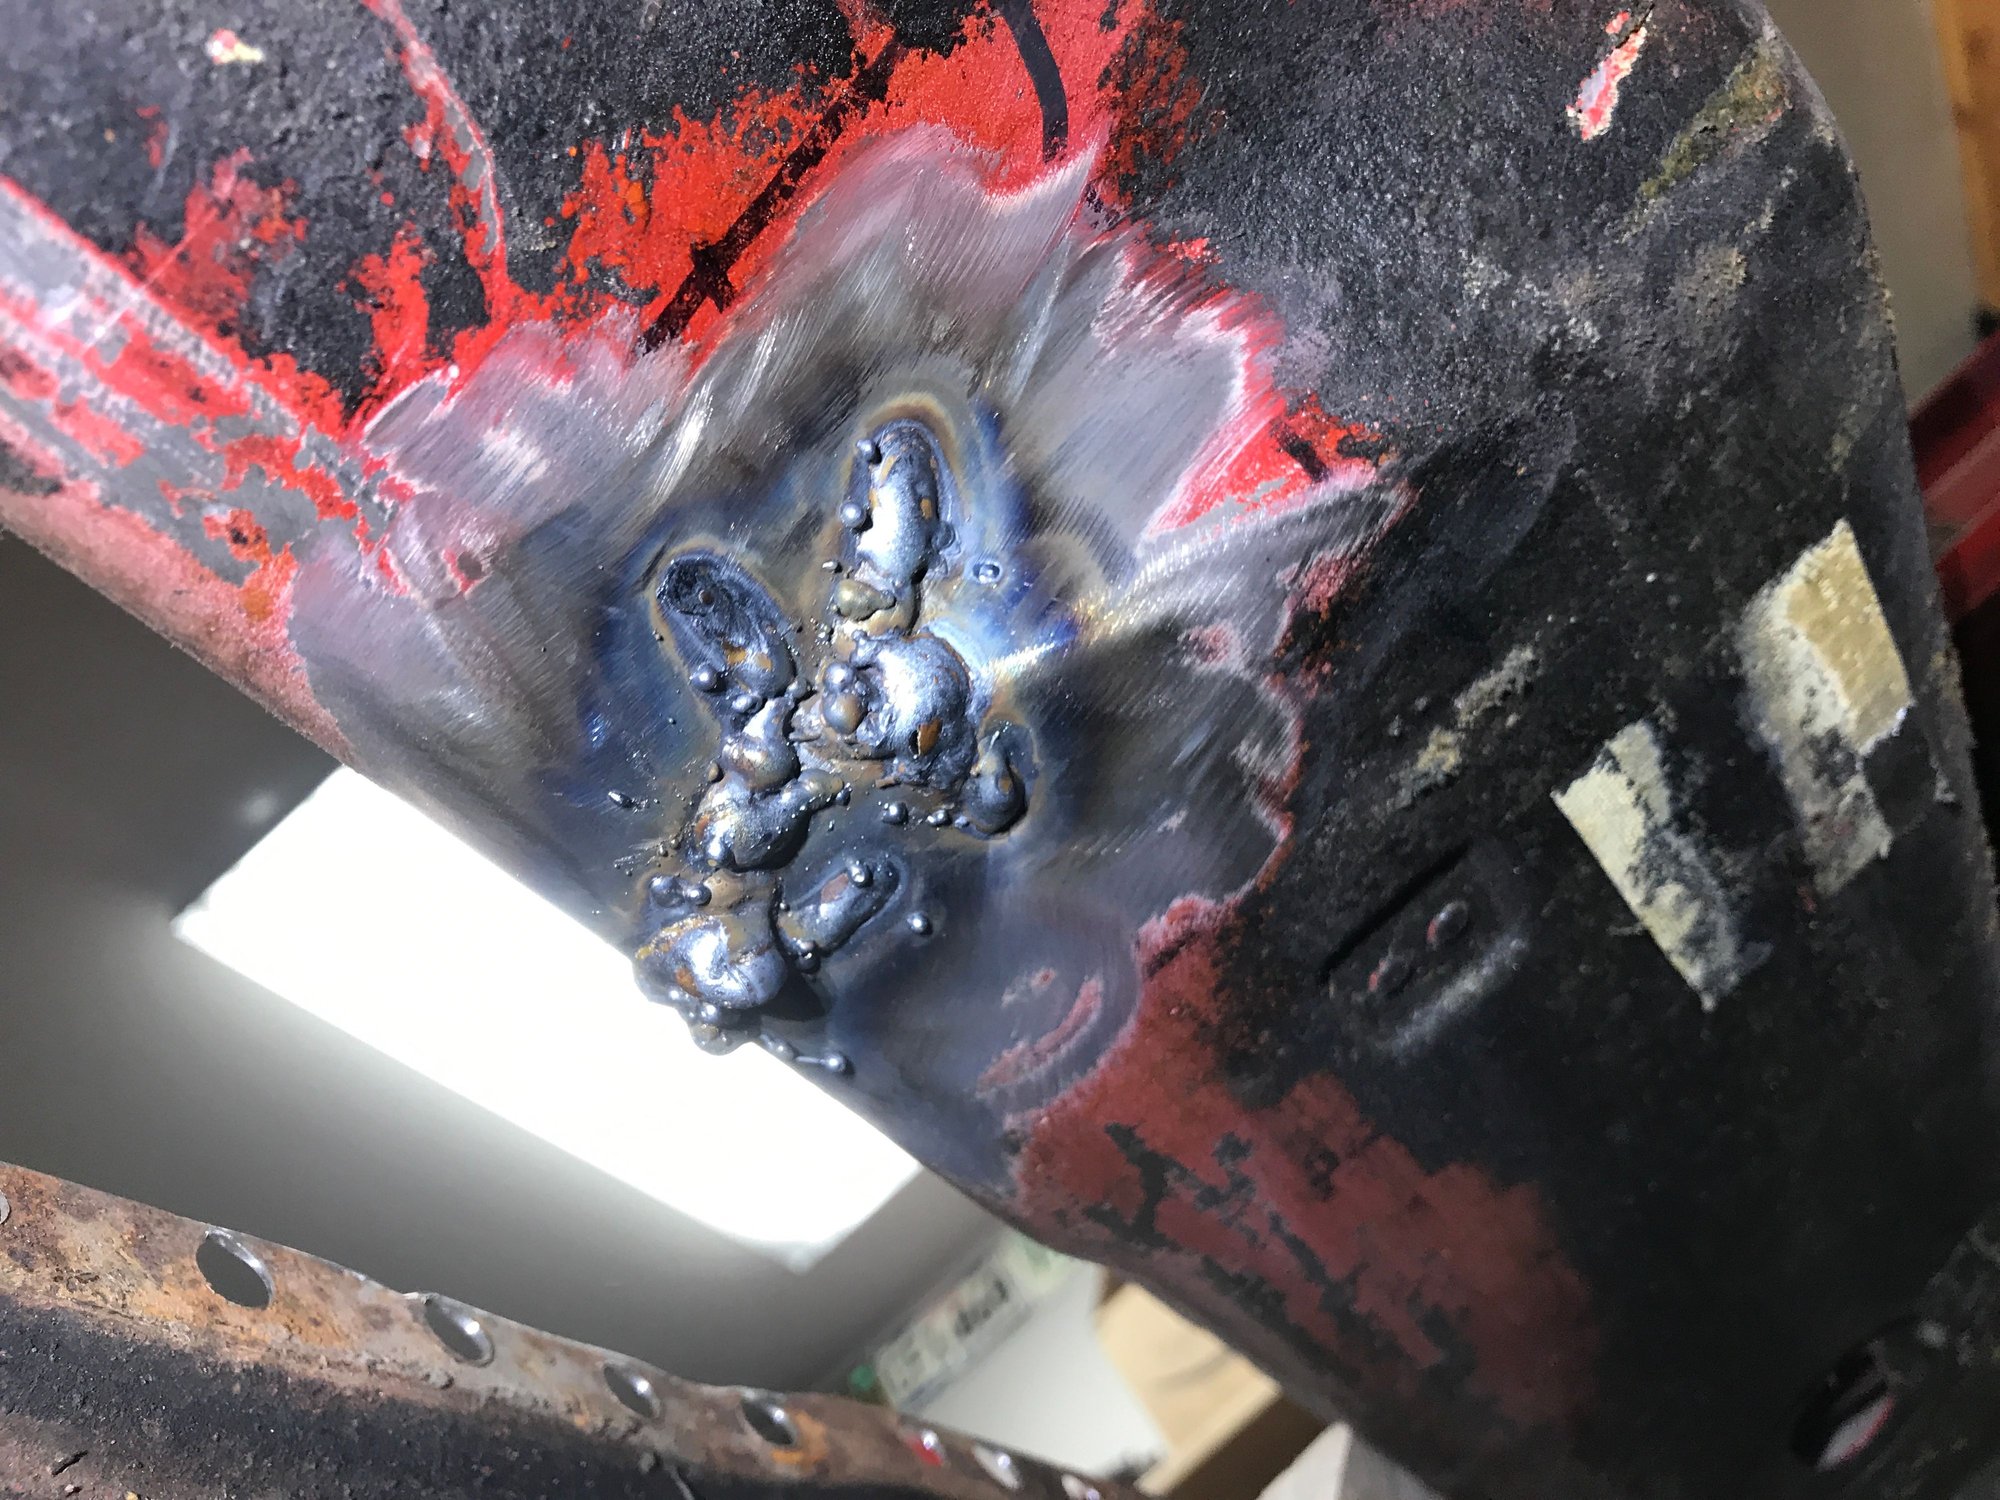
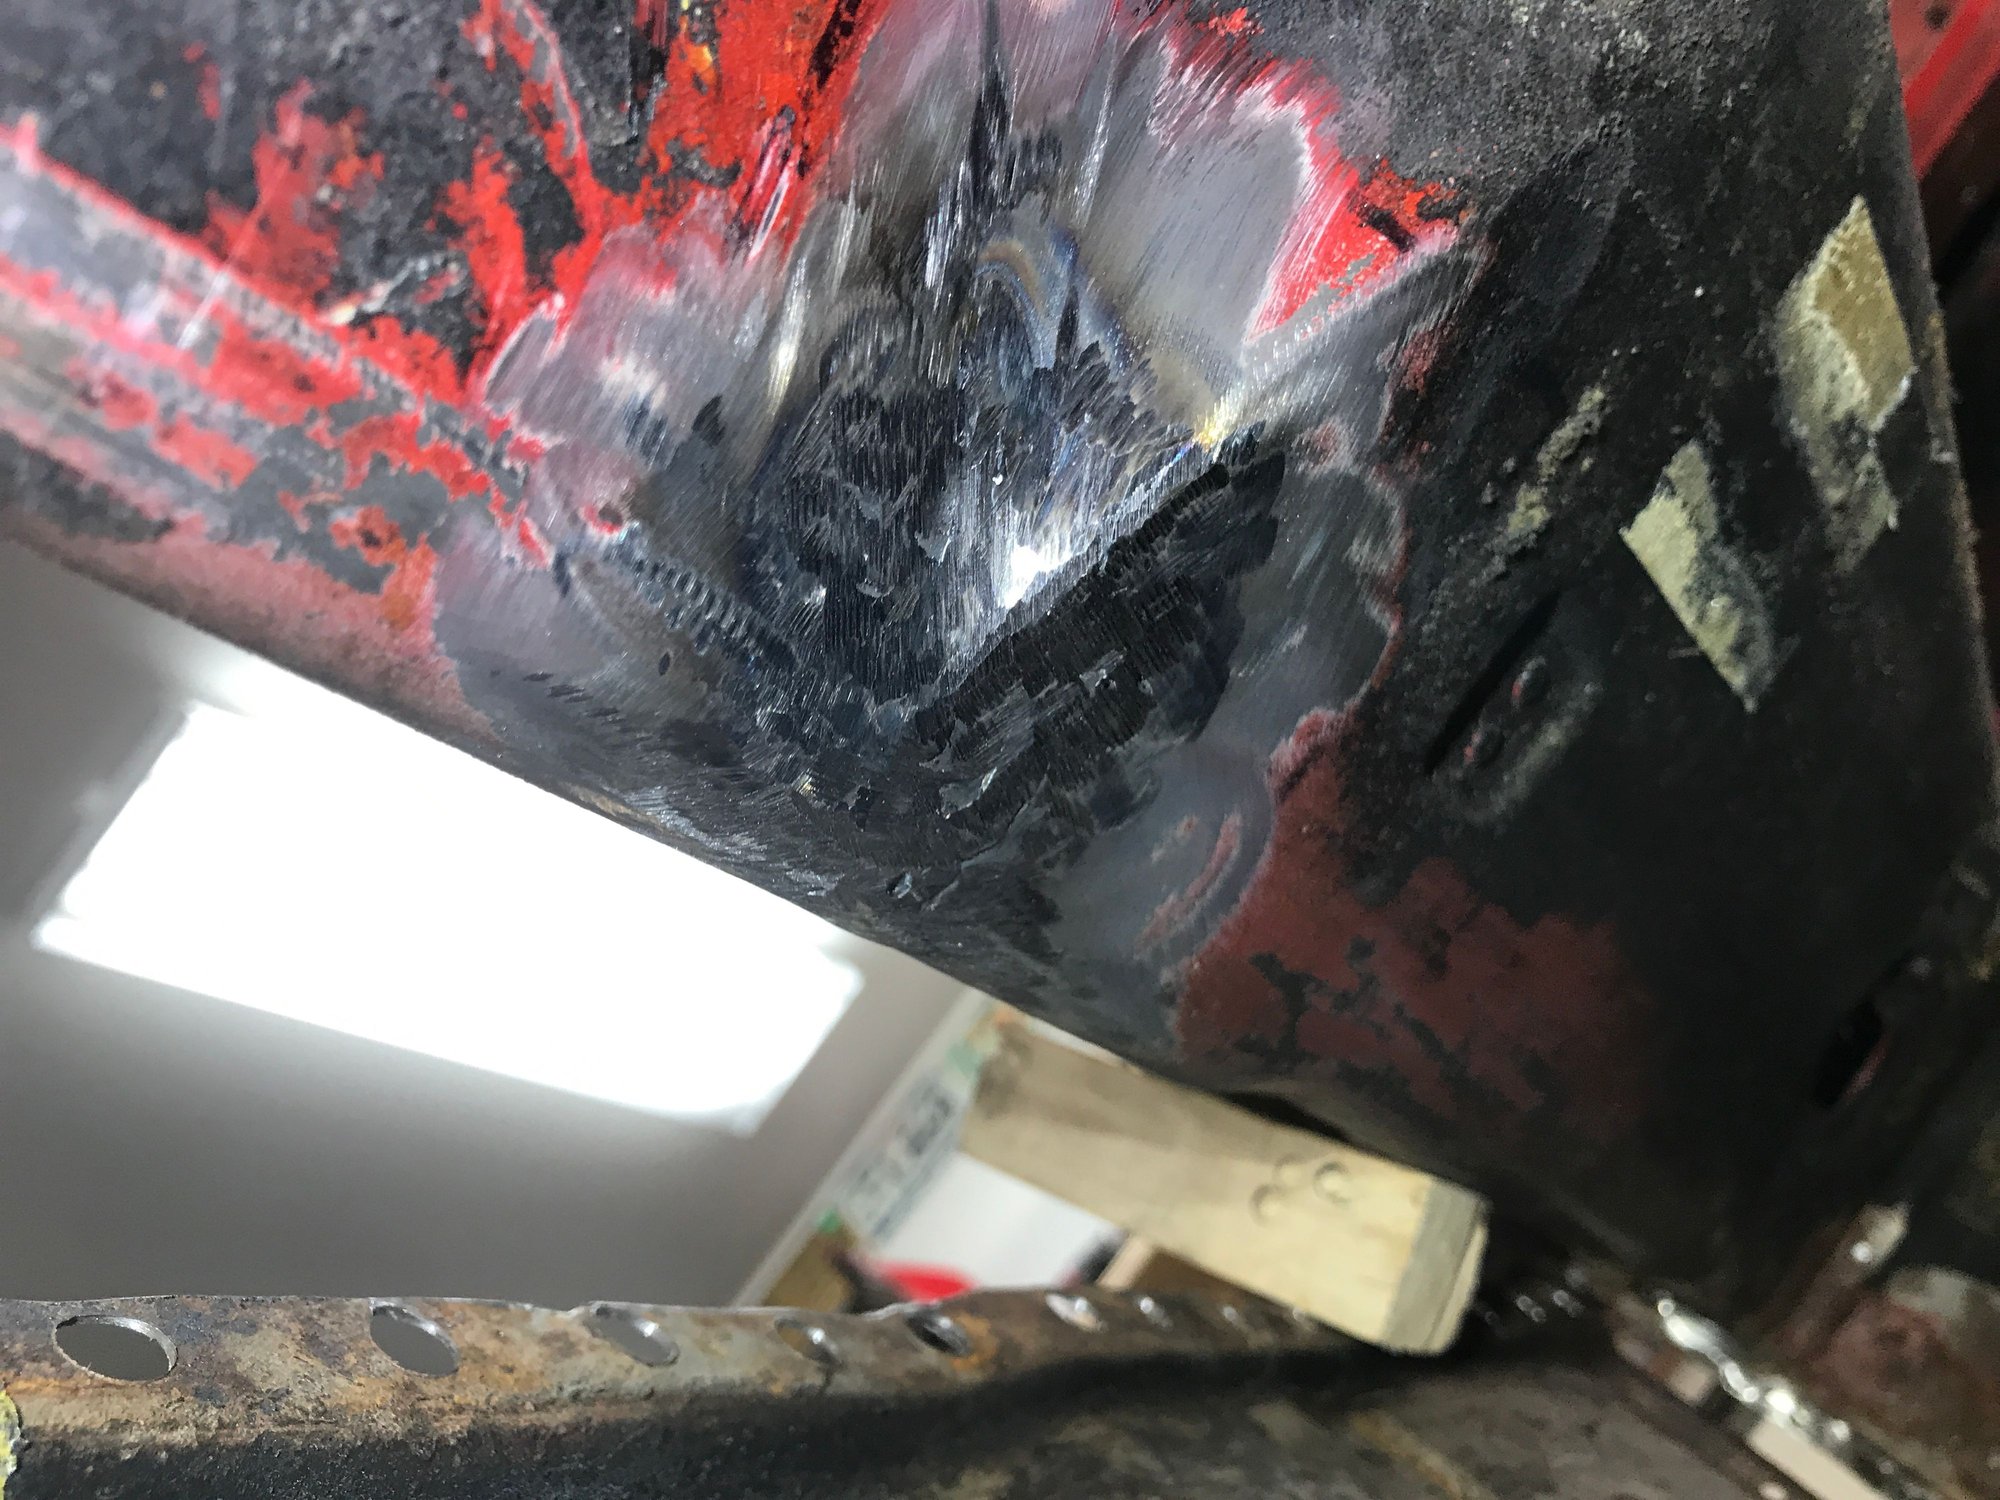
One more sill problem: the left inner sill has typical cracks near the recess for grabbing the parking brake lever. These need to be welded up!


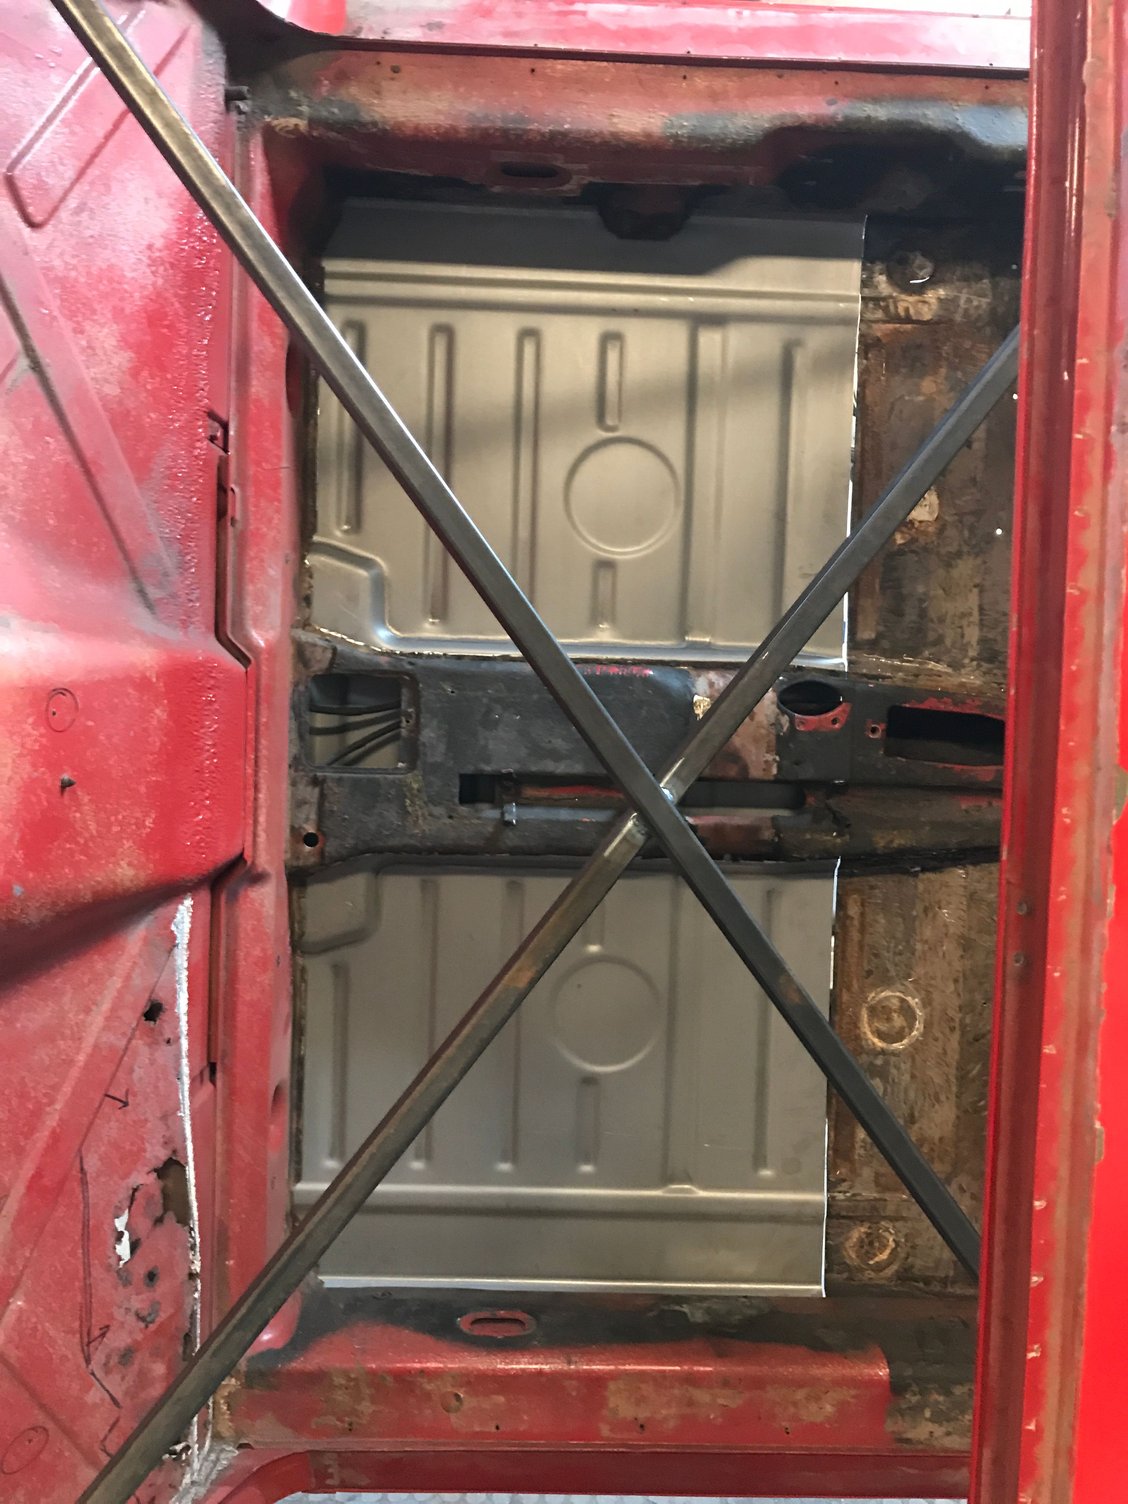
To get access I detached the remaining floor from the left sill, and propped it away. This gave me room to grind a groove along each crack for better weld penetration.


Old 01-06-2020, 10:49 PM
  #111  
bkrantz
Rennlist Member
Thread Starter
 
bkrantz's Avatar
 
Join Date: Oct 2012
Location: SW Colorado
Posts: 6,070
Likes: 0
Received 1,112 Likes on 669 Posts
Default

Before quitting today I could not resist a first fitting of the replacement rear floor. This will need trimming all around but looks good.


Old 01-07-2020, 04:27 PM
  #112  
skl
Official Wednesday AM Red Bull F1 test driver
Rennlist Member
 
skl's Avatar
 
Join Date: Apr 2003
Location: North Scottsdale
Posts: 10,031
Received 965 Likes on 589 Posts
Default

I love that a 914 is getting this much love. Of course I'm biased but they deserve it!!

Keep it coming.
Old 01-07-2020, 10:32 PM
  #113  
bkrantz
Rennlist Member
Thread Starter
 
bkrantz's Avatar
 
Join Date: Oct 2012
Location: SW Colorado
Posts: 6,070
Likes: 0
Received 1,112 Likes on 669 Posts
Default

Just a token bit of work today, straightening one of the rear floor triangle braces. These should clean up fine for re-use.


Old 01-07-2020, 10:38 PM
  #114  
bkrantz
Rennlist Member
Thread Starter
 
bkrantz's Avatar
 
Join Date: Oct 2012
Location: SW Colorado
Posts: 6,070
Likes: 0
Received 1,112 Likes on 669 Posts
Default

Got distracted with upgrading y garage ceiling lights, replacing fluorescent bulbs with LED. The light is both brighter and whiter.


The problem is that I have to strip the old fixture down to a bare shell, since the sockets are wrong.


Old 01-08-2020, 10:57 PM
  #115  
bkrantz
Rennlist Member
Thread Starter
 
bkrantz's Avatar
 
Join Date: Oct 2012
Location: SW Colorado
Posts: 6,070
Likes: 0
Received 1,112 Likes on 669 Posts
Default

Today, I first finished the 2 light fixtures directly over my work area.


Old 01-08-2020, 11:01 PM
  #116  
bkrantz
Rennlist Member
Thread Starter
 
bkrantz's Avatar
 
Join Date: Oct 2012
Location: SW Colorado
Posts: 6,070
Likes: 0
Received 1,112 Likes on 669 Posts
Default

With a just a little bit of time, I worked on the muffler shield, which was still attached to a remnant of the old trunk floor.


Here's the shield, after detaching the floor, and doing a bit of metal work.

Old 01-20-2020, 10:48 PM
  #117  
bkrantz
Rennlist Member
Thread Starter
 
bkrantz's Avatar
 
Join Date: Oct 2012
Location: SW Colorado
Posts: 6,070
Likes: 0
Received 1,112 Likes on 669 Posts
Default

Back from "vacation" (not sure if I get vacations during retirement). Got some new tools and played a bit, starting with grinding and cleaning up the old seams.


Old 01-22-2020, 10:40 PM
  #118  
bkrantz
Rennlist Member
Thread Starter
 
bkrantz's Avatar
 
Join Date: Oct 2012
Location: SW Colorado
Posts: 6,070
Likes: 0
Received 1,112 Likes on 669 Posts
Default

Getting back to it, prepping the surfaces for welding: lots of grinding of drilled-out spot welds and metal clean-up.


Old 01-22-2020, 10:43 PM
  #119  
bkrantz
Rennlist Member
Thread Starter
 
bkrantz's Avatar
 
Join Date: Oct 2012
Location: SW Colorado
Posts: 6,070
Likes: 0
Received 1,112 Likes on 669 Posts
Default

And then fitting the replacement floor section. Cutting excess from the panel, cutting the edge of the remaining floor, and grinding for fit.


Old 01-24-2020, 11:42 PM
  #120  
bkrantz
Rennlist Member
Thread Starter
 
bkrantz's Avatar
 
Join Date: Oct 2012
Location: SW Colorado
Posts: 6,070
Likes: 0
Received 1,112 Likes on 669 Posts
Default

A few things before welding in the floor panel. First: welding the cracks in the left inner long, near the recess for the parking brake handle (a very common phenomenon). Weld first, and then grind.


Quick Reply: After a 25 Year Break, 914 Ownership Again


All times are GMT -3. The time now is 07:15 PM.