Projects on my new, to me, 1974 914-6
 10-29-2018, 05:07 PM
#91
Racer
Thread Starter

I did use Velcro to attach the tunnel carpets.
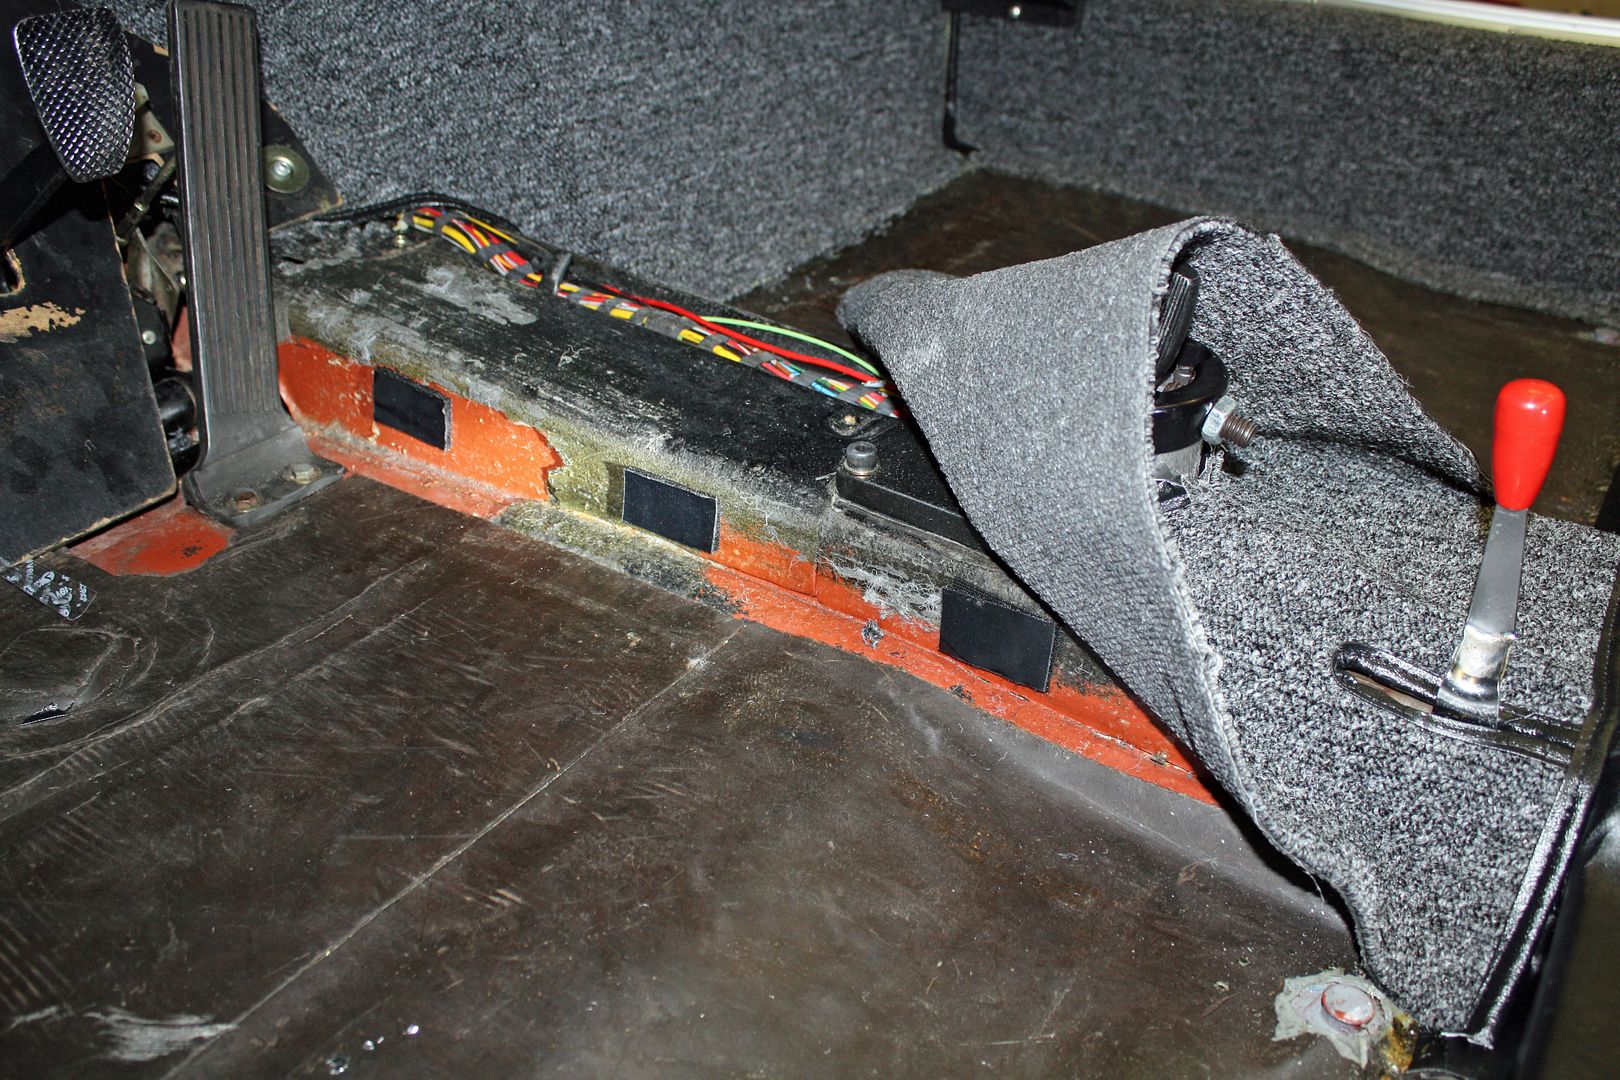
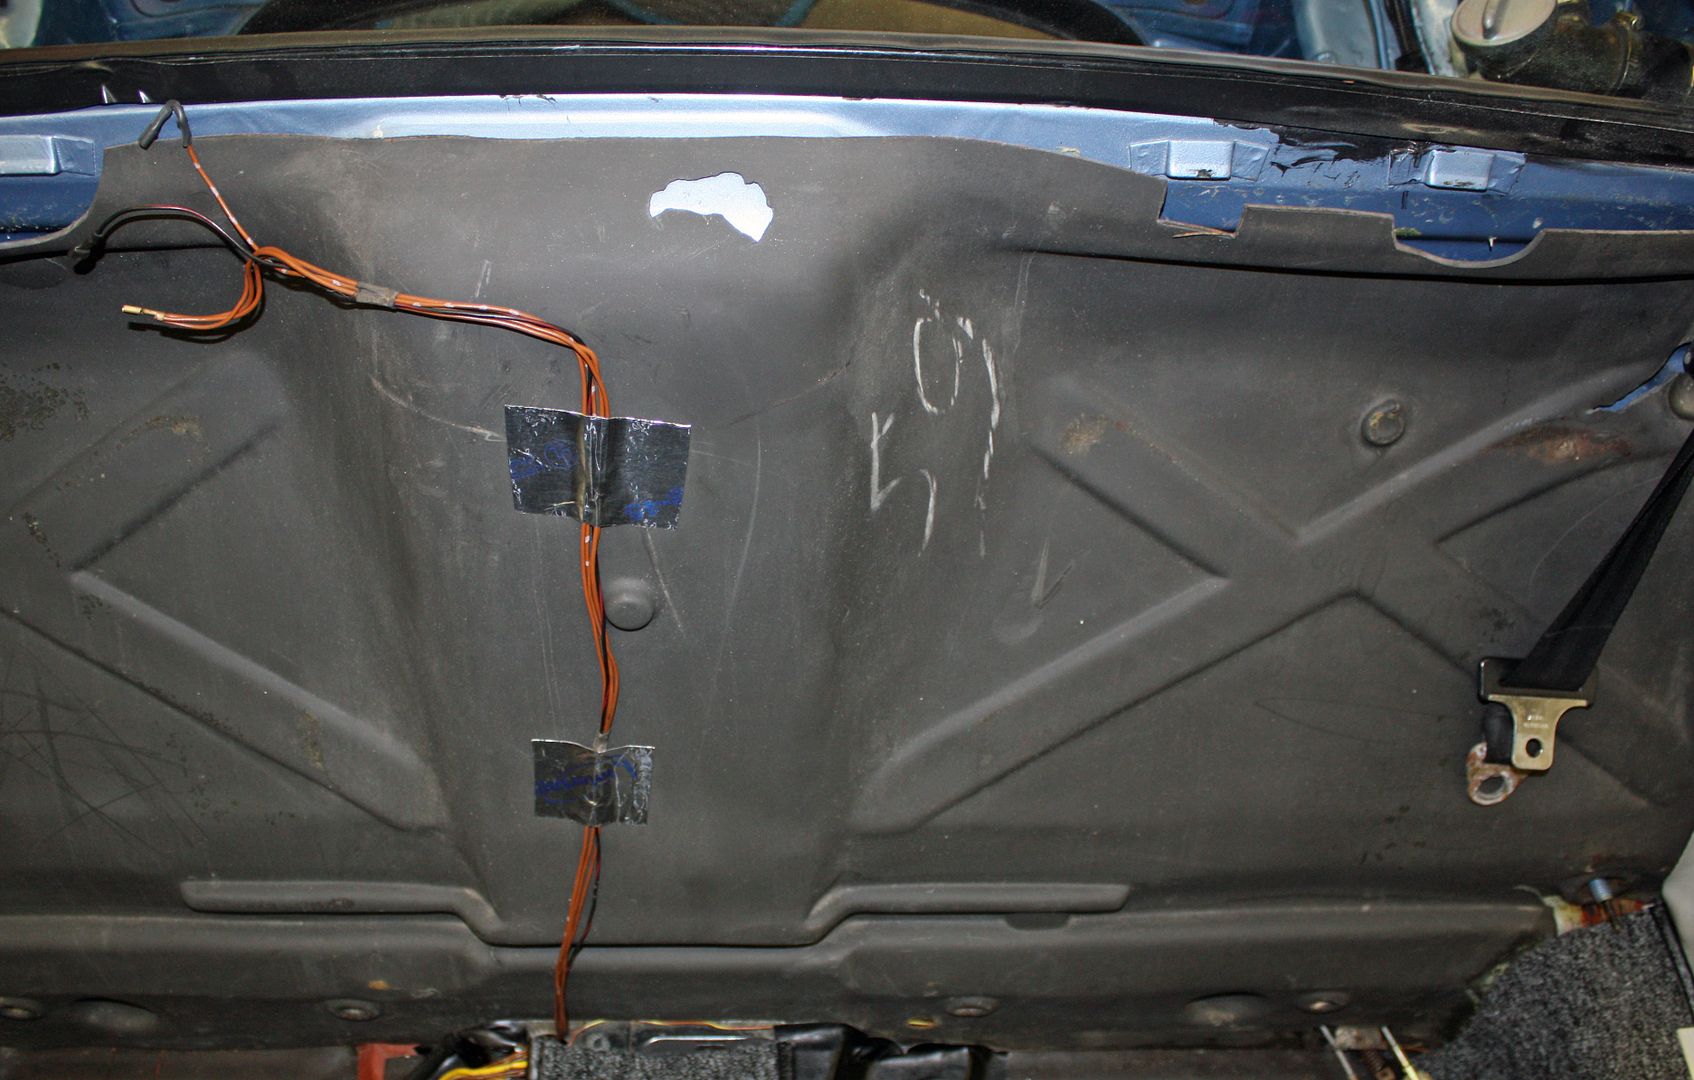
Yesterday, while the NASCAR race was on, I taped the wires for the dome light to the firewall pad and then installed the firewall trim pad. I also installed the seat belts and center armrest.
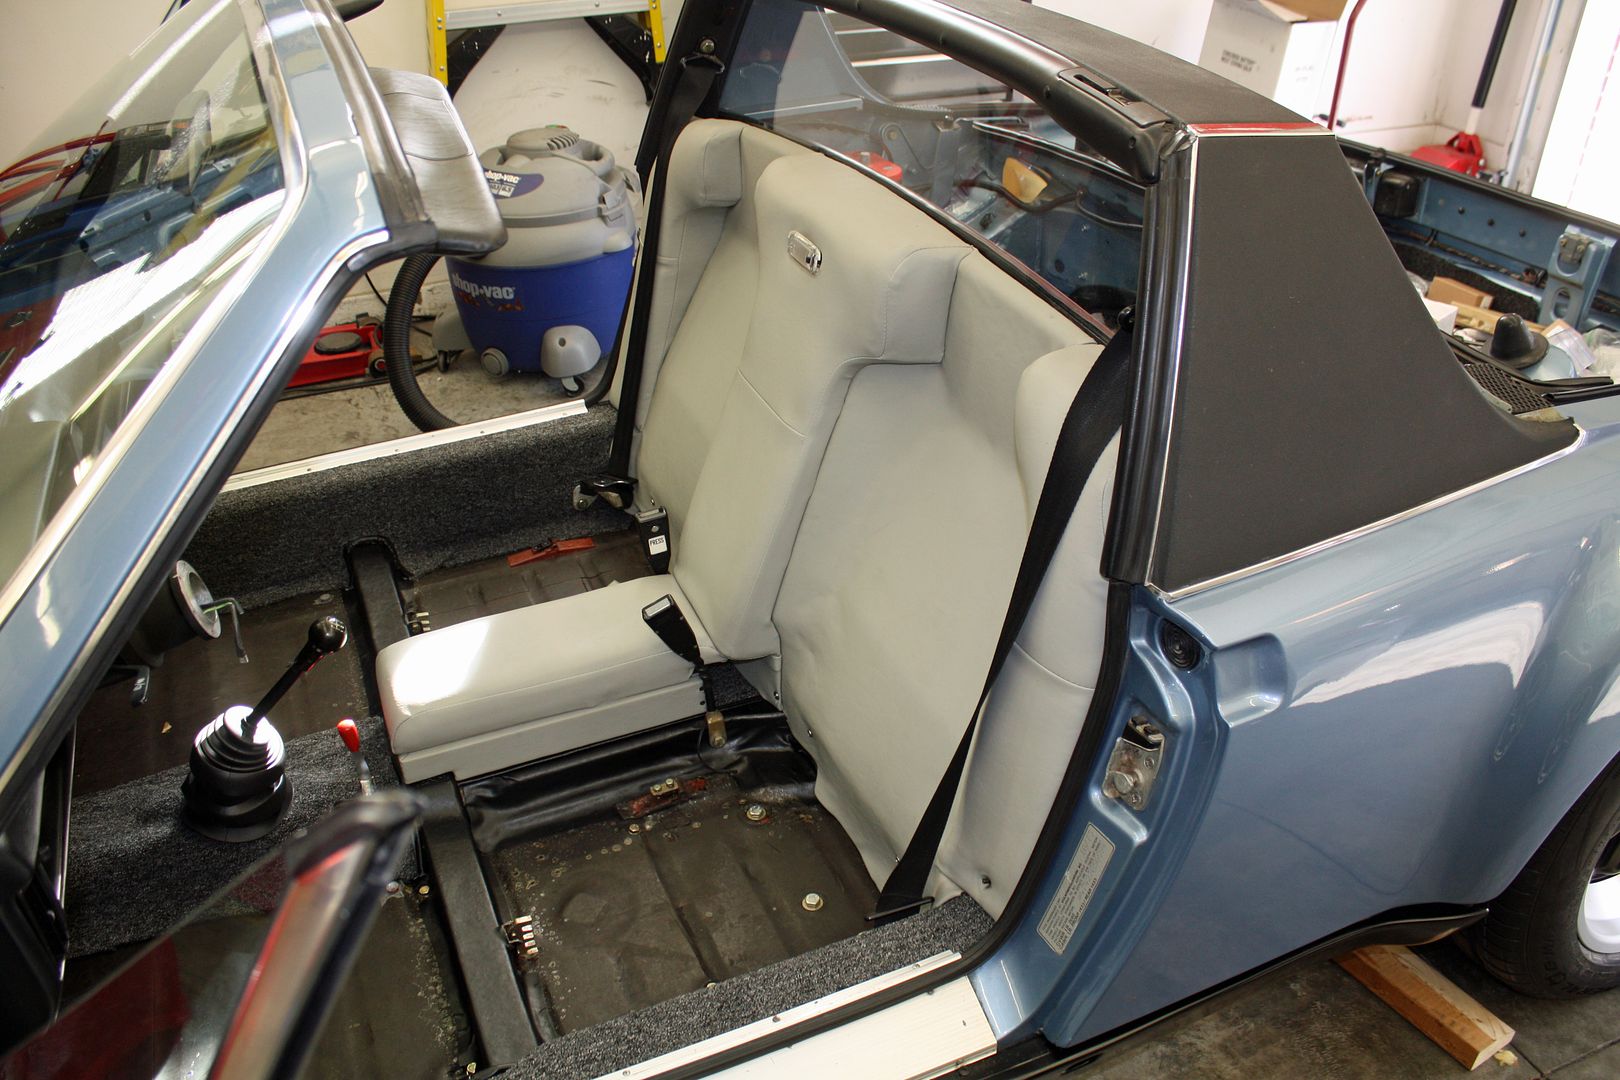
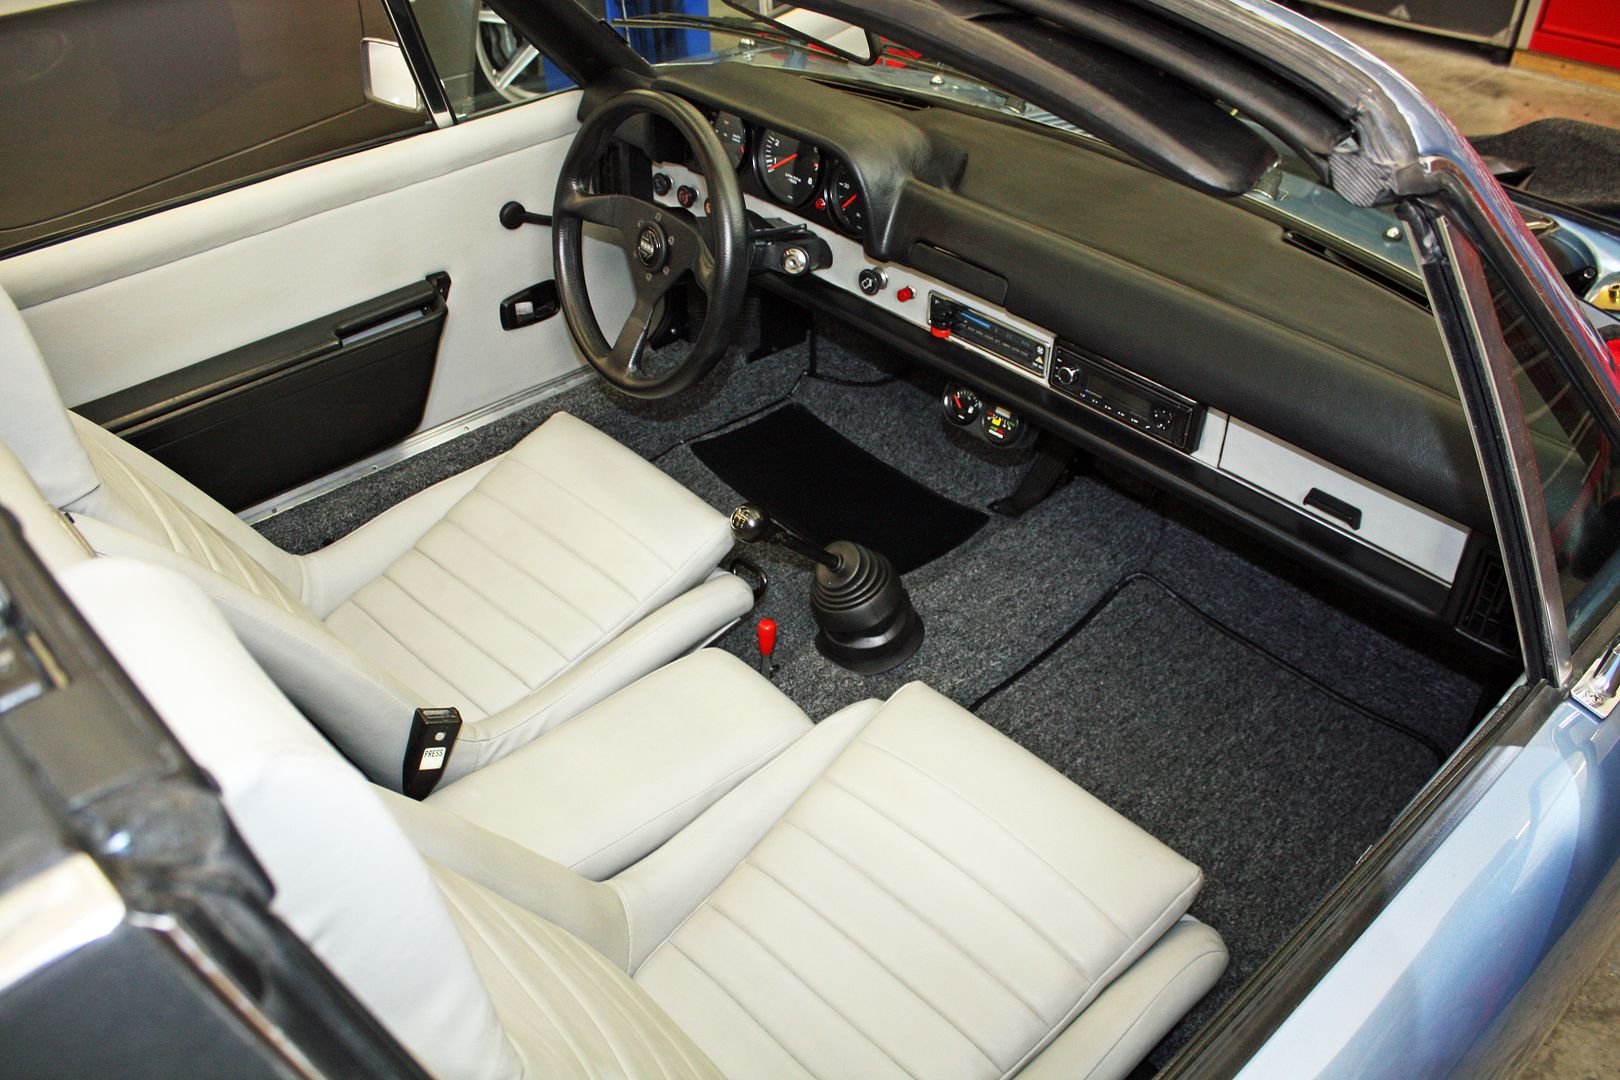
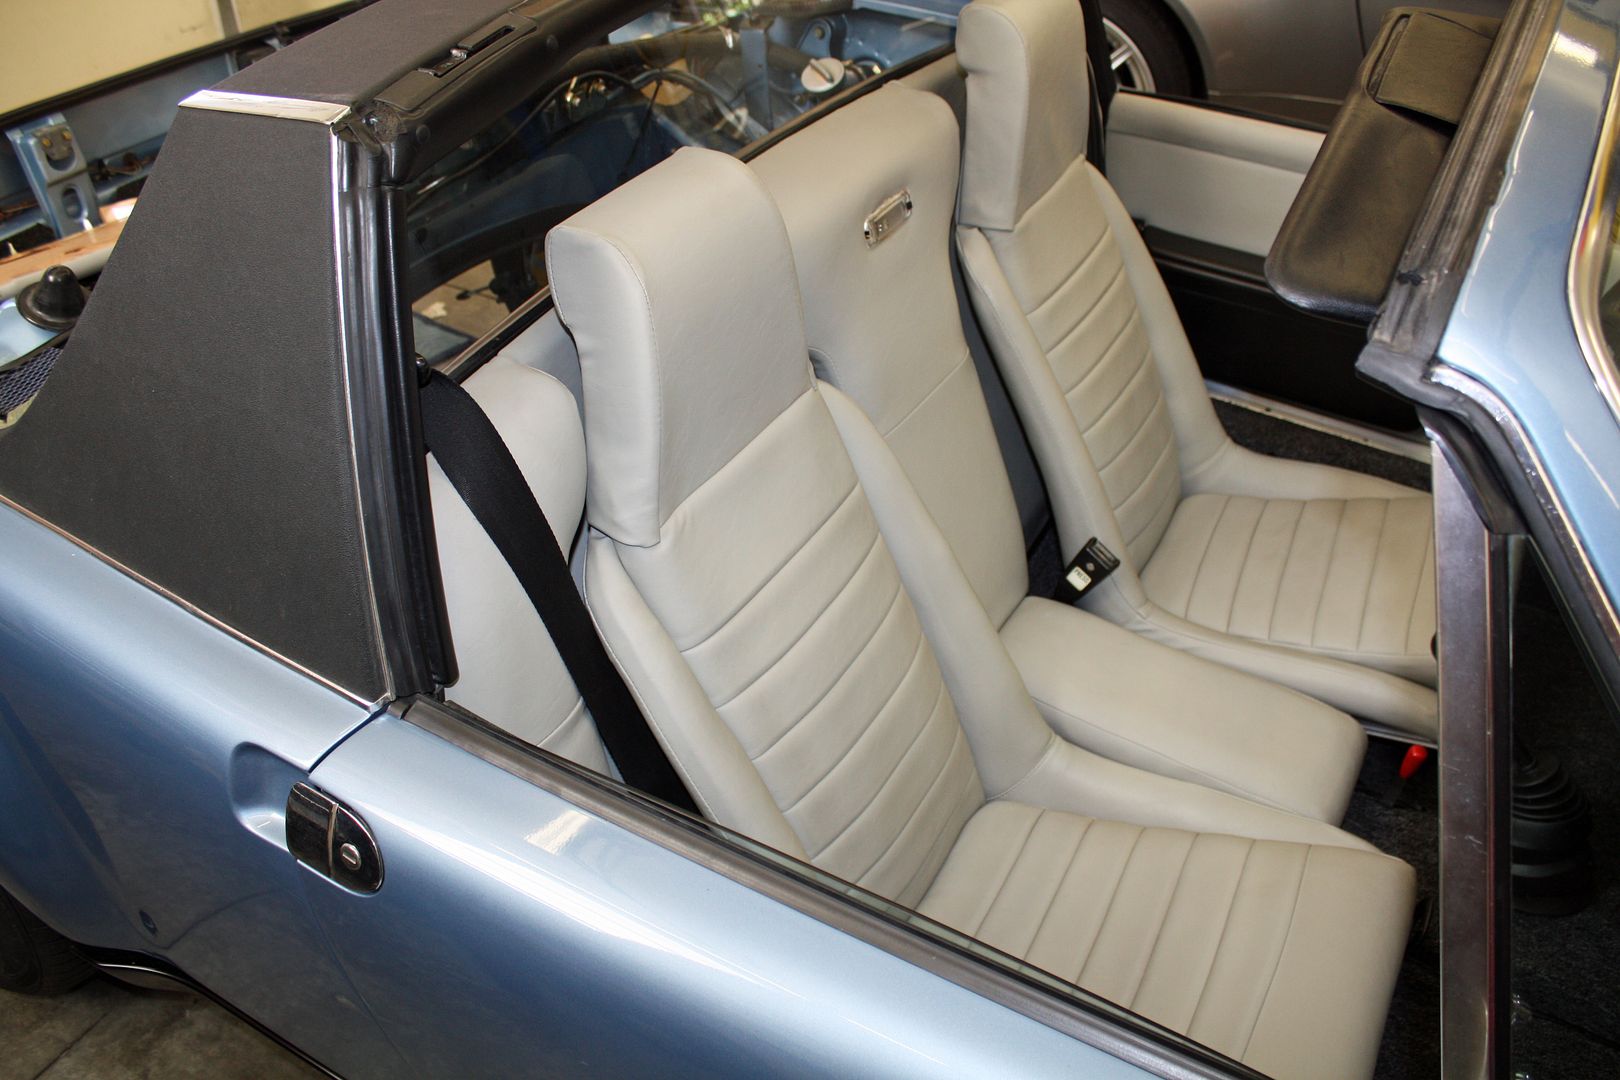
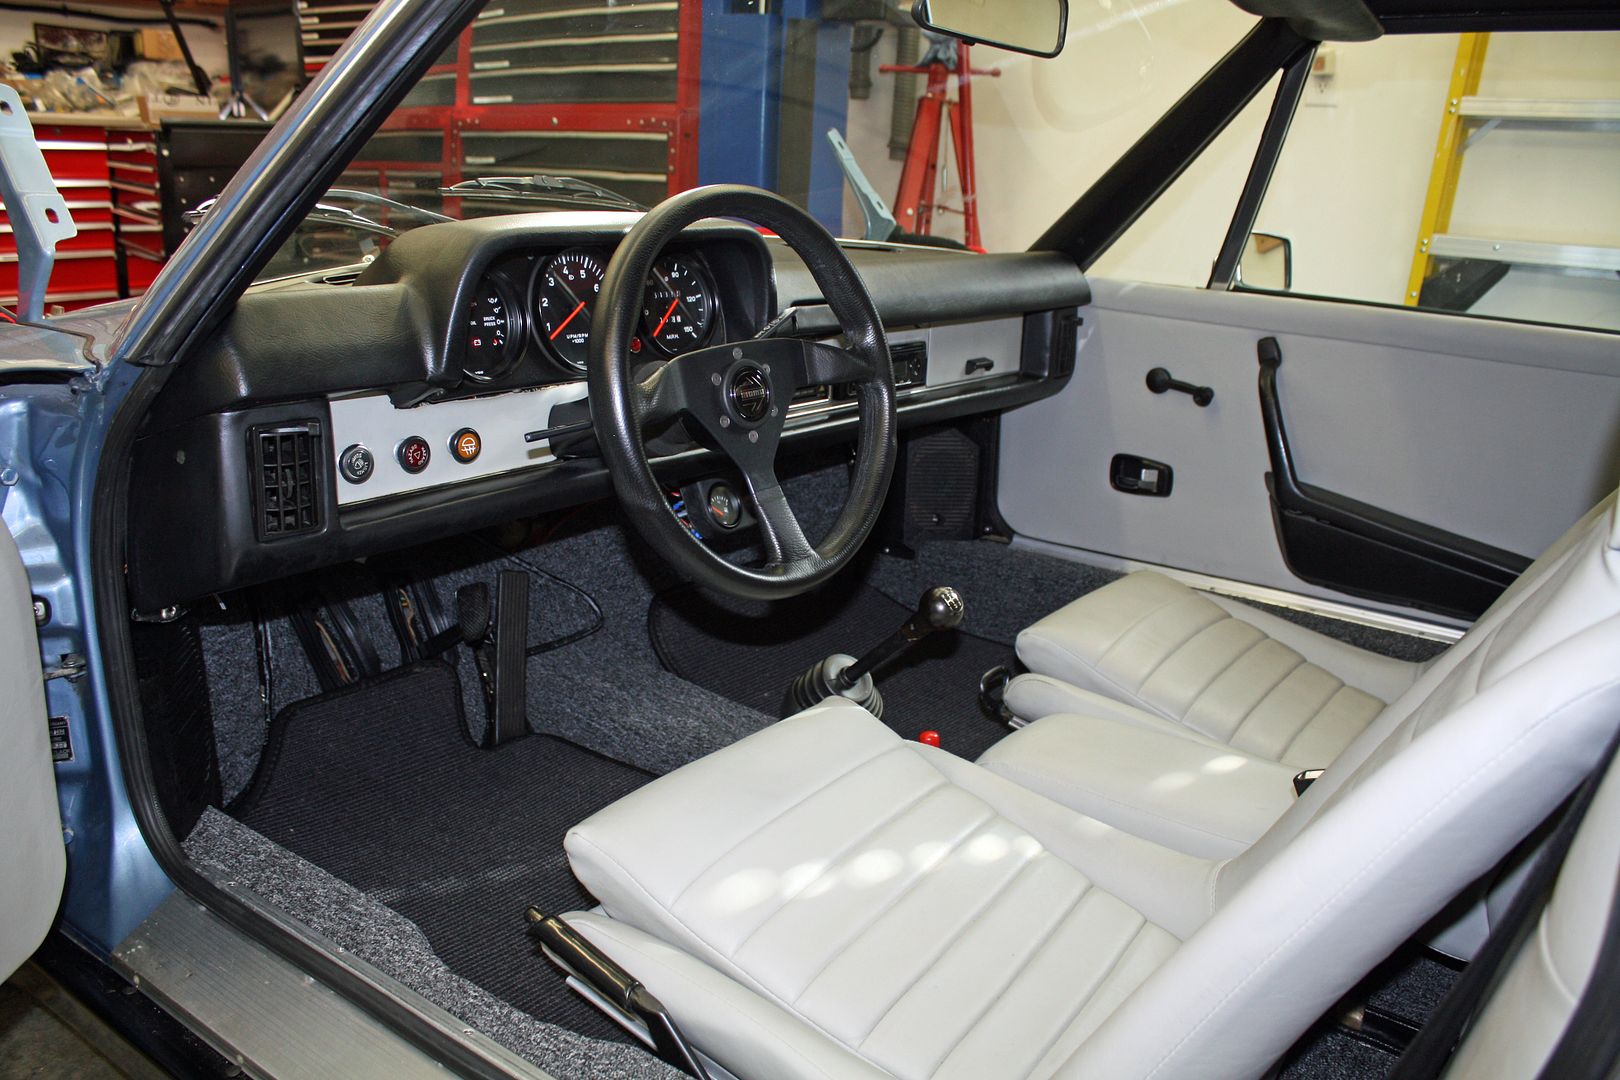
Today I installed the seats to complete the interior. I am still waiting for the clips for the passenger door panel. The seats appear to be white but are actually a very light gray.
Months ago I found a slightly used set of Sisal floor mats on eBay.

Yesterday, while the NASCAR race was on, I taped the wires for the dome light to the firewall pad and then installed the firewall trim pad. I also installed the seat belts and center armrest.


Today I installed the seats to complete the interior. I am still waiting for the clips for the passenger door panel. The seats appear to be white but are actually a very light gray.


Months ago I found a slightly used set of Sisal floor mats on eBay.
 10-29-2018, 05:12 PM
#92
Racer
Thread Starter
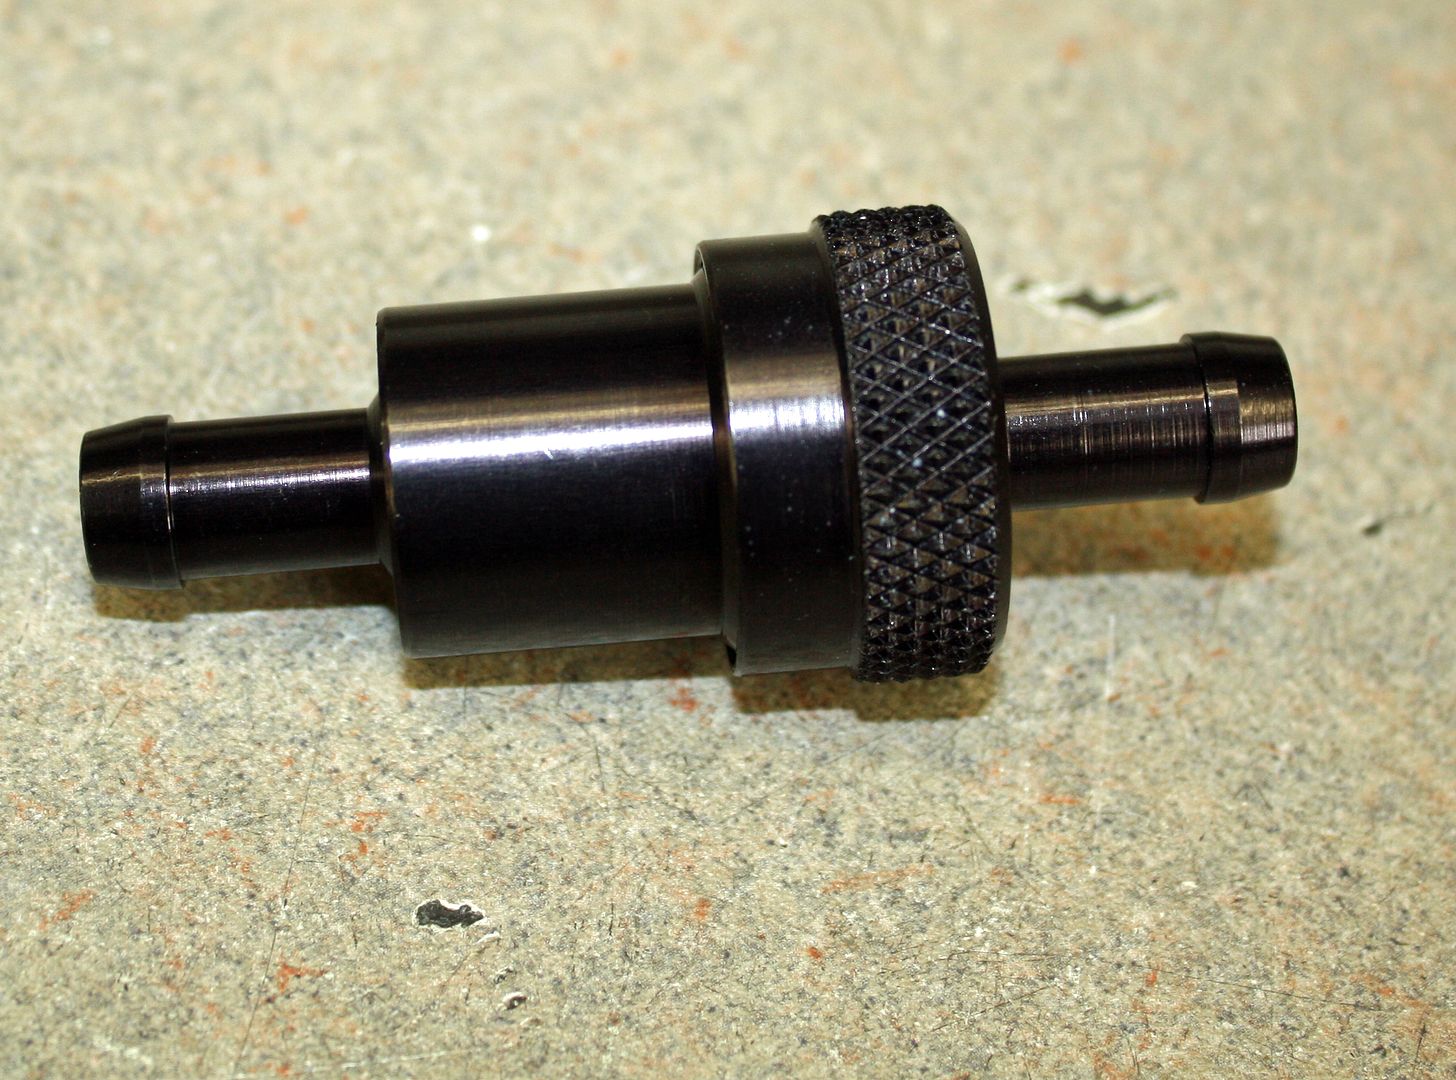
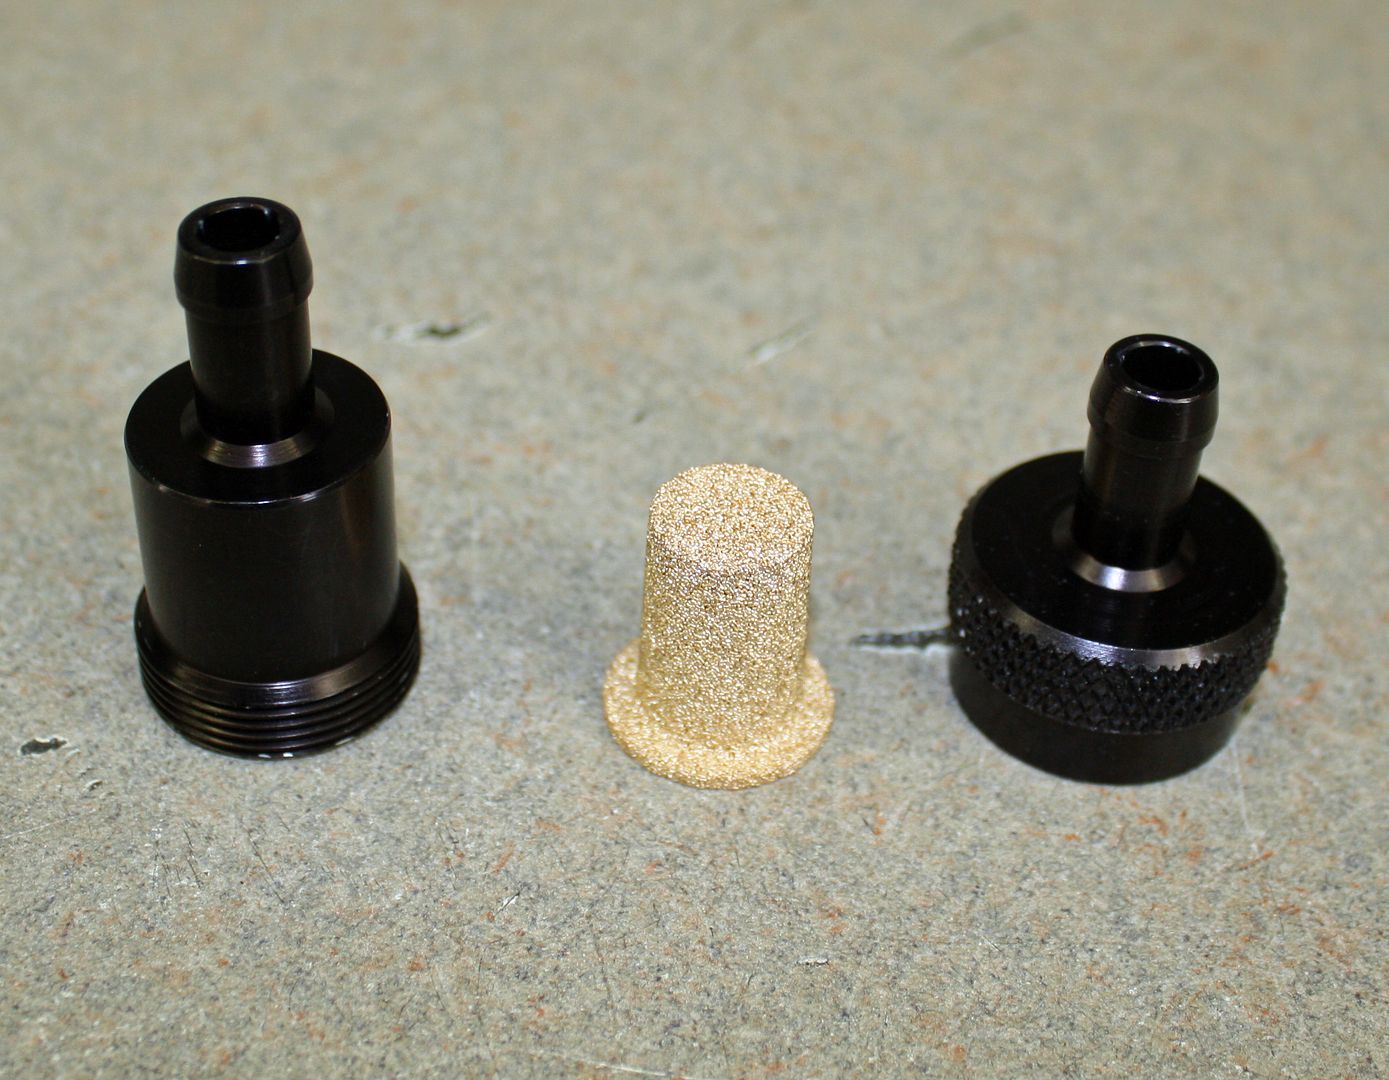
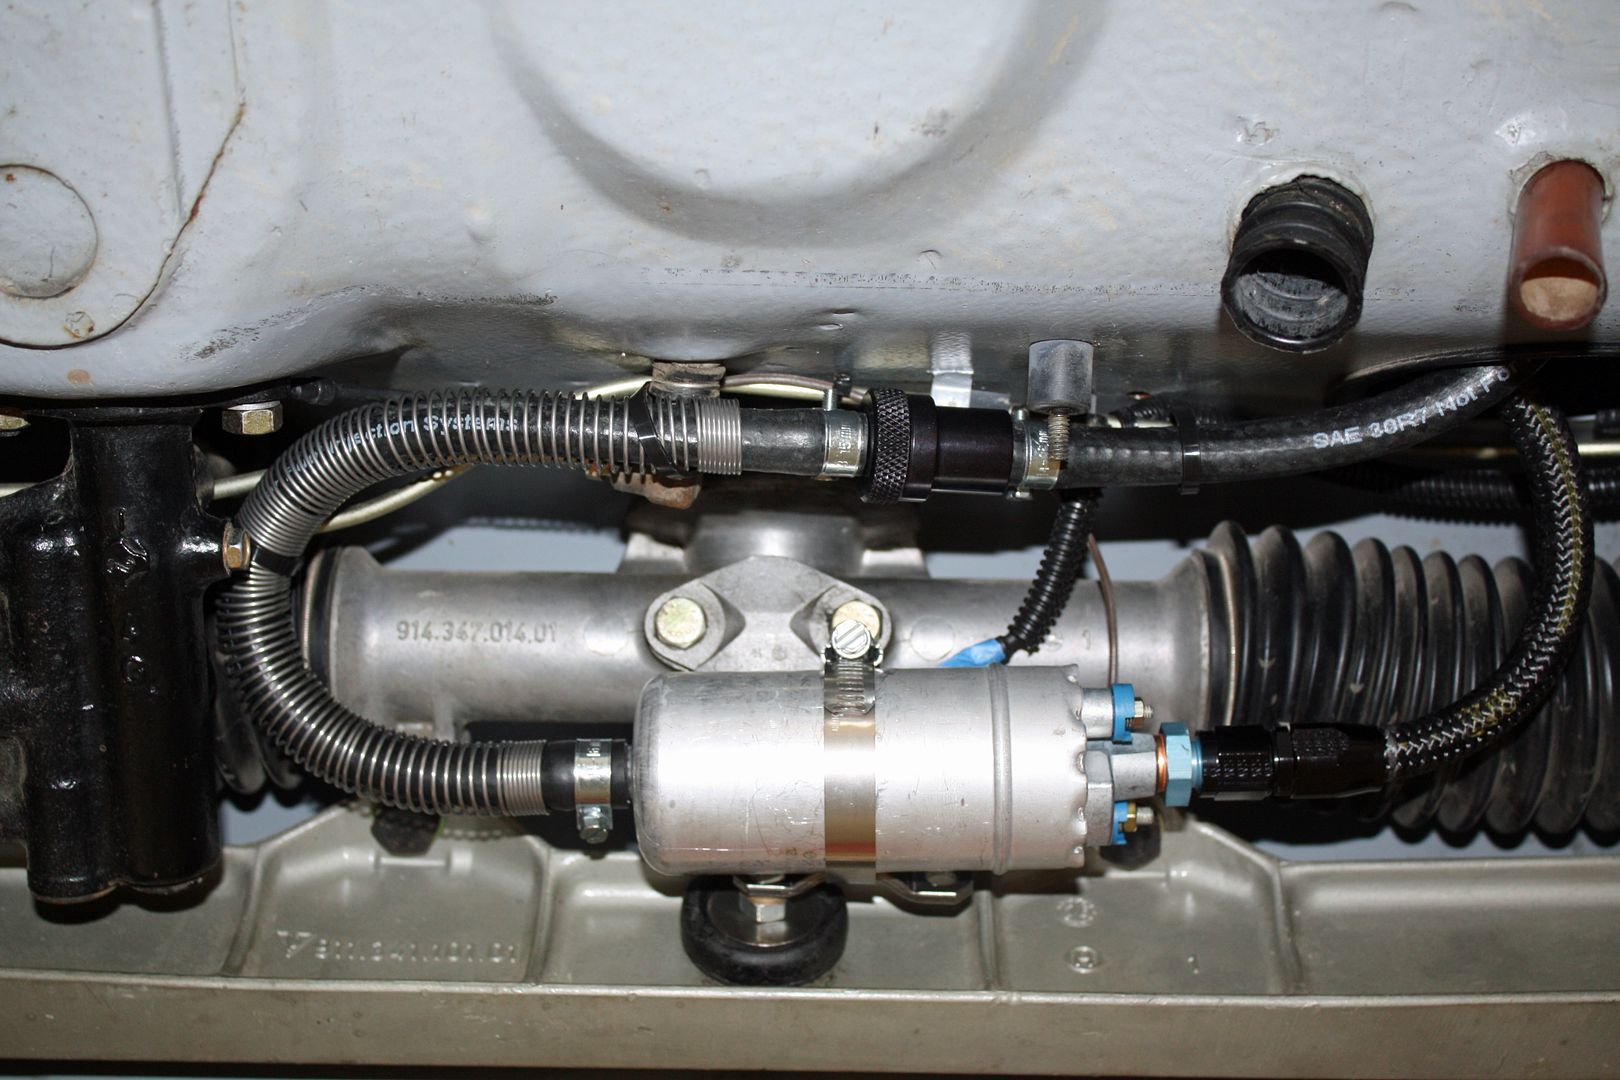
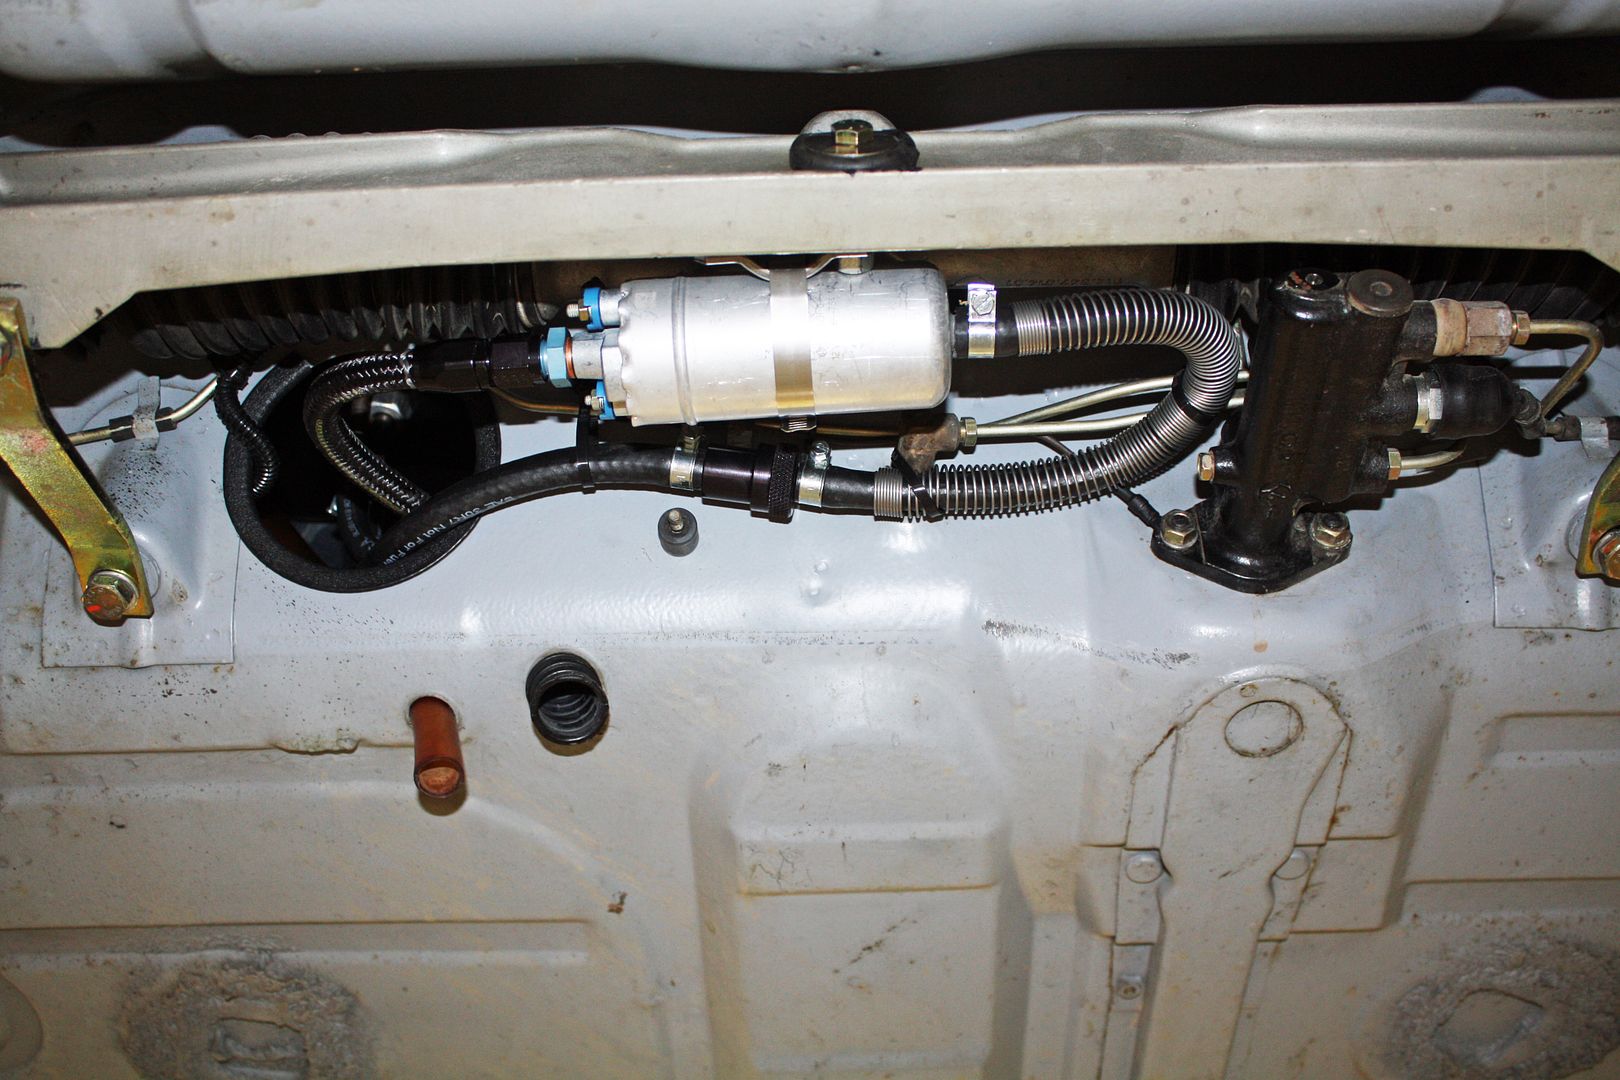
Chris Foley's spring for the fuel line and my inline fuel filter arrived Saturday. I cut the line, inserted the spring and fastened the fuel filter in place. The fuel filter is a billet piece that has a replaceable element.


 10-30-2018, 05:02 PM
#93
Racer
Thread Starter
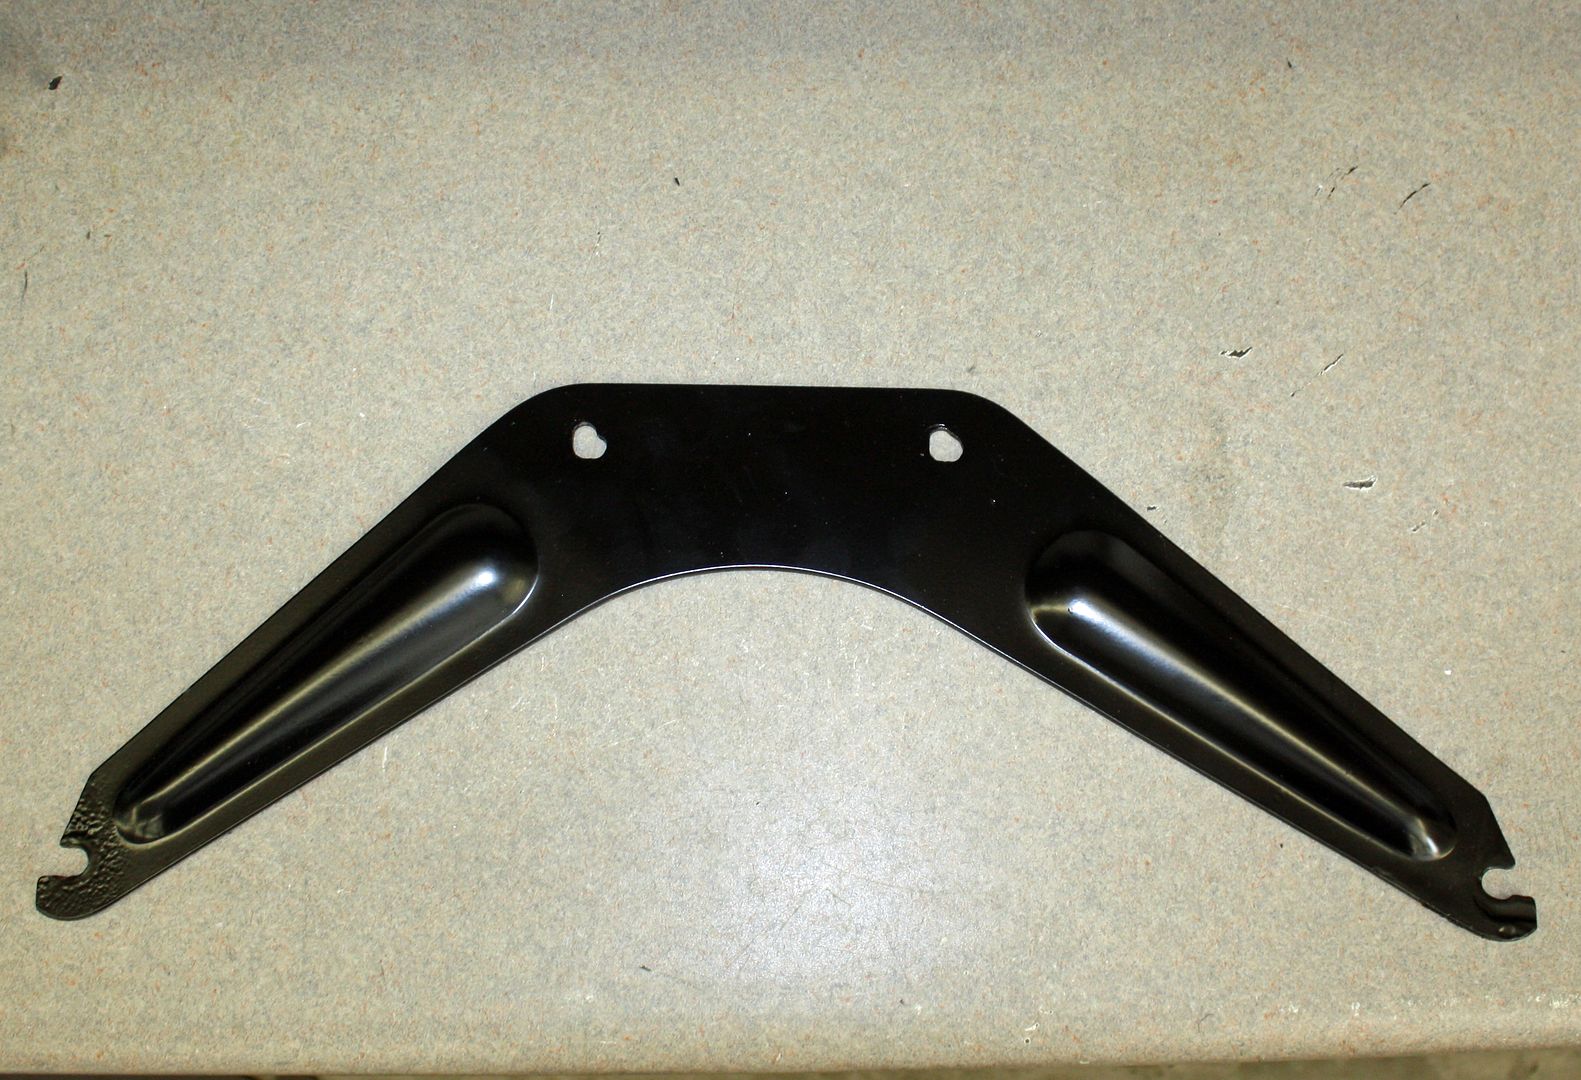
I spent the morning crimping on the new terminals on the wiring harness. After lunch I replaced a leaky propane gas line on the motorhome. I also received a call from my powder coater telling me the boomerang was ready. For the princely sum of $5, it looks like new.
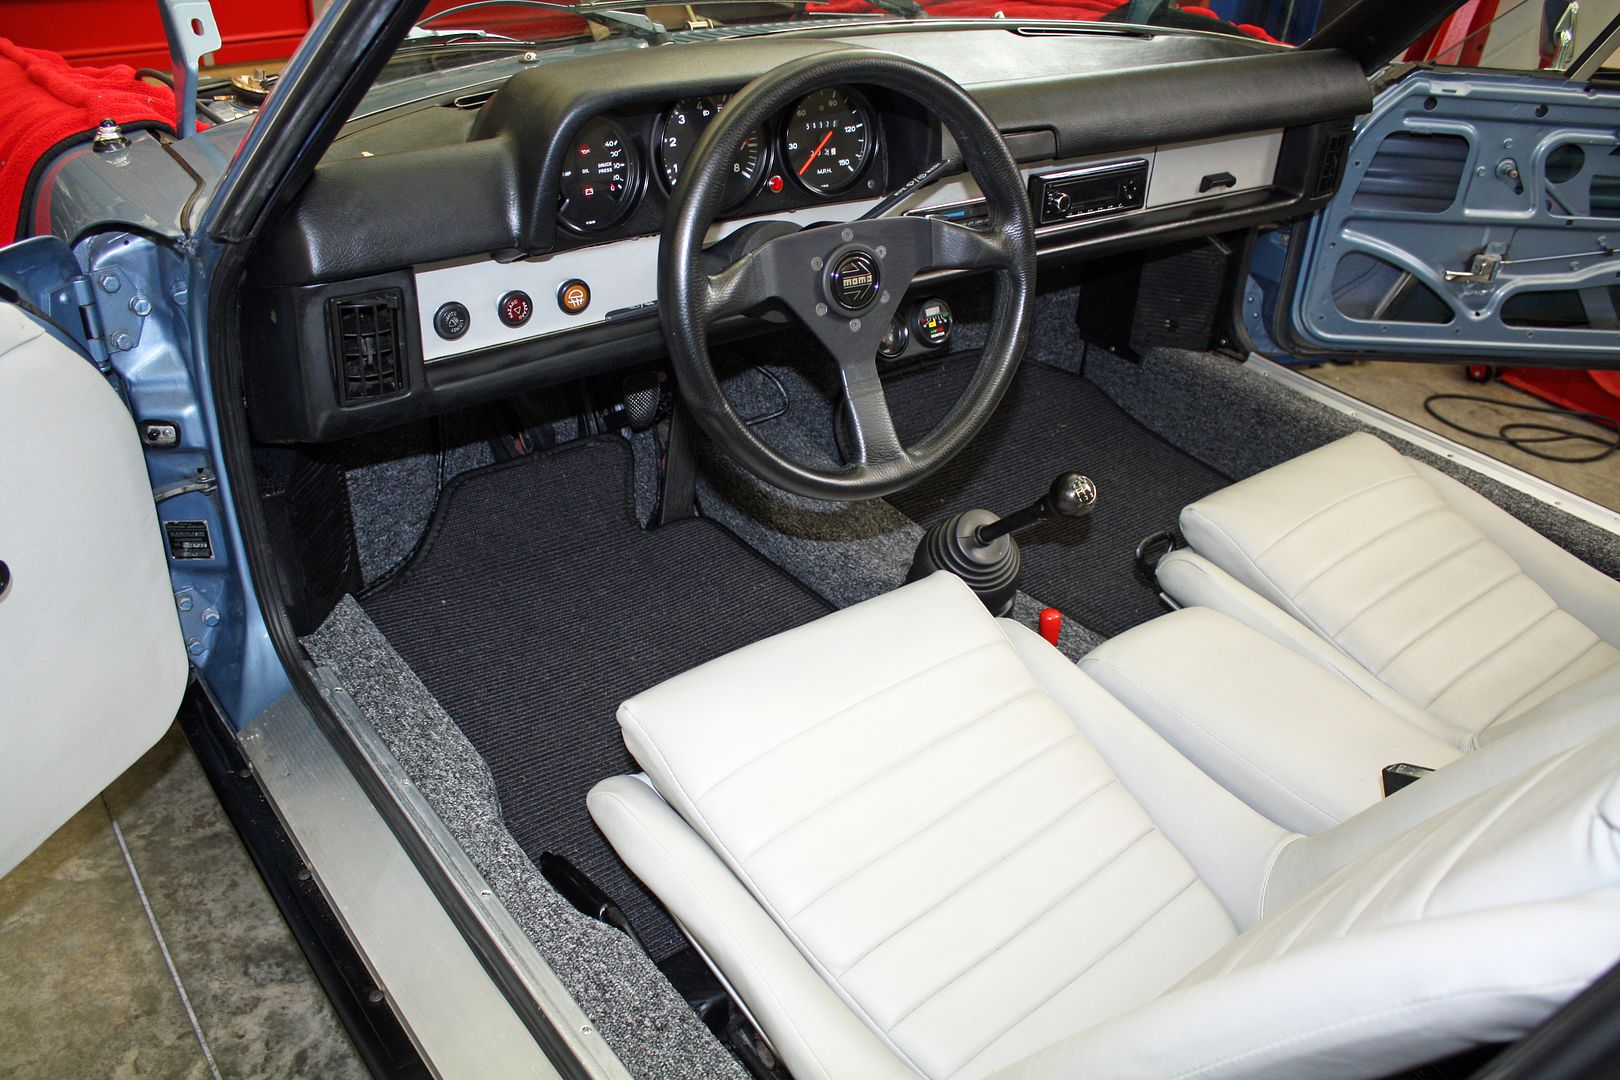
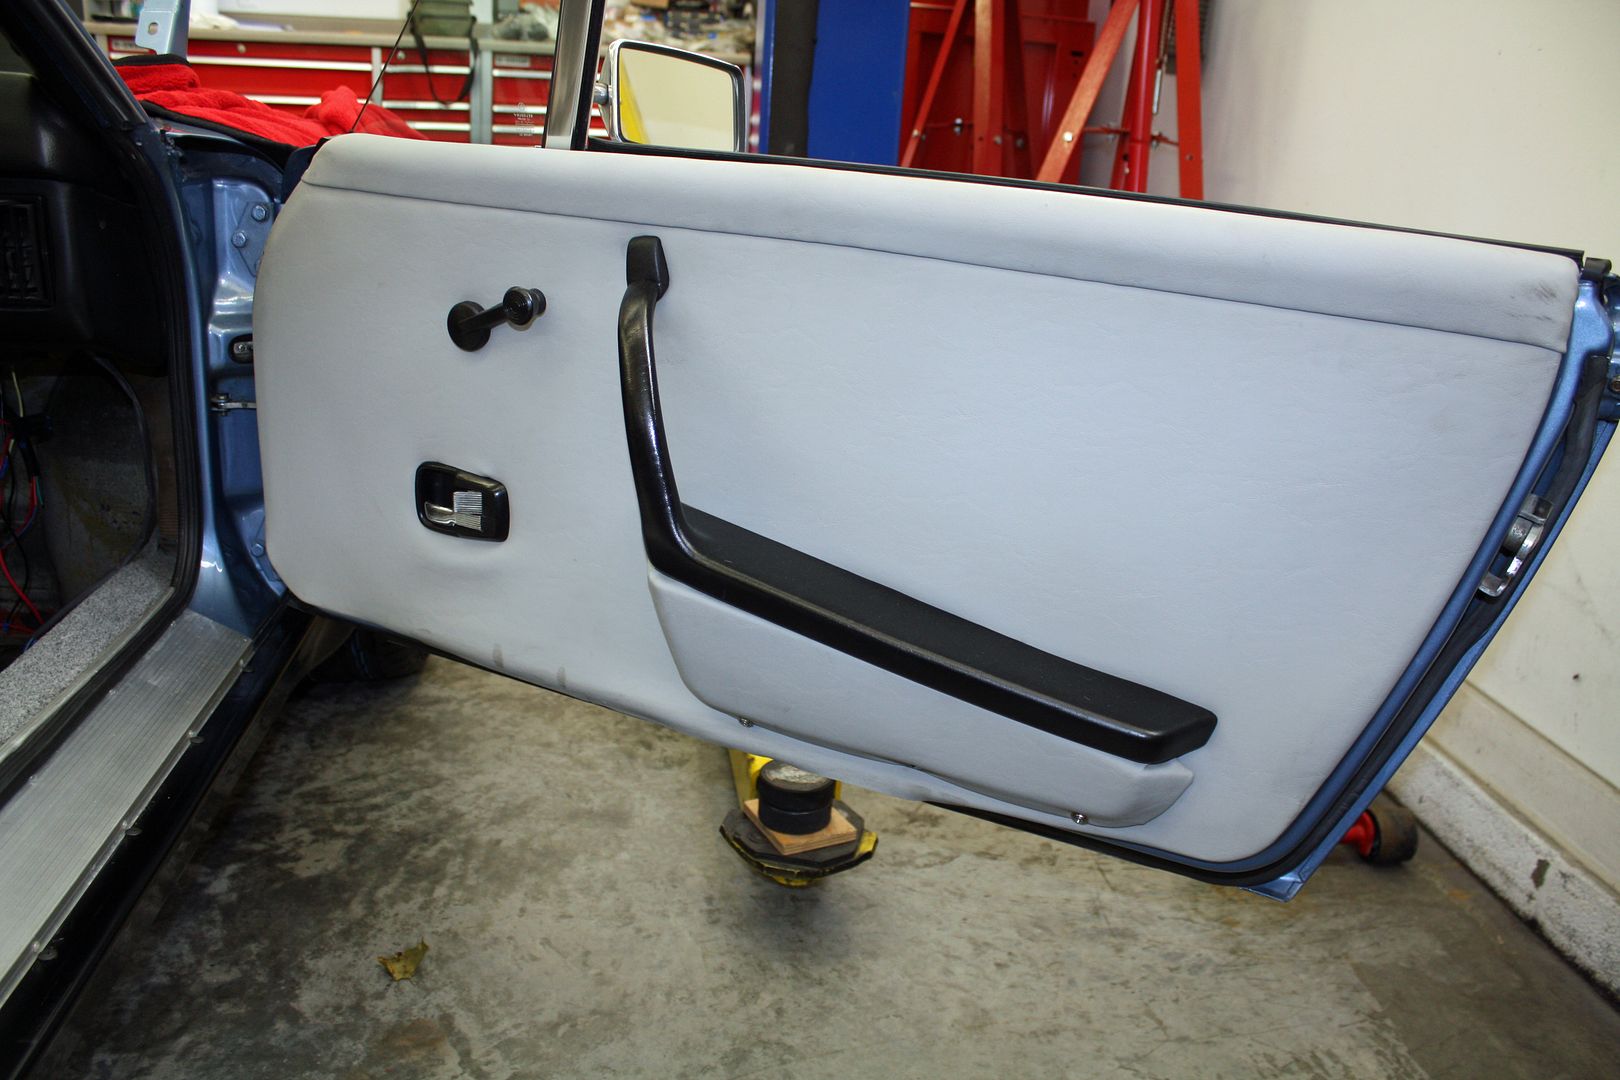
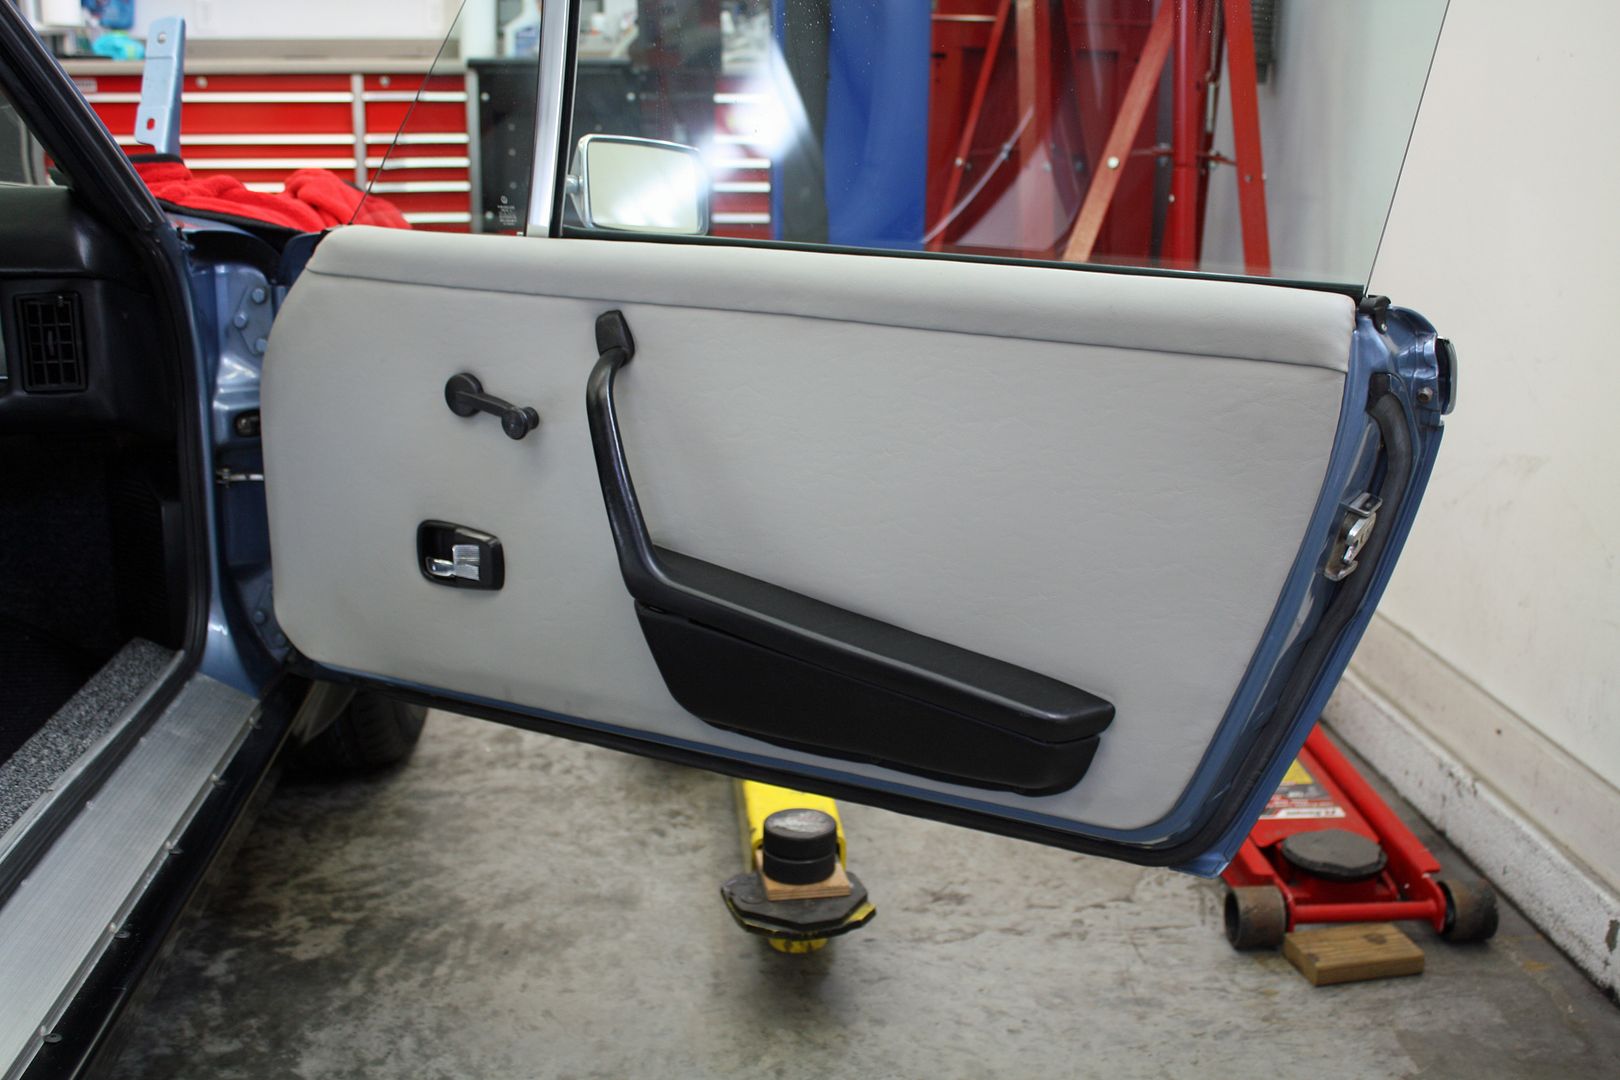
My clips for the passenger door panel arrived in today's mail so I could re-install it. I used the black lower armrest part in place of the light gray one.

My clips for the passenger door panel arrived in today's mail so I could re-install it. I used the black lower armrest part in place of the light gray one.


 11-01-2018, 05:19 PM
#94
Racer
Thread Starter
I worked on installing the terminals into the bulkhead connectors yesterday. It is a very intense experience as the pins need to be placed in the same holes in both halves of the connector. I screwed up a couple by placing the wire in the hole before passing it through the seal. I had purchased a terminal removal tool, but, don't you know, I had the wrong size. The correct tool is on the way.
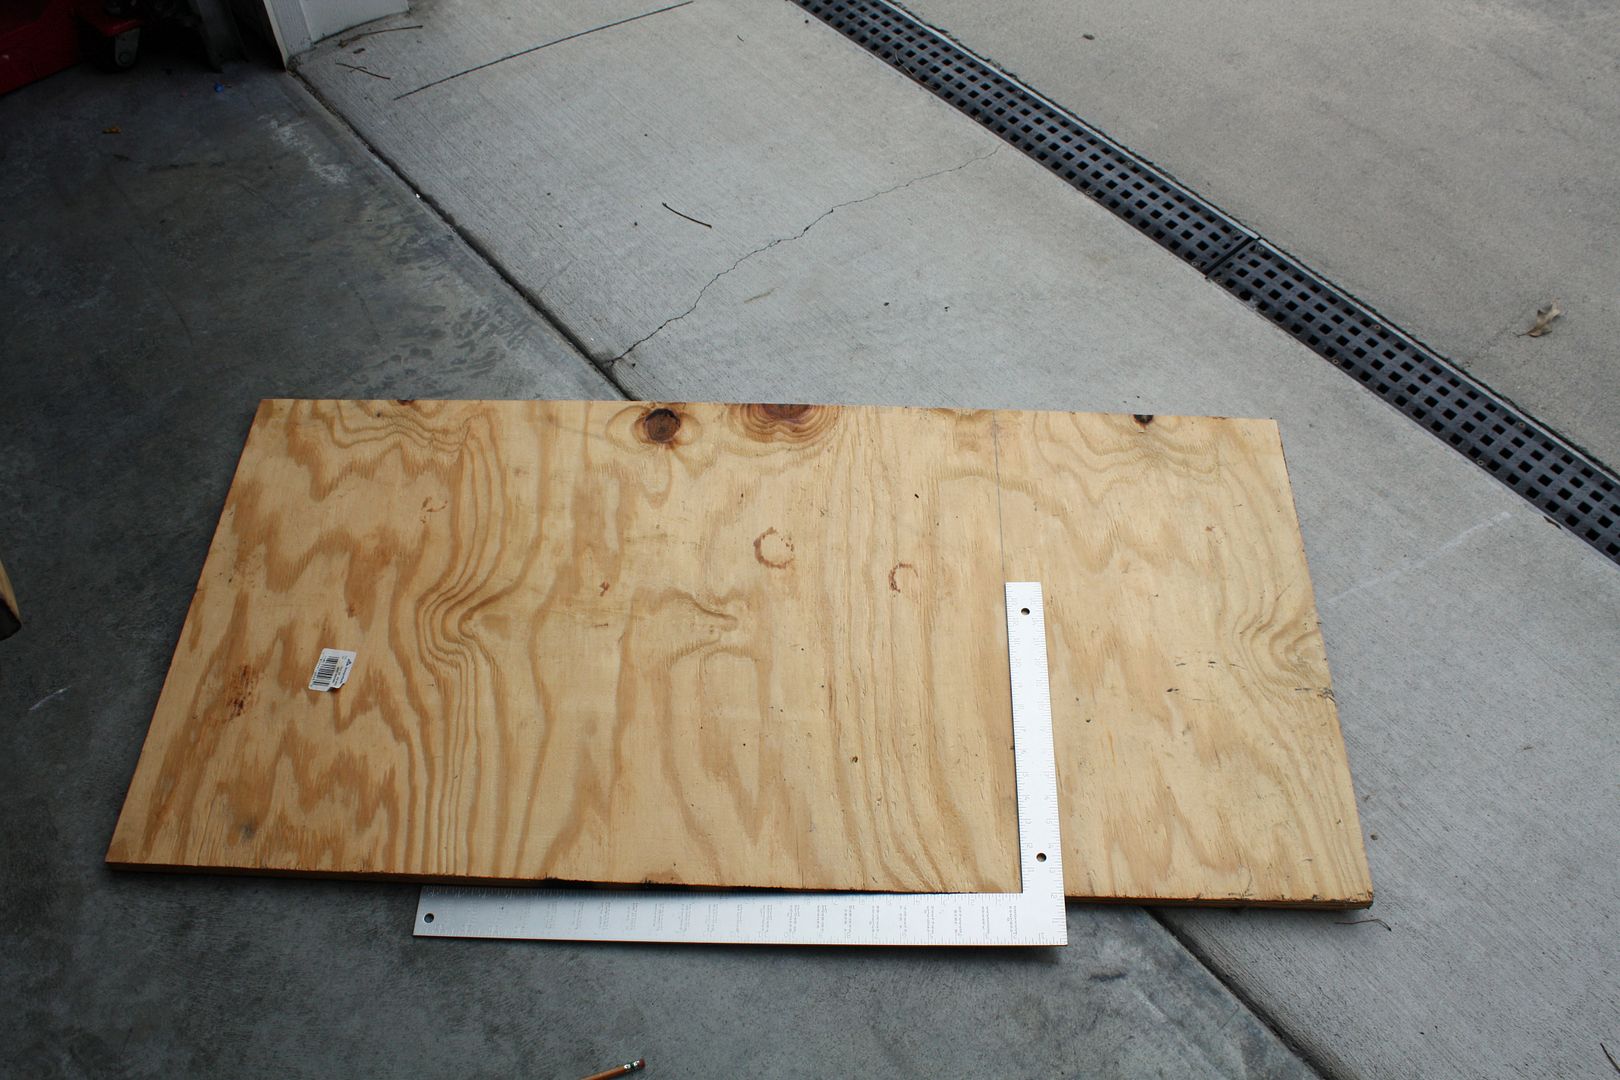
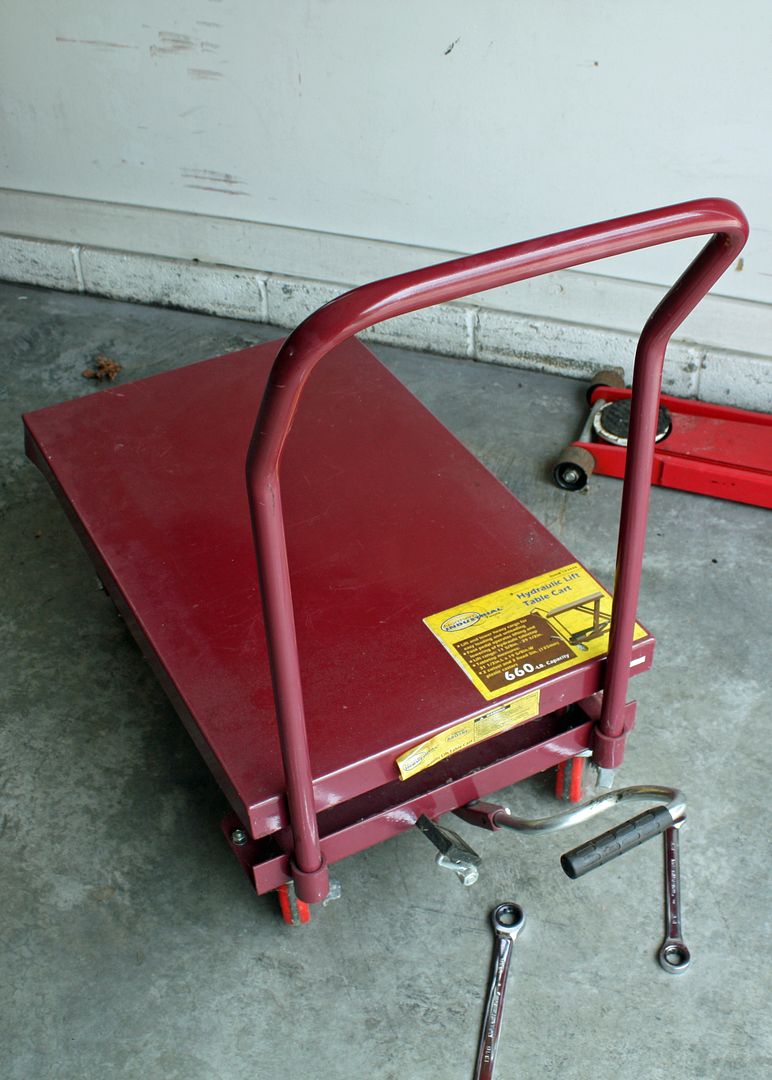
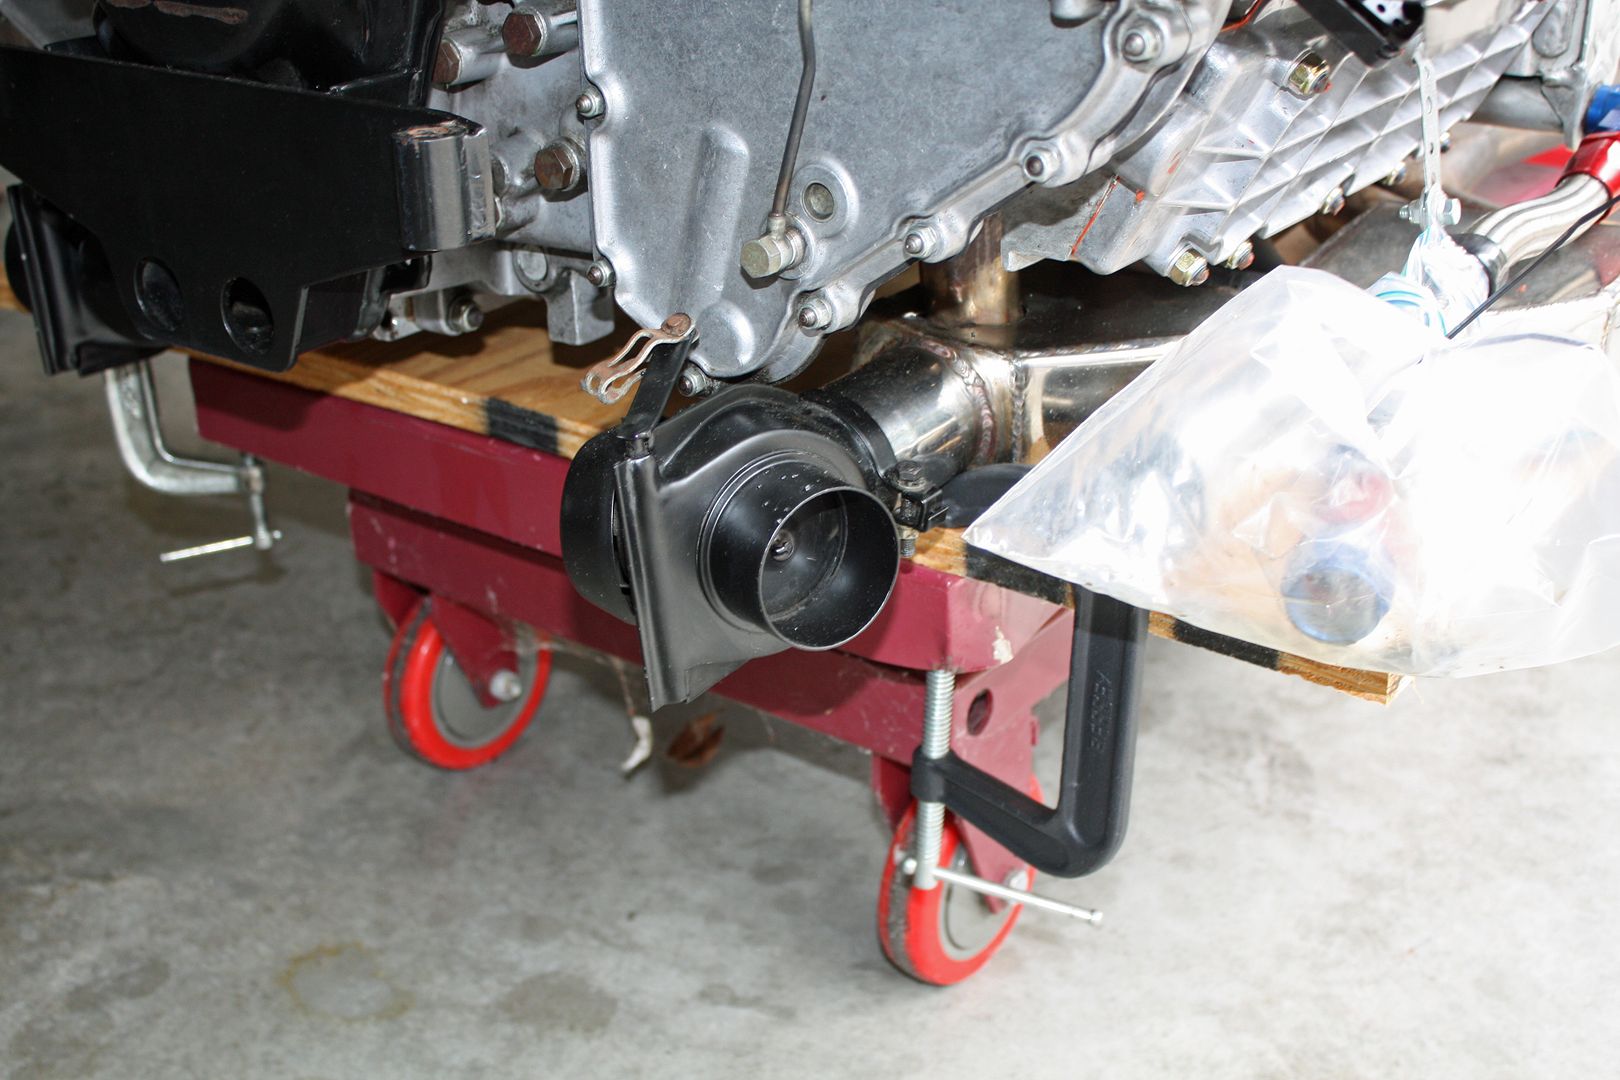
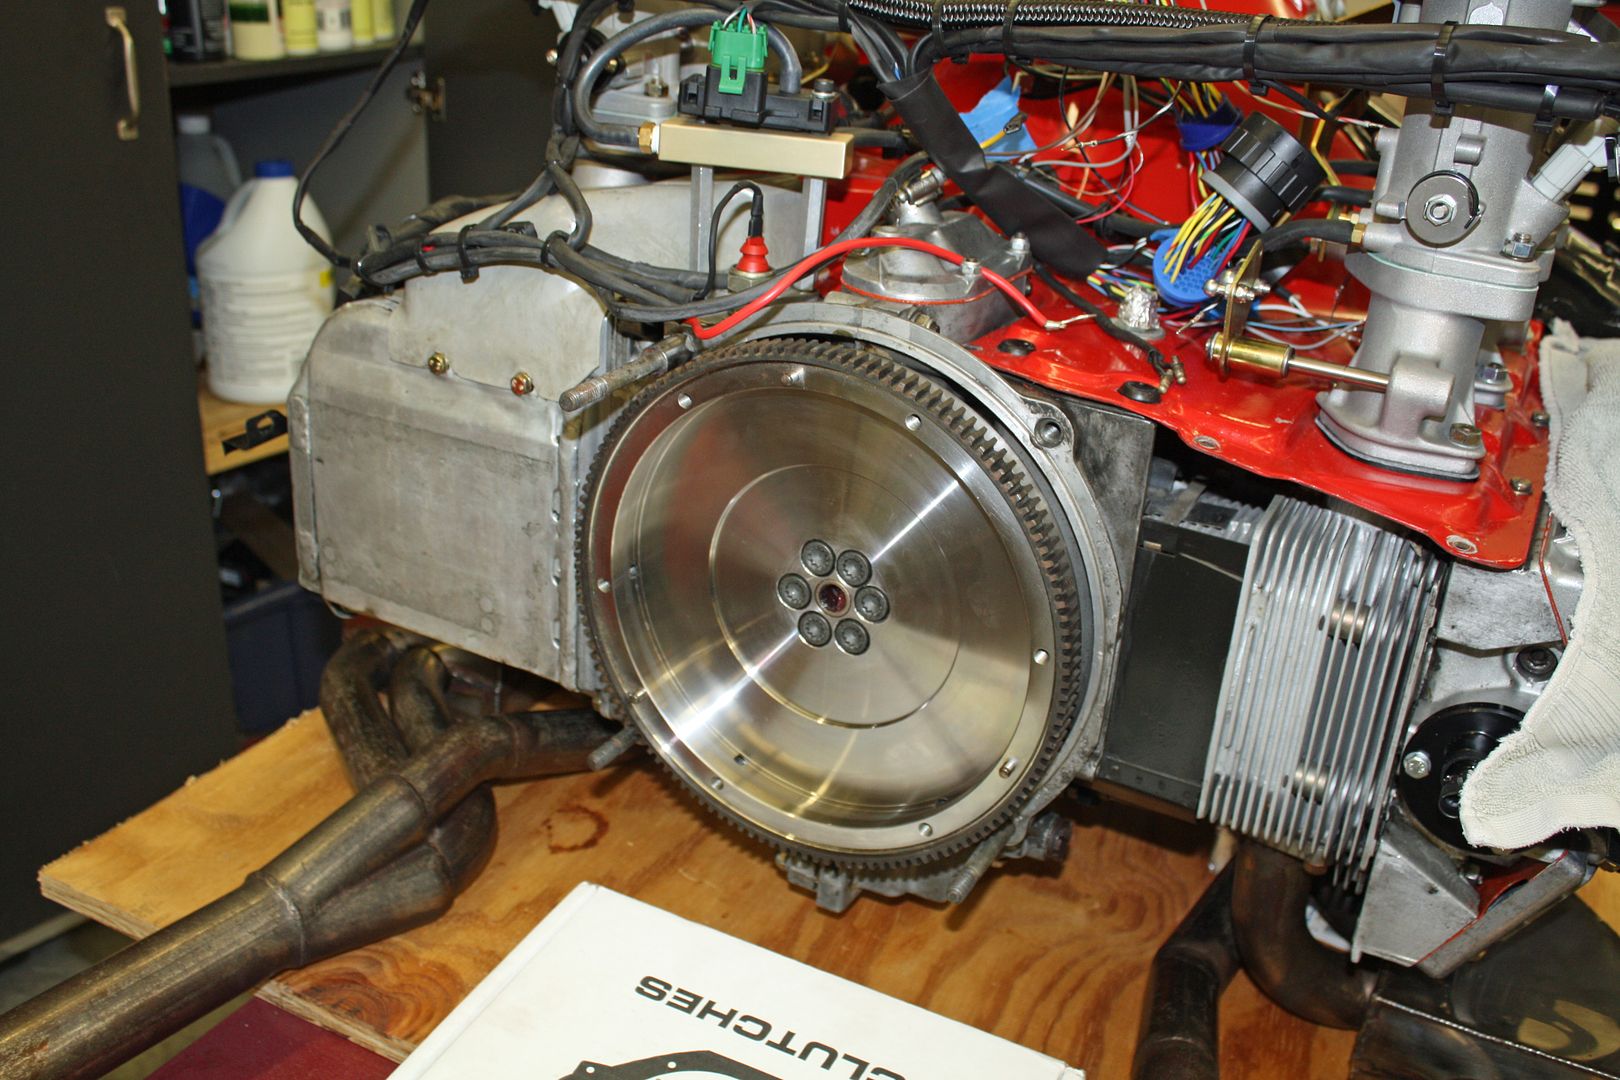
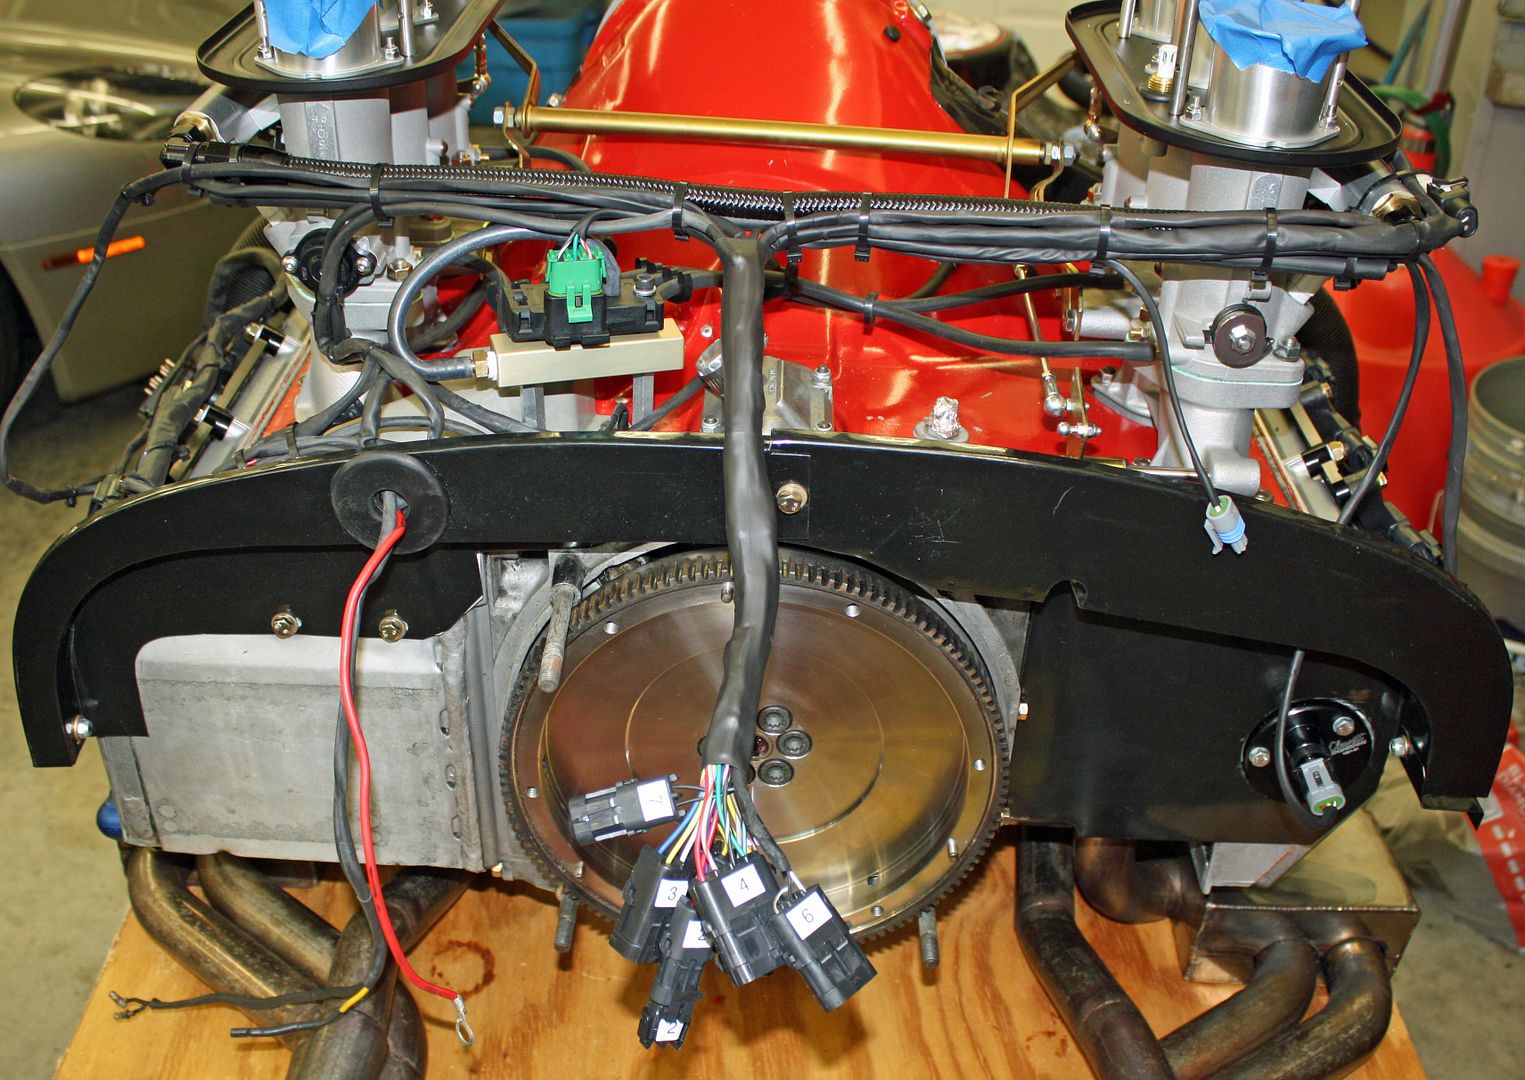
Since I am close to having the wiring finished, I decided it was time to remove the engine from the engine stand and place it on the hydraulic table that I will be using to put the motor into the car. I cut a piece of plywood to be the same width as the heat exchangers and mounted the board to the table with clamps. I also removed the handle on the one end as it would have been in the way.
With that done, I removed the tin at the front and rear of the motor as it would have been bent by the straps. I strapped it at both ends and, using my overhead hoist, I took the weight off of the engine stand and removed the mount. I then lowered the engine onto the hydraulic cart. Now I can install the flywheel, clutch, transmission, starter, etc. in preparation for putting the motor into the car.
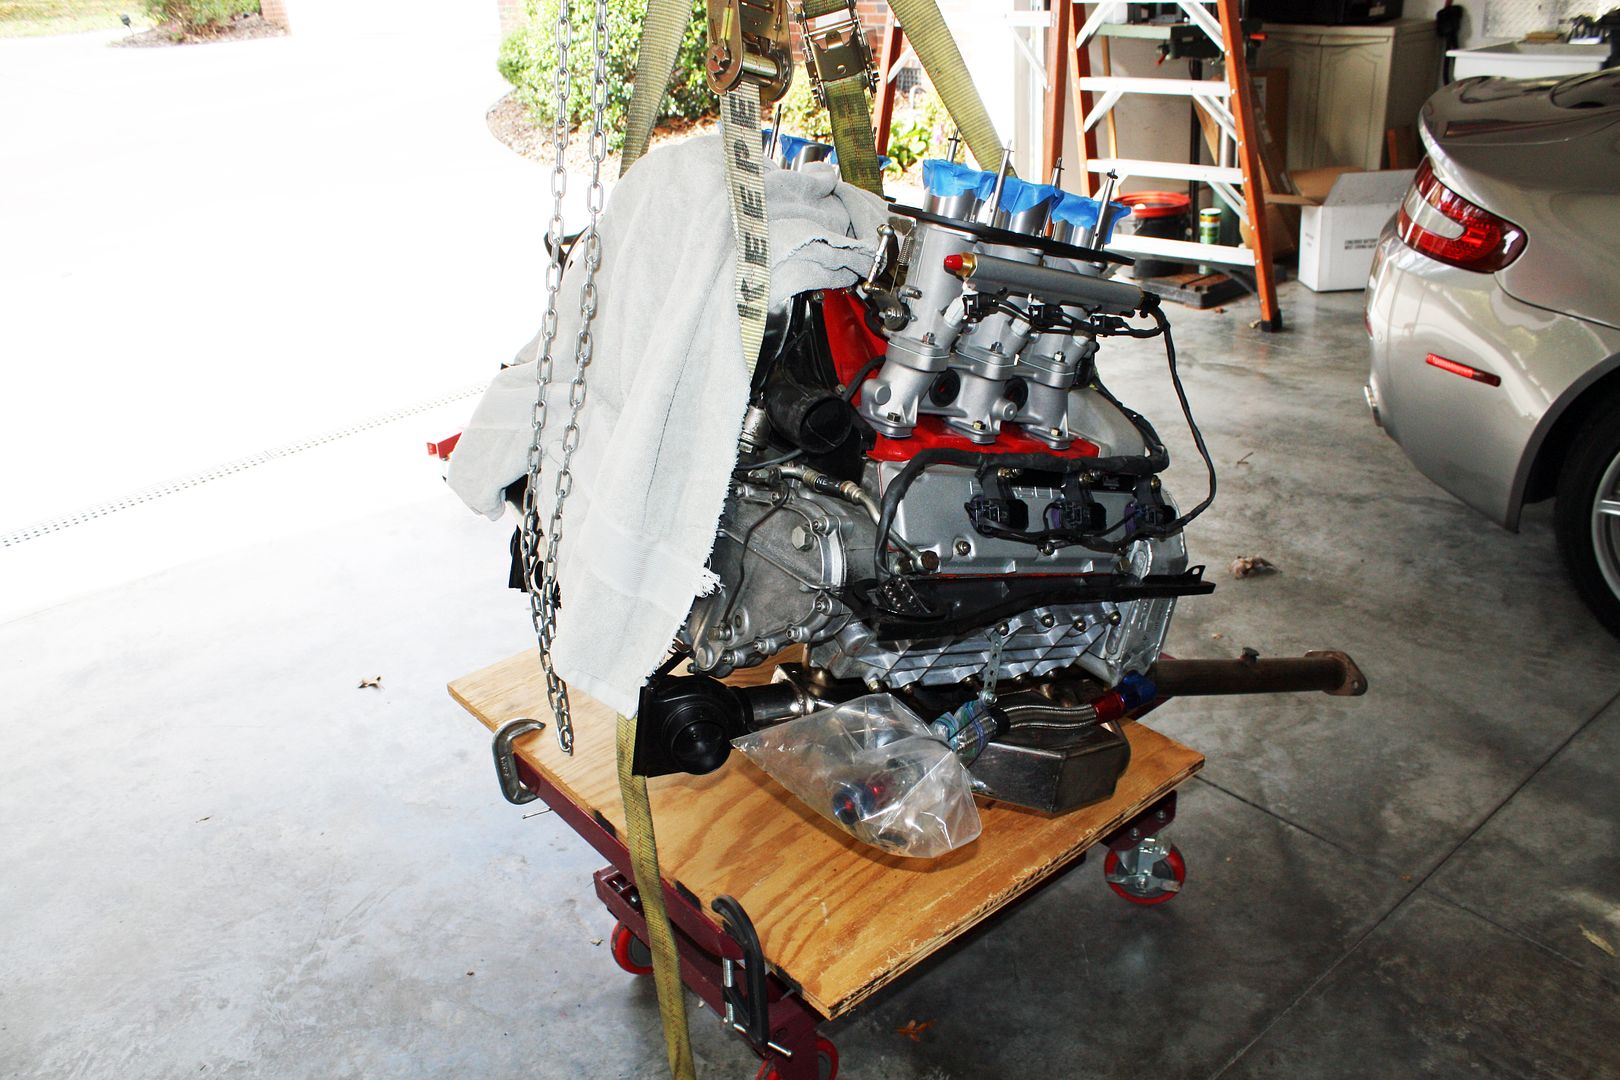
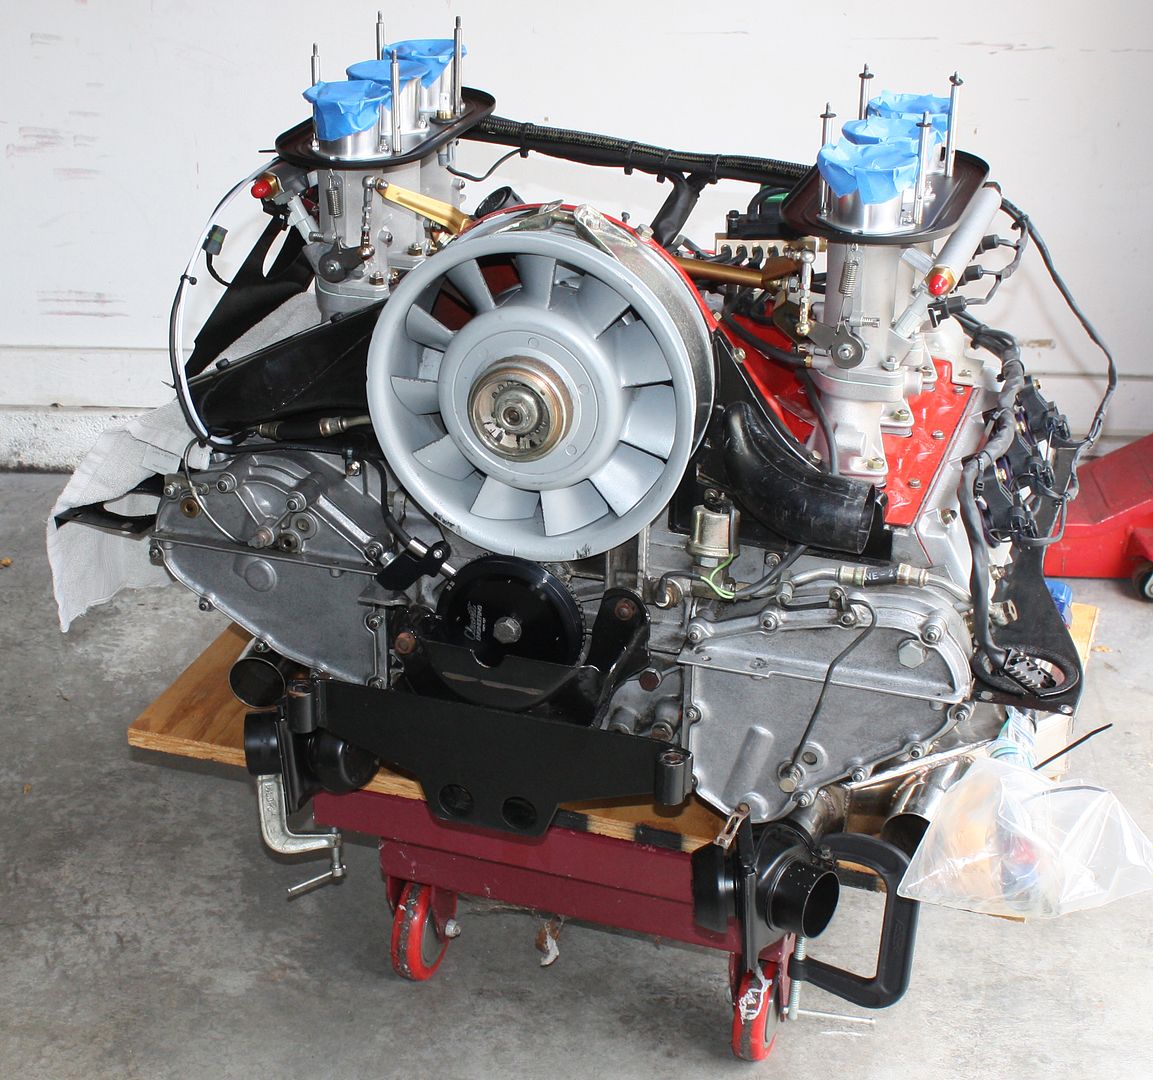
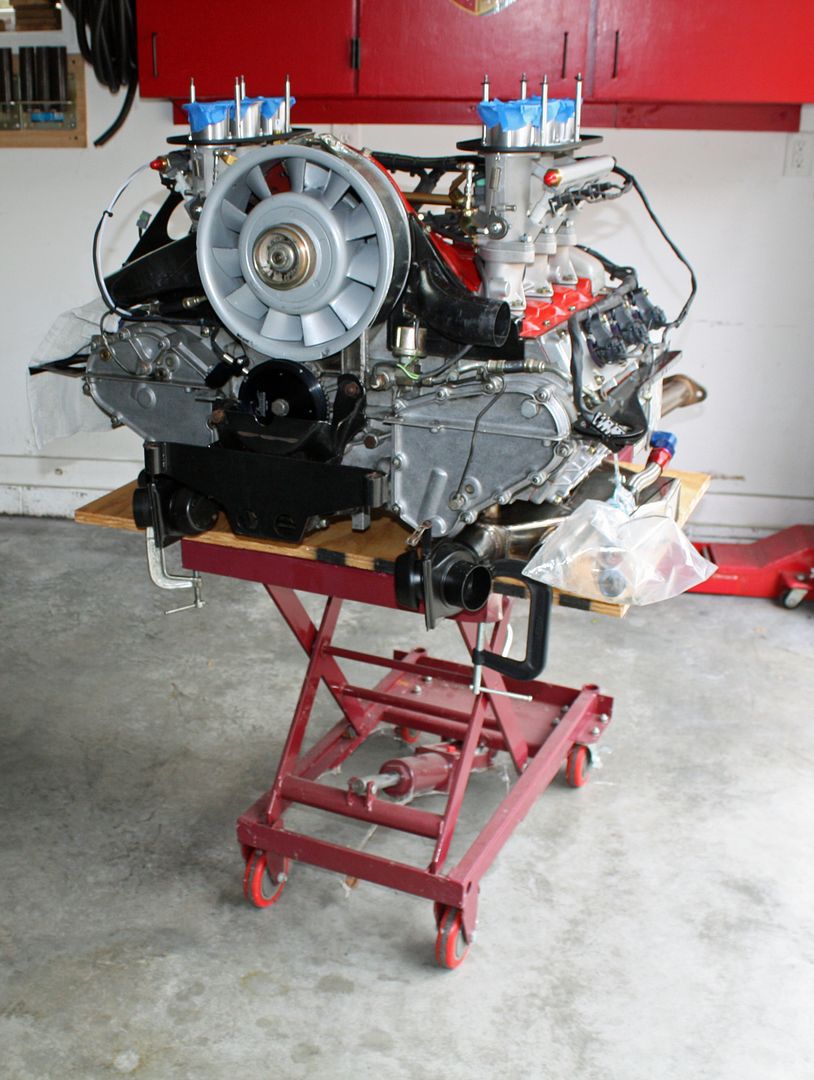
Since I am close to having the wiring finished, I decided it was time to remove the engine from the engine stand and place it on the hydraulic table that I will be using to put the motor into the car. I cut a piece of plywood to be the same width as the heat exchangers and mounted the board to the table with clamps. I also removed the handle on the one end as it would have been in the way.


With that done, I removed the tin at the front and rear of the motor as it would have been bent by the straps. I strapped it at both ends and, using my overhead hoist, I took the weight off of the engine stand and removed the mount. I then lowered the engine onto the hydraulic cart. Now I can install the flywheel, clutch, transmission, starter, etc. in preparation for putting the motor into the car.


 11-02-2018, 05:36 PM
#95
Racer
Thread Starter
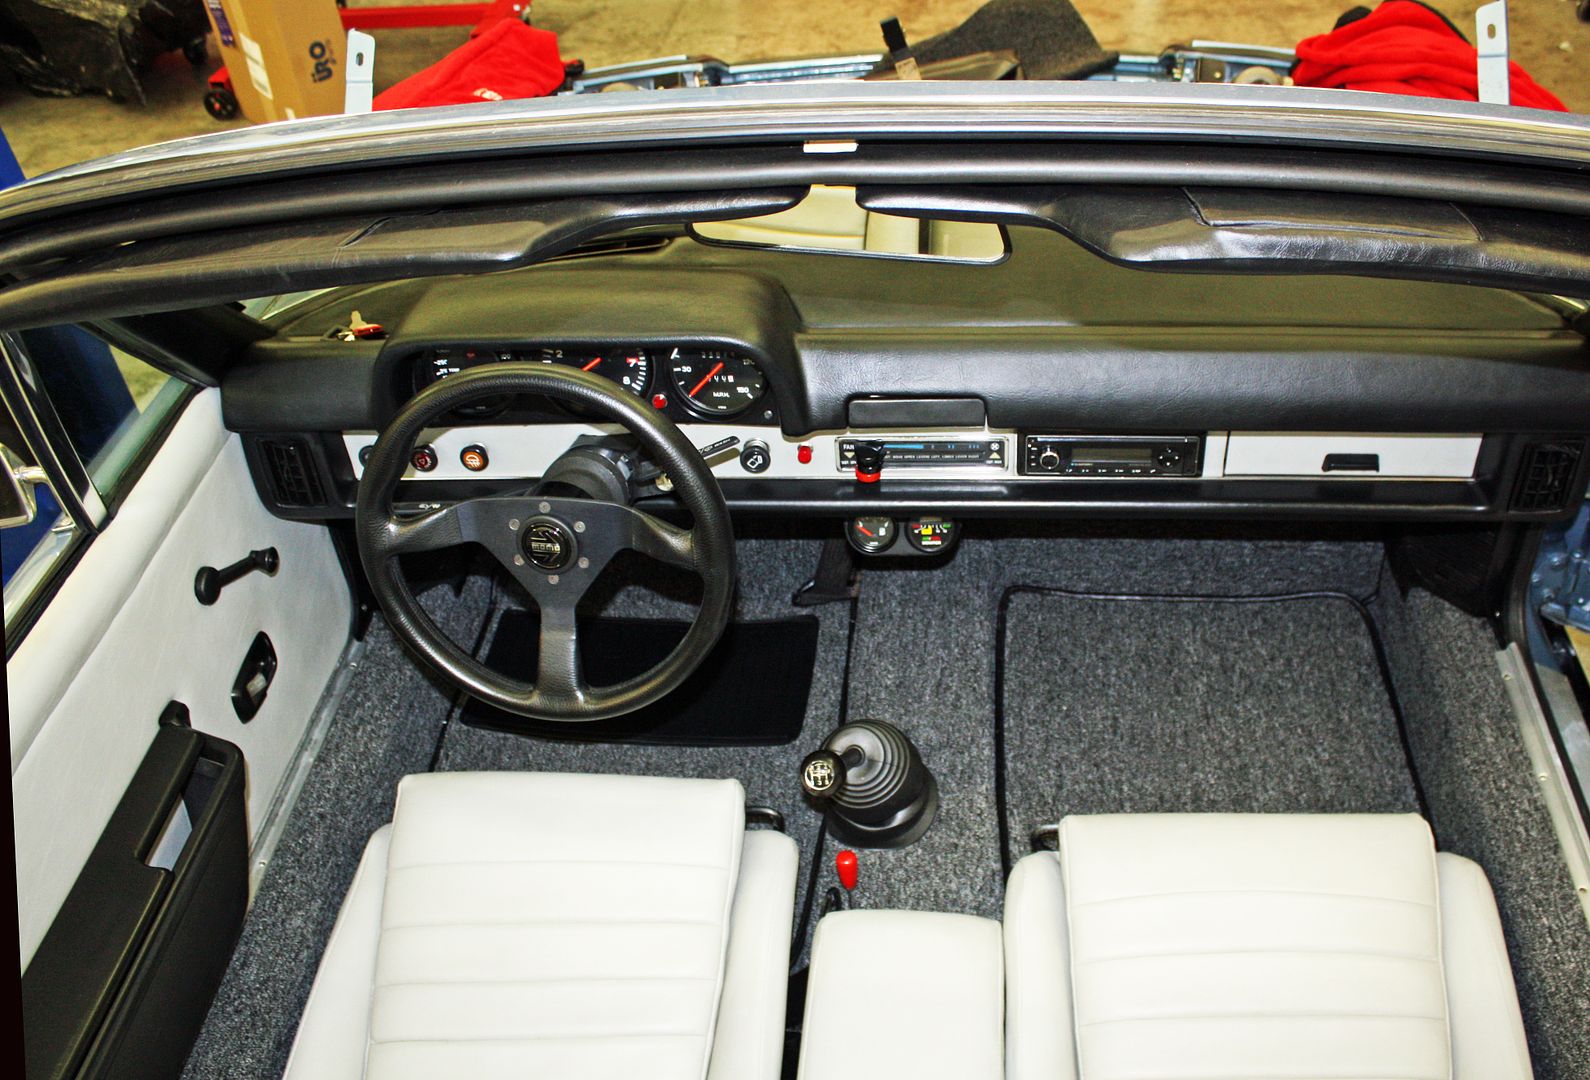
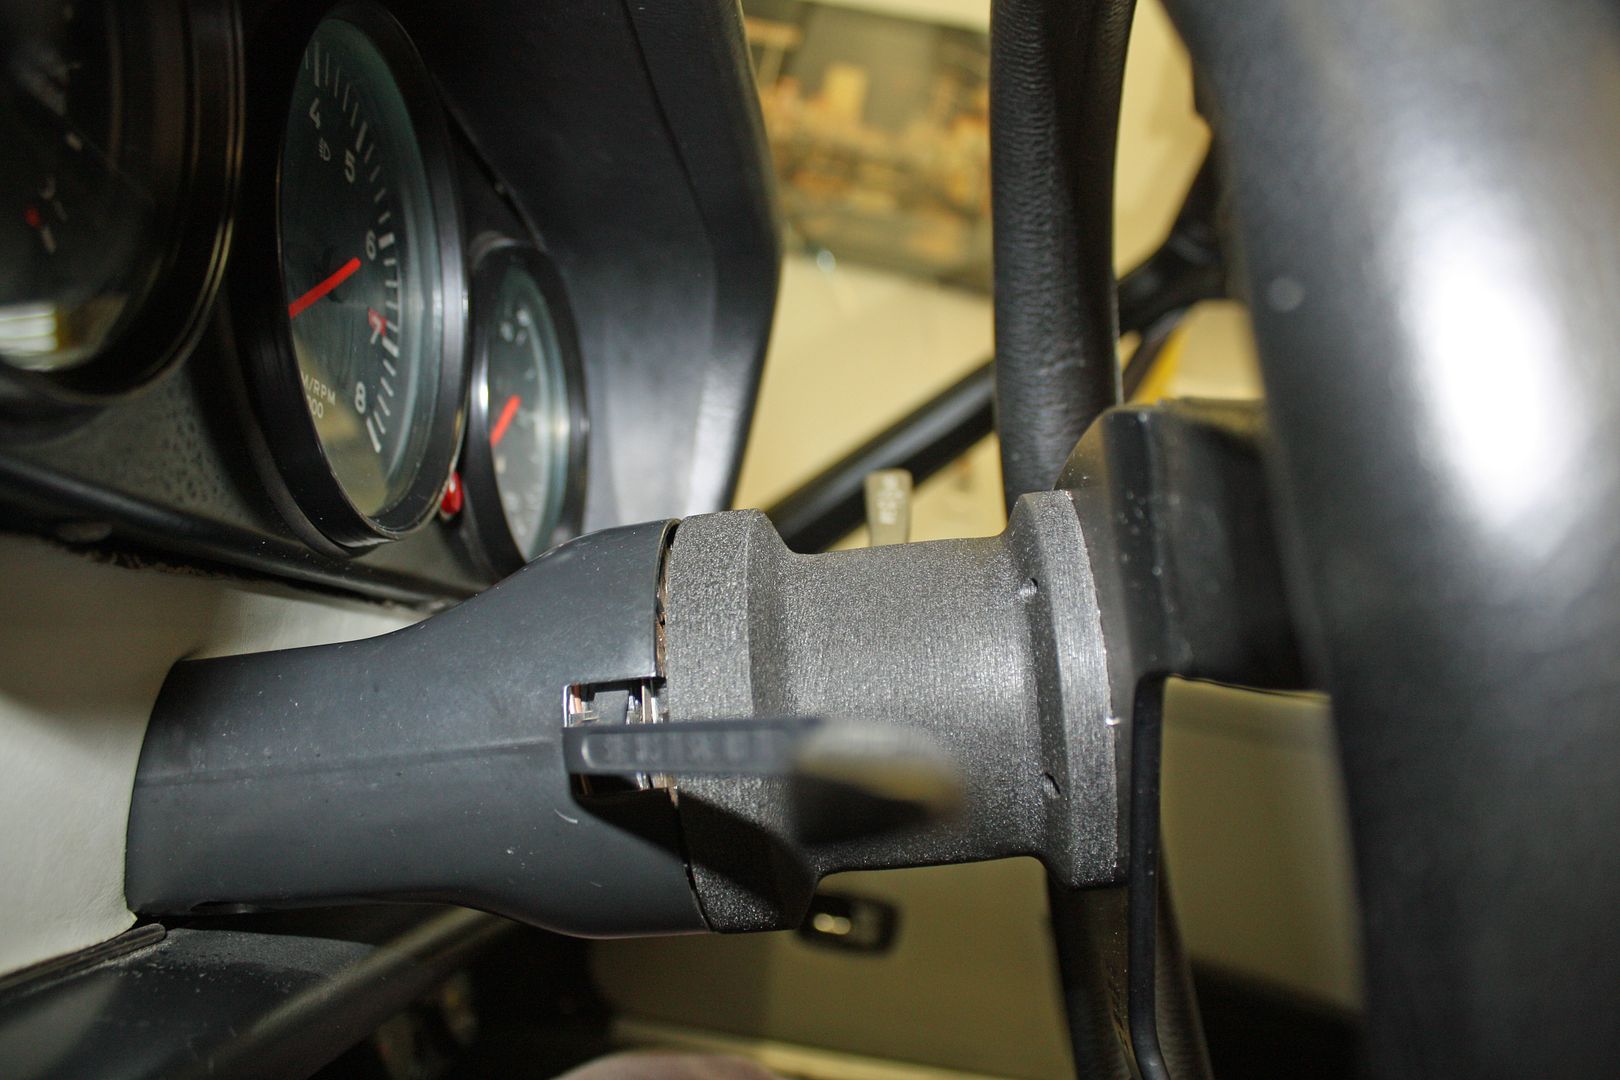
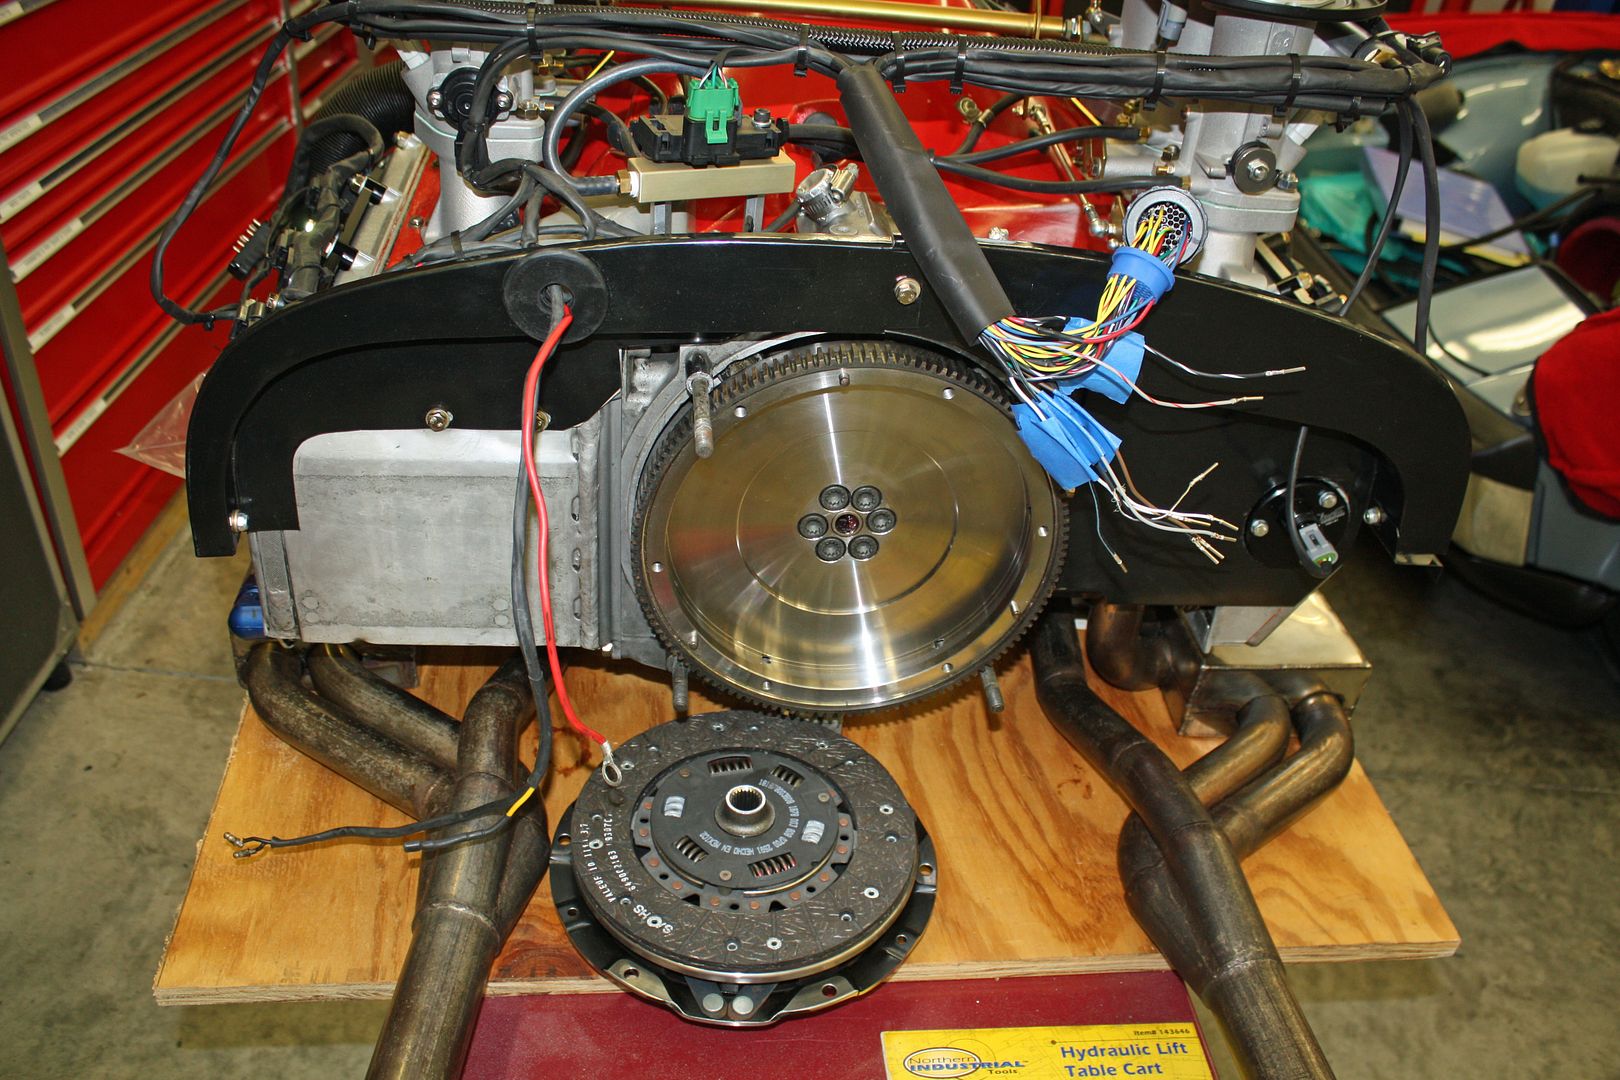
The shorter screws for the Momo steering wheel arrived today. So I removed the 1 1/2" steering wheel spacer.

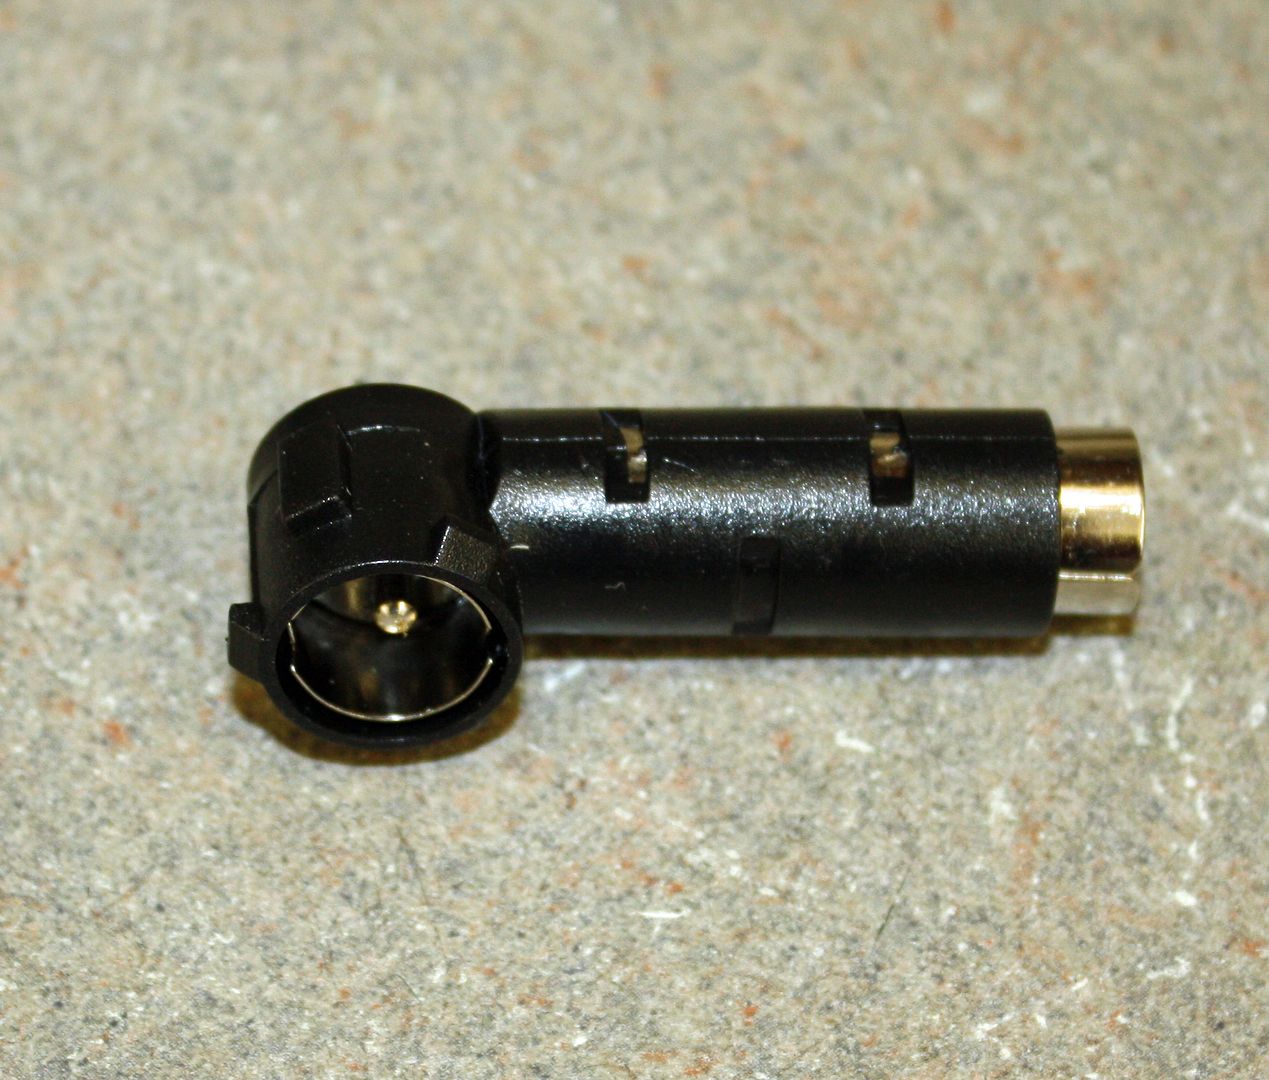
The Blaupunkt radio I recently installed required an antenna adapter. It also arrived today and is now in the car. I have tunes!!
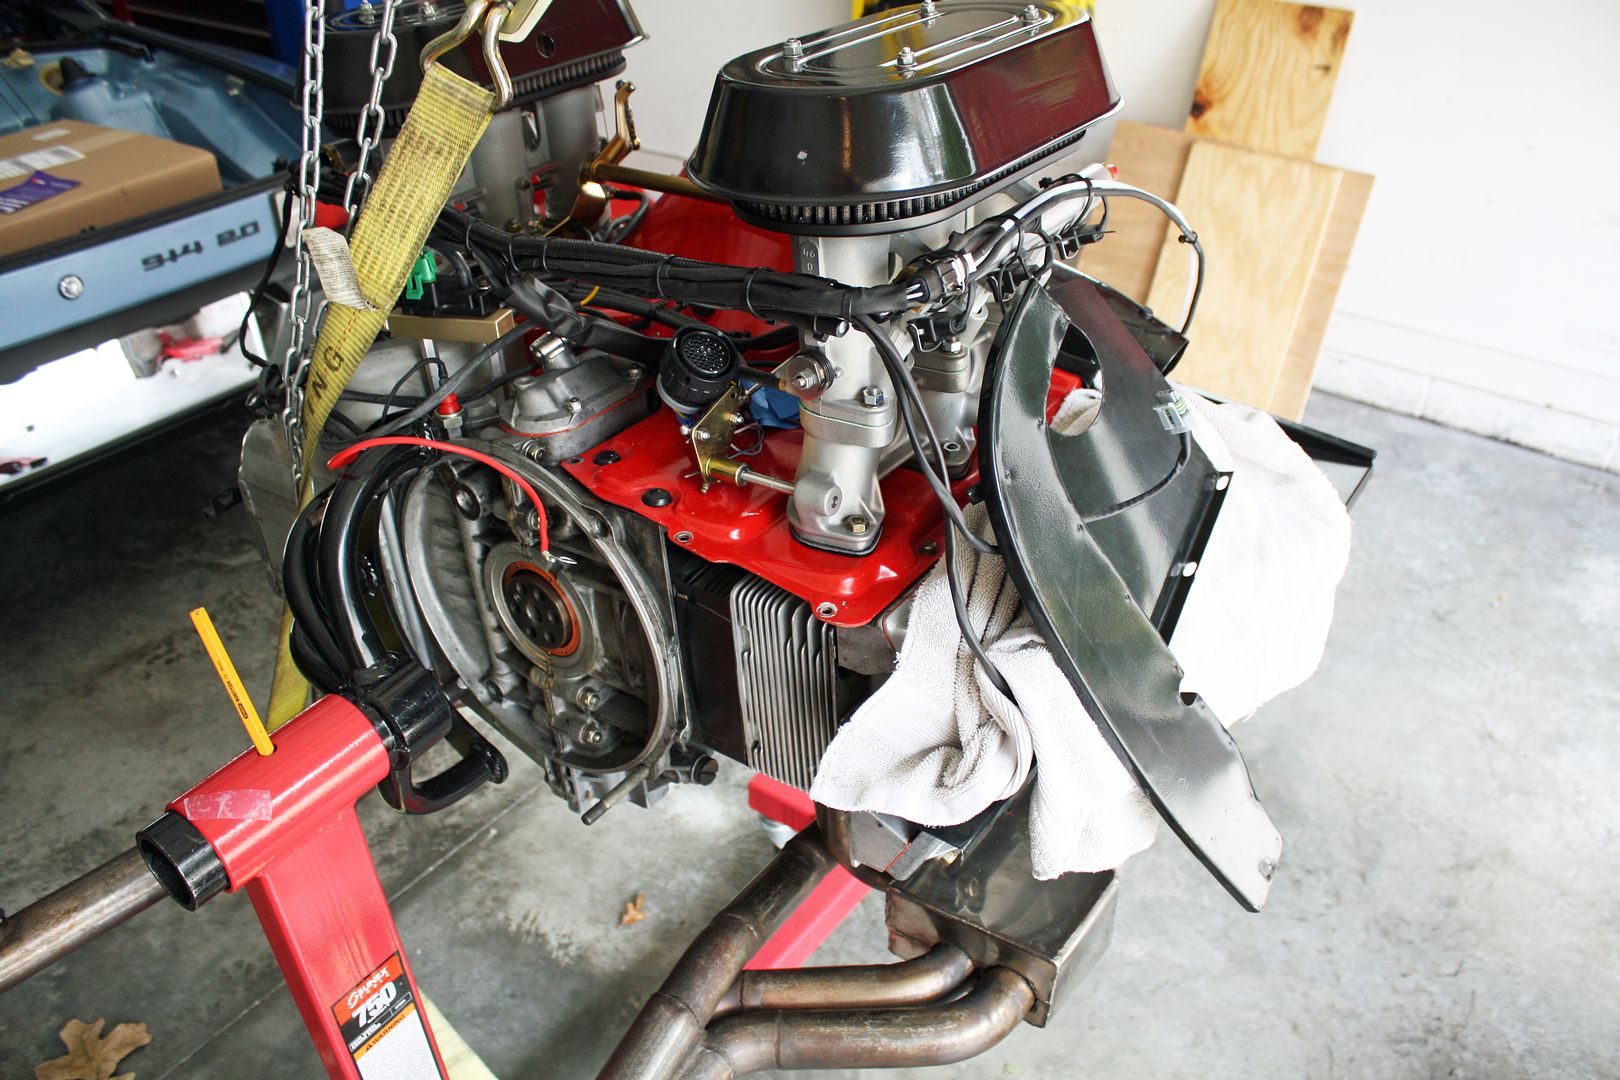
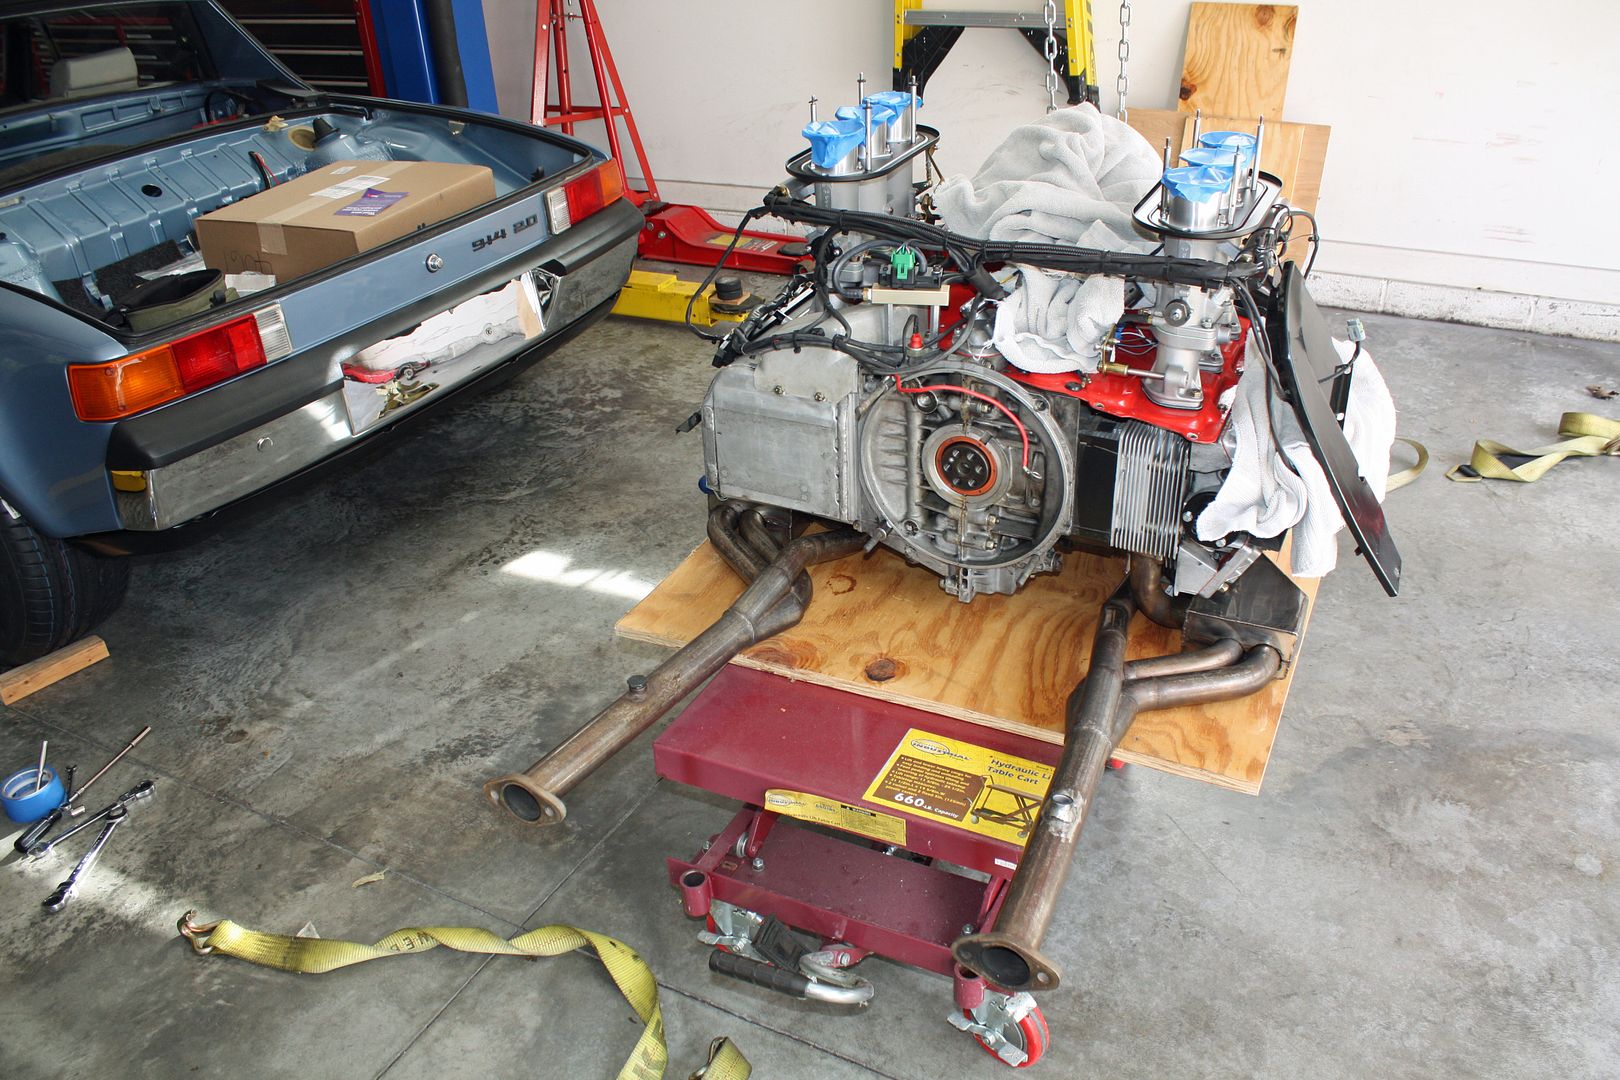
Next up was installing the flywheel. I torqued the bolts to 66 ft lbs.
I was going to install the clutch as well but, out of the eight or so clutch alignment tools that are in my drawer, there wasn't one that fit this clutch. It is on order.
I re-installed the sheet metal I removed yesterday as well as the rear sheet metal that I couldn't install while the engine was on the engine stand. I also installed the hoses on the front end.
The Blaupunkt radio I recently installed required an antenna adapter. It also arrived today and is now in the car. I have tunes!!

Next up was installing the flywheel. I torqued the bolts to 66 ft lbs.


I was going to install the clutch as well but, out of the eight or so clutch alignment tools that are in my drawer, there wasn't one that fit this clutch. It is on order.
I re-installed the sheet metal I removed yesterday as well as the rear sheet metal that I couldn't install while the engine was on the engine stand. I also installed the hoses on the front end.

 11-04-2018, 03:53 PM
#96
Racer
Thread Starter
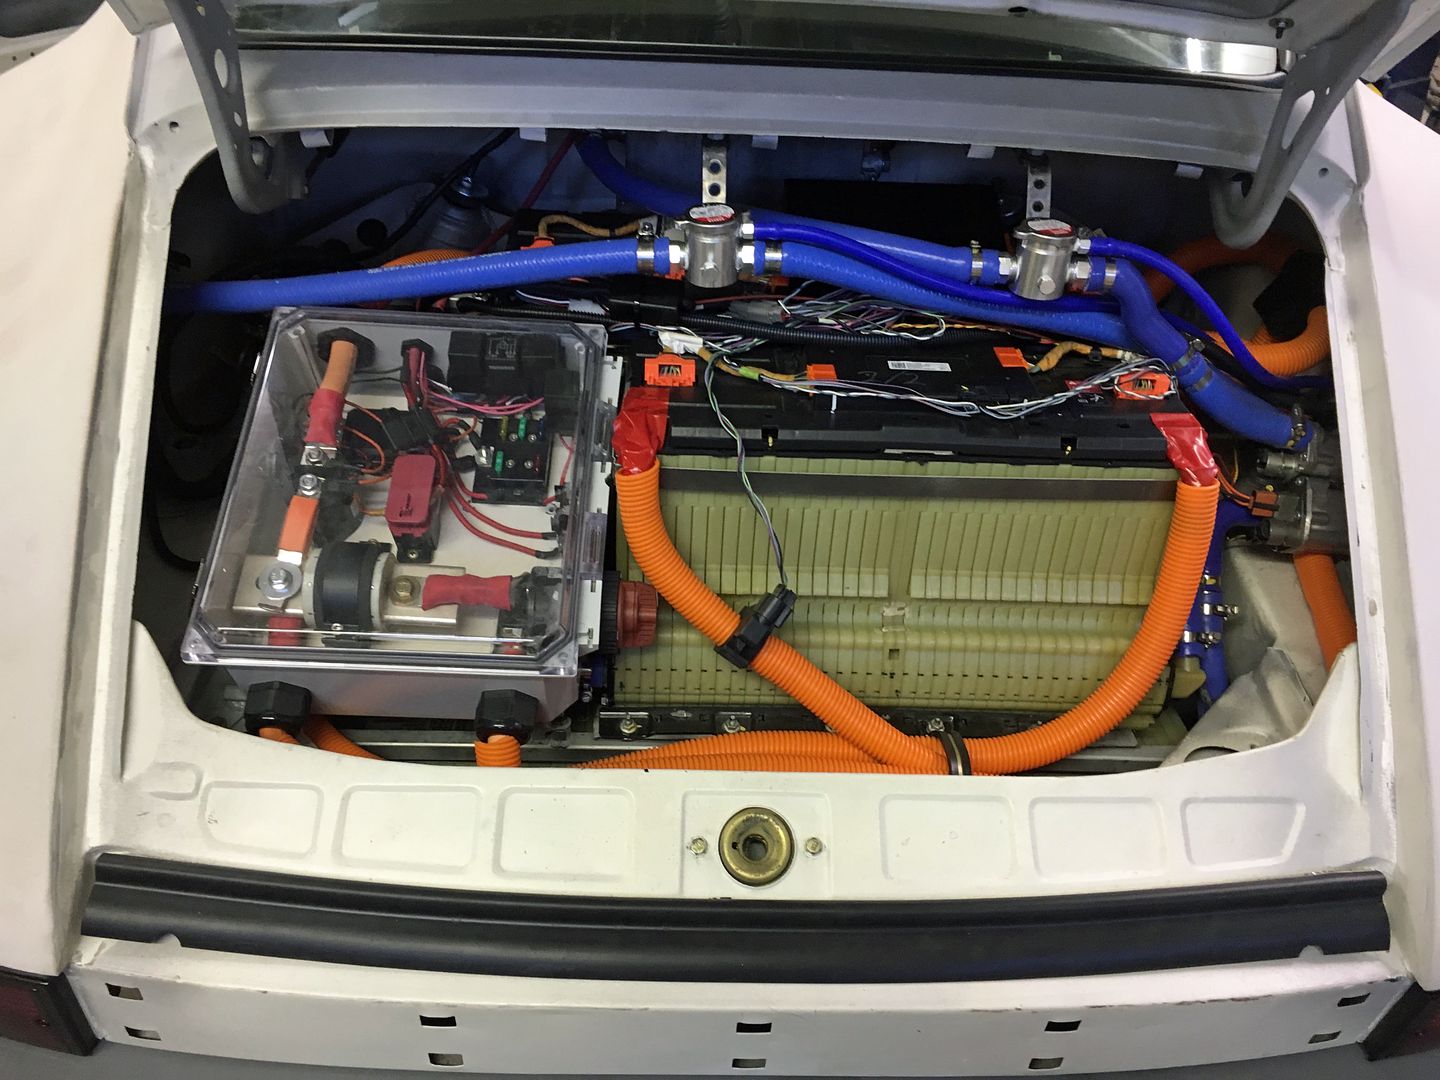
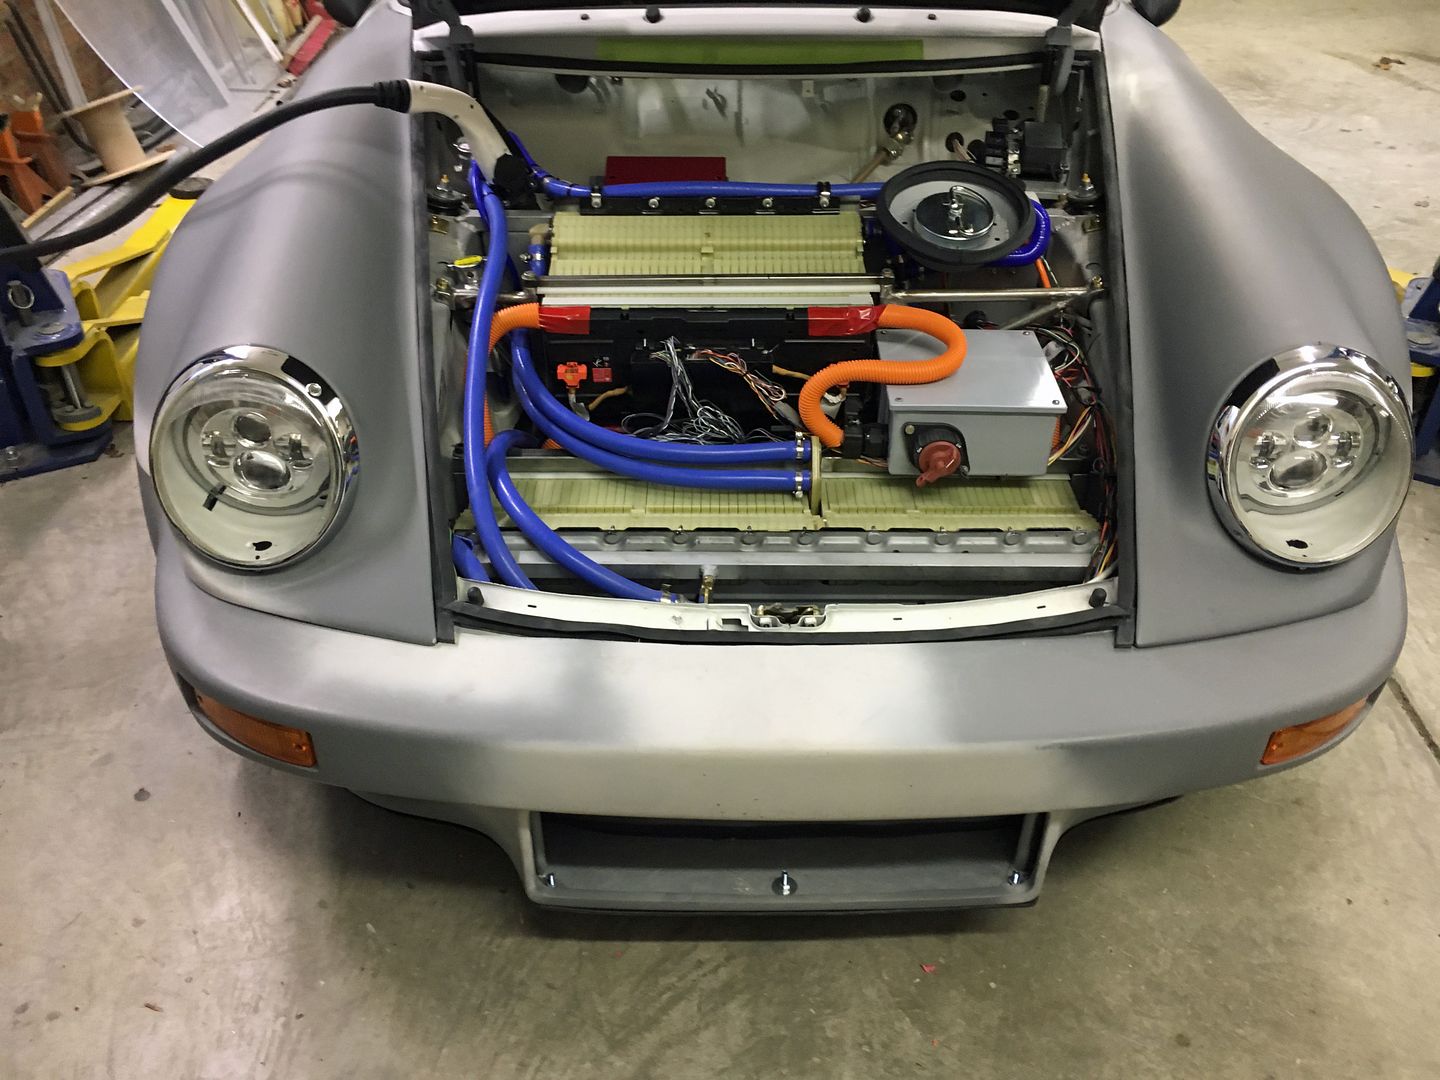
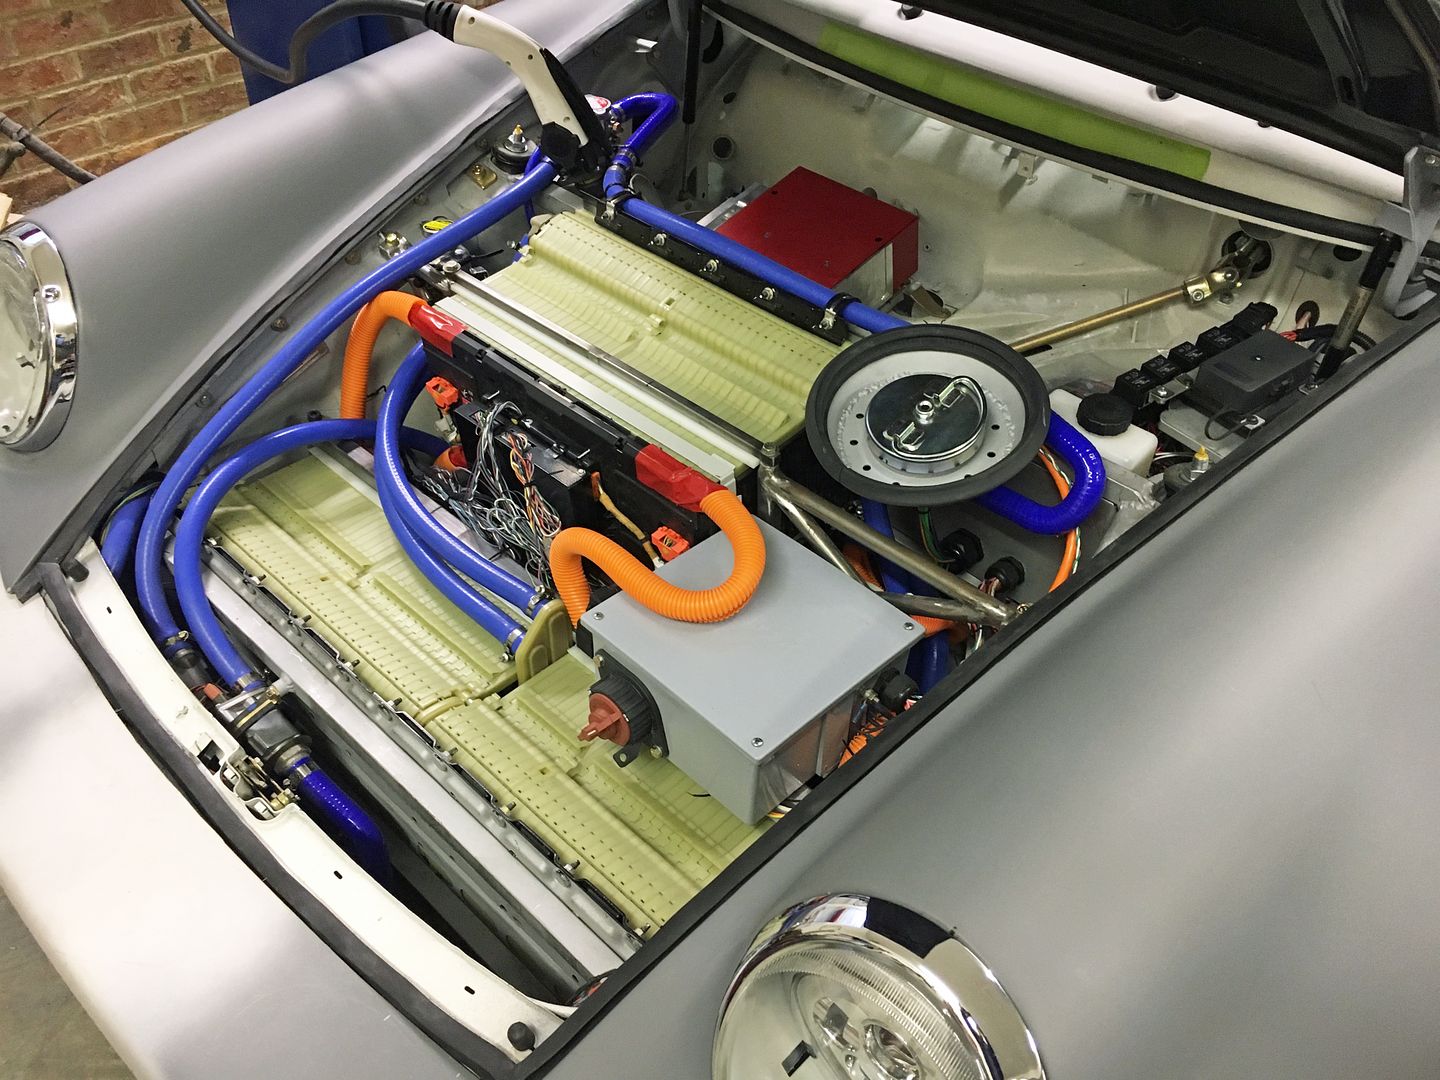
Not much happening on the car this weekend. Been busy with other things. One of those things was taking a ride and getting to drive my son's 911 T (for Tesla). The first time he floored it, my response was some four letter words. It is that fast!!! He has clocked 0-60, unofficially, at 2.0 seconds!!
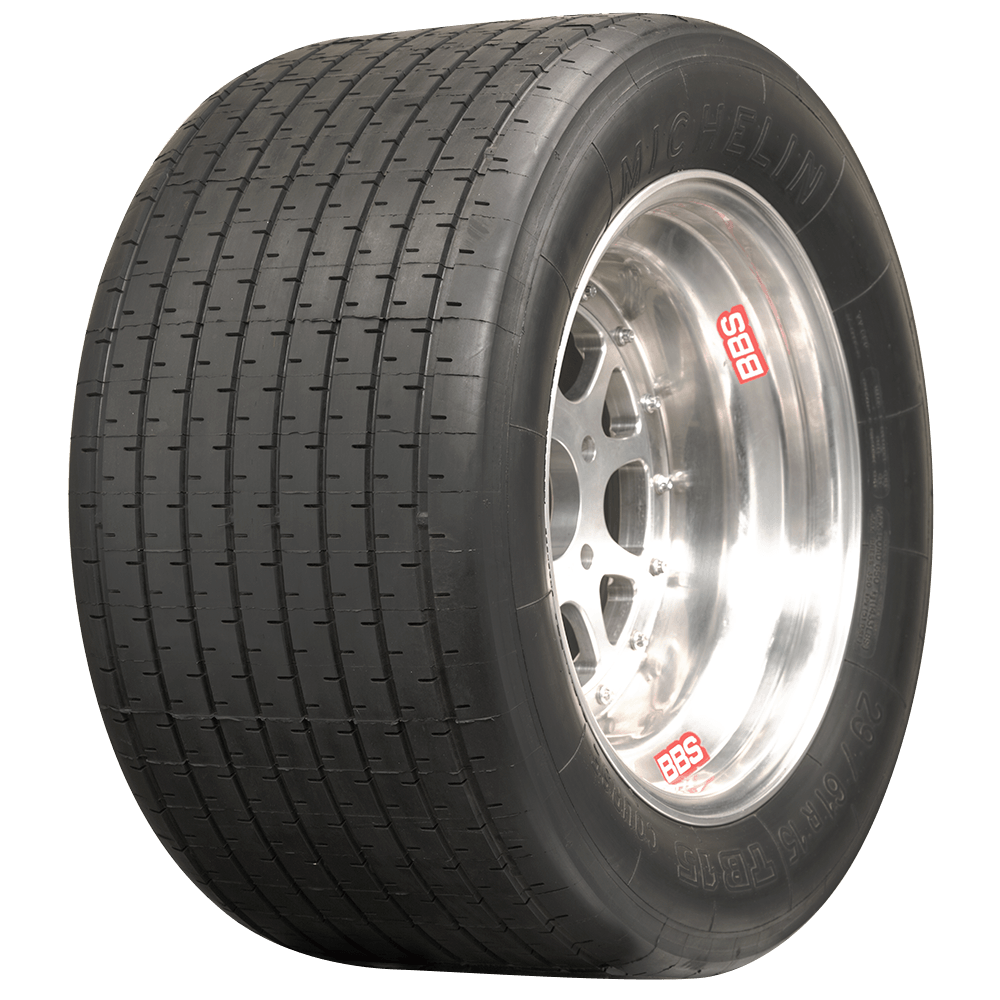
We switched drivers and I got the chance to see what it could do. Holy #@$!!! My last track car was a 1982 911SC with a breathed on 1989 930 turbo motor that registered 330HP at the wheels. I had installed a G50 five speed which helped make that a very, very fast car. I also had a 2002 Z06 with a Magnacharger. It was over 500hp and was also very fast. Matt's car absolutely blows both of these cars away. And, there is no wheelspin. It was in the high forties this morning and there was still plenty of traction. IT Just Goes!!!
The drivability was also excellent. It was very easy to modulate the throttle with everything being very progressive. The only sound is that of the various coolant pumps and the rocks thrown up by the sticky tires. This is the description of the tires as it appears on Coker's web site.
"Michelin PB20 | Competition Tires
The incredible Michelin PB 20 is a VHC rally tire specifically designed for wet racing surfaces. The PB 20 is available in two popular 15 inch sizes to fit many applications. This tire features a specially designed compound and tread pattern for maximum grip in wet racing conditions. The Michelin PB 20 is classified as VHC Full Rain tire, and like other Michelin Classic competition tires is DOT and ECE approved for public road use."
The other new experience for me was the regenerative braking. Under normal driving, the physical brakes are rarely used. The regen brakes will bring the car to a complete stop. I stomped the throttle not too far before we had to turn into Matt's subdivision. I did have to use the physical brakes then and it stopped well, albeit with a fair amount of brake pedal pressure needed as there are no power brakes. He could add them later if needed by adding a vacuum pump.
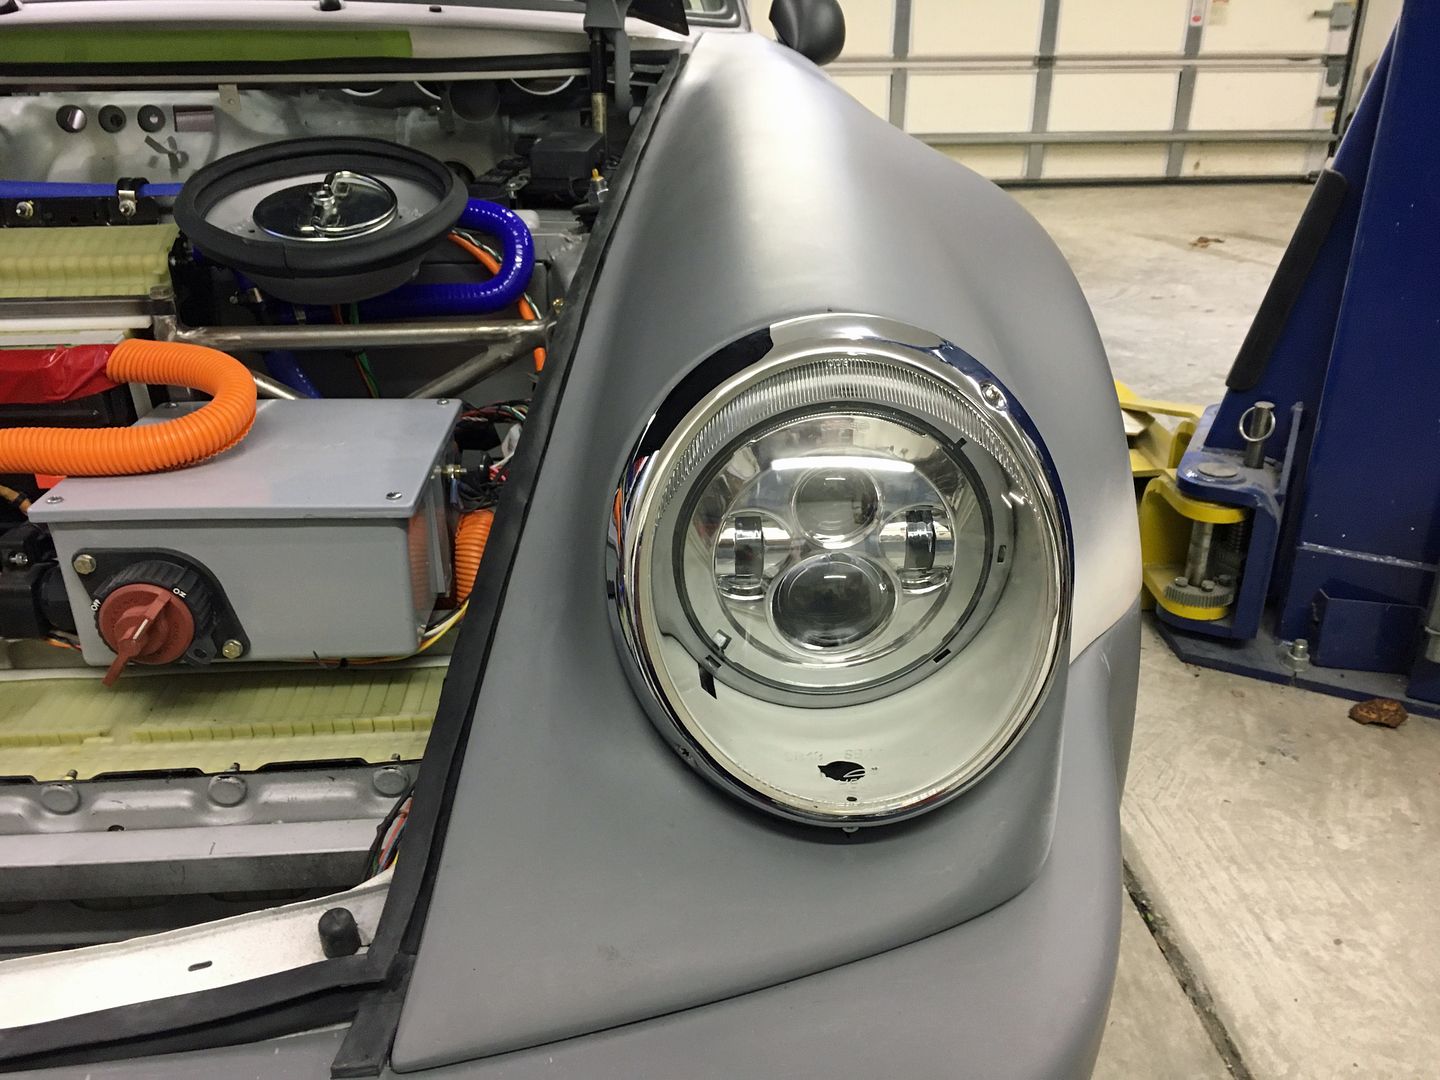
Those wide tires and the extra weight on the nose did cause the steering to be somewhat heavier than a stock 911 at low speeds. It was fine in normal driving. There was a bit of hunting with those big tires but, again, nothing that was a big bother. The weight distribution is 61% rear and 39% front
All in all, I surprised at how civil it was. He is waiting for some door window seals so he can install the door glass and there is no insulation or interior trim in the car yet. Once the windows are in, it will be his daily driver in fair weather. He has an appointment with a body shop for paint in January. The plan is to drive it for the next month of so to sort any bugs, blow the car apart, have it bead blasted again, and the take it to the body shop.
We switched drivers and I got the chance to see what it could do. Holy #@$!!! My last track car was a 1982 911SC with a breathed on 1989 930 turbo motor that registered 330HP at the wheels. I had installed a G50 five speed which helped make that a very, very fast car. I also had a 2002 Z06 with a Magnacharger. It was over 500hp and was also very fast. Matt's car absolutely blows both of these cars away. And, there is no wheelspin. It was in the high forties this morning and there was still plenty of traction. IT Just Goes!!!
The drivability was also excellent. It was very easy to modulate the throttle with everything being very progressive. The only sound is that of the various coolant pumps and the rocks thrown up by the sticky tires. This is the description of the tires as it appears on Coker's web site.
"Michelin PB20 | Competition Tires
The incredible Michelin PB 20 is a VHC rally tire specifically designed for wet racing surfaces. The PB 20 is available in two popular 15 inch sizes to fit many applications. This tire features a specially designed compound and tread pattern for maximum grip in wet racing conditions. The Michelin PB 20 is classified as VHC Full Rain tire, and like other Michelin Classic competition tires is DOT and ECE approved for public road use."
The other new experience for me was the regenerative braking. Under normal driving, the physical brakes are rarely used. The regen brakes will bring the car to a complete stop. I stomped the throttle not too far before we had to turn into Matt's subdivision. I did have to use the physical brakes then and it stopped well, albeit with a fair amount of brake pedal pressure needed as there are no power brakes. He could add them later if needed by adding a vacuum pump.
Those wide tires and the extra weight on the nose did cause the steering to be somewhat heavier than a stock 911 at low speeds. It was fine in normal driving. There was a bit of hunting with those big tires but, again, nothing that was a big bother. The weight distribution is 61% rear and 39% front
All in all, I surprised at how civil it was. He is waiting for some door window seals so he can install the door glass and there is no insulation or interior trim in the car yet. Once the windows are in, it will be his daily driver in fair weather. He has an appointment with a body shop for paint in January. The plan is to drive it for the next month of so to sort any bugs, blow the car apart, have it bead blasted again, and the take it to the body shop.


 11-06-2018, 07:23 PM
#97
Racer
Thread Starter
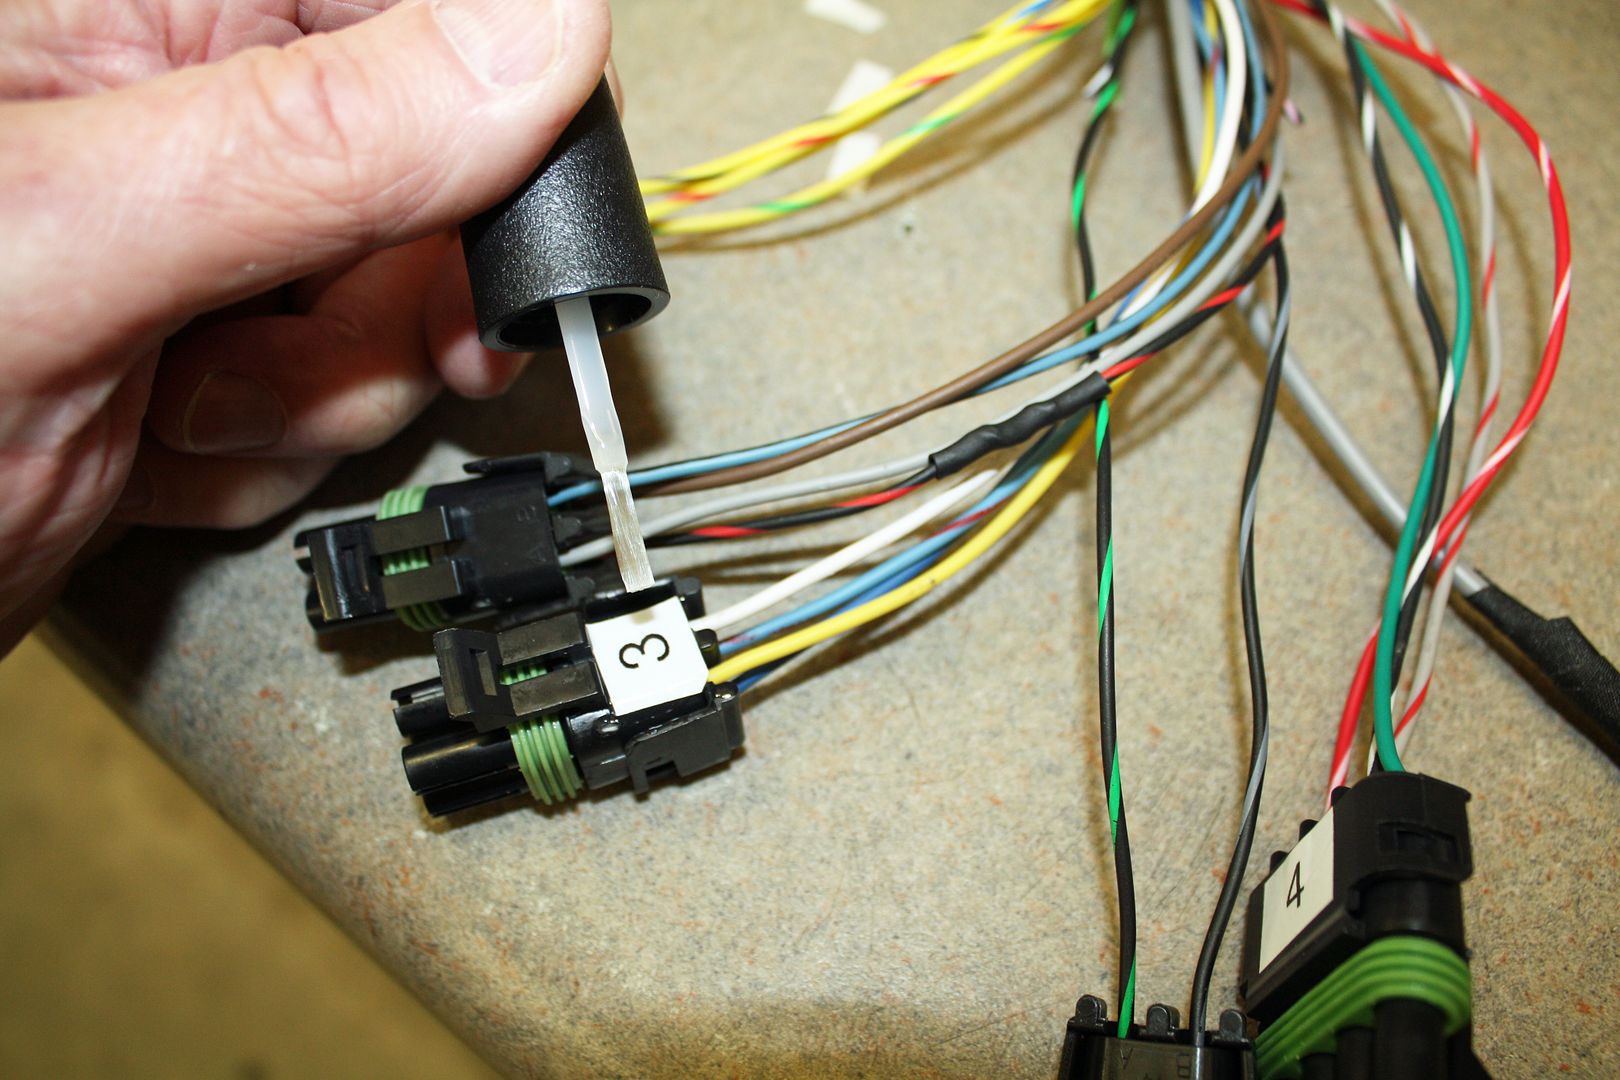
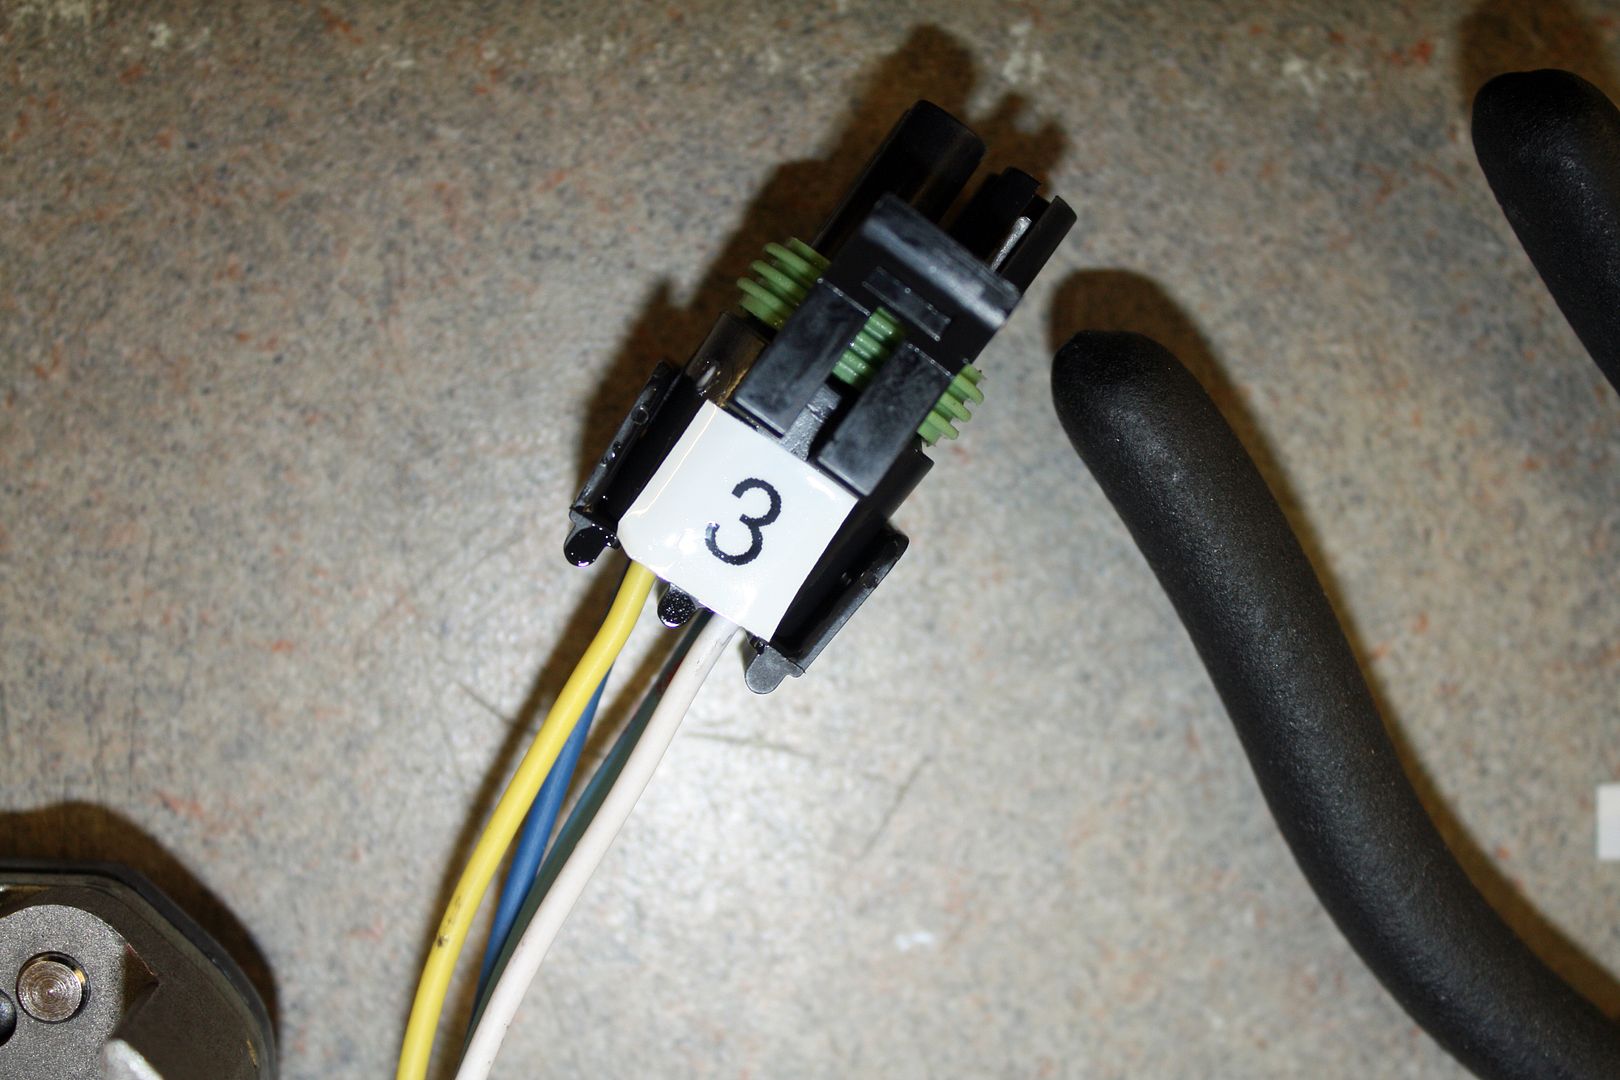
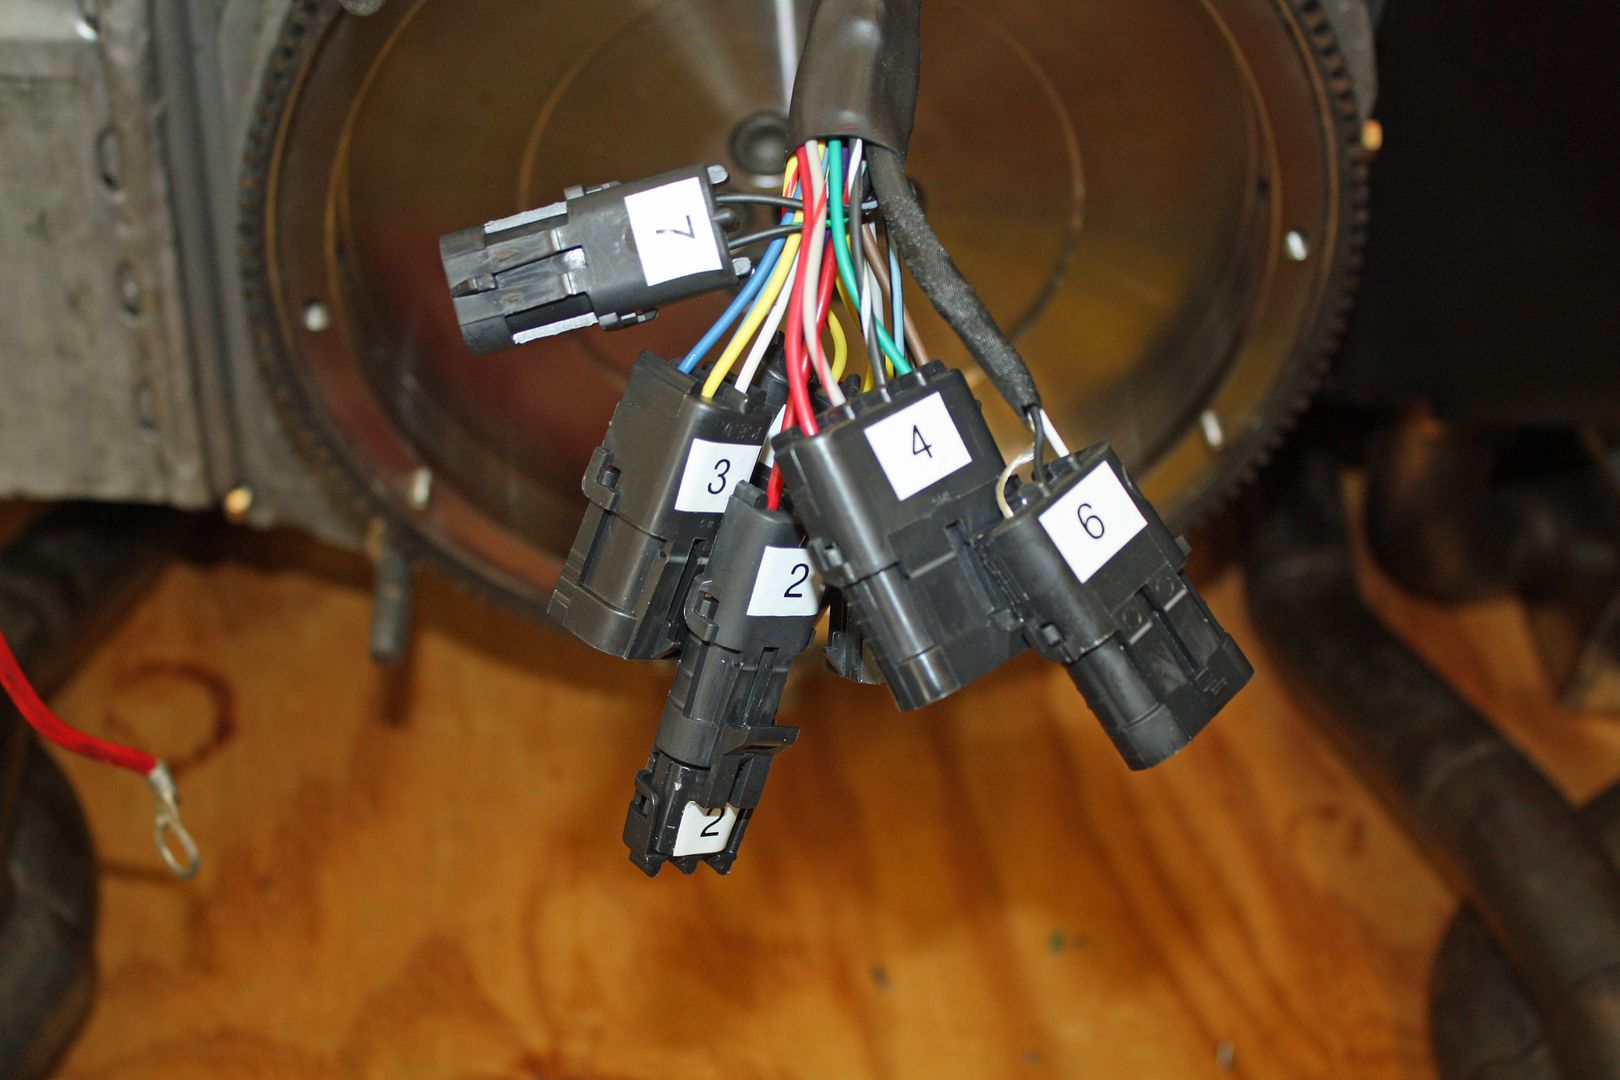
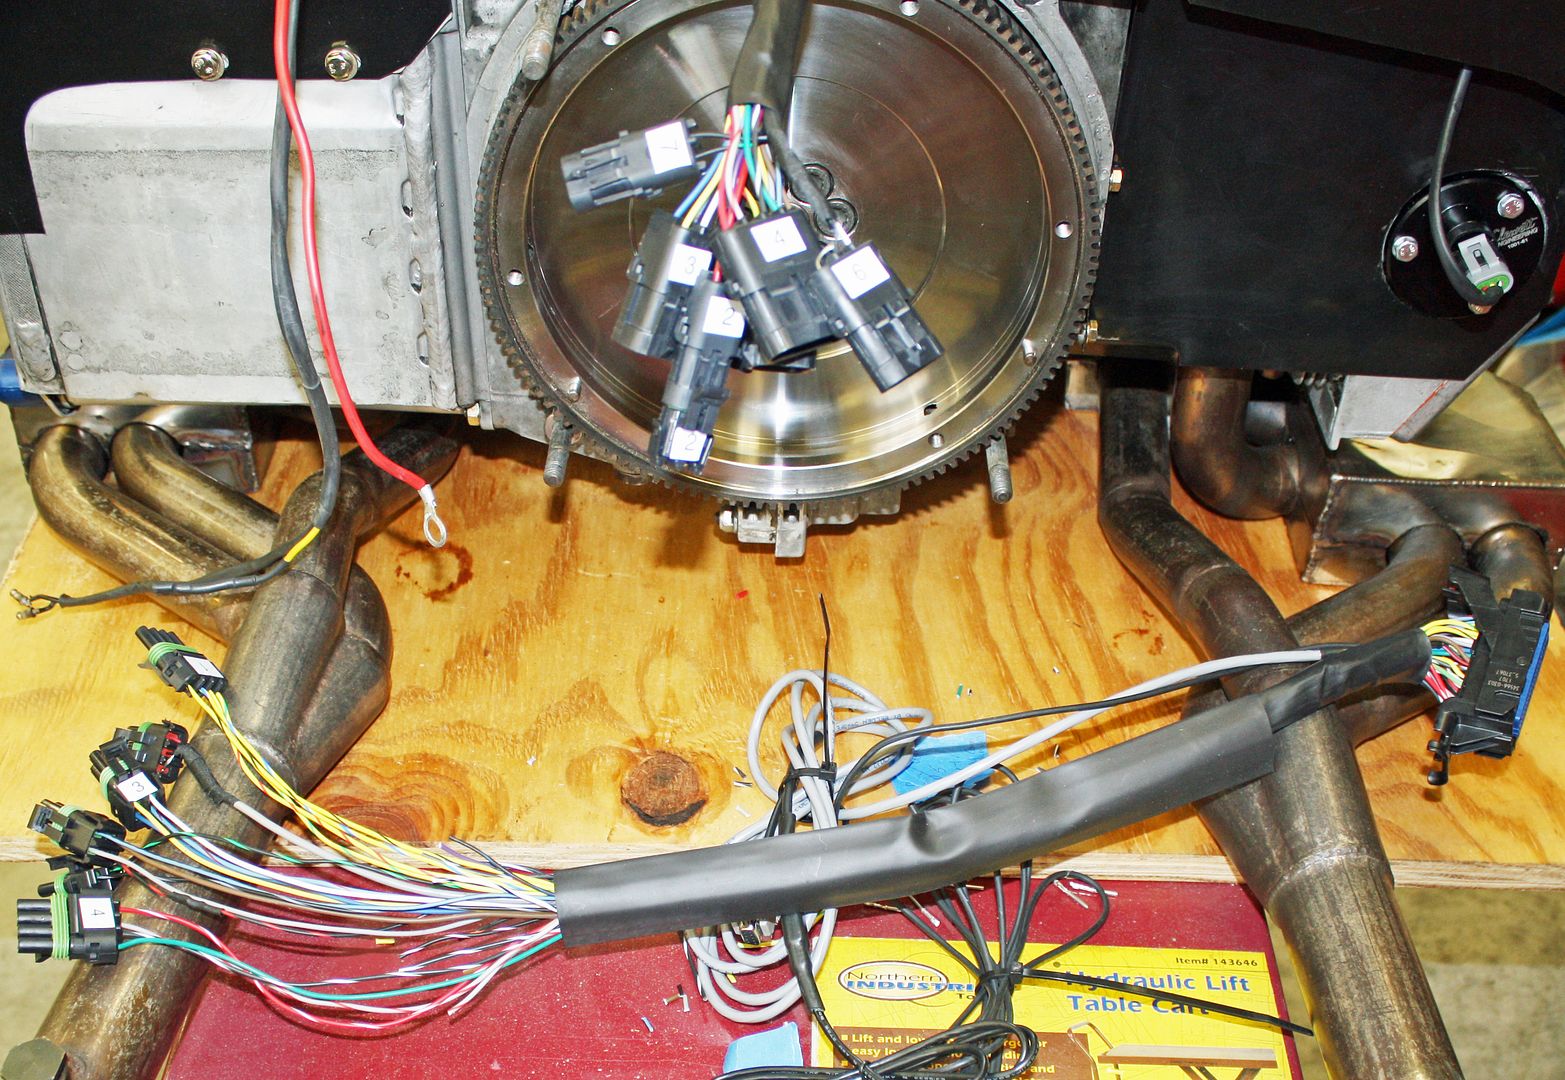
I gave up on the bulkhead connector. The removal tools arrived and did not work. It is incredibly difficult to get the wires in the right holes. So I used seven weather pack connectors. It is so much easier to crimp the weather pack terminals. By having nor more than four wires per connector, it is easy to see if the wires are in the correct place. I was very concerned about getting the wires in the correct position on the bulkhead connector and afraid I would damage the ECU.
I made a list of the wires to each connector and will place that list in the ECU three ring binder for future reference. I used my labeler to label each of the connectors. When I installed a tire pressure monitoring system on my motorhome and my towed car, the instructions called for numbering each of he tire monitors with their supplied numbers. They also recommended applying clear finger nail polish on each number to protect them. That has worked well so I borrowed my wife's polish to do the same on these numbers.
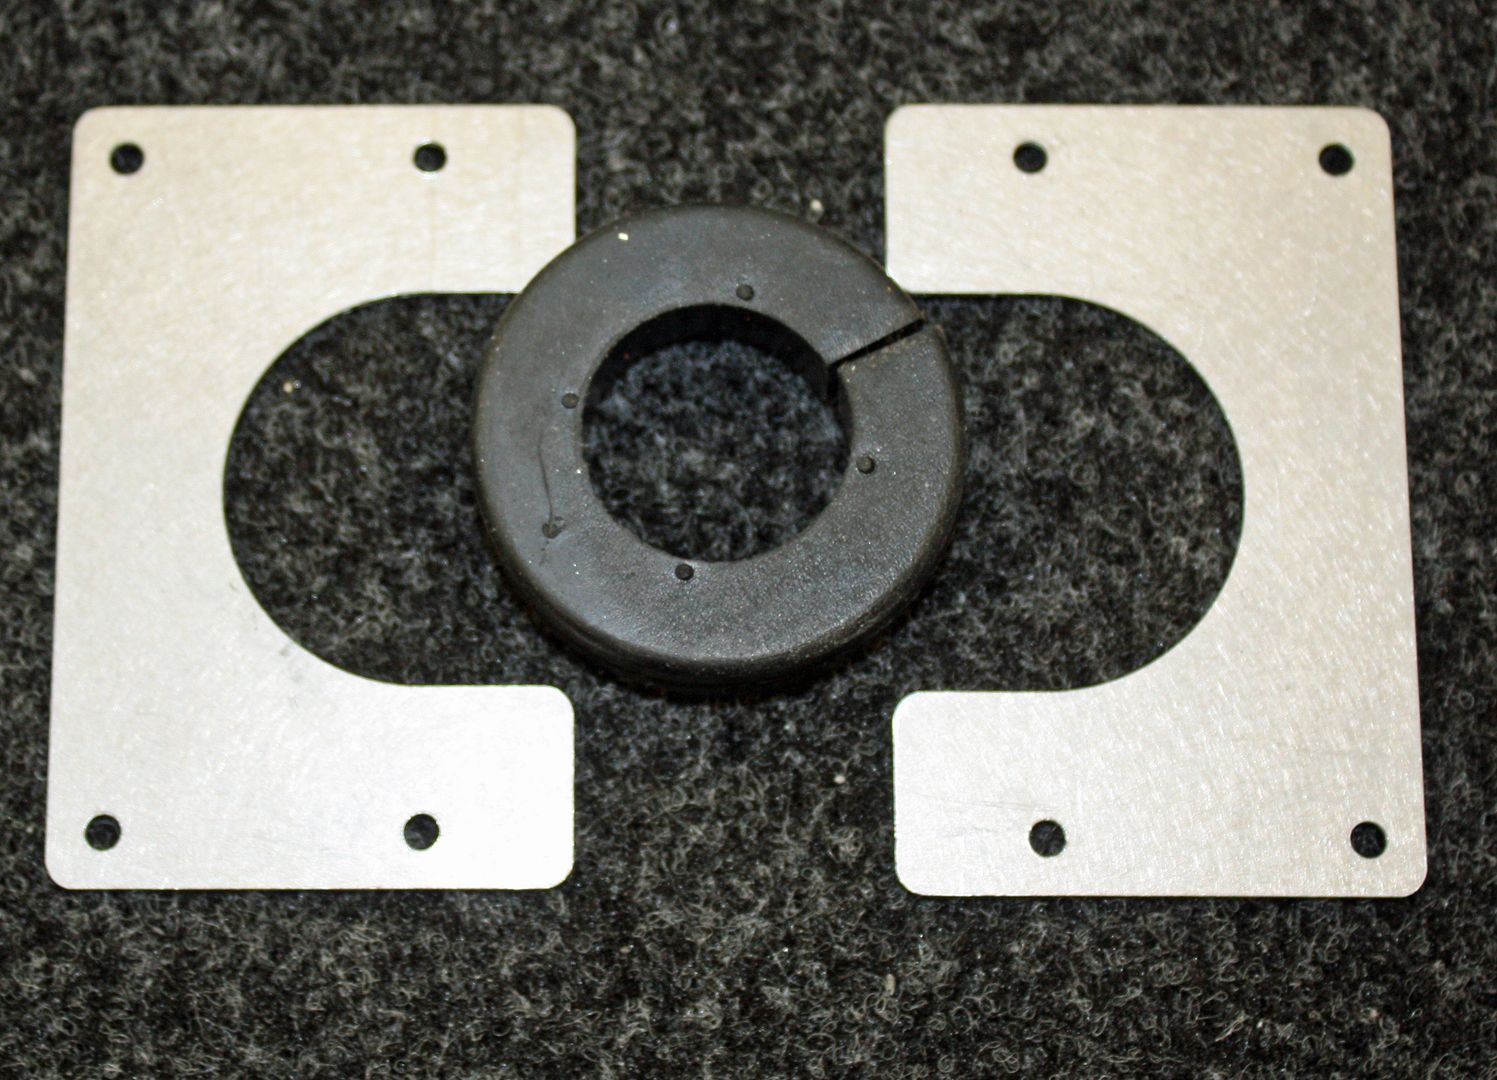
I am disappointed that I could not make the bulkhead connector work as I liked the cleanliness of that type of installation. I called Richard Clewett, the supplier of the injection system, and nearly bit the bullet to have him make a harness as I was frustrated. He advised against that because of the cost and that I have done the hard work of wiring the engine. He is sending me a 2" grommet that he uses on his installations that I can use. He sent photos of the grommet and plates and it should work well.
Now that I have the connectors on the ECU harness, I can complete the wiring to that harness from the power harness. Then...I can work on getting that motor back into the car!!
I made a list of the wires to each connector and will place that list in the ECU three ring binder for future reference. I used my labeler to label each of the connectors. When I installed a tire pressure monitoring system on my motorhome and my towed car, the instructions called for numbering each of he tire monitors with their supplied numbers. They also recommended applying clear finger nail polish on each number to protect them. That has worked well so I borrowed my wife's polish to do the same on these numbers.
I am disappointed that I could not make the bulkhead connector work as I liked the cleanliness of that type of installation. I called Richard Clewett, the supplier of the injection system, and nearly bit the bullet to have him make a harness as I was frustrated. He advised against that because of the cost and that I have done the hard work of wiring the engine. He is sending me a 2" grommet that he uses on his installations that I can use. He sent photos of the grommet and plates and it should work well.
Now that I have the connectors on the ECU harness, I can complete the wiring to that harness from the power harness. Then...I can work on getting that motor back into the car!!


 11-07-2018, 05:01 PM
#98
Racer
Thread Starter
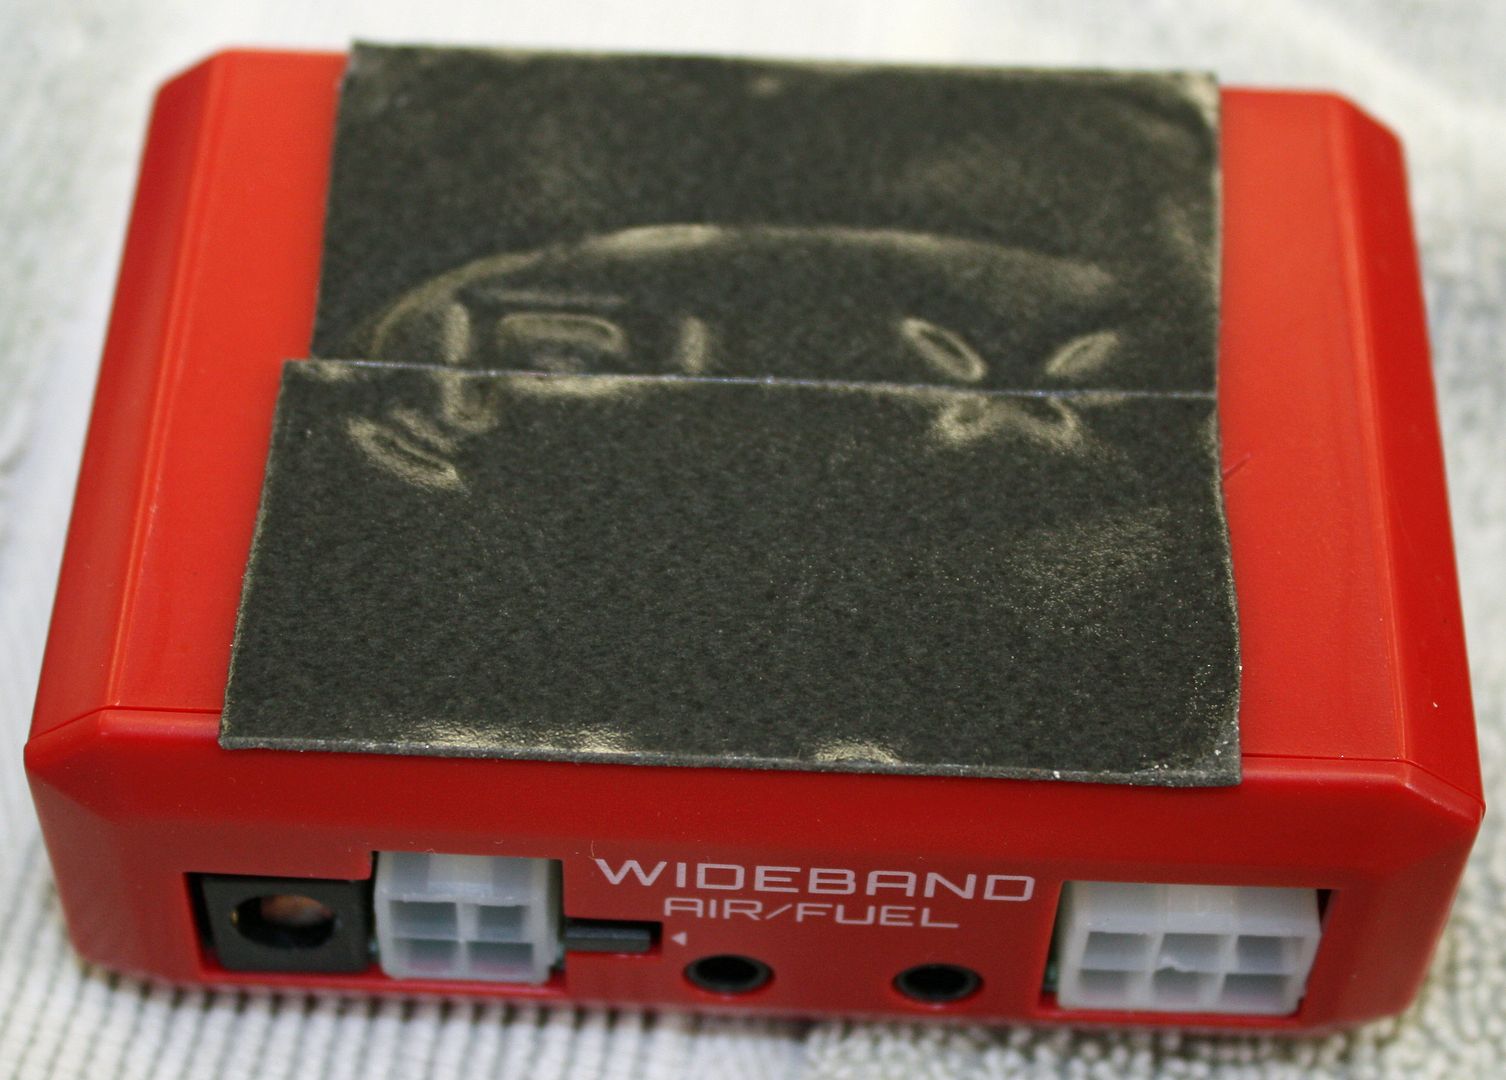
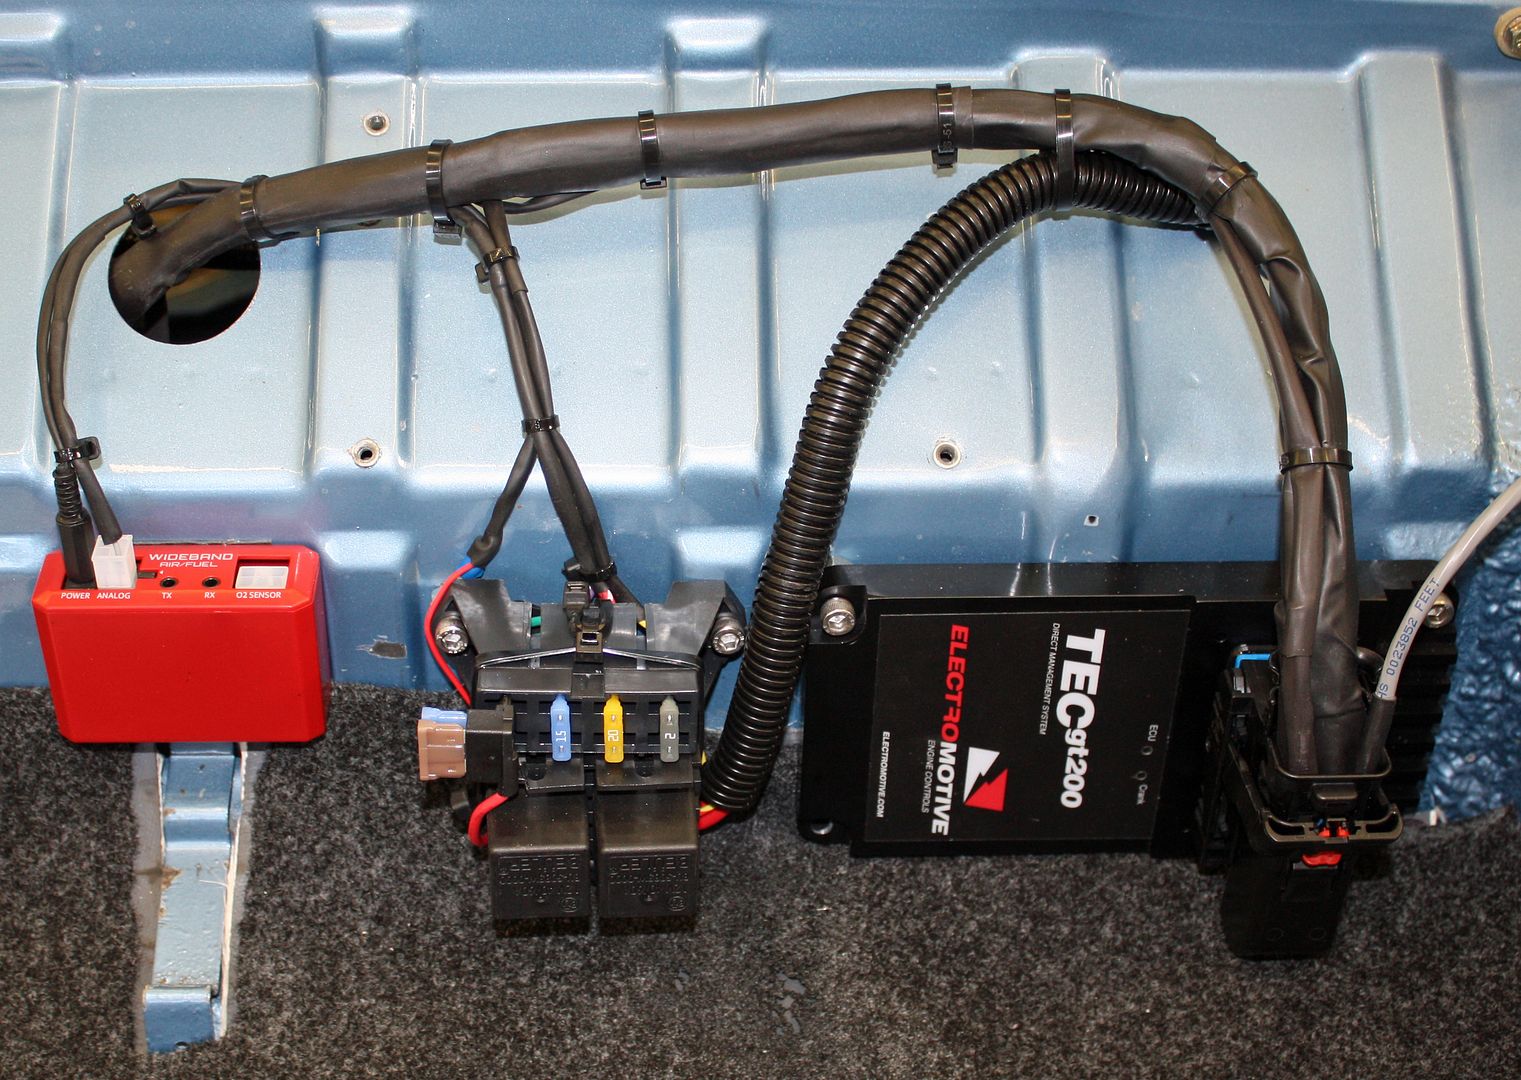
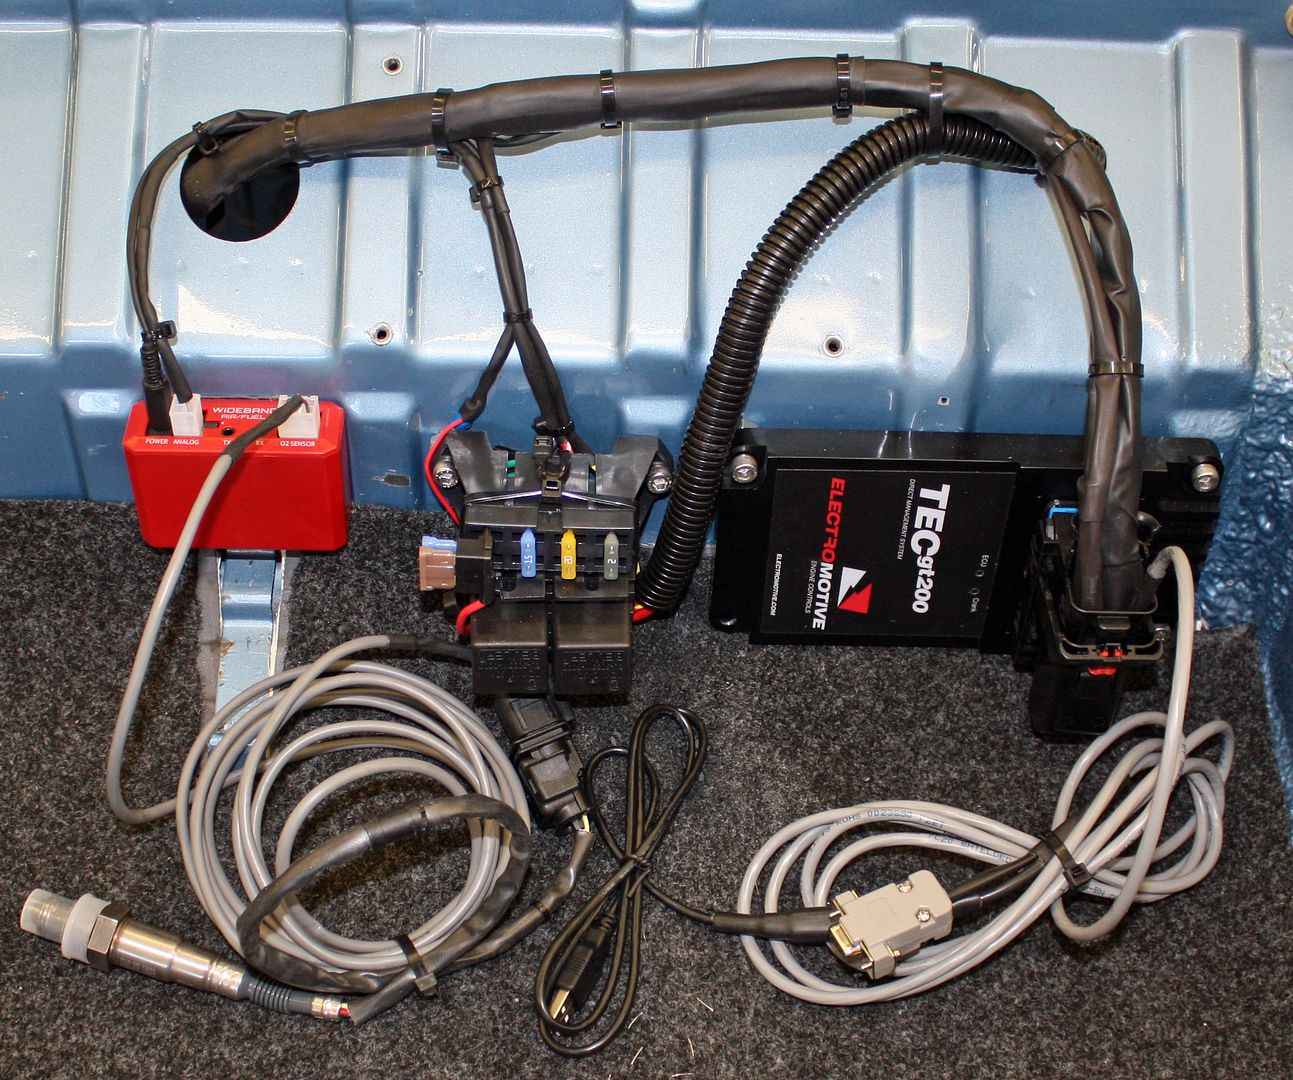
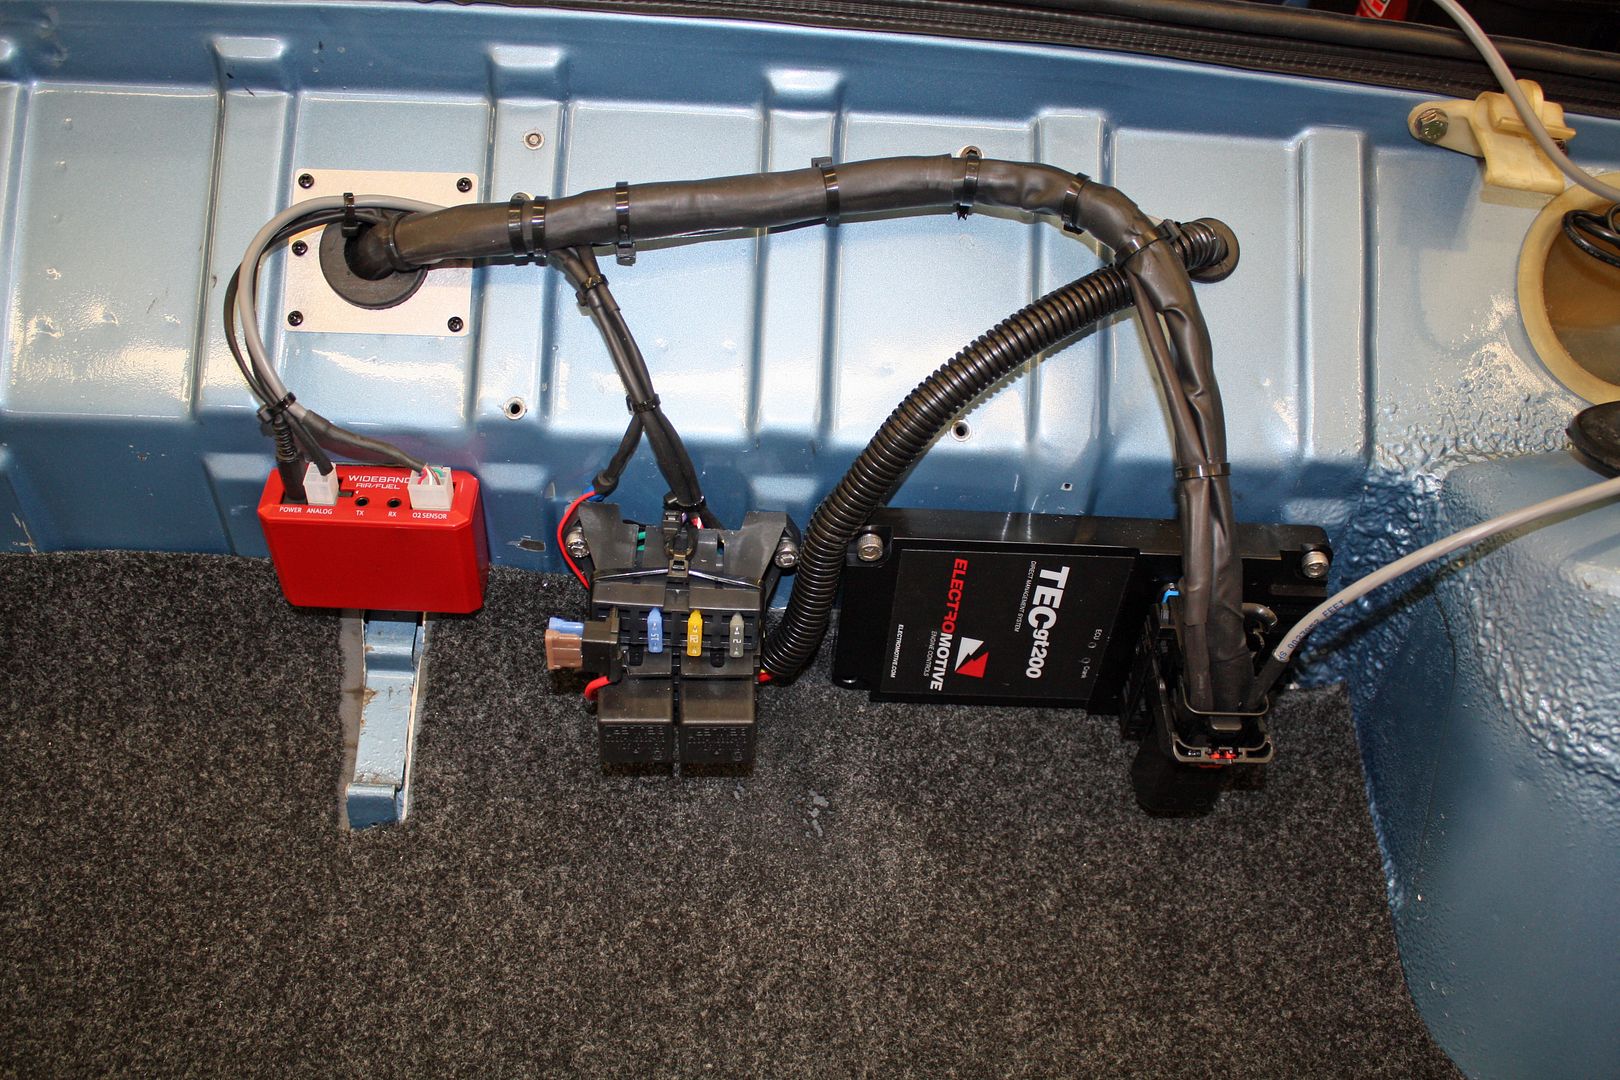
I worked on the trunk wiring today. The wide band O2 sensor is run through a small red box. I mounted this using double sided tape. This box is separately powered and one wire runs from it to the ECU. It has other functions that I will not be using. I used a piggy back fuse tap to get power and grounded it to the chassis. The purple wire from the ECU is wired into the lower right terminal of the connector.
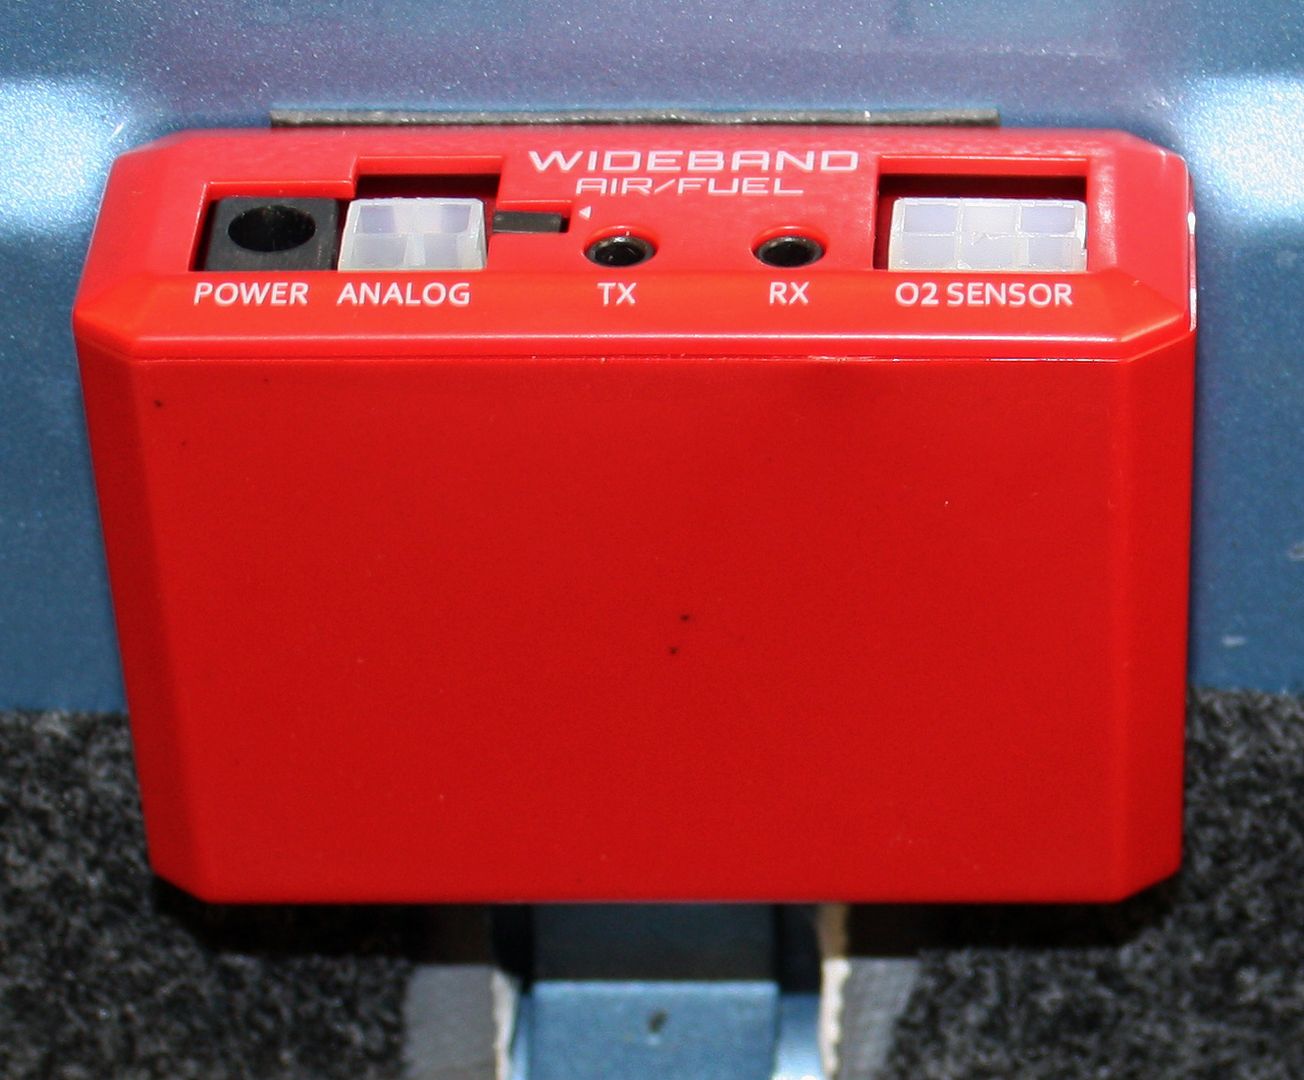
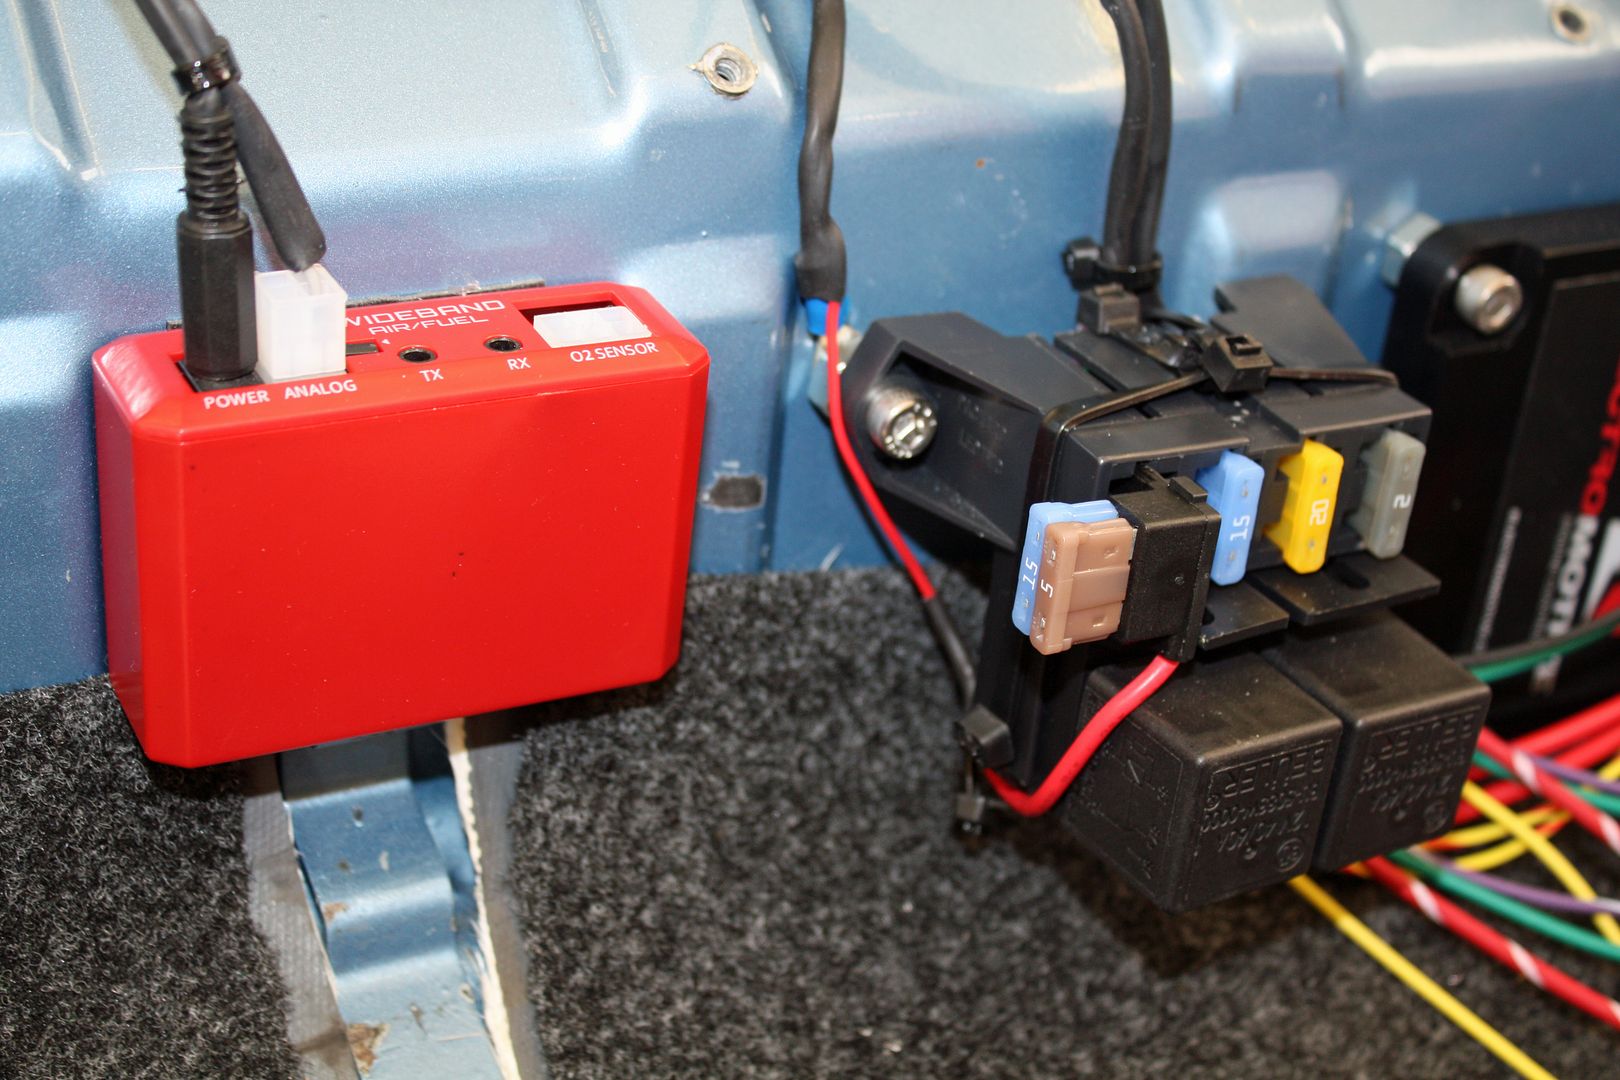
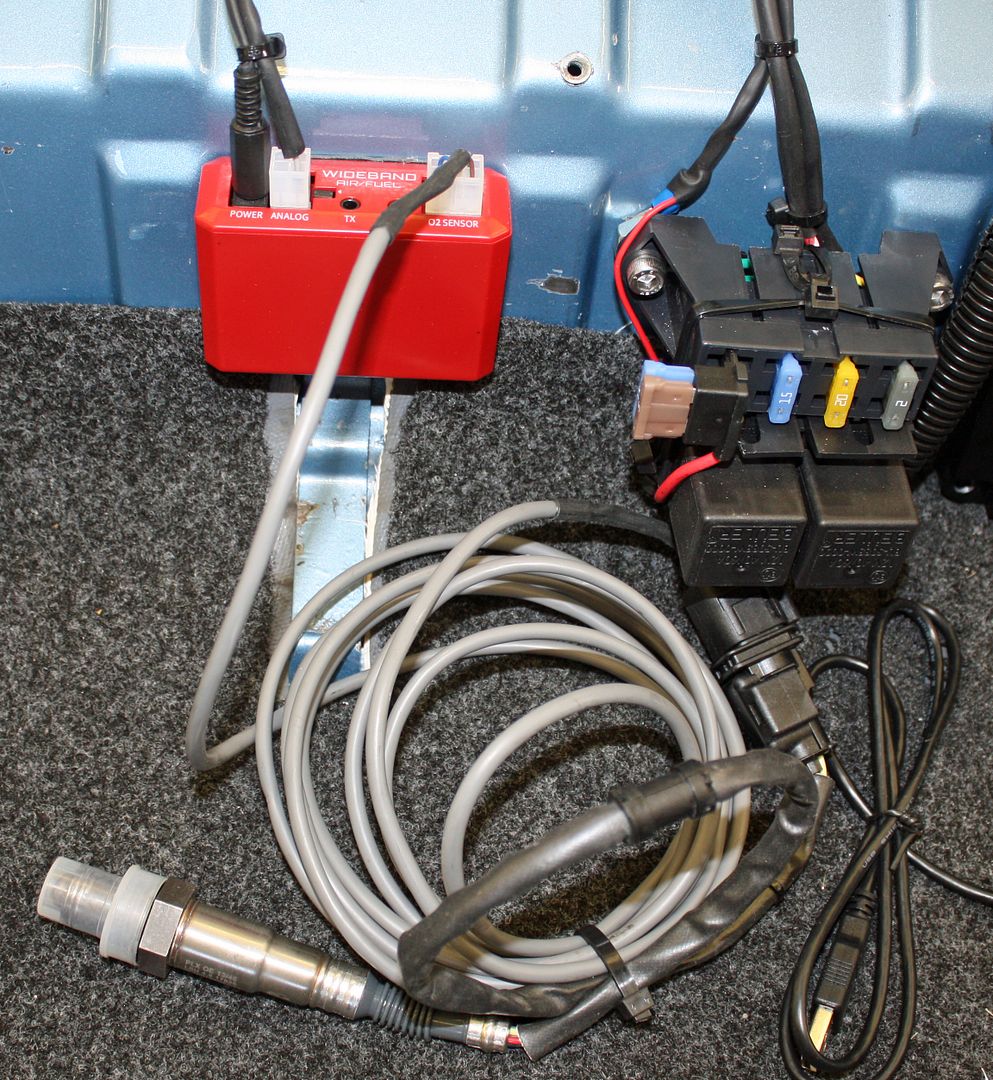
Three other wires from the ECU harness must be wired. Two go to the power harness and the other is the main ground for the ECU. All are now wired except the main ground. I will put the car on the lift to do that wiring. I fed all of the connectors through the hole and tied everything together. Richard's grommet for the main harness arrived late today and will be installed tomorrow. There are two connectors for hooking up the ECU to a computer, RGB and USB.
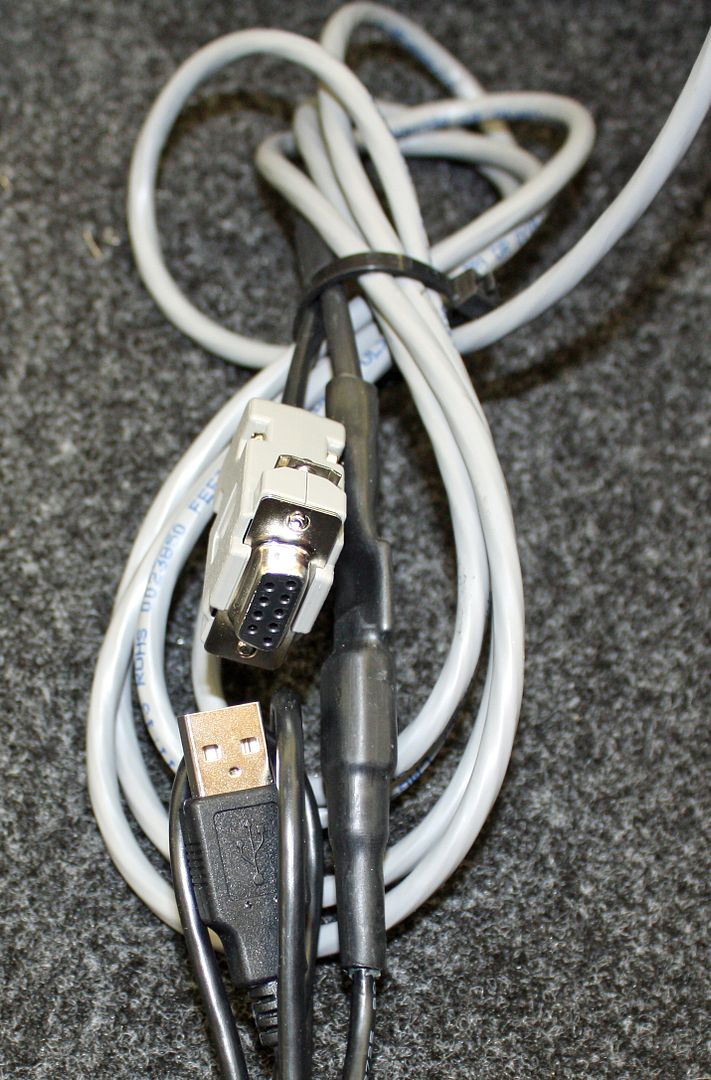


Three other wires from the ECU harness must be wired. Two go to the power harness and the other is the main ground for the ECU. All are now wired except the main ground. I will put the car on the lift to do that wiring. I fed all of the connectors through the hole and tied everything together. Richard's grommet for the main harness arrived late today and will be installed tomorrow. There are two connectors for hooking up the ECU to a computer, RGB and USB.


 11-08-2018, 10:27 PM
#99
Racer
Thread Starter
THE EFI WIRING IS DONE!!
I ran the ECU ground wire to the battery and tidied up the wiring in the engine bay as well as the trunk. I decided to run the O2 sensor wiring into the engine bay. Once the engine is back in the car, I can run the harness from there back to the sensor. Richard's grommet kit worked well.
I have done a lot of wiring in my past but this was the first time I had used connectors and crimped terminals like I did here. There was a learning curve. Overall, installing the fuel injection system has been more difficult than I thought it would be. The good side is that I learned new things.
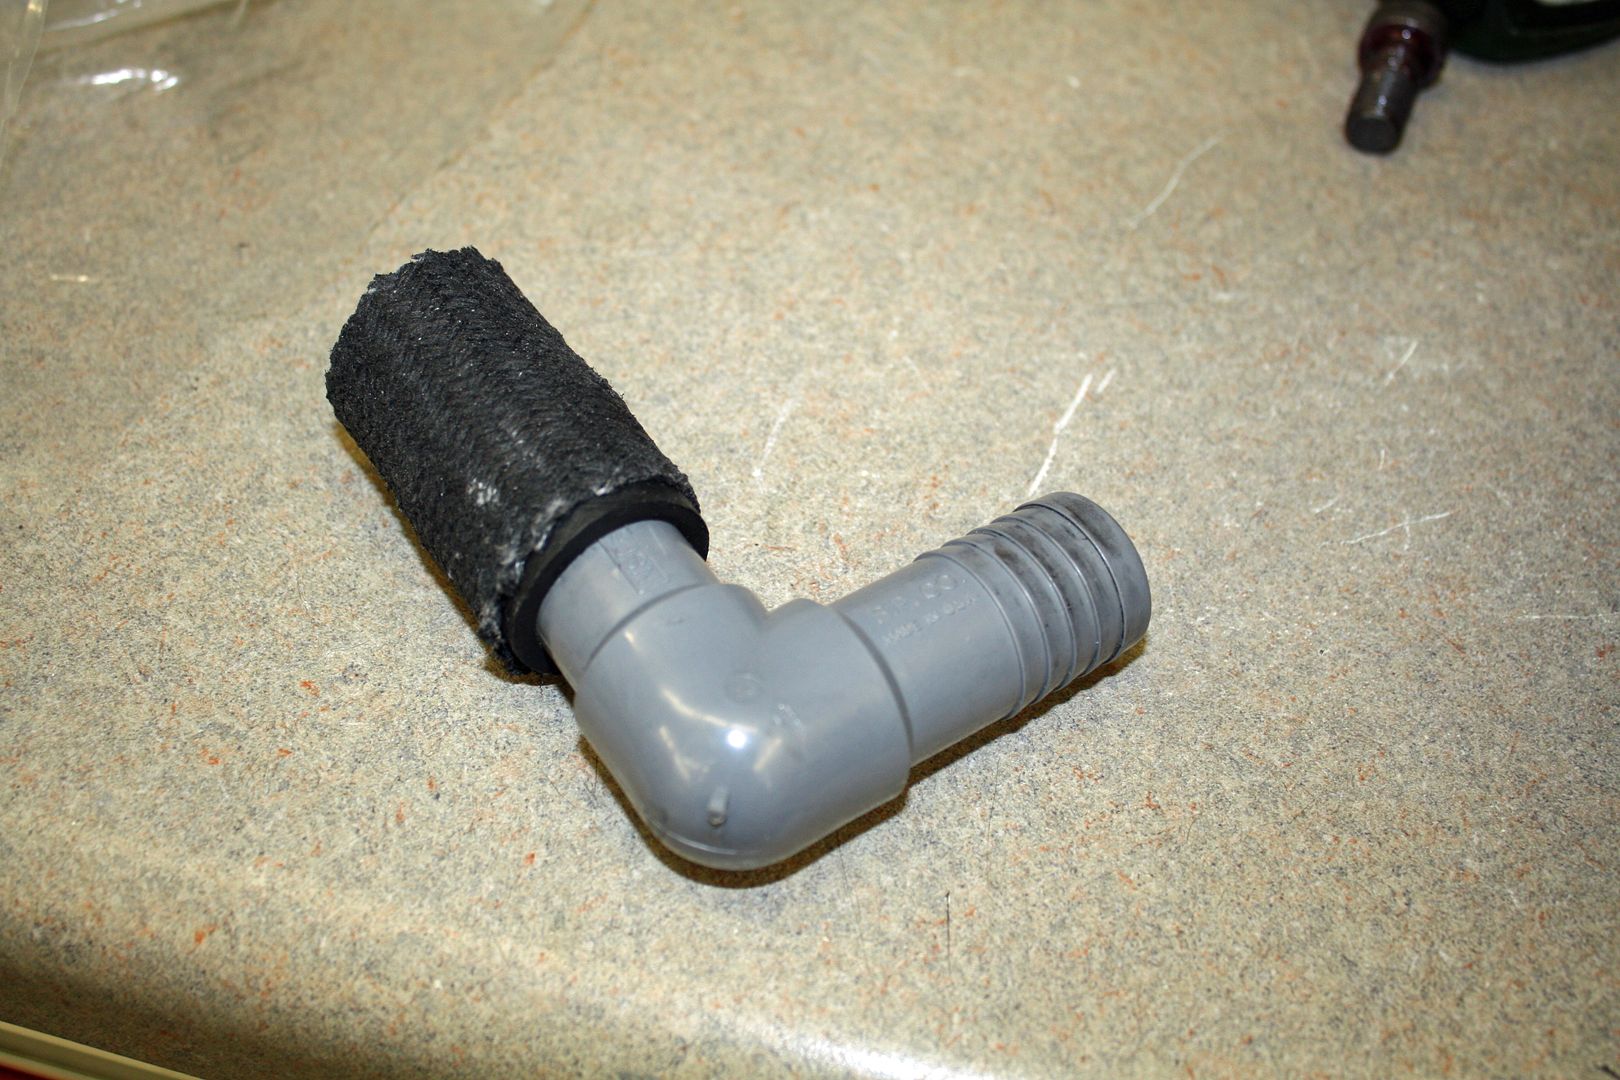
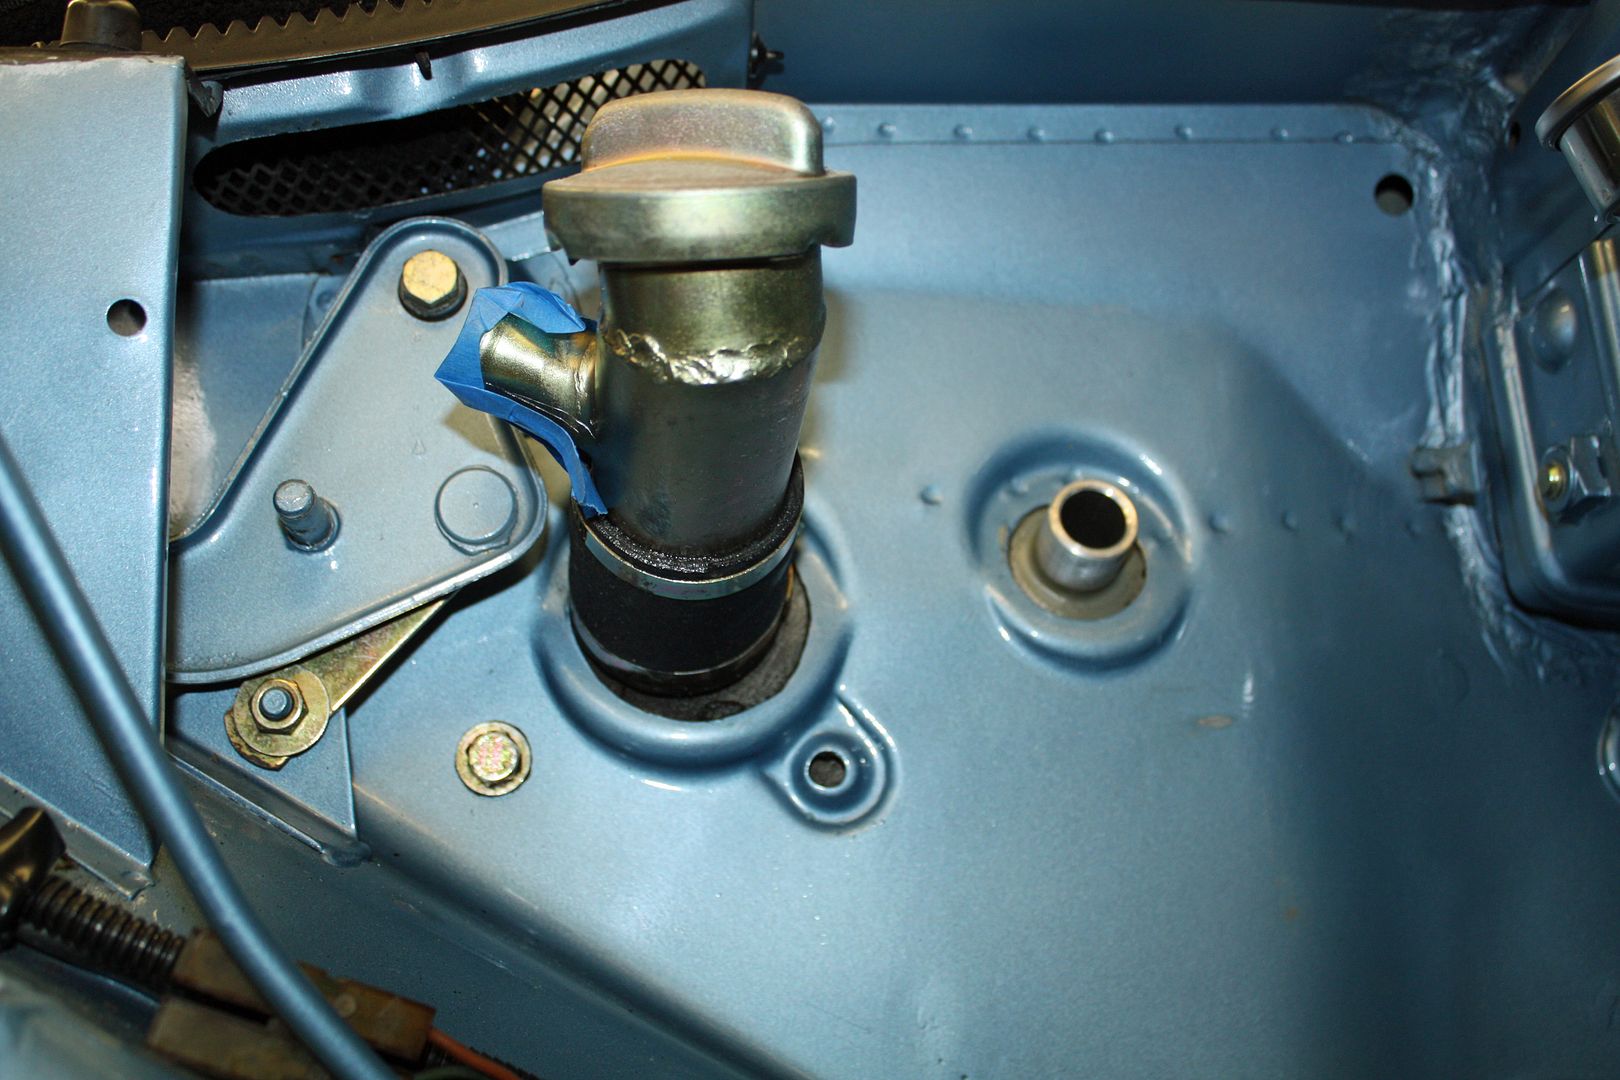
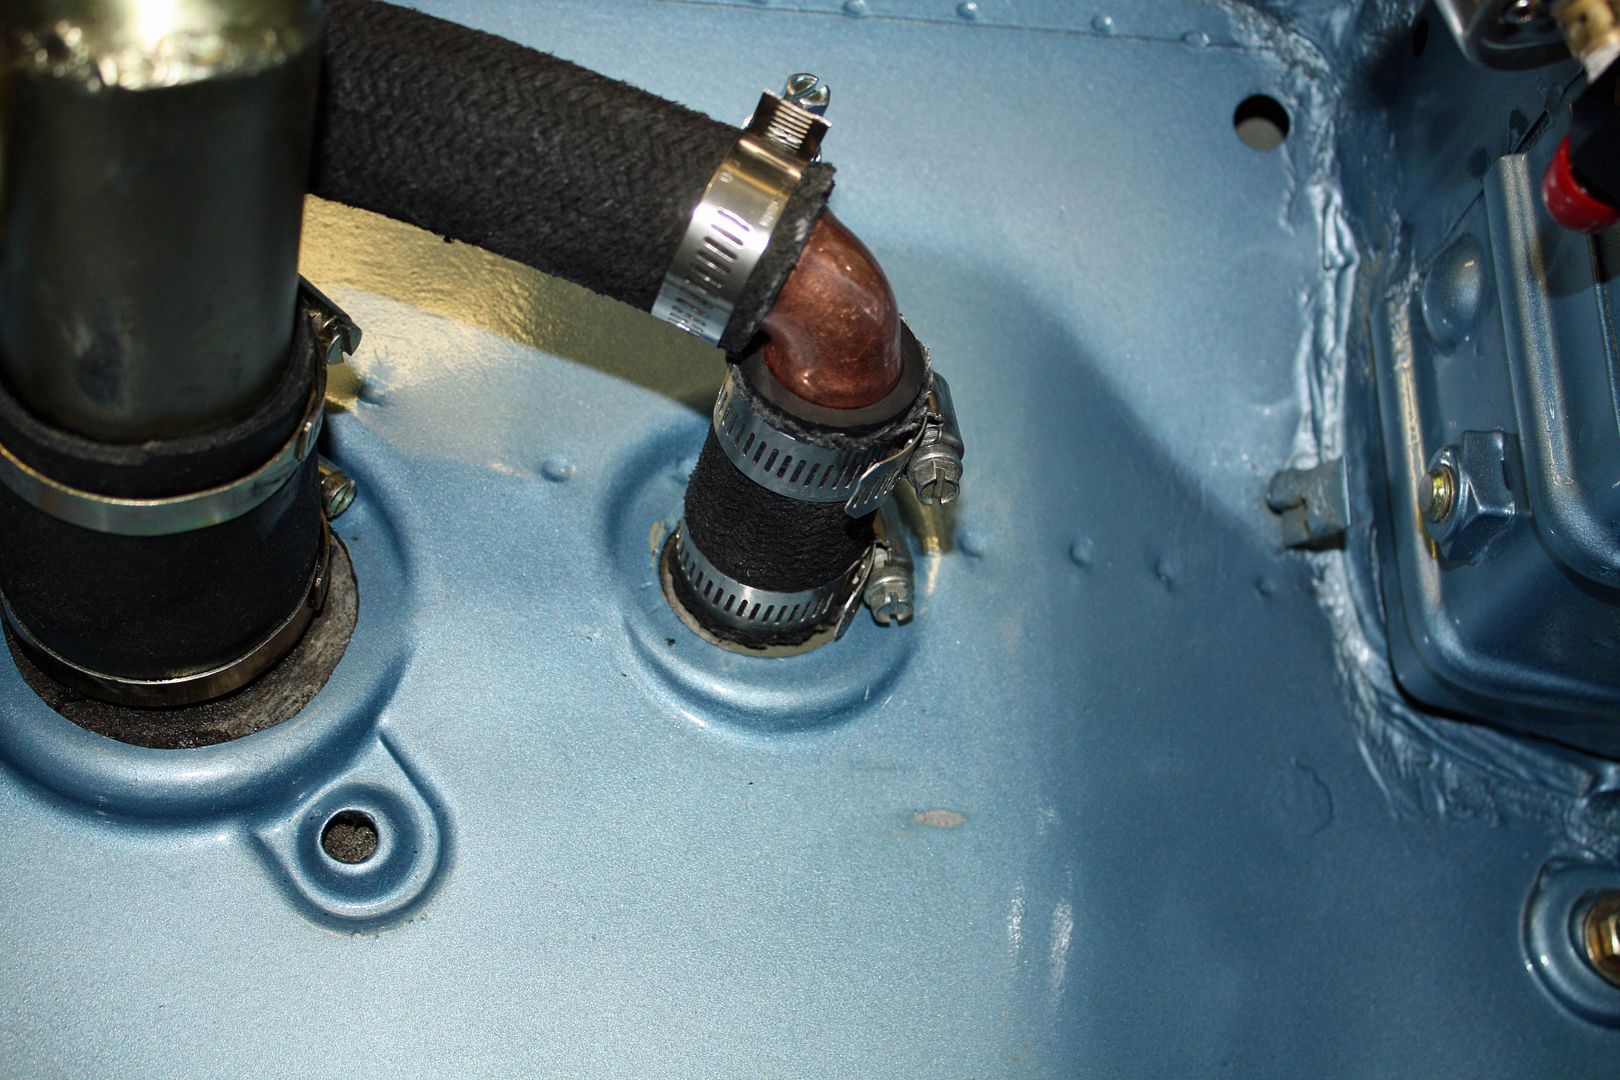
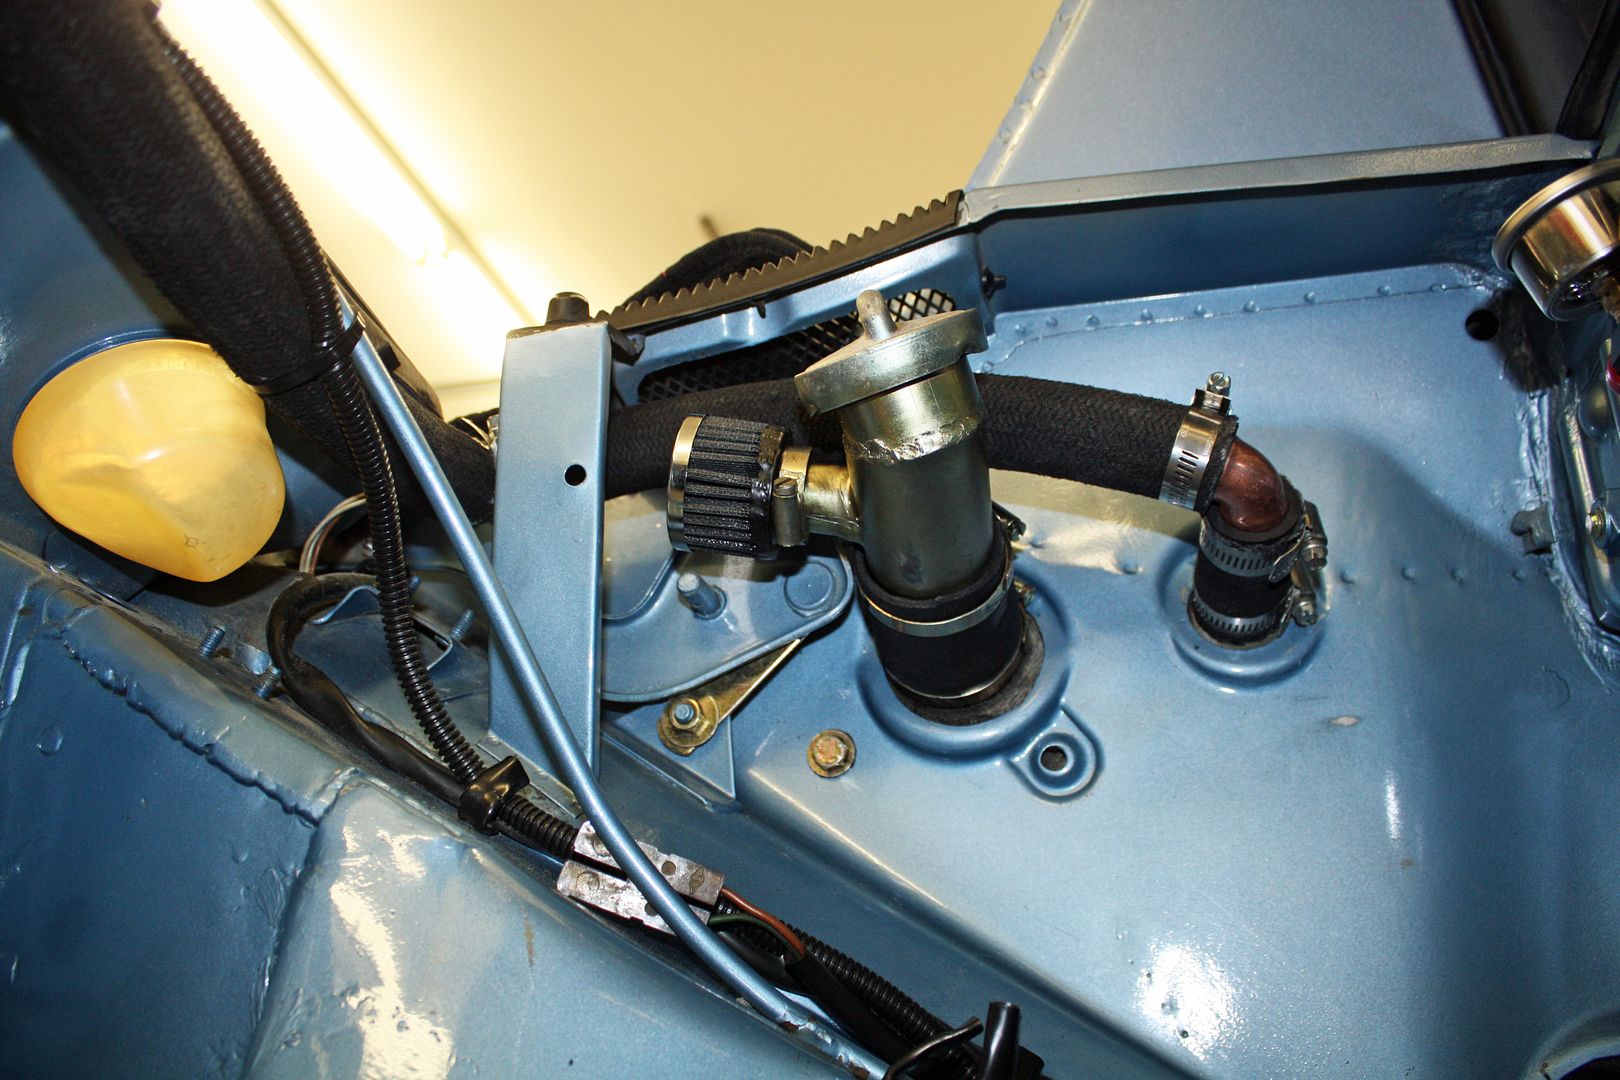
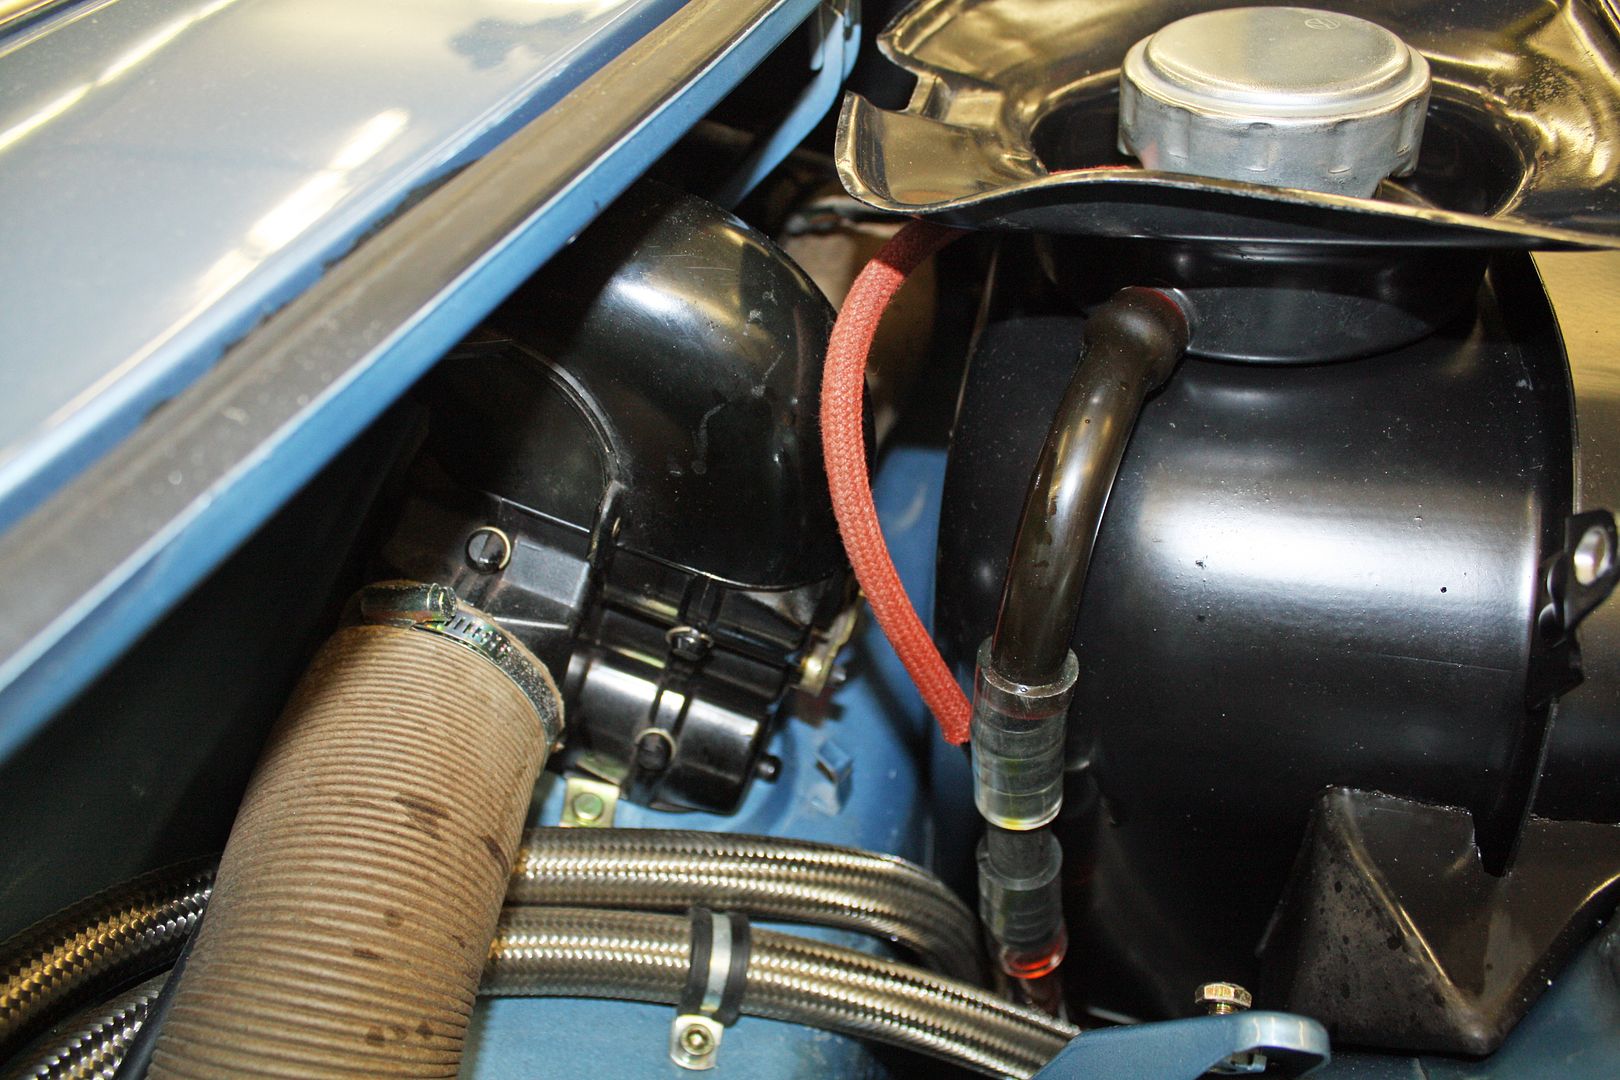
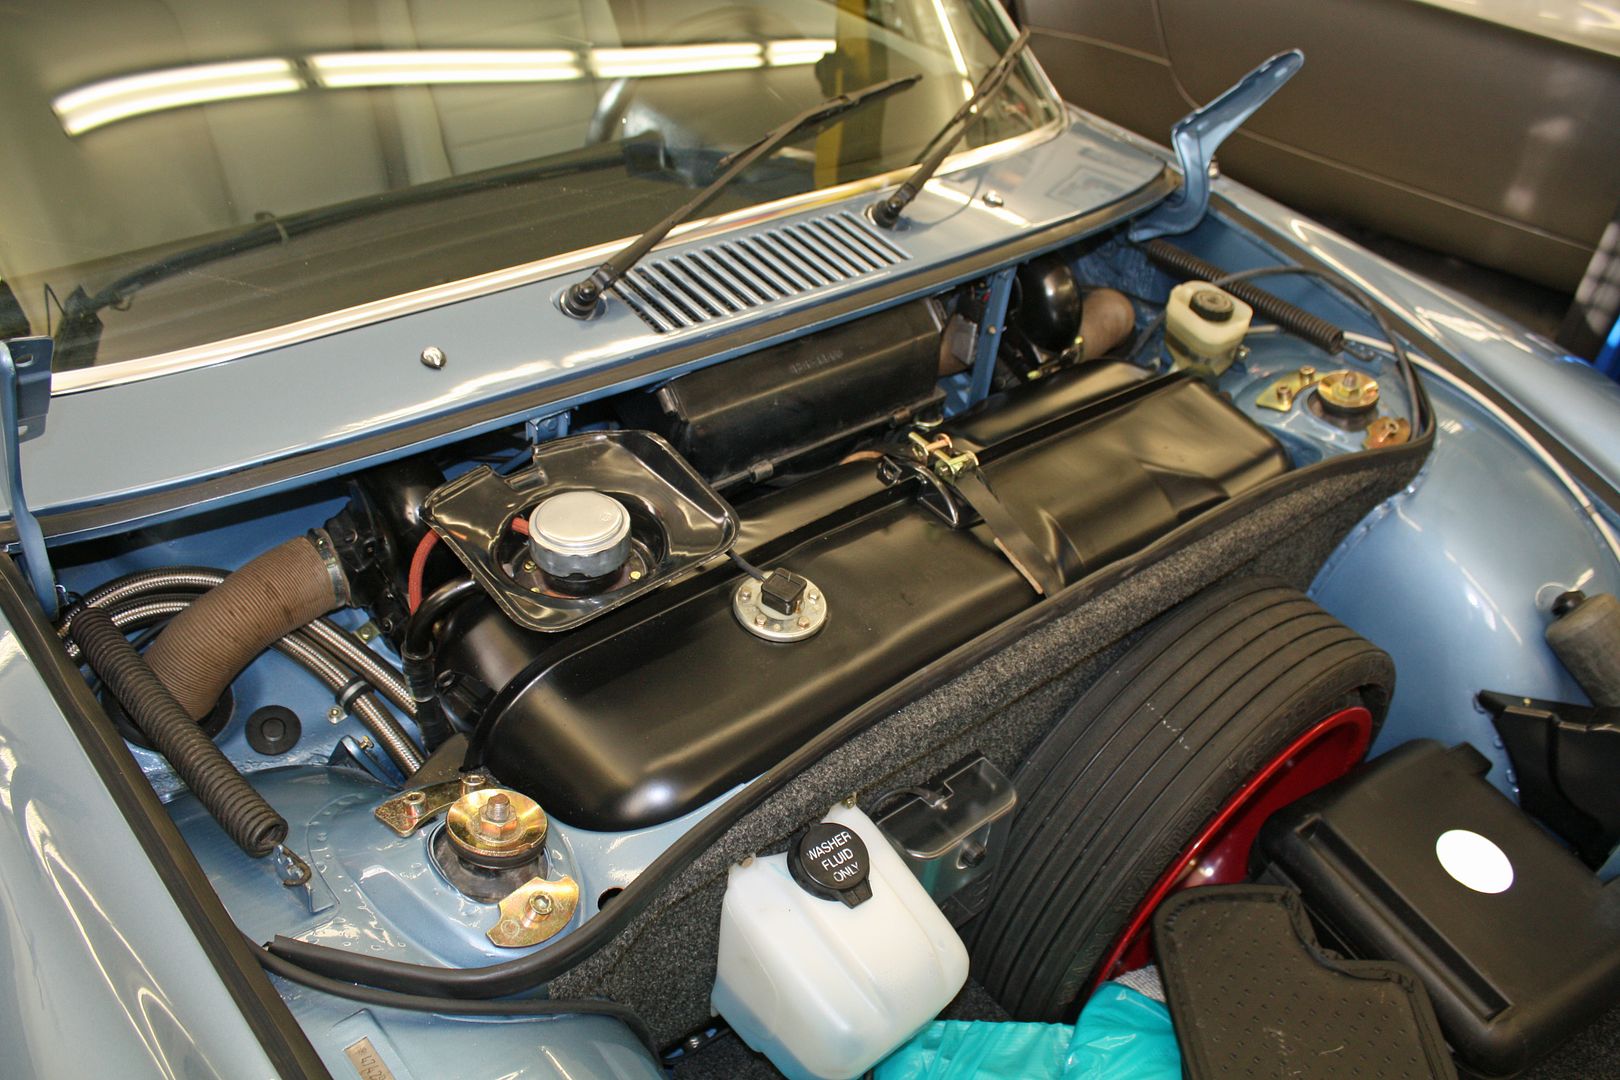
The engine bay had been covered with a fine oil film. Ed had told me that it was blowing oil from improper crankcase ventilation. The setup when I bought the car was that the hose that goes from the gas tank to the inlet on the motor came from the oil filler neck. The other vent from the oil tank had a K & N filter installed.
Last summer, Hendrick Porsche had a Porsche 70th birthday party and had a number of vintage cars on display in their new showroom. One of them was a 914-6. I noticed that this car was vented the reverse of mine. I asked him if he had any issues with oil blowing into the engine bay and he said he didn't.
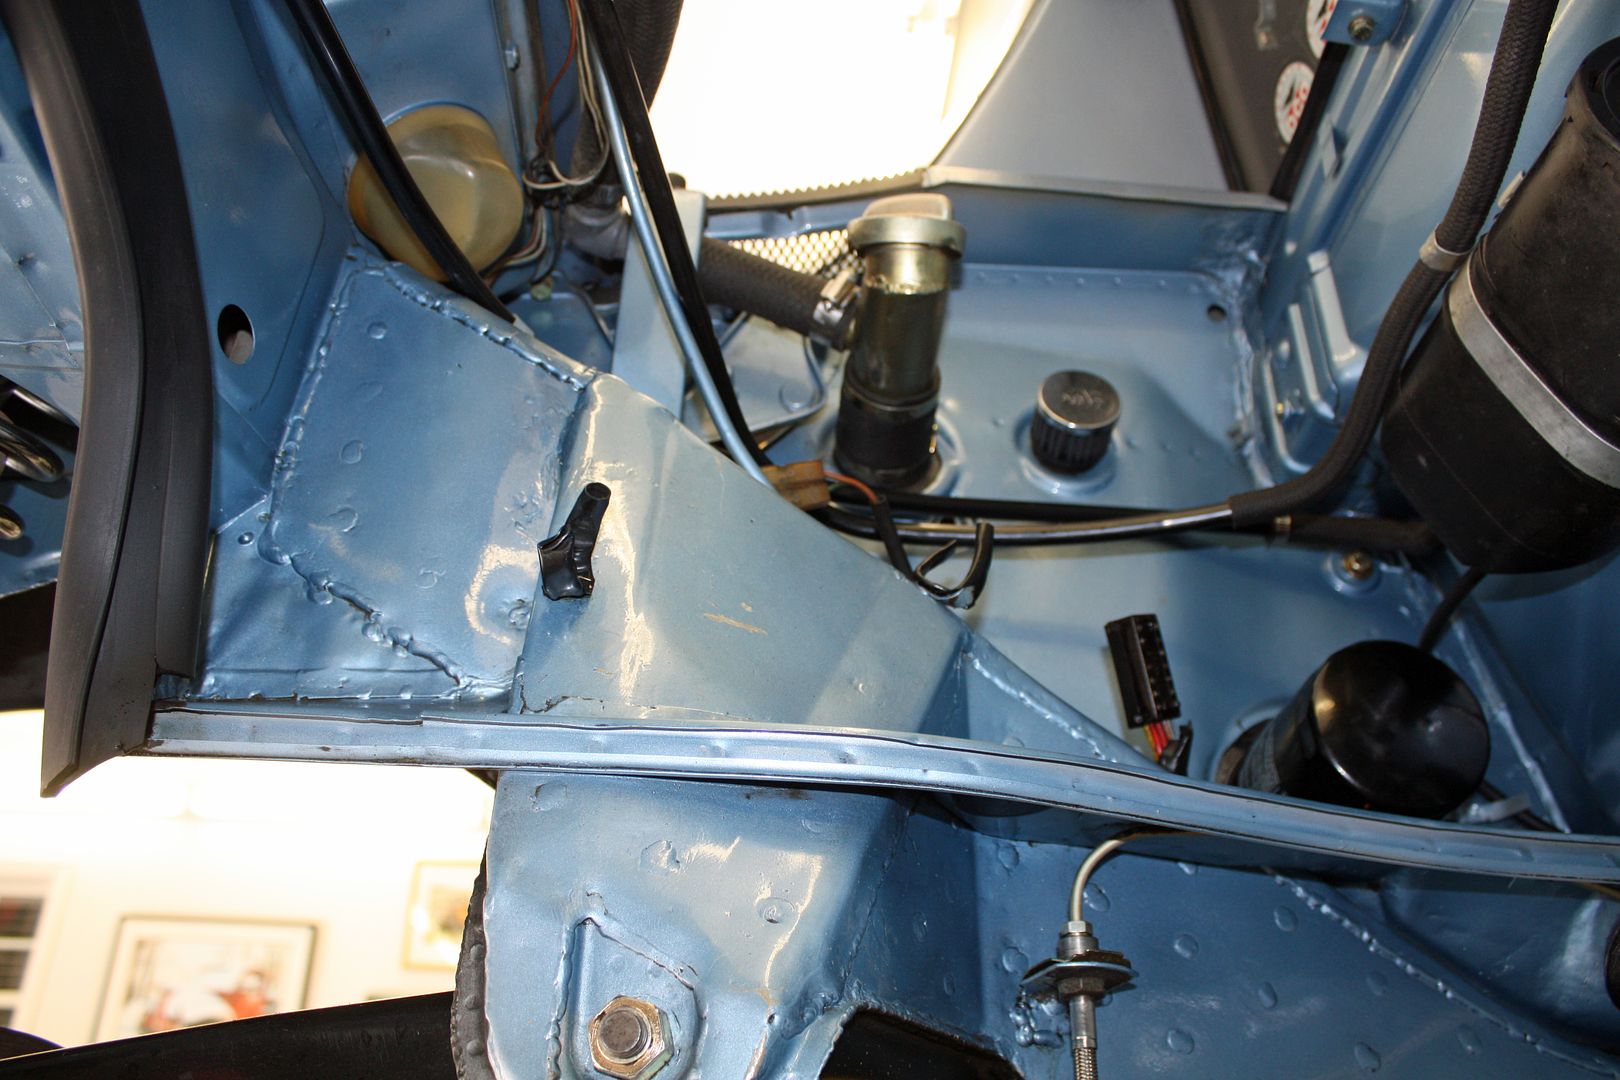
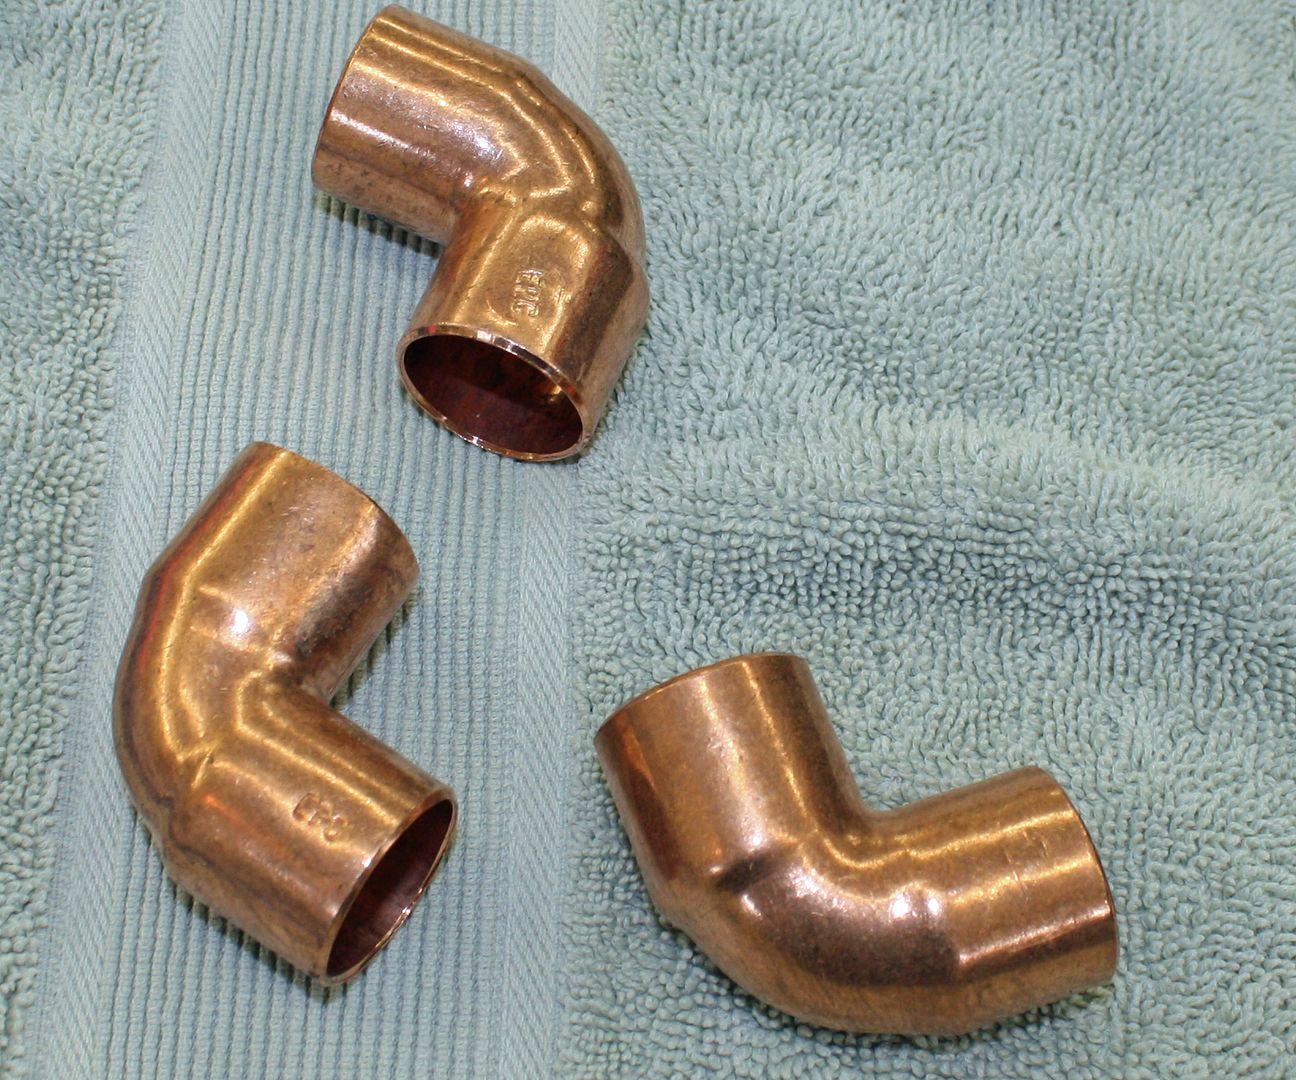
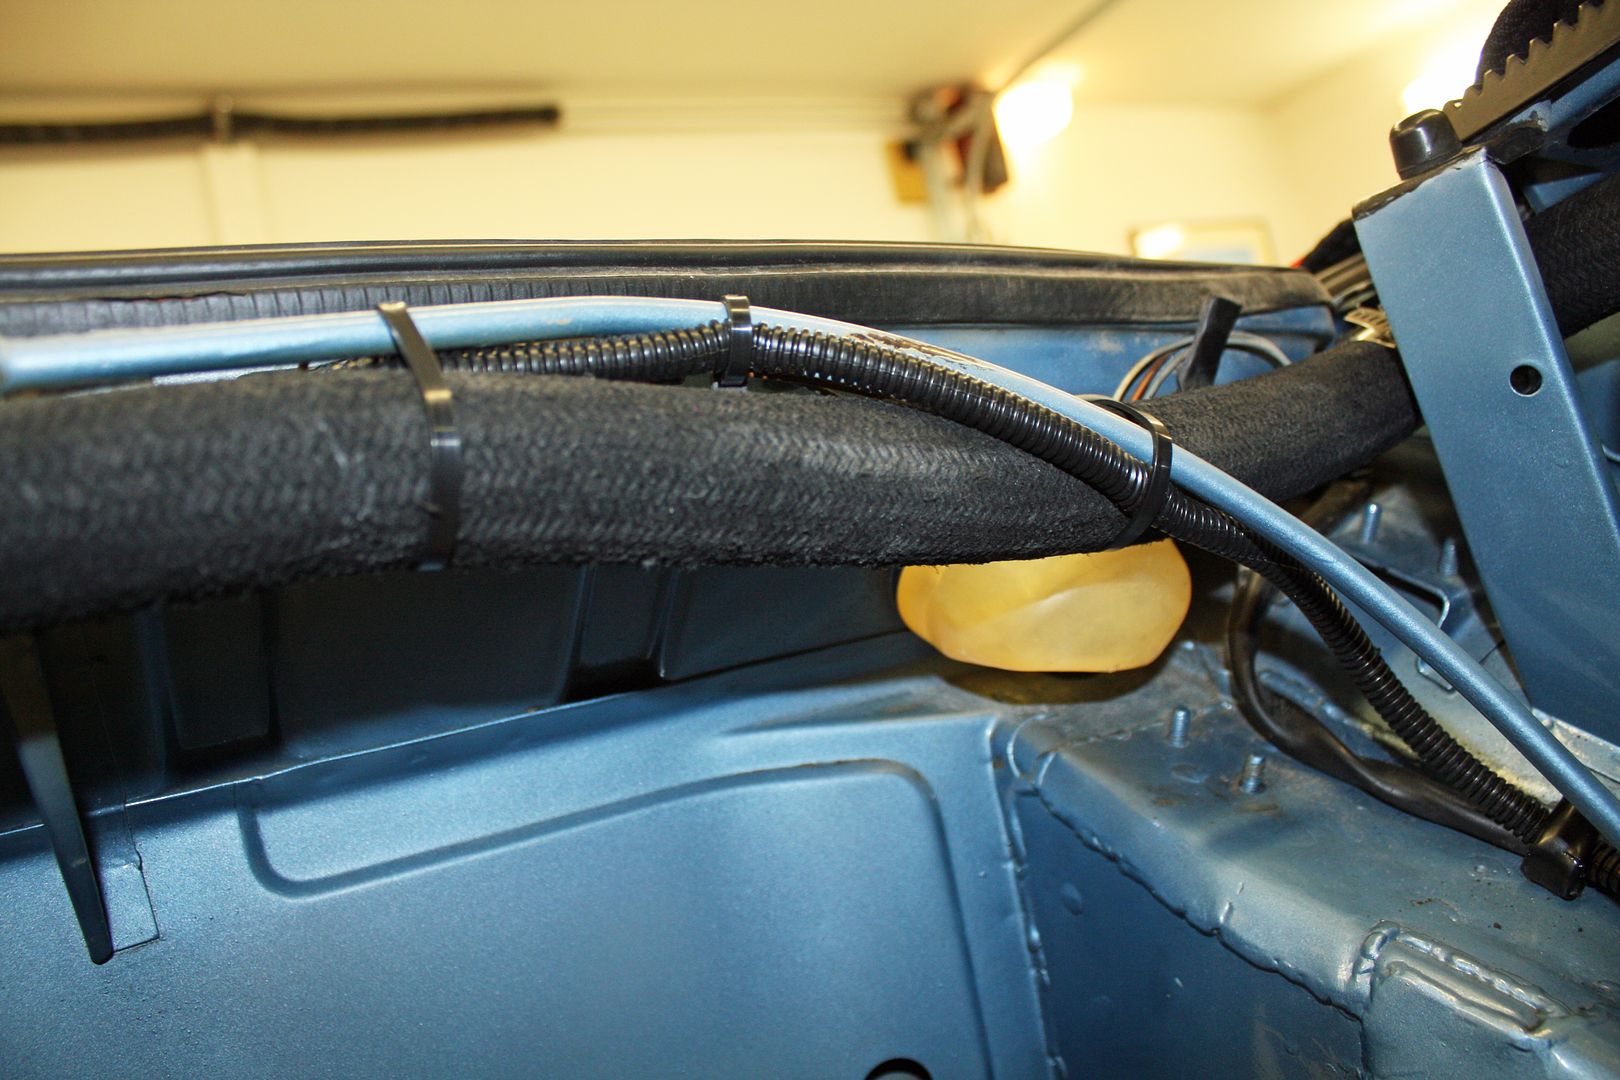
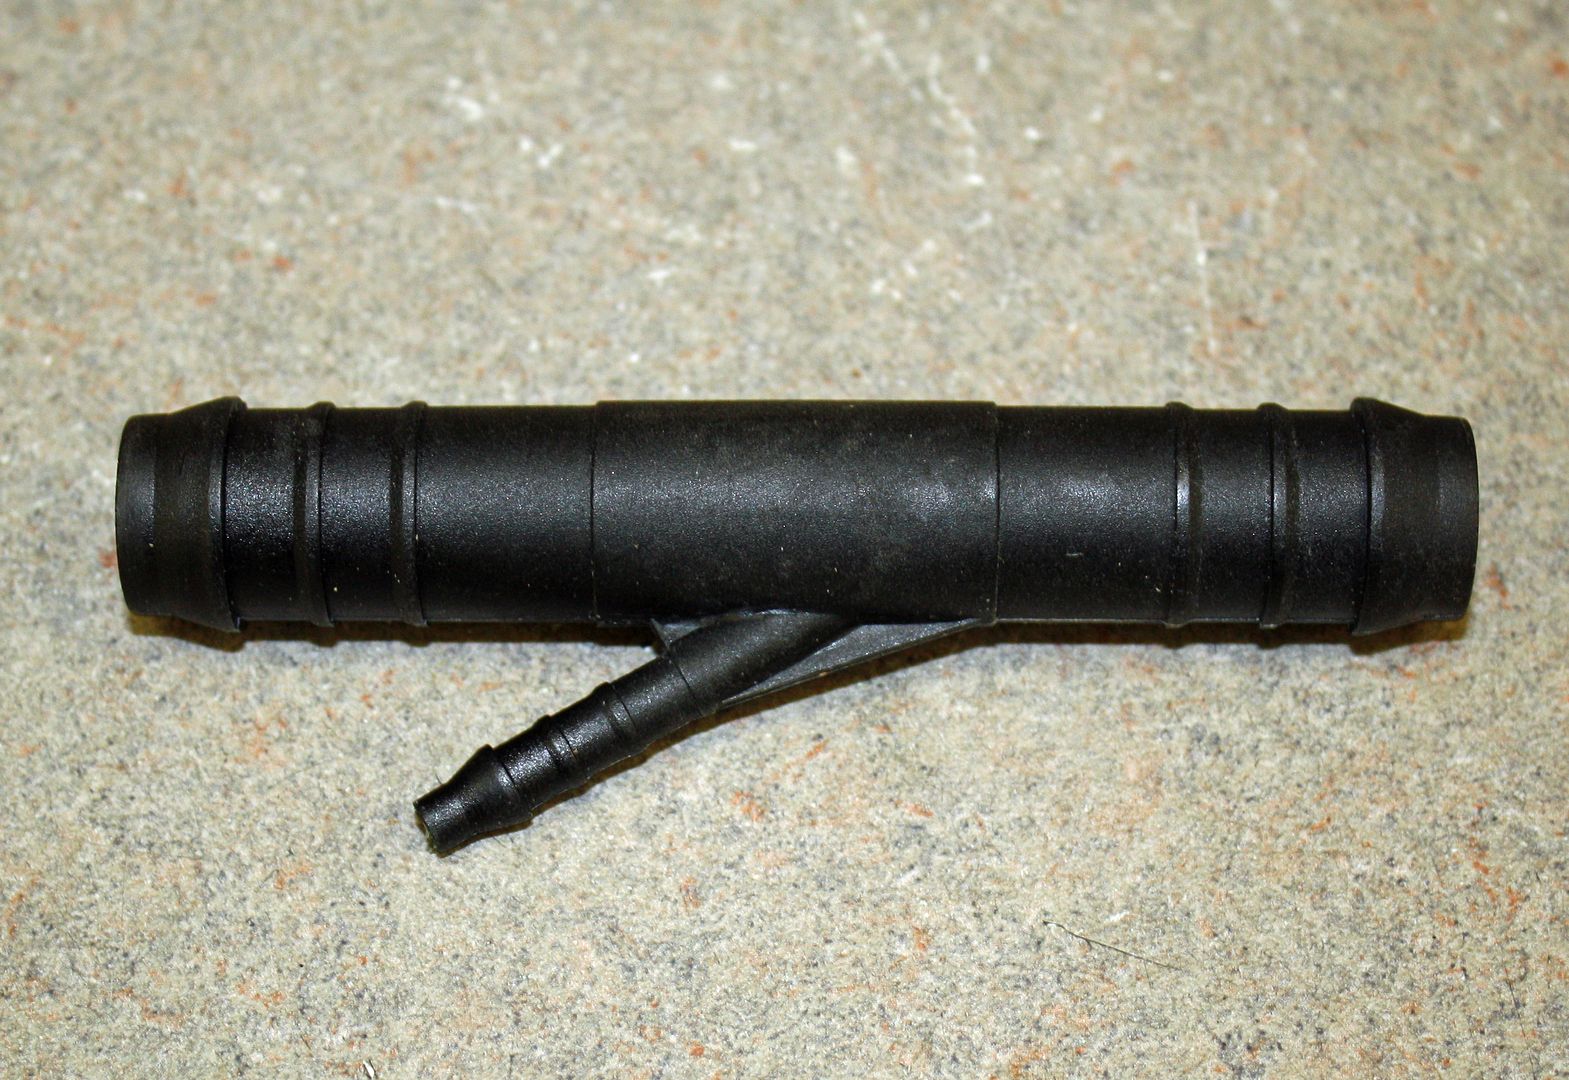
Since I was working in the engine bay, I decided to address this venting issue. I had purchased new hose. To run the lines the way I wanted, I needed at least one extra elbow. The one elbow that was in the system was made out of plastic and was bulky. A trip to the local hardware store netted me some copper elbows that were compact. I ran a short piece of hose from the front tank vent to an elbow, ran that line to the rear of the car above the oil filler neck to another elbow and then ran the line over to the center of the car. I made the line plenty long and will cut it to size once the motor is in. I installed the K & N filter on the oil filler neck. Hopefully this works.
I ran the ECU ground wire to the battery and tidied up the wiring in the engine bay as well as the trunk. I decided to run the O2 sensor wiring into the engine bay. Once the engine is back in the car, I can run the harness from there back to the sensor. Richard's grommet kit worked well.
I have done a lot of wiring in my past but this was the first time I had used connectors and crimped terminals like I did here. There was a learning curve. Overall, installing the fuel injection system has been more difficult than I thought it would be. The good side is that I learned new things.


The engine bay had been covered with a fine oil film. Ed had told me that it was blowing oil from improper crankcase ventilation. The setup when I bought the car was that the hose that goes from the gas tank to the inlet on the motor came from the oil filler neck. The other vent from the oil tank had a K & N filter installed.

Last summer, Hendrick Porsche had a Porsche 70th birthday party and had a number of vintage cars on display in their new showroom. One of them was a 914-6. I noticed that this car was vented the reverse of mine. I asked him if he had any issues with oil blowing into the engine bay and he said he didn't.
Since I was working in the engine bay, I decided to address this venting issue. I had purchased new hose. To run the lines the way I wanted, I needed at least one extra elbow. The one elbow that was in the system was made out of plastic and was bulky. A trip to the local hardware store netted me some copper elbows that were compact. I ran a short piece of hose from the front tank vent to an elbow, ran that line to the rear of the car above the oil filler neck to another elbow and then ran the line over to the center of the car. I made the line plenty long and will cut it to size once the motor is in. I installed the K & N filter on the oil filler neck. Hopefully this works.


 11-11-2018, 05:21 PM
#100
Racer
Thread Starter
I installed new engine bay seals.

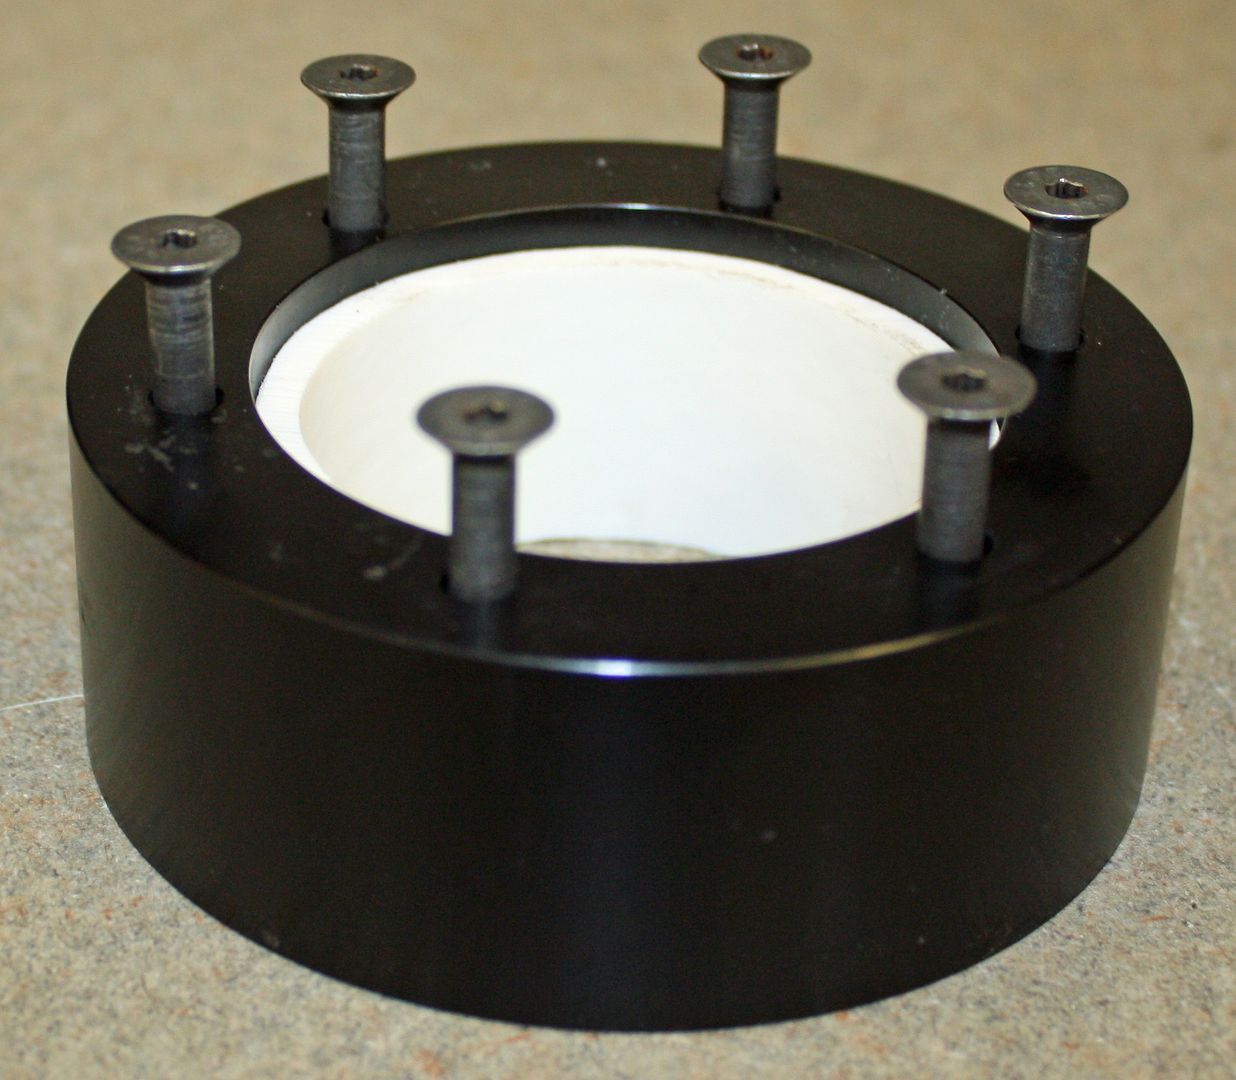
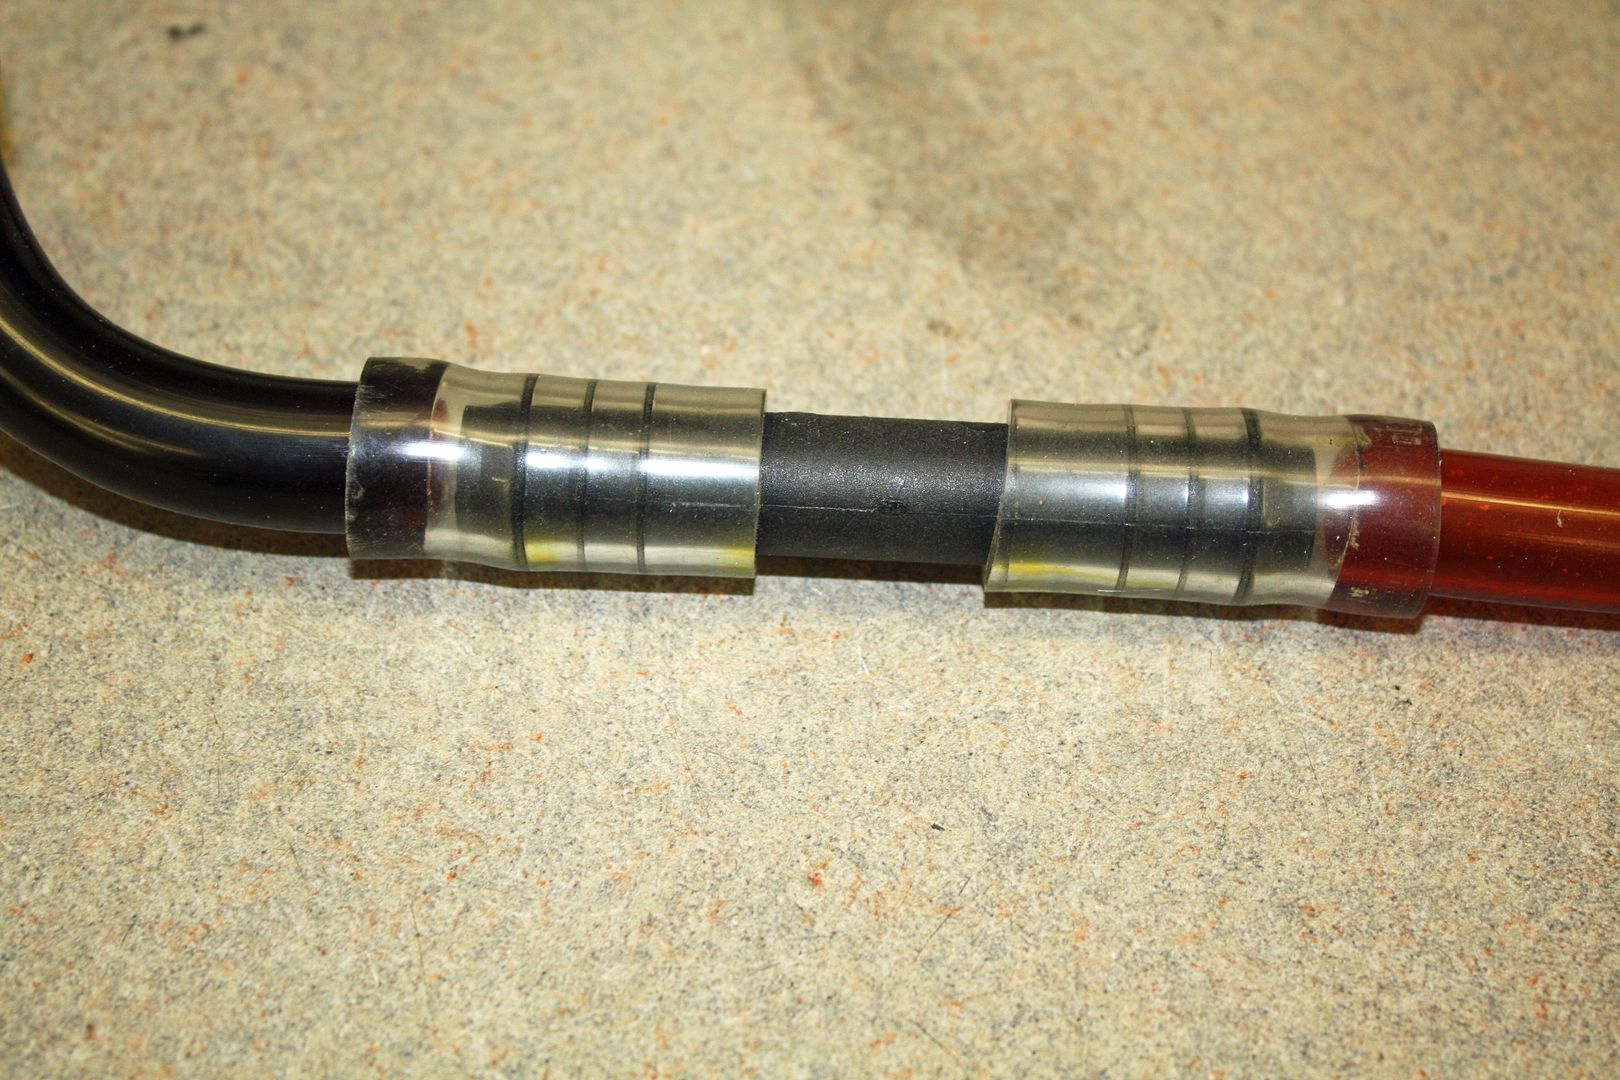
I had removed the charcoal canister from the engine bay. As I mentioned earlier, I had ordered a new gas tank in lieu of having the original one cleaned and sealed. However, when I tried to install the expansion tank on the new tank, the weld seam was taller than on the original tank which made the expansion tank sit too high. George at Automobile Atlanta is working on this issue with Dansk. I asked George if I needed the expansion tank since I was eliminating the charcoal canister and he said I did not need it as the early cars did not have one. They had a "Y" fitting that fit into the fuel tank overflow line. I ordered one of these from George. The fitting and the original line are about the same size and, since the old vent hose is stiff, I could not insert the fitting. I had some clear plastic tubing in my drawer that was just enough larger to fit over both the vent hose and the fitting. I cut everything to size and attached the small vent line from the fuel filler neck to the fitting. I have read that I may have gas odor issues with this setup. I'll deal with that issue if it occurs.

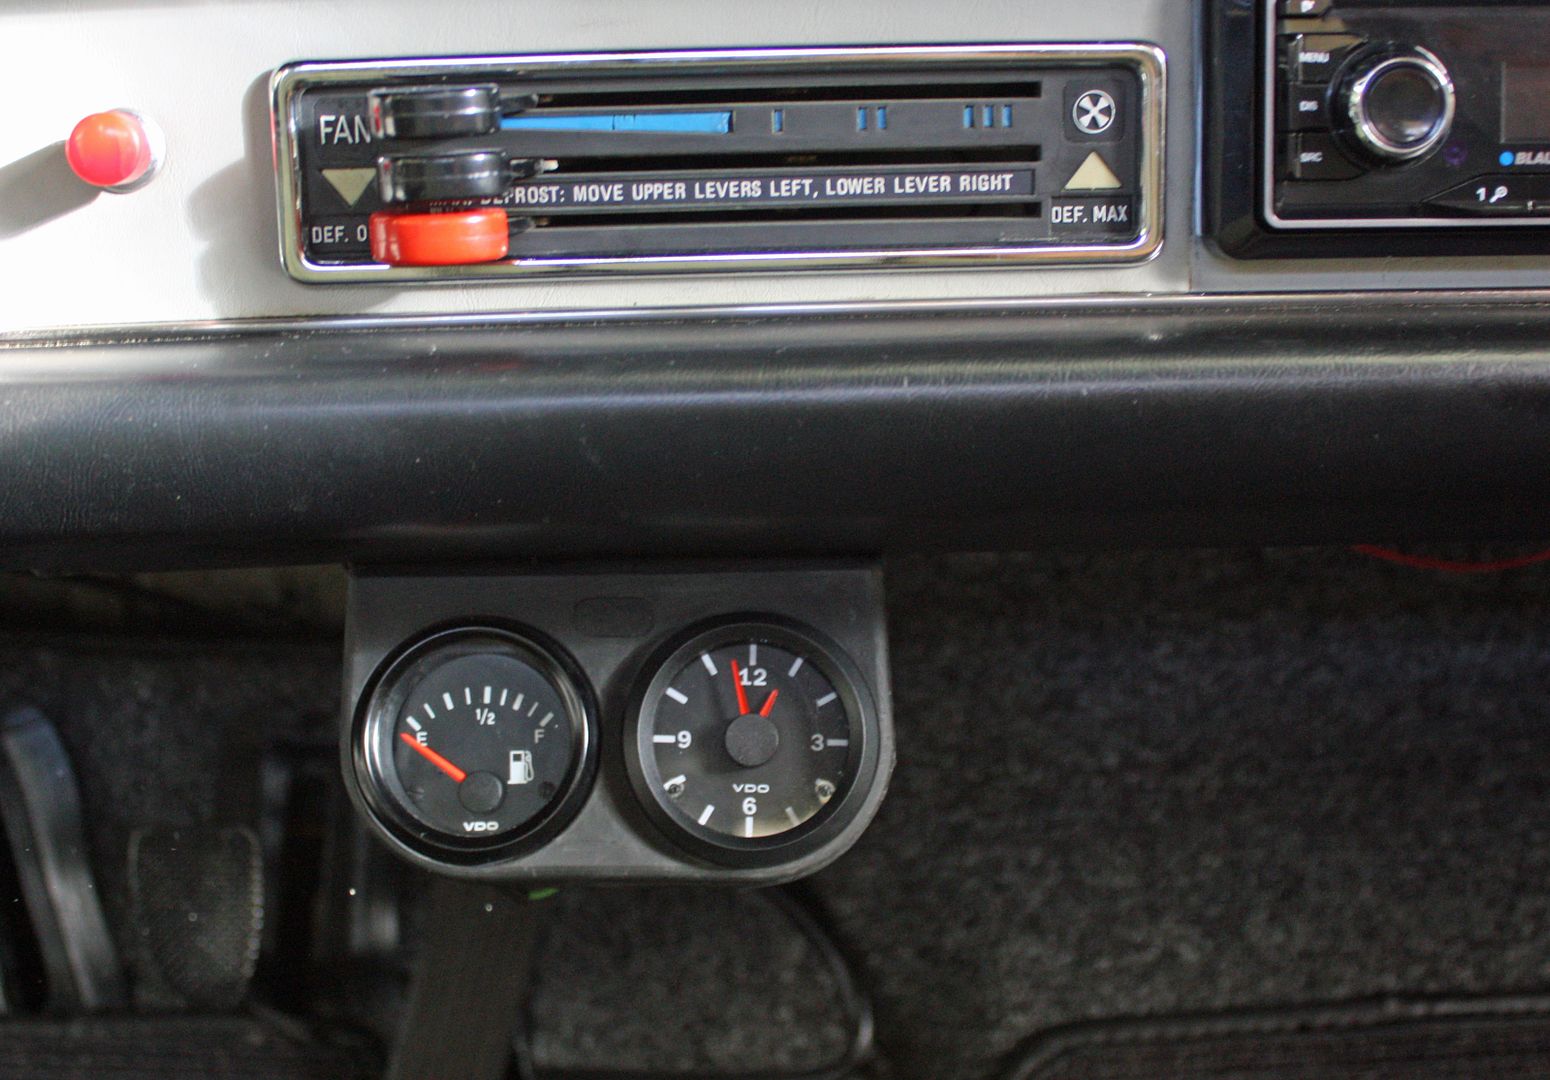
Since I will not be using the O2 sensor gauge that came in the car, I have been thinking about what gauge to place in that hole. Last Sunday while I was in the garage setting my clocks back for daylight savings, it occurred to me that there was no clock in the car. I found a VDO clock on eBay and installed it today.


 11-19-2018, 04:38 PM
#102
Racer
Thread Starter
Grunt work was done last week. I went through each of the bags of parts that were tagged as removed from the car when the engine was taken out. I cleaned up each of the parts and ordered new parts if necessary.
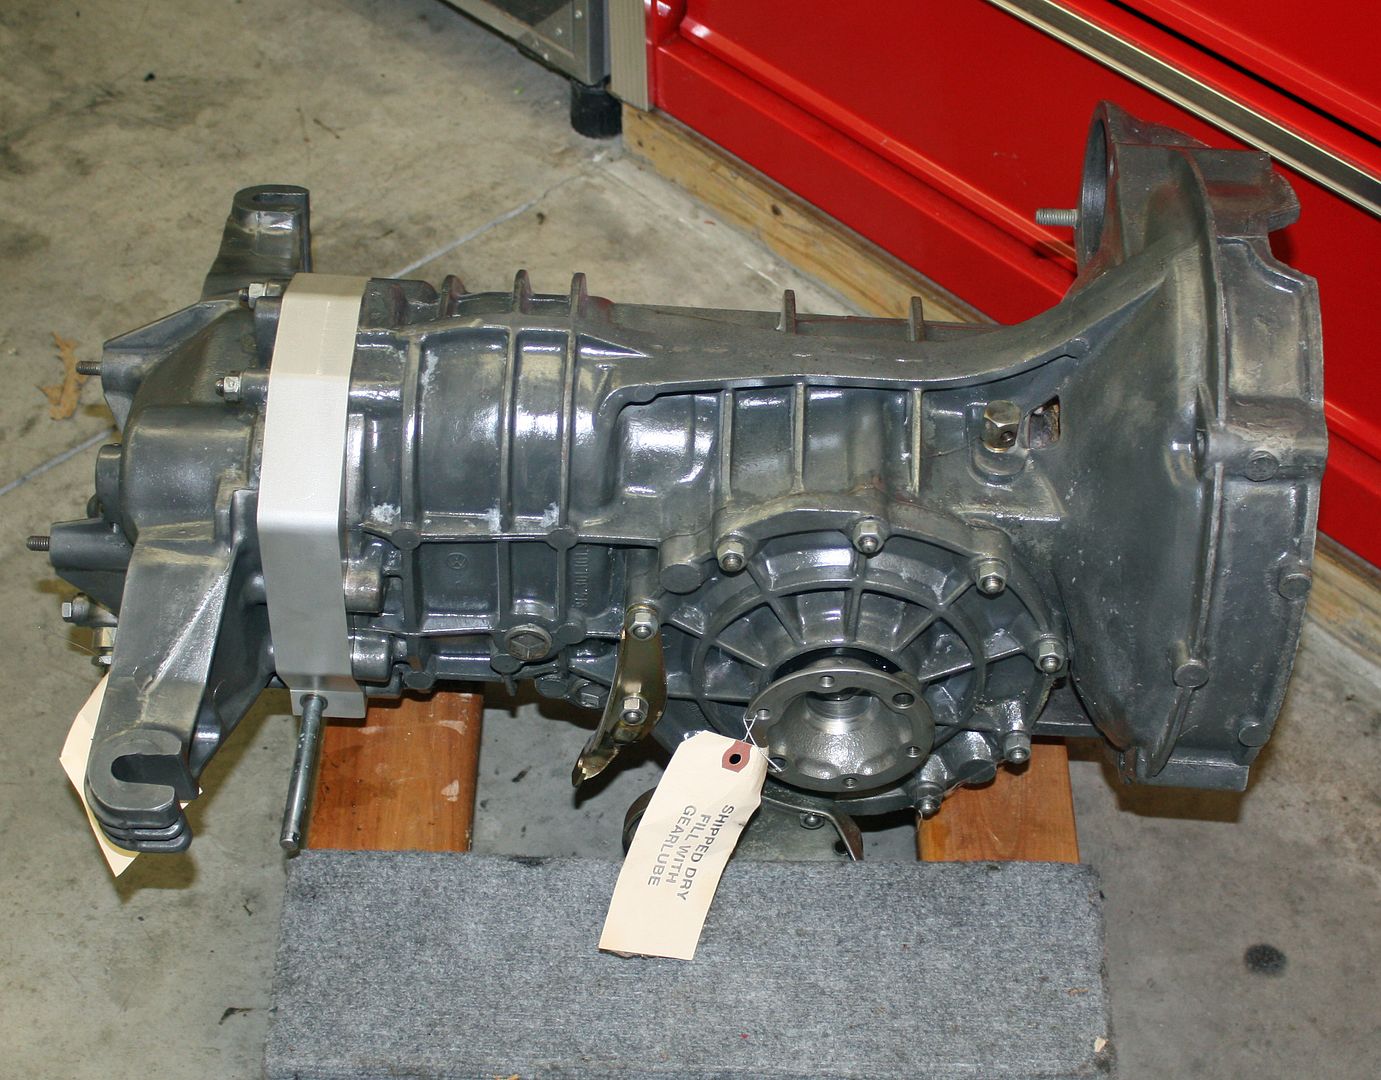
I also took the transmission out of the bag is has been in for the past thirteen years since it was rebuilt.
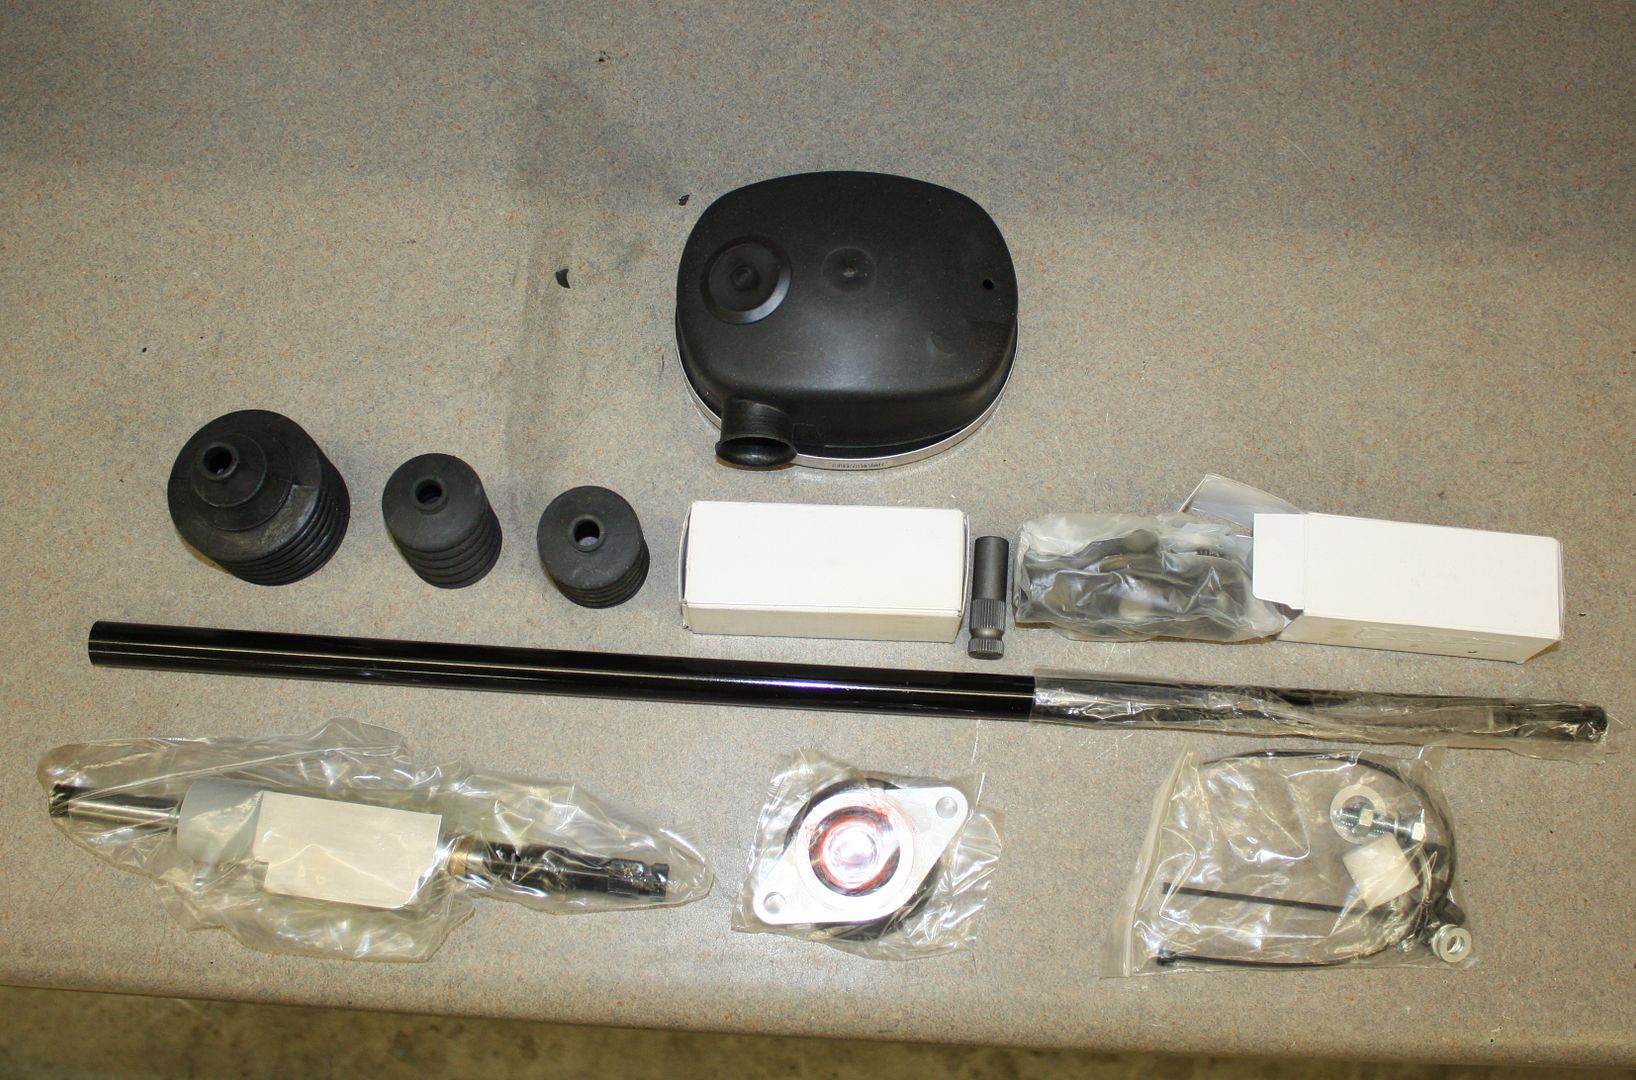
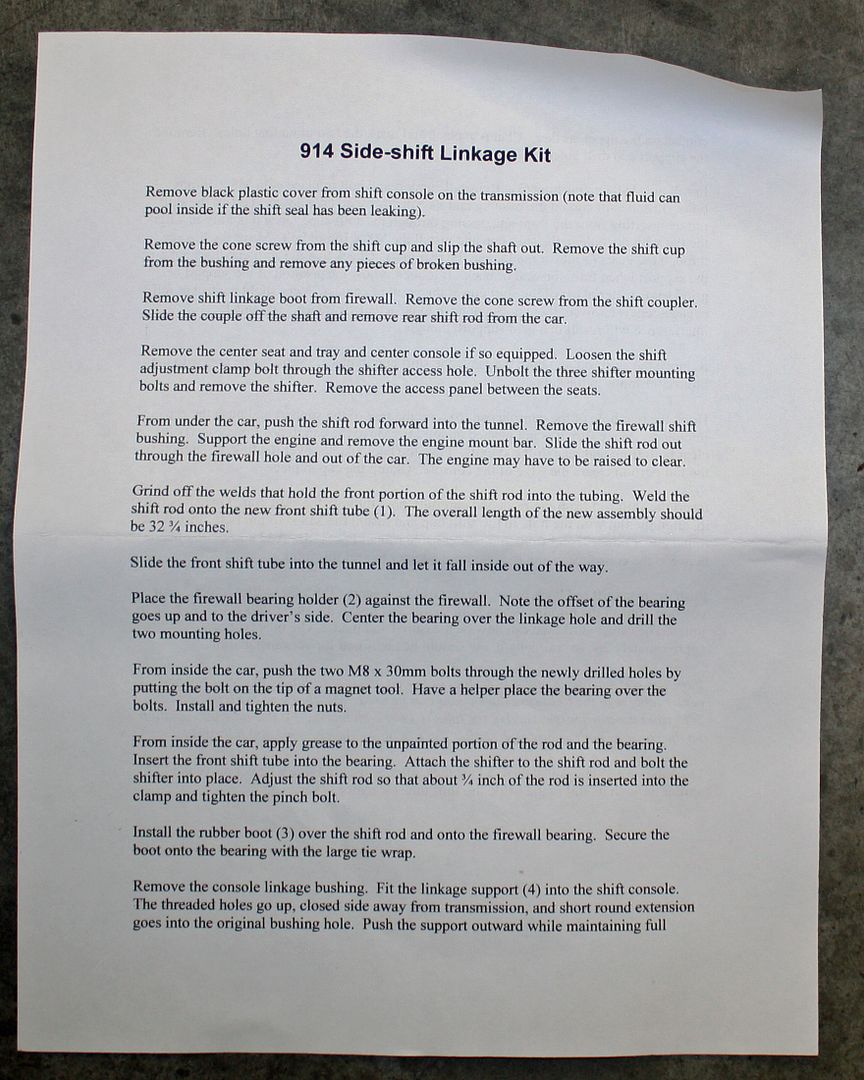
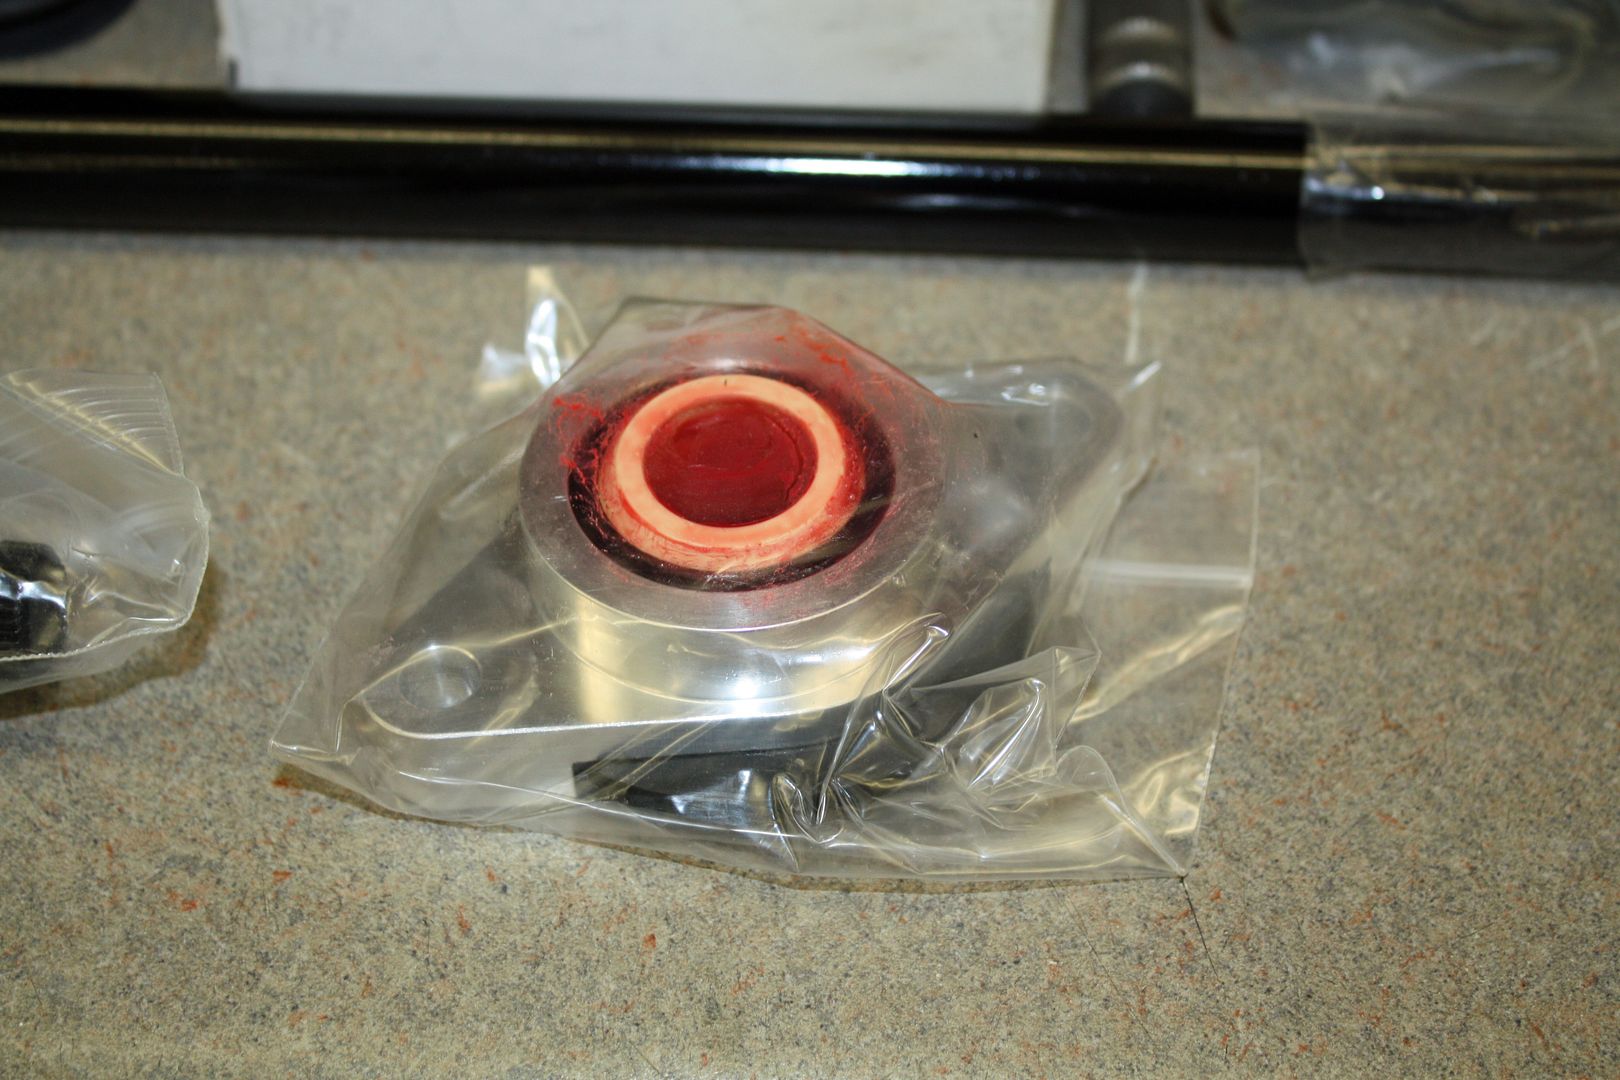
Another item that came with the car is a brand new JWest side shift linkage kit. I don't know if I will install this. Anyone have any experience with this product?

I also took the transmission out of the bag is has been in for the past thirteen years since it was rebuilt.
Another item that came with the car is a brand new JWest side shift linkage kit. I don't know if I will install this. Anyone have any experience with this product?


 11-19-2018, 04:51 PM
#103
Racer
Thread Starter
We made a quick trip to icy Indiana late last week to visit my mother-in-law. We celebrated her 94th birthday at the assisted living center where she now lives. We were going to drive there on Thursday but left a day early upon seeing the weather forecast. And we were glad we did as we woke up to over a 1/4" of ice on our car Thursday morning. Another reason we moved south from Indiana!!!
I had to remove the seats to move the fuel regulator so I could access the rear of the bolts. In doing so, I accidentally snapped off one of the pot metal seat adjuster handles. I ordered a new pair of plastic ones and installed one of them today. To do so, the old rivets have to be drilled out and new rivets installed. The rivets had to be drilled out from the rear as well as the front. Once the pot metal piece was removed from the seat track, I mounted the new handle with a zip tie so I could drill the holes from the rear and then fastened it.
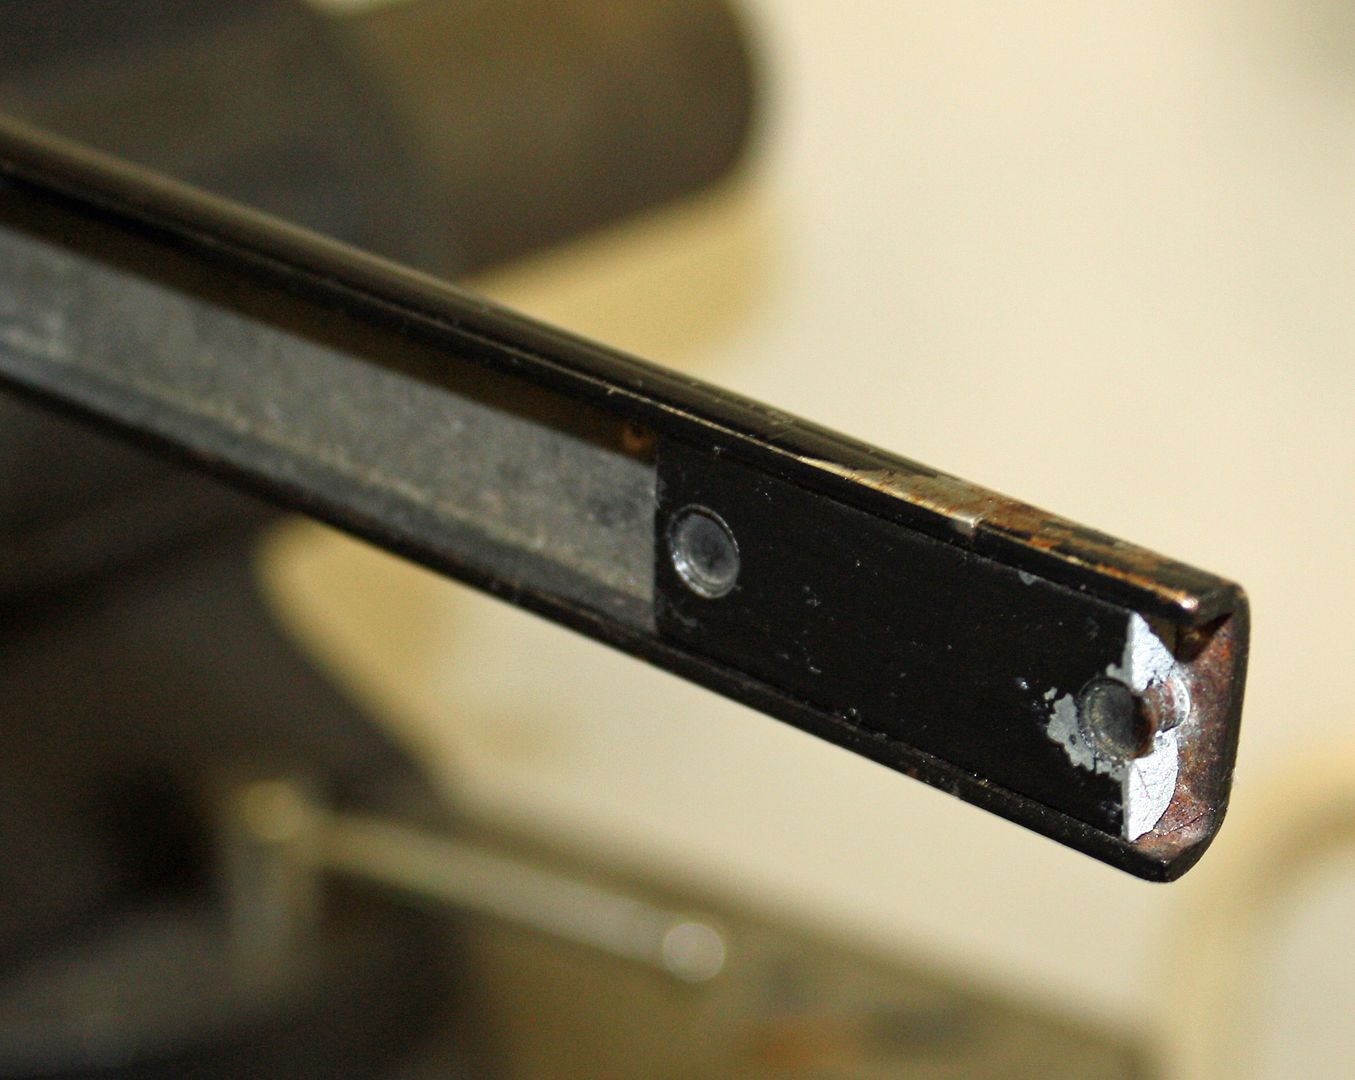
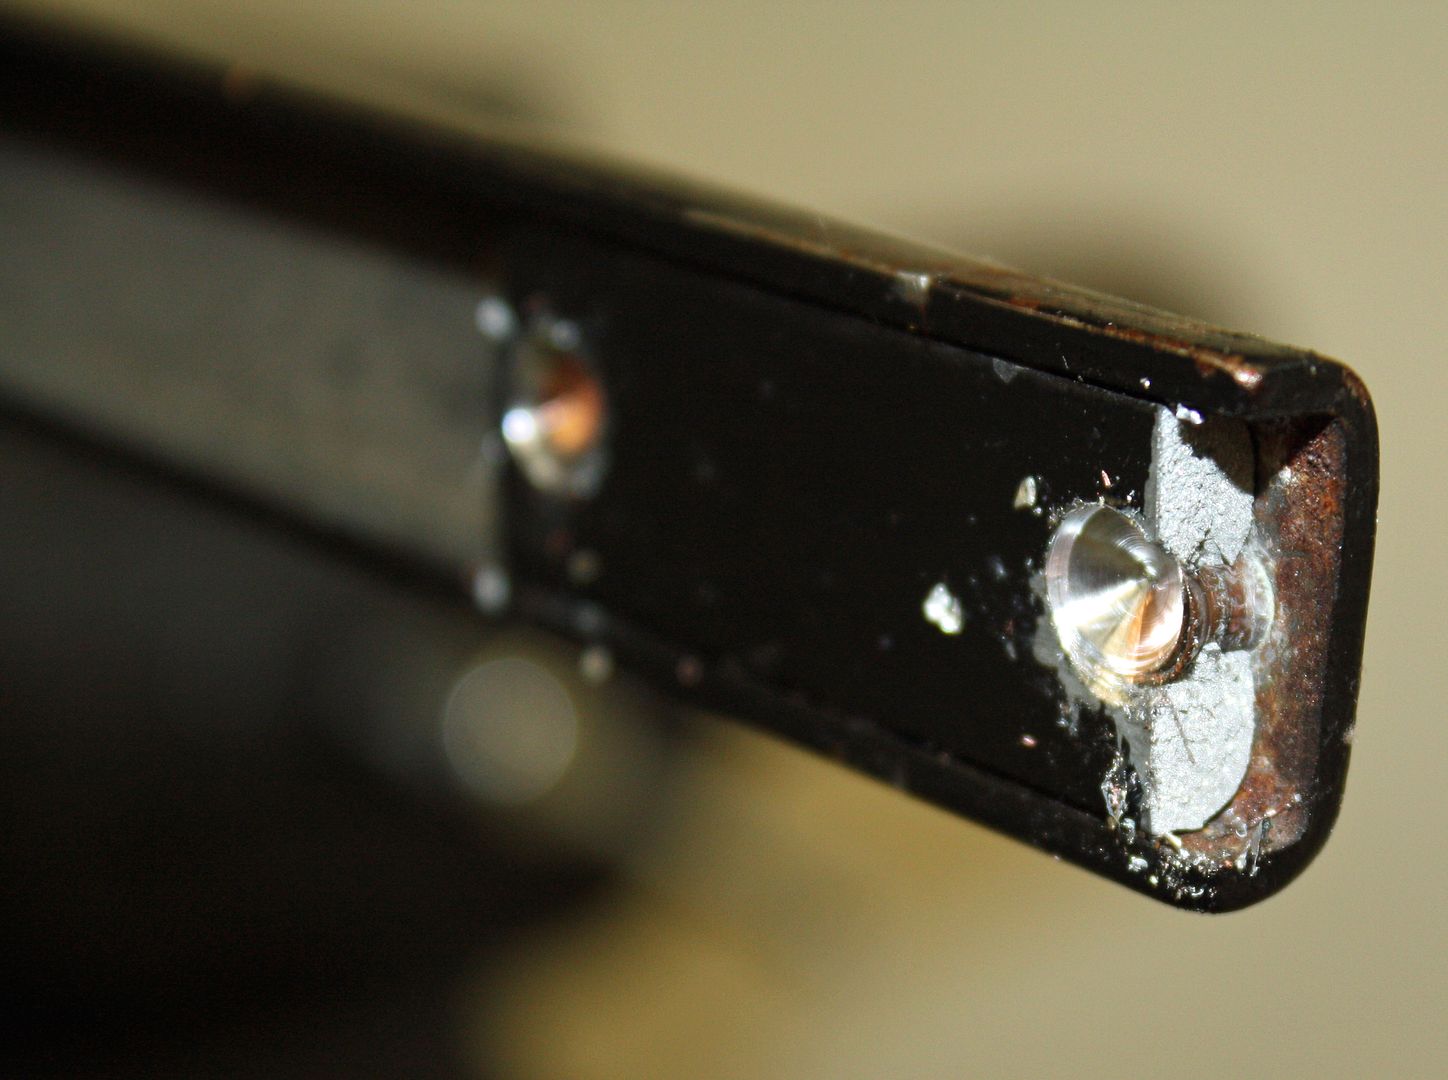
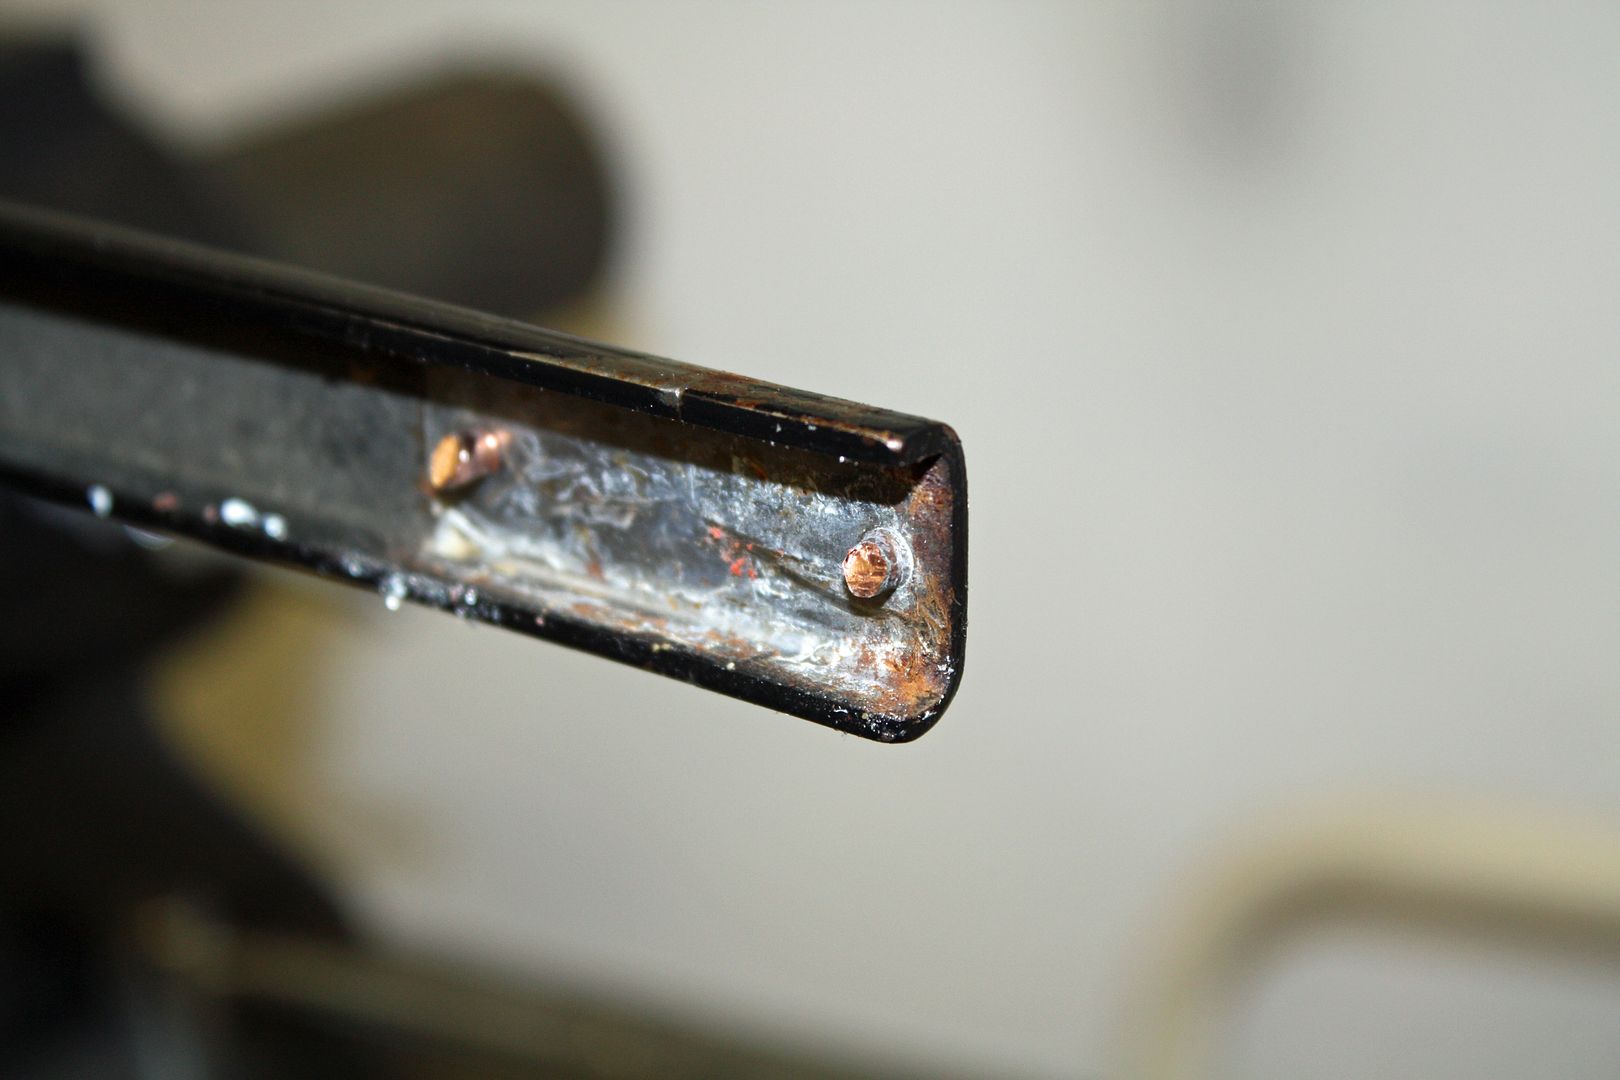

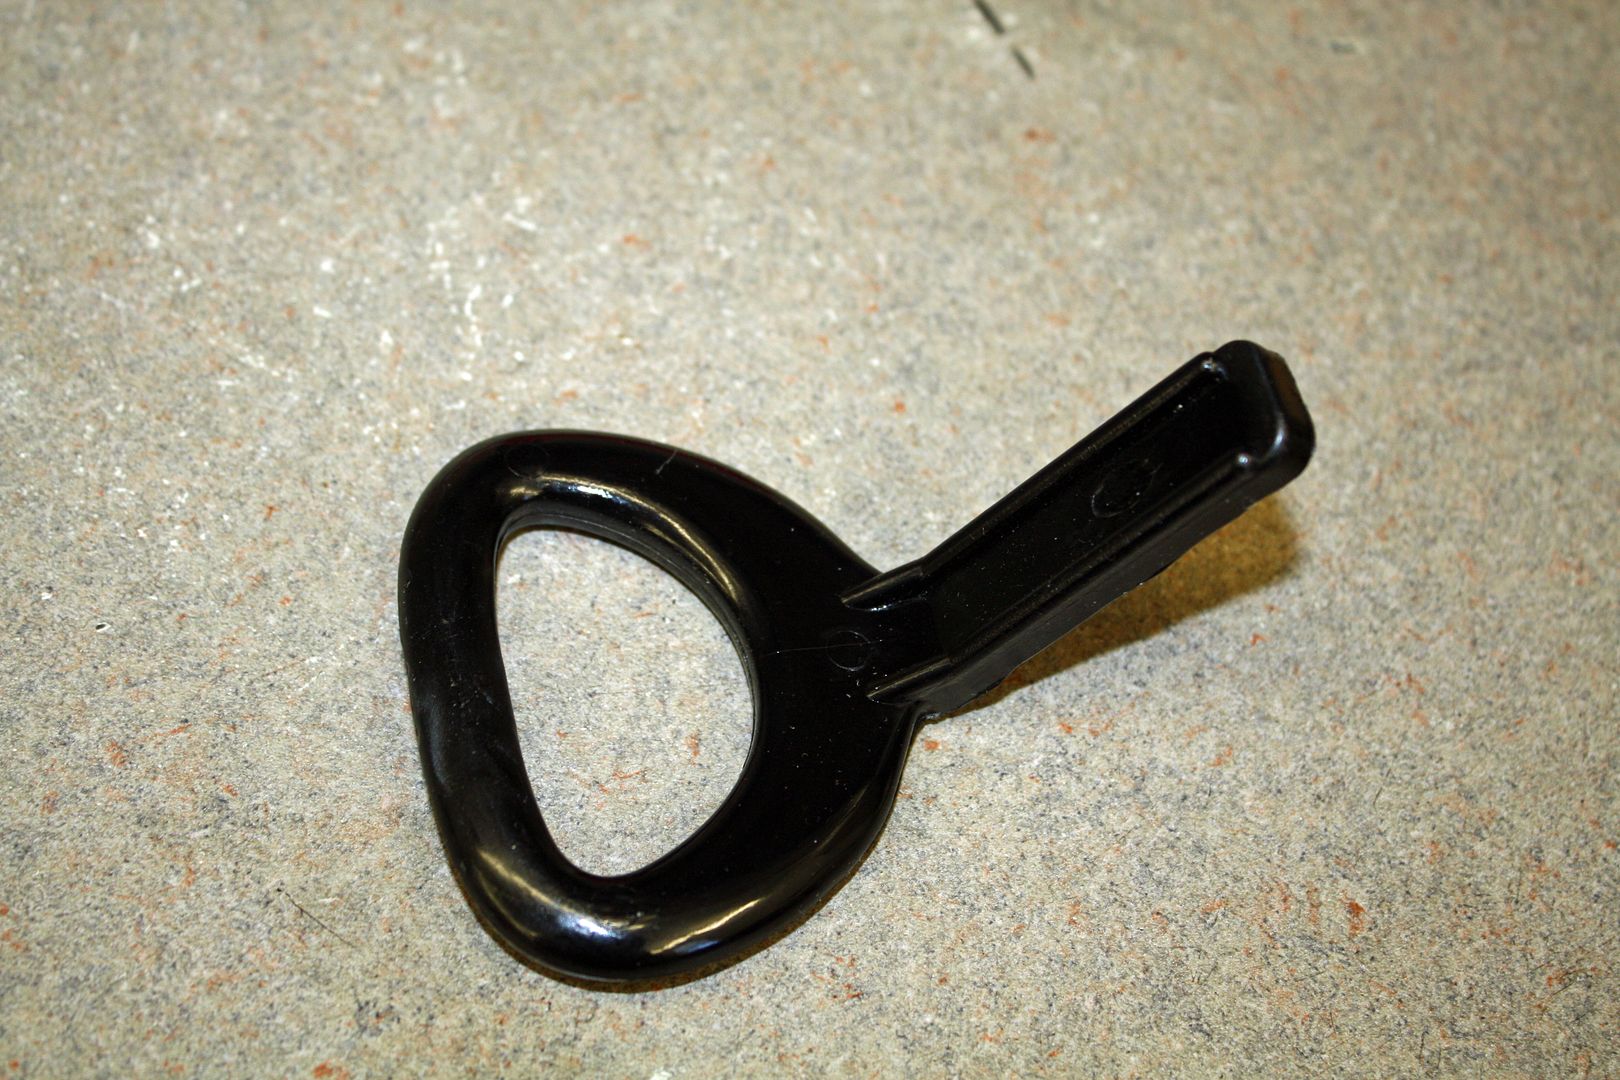
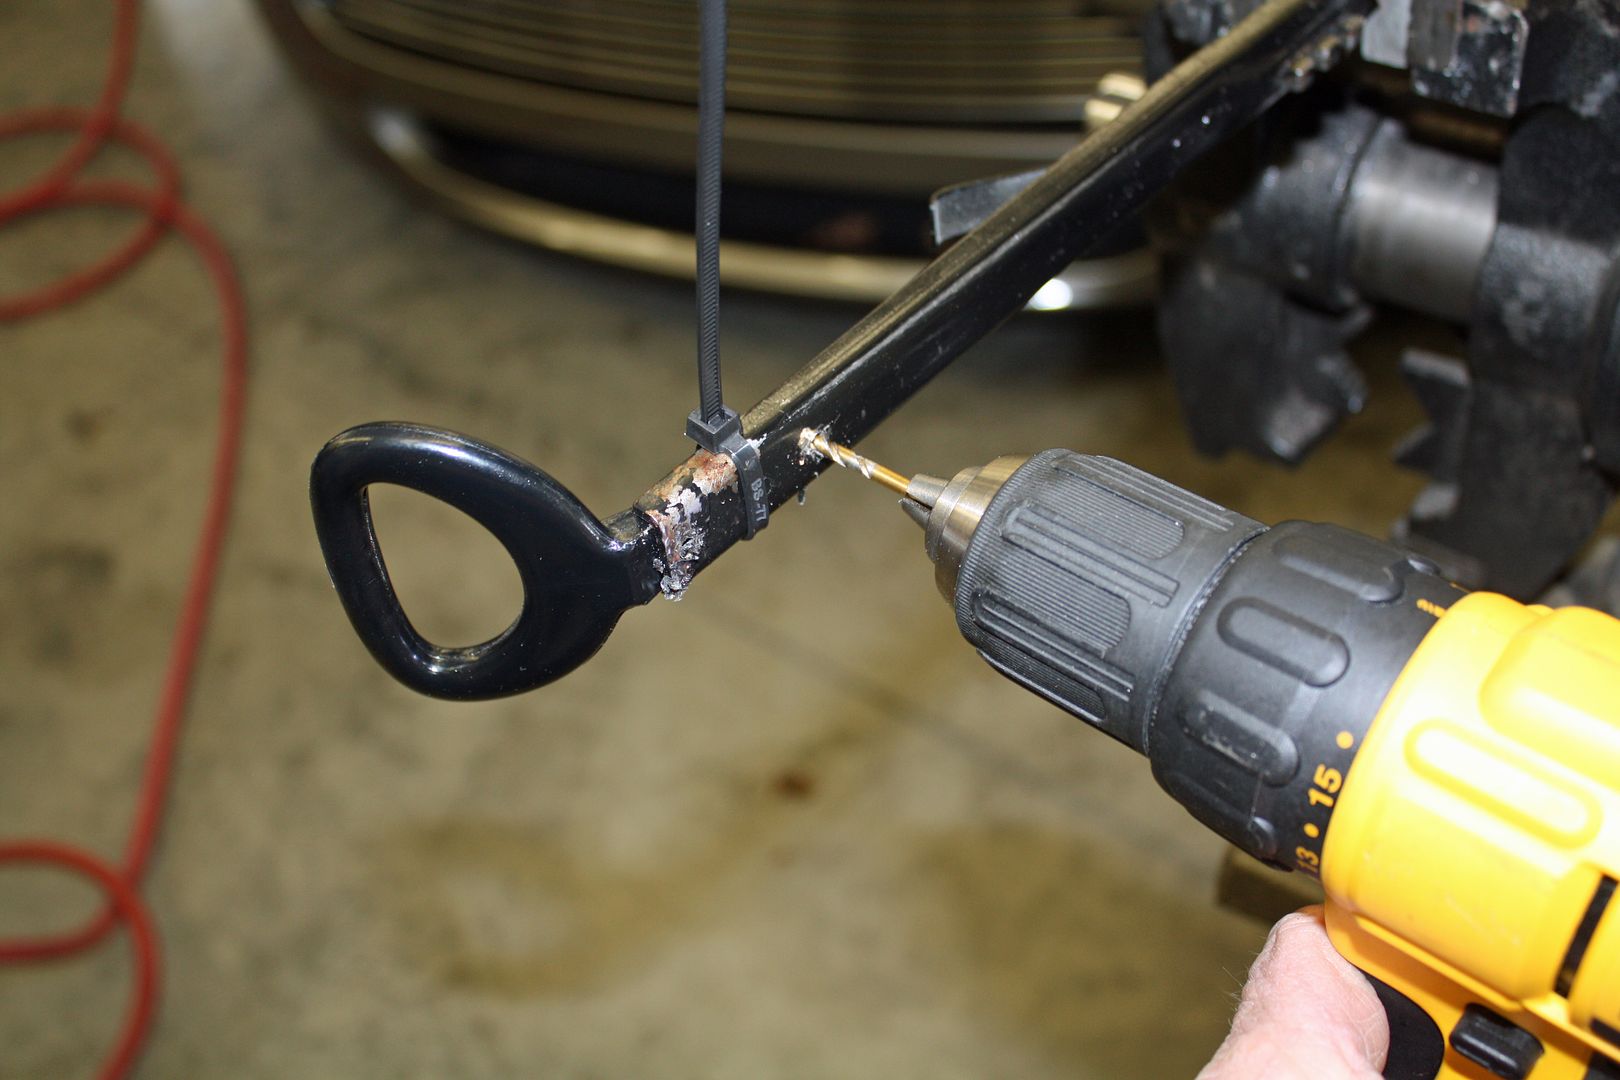

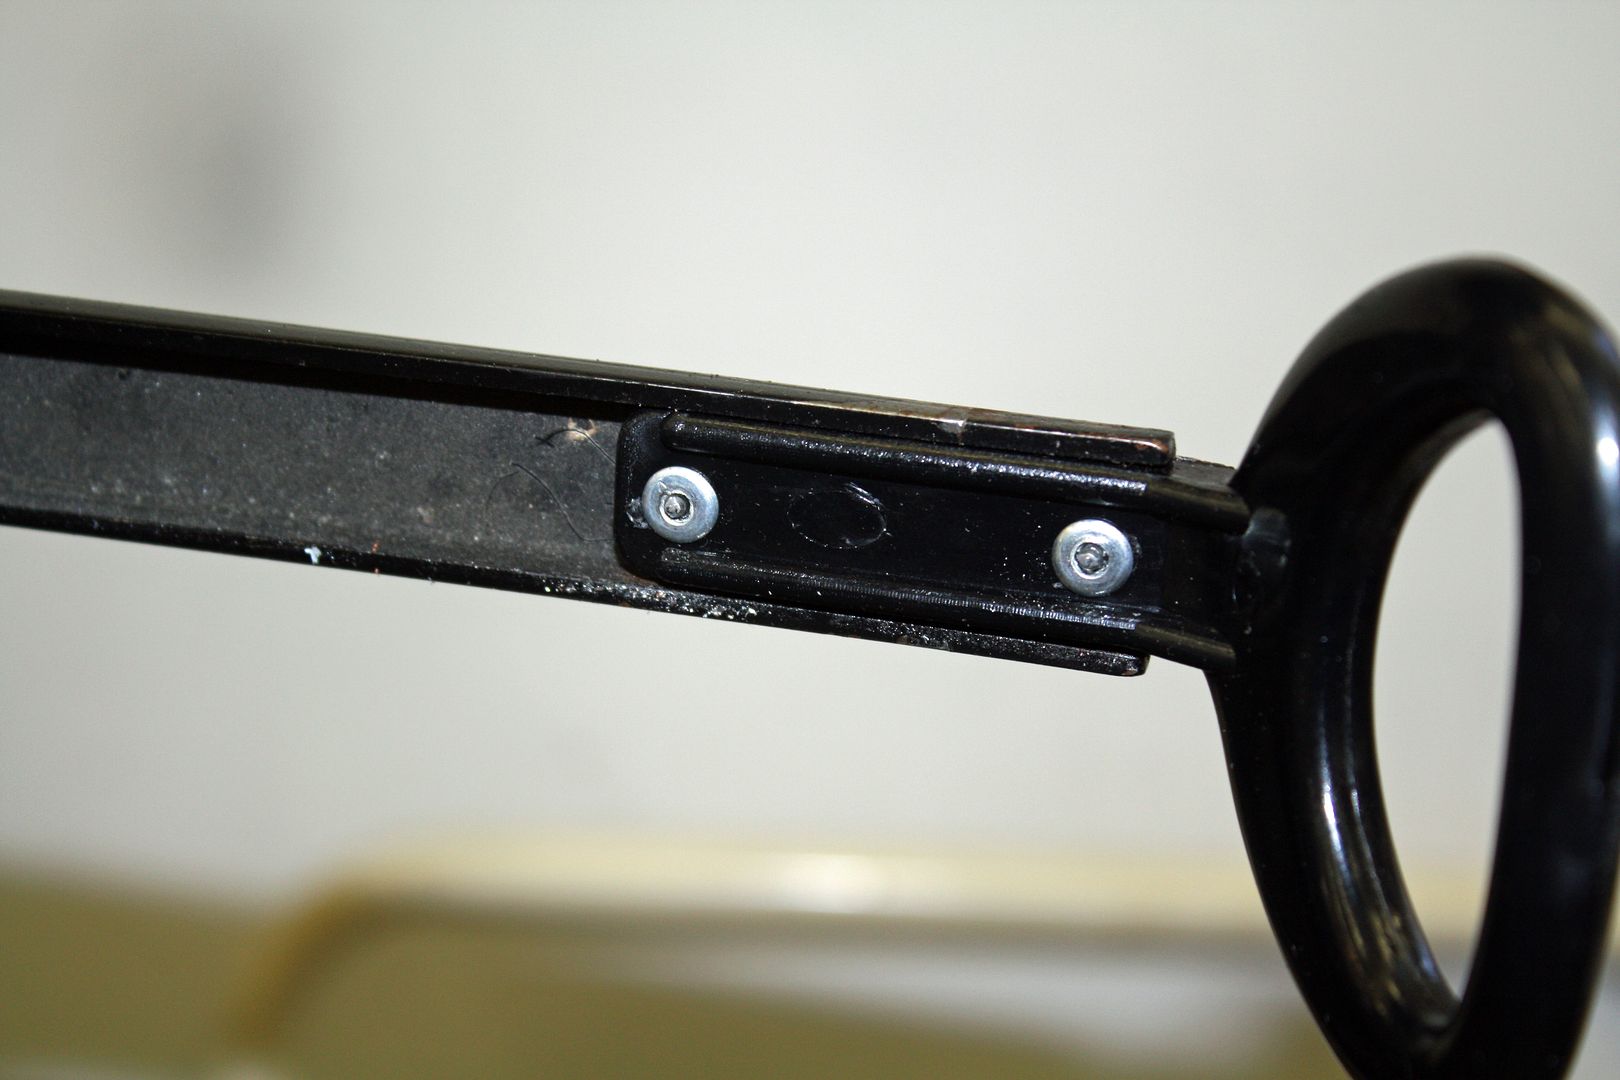
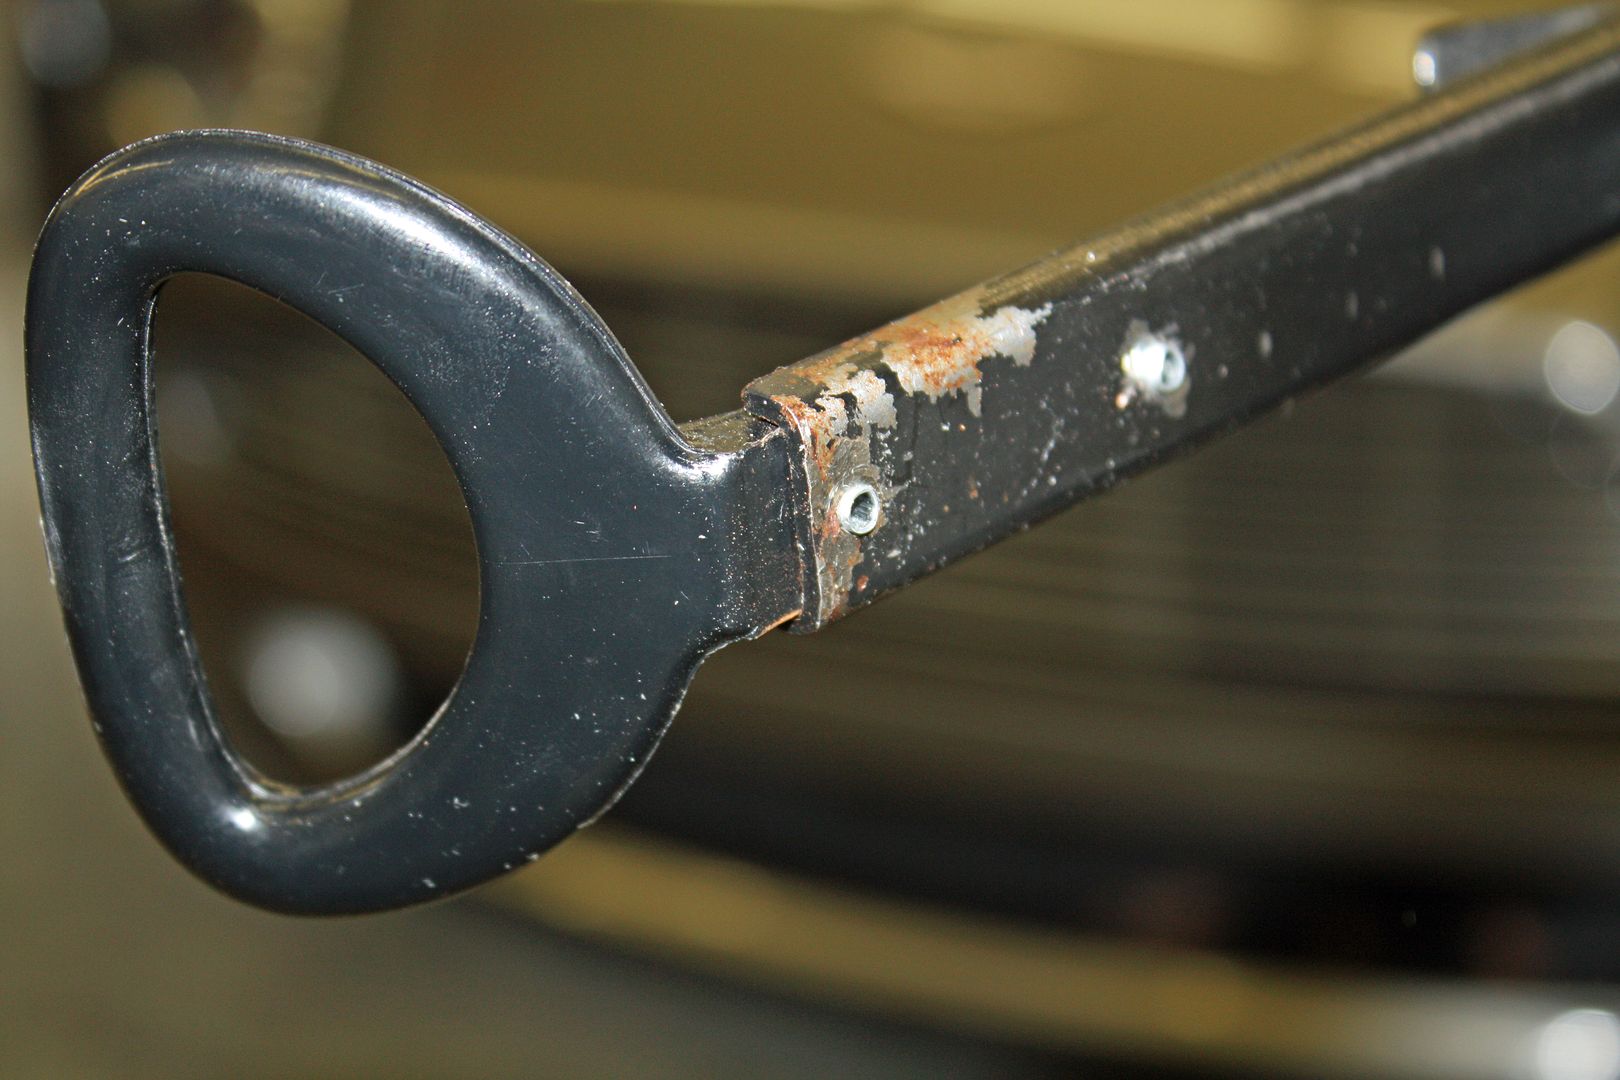
I had to remove the seats to move the fuel regulator so I could access the rear of the bolts. In doing so, I accidentally snapped off one of the pot metal seat adjuster handles. I ordered a new pair of plastic ones and installed one of them today. To do so, the old rivets have to be drilled out and new rivets installed. The rivets had to be drilled out from the rear as well as the front. Once the pot metal piece was removed from the seat track, I mounted the new handle with a zip tie so I could drill the holes from the rear and then fastened it.


 11-19-2018, 08:03 PM
#104
Racer
Thread Starter
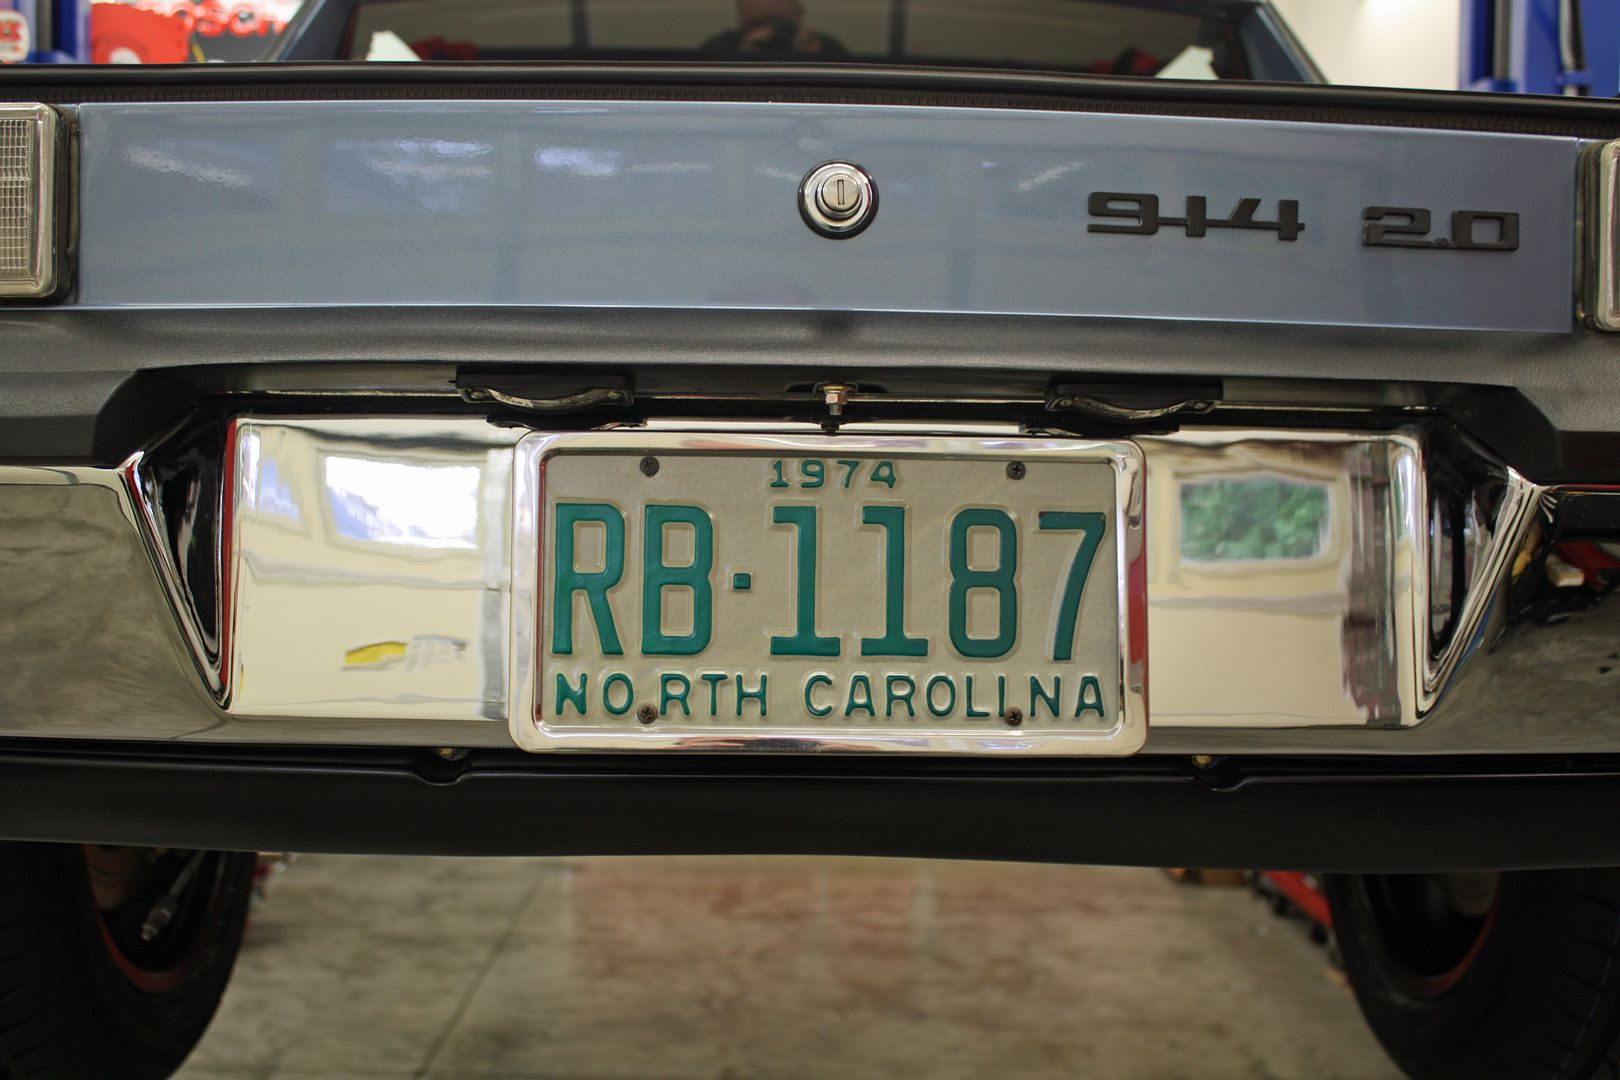
I did accomplish one other major goal. I mounted my 1974 North Carolina license plate!! If your car is at least thirty-five years old, you are allowed to run a vintage plate as long as you have your regular plate in the car to show an officer.